
Feliz y bendecido domingo tengan todos ustedes, el día de hoy tengo gran placer de volver a compartir en este hermoso comunidad en esta oportunidad para traerles un muy sencillo tutorial donde juntos elaboraremos un hermoso y elegante collar, ideal para lucir en cualquier ocasión o para realizar un hermoso detalle a una persona especial. Acompáñame en esta sencilla y creativa elaboración paso a paso.
Happy and blessed Sunday all of you, today I have great pleasure to share again in this beautiful community on this opportunity to bring you a very simple tutorial where together we will make a beautiful and elegant necklace, ideal to wear on any occasion or to make a beautiful detail for a special person.
Join me in this simple and creative step-by-step preparation.
- Alambre de bisutería calibre 20.
- Alambre de bisutería calibre 26.
- Estrellitas de nácar.
- piedras Perladas pequeñas.
- medio metro de cadena.
- pinza de bisutería.
- 20 gauge jewelry wire.
- 26 gauge jewelry wire.
- Mother-of-pearl stars.
- small pearl stones.
- half a meter of chain.
- jewelry clamp.
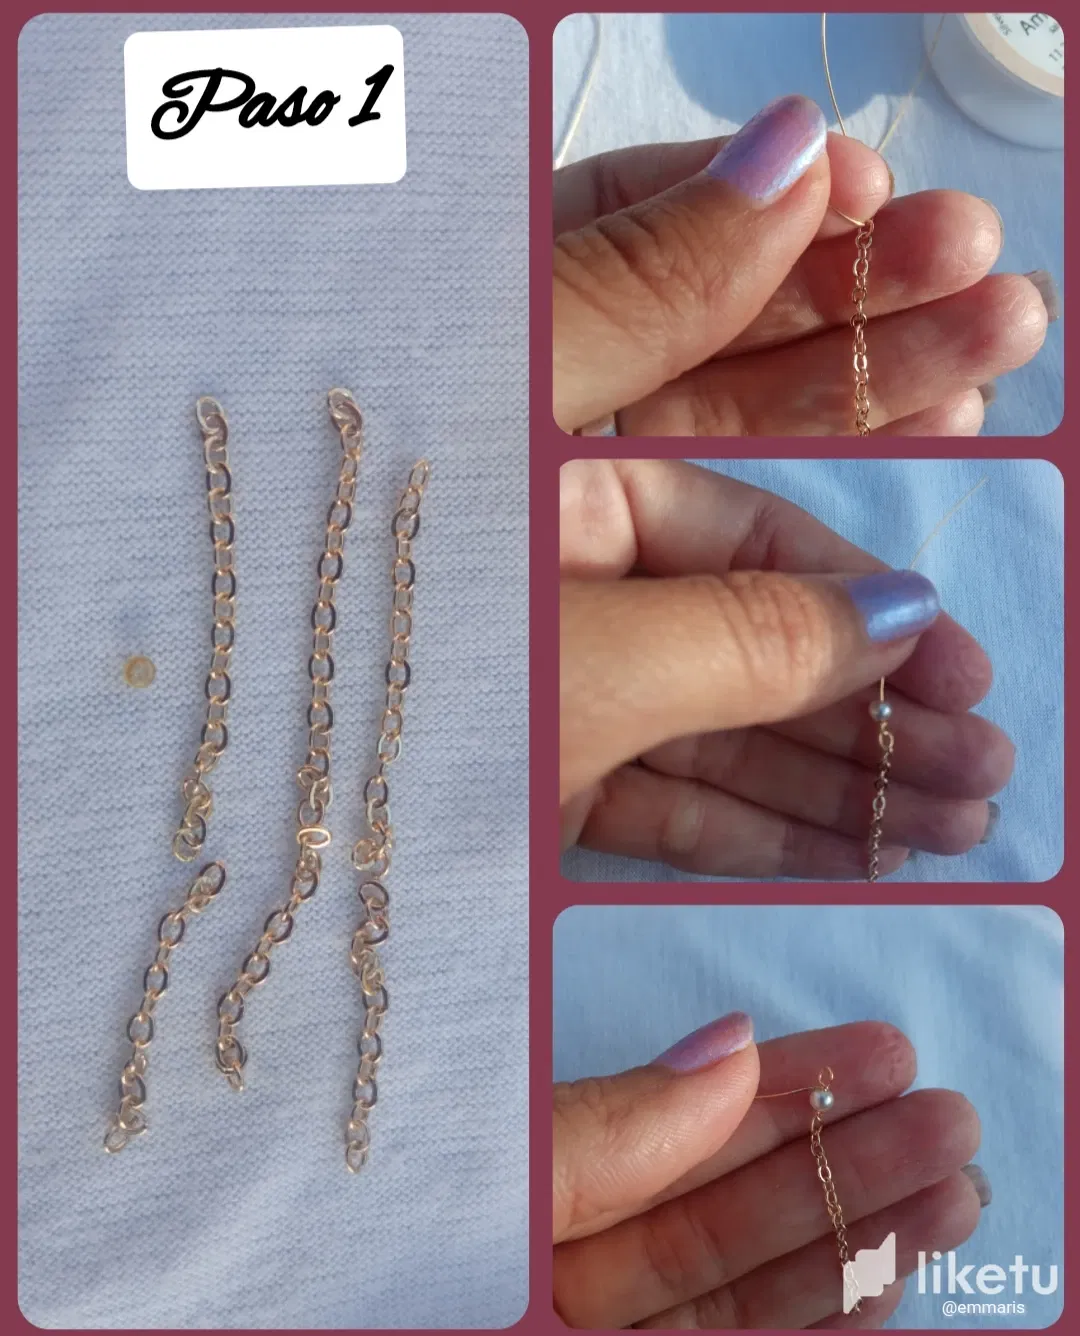
⭐ Paso 1: para iniciar la elaboración de este hermoso diseño de collar lo primero que debemos realizar es el cortar la cadena en pedazos pequeños de aproximadamente 5 o 6 cm dependiendo de su gusto. Para esta elaboración necesitaremos nueve pedacitos de cadena, una vez cortados todos los pedacitos que vamos a necesitar procedemos a tomar el primero de ellos y por la primera argolla de la cadena introduciremos el alambre de bisutería calibre 26 y con ayuda de una pequeña punta de la pinza elaboraremos una forma circular para así unir el alambre al pedazo de cadena, seguidamente por el otro extremo del alambre introduciremos una pequeña piedra blanca perlada y con ayuda de la pinza nuevamente elaboraremos una forma circular luego de la piedra tal cual pueden observar a continuación.
⭐ Step 1: to start making this beautiful necklace design, the first thing we must do is cut the chain into small pieces of approximately 5 or 6 cm depending on your taste.
For this preparation we will need nine pieces of chain, once we have cut all the pieces that we are going to need, we proceed to take the first of them and through the first ring of the chain we will introduce the 26 gauge jewelry wire and with the help of a small tip of the With tweezers we will make a circular shape to join the wire to the piece of chain, then at the other end of the wire we will insert a small pearly white stone and with the help of the tweezers we will again make a circular shape after the stone as you can see below.
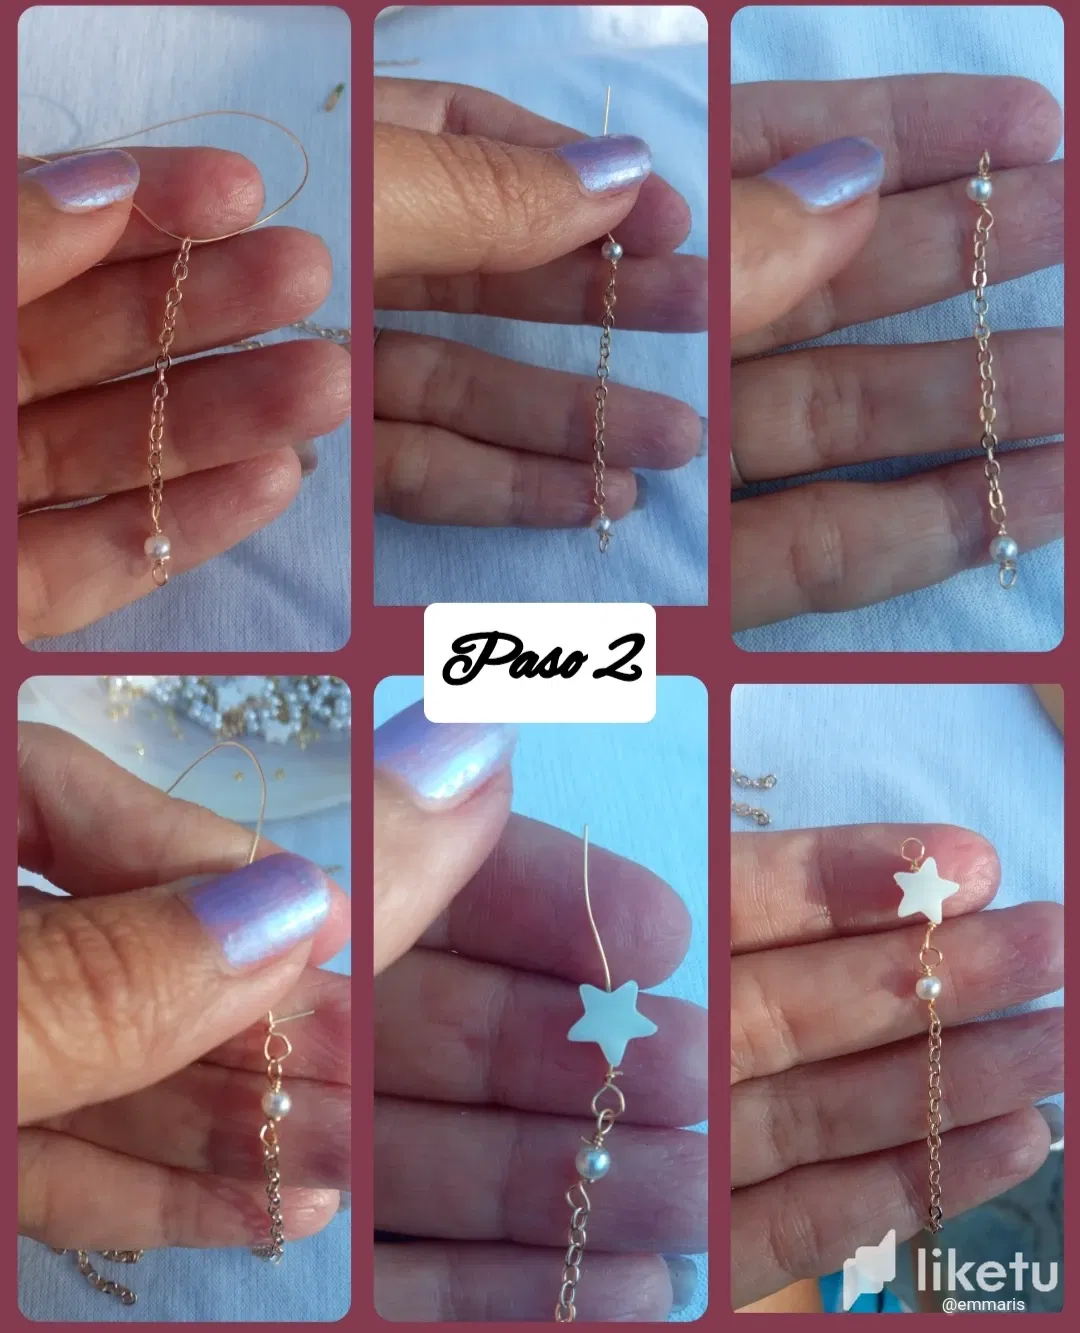
⭐ Paso 2: en nuestro segundo paso tomaremos el mismo trozo de cadena que estamos trabajando Y en el otro extremo introduciremos el alambre de bisutería calibre 26 y de igual manera realizaremos una pequeña forma circular con ayuda de la pinza y por el otro extremo del alambre introduciremos una pequeña piedra perlada y cerraremos con otra forma circular tal cual lo hicimos en El Paso anterior. Seguidamente tomaremos el alambre calibre 26 lo introduciremos por esta argolla que elaboramos después de la piedra perlada realizamos una argolla para unirla a esta pieza y por el extremo del alambre introduciremos una estrella de naca y con el exceso de alambre secaremos con una forma circular apoyándonos en la punta de la pinza.
⭐ Step 2: in our second step we will take the same piece of chain that we are working on and at the other end we will insert the 26 gauge jewelry wire and in the same way we will make a small circular shape with the help of the tweezers and on the other end of the wire we will insert a small pearly stone and close with another circular shape as we did in the previous El Paso.
Next we will take the 26 gauge wire, we will insert it through this ring that we made after the pearl stone we make a ring to attach it to this piece and at the end of the wire we will insert a naca star and with the excess wire we will dry it with a circular shape leaning on the tip of the tweezer.
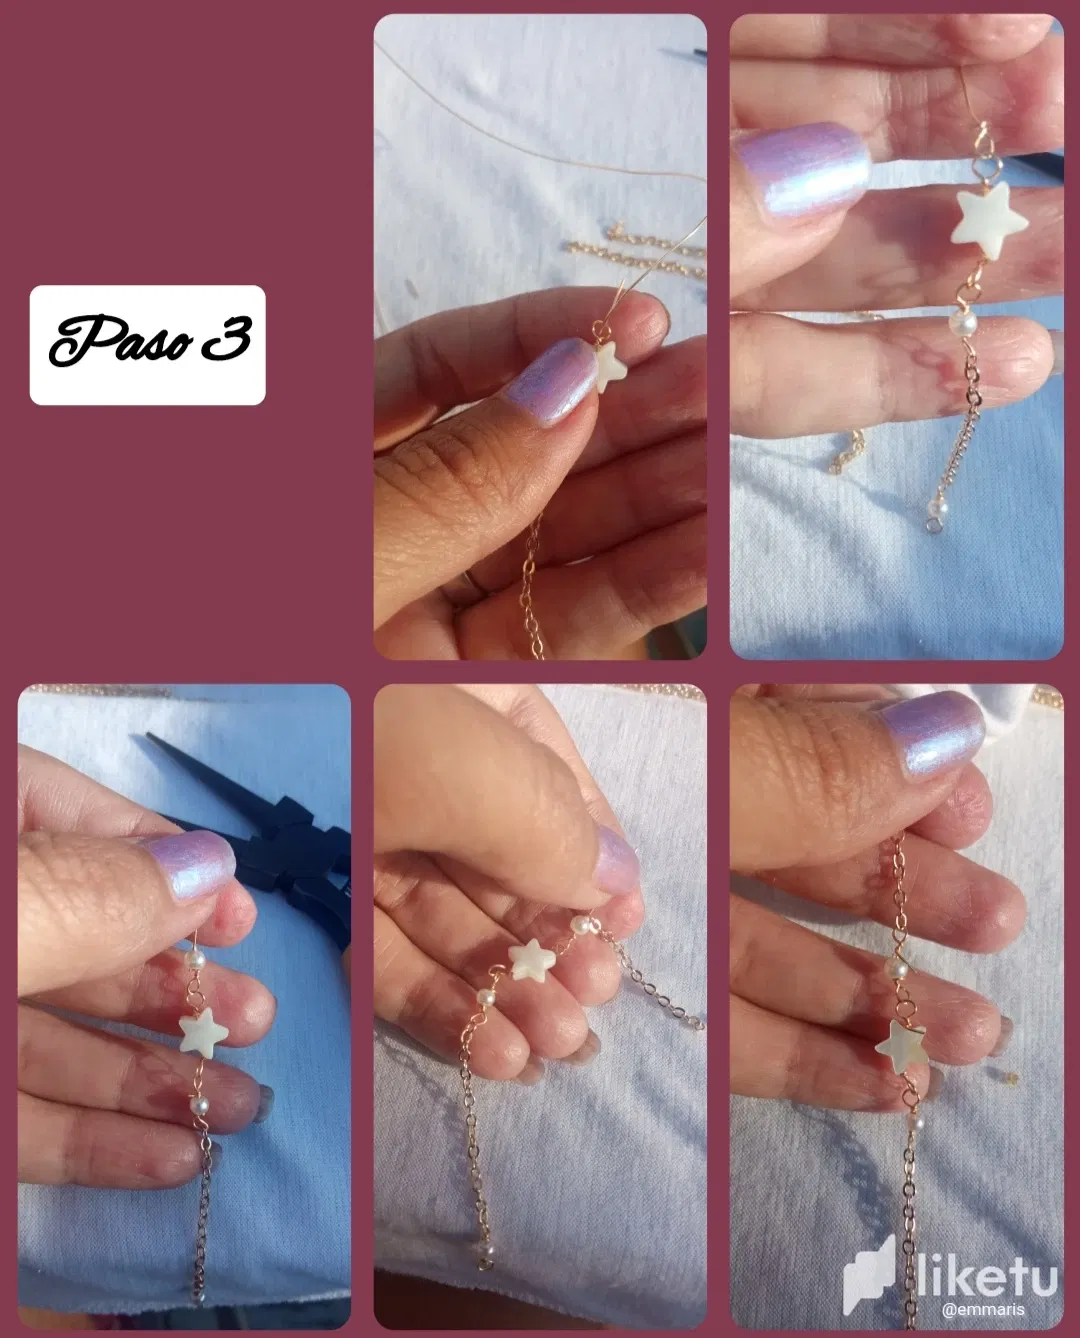
⭐ Paso 3: en la argolla que nos quedó debajo de la Estrella de naca introduciremos el alambre de bisutería calibre 26 y realizaremos una pequeña argolla por la cual nuevamente introduciremos una piedra pequeña perlada luego por el extremo del alambre introduciremos otro pedazo de la cadena que hemos picado y realizaremos una pequeña forma circular con el alambre de bisutería calibre 26 quedándonos así unida a esta pieza el otro trozo de cadena como pueden verlo.
⭐ Step 3: in the ring that was left under the Naca Star we will insert the 26 gauge jewelry wire and we will make a small ring through which we will again insert a small pearlized stone then through the end of the wire we will insert another piece of the chain that we have chopped and we will make a small circular shape with the 26 gauge jewelry wire, thus leaving the other piece of chain attached to this piece as you can see.
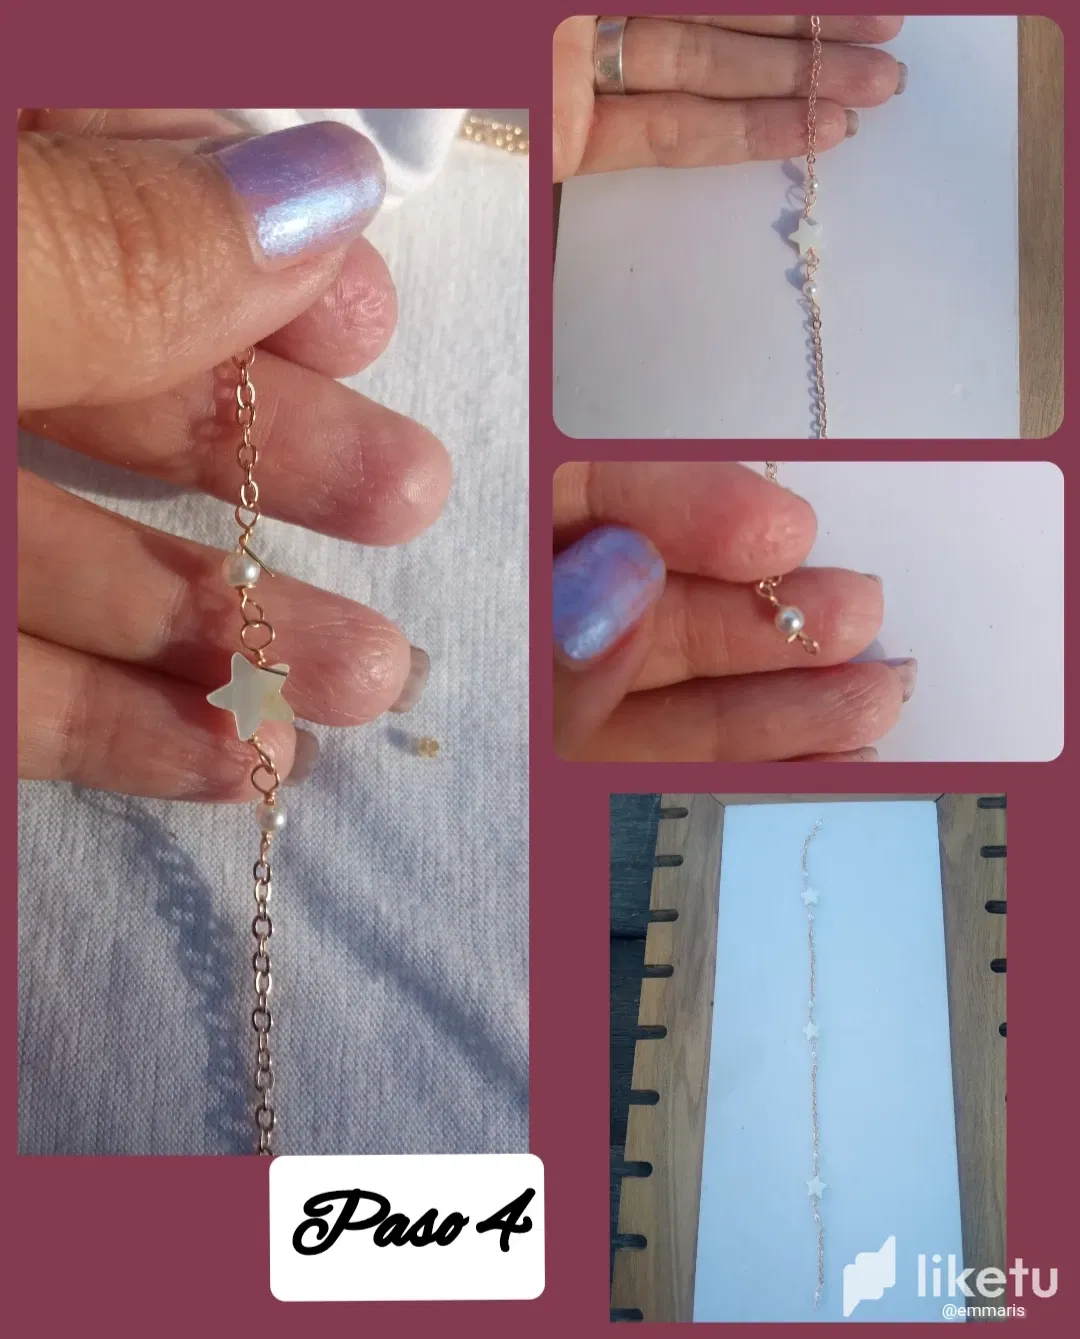
⭐ Paso 4: ahora repetiremos el procedimiento introduciremos el alambre de bisutería calibre 26 por la última pieza de la cadena y insertaremos una piedra perlada luego la pieza con la estrella y cerraremos una piedra perlada blanca introduciendo en la última argolla otro pedazo de cadena y así sucesivamente hasta elaborar la pieza del largo deseado. En este caso el largo fue de cuatro trozos de cadena como puede verlos en las imágenes y así elaboramos la primera pieza.
⭐ Step 4: now we will repeat the procedure, we will introduce the 26 gauge jewelry wire through the last piece of the chain and we will insert a pearl stone, then the piece with the star and we will close a white pearl stone, inserting another piece of pearl in the last ring. chain and so on until making the piece of the desired length. In this case the length was four pieces of chain as you can see in the images and that is how we made the first piece.
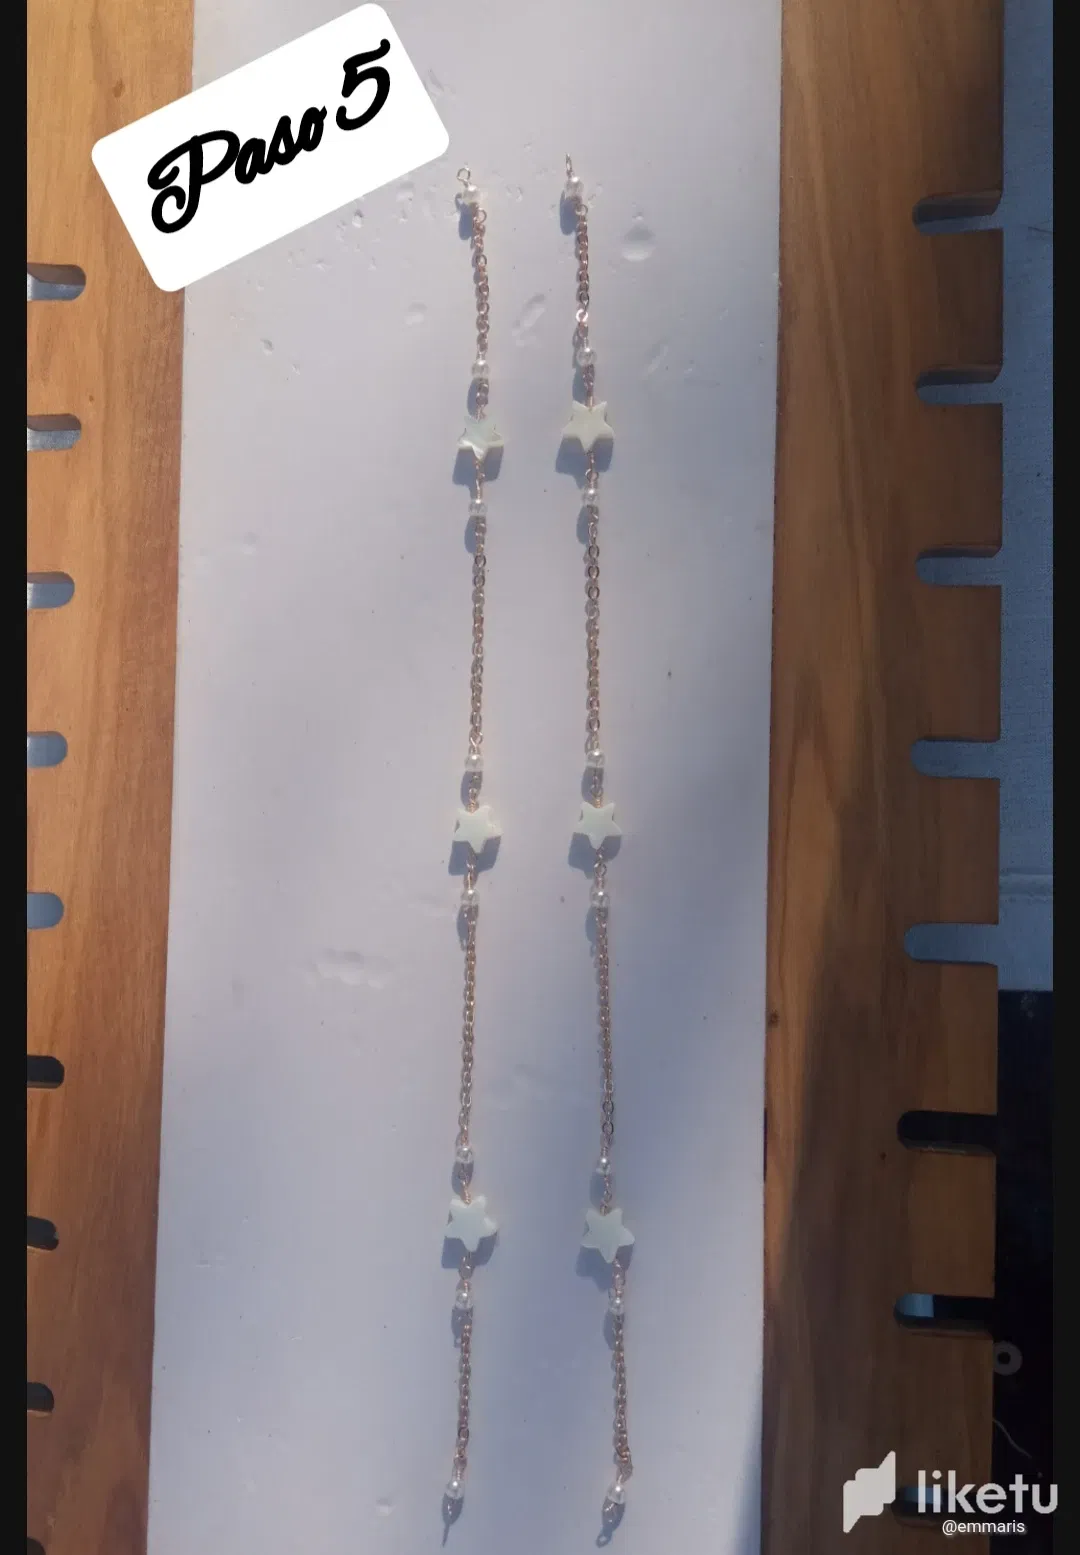
⭐ Paso 5: de igual manera siguiendo los pasos anteriores elaboraremos una pieza exacta a la ya elaborada.
⭐ Step 5: in the same way, following the previous steps we will make an exact piece to the one already made.
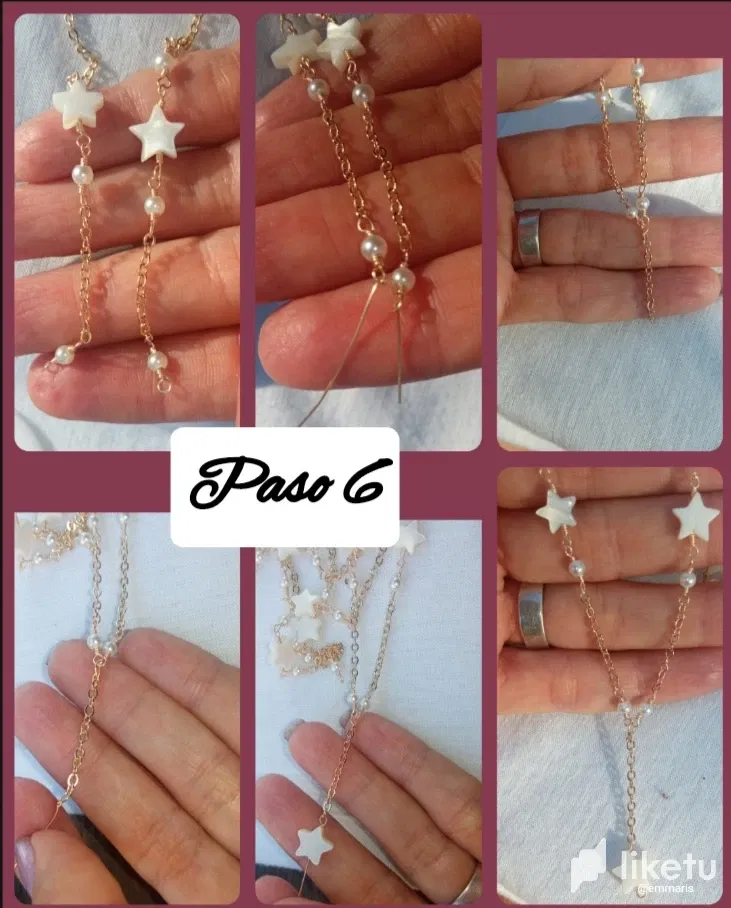
⭐ Paso 6: ahora uniremos las dos piezas tomando los dos extremos de nuestra cadena elaborada unimos las dos últimas argollas y por ambas introduciremos el alambre de bisutería calibre 26 y de igual manera introduciremos por el alambre el último pedazo de cadena que nos queda y luego elaboraremos una pequeña argolla para unir las piezas. Seguidamente volvemos a introducir el alambre de bisutería por la última argolla de la cadenita que acabamos de introducir realizamos una argolla circular y por el alambre introducimos una pequeña estrella y cerramos con una argolla circular.
⭐ Step 6: now we will join the two pieces, taking the two ends of our elaborate chain, we join the last two rings and through both we will insert the 26 gauge jewelry wire and in the same way we will insert the last piece of chain through the wire that we remains and then we will make a small ring to join the pieces.
Next, we reinsert the jewelry wire through the last ring of the chain that we just introduced, we make a circular ring and through the wire we insert a small star and close with a circular ring.
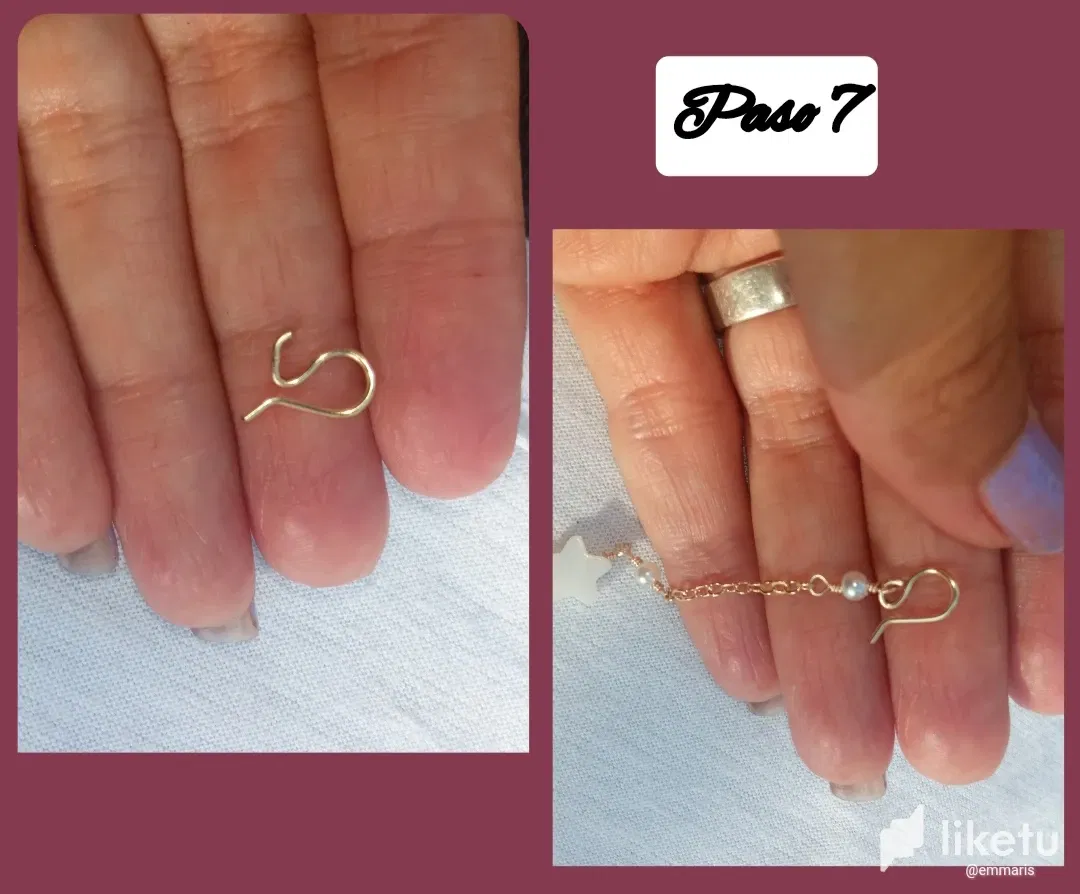
⭐ Paso 7: para culminar con el alambre calibre 20 elaboraremos una pequeña forma de gancho el cual uniremos a uno de los lados de la cadena para usar como terminal de cadena y así culminaremos esta hermosa elaboración.
⭐ Step 7: to finish with the 20 gauge wire we will make a small hook shape which we will attach to one of the sides of the chain to use as a chain terminal and thus we will complete this beautiful creation.
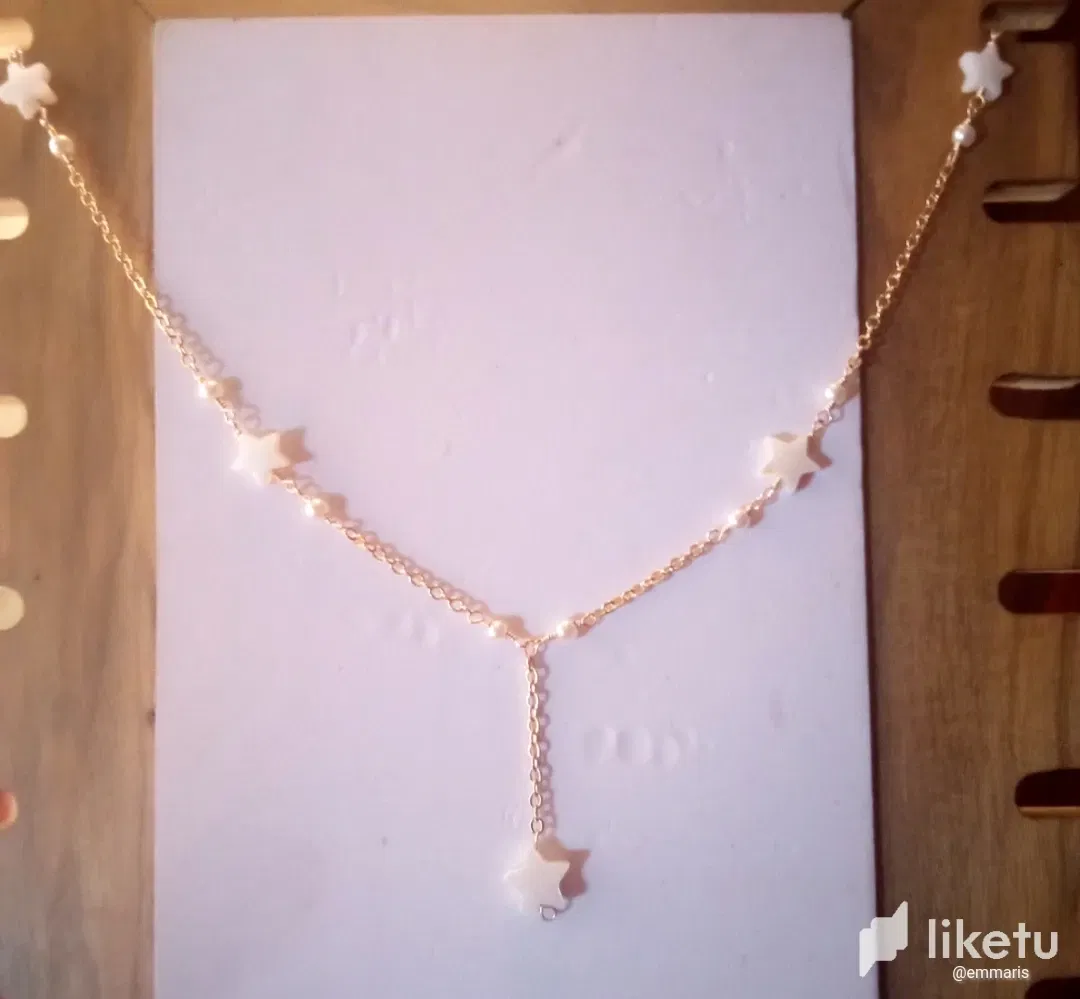
Todas las Fotos son de mi autoría y fueron tomadas con mi Celular Redmi 9.And in this simple way we will be able to make a very elegant and beautiful necklace.
My dear and appreciated friends, this has been my contribution to all of you today, which I hope is to your complete pleasure. I say goodbye for this opportunity, grateful for your visit.
All Photos are my authorship and were taken with my Redmi 9 Cellphone
For the best experience view this post on Liketu