
Greetings hivers!❤️🥰
Hello beautiful people of Hive as this time I do not bring you a recipe but a step by step of how I made the toppers for this jelly 🥰 I make my first publication for the #HIVEDIY community, my name is Elianis Guerrero, I am a pastry chef who makes her own toppers cut by hand. I hope you like it ❤️ and it will be helpful for those who want to enhance their desserts using toppers.
Before I begin to show you the process I want to tell you that I made them in a handmade way, without cutting plotter, without cameo or any sophisticated tool, and the organization of the images I made it in an application of domain of many which is powerpoint 😜 the images I used to make the Toppers were from the internet.
 1 1 | 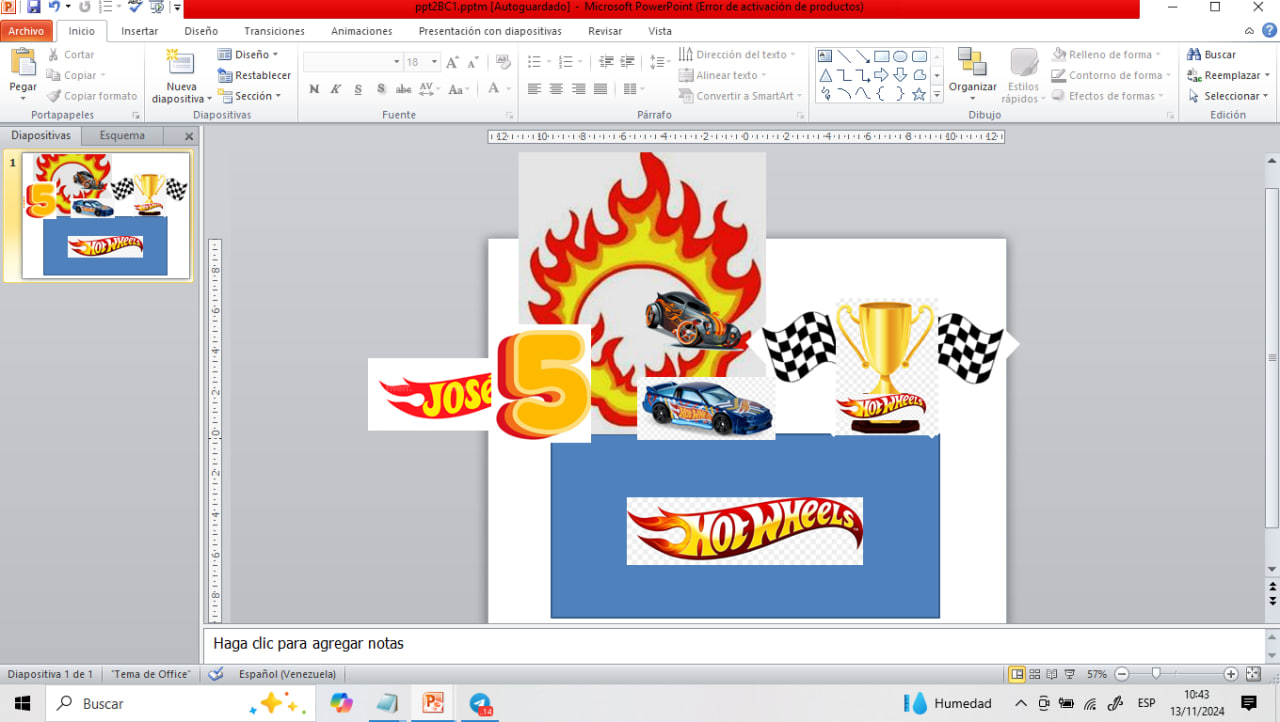 2 2 | 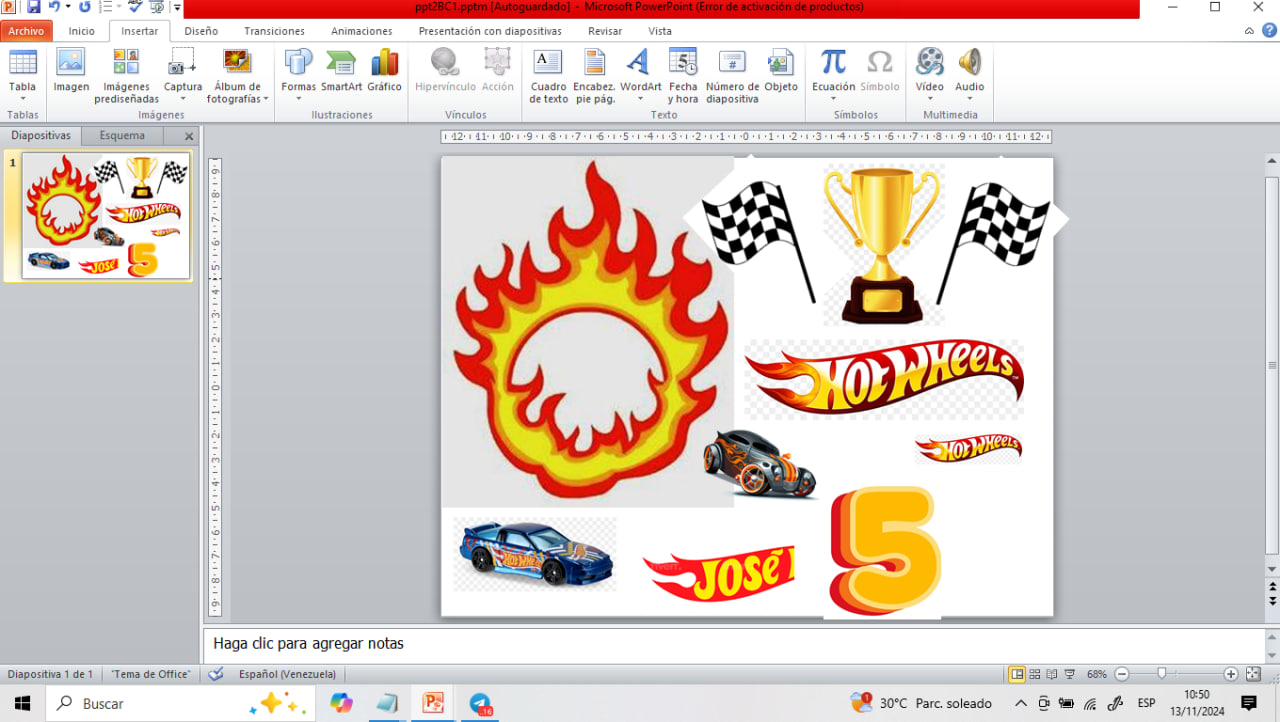 3 3 |
|---|
(Click to enlarge)
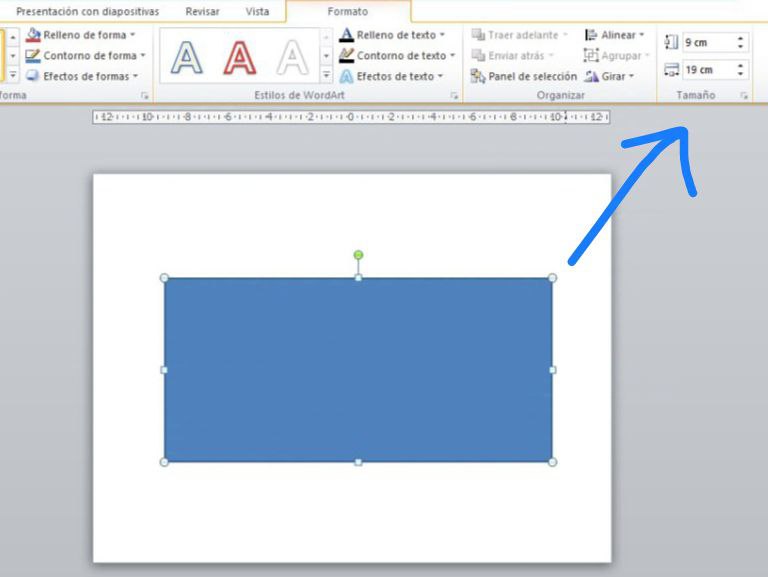
The first thing we do is to insert a “rectangle” shape and place one of the measurements of the mold we are going to use, my jelly was going to be 19 cm in diameter and the height of about 9cm so I used these measurements.
Then on this rectangle that gives me a fairly realistic proportion of the size that will be my jelly I start to square the images that I will use and I'm arranging them as I want them to look. As I used images from the internet almost none of them had transparent backgrounds, and they look overlapped, but I can still see how they will look in terms of size and order. Doing it this way guarantees me that the prints will have an appropriate size and according to the gelatin.
Then I remove the rectangle and organize the images to print the Toppers. The printing is done on photographic paper.
 |  |  |
|---|
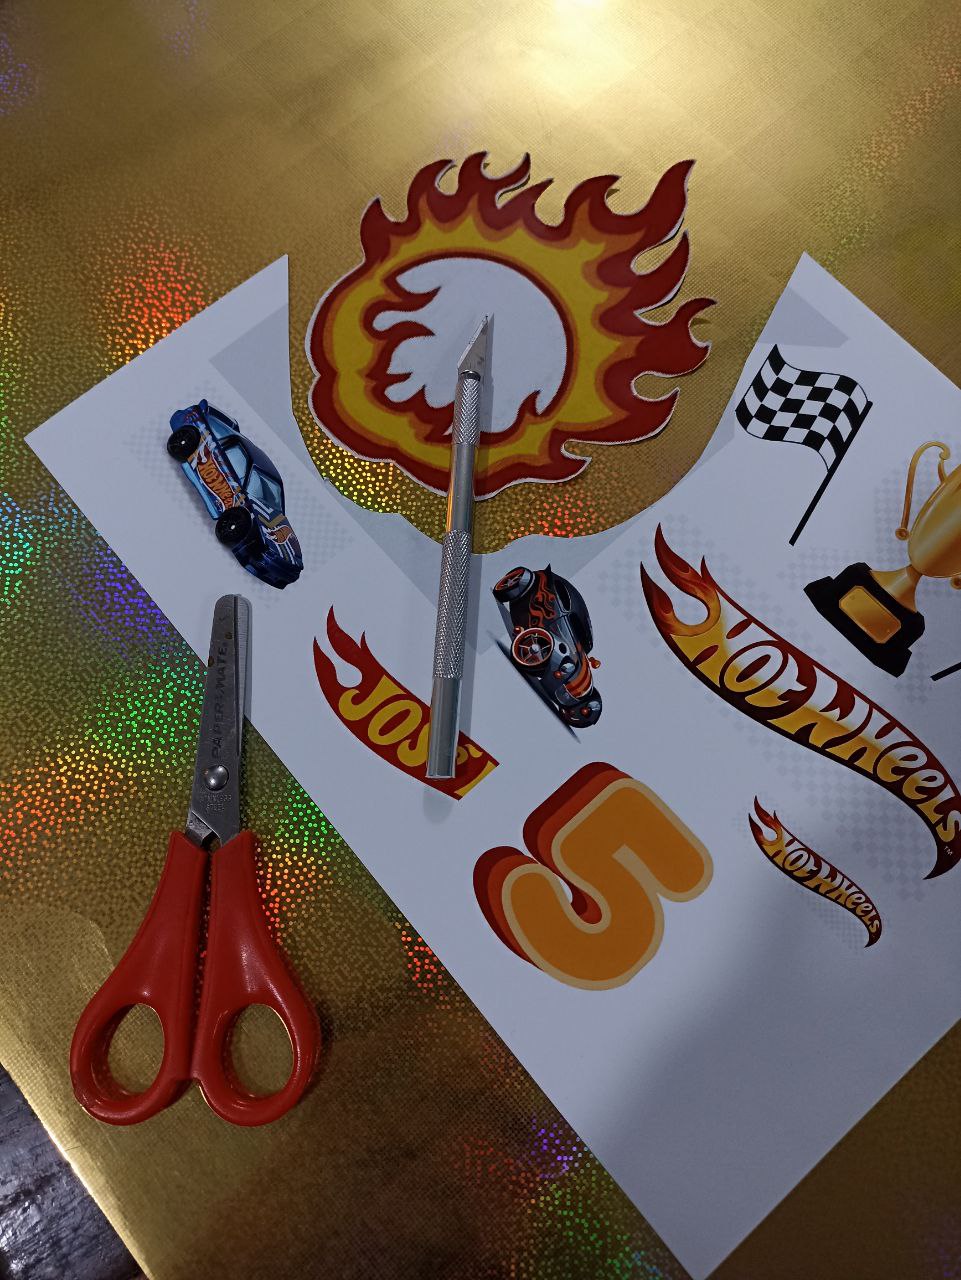
After we have the print ready we proceed to cut as close to the edge as possible but trying not to cut the image, I try to leave like a couple of millimeters of separation, I'm leaving a kind of mini white border (I imagine I'm a human cameo😜).
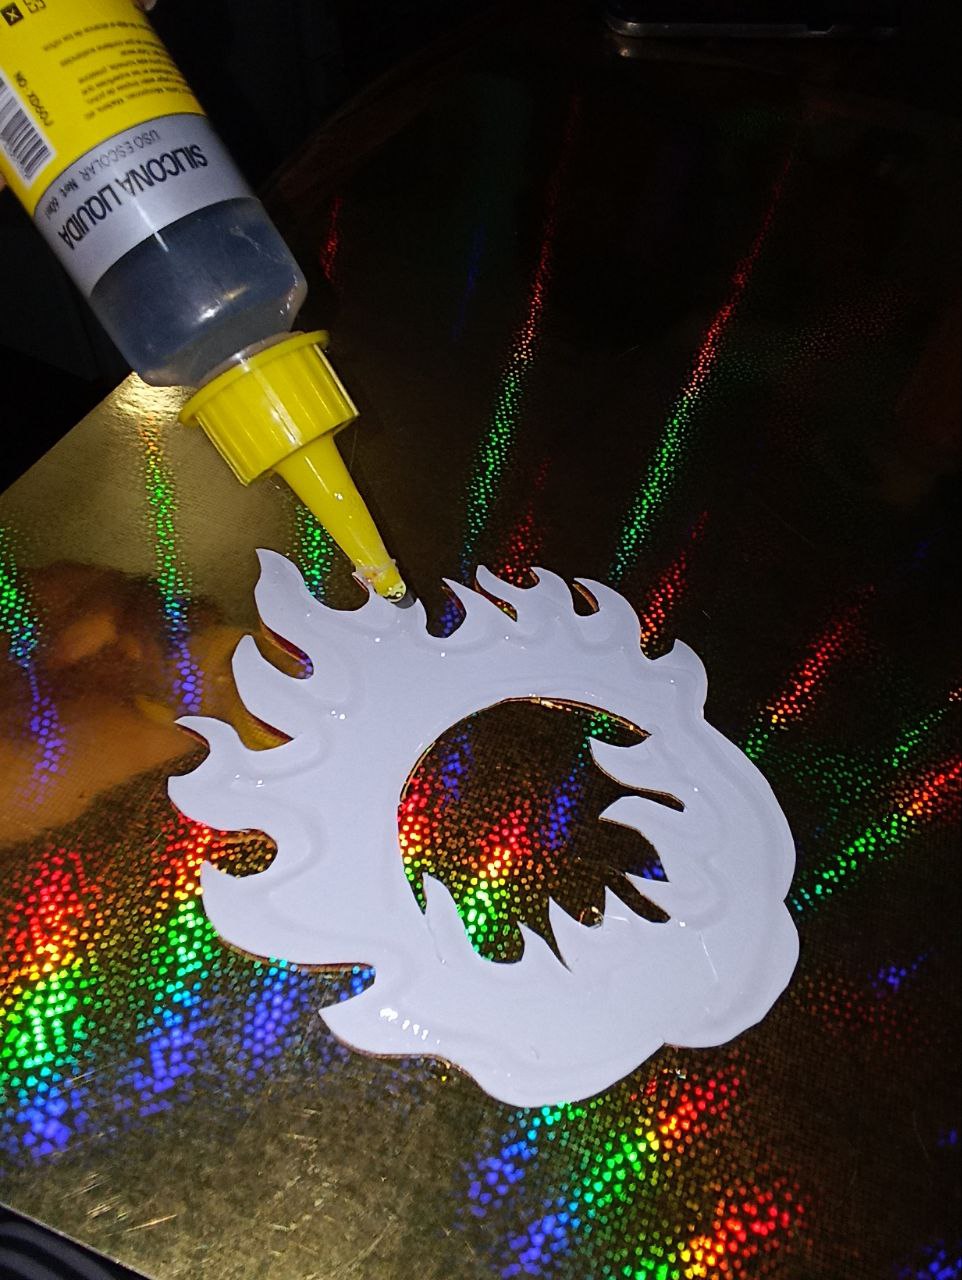
Once we have all the figures cut out we proceed to put liquid silicone only on the edges and glue on cardboard, here I used gold metallic but you can use any other color depending on your taste and the theme you are doing.
Note: for internal cuts like the fire ring I used a cutter/exactly.
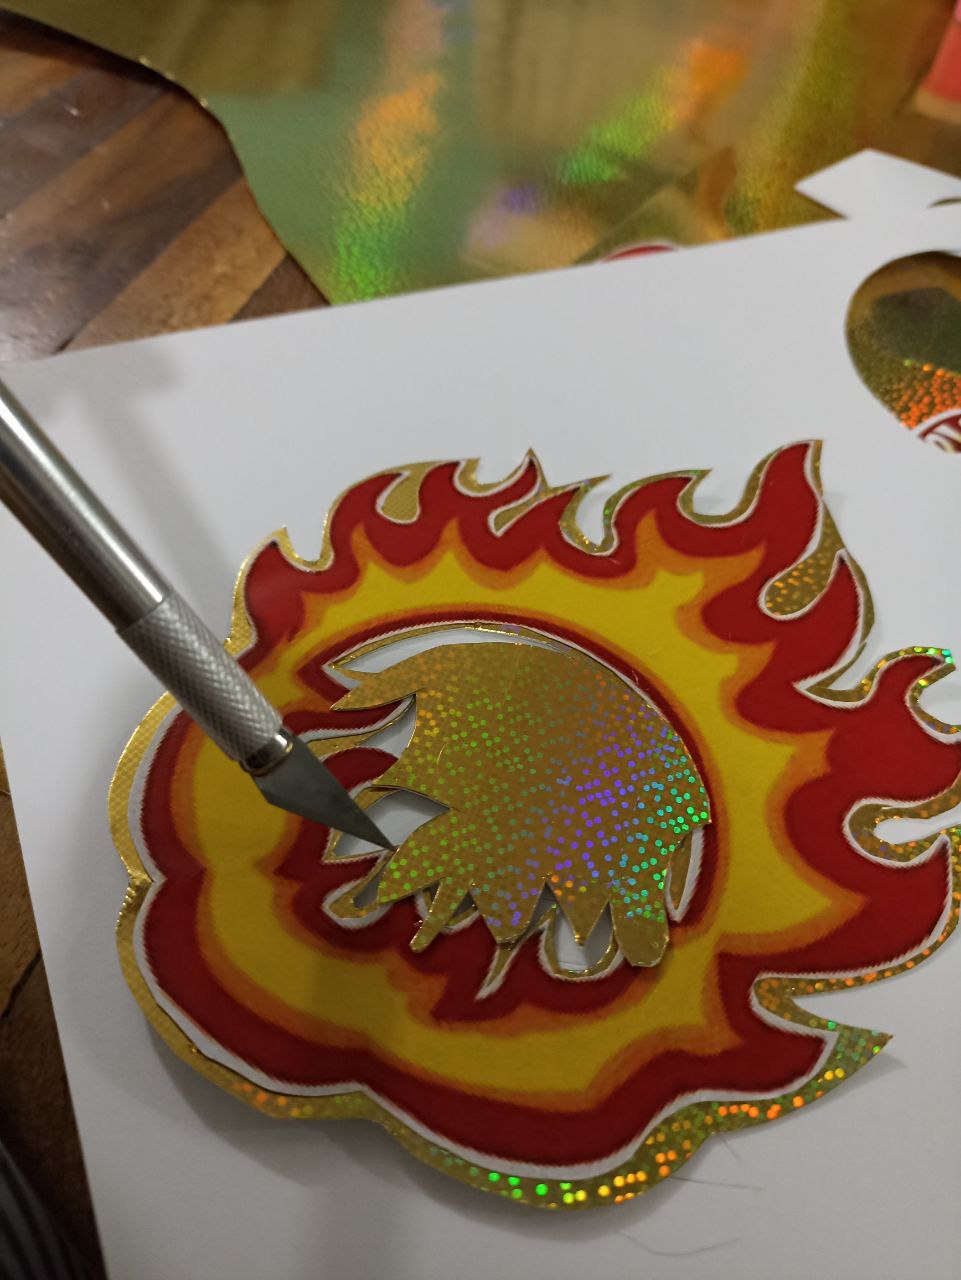 | 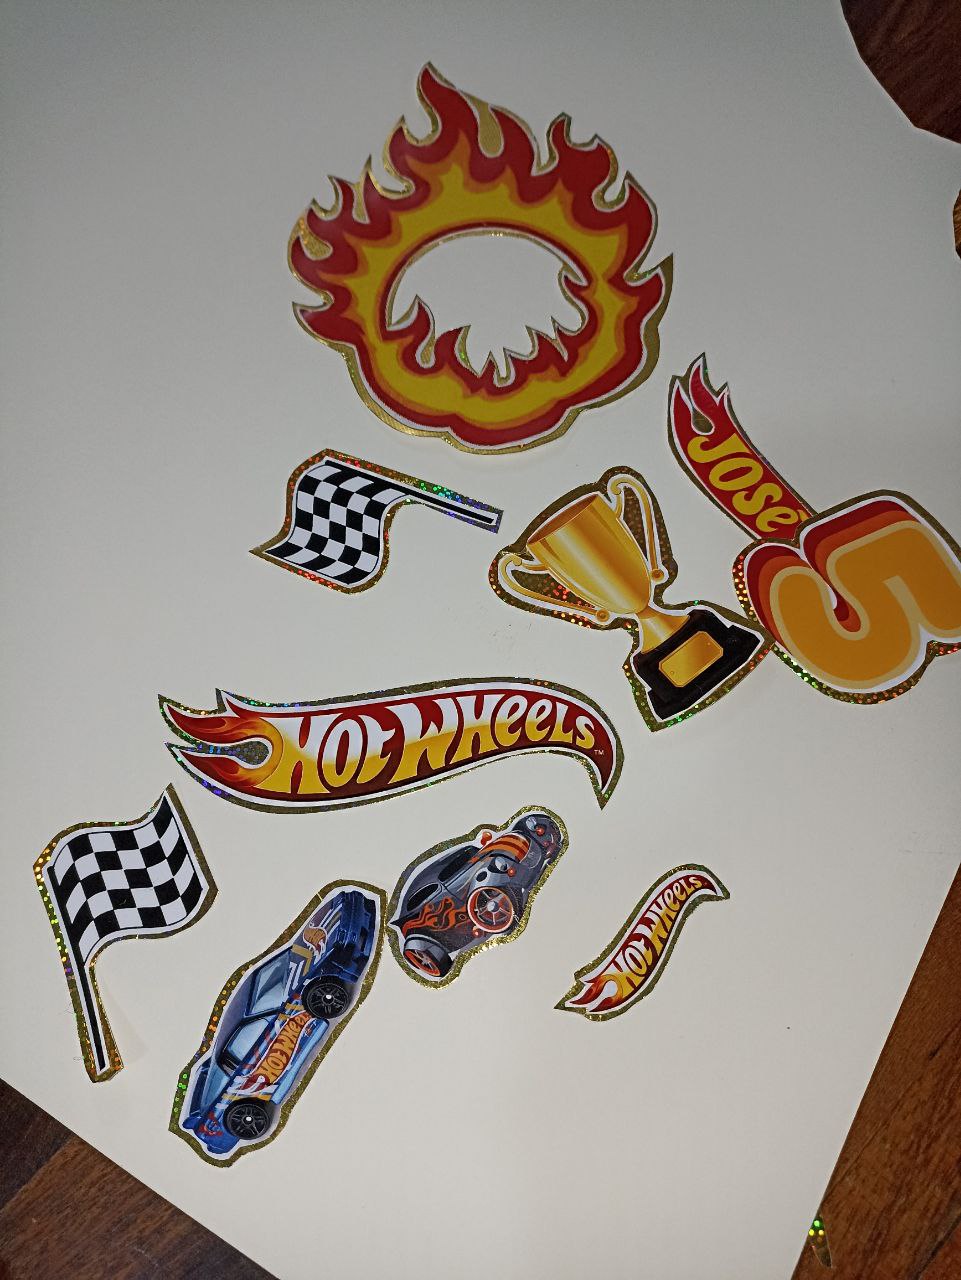 |
|---|
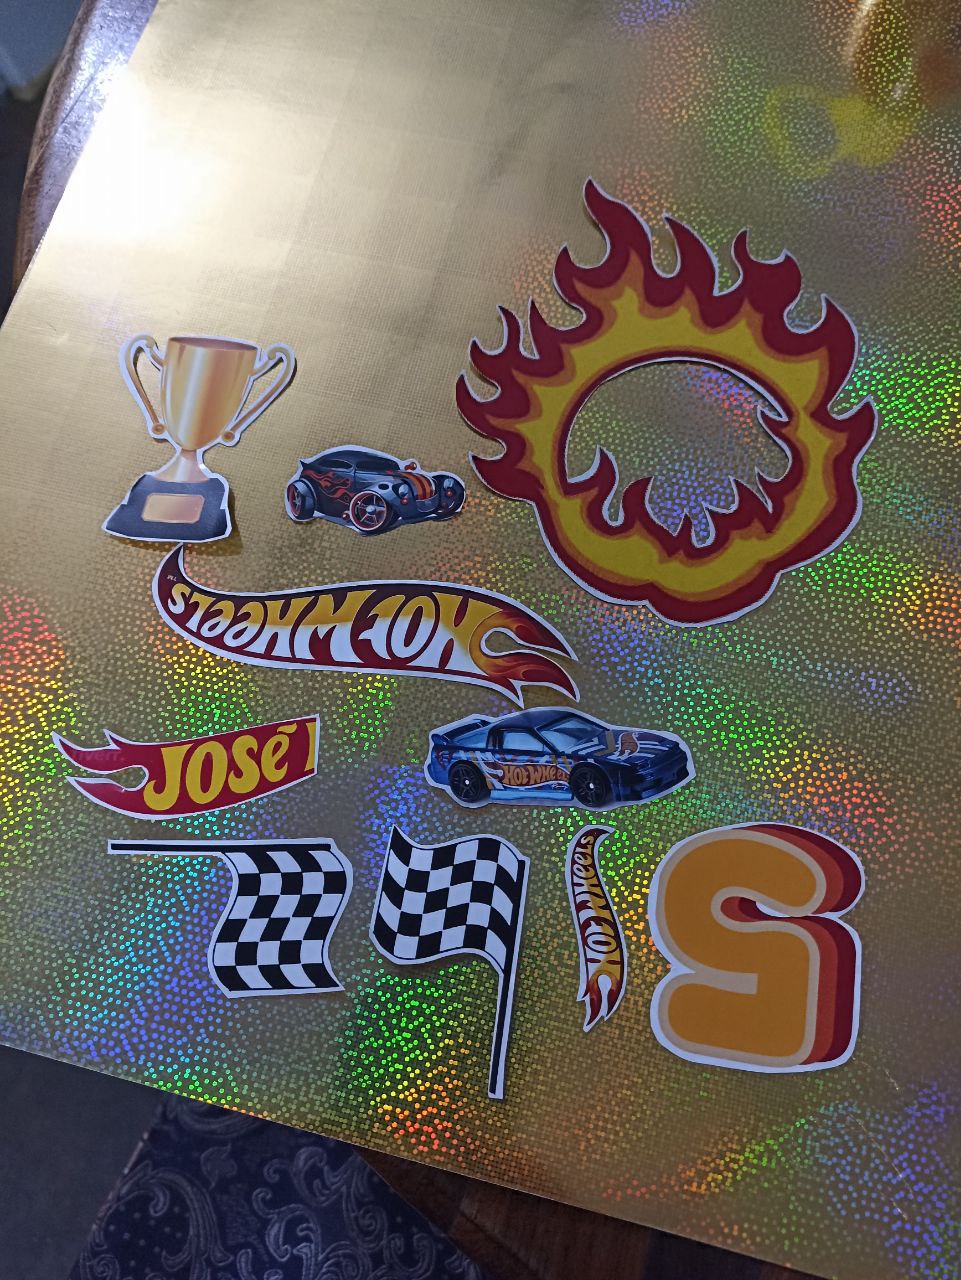
After gluing the figures on the golden cardboard sheet and cutting them out, heat the silicone gun to glue the sticks and have our Toppers ready by just placing them on the Gelatin (note that they can also be used for cakes).
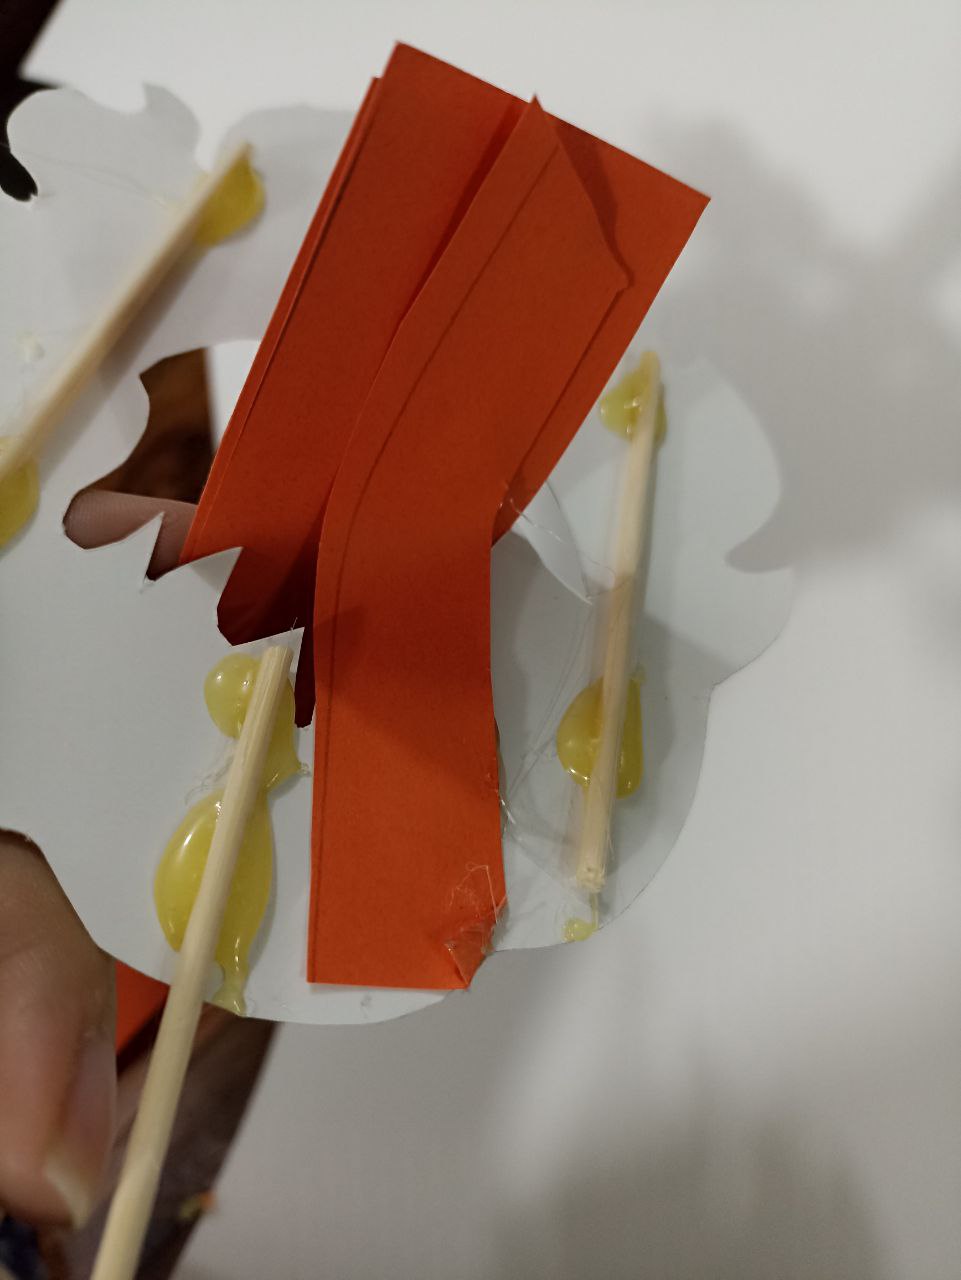 | 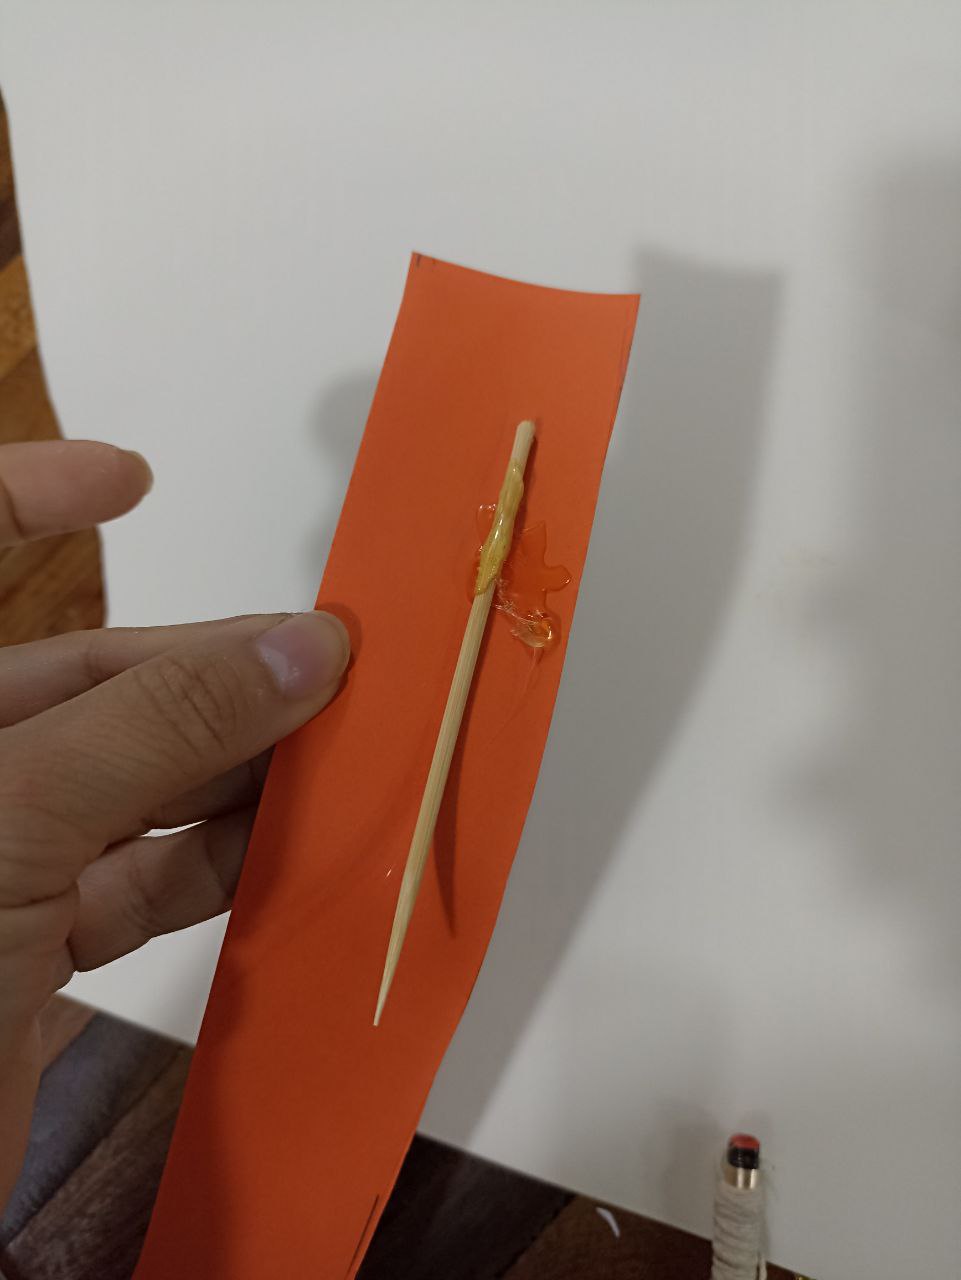 |  |
|---|
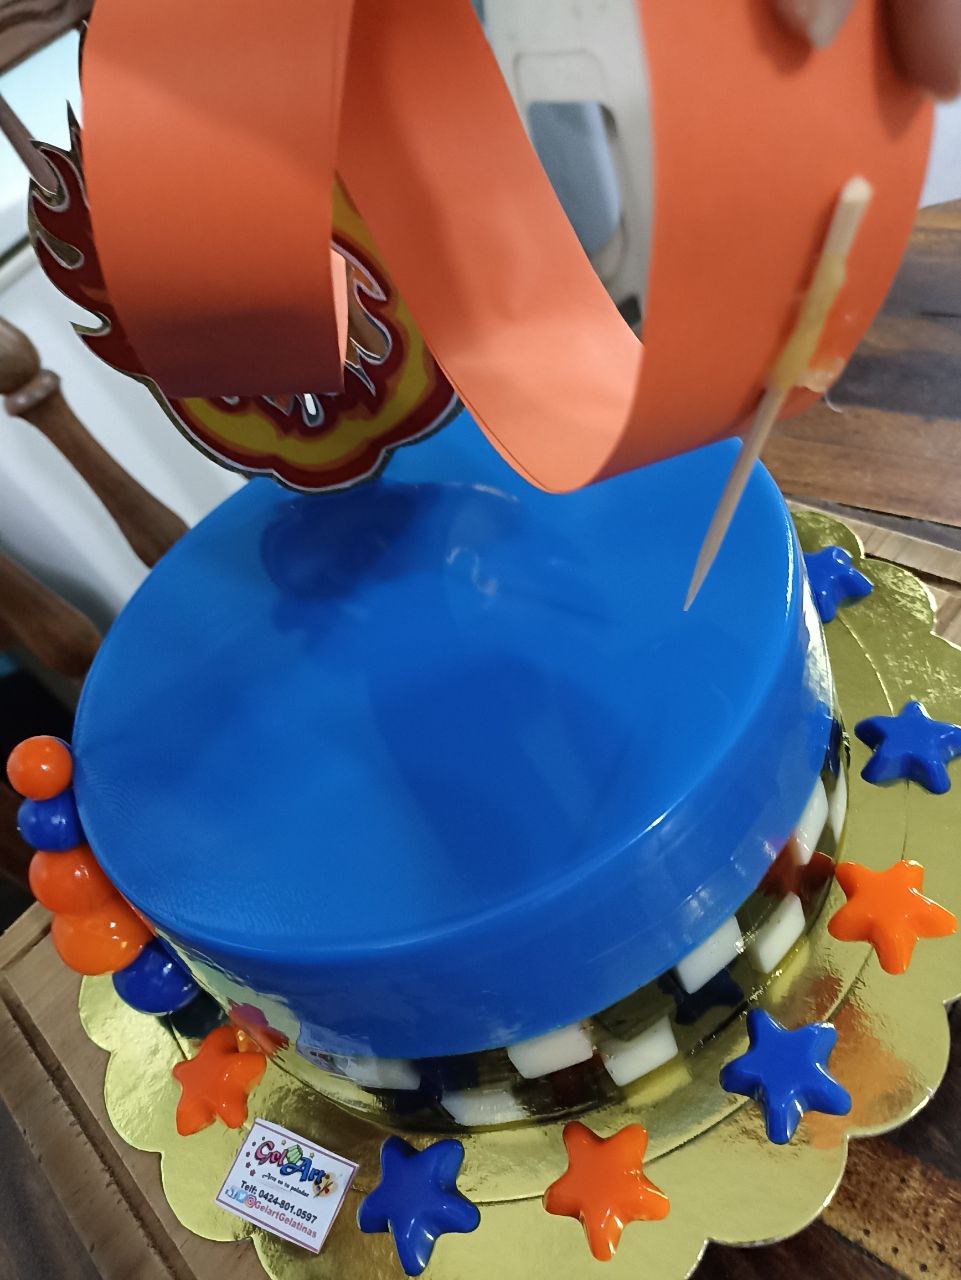
The customer wanted a model that was a kind of hotwheels ➰ 360 degrees turning track. To make the track I used a type of paper that here they call “school cardboard” I cut a long strip of it and put it together as you can see in the pictures.
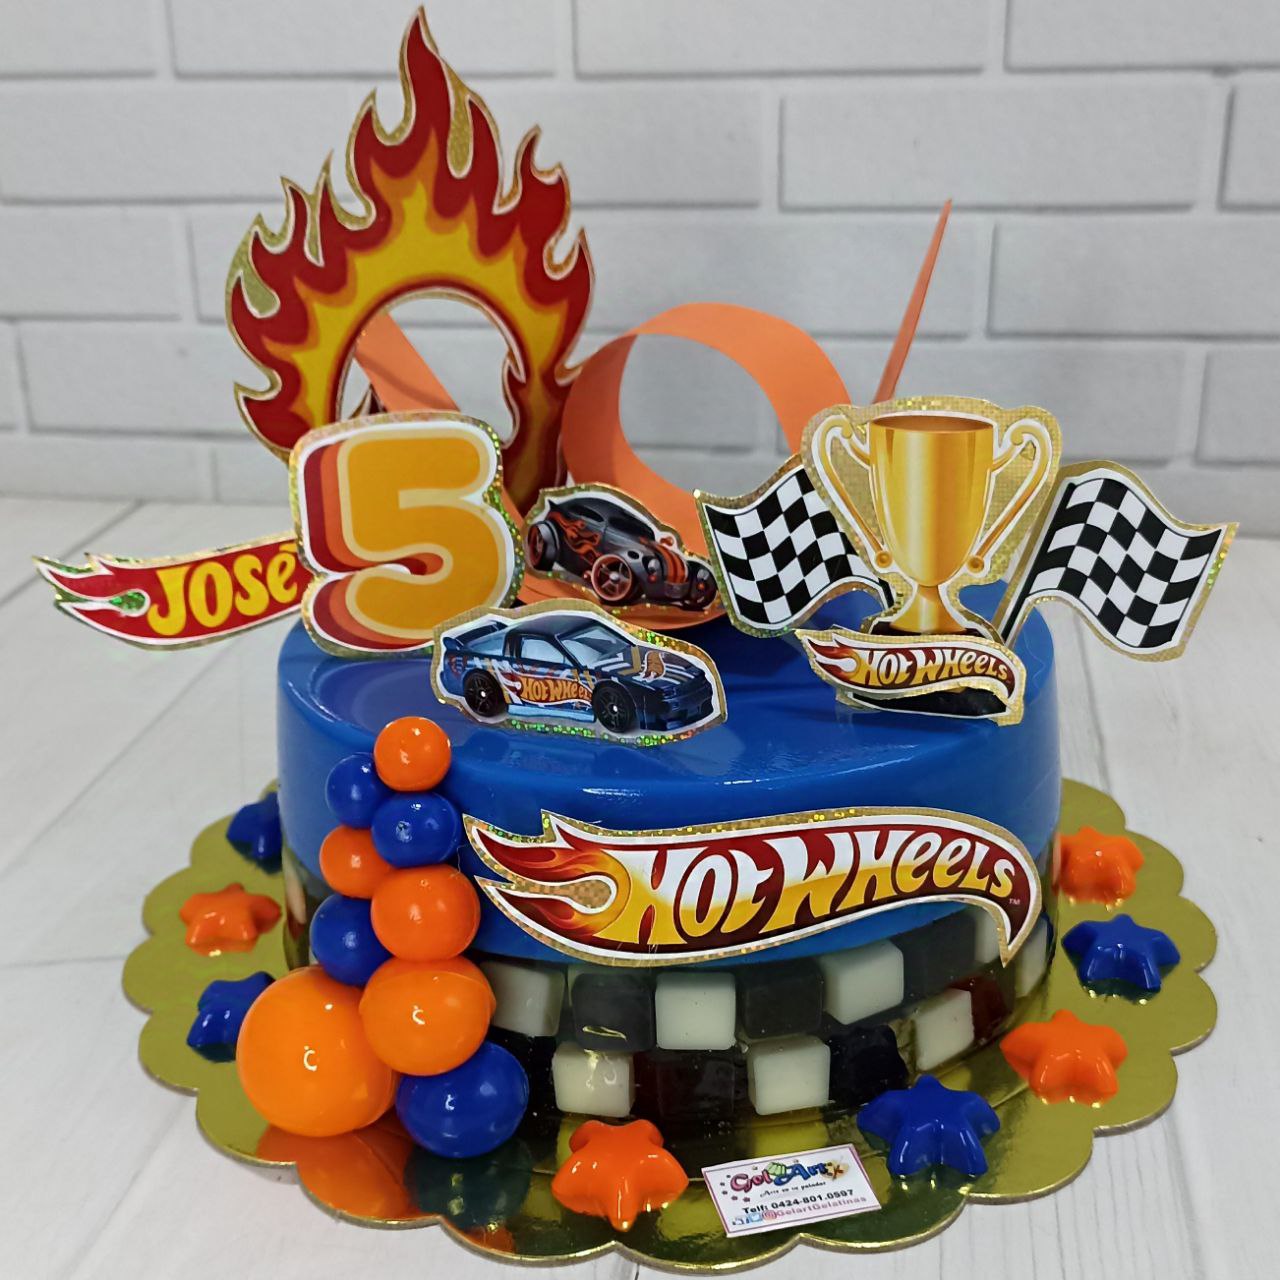
I had a picture of a jelly from the internet but I don't know the author but I'm going to leave it here so you can see what my client's request was.
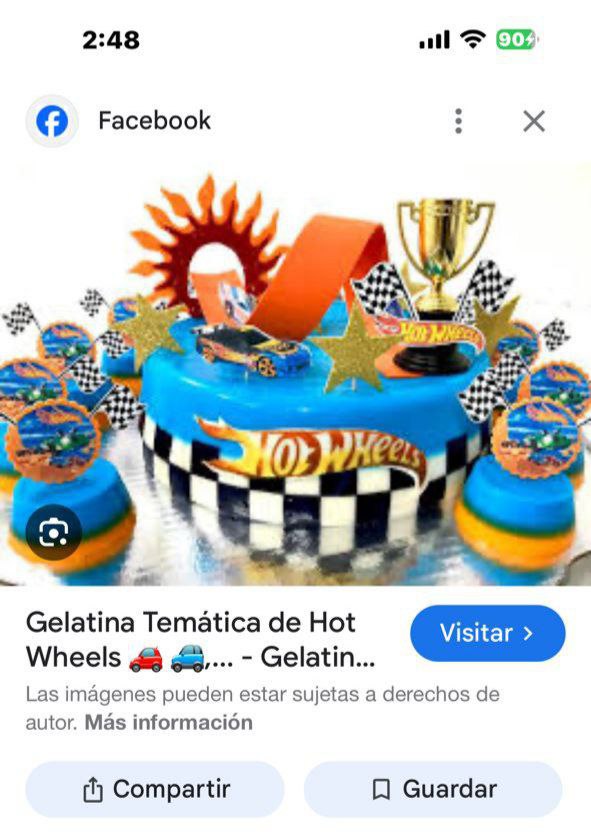
(photo of the network sent by the customer)
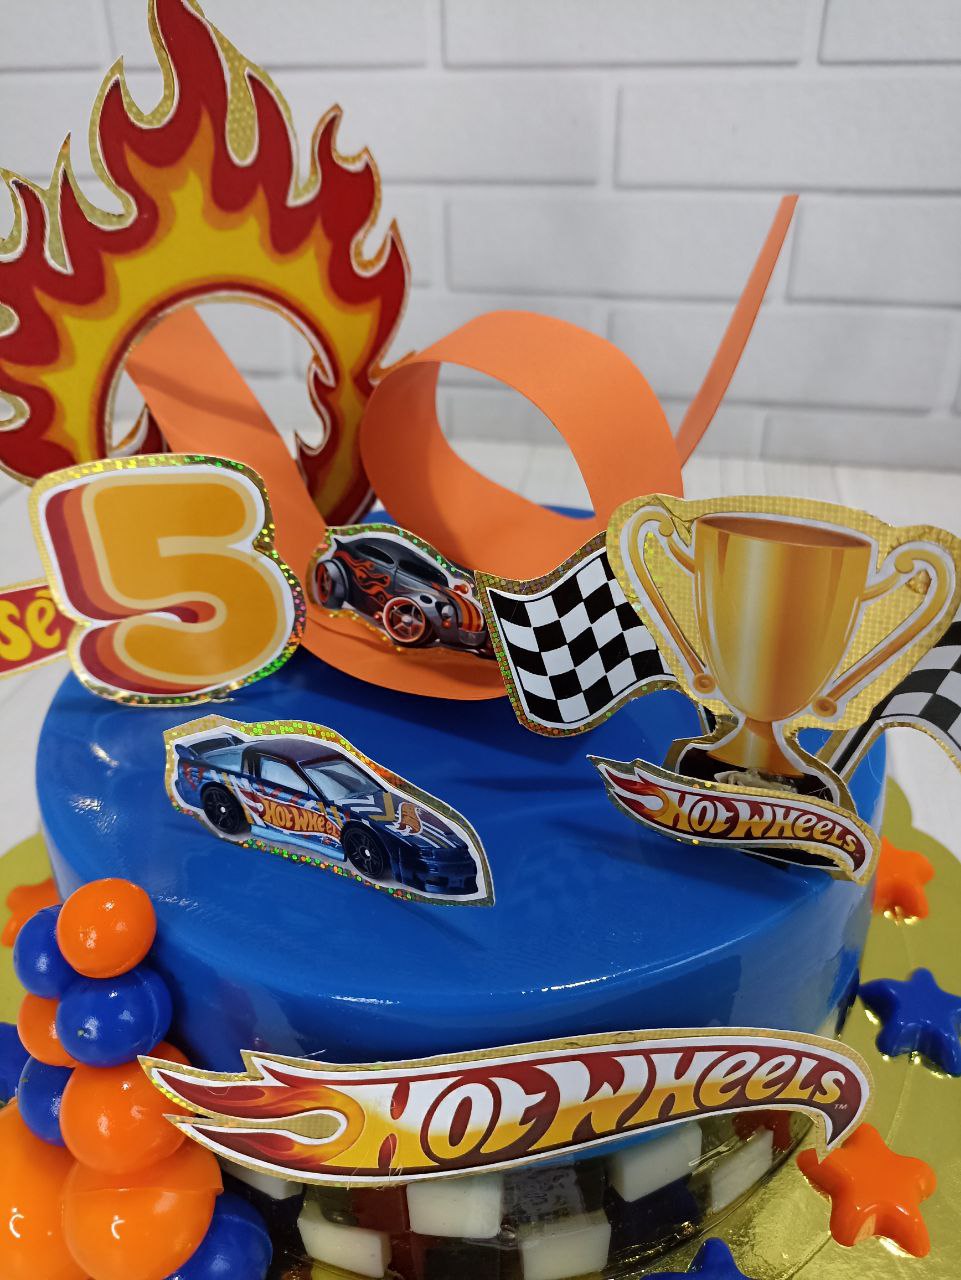
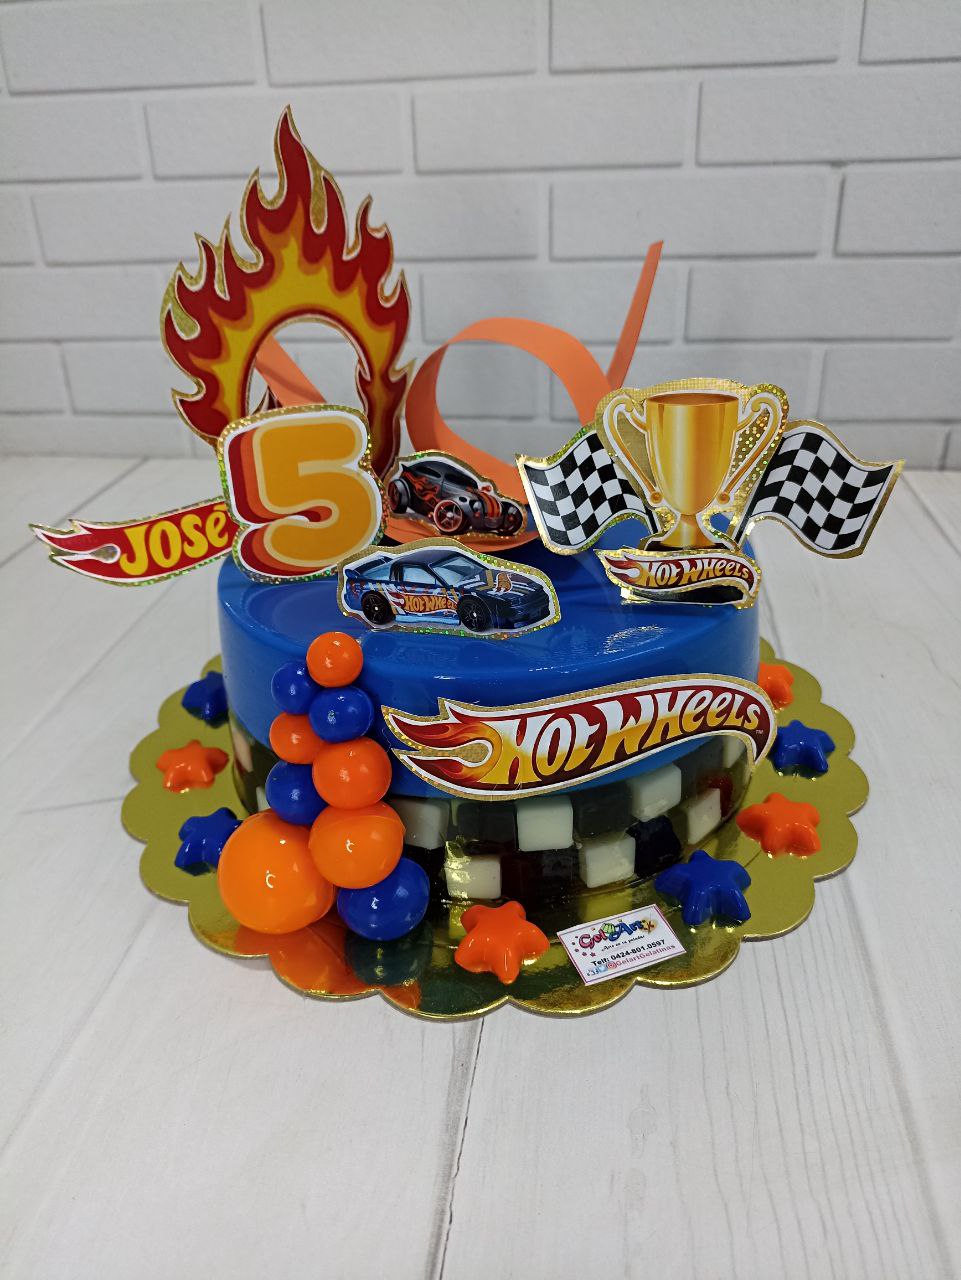
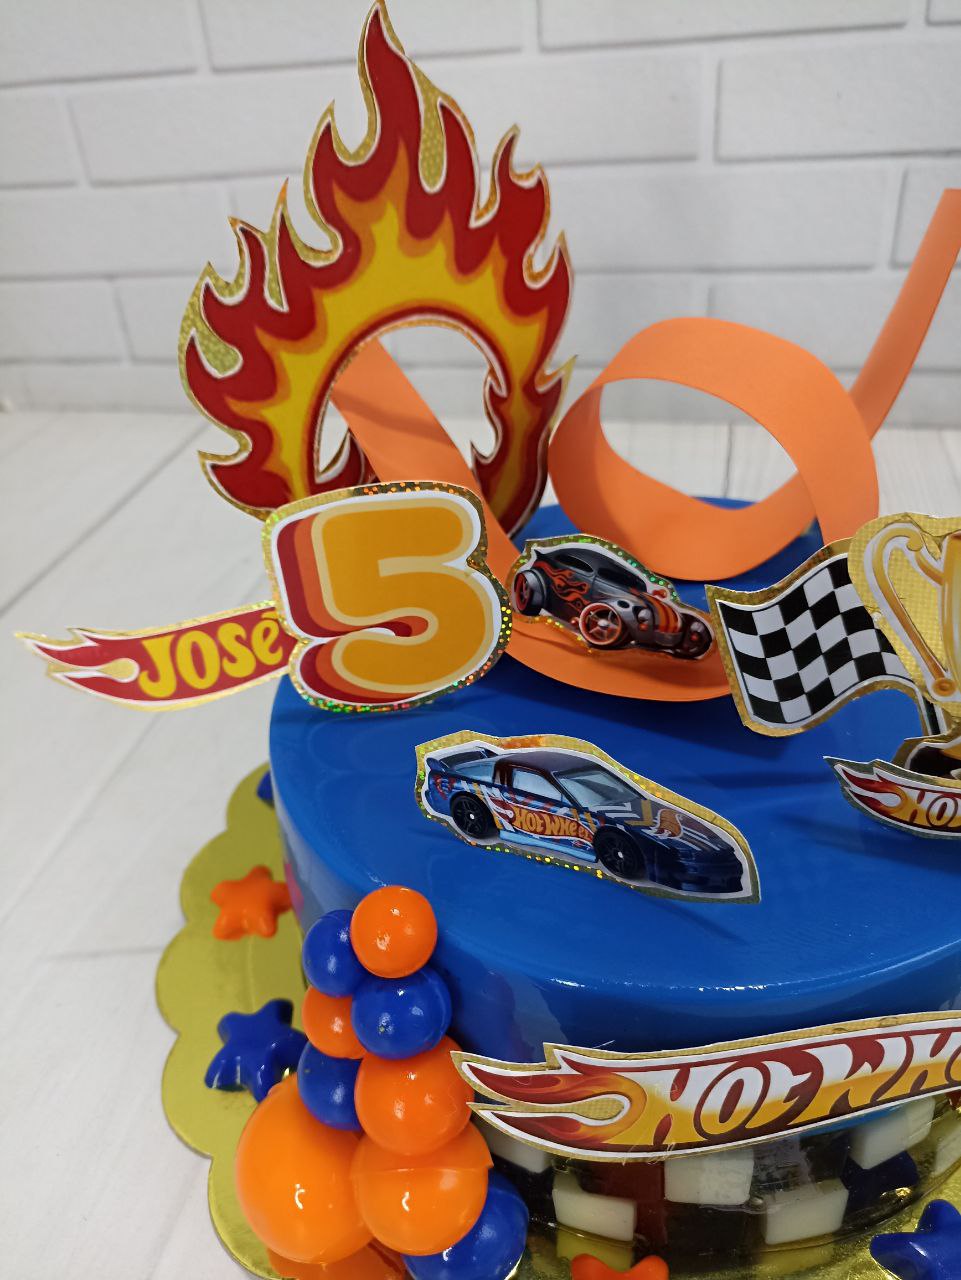
I only missed the little stars but I felt it would be too overloaded with so many things, sometimes less is more 😉. The flame ring figure I didn't get the picture image and took from the internet one I liked, the carts are also different it's very difficult sometimes to locate specific images starting from this kind of jello/cake pictures.
I feel it is very difficult to duplicate other people's work, when I am asked to do some other baker's work I try to make it as similar as possible but I always end up putting my personal touch 🥰.
 |  |  |
|---|
And so was the topper in the gelatin decoration, I hope you liked the process and serve as a guide for this type of work. This was a pretty elaborate Topper for the track but the techniques can be applied for much simpler things ❤️ toppers are very fashionable in the pastry and I feel that when I make them myself I can better master every detail and the proportion of sizes.
Thanks for reading me 🤗 until a next post ❤️
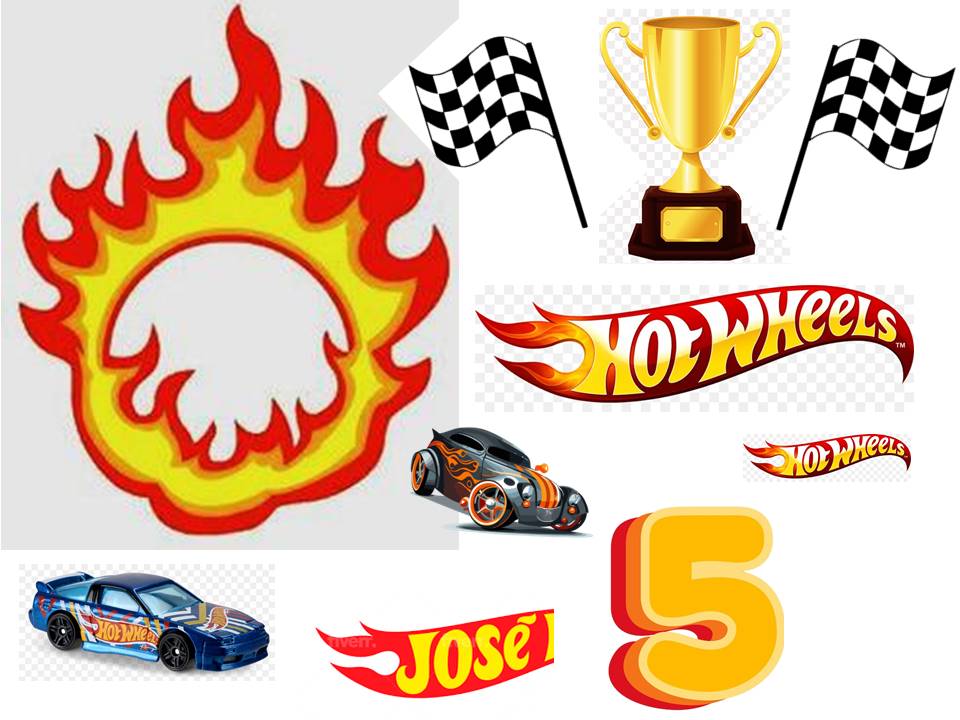
P.S. Here 👇 I leave you the image I printed in case you need to use it.

¡Saludos hivers!❤️🥰
Hola gente linda de Hive como en esta oportunidad no les traigo una receta sino un paso a paso de como elaboré los toppers para esta gelatina 🥰 hago mi primera publicación para la comunidad #HIVEDIY, mi nombre es Elianis Guerrero, soy una repostera que hace sus propios toppers recortados a mano. Espero les guste ❤️ y sea de ayuda para quienes quieran realzar sus postres usando toppers.

Antes de comenzar a enseñarles el proceso quiero contarles que los elaboré de forma artesanal, sin plotter de corte, sin cameo o ninguna herramienta sofisticada, y la organización de las imágenes lo realice en una aplicación de dominio de muchos la cual es powerpoint 😜 las imágenes que utilicé para elaborar los Toppers fueron de internet.
 1 1 |  2 2 |  3 3 |
|---|
(Haz click para ampliar)
Lo primero que hacemos es insertar forma "rectángulo" y colocar uno de las medidas del molde que vamos a usar, mi gelatina iba a ser de 19 cm de diámetro y la altura de aproximadamente unos 9cm así que use estás medidas.
Luego sobre este rectángulo que me da una proporción bastante real del tamaño que será mi gelatina comienzo a cuadrar las imágenes que voy a usar y las voy organizando como quiero que se vean. Como usé imágenes de internet casi ninguna tenía fondo transparente, y se ven superpuestas, pero igual allí más u menos se ver cómo quedarán en cuanto al tamaño y orden. El hacerlo así me garantiza que las impresiones tendrán un tamaño apropiado y acorde con la gelatina.
Luego elimino el rectángulo y organizo las imágenes para realizar la impresión de los Toppers. La impresión la realice en papel fotográfico.
 |  |  |
|---|
Luego que tenemos la impresión lista procedemos a cortar lo más cercano al borde posible pero tratando de no cortar la imagen, yo trato de dejar como un par de milímetros de separación, voy dejando una especie de mini borde blanco (me imagino soy una cameo humana😜).
Una vez tenemos recortadas todas las figuras procedemos a ponerle silicón líquido sólo en los bordes y pegamos sobre cartulina, acá yo utilicé metalizada dorada pero pueden usar cualquier otro color dependiendo sus gustos y la temática que estén realizando.
Nota: para cortes internos como el del aro de fuego me ayudó de un cortador tipo cutter/exacto.
 |  |
|---|
Luego de haber pegado las figuras en la lámina de cartulina dorada y haberlas recortado calentamos la pistola de silicón para pegarle los palitos y ya tener listos nuestros Toppers de solo colocarlos sobre la Gelatina (nota también pueden servir para tortas).
 |  |  |
|---|
El cliente quería un modelo que era una especie de pista con giro ➰ 360 grados de hotwheels. Para hacer la pista utilicé un tipo de papel que acá llaman "cartulina escolar" recorte una tira larga de esta y la arme como pueden ver en las fotos.
Me habían pasado una foto de una gelatina de internet de la cual desconozco el autor pero acá se las voy a dejar para que vean cuál fue la solicitud que hizo mi client.

(foto de la red enviada por el cliente - Fuente foto original)
Sólo me faltaron las estrellitas pero sentí que iba a quedar demasiado sobrecargada con tantas cosas, a veces menos es más 😉. La figura del aro de llamas no conseguí la imagen de la foto y tomé de internet una que me gustó, los carritos también son diferentes es muy difícil a veces ubicar imágenes específicas partiendo desde este tipo de fotos de gelatinas/tortas.
Siento que es muy difícil duplicar trabajos de otras personas, cuando me piden hacer algún trabajo de otro repostero intento hacerlo lo más parecido posible pero siempre termino poniéndole mi toque personal 🥰
 |  |  |
|---|
Y así quedó el topper en la decoración de la gelatina, espero les haya gustado el proceso y les sirva de orientación para realizar este tipo de trabajos. Esté fue un Topper bastante elaborado por la pista pero las técnicas las pueden aplicar para cosas mucho más sencillas ❤️ los toppers están muy de moda en la pastelería y siento que cuando los hago yo misma puedo dominar mejor cada detalle y la proporción de tamaños
Gracias por leerme 🤗 hasta una próxima publicación ❤️
Posdata: Acá 👇les dejo la imagen que imprimí por si necesitan usarla.


