Hola amigos y amigas de Hive DIY. Feliz Viernes, espero el fin de semana que inicia sea de descanso, diversiones y alegrías. De mi parte, desde que mi nieta se ha marchado de la casa, he quedado nuevamente sola y aprovecho de ocupar mi tiempo en aprender, planificar y crear. No hay nada más terapéutico que ocuparte en las cosas que te gustan. En esta oportunidad quiero compartir con ustedes un paso a paso de la Confección de un Vestido de Niña.
Hello friends of Hive DIY. Happy Friday, I hope the weekend ahead is one of rest, fun and joy. For my part, since my granddaughter left home, I have been left alone again and I take advantage of spending my time learning, planning and creating. There is nothing more therapeutic than occupying yourself with the things you like. On this occasion I want to share with you a step by step of Making a Girl's Dress.
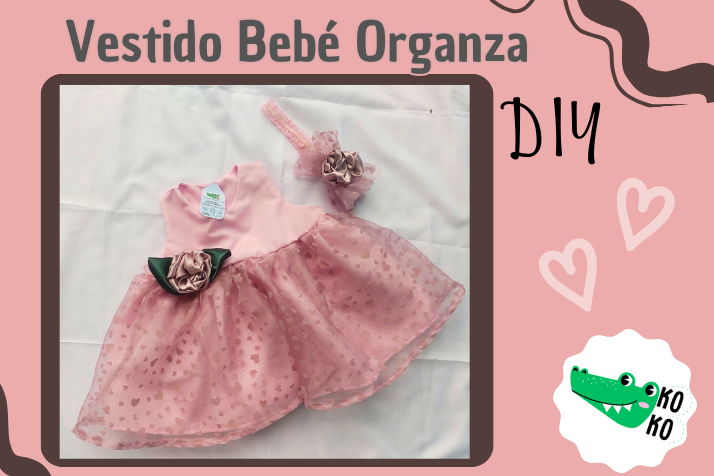
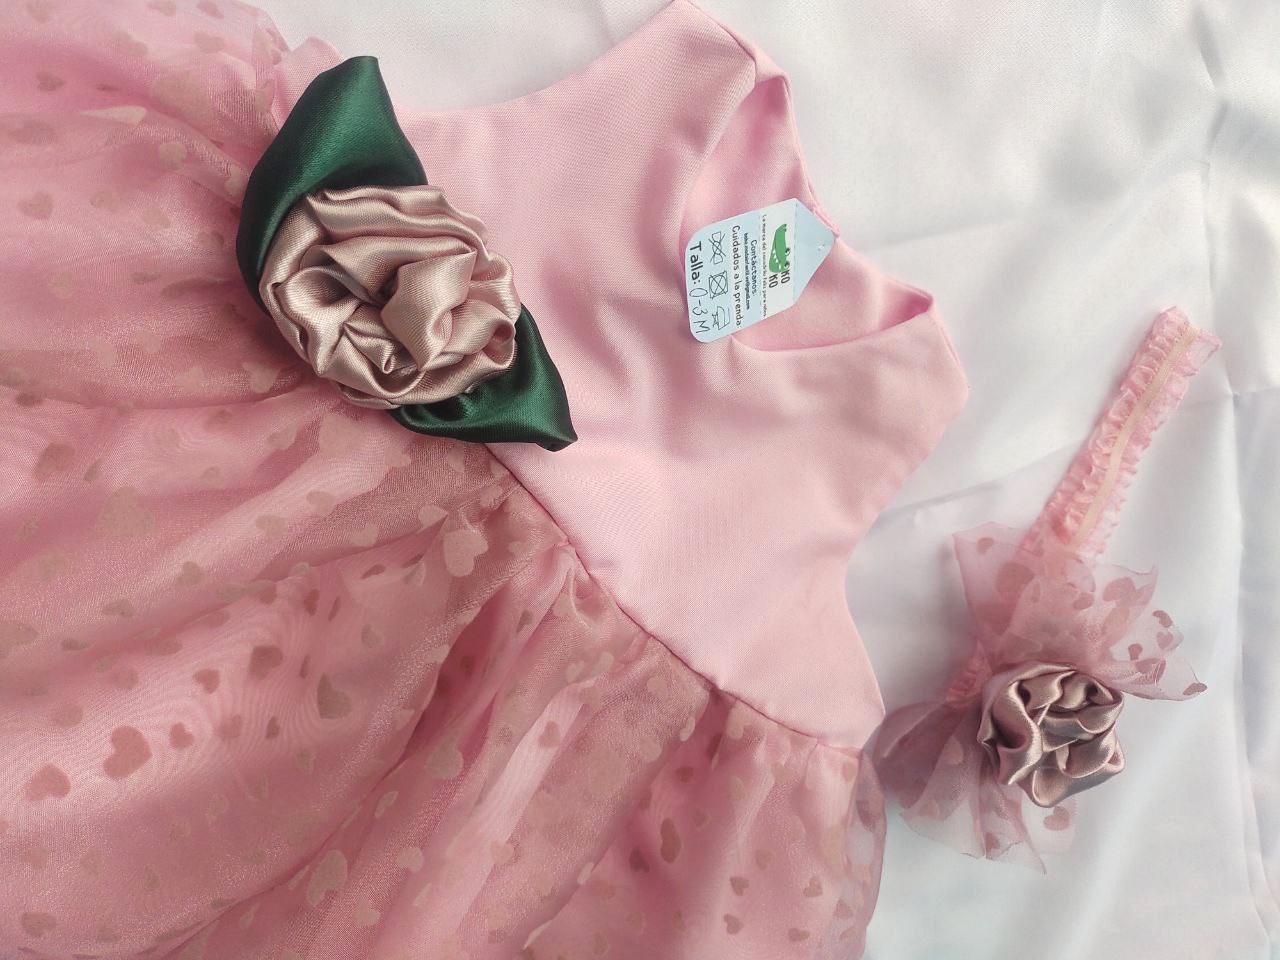
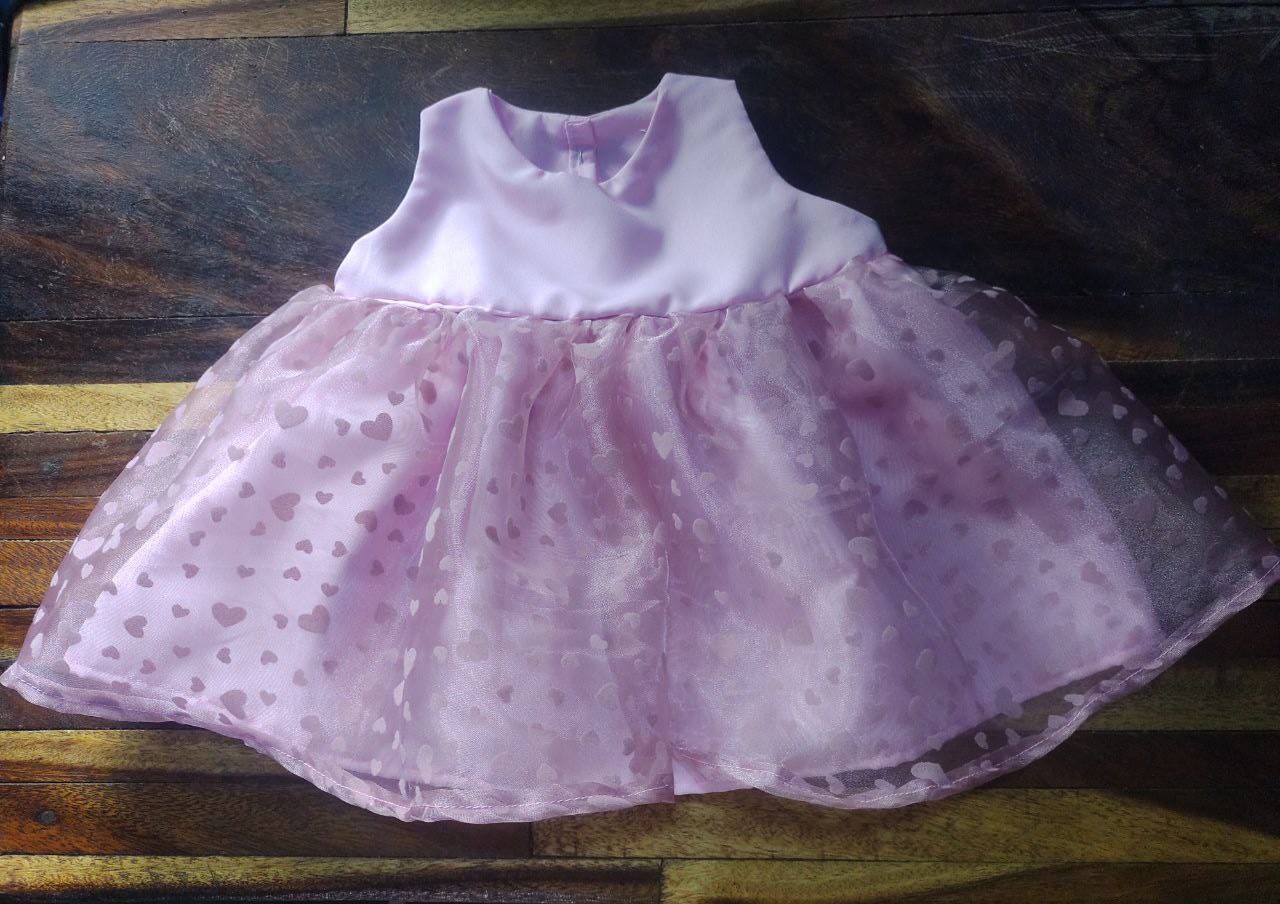
Los vestidos para bebé o niña son un clásico, una vestimenta infantil que puede ser divertida o colorida, fresca o un poco más cargada de capas según la ocasión lo amerite. Lo cierto es que siempre es ideal tener para nuestros niñas contar con algunos vestidos para lucir en ocasiones especiales. En mi emprendimiento, realizo vestidos y ropa a la medida, en esta ocasión les mostraré el proceso fotográfico de como he realizado el modelo de Vestido Organza. Una prenda de corte clásico, con la parte de la falda en doble tela, una base y otra capa de organza estampada.
Dresses for babies or girls are a classic, children's clothing that can be fun or colorful, fresh or a little more layered depending on the occasion. The truth is that it is always ideal for our girls to have some dresses to wear on special occasions. In my business, I make custom dresses and clothing, on this occasion I will show you the photographic process of how I made the Organza Dress model. A classic cut garment, with the skirt part in double fabric, a base and another layer of printed organza.

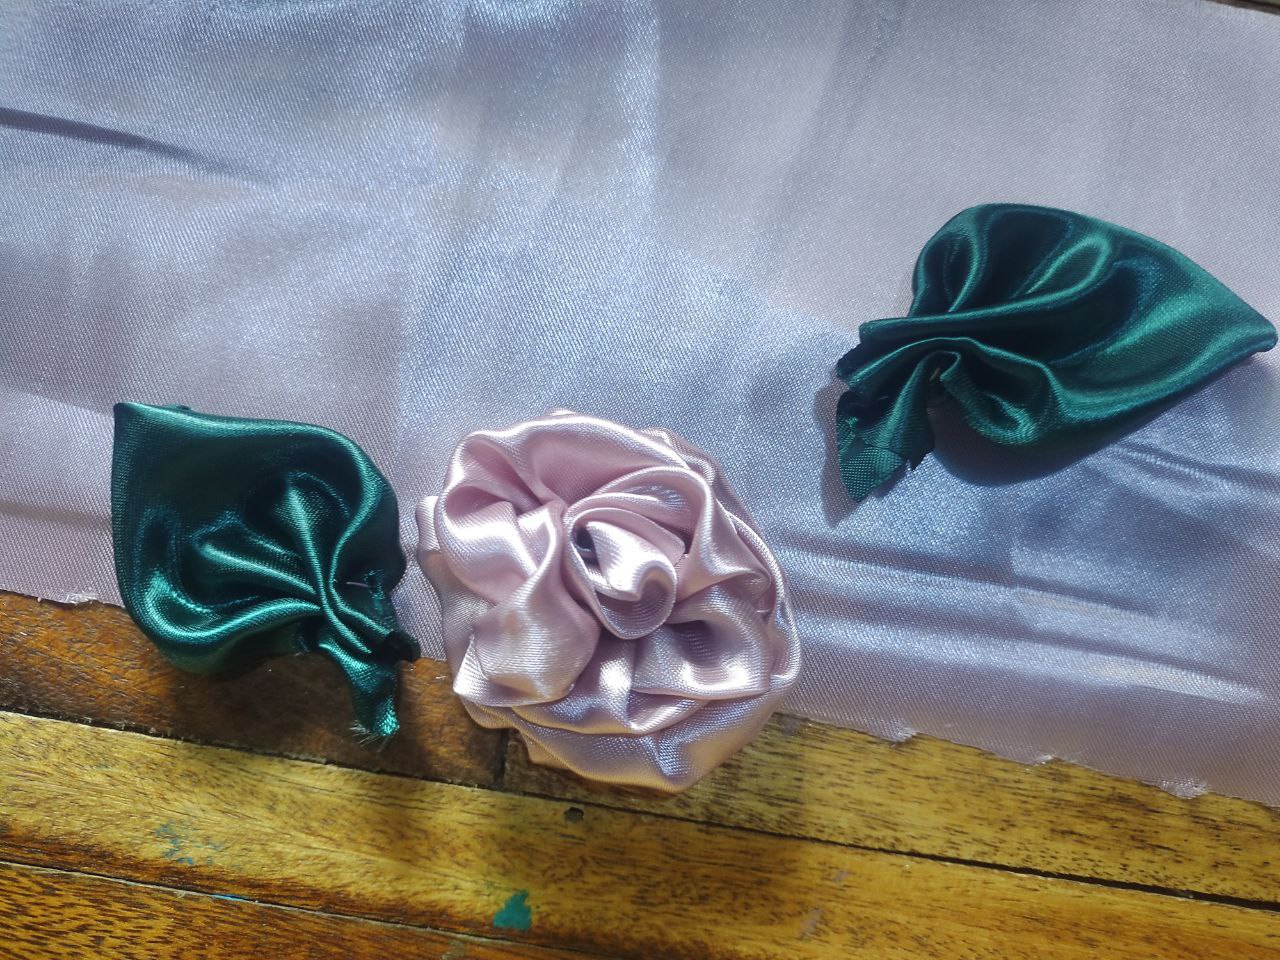
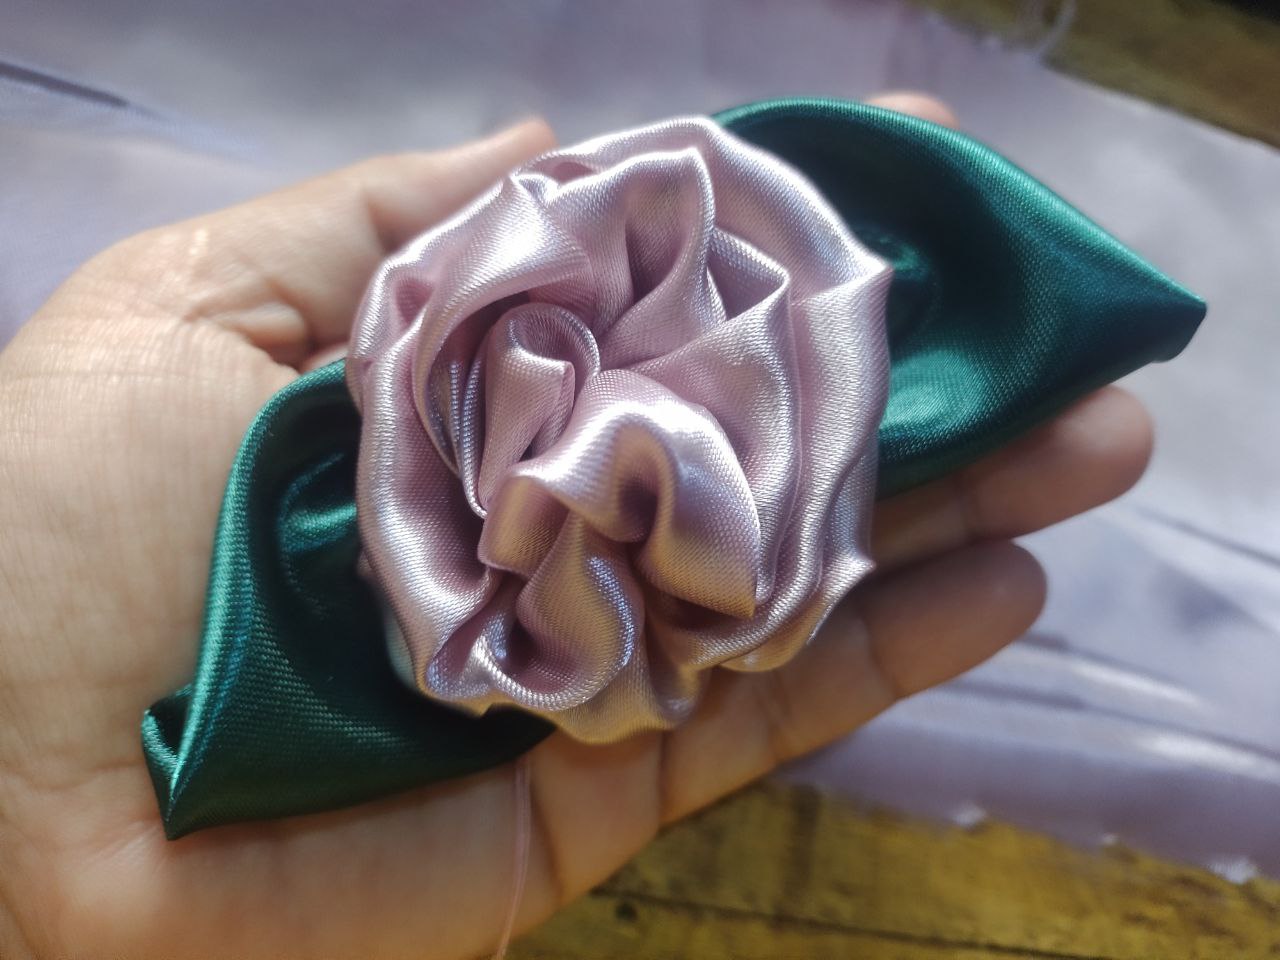
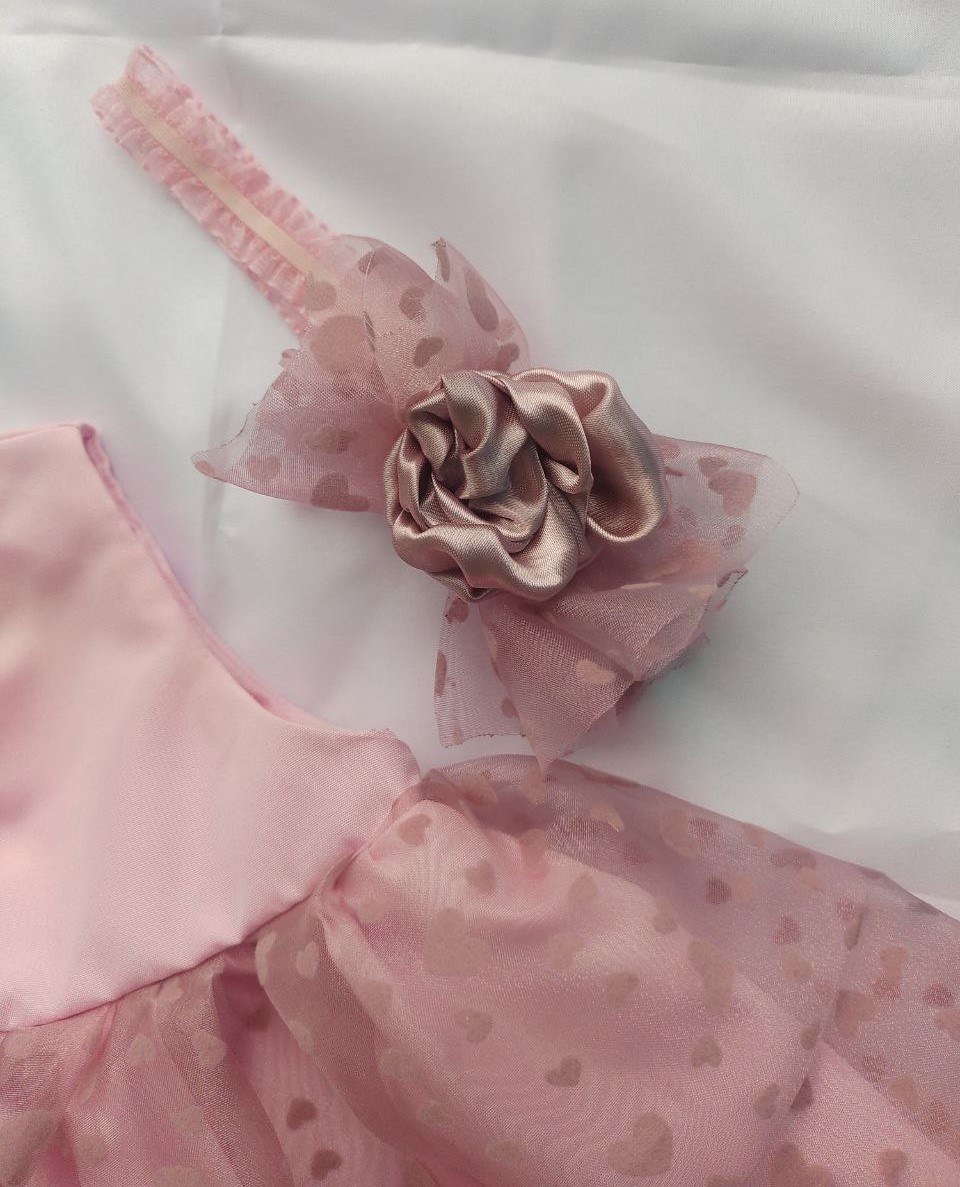
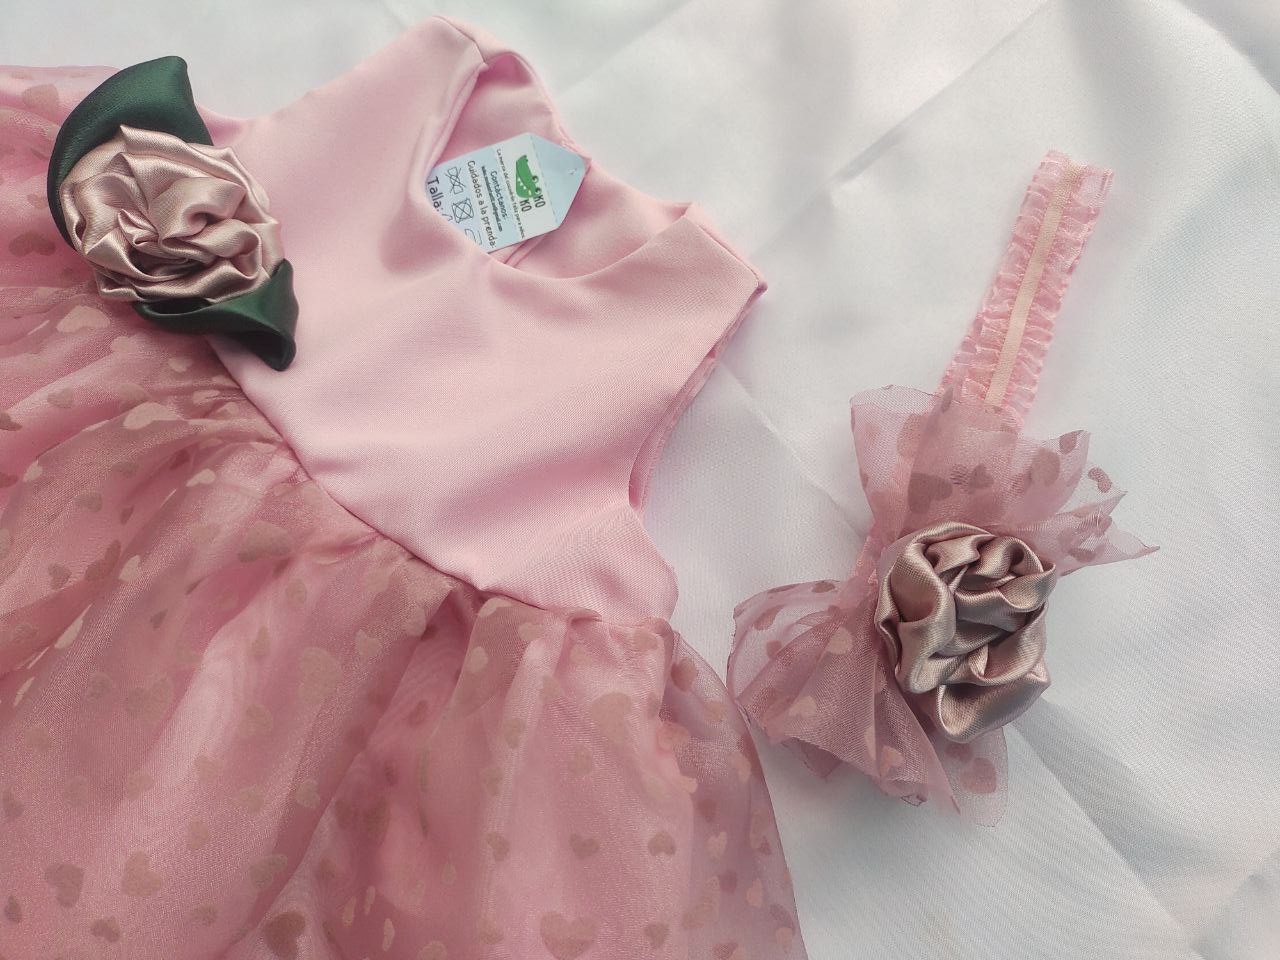
Este modelo es delicado, como detalles de decorado tiene una rosa en tela satinada acompañada de hojas que dan realce a la composición general. Para acompañar el vestido, una linda diadema elaborada en tornasol elástico y en el mismo color del vestido. La diadema también la he realizado, usando organza estampada y otra flor satinada igual a la del vestido. Crear este tipo de conjunto o set de piezas es un proceso hermoso y delicado.
This model is delicate, as decorative details it has a rose in satin fabric accompanied by leaves that enhance the general composition. To accompany the dress, a beautiful headband made of elastic iridescent and in the same color as the dress. I also made the headband, using printed organza and another satin flower the same as the one on the dress. Creating this type of ensemble or set of pieces is a beautiful and delicate process.
🌸🌸🌸🌸🌸🌸
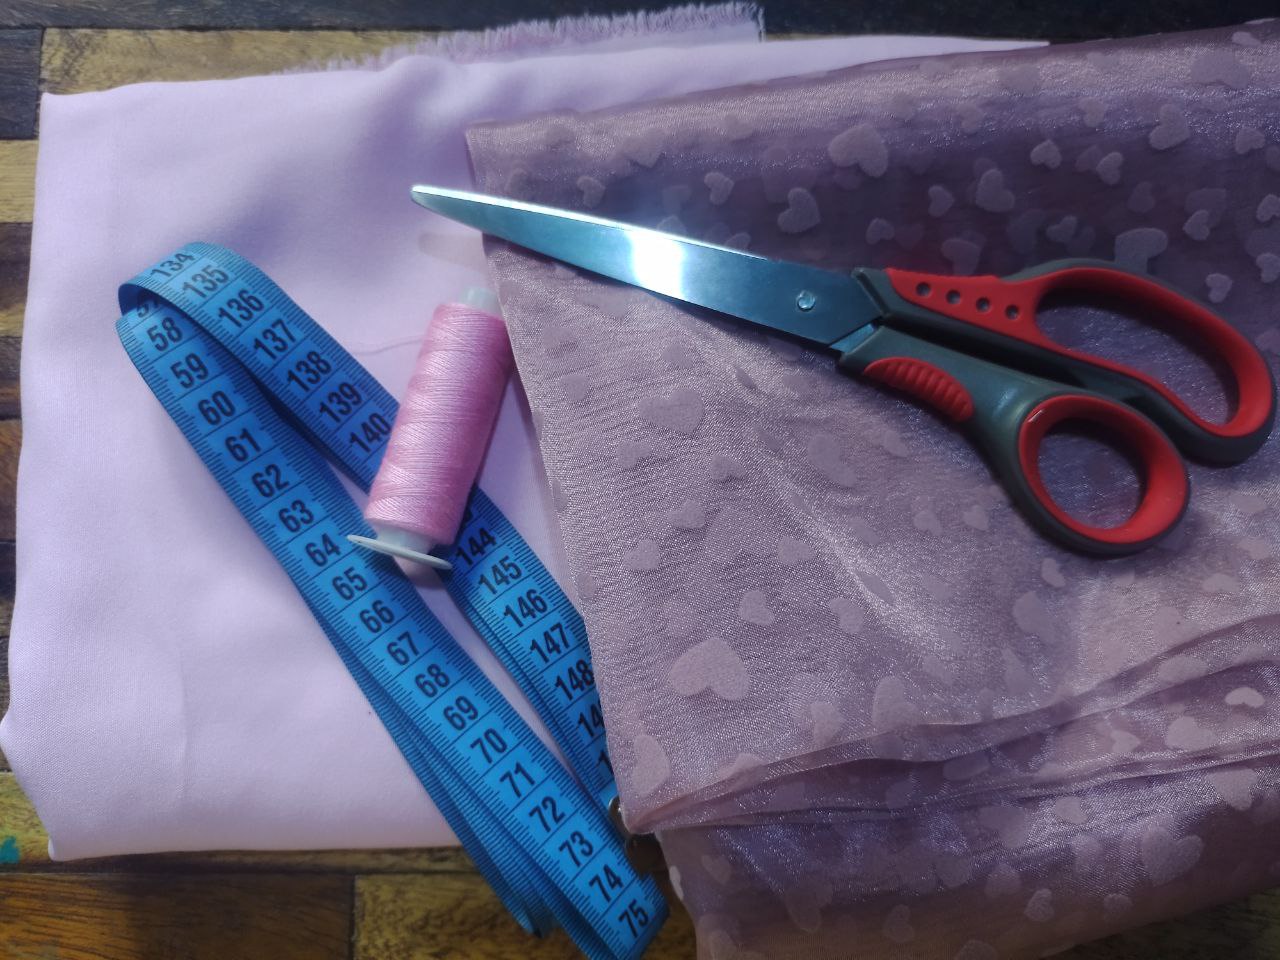
Materiales
- Tela Poppelina
- Tela Organza estampada
- Tela raso en rosa vieja y verde esmeralda
- Hilo a tono del color de la tela, en este caso Rosado
- Tornasol elástico rosa
- Aguja común
- Máquina de coser
- Tijera
- Cinta Métrica
- Silicon
Patrón de Canesú de vestido, talla 0-3 Meses
Materials
- Poppelina fabric
- Printed Organza fabric
- Satin fabric in old pink and emerald green
- Thread matching the color of the fabric, in this case Pink
- Pink elastic litmus
- Common Godwit
- Sewing machine
- Scissors
- Measuring tape
- Silicon
Dress yoke pattern, size 0-3 Months
🌸🌸🌸🌸🌸🌸
Proceso de Creación / Creation Process
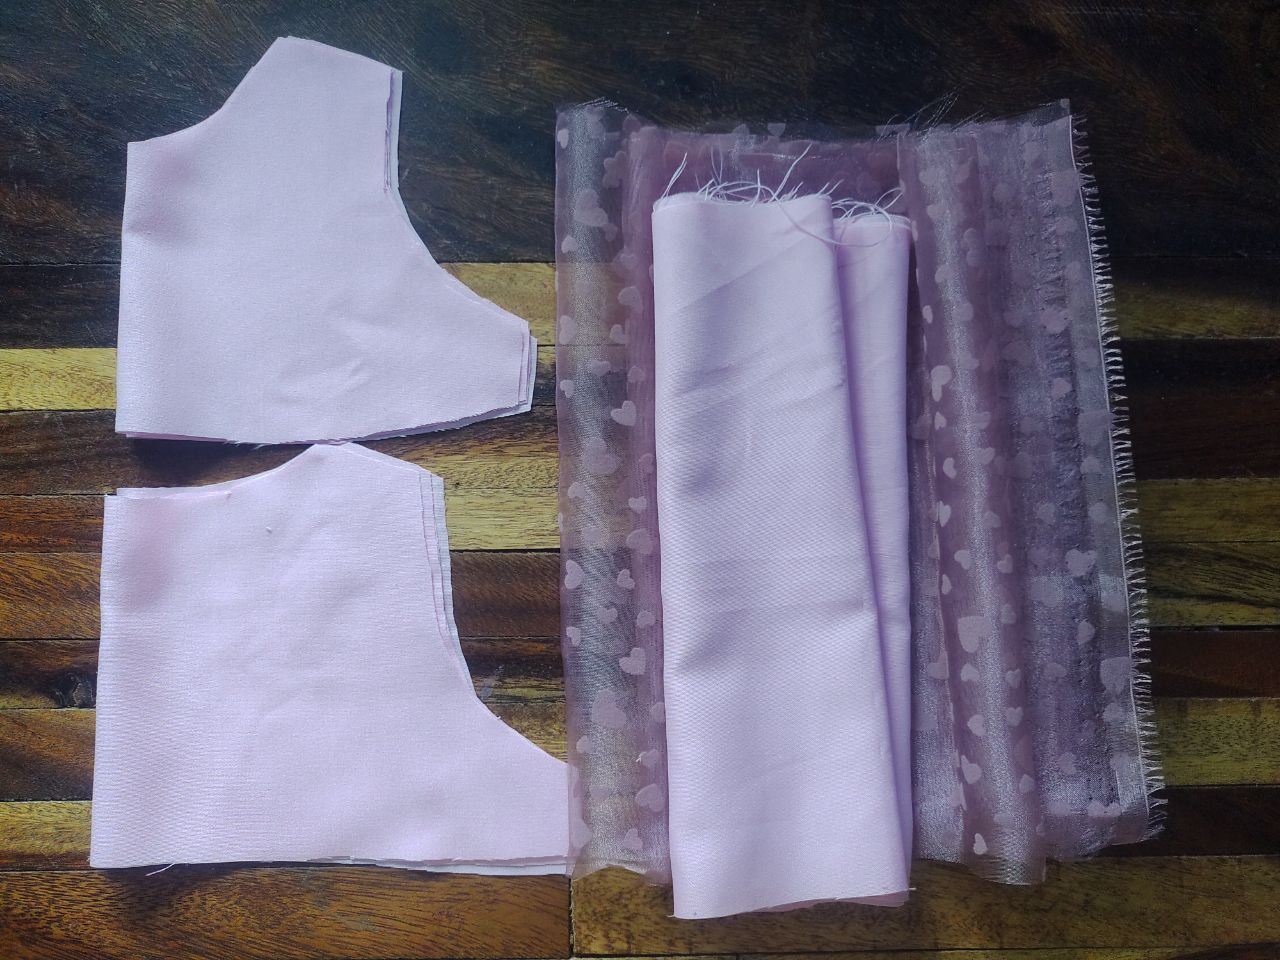
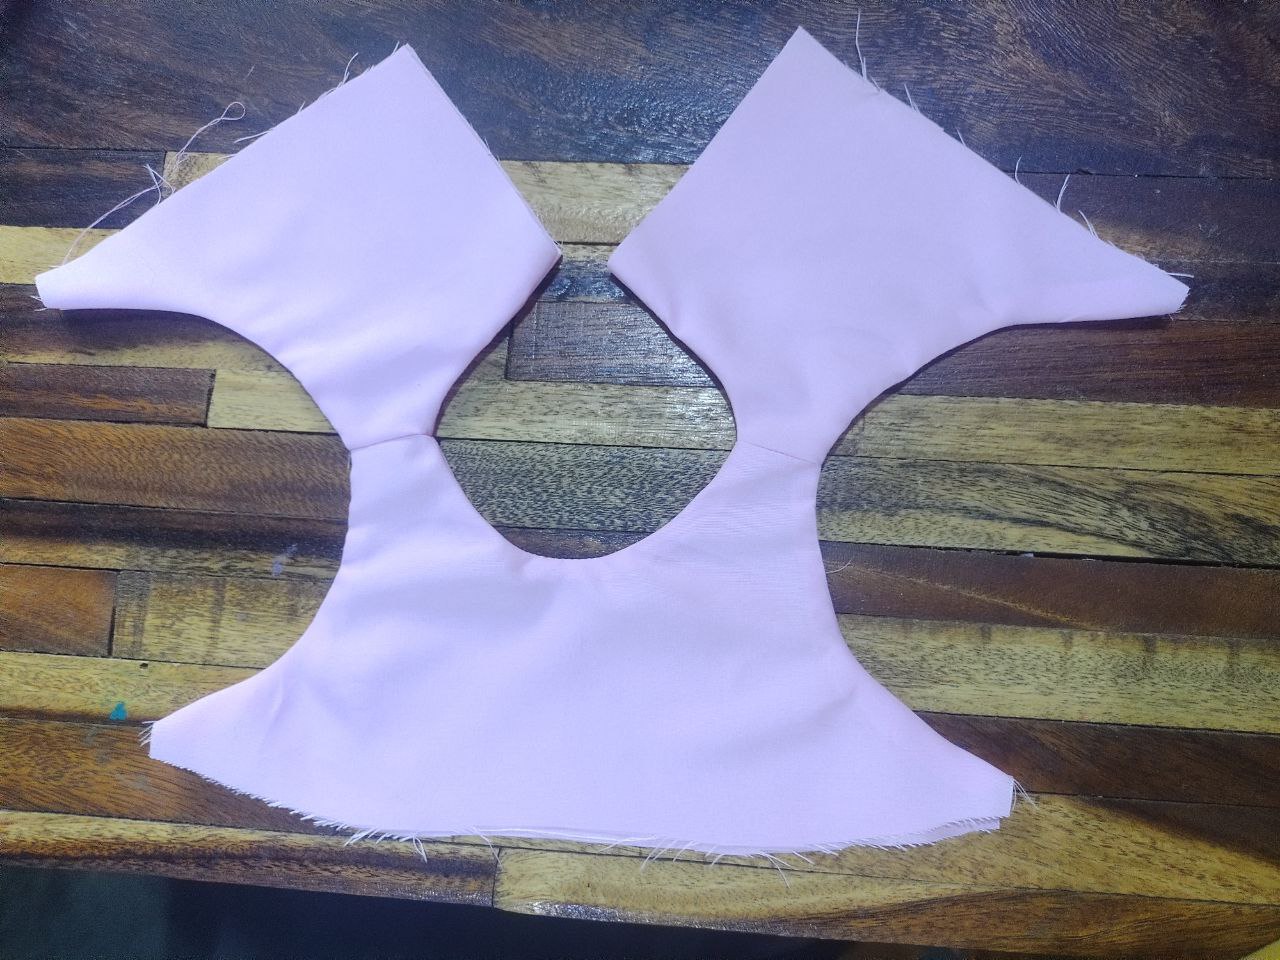
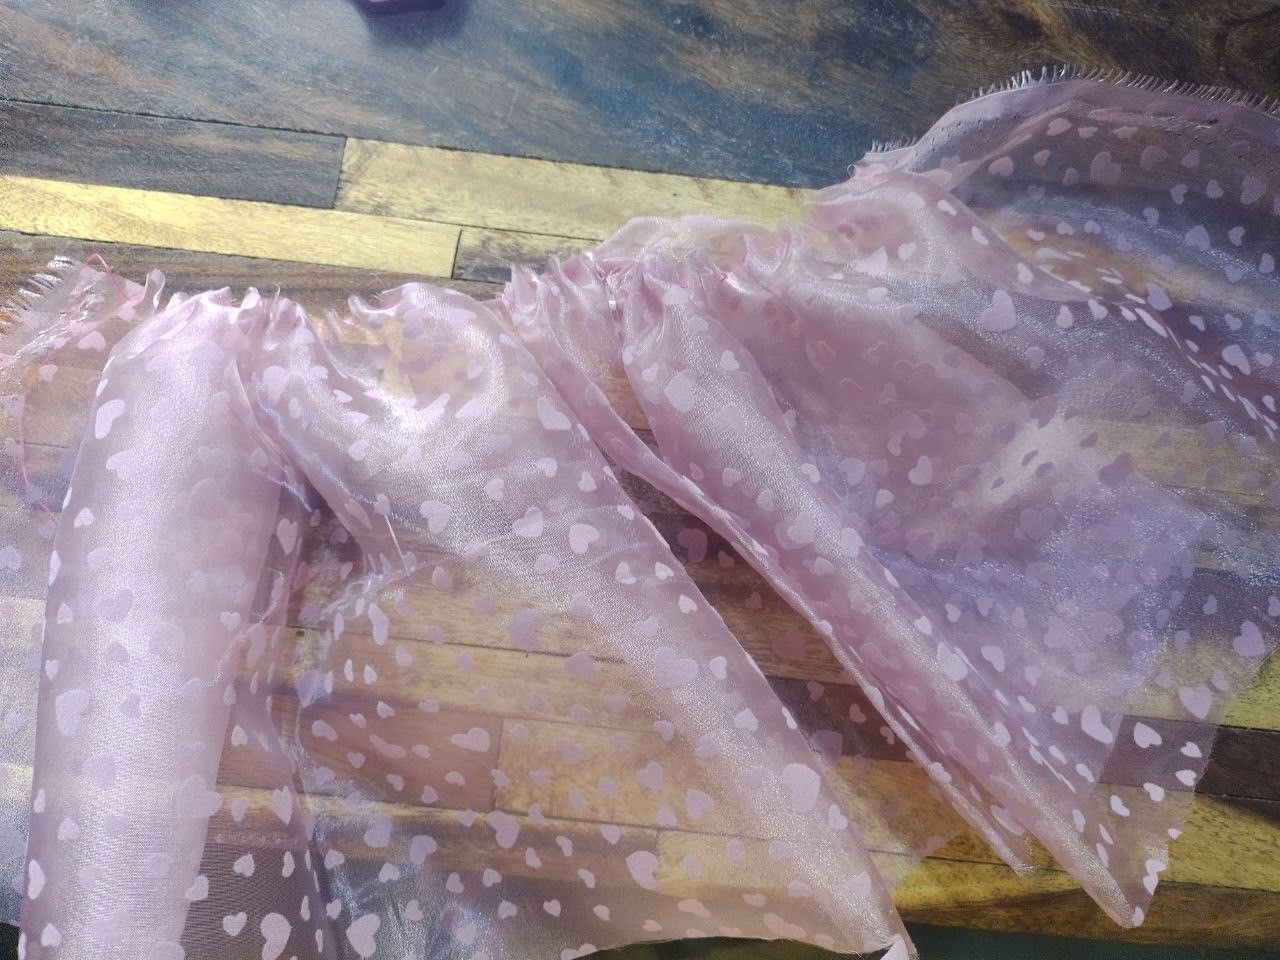
Comenzamos cortando las piezas del vestido. Siendo este doble, necesitamos cortar 2 piezas del delantero, 2 piezas del trasero, esto va a ser en Poppelina. Seguidamente cortaremos la falda o parte inferior del vestido, para ello usaremos un rectangulo que tiene de alto 25 CM y de ancho será dependiendo que tantos pliegues quisiera que tuviera. Yo lo hice con un ancho de 140 cm.
We start by cutting the pieces of the dress. This being double, we need to cut 2 pieces from the front, 2 pieces from the back, this is going to be in Poppelina. Next we will cut the skirt or bottom part of the dress, to do this we will use a rectangle that is 25 CM high and wide depending on how many folds you would like it to have. I made it with a width of 140 cm.
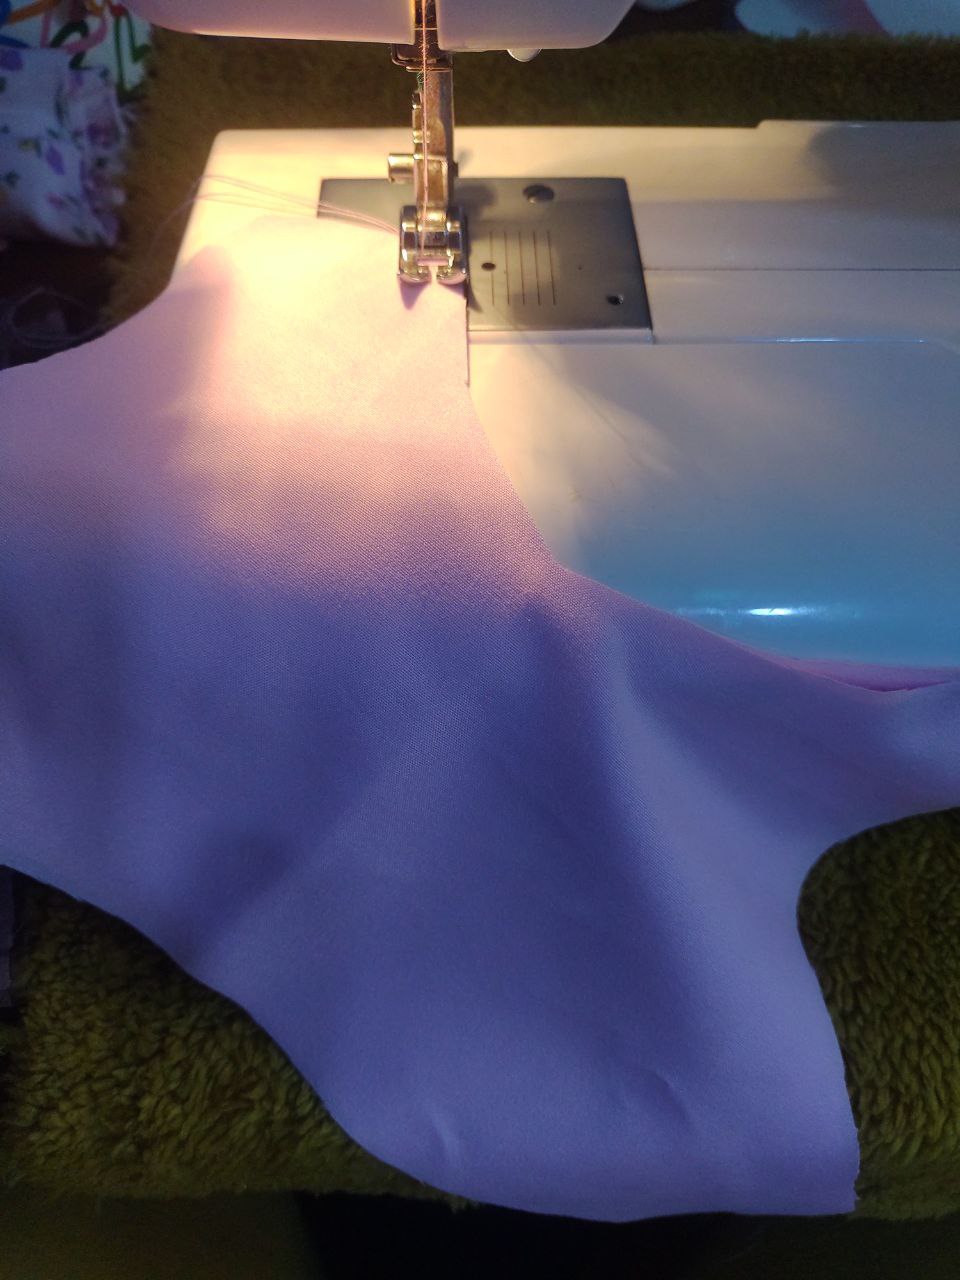
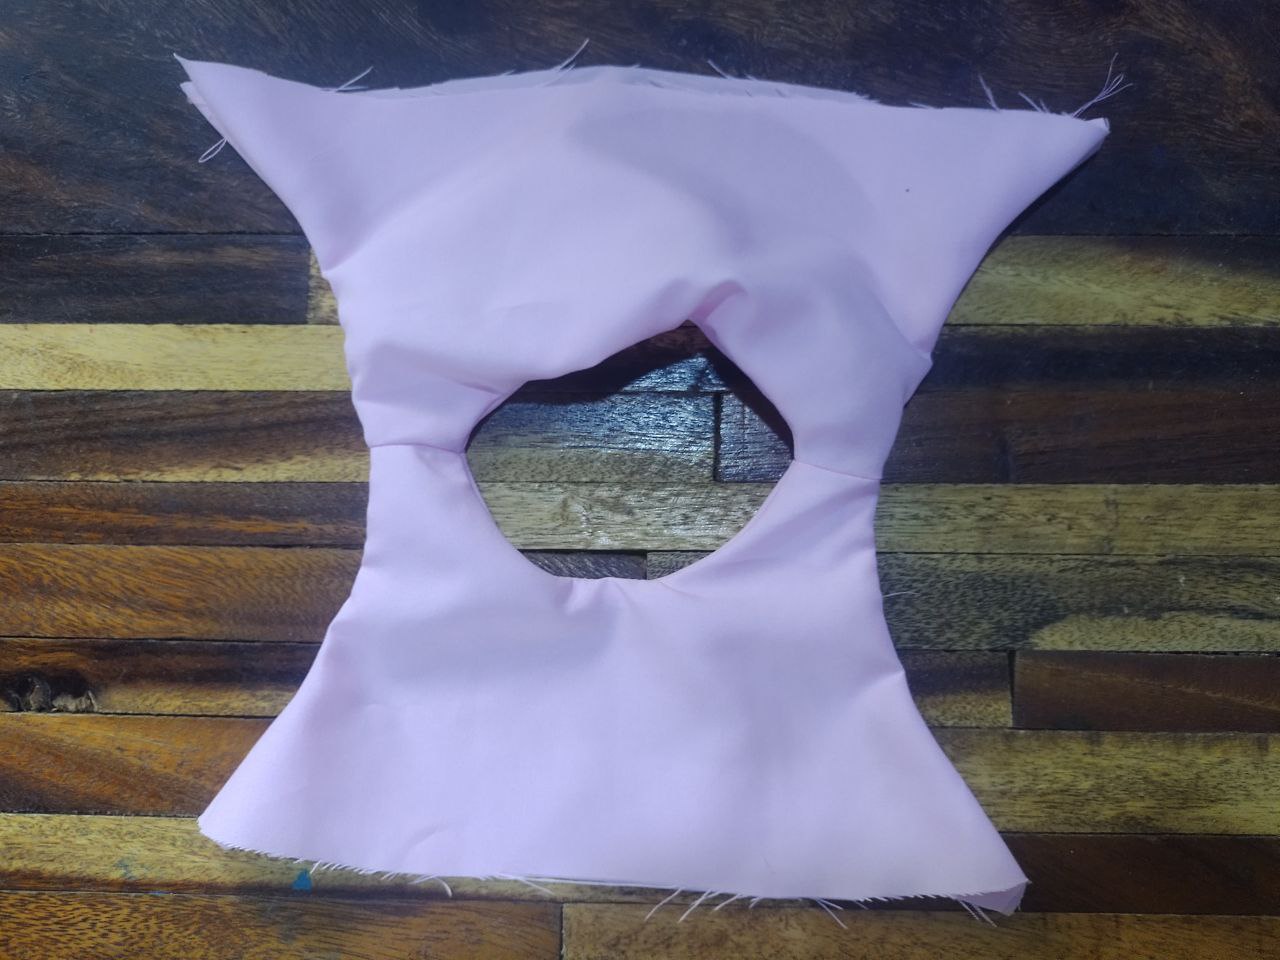
Para el proceso de confección tomamos las dos piezas del delantero, enfrentamos derechos y unimos por el cuello. Realizamos piquetes por el contorno para así darme más flexibilidad a la curva. Lo mismo lo haremos con las piezas del trasero. Después volteamos y nos quedarían al derecho ambas piezas. Enfrentamos las uniones de los hombros y cosemos por allí para unir. Para coser las sisas, extendemos el canesú y volteamos uno para enfrentar los mismo derechos de la sisa y cosemos, realizamos los piquetes. Sacamos o volteamos la pieza, repetiremos el mismo proceso con la otra sisa.
For the manufacturing process, we take the two front pieces, face them straight and join at the neck. We made pickets along the contour to give the curve more flexibility. We will do the same with the butt pieces. Then we turn and both pieces would be right side up. We face the shoulder joints and sew there to join. To sew the armholes, we extend the yoke and turn one to face the same right sides of the armhole and sew, make the notches. We take out or turn the piece, we will repeat the same process with the other armhole.
 | 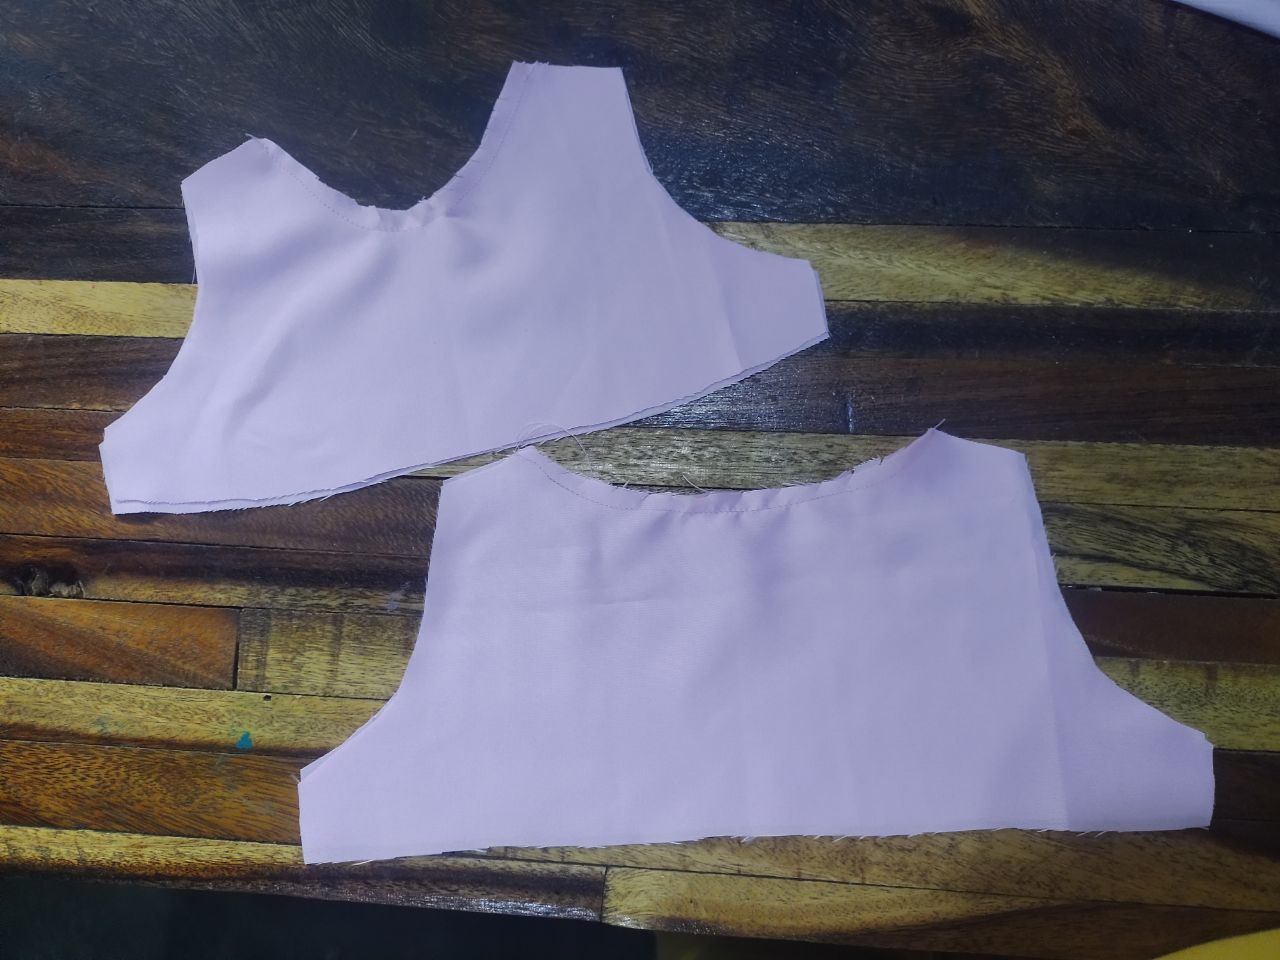 |  |
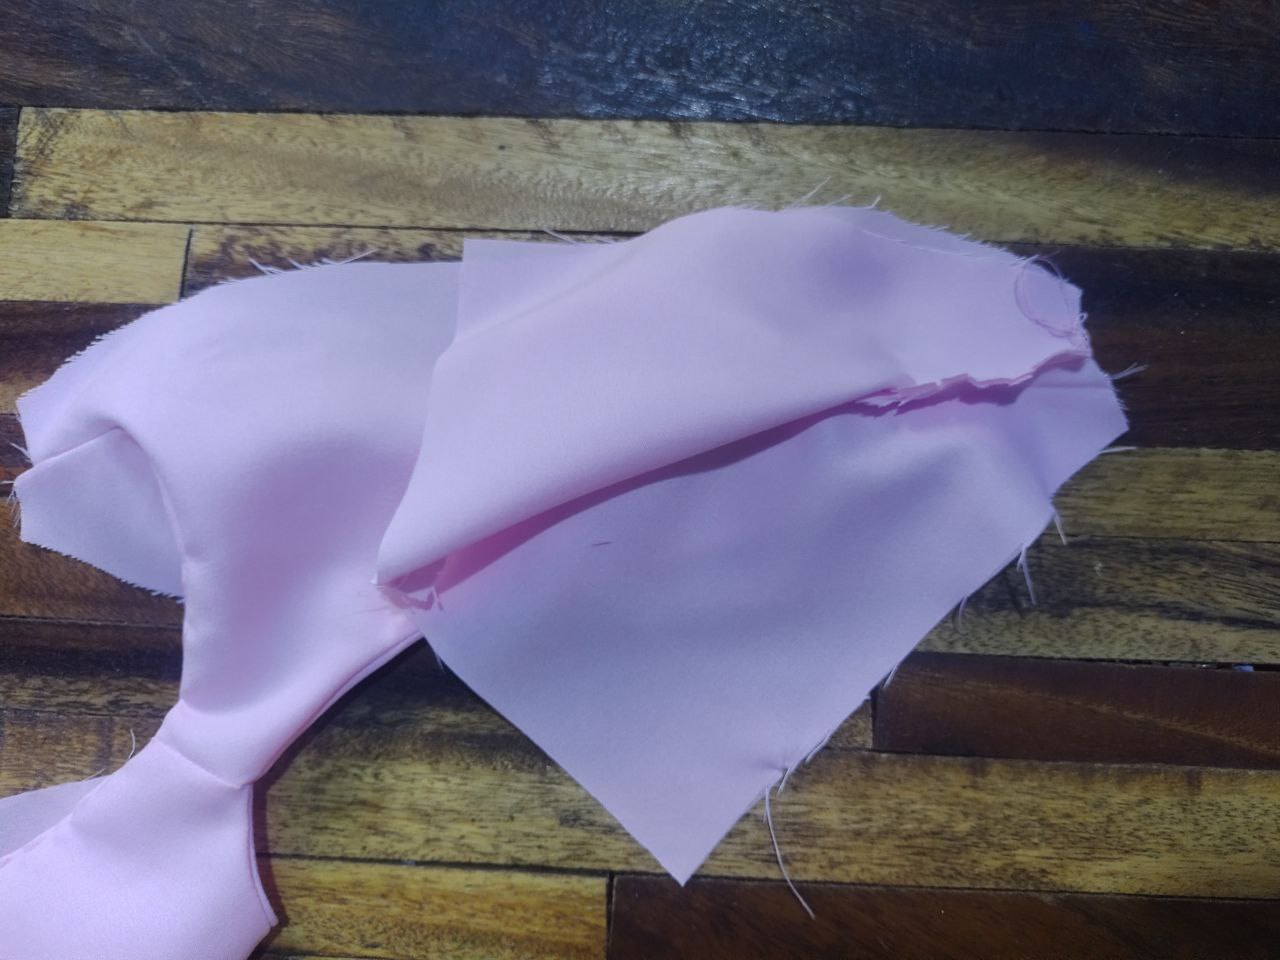
En esta parte del proceso, puede parecerte algo sin forma. Pero debes planchar y cortar a mitad la parte de la espalda. Allí puedes colocar botones o broches, según sea tu preferencia. Después del planchado, vemos que ha tomado la forma deseada y se ve mucho más prolijo.
At this part of the process, it may seem formless to you. But you must iron and cut the back part in half. There you can place buttons or brooches, depending on your preference. After ironing, we see that it has taken the desired shape and looks much neater.
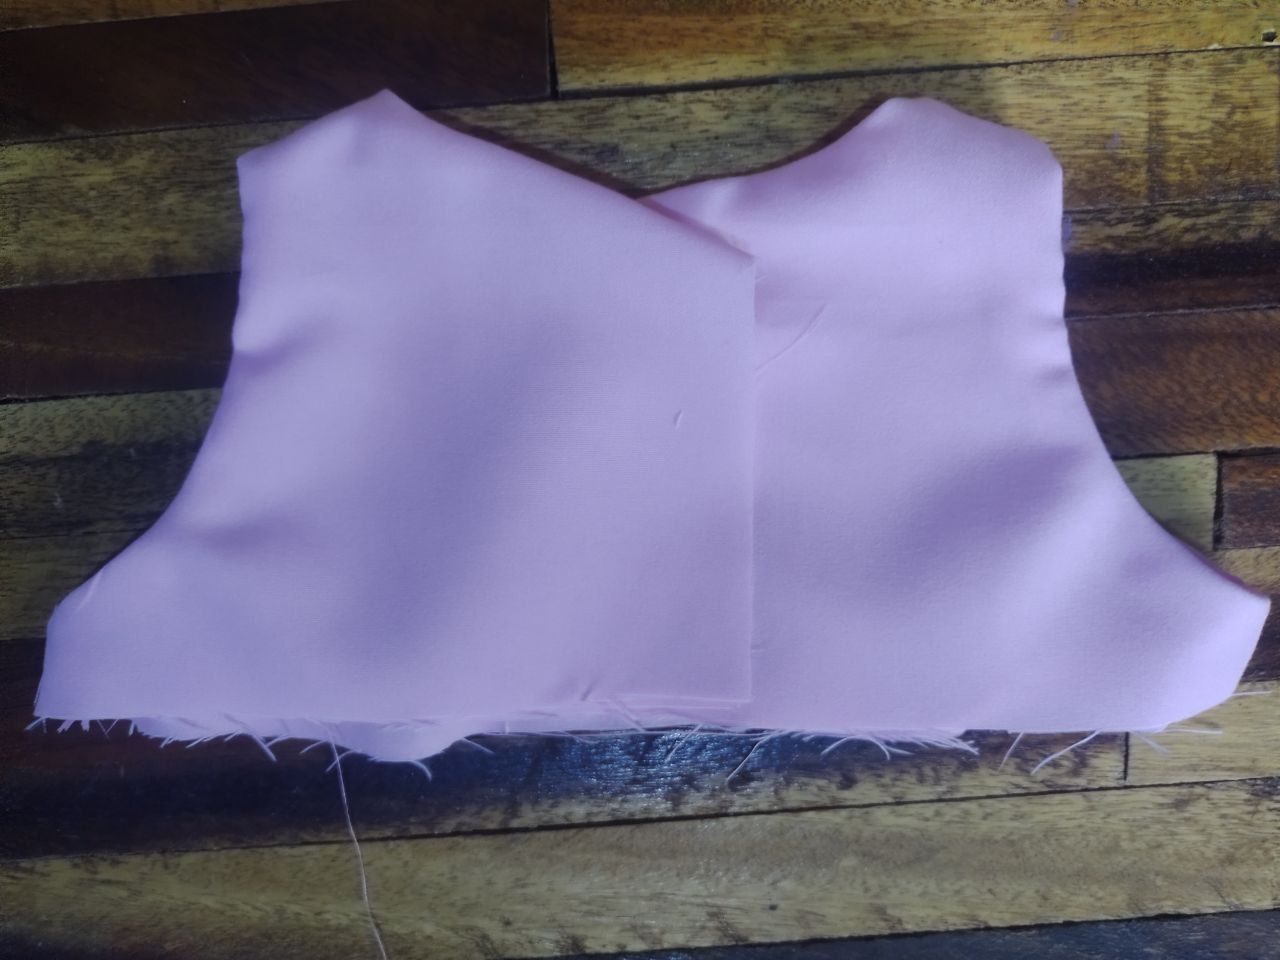
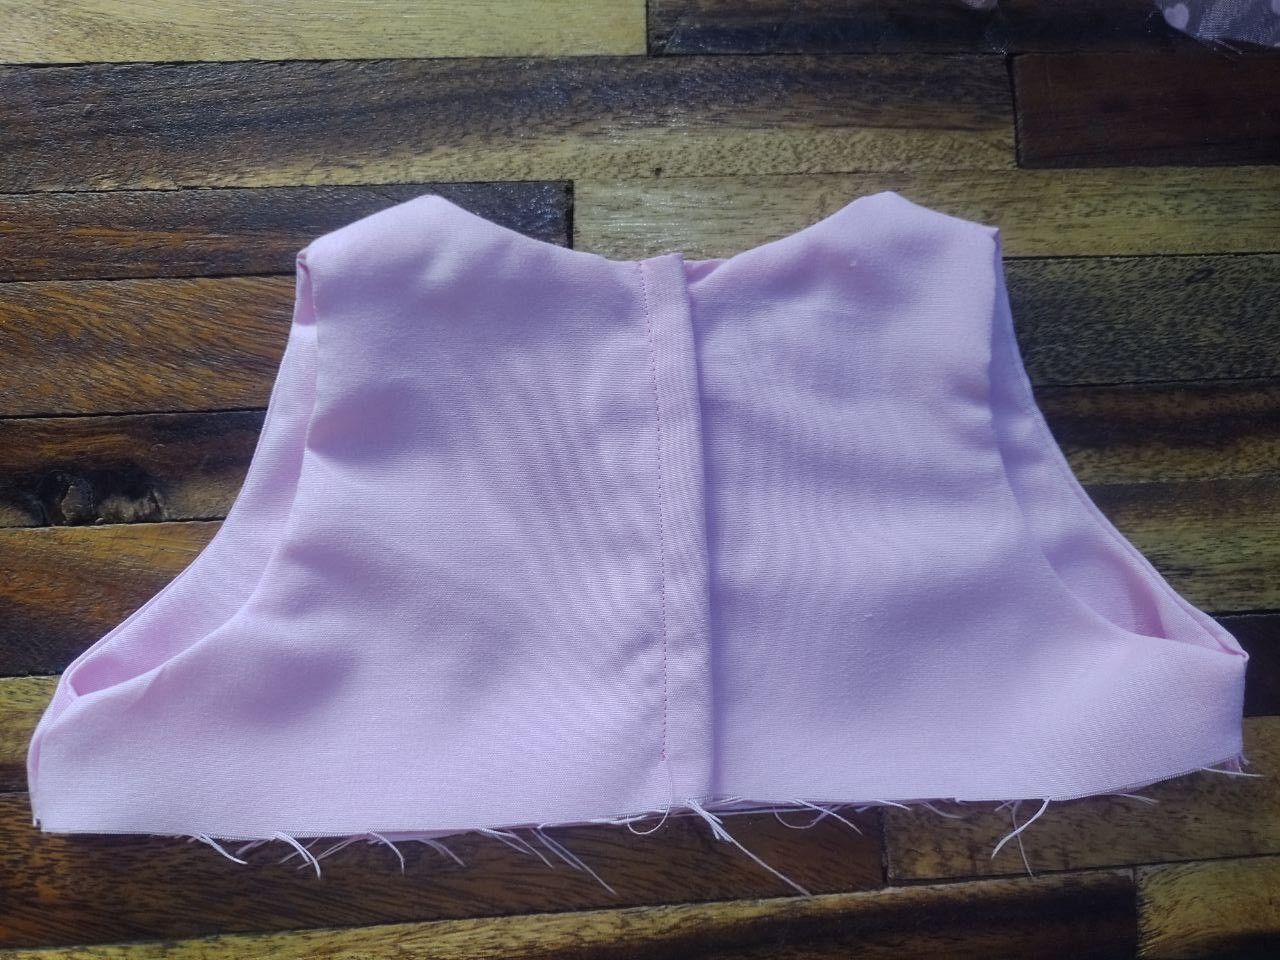
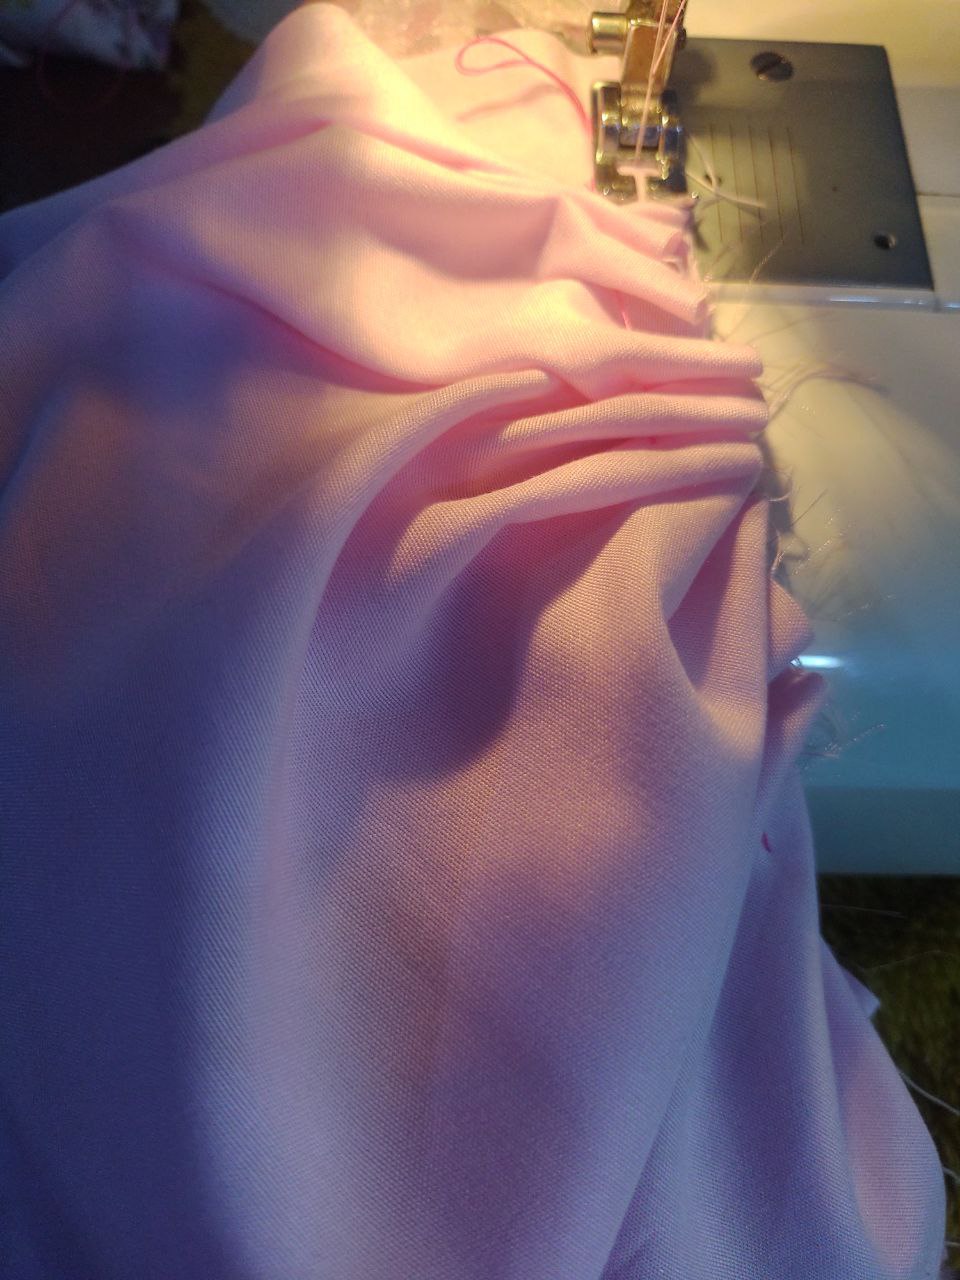
Procederemos a enfrentar los costados abiertos de frente y trasero, pasamos costura. Así, de esta manera todas las costuras quedan por dentro y le brinda una prolijidad espectacular al vestido. En la parte de la espalda, donde realizamos el corte, haremos un dobladillo en cada parte. El canesú esta listo.
We will proceed to face the open sides from the front and back, we sew. Thus, in this way all the seams are inside and gives a spectacular neatness to the dress. In the back part, where we made the cut, we will hem each part. The yoke is ready.
 |  |
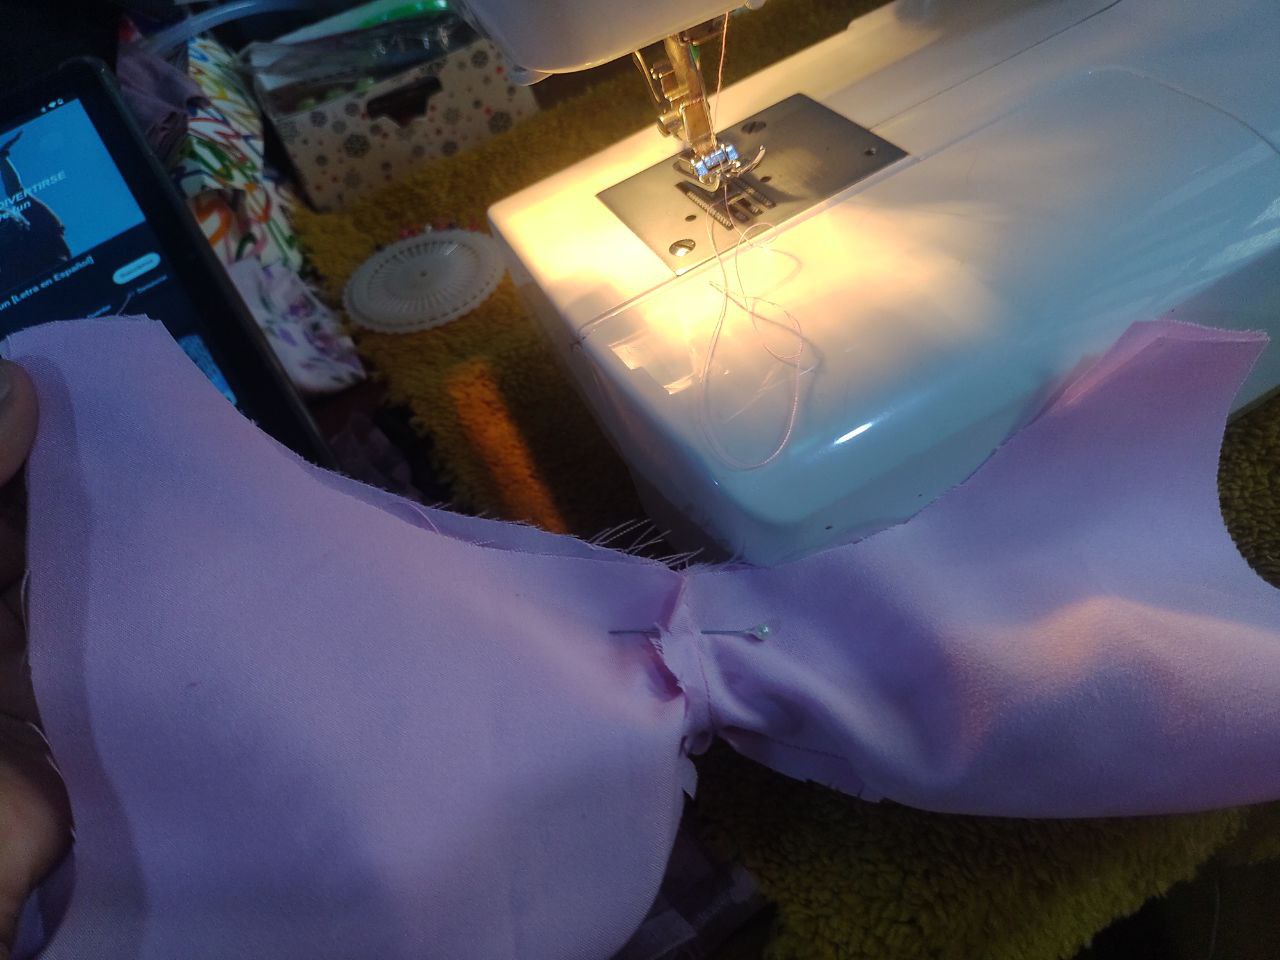
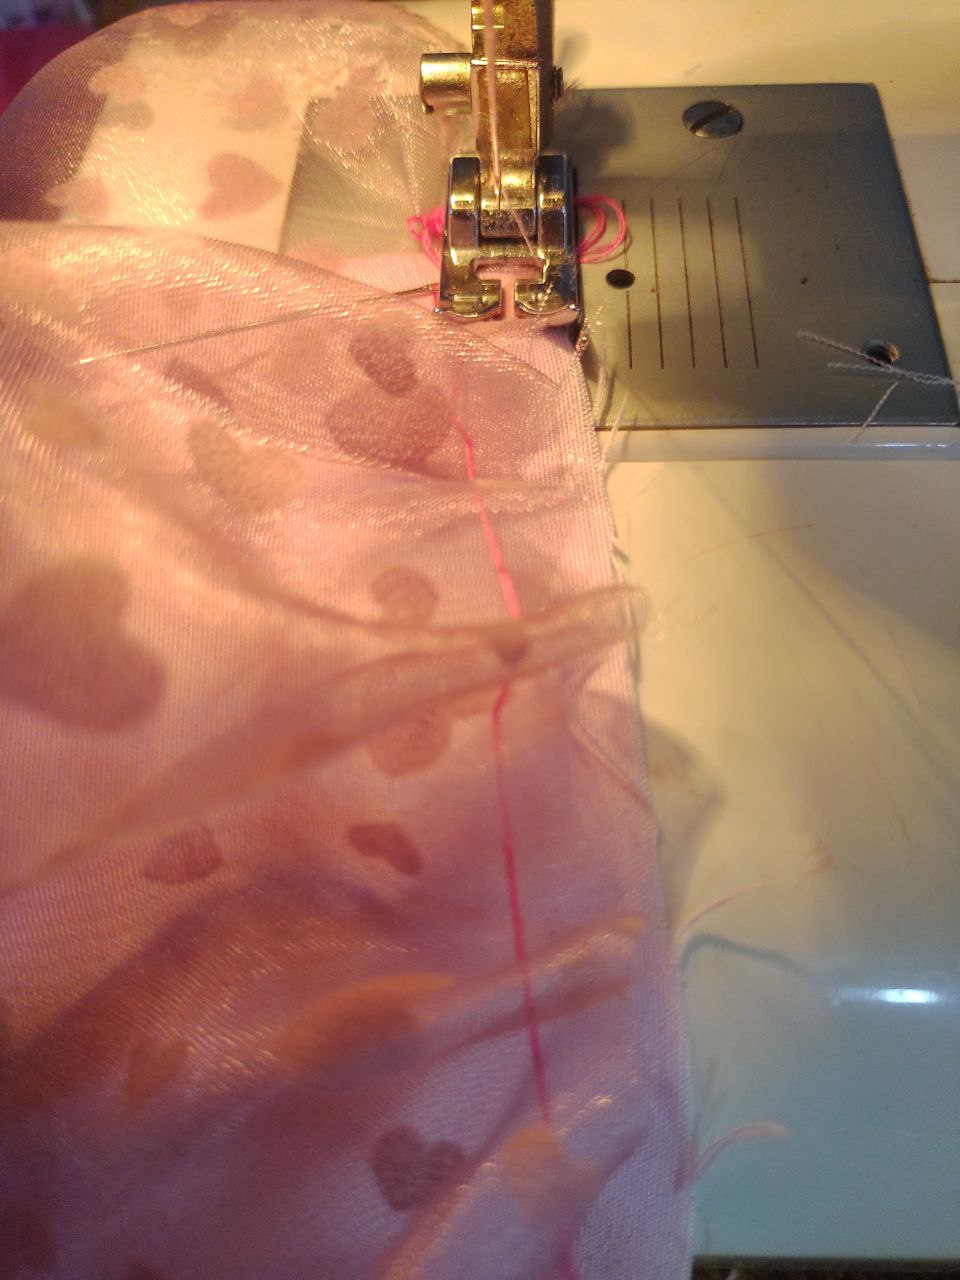
Pasamos a montar la falda, con aguja e hilo e hilvanado todo el contorno de la organza y enfrentando derechos con el canesú he unido con una costura recta. Este paso lo repetimos con la otra capa de la falda que sería Poppelina. Al tenerlas cosidas, pasamos una puntada adicional de seguridad, cortando antes excedentes. Cerramos las uniones traseras, cada capa individual. Haremos el dobladillo inferior a cada capa.
We proceeded to assemble the skirt, with a needle and thread and basted the entire contour of the organza and facing right sides with the yoke I joined with a straight seam. We repeat this step with the other layer of the skirt, which would be Poppelina. When we have them sewn, we pass an additional security stitch, cutting off excess beforehand. We close the back joints, each individual layer. We will hem the bottom of each layer.
 |  |  |
 | i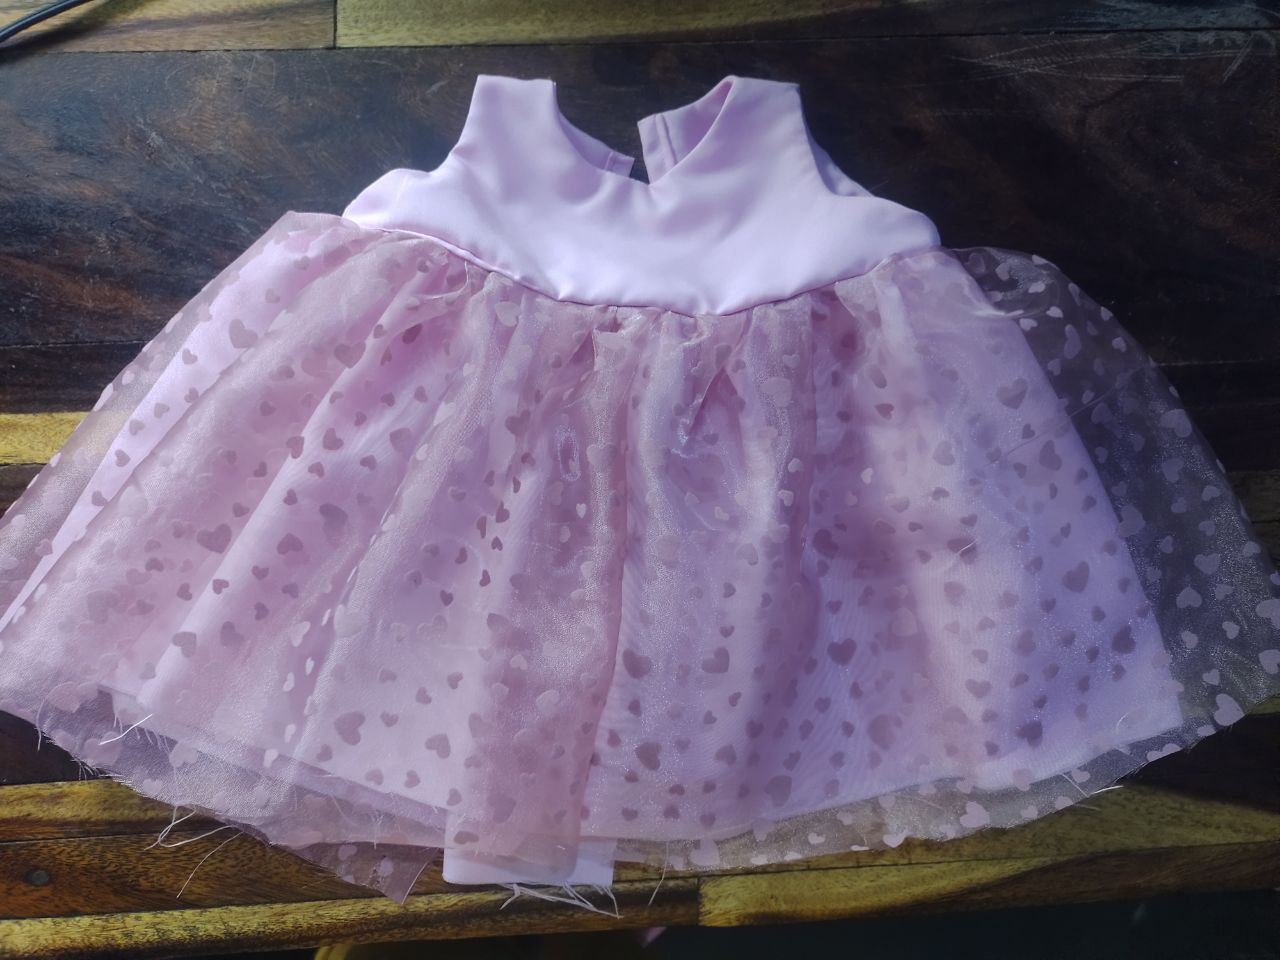 | 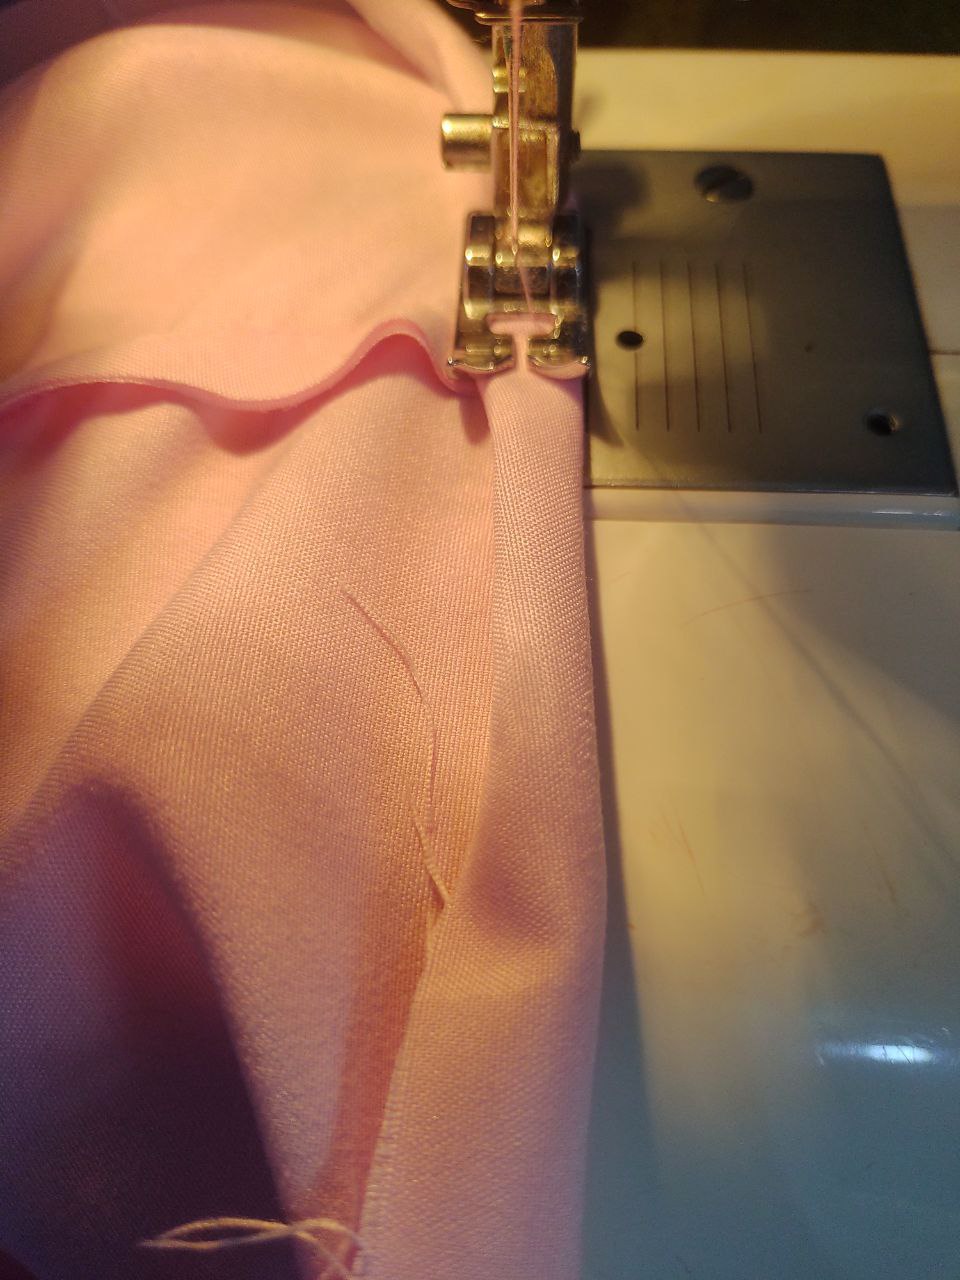 |
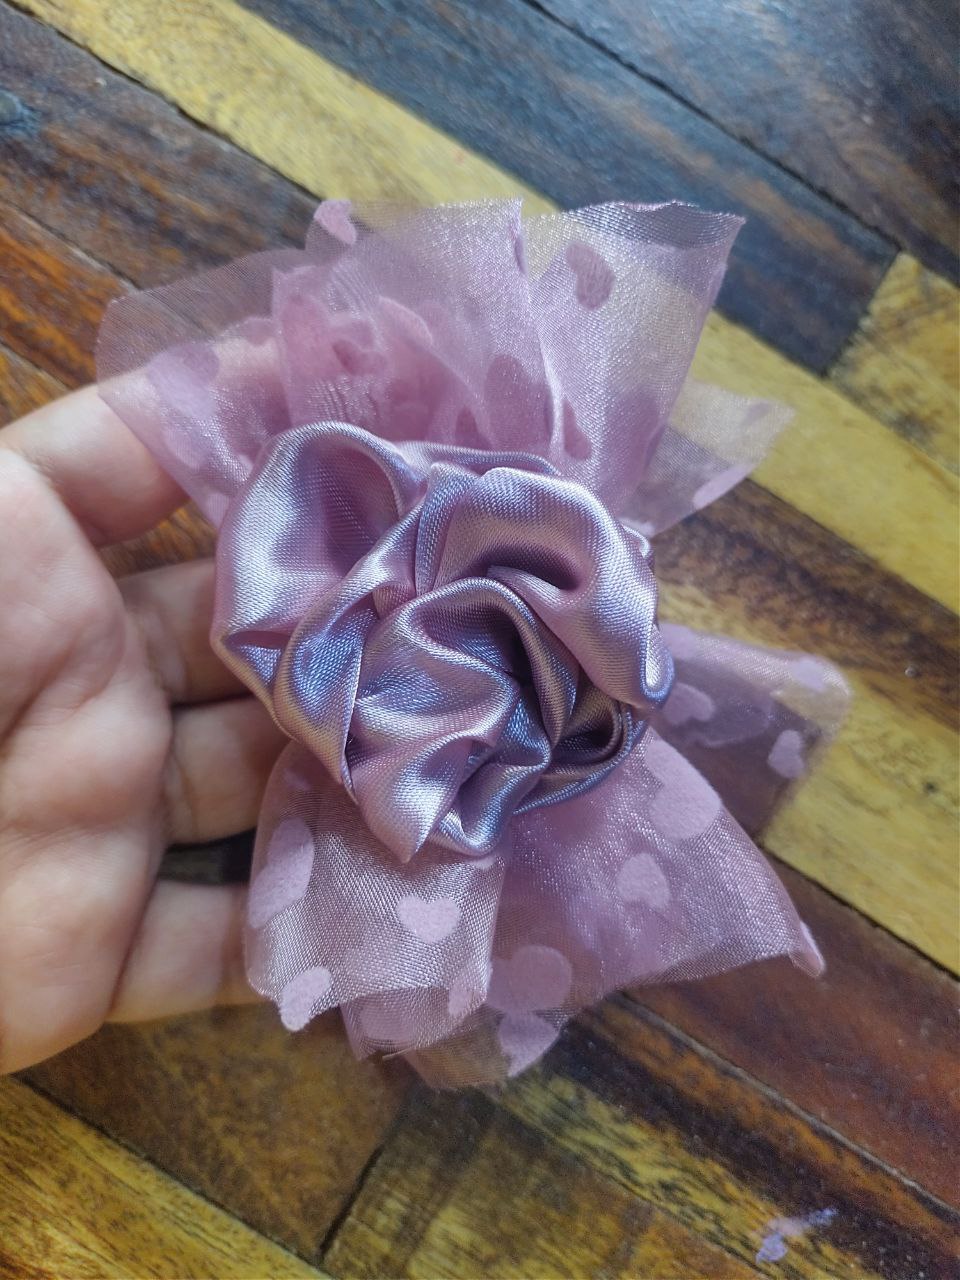
Ahora haremos la rosa y las hojas. Para ello he usado un listón y dos rectangulos. Para el proceso, he usado el mismo que he usado para crear la de las Scrunchies, te dejo aquí el enlace de mi publicación que contiene un paso a paso de como elaborar la rosa y hojas: Maxi Scrunchies de Rosa. Un accesorio Único de Realce femenino. - Eng: Maxi Flower Scrunchies. A unique female enhancement accessory.. Seguidamente he unido al vestido con puntadas discretas.
Now we will make the rose and the leaves. For this I have used a ribbon and two rectangles. For the process, I have used the same one that I used to create the Scrunchies, here is the link to my publication that contains a step by step on how to make the rose and leaves: Rose Maxi Scrunchies. A unique female enhancement accessory. - Eng: Maxi Flower Scrunchies. A unique female enhancement accessory.. I then joined the dress with discreet stitches.
 |  |
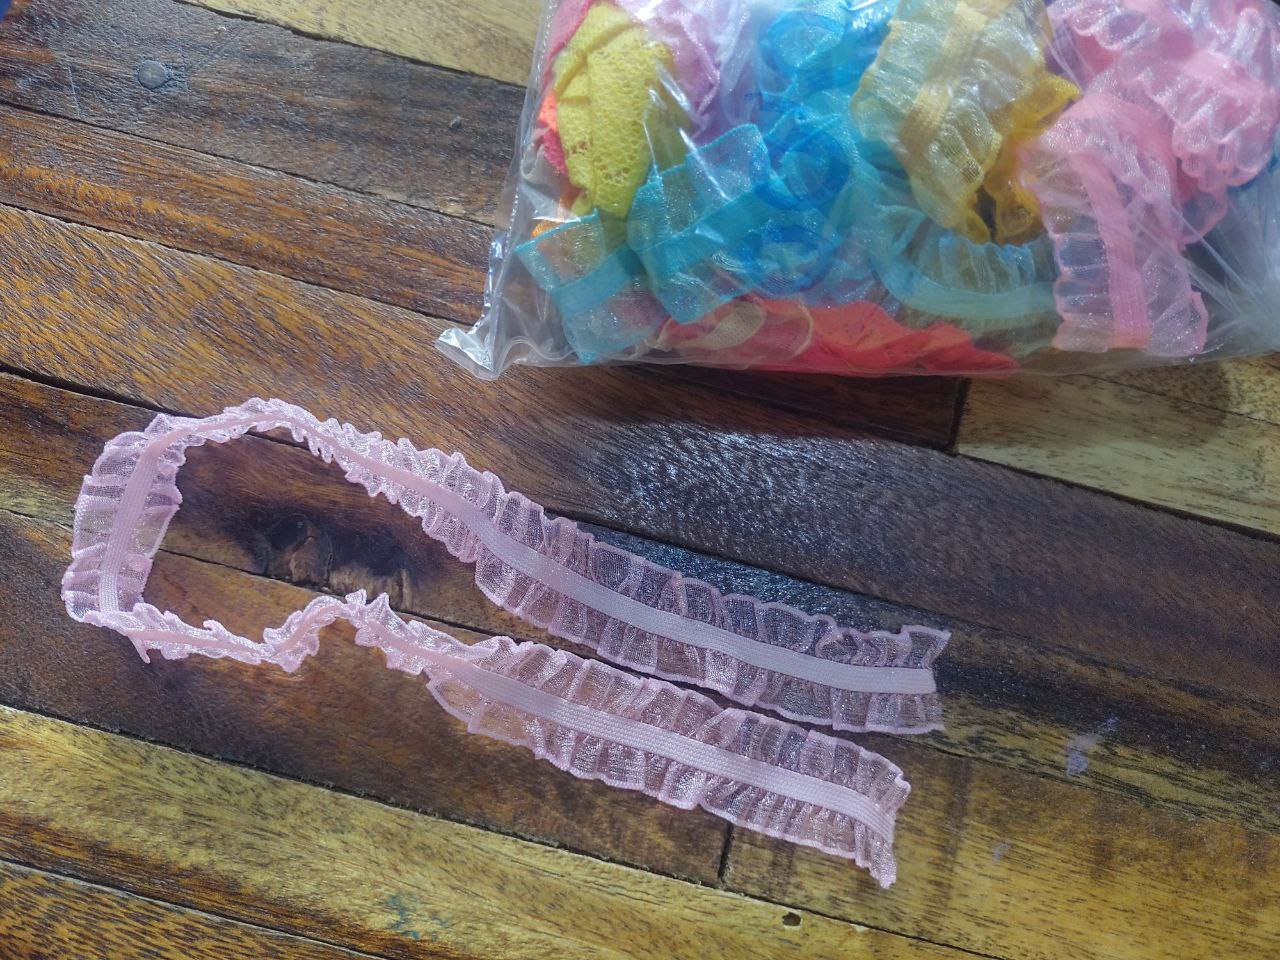
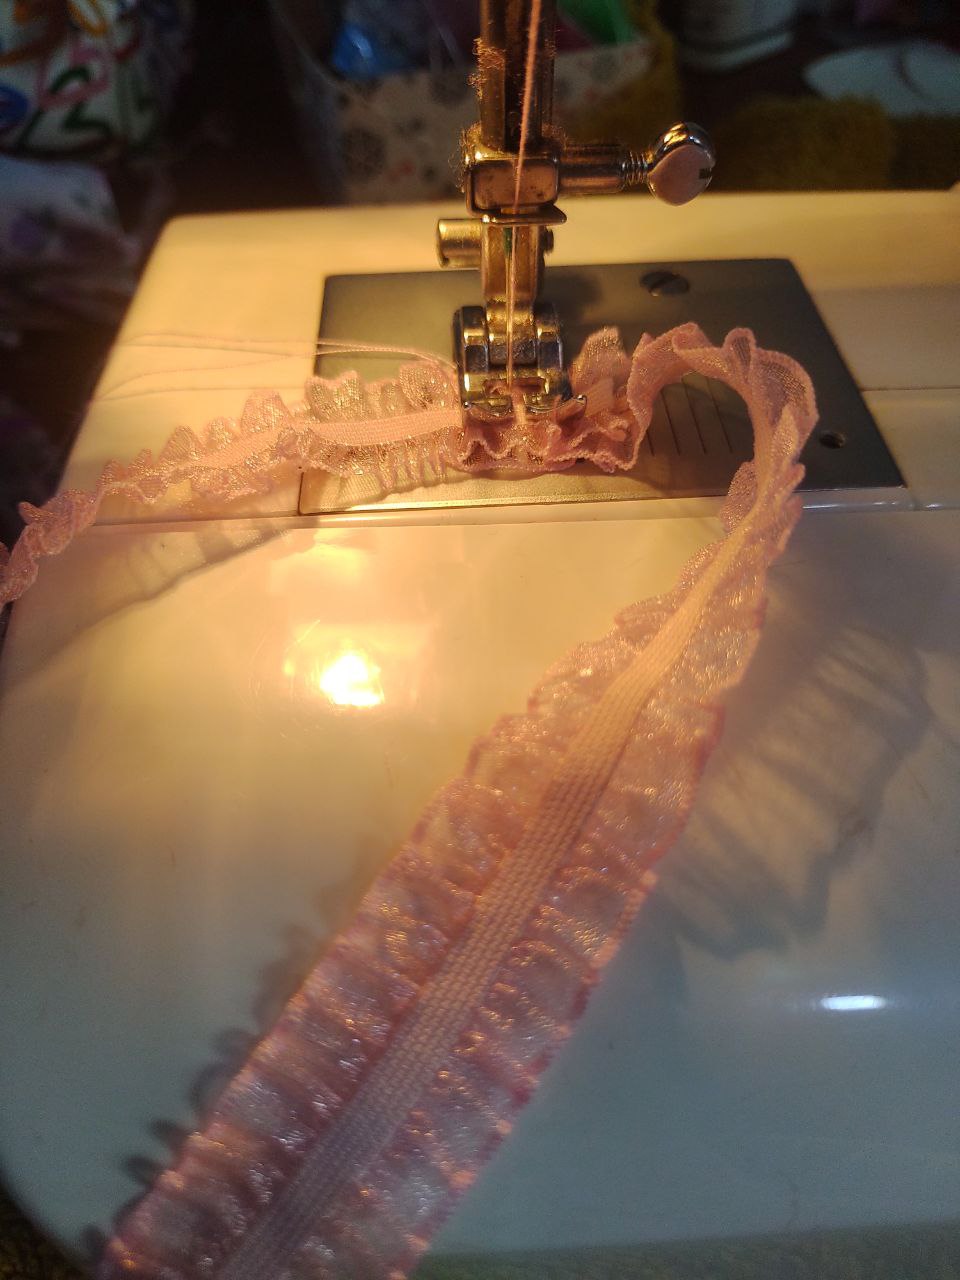
Para la diadema, he tomado tornasol y unido con dos costuras rectas en las uniones. Corté un rectángulo de aproximadamente 60 cm en organza que he hilvanado por el medio y fruncido. Formando un moño. Hice nuevamente una rosa y cosido al centro del moño. Con silicon he unido a la base tornasol de la diadema.
For the headband, I took litmus and joined with two straight seams at the joints. I cut a rectangle of approximately 60 cm in organza that I basted in the middle and gathered. Forming a bun. I made a rose again and sewed it to the center of the bow. With silicone I attached it to the iridescent base of the headband.
 |  |  |
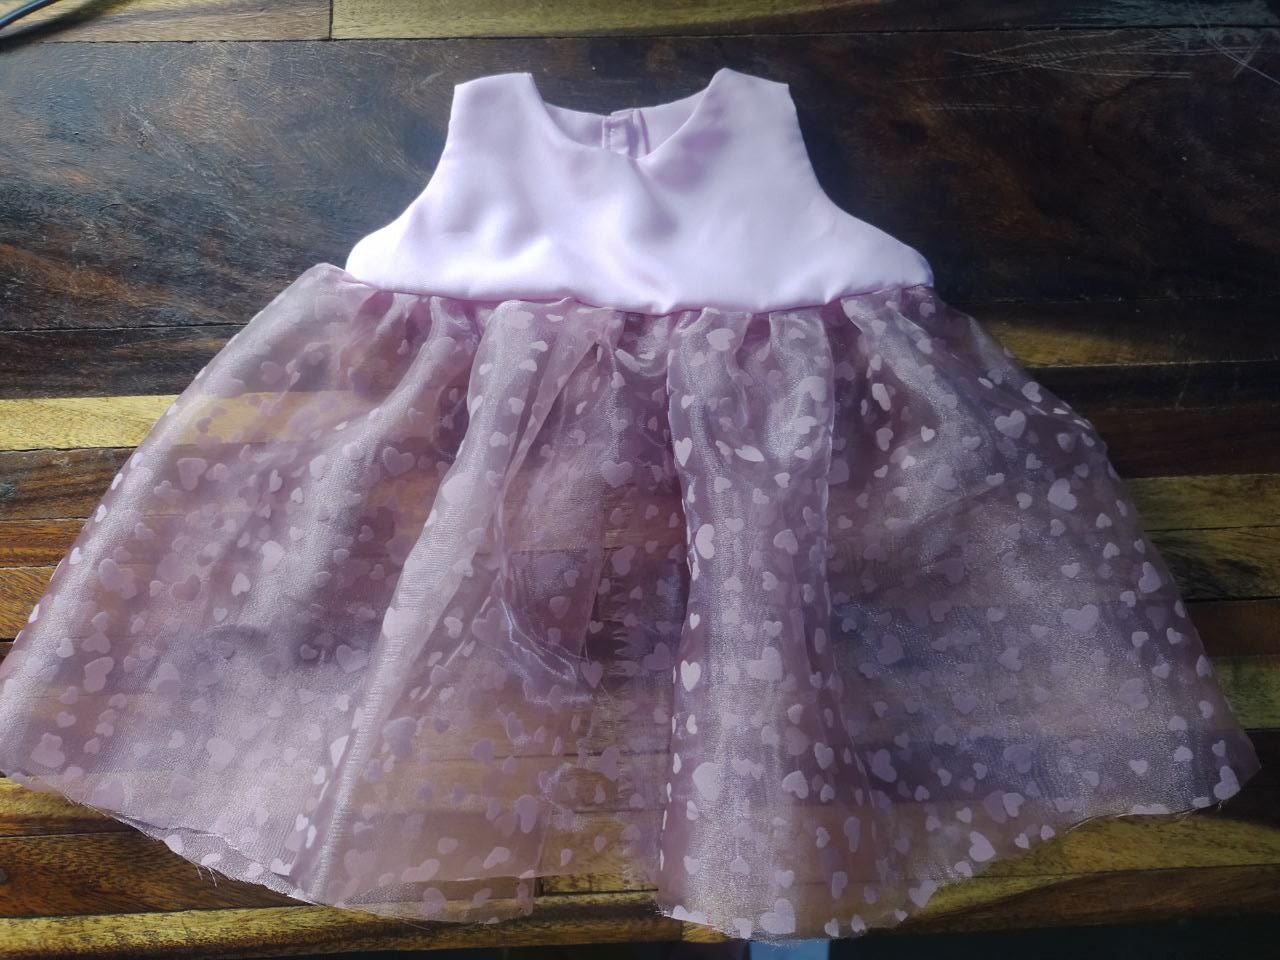
Resultado / Result :
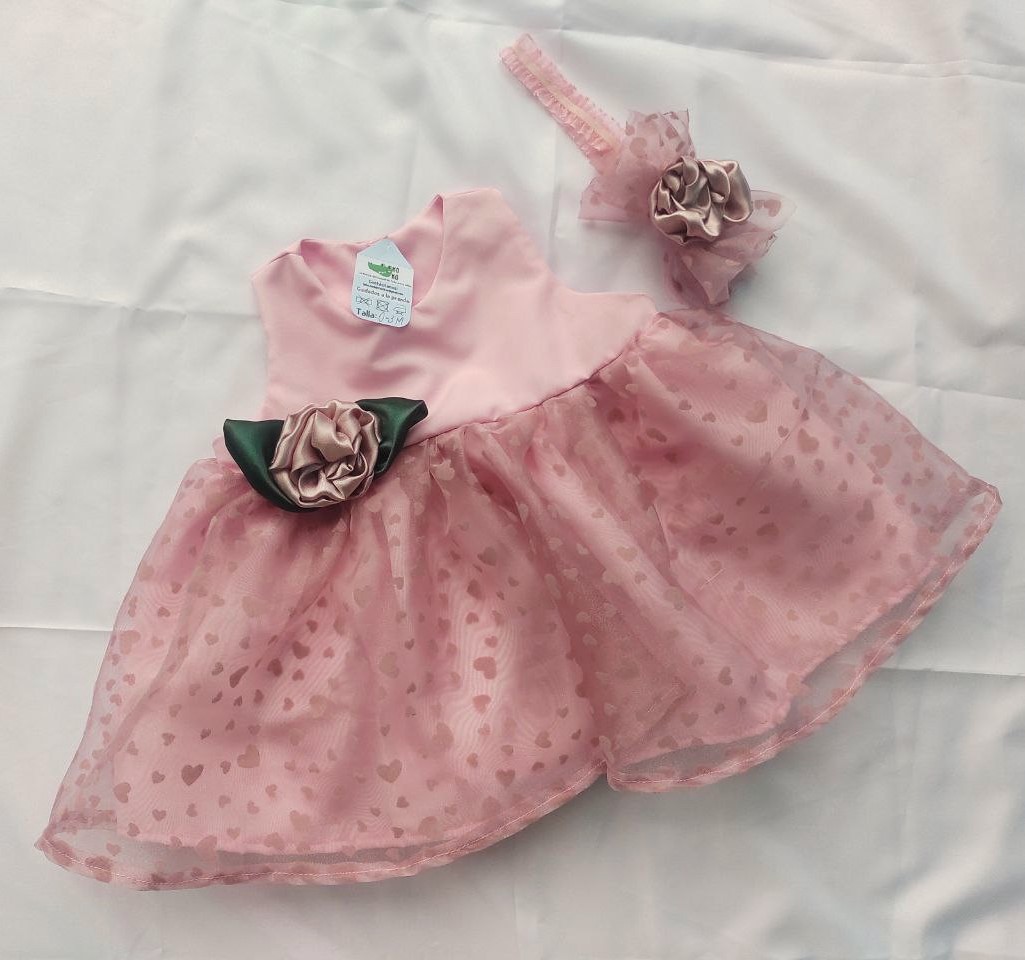
Amo elaborar vestidos, este modelo es uno de mis favoritos porque me parece tierno y la organza le da esos aires de elegancia. Es una pieza preciosa, perfecta para las sesiones de fotos o para vestir lindamente a las bebés.
I love making dresses, this model is one of my favorites because I find it tender and the organza gives it that air of elegance. It is a beautiful piece, perfect for photo sessions or to cutely dress babies.
¡Y hasta aquí el proyecto del día! Espero les haya gustado tanto como a mí.
Si tienes alguna duda o sugerencia, no dudes en dejar un comentario. Las fotos que he colocado a lo largo del texto, las he tomado desde mi móvil Infinix.
¡Hasta la próxima!, tengan todos un bendecido día cargado de salud, paz y amor.
And that's it for the project of the day! I hope you liked it as much as I did.
If you have any questions or suggestions, don't hesitate to leave a comment. The photos that I have placed throughout the text were taken from my Infinix mobile.
Until next time, everyone have a blessed day full of health, peace and love.