Es un placer pasar por acá para compartir con ustedes una vez más, un accesorio tendencia como es las pulseras coquette, en esta oportunidad les quiero compartir el tutorial. Desde hacen días tenía pendiente este proyecto, que siempre iba aplazando, hasta que hoy se materializó la pulsera coquette para mis seguidores. Pero no crean que fue tan fácil, me tocó hacer el lazo dos veces porque en la primera oportunidad el balín utilizado era pequeño, lo cual sustituí por uno de 6 mm, además por dicho orificio tenía que pasar 4 veces el hilo chino. Después de superar la dificultad el trabajo fluyó con facilidad. A pesar de la dificultad presentada no desmayé en el proyecto, incluso se convirtió en un reto que superé gracias a mi empeño. En cuanto a los materiales usé mostacillas de color anaranjado de 3 mm, complementé el diseño usando nudo franciscano y nudo plano. Invito a mis seguidores al paso a paso de la elaboración de una pulsera coquette.
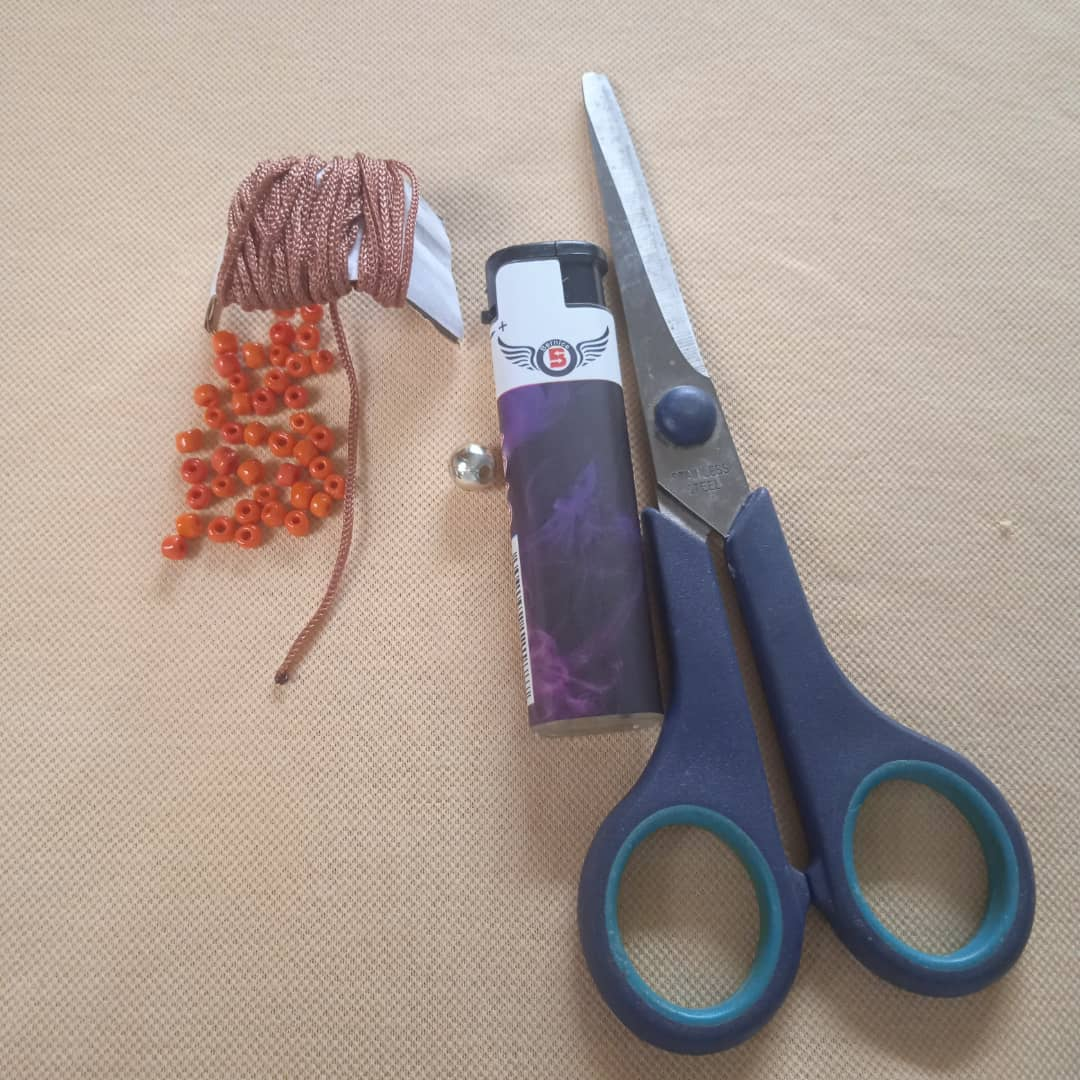
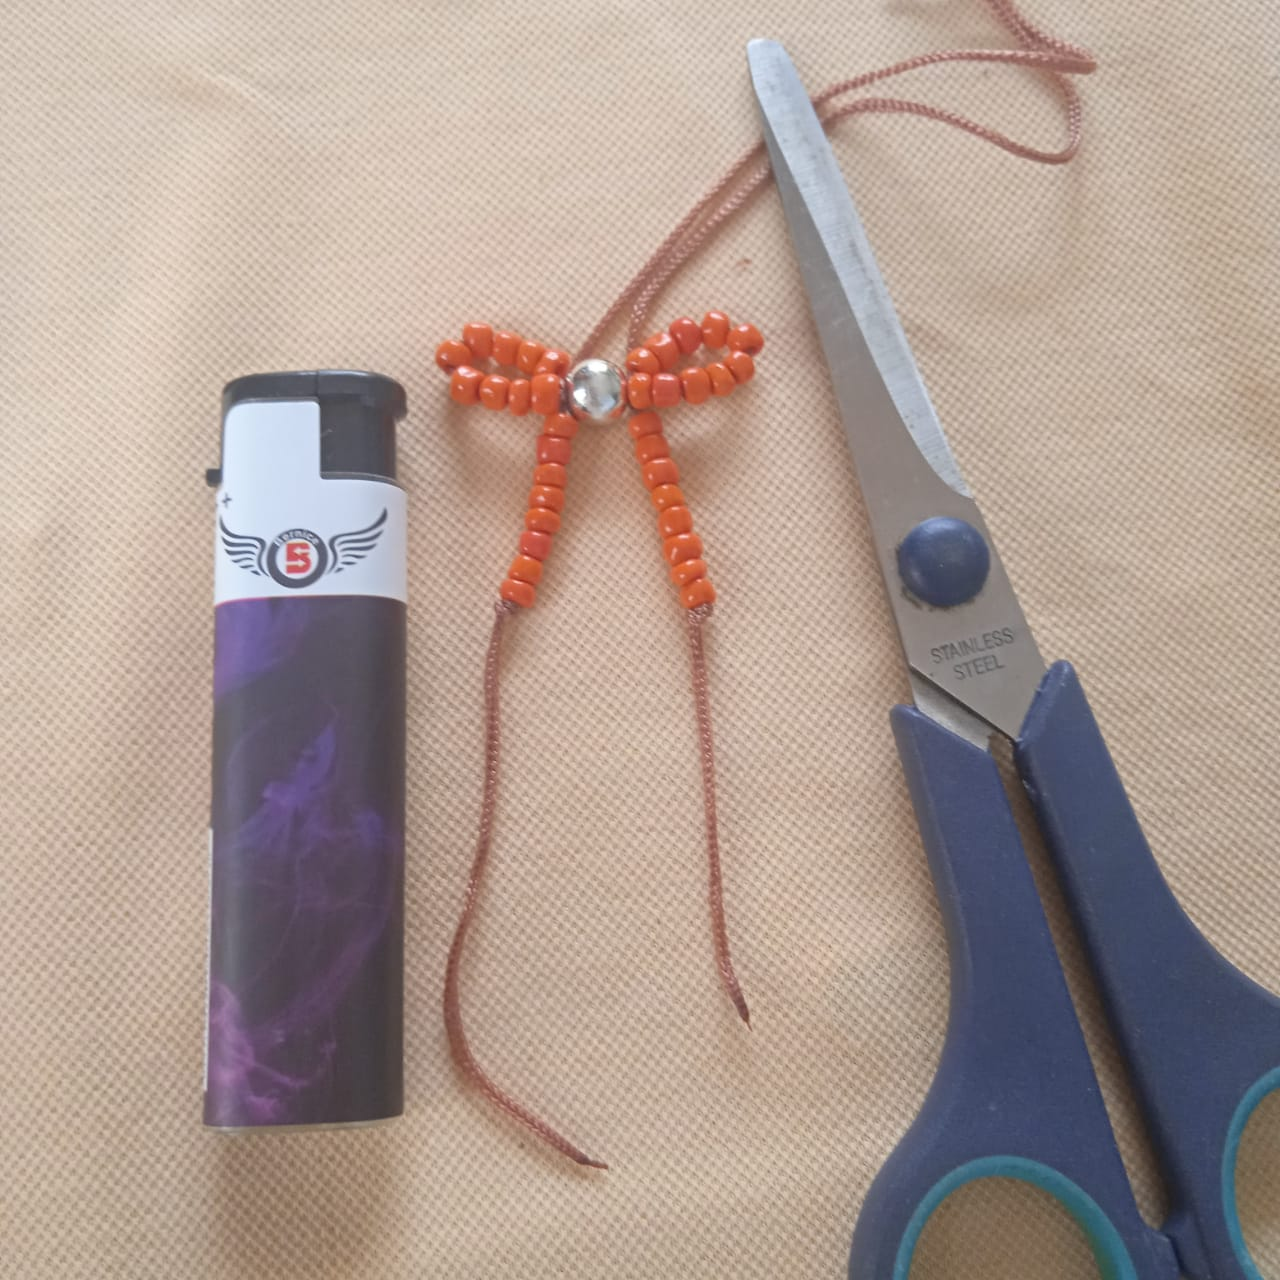
✨MATERIALS//MATERIALES✨
- Large beads.
- 1 ball of 6 mm.
- Chinese thread.
- Scissors.
- Lighter.
- Mostacillas grandes.
- 1 Balín de 6 mm.
- Hilo chino.
- Tijera.
- Encendedor.
✨STEPS//PASOS✨
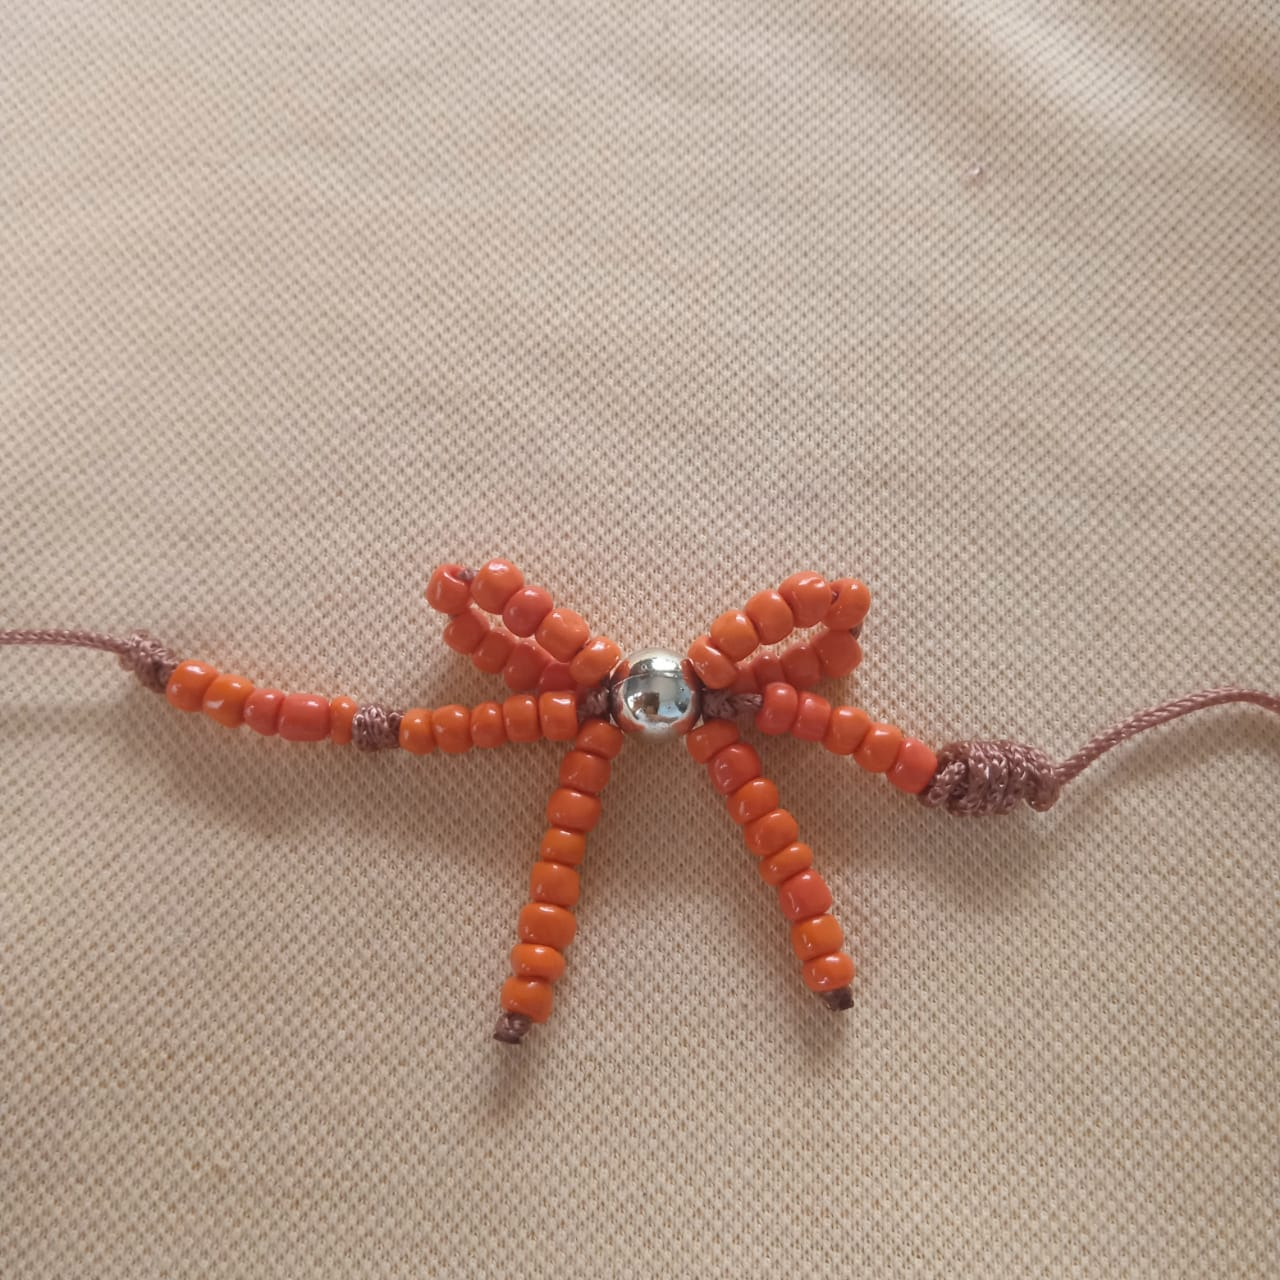
- The first thing to do is the loop, for which measure about 25 cm of Chinese thread and cut. Insert the 6 mm ball, then insert on each side 10 orange beads.
- Lo primero en hacer es el lazo, para lo cual se miden unos 25 cm de hilo chino y cortar. Introducir el balín de 6 mm, luego introducir de cada lado 10 cuentas anaranjadas.
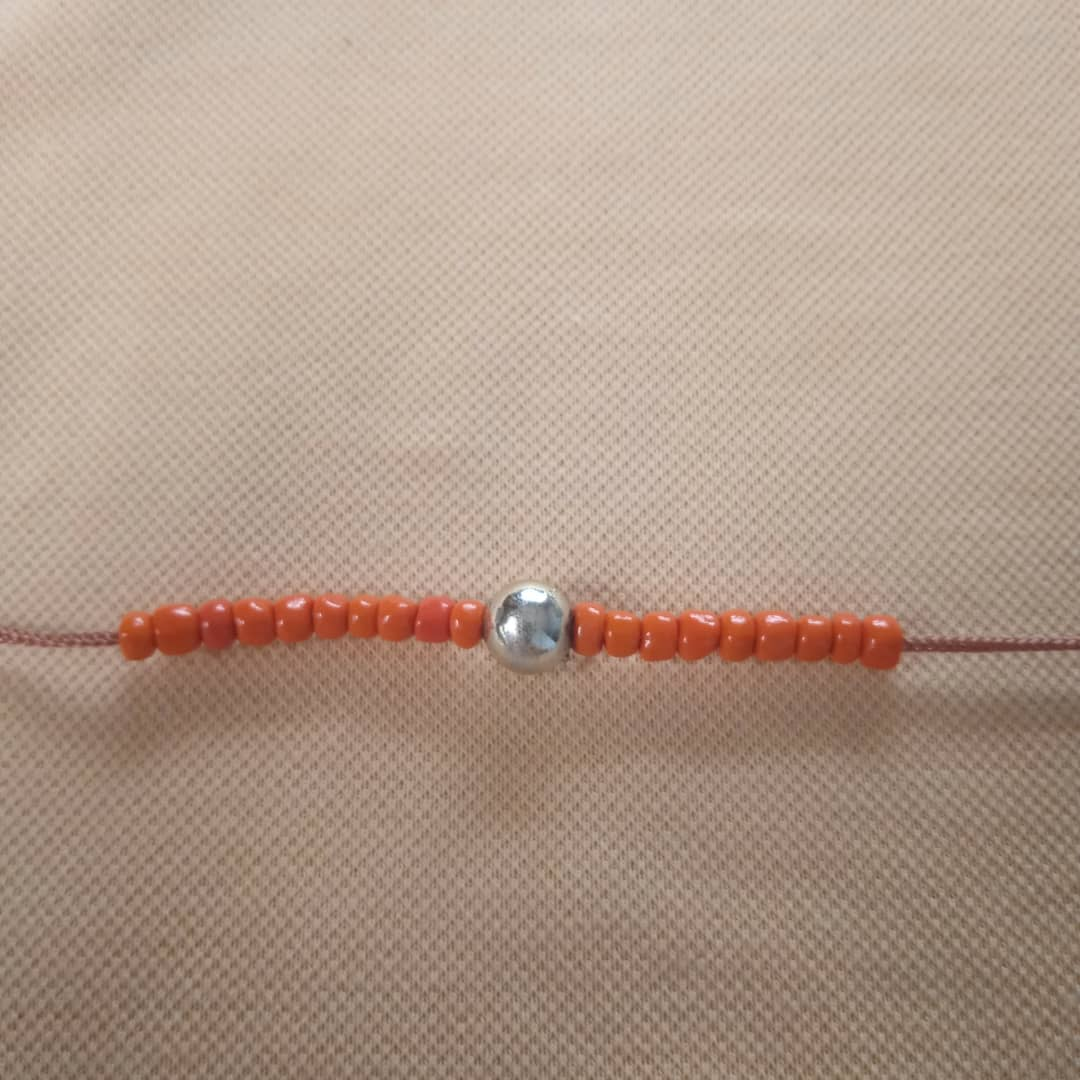
- Then pass the threads on both sides through the hole of the ball to form a part of the loop.
- Luego pasar los hilos de ambos lados por el orificio del balín para formar una parte del lazo.

- Take the opportunity to insert the Chinese thread through the hole of the ball of about 30 cm, and then work on this thread.
- Aprovechar de insertar el hilo chino por el agujero del balín de unos 30 cm, para luego trabajar en dicho hilo.
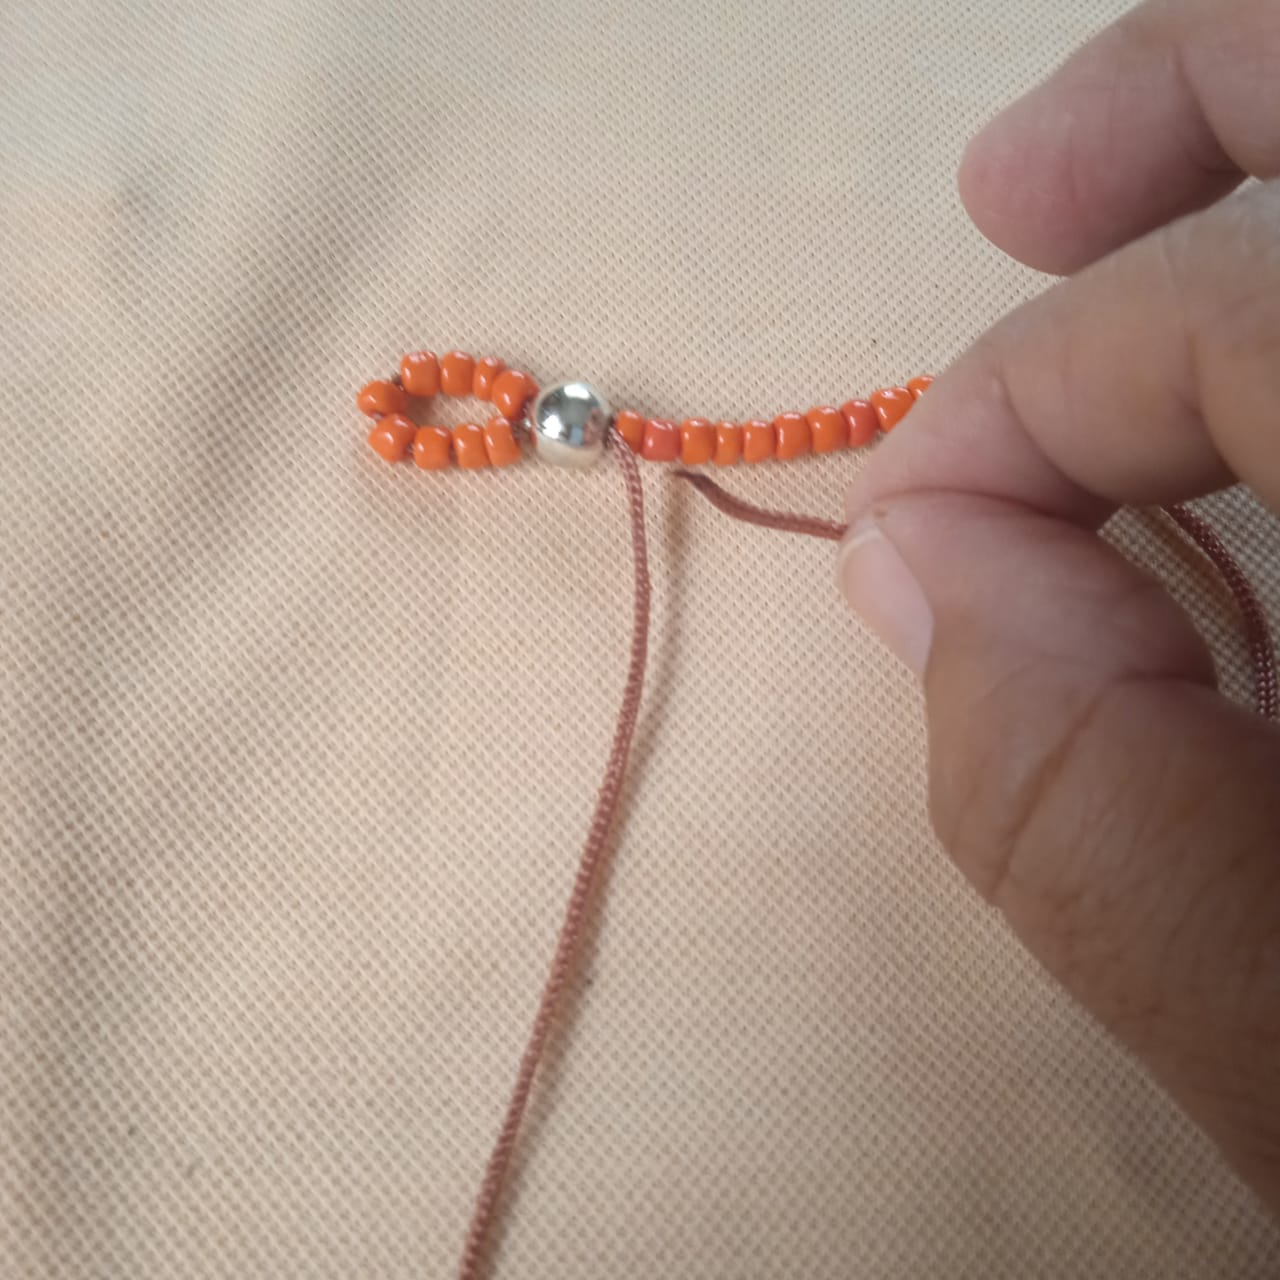
- Insert on each side 8 orange beads on each of the strings.
- Insertar en cada lado 8 cuentas anaranjadas en cada una de las cuerdas.
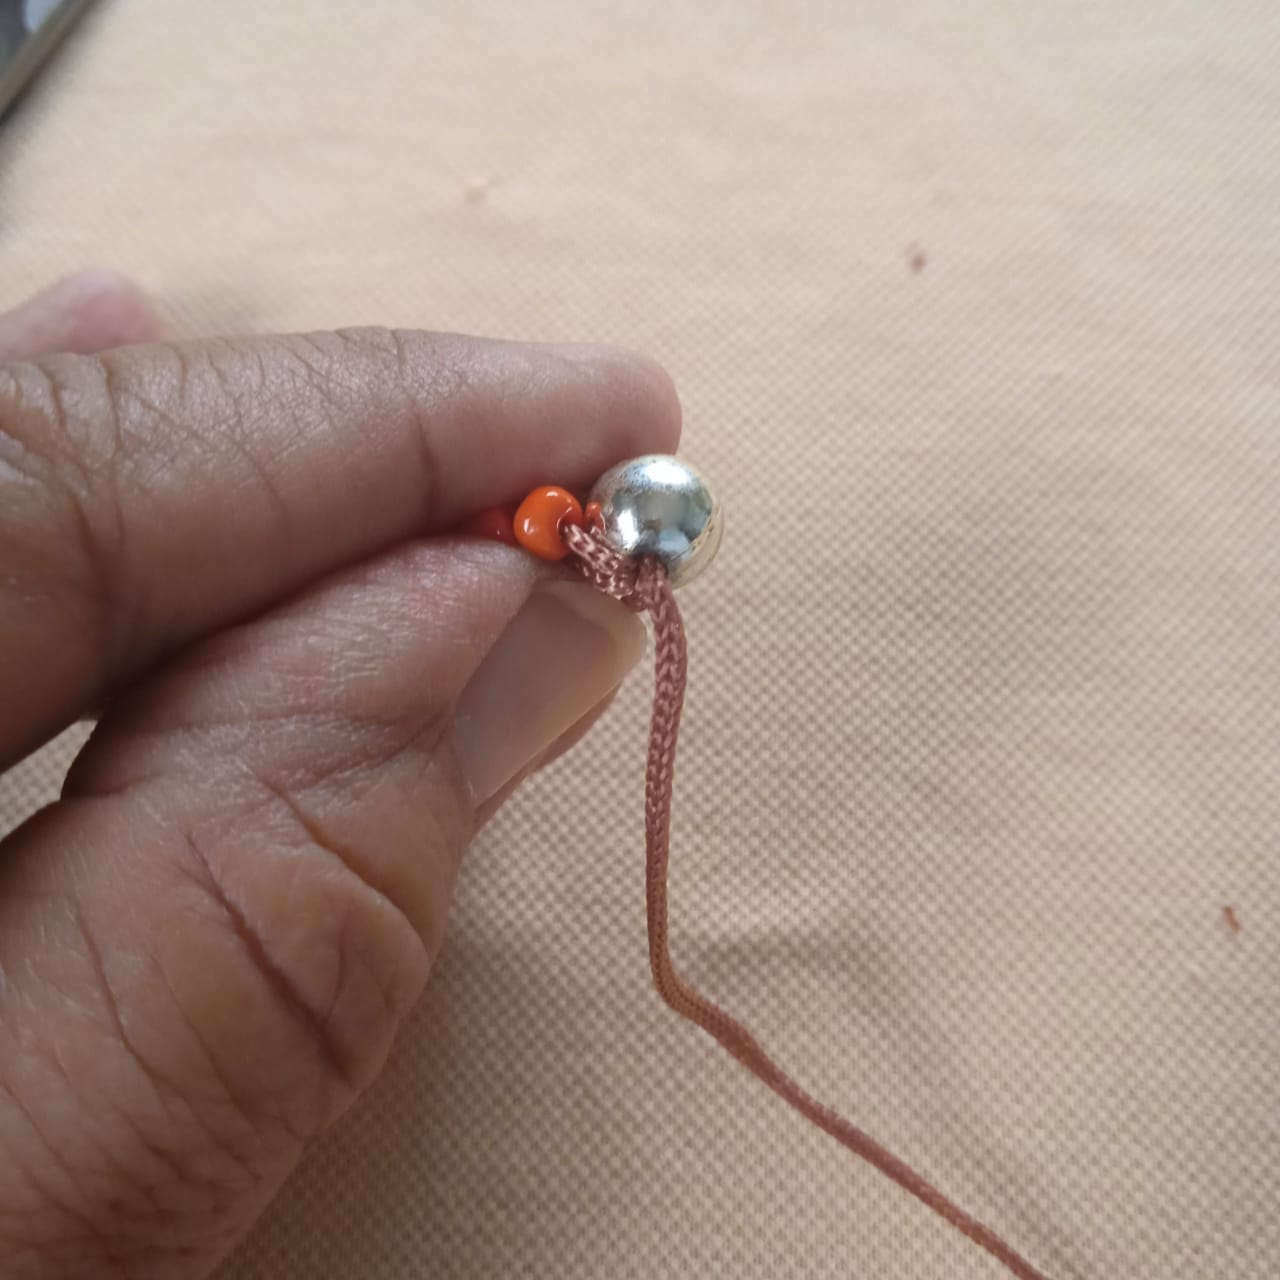
- Make a basic knot, cut the excess material and then burn with the lighter. This is how we finish the loop.
- Hacer un nudo básico, cortar el material sobrante y luego quemar con el encendedor. Así terminamos el lazo.
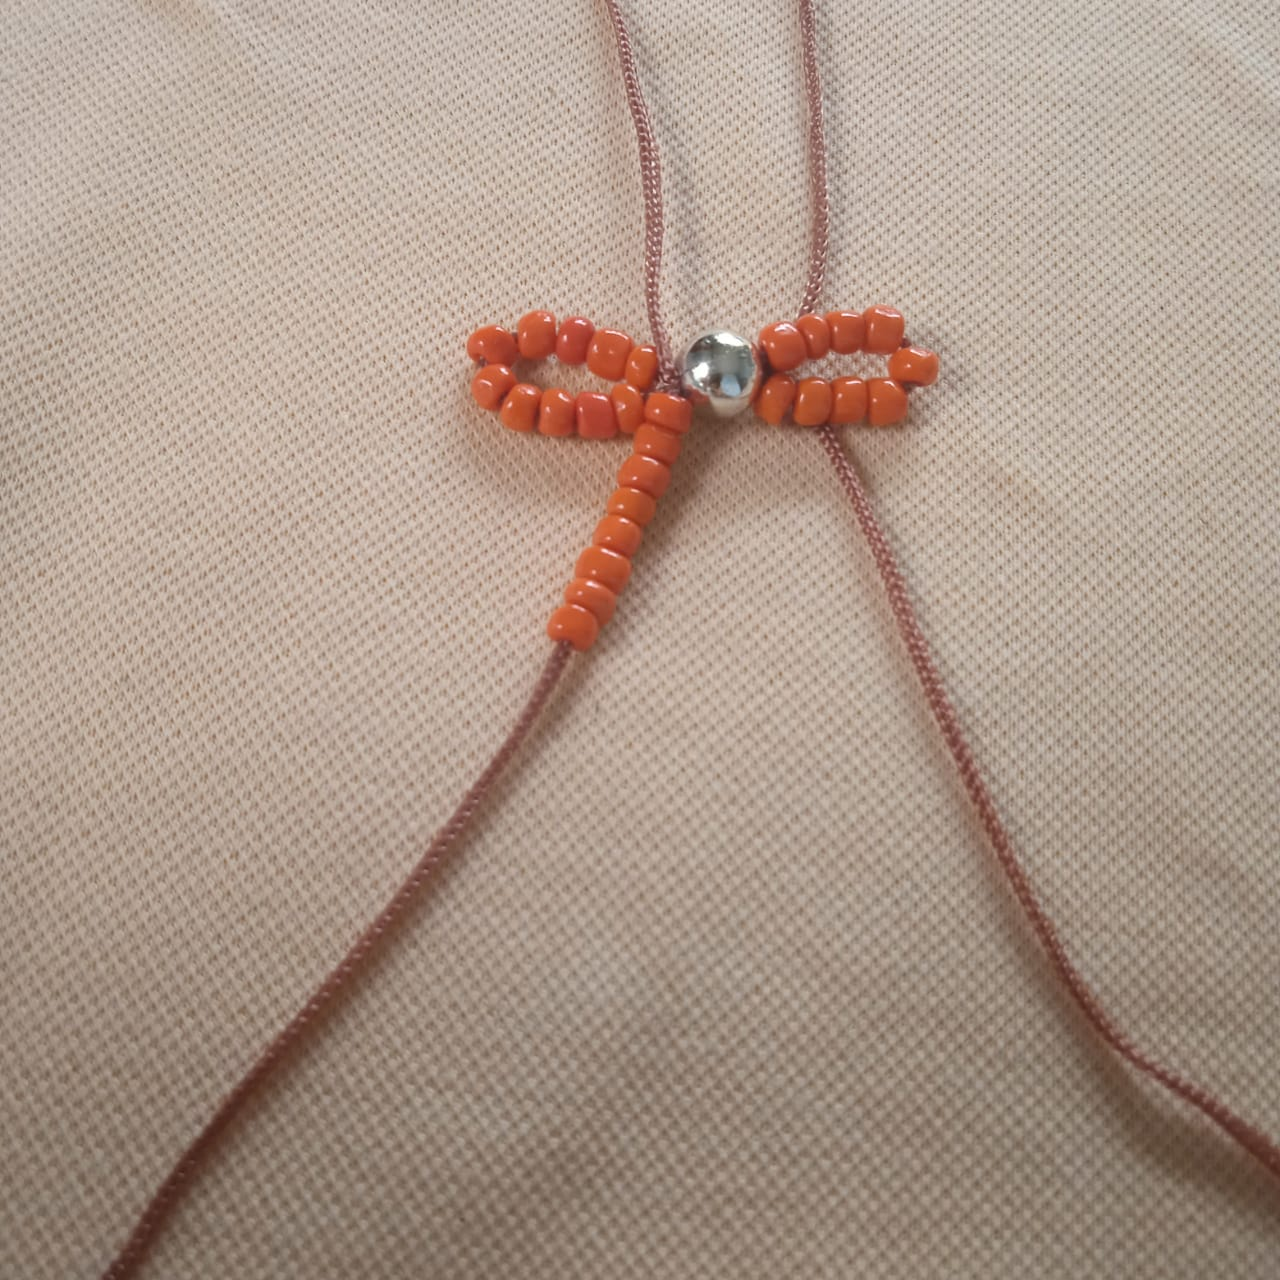
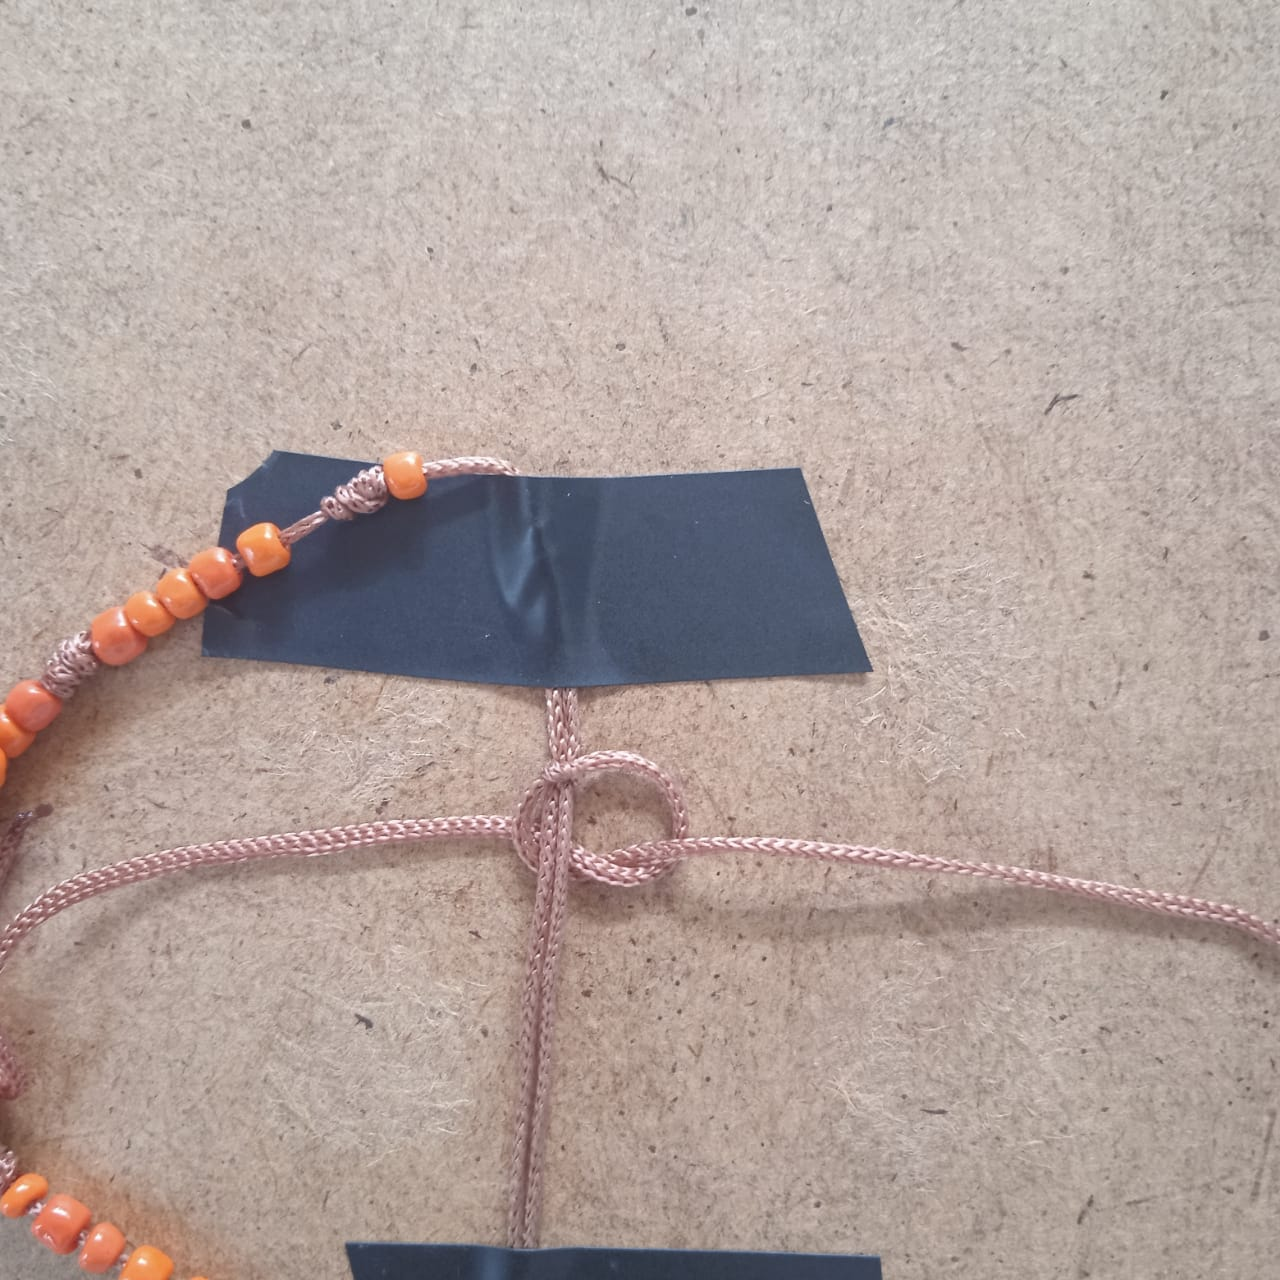
- Now we proceed to work on the thread that we introduce, first make a basic knot on each side of the ball, so that the loop does not move, then introduce the orange beads, more Franciscan knot that is made by giving 5 turns around a straw of 2 cm back to front, then pass the thread through the hole in the straw, remove the straw, go adjusting the Franciscan knot.
- Ahora procedemos a trabajar en el hilo que introducimos, en primer lugar hacer un nudo básico en cada lado del balín, para que no se mueva el lazo, luego introducir las cuentas anaranjadas, mas nudo franciscano que se hace dando 5 vueltas alrededor de un pitillo de 2 cm de atrás hacia delante, luego pasar el hilo por el orificio del pitillo, retirar el pitillo, ir ajustando el nudo franciscano.
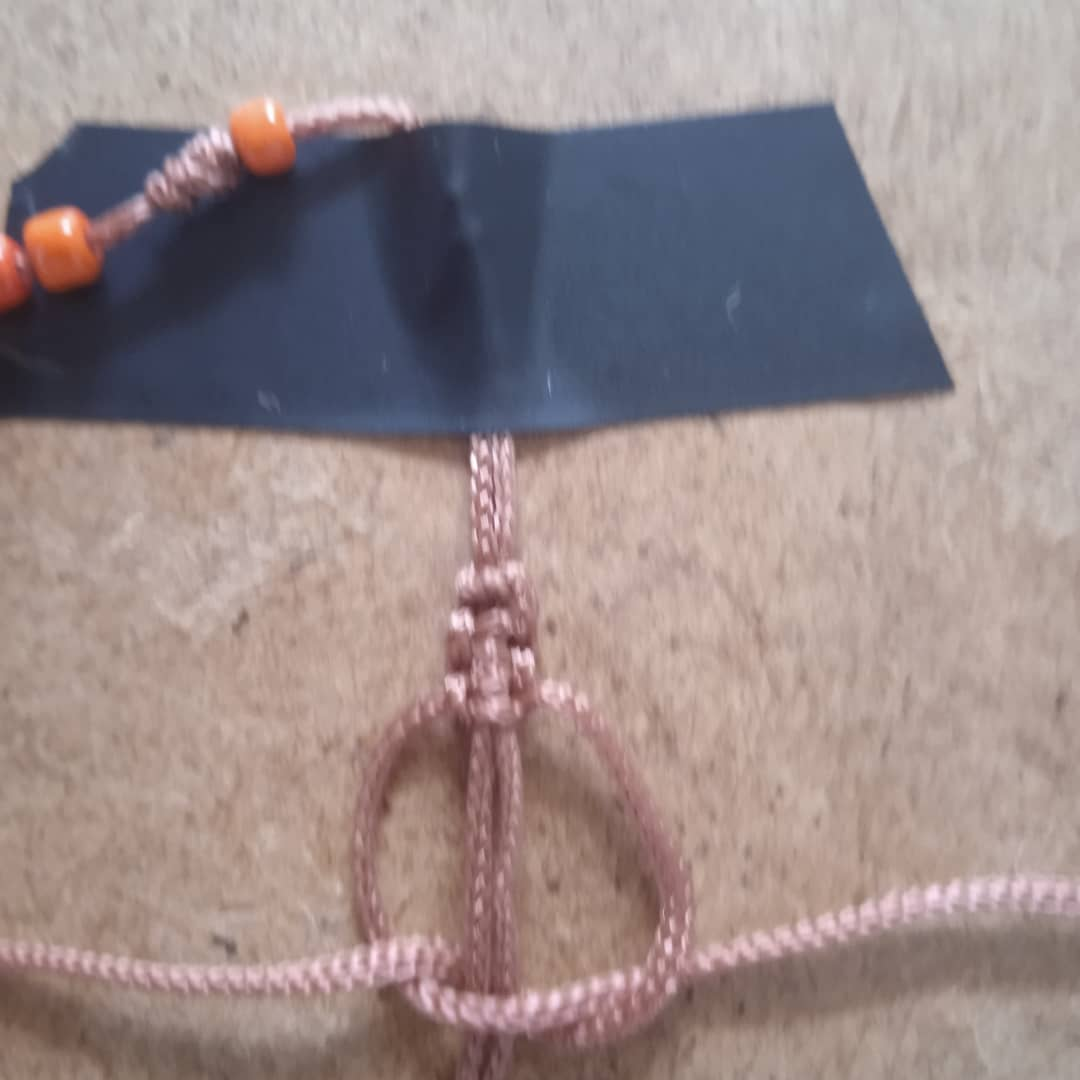
- Then fasten the threads with adhesive band, then pass a Chinese thread of about 20 cm underneath to make a basic knot and start the flat knot that allows adjusting the bracelet.
- Luego sujetar los hilos con banda adhesiva, luego pasar un hilo chino de unos 20 cm por debajo para hacer un nudo básico e iniciar el nudo plano que permite ajustar la pulsera.
- Then, make on one side the figure of a P and pass the Chinese thread under the belly of the P diagonally and adjust, then do it the other way around, repeat as many times as you want, thus achieving the desired length of the flat knot.
- Luego, hacer de un lado la figura de una P y pasar el hilo chino por debajo de la panza de la P en forma diagonal y ajustar, luego hacerlo al contrario, repetir las veces que quieras, así logramos el largo deseado del nudo plano.
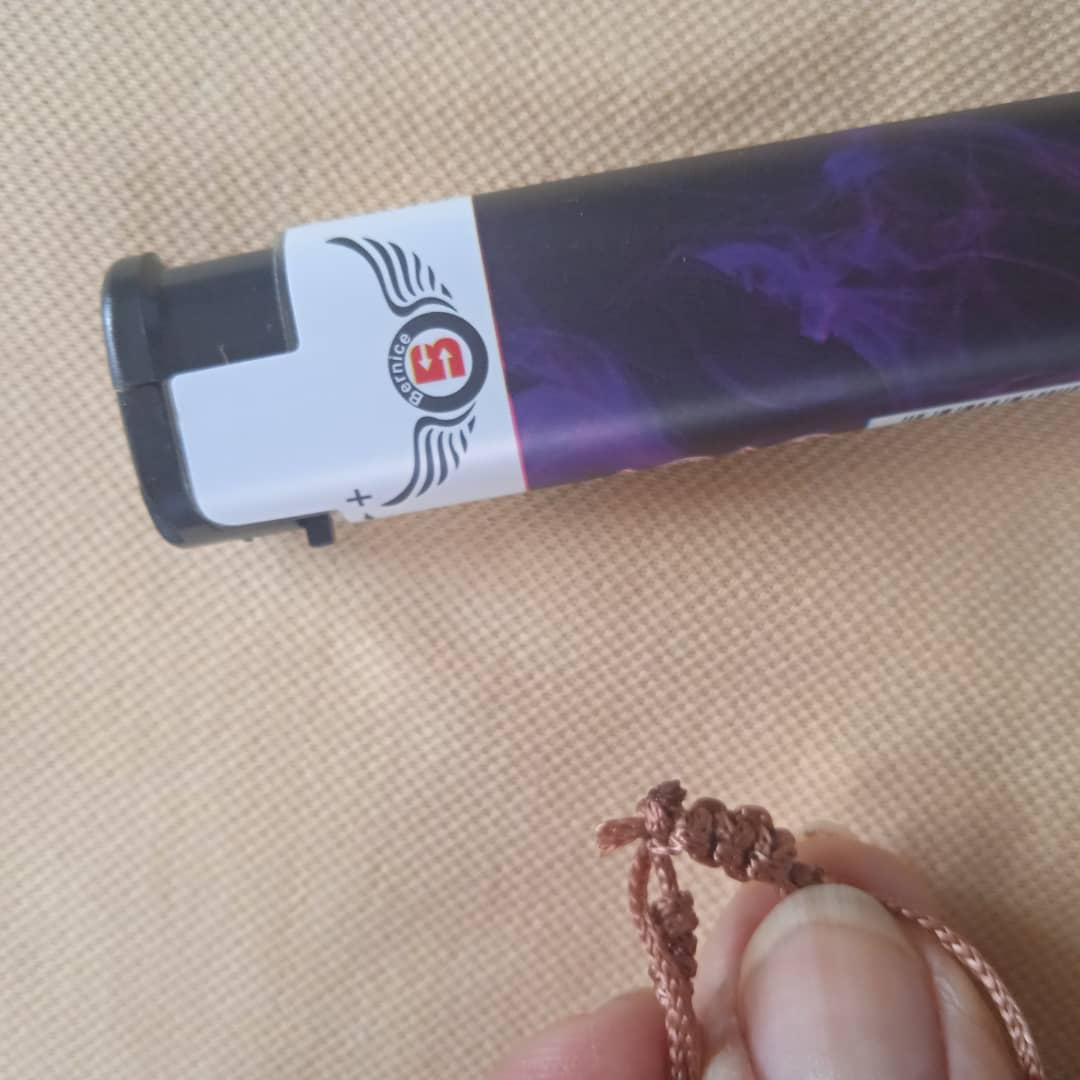
- Cut off excess material and burn with the lighter to seal the flat knot.
- Cortar el material sobrante y quemar con el encendedor para sellar el nudo plano.
- Place a bead on both strands, knot, cut the excess strand, burn to seal.
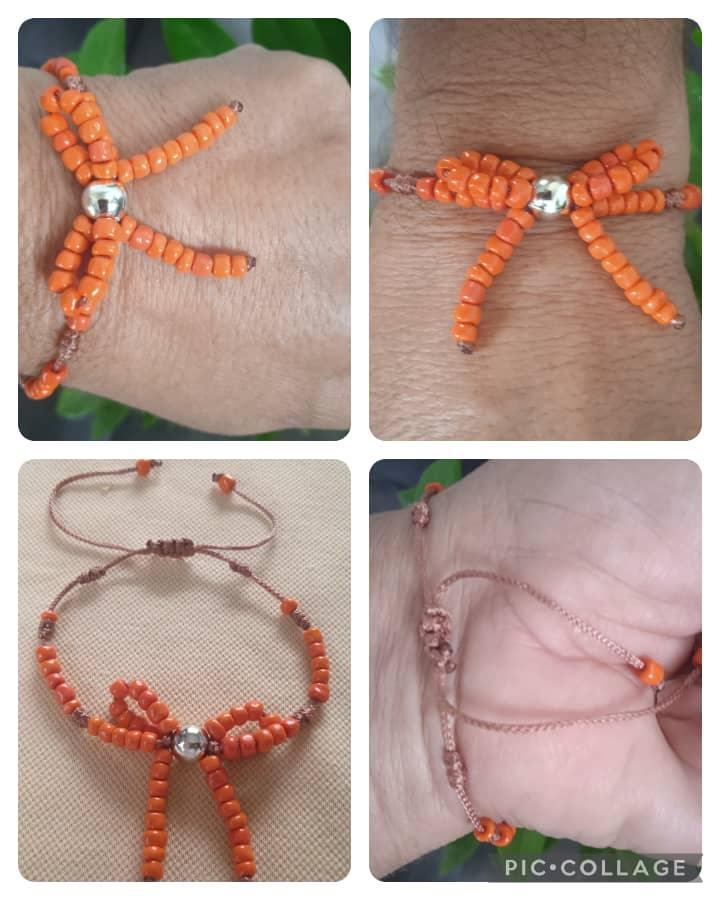
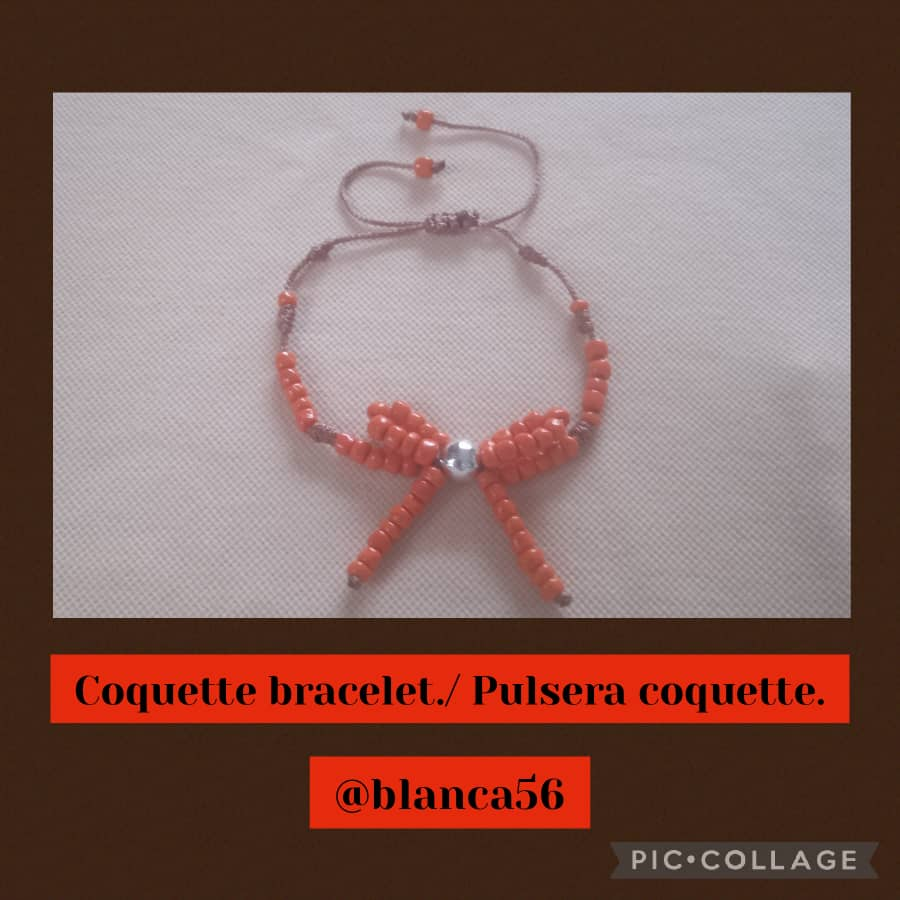
- Thus we finish the project of a nice bracelet with bow made with beads, coquette trend.
- Colocar en ambos hilos una cuenta, anudar, cortar el hilo sobrante, quemar para sellar.
- Así damos por terminado el proyecto de una linda pulsera con lazo hecha con cuentas, tendencia coquette.
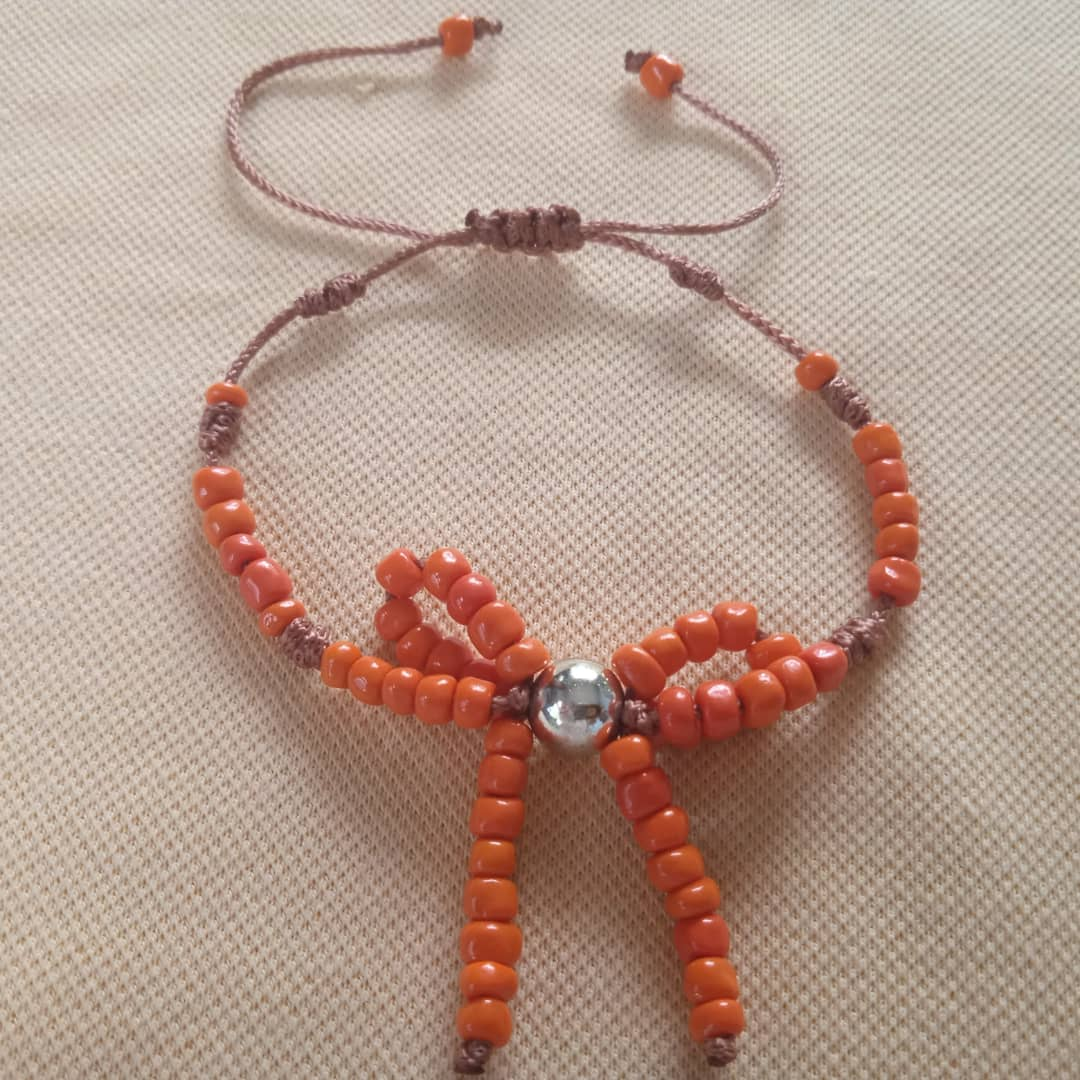
- A new design that I share with the fashion jewelry lovers in the #HiveDiy community, a cute bracelet with bow trend coquette, to wear on casual occasions. I say goodbye 🖐️ thanking you for your visit and comments.
- Un nuevo diseño que comparto con los amantes de la bisutería en la comunidad #HiveDiy, una linda pulsera con lazo tendencia coquette, para lucir en ocasiones informales. Me despido 🖐️ agradeciéndoles su visita y comentarios.