Hola a todos, comunidad de @hivearte. Soy yo nuevamente, @Cristhenos; espero todos se encuentren muy bien. El día de hoy vamos a hacer algo distinto a lo que acostumbro en mi blog. Usualmente, siempre empezamos a dibujar partiendo de una técnica o tomando directamente como referencia una fotografía, pero en esta ocasión vamos a empezar desde lo más básico a lo más complejo con una de las partes de la cara, con la capacidad de percibir hasta 10.000 aromas distintos. La nariz
Hello everyone, hivearte community. It's me again, Cristhenos; I hope everyone is doing well. Today we are going to do something different from what I usually do in my blog. Usually, we always start drawing from a technique or directly taking a photograph as a reference, but this time we are going to start from the most basic to the most complex with one of the parts of the face, with the ability to perceive up to 10,000 different aromas. The nose
Antes de comenzar, quiero agradecerles de corazón a todas aquellas personas por el apoyo que me están dando en mis post; al igual que en todos mis post, podrán encontrar al final del post el link del video que estoy utilizando para mejorar mi capacidad de dibujar. Sin más nada que aportar, los dejo con el procedimiento.
Before I start, I want to thank from the bottom of my heart all those people for the support they are giving me in my posts; as in all my posts, you can find at the end of the post the link to the video I am using to improve my ability to draw. With nothing more to contribute, I leave you with the procedure.
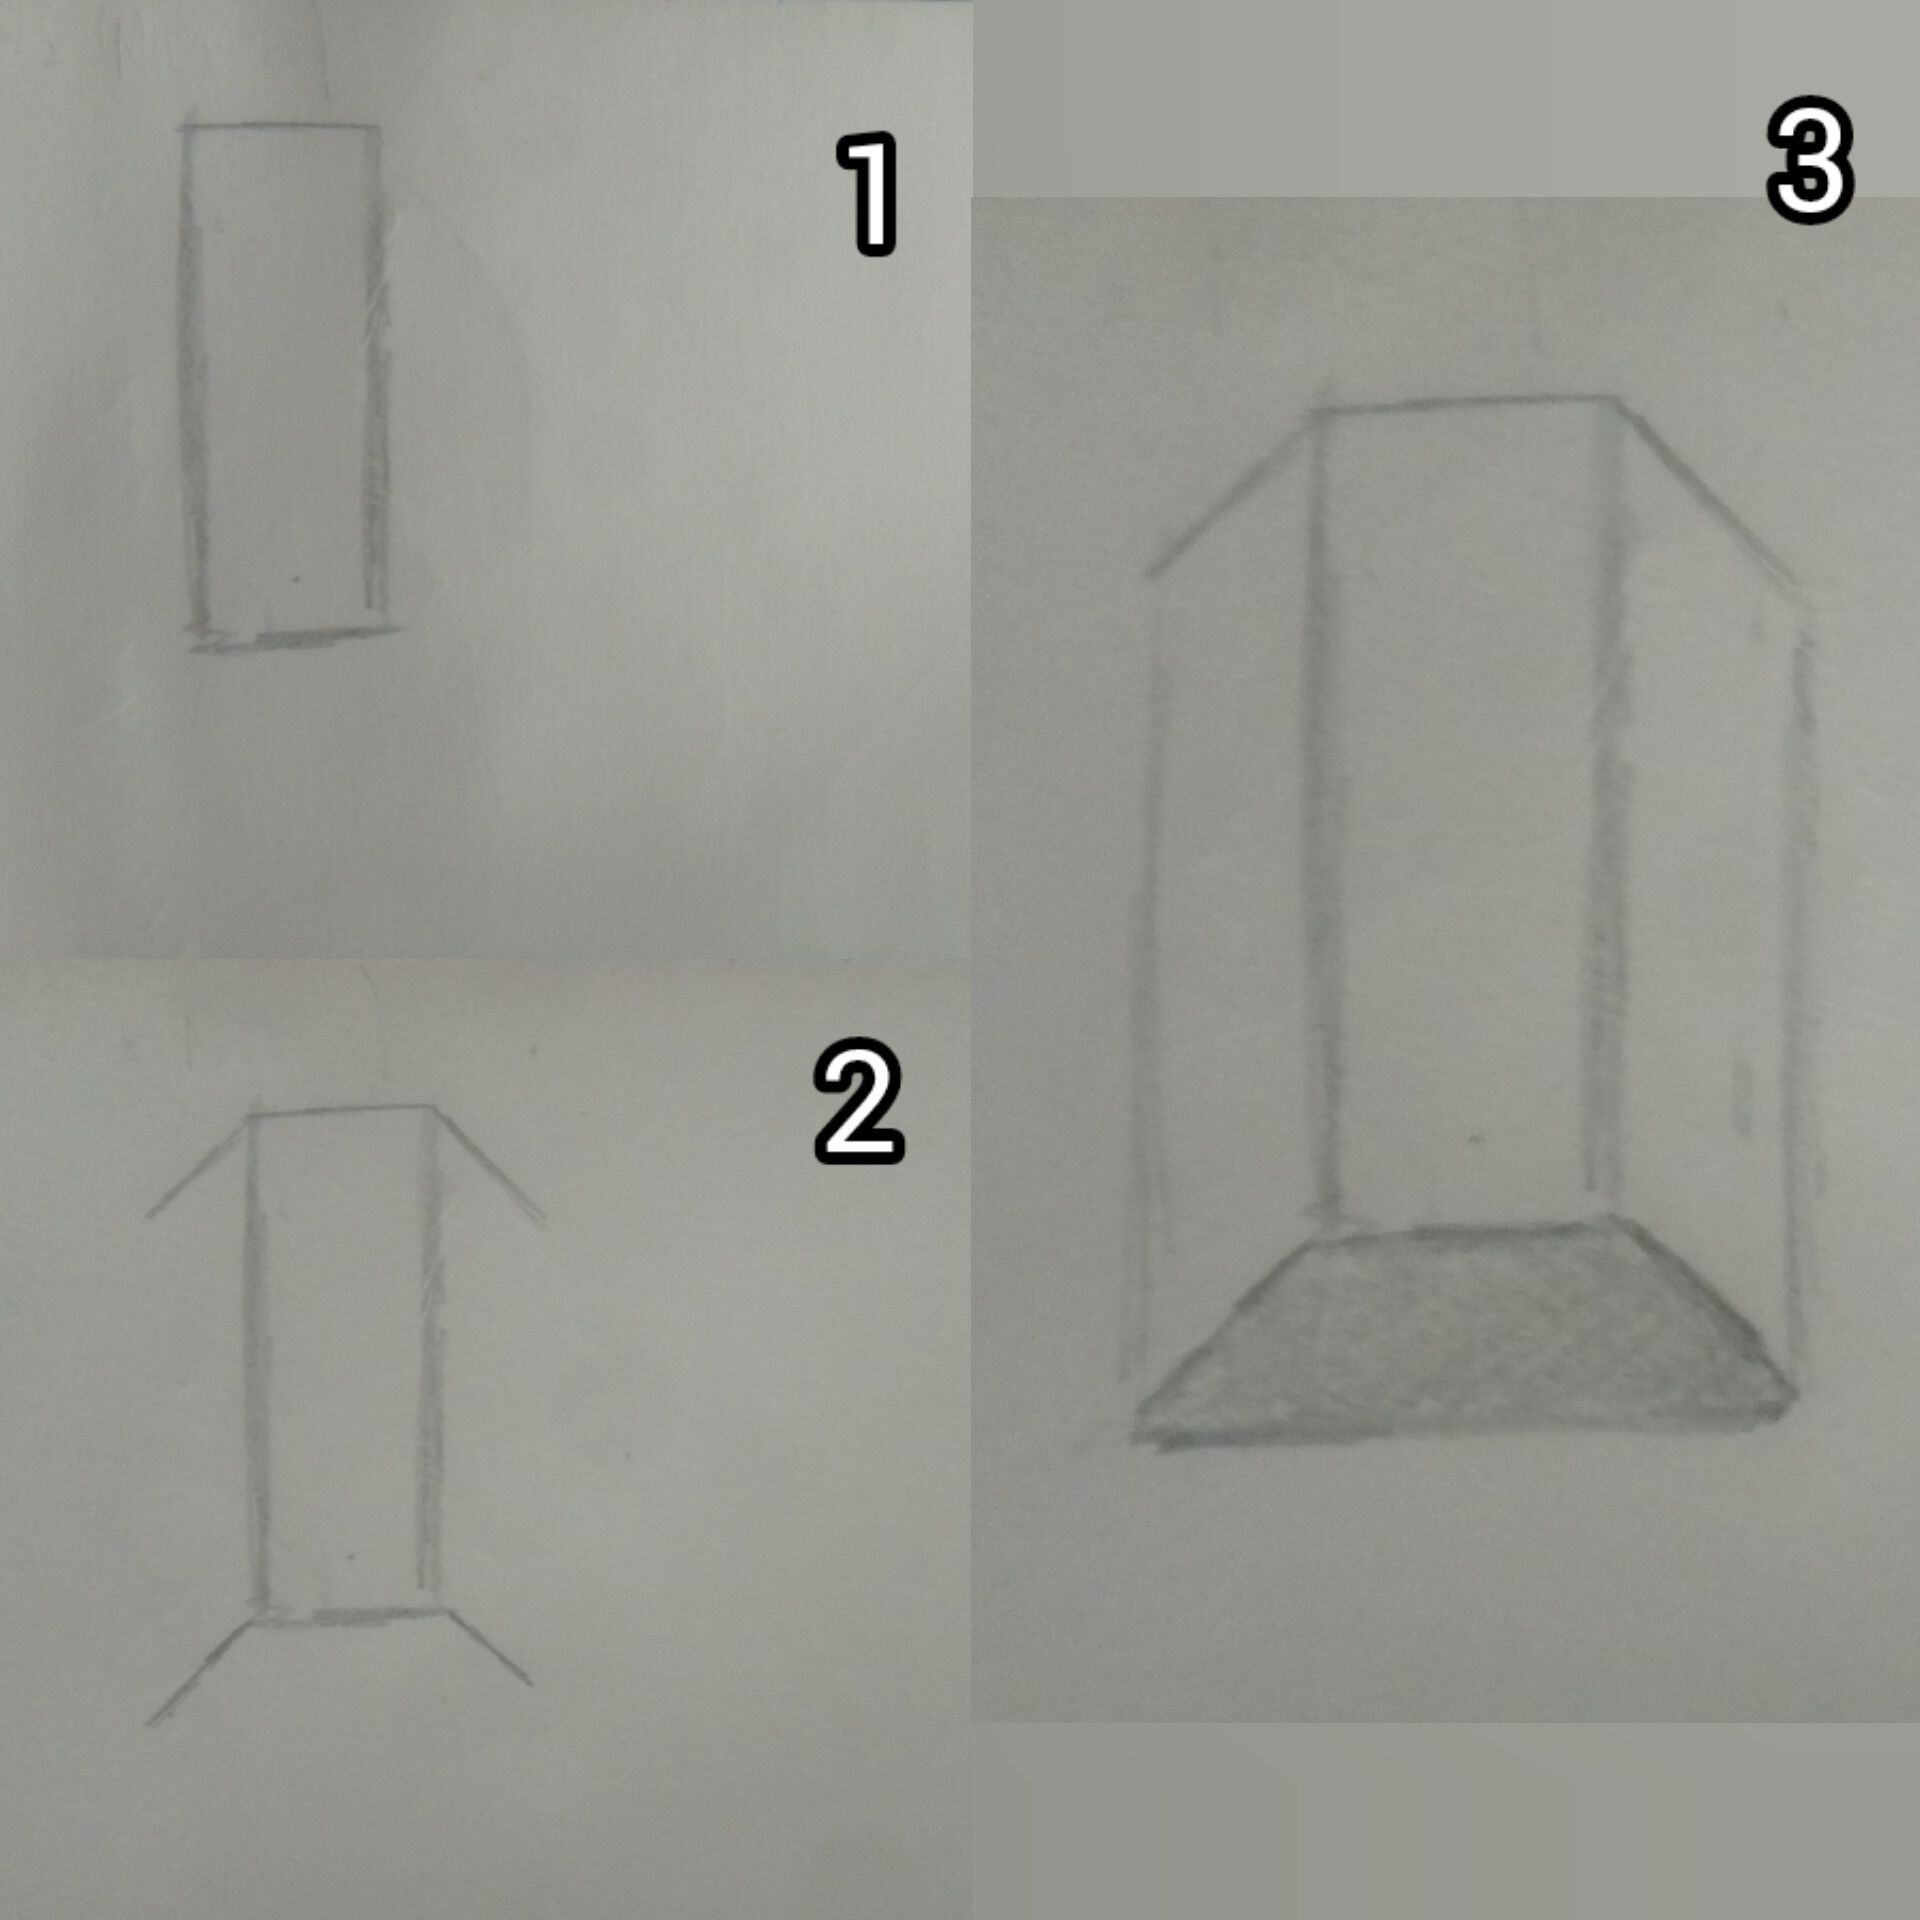
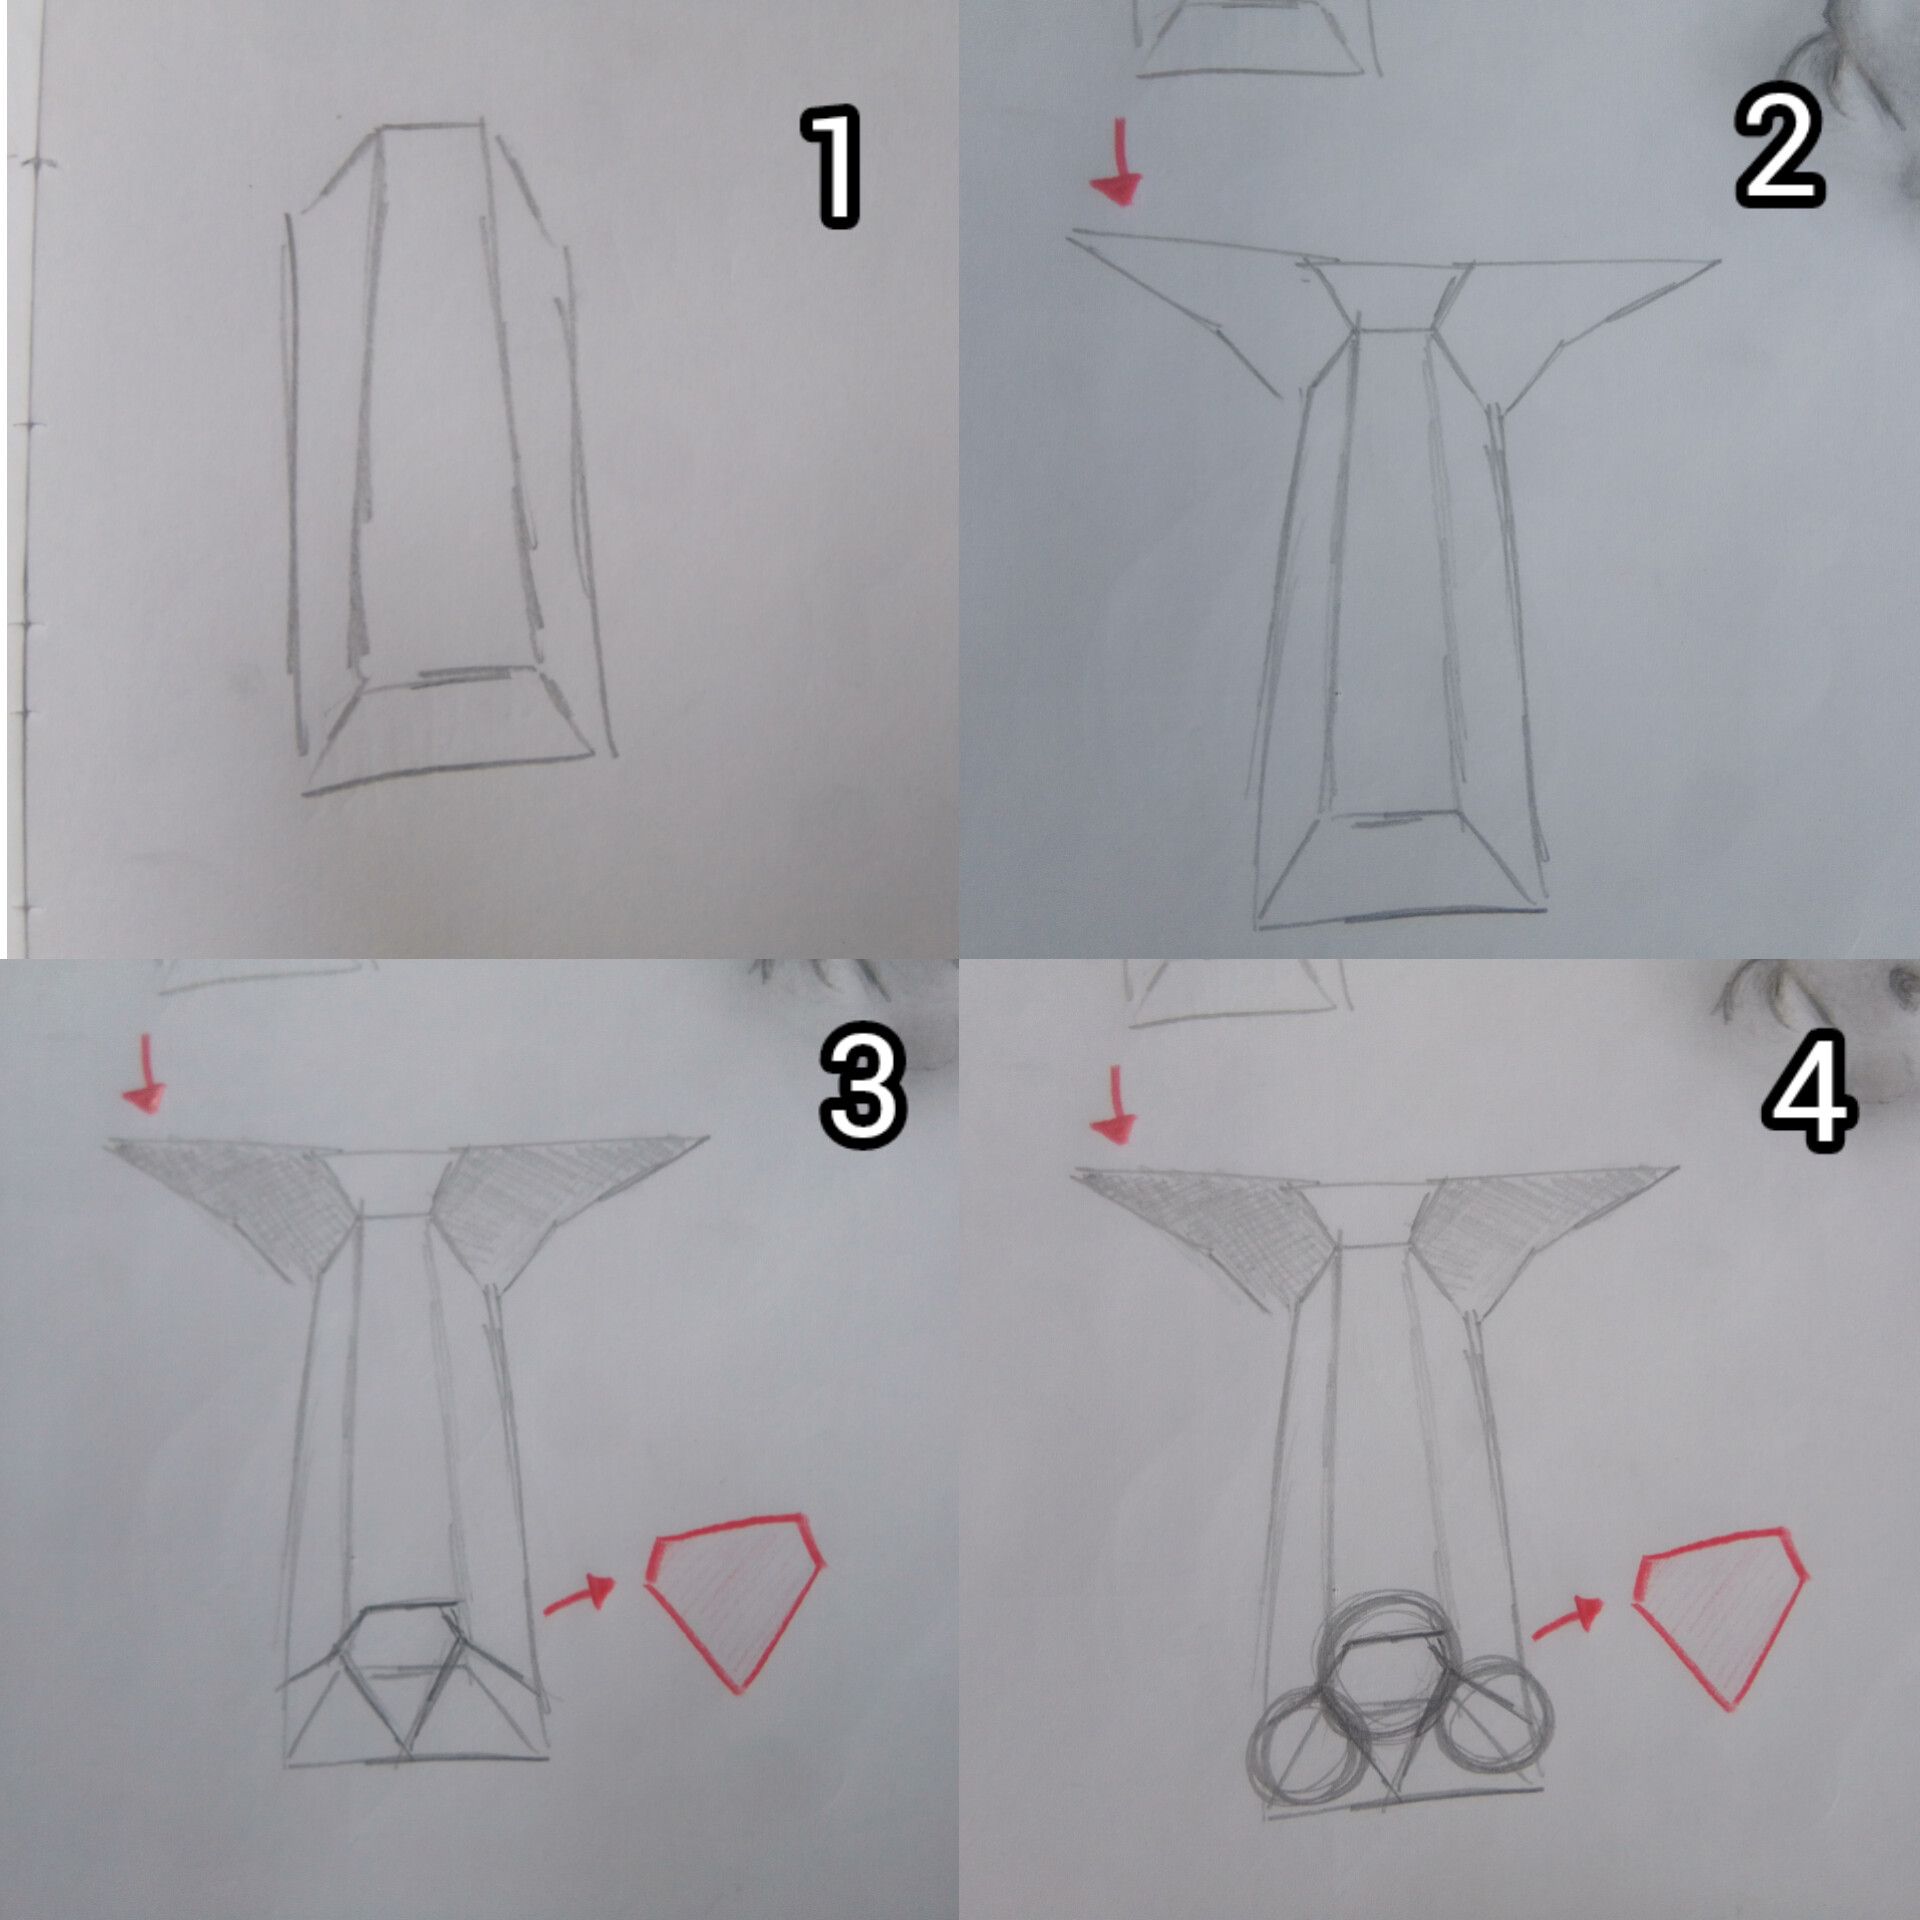
Antes de comenzar a dibujar la nariz, partiremos primero de una estructura para tener un plano mental a la hora de retratar un rostro. Lo primero que vamos a hacer será partir de un rectángulo al cual le daremos una especie de forma 3D. Si se fijan bien, es como dibujar un hexágono, pero dividido a la mitad.
Before we start drawing the nose, we will first start from a structure to have a mental plan when we are going to portray a face. The first thing we are going to do is to start from a rectangle to which we will give a kind of 3D shape. If you look closely, it's like drawing a hexagon, but divided in half.
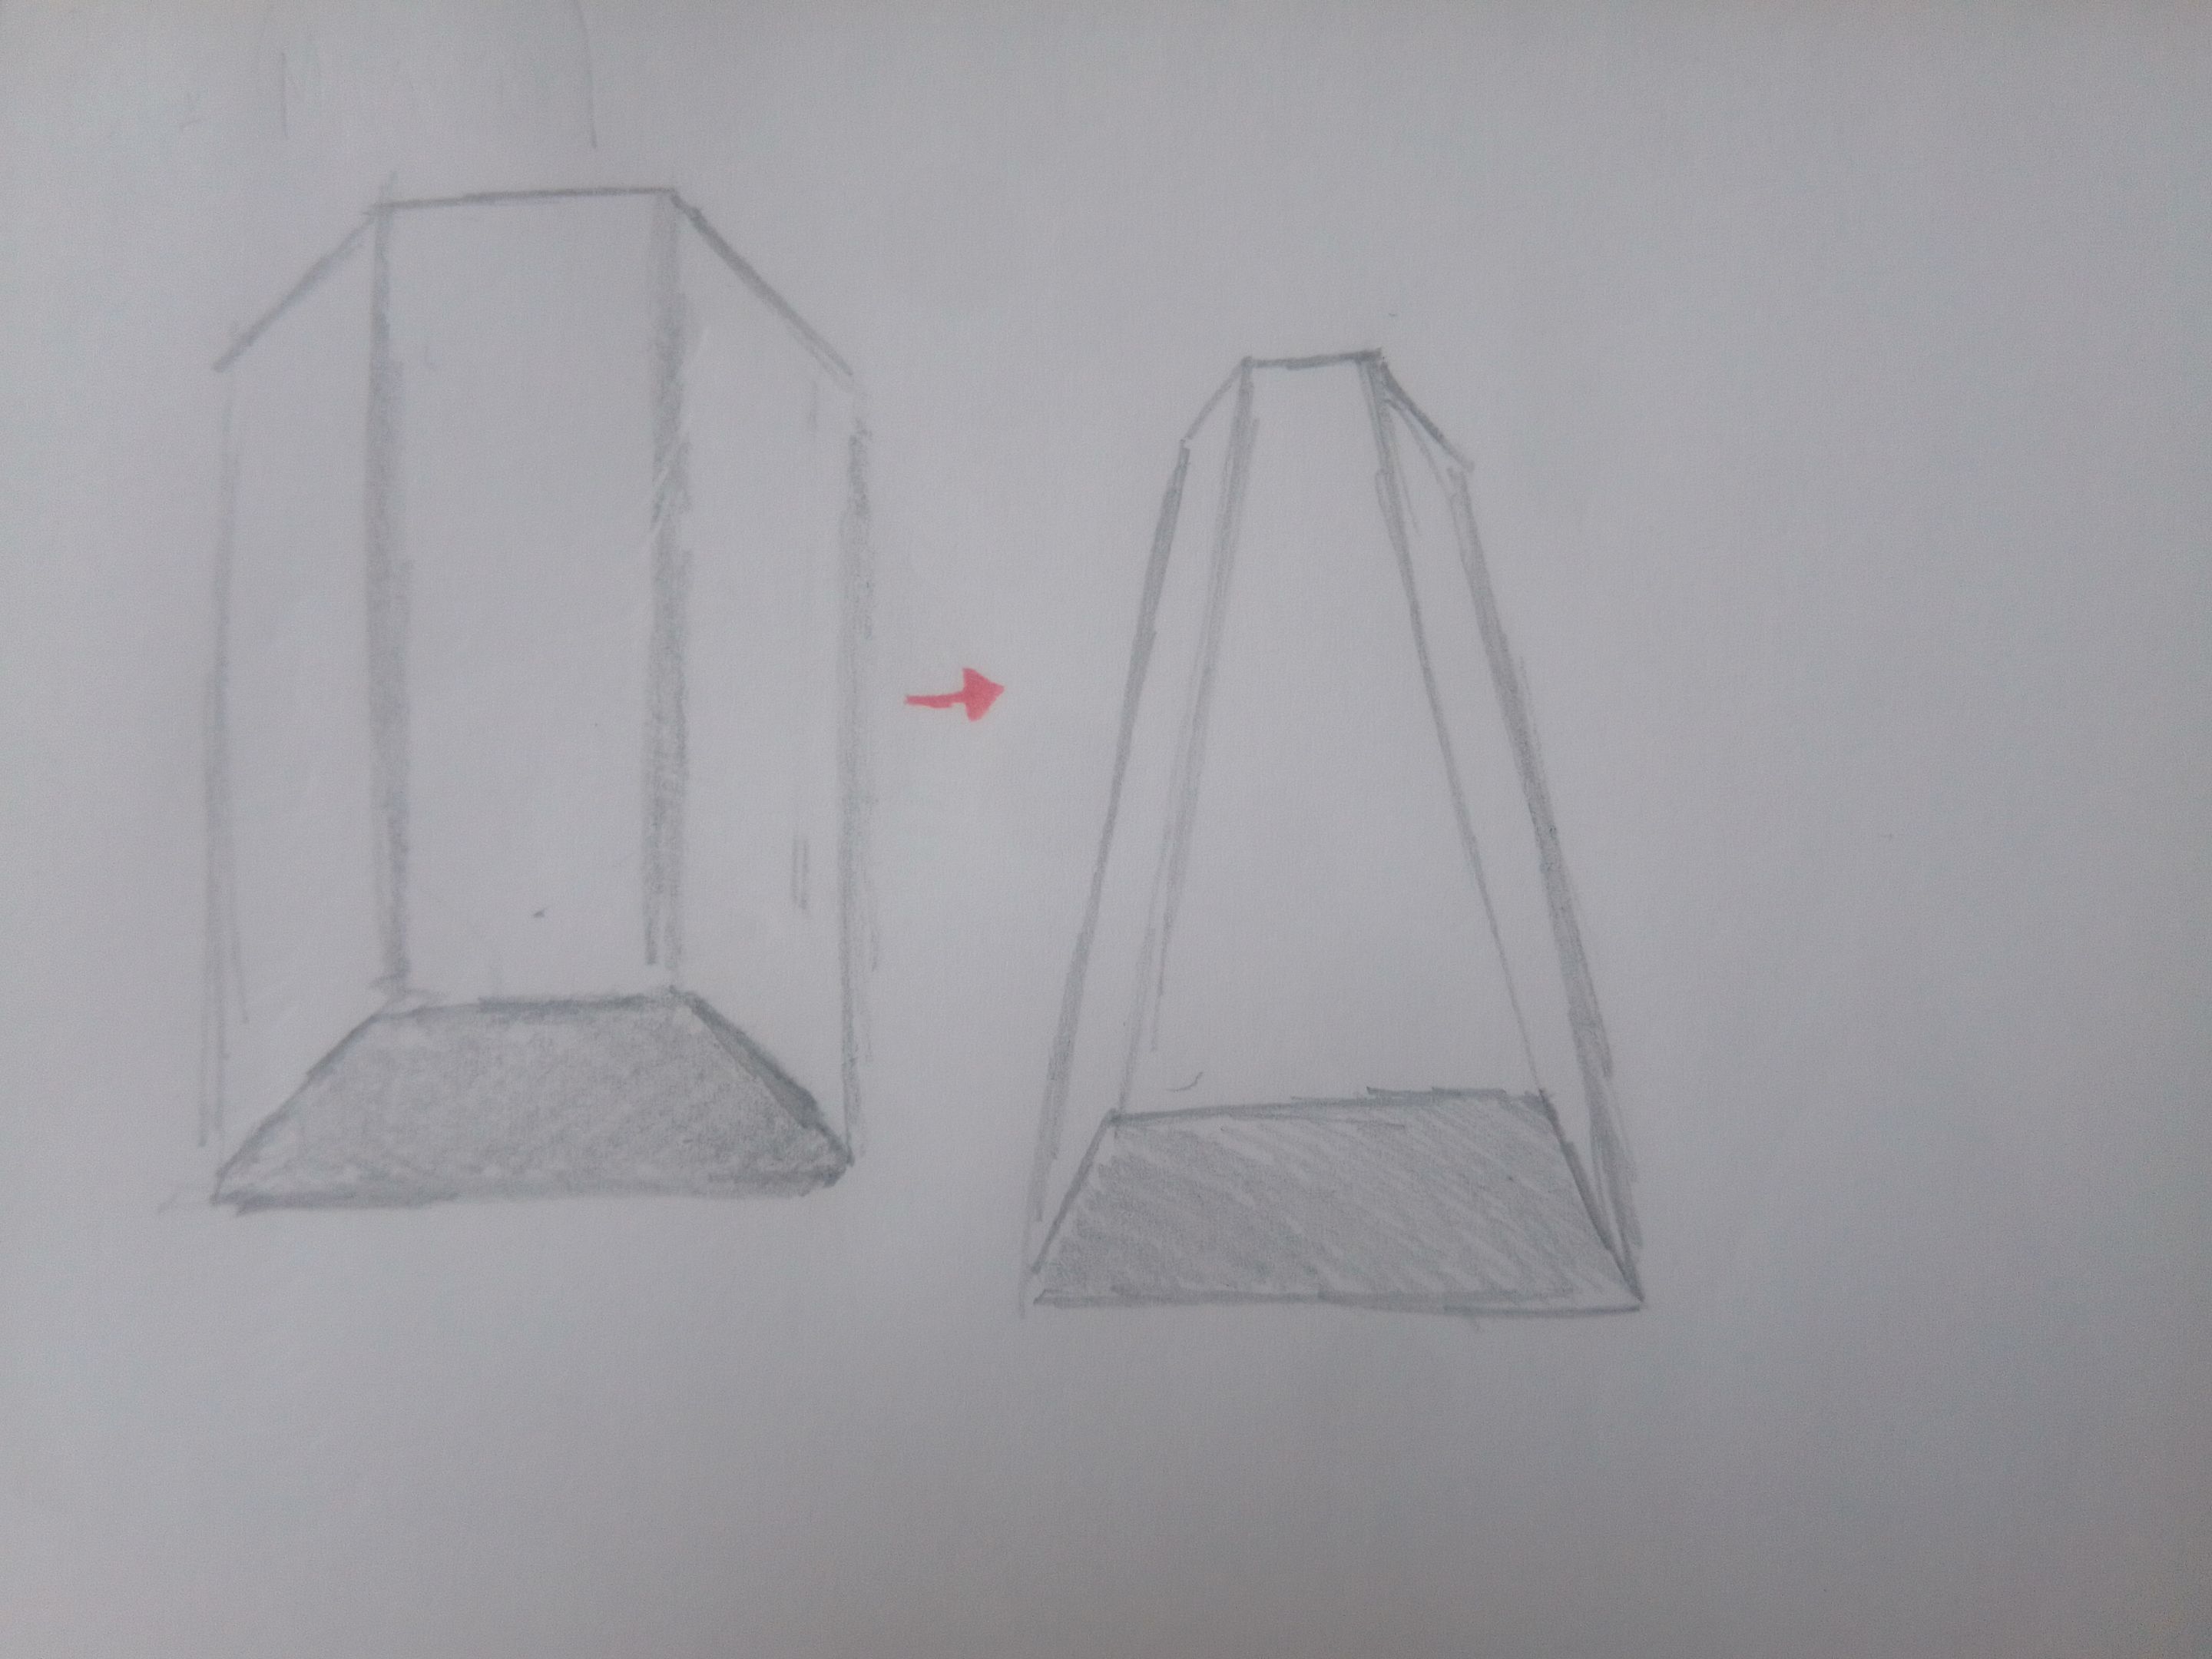
Ahora haremos lo mismo, pero en vez de un rectángulo, dibujaremos una especie de triángulo, pero sin una punta arriba; es muy parecida al primer boceto, pero como si la estuviéramos viendo desde abajo.
Now we will do the same, but instead of a rectangle, we will draw a kind of triangle, but without a point at the top; it is very similar to the first sketch, but as if we were looking at it from below.
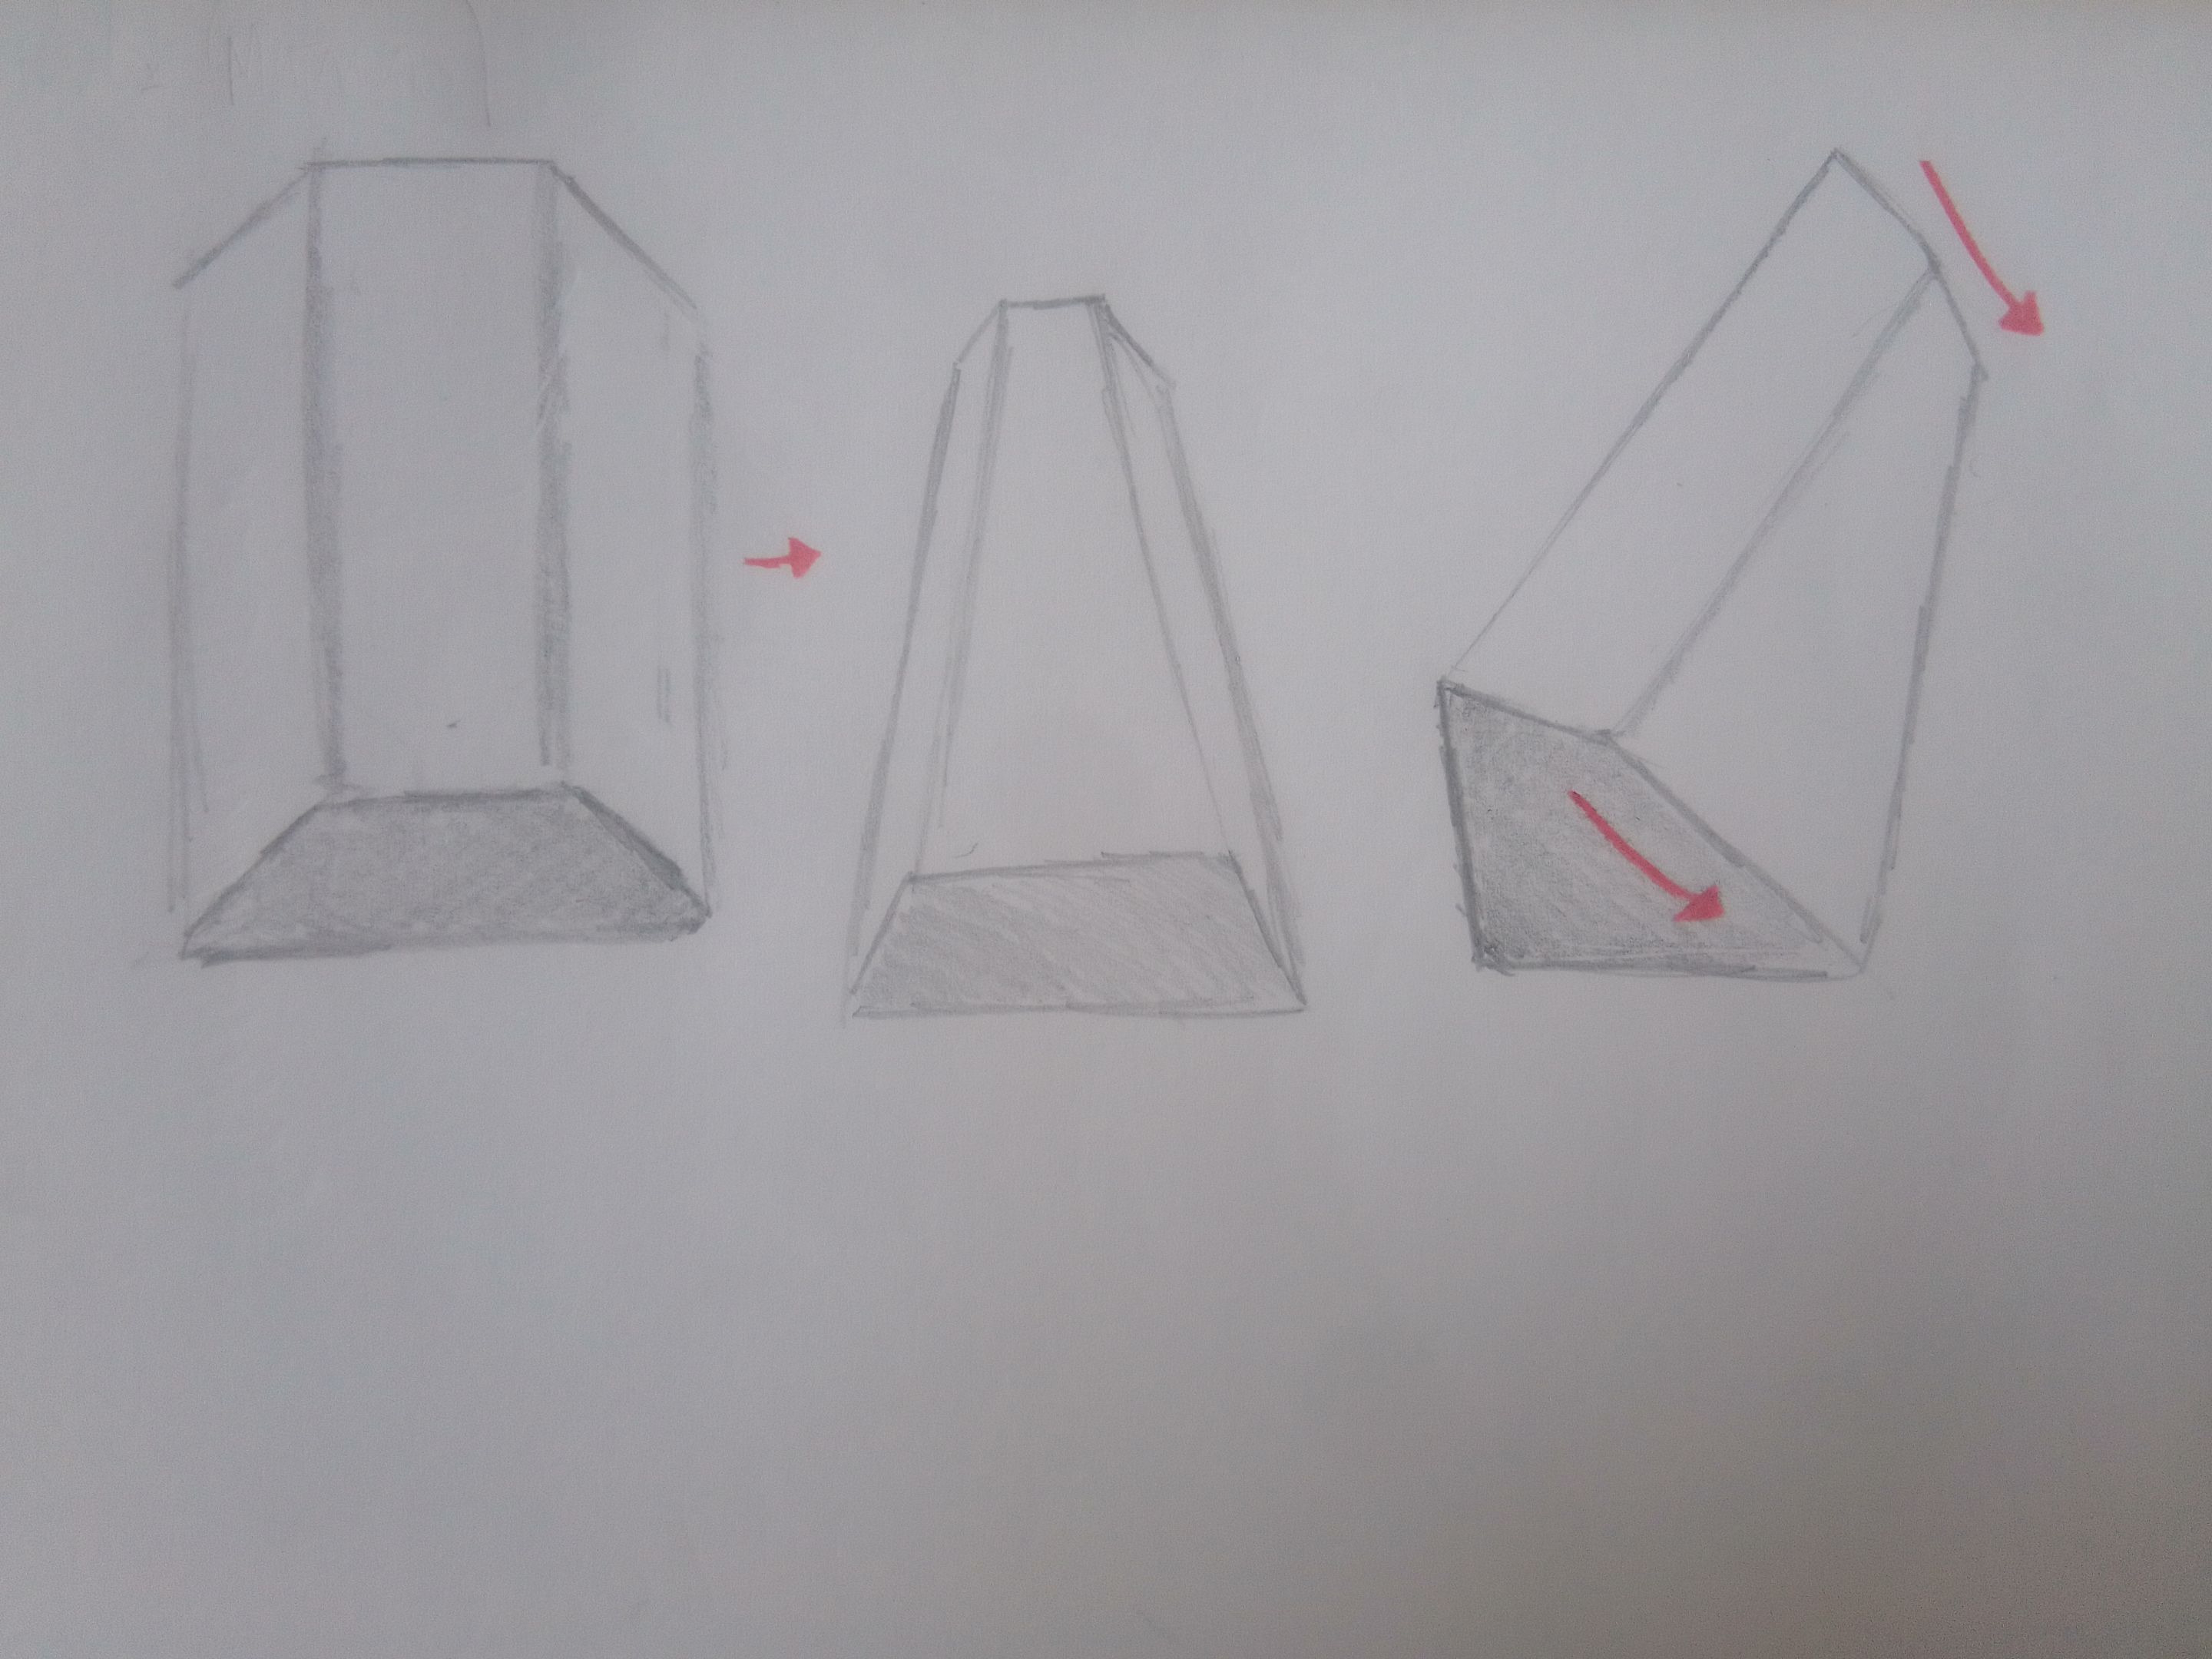
Podemos practicarla desde diferentes ángulos; por ejemplo, aquí la dibujé como si estuviera en ¾ de perfil. La idea de todo es tener una imagen mental a la hora de dibujar. Traten de dibujarla desde diferentes ángulos, no se conformen solamente con las imágenes del post, sean ustedes mismos su ensayo y error, que es una de las mejores formas de aprender por cuenta propia, aunque nunca está de más tener apoyo por personas más experimentadas.
We can practice it from different angles; for example, here I drew it as if it were in ¾ profile. The idea of it all is to have a mental image when drawing. Try to draw it from different angles, don't just settle for the images in the post, be your own trial and error, which is one of the best ways to learn on your own, although it never hurts to have support from more experienced people.
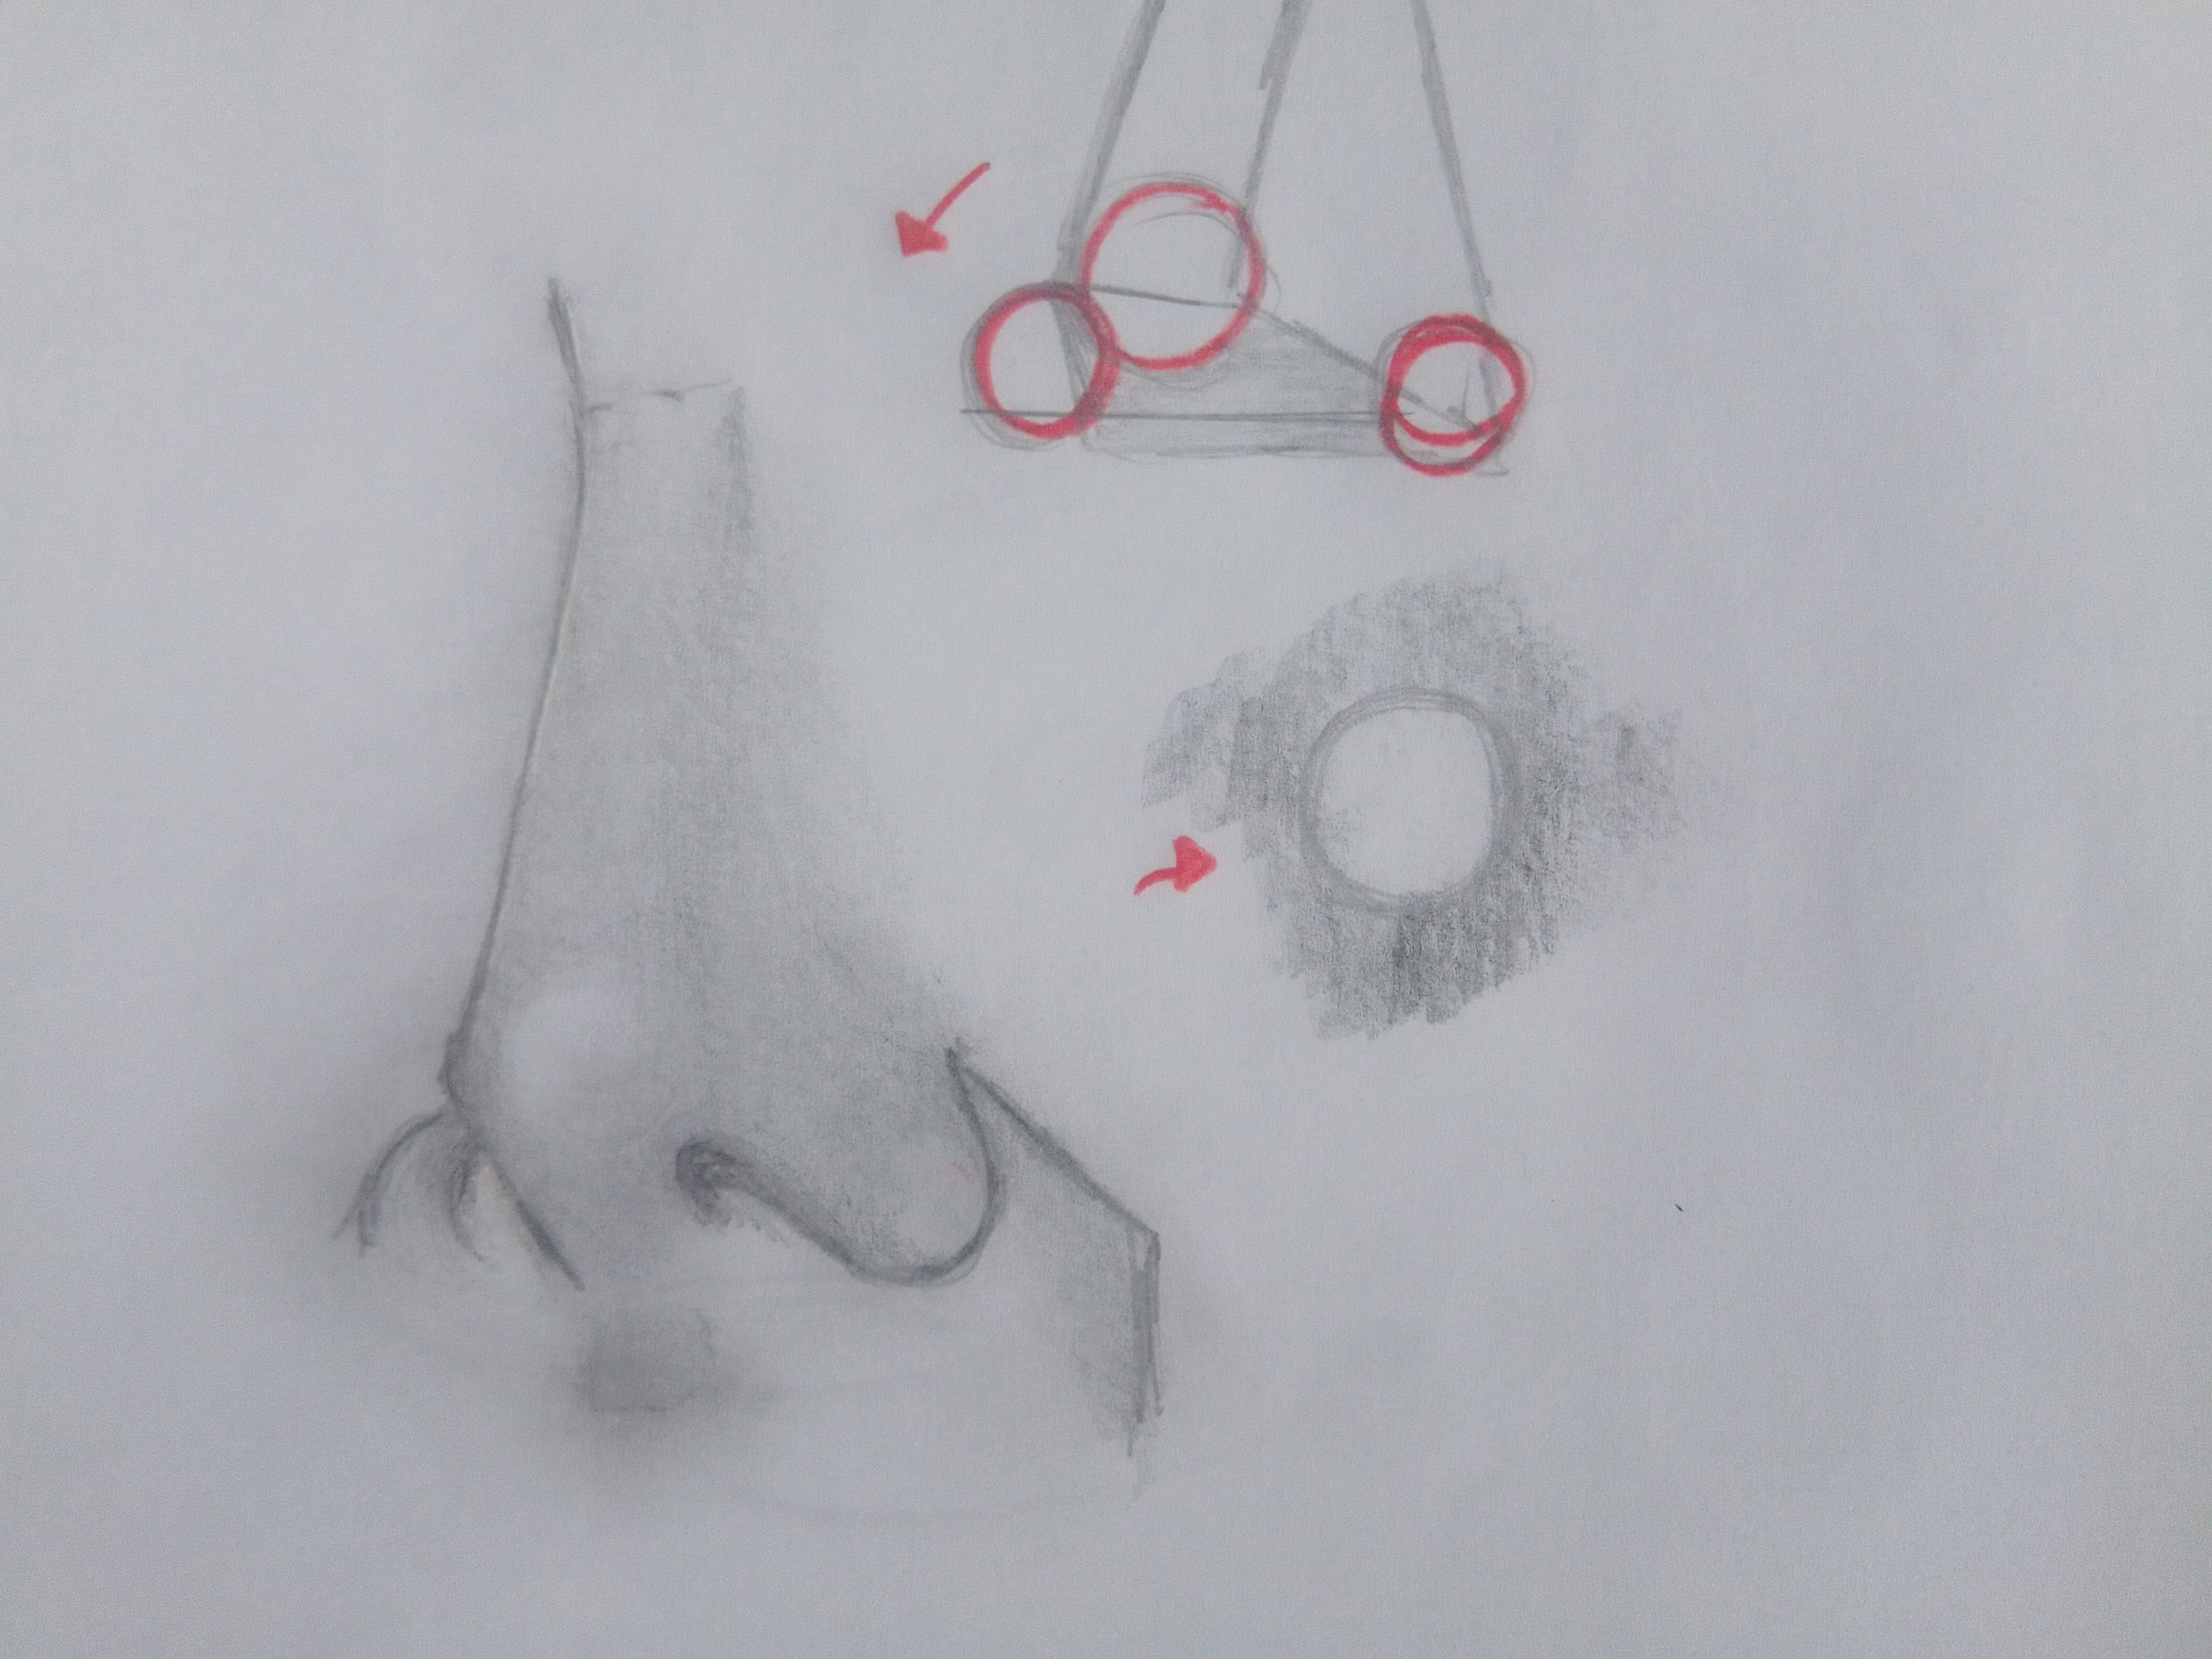
Pasaremos ahora al boceto, porque a pesar de ser la estructura principal, sigue siendo una figura que intenta dar ilusión de lo que es o de lo que intenta imitar, muy parecido al dibujo abstracto. Una de las figuras más importantes a la hora de dibujar la nariz (desde mi punto de vista) serán los círculos, ya que estos indicarán dónde irán las aletas y los orificios de la nariz. Ya con todo el boceto armado, borramos todo, pero de una forma muy suave, de manera que sea visible nuestro boceto para poder remarcar nuestra silueta.
We will now move on to the sketch, because in spite of being the main structure, it is still a figure that tries to give the illusion of what it is or what it tries to imitate, very similar to the abstract drawing. One of the most important figures at the time of drawing the nose (from my point of view) will be the circles, since these will indicate where the fins and the orifices of the nose will go. Once the sketch is ready, we erase everything, but in a very soft way, so that our sketch is visible to be able to highlight our silhouette.
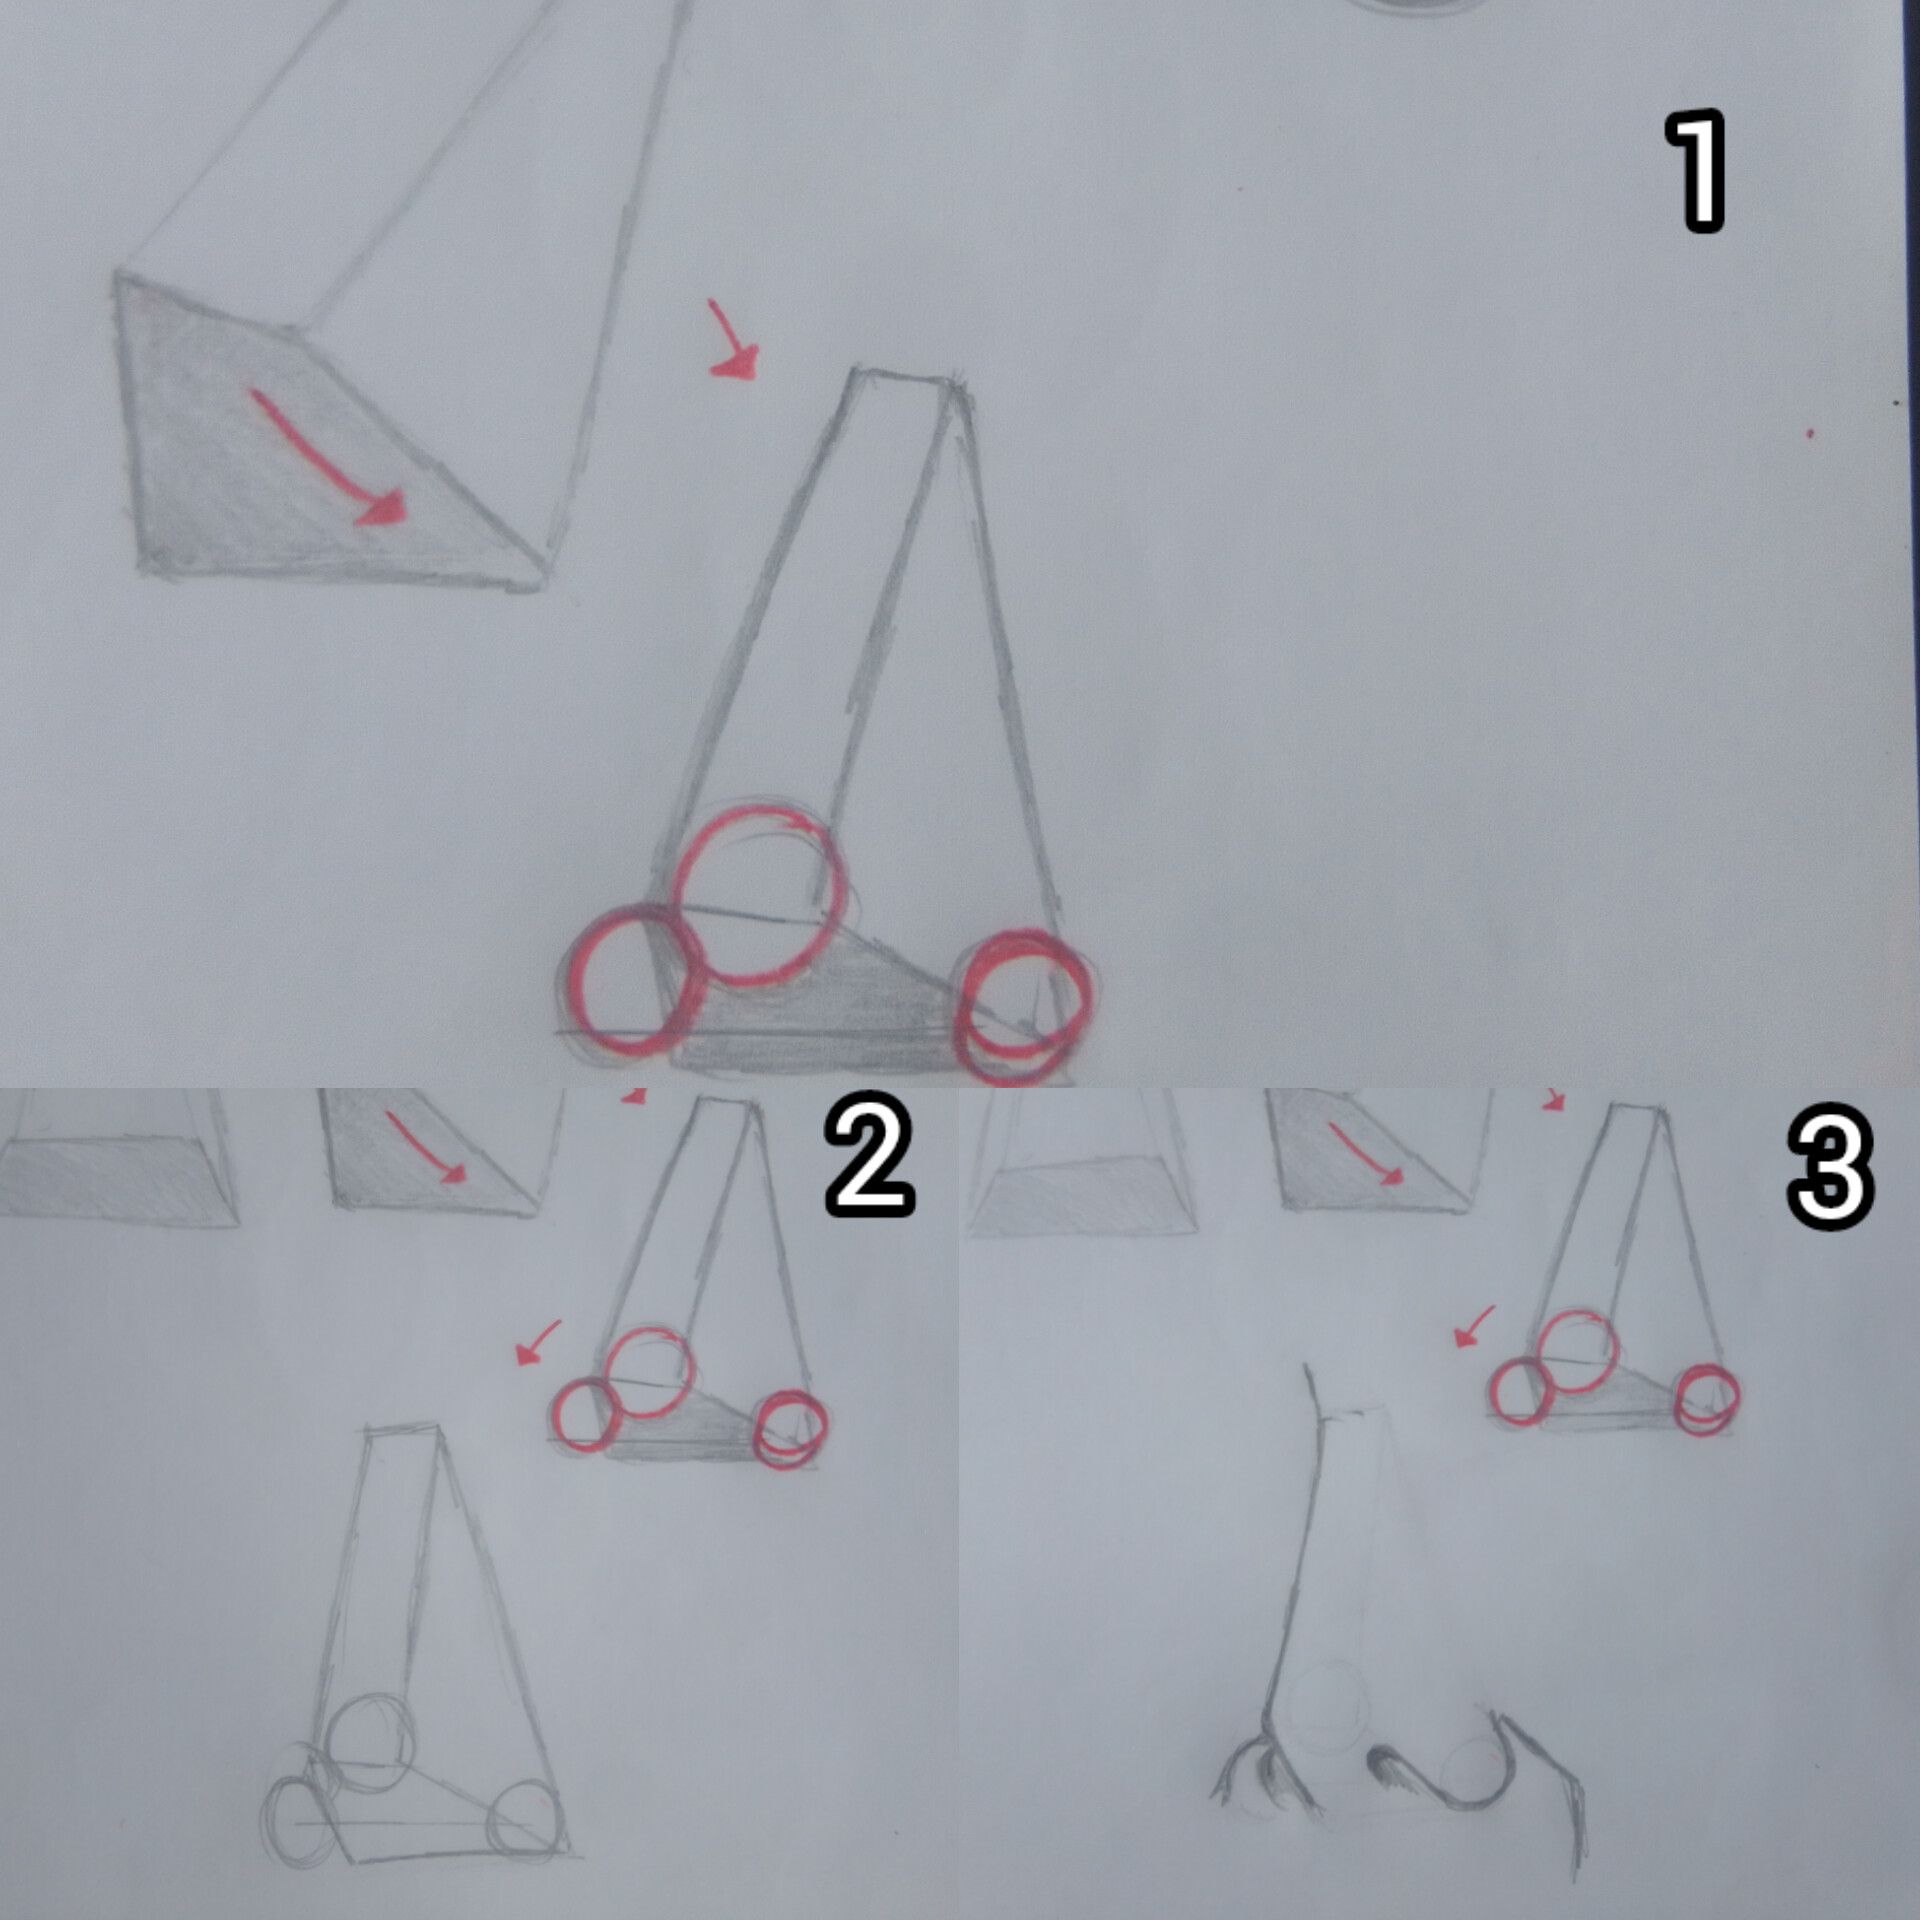
Ya si queremos darle un tono de profundidad, podemos sombrear, y un consejo que les doy es que sombren de manera que rodeen los círculos para lograr un tono suave.
Now if we want to give it a tone of depth, we can shade, and a tip I give you is to shade in a way that surrounds the circles to achieve a soft tone.
Para finalizar, vamos a dibujar un boceto con la estructura inicial. Comenzamos siguiendo la misma lógica que al principio del blog, con la diferencia de que vamos a agregar algunas figuras extras para simular dónde irían los ojos. Ya con toda la estructura elaborada vamos a borrar, pero de manera muy suave para poder remarcar como hicimos anteriormente.
Finally, let's draw a sketch with the initial structure. We start following the same logic as at the beginning of the blog, with the difference that we are going to add some extra figures to simulate where the eyes would go. Once the whole structure is ready we are going to erase, but in a very soft way to be able to highlight as we did before.
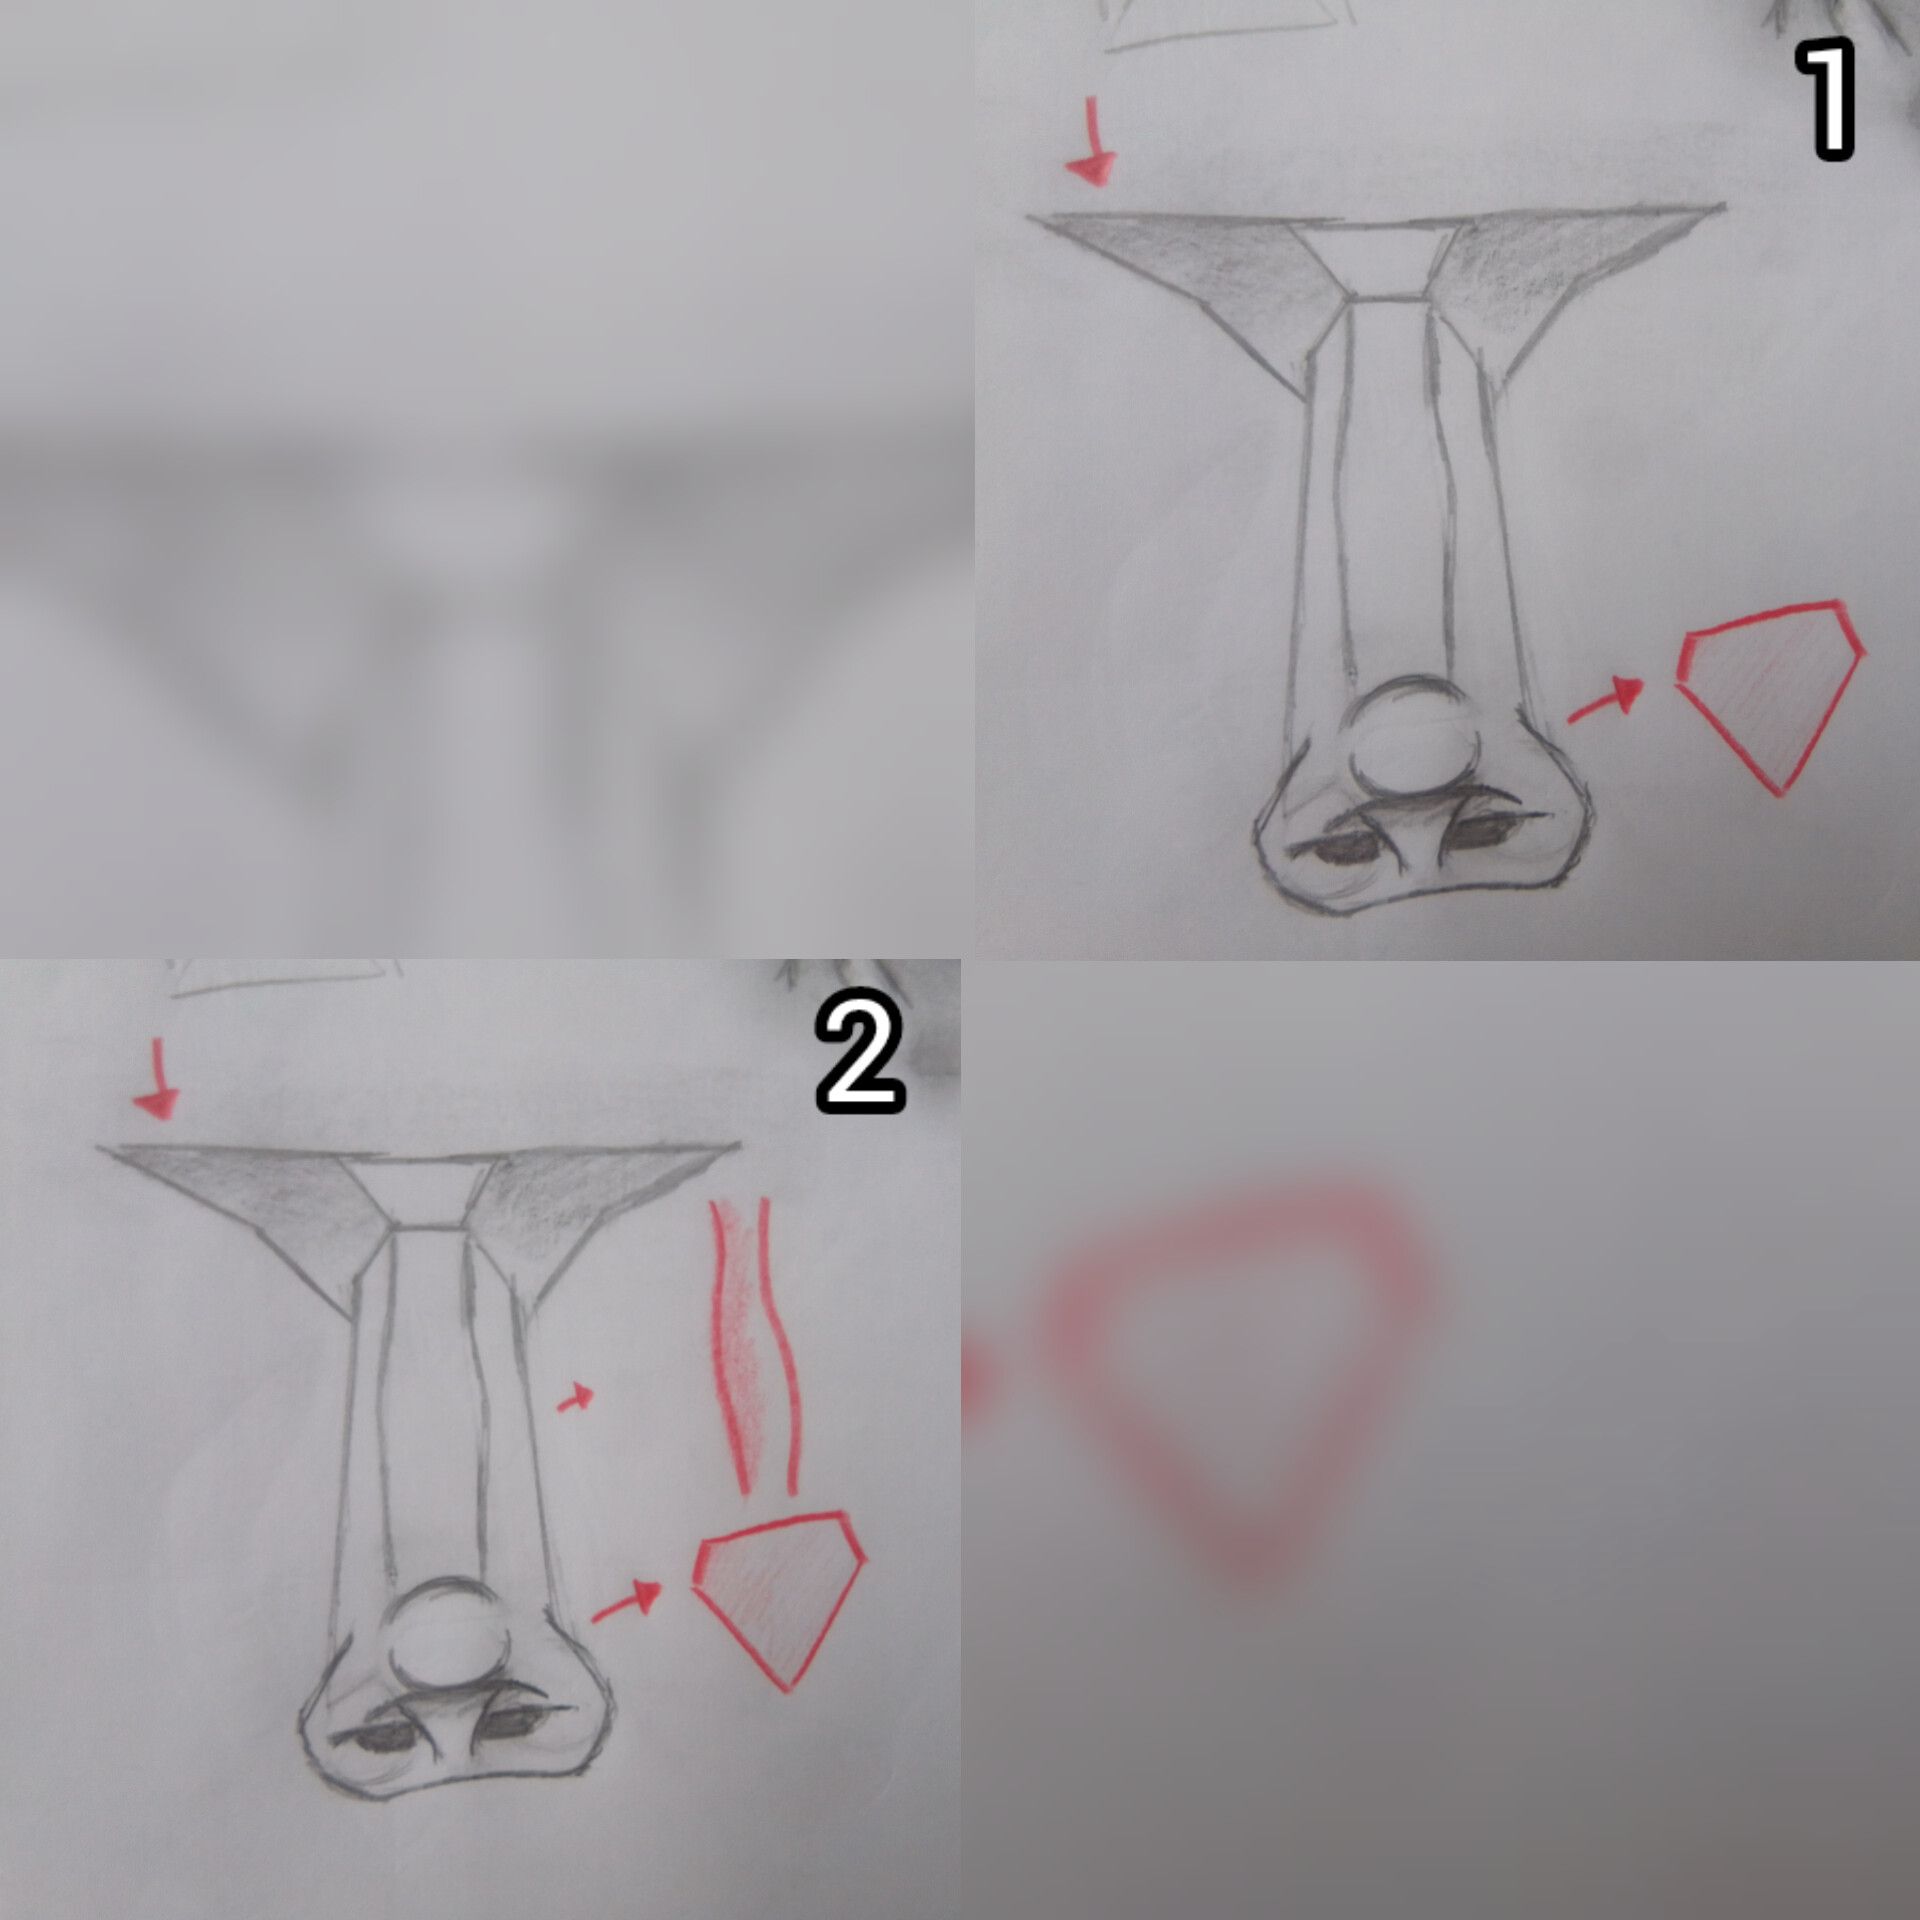
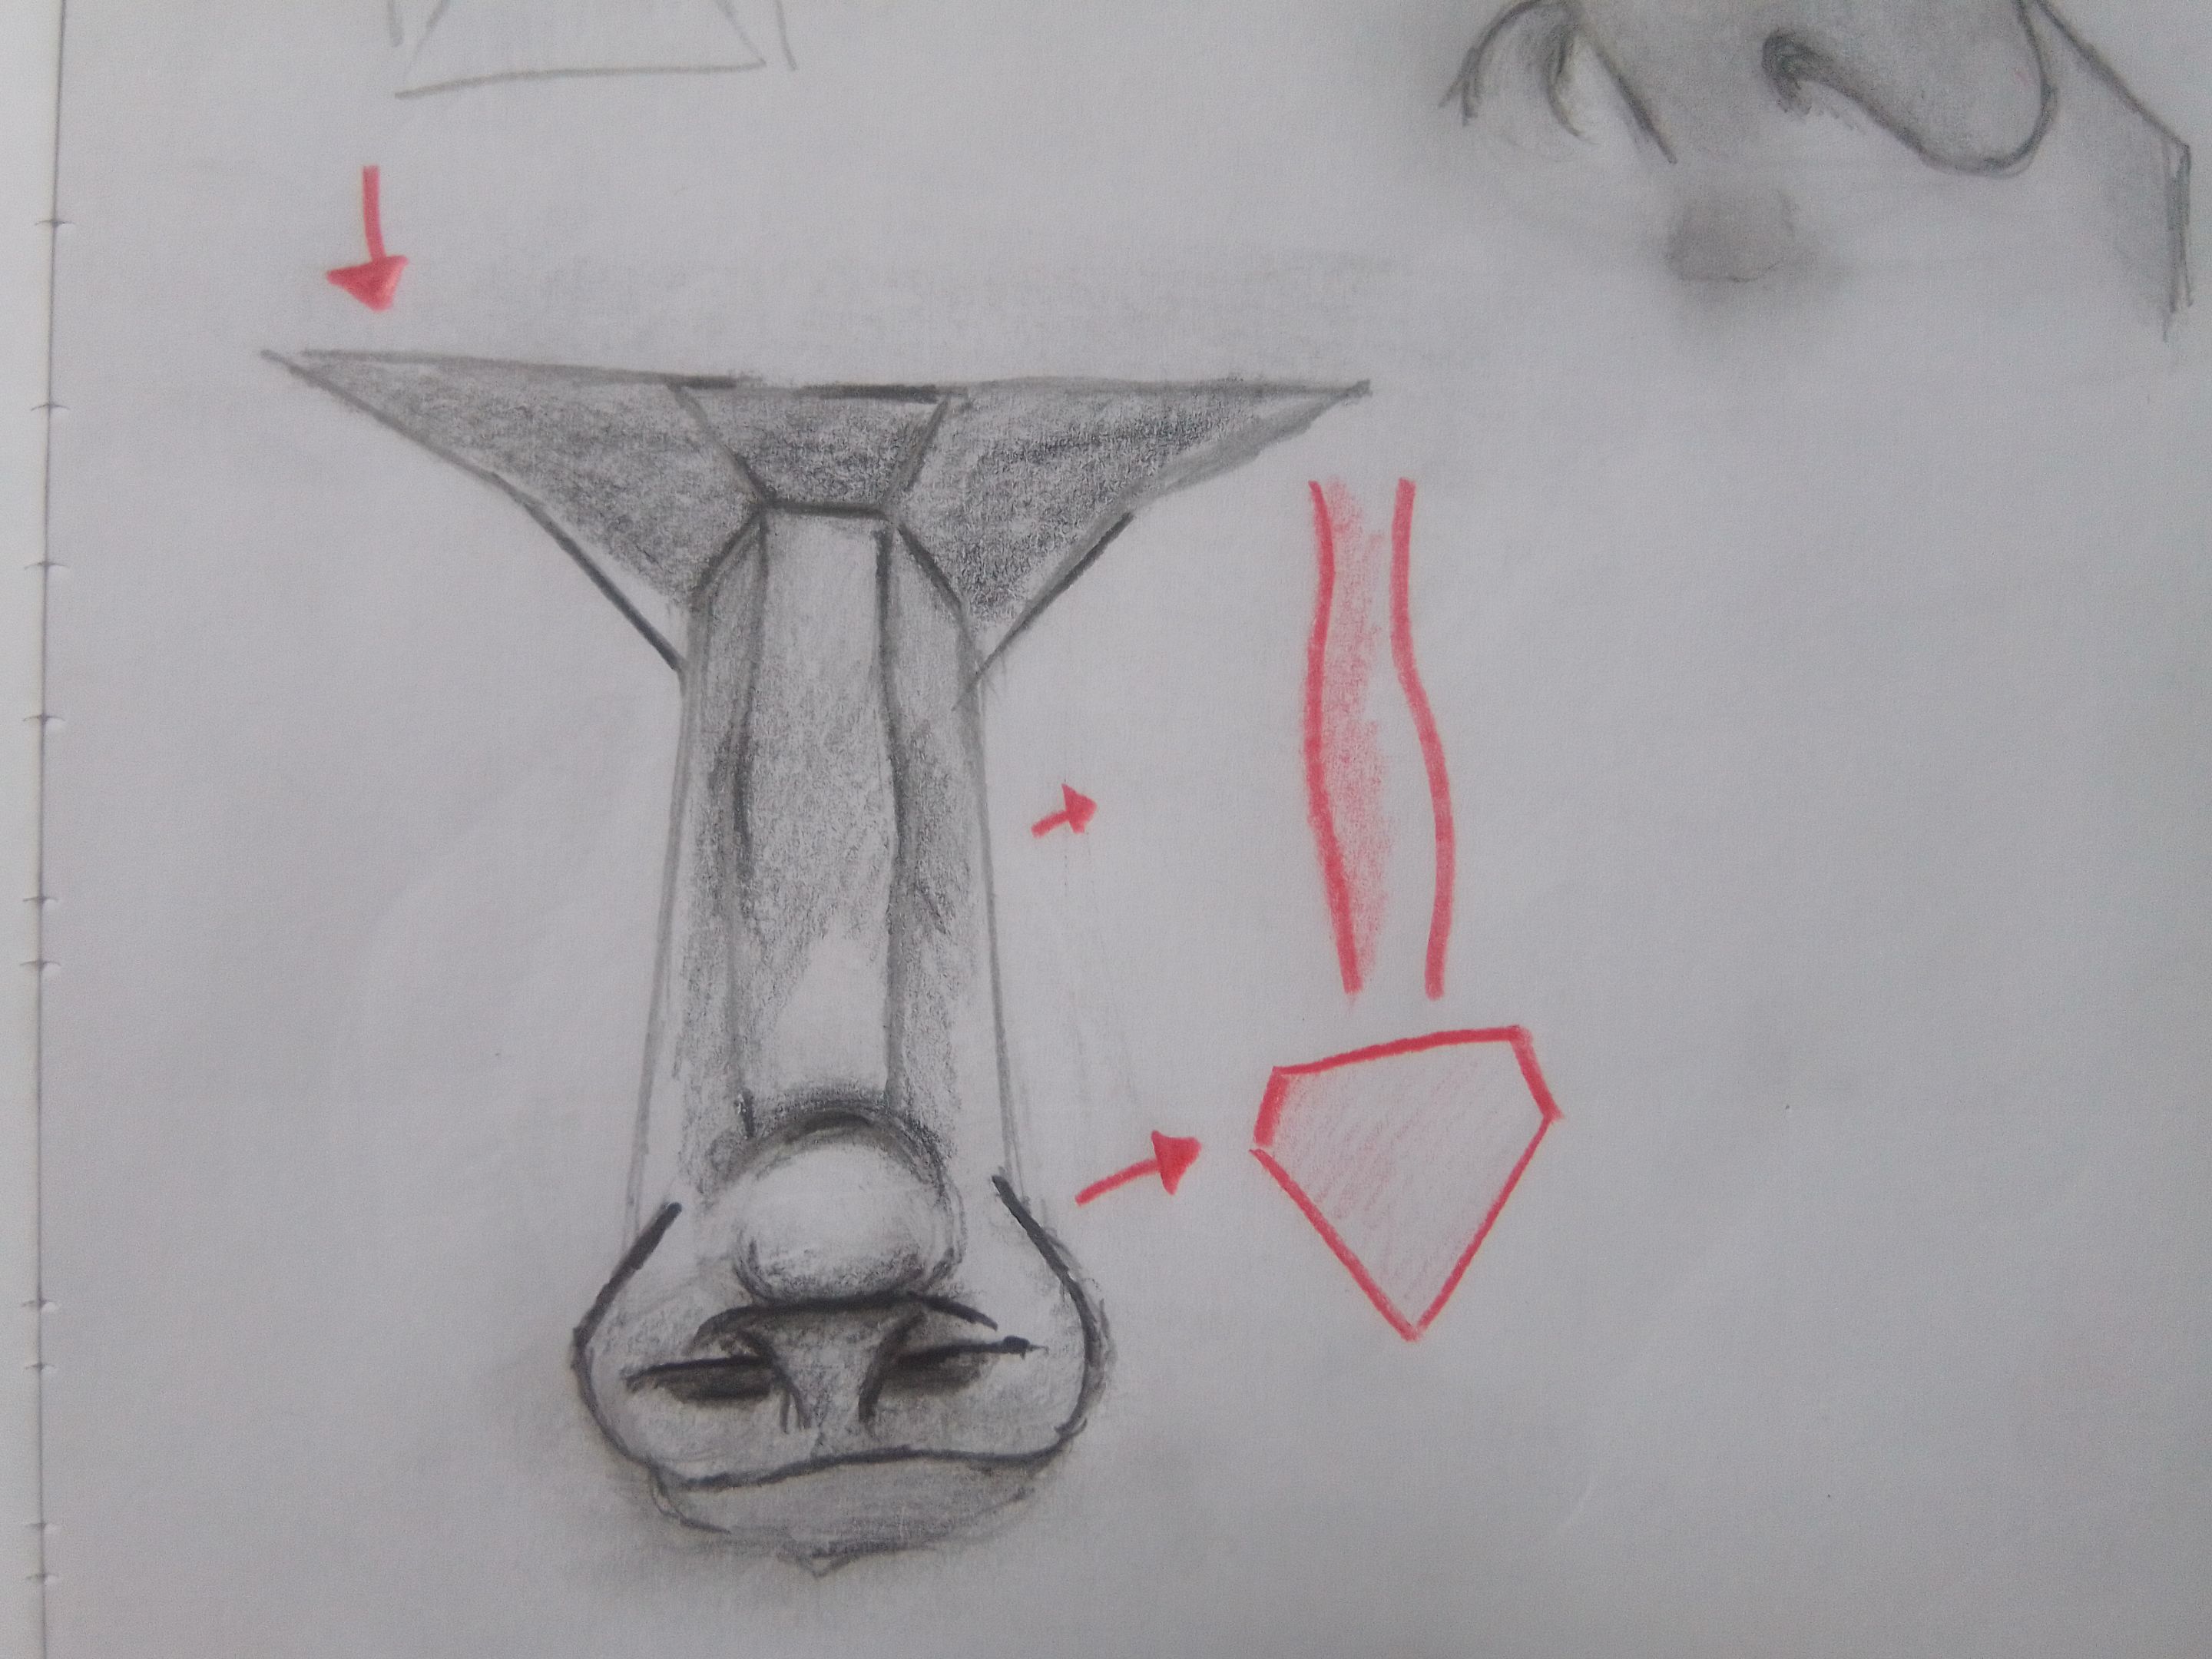
Como último paso, agregamos un poco de sombreado para darle un toque más natural y algunos detalles como las aletas, los orificios, el puente de cupido (...)
Y listo.
As a last step, we add some shading to give it a more natural touch and some details such as the fins, the holes, the cupid's bridge (...)
And that's it.
Esto fue todo por el día de hoy. Espero le haya gustado mi post; recuerden que la mejor forma de mejorar es practicar y practicar. Me despido y hasta la siguiente publicación.
That was all for today. I hope you liked my post; remember that the best way to improve is to practice and practice. I say goodbye and until the next post.
|
|
|  |
|---|