
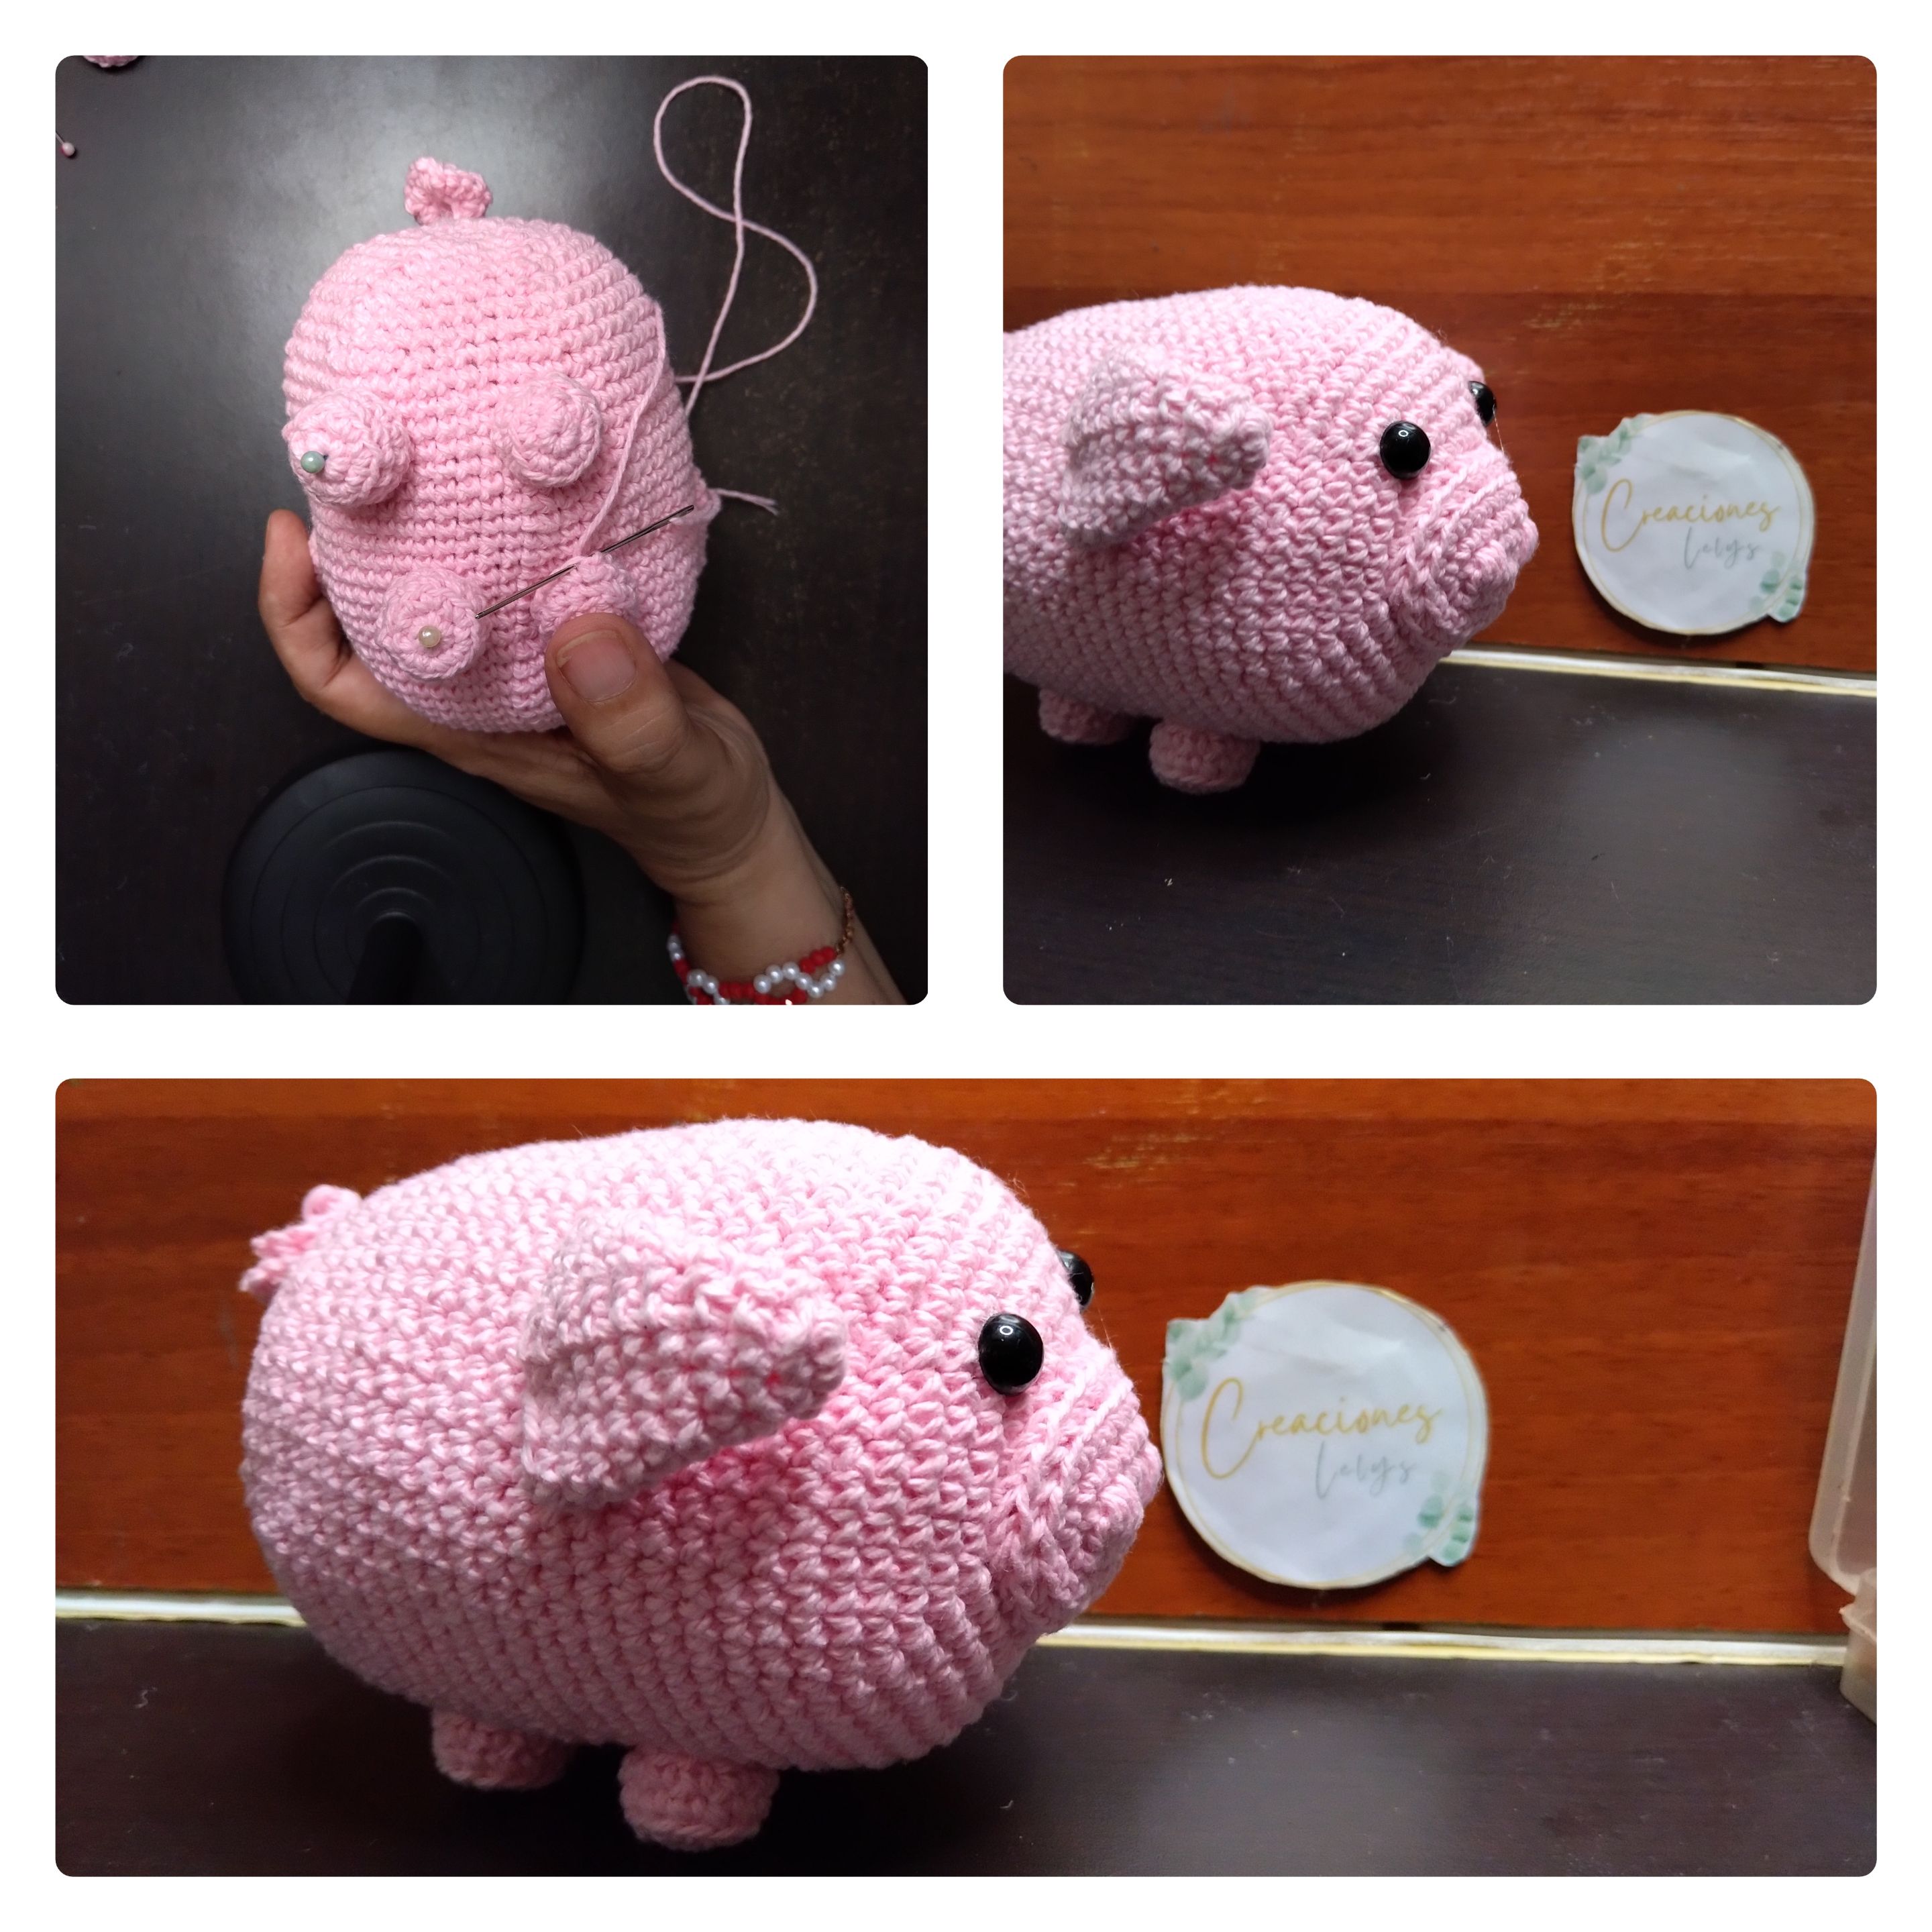
Hola amigos, espero que estén muy bien hoy. Para mí siempre es un placer pasar por aquí leerlos y compartirles mis más recientes creaciones. En esta oportunidad quiero mostrarles algunas imágenes y el paso a paso para elaborar un CERDITO tejido. Ya antes había tejido otros cerditos, pero no uno de este modelo. La verdad es que me encantó tejerlo. El procedimiento es bastante sencillo, sería un proyecto ideal para los tejedores que apenas inician.
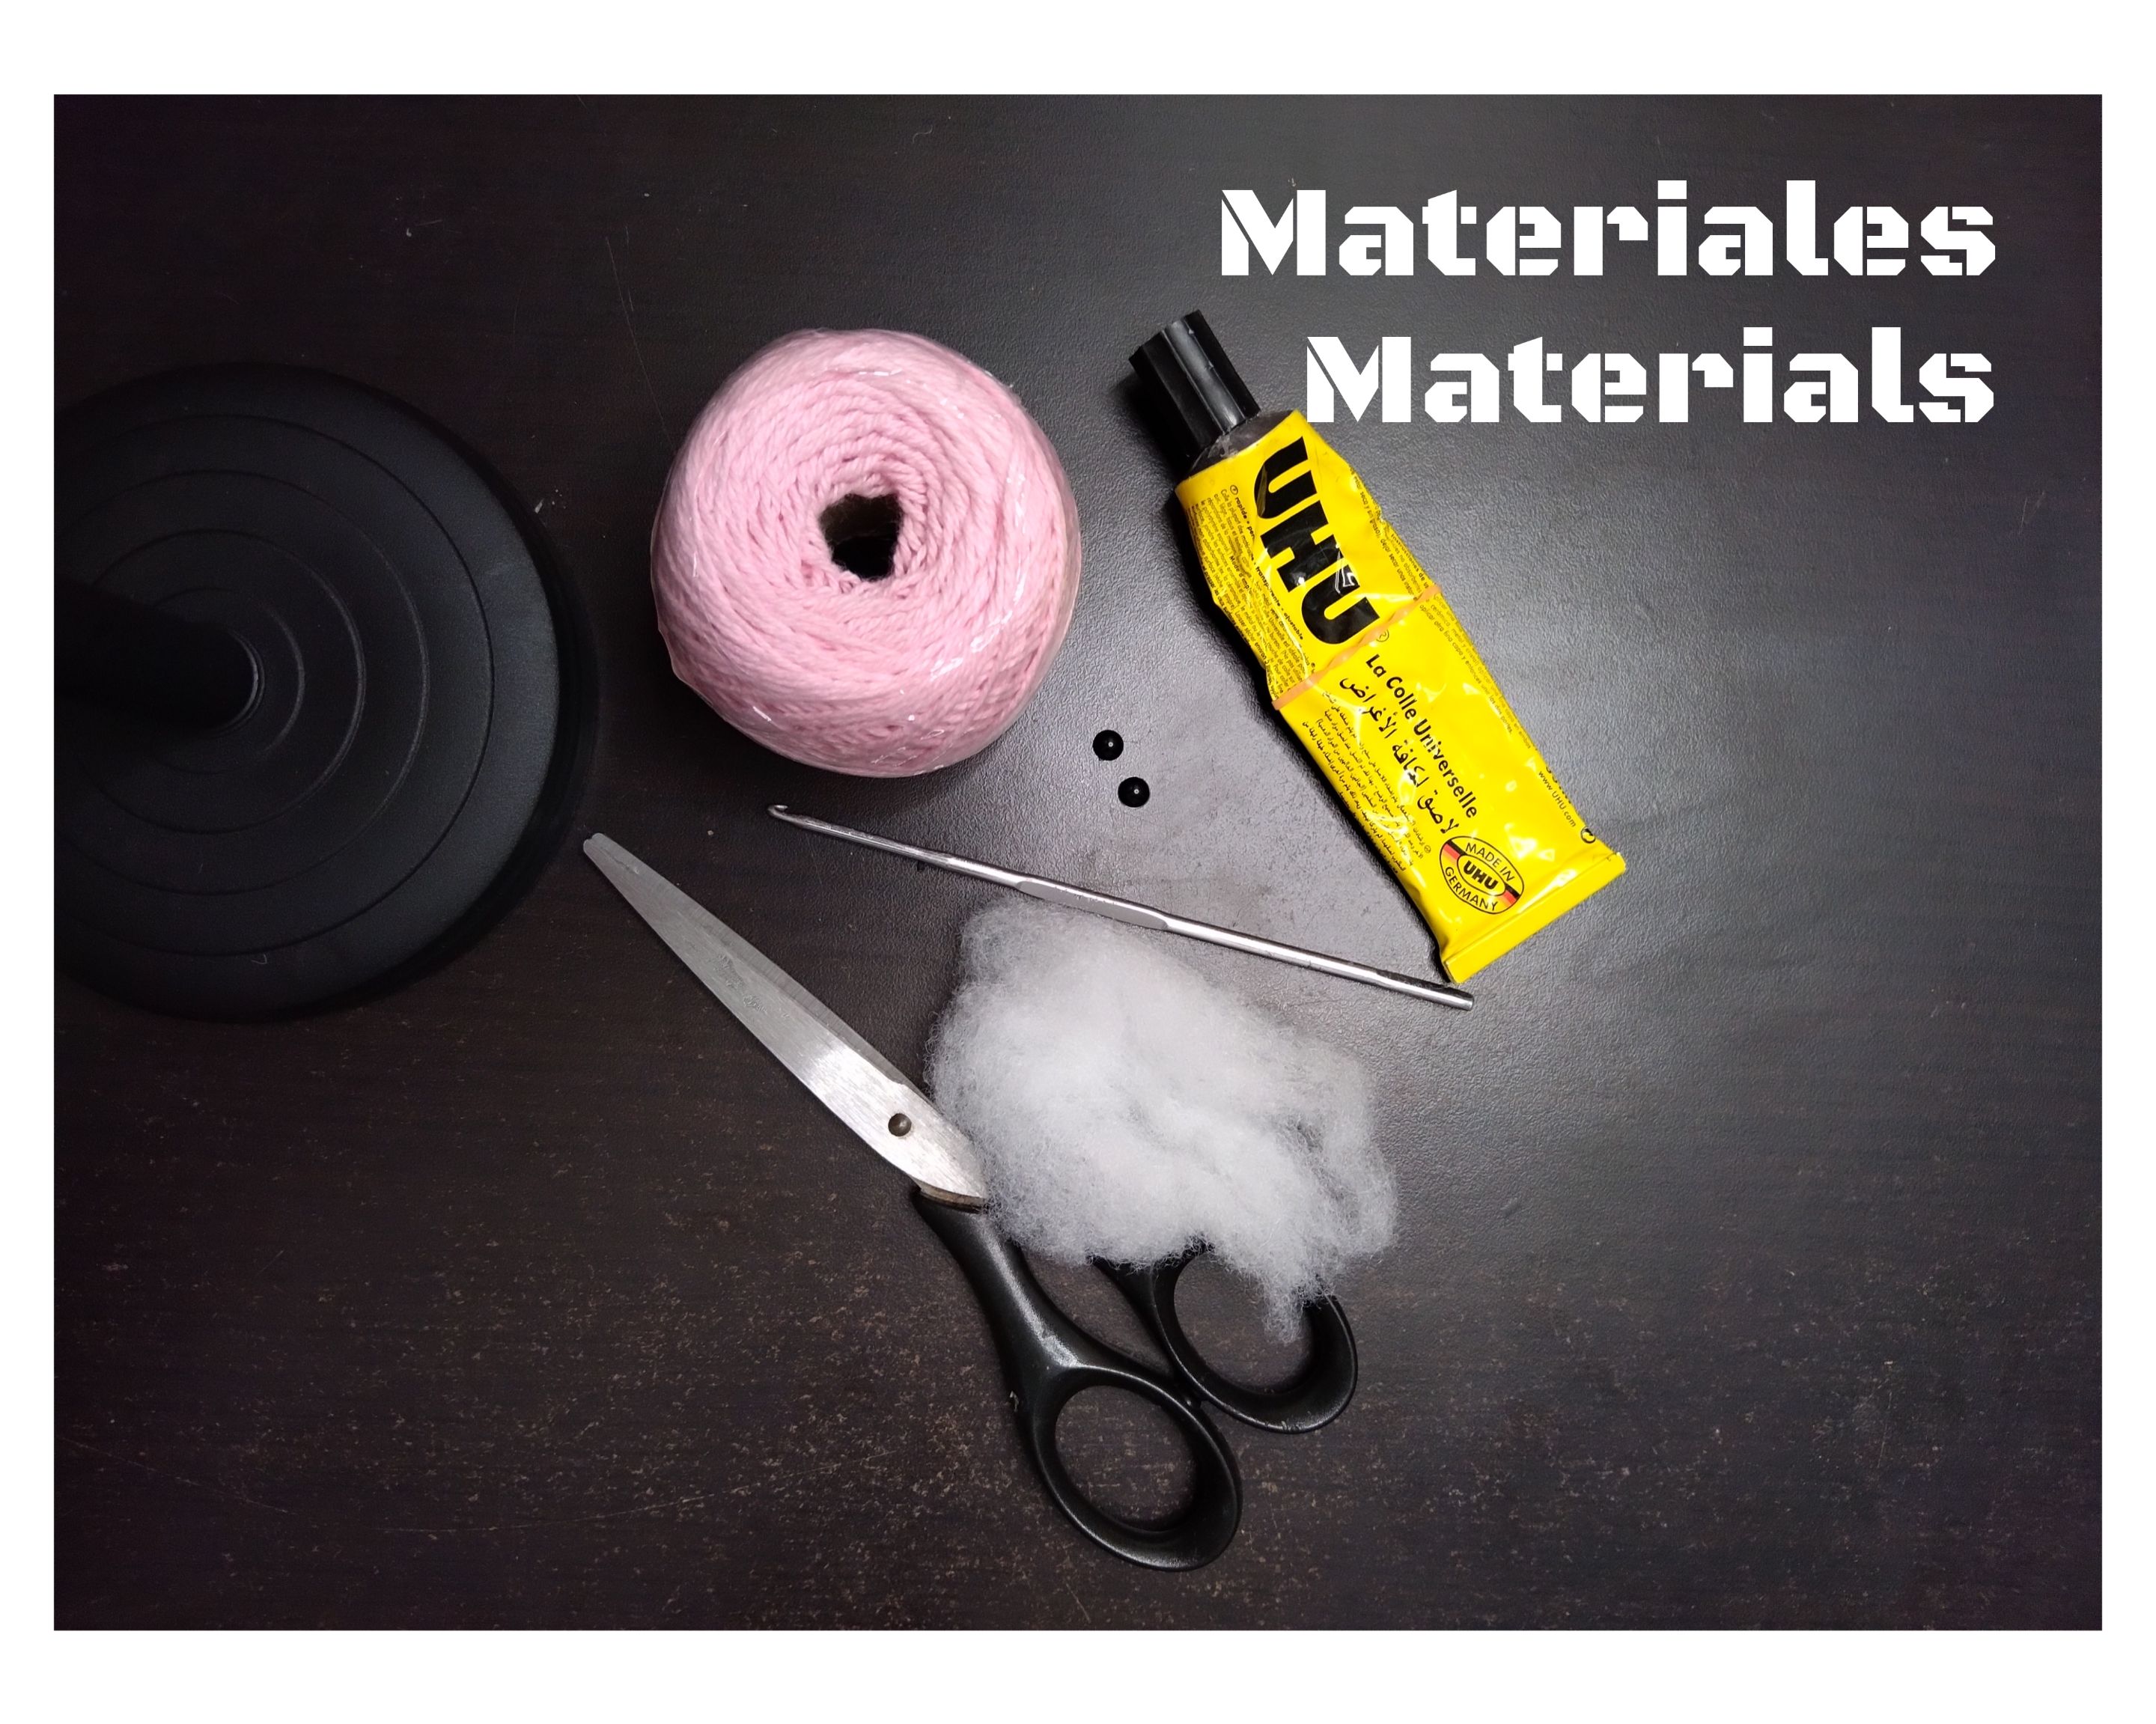
Los materiales que utilicé fueron: hilo pabilo color rosado, aguja de crochet de 2,25mm, tijeras, algodón para rellenar, alfileres, aguja lanera, pegamento y ojos plásticos.
Hello friends, I hope you are very well today. It's always a pleasure for me to come by to read and share with you my latest creations. This time I want to show you some images and the step by step to make a knitted PIGGY. I had knitted other piggies before, but not one of this pattern. The truth is that I loved knitting it. The procedure is quite simple, it would be an ideal project for knitters who are just starting out.
The materials I used were: pink thread, 2.25mm crochet needle, scissors, cotton for stuffing, pins, wool needle, glue and plastic eyes.
🐷 Empecé tejiendo un anillo mágico de 6pb. Luego 6aum de pb. Después 1pb-1aum. Continué haciendo aumentos hasta llegar a la vuelta de 8pb-1aum.
🐷 I started by knitting a 6pb magic ring. Then 6aum of bp. Then 1pb-1aum. I continued making increases until I reached the 8pb-1aum round.
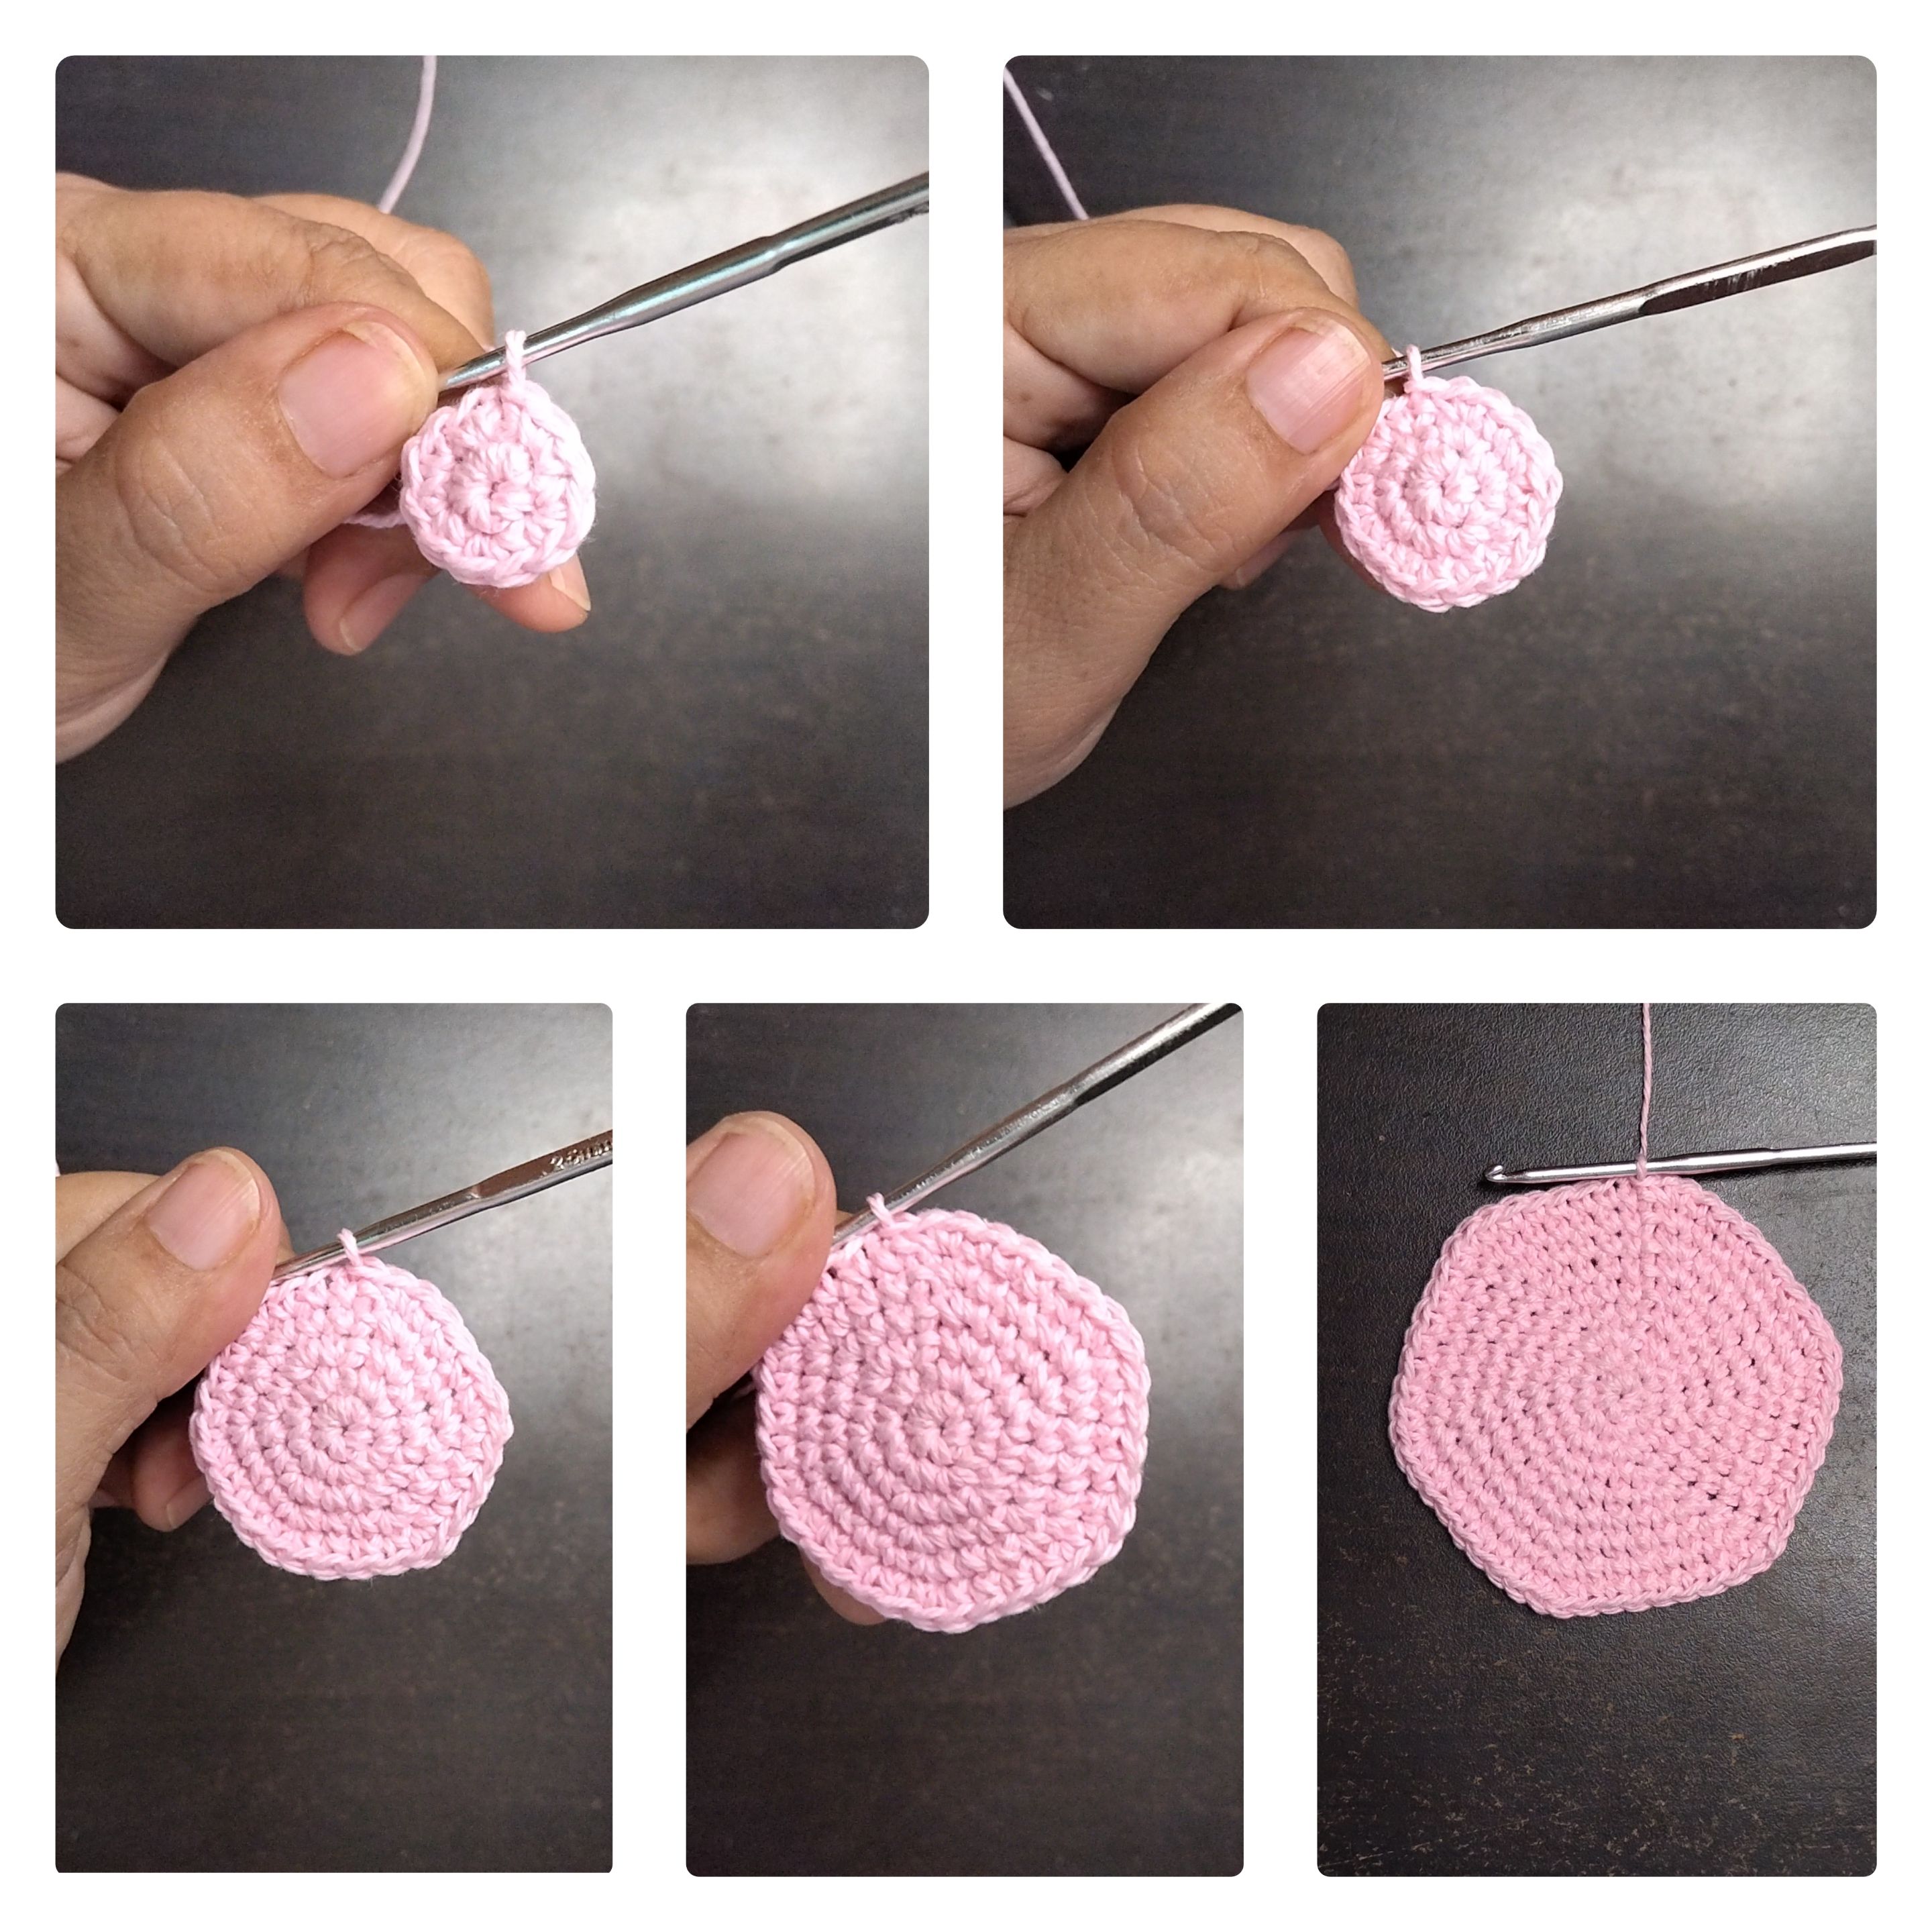
🐷 A partir de la vuelta 11 hasta la 30 solo tejí pb (60pb) de esta forma empezó a crecer el cuerpo del cerdito.
🐷 From row 11 to row 30 I only knitted stitches (60 sts) in this way the body of the piggy started to grow.
Estuve entretenida por un largo rato. Tejer el cerdito me ocupo más o menos una hora. Me gustó mucho tejerlo porque a pesar de ser un tejido muy simple cada una de las piezas que lo conforman hacen verlo laborioso.
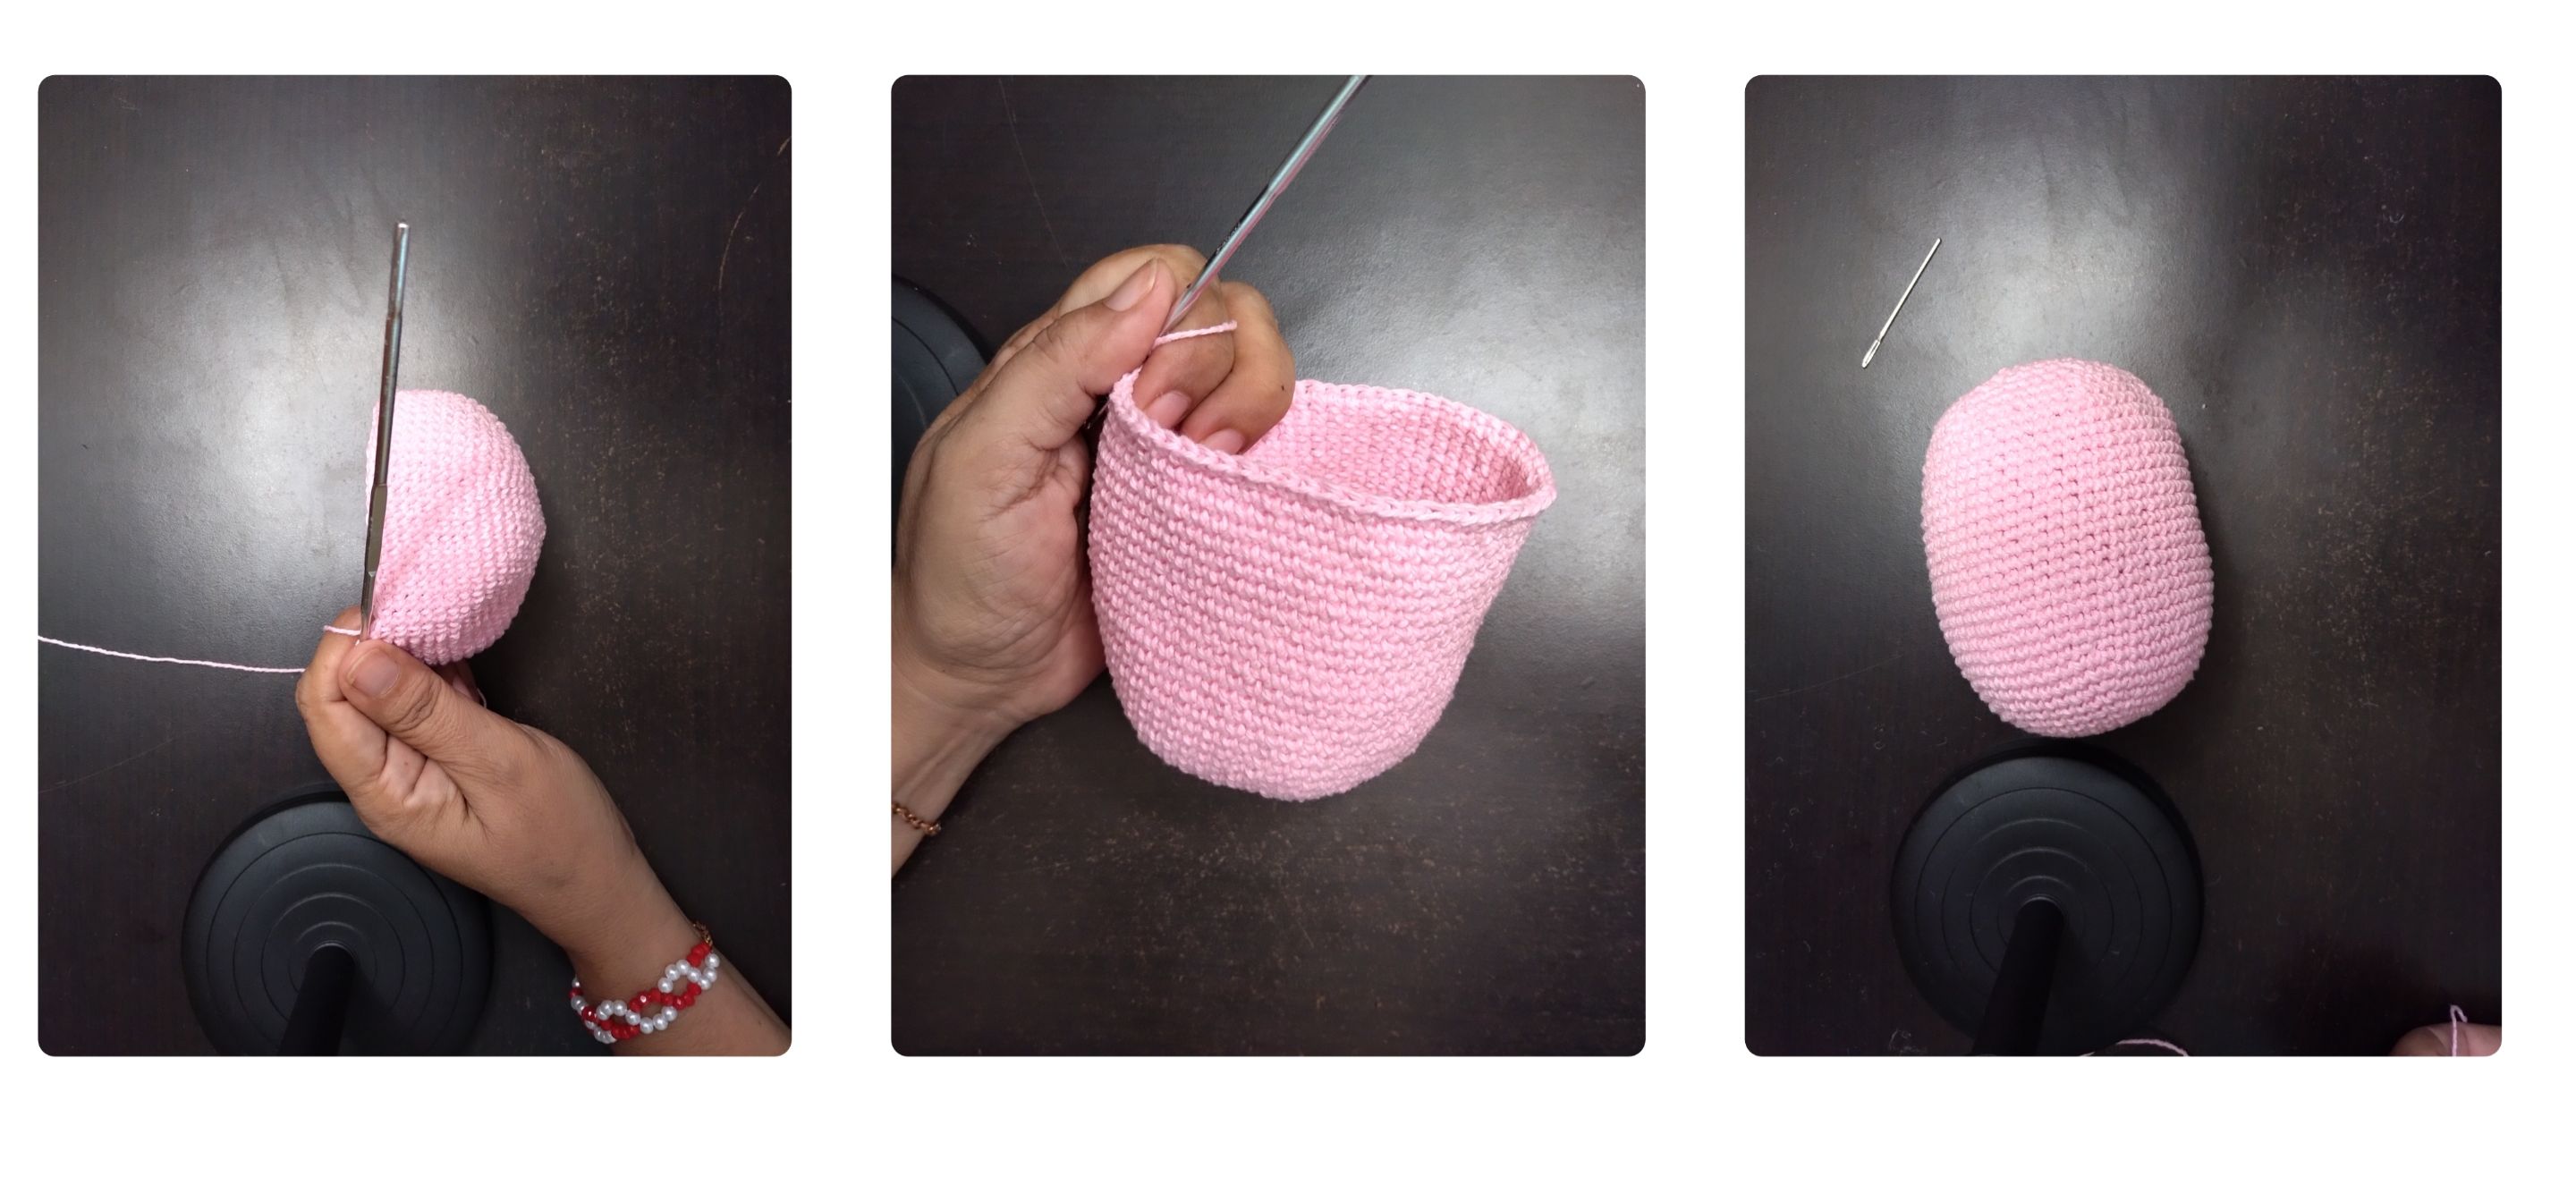
🐷 Una vez que terminé todas las vueltas del cuerpo del cerdo 🐷 empecé a realizar las disminuciones para cerrar esta pieza. Inicié con 8pb-1dism y así sucesivamente hasta llegar a 3pb-1dism. Me detuve en esa vuelta para rellenar y luego seguí tejiendo hasta cerrar el cuerpo.
🐷 Inmediatamente empecé a tejer las otras piezas. Para tejer las patas inicié con un anillo mágico de 6p. Luego 6aum de pb. Tejí 12pb tomando solo la hebra de atrás. Finalicé tejiendo 12pb. Corté el hilo y lo escondí. Tejí cuatro iguales, en una de ellas dejé la hebra larga para coserlas todas al cuerpo.
I was entertained for a long time. Knitting the piggy took me about an hour. I really enjoyed knitting it because even though it is a very simple knitting each of the pieces that make it up make it look laborious.
🐷 Once I finished all the loops of the pig's body 🐷 I started making the decreases to close this piece. I started with 8pb-1dism and so on until I reached 3pb-1dism. I stopped at that round to fill in and then continued knitting until I closed the body.
🐷 I immediately started knitting the other pieces. To knit the legs I started with a 6p magic ring. Then 6aum of bp. I knit 12pb taking only the back strand. I finished by knitting 12pb. I cut the yarn and hid it. I knit four of the same, on one of them I left the long strand to sew them all to the body.
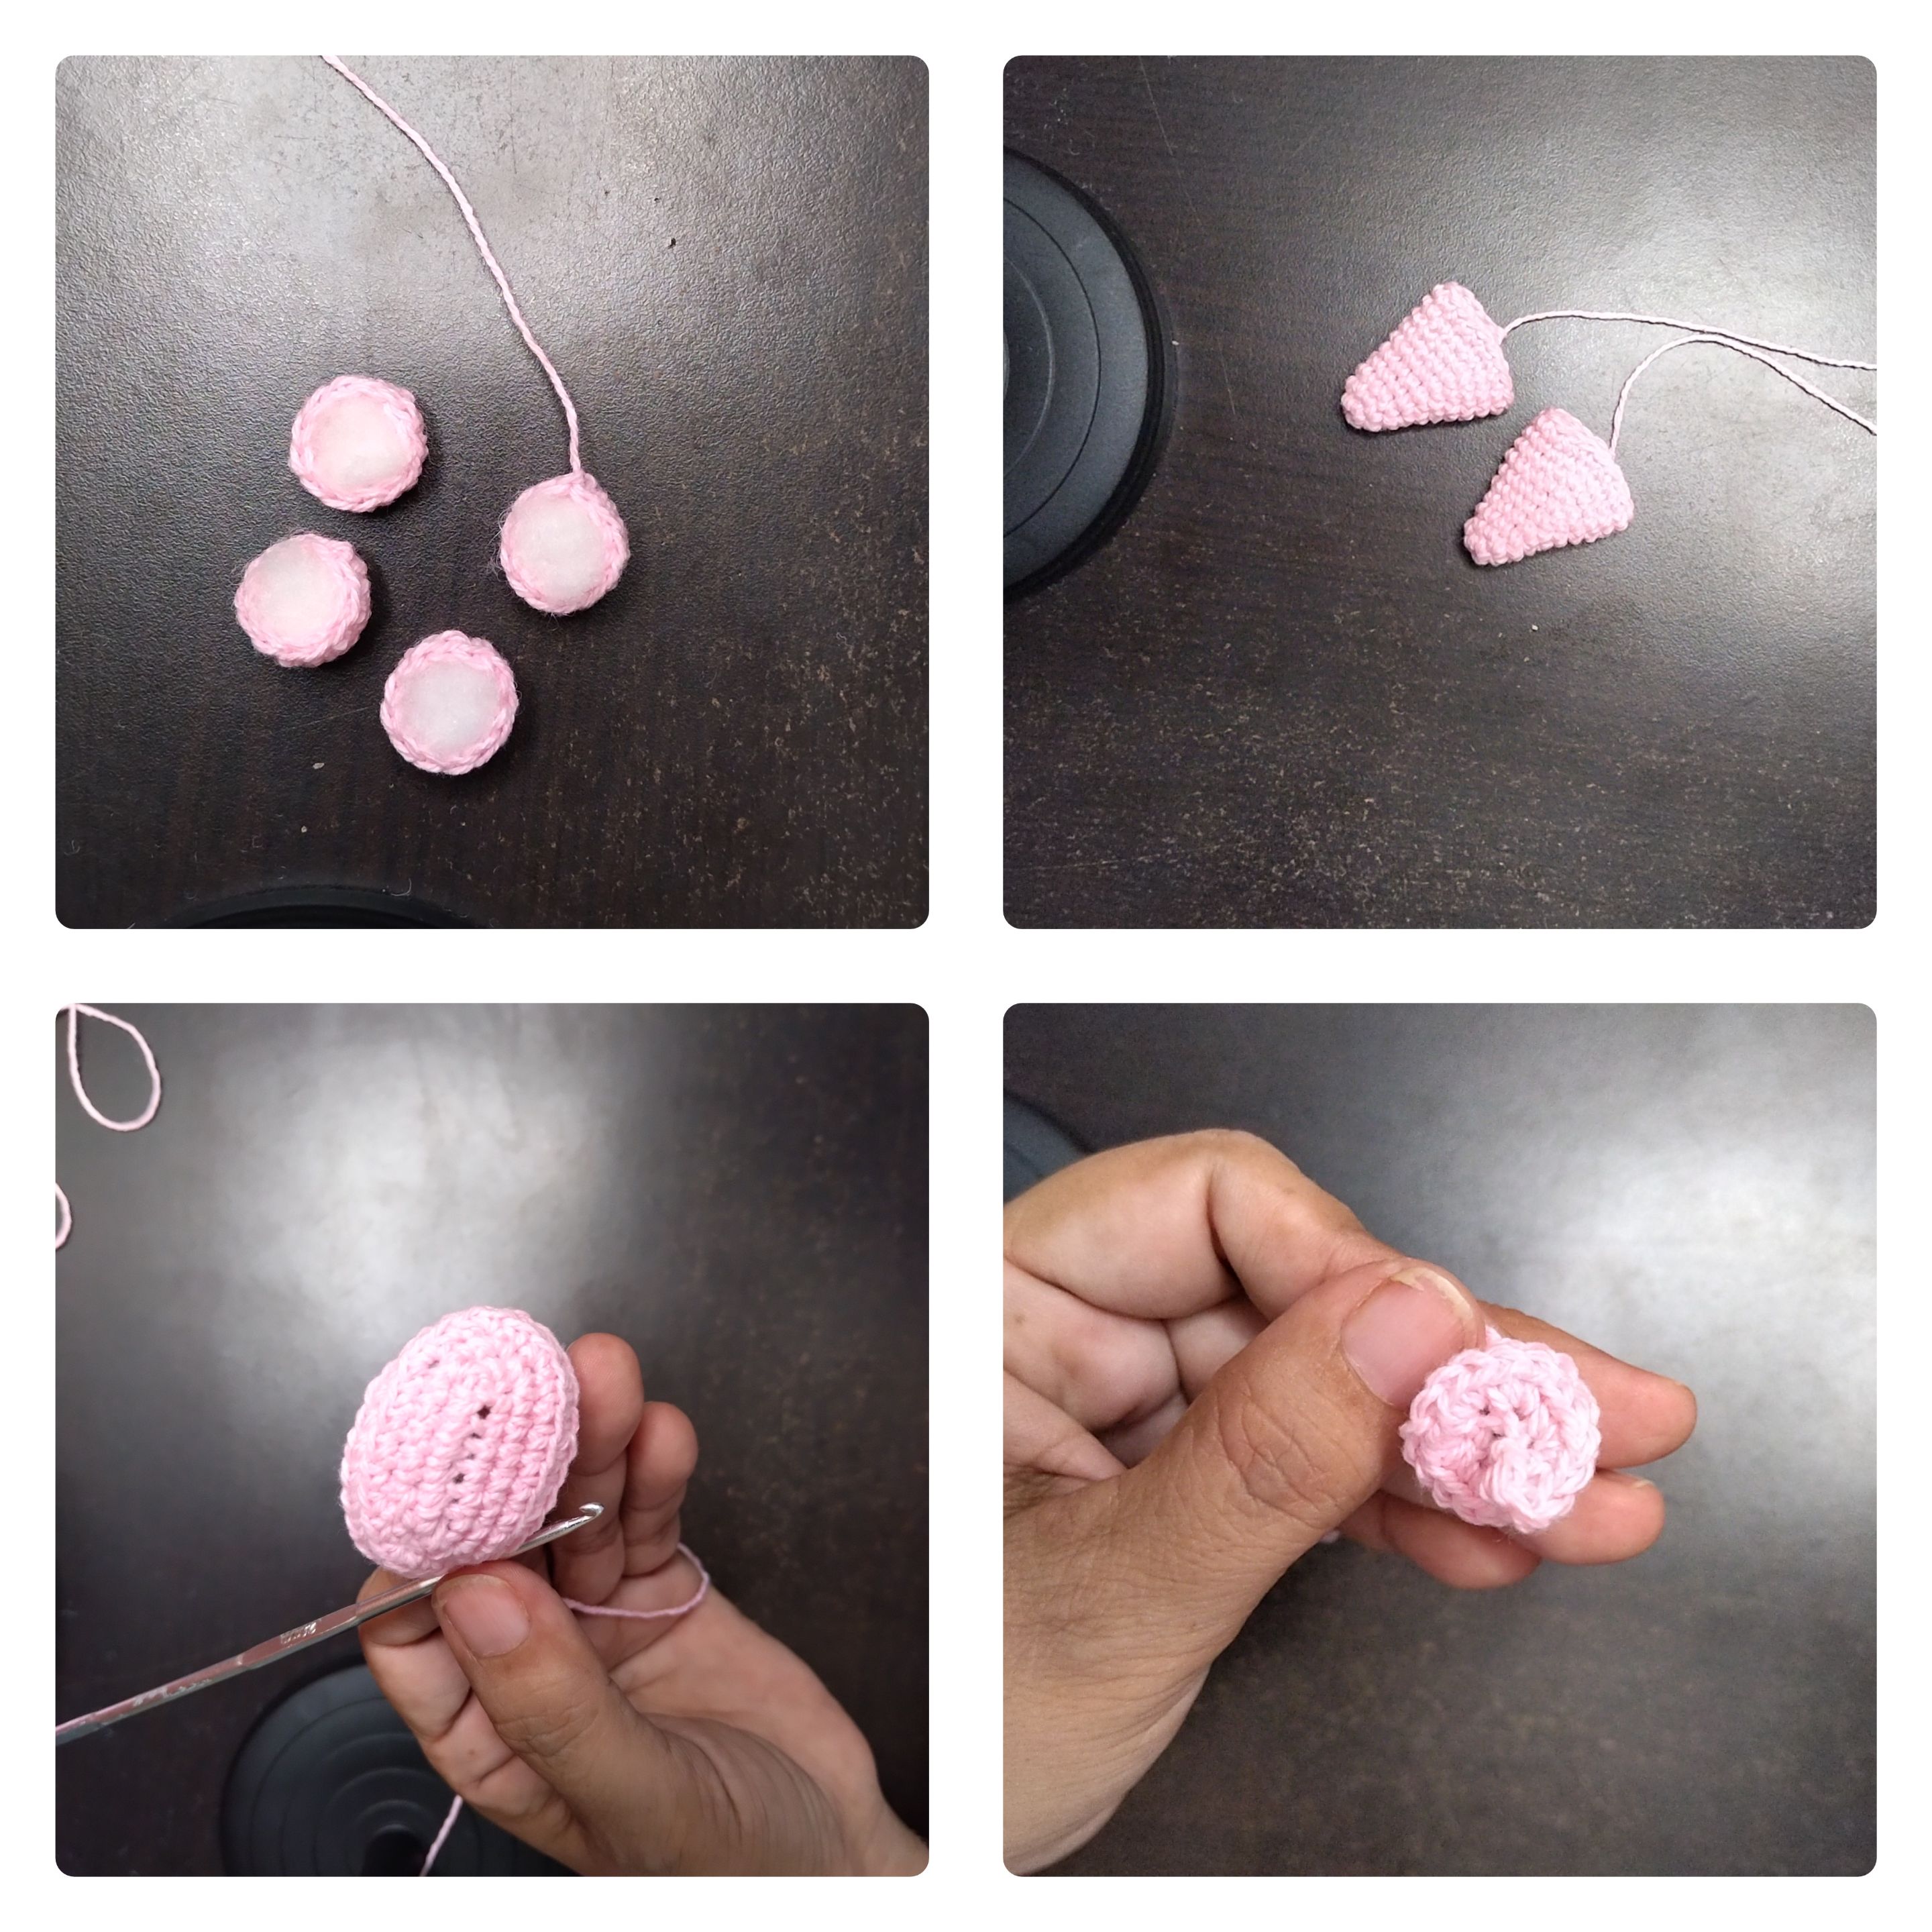
🐷 Para tejer las orejas comencé con un anillo mágico de 6pb. Enseguida tejí 2pb-1aum. Luego una vuelta de pb. A partir de la siguiente vuelta tejo aumentos hasta llegar a 7pb-1aum. Luego tejí 2 vueltas de solo puntos bajos.
🐷 Para hacer la colita tejí una cadena de 10 puntos. En cada punto tejí 3pb. Dejé hilo para coserla al cuerpo.
🐷 To knit the ears I started with a 6pb magic ring. Next I knit 2pb-1aum. Then a round of bp. Starting with the next round I knit increases until I reached 7pb-1aum. Then I knit 2 rounds of just single crochet.
🐷 To make the pigtail I knit a chain of 10 stitches. In each stitch I knit 3pb. I left yarn to sew it to the body.
🐷 Por último tejí el 🐽 hocico. Empecé con una cadena de 8 puntos. Luego tejí 6pb y 1aum triple en el siguiente punto. Seguí con 5pb y 1aum. La otra vuelta la empecé 1aum y 5pb, después 3aum. Luego 5pb y 2aum. La última vuelta de aumentos fue de 1pb-1aum-5pb. Luego 1pb-1aum tres veces. Después 5pb-1pb-1aum dos veces y la última vuelta tejo solo puntos bajos.
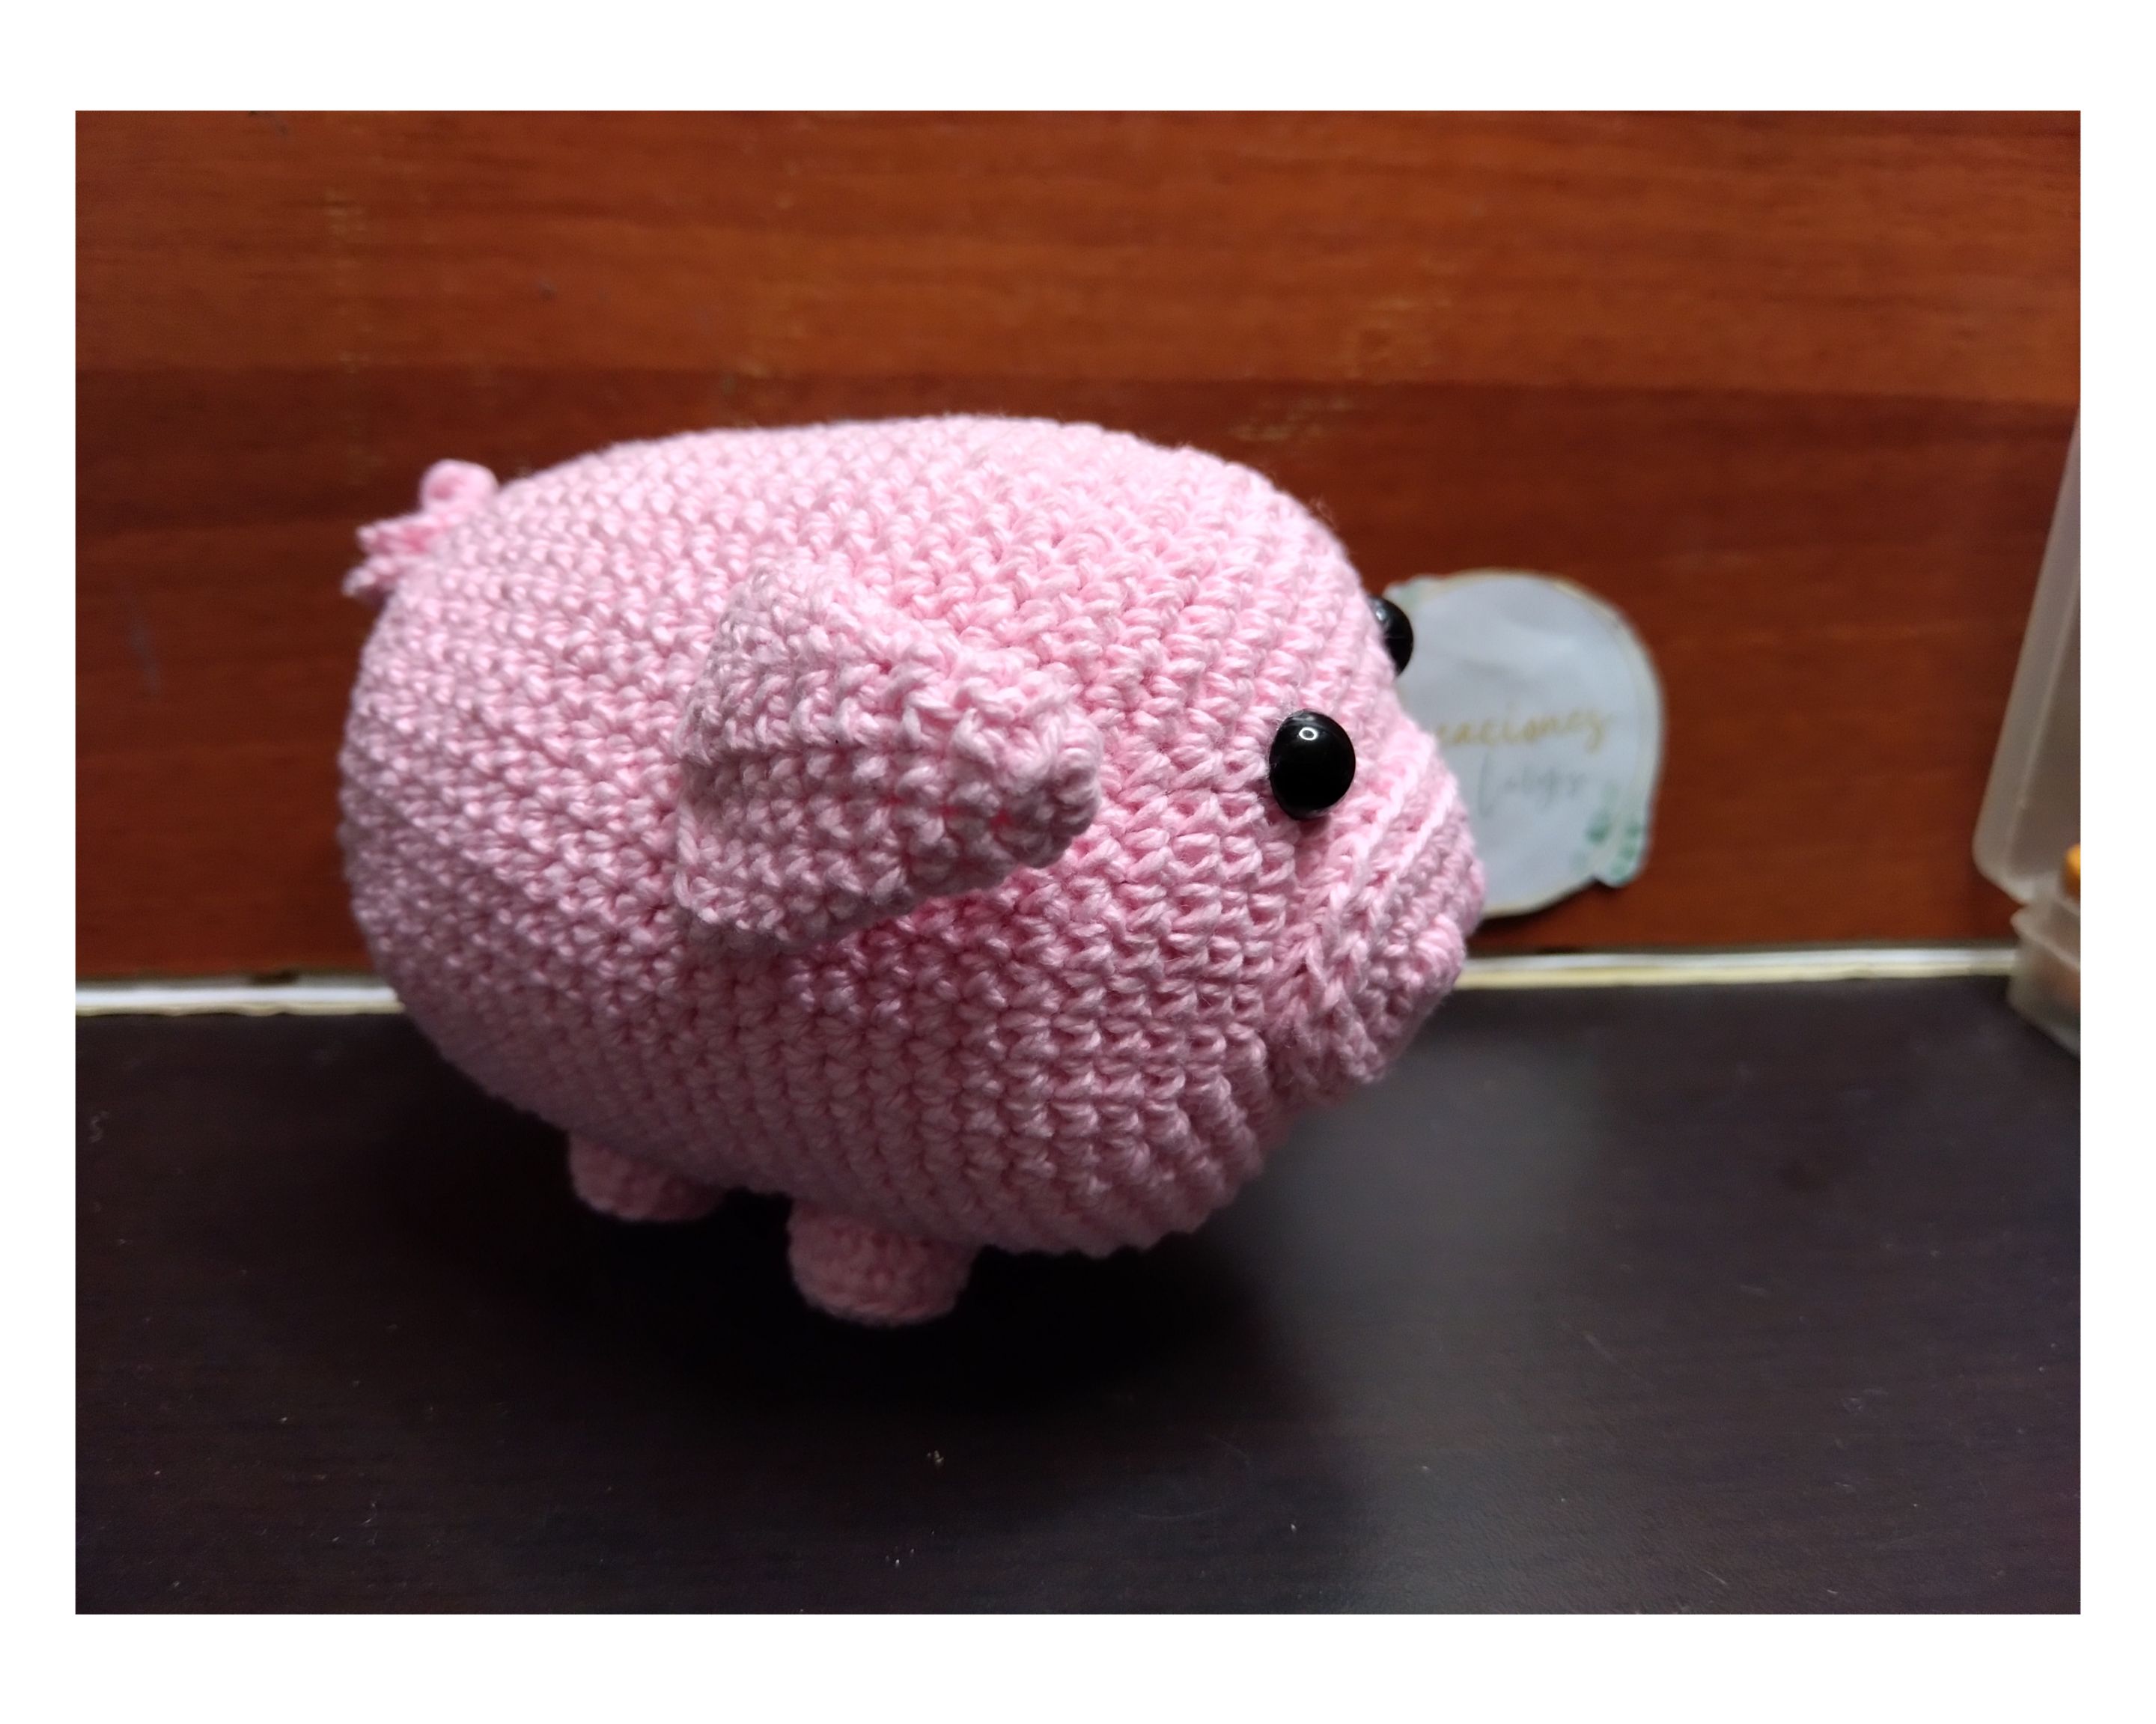
En esta pieza tardé un poco más porque me costó hacer la forma del hocico. Luego tomé un trozo de hilo y con la aguja lanera realicé unas marcas en el 🐽 hocico. Y así quedó terminado luego de coser todas las piezas.
🐷 Finally I knitted the 🐽 muzzle. I started with a chain of 8 stitches. Then I knit 6pb and 1aum triple in the next stitch. I continued with 5pb and 1aum. The other round I started it 1aum and 5pb, then 3aum. Then 5pb and 2aum. The last round of increases was 1pb-1aum-5pb. Then 1pb-1aum three times. Then 5pb-1pb-1aum twice and the last round I knit only low stitches.
In this piece I took a little longer because I had trouble making the shape of the snout. Then I took a piece of yarn and with the wool needle I made some marks on the 🐽 snout. And this is how it was finished after sewing all the pieces together.
Muchísimas gracias por el apoyo. Todas las fotos son de mi propiedad. Edité con Polish. Usé el traductor de Deelp. Será hasta un nuevo post. Cuidense mucho. Bendiciones.
Thank you very much for your support. All photos are my property. I edited with Polish. I used Deelp translator. It will be until a new post. Take care of yourselves. Blessings.