🌸Español🌸
Hola hola mi gente linda de hive ✨️💕 muy buenas noches para todos queridos amigos espero que se encuentren muy bien disfrutando de la noche 😊 🤗 saludos especiales para todos en esta linda comunidad de #Diy 😊 en esta ocasión me gustaría compartirles el diseño y la confección de un hermoso pantalón tiro alto y con un estilo de piernas anchas me gustaría que me acompañen en cada paso a seguir.

Estos fueron los materiales que use
• Máquina de coser
• Tijera
• Hilo de coser
• Tela
• Prenda de medida
• Cremallera
• Botones
✨️Pasos✨️
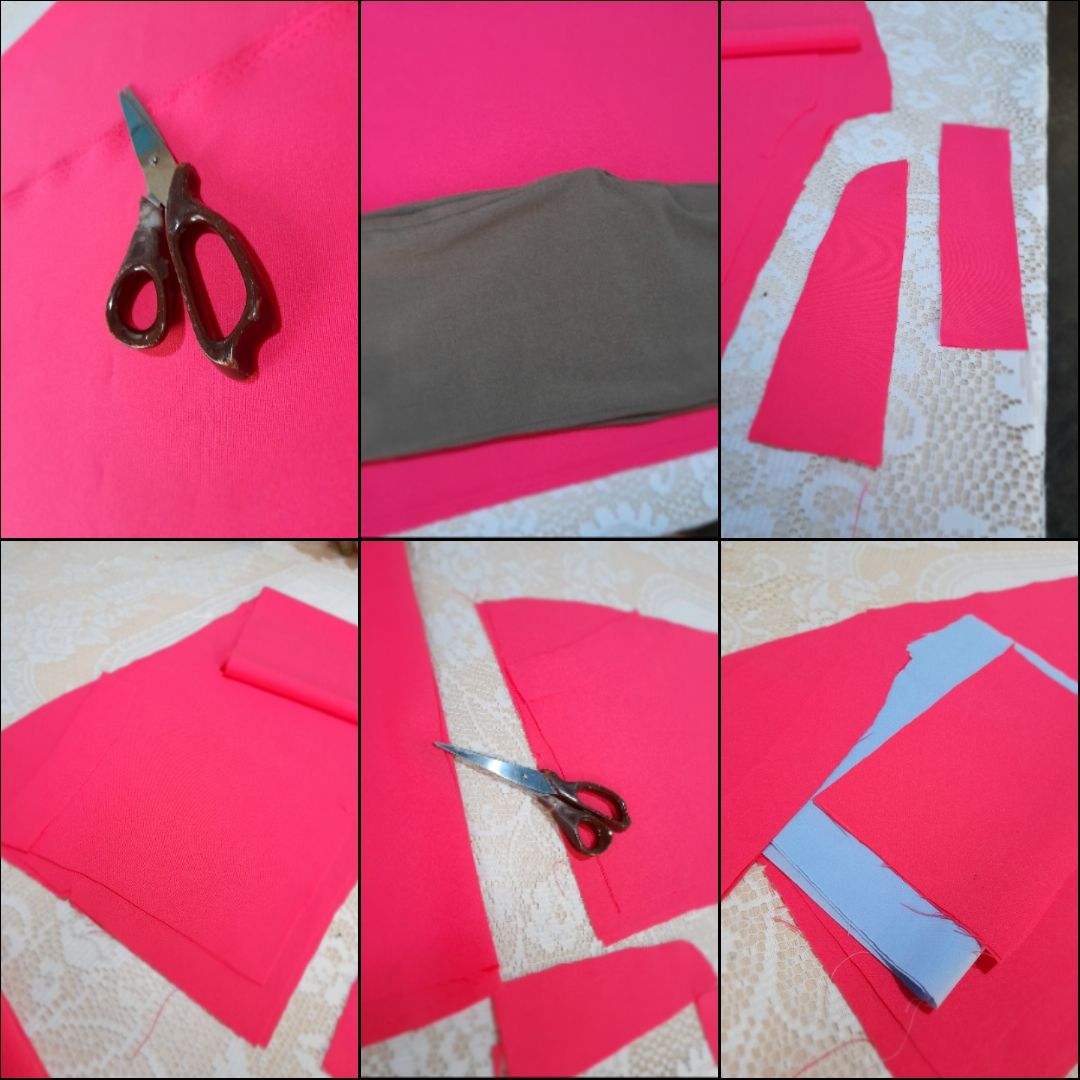
•✨️Voy a iniciar cortando todas las piezas de mi pantalón usando una prenda de medida como método de referencia y voy a cortar dos piezas laterales traseras y delanteras, contorno de cintura, dos forros para los bolsillos, dos orillas, dos forros para la cremallera y dos bolsillos.
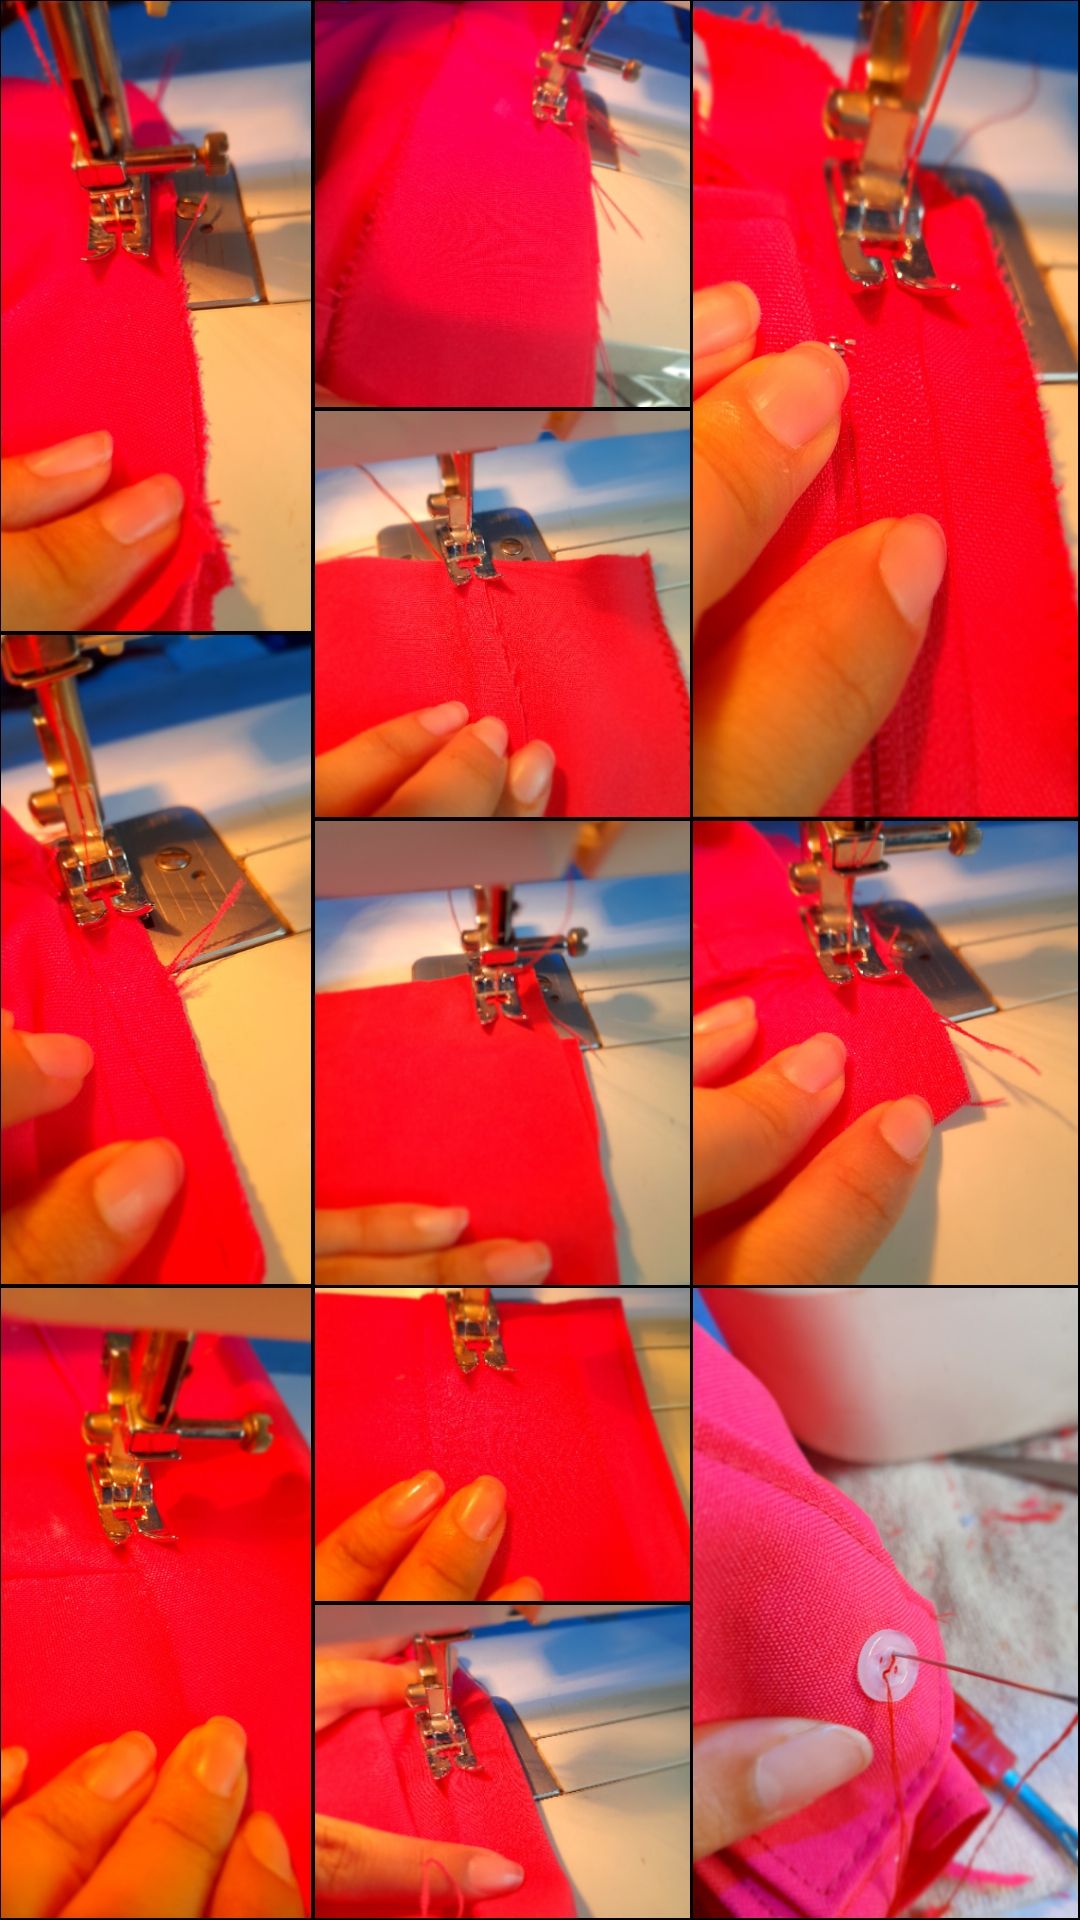
•✨️Continúo armando los bolsillos cosiendo los forros con costura recta luego voy a coser el bolsillo al pantalón quedando bolsillo la pieza principal y una orilla y voy a coser con costura recta para luego doblar la orilla restante y coser con costura de zigzag luego voy a coser por encima del bolsillo para proporcionar caída.
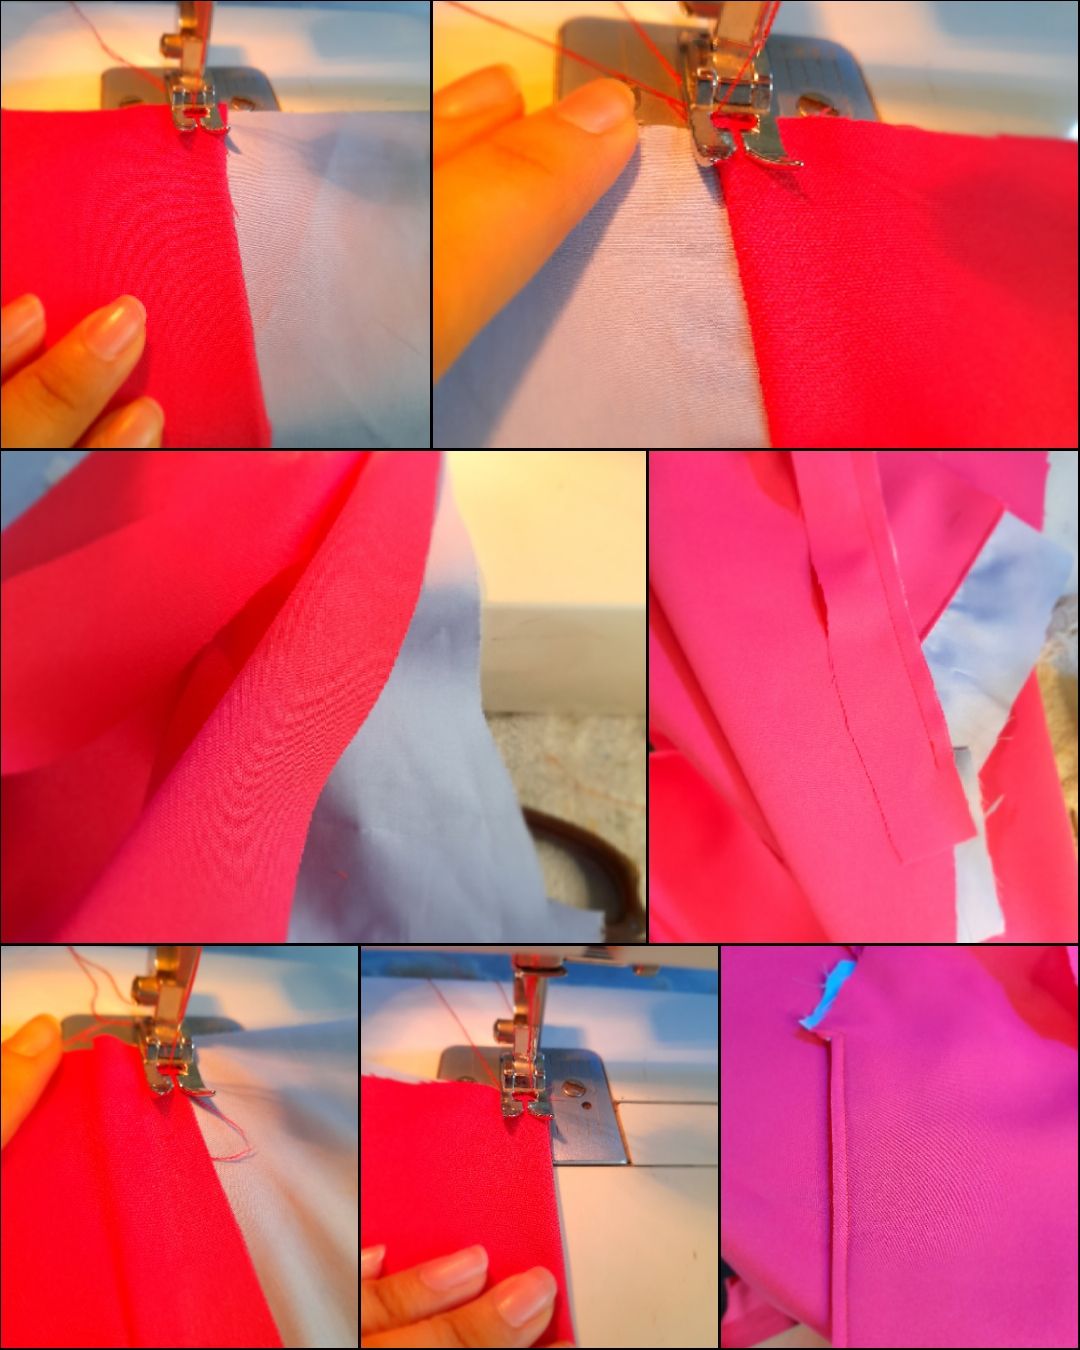
•✨️Voy a coser las pinzas frontales doblando y 5 cm del bolsillo y cosiendo con costura recta y un largo de 6 cm aproximadamente para fijar en la parte superior el bolsillo con una costura recta voy a coser también el bolsillo con costura recta y zigzag para asegurar luego fijaré el bolsillo los laterales con costura recta y zigzag luego voy a coser los forros de la cremallera con costura recta y zigzag alrededor.

•✨️Terminaré de coser alrededor de los forros de la cremallera con costura de zigzag para luego coser en los laterales externos con costura recta y zigzag luego fijaré la cremallera con uno de los forros y voy a coser con costura recta para luego coser por encima con costura recta nuevamente y luego voy a coser ambos laterales pero en la parte interna con costura recta y zigzag para asegurar
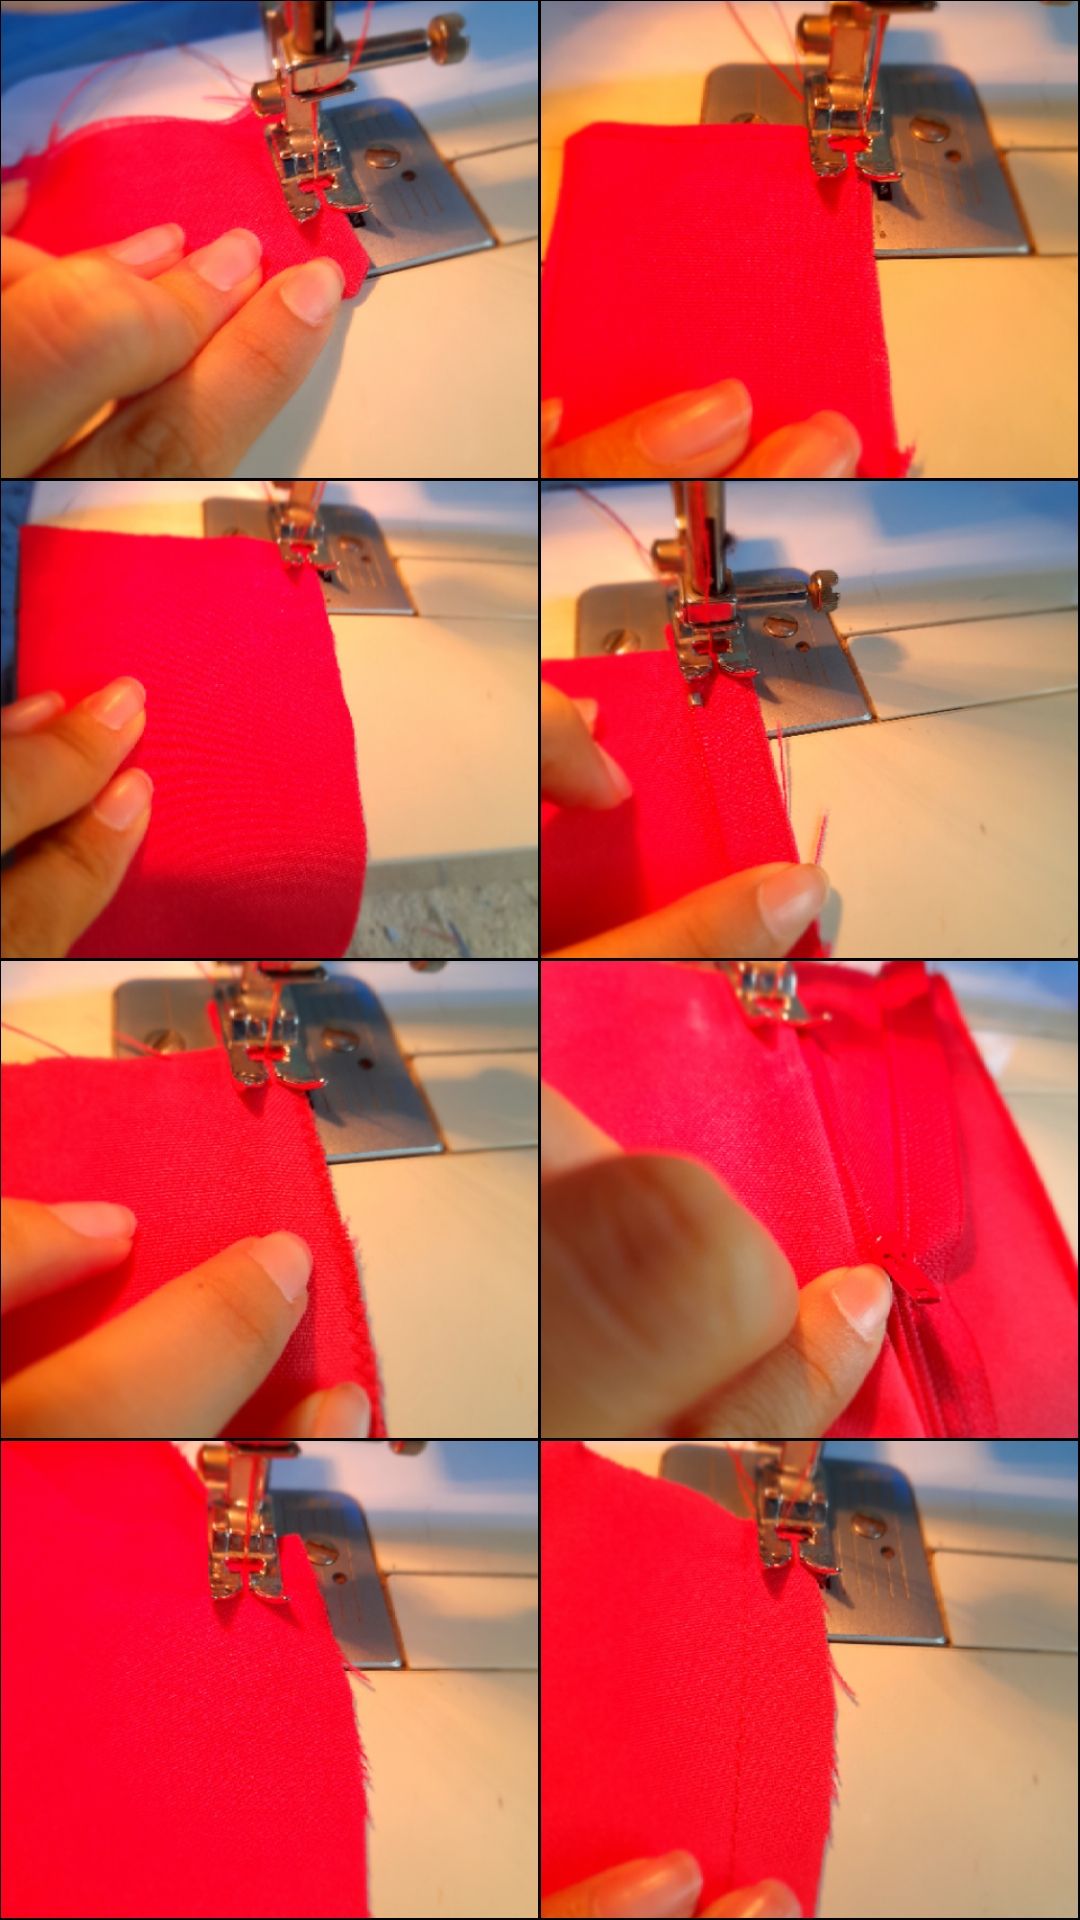
•✨️Voy a unir ambas partes laterales con costura recta y zigzag para asegurar pero luego voy a coser las pinzas traseras para proporcionar forma y caída en los glúteos luego voy a coser el forro faltante de la cremallera con costura recta para luego coser la cremallera del mismo con una costura recta y coser por encima con costura recta.
Continúo cosiendo el contorno de cintura colocandolo en el lado reverso de la tela y cosiendo con costura recta para luego coser en ambos extremos con costura recta nuevamente al voltear el contorno de cintura quedarán listas nuestras costuras laterales para luego coser por la parte externa doblando hacia adentro y cosiendo con costura recta y alrededor del contorno de cintura y luego así coser el ruedo doblando la tela y cosiendo con costura recta y para finalizar voy a coser los ojales con la tensión en 1 y costura de zigzag y cosemos los botones con una aguja de mano.
💕Resultados💕
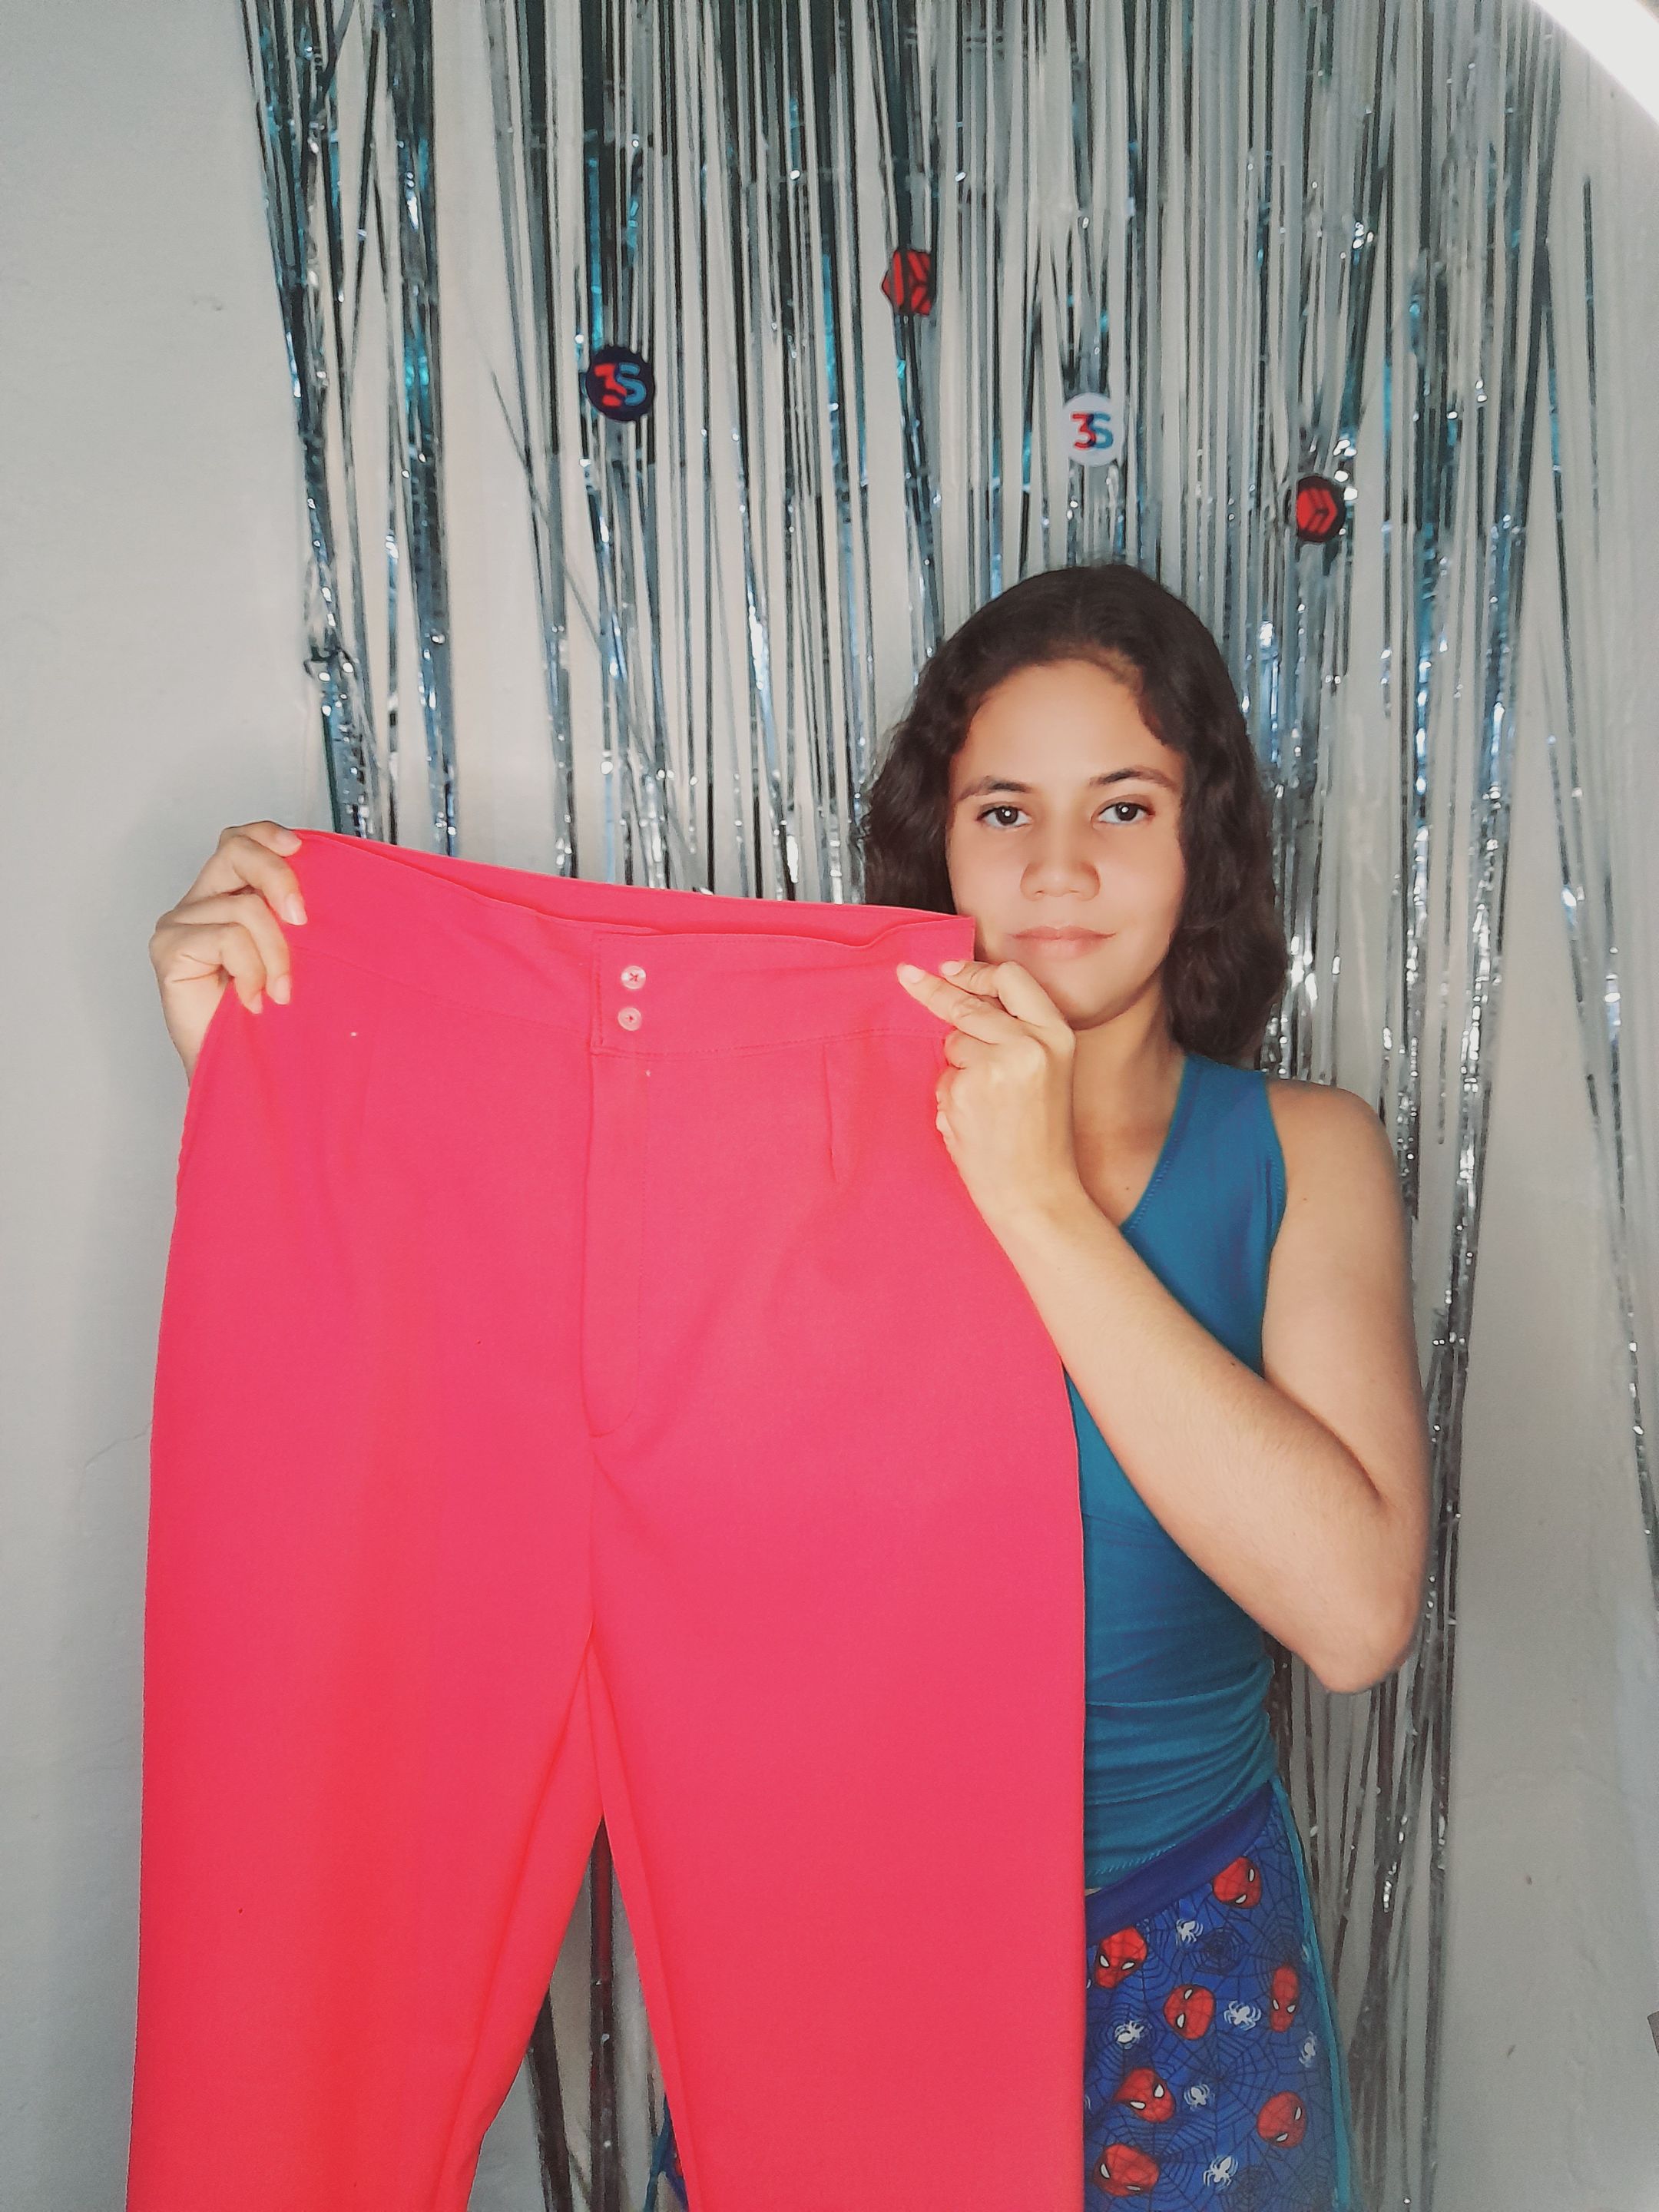
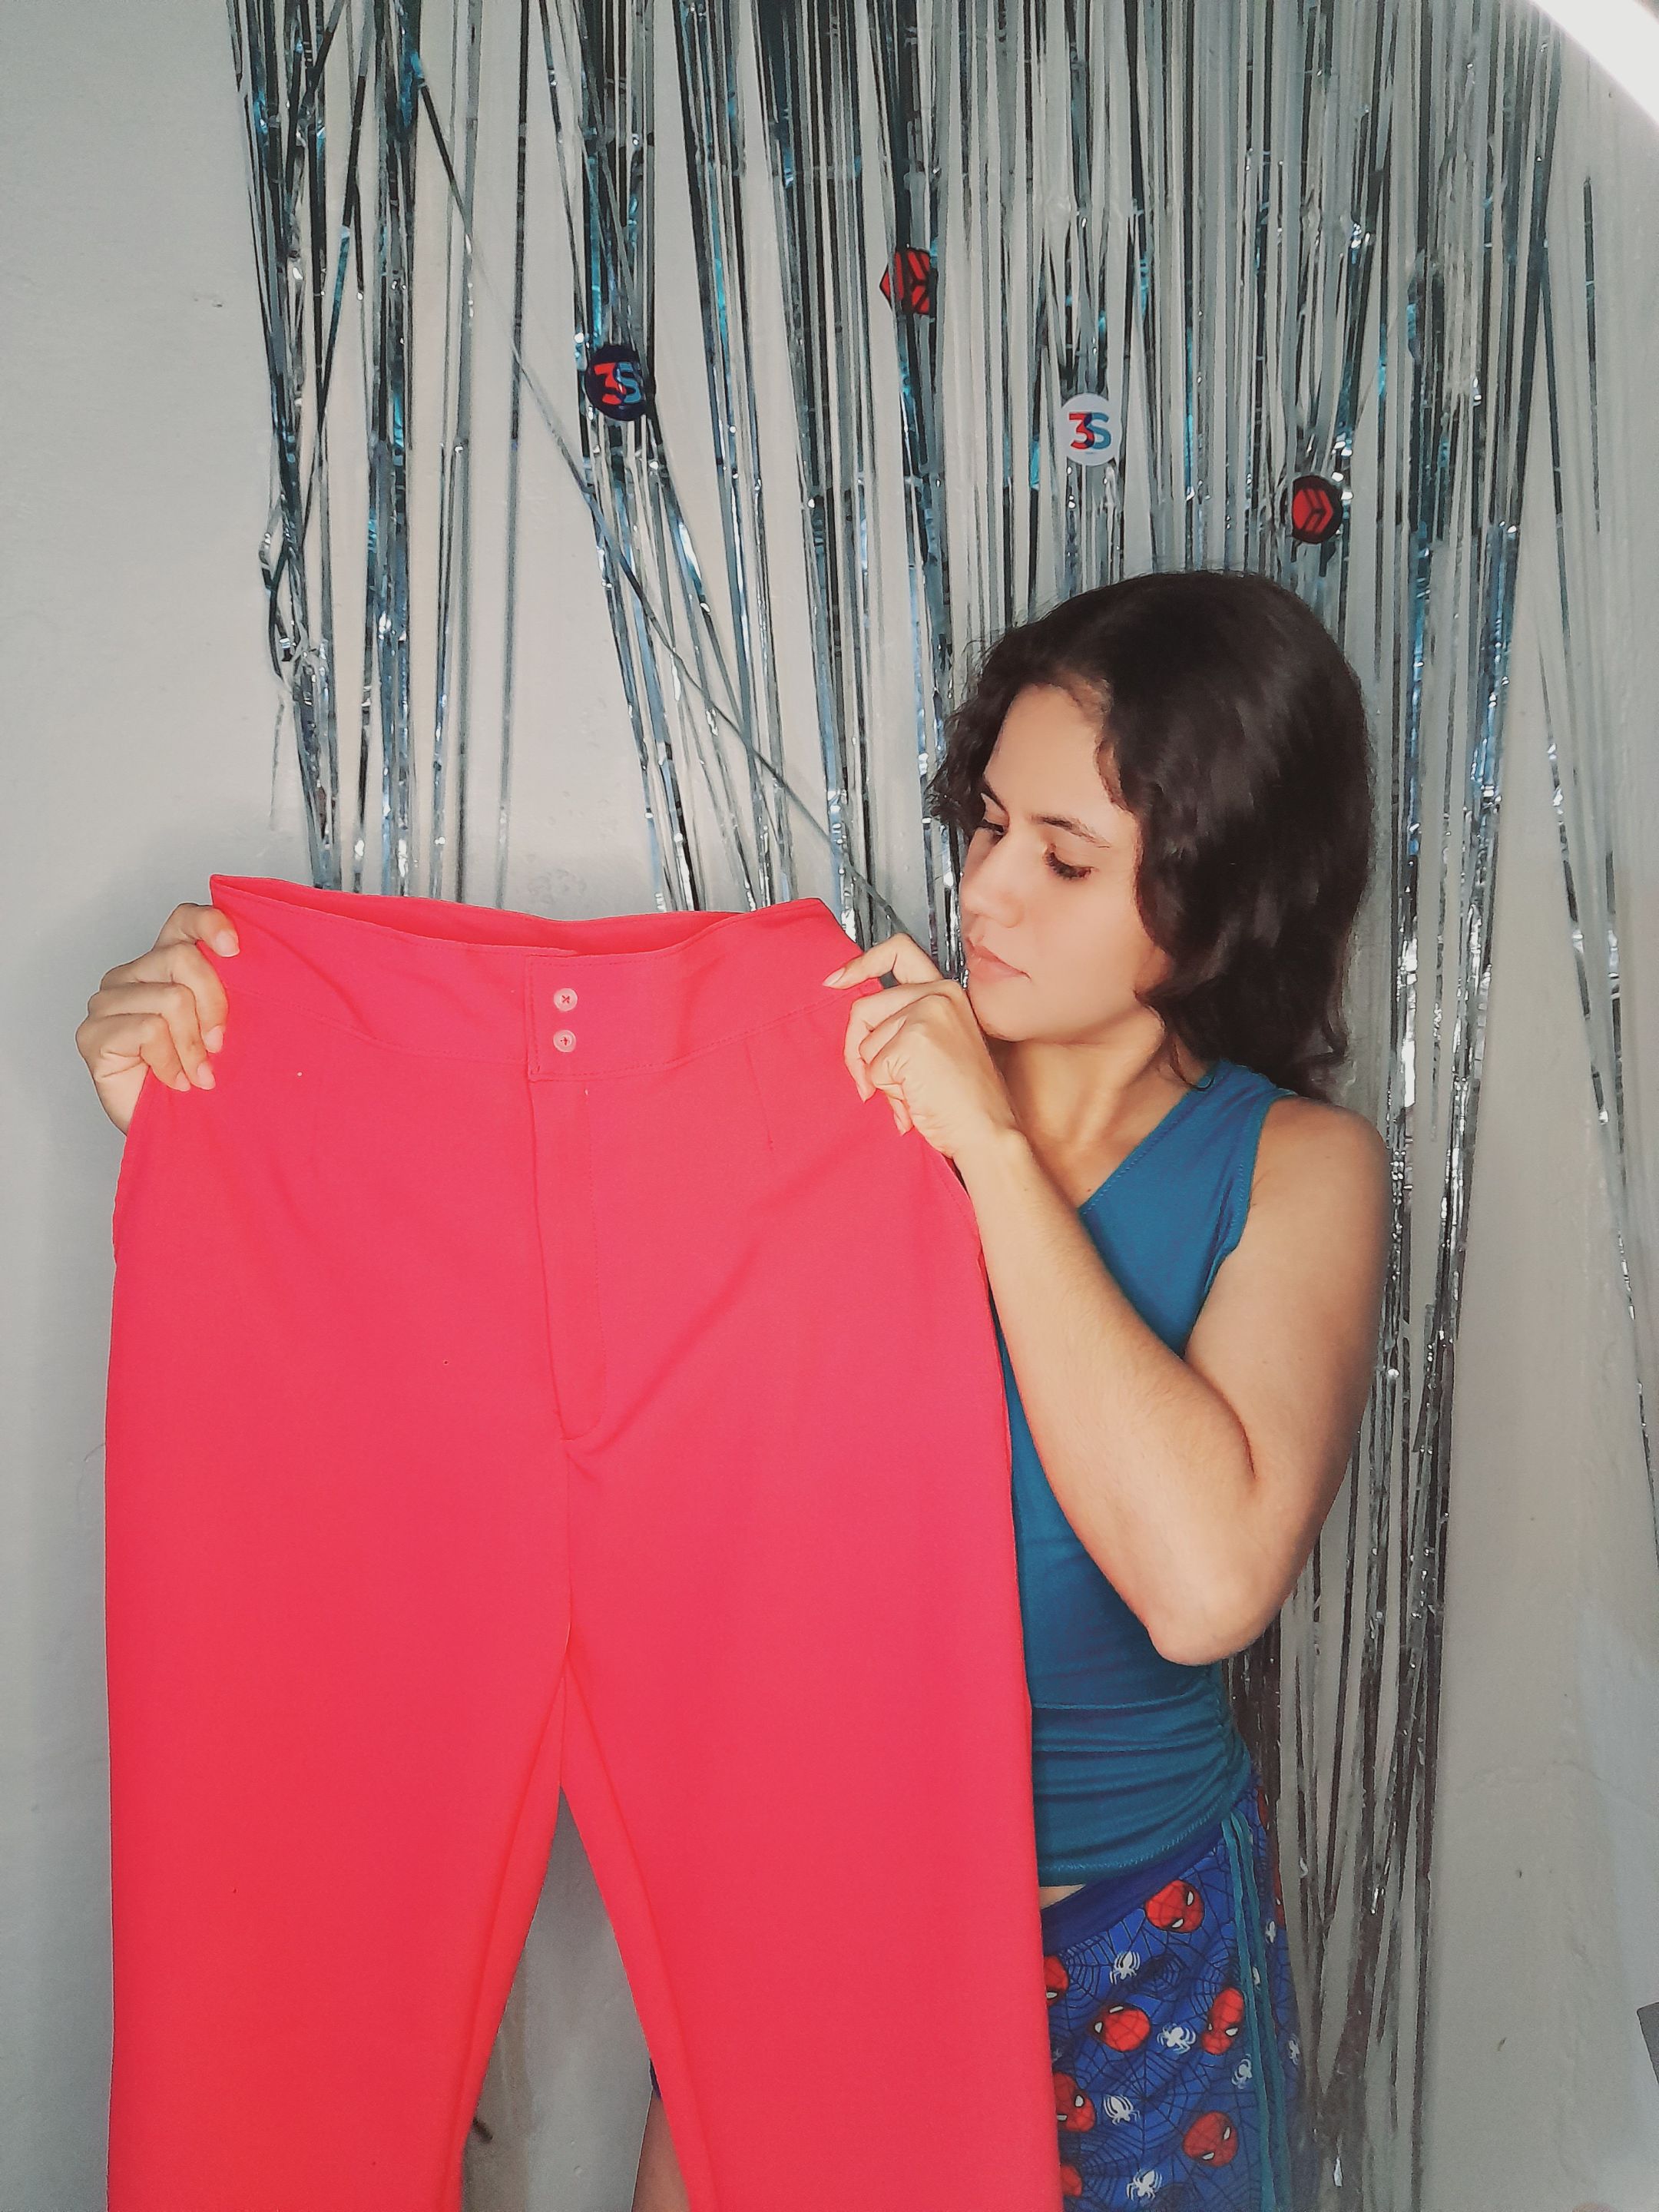
Es un increíble modelo que resalta la cintura proporcionando una silueta de sirena 🧜♀️ haciendo lucir muy femenina y elegante ❤️ me alegra mucho haber estado acá compartiendo con todos ustedes algo nuevo la noche de hoy espero les guste mi post y muchas gracias por haber tomado un minuto para leer 💕 saludos y linda noche para todos amigos de Hive 😉✨️.
🌸English🌸
Hello hello my beautiful hive people ✨️💕 very good night to all dear friends I hope you are well enjoying the night 😊 🤗 special greetings to everyone in this beautiful #Diy community 😊 on this occasion I would like to share the design and making beautiful high-waisted pants with a wide-leg style, I would like you to accompany me in every step to follow.
These were the materials I used
• Sewing machine
• Scissors
• Sewing thread
• Fabric
• Measurement garment
• Zipper
• Buttons
✨️Steps✨️
•✨️I am going to start by cutting all the pieces of my pants using a garment measurement as a reference method and I am going to cut two back and front side pieces, waist contour, two linings for the pockets, two edges, two linings for the zipper and two pockets.
•✨️I continue assembling the pockets by sewing the linings with a straight seam then I will sew the pocket to the pants leaving the main piece and an edge as a pocket and I will sew with a straight seam and then fold the remaining edge and sew with a zigzag seam then I will sew above pocket to provide drape.
•✨️I am going to sew the front darts by folding and 5 cm from the pocket and sewing with a straight seam and a length of approximately 6 cm to fix the pocket at the top with a straight seam. I will also sew the pocket with a straight and zigzag seam to Secure then I will fix the pocket on the sides with straight and zigzag sewing then I will sew the zipper linings with straight and zigzag sewing around.
•✨️I will finish sewing around the zipper linings with a zigzag seam and then sew on the outer sides with a straight and zigzag seam, then I will fix the zipper with one of the linings and I will sew with a straight seam and then sew over it with straight seam again and then I am going to sew both sides but on the inside with straight seam and zigzag to secure
•✨️I am going to join both side parts with a straight and zigzag seam to secure but then I am going to sew the back darts to provide shape and drape on the buttocks then I am going to sew the missing zipper lining with a straight seam and then sew the zipper of the same with a straight seam and sew over it with a straight seam. I continue sewing the waist contour, placing it on the reverse side of the fabric and sewing with a straight seam and then sewing at both ends with a straight seam again. When I turn the waist contour, our side seams will be ready and then sew on the outside, folding inward. and sewing with a straight seam and around the waist contour and then sew the hem by folding the fabric and sewing with a straight seam and to finish I am going to sew the buttonholes with the tension at 1 and zigzag sewing and we will sew the buttons with a needle. hand.
💕Results💕
It is an incredible model that highlights the waist providing a mermaid silhouette 🧜♀️ making it look very feminine and elegant ❤️ I am very happy to have been here sharing with you all something new tonight I hope you like my post and thank you very much for having taken a minute to read 💕 greetings and nice night to all Hive friends 😉✨️.
💁♀️Todas las fotografías son de mi autoría capturadas con mi Samsung Galaxy A12 y editadas en GridArt.
El texto y resumen es totalmente de mi autoría.
Texto traducido en el traductor Google.💁♀️
💁♀️All the photographs are my own, captured with my Samsung Galaxy A12 and edited in GridArt.
The text and summary is entirely my own.
Translated text in Google translator.💁♀️