Abajo les comparto el proceso de este dibujo.
Below I share with you the process of this drawing.

Español
Realmente me gustan mucho las criaturas mitológicas, y ustedes saben que tengo especial fascinación por las sirenas. Sin embargo, otras criaturas que me gustan en igual medida, son las hadas y los elfos (que aunque sé que no son lo mismo, se parecen bastante).
Hace poco estaba recordando lo mucho que me gustan los libros de cazadores de sombras, y como las hadas y los elfos son prácticamente las mismas criaturas en ese mundo. Mujeres y hombres hermosos, con unas orejas puntiagudas, donde yo decidí exagerar este rasgo.
Justo compré unos colores baratos que, para sorpresa de nadie, terminaron por decepcionarme, pero eso no impide que los utilice para mis prácticas. Así que el día de hoy vamos a tomar el azul claro y color oscuro, y me acompañarán a dibujar a esta elfo, ¡vamos allá!
Tomamos un lápiz de color azul claro.
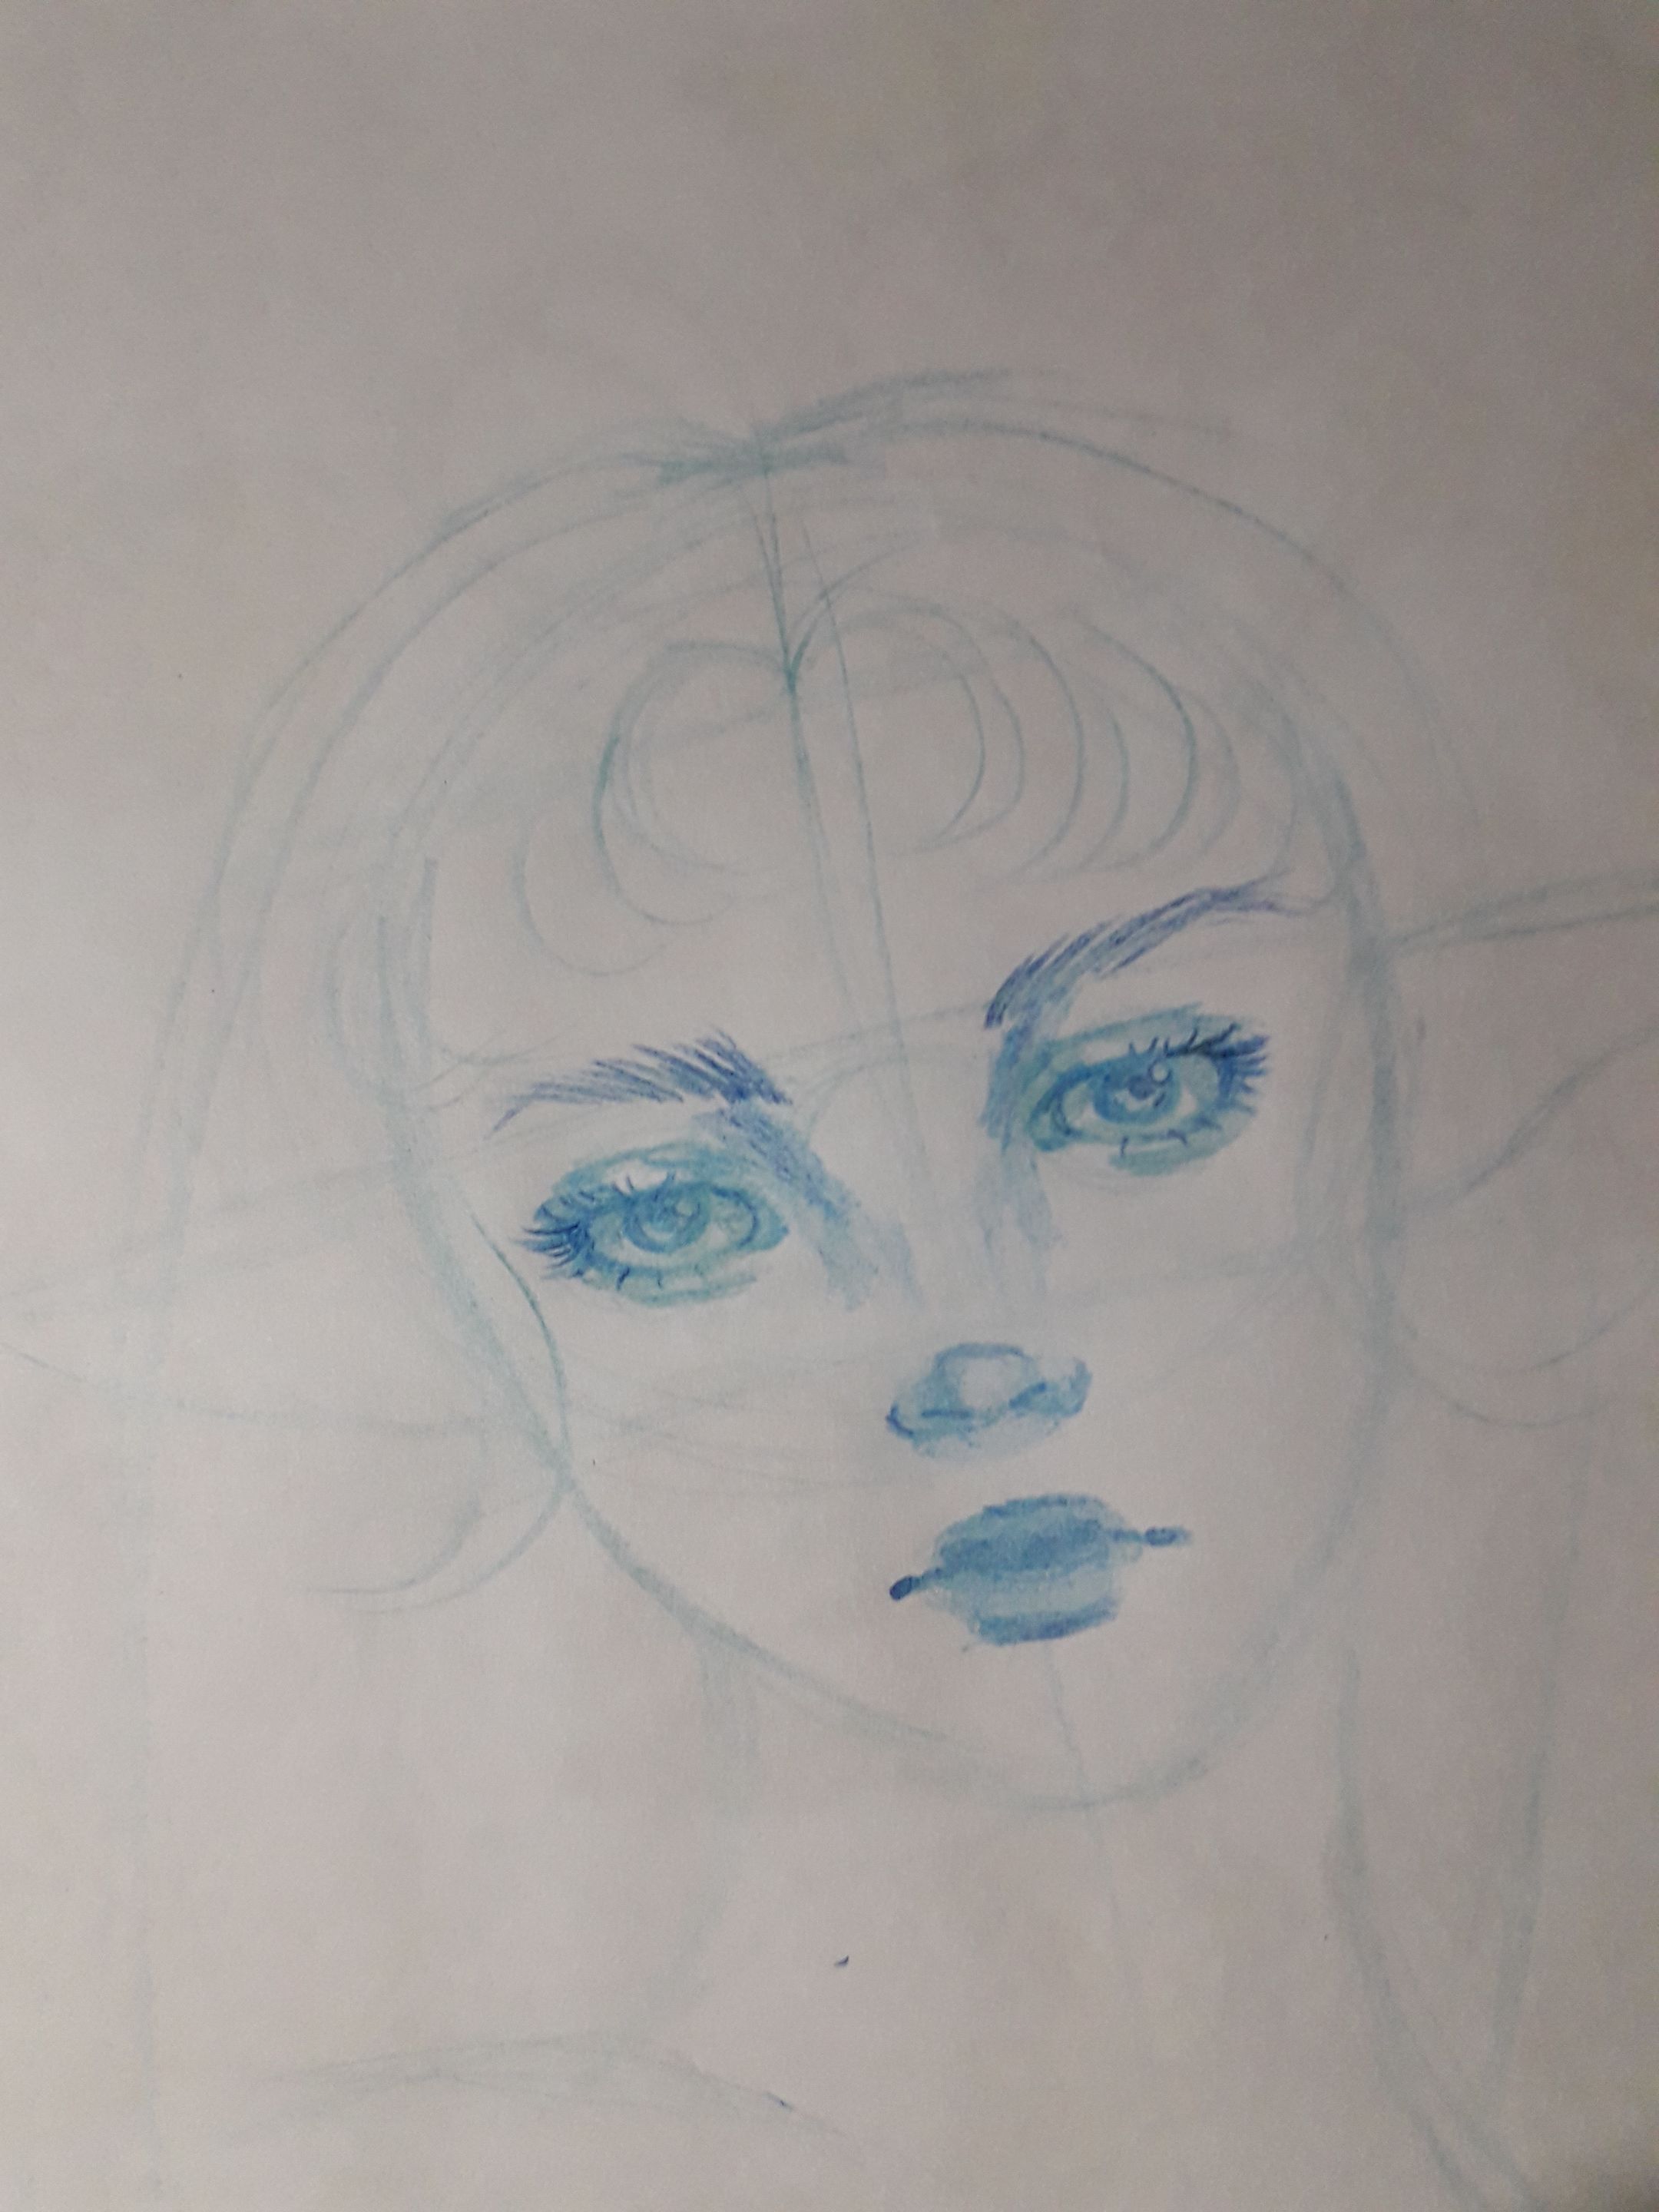
Al principio comencé por hacer un círculo y dividirlo en cruz, el típico método para hacer un rostro. Sin embargo, actualmente dibujo más por instinto que por un método establecido, pero no nos adelantemos a eso, hablemos del procedimiento de este dibujo en específico, jajaja.
Hice tres círculos para saber donde dibujar los ojos, dejando el círculo central como una, guía nada más. Dentro de los otros dos círculos, dibujé el bosquejo de cada ojo, quería hacer unos ojos algo afilados.
Para la nariz, dibujé un óvalo. Si se dan cuenta, la distancia entre el final del ojo y la base de la nariz, es la misma que la de la altura de un ojo. En fin, un poco debajo de la base de la nariz, hice otro óvalo para la boca y lo dividí a la mitad, que vendría siendo la comisura de la boca.
Por último, hice el contorno del rostro.
 |  |
|---|
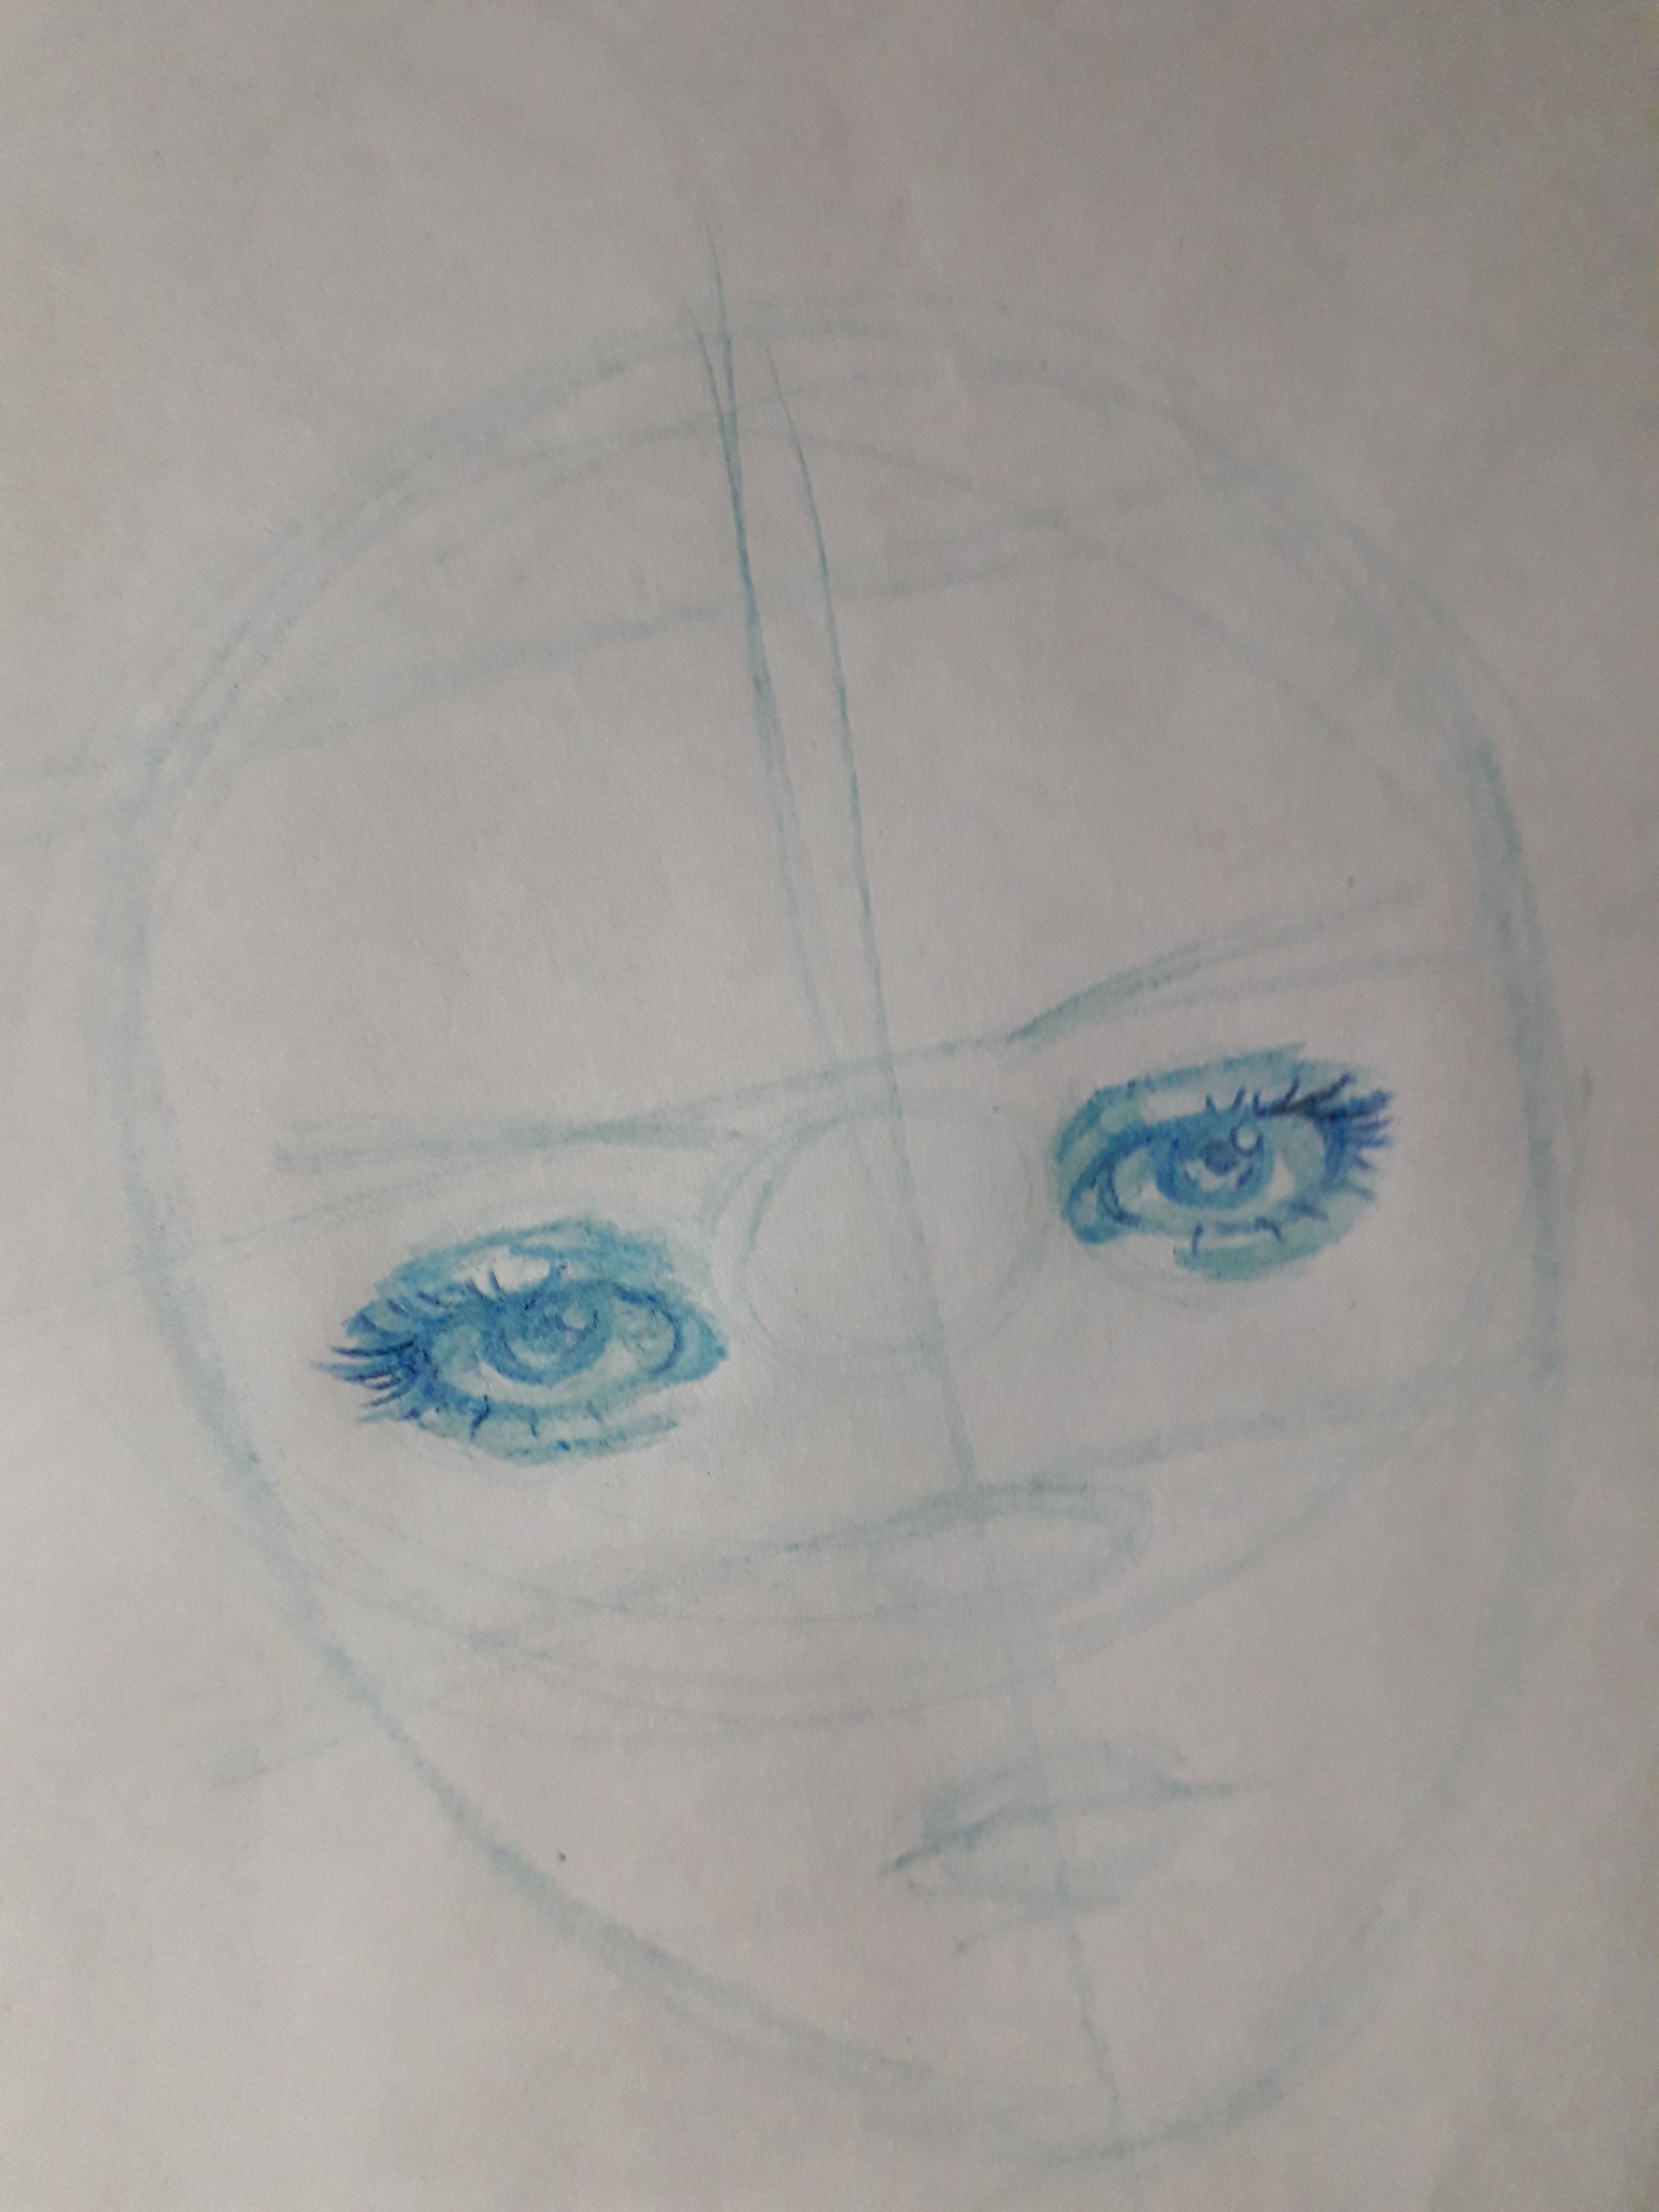
Aun con el lápiz de color azul claro, comencé por comenzar a dibujar los ojos.
Si eres principiante y me estás leyendo, no hagas esto. En este momento, estaba experimentando con mi proceso a la hora de dibujar, y me di cuenta de que esto es un error que cometemos muy a menudo. Repitan después de mí: de lo general, a lo particular.
Pero la Celely del pasado no sabía esto, así que sigamos.
Primero, comencé por remarcar lo que sería el borde de los ojos y la iris. También di sombras dentro del ojos, que estaría proyectada por el parpado superior del ojo. Dibujé algunas pestañas.
Con el lápiz de color azul oscuro, volví a repasar. Di color a los iris y la pupila, dejando un poco de espacio que represente los “brillos” del ojo y dibujé más pestañas. Por último, di sombras en los pliegues alrededor del ojo, dejando algunos espacios sin pintar para que dé esta impresión de que hay luz reflejándose ahí en la piel.
Ah, una pausa, pronto quiero compartir con ustedes realmente mis prácticas a través de Liketu, porque siento que en cada post menciono cosas que no me gustan sobre mis propios dibujos y creo que parece dar la impresión de que ningún dibujo mío me gusta. En realidad, este es un dibujo que hice hace un par de semanas y opino que he aprendido un poco más y ya veo errores, por eso lo critico.
Sin embargo, creo que siempre en la vida tendremos algo nuevo que aprender, y siempre nos debemos comparar únicamente con nosotros mismos; debemos ser nuestra propia inspiración y meta a superar.
Aun así, que vea errores no quiere decir que esté feo o no me guste, de hecho este dibujo fue uno de mis grandes orgullos cuando lo terminé, por eso lo comparto. Sigamos.
 |  |
|---|
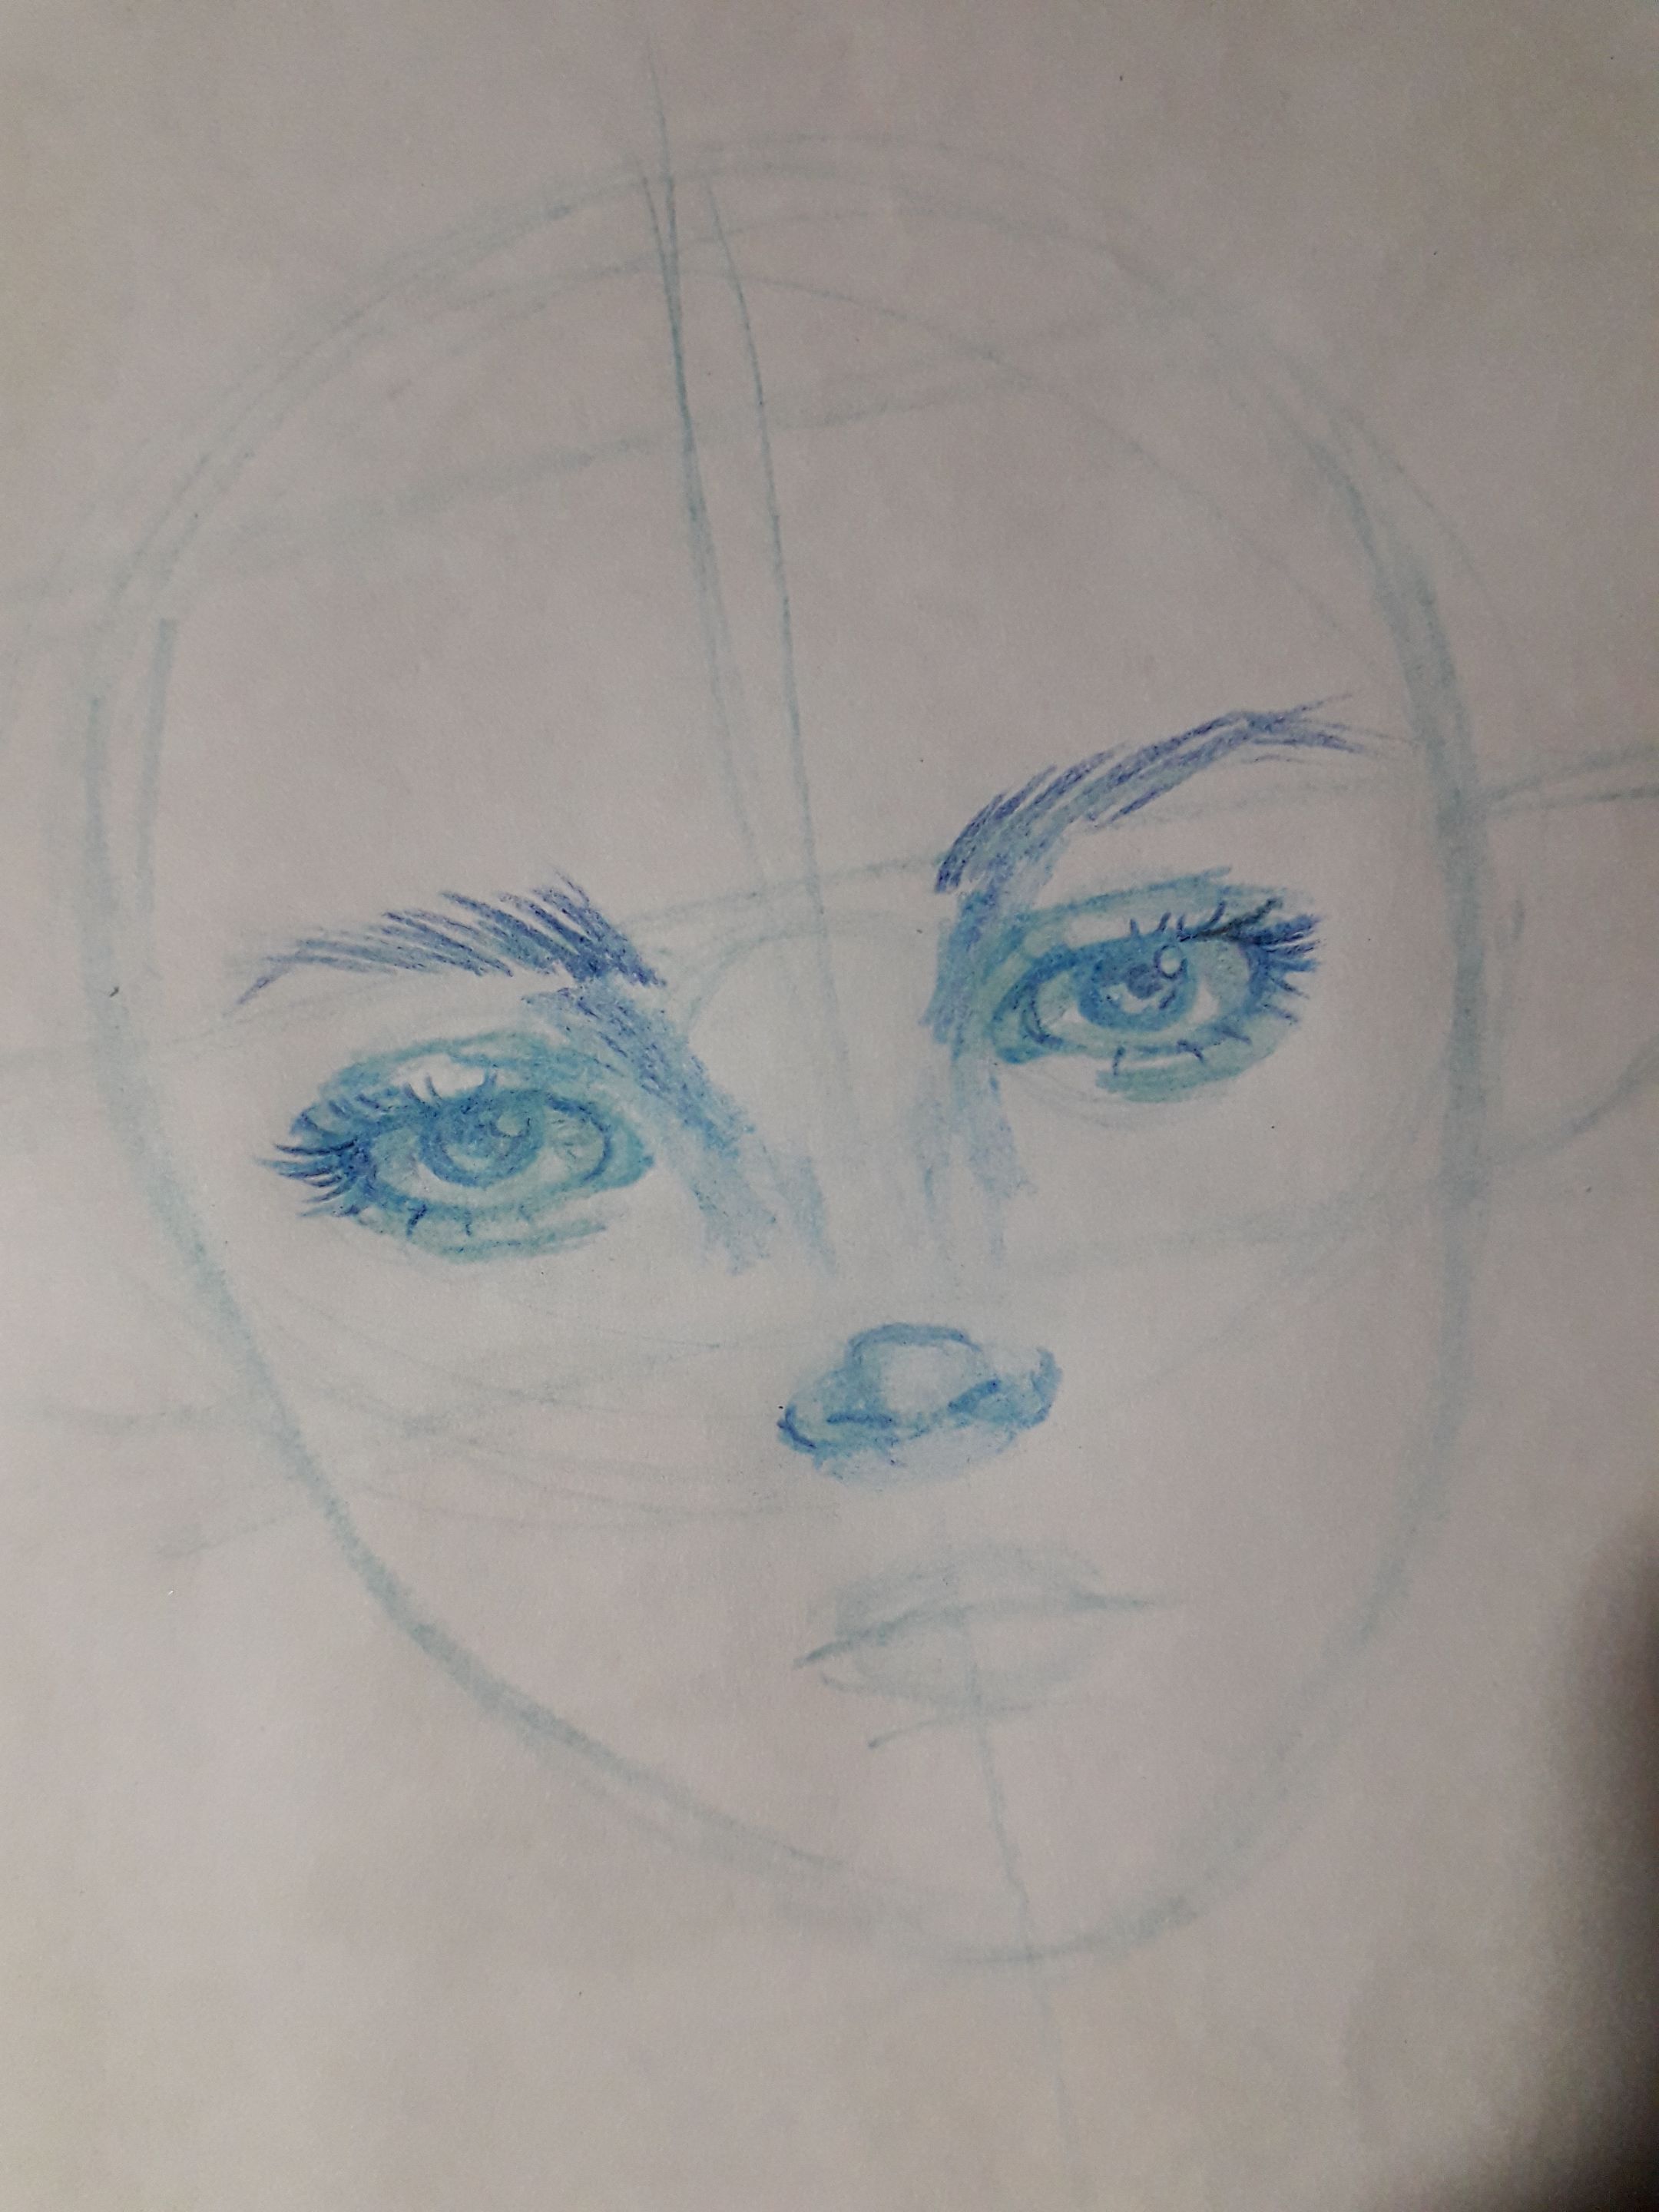
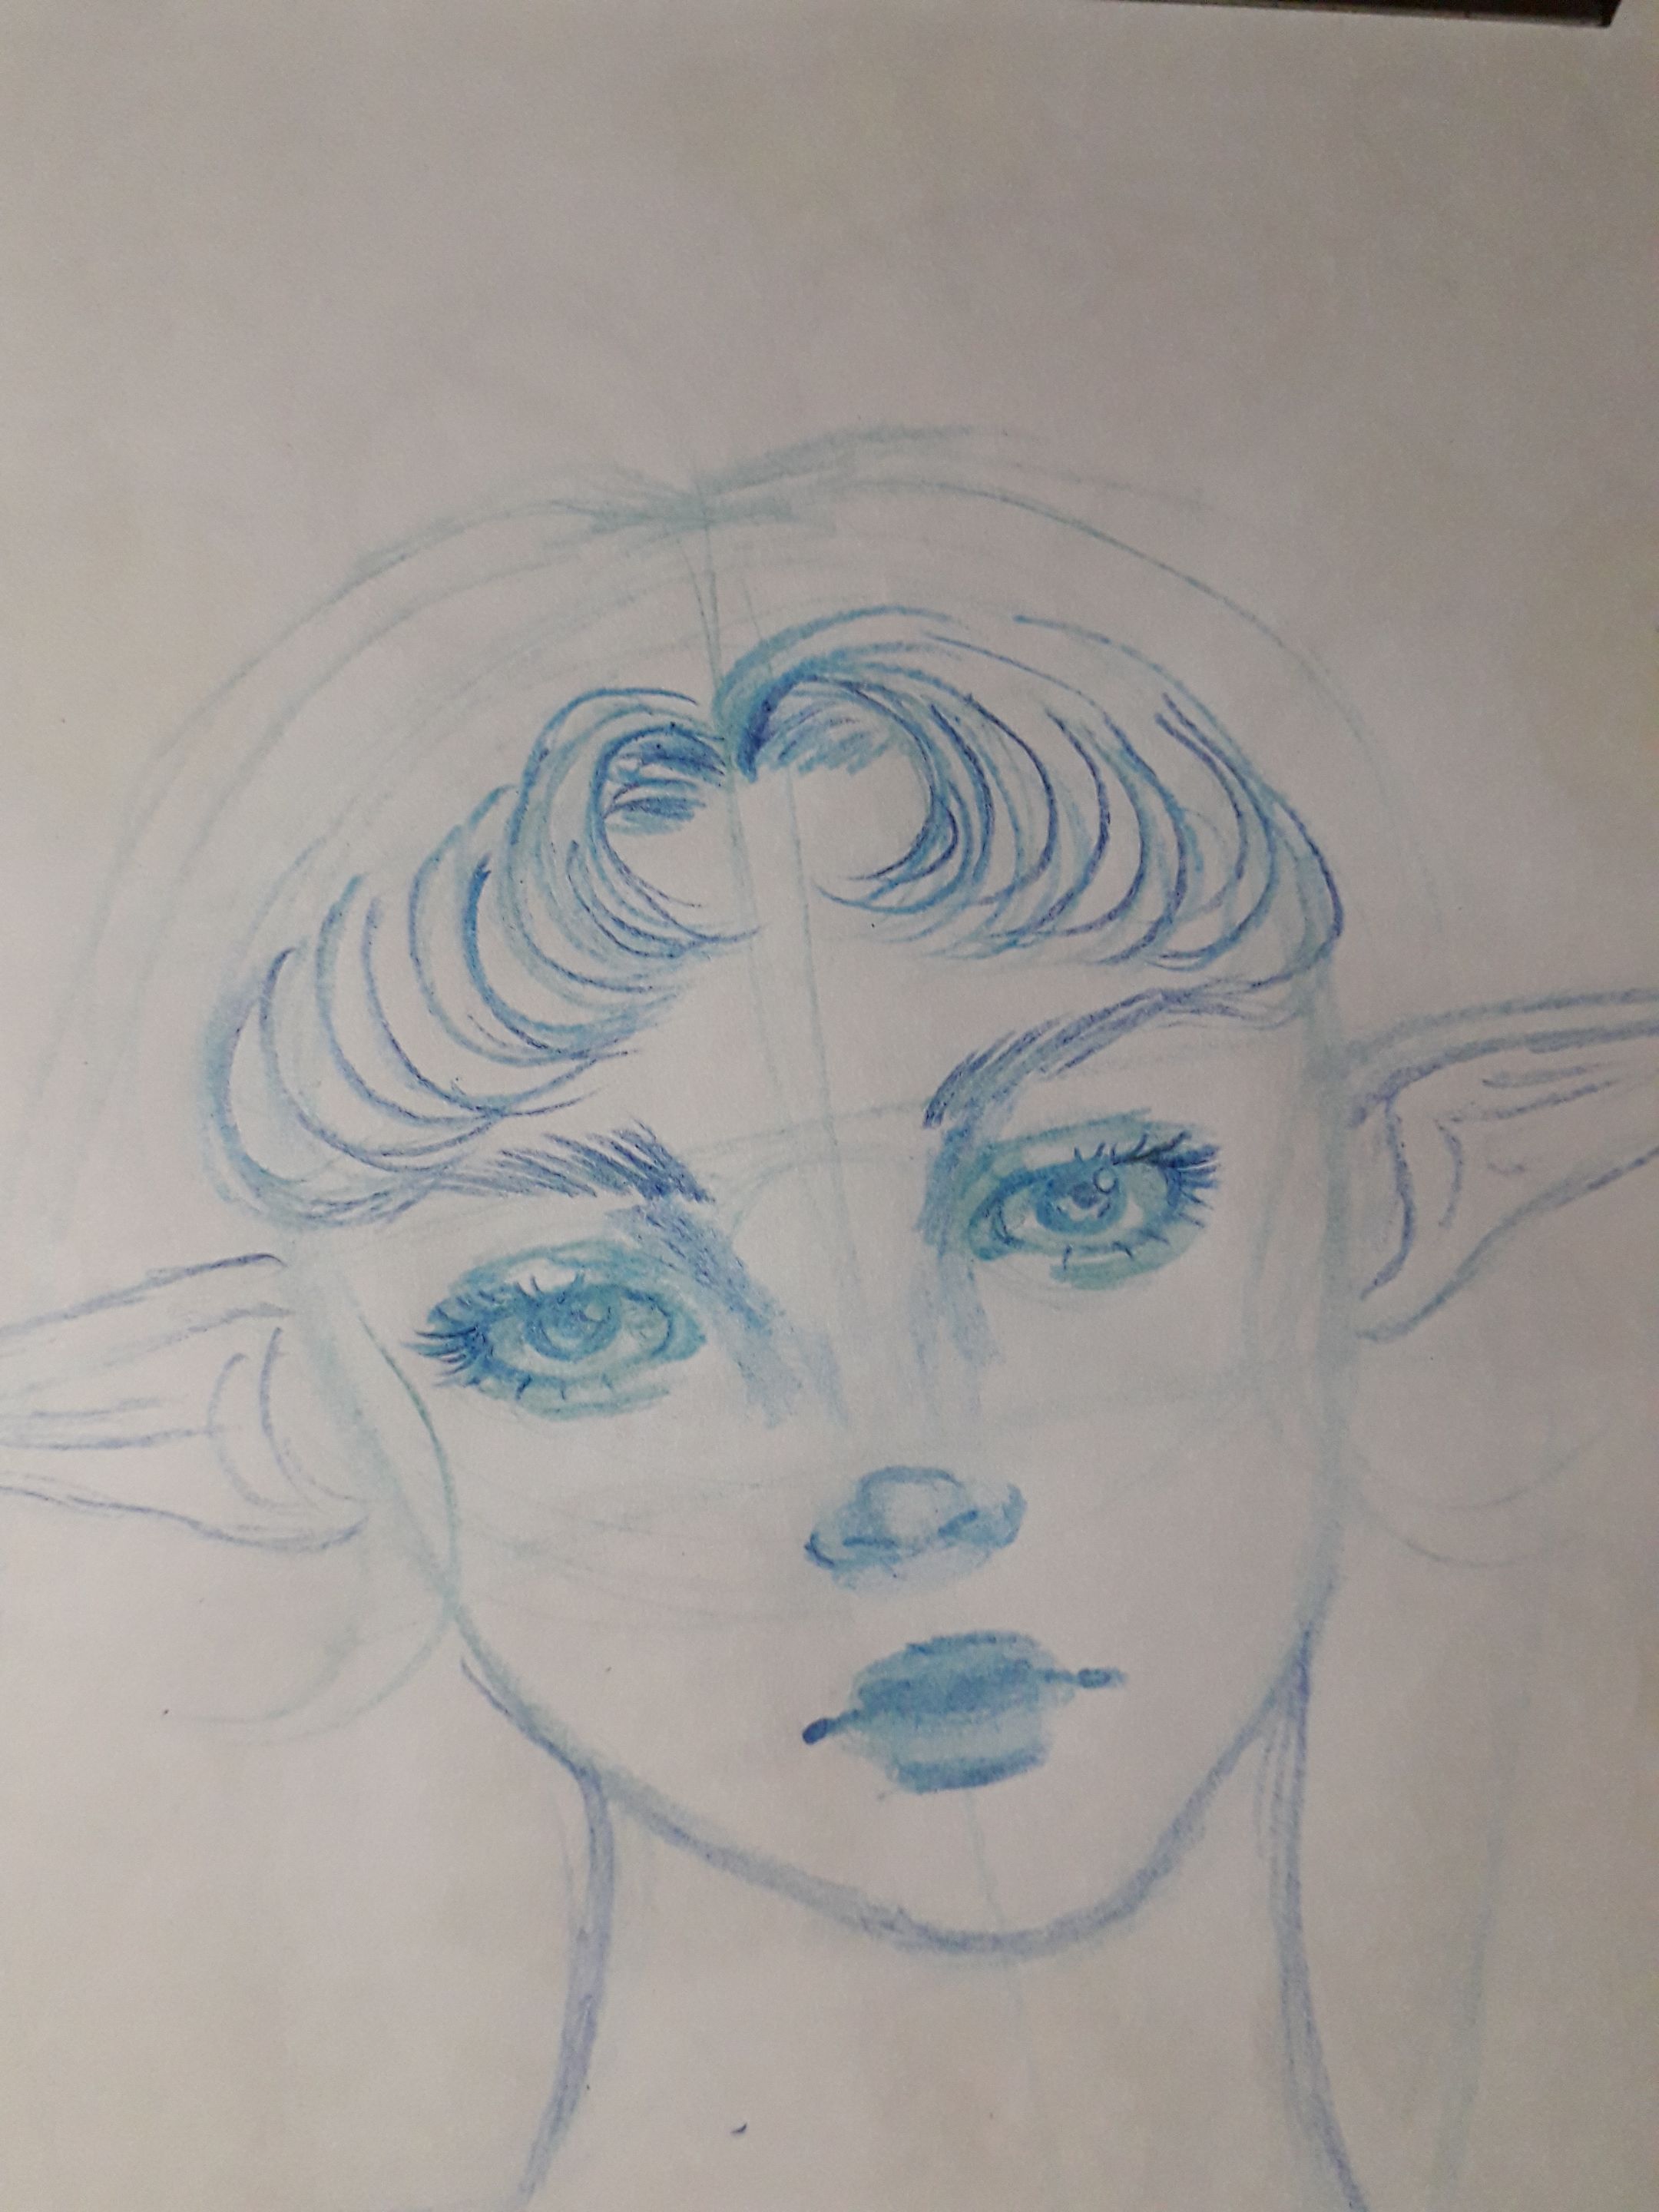
Con trazos rápidos y diagonales hacia arriba, hice cada ceja, me encanta como enmarcan la mirada. Una mirada astuta, fría, así me imagino a estas hadas, las cuales suelen hacer tratos injustos con los humanos solo para molestar; así son esas hadas en los libros que leo, jijiji.
También, di sombras en la zona que vendría siendo el entrecejo, para dotarlo de más profundidad. Para las zonas donde quiero un color más fuerte, y, por tanto, una sombra más profunda, uso más presión en el lápiz, y cuando quiero que sea más claro, uso menos presión; también alterno entre el lápiz azul oscuro y azul claro, dependiendo que tan intenso quiero que sea el trazo.
Como vemos, dibujé la nariz a partir del óvalo que hice, guiándome de los bordes para dibujar las aletas de la nariz. Hice un pequeño círculo en el centro para darle un aspecto más redondo a la nariz, y justo debajo dibujé las fosas nasales. A toda la nariz le doy un poco de color con el lápiz de color azul claro, para que resulte más llamativa, como si de un rubor se tratase.
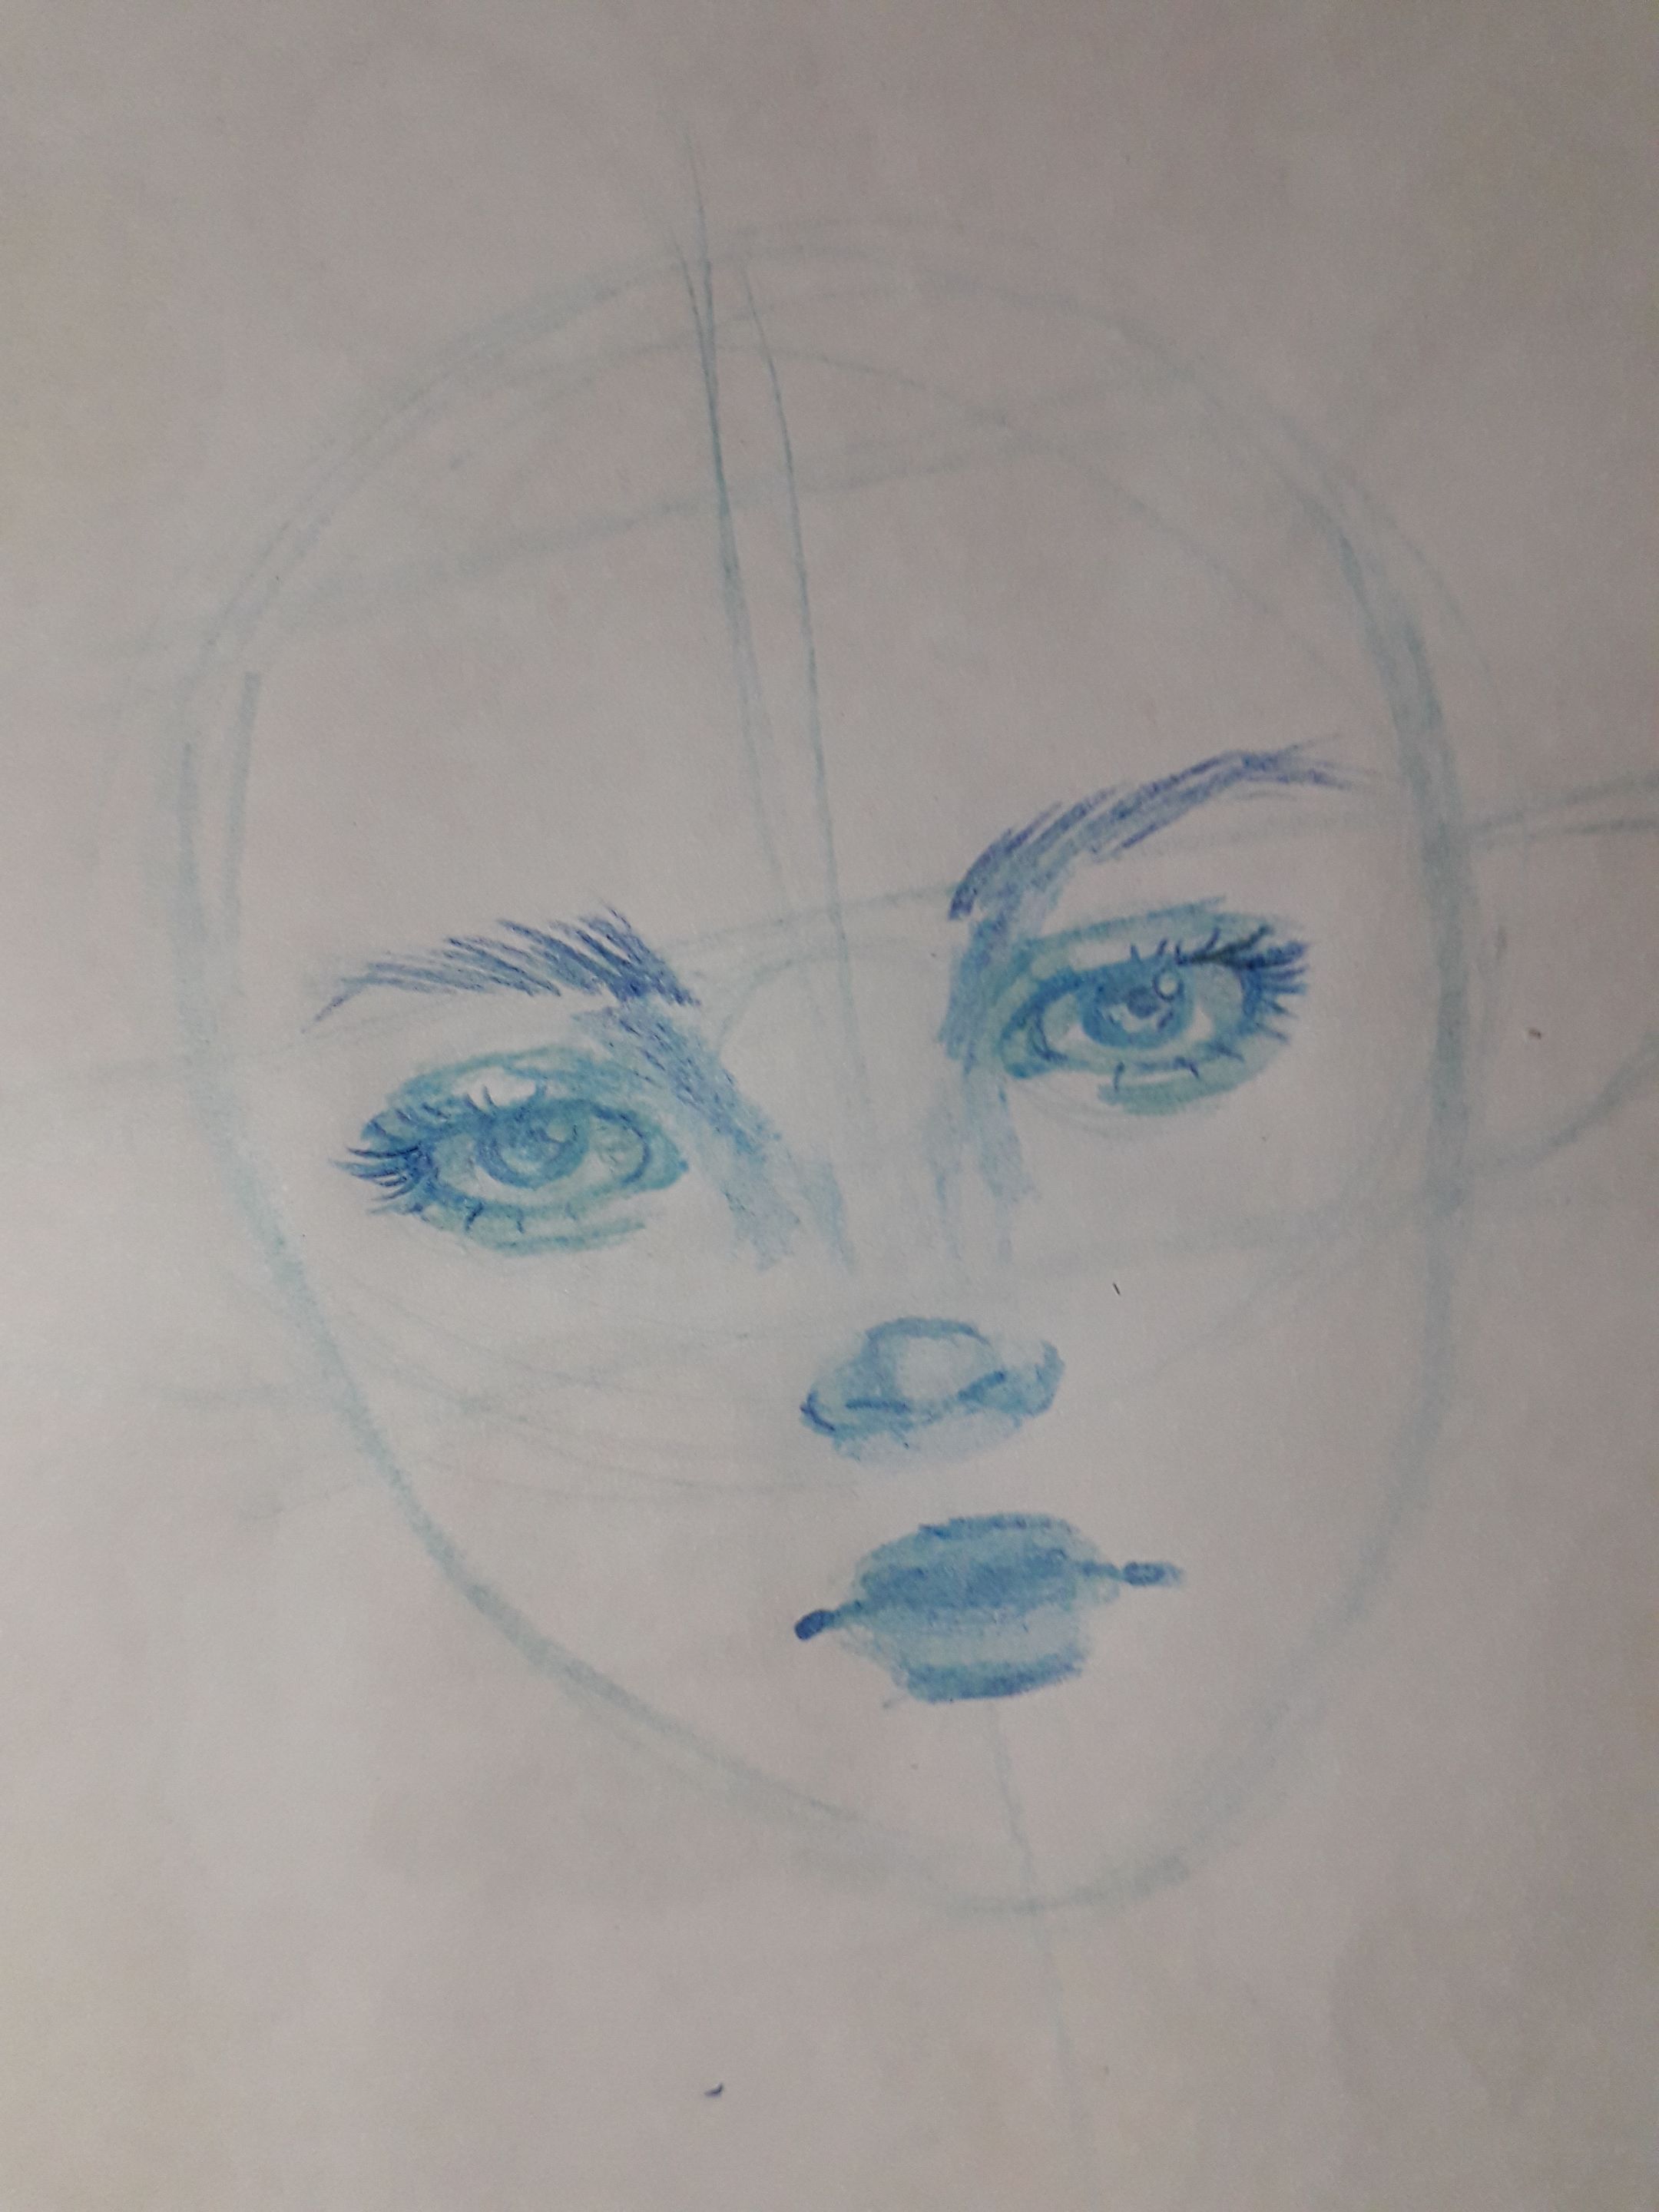
La boca también la hice a partir del óvalo, pero fue mucho más fácil. Simplemente, di color a todo el labio, luego en las zonas más cercanas a las comisuras de la boca, les di color con un poco más de intensidad, también remarqué los bordes de las comisuras de la boca y los bordes de los labios. Y ya estaría el rostro.
 |  |
|---|
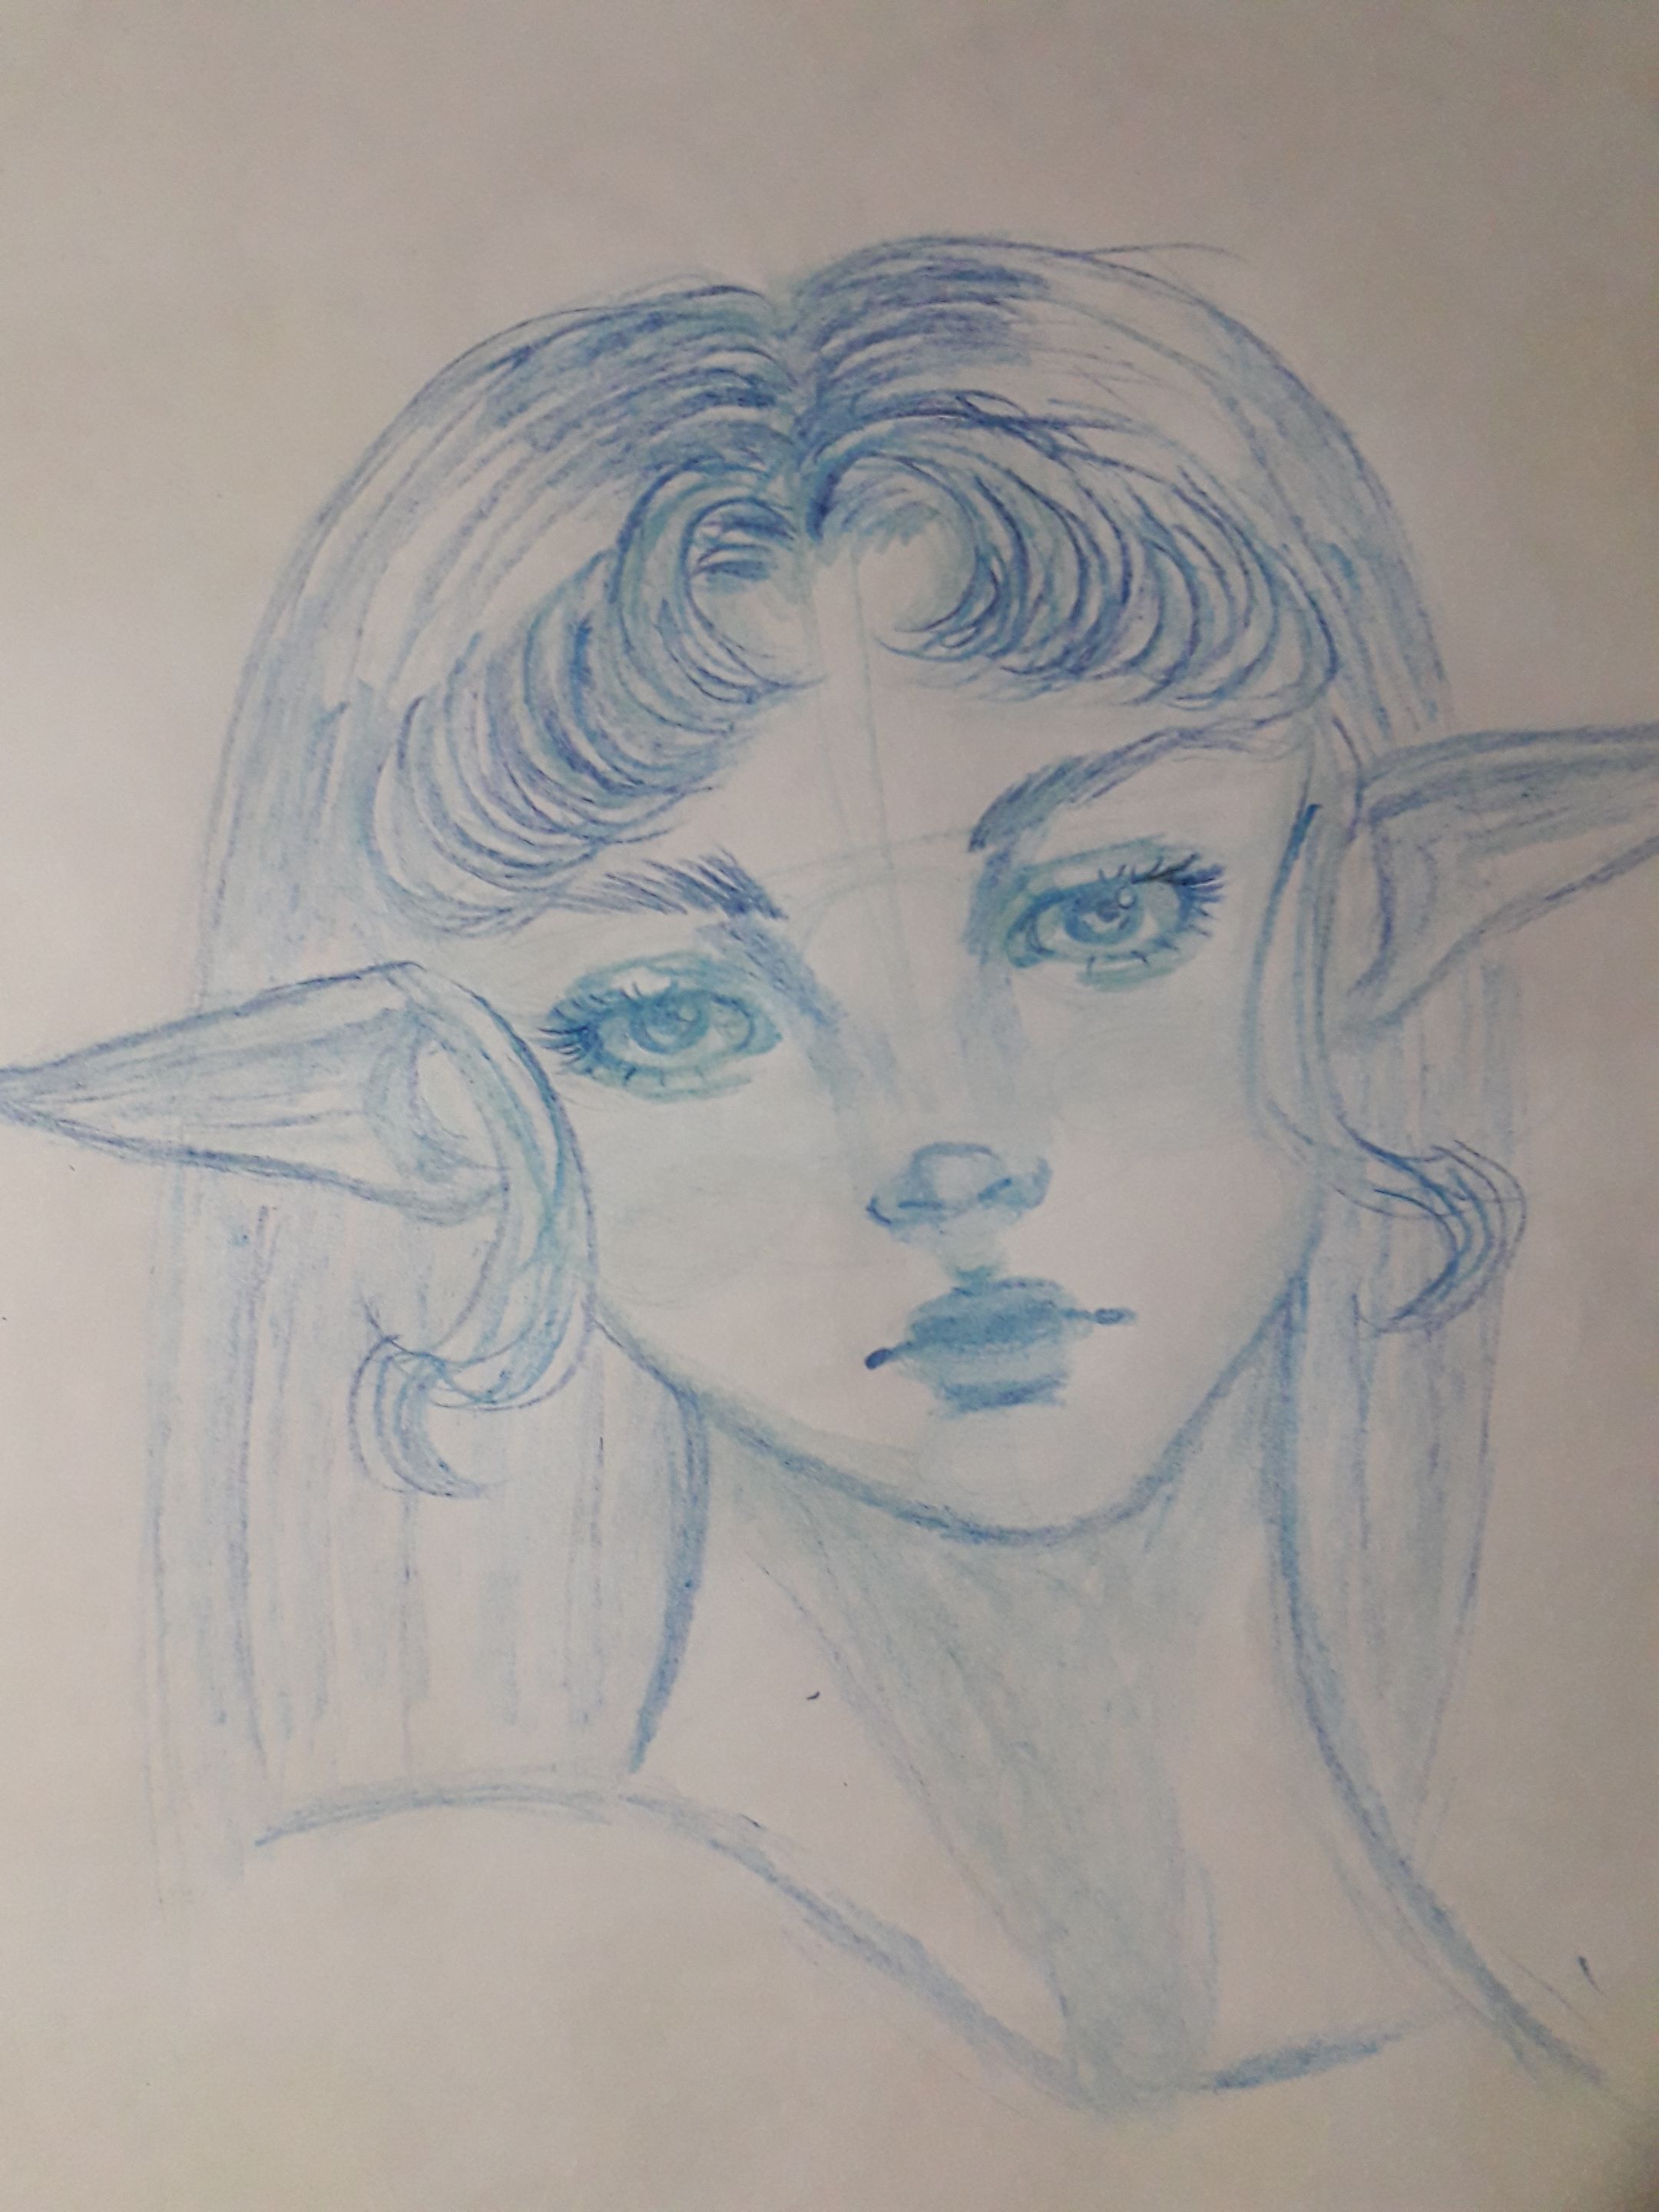
Ahora es momento de lo más importante, el cabello y las orejas.
Comencé por hacer un bosquejo del flequillo, el cual será un poco “arqueado” y estará dividido a la mitad, imaginen el flequillo de la protagonista de Sailor Moon. El resto del cabello lo hice largo cayendo hacia atrás.
Por otro lado, las orejas las bosquejé con una forma triangular.
 |  |
|---|
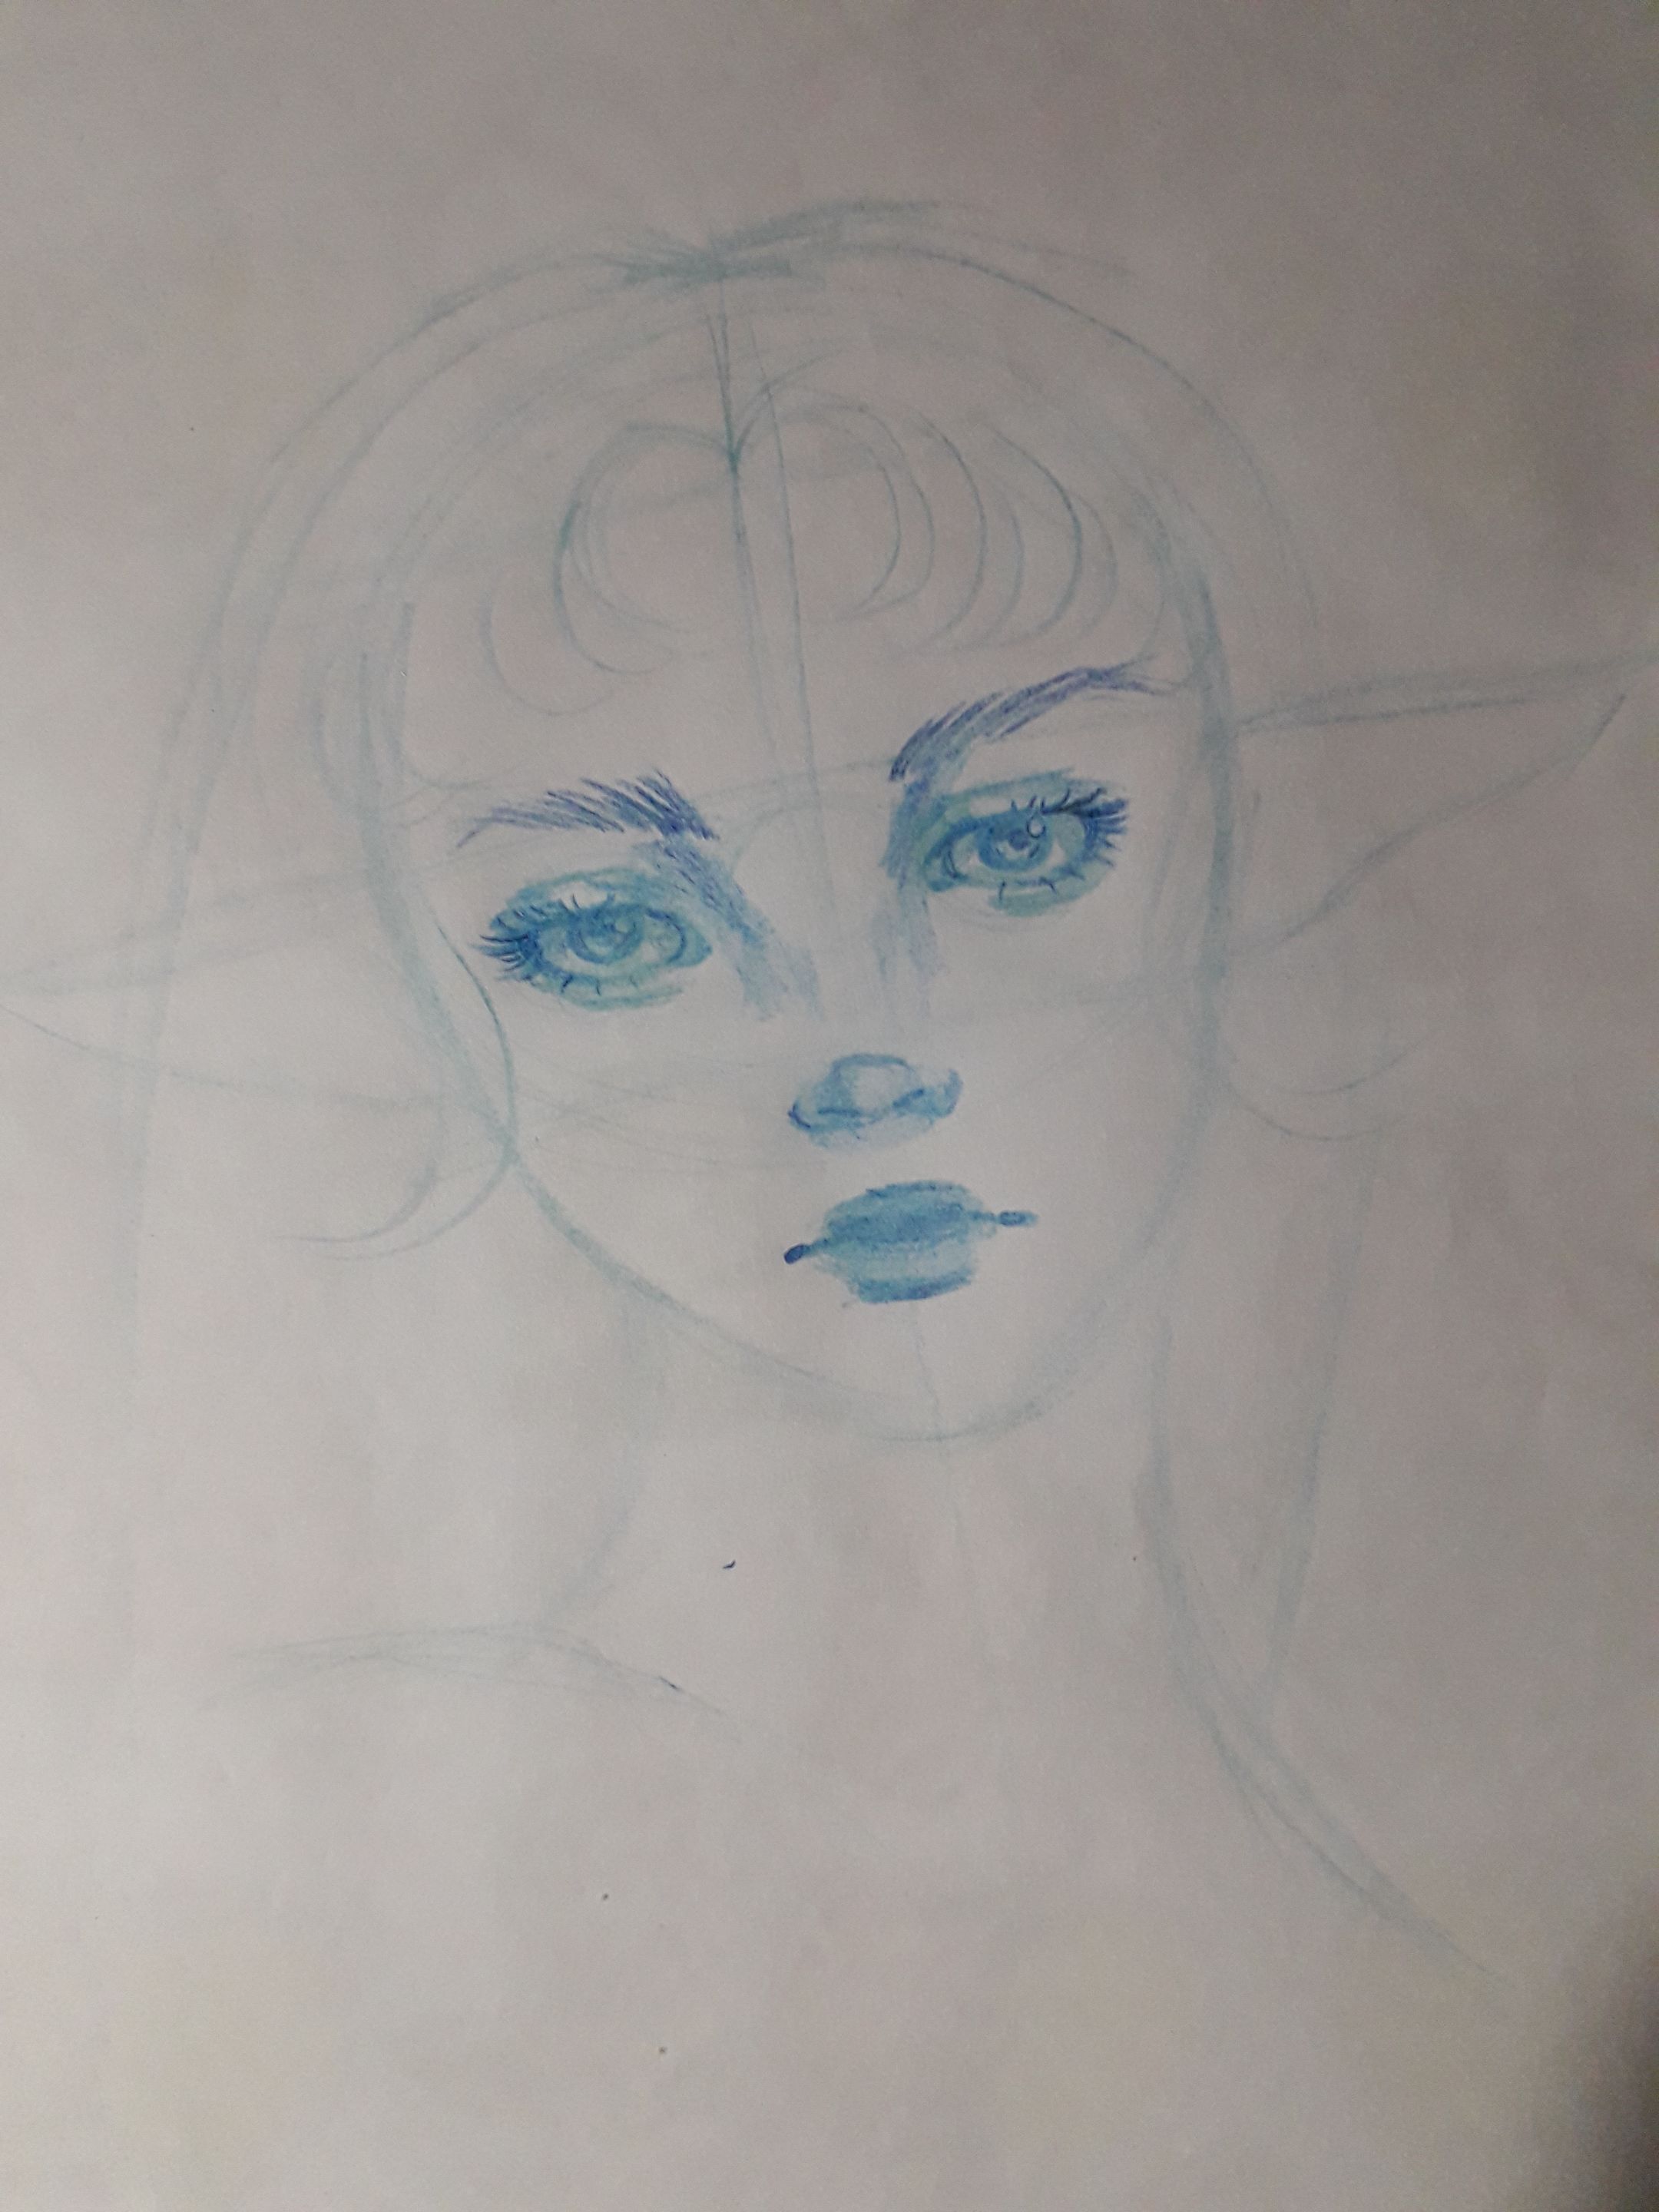
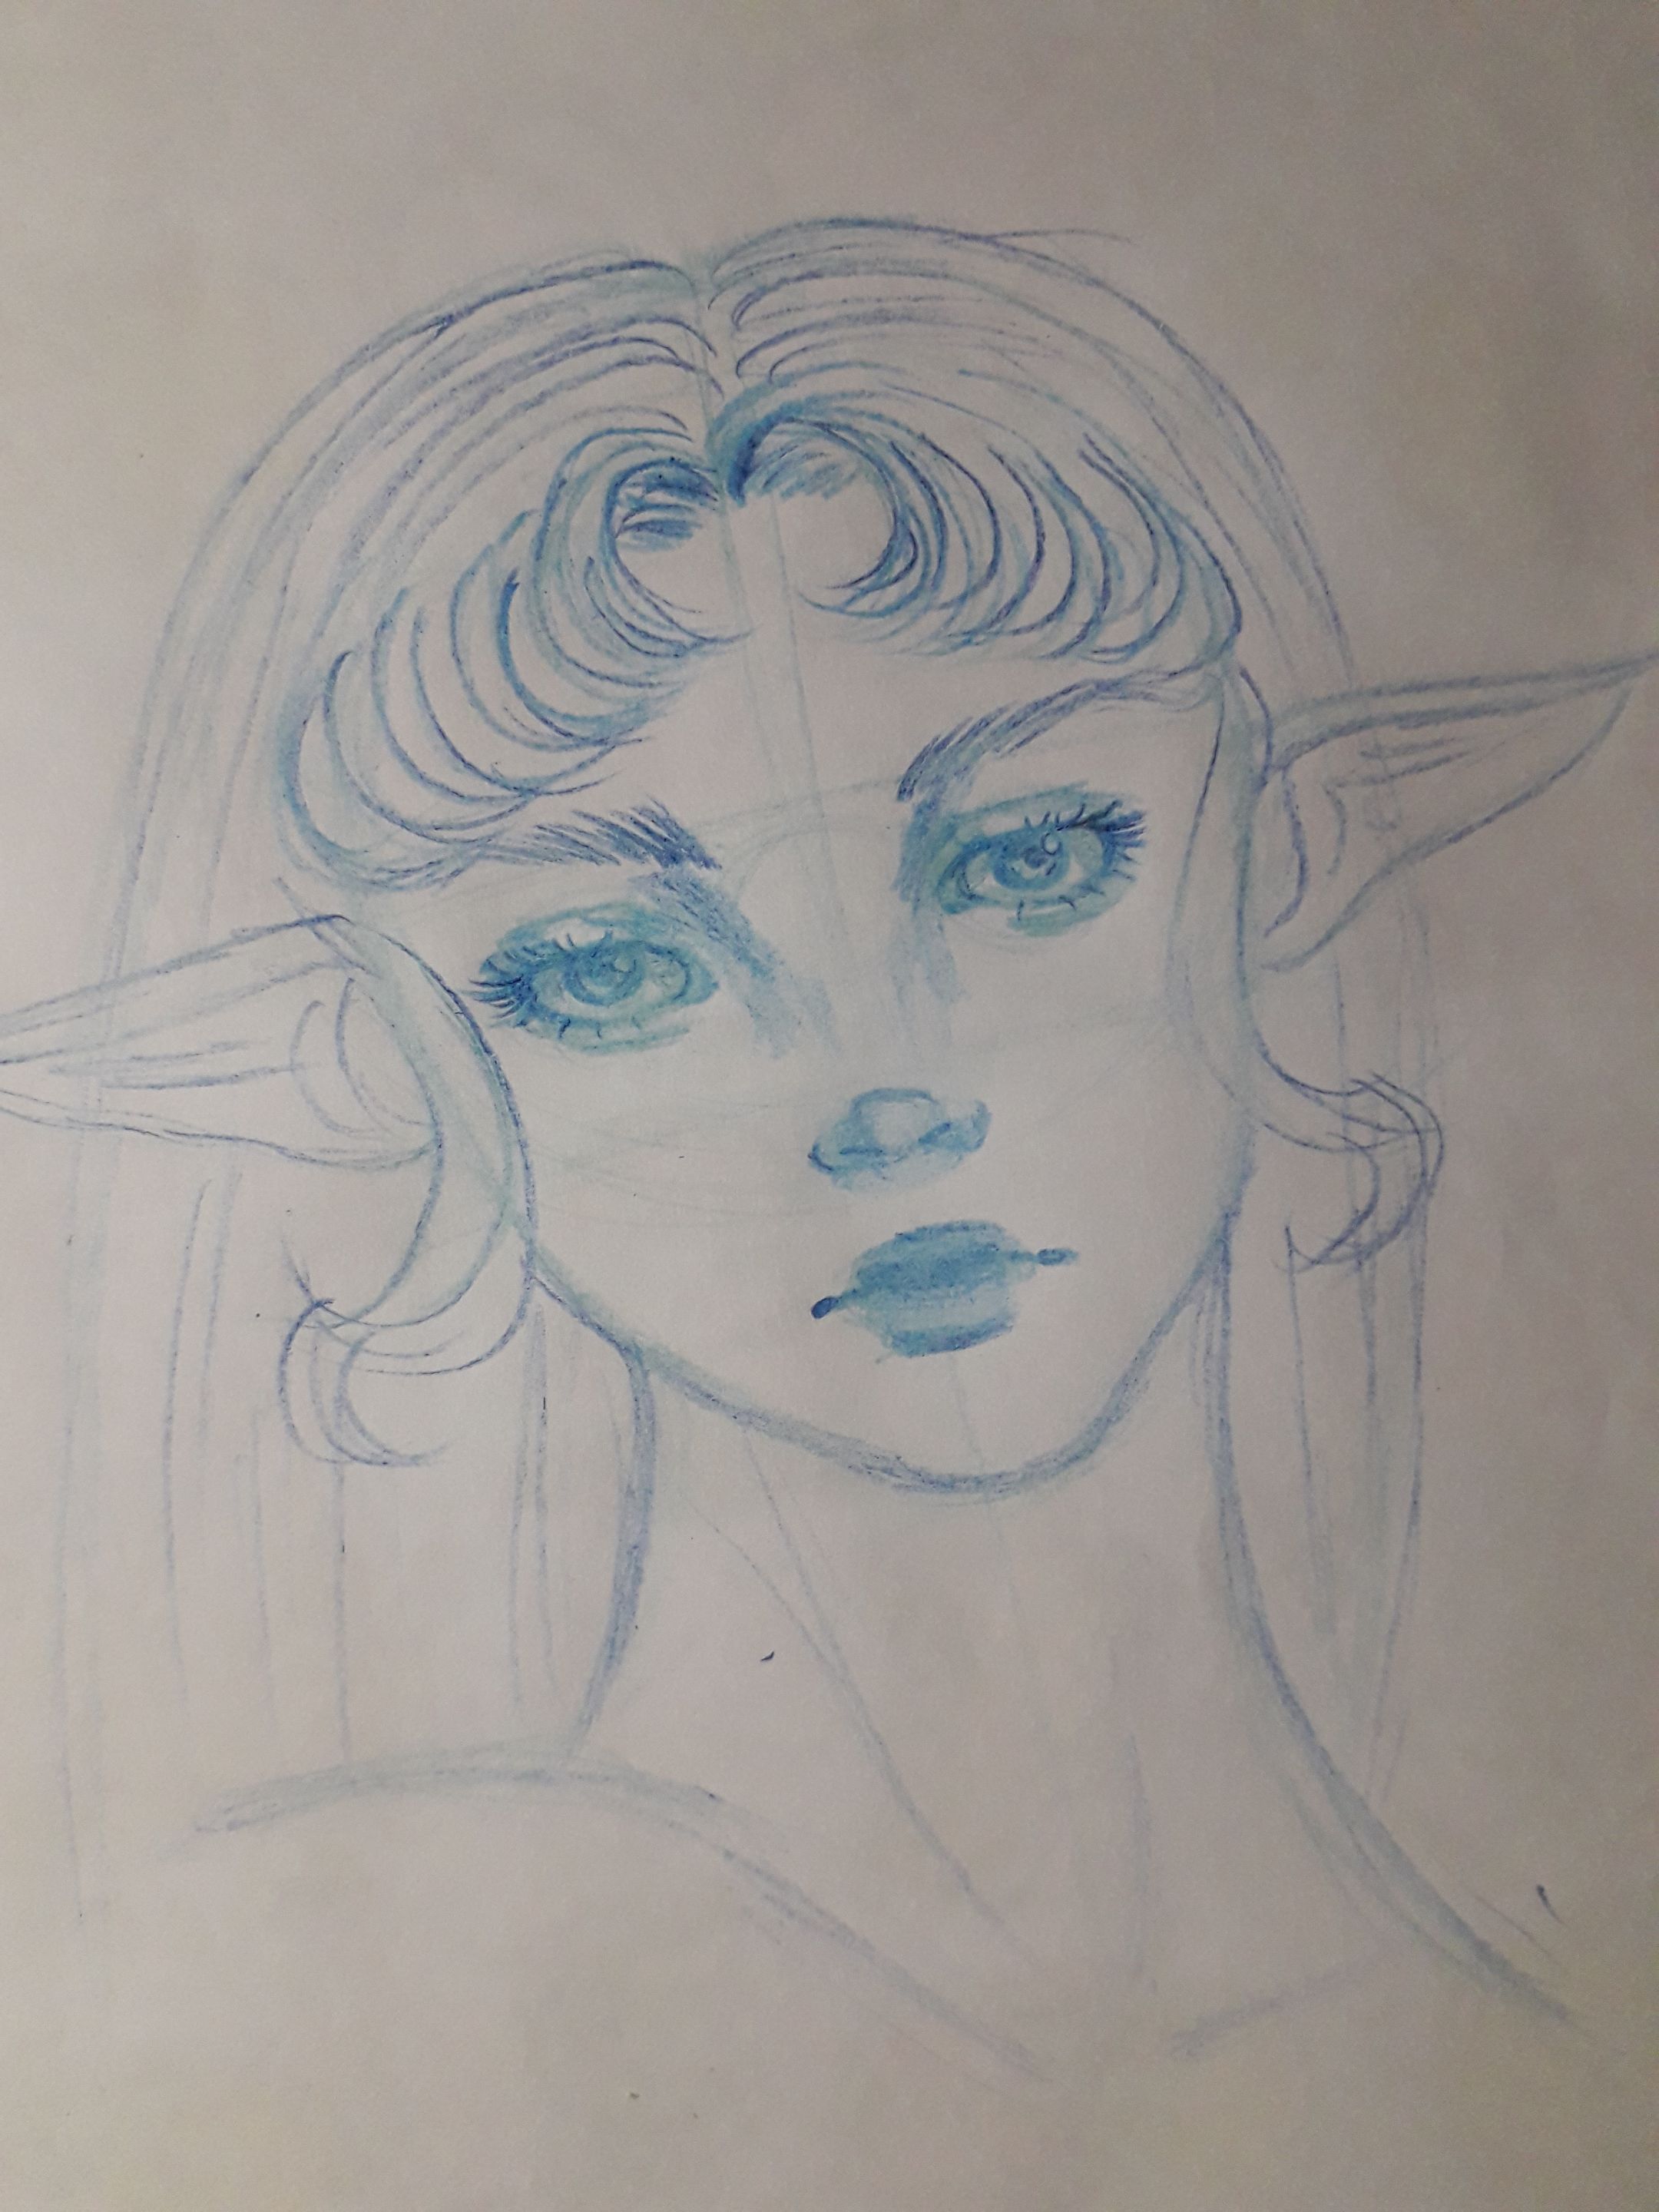
Comencé por remarcar el fleco, siguiendo la dirección en la que crece y se acomoda el cabello, dibujando también la zona donde empieza el crecimiento del cabello y se divide a la mitad. Luego también dibujé un par de mechones delante de las orejas, enmarcando el rostro. Por último, comencé a dibujar líneas que representan los mechones que van siguiendo la dirección y crecimiento del cabello, partiendo de la división del cabello.
También remarqué un poco las orejas, redondeándolas y dando más forma, e intenté dibujar lo que sería dentro de la oreja, aunque creo que muy pocos se toman el tiempo de dibujar una oreja por dentro, jajaja.
 |  |
|---|
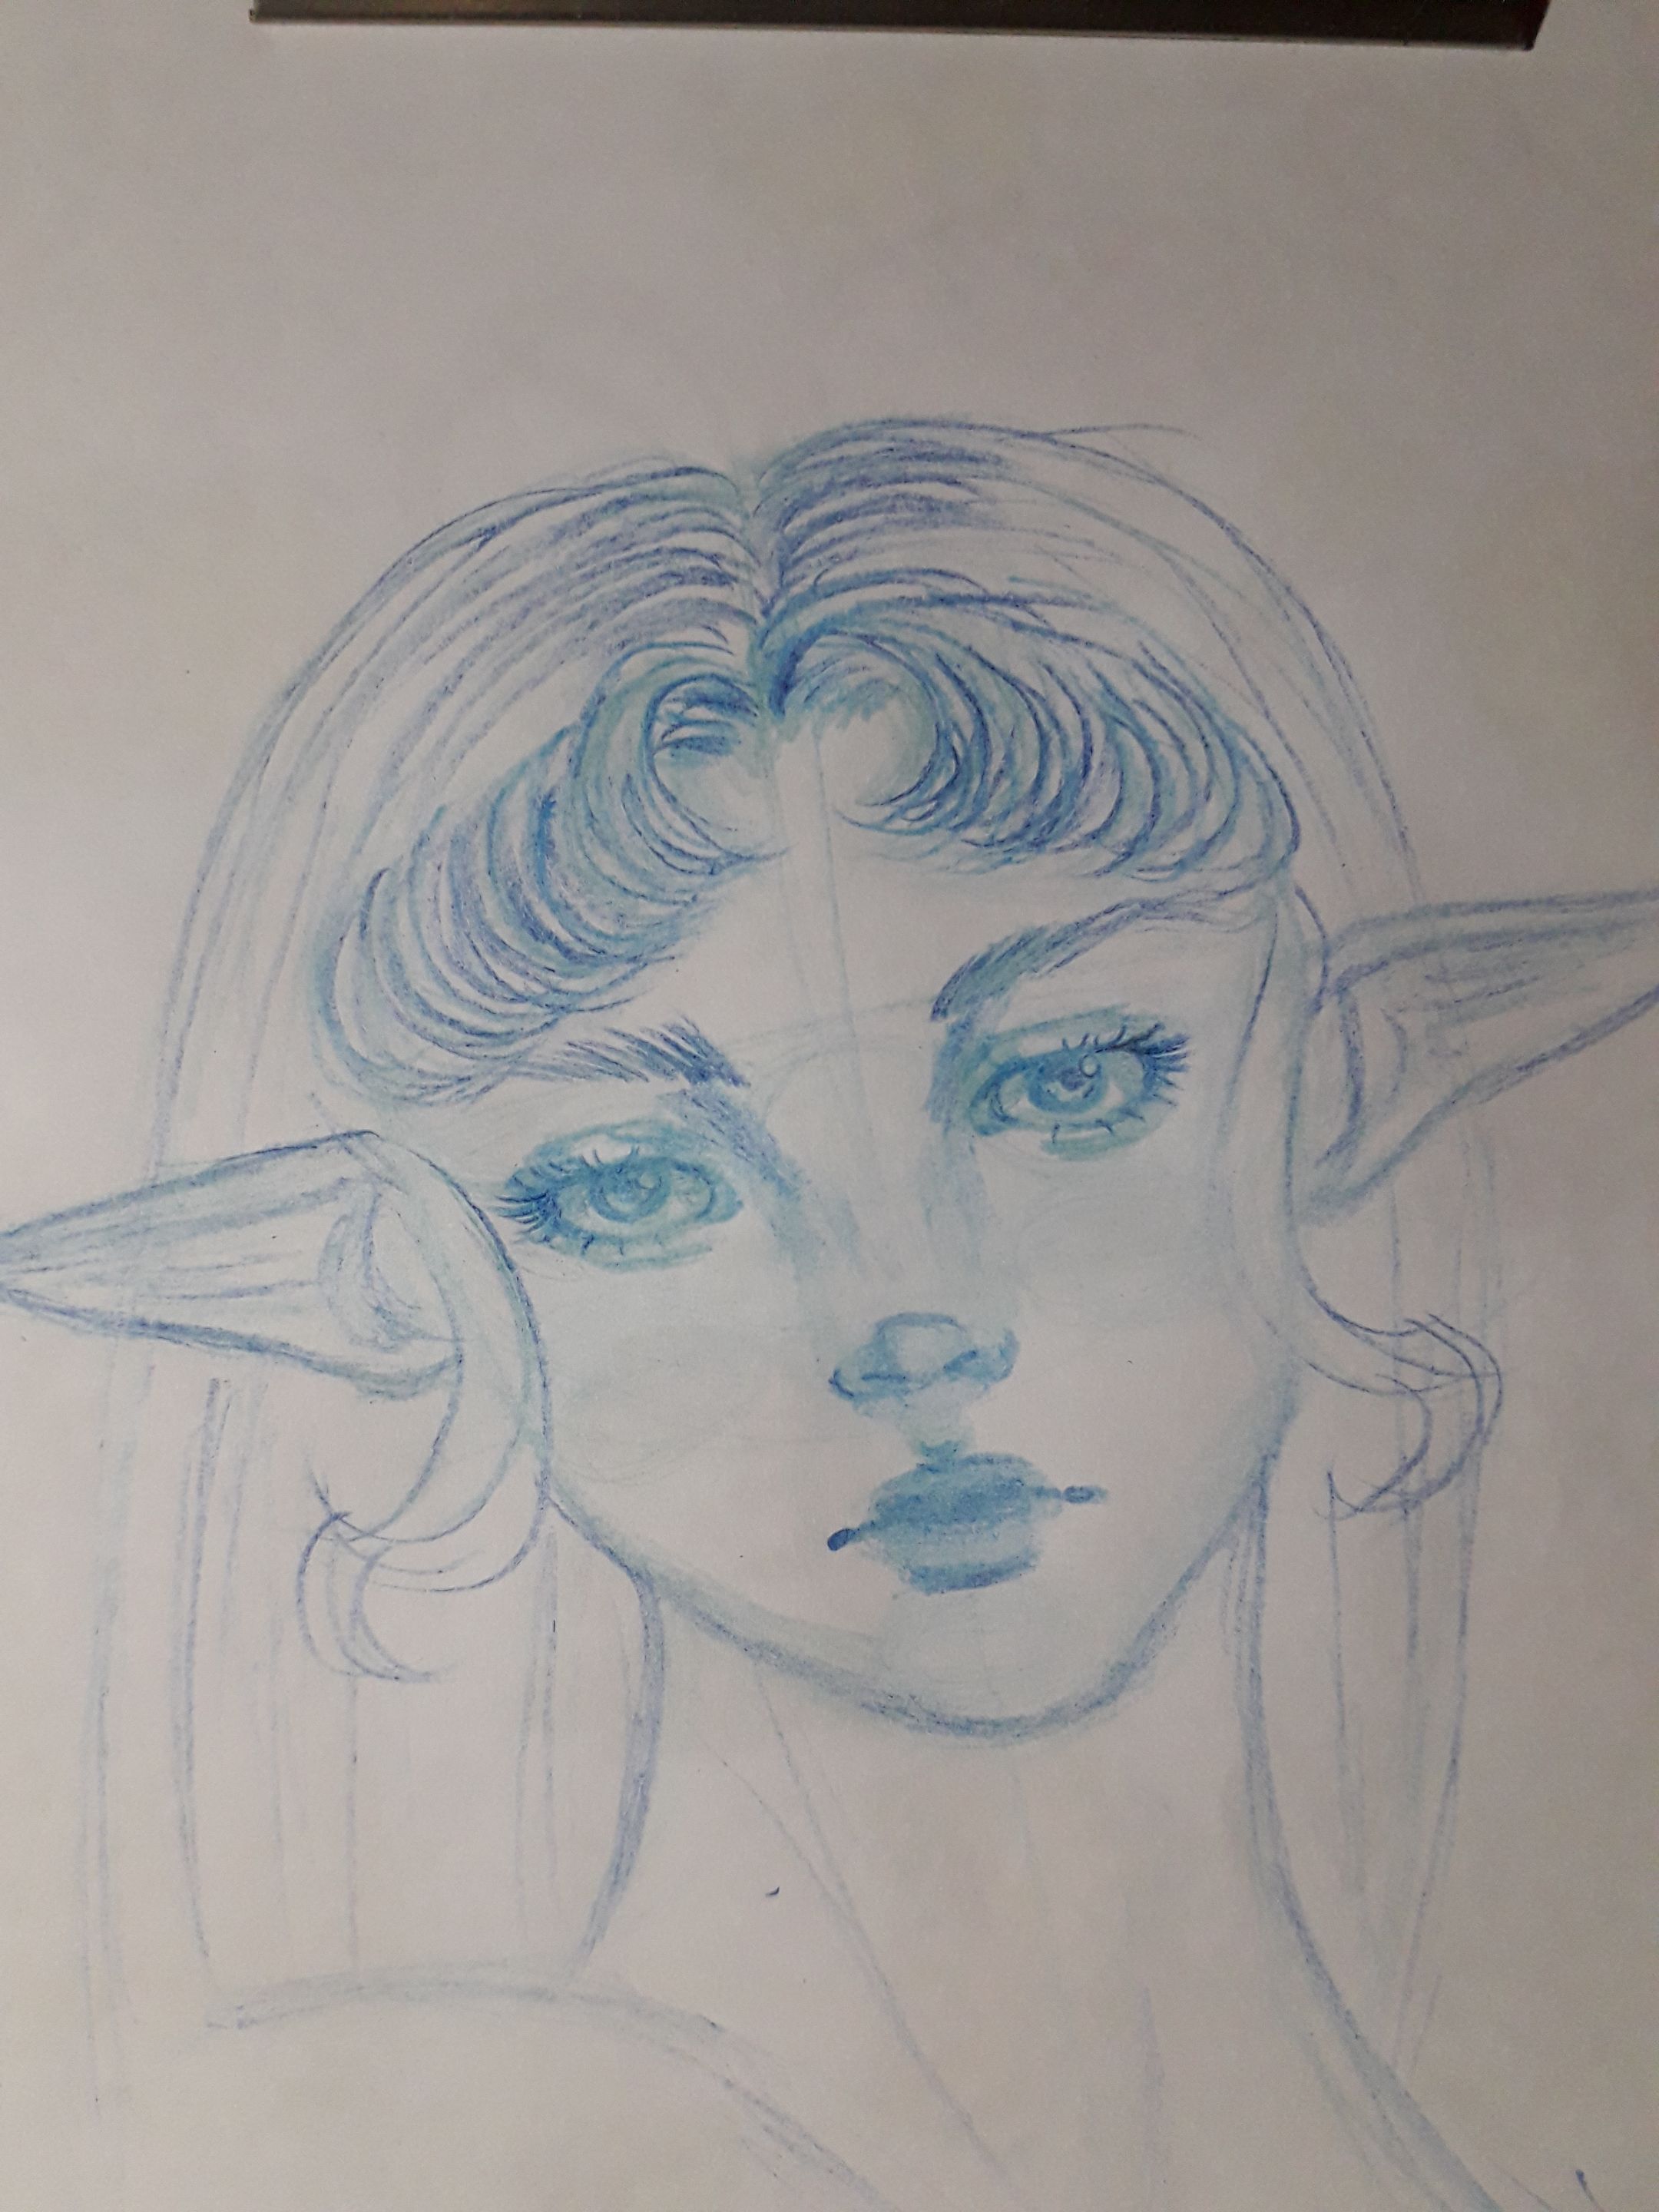
Acá seguí repitiendo lo que hice en el paso anterior referente al cabello: le daba más intensidad y profundidad a los trazos que indican la dirección y crecimiento del cabello; alternaba entre la presión del lápiz y el color del mismo, usando azul claro y azul oscuro donde veía necesario.
Por último, tomé el lápiz de color azul claro para hacer las sombras. Un poco de rubor en las mejillas, sombras en el cuello, las clavículas, las orejas y frente.
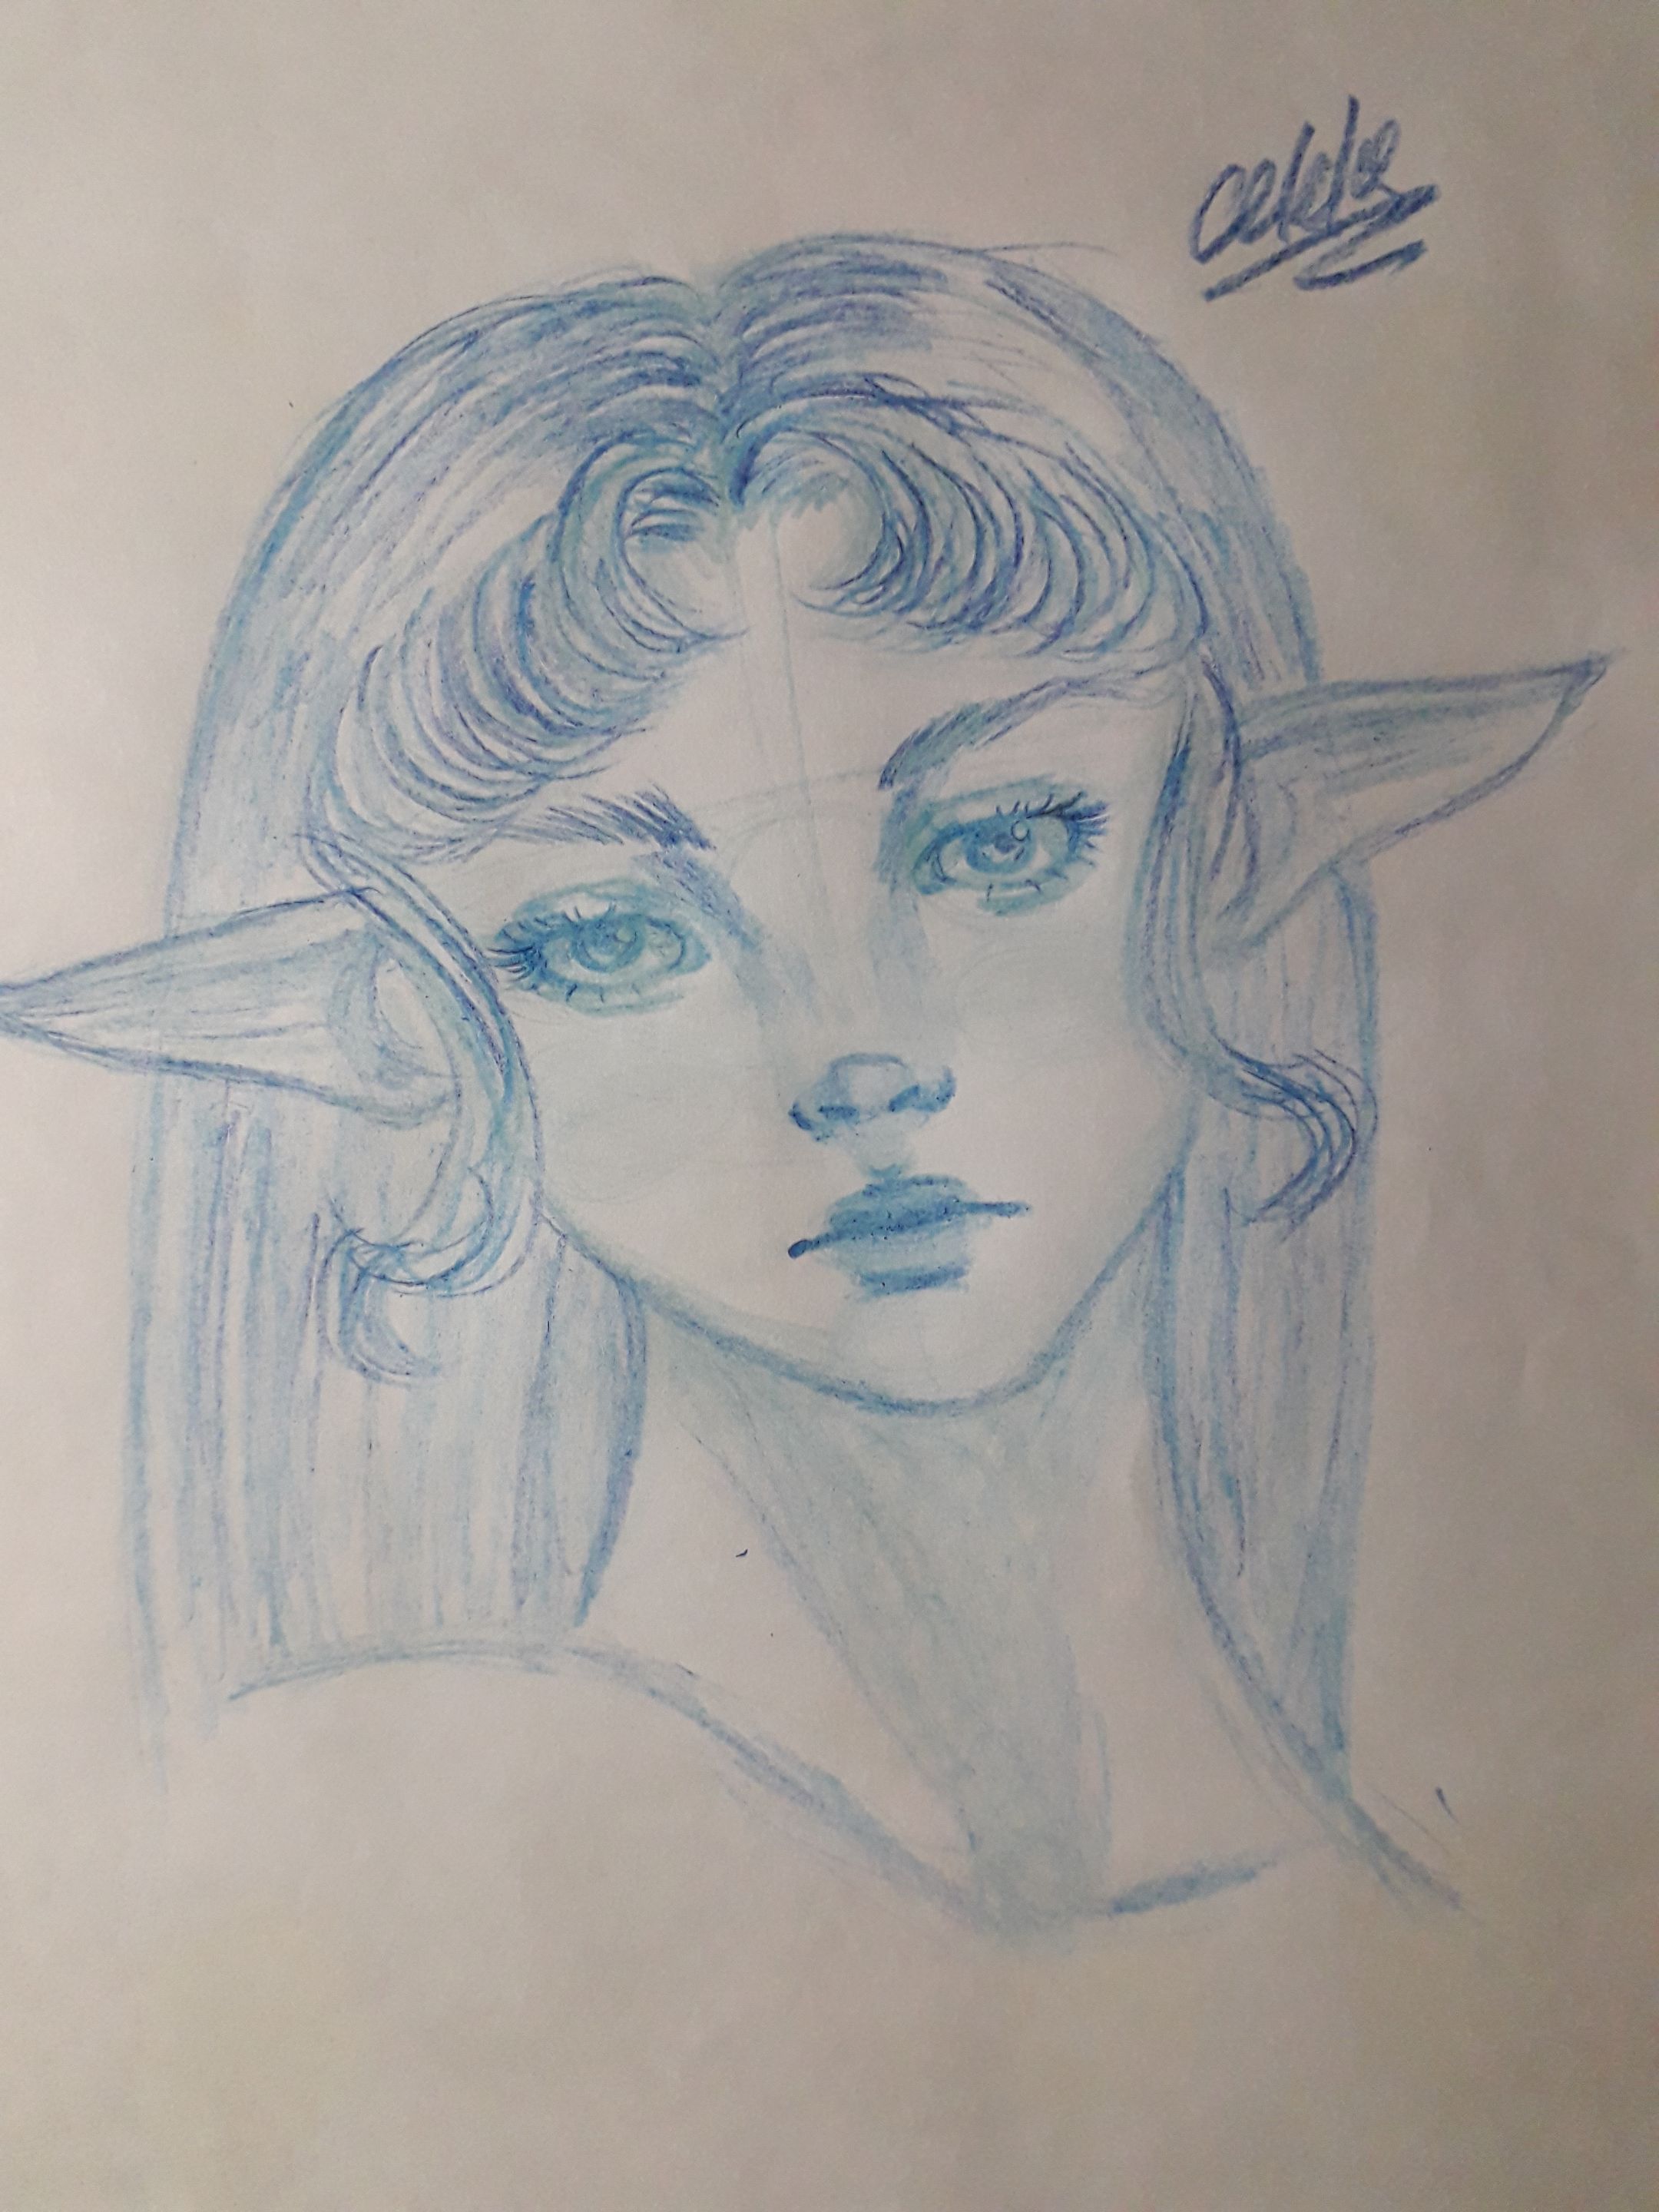
Finalmente, damos un toque de azul oscuro para remarcar algunas zonas importantes en el dibujo… Y ya estaría.
A día de hoy, a pesar de los pequeños errores que vi en el procedimiento (más no tanto en la estructura), puedo decir que sigo orgullosa de este dibujo. Si a mi yo del pasado le mostraras este dibujo, seguro pensaría que es genial, y creo que eso es lo que debería importar.
Me gustaría que me dijeran qué fue lo que más les gusto, si hubo algo, a mí me gustaron los ojos. Si no les gustó nada, o si tienen algún consejo para dar, también me gustaría escuchar su feedback.
Actualmente, sigo practicando los rostros y los cuerpos humanos, pero estos últimos se me complican en sobremanera; aun así, sigo aprendiendo y mirando muchos videos para aprender, incluso me colé en una clase de medicina en YouTube para saber los músculos del cuerpo, es muy interesante… aunque eso no me ha enseñado a dibujarlos.
Algo que sí sé, es como capturar un poco el dinamismo de las poses, que fue una cosa que se me dificultaba enormemente en el pasado, así que es otro ejemplo de mi propia superación. Espero pronto compartir los poquitos consejos que aprendí, pero para eso seguiré practicando anatomía. Vamos, a practicar todos, y no olviden lo que siempre digo: practicar y aprender son igual de importantes. La práctica en sí no es la que hace al maestro, el aprendizaje también.
Sin nada más que añadir… Cuídense, tomen agua, y no se olviden de sonreír. ¡Se les quiere! Nos vemos en el próximo post, ¡chau!
English
I really like mythological creatures, and you know that I have a special fascination for mermaids. However, other creatures that I like in equal measure, are fairies and elves (which, although I know they are not the same, they are quite similar).
I was recently remembering how much I love the Shadow hunters books, and how faeries and elves are pretty much the same creatures in that world. Beautiful women and men, with pointy ears, where I decided to exaggerate this trait.
I just bought some cheap colors that, to no one's surprise, ended up disappointing me, but that doesn't stop me from using them for my practices. So today we are going to take the light blue and dark color, and join me to draw this elf, let's go there!
We took a light blue pencil.
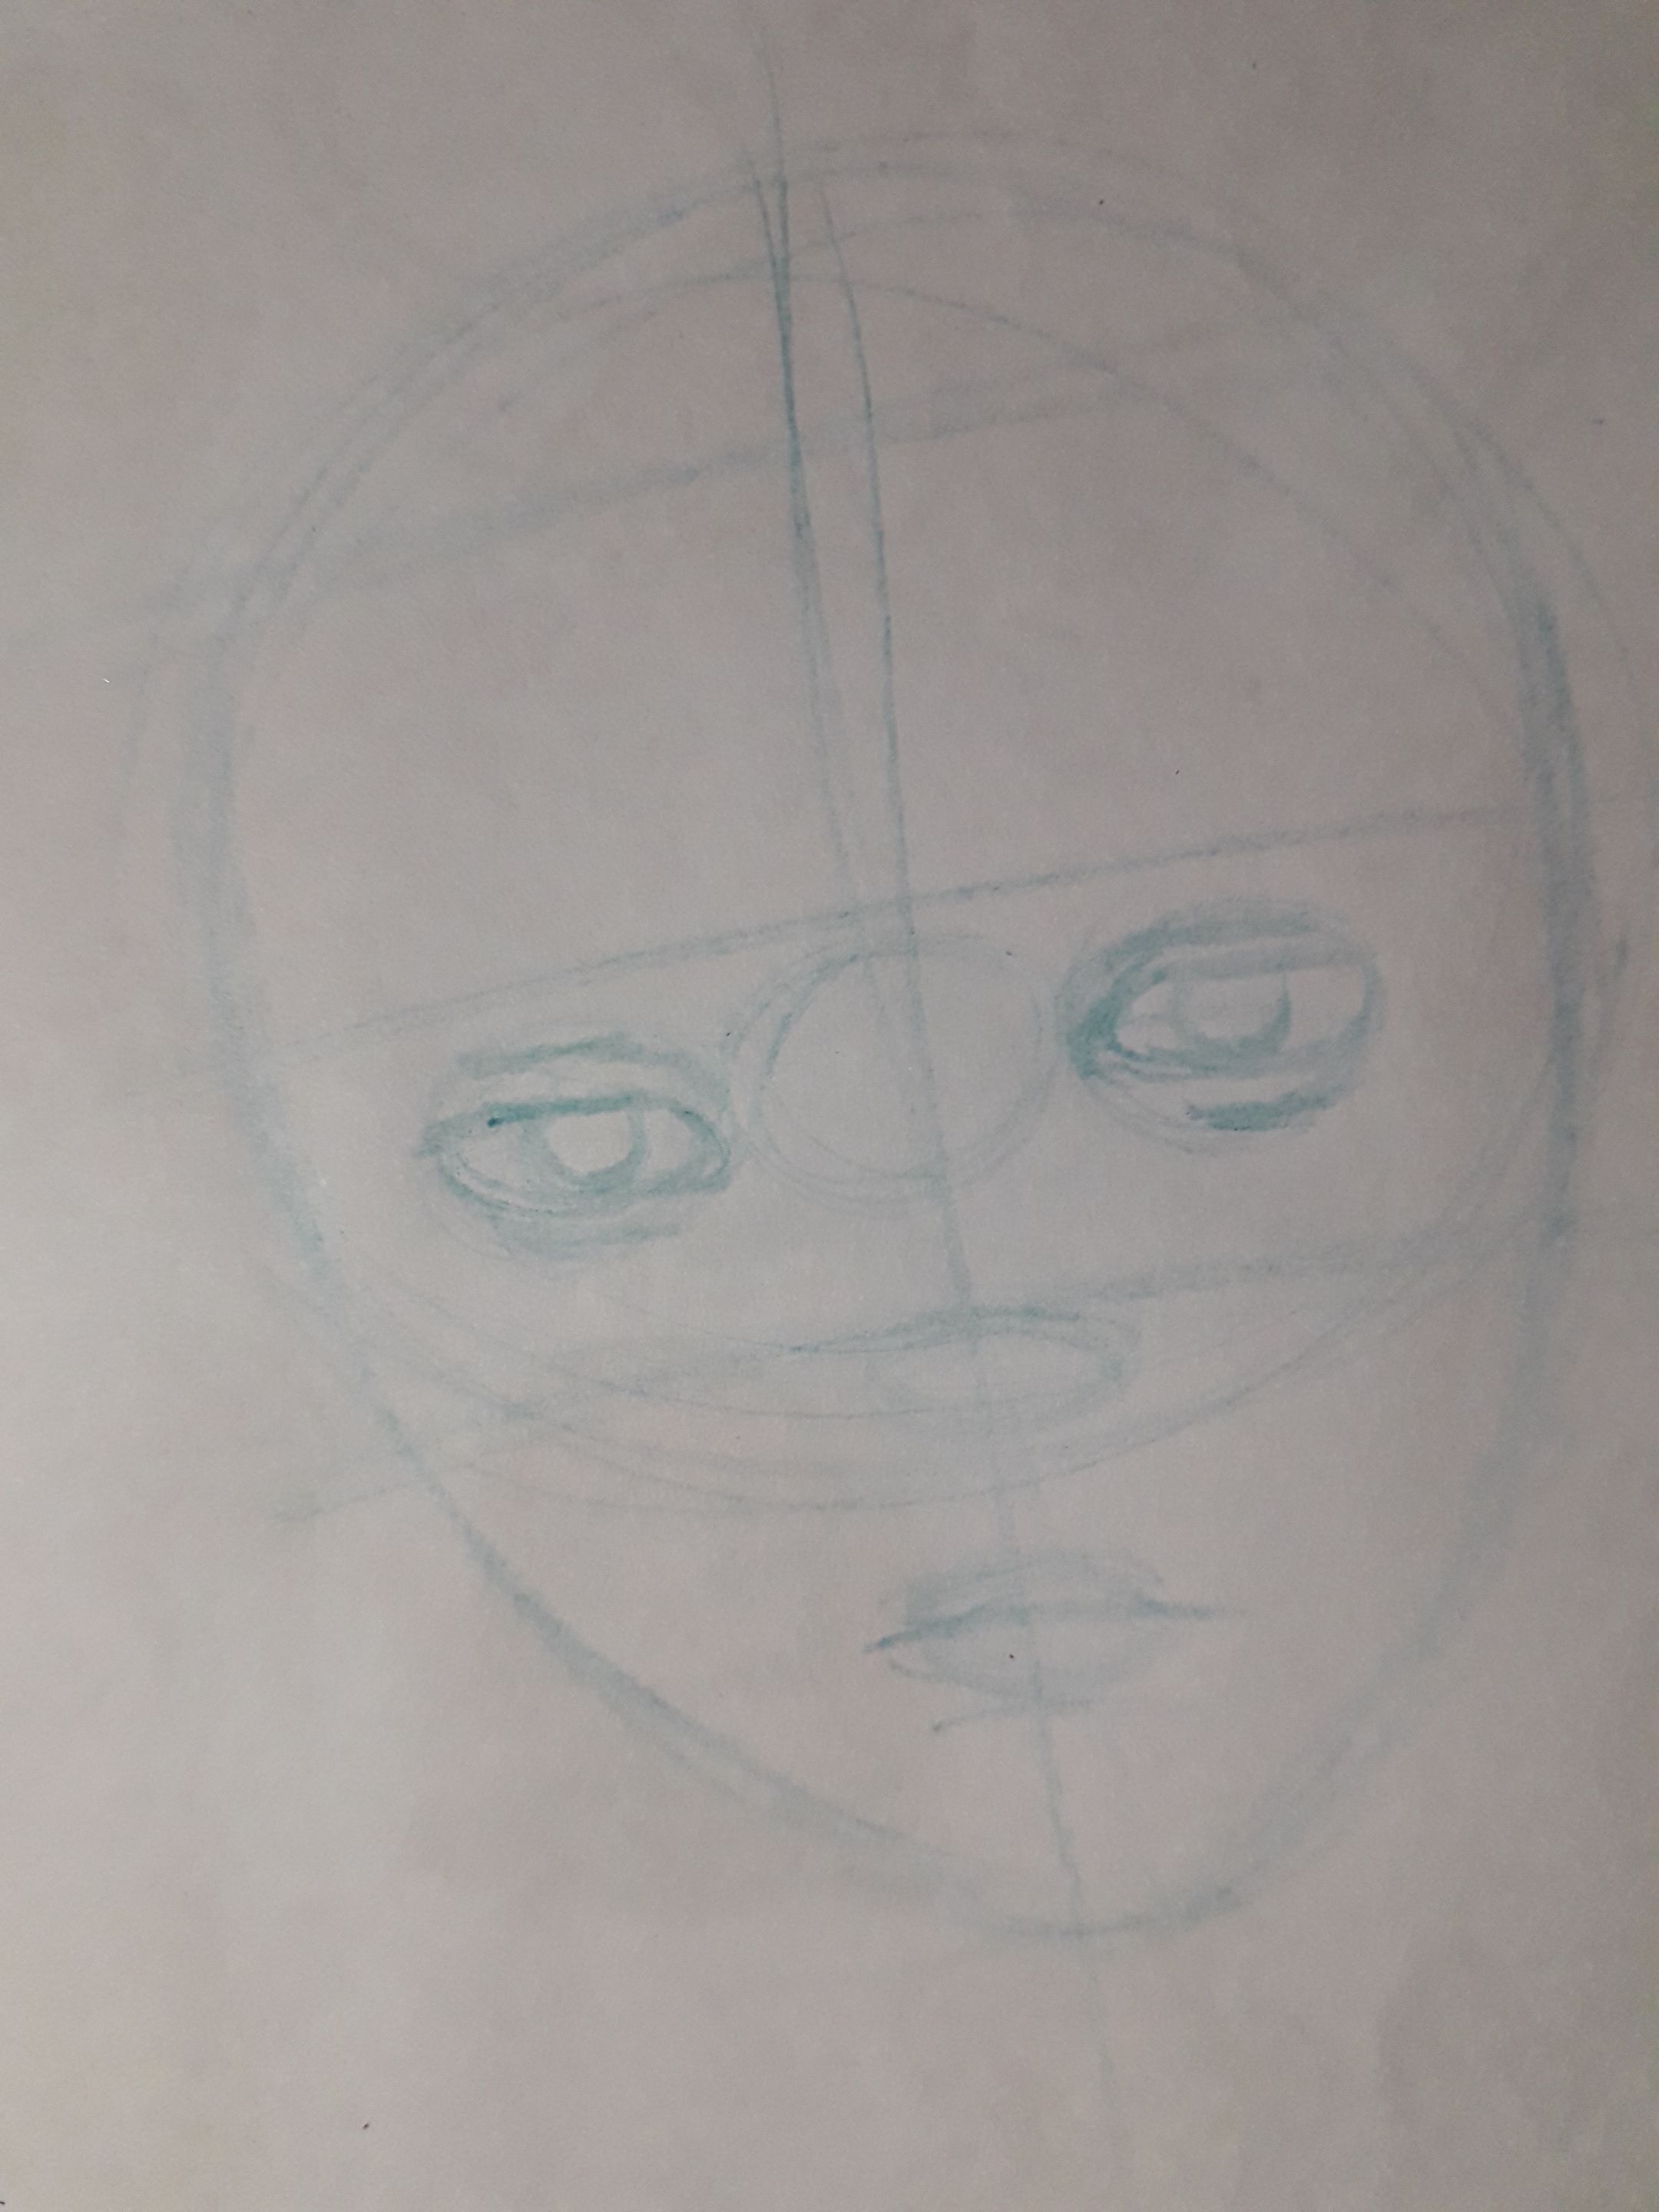
At first, I started by making a circle and dividing it into a cross, the typical method for making a face. However, nowadays, I draw more by instinct than by an established method, but let's not get ahead of that, let's talk about the procedure of this specific drawing, hahaha.
I made three circles to know where to draw the eyes, leaving the central circle as a guide only. Inside the other two circles, I drew the outline of each eye, I wanted to make somewhat sharp eyes.
For the nose, I drew an oval. If you notice, the distance between the end of the eye and the base of the nose is the same as the height of an eye. Finally, a little below the base of the nose, I made another oval for the mouth and divided it in half, which would be the corner of the mouth.
Finally, I made the outline of the face.
| |
|---|
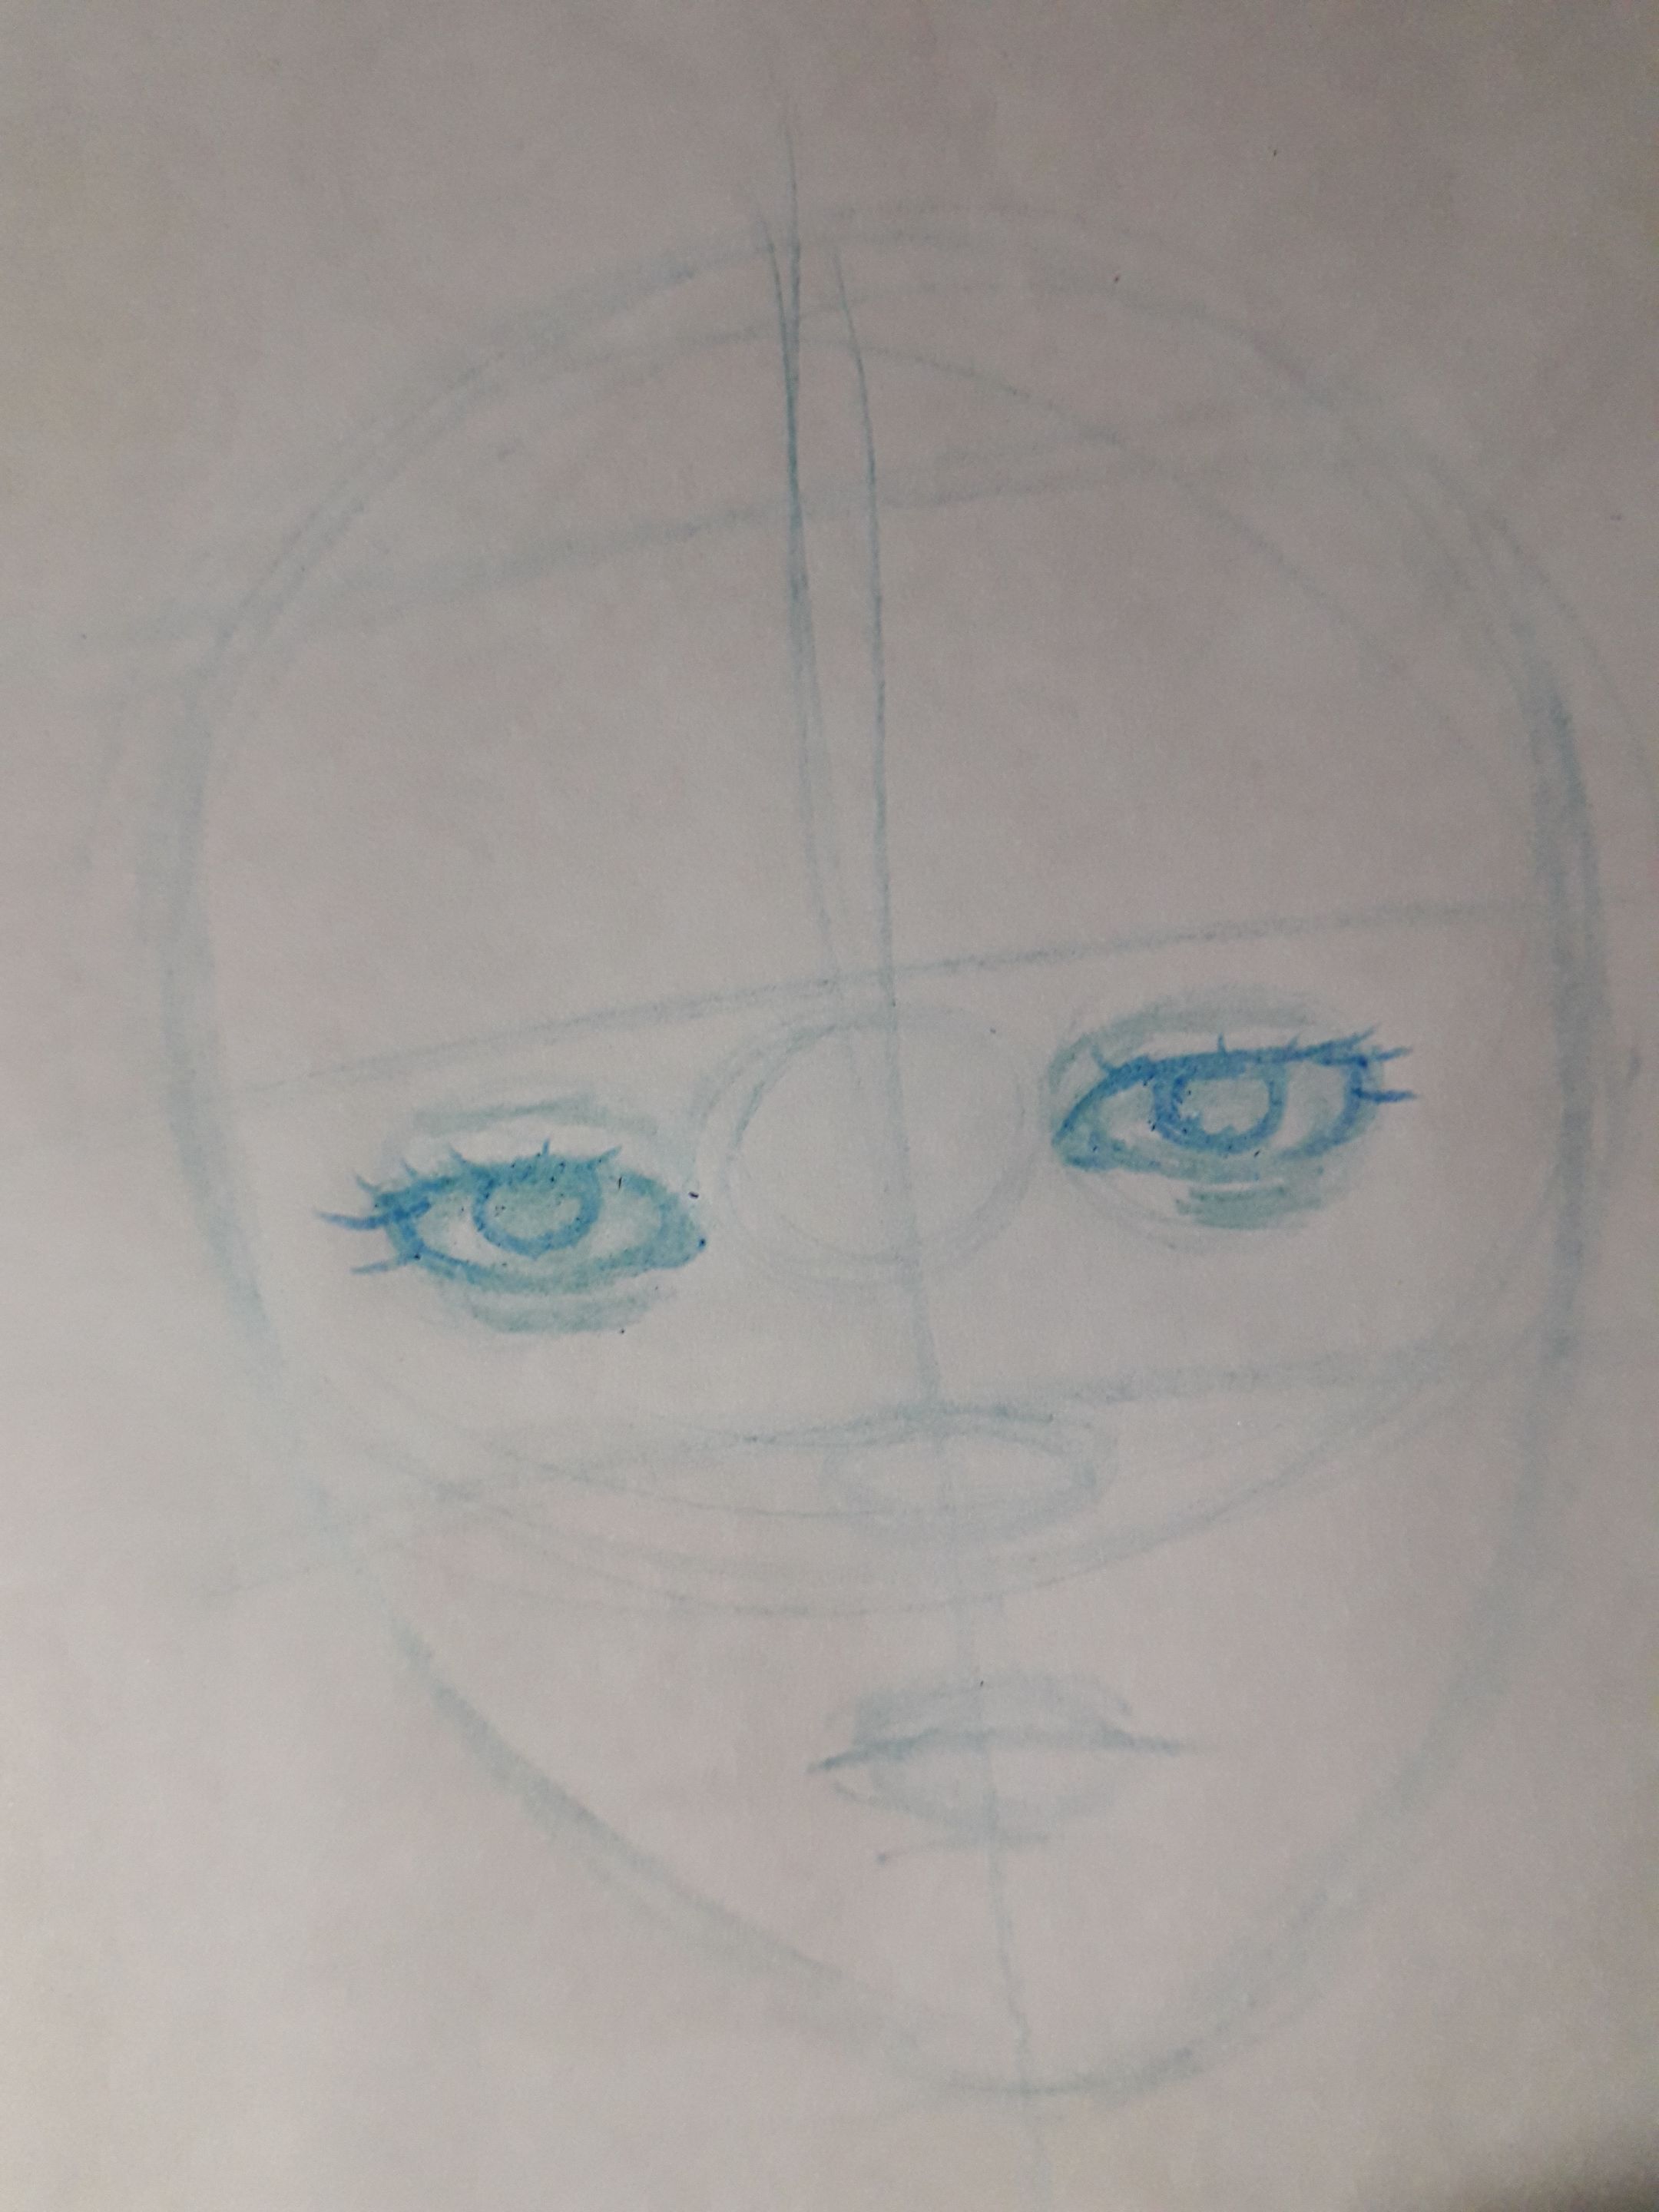
Still with the light blue pencil, I started by beginning to draw the eyes.
If you are a beginner and you are reading this, don't do this. At this point, I was experimenting with my drawing process, and I realized that this is a mistake we make all too often. Repeat after me: from the general, to the particular.
But the Celely of the past didn't know this, so let's continue.
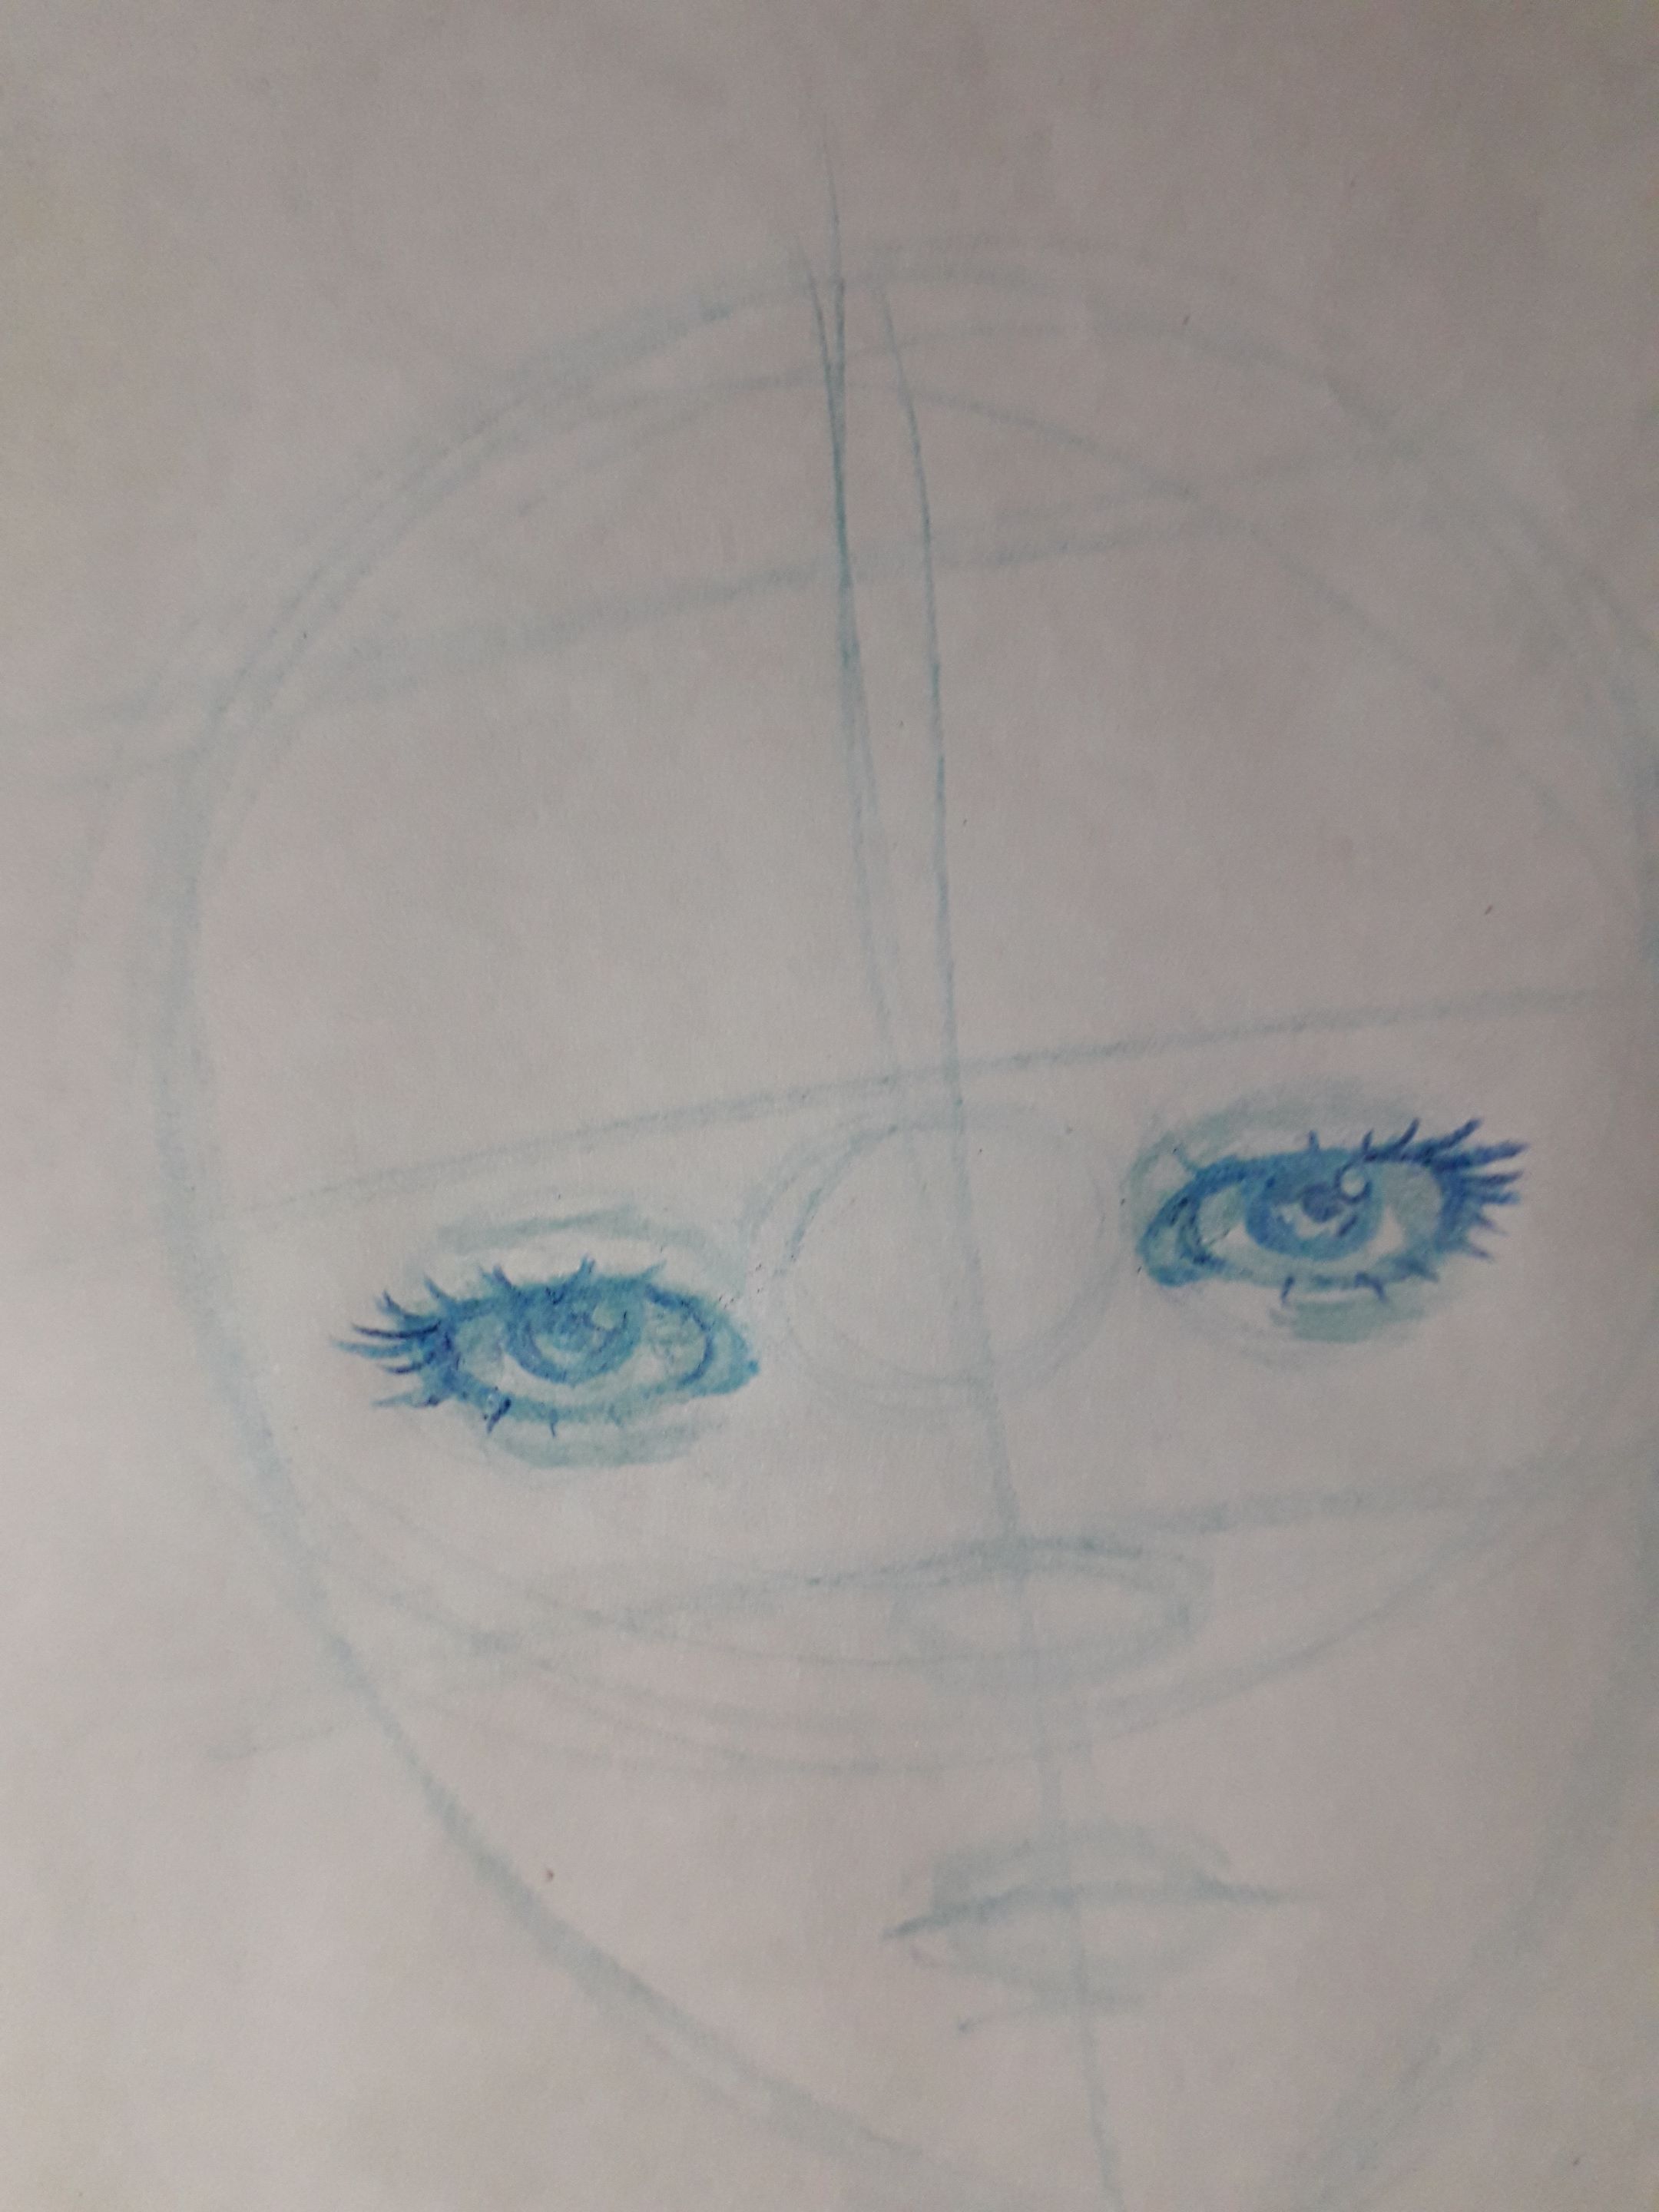
First, I started by highlighting what would be the rims of the eyes and the iris. I also gave shadows inside the eyes, which would be projected by the upper eyelid of the eye. I drew some eyelashes.
With the dark blue pencil, I went over again. I colored the iris and pupil, leaving some space to represent the “sparkles” of the eye and drew more eyelashes. Finally, I gave shadows in the creases around the eye, leaving some unpainted spaces to give this impression that there is light reflecting there on the skin.
Ah, a pause, soon I want to really share with you my practices through Liketu, because I feel like in every post I mention things I don't like about my own drawings and I think it seems to give the impression that I don't like any of my drawings. Actually, this is a drawing I did a couple of weeks ago and I'm of the opinion that I've learned a bit more and I already see mistakes, that's why I criticize it.
However, I believe that in life we will always have something new to learn, and we should always compare ourselves only with ourselves; we should be our own inspiration and goal to overcome.
Still, just because I see mistakes doesn't mean it's ugly or I don't like it, in fact this drawing was one of my greatest prides when I finished it, that's why I share it. Let's continue.
| |
|---|
With quick, diagonal upward strokes, I did each eyebrow, I love how they frame the look. A cunning, cold look, that's how I imagine these fairies, who usually make unfair deals with humans just to annoy; that's how those fairies are in the books I read, hehehehe.
Also, I gave shadows in the area between the eyebrows, to give it more depth. For the areas where I want a stronger color, and, therefore, a deeper shadow, I use more pressure on the pencil, and when I want it to be lighter, I use less pressure; I also alternate between dark blue and light blue pencil, depending on how intense I want the stroke to be.
As we can see, I drew the nose from the oval I made, using the edges to draw the fins of the nose. I made a small circle in the center to give a rounder look to the nose, and just below I drew the nostrils. To the whole nose I give a little color with the light blue pencil, to make it more striking, as if it were a blush.
The mouth was also made from the oval, but it was much easier. I simply colored the entire lip, then in the areas closest to the corners of the mouth, I colored them with a little more intensity. I also highlighted the edges of the corners of the mouth and the edges of the lips. And the face would be ready.
| |
|---|
Now it's time for the most important thing, the hair, and the ears.
I started by making a sketch of the bangs, which will be a little “arched” and will be divided in half, imagine the bangs of the Sailor Moon protagonist. The rest of the hair will be long and falling backwards.
On the other hand, I sketched the ears with a triangular shape.
| |
|---|
I started by highlighting the fringe, following the direction in which the hair grows and settles, also drawing the area where the hair starts to grow and divides in half. Then I also drew a couple of strands in front of the ears, framing the face. Finally, I began to draw lines that represent the locks that follow the direction and growth of the hair, starting from the division of the hair.
I also remarked a little the ears, rounding them and giving more shape, and I tried to draw what would be inside the ear, although I think very few people take the time to draw an ear inside, hahaha.
| |
|---|
Here I continued repeating what I did in the previous step regarding the hair: I gave more intensity and depth to the strokes that indicate the direction and growth of the hair; I alternated between the pressure of the pencil and the color of the pencil, using light blue and dark blue where I saw necessary.
Lastly, I took the light blue pencil to do the shadows. A little blush on the cheeks, shadows on the neck, collarbones, ears and forehead.
Finally, we give a touch of dark blue to highlight some important areas in the drawing... And that was it.
To this day, despite the small mistakes I saw in the procedure (but not so much in the structure), I can say that I'm still proud of this drawing. If you showed this drawing to my past self, I'm sure he'd think it was great, and I think that's what should matter.
I would like you to tell me what you liked the most, if anything, I liked the eyes. If you didn't like anything, or if you have any tips to give, I'd also like to hear your feedback.
Currently, I'm still practicing faces and human bodies, but the latter are very complicated for me; even so, I'm still learning and watching a lot of videos to learn, I even snuck into a medical class on YouTube to know the muscles of the body, it's very interesting... although it hasn't taught me how to draw them.
One thing I do know, is how to capture a bit of dynamism in poses, which was one thing I struggled with immensely in the past, so that's another example of my own overcoming. I hope soon to share the little bit of tips I learned, but for that I'll keep practicing anatomy. Come on, let's all practice, and don't forget what I always say: practicing and learning are equally important. It's not the practice itself that makes the master, it's the learning as well.
Without anything else to add… Take care, drink water, and don't forget to smile. Love you! See you in the next post, bye!
Créditos | Credits
- Traducción al inglés DeepL (lo siento por cualquier error, no sé mucho inglés.)
- English translation DeepL (sorry for any mistakes, I don't know much English)
- Para los separadores usé la siguiente imagen: copo de nieve PNGs por Vecteezy. Y fueron editados desde Canva. Banners hechos en Canva
- For the separators I used the following image: copo de nieve PNGs por Vecteezy. And they were edited from Canva. Banners made in Canva
- Las fotos usadas en el post fueron tomadas por mí, usando un Samsung Galaxy J6.
- Photos used in the post were taken by me, using a Samsung Galaxy J6.
Posted Using INLEO