La pintura, además de ser un arte, nos permite expresarnos sin palabras, es una de las mejores herramientas para soltar el estrés, echar a volar la imaginación y encontrar paz en medio de la tormenta. No en vano es utilizada como terapia para el estrés e incluso para combatir algunas enfermedades.
Y para los niños diagnosticados con TEA, la pintura es la mejor manera de expresarse, sin el estrés de buscar la forma correcta o eficaz de comunicar lo que sienten, además es una herramienta increíble para mejorar la concentración y ayudar a la relajación, es por esto que el día de hoy en nuestra columna mensual, Arte Azul, vamos a pintar, pero de una manera muy original porque pintaremos sin pinceles.
Los materiales que vamos a utilizar posiblemente los tengan en casa, sobre todo si tienen niños, y como siempre digo, los pueden reemplazar sin problemas por lo que tengan a su alcance, así que no se compliquen si no tienen algo de lo que les menciono abajo, dejen volar su imaginación y sustitúyanlo con otra cosa.
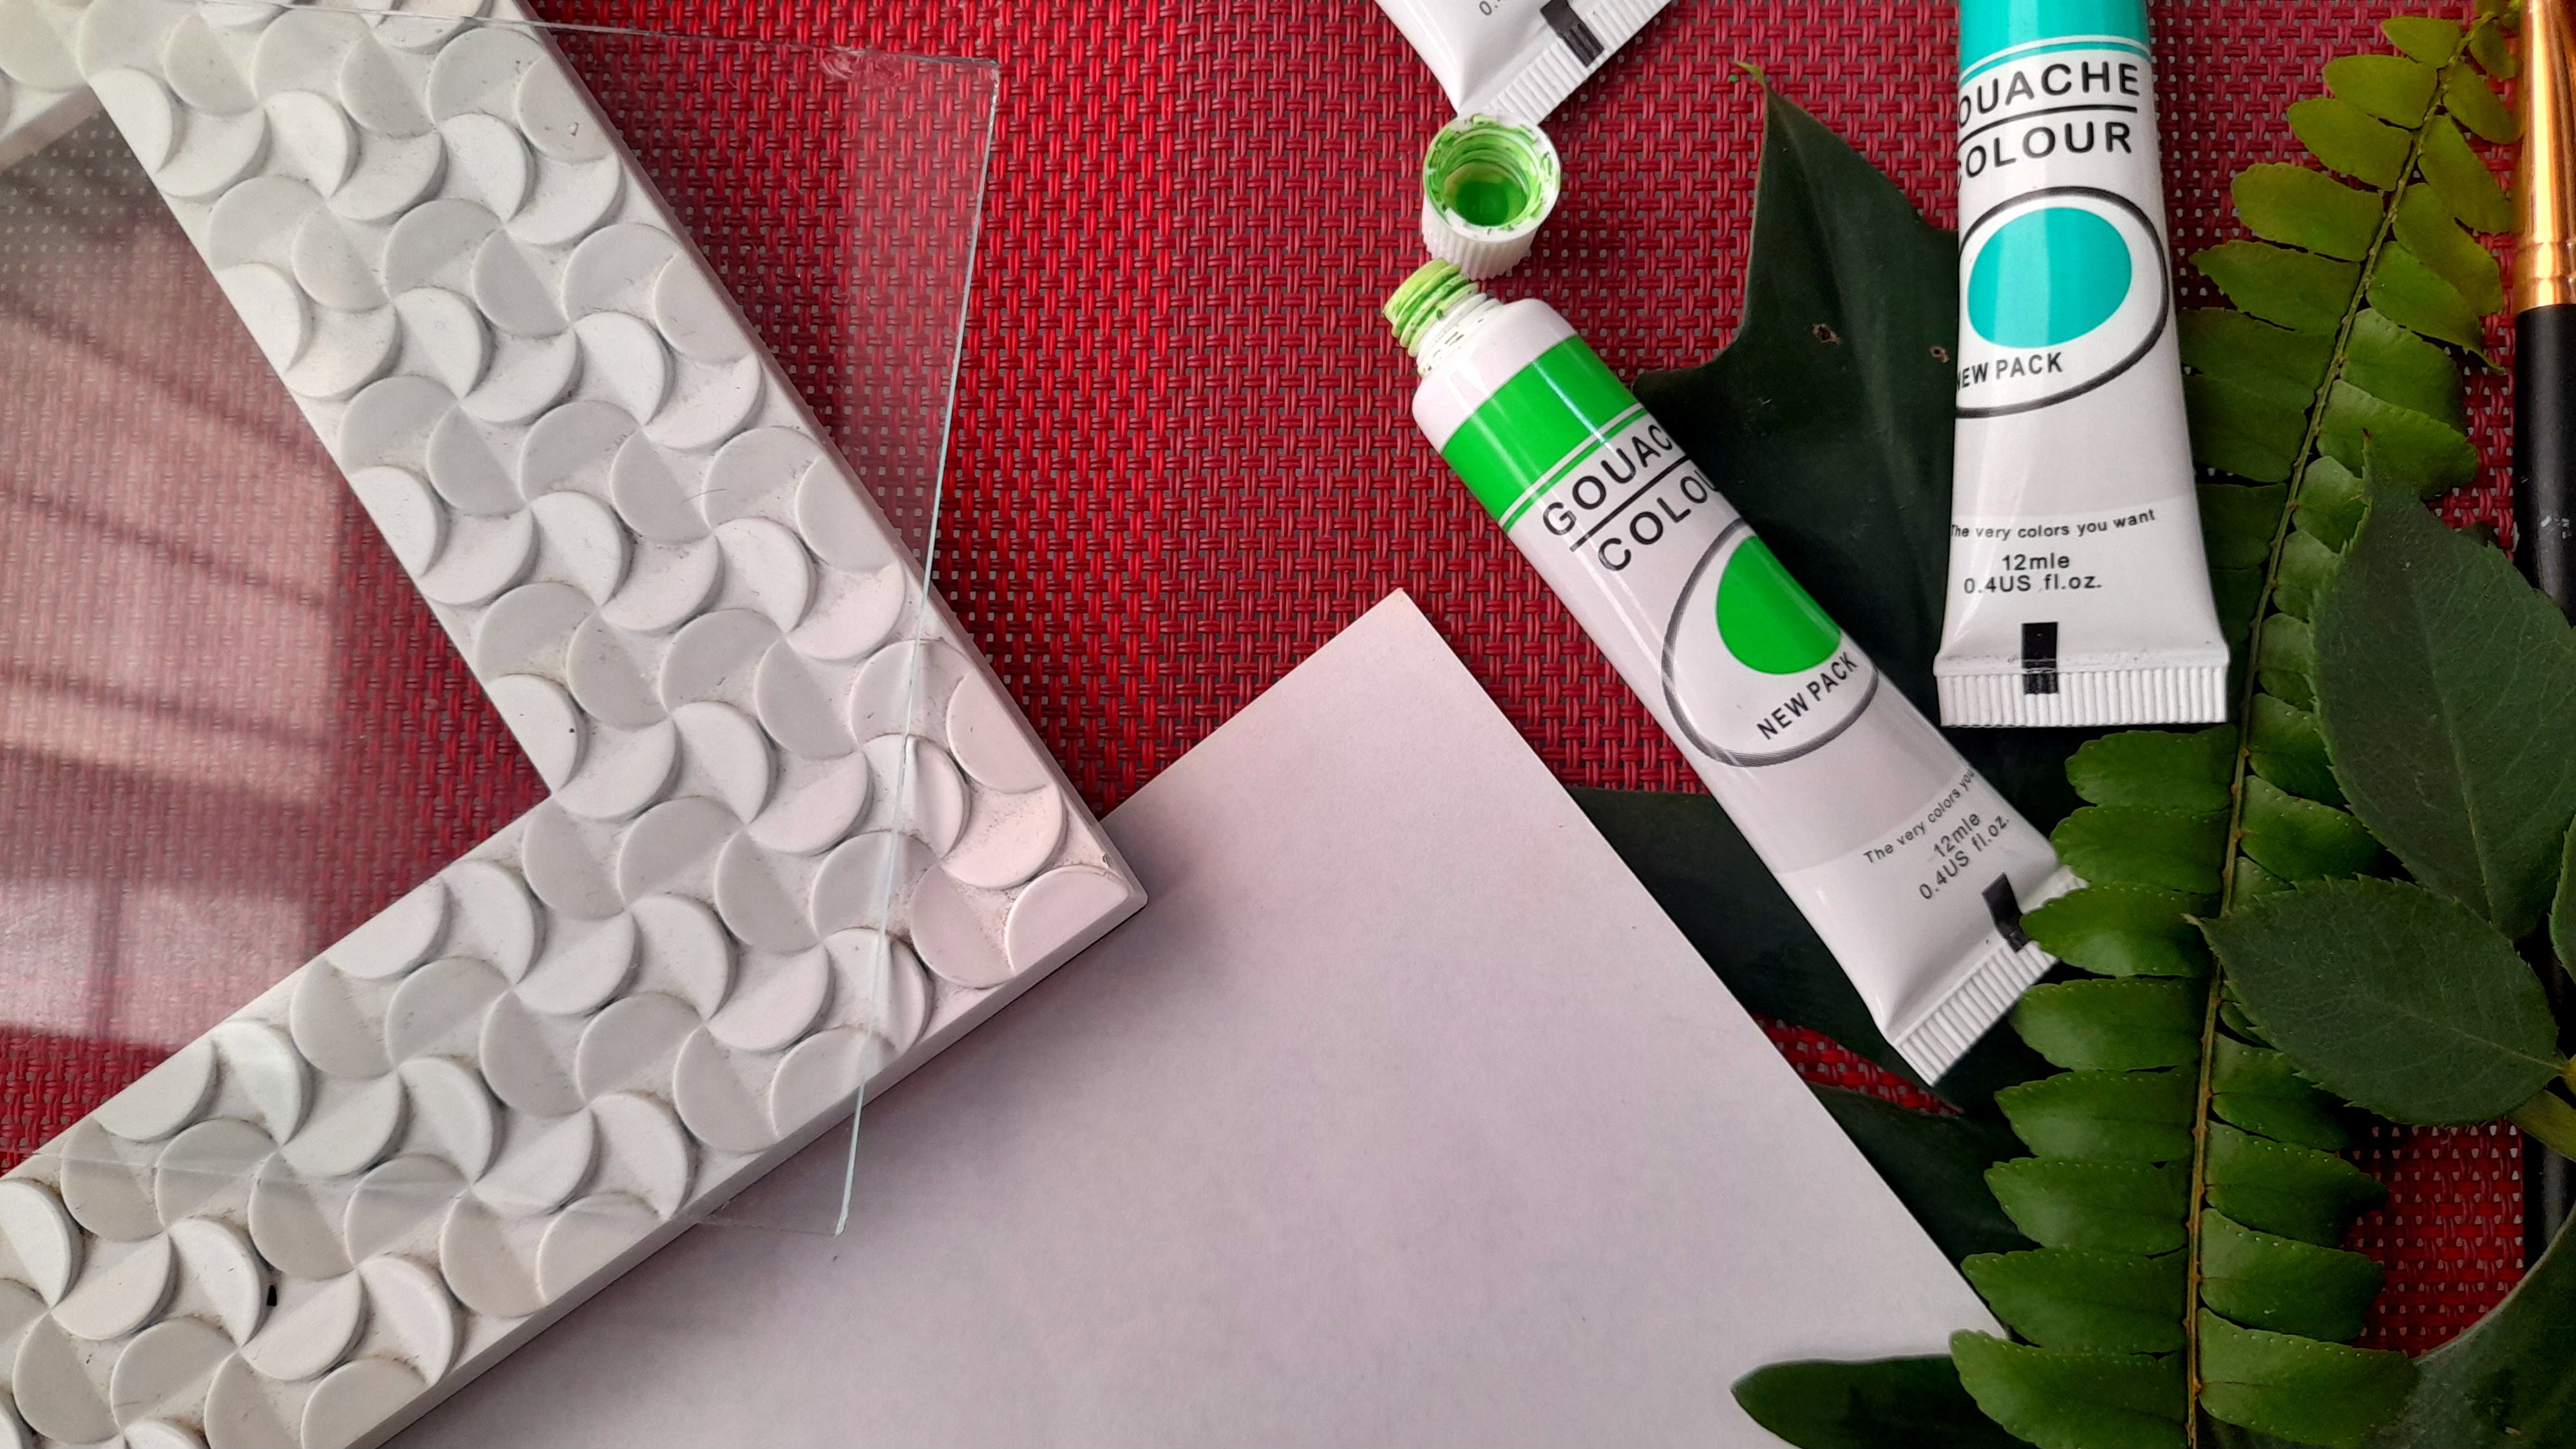
MATERIALES
Superficie para pintar, puede ser cartulina, hoja blanca e incluso un lienzo.
Acuarelas (pueden usar cualquier pintura que tengan en casa)
Hojas pequeñas de alguna planta
Guata o algodón
Porta retrato (no es indispensable, de igual forma si desean enmarcar la pintura pueden improvisar un marco con paletas, cartulina, etc.)
PROCEDIMIENTO
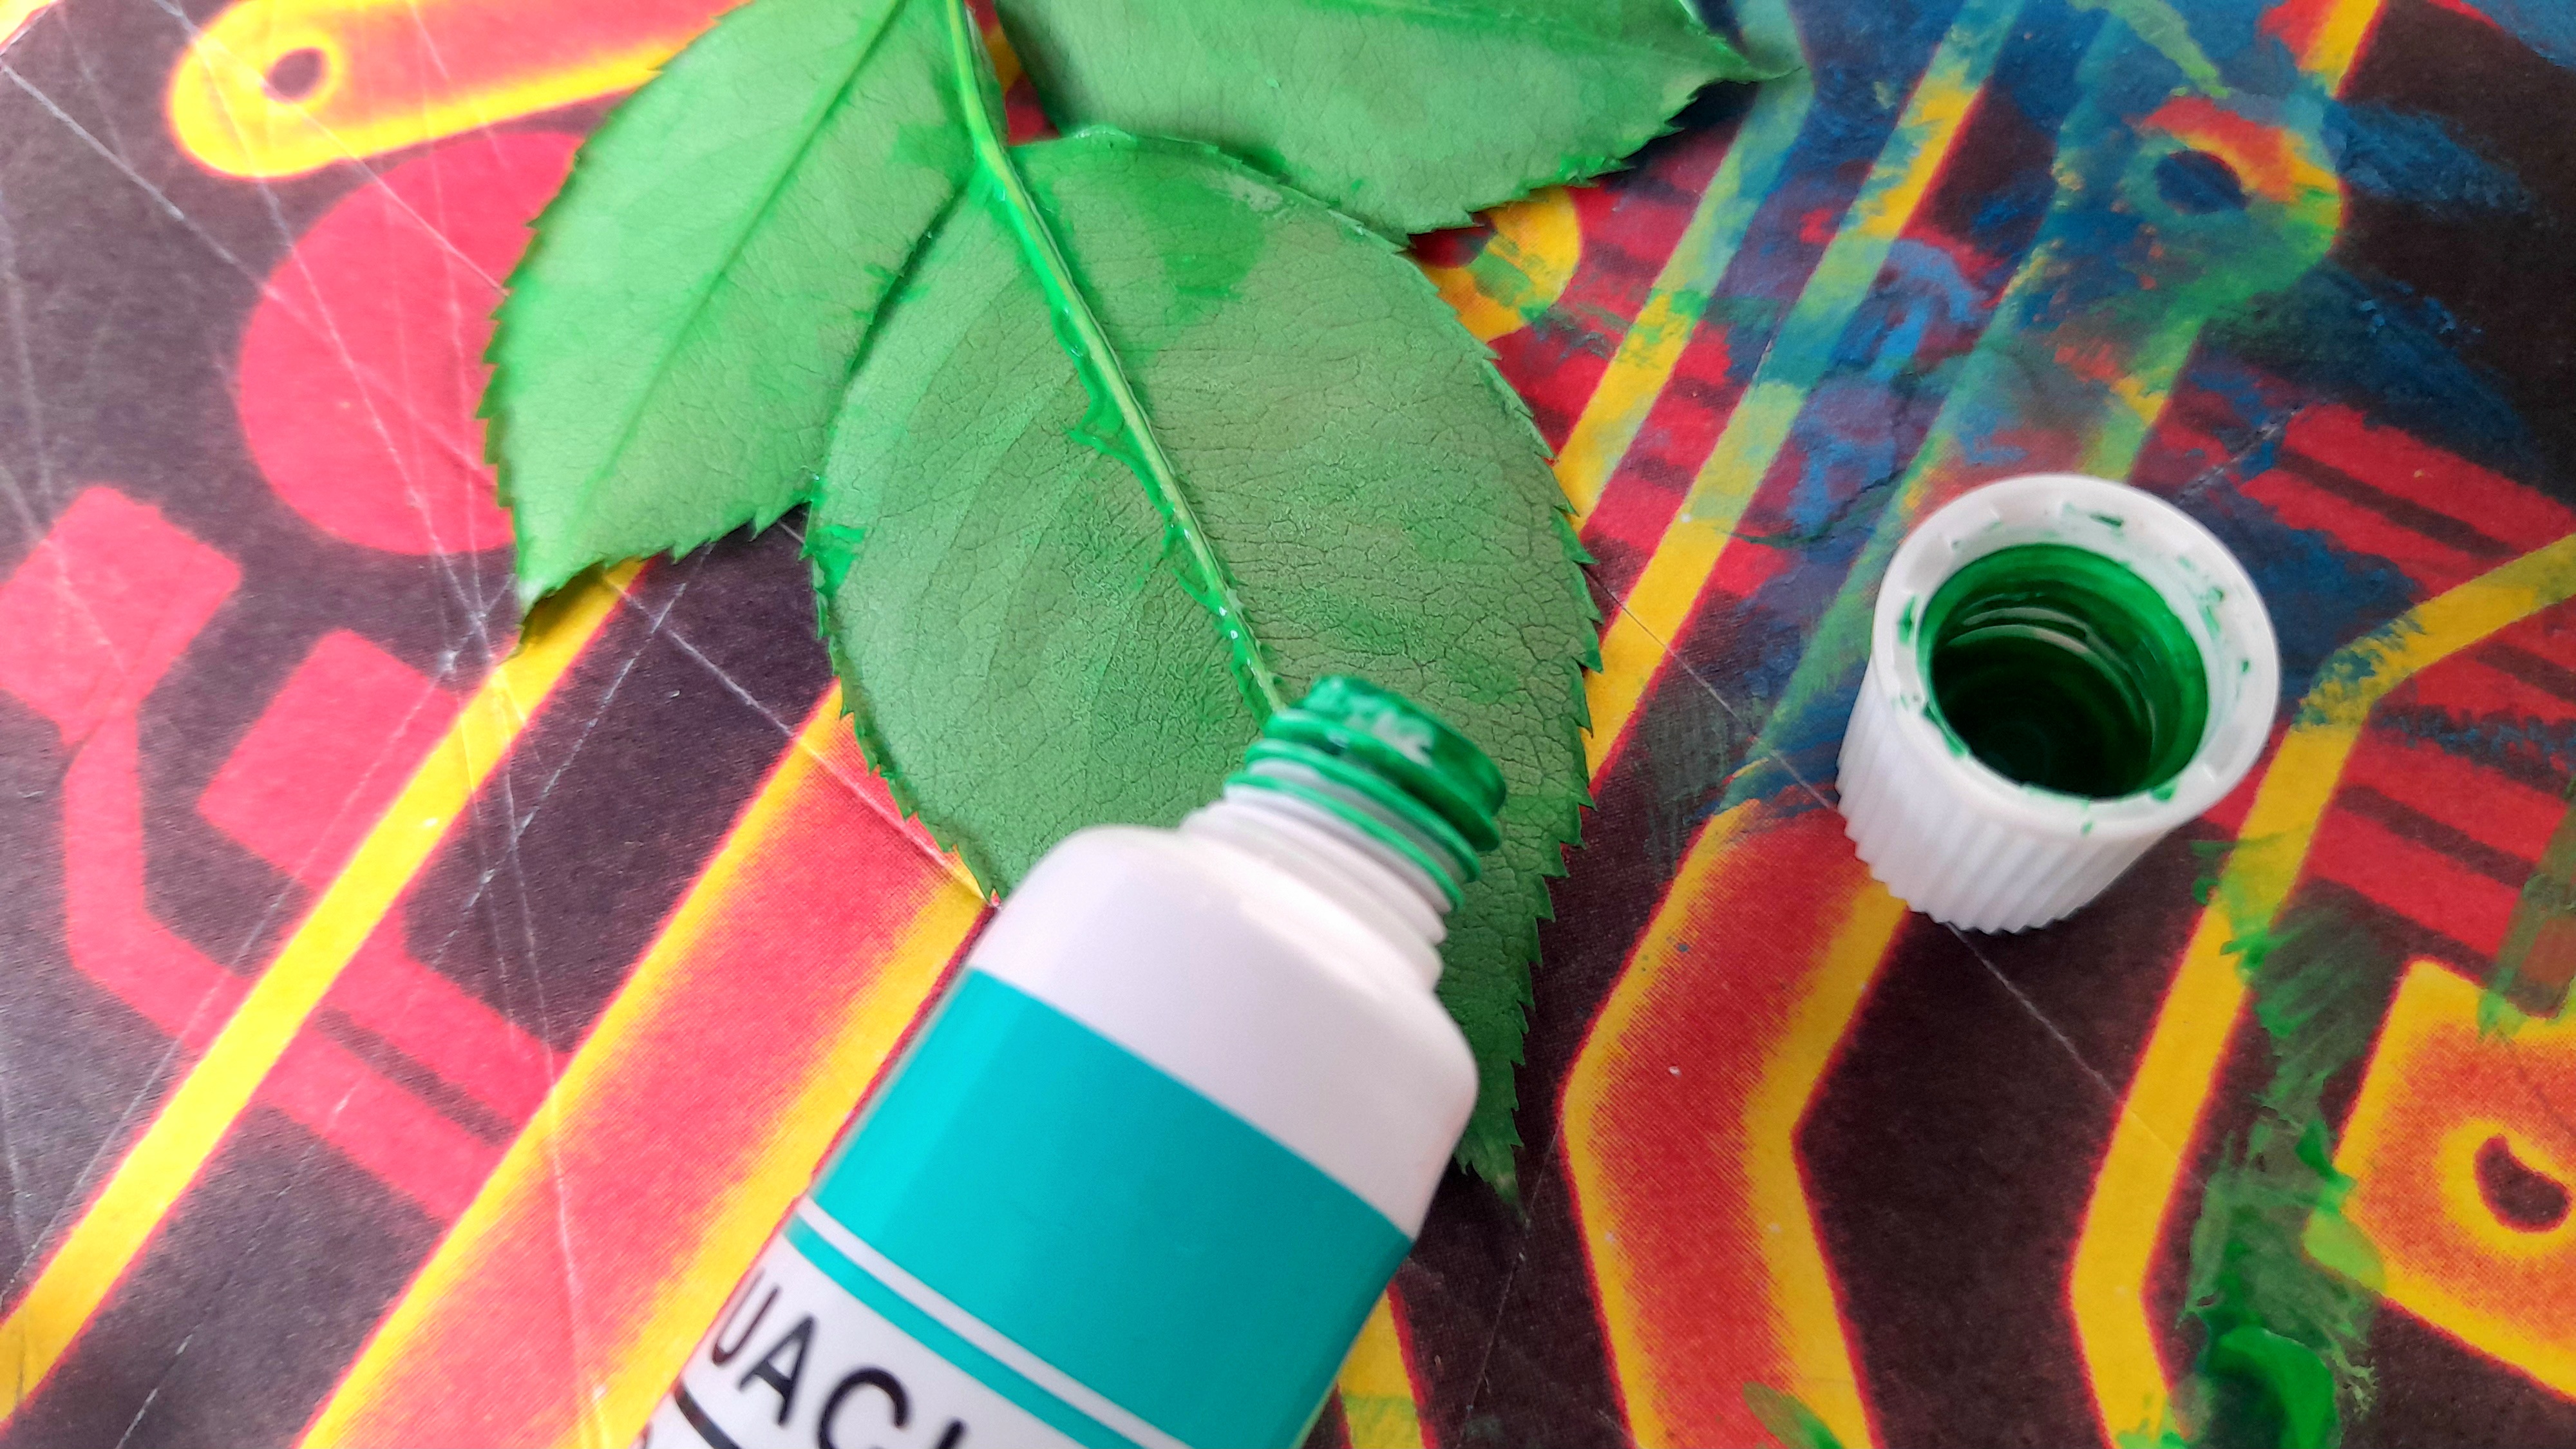
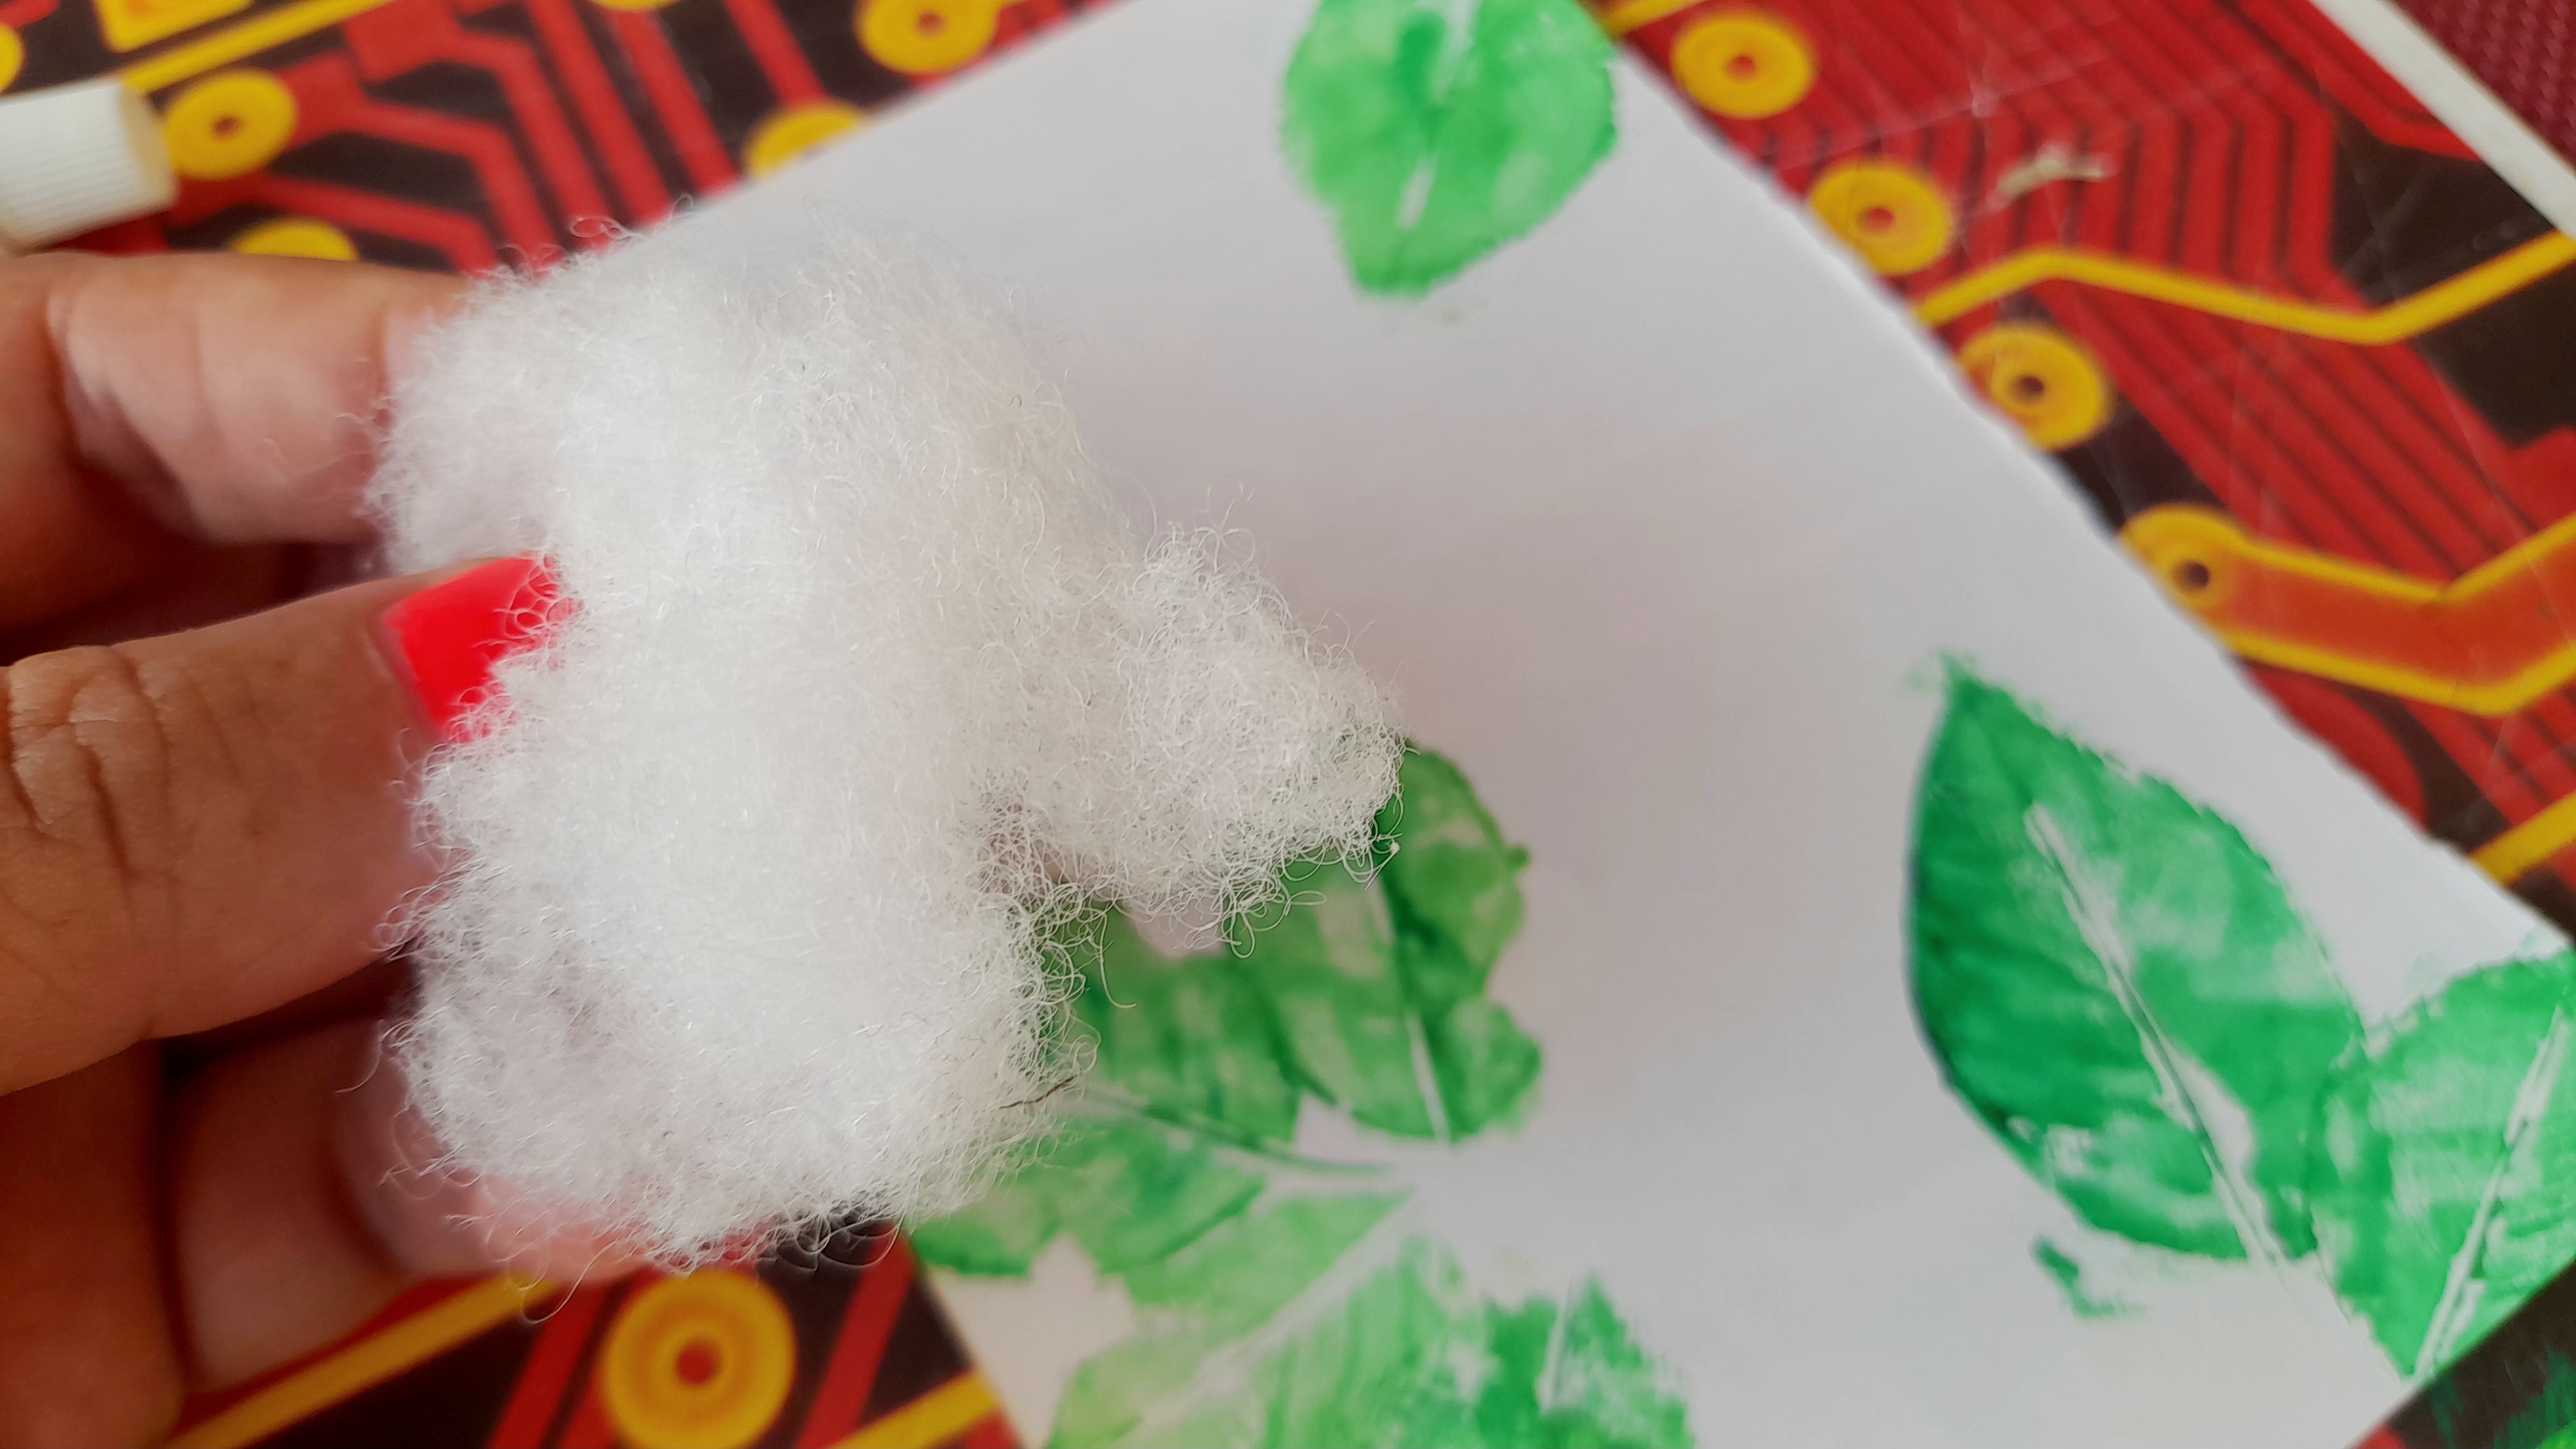
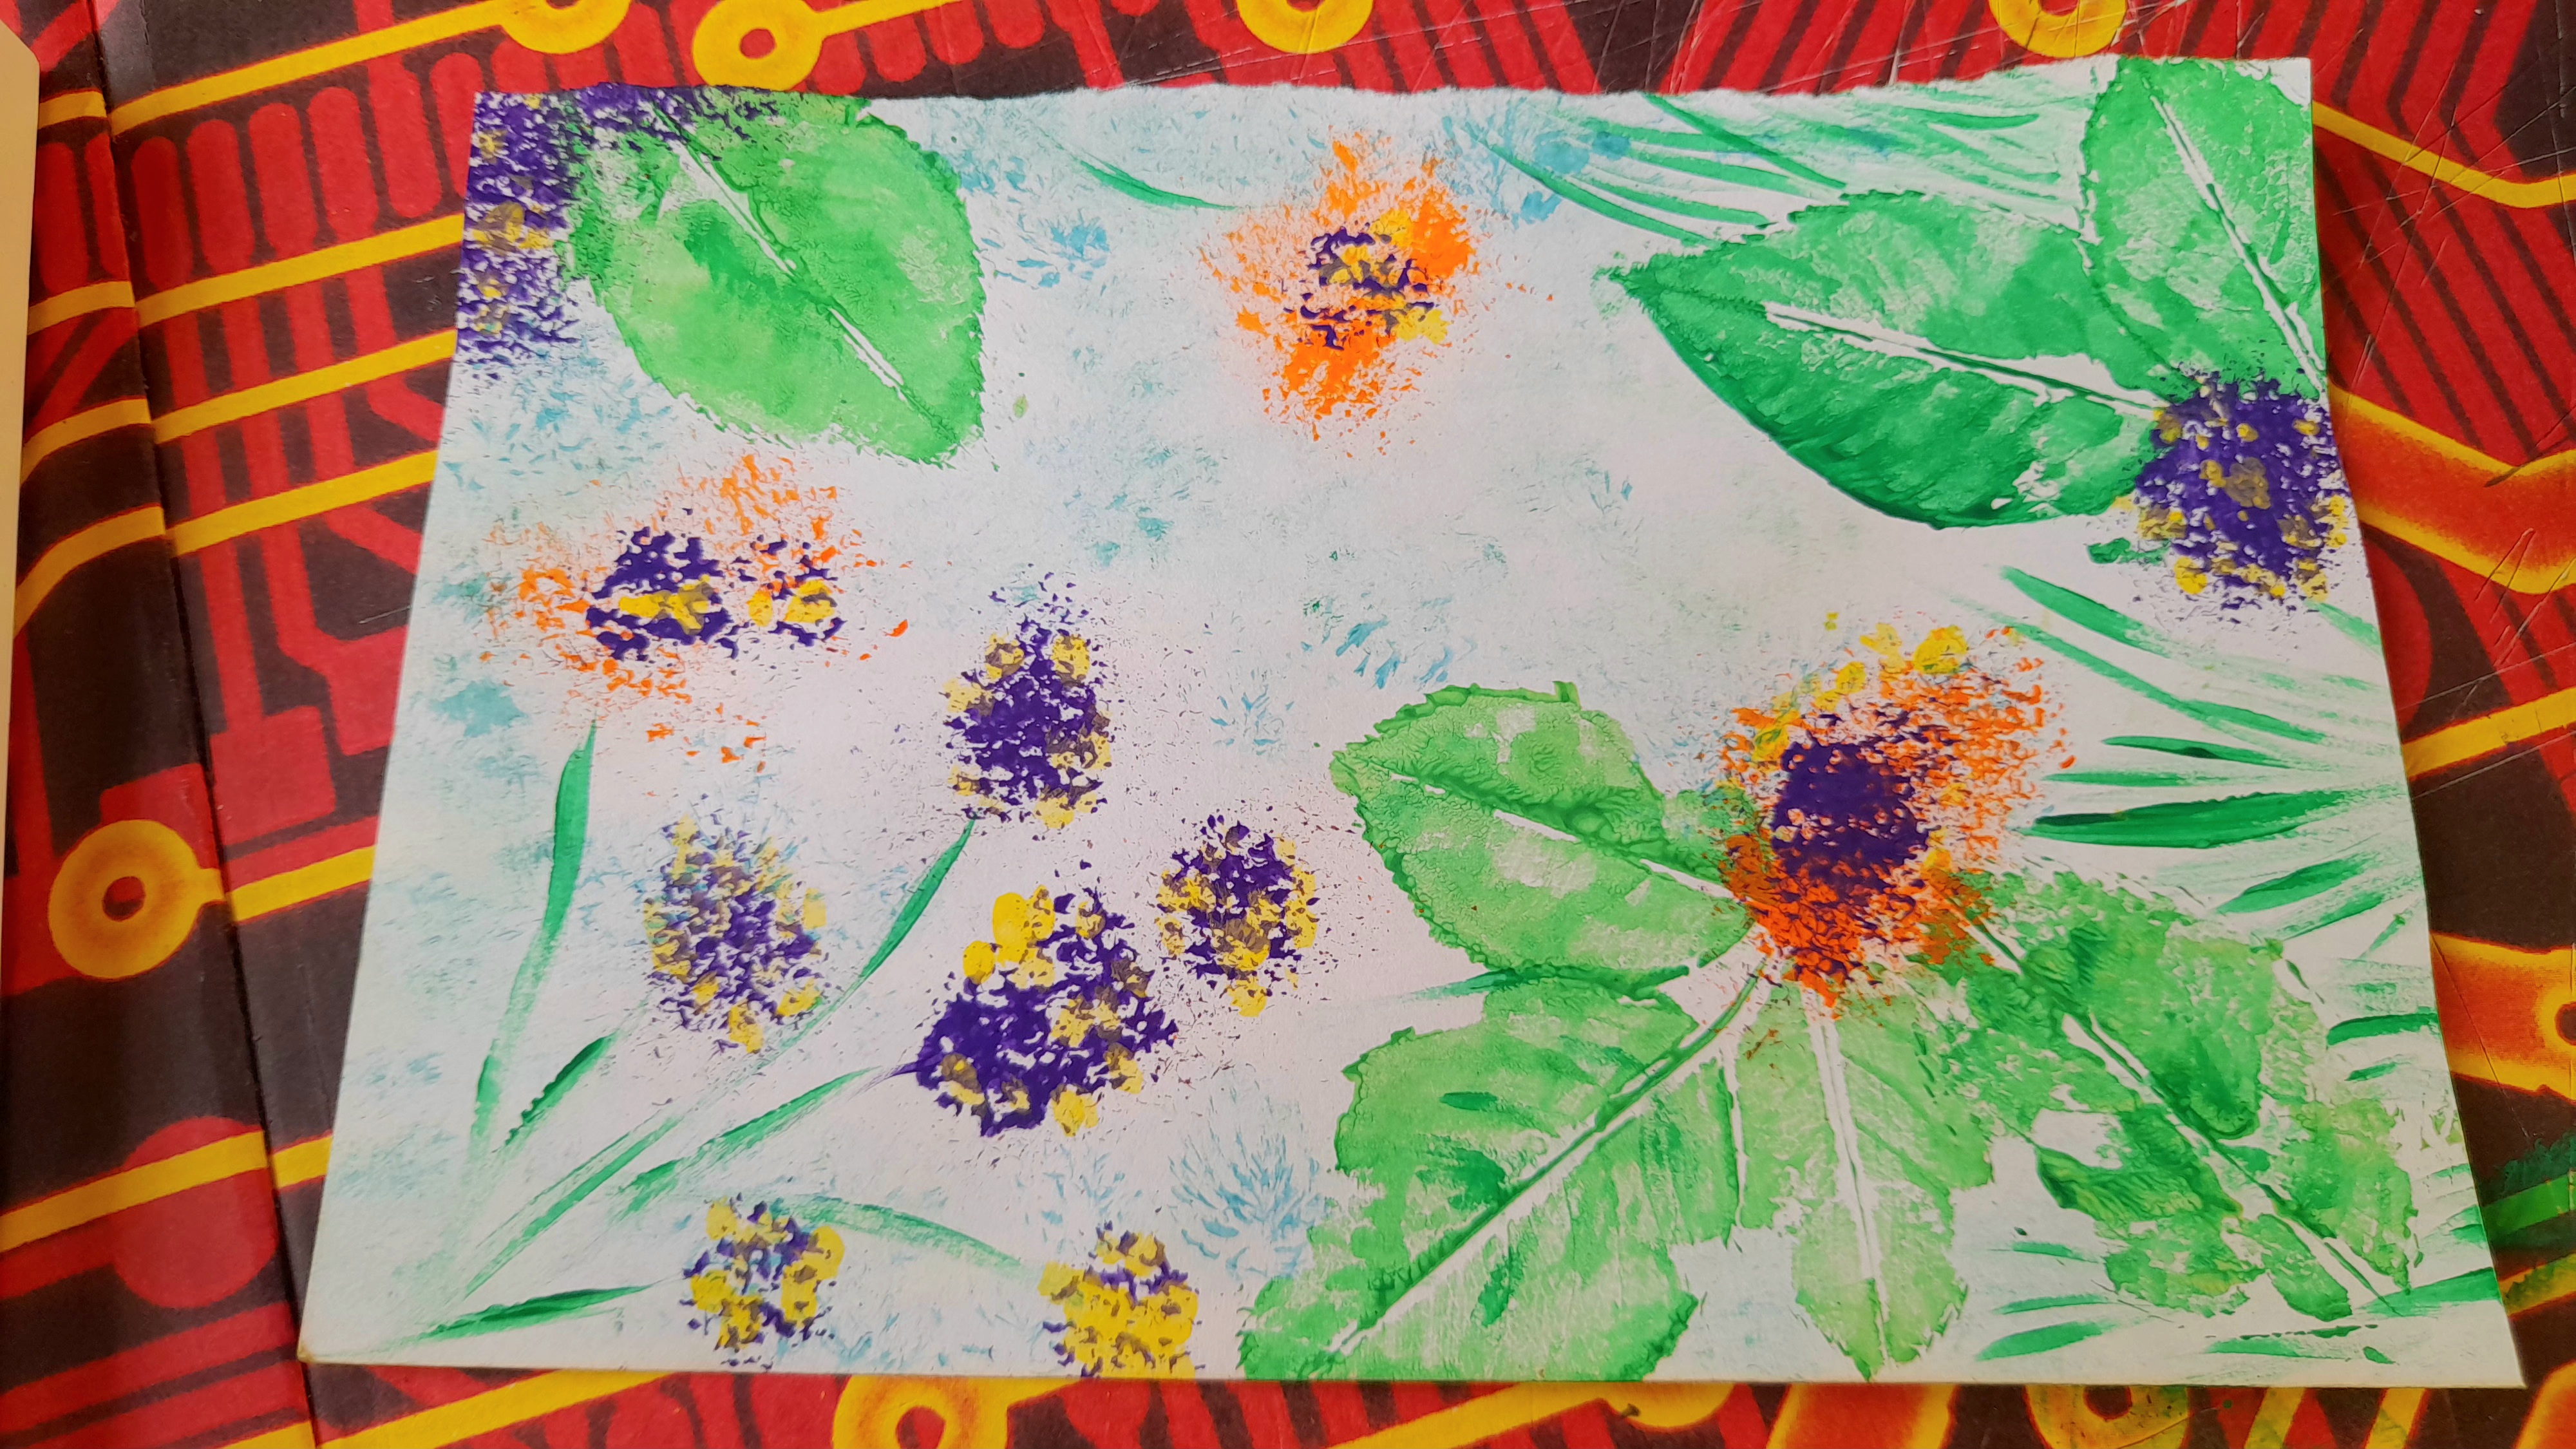
💙 El primer paso es transferir el diseño de las hojas al papel, por lo que deben impregnar de pintura las hojas de la plantita. Para esto pueden utilizar los dedos, pues la idea es no utilizar ninguna herramienta convencional. En mi caso me ayudé con el pincel, ya que estaba tomando fotos para el paso a paso y de hacerlo con las manos hubiese hecho un gran desastre, pero ustedes en casa aprovechen de jugar y ensuciarse un poco.
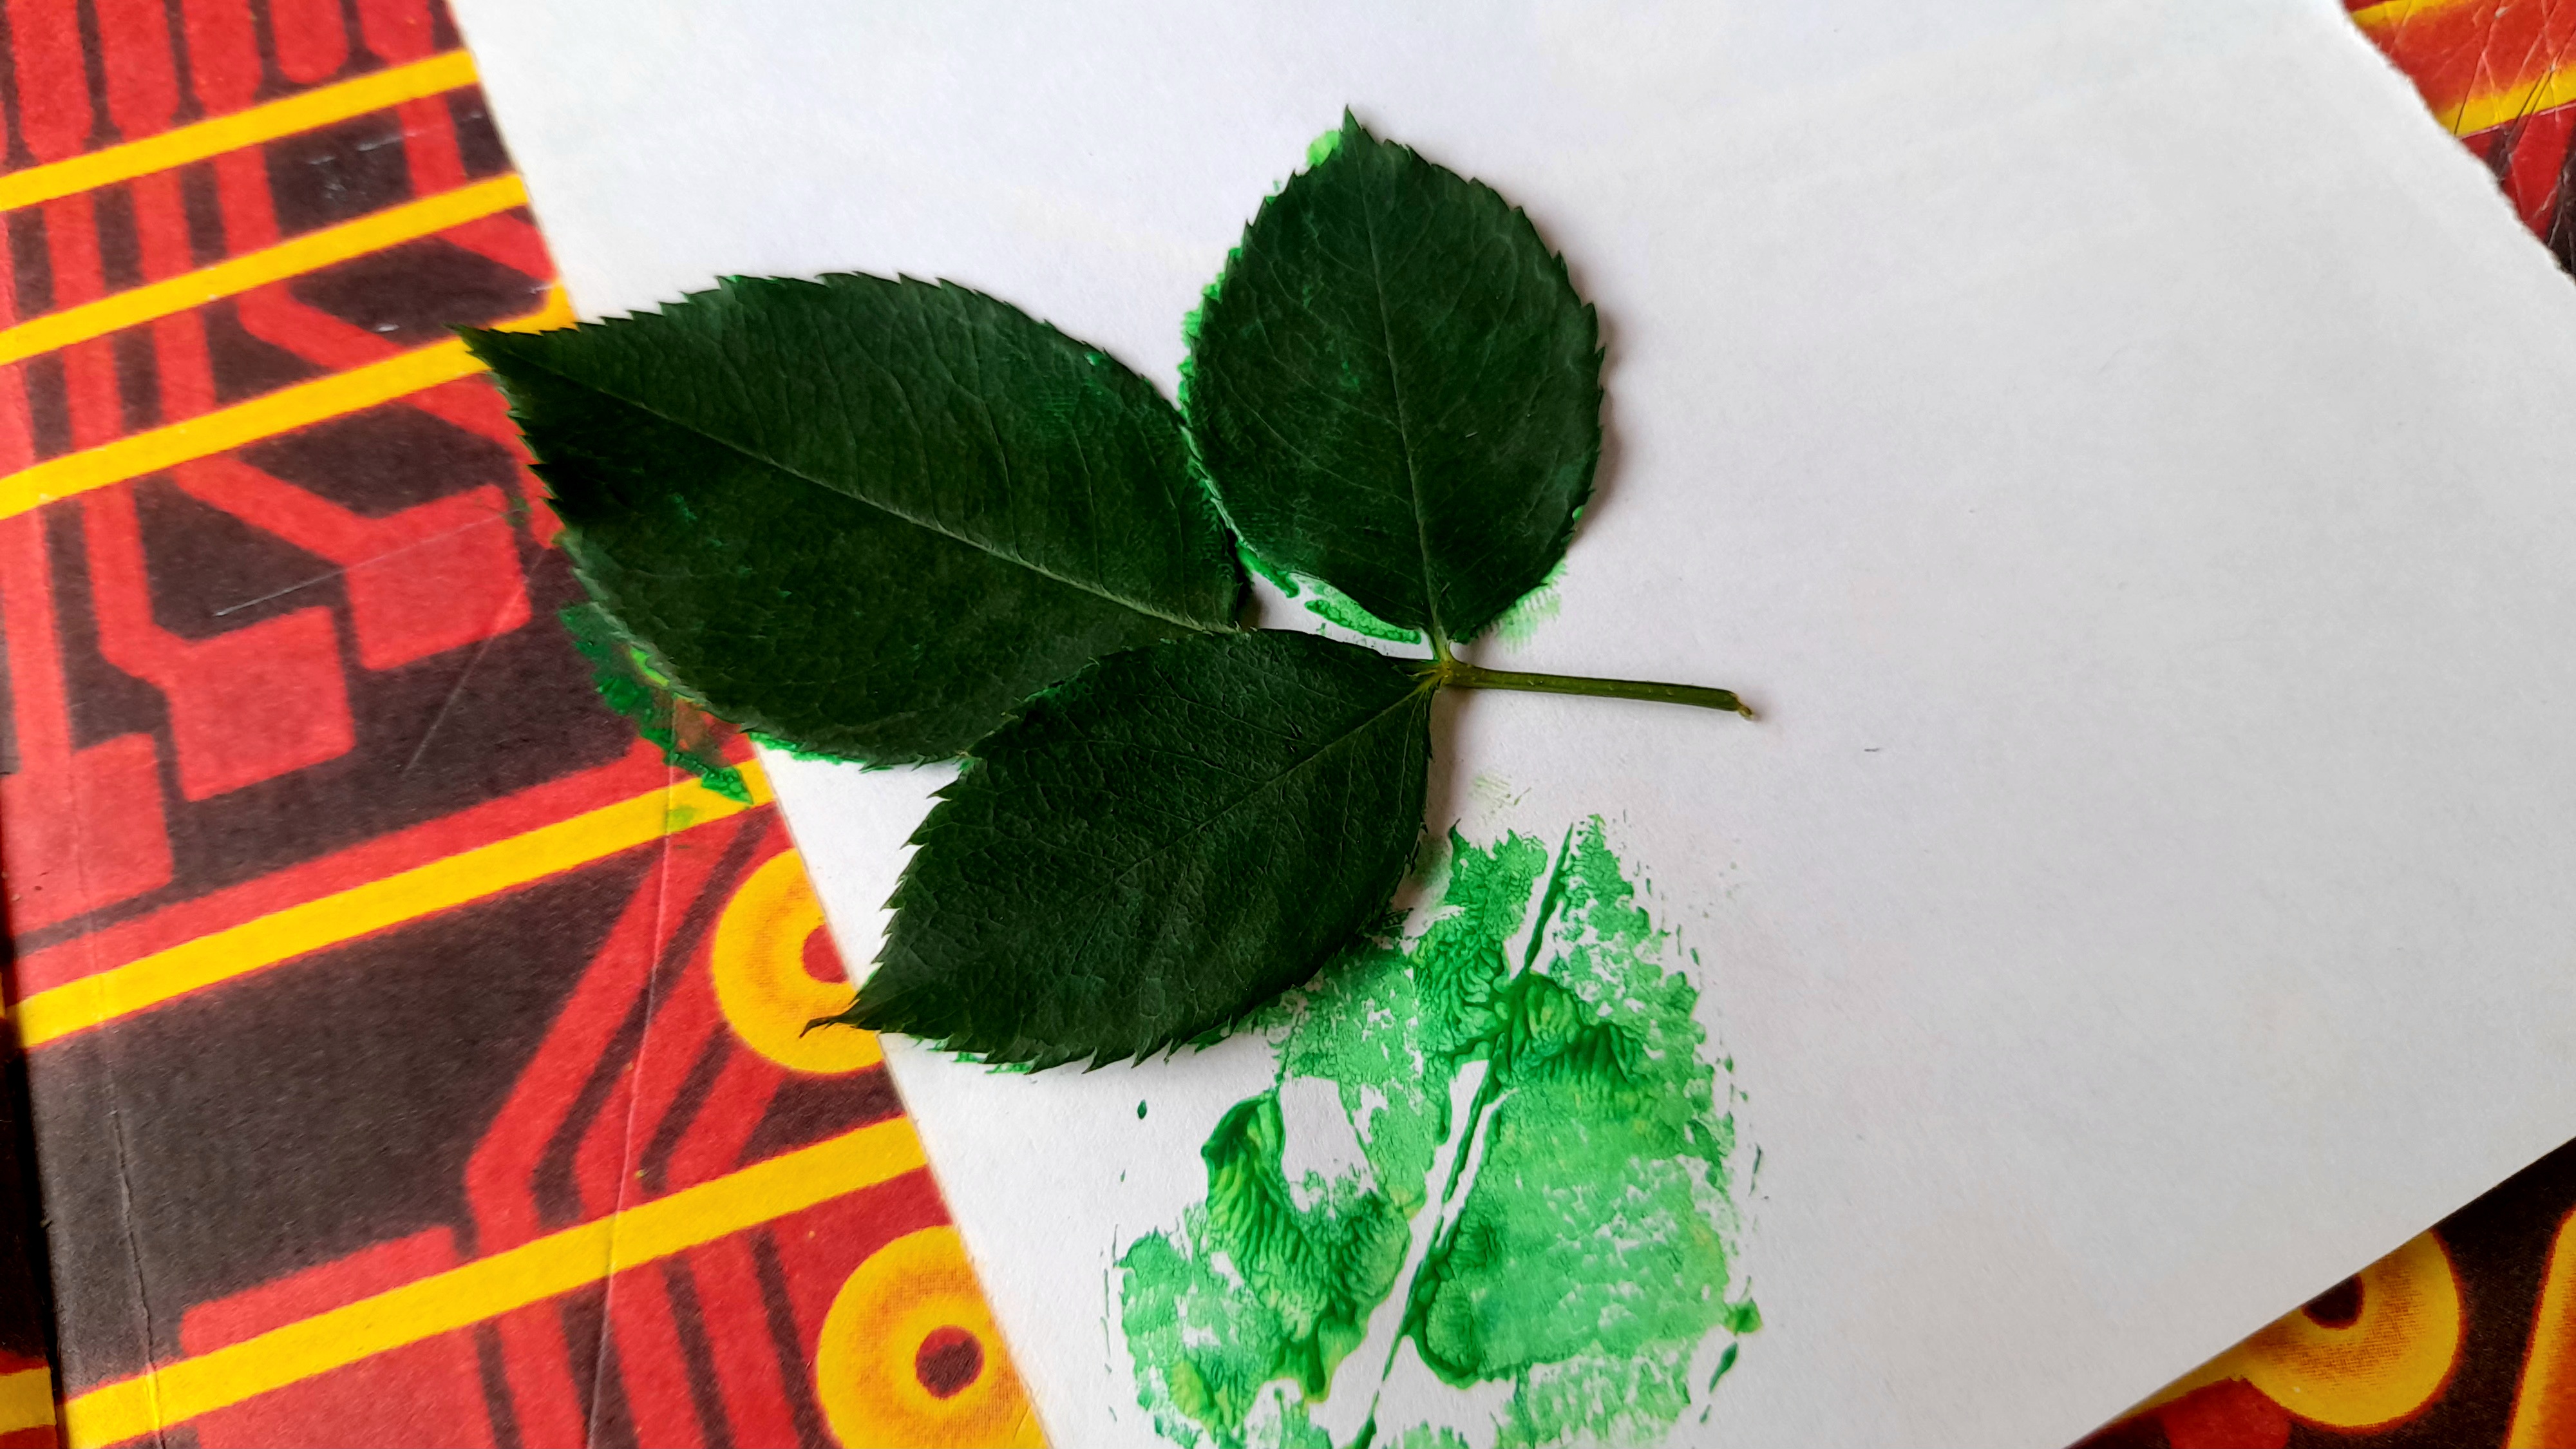
💙 Una vez empapamos muy bien la hojita con pintura, la ponemos sobre el papel y con cuidado presionamos toda su superficie para que puedan marcarse todas las nervaduras de las hojitas. Después de hecho esto, retiramos con cuidado.
Repetimos en distintas partes de la superficie en la que estemos trabajando y dejamos secar.
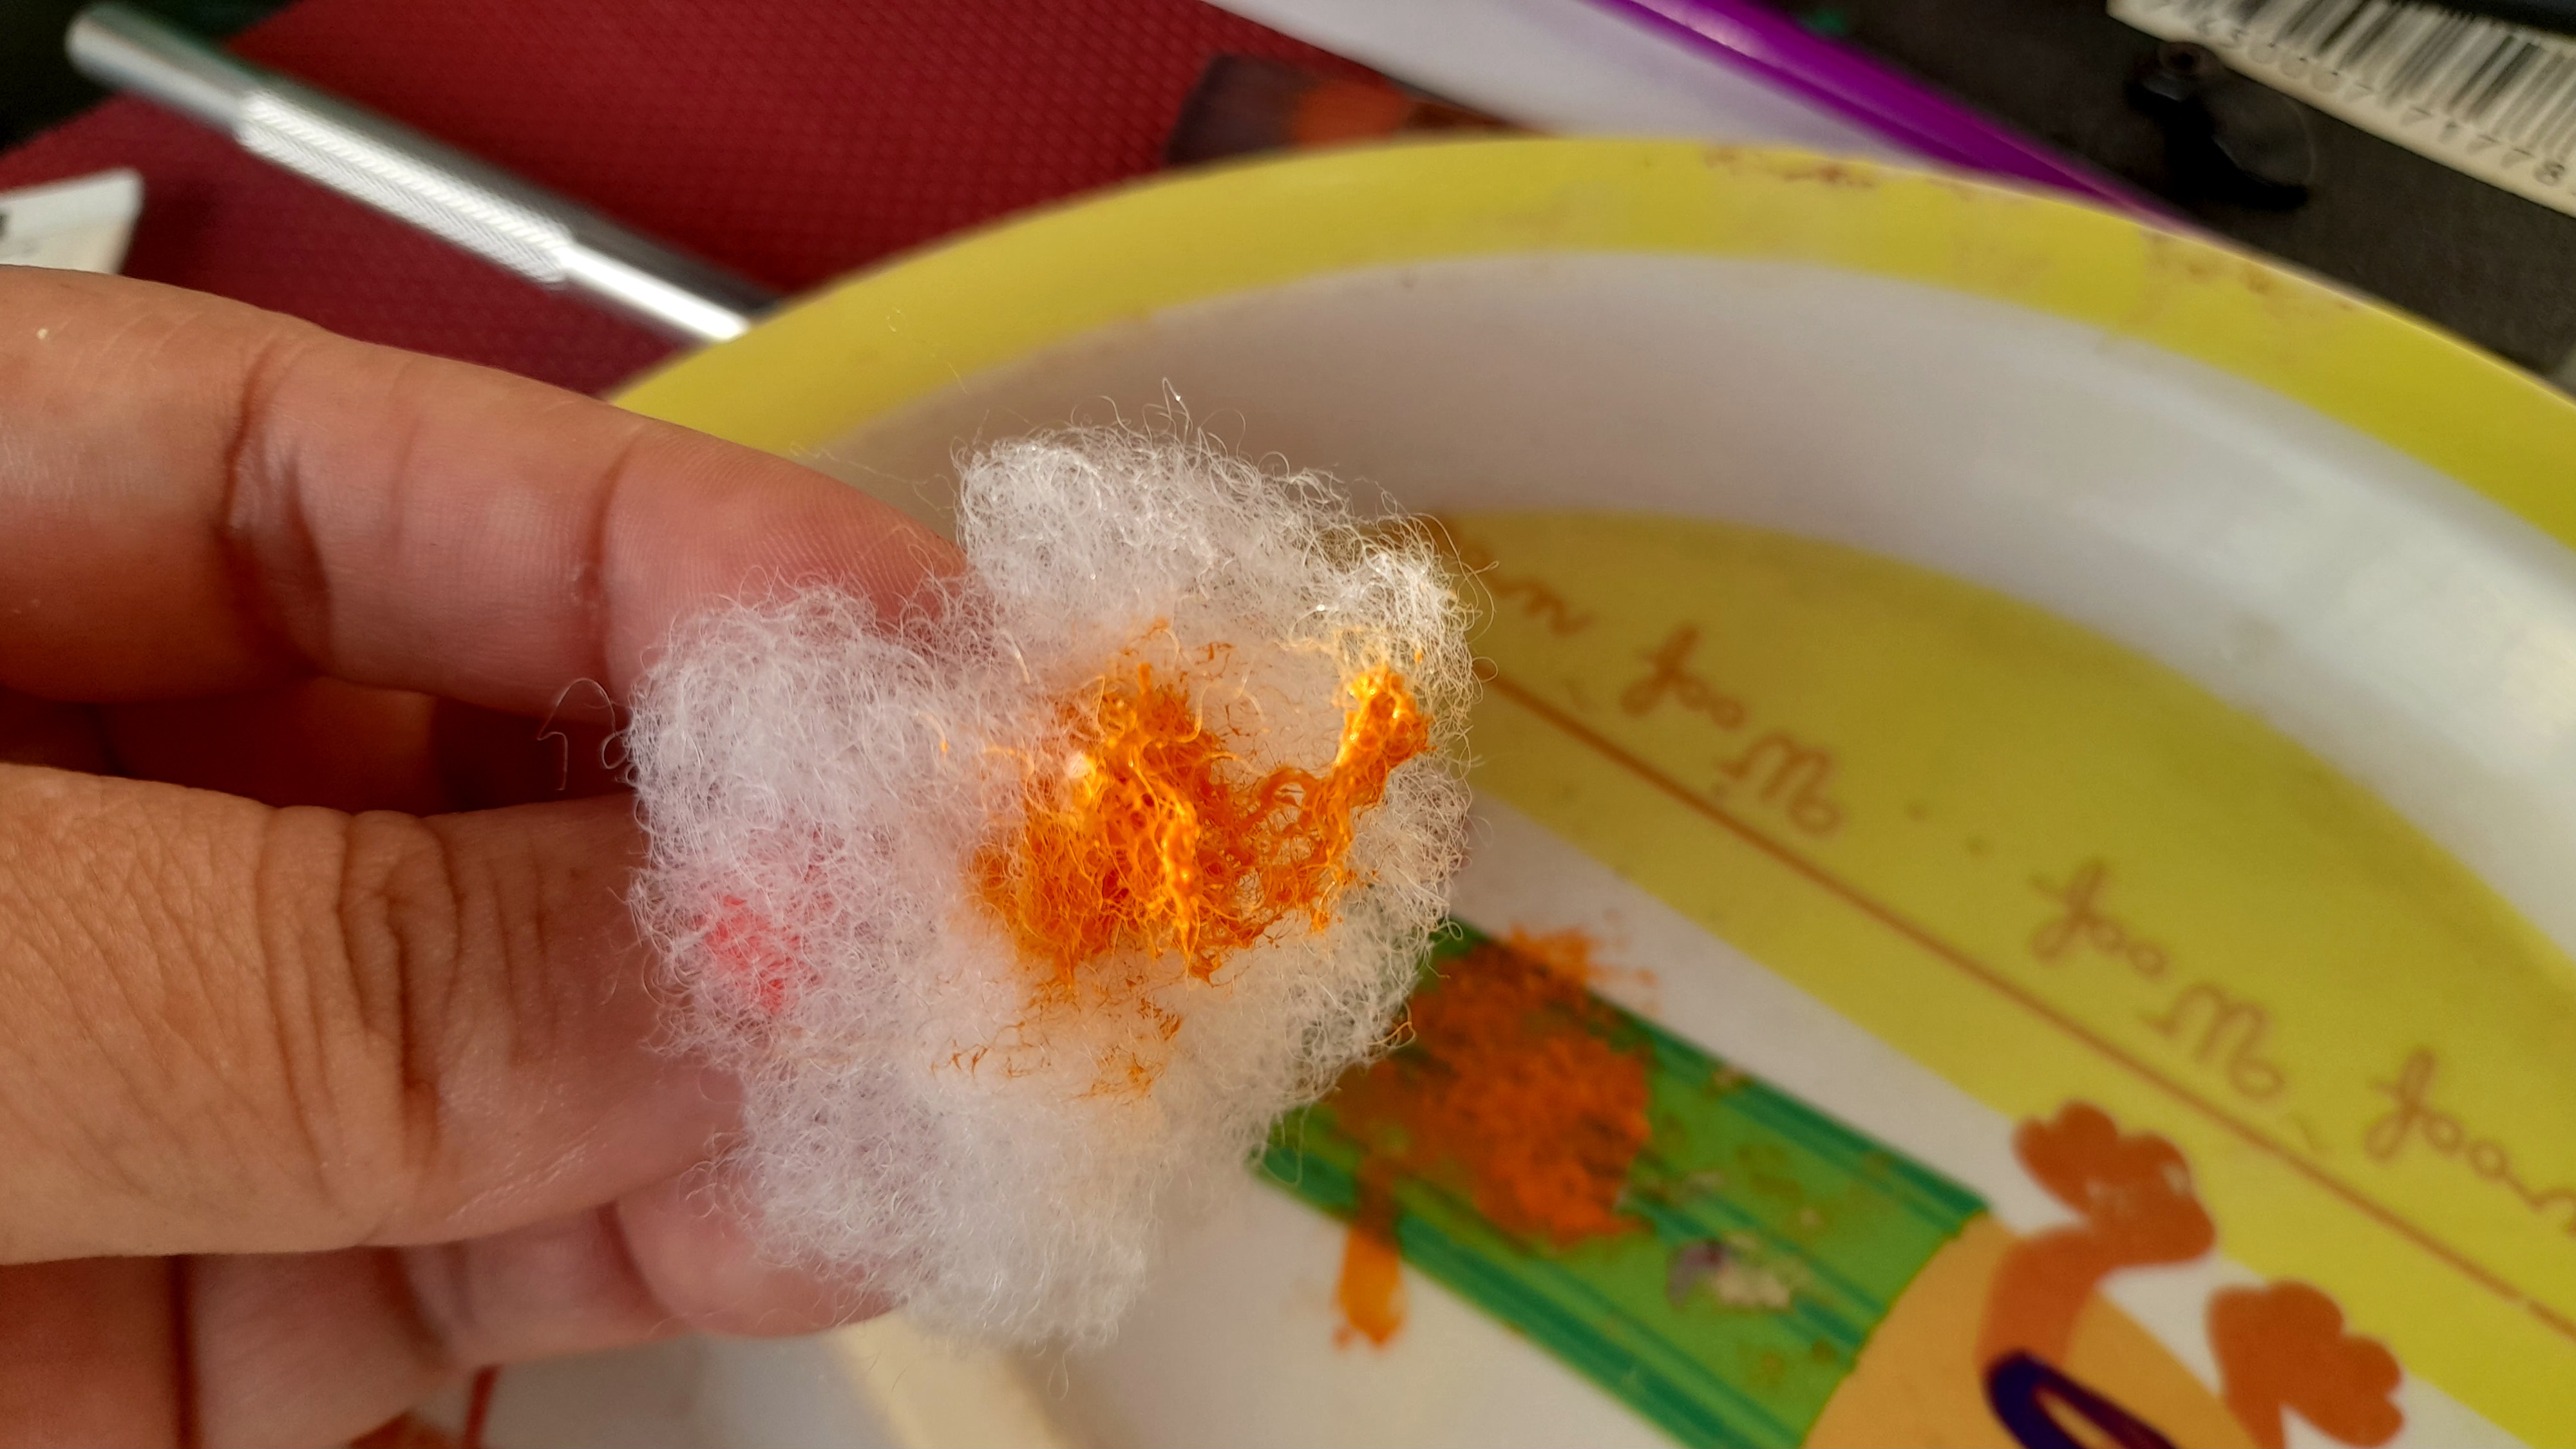
💙 El siguiente paso, es realizar algunas flores de colores y para ello utilizaremos un trocito de guata o algodón, y pintura de diferentes colores.
Lo que haremos es dar toquecitos sobre la pintura que usaremos y hacer lo mismo sobre la zona de trabajo. La idea es no llenar de pintura la guata, sino que tome muy poca pintura y dar con ella toques suaves en distintas zonas del papel.
En mi caso, como ven, usé tres tonos diferentes.
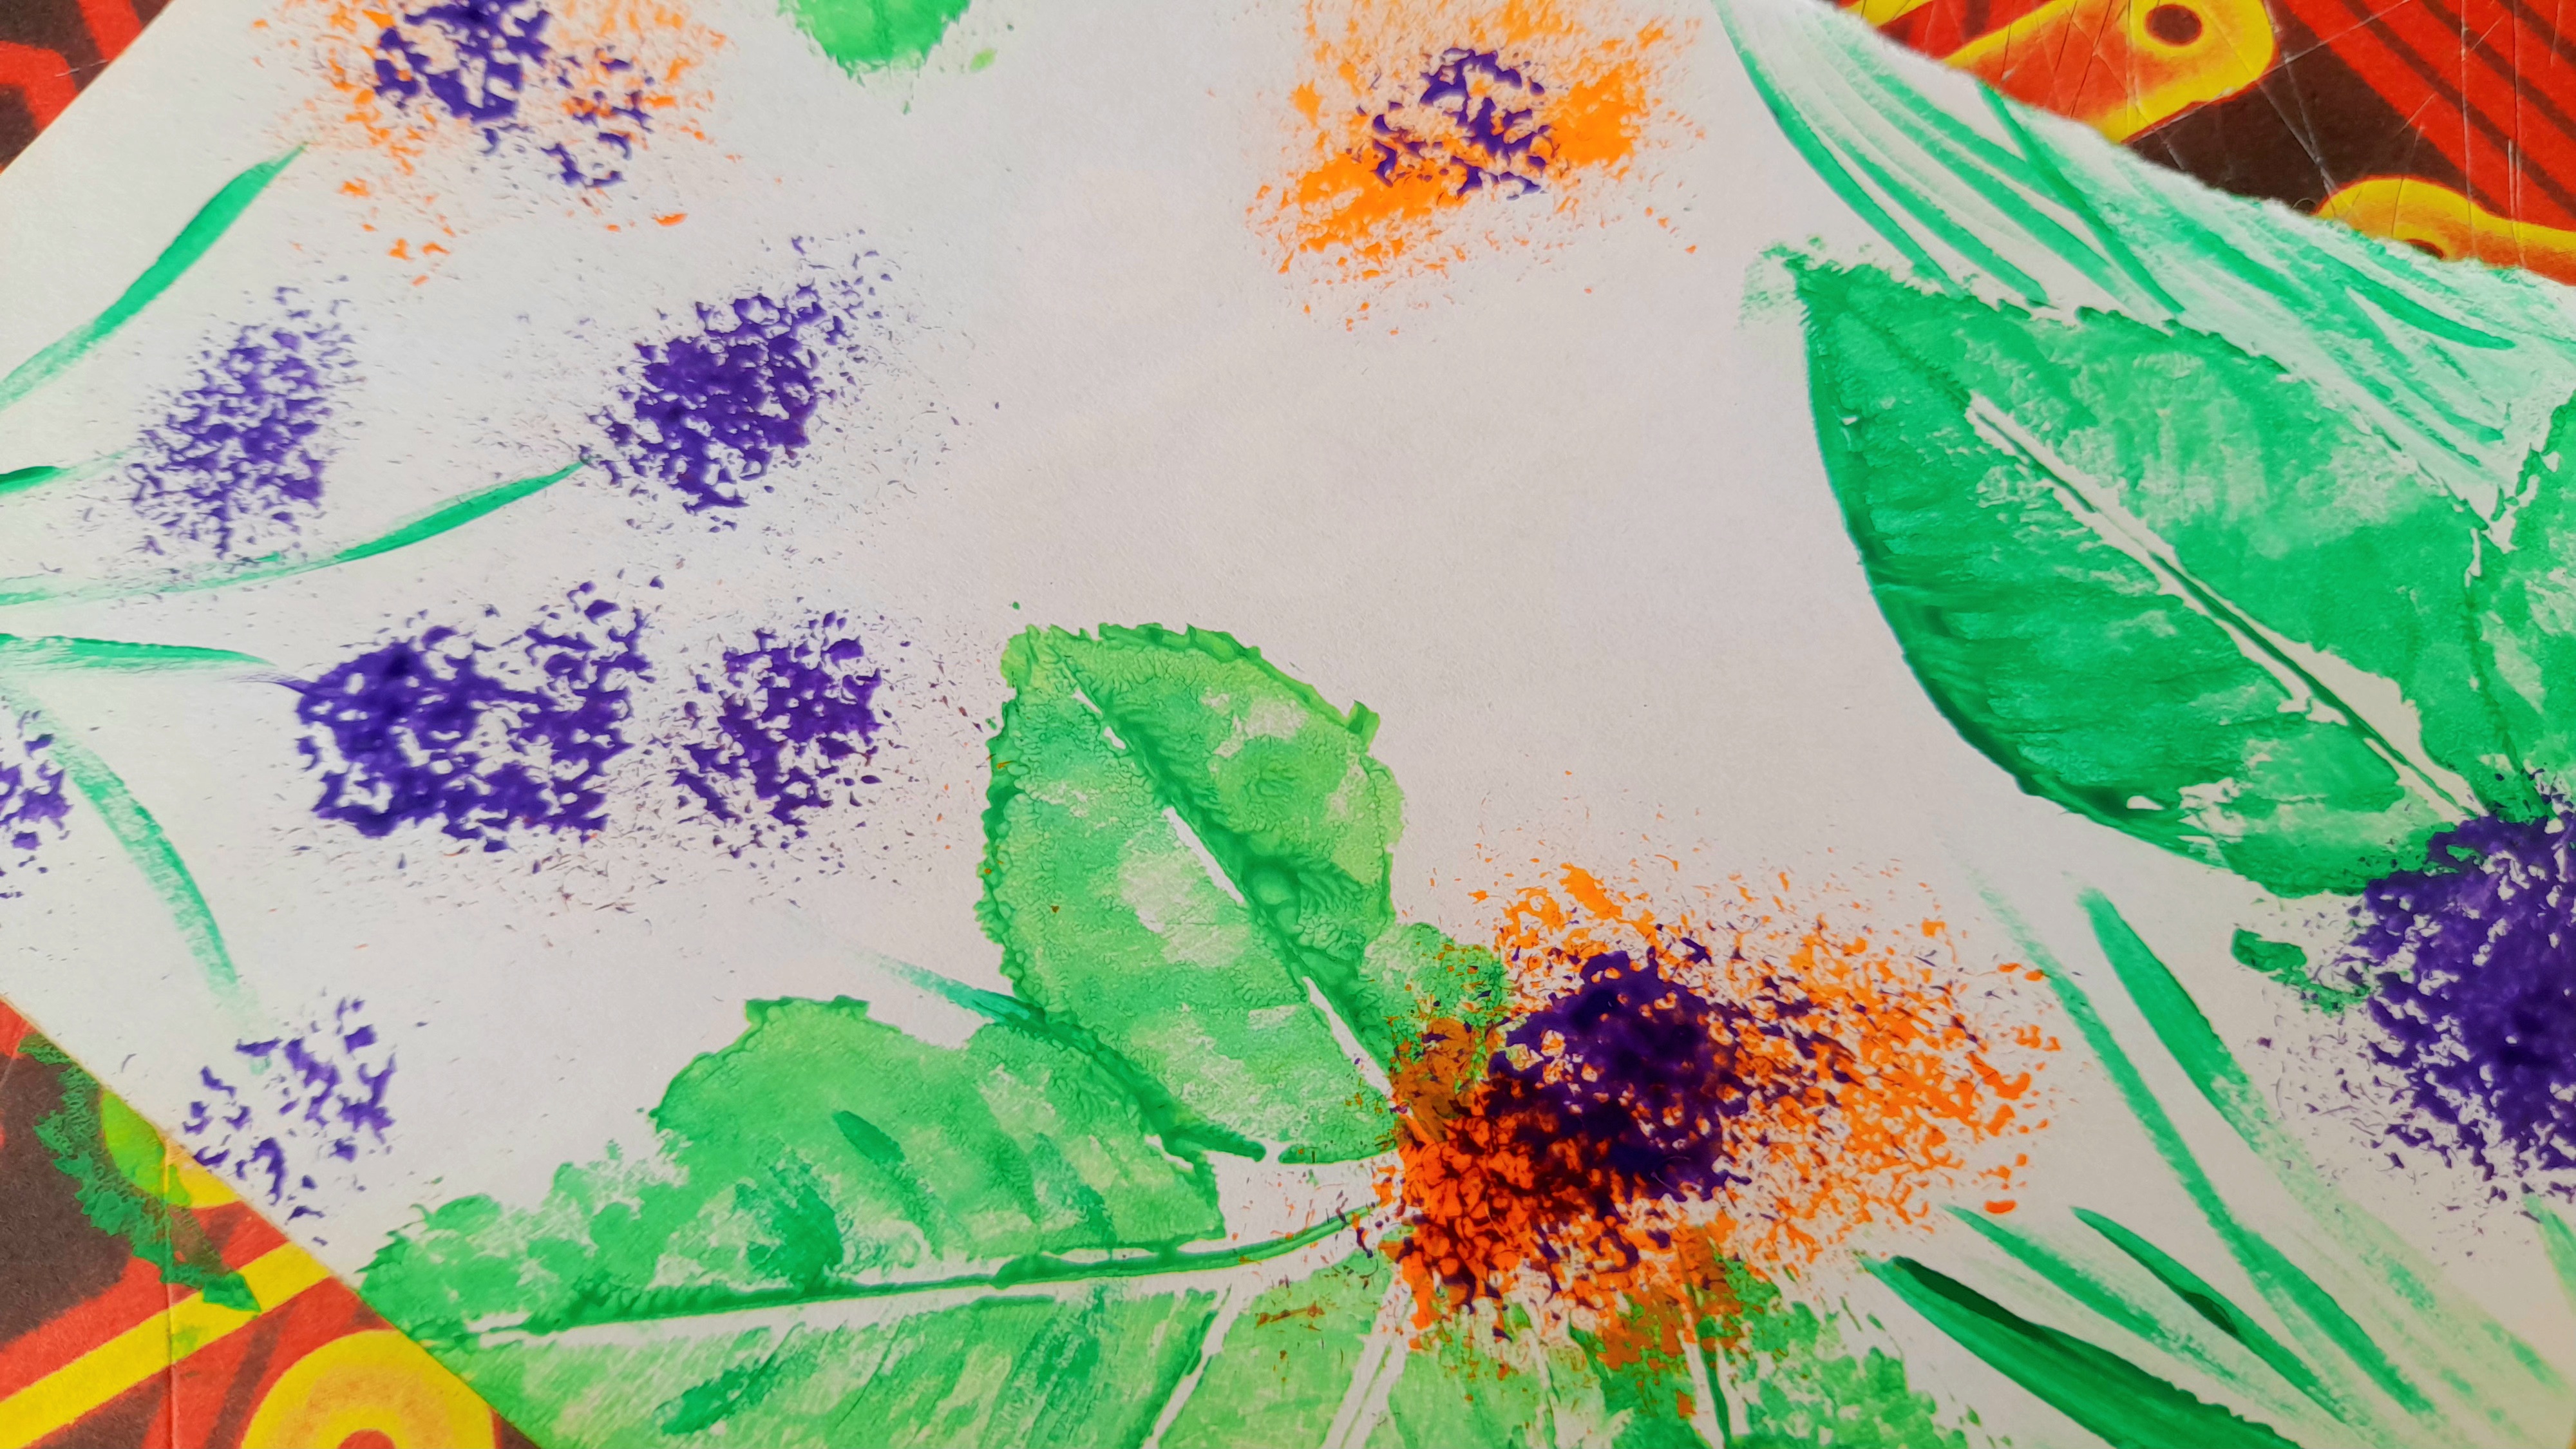
💙 Una vez que las flores secaron muy bien, hice ramitas por distintos lugares para darle vistosidad y finalmente con guata y colores azul y verde, usando la misma técnica de toquecitos "descargando" un poco de pintura antes de dar los toques sobre nuestro papel cubrí la superficie que aún estaba en blanco.

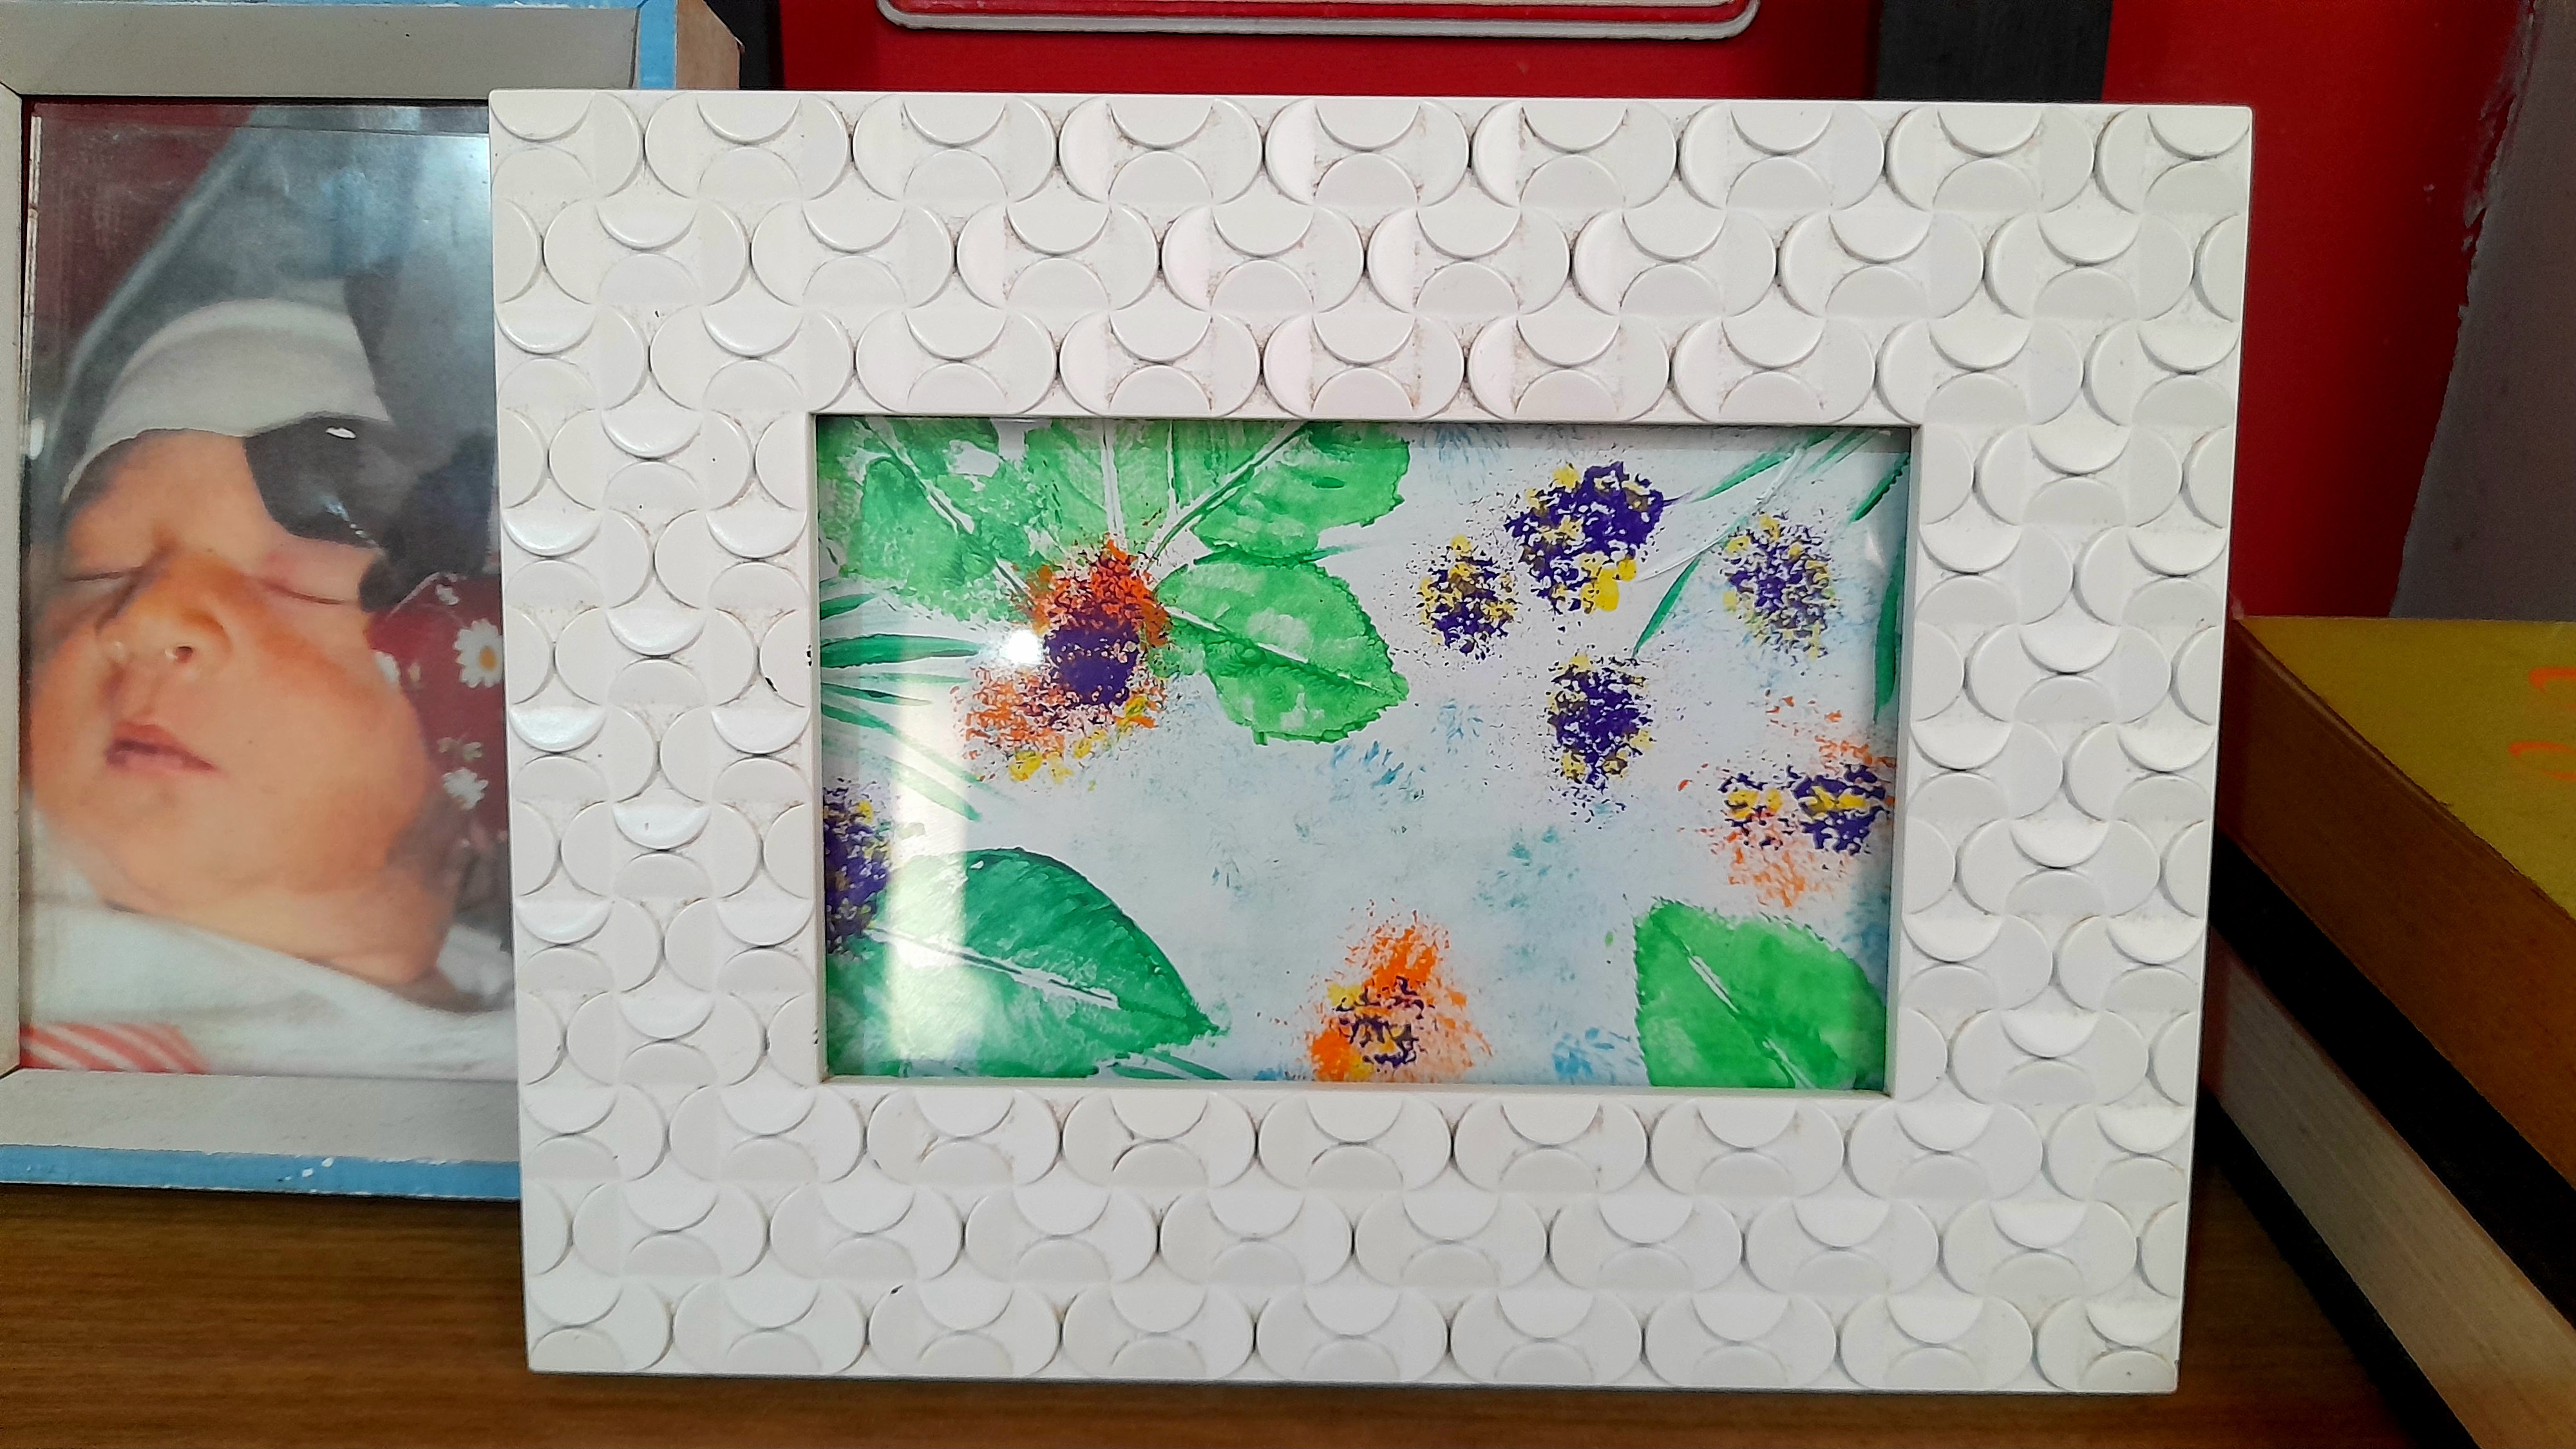
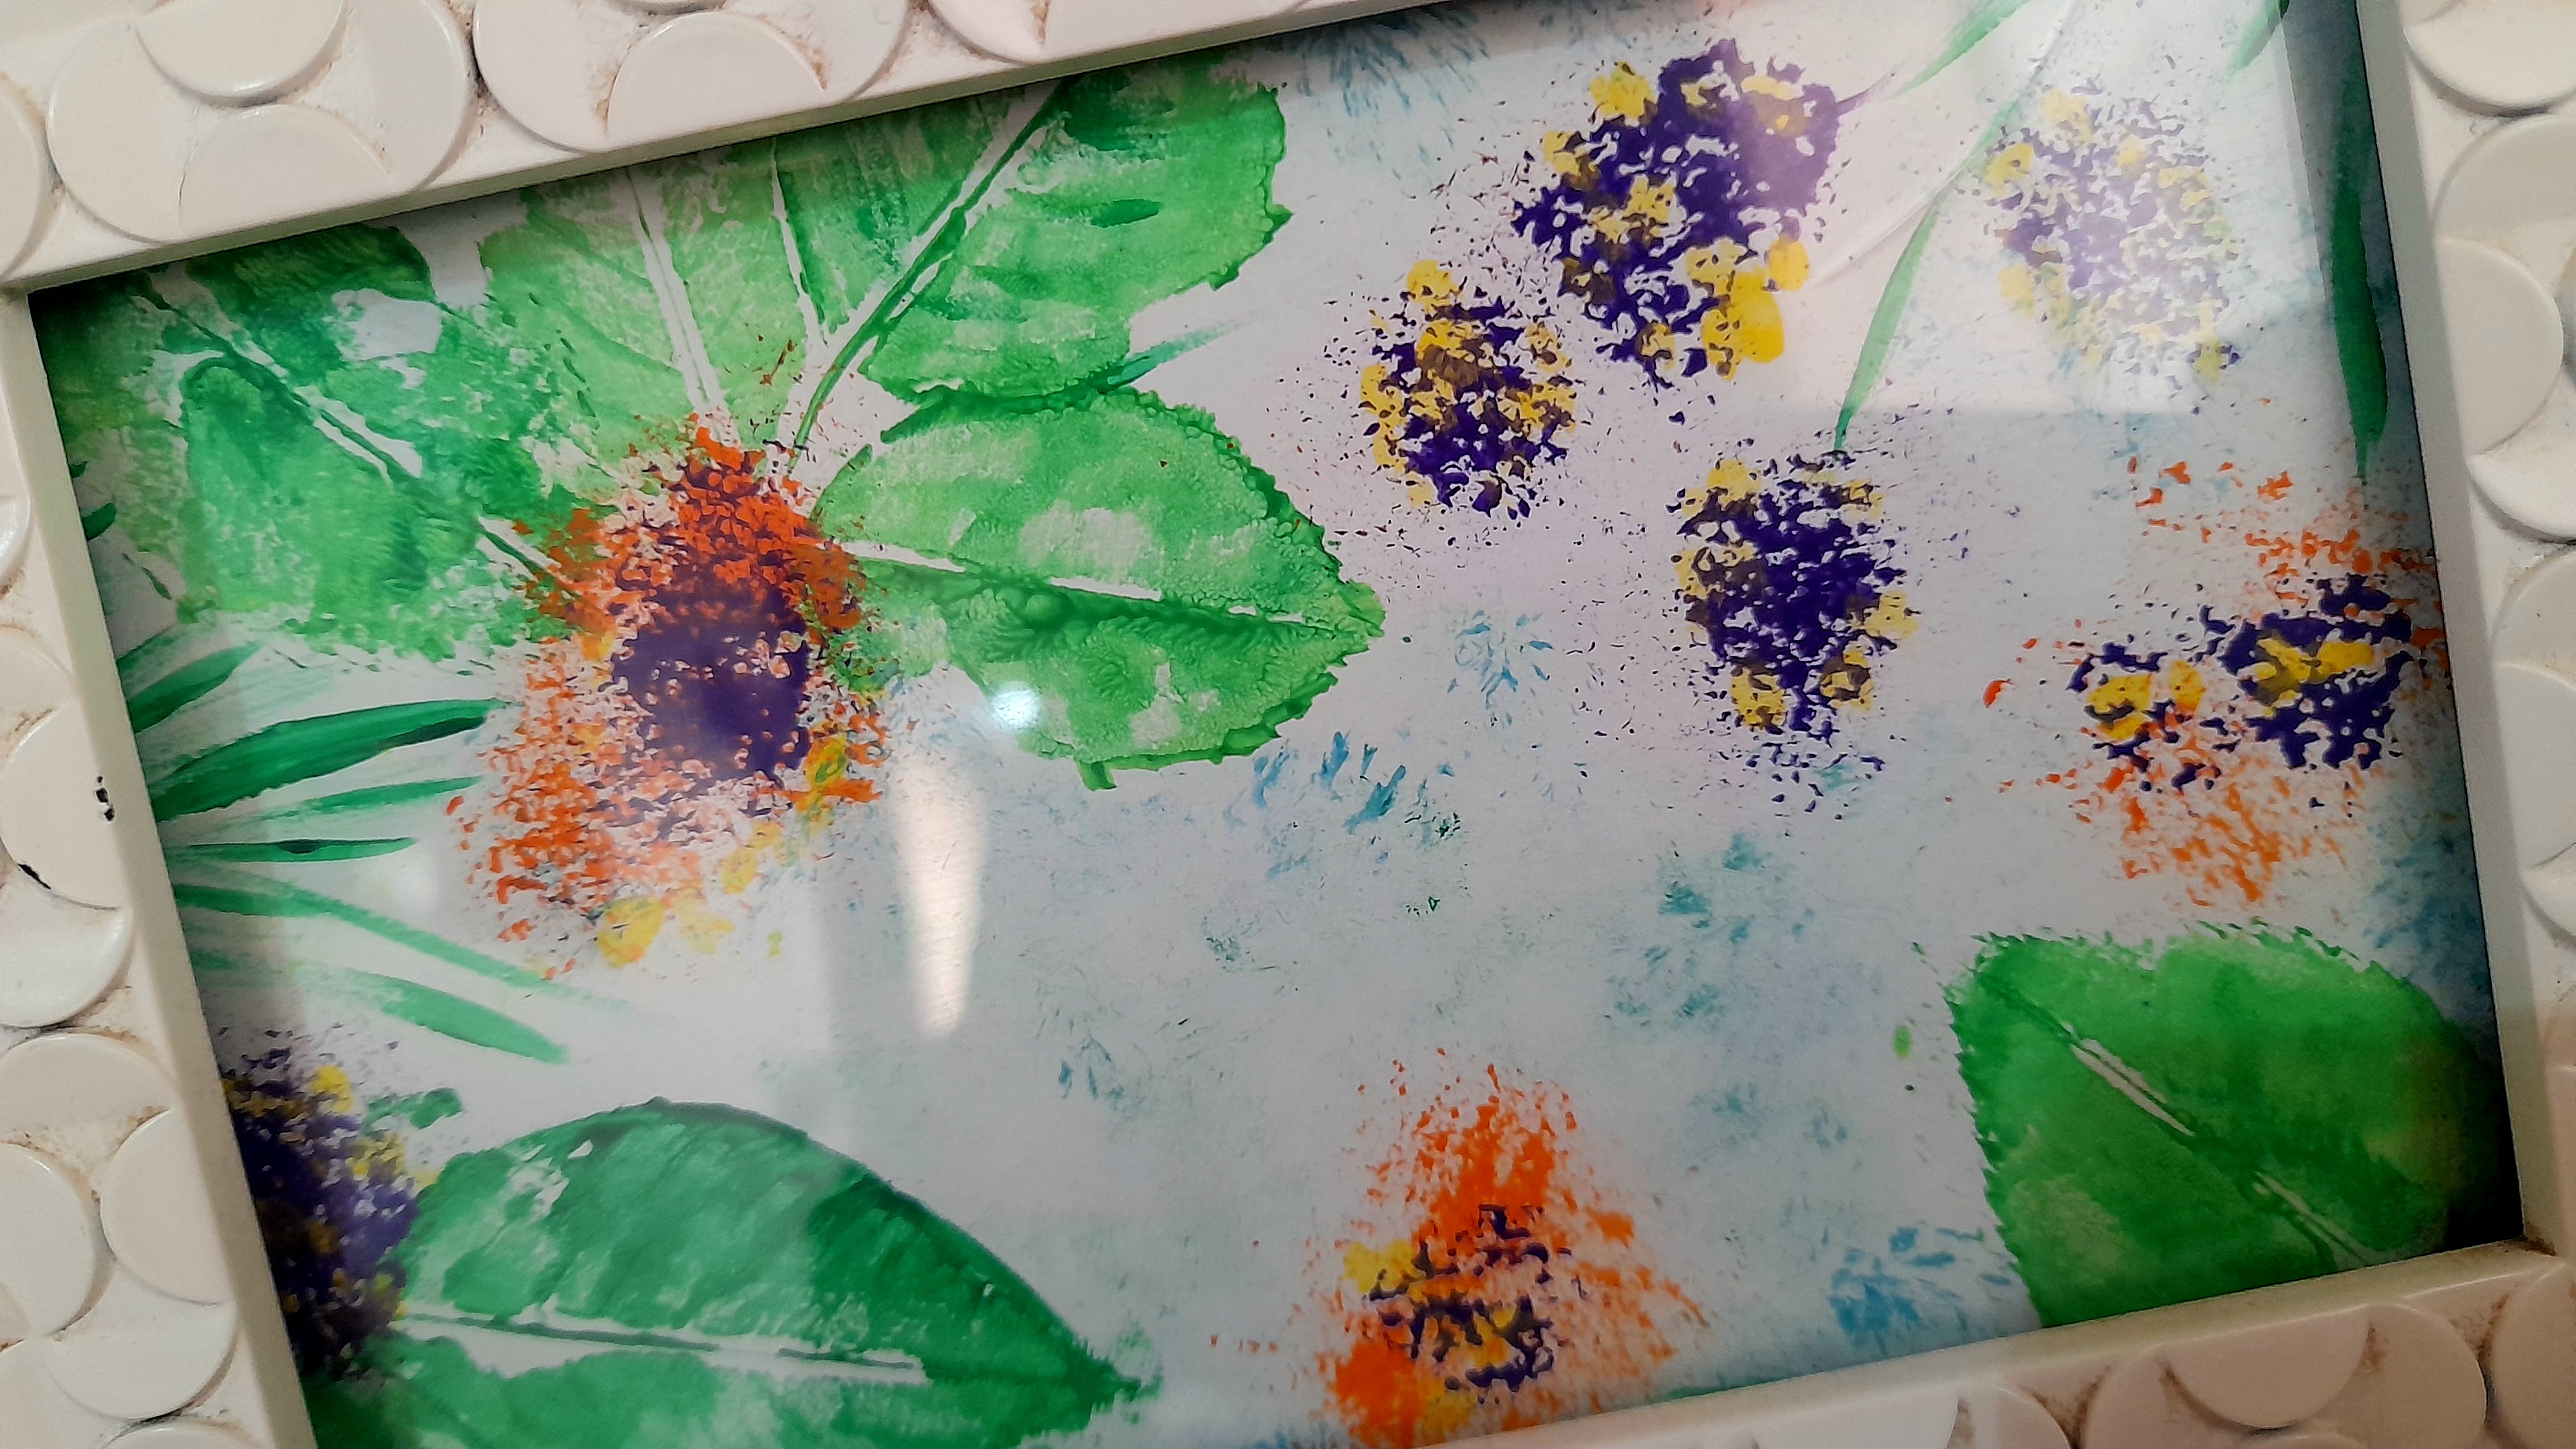
Dejé secar y coloqué luego en el porta retrato, pero si ustedes no tienen pueden improvisar. Por ejemplo, cortando un rectángulo en catón grueso, y forrándolo con una hoja ya tendrían una base firme para trabajar, un lienzo hecho en casa, y una vez haya secado la pintura, con tiras de cartón pintadas pueden hacer el marco y así decorar algún lugar en casita con la obra de arte de nuestro pequeño, lo que estoy segura lo hará sentir muy orgulloso de su trabajo.
Como ven, es una actividad bastante entretenida, pero sobre todo con muchos beneficios para los peques en casa, así que no duden en ponerse manos a la obra.

Painting, besides being an art, allows us to express ourselves without words, it is one of the best tools to release stress, let our imagination fly and find peace in the middle of the storm. Not for nothing is it used as a therapy for stress and even to combat some diseases.
And for children diagnosed with ASD, painting is the best way to express themselves, without the stress of looking for the right or effective way to communicate what they feel, it is also an incredible tool to improve concentration and help relaxation, which is why today in our monthly column, Blue Art, we are going to paint, but in a very original way because we will paint without brushes.
The materials we are going to use possibly have them at home, especially if you have children, and as I always say, you can replace them without problems for what you have at your fingertips, so do not complicate if you do not have something of what I mention below, let your imagination fly and replace it with something else.
MATERIALS
Surface to paint, it can be cardboard, white paper or even a canvas.
Watercolors (you can use any paint you have at home).
Small leaves of any plant
Wadding or cotton
Portrait holder (it is not essential, but if you want to frame the painting you can improvise a frame with pallets, cardboard, etc.).
PROCEDURE
💙 The first step is to transfer the design from the leaves to the paper, so you must impregnate the leaves of the seedling with paint. For this you can use your fingers, since the idea is not to use any conventional tool. In my case I helped myself with the brush, since I was taking pictures for the step by step and if I had done it with my hands I would have made a big mess, but you at home take the opportunity to play and get a little dirty.
💙 Once we soaked the leaf with paint very well, we put it on the paper and carefully press its entire surface so that all the veins of the leaves can be marked. After this is done, we remove it carefully.
Repeat on different parts of the surface we are working on and let it dry.
💙 The next step is to make some colorful flowers and for this we will use a piece of wadding or cotton, and paint of different colors.
What we will do is to dab on the paint that we will use and do the same on the work area. The idea is not to fill the wadding with paint, but to take very little paint and use it to make soft touches in different areas of the paper.
In my case, as you can see, I used three different tones.
💙 Once the flowers dried very well, I made twigs in different places to make it more colorful and finally with wadding and blue and green colors, using the same technique of "unloading" a little paint before touching it on our paper, I covered the surface that was still blank.
💙 I let it dry and then placed it in the portrait holder, but if you don't have any, you can improvise. For example, by cutting a rectangle in thick cardboard, and lining it with a sheet of paper, you would already have a firm base to work with, a homemade canvas, and once the paint has dried, with strips of painted cardboard you can make the frame and thus decorate some place at home with the artwork of our little one, which I am sure will make him feel very proud of his work.
As you can see, it is a very entertaining activity, but above all with many benefits for the little ones at home, so do not hesitate to get to work.
