✨🎀🔑¡Hola amigos amantes de la creatividad! Espero que hayan pasado un muy buen comienzo de semana.🔑🎀🎀✨
🔸Sin más que añadir, a continuación los dejo con el paso a paso:
✨🎀🔑¡Hello friends who love creativity! I hope you had a very good start to the week.🔑🎀✨
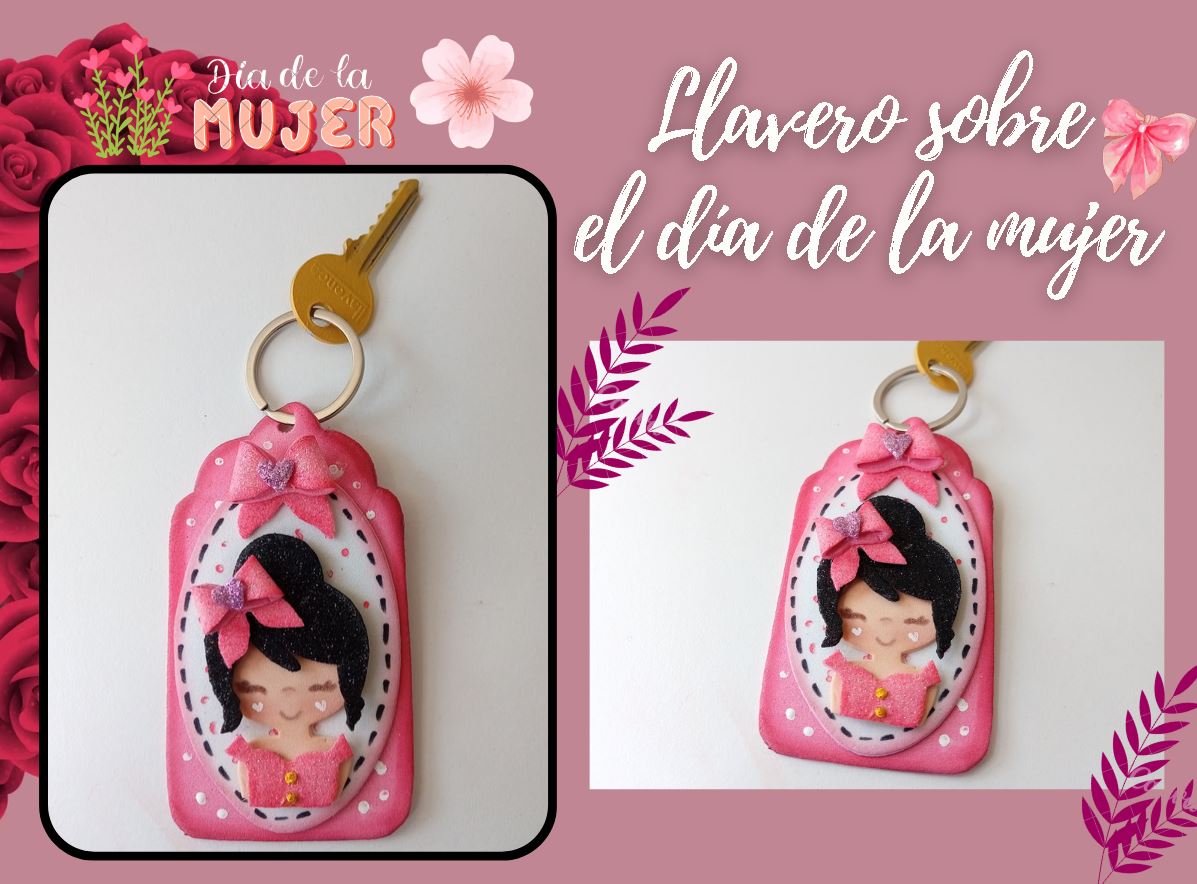
¡Good afternoon friends! I hope you are having a great week. Today I share with you the step by step to make a beautiful keychain about Women's Day. In past years I was never on time to share something about this beautiful day, so this time I decided to do it in advance. I wanted to make a nice keychain, but it is also perfect as a refrigerator magnet or to leave a nice message on the back and give it as a simple but nice detail.
I was very happy with the result of this creation, I wanted to apply many details and make it look very tender and flirty. I didn't want to write anything to the design, but you can if you want.
🔸Without more to add, then I leave you with the step by step:
♥️ESPERO QUE TE GUSTE,
¡Empecemos!
♥️I HOPE YOU LIKE IT,
Let's start!

✂️ MATERIALES | ✂️ MATERIALS
- Círculo metálico para llaveros.
- Foami escarchado: negro, rosado
morado y dorado. - Foami: blanco y piel.
- Abridor de huecos.
- Marcadores.
- Pinturas.
- Pegamento.
- Hoja blanca.
- Tijieras.
- Lápiz.
- Metal circle for keychains.
- Frosted foam: black, pink
purple and gold. - Foami: white and skin.
- Gap opener.
- Markers.
- Paintings.
- Glue.
- White sheet.
- Weaves.
- Pencil.
PROCEDIMIENTO | PROCESS
✨ PASO 1:
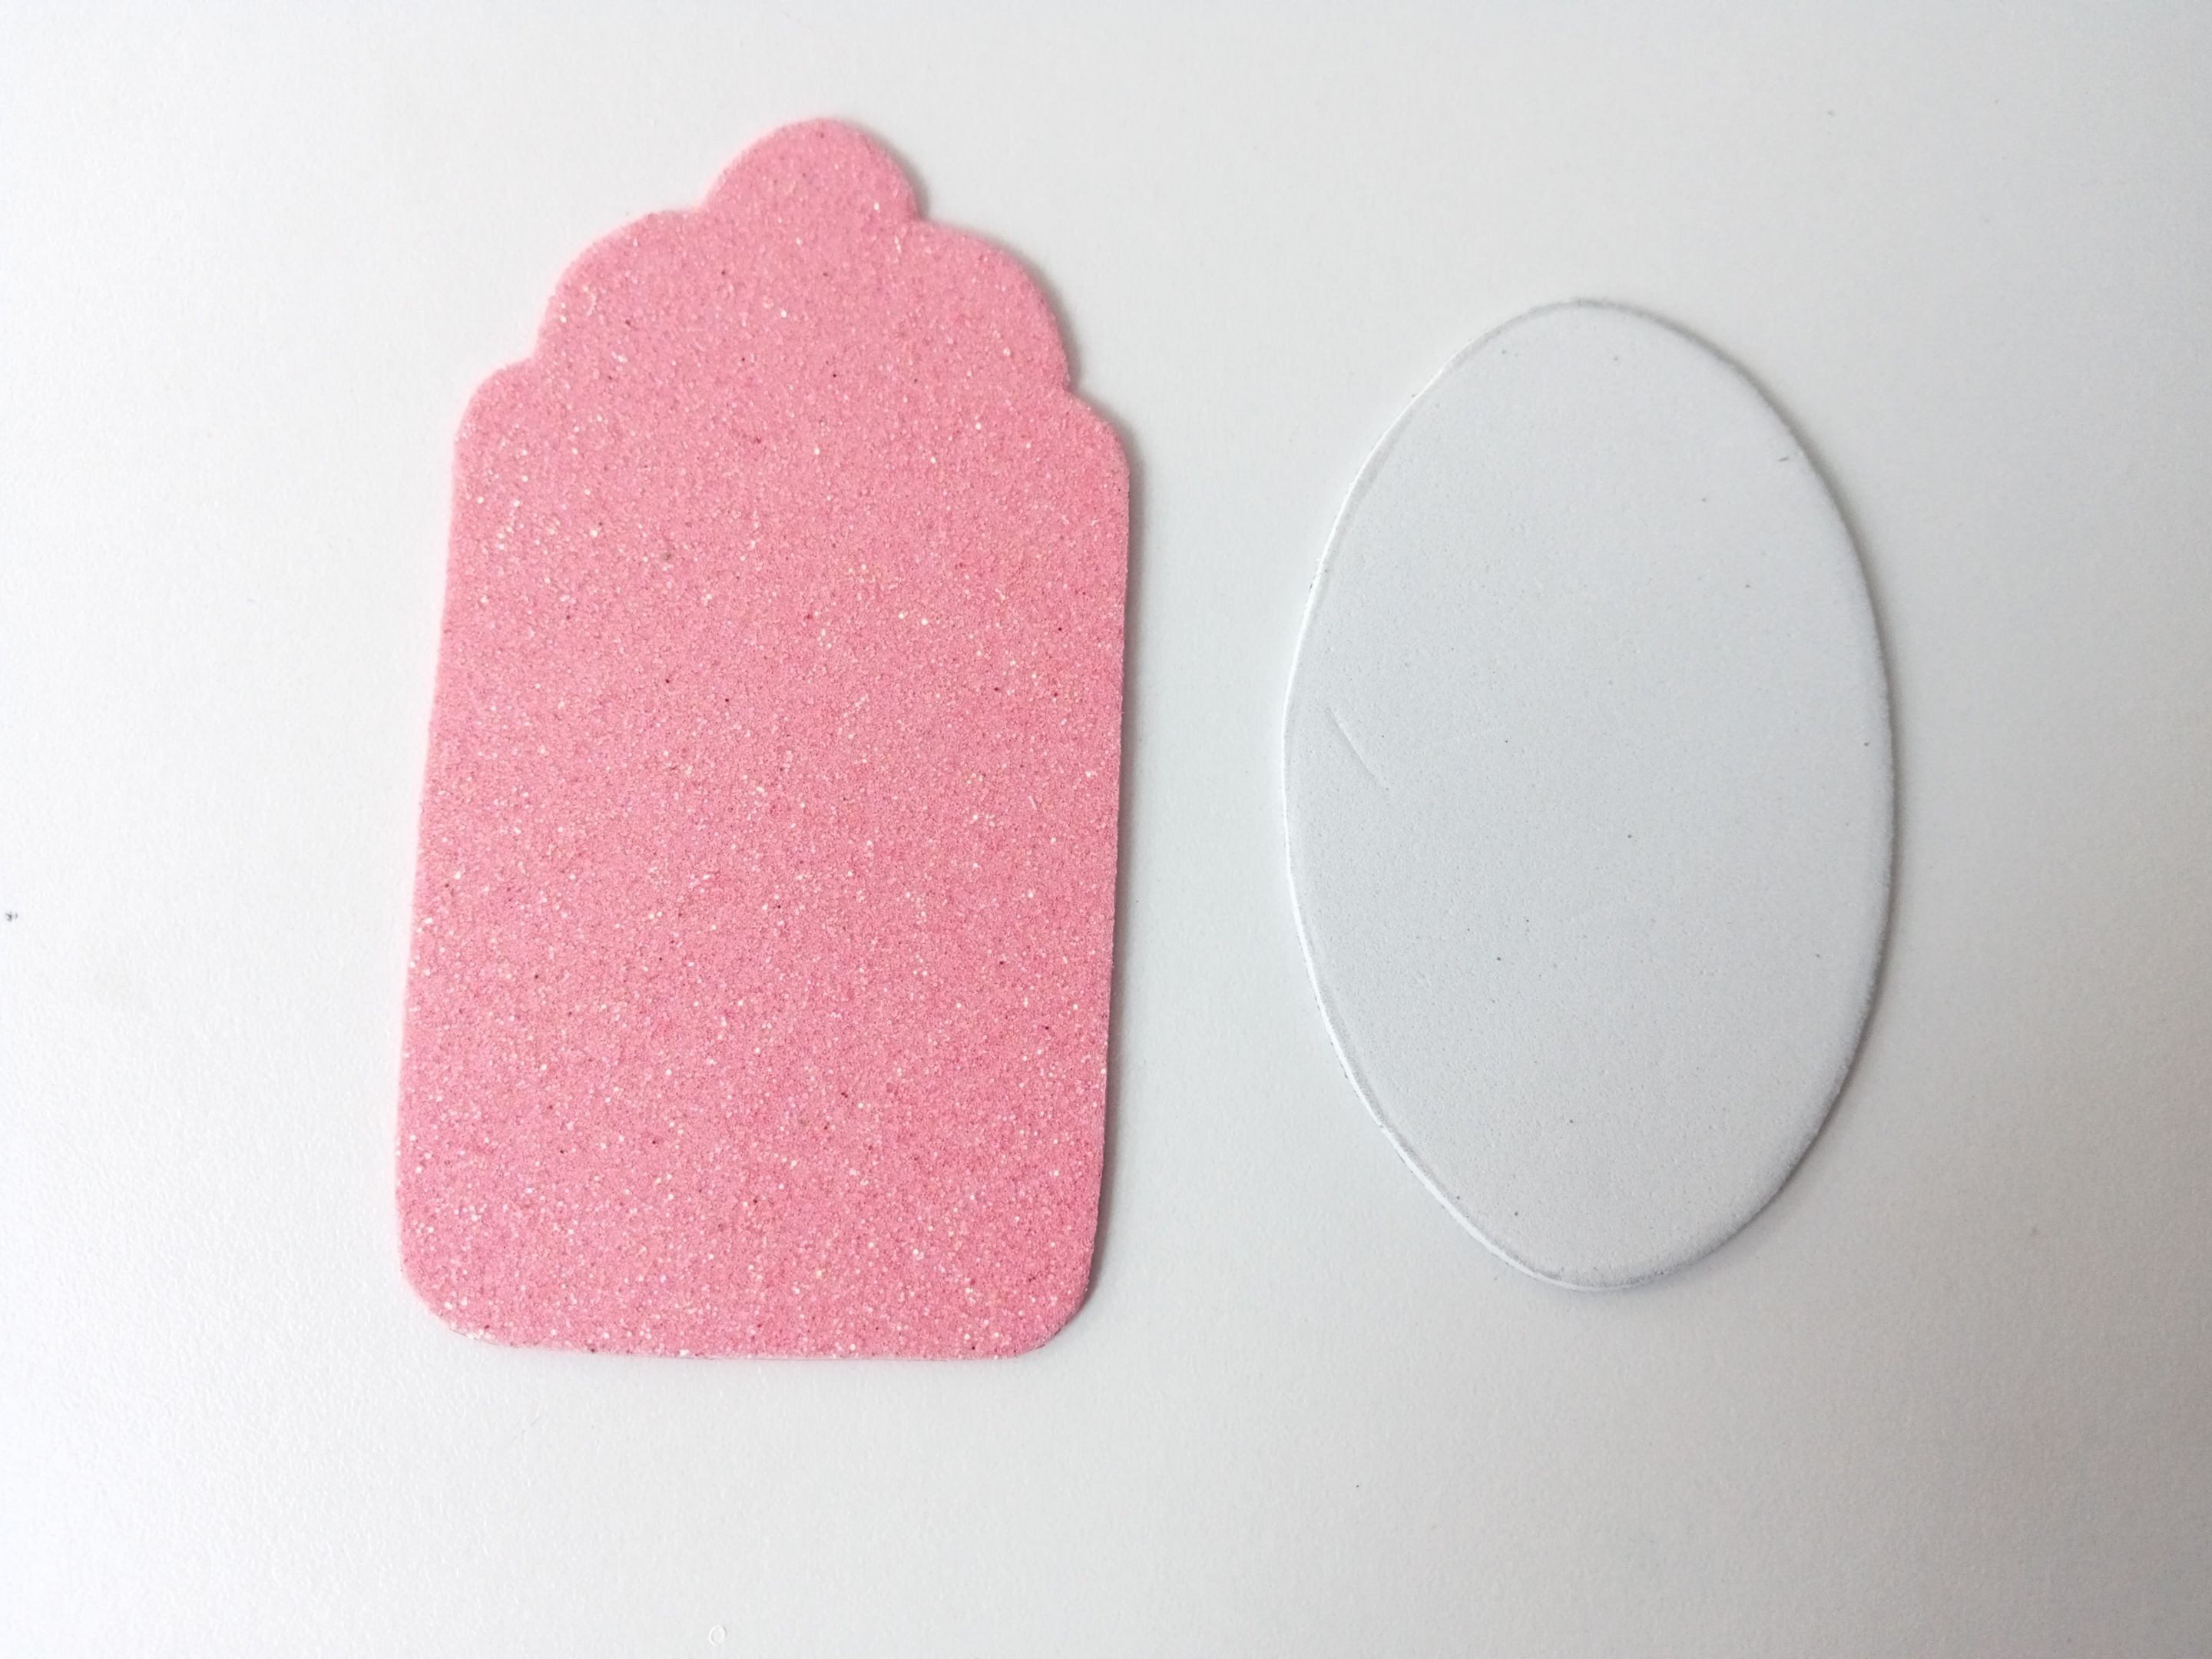
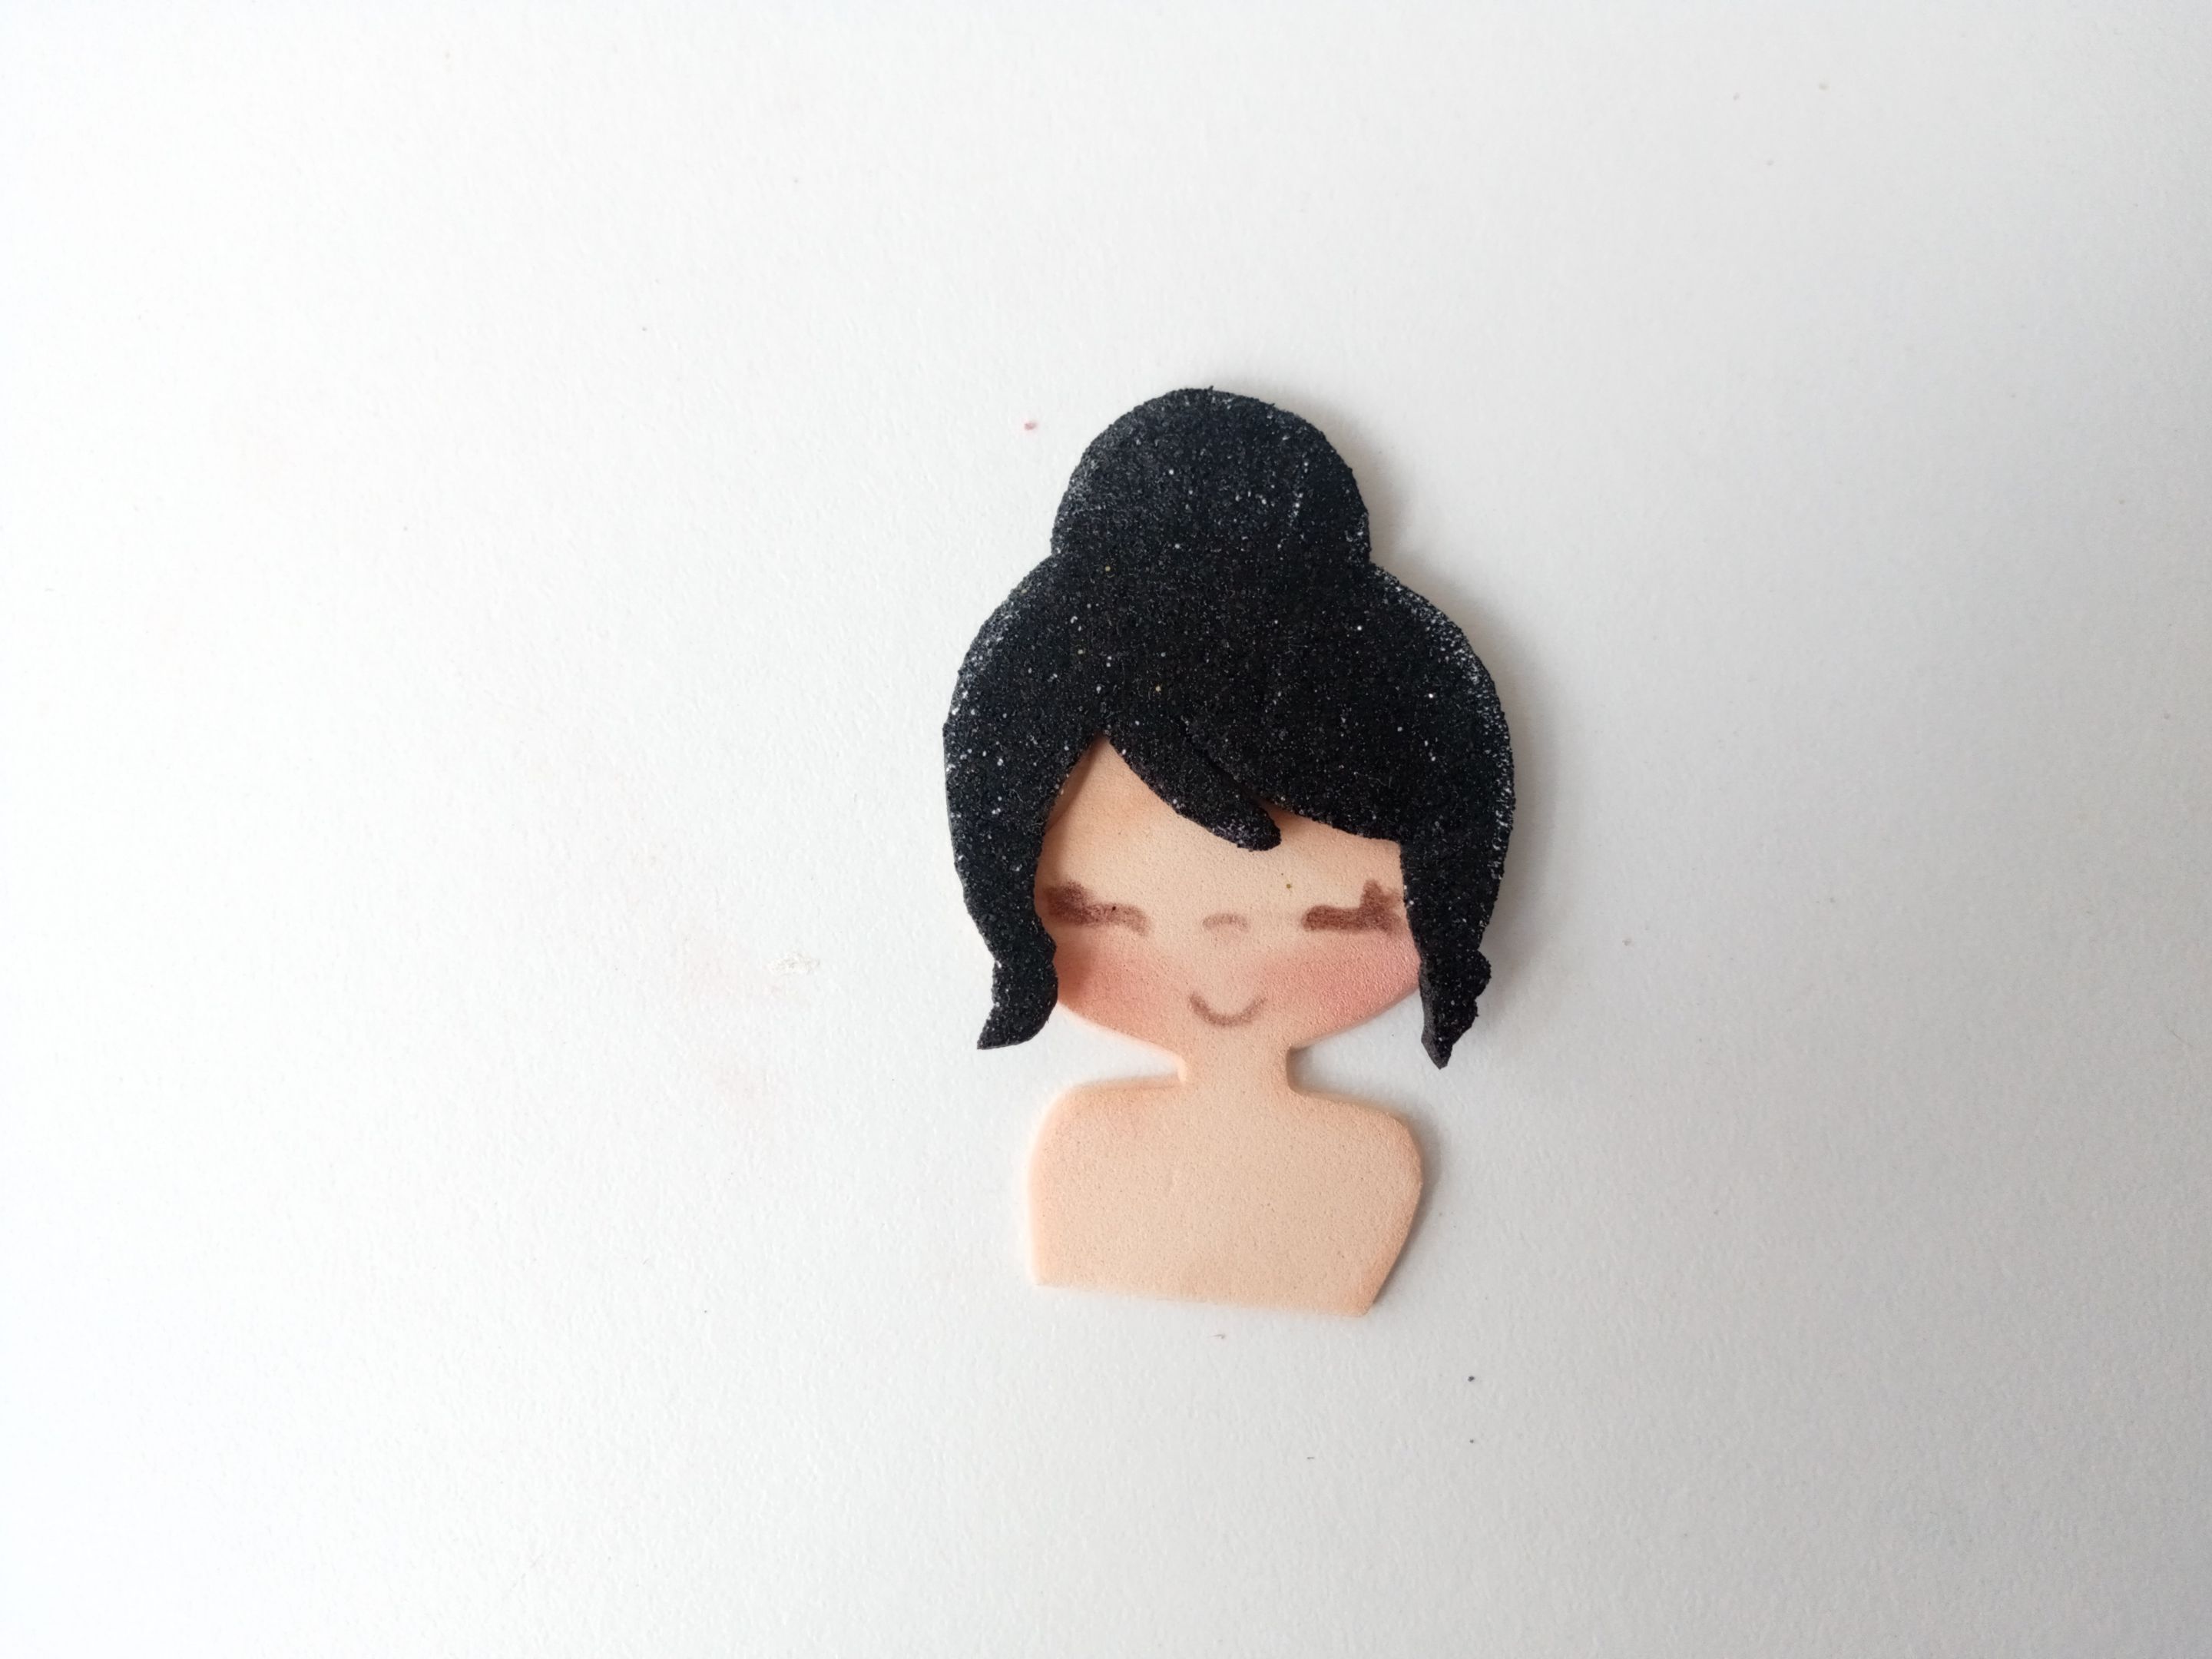
Lo primero que hice fue el dibujo del boceto que les estaré dejando al final del post. Luego, transferí cada una de las partes, al color correspondiente de foami, en el siguiente orden: cuerpo en foami color piel, cabello en negro escarchado, ropa y lazos en rosa escarchado, corazones en morado escarchado y botones en dorado escarchado. En el caso de los fondos utilicé los siguientes colores y formas: para el fondo más grande, recorté un rectángulo en foami rosa escarchado, con diseño curvo en uno de sus laterales para utilizarlo de forma vertical y luego, un ovalo en foami blanco.
✨ STEP 1:
The first thing I did was drawing the sketch that I will be leaving you at the end of the post. Then, I transferred each of the parts to the corresponding color of foam, in the following order: body in skin-colored foam, hair in frosted black, clothes and bows in frosted pink, hearts in frosted purple, and buttons in frosted gold. In the case of the backgrounds, I used the following colors and shapes: for the largest background, I cut out a rectangle in frosty pink foam, with a curved design on one of its sides to use it vertically, and then an oval in white foam.

✨ PASO 2:
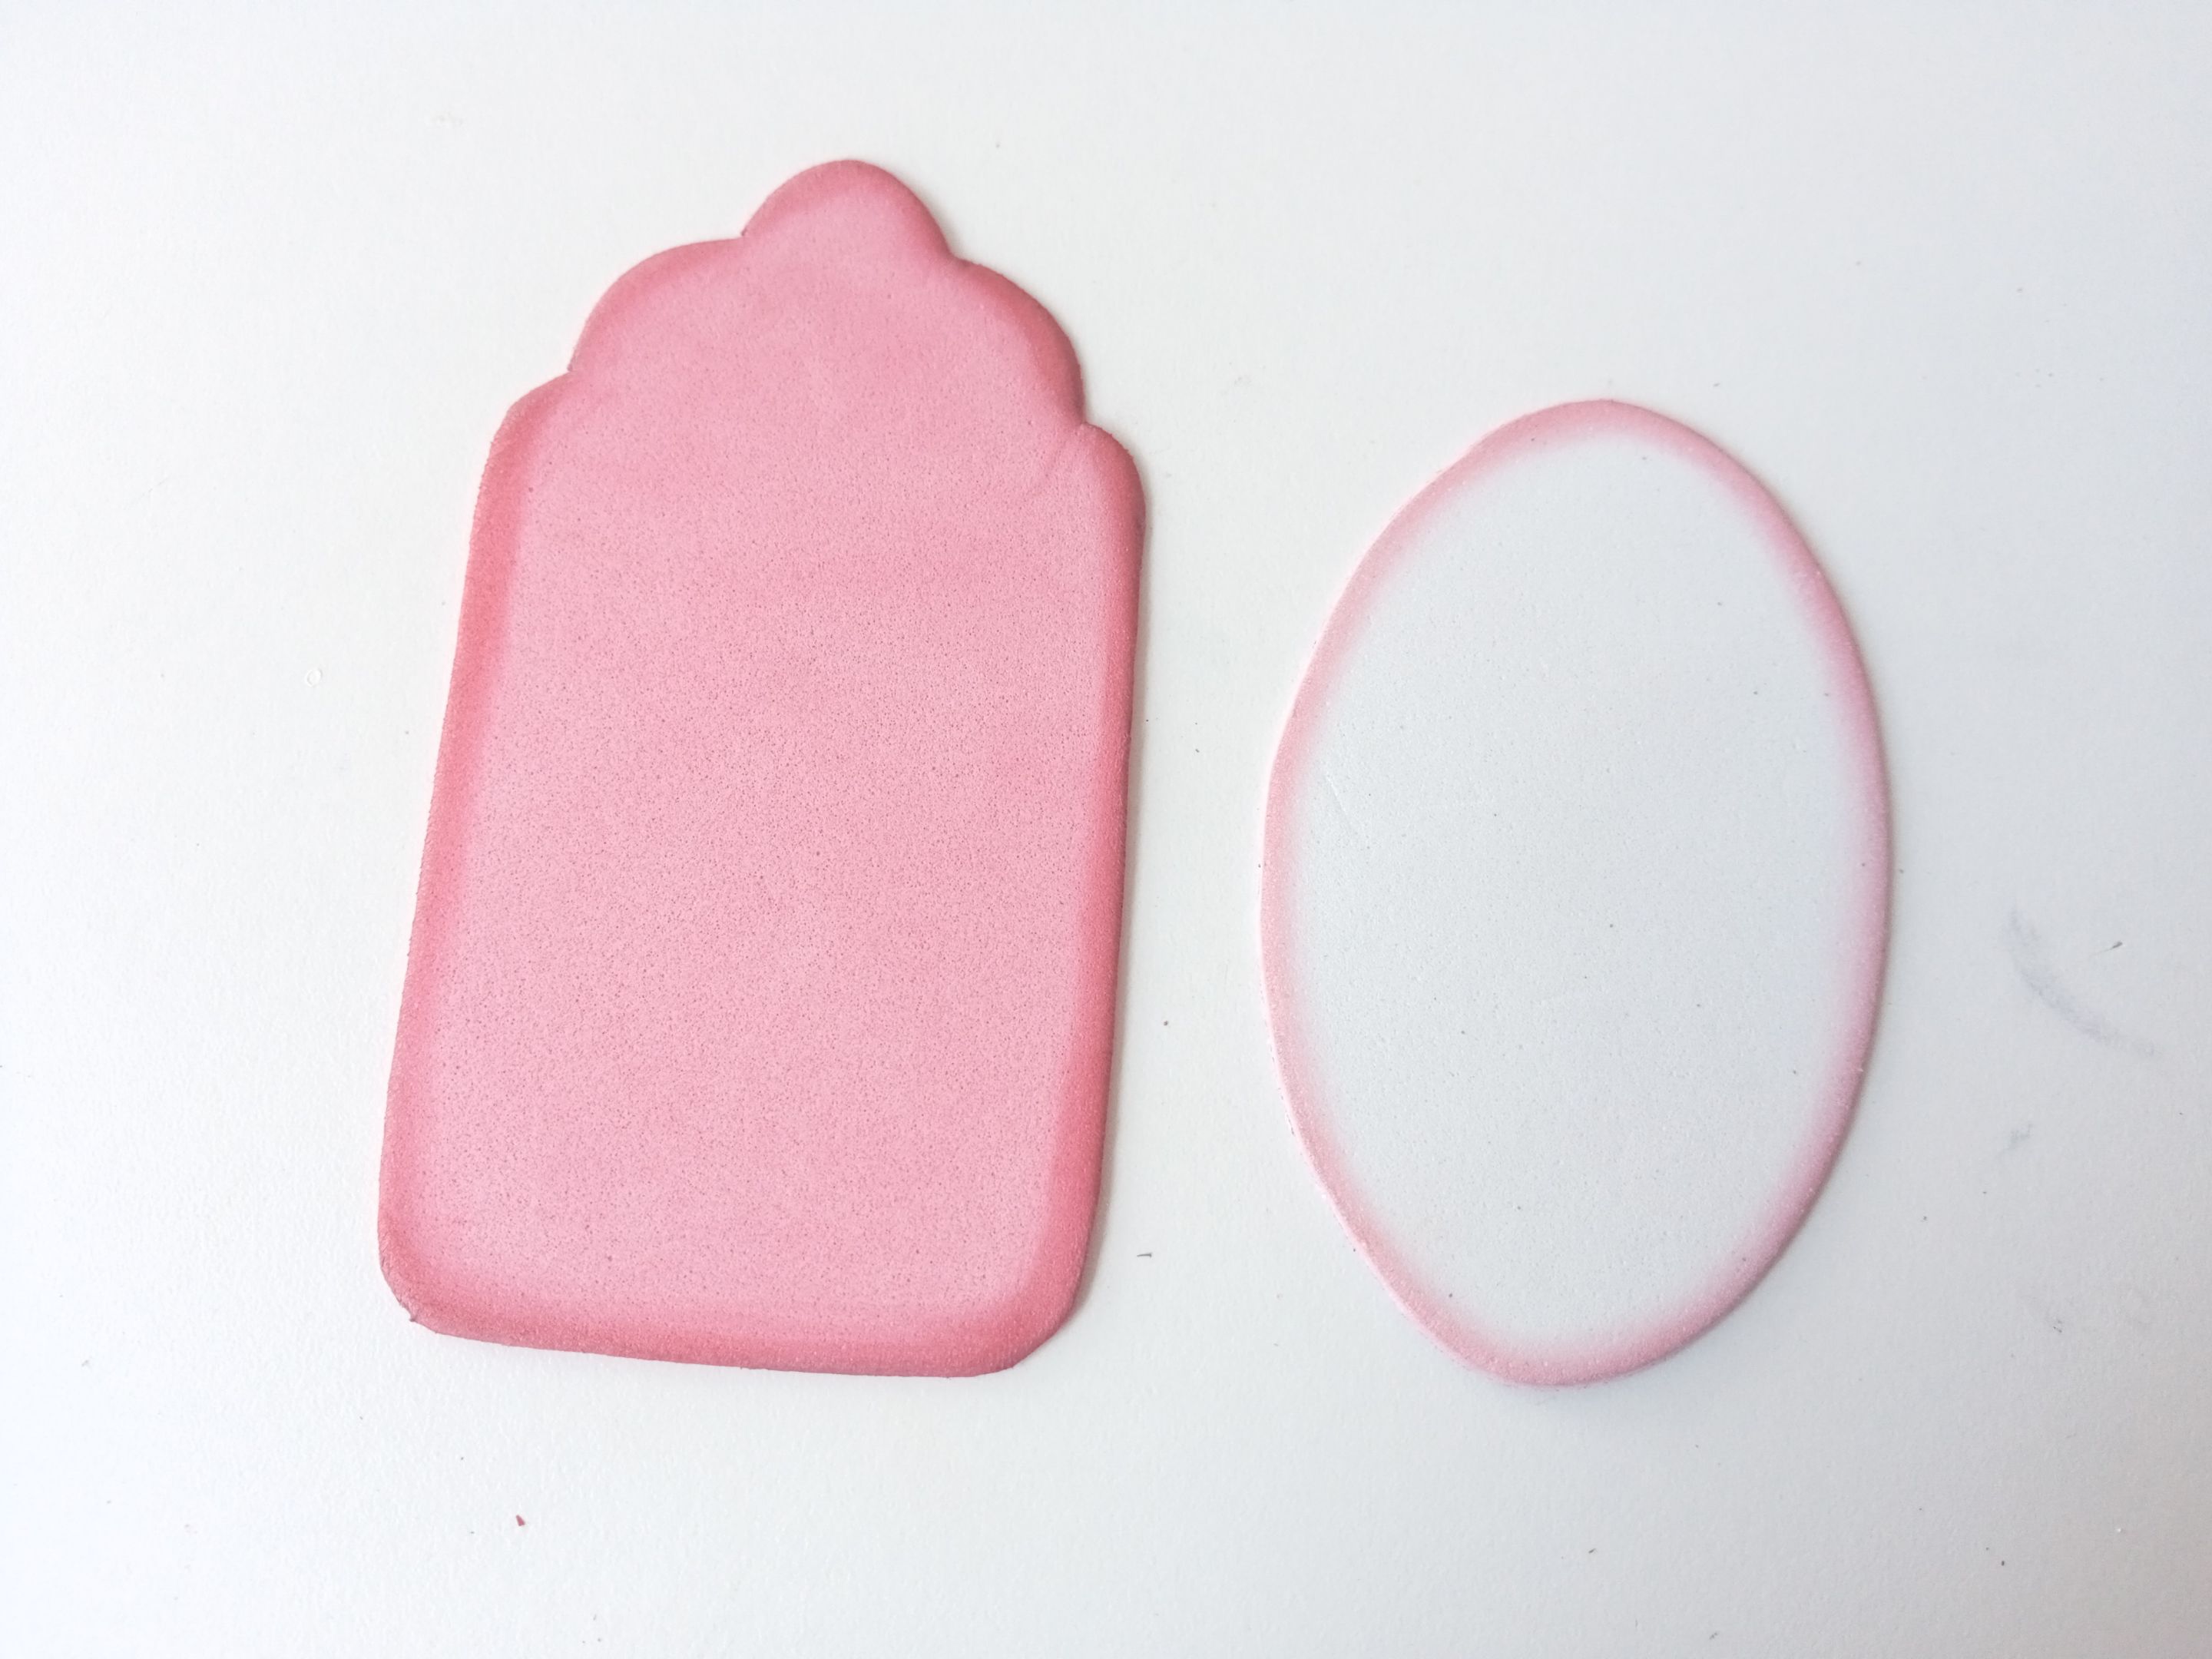
Una vez recortadas todas las piezas, proseguí a dar detalles. Tomé un poco de pintura rosada y pase por el borde de cada pieza frotando con ayuda de un pañito, en el caso del cuerpo, utilicé pintura marrón.
✨ STEP 2:
Once all the pieces were cut out, I continued to give details. Take a little pink paint and go over the edge of each piece rubbing with the help of a cloth, in the case of the body, I used brown paint.
✨ PASO 3:
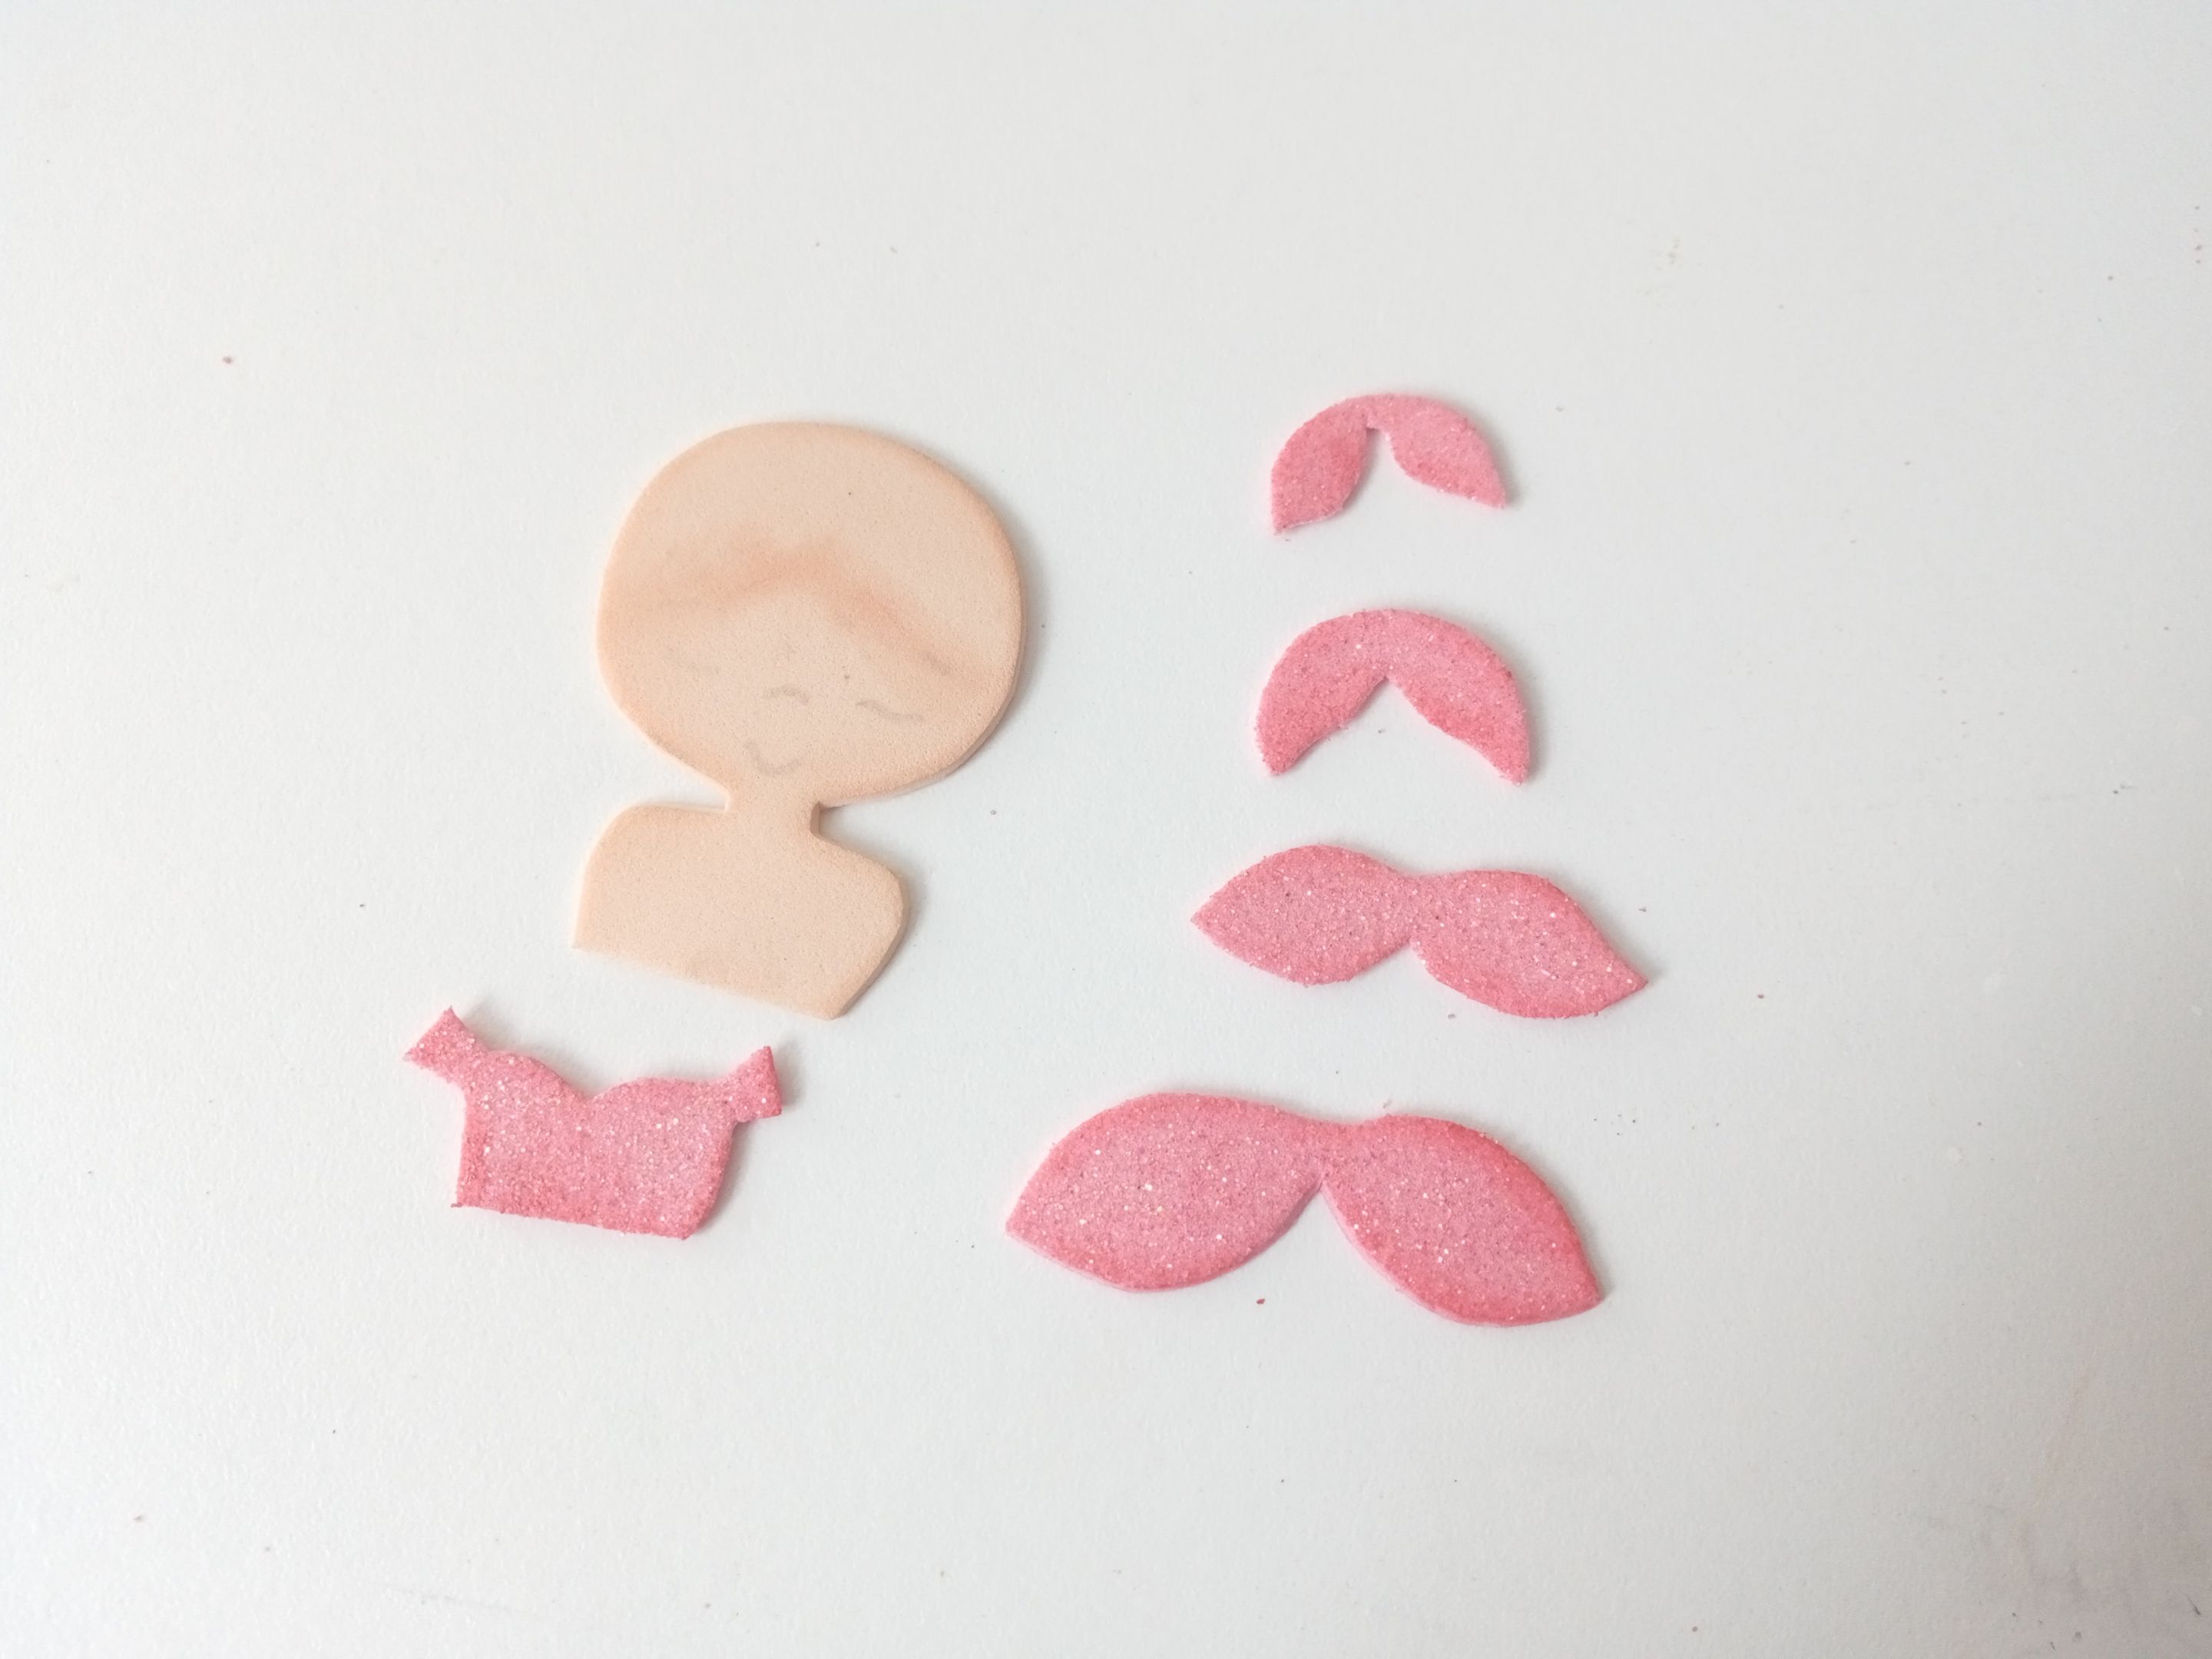
Dibujé el rostro de la muñeca junto con un poco de rubor en las mejillas y comencé a pegar cada pieza en su lugar de la siguiente manera: el cabello, la ropa y los botones.
✨ STEP 3:
I drew the doll's face along with some blush on the cheeks and began gluing each piece in place as follows: hair, clothes and buttons.

✨ PASO 4:
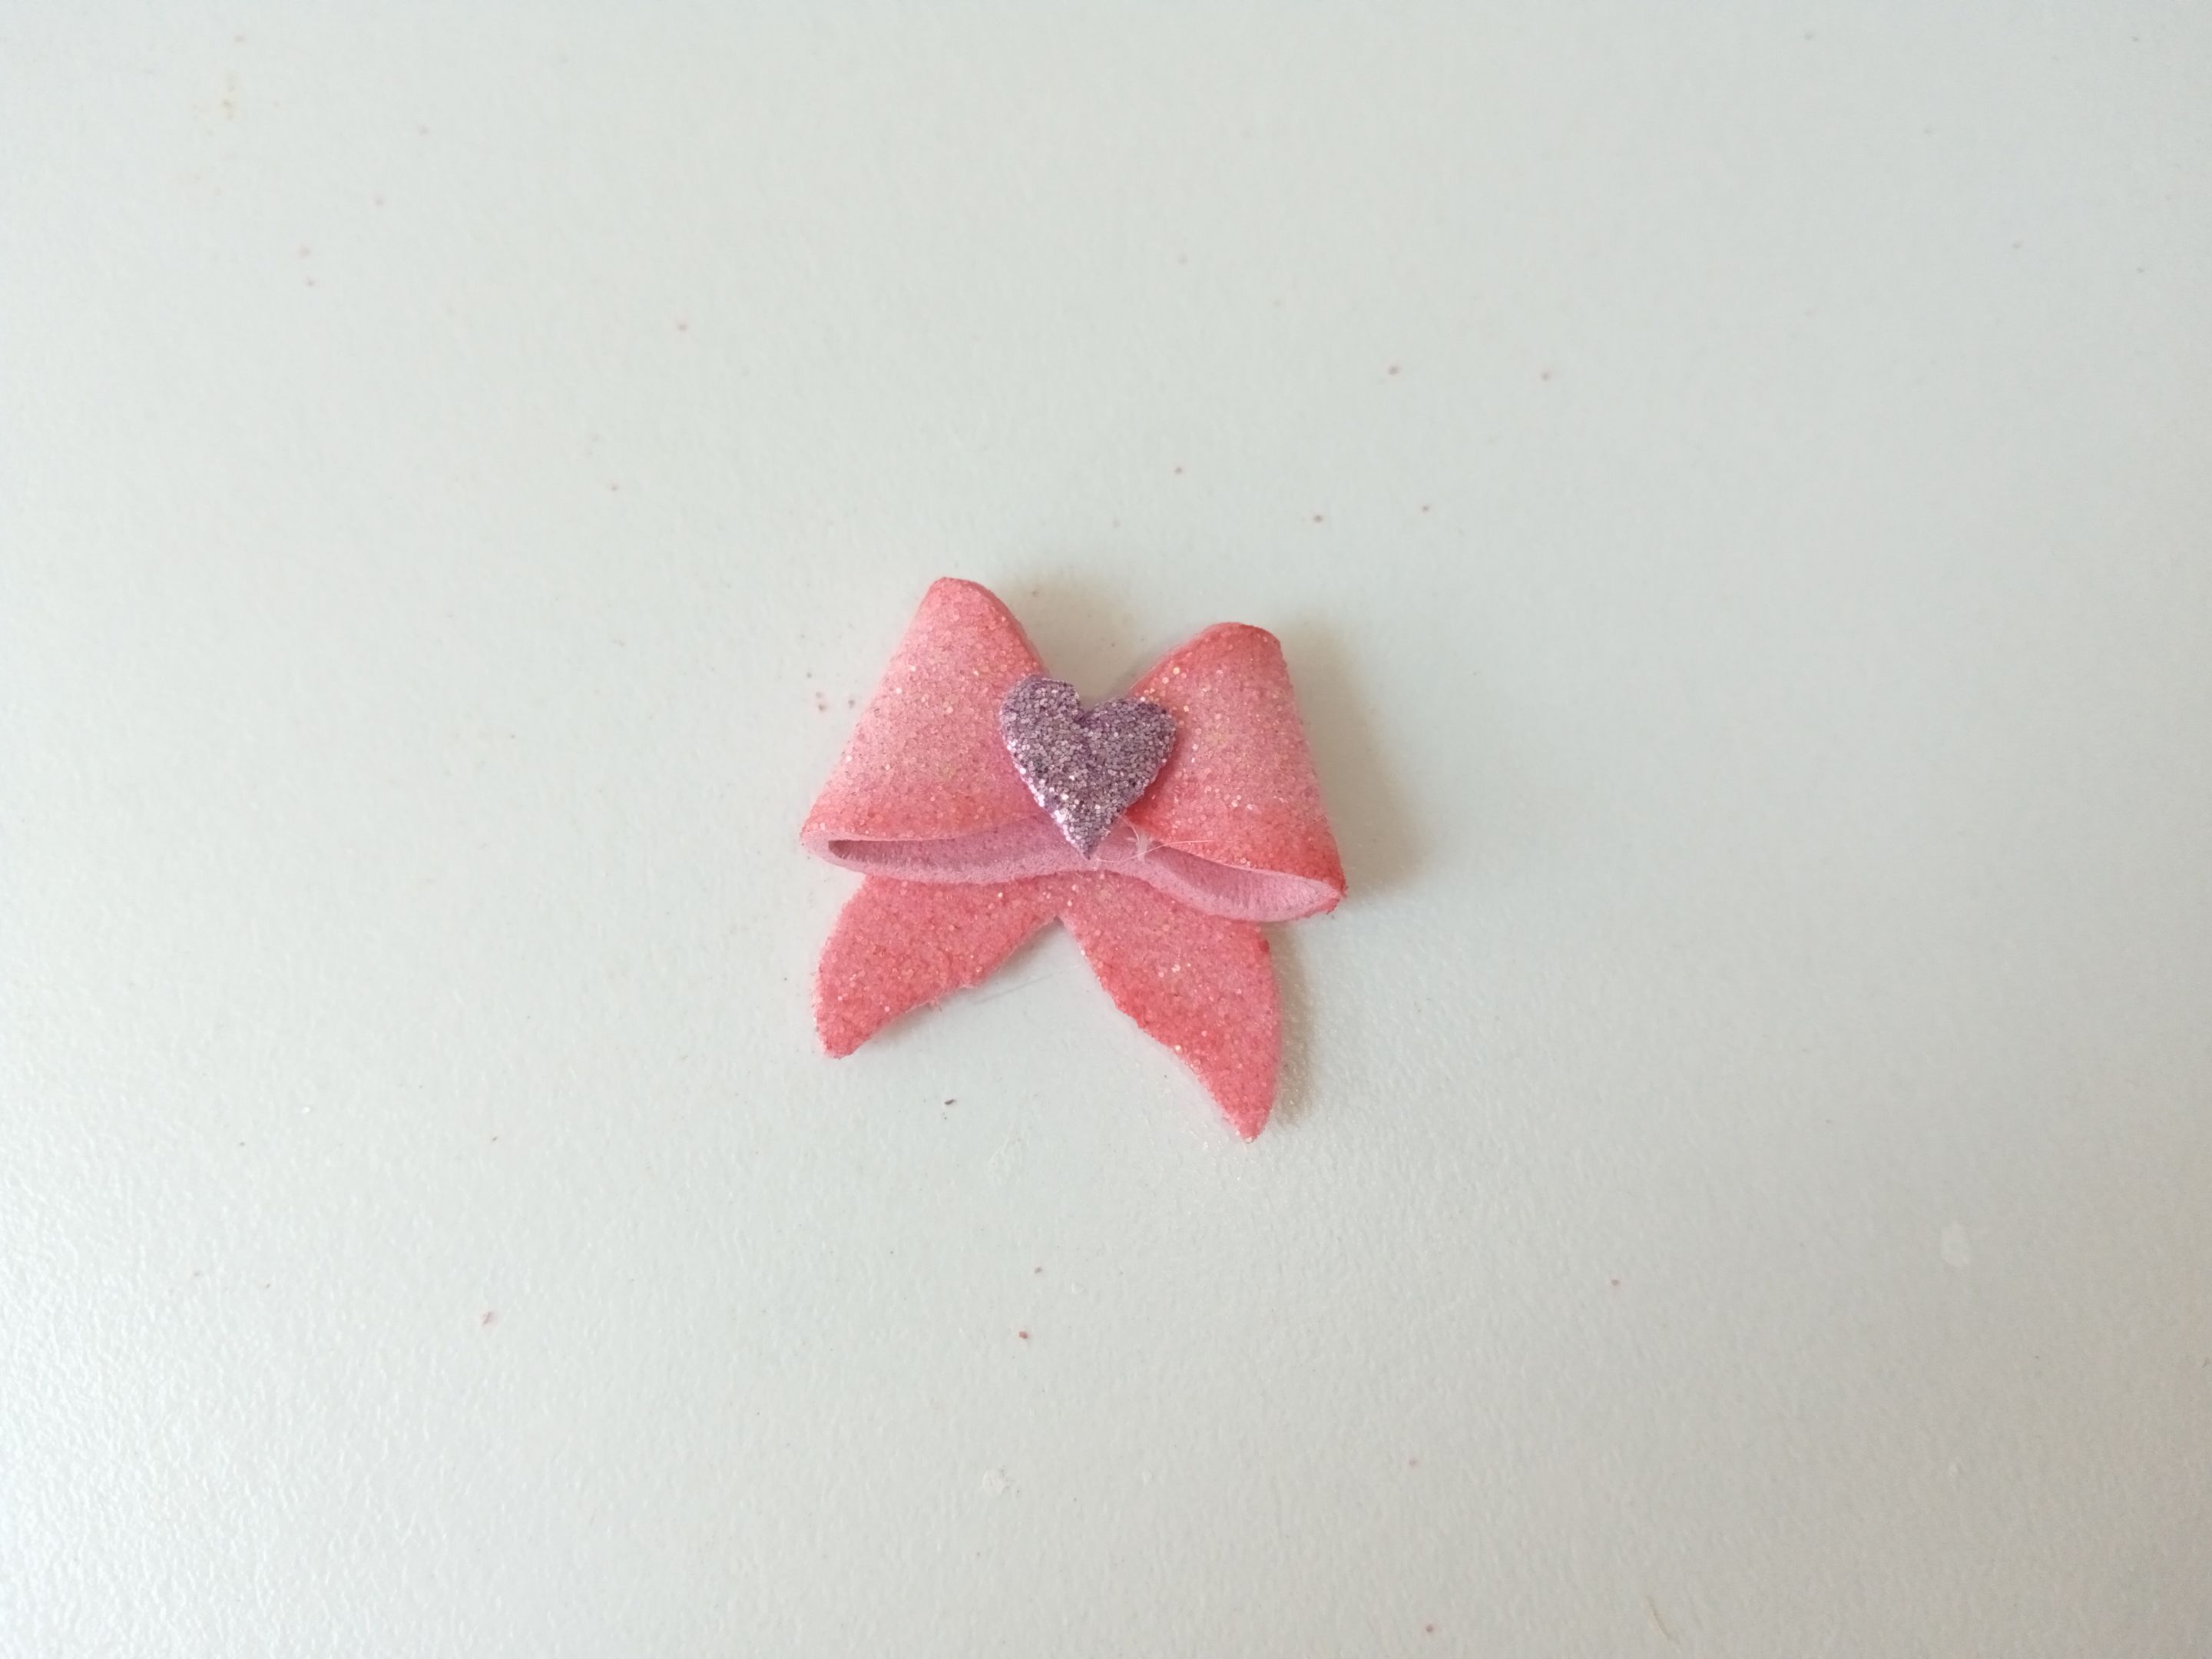
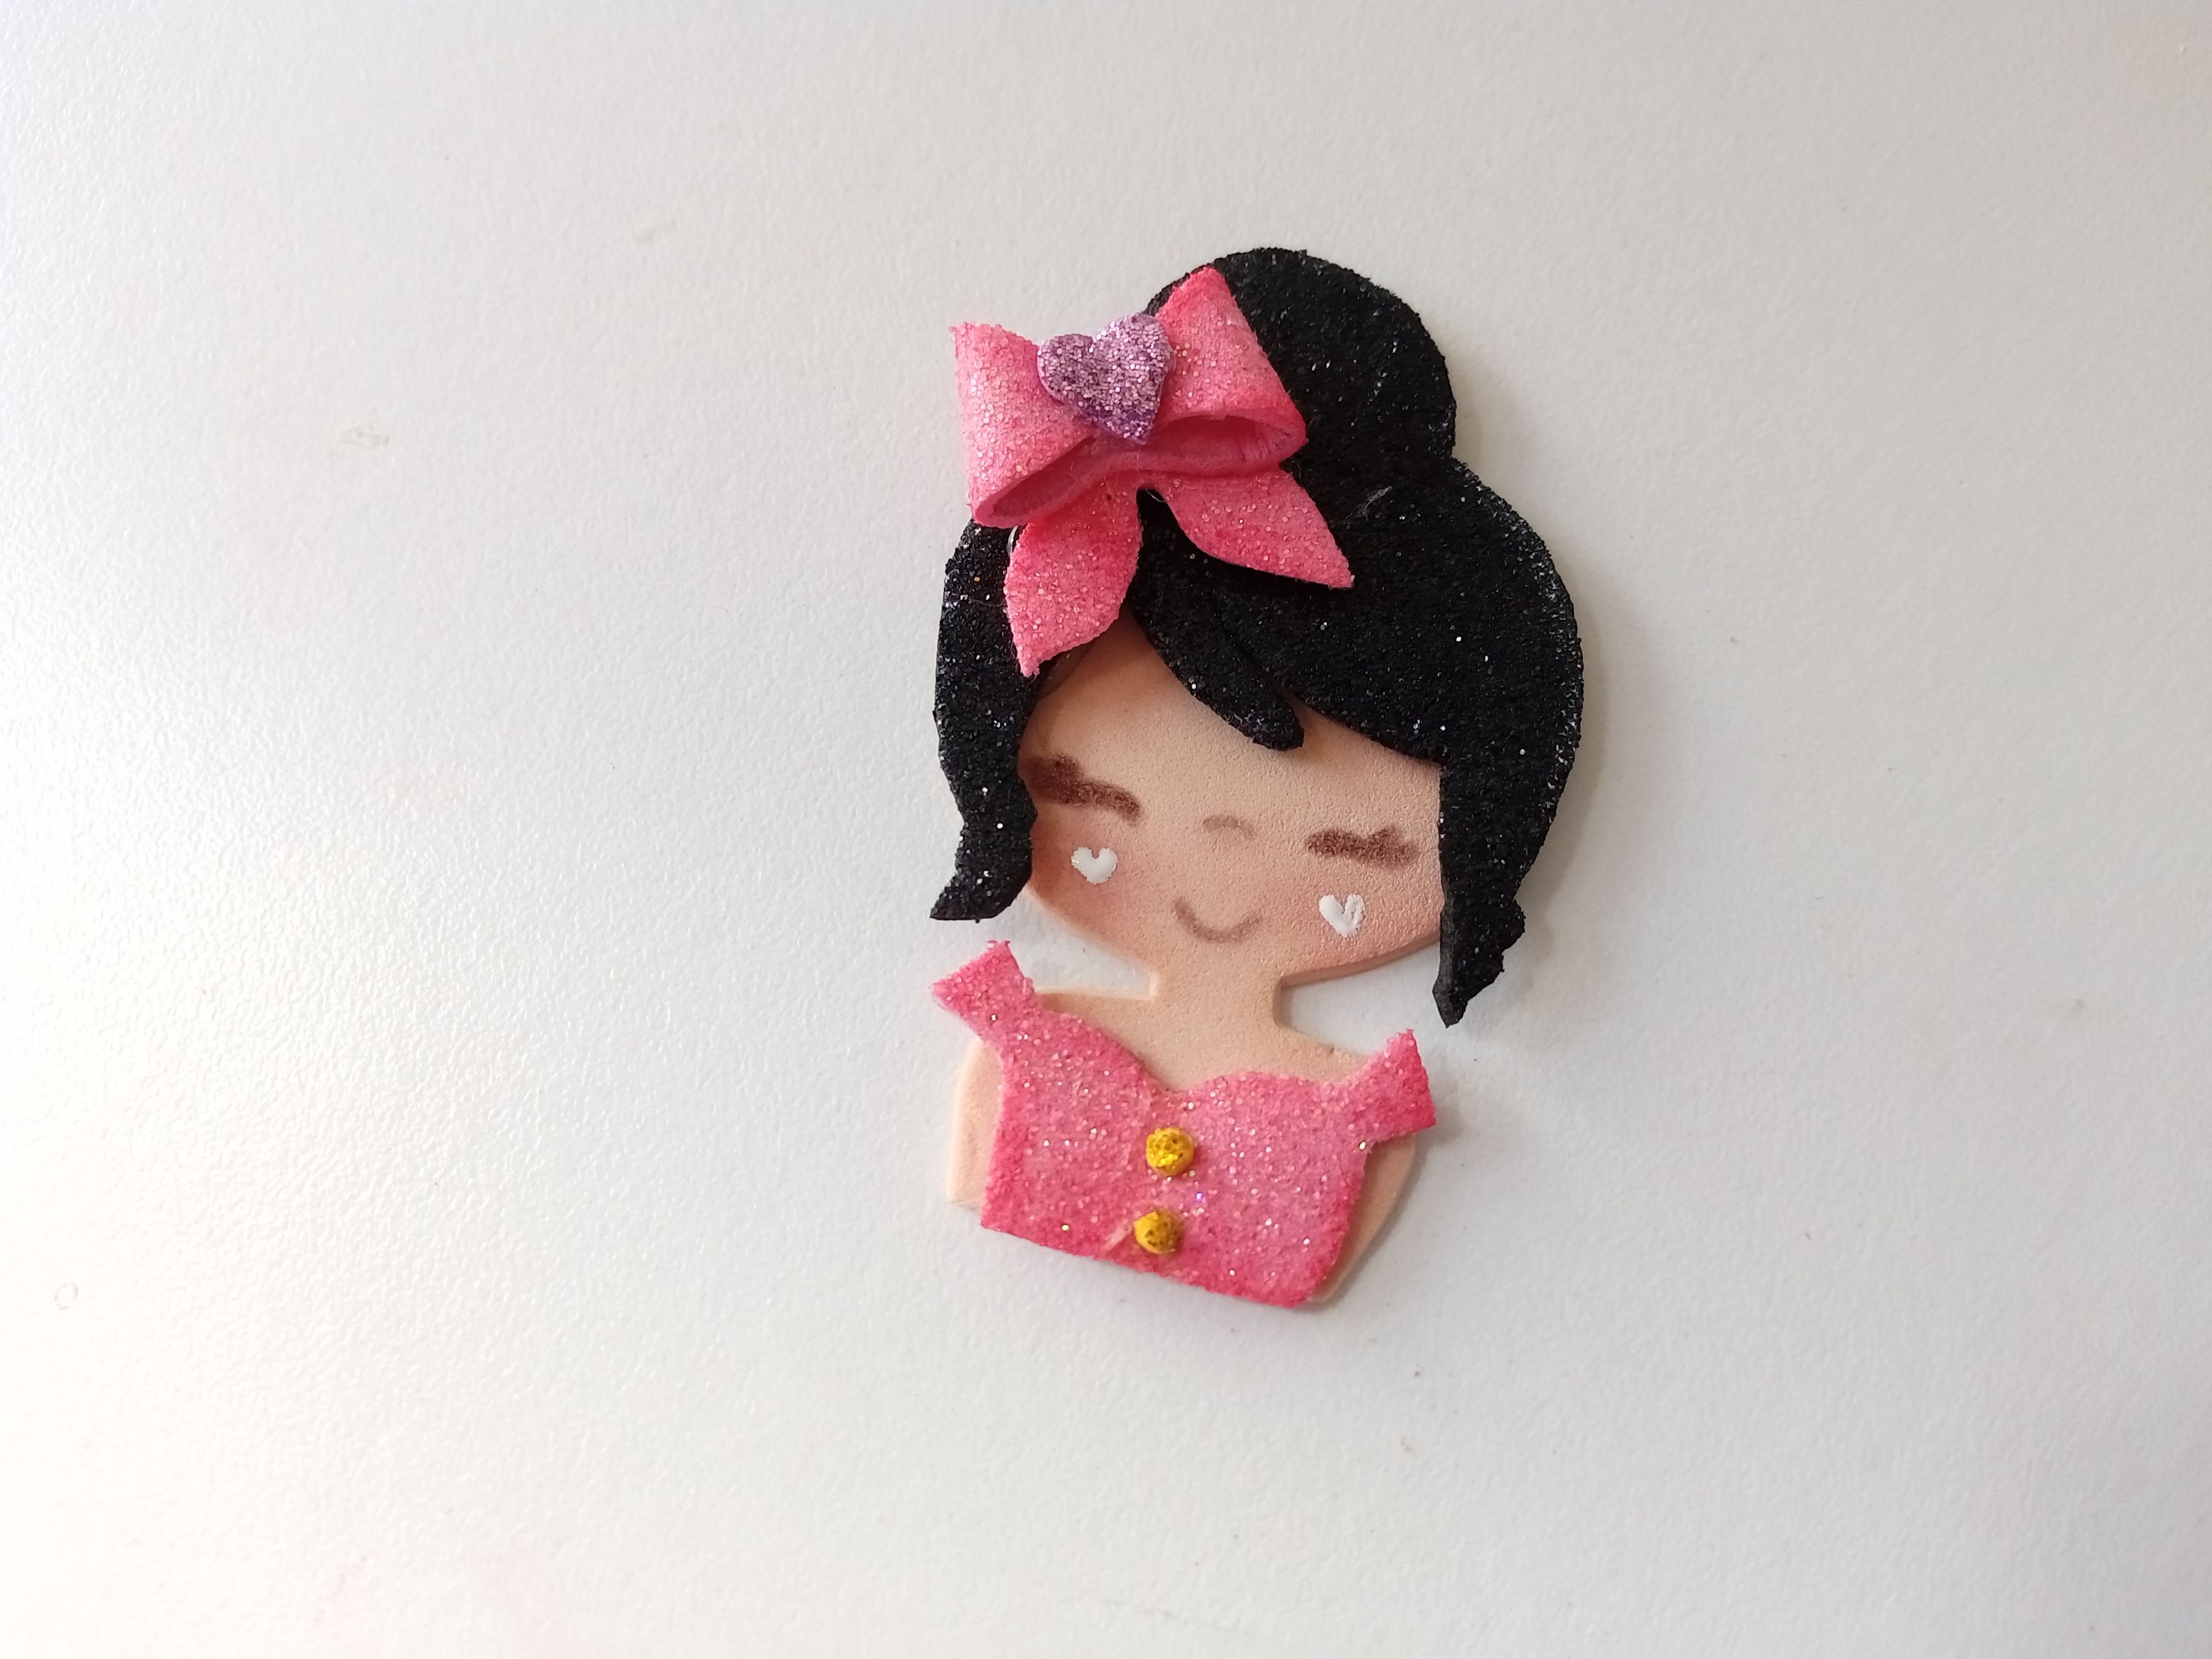
Armé ambos lazos como se muestra en las siguientes imágenes, en medio pegué los corazones morados y pegué el lazo más pequeño en uno de los costados del cabello de la muñeca. Para dar un toque de luz, pinté dos mini corazones con pintura blanca en las mejillas.
✨ STEP 4:
I assembled both bows as shown in the following images, in the middle I glued the purple hearts and glued the smaller bow to one of the sides of the doll's hair. For a highlight, paint two mini hearts with white paint on the cheeks.
✨ PASO 5:
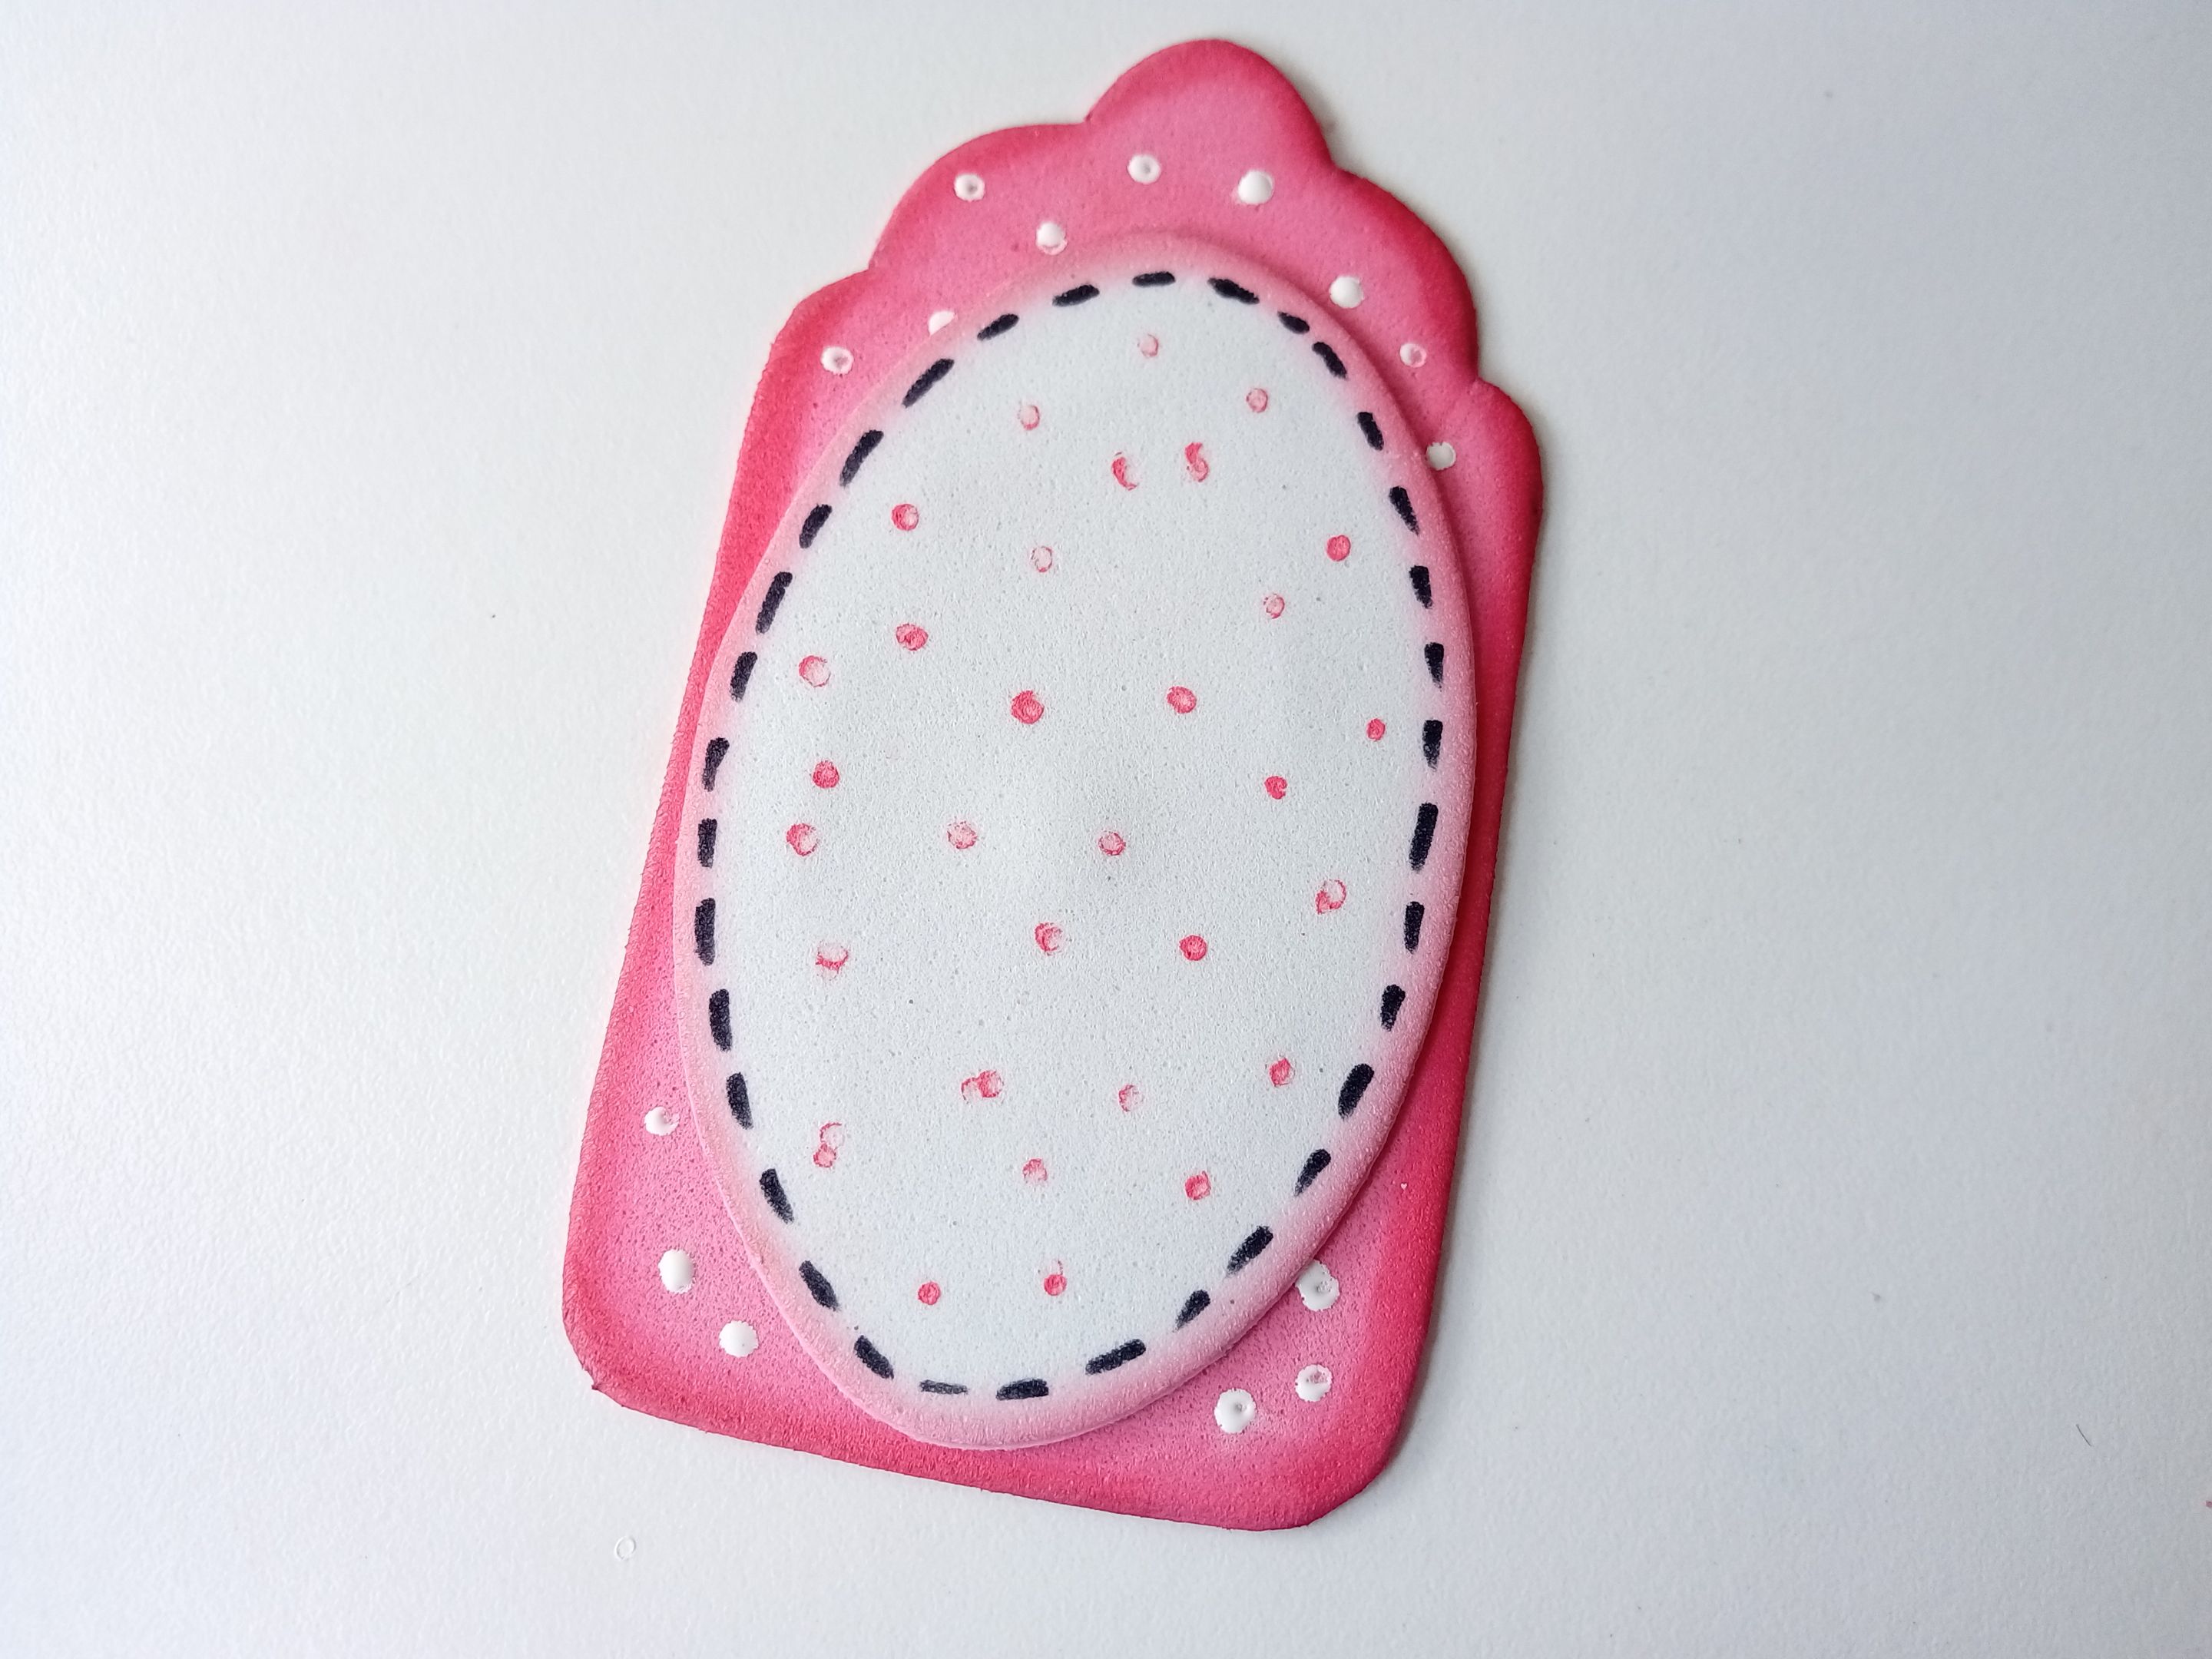
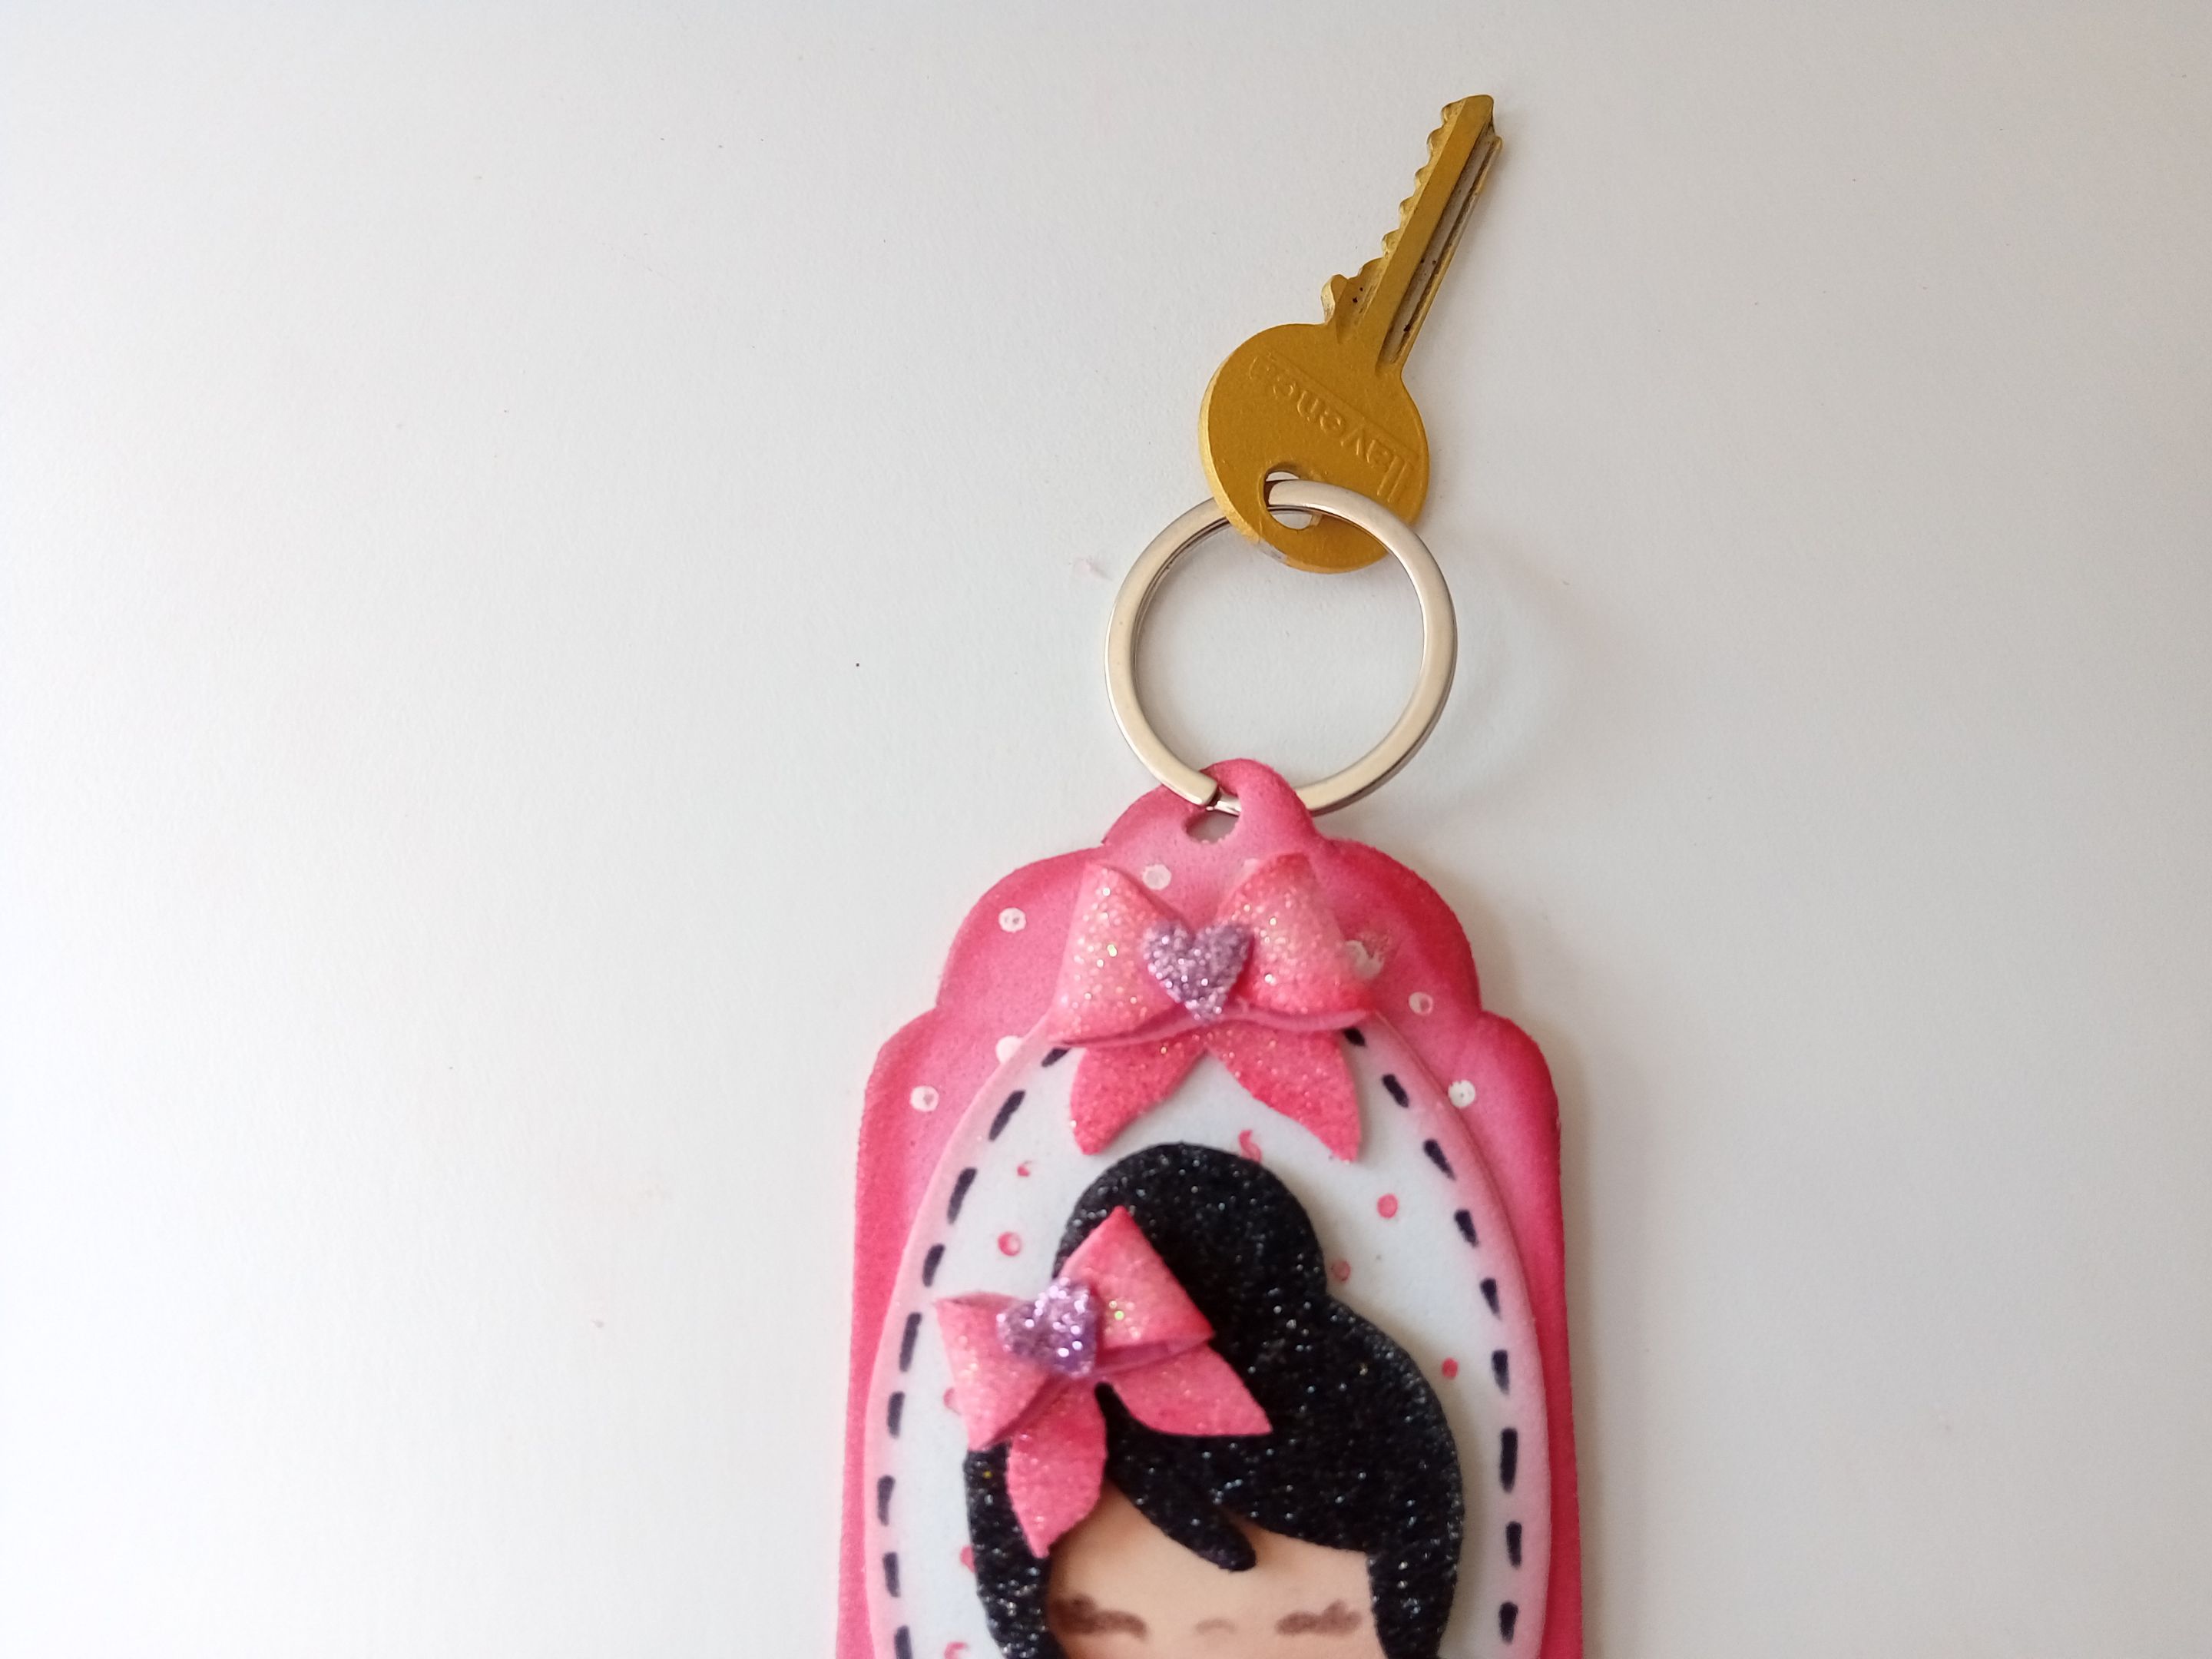
Para los fondos, coloqué ambas piezas en vertical y pegué el óvalo en medio de la pieza más grande. Para dar detalles, pinté puntos blancos en el fondo más grande, puntos rosas en el óvalo blanco y dibujé líneas de costura por todo el borde del mismo. Al estar seco, pegué la muñeca en medio, abrí un agujero en la parte superior del fondo más grande e inserté el círculo metálico junto con la llave.
✨ STEP 5:
For the backgrounds, I placed both pieces vertically and glued the oval in the middle of the larger piece. For details, I painted white dots on the larger background, pink dots on the white oval, and drew stitching lines all around the edge of it. Once it was dry, I glued the doll in the middle, opened a hole at the top of the larger bottom and inserted the metal circle along with the key.
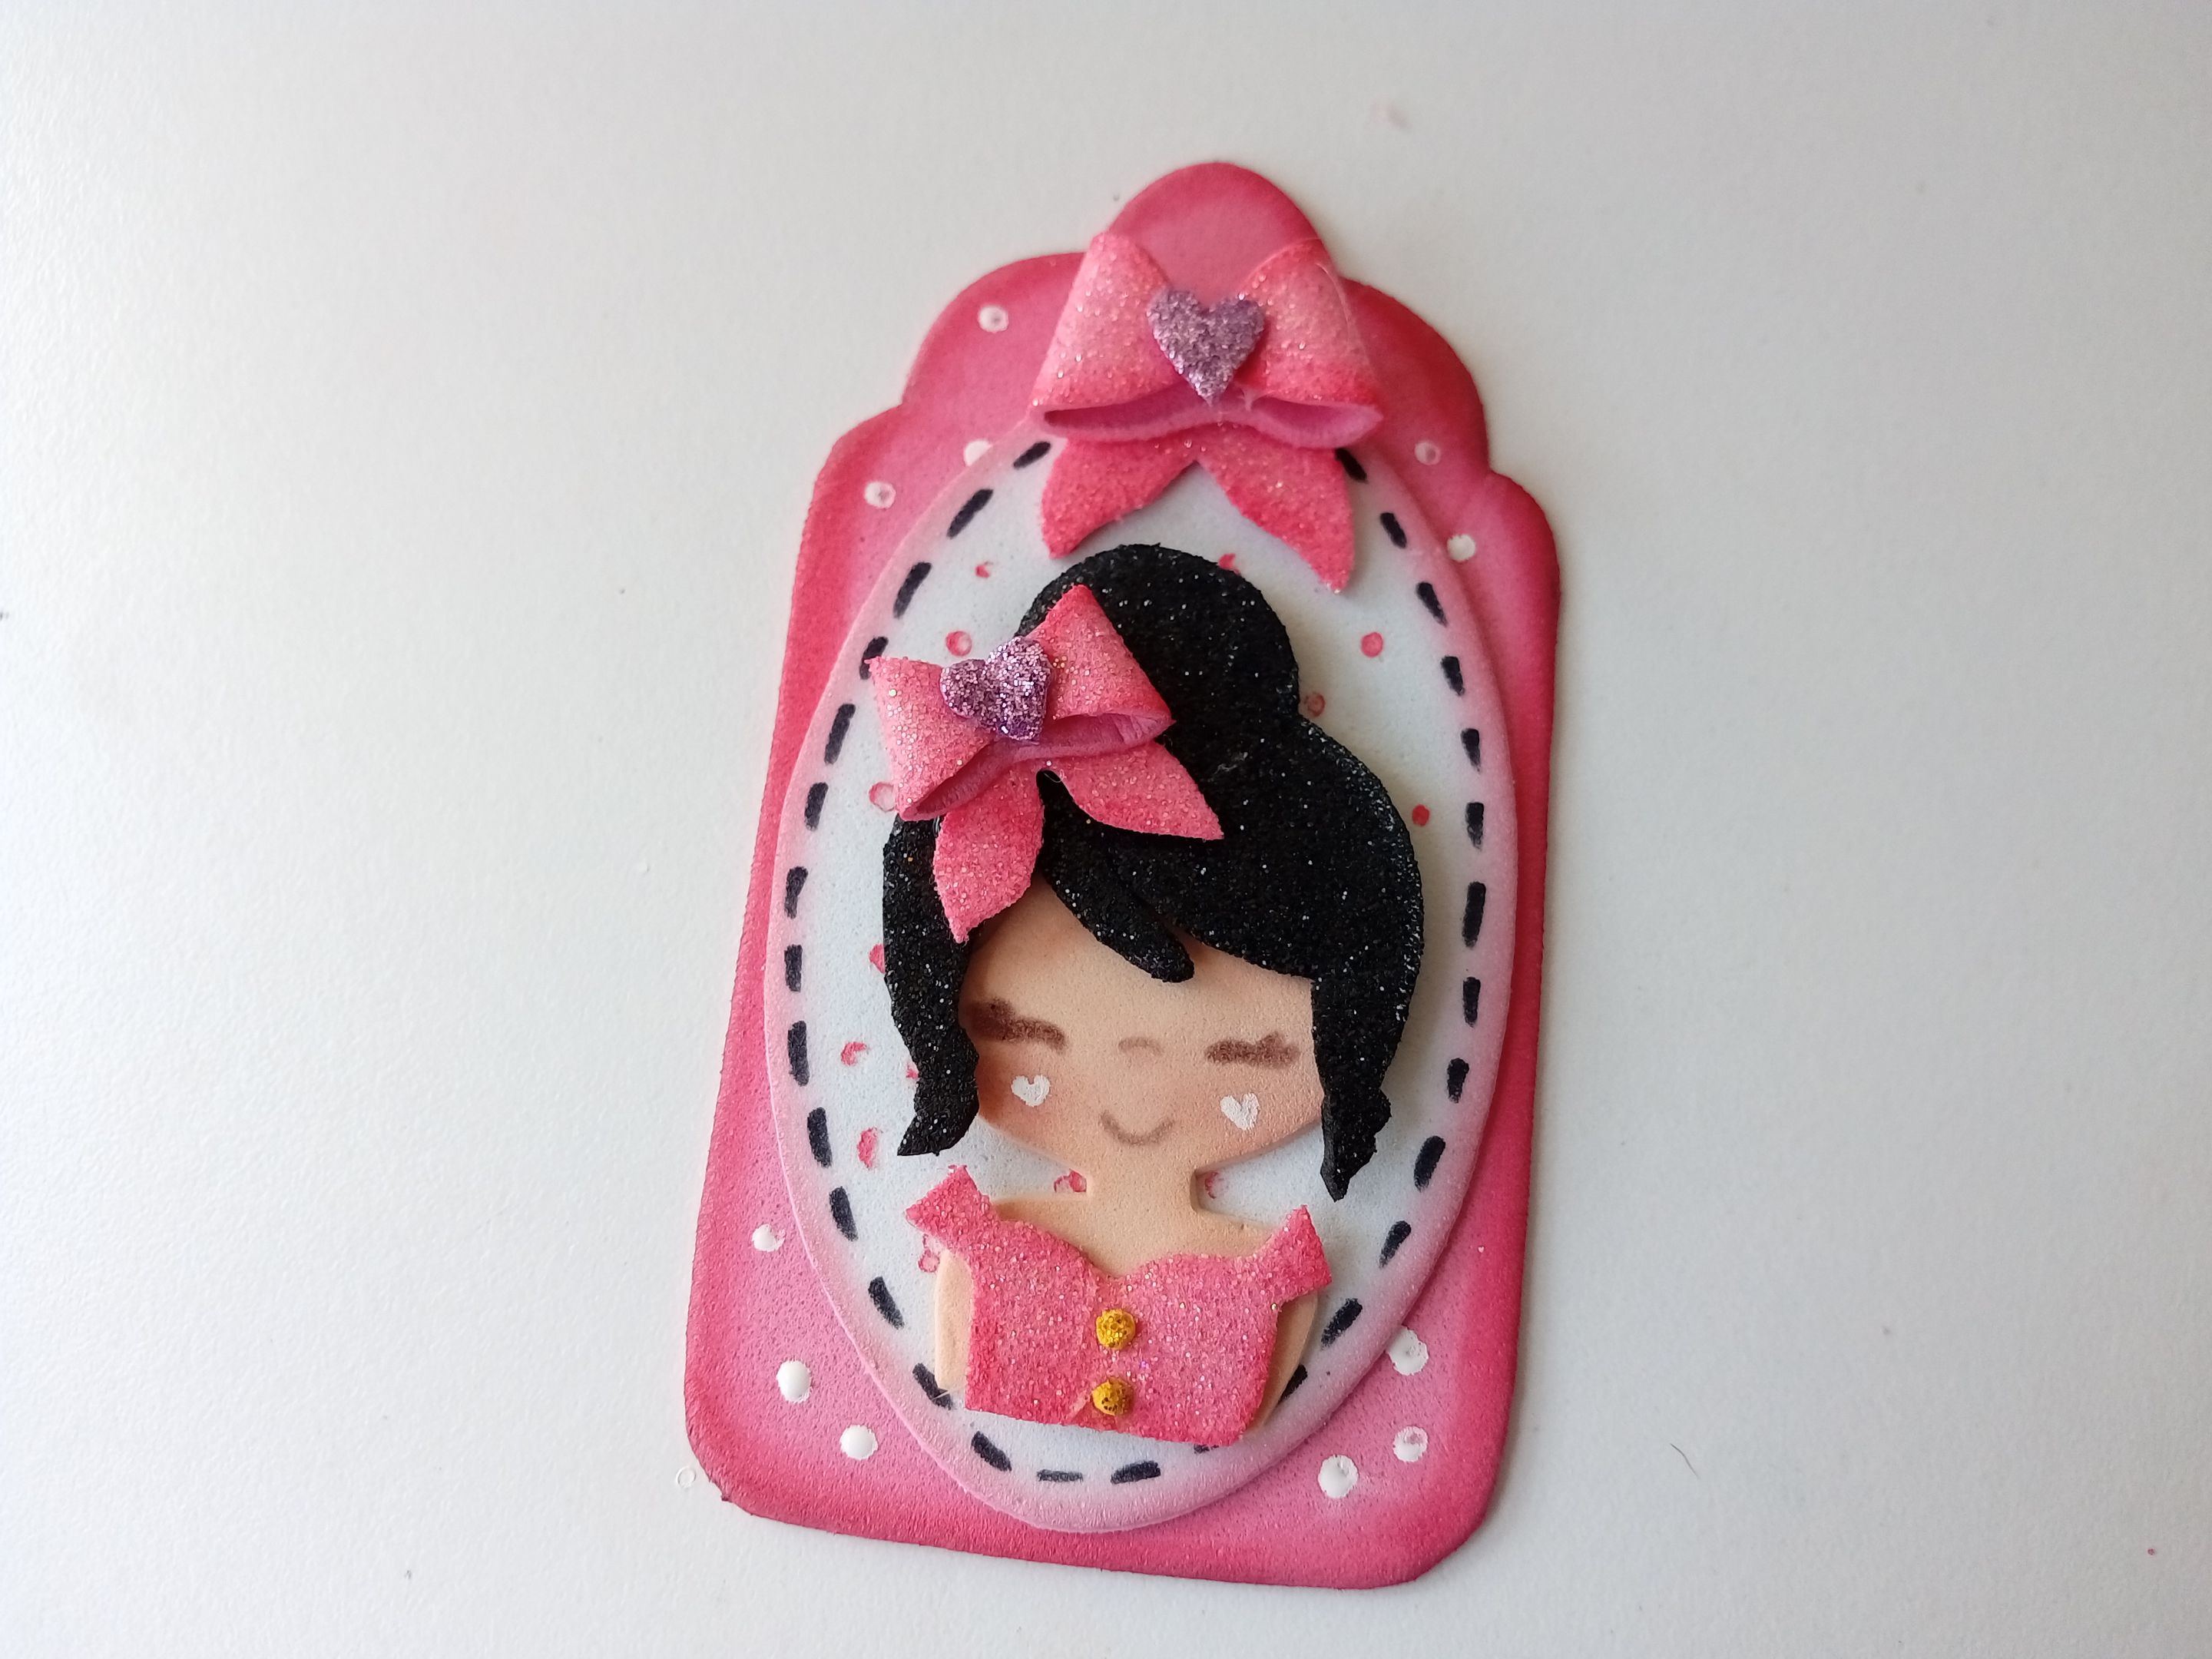
✨🎀🔑¡And ready!🔑🎀✨This is how you can make this beautiful, tender and flirty keychain to give as a gift on Women's Day. Let me know if you liked this idea as a keychain or if you would make it with another idea. For my part, I really enjoyed giving details, as it is my favorite part when creating. I hope you liked it and are encouraged to make it.
❤️Until the next post.
✨RESULTADO: | ✨RESULT:


Todas las fotografías son de mi propiedad.
Separador y Fotos editadas en Canva
All photographs are my property.
Photos edited in Canva