
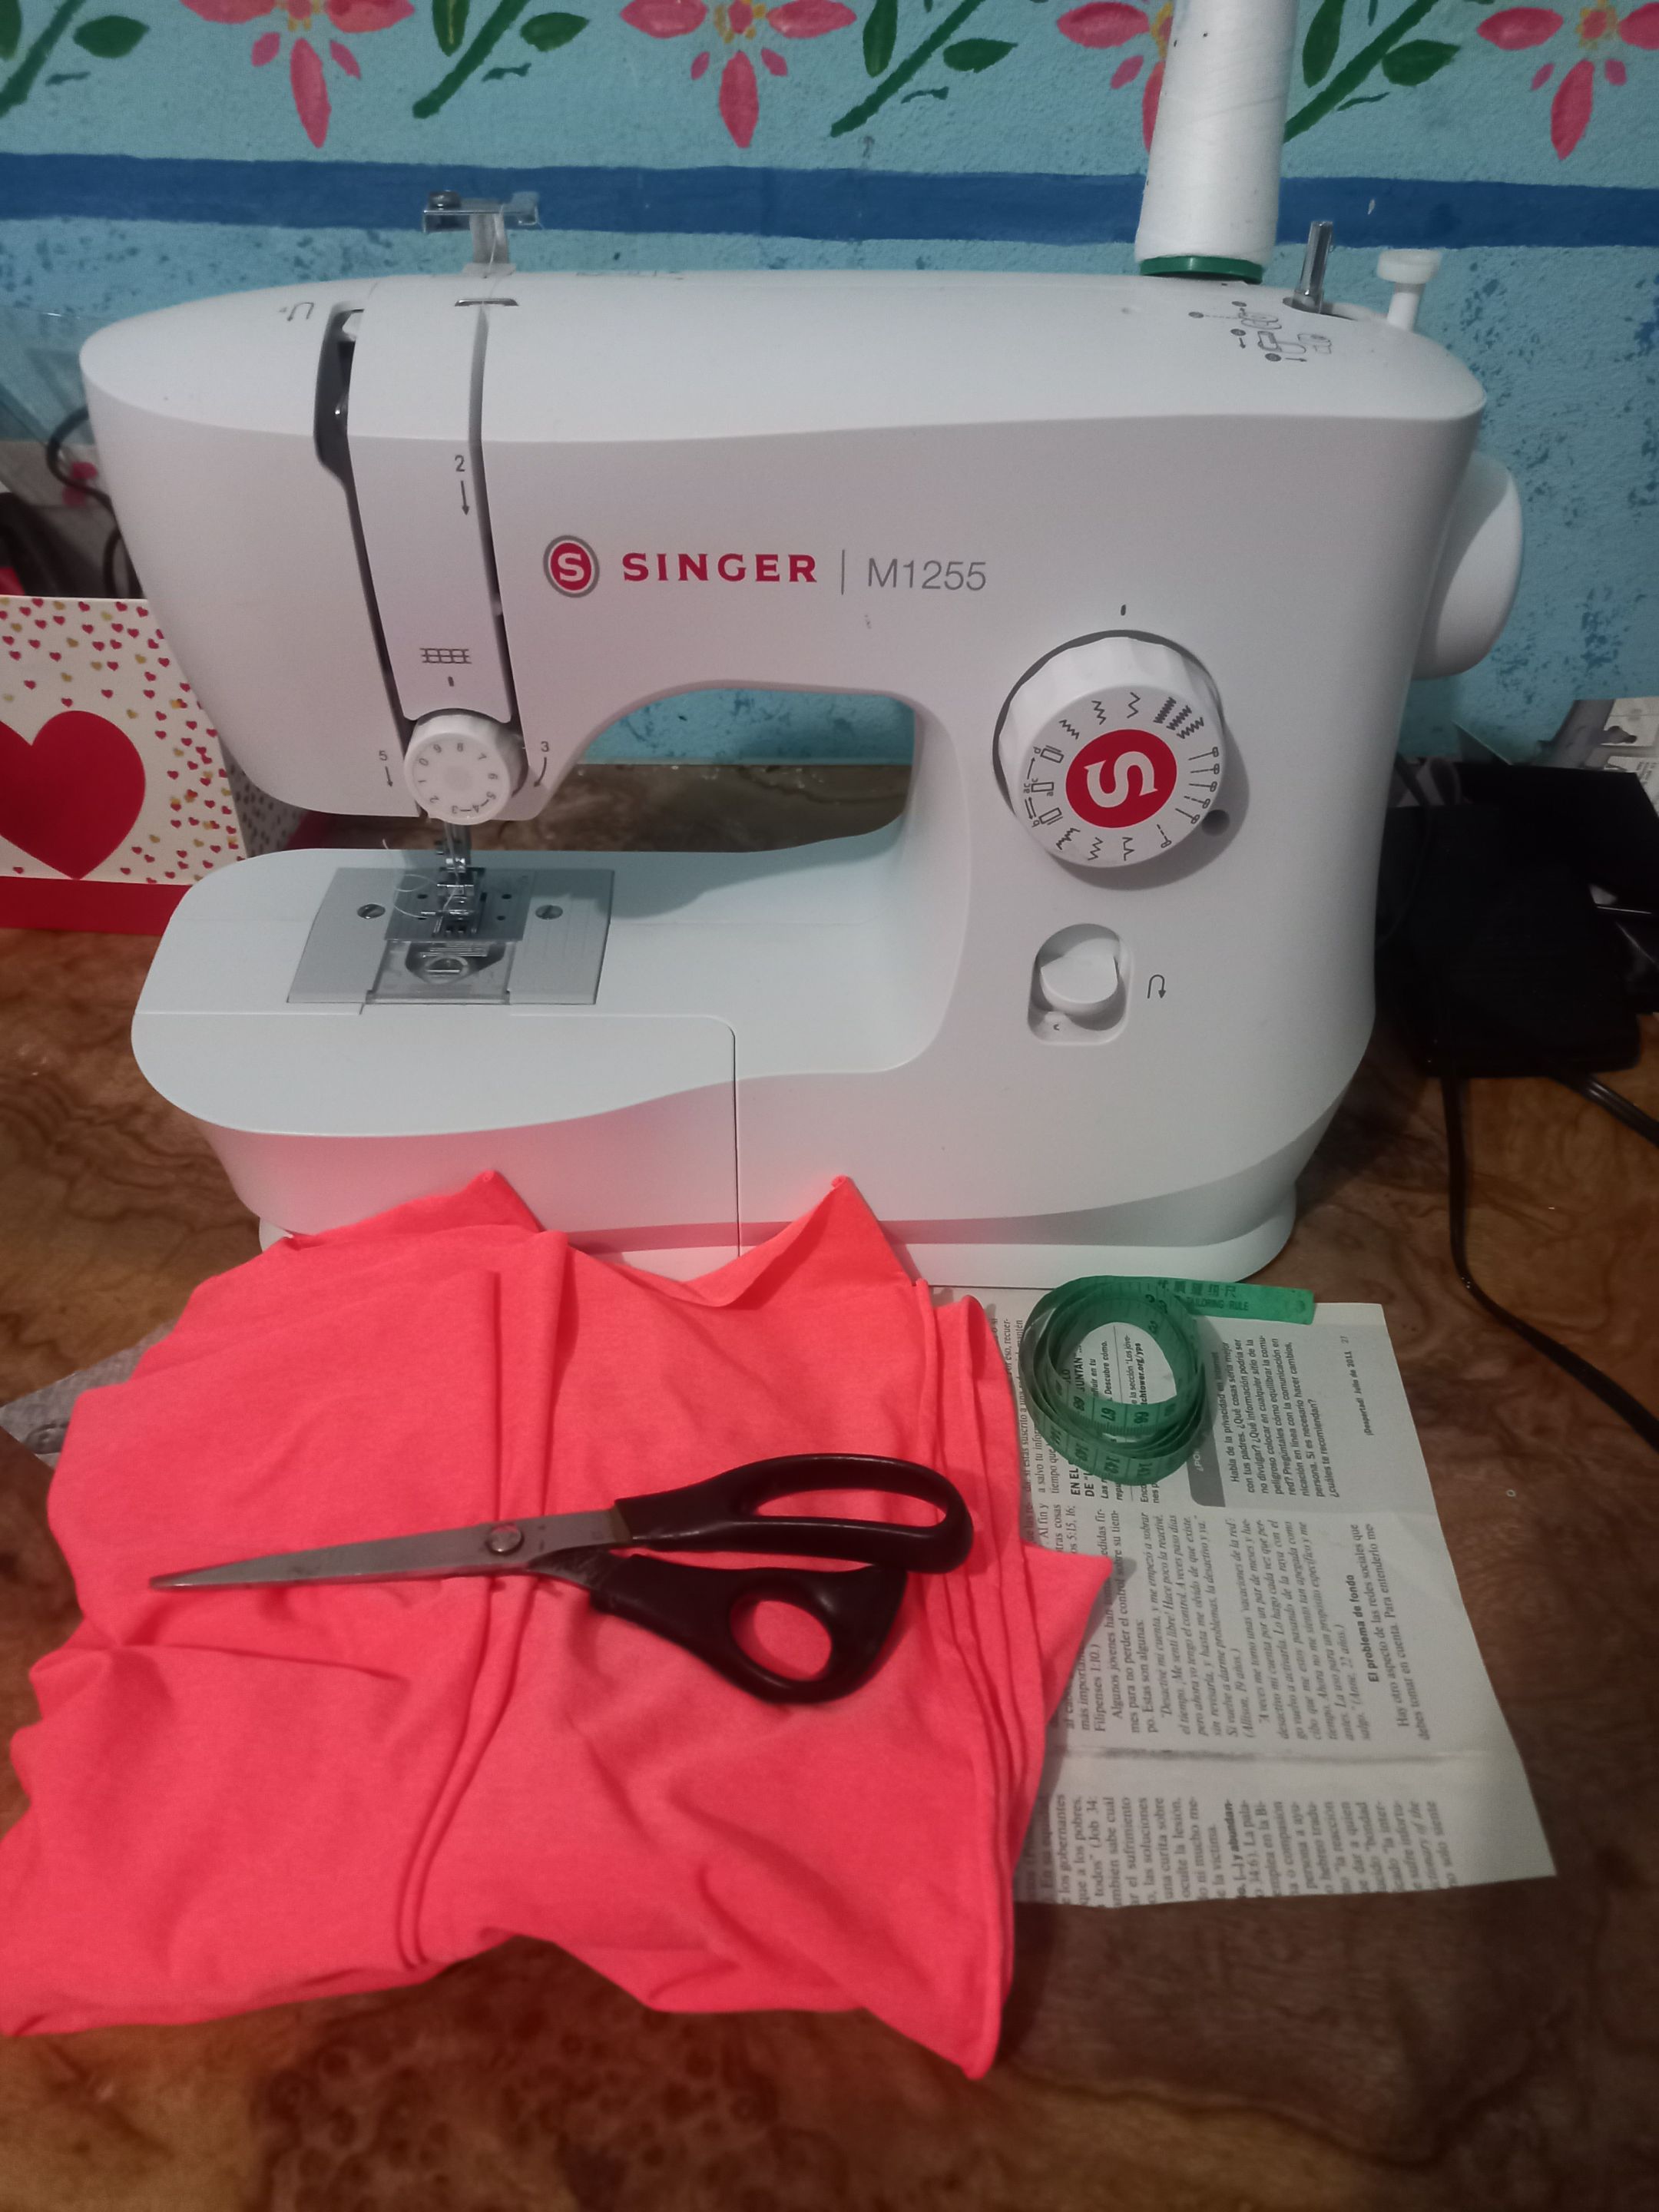
Hola, hola mis muy apreciados amigo de esta Colmena #Needleworkmonday, me da mucho gusto poder saludarlos y desearles un grandioso fin de semana. Hace más de 30 días creo que no compartía ningún contenido con ustedes, debido a que estaba bastante desmotivada con el tema de la costura; por motivos personales, pero estoy de vuelta una vez más y hoy quiero mostrarles un tutorial de cómo confeccionar una blusa con hombros descubierto y con escote en forma de gota para esta blusa utilice una tela elástica de un color naranja neón. Espero les guste.
Hello, hello my very appreciated friends of this #Needleworkmonday Hive, it gives me great pleasure to greet you and wish you a great weekend. It's been more than 30 days since I think I shared any content with you, because I was quite unmotivated with sewing; for personal reasons, but I'm back once again and today I want to show you a tutorial on how to make a blouse with bare shoulders and a drop neckline for this blouse I used a stretch fabric in a neon orange color. I hope you like it.

- 1 metro de tela elástica naranja neón.
- Patrón.
- Cinta métrica.
- Maquina de coser.
- Tijeras.
- 1 meter of neon orange elastic fabric.
- Pattern.
- Tape measure.
- Sewing machine.
- Scissors.

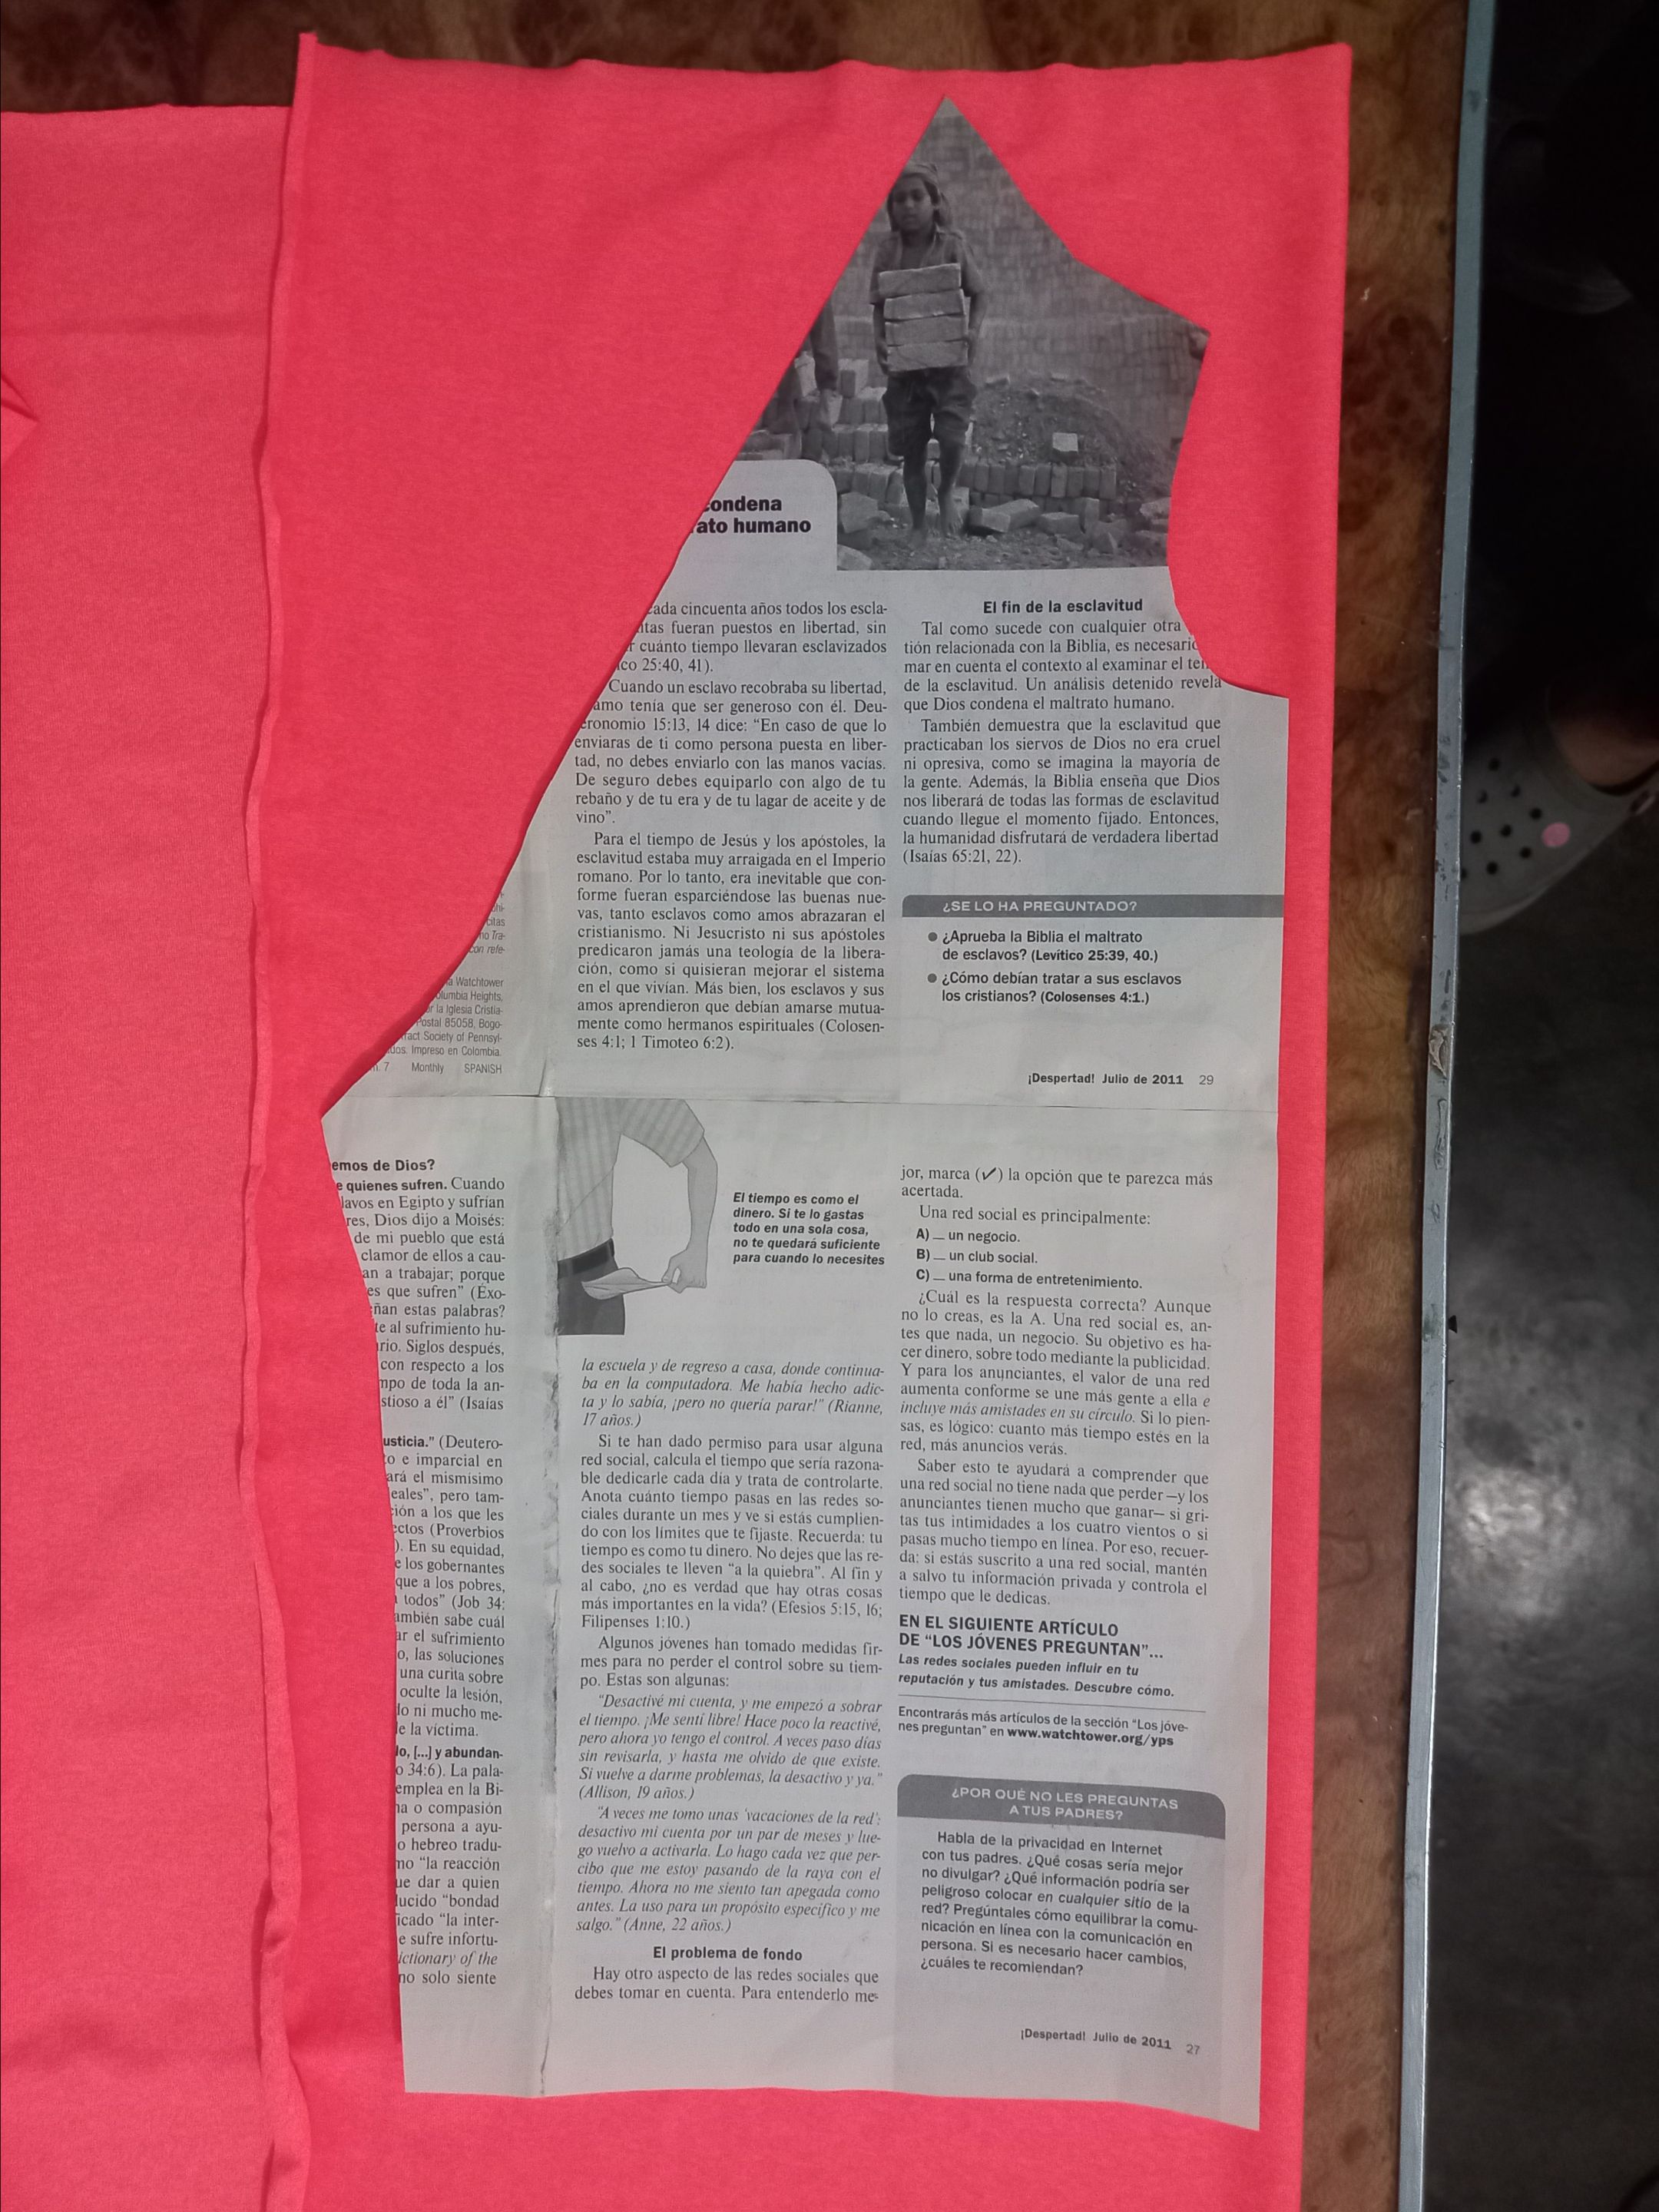
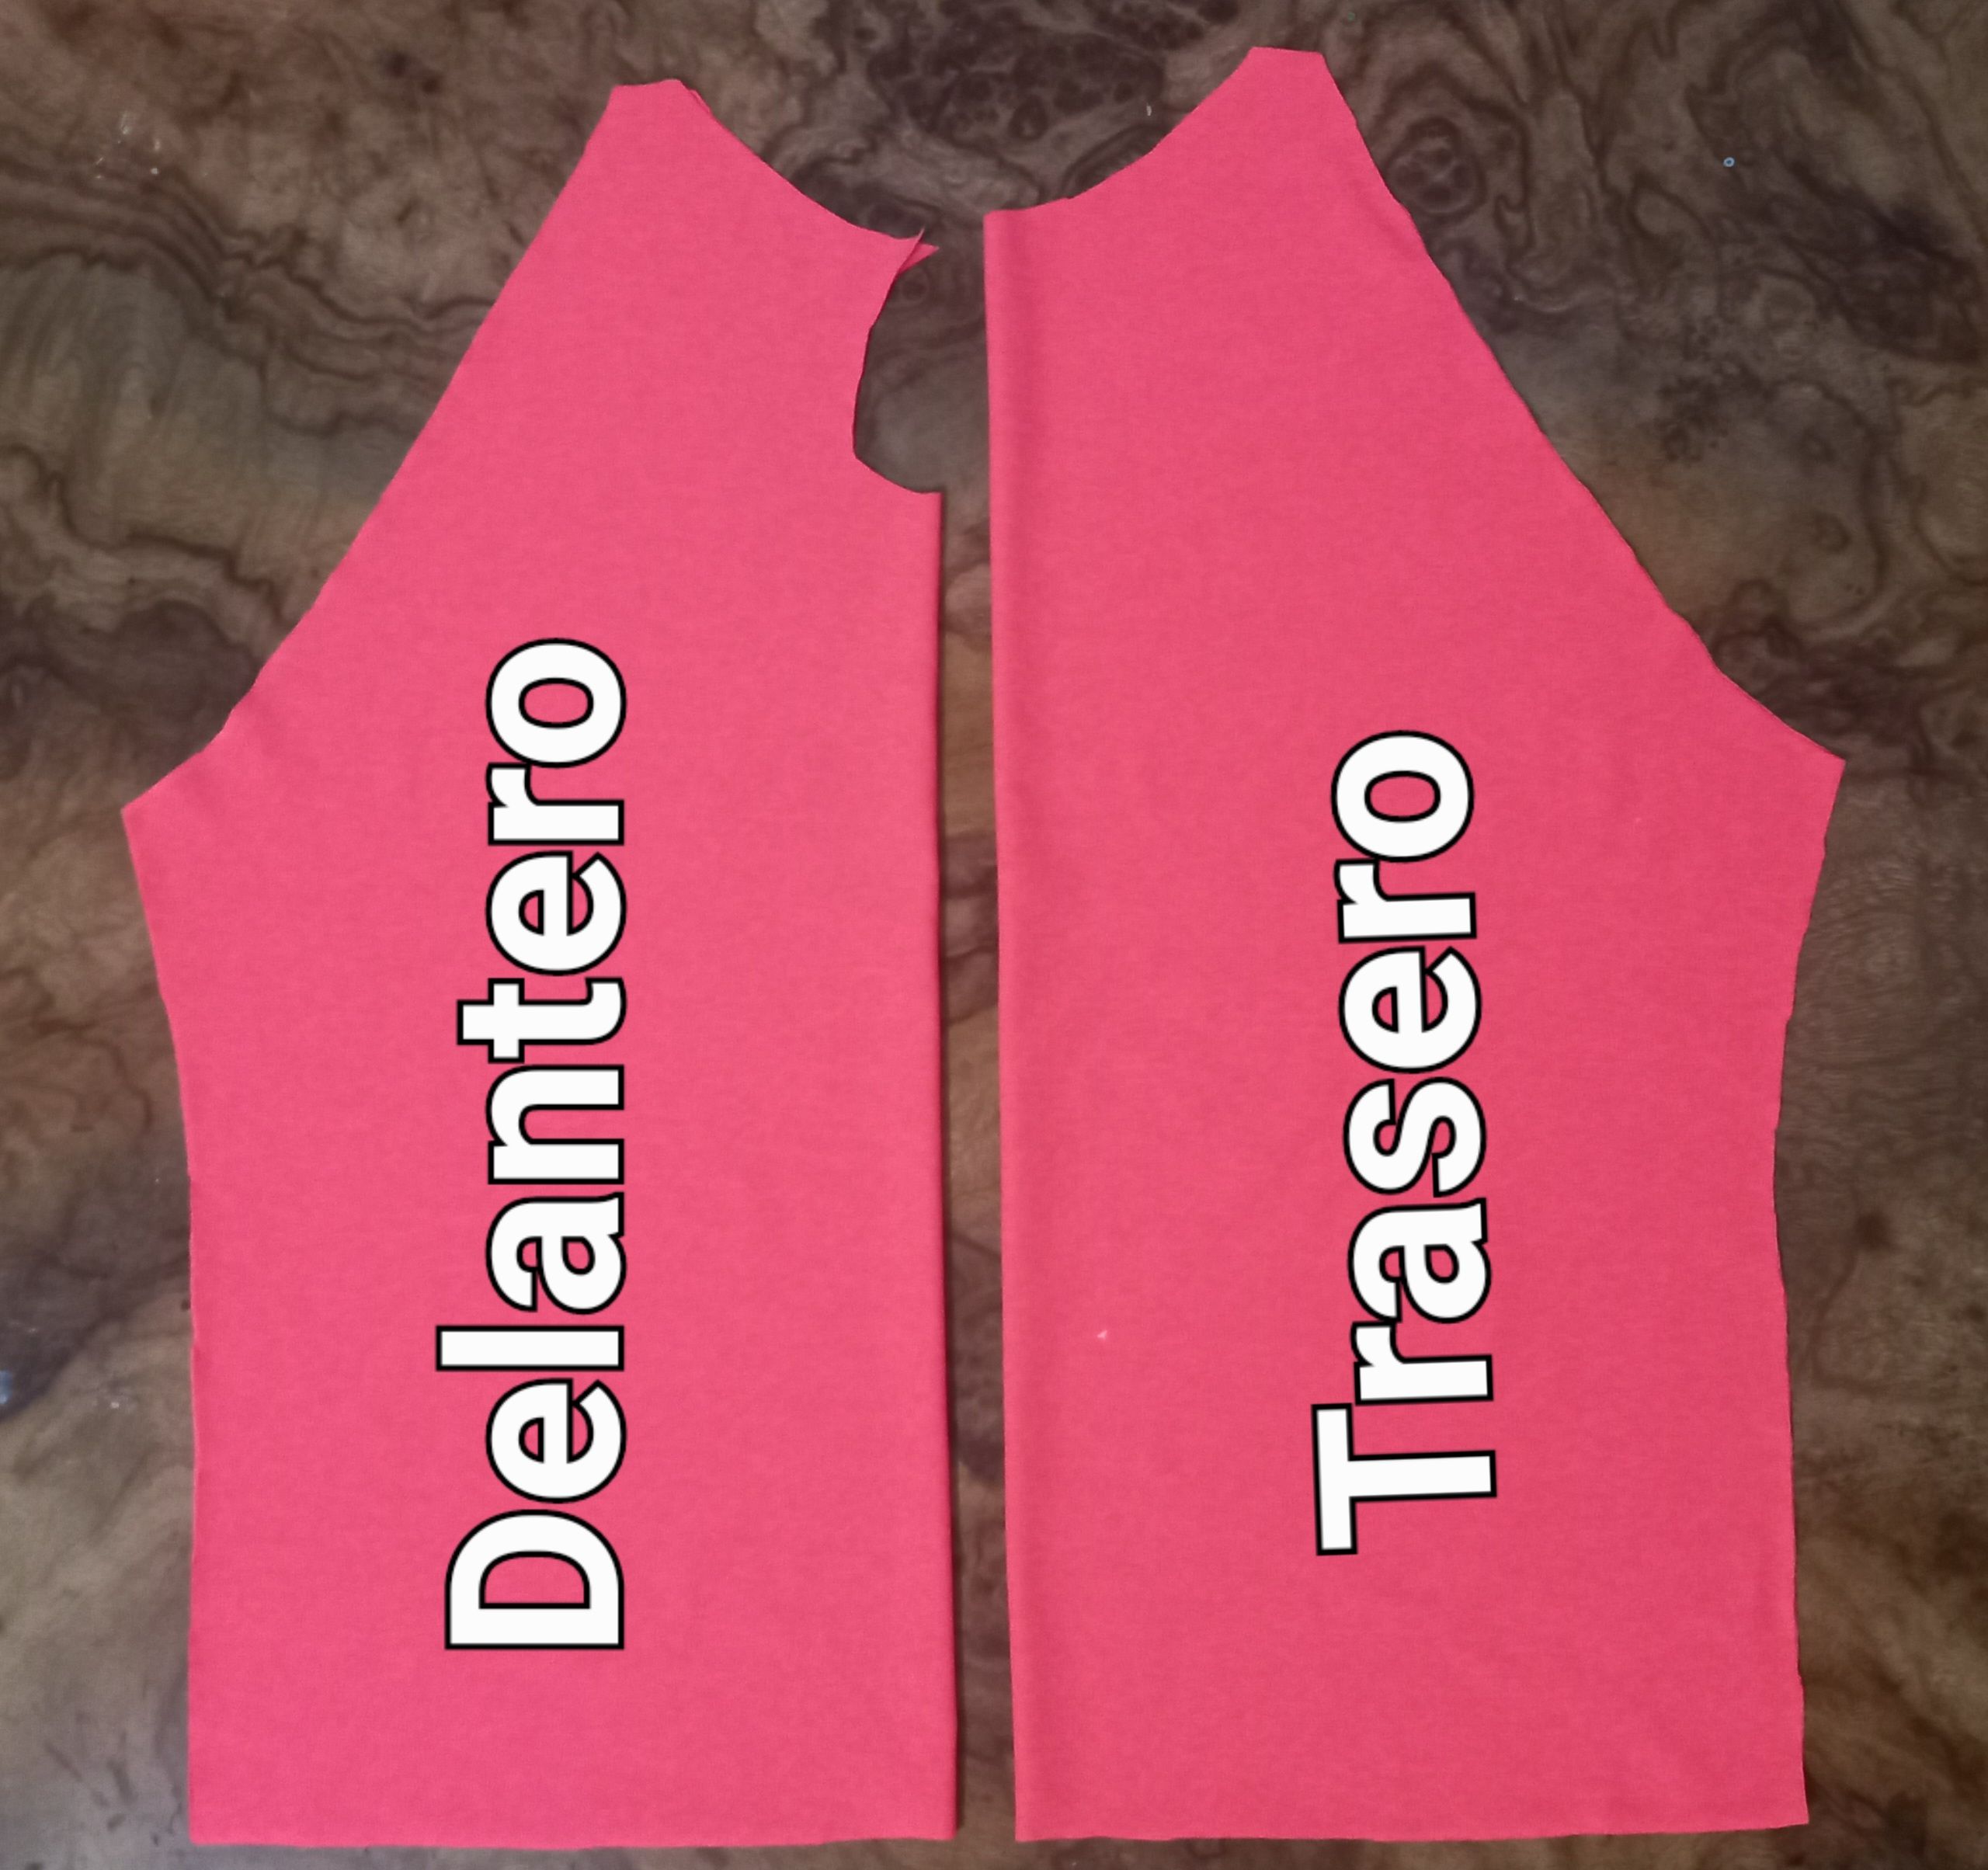
Para la confección de esta blusa, lo primero que hice fue colocar como siempre, mi tela doblada en dos y sobre esta coloqué el patrón, éste patrón lo utilicé para sacar la parte delantera y la parte trasera, la única diferencia es que la parte delantera lleva un pequeño escote en el frente en forma de gota.
To make this blouse, the first thing I did was to place as usual, my fabric folded in two and on this I placed the pattern, I used this pattern to draw the front and the back, the only difference is that the front has a small neckline in the front in the form of a drop.
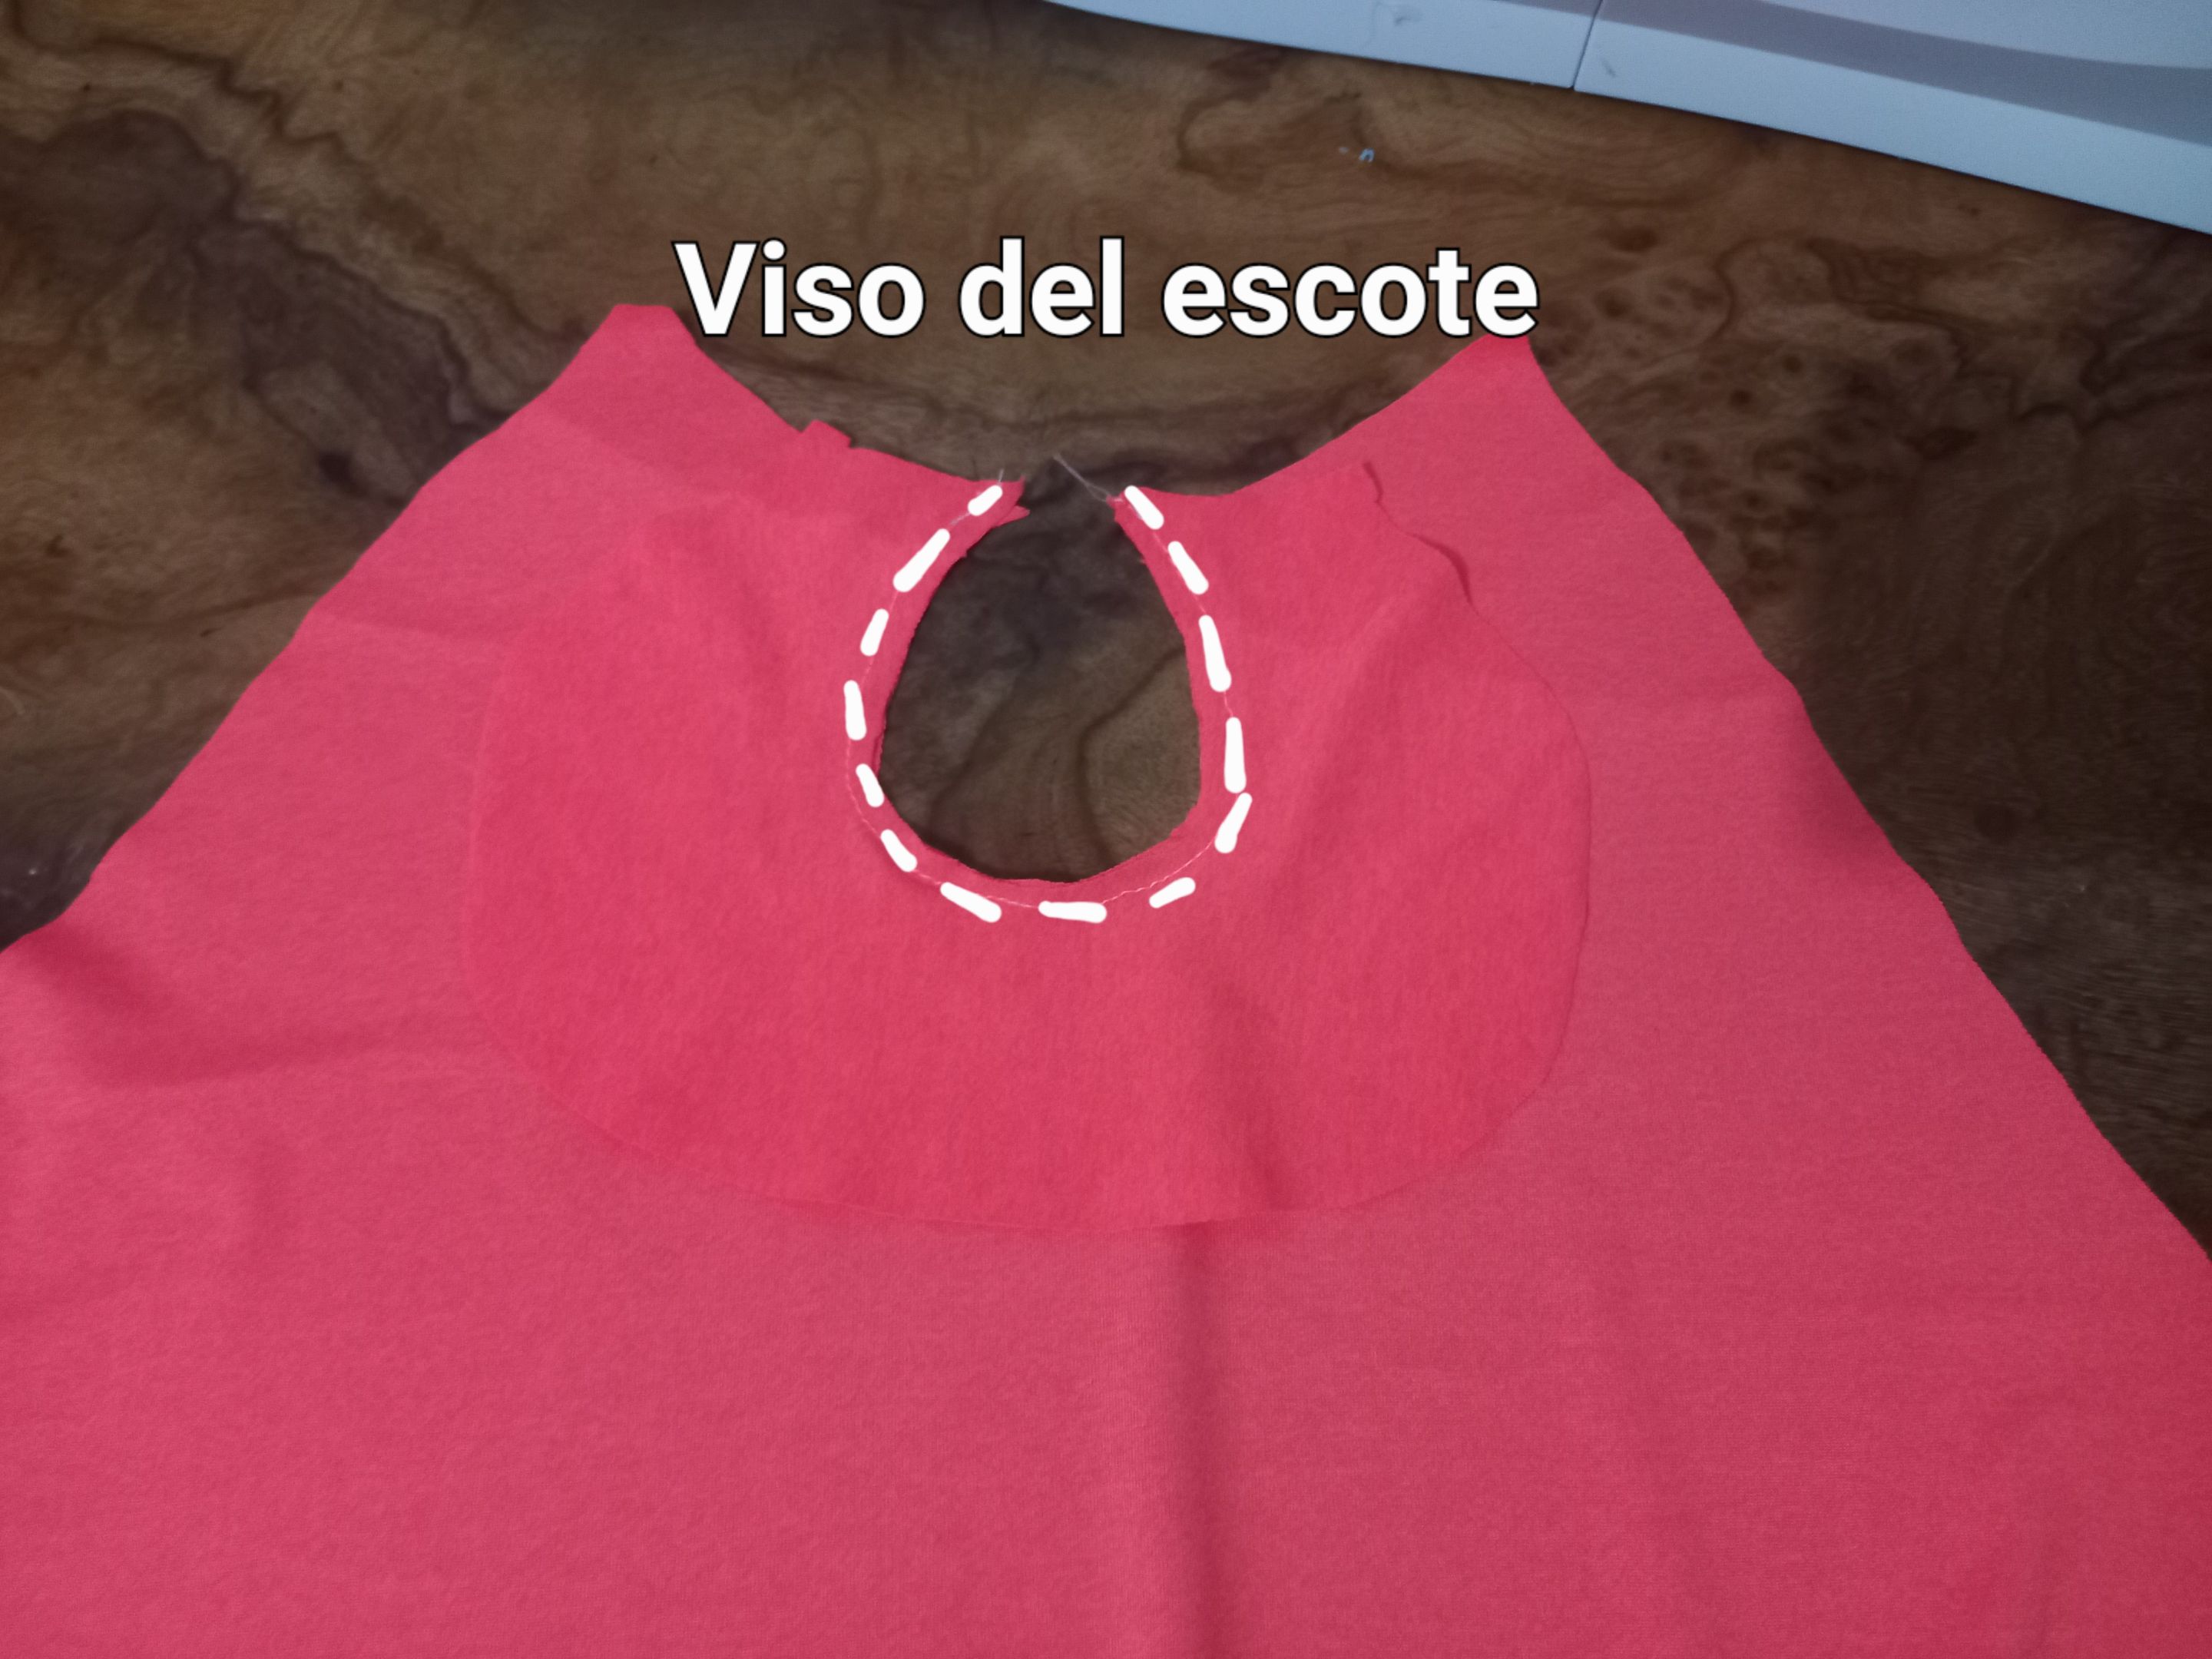
Después coloqué un viso siguiendo la forma del escote en gota, éste viso va primeramente por la parte del derecho de la blusa, se pasa la costura por toda la orilla de la forma, se dobla el resto de tela hacia la parte del revés y se pasa una costura por todo el contorno o la orilla del escote.
Then I placed a mink following the shape of the drop neckline, this mink goes first on the right side of the blouse, the seam is passed along the entire edge of the shape, the rest of the fabric is folded to the back side and a seam is passed along the entire contour or the edge of the neckline.
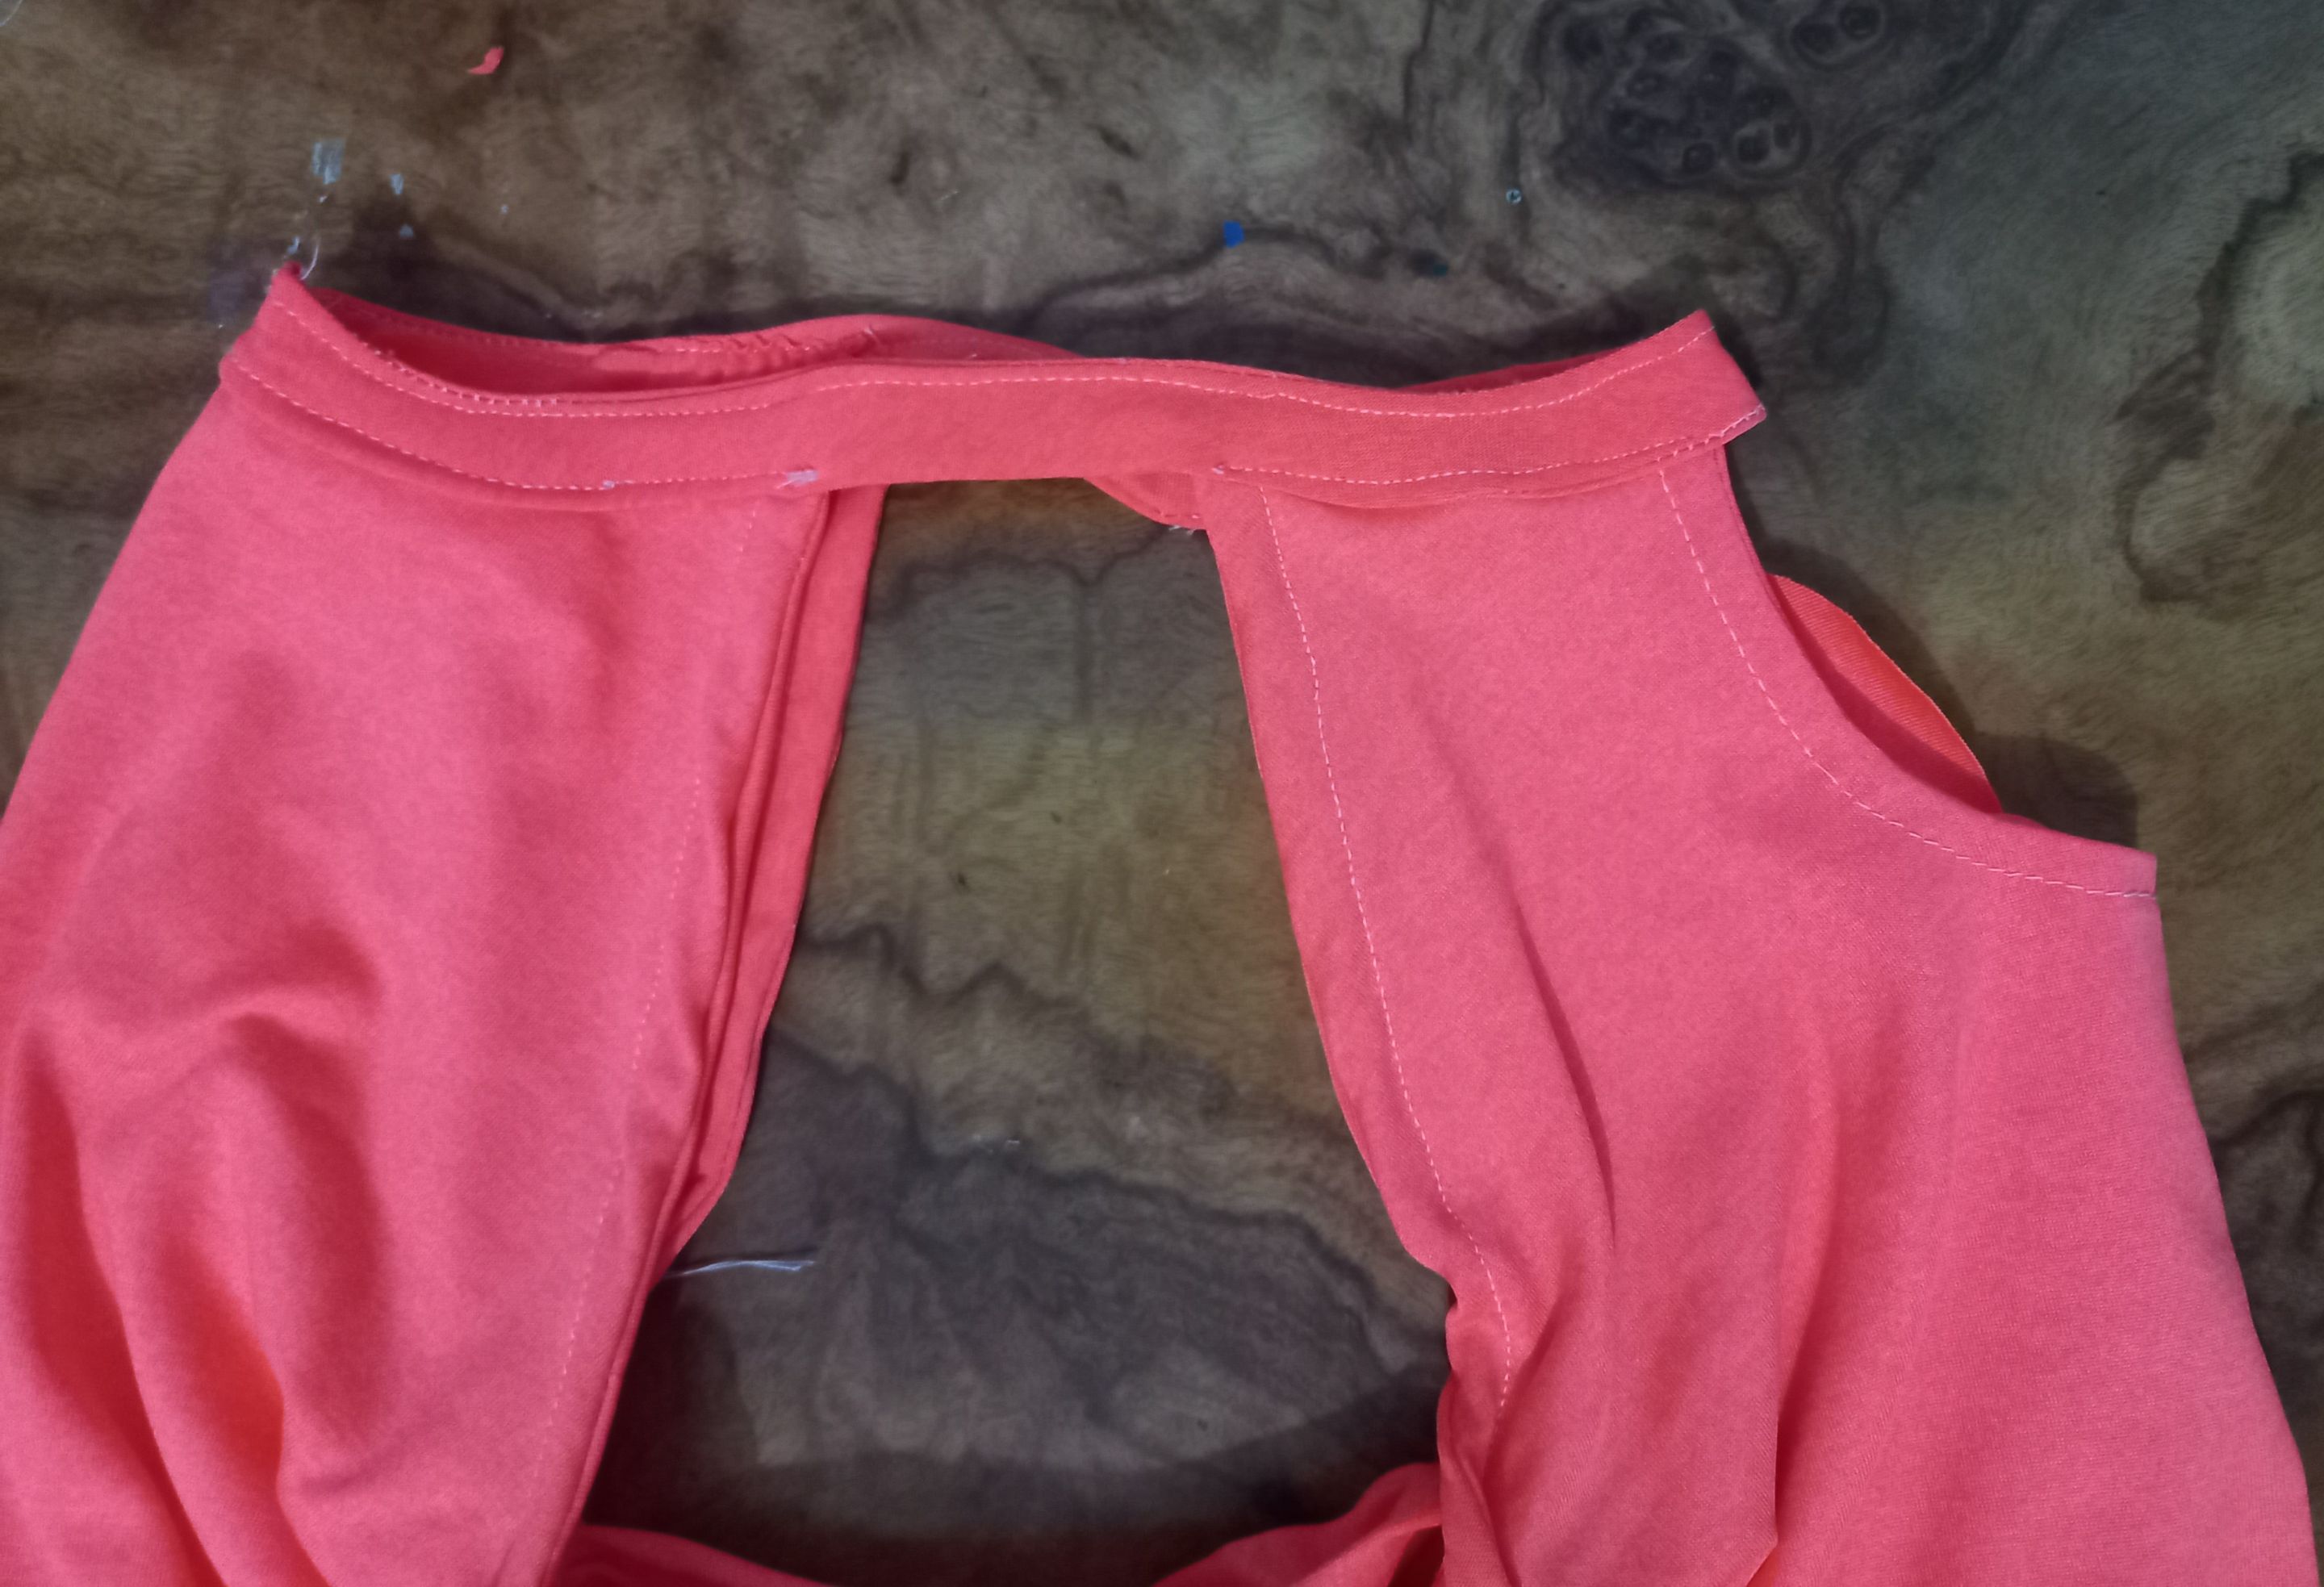
Luego de haber colocado el viso del escote, procedí a unir las dos piezas tanto delantera como trasera, por sus costados, colocando los derechos enfrentados.
After placing the neckline trim, I proceeded to join the two pieces, both front and back, on their sides, placing the right sides facing each other.
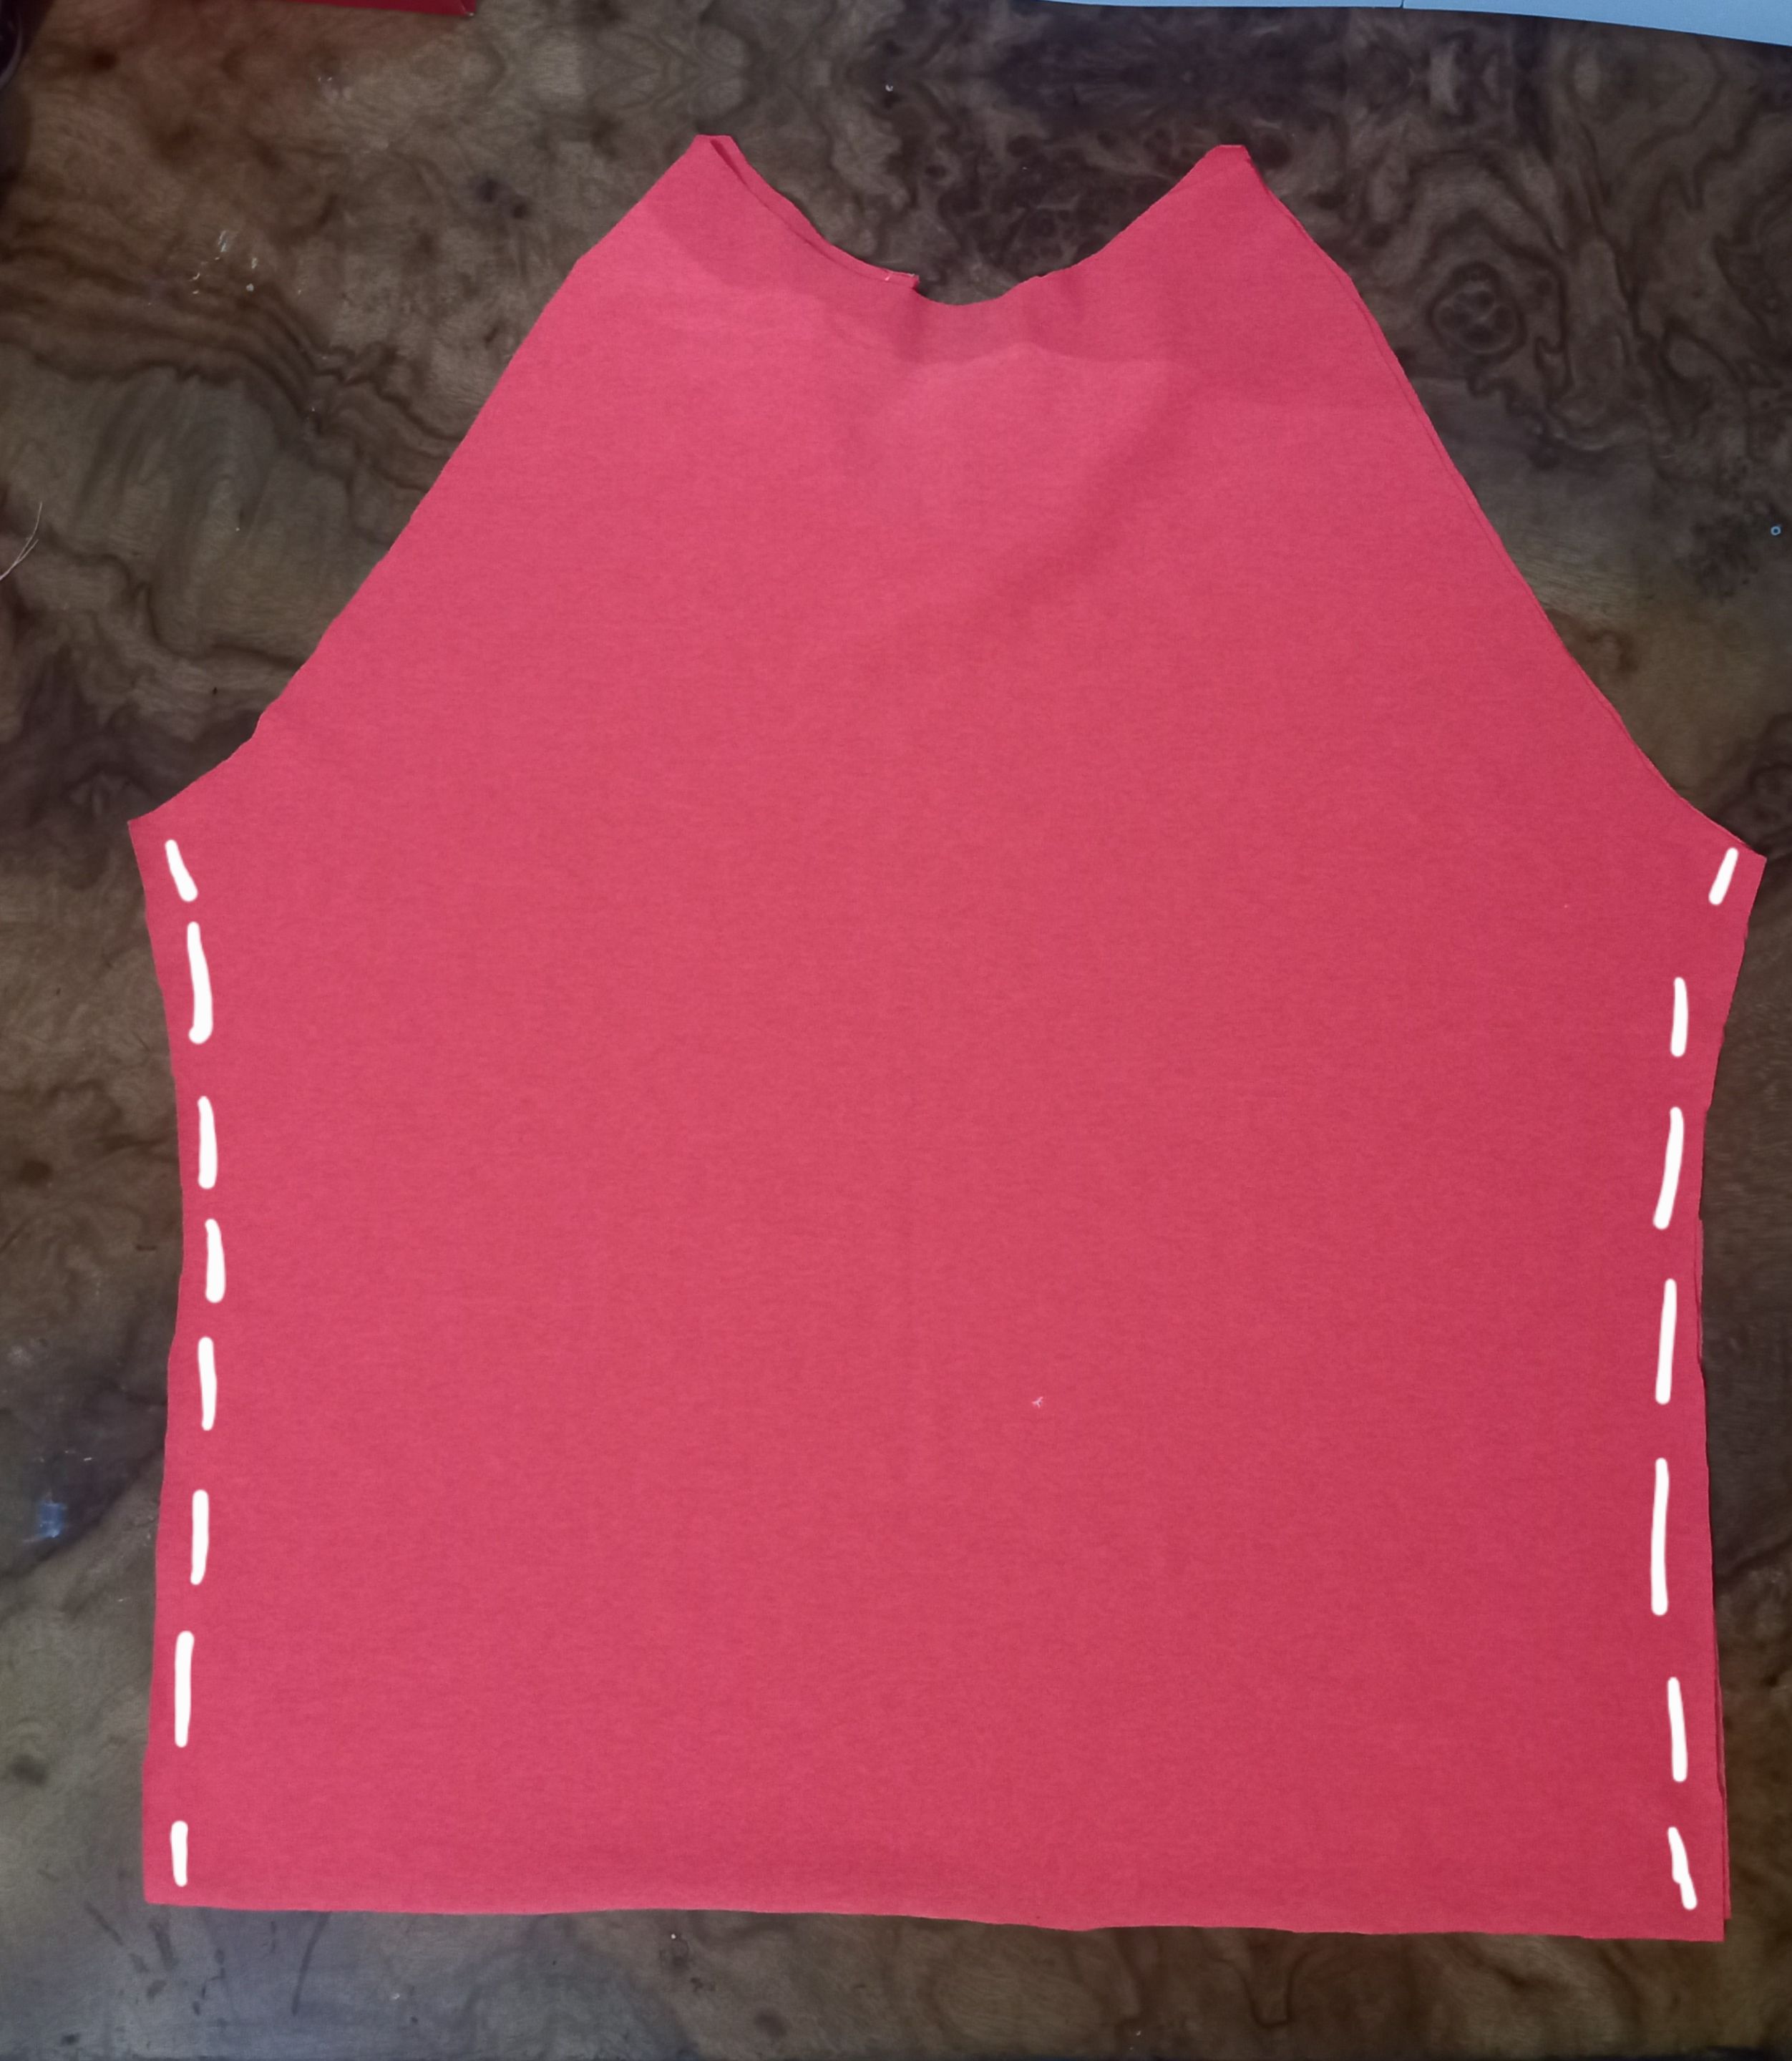
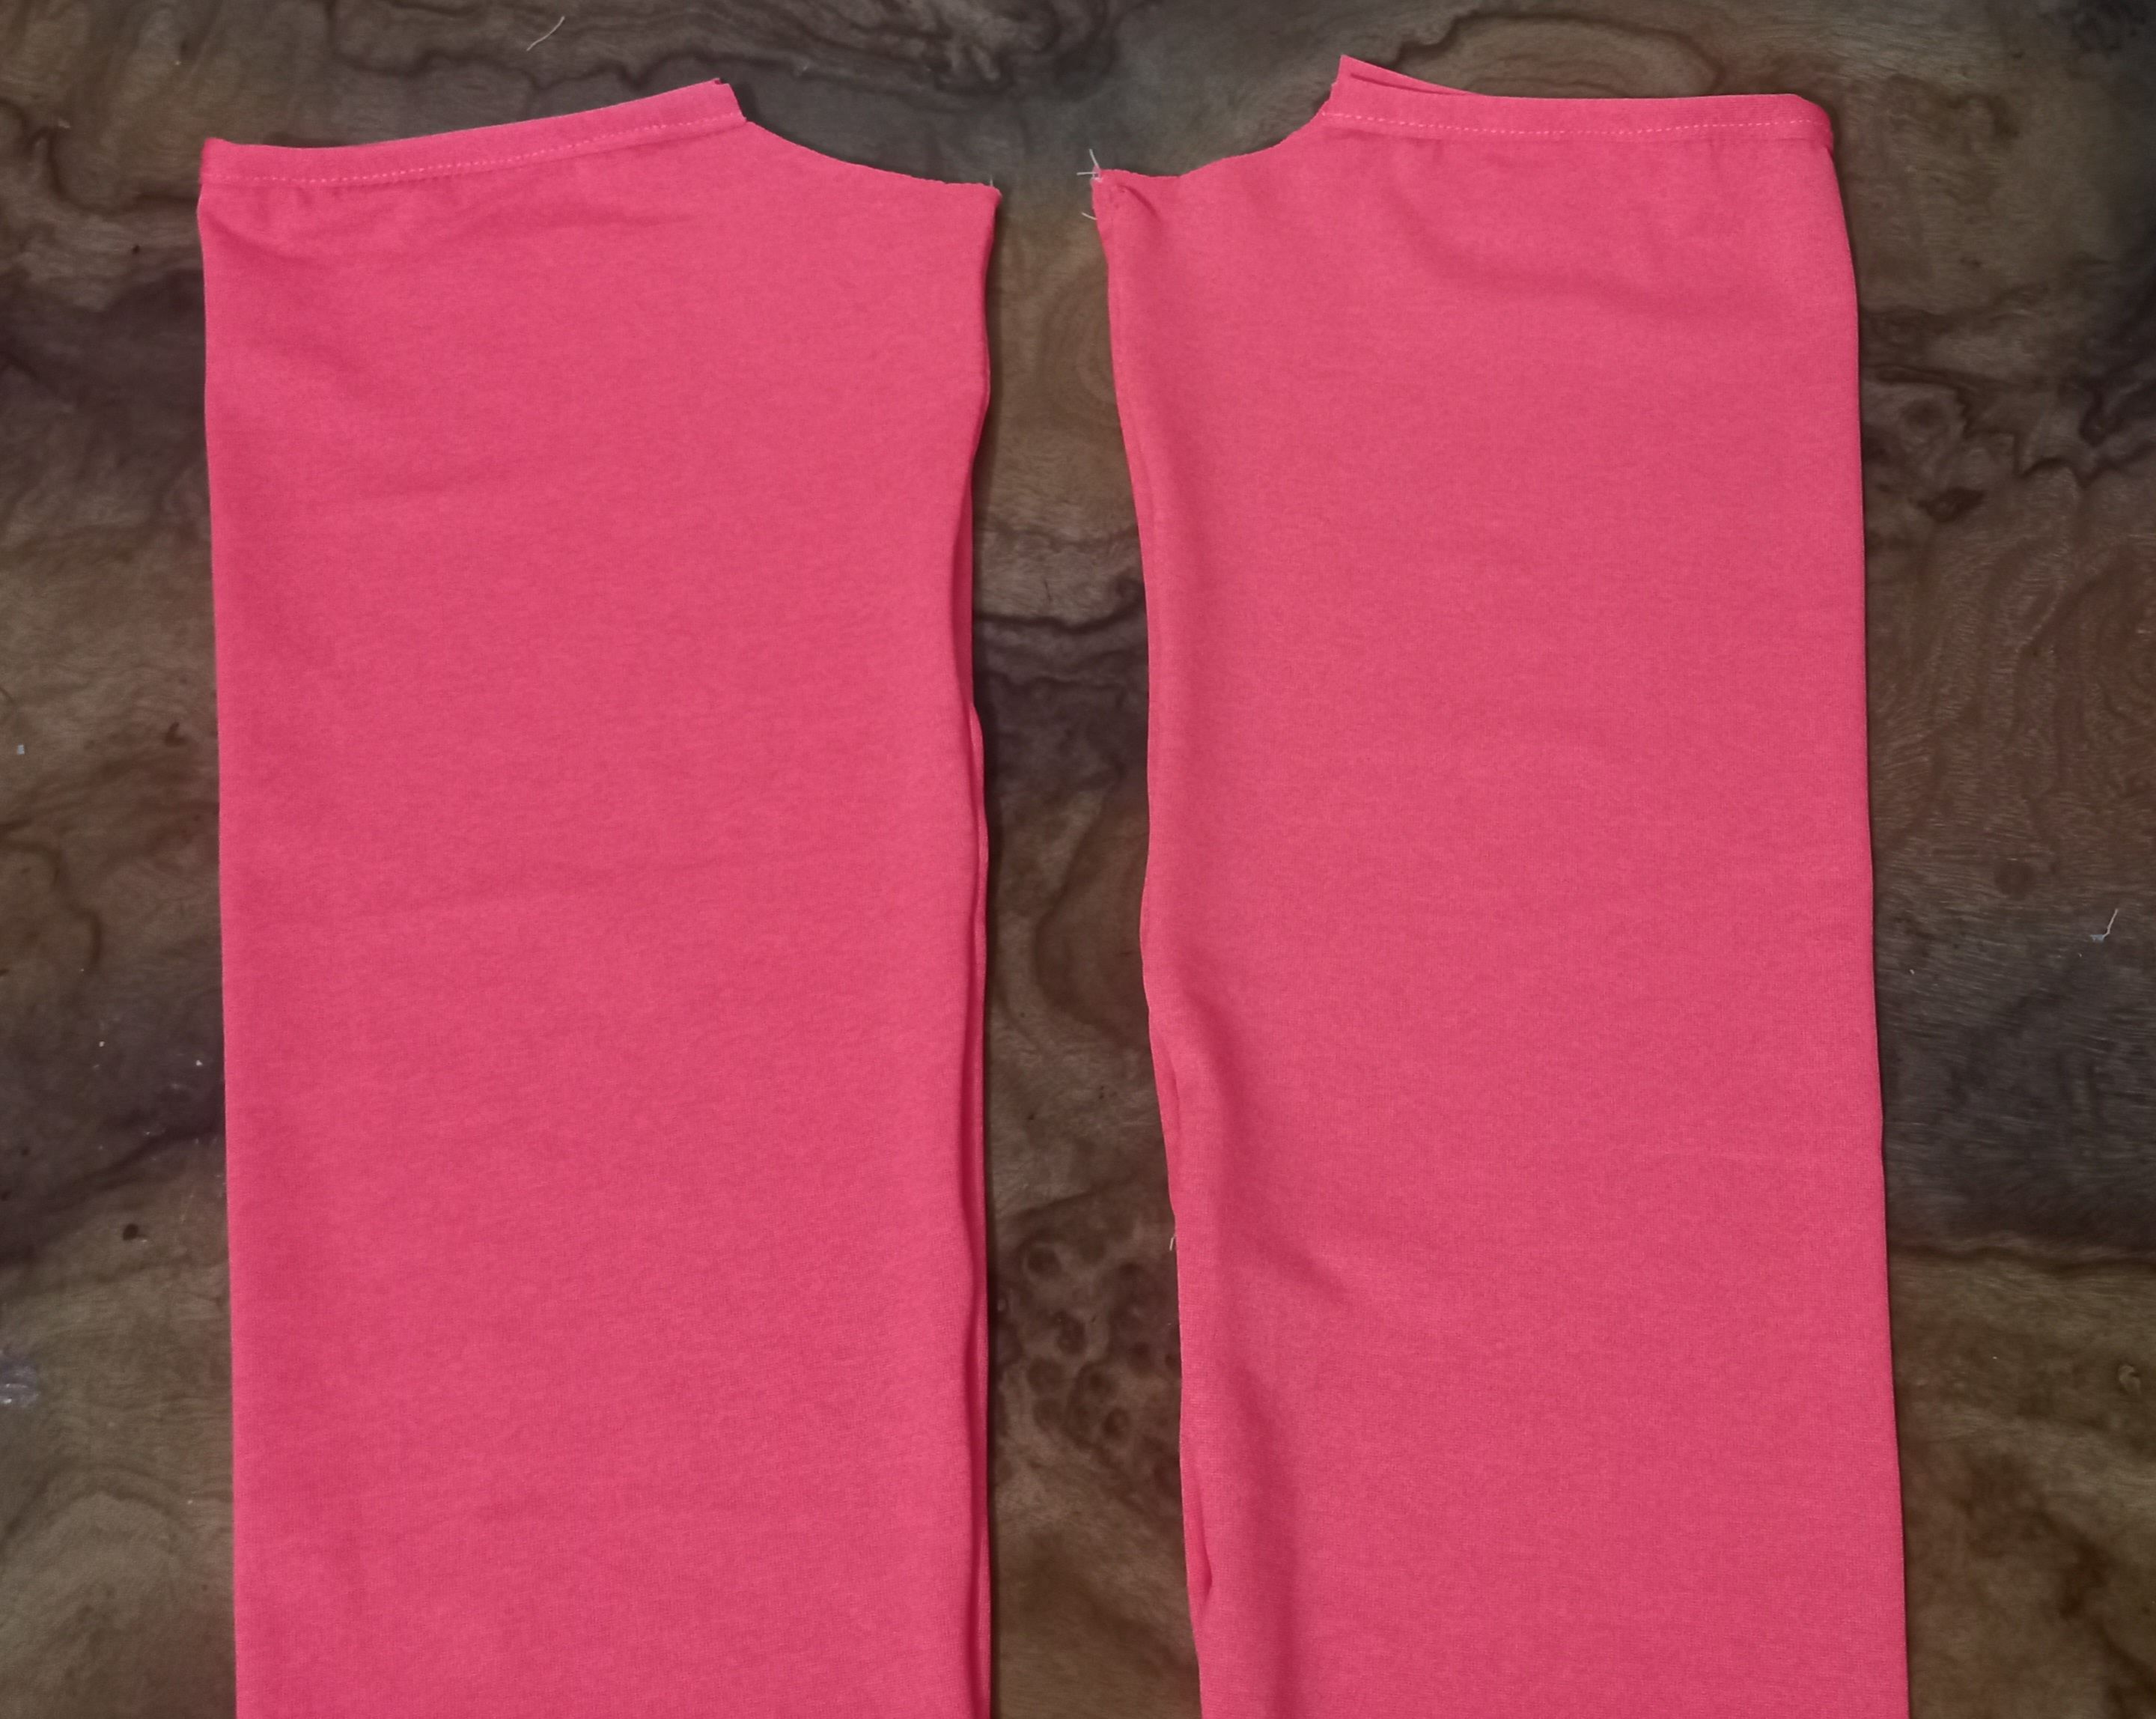
Después saqué el patrón de las mangas, llegando Solamente hasta la parte baja que corresponde a la sisa es decir sin llegar a los hombros.
Then I took out the pattern of the sleeves, reaching only to the lower part that corresponds to the armhole, i.e. without reaching the shoulders.
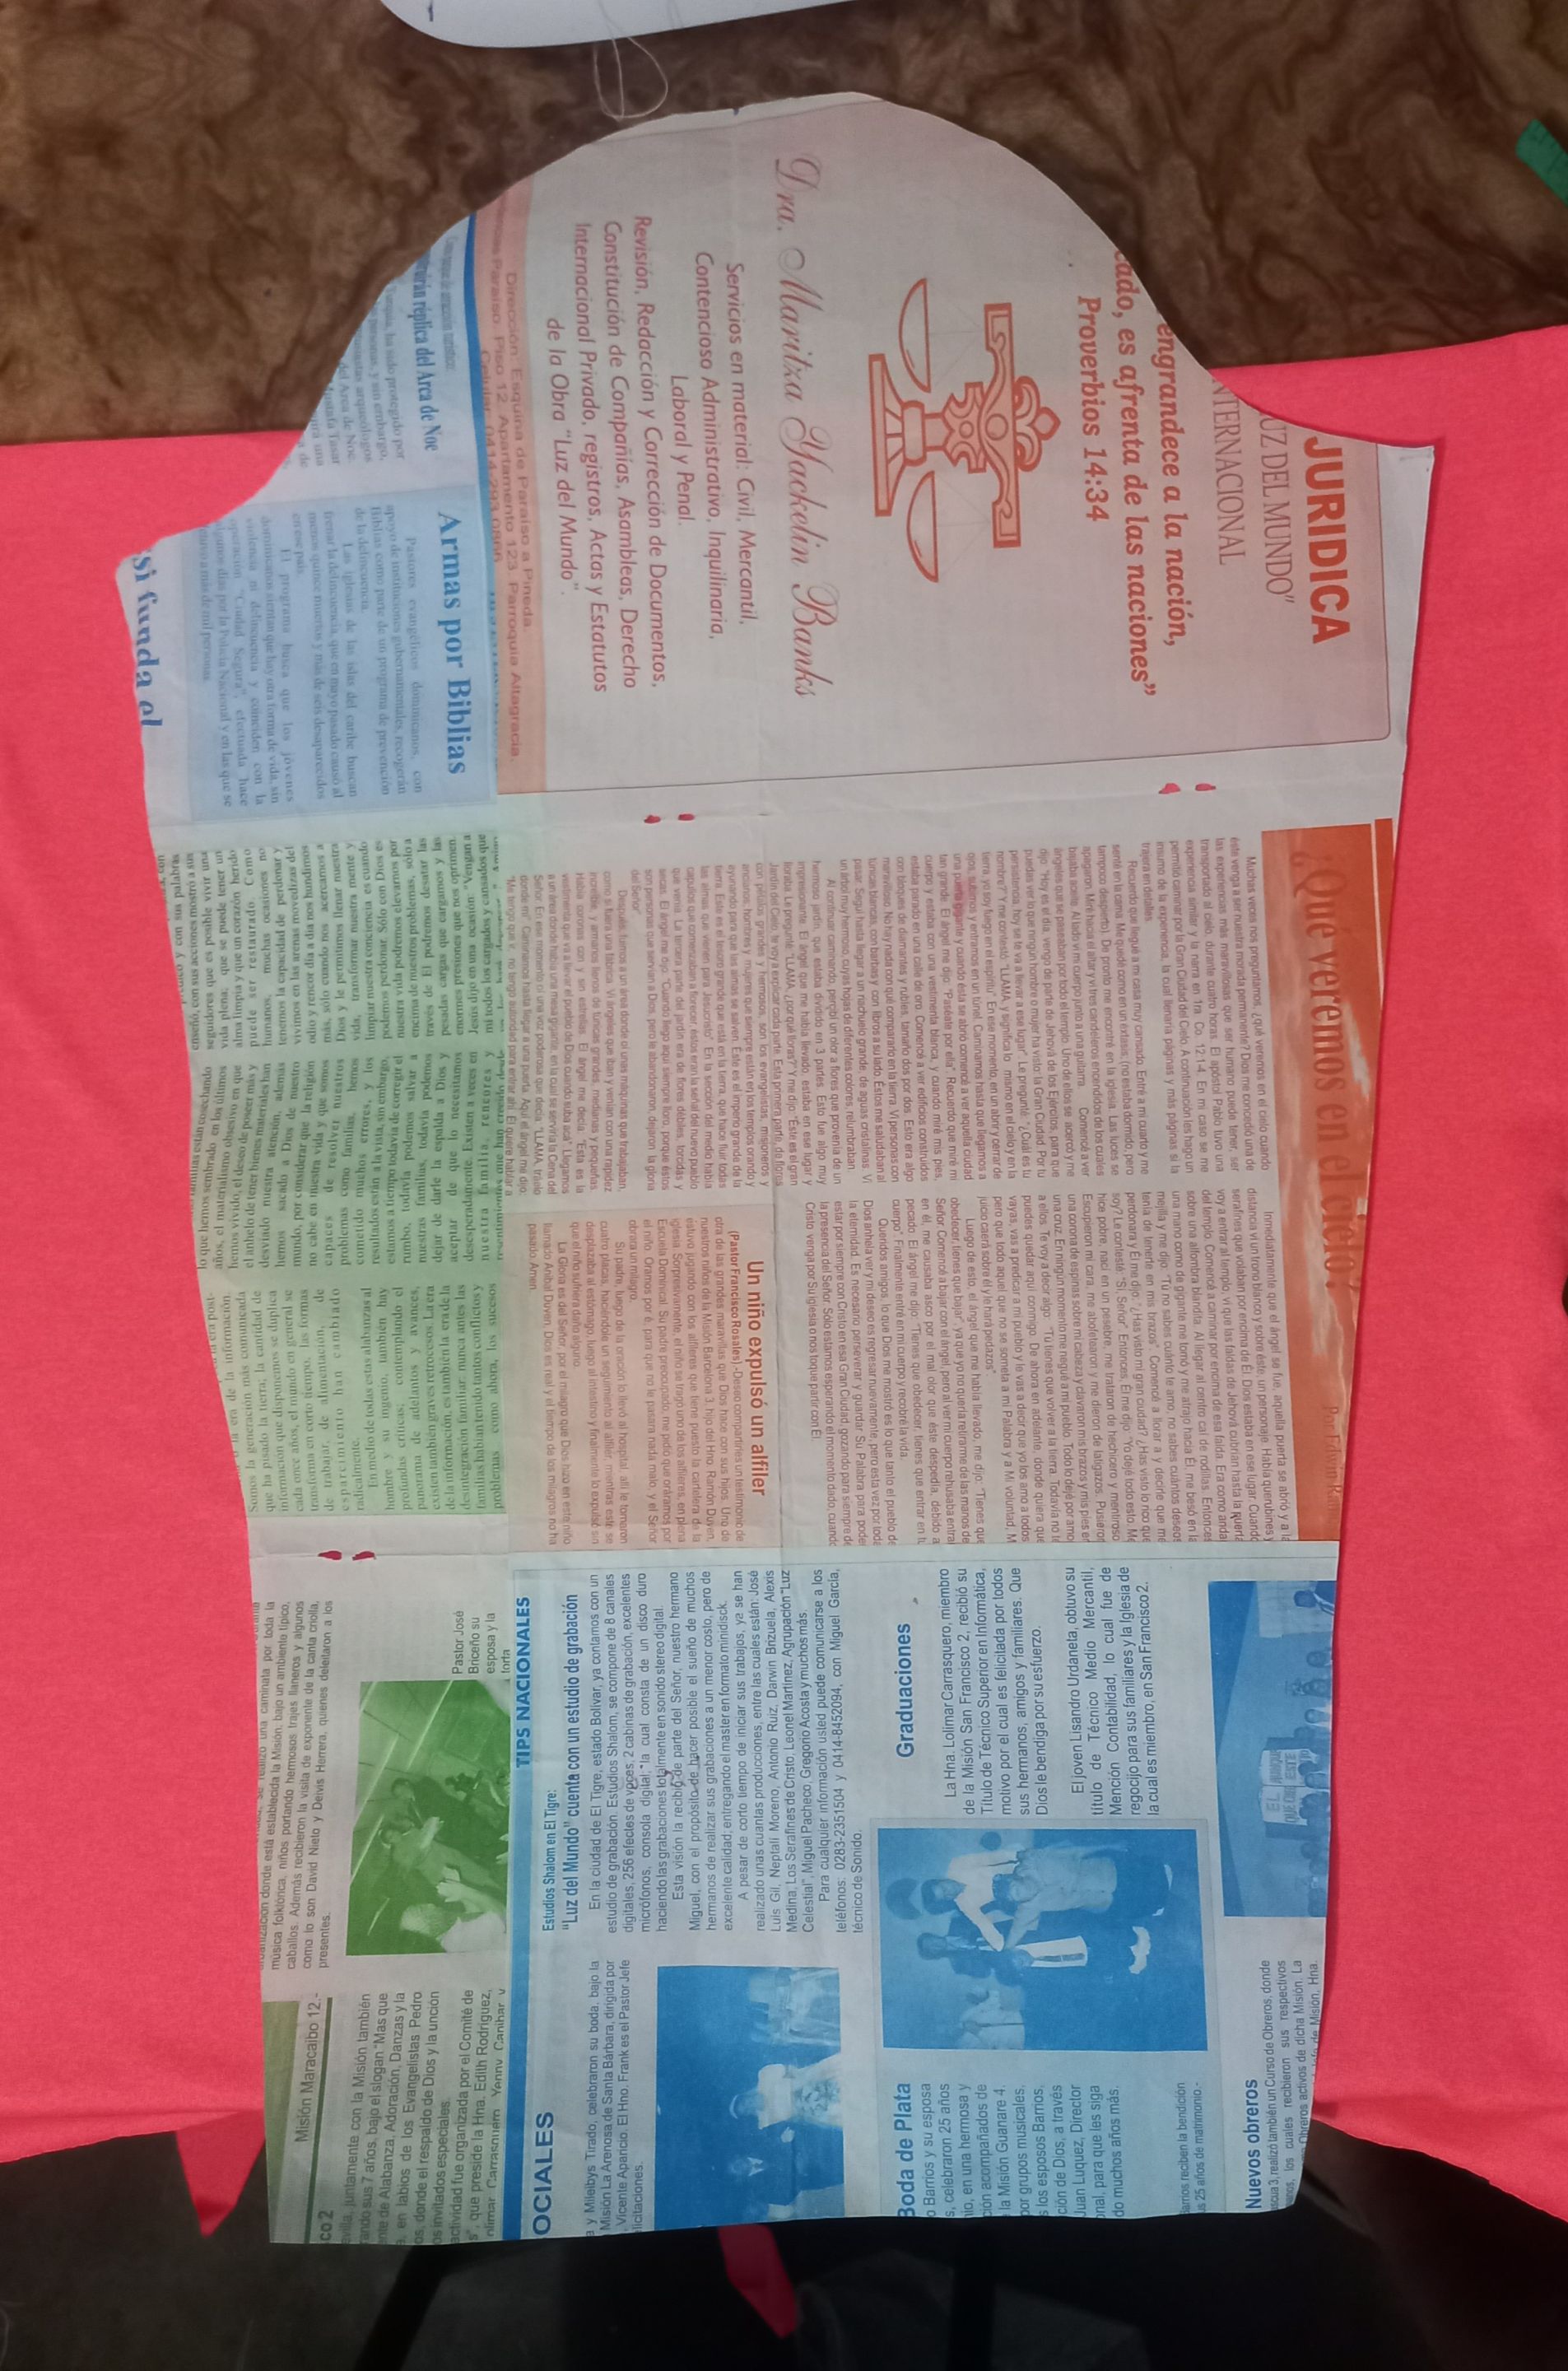
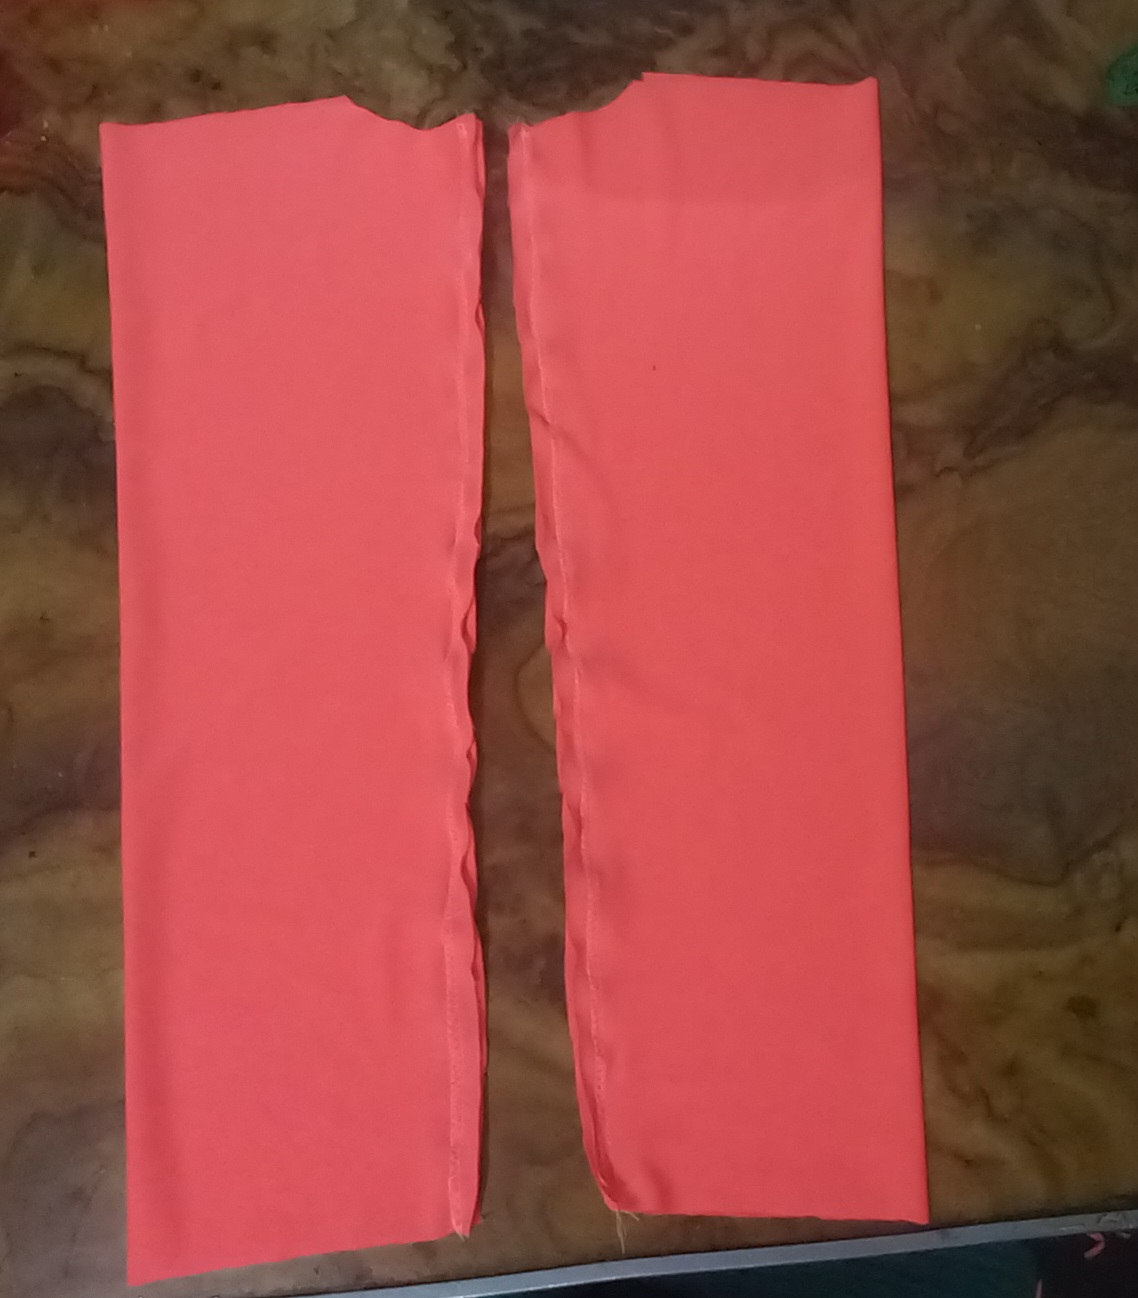
Antes de pegar las mangas coloqué un sesgo por toda la orilla superior de esta y luego la pegué.
Before gluing the sleeves I placed a bias binding along the top edge of the sleeve and then glued it on.
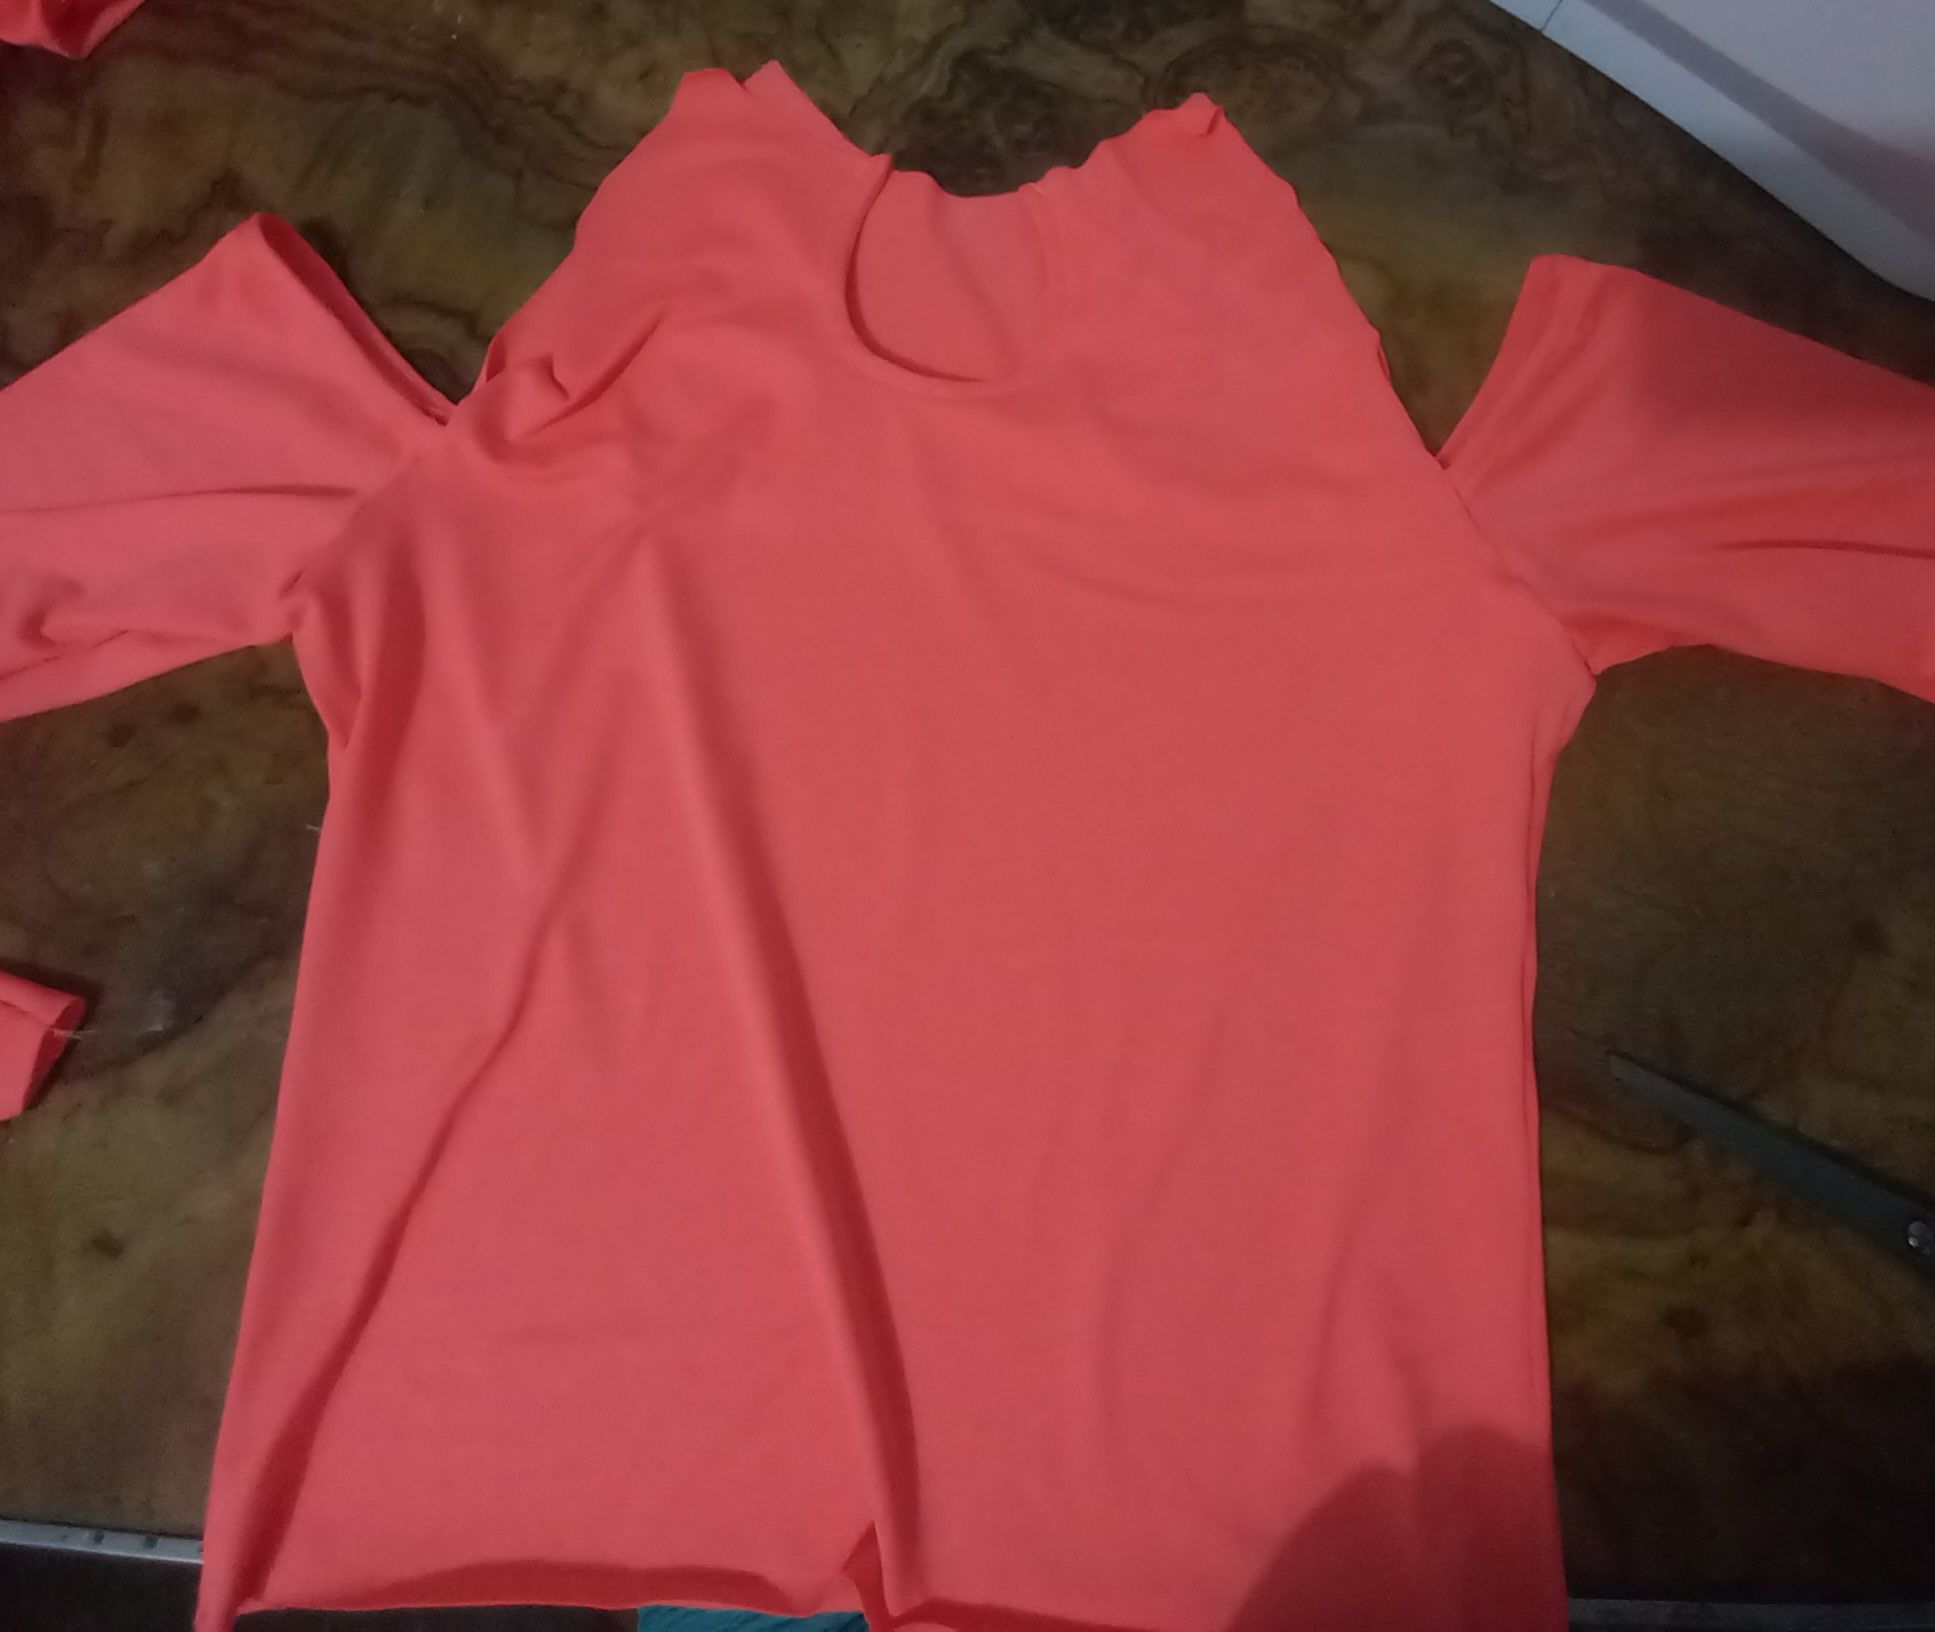
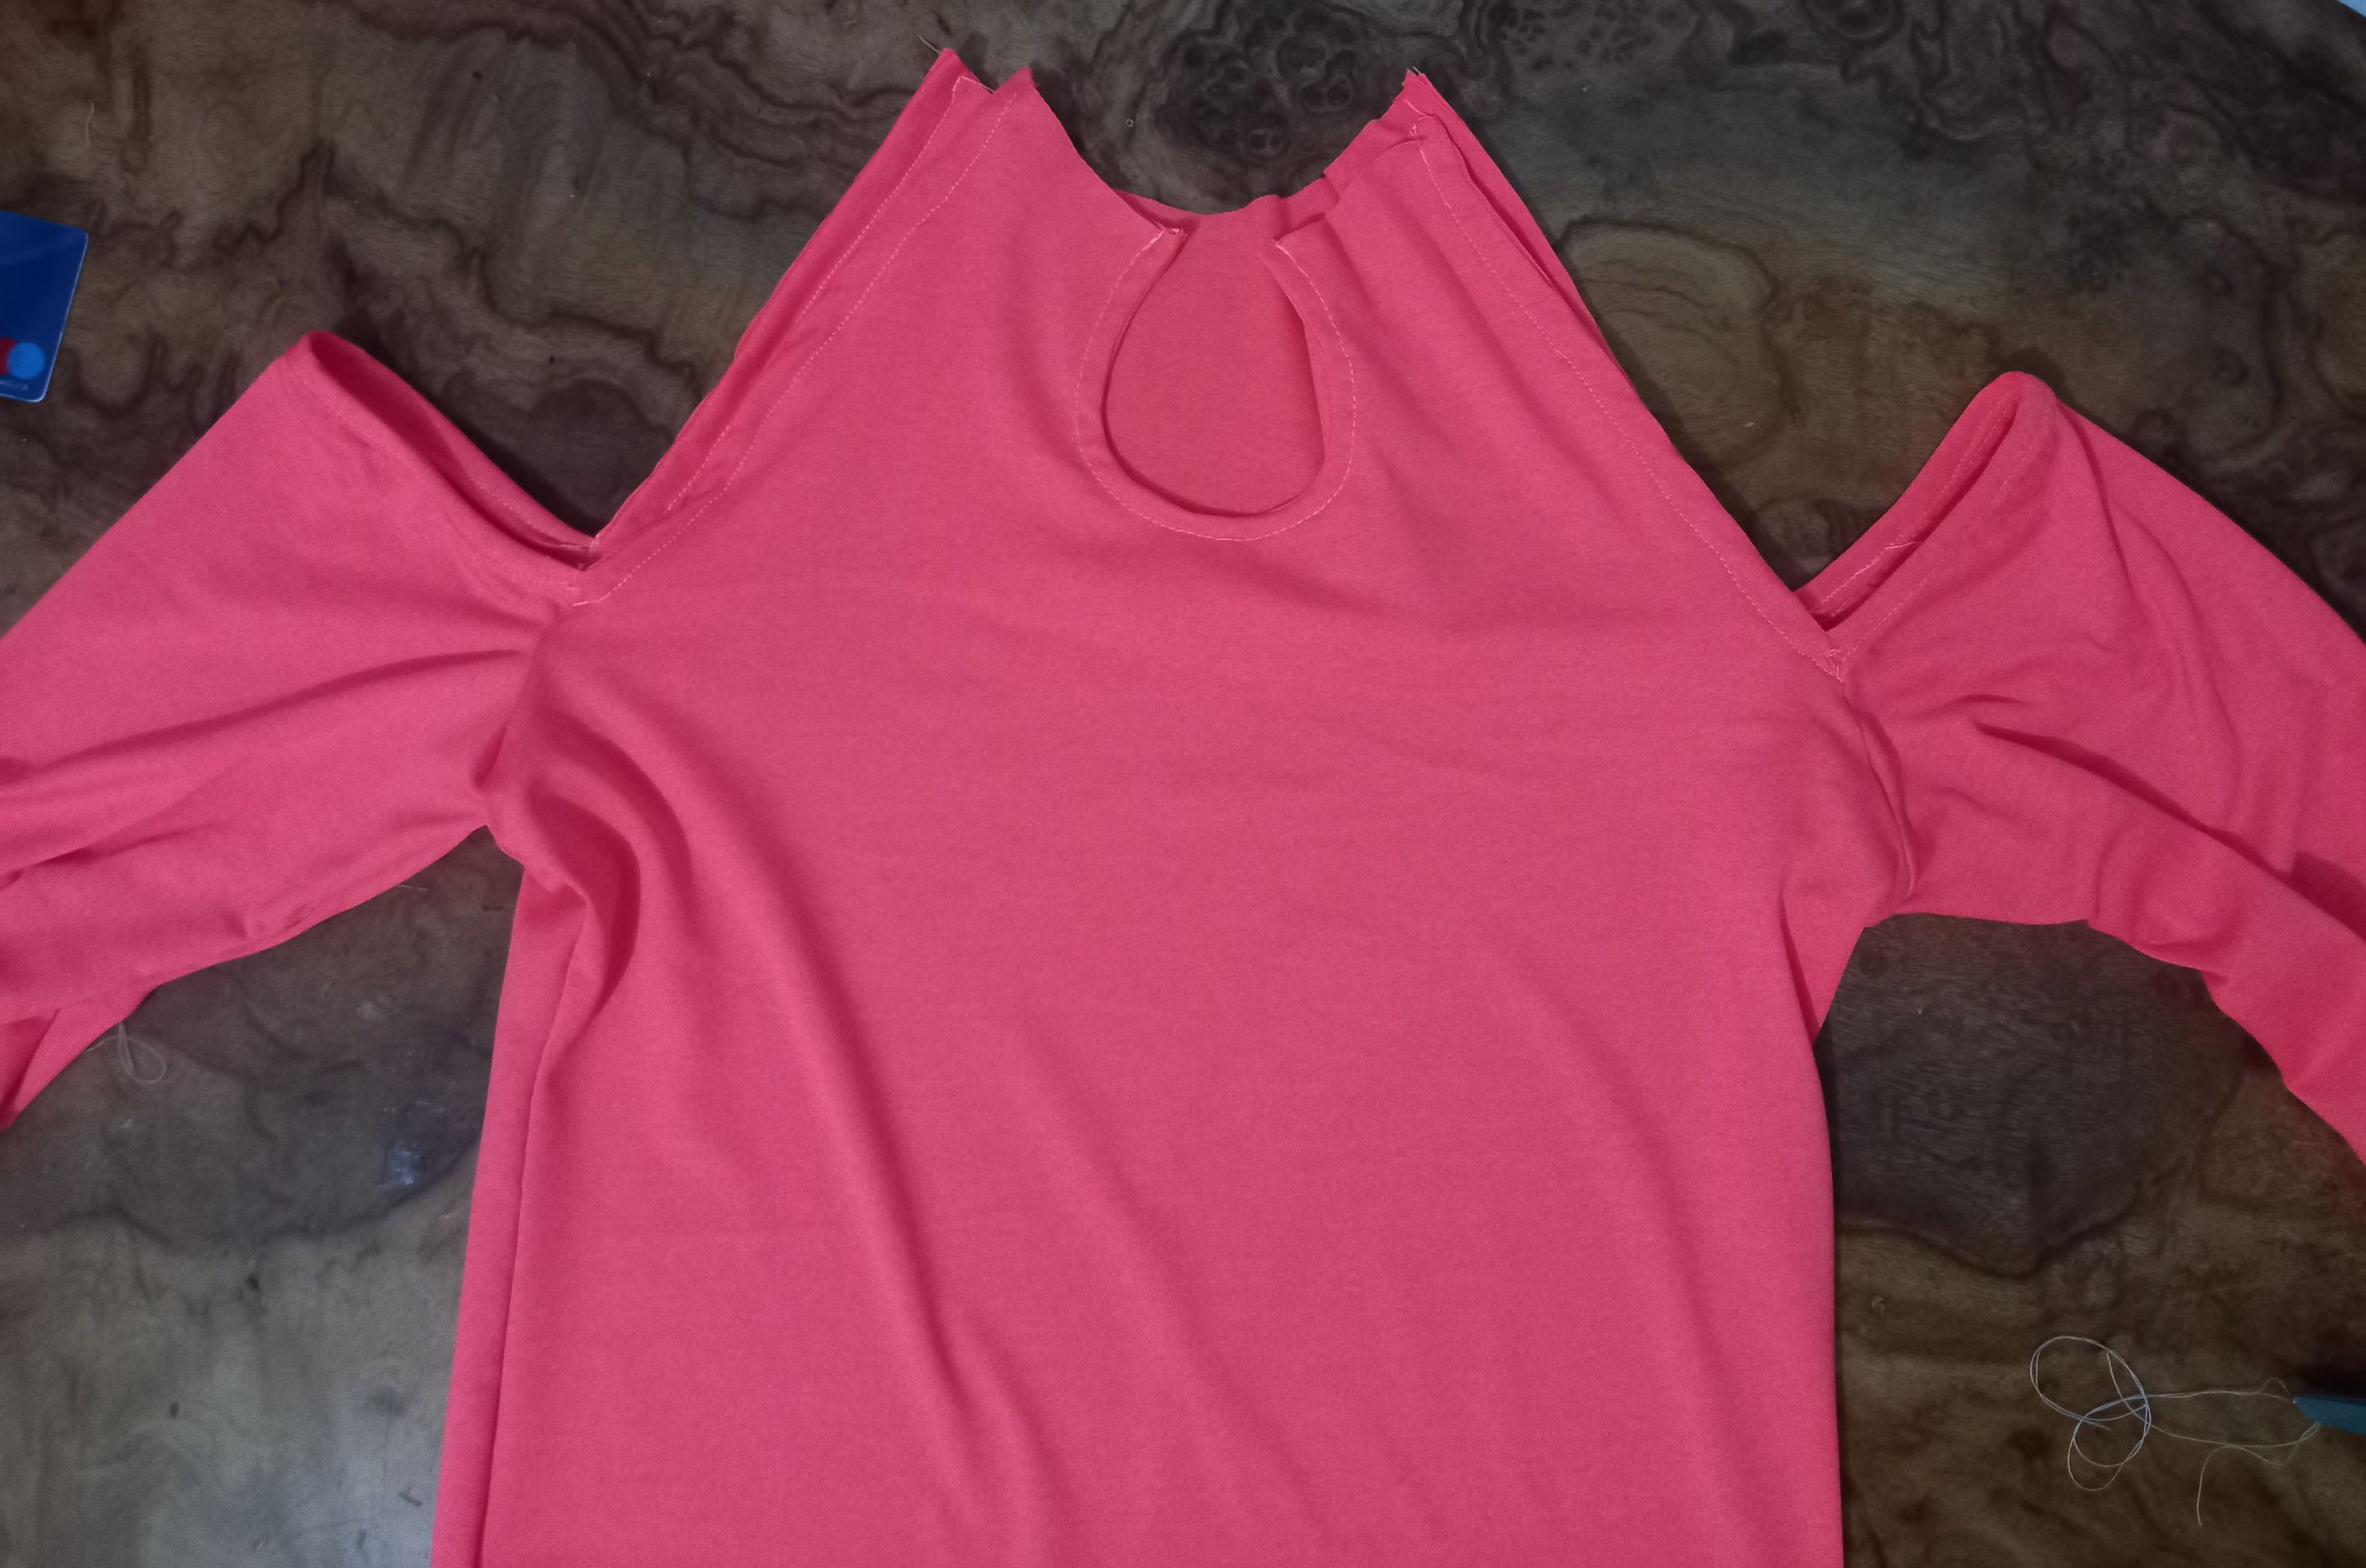
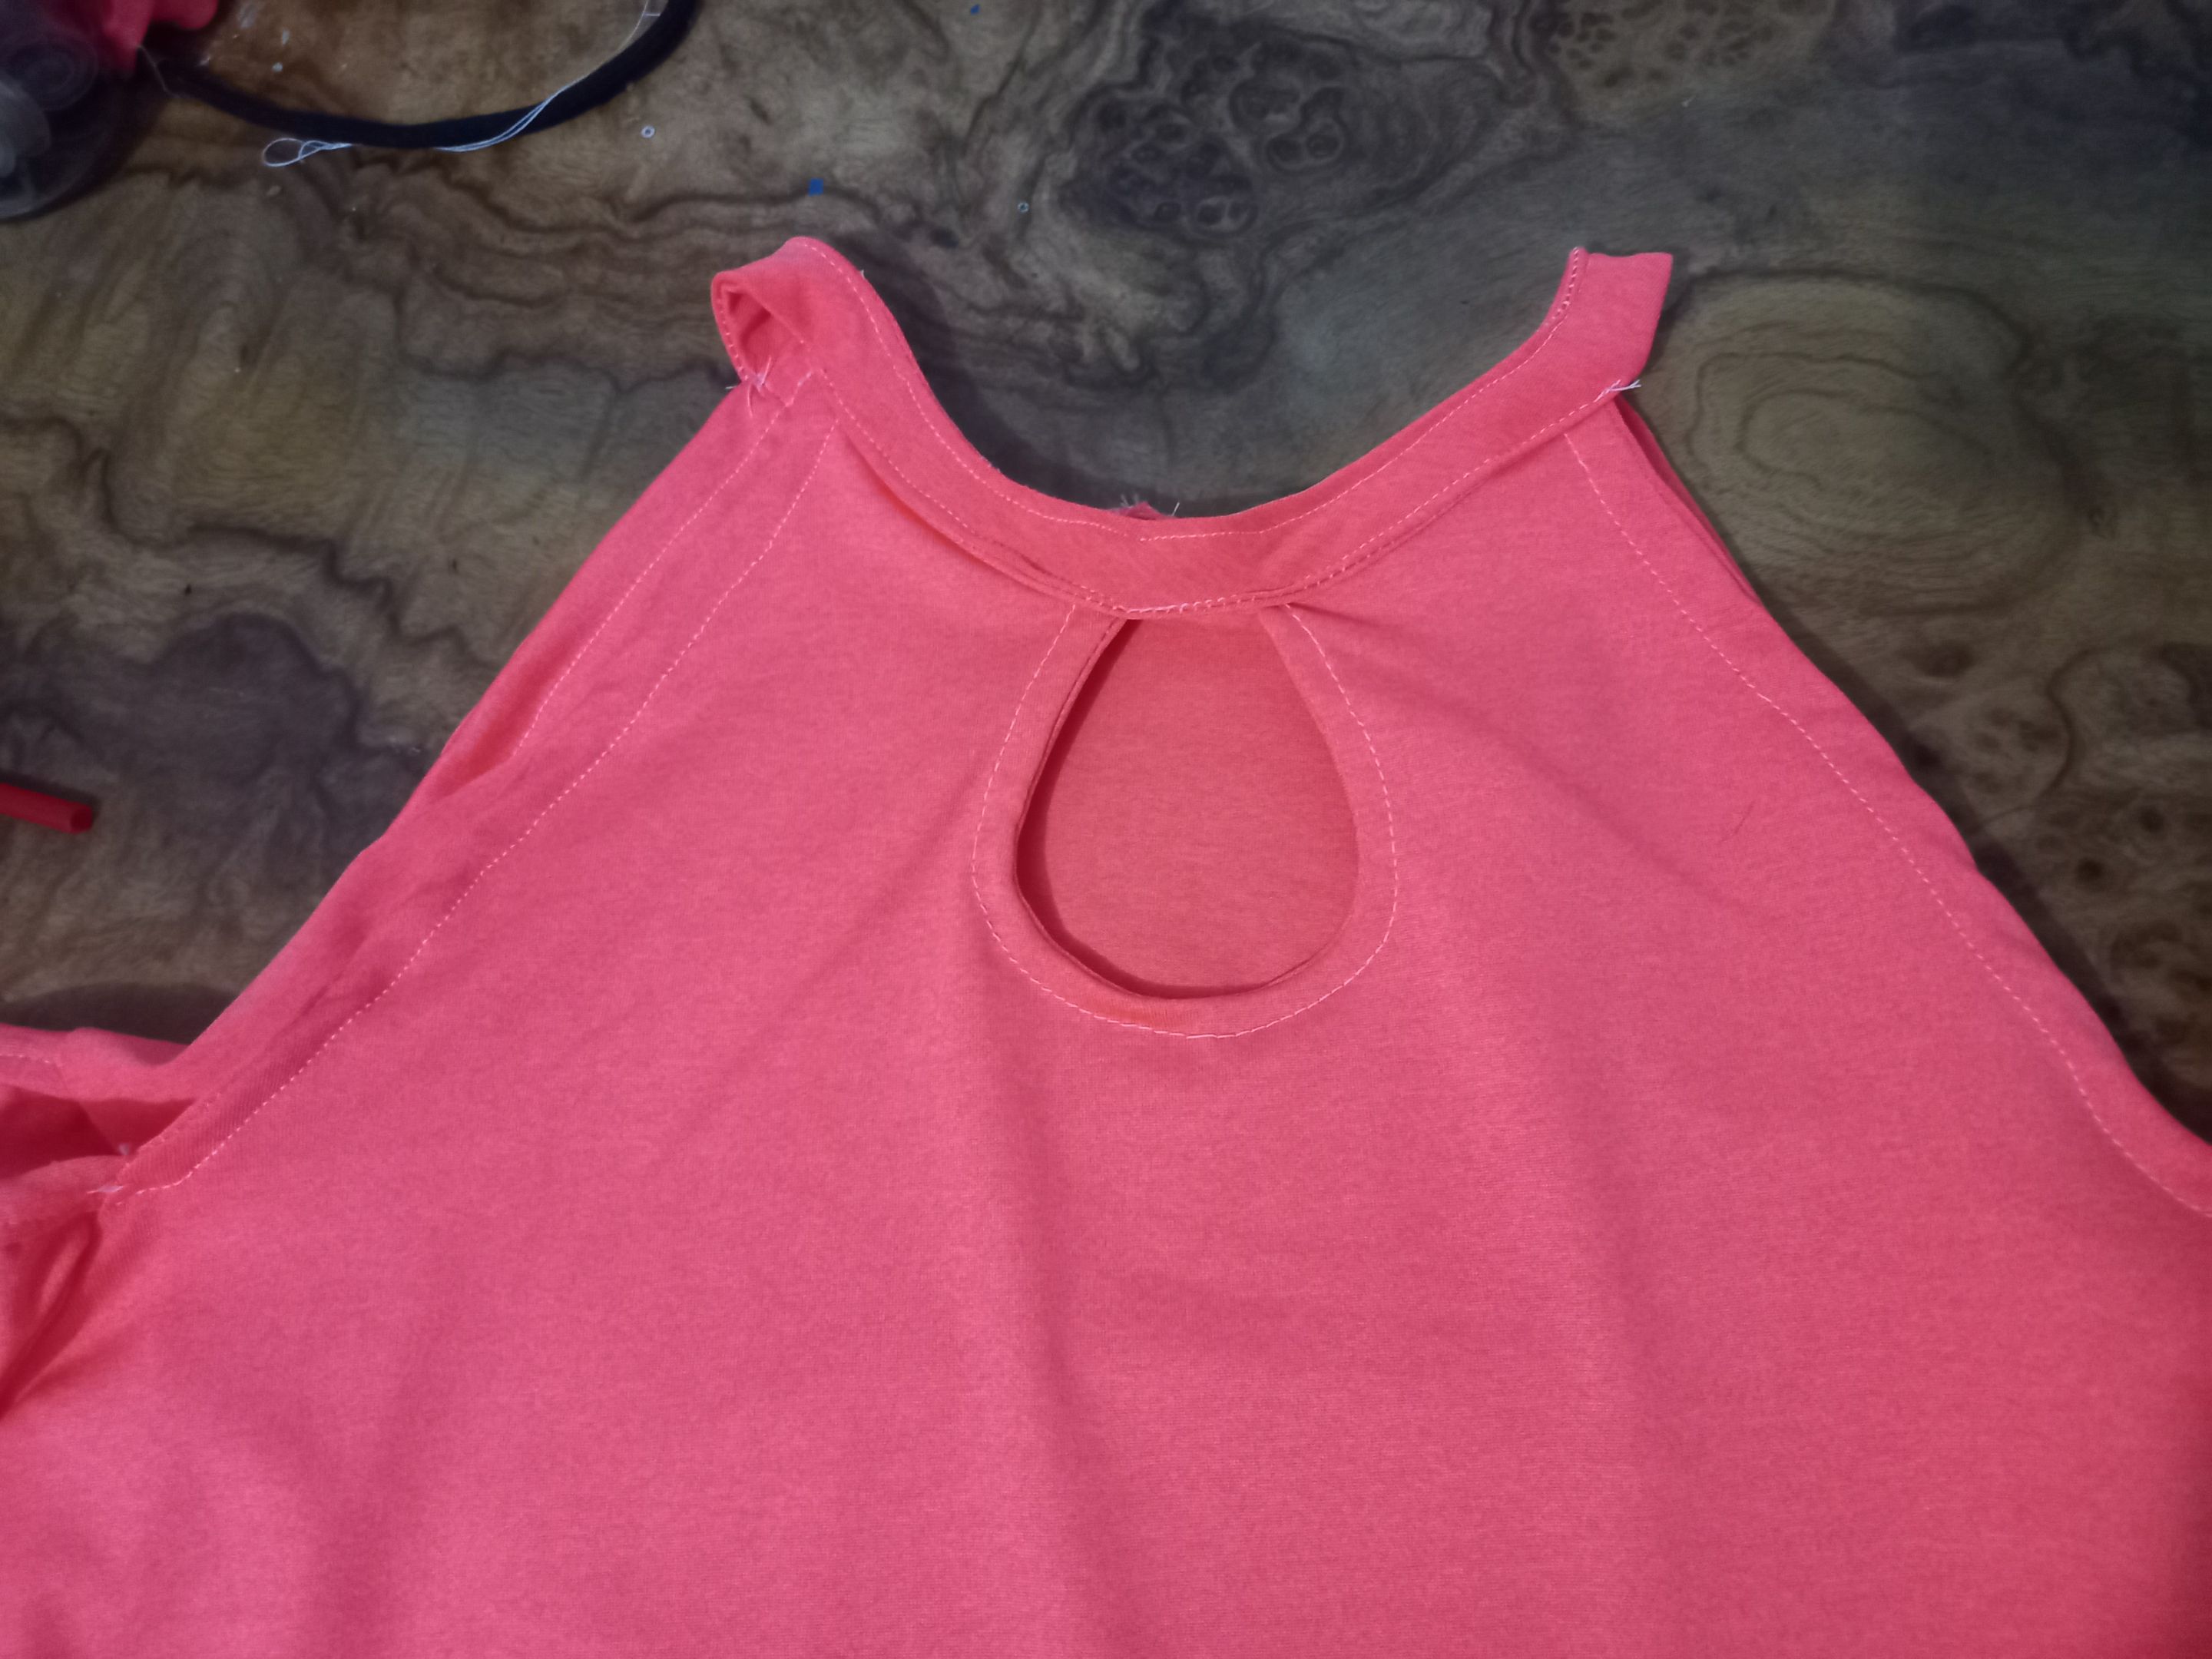
Una vez que terminé de pegar Las mangas procedí a hacer el ruedo que corresponde en la orilla del escote halter.
Once I finished gluing the sleeves, I proceeded to make the corresponding hem at the edge of the halter neckline.
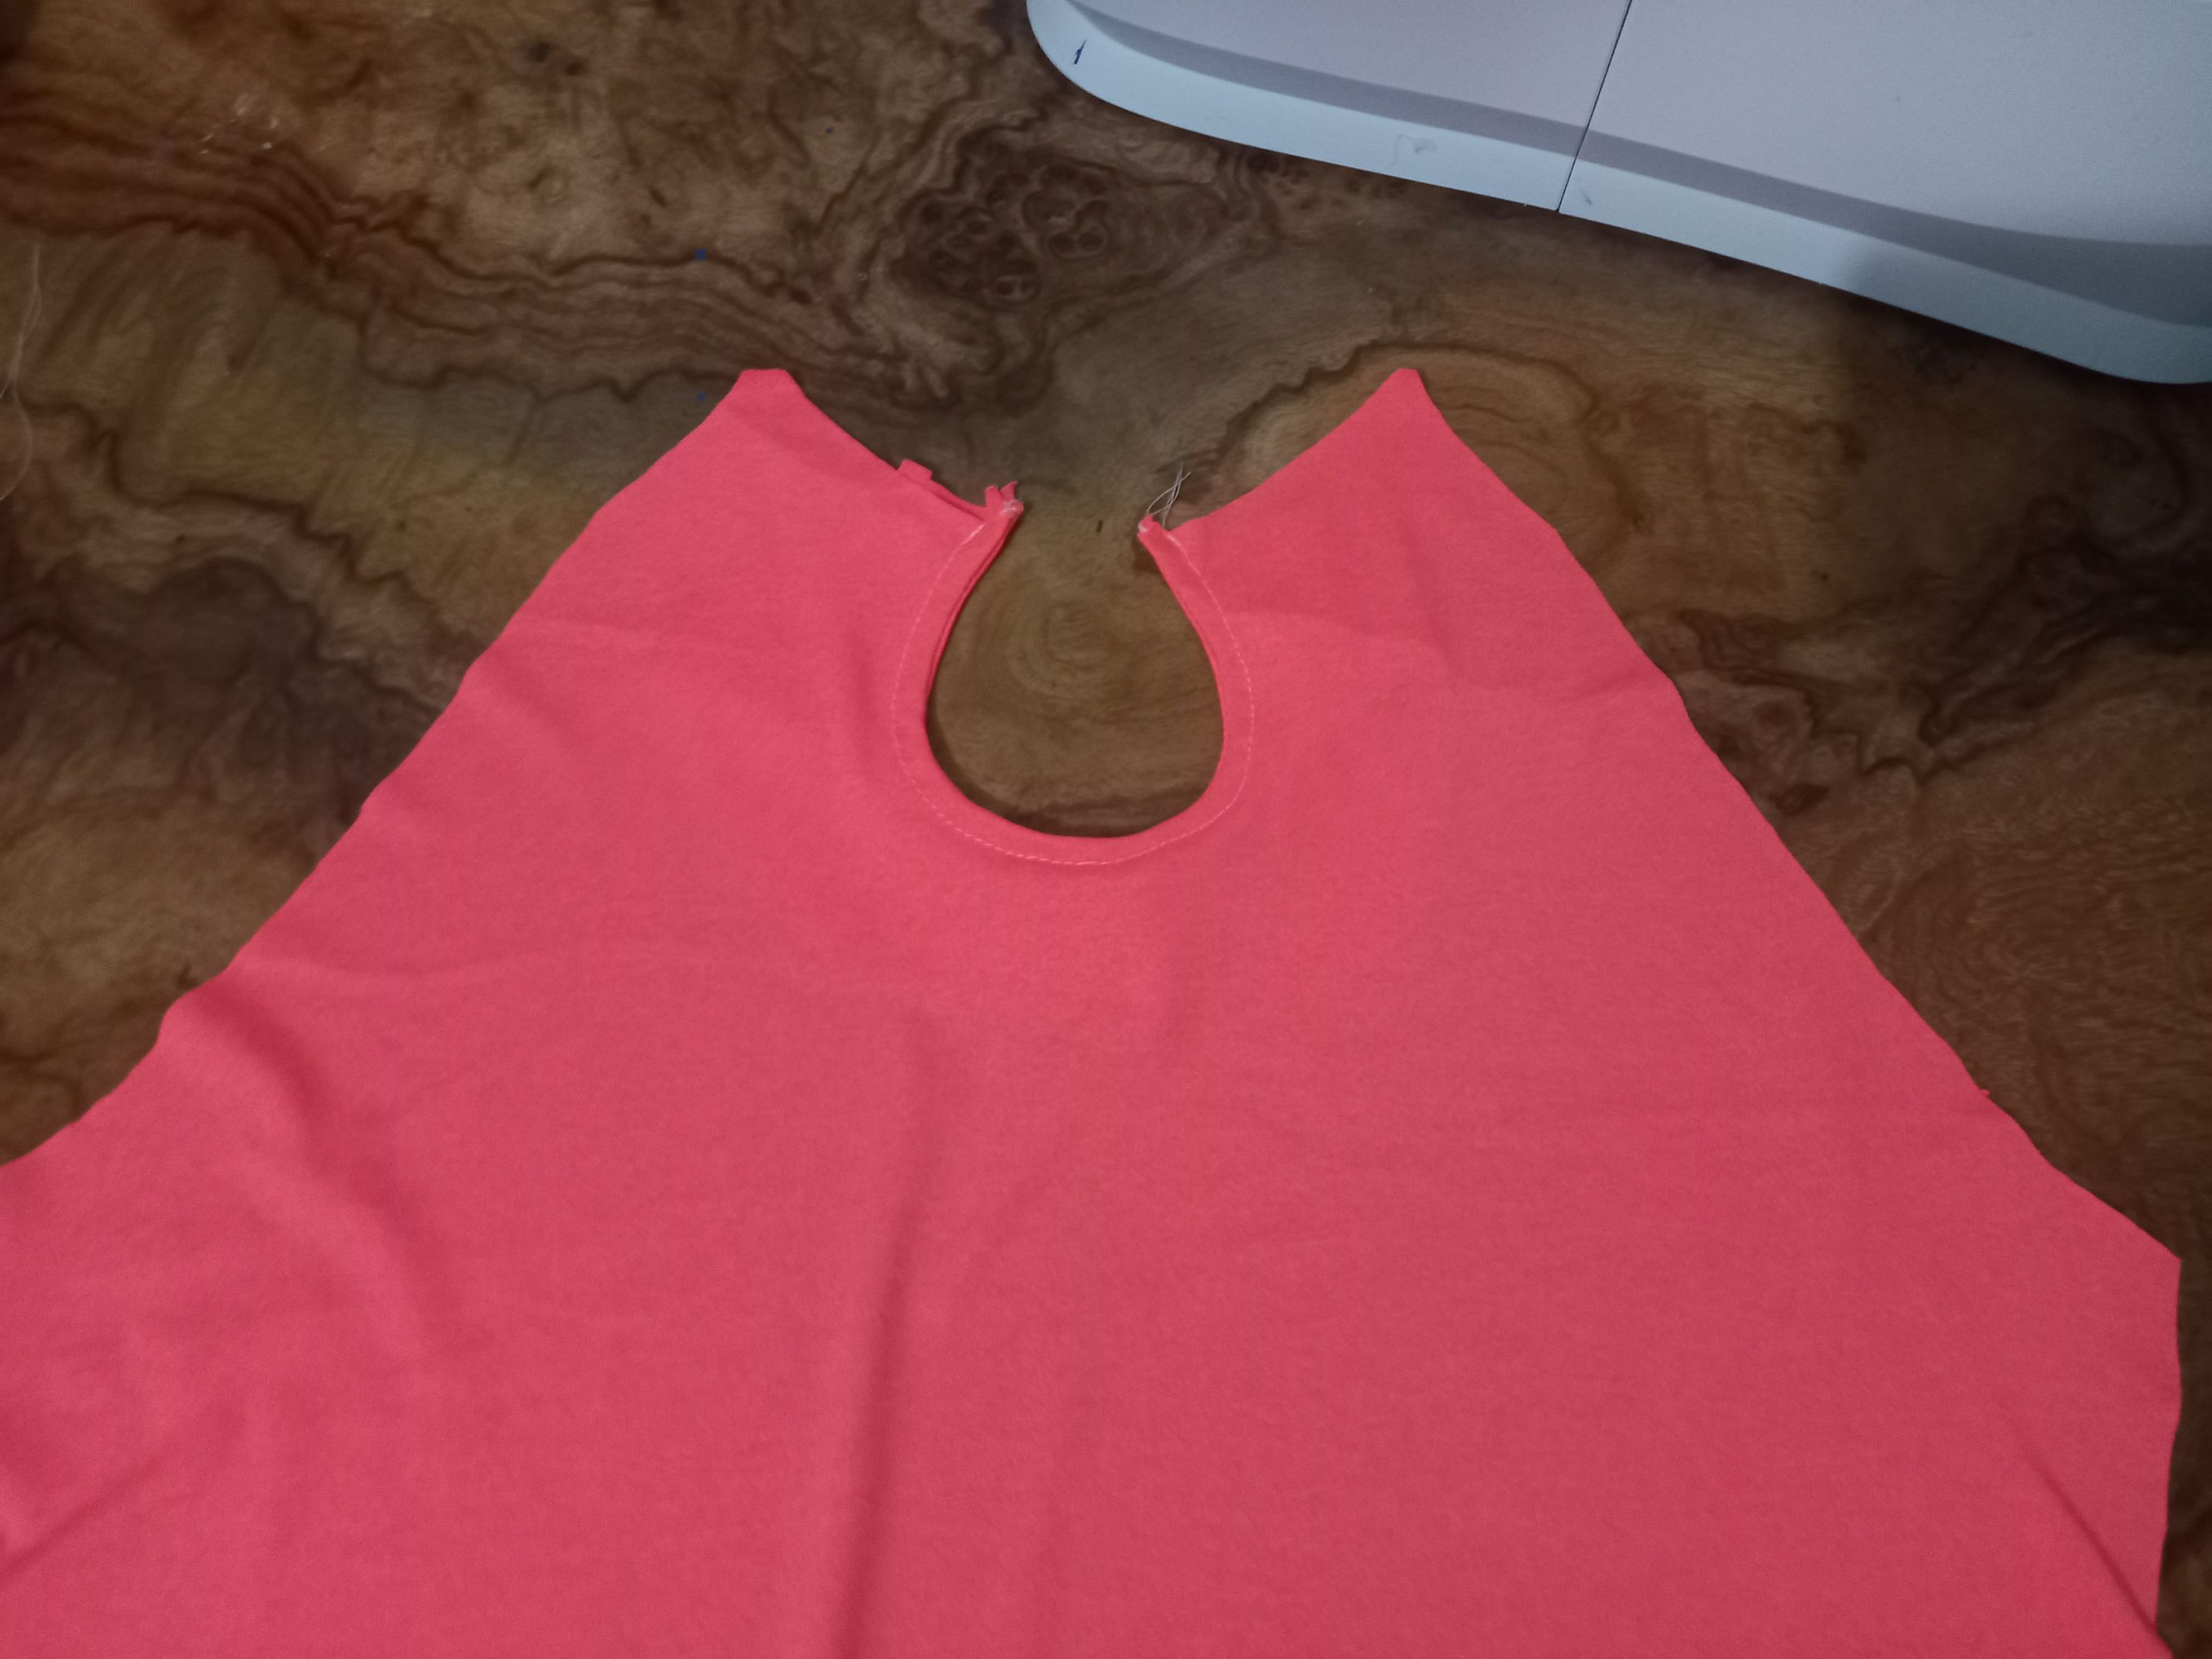
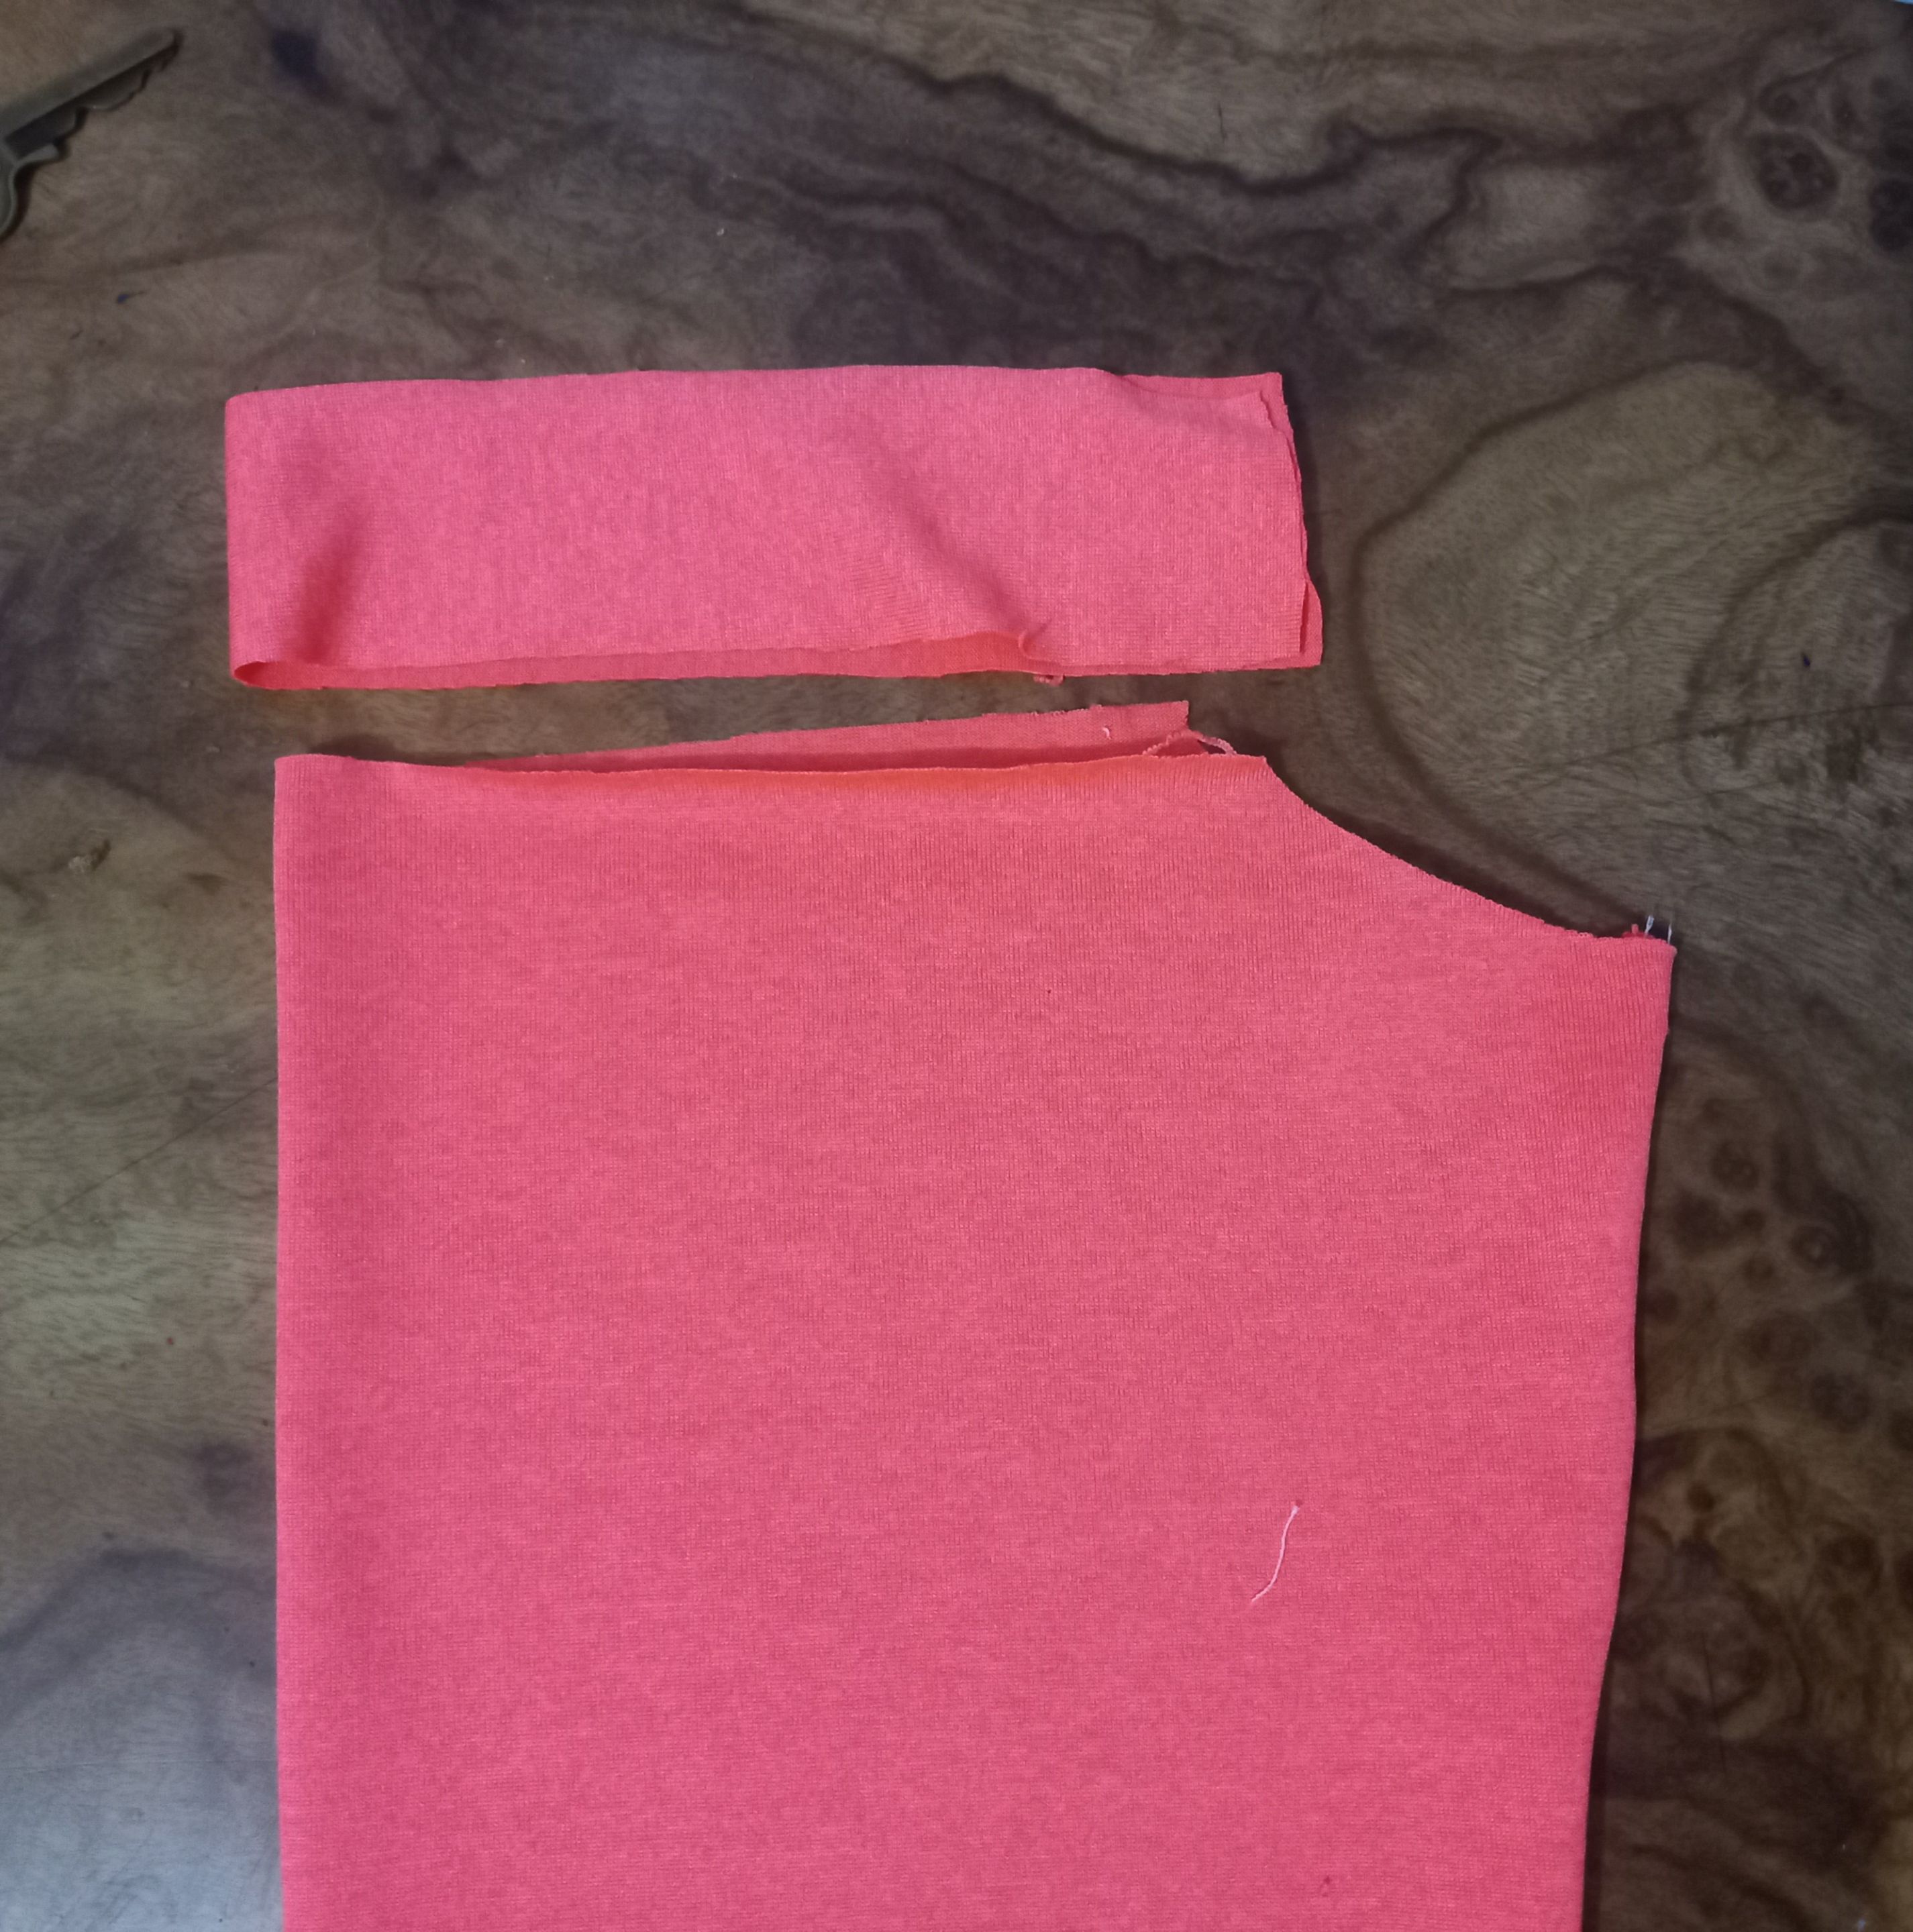
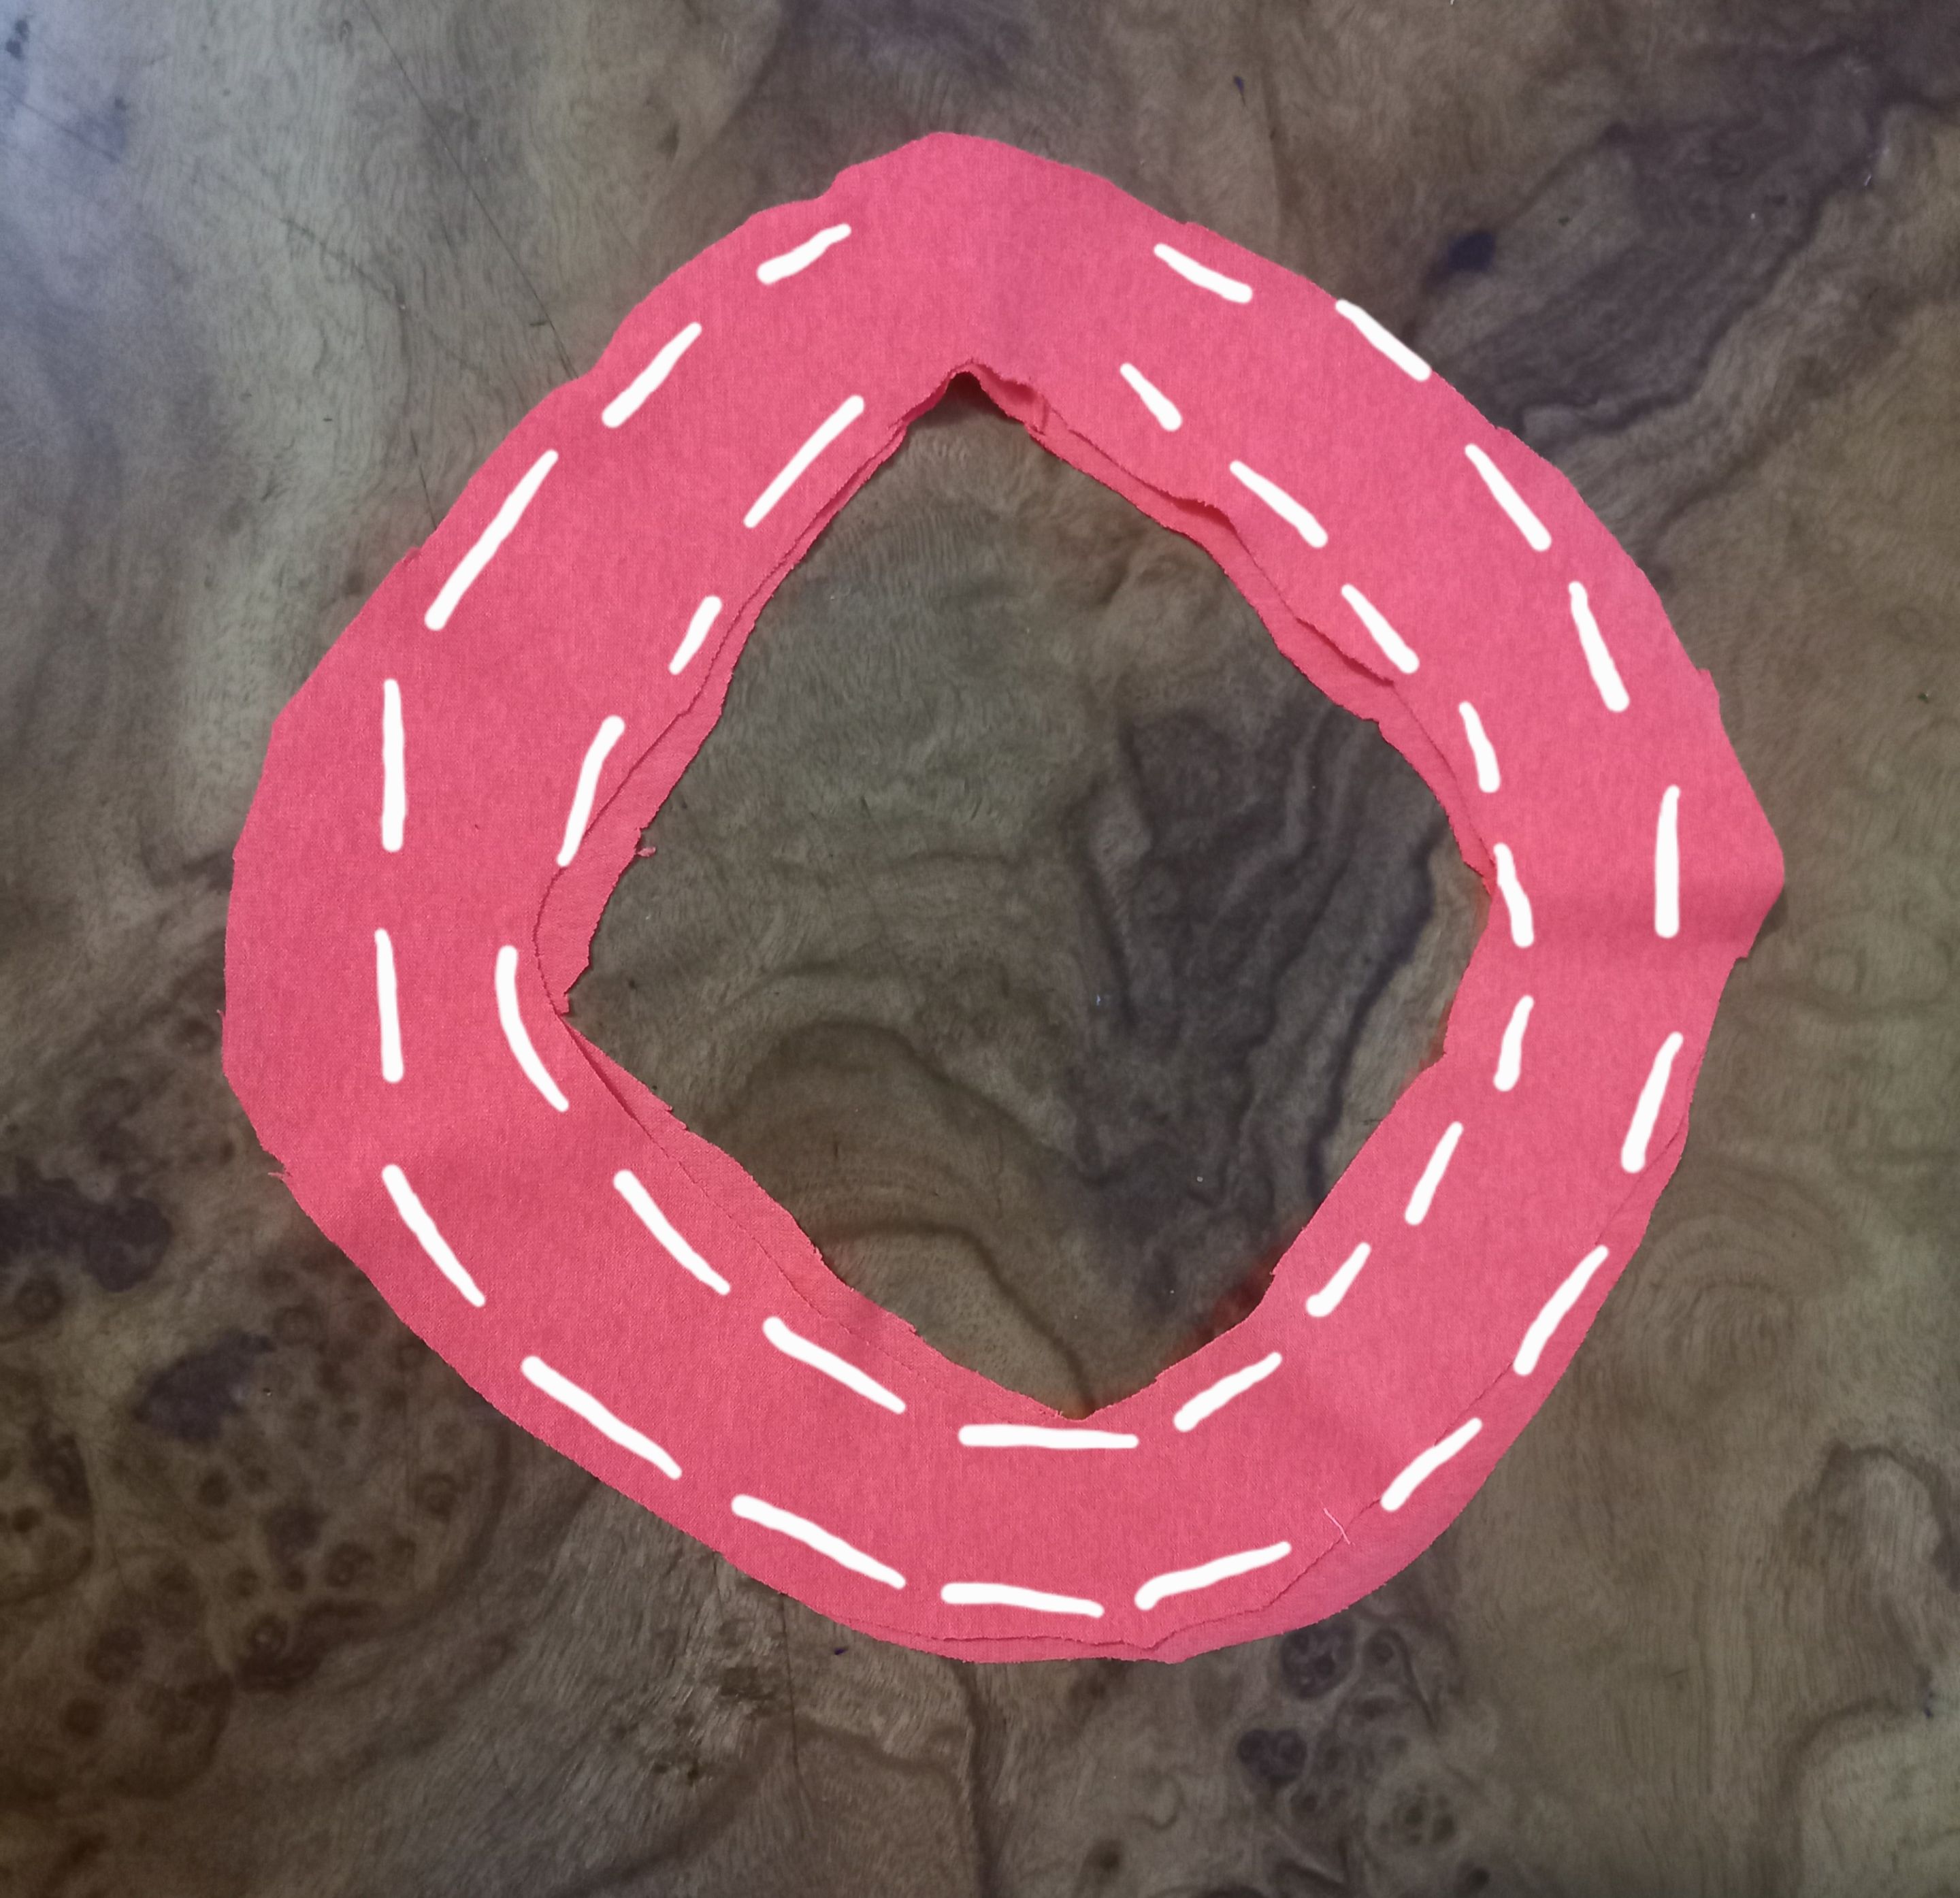
Luego procedí a sacar la pieza del cuello, para esto corte dos circulos, cosí sus orillas tanto las de adentro como las de afuera y corté en el centro para desdoblar.
Then I proceeded to remove the neck piece, for this I cut two circles, sewed their edges both inside and outside and cut in the center to unfold.
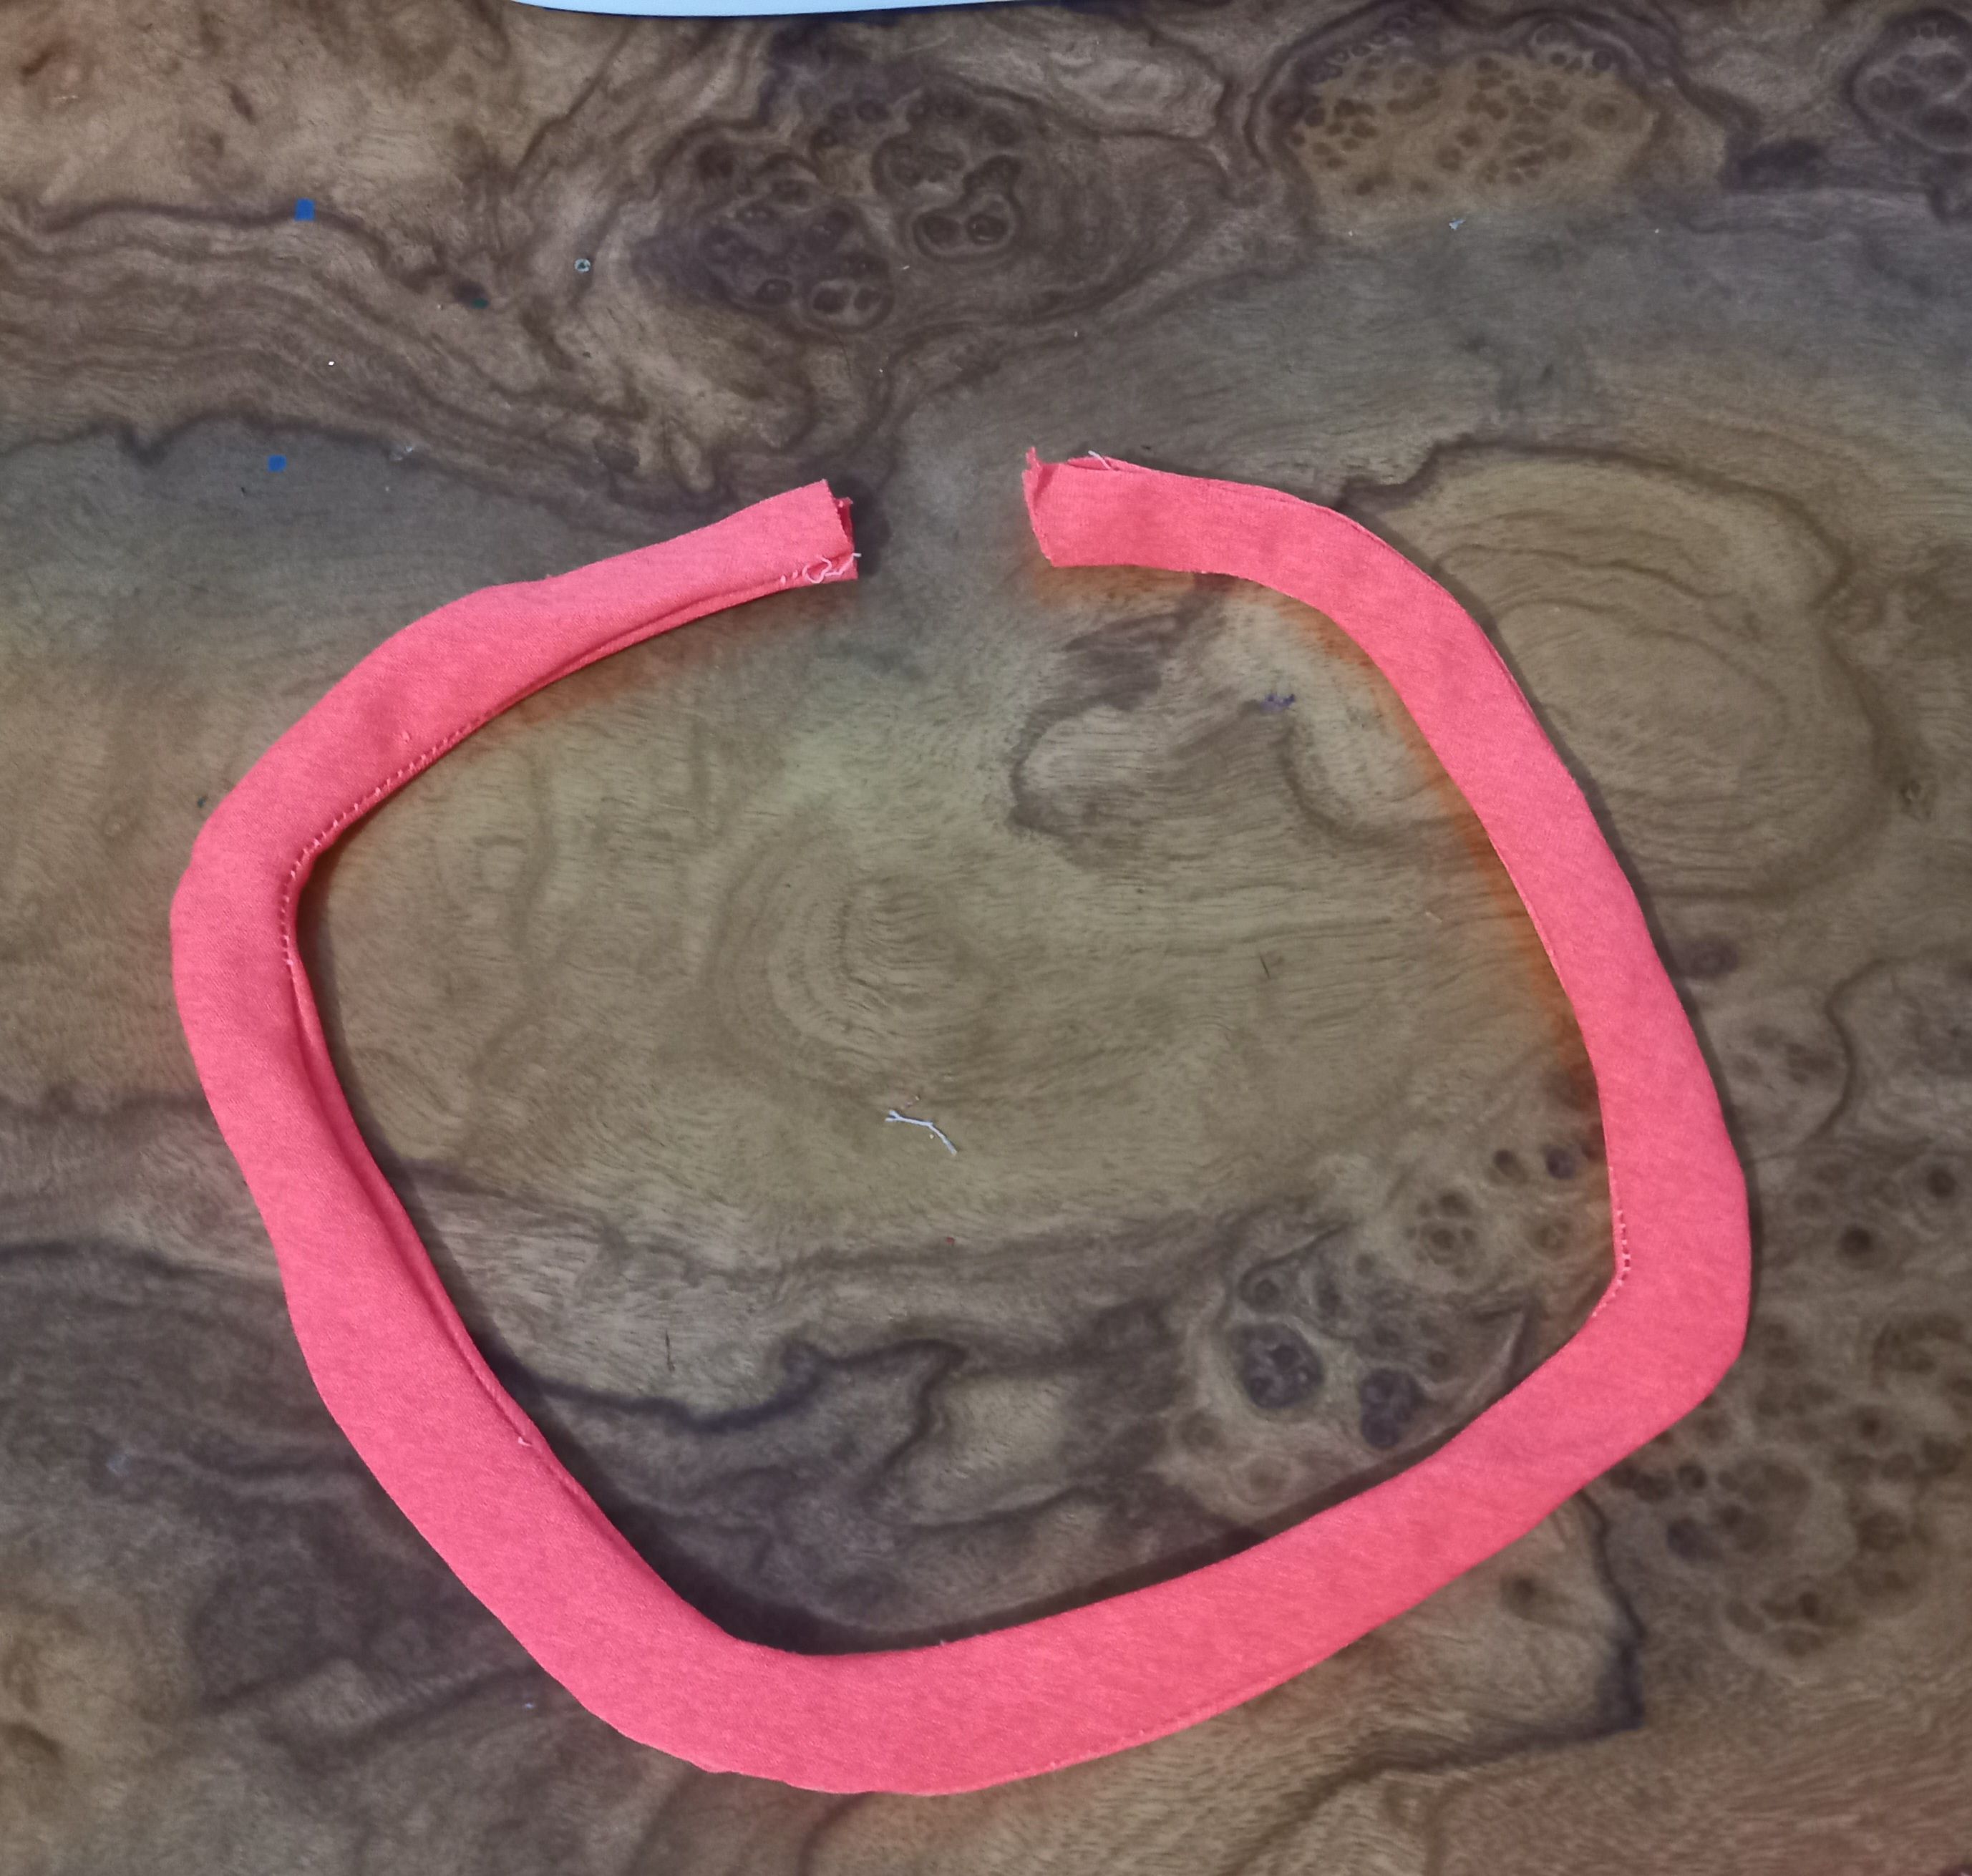
Después que corté la tira para el cuello, procedí a pegarla primeramente en la parte del frente y luego, para unirla en la parte de atrás, dejé un espacio de 6 cm entre la parte superior delantera y la parte superior trasera, es decir, entre las dos puntas que conectan las dos piezas en la parte del cuello.
After I cut the strip for the neck, I proceeded to glue it first in the front part and then, to join it in the back part, I left a space of 6 cm between the front top and the back top, that is, between the two points that connect the two pieces in the neck part.

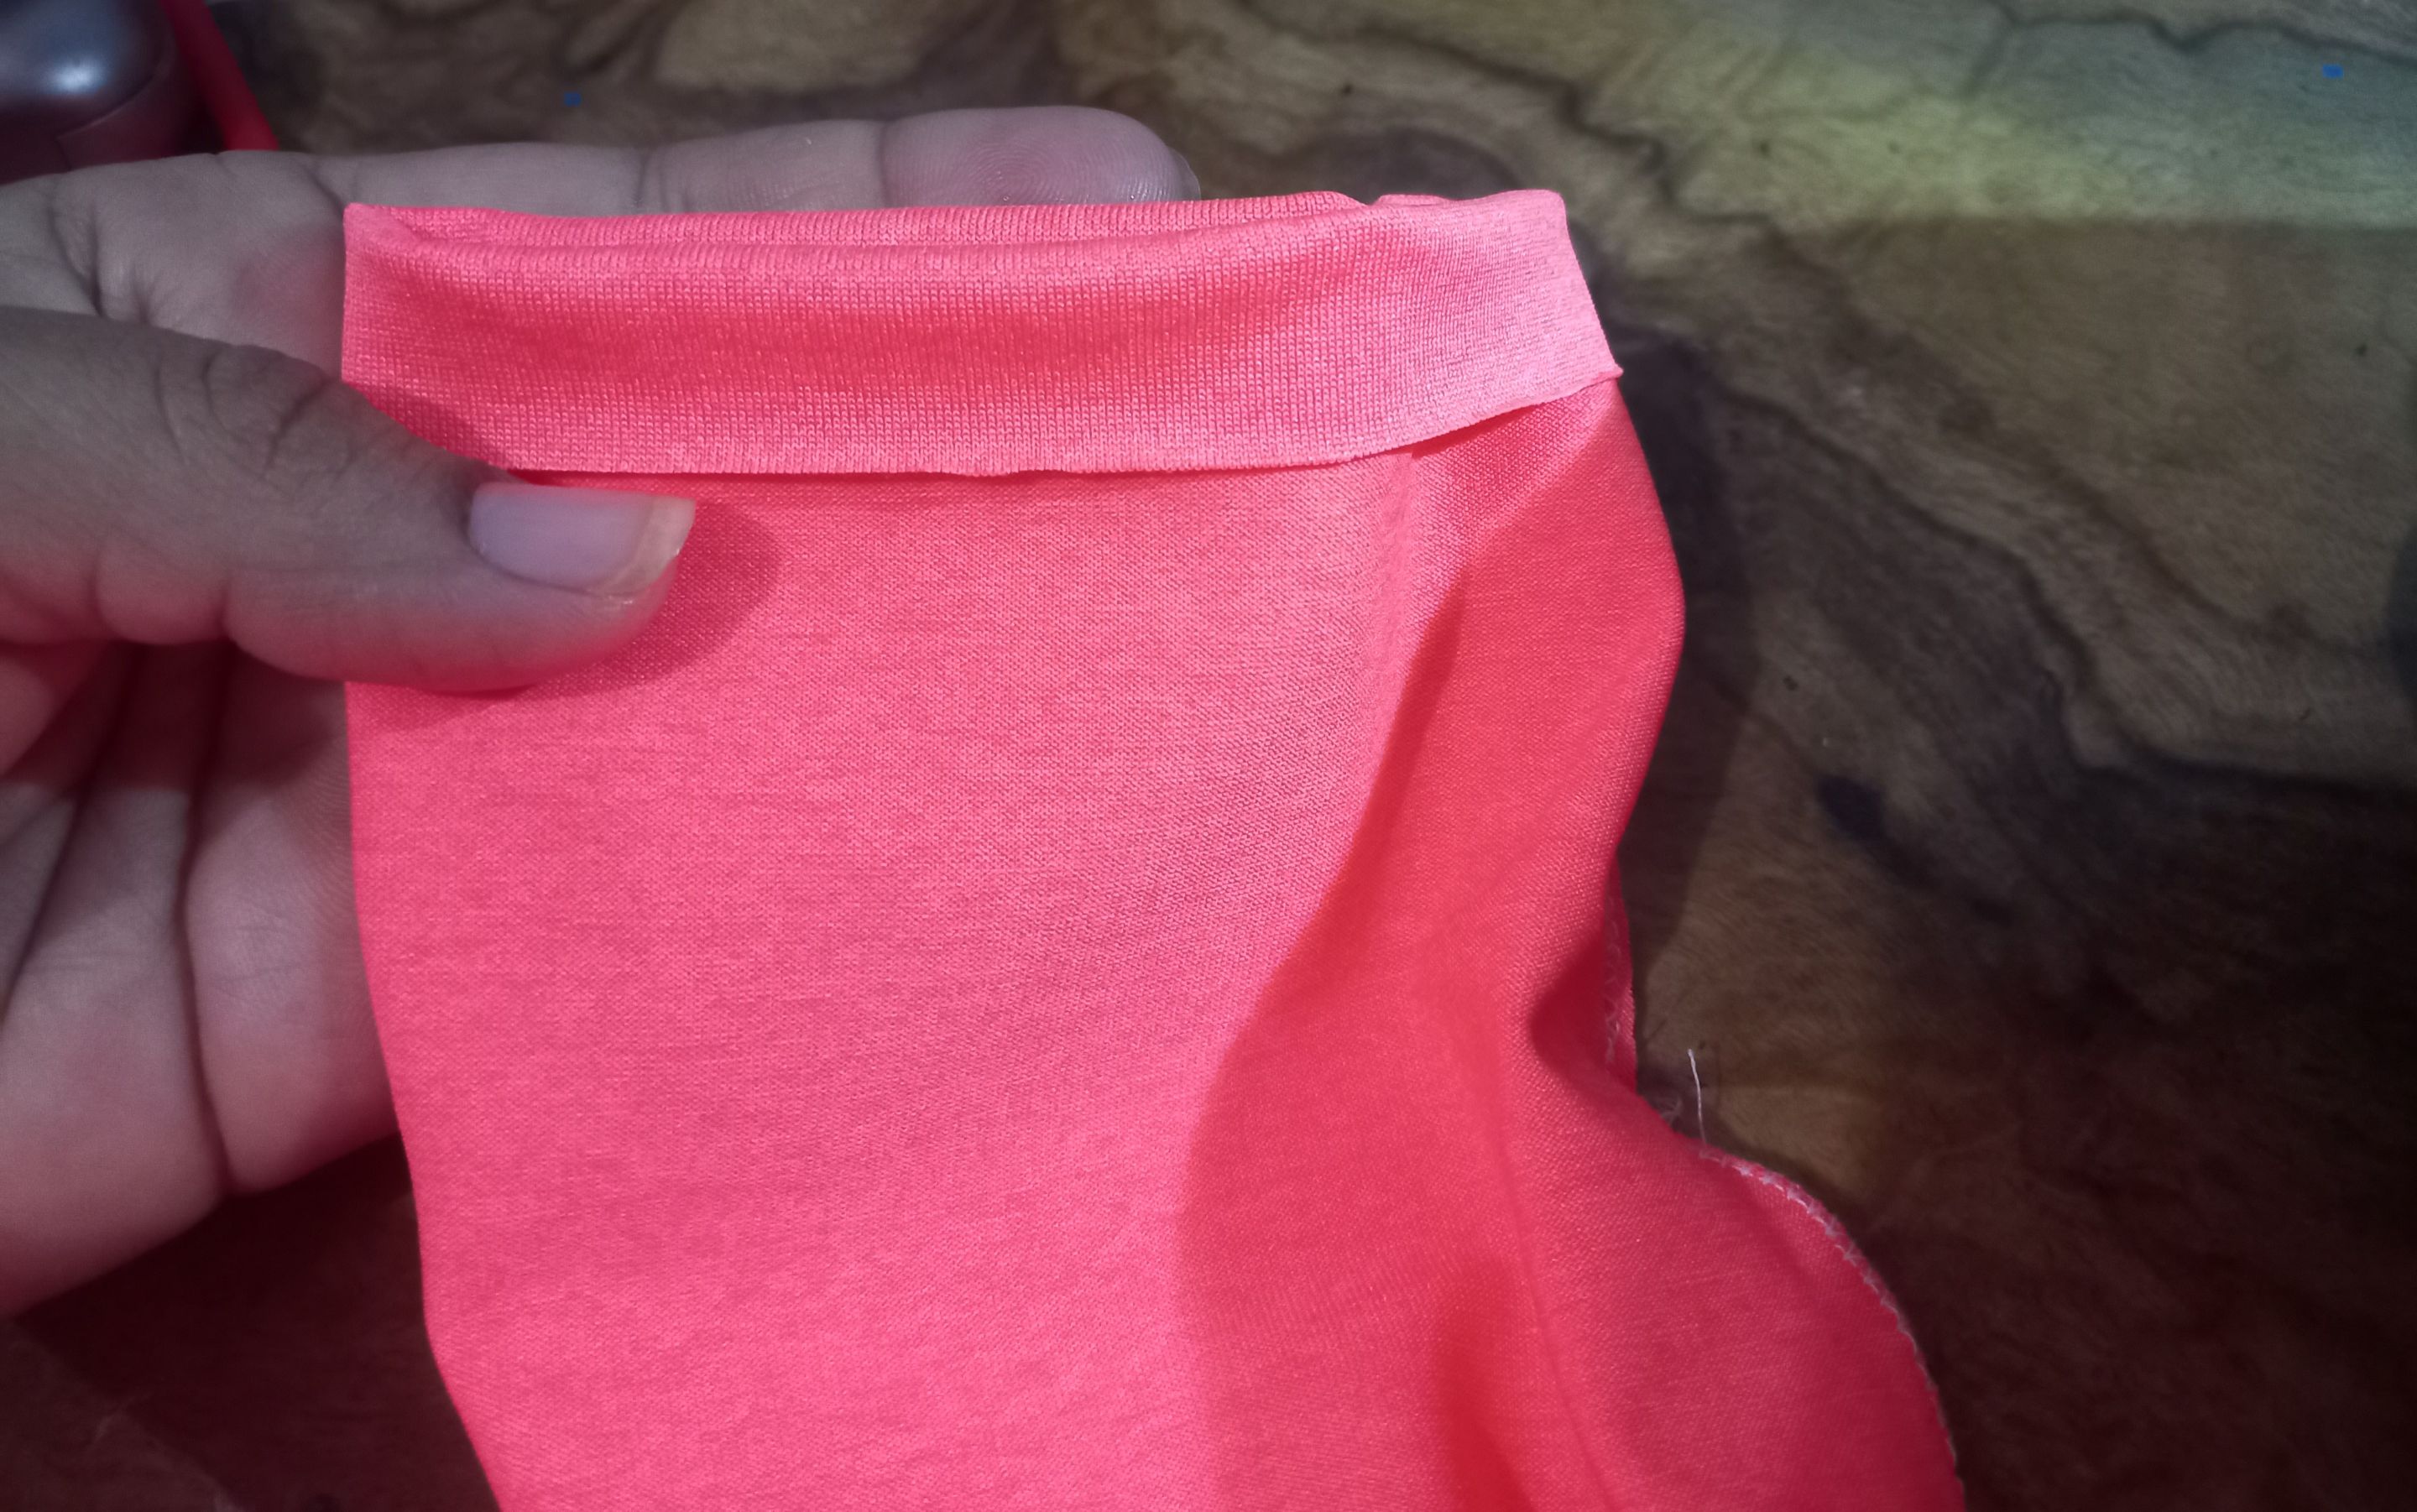
Para terminar esta blusa, hice un pequeño ruedo en la orilla del puño de la manga y en la orilla del contorno de cintura de la blusa.
To finish this blouse, I made a small ruffle at the edge of the sleeve cuff and at the edge of the waistline of the blouse.
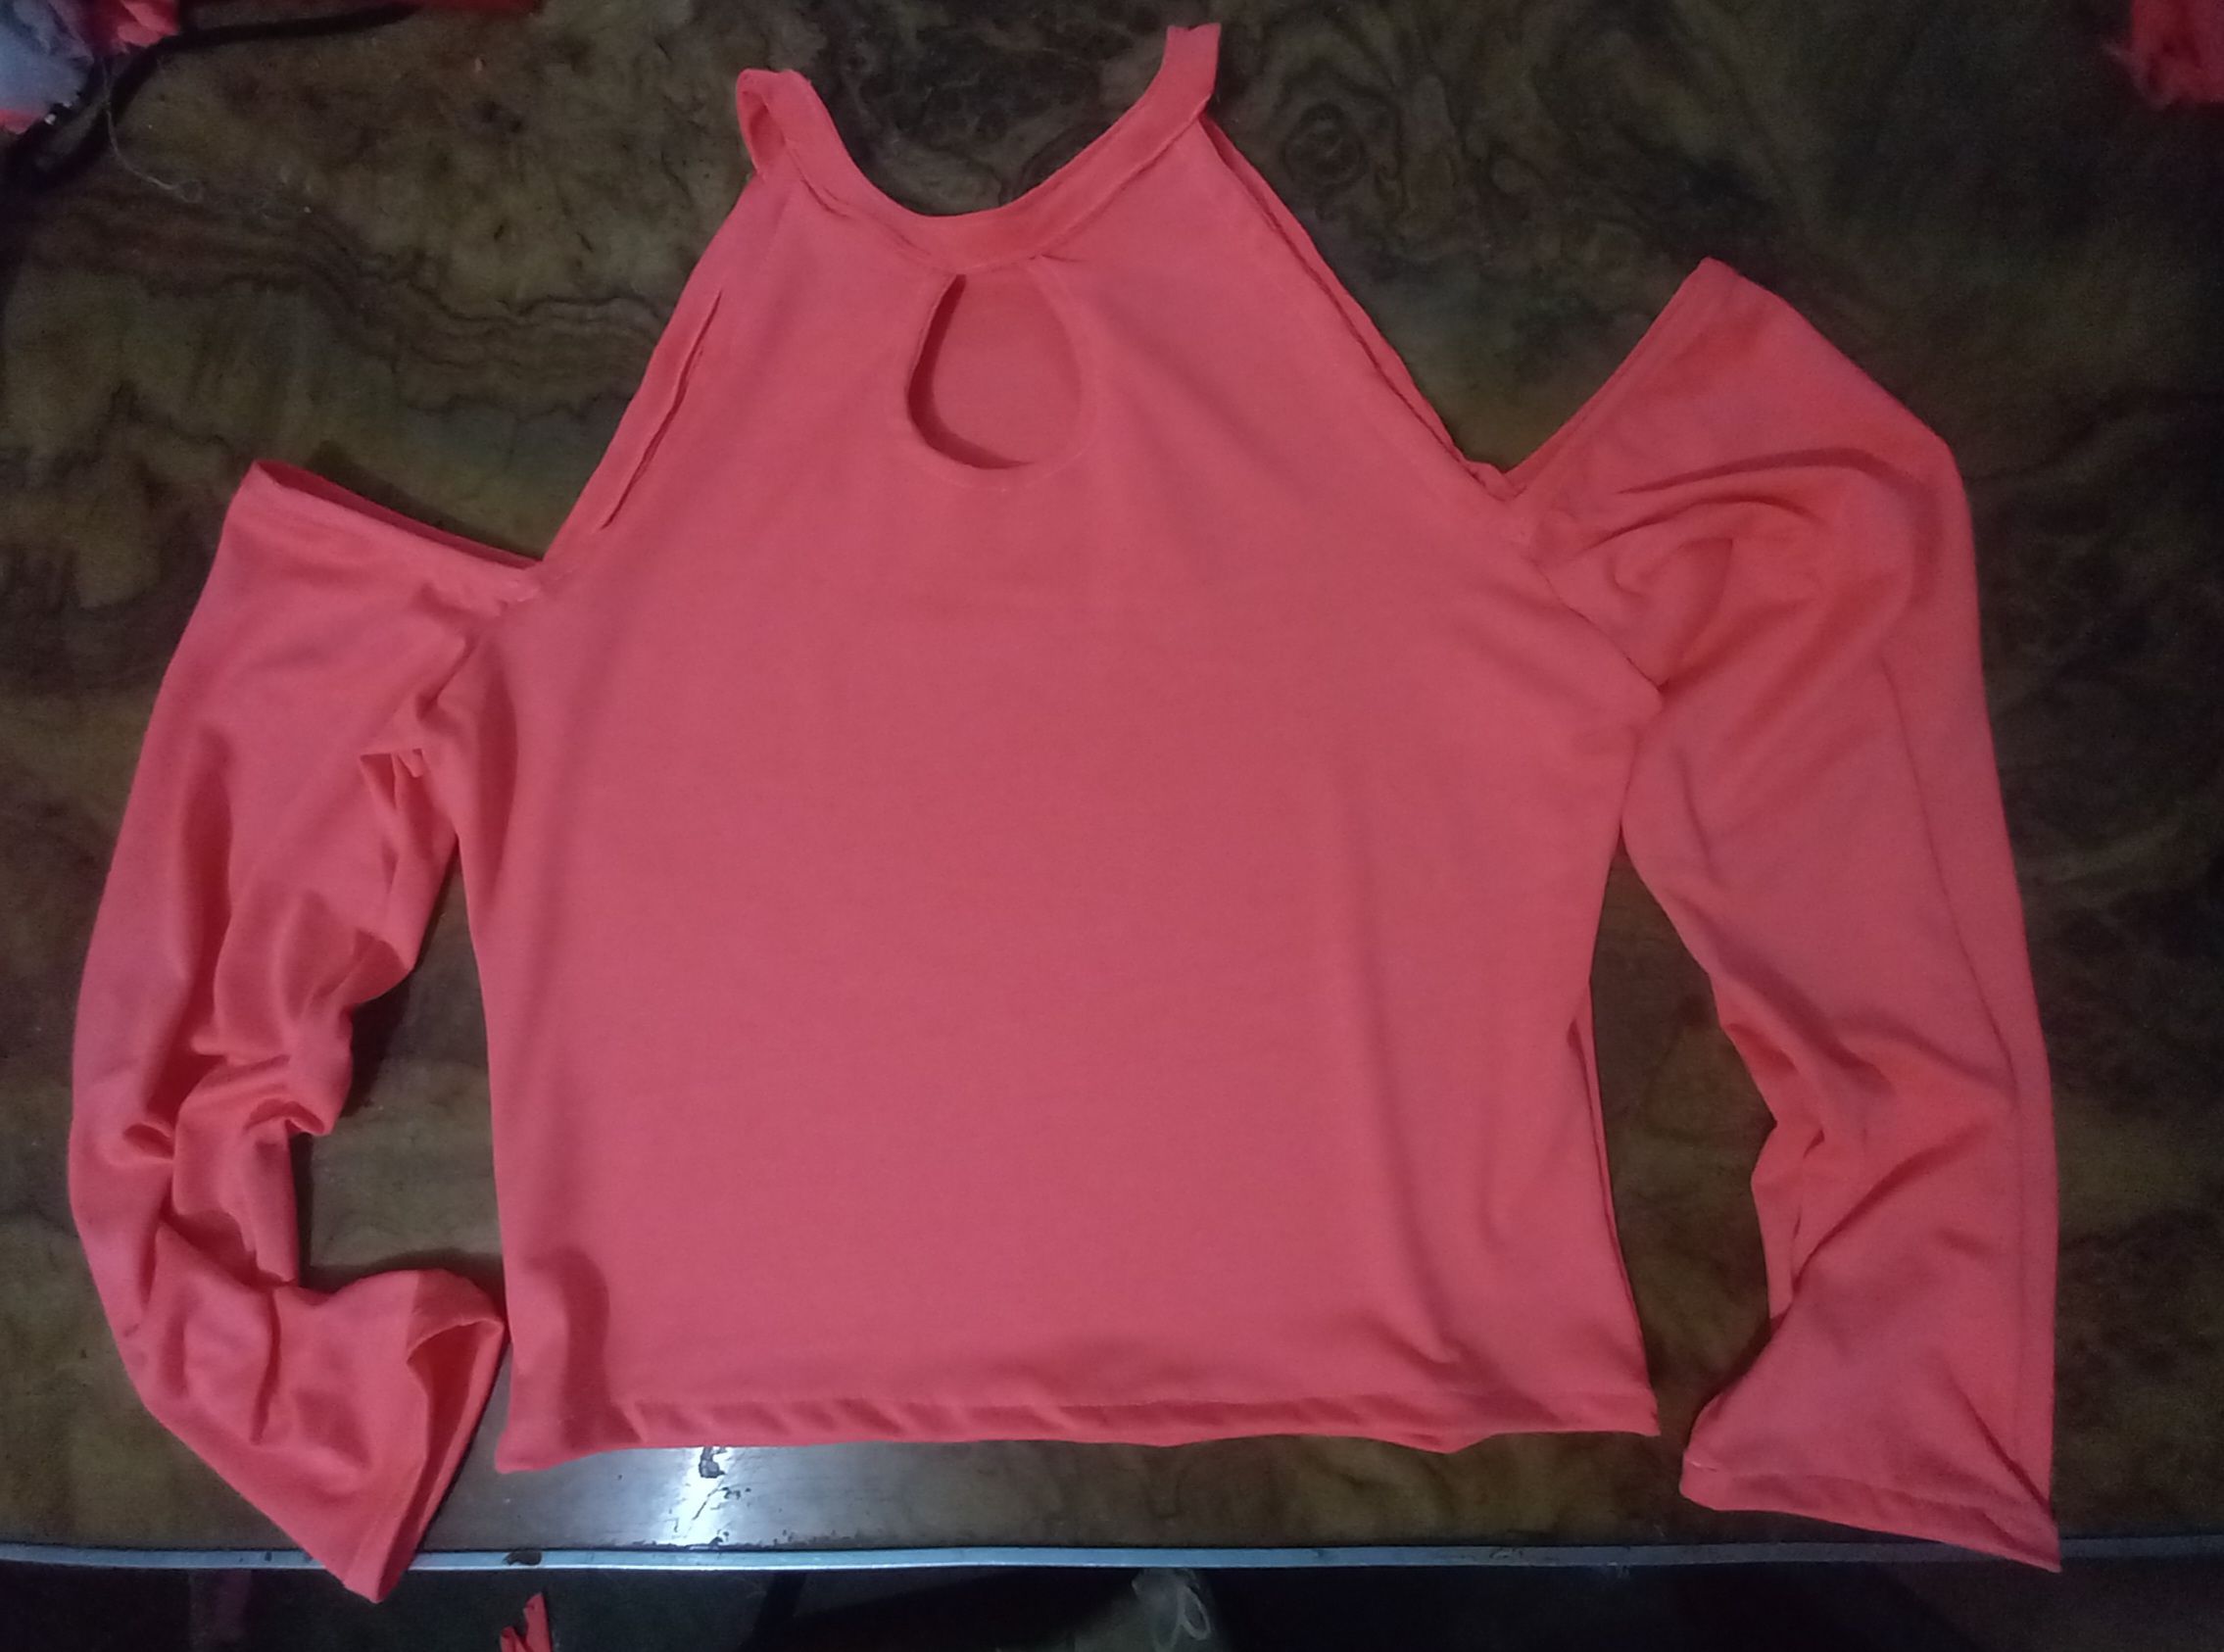


Me gustó mucho el resultado de esta blusa, ya que tiene un estilo bastante Juvenil y muy moderno, aparte que el color me encanta, de hecho por eso lo escogí. Espero que a ti también te haya gustado y que el tutorial sea de gran utilidad para tus próximos proyectos. Muchas bendiciones mis muy apreciados amigos.
I really liked the result of this blouse, as it has a very youthful and modern style, besides I love the color, in fact that's why I chose it. I hope you also liked it and that the tutorial will be very useful for your next projects. Many blessings my dear friends.