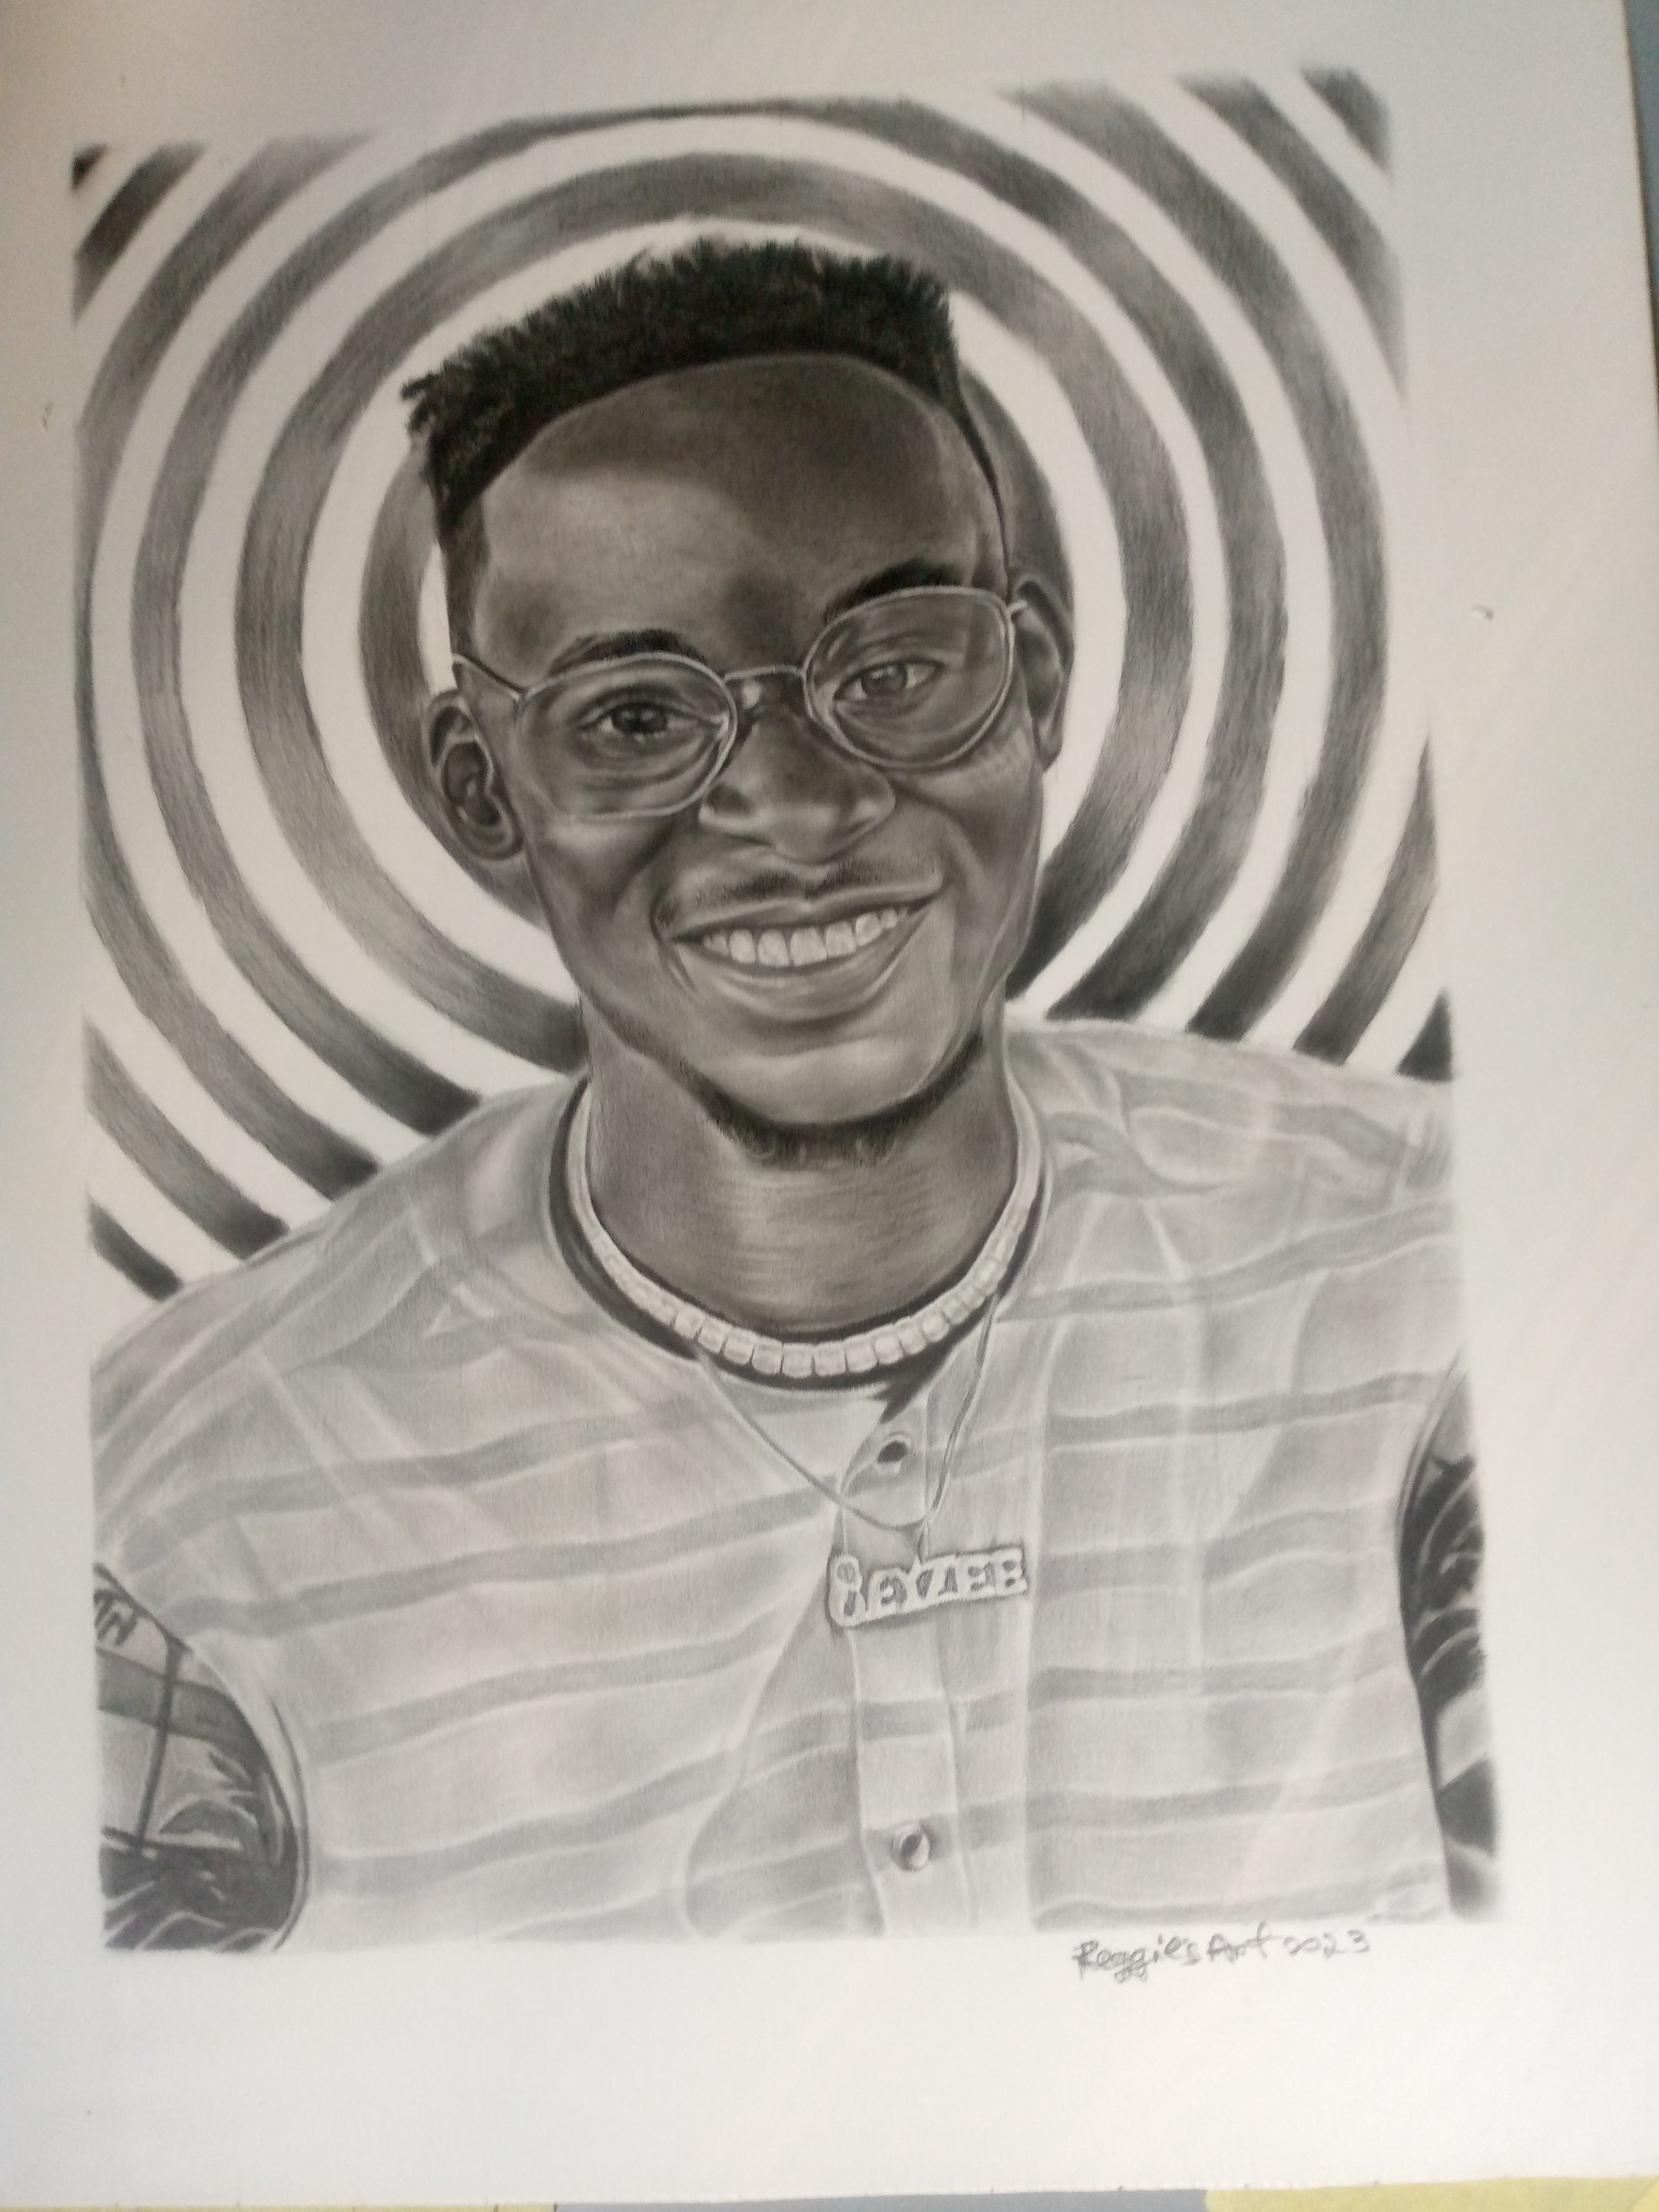
hello friends of art, I'd be sharing with y'all today my pencil drawing of my friend I had done a while back. I have been working on a lot of stuffs lately, I'm trying to schedule myself better and boost my consistency, I'd appreciate some helpful suggestions/ advice.
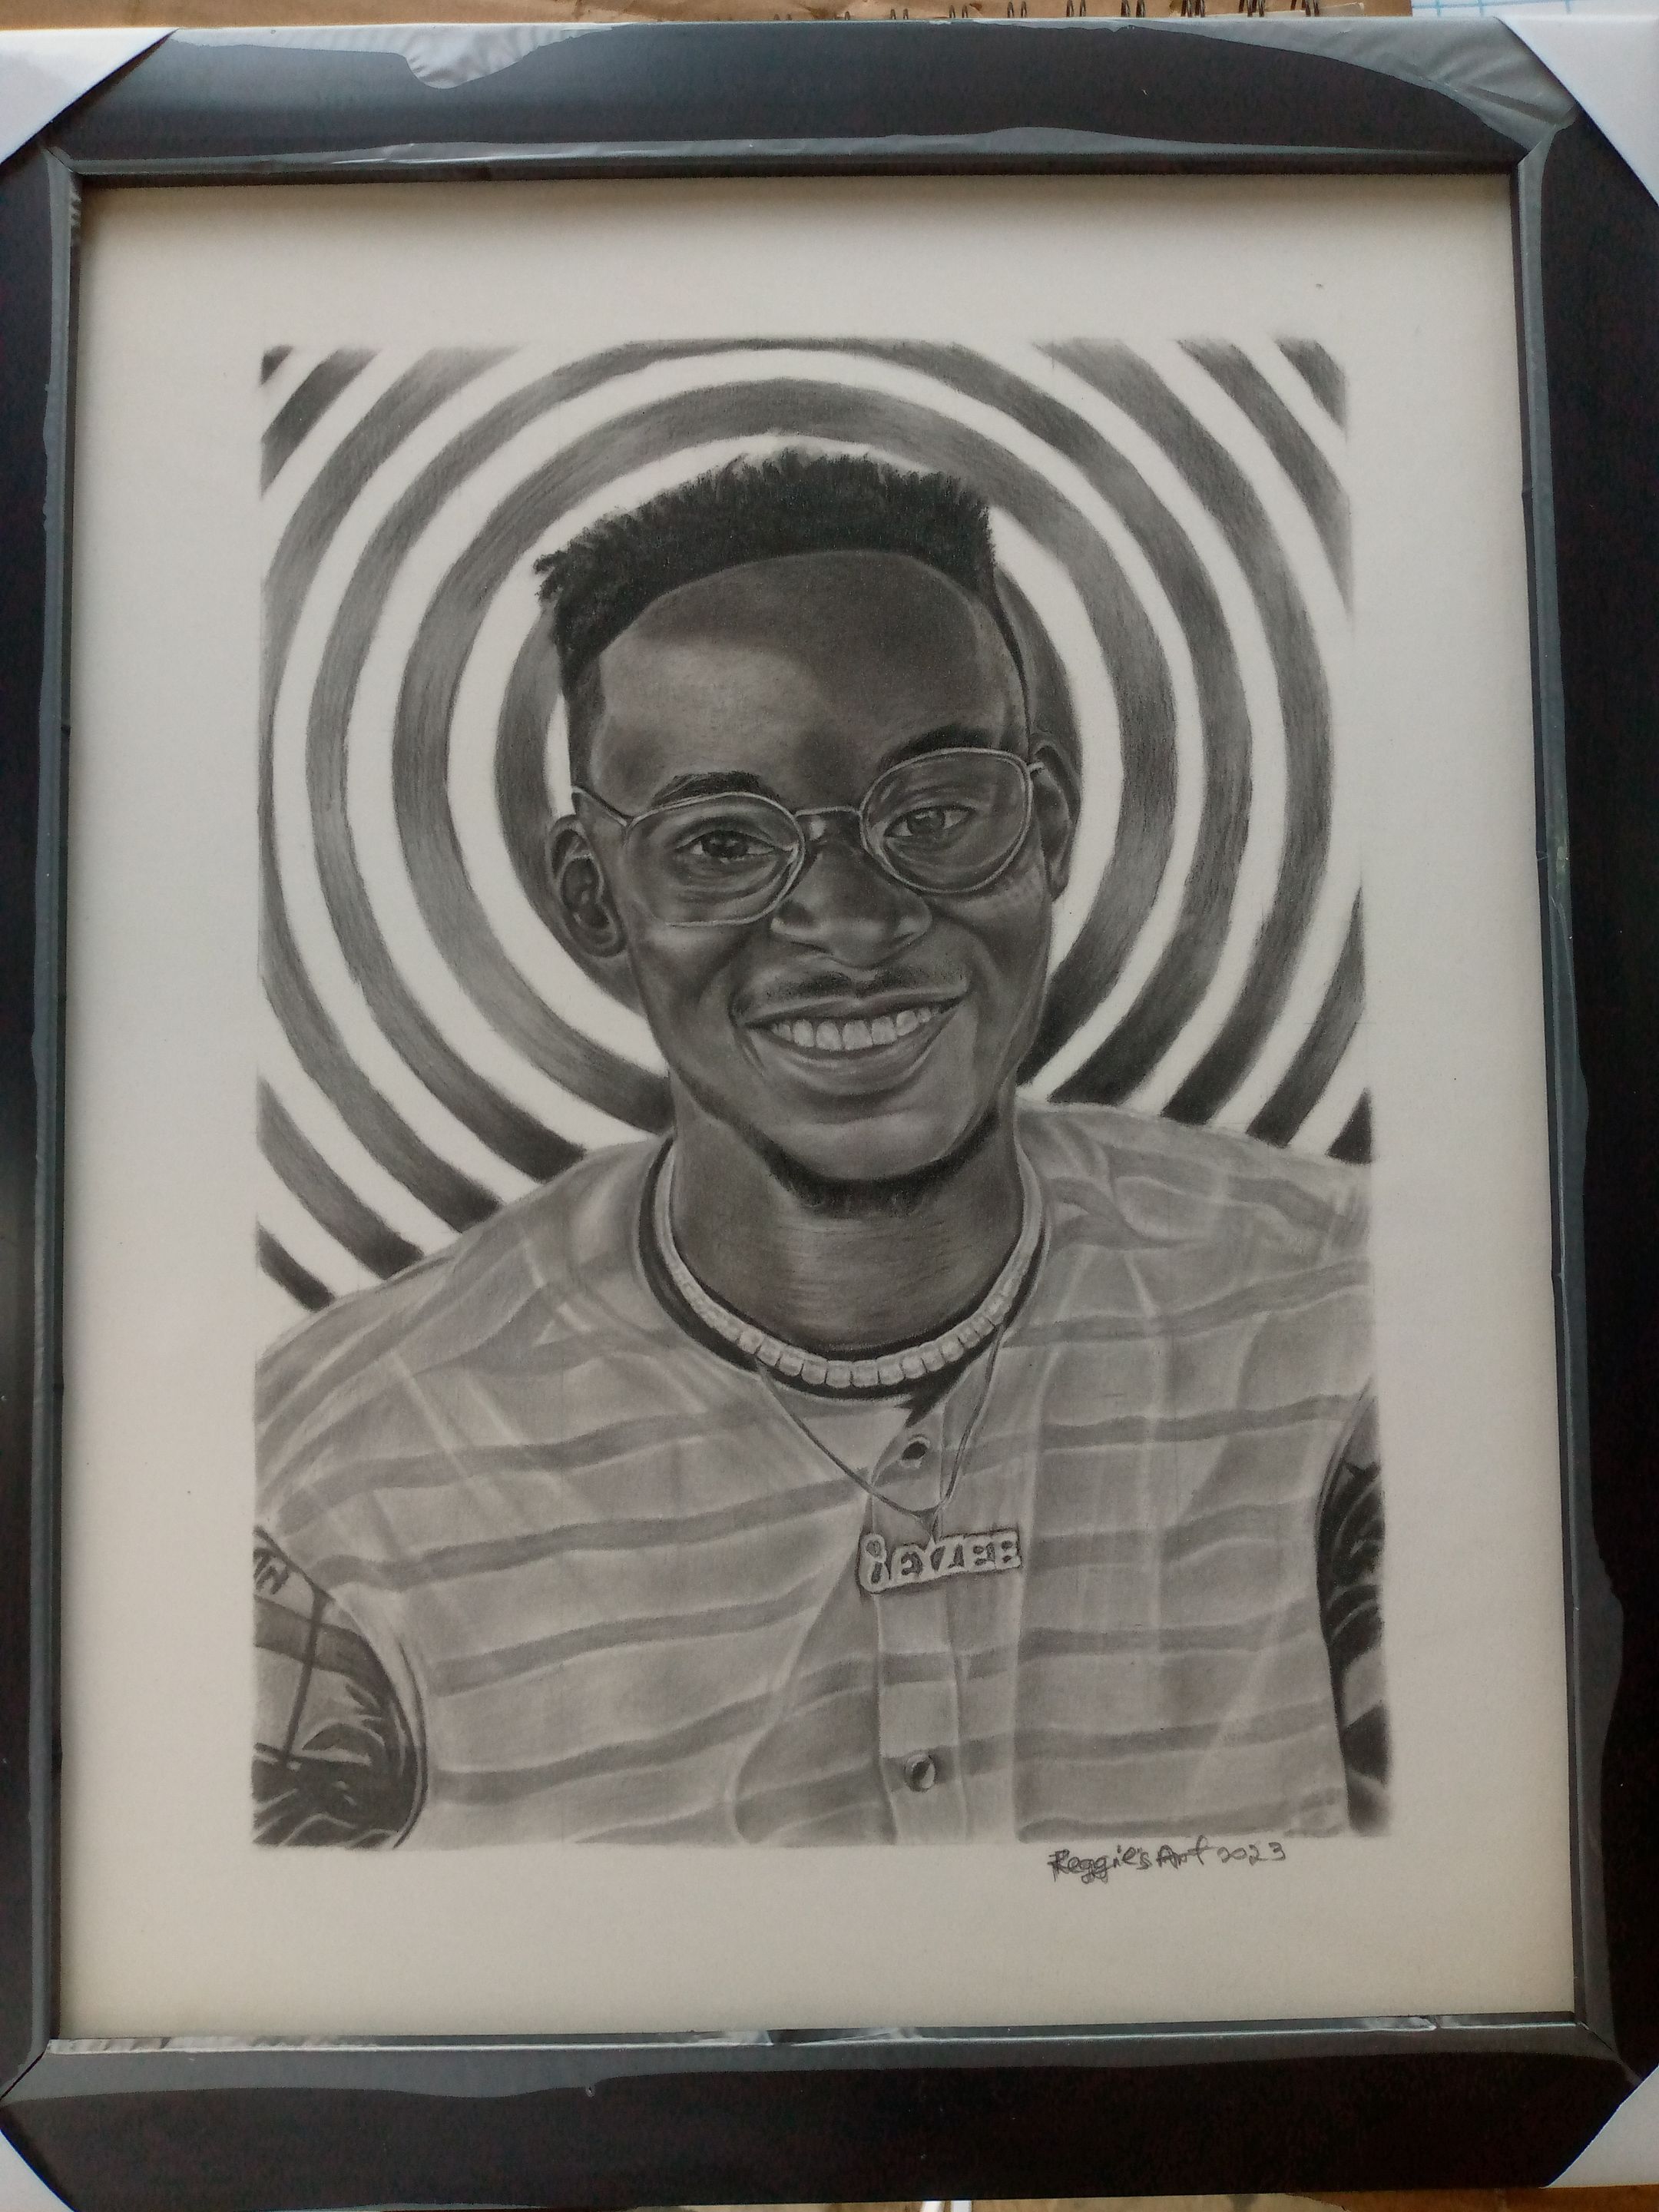
Title: Untitled
Medium: Charcoal and graphite( 8b& hb) pencils on Fbb paper
size: 13*15
Time: 10 hrs
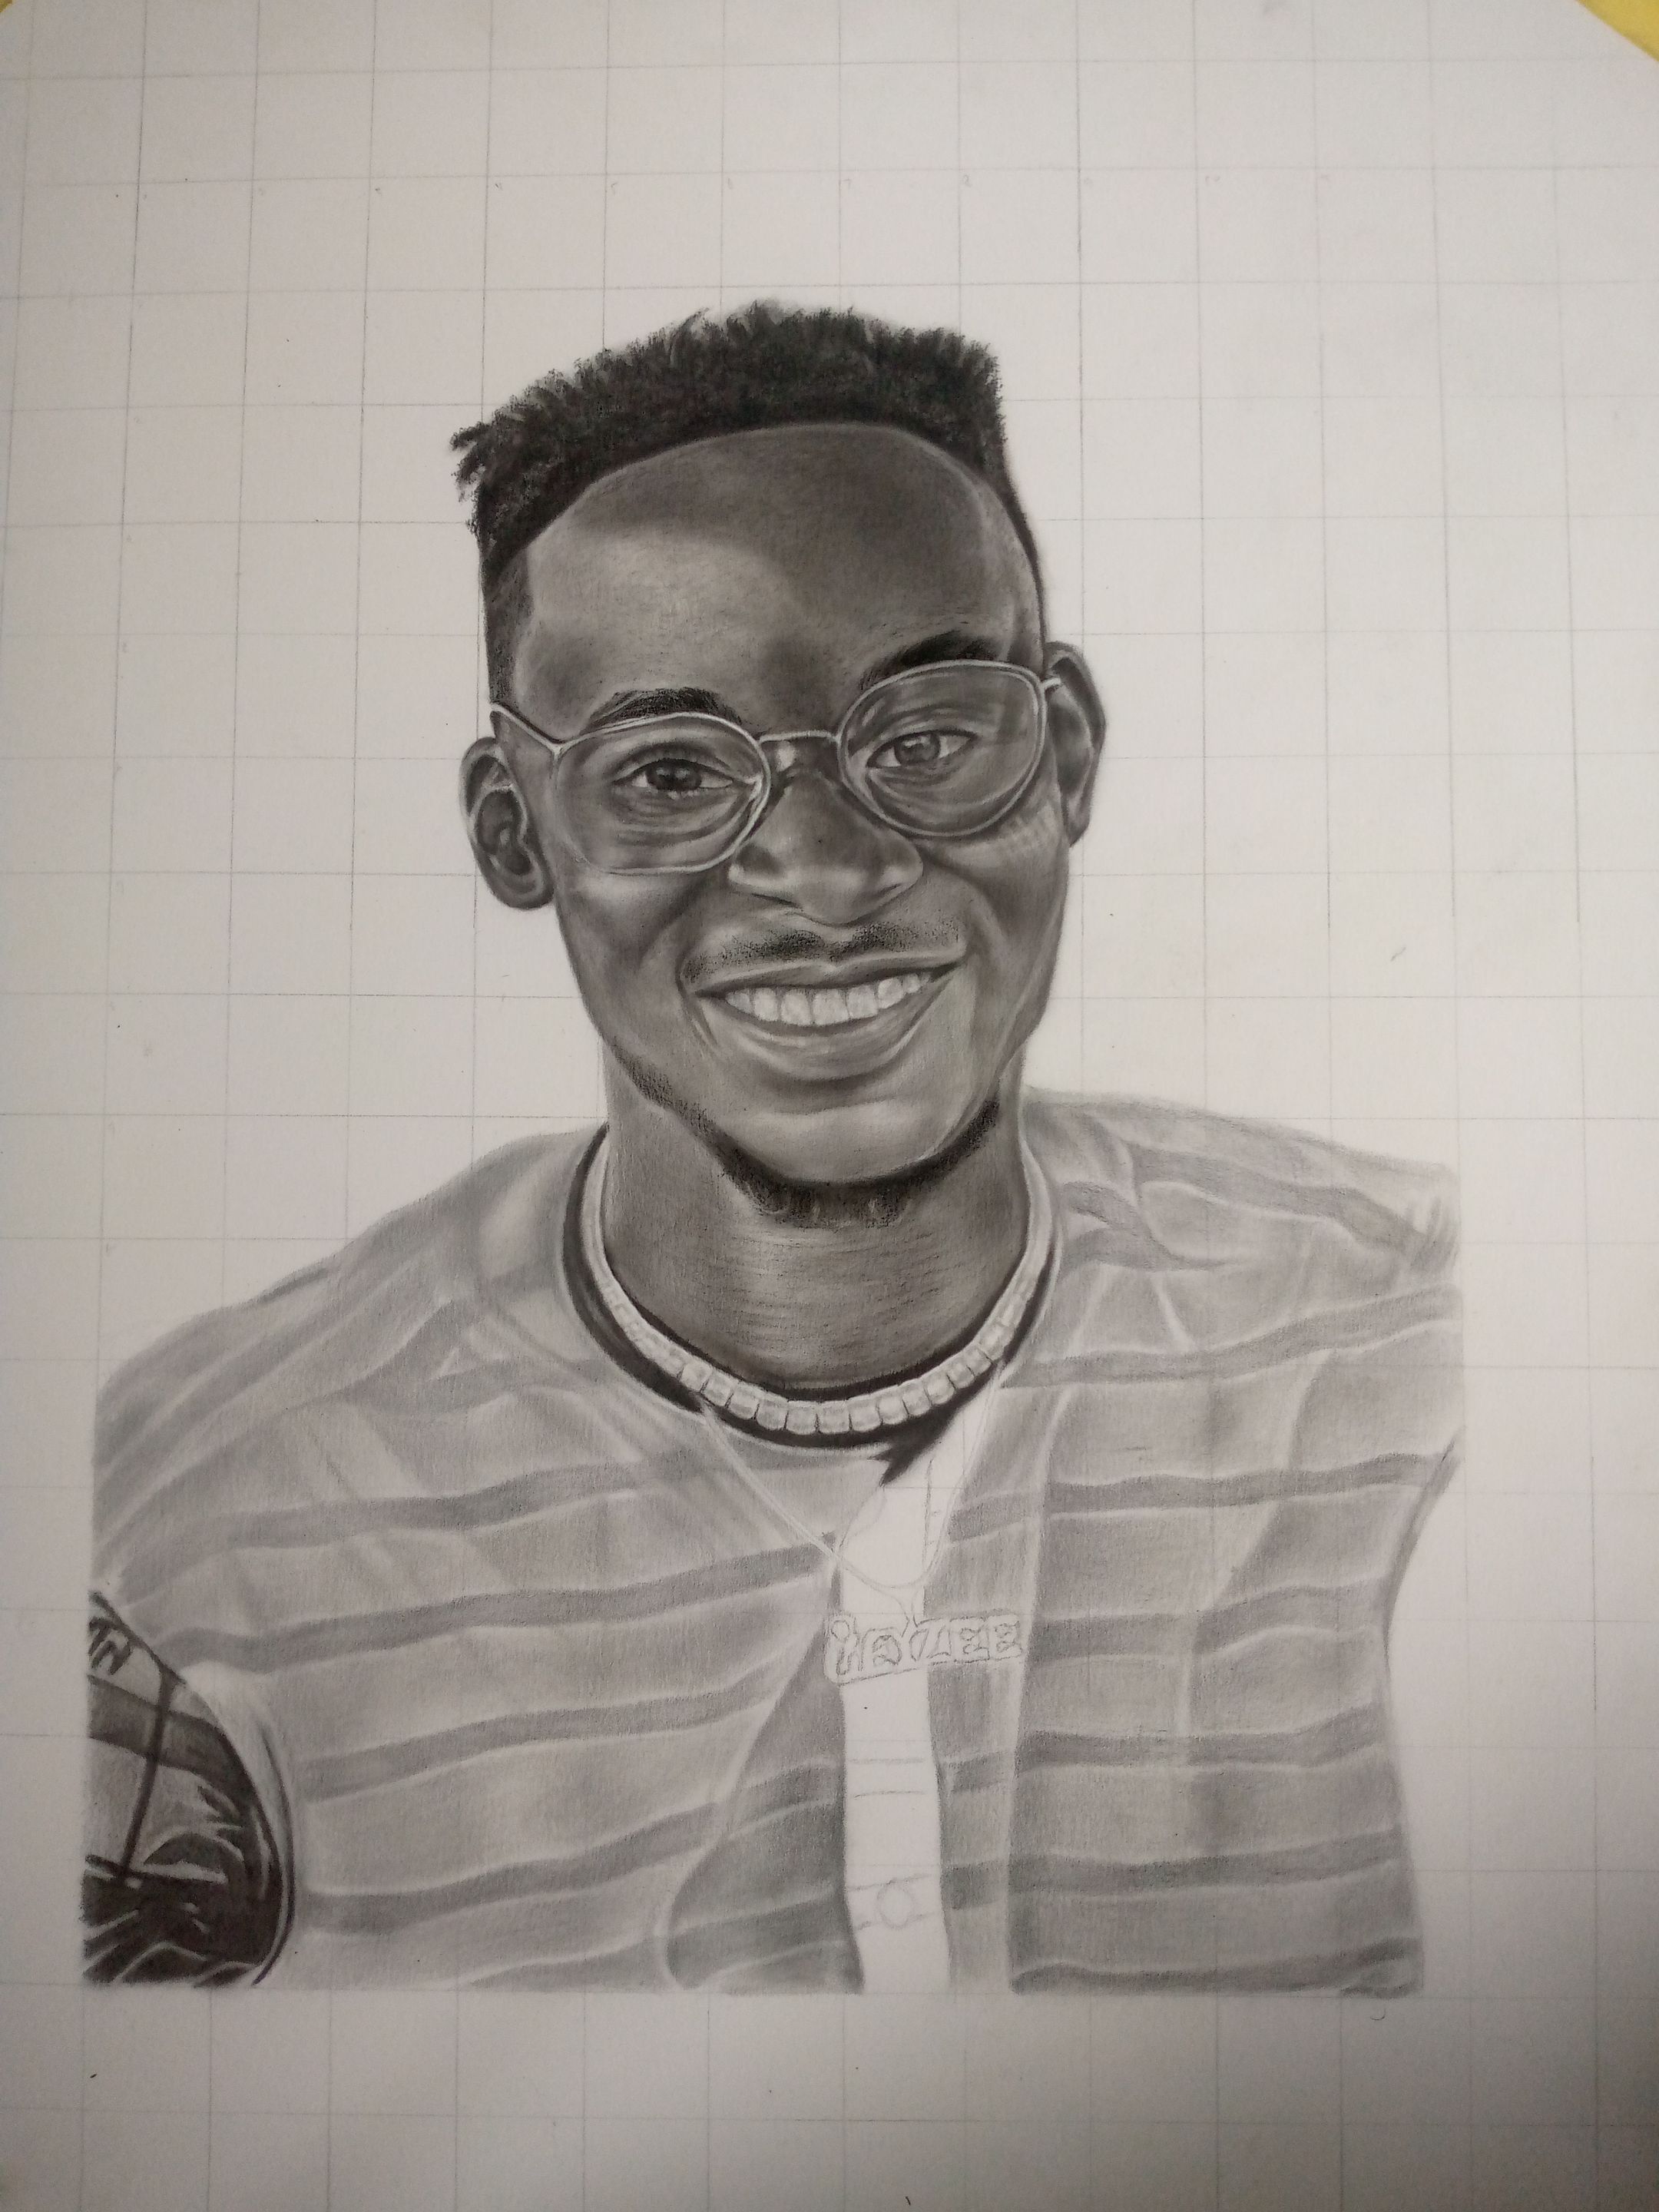
On this piece, I focused on his lenses cos normally, I'm scared of drawing references that got lenses. There's something about getting the right lens proportions and moderate shade value and highlights that gives me cold feet. But I had to do the work on this one and I go so intentional about it that I spent 4 hours on the lens sections alone.
Below are my work in progress pictures.
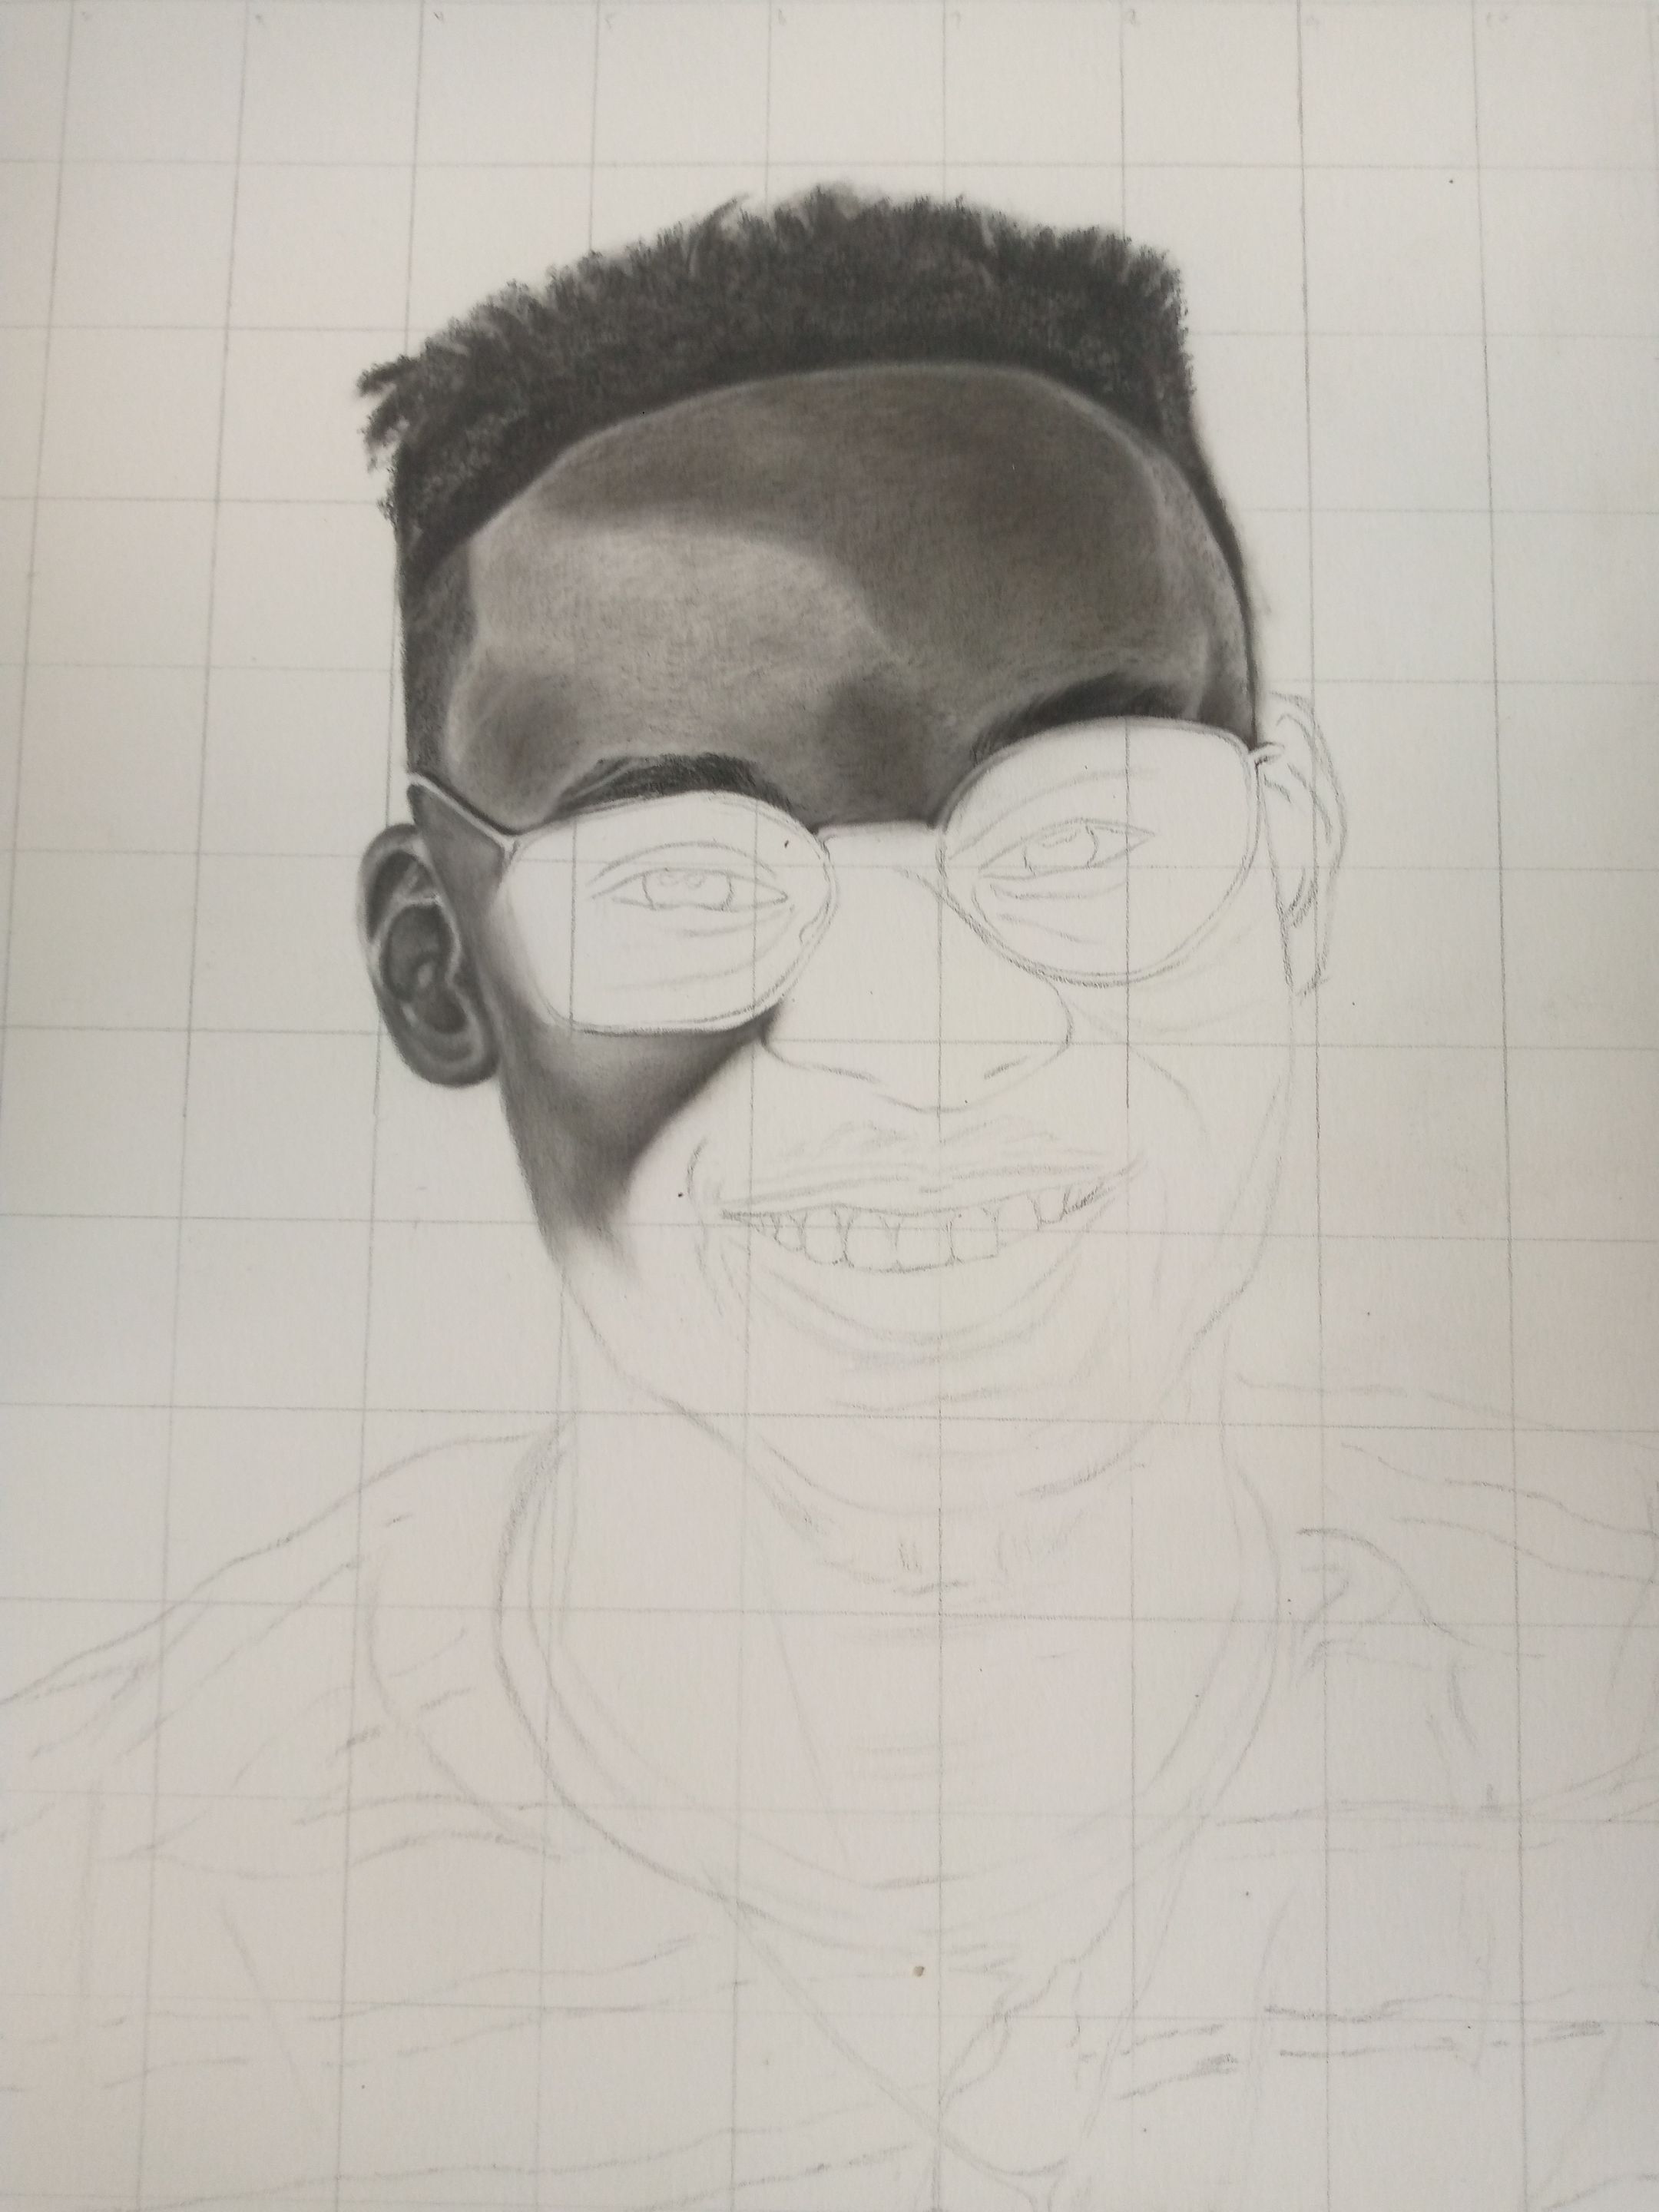
Once again, I started the piece and got carried away that I forgot to take a pic of my grid and sketch. I'll make a post on grid and sketches soon for those that have difficulties with making accurate sketches with free hand.
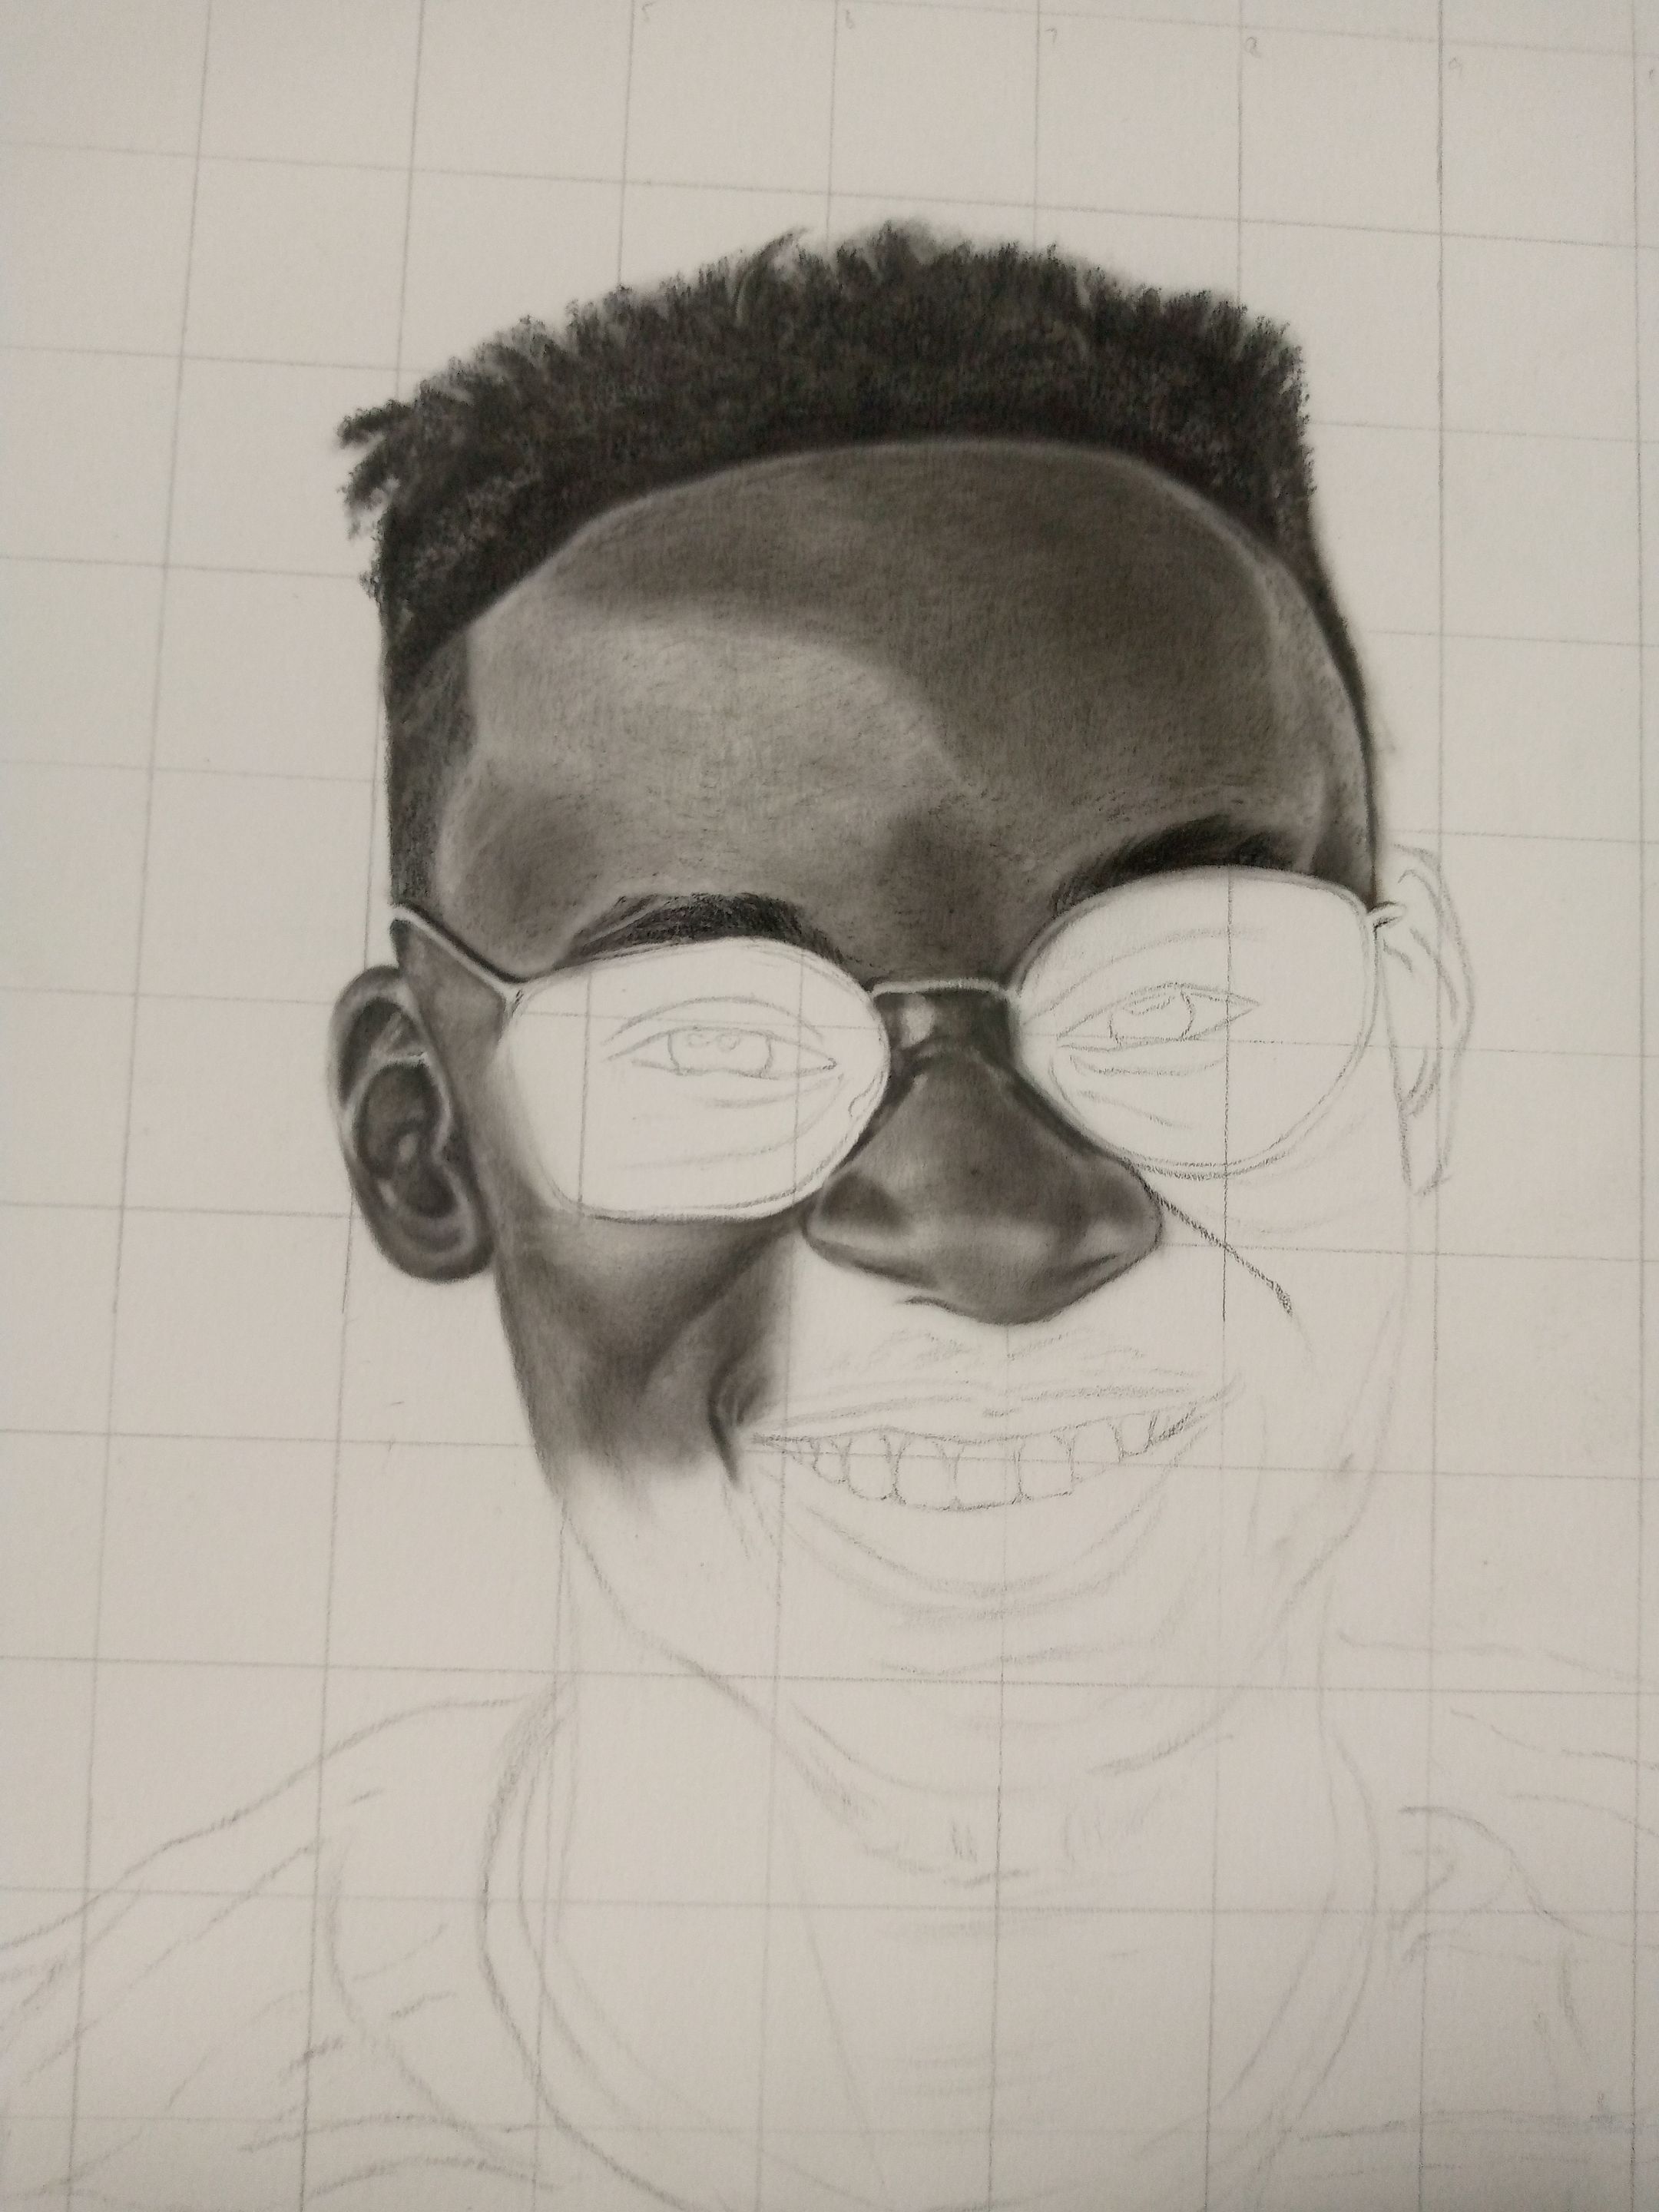
I like what I did with the hair, It was a simple technique which I had to refine, I was inspired in my dream and I had to try it on my next drawing and this happened to be that drawing.
shade a layer with Hb pencil or 4b pencil, then scribble according to the hair pattern and blend with a brush, repeat this step based on how dark and full you wan the hair to be, then you can finish it up by creating dots/ curves with an eraser to cause so contrast( makes it look real).
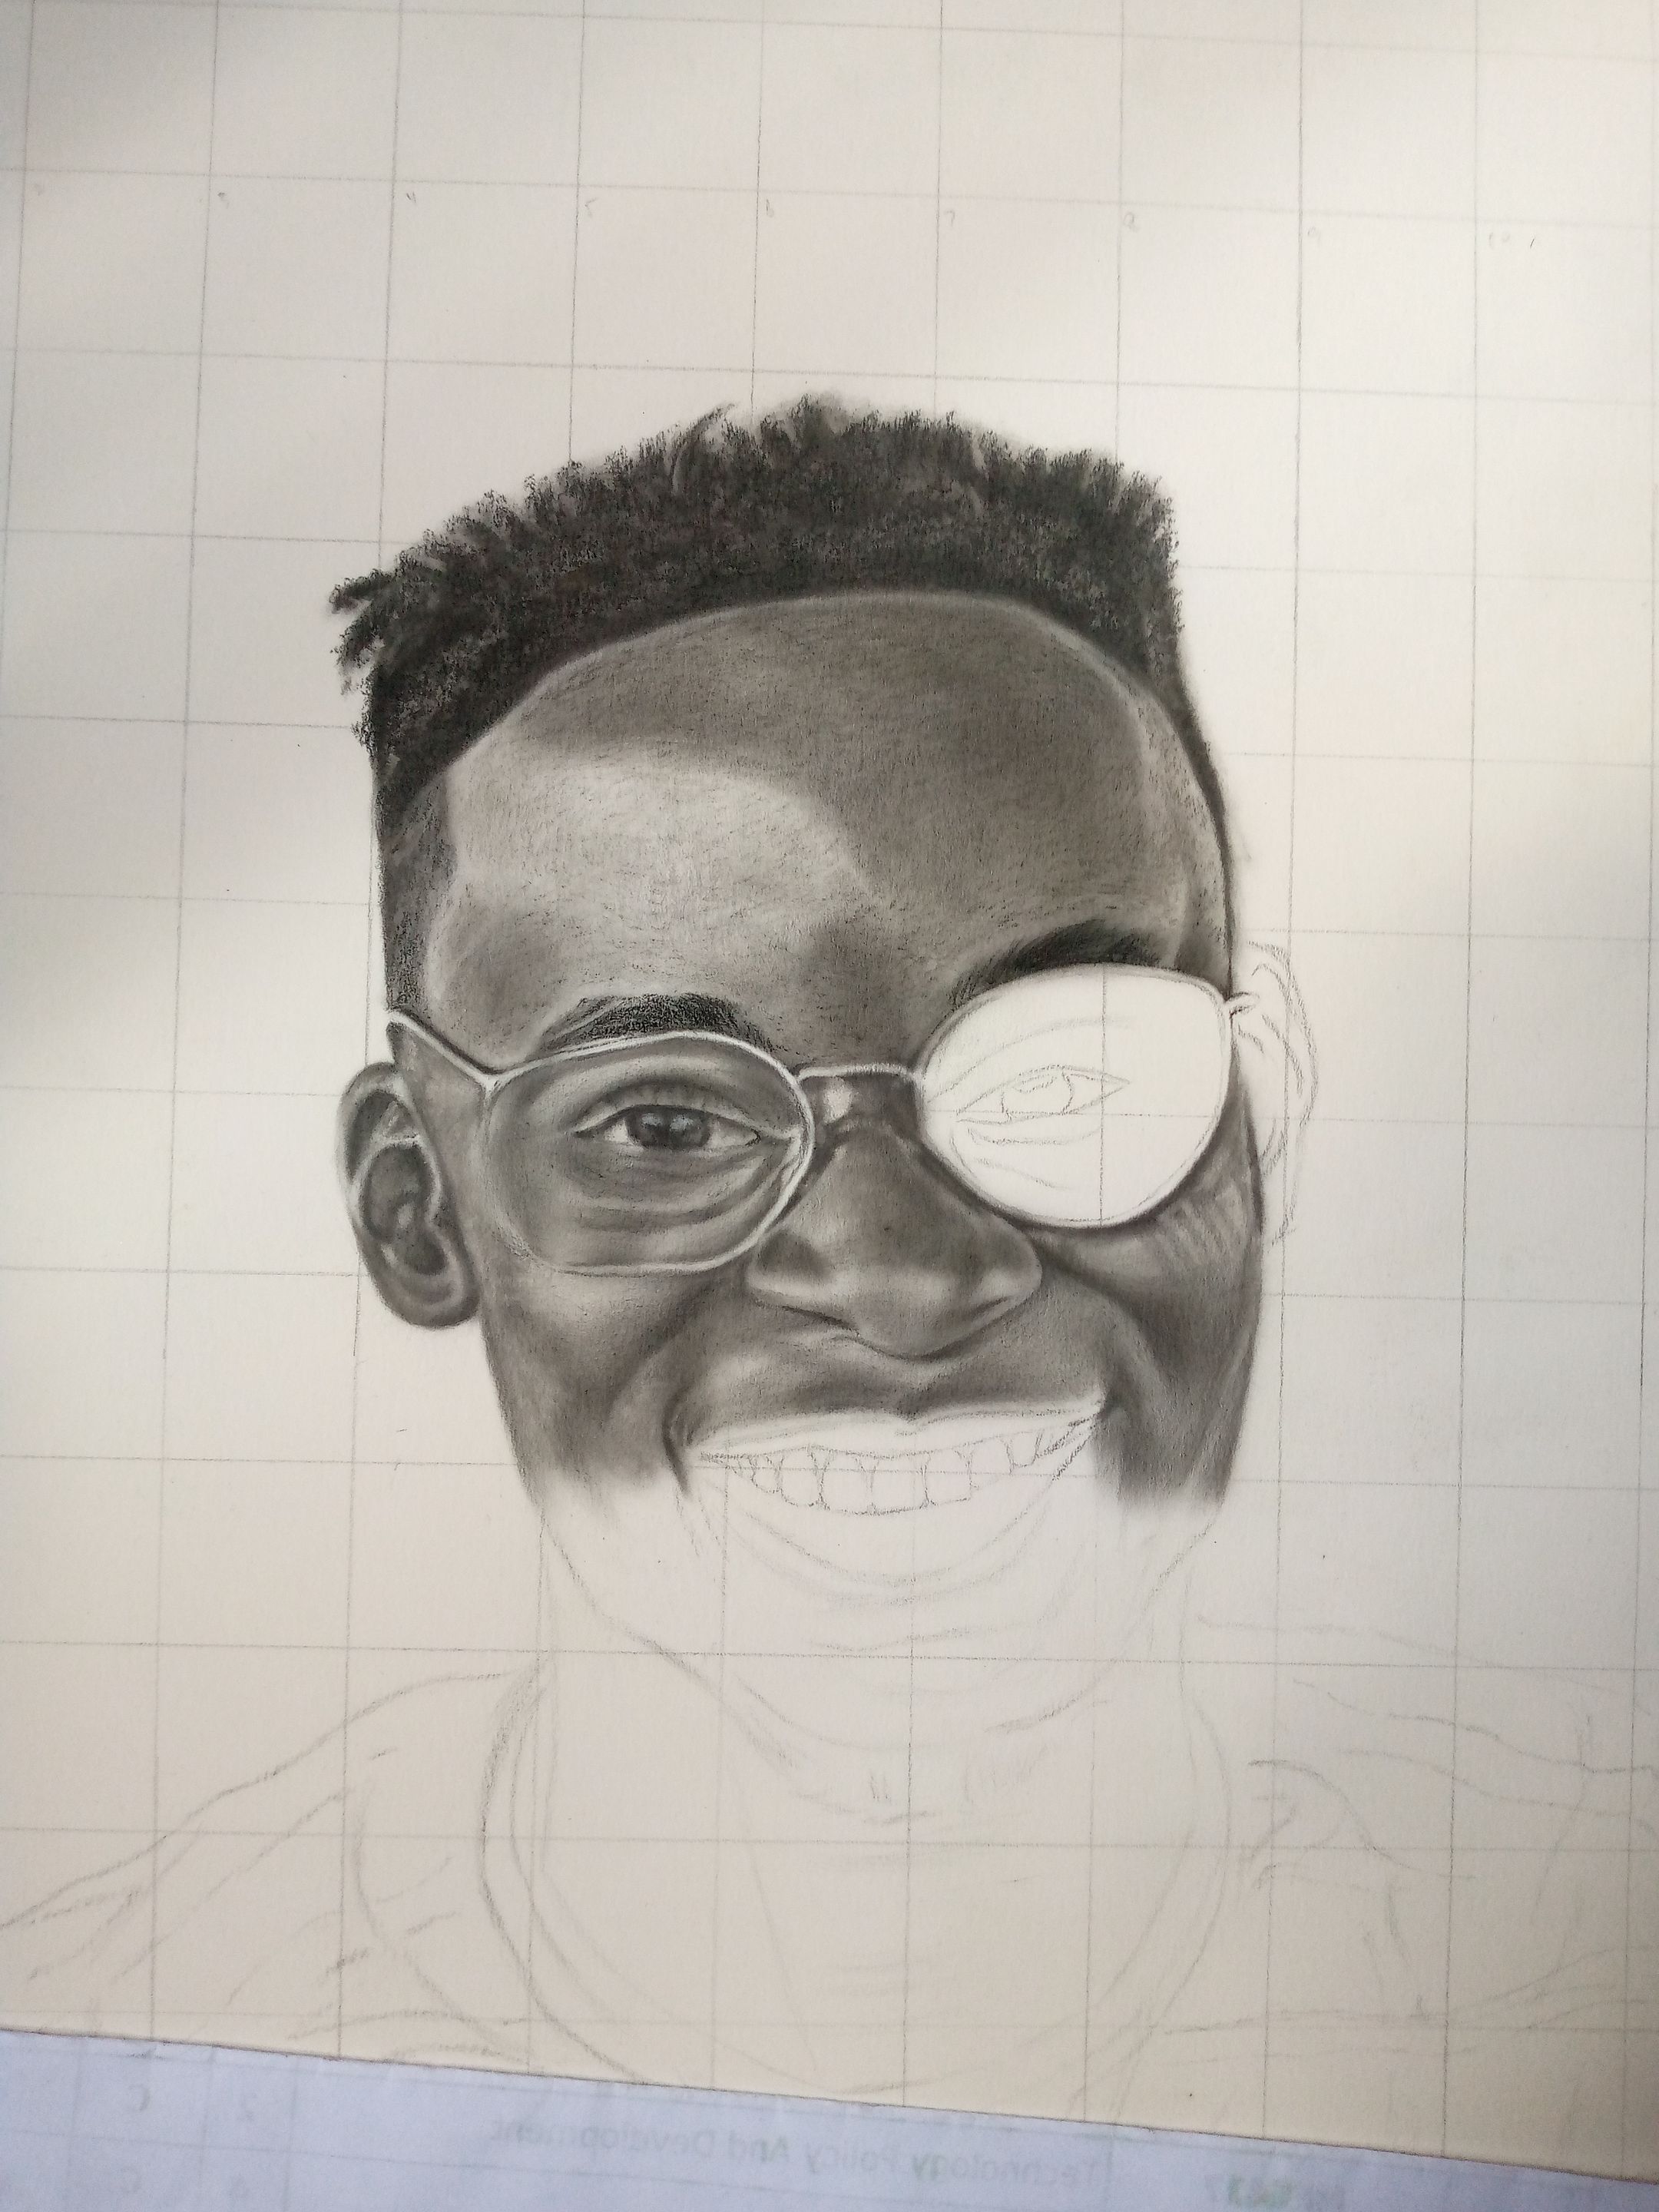
To my challenge( the lens sections), I had to shade with caution so I don't overlap on the frame of the lens cos it was white and I think that was a good think cos it made it easier for me to distinguish the skin from the skin underneath the lens. I used my blending stump to blend shades on the lens so I can replicate those blurry and reflective effects on the lens, finished it with my eraser on the highlights.
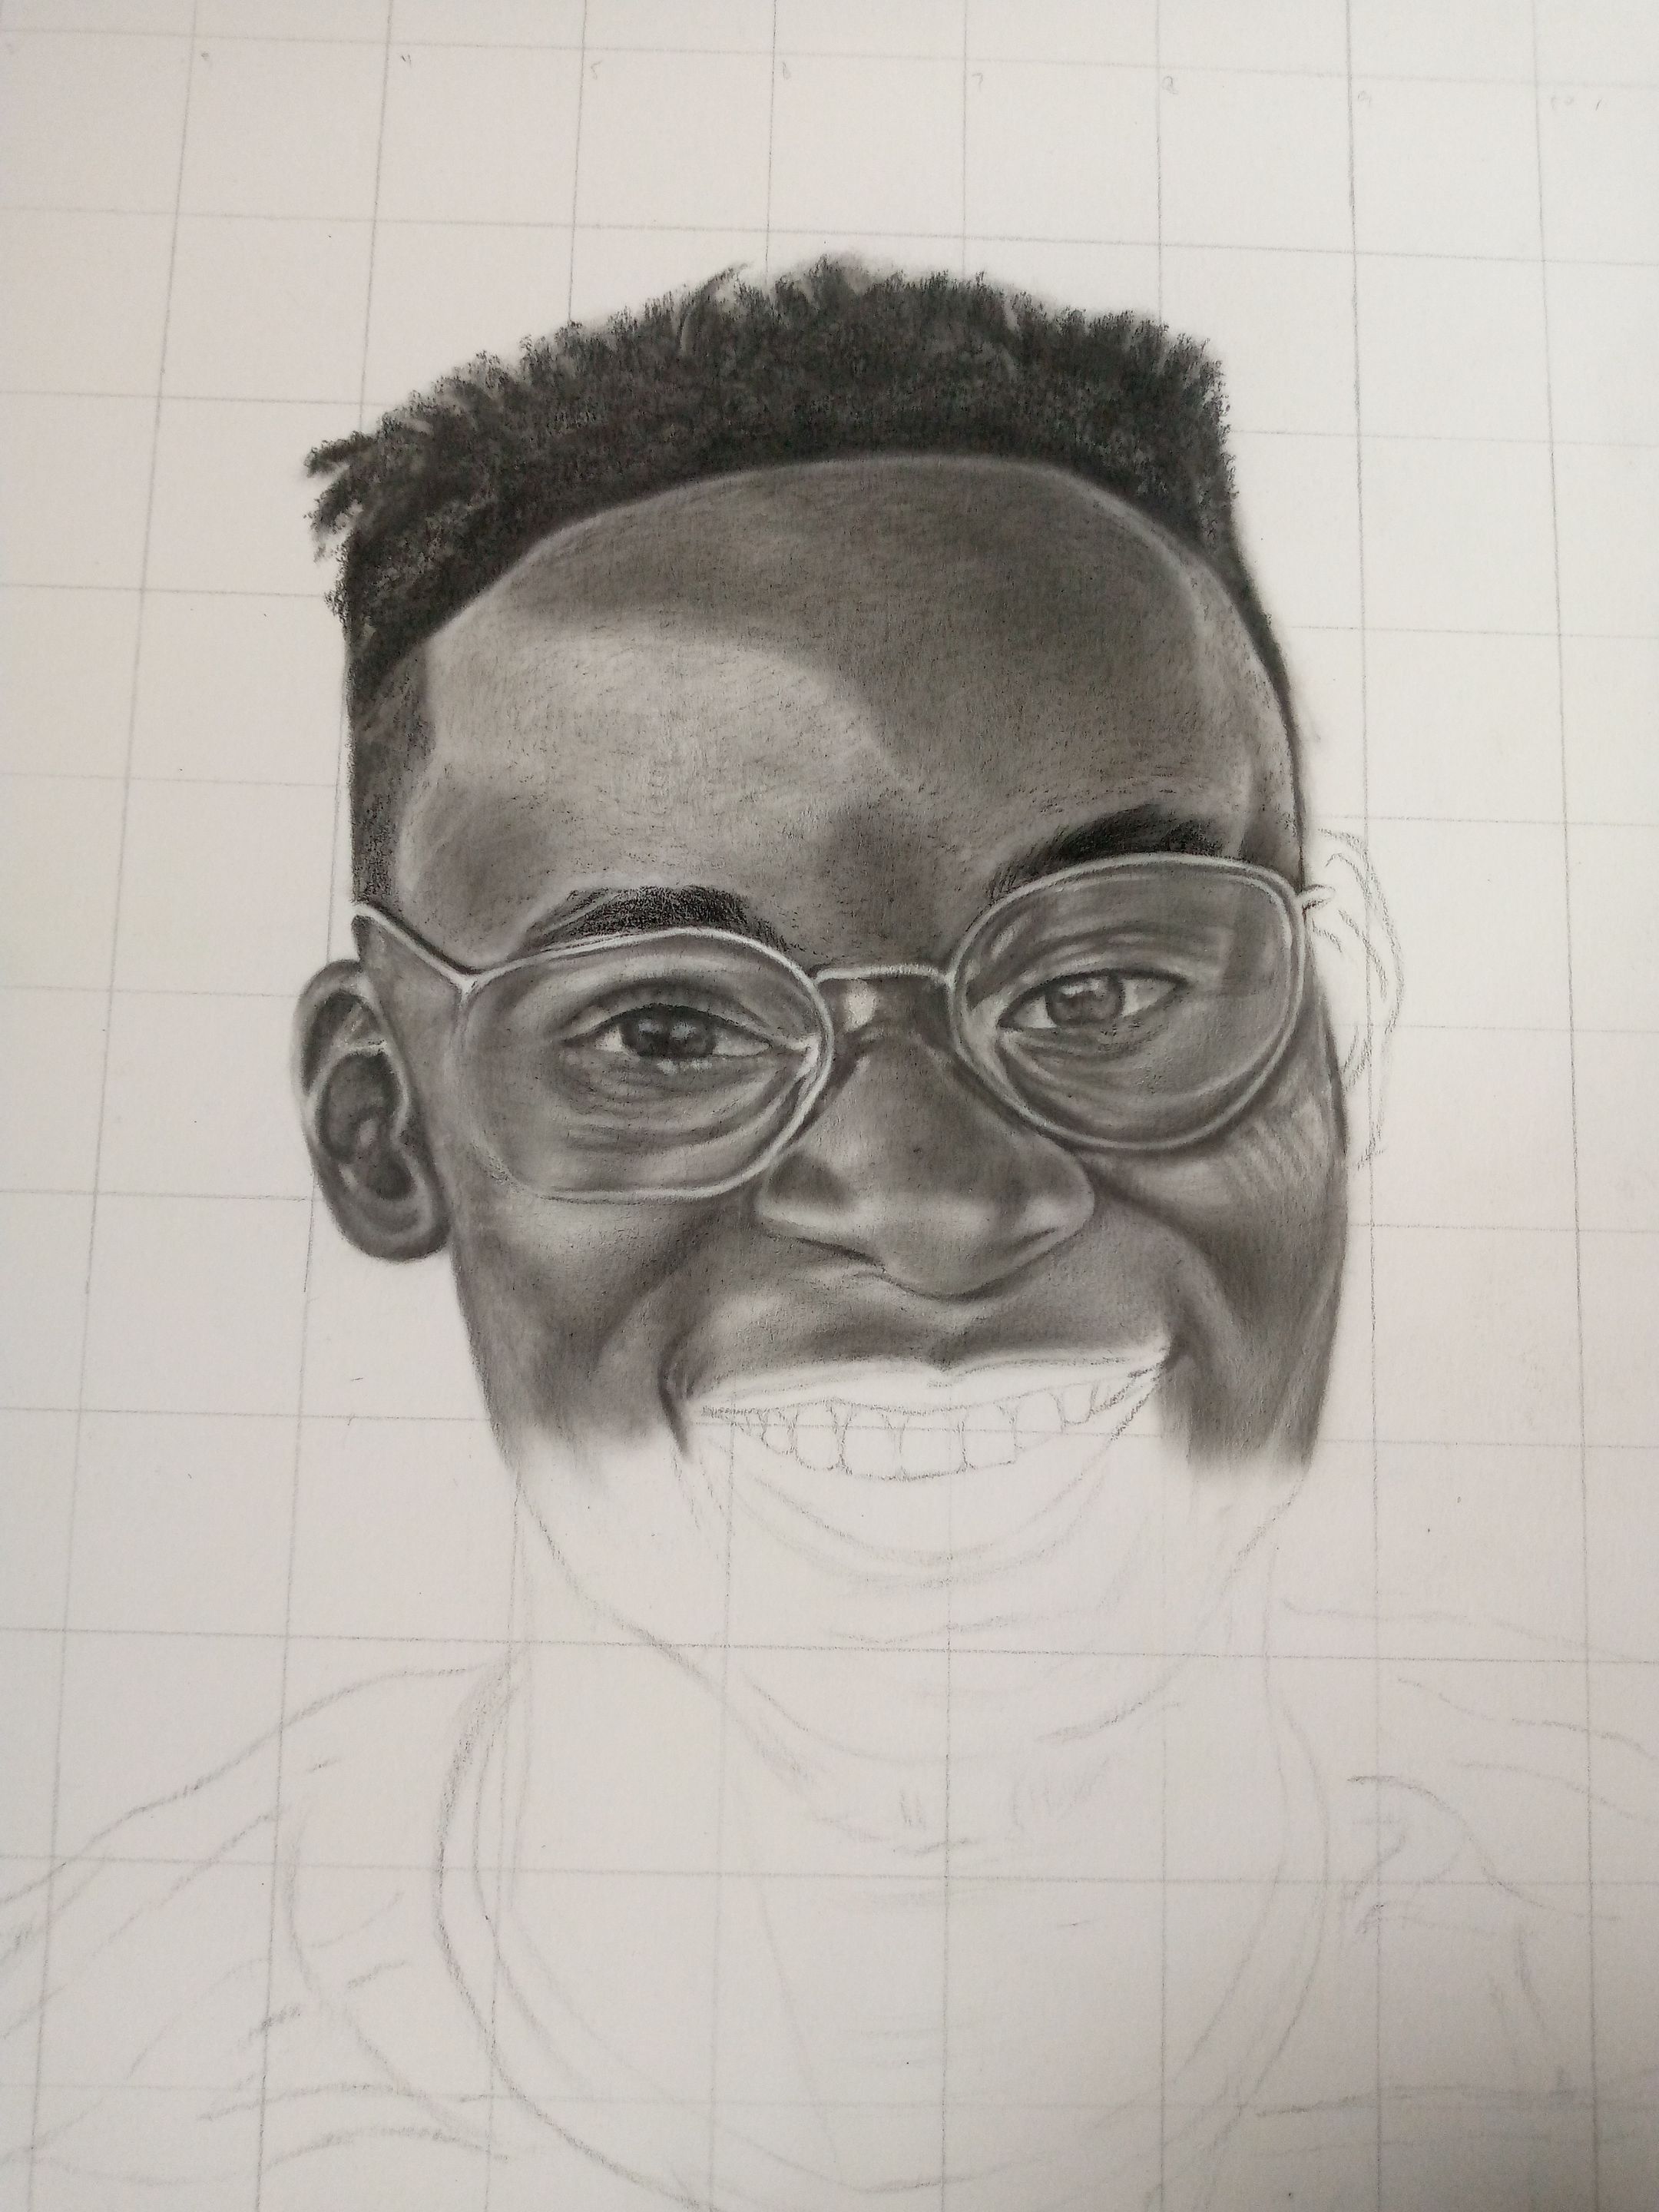
quick side note for me and you before I let you scroll through the rest of the piuctures with no further words from me; When you've got to shade the eyes( pupil, retina, cornea etc) don't be scared of blending the darker parts into the lighter parts, that's why you've got your eraser, based on how dark it, you have to shade layer after layer, so yeah, you'll get the lighter parts dented but you can correct that when finishing with your eraser.
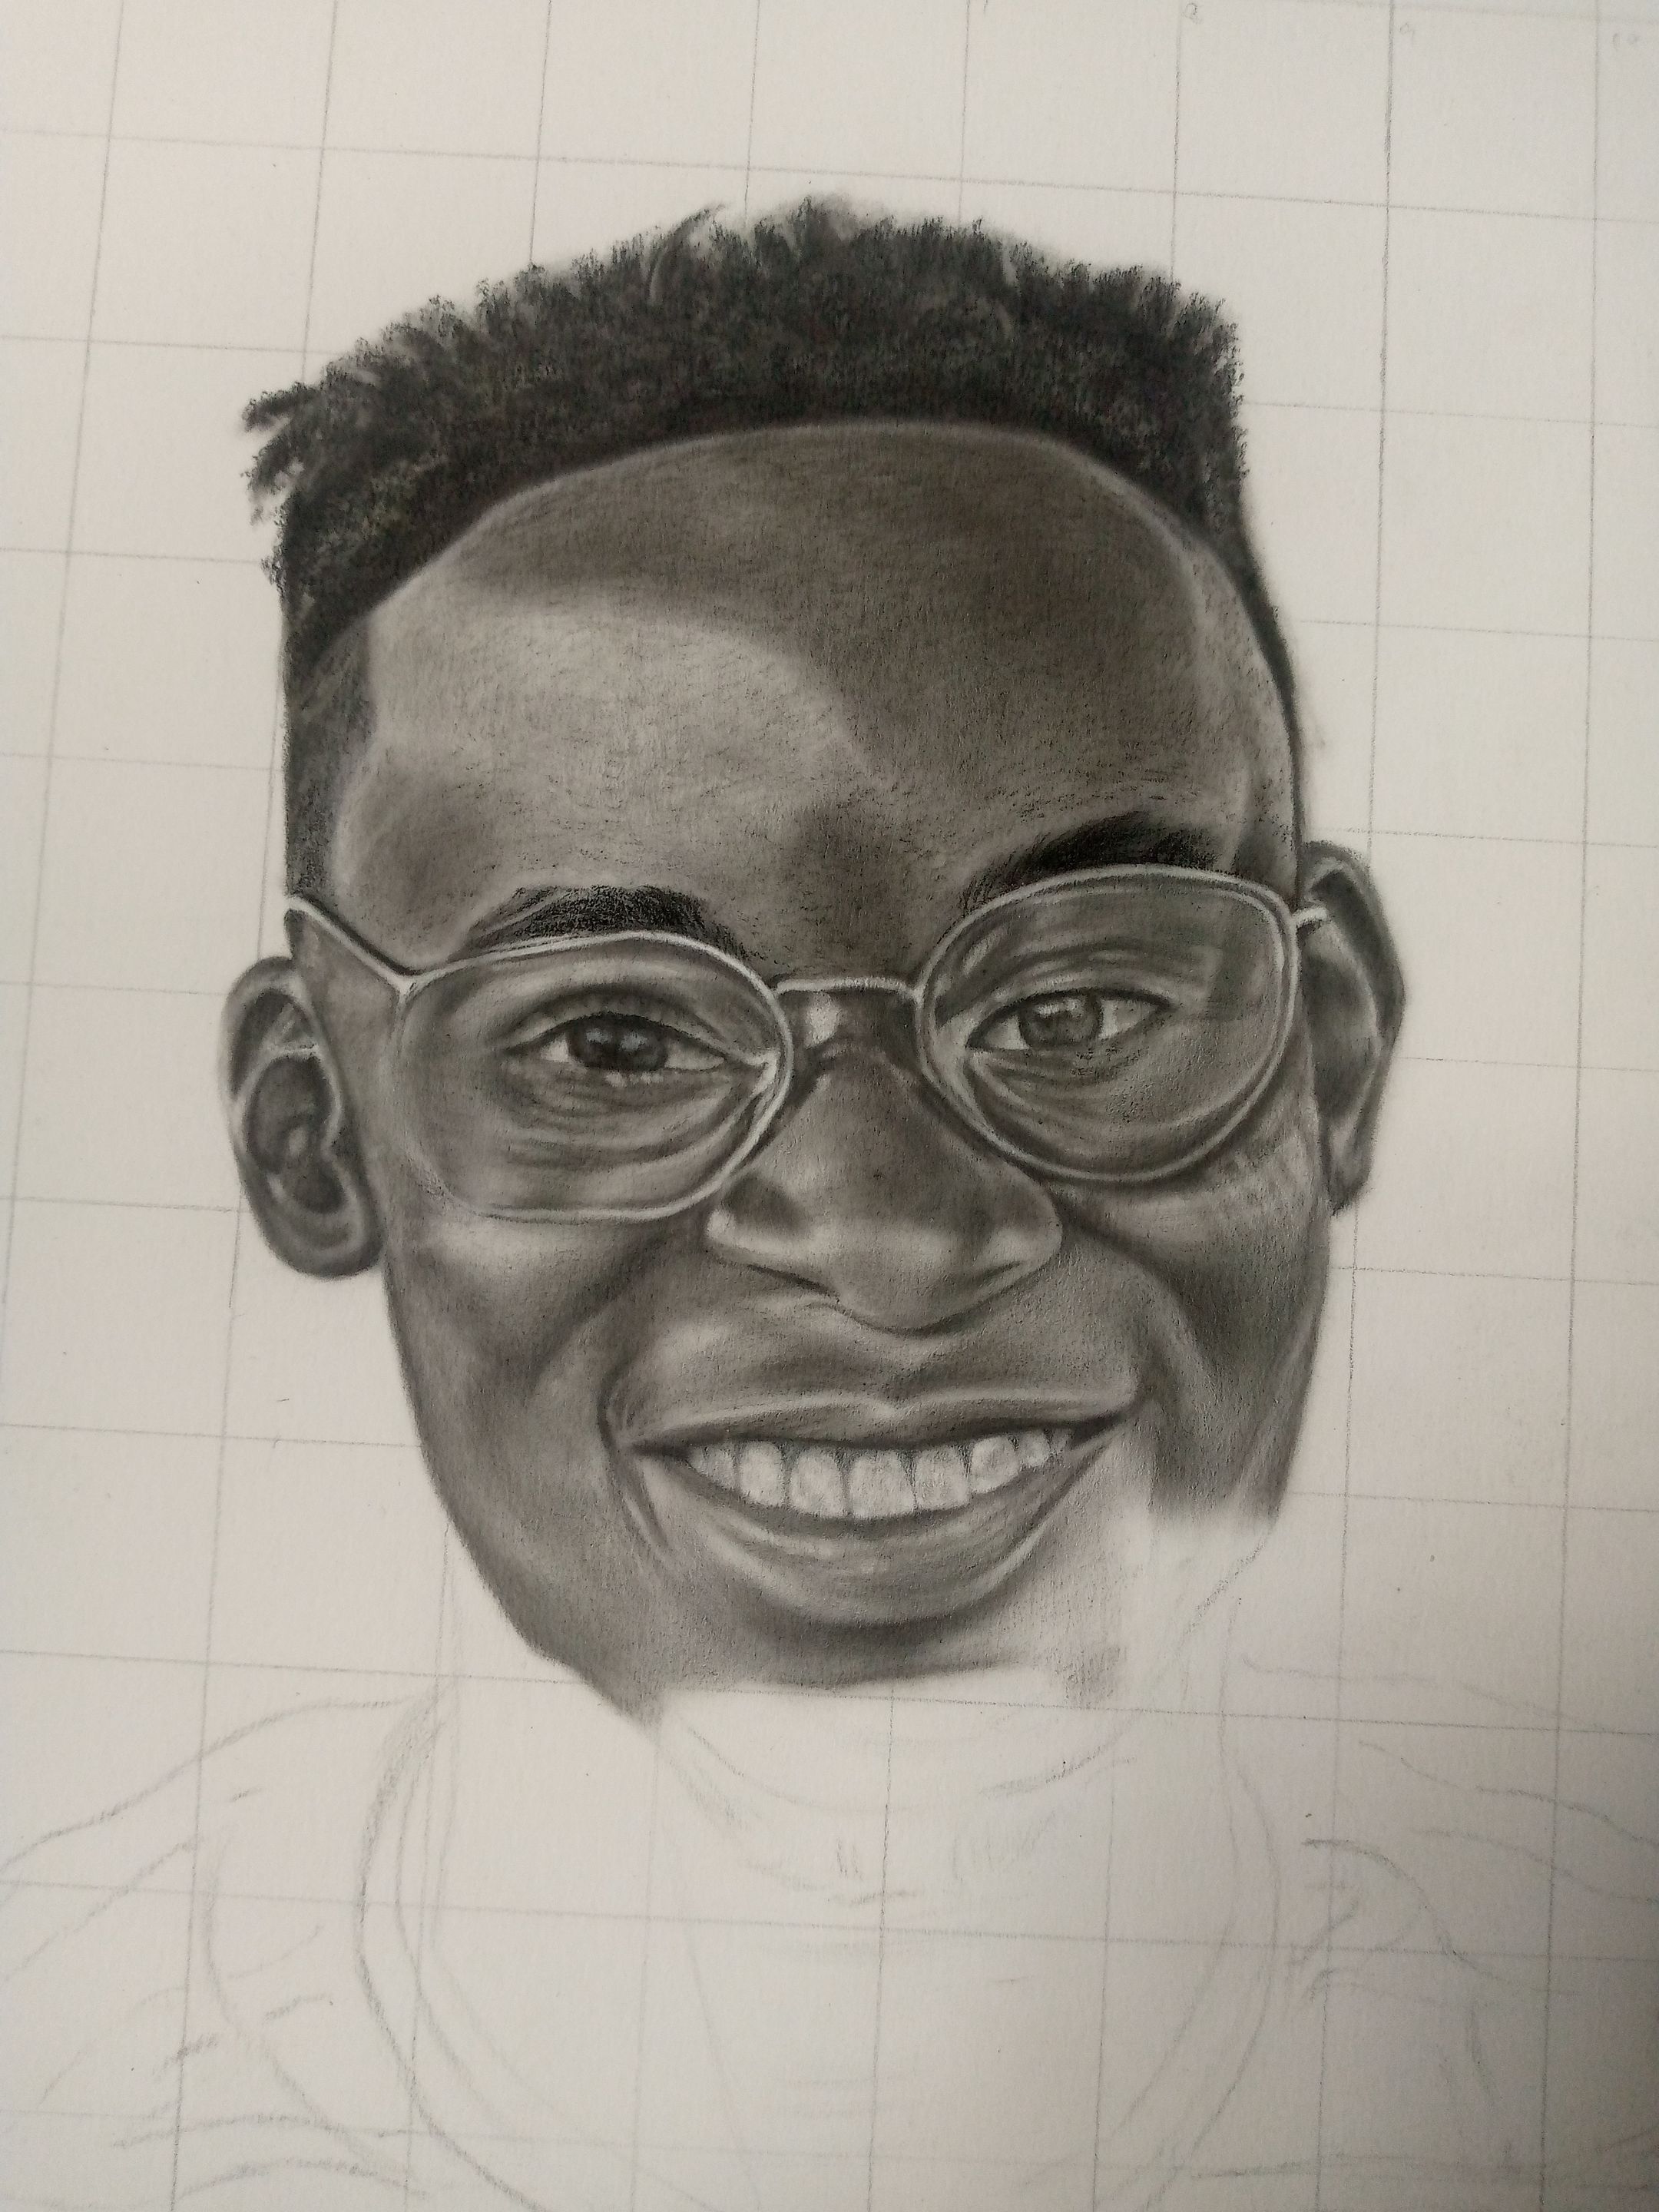
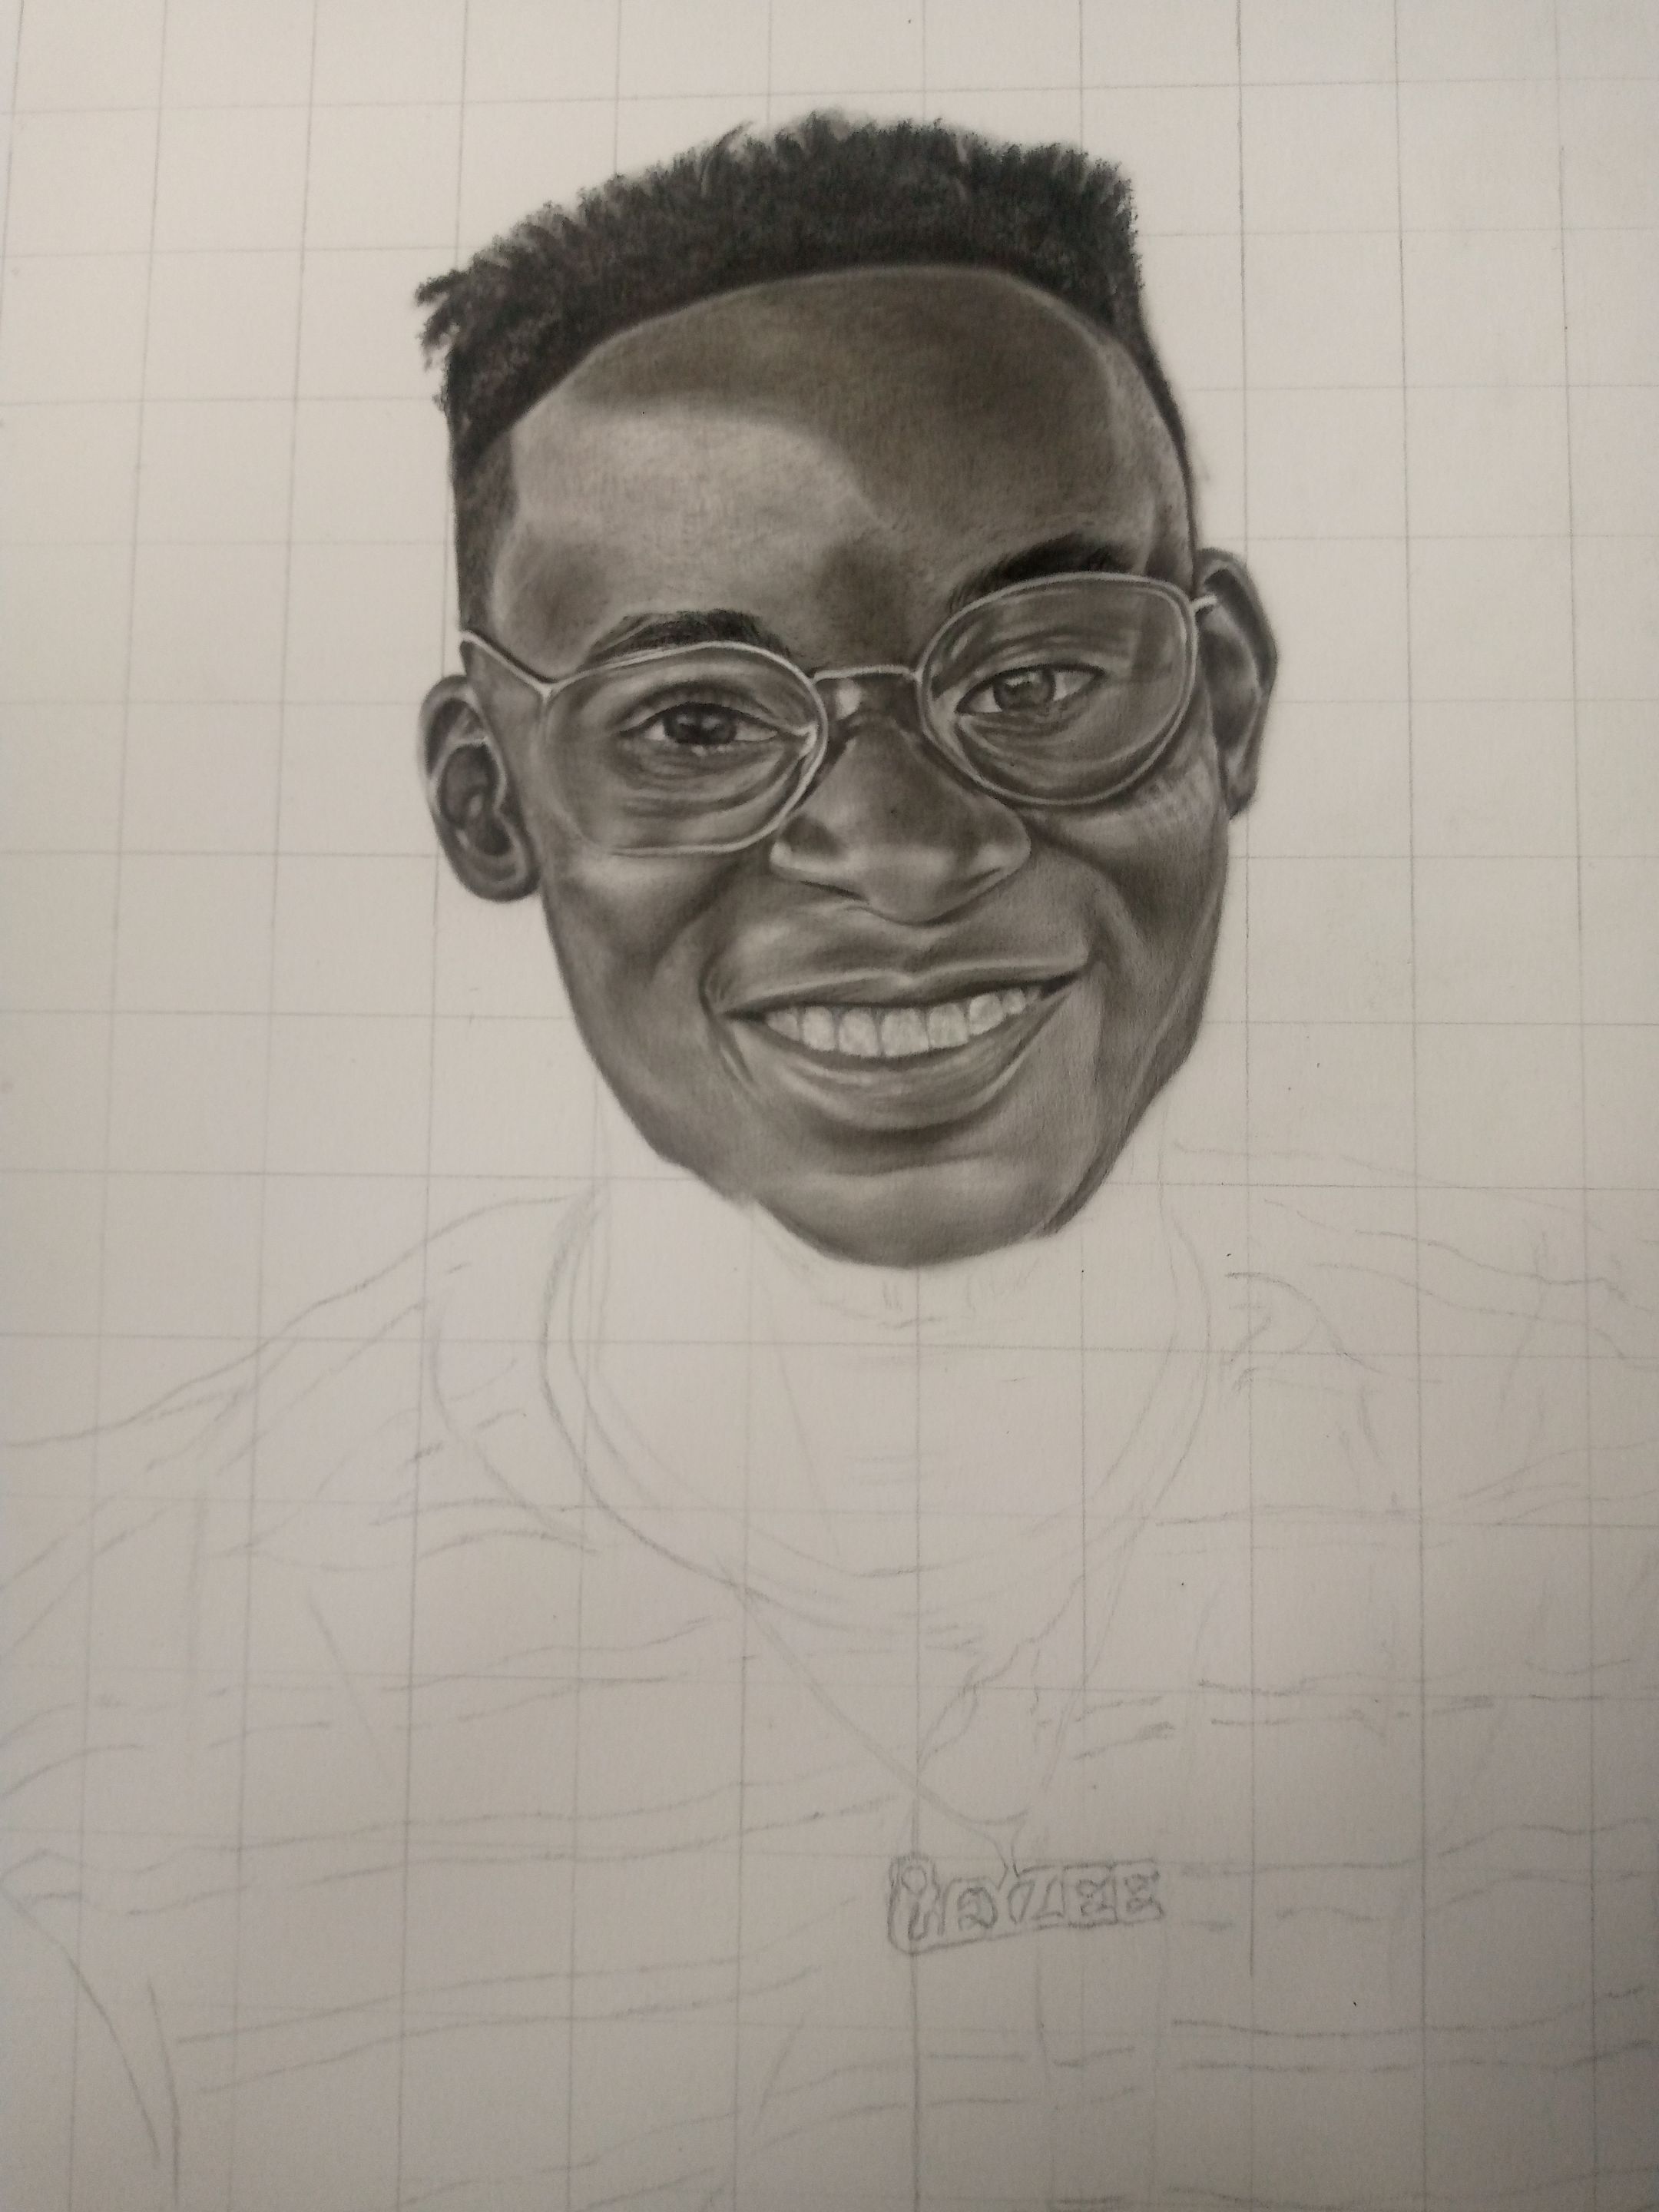
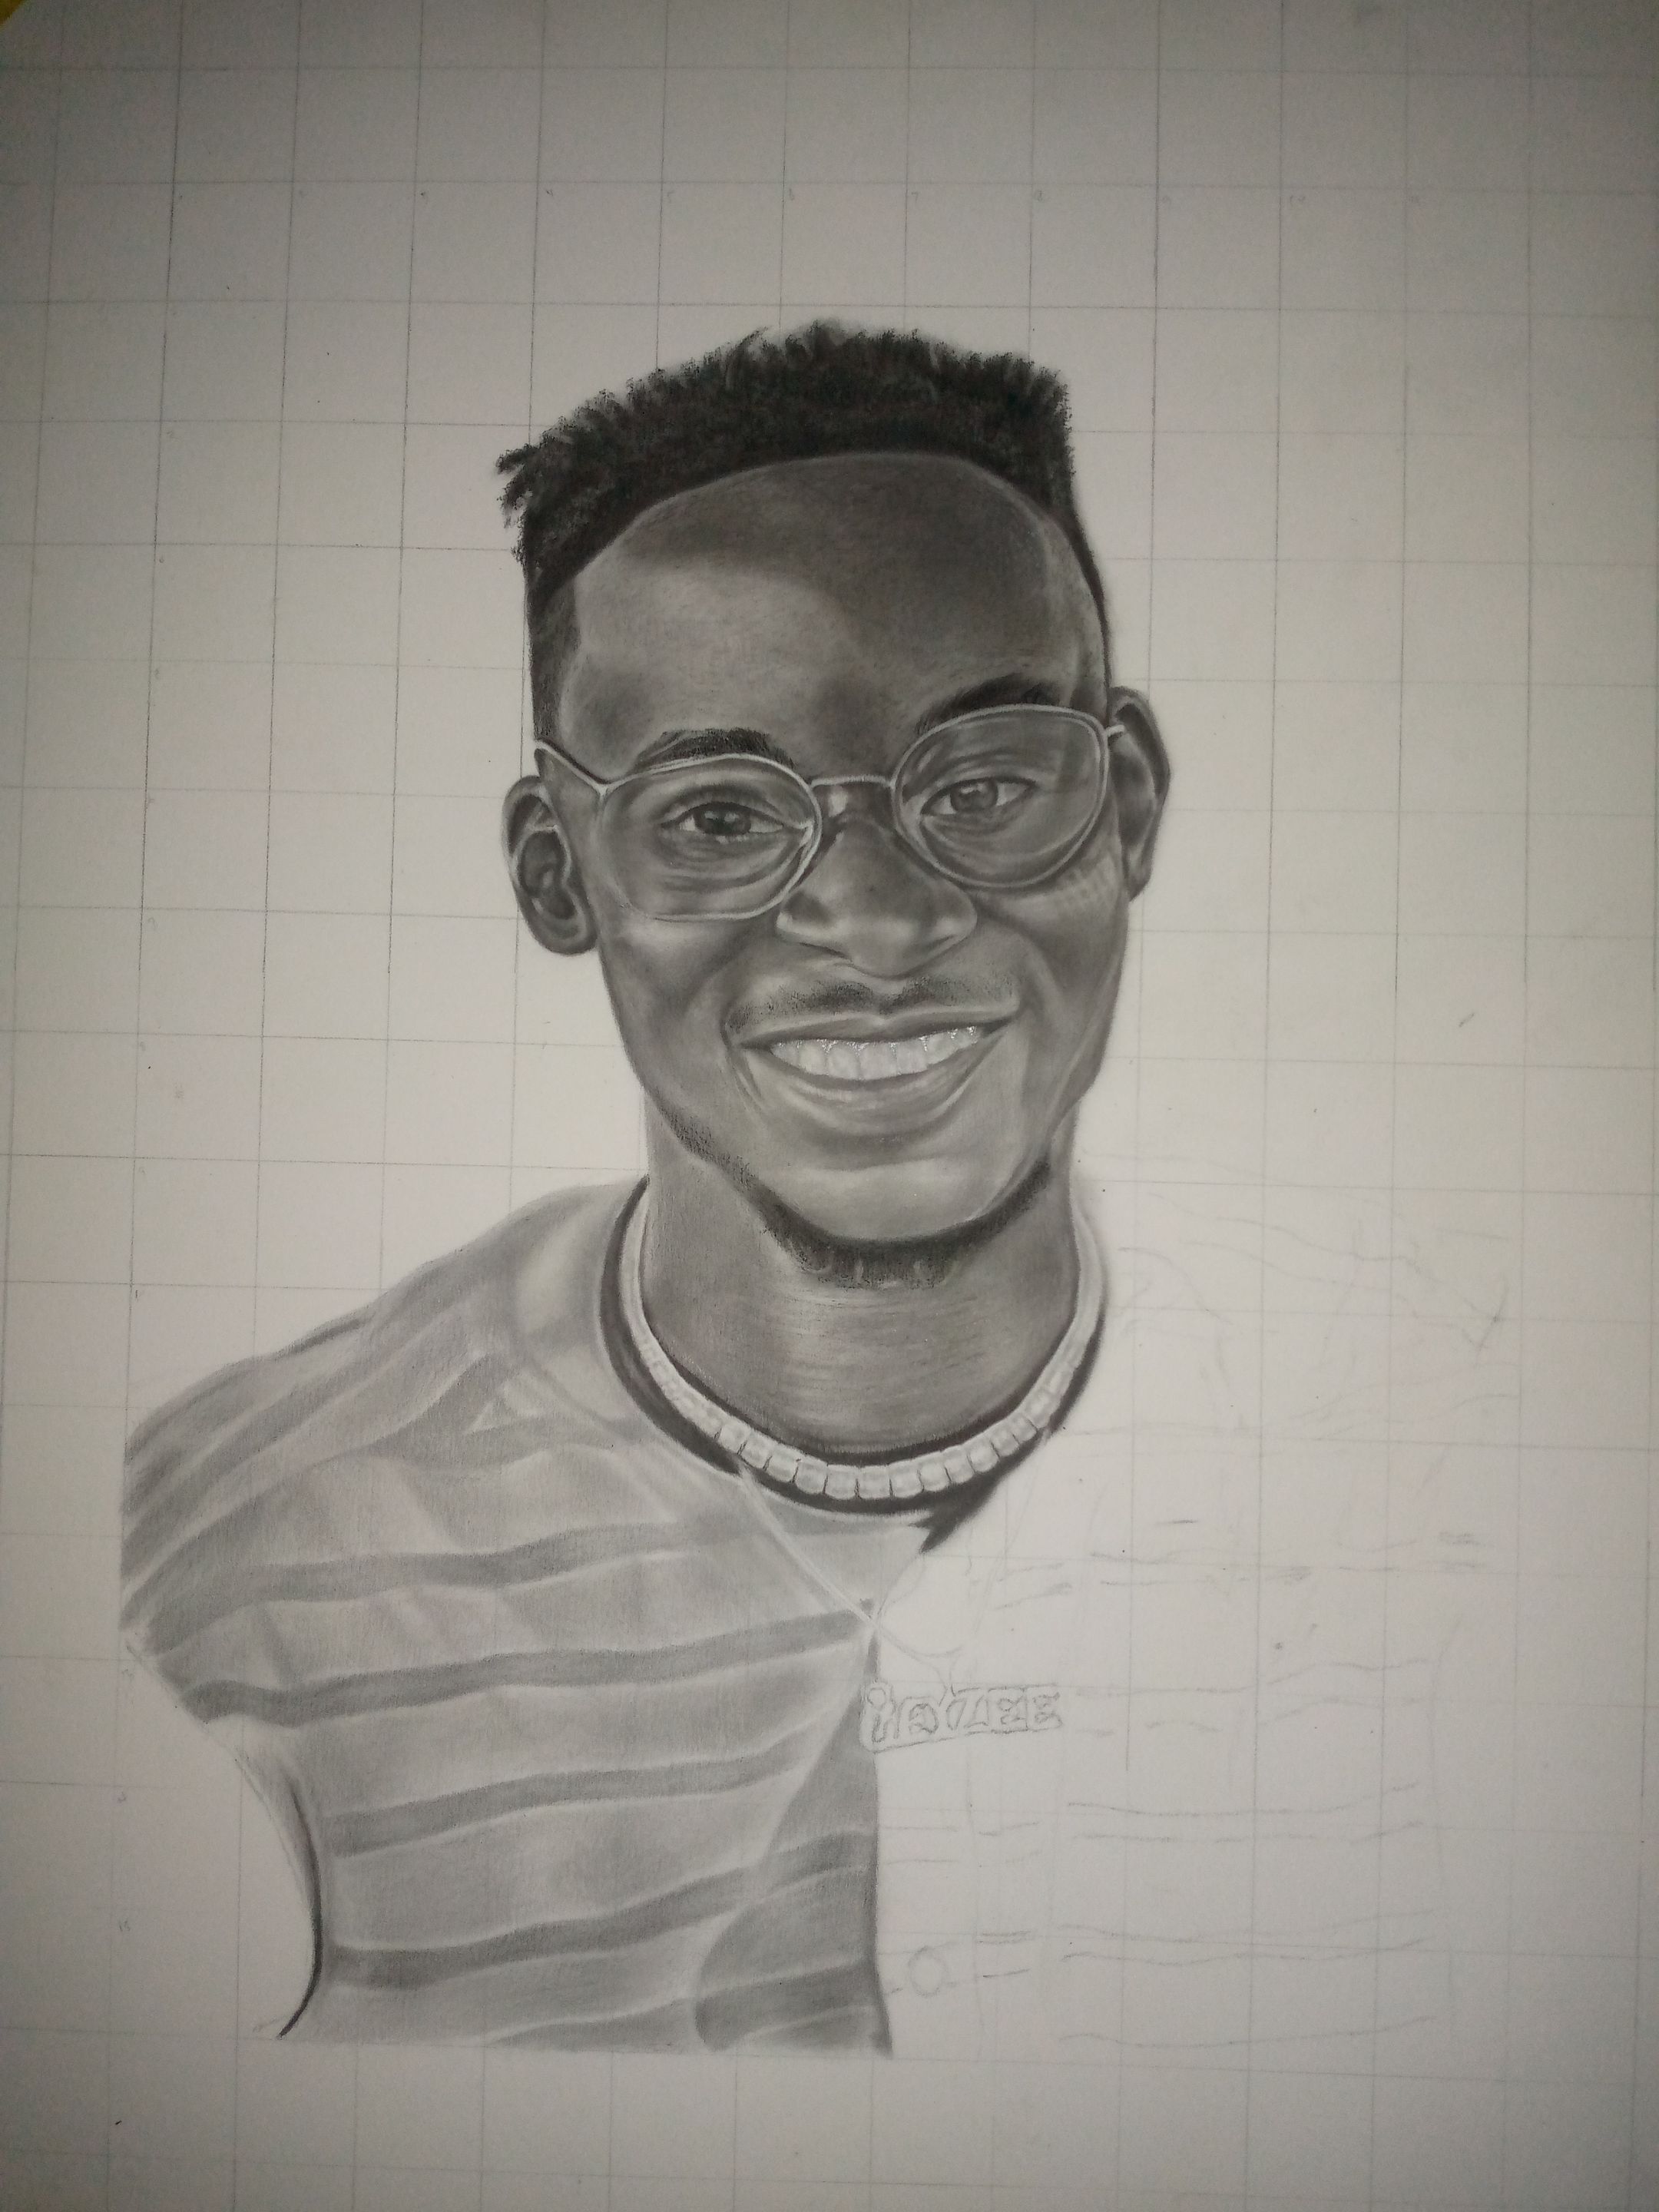
That would be all for now.
Thanks for viewing this post, I hope my tips were helpful.
Do well to leave a comment, like and reblog.