| Esp | Eng |
|---|---|
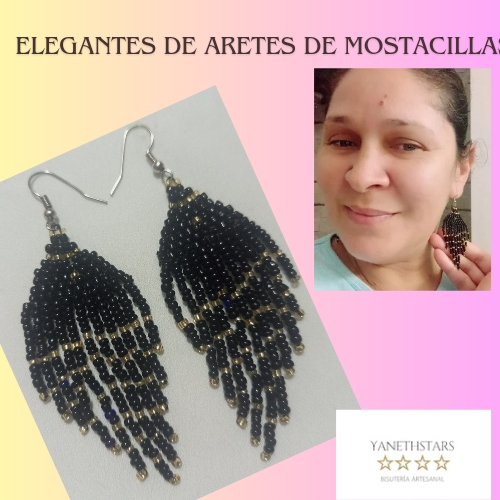
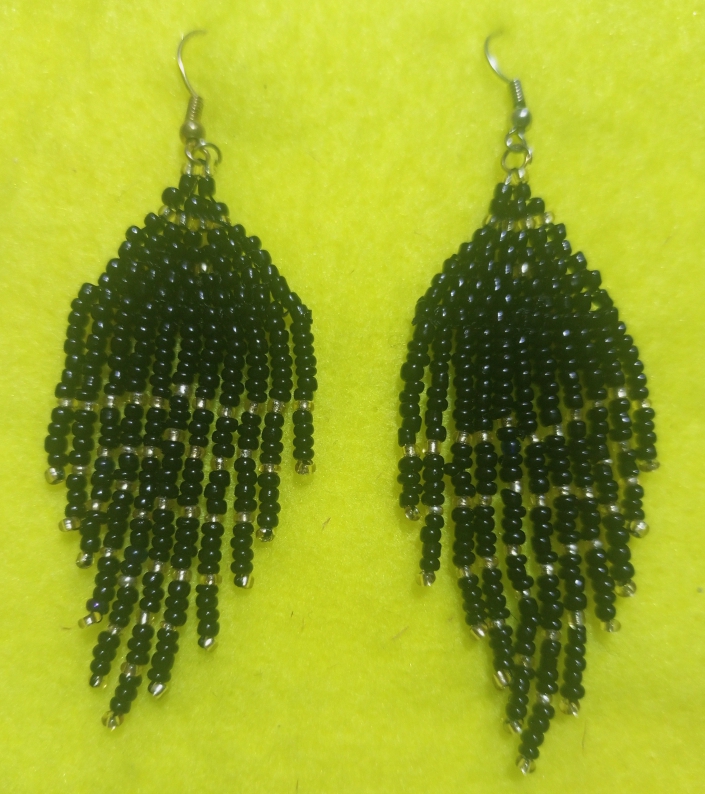
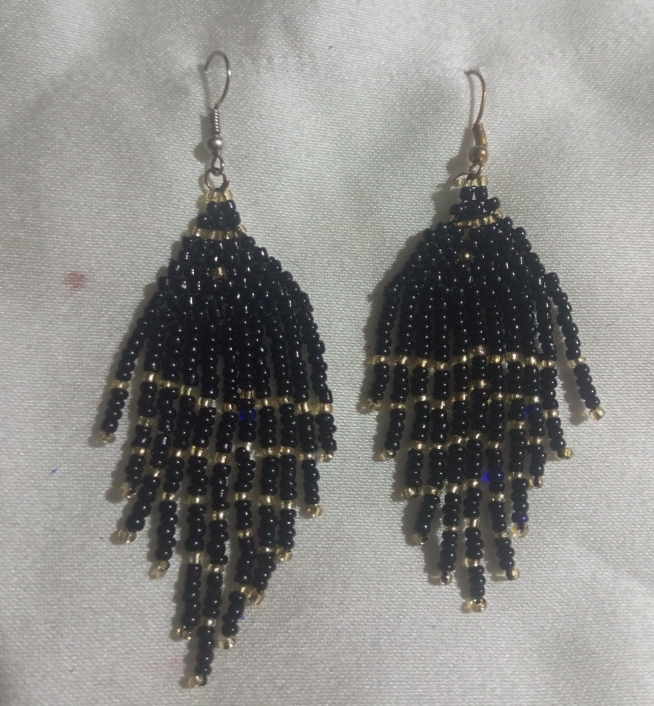
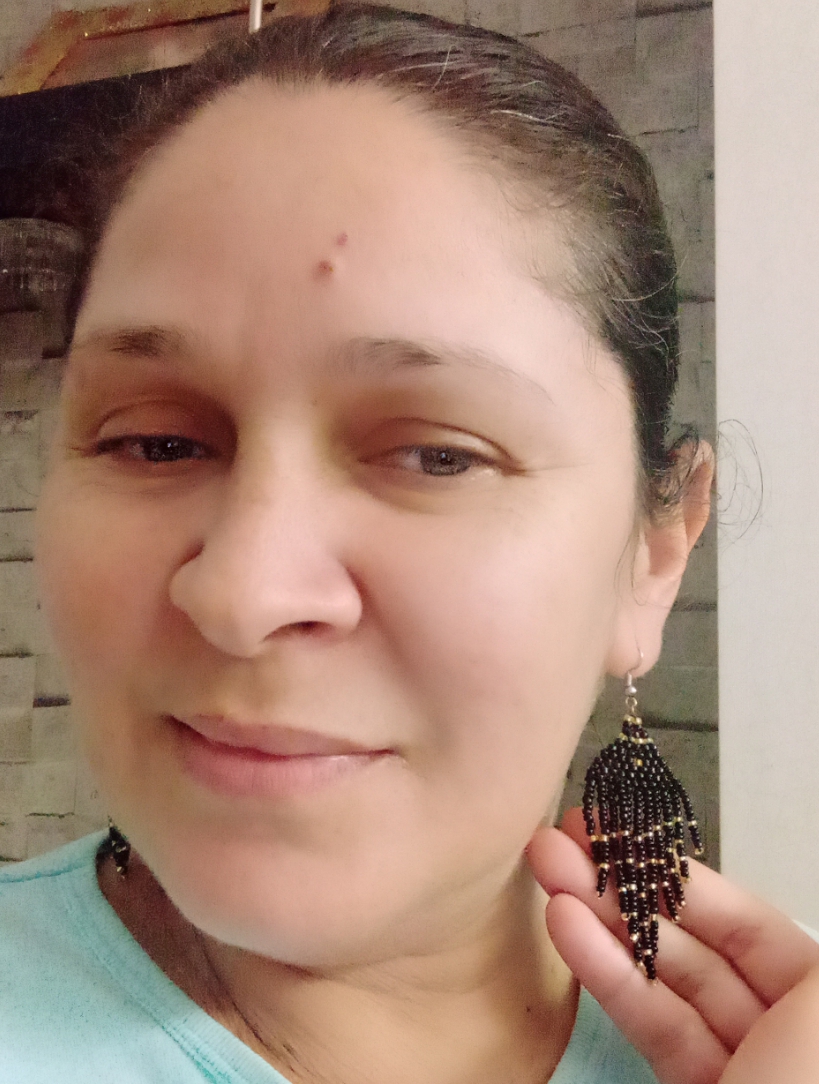
| Hola amigos creativos de @Jewelry, el día de hoy traigo para ustedes estos LINDOS Y ELEGANTES ARETES CASCADAS DE MOSTACILLAS. Estos elegantes aretes son hechos en la TÉCNICA PEYOTE, a mí me dan la ilusión de plumas negras, son muy fáciles de hacer y pocos colores de mostacillas negras y plateadas, el resultado es sofisticado y elegantes, para usarlos en cualquier ocasión. Un trabajo sencillo con un resultado fabuloso y elegante. A continuación la lista de materiales y procedimientos para elaborar estos hermosos aretes, espero les guste y disfruten mi post. | Hello creative friends of @Jewelry, today I bring for you these NICE AND ELEGANT MOSTACILLES CASCADE EARRINGS. These elegant earrings are made in PEYOTE TECHNIQUE, to me they give me the illusion of black feathers, they are very easy to make and few colors of black and silver beads, the result is sophisticated and elegant, to wear them on any occasion. A simple work with a fabulous and elegant result. Below is the list of materials and procedures to make these beautiful earrings, I hope you like and enjoy my post. |

| Materiales: | Materials: |
|---|---|
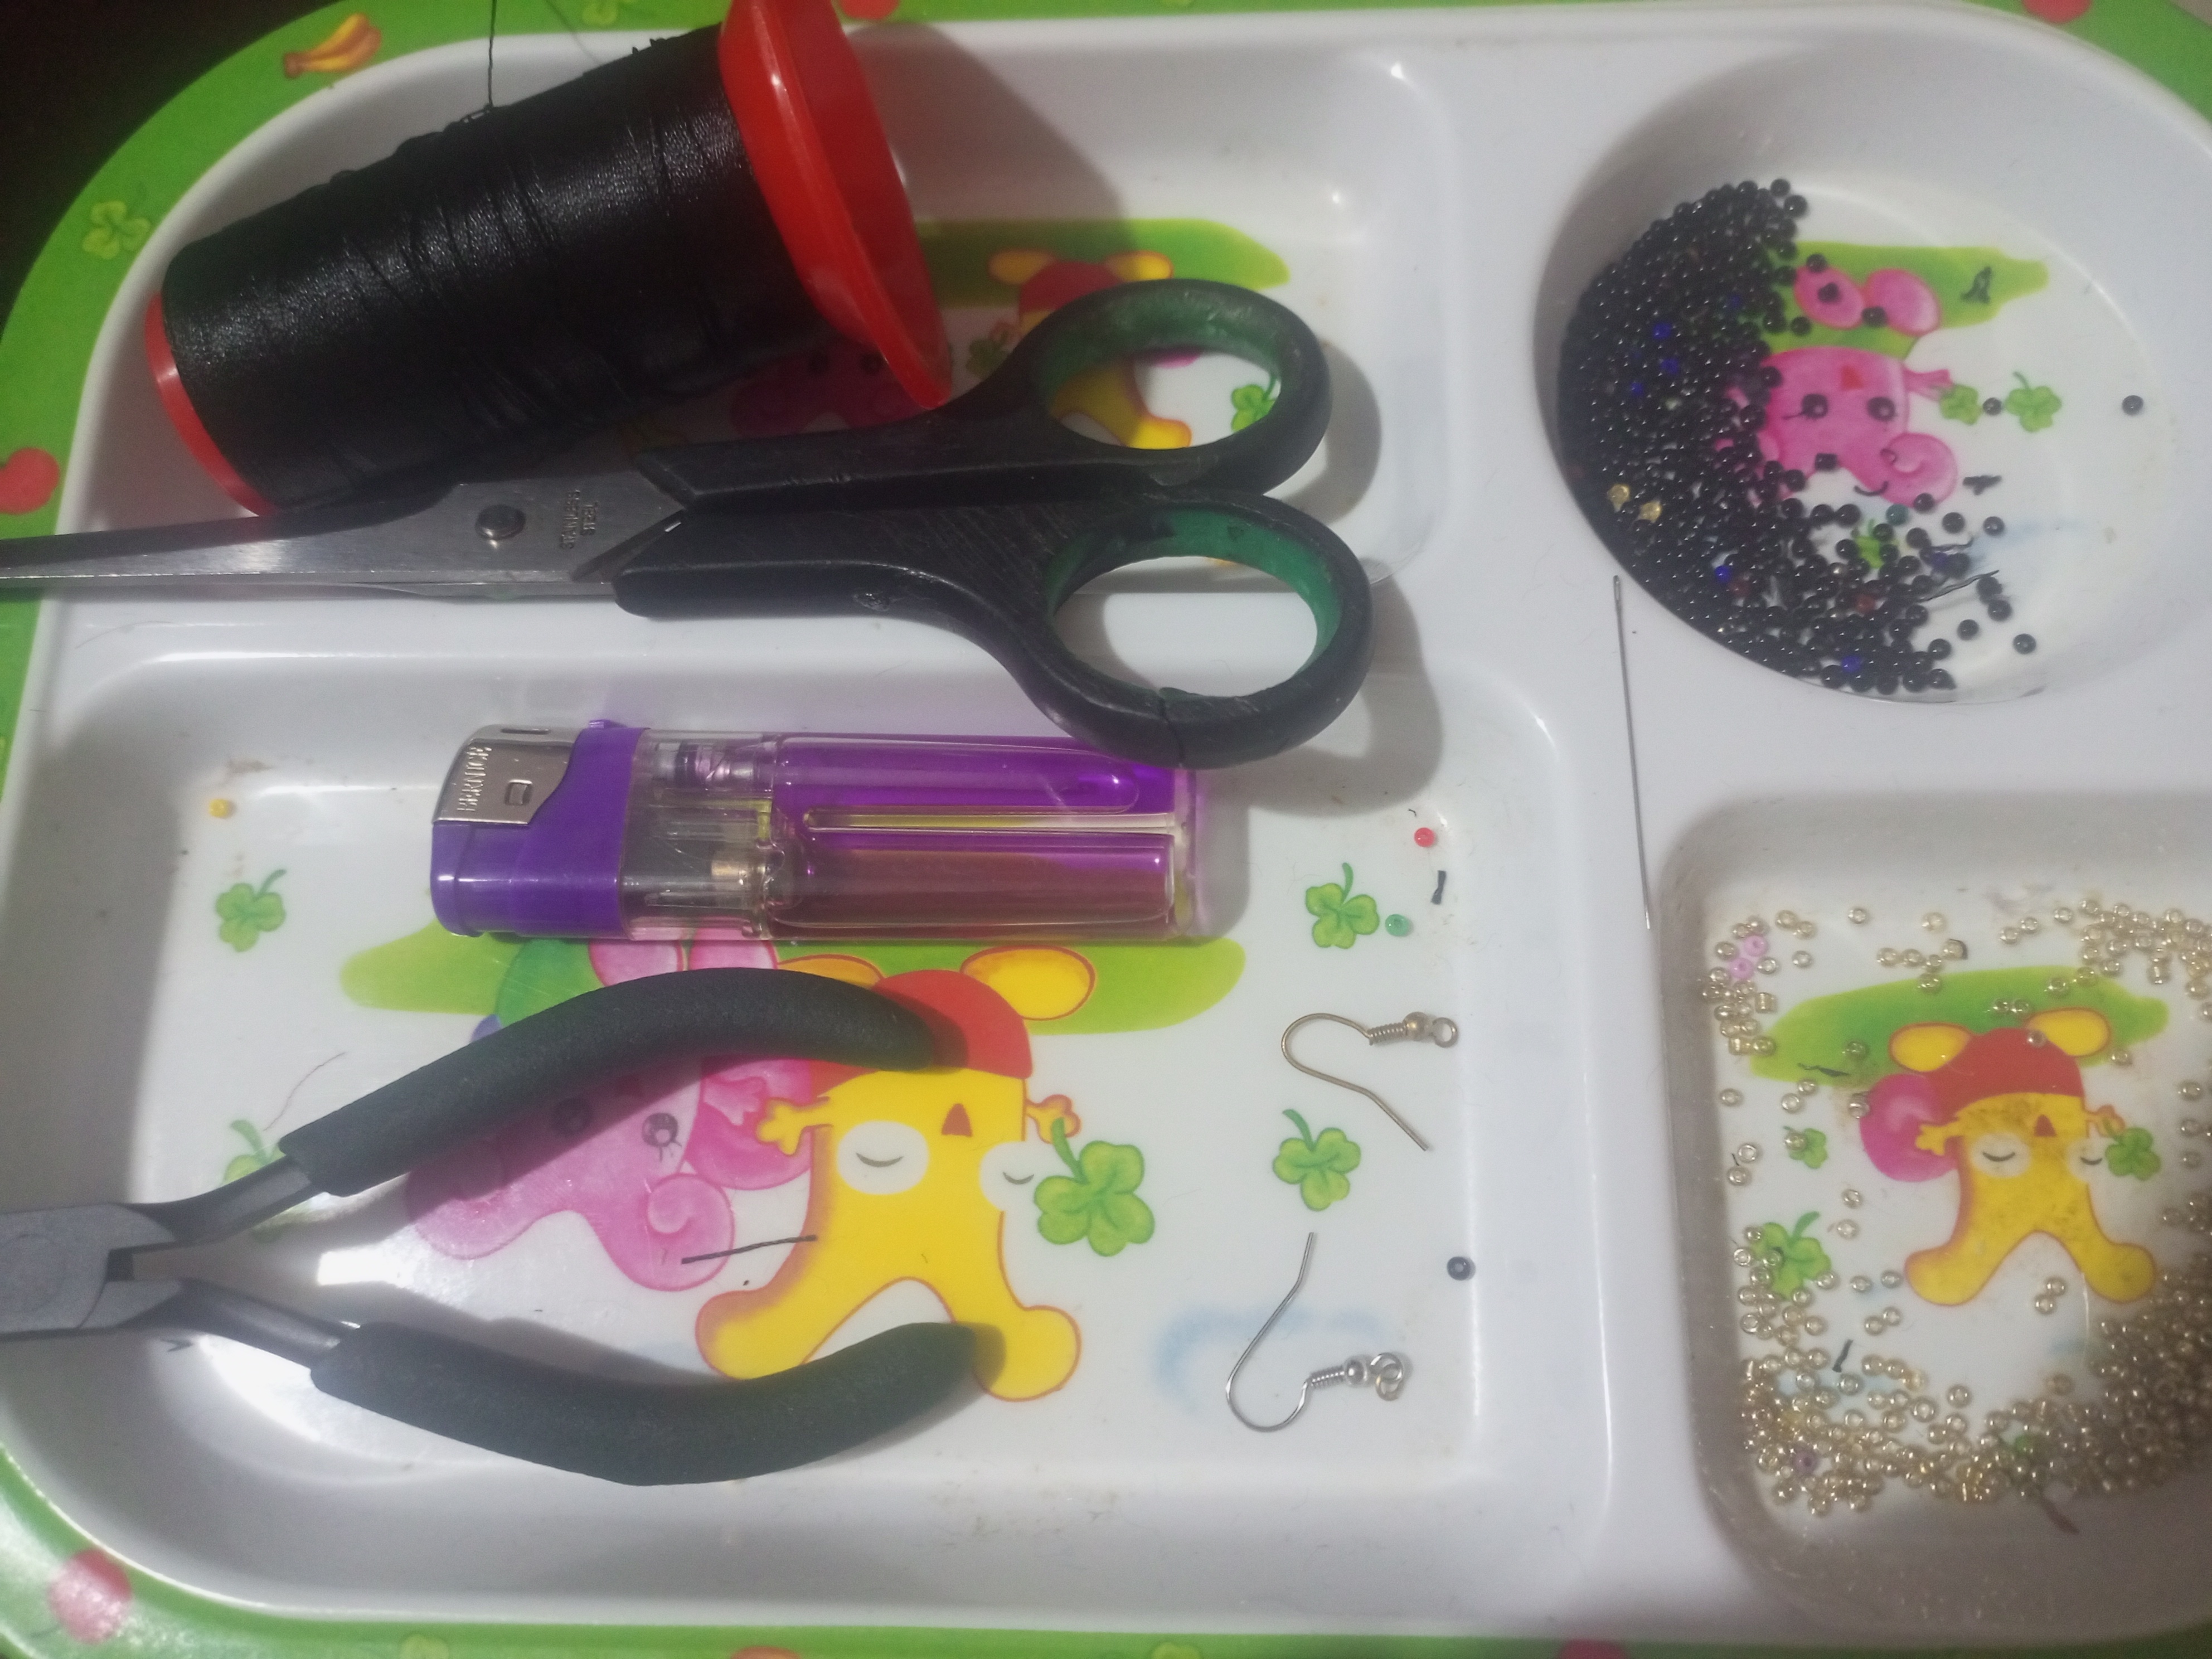
| Hilo para.mostacilla negro, mostacillas negras y plateadas, dos argollas, 2 anzuelos, tijeras, yesquero, aguja. | Black bead wire, black and silver beads, two rings, 2 hooks, scissors, tinder, needle, needle. |
| Instrucciones: | Instructions: |
|---|
| Paso 1 | Step 1 |
|---|---|
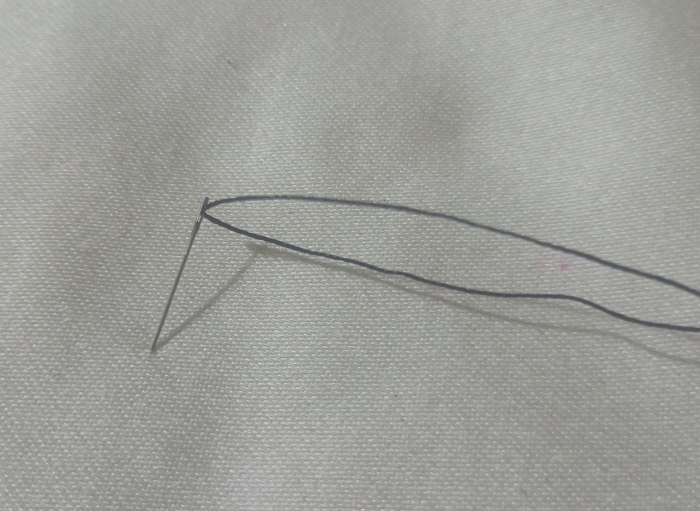
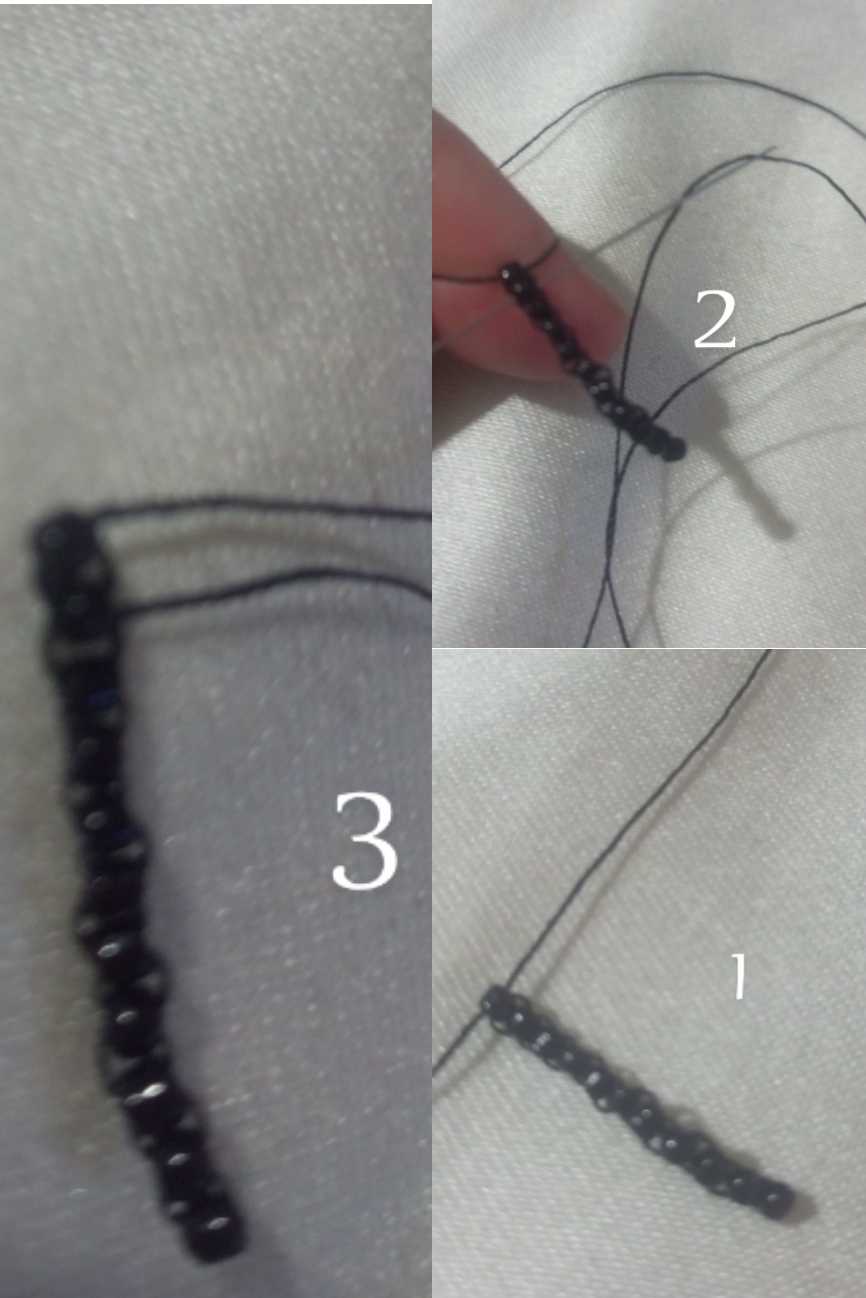
| Corté 1 piezas de hilo mostacillero negro aproximado 1 metro, para trabajar en la parte superior del arete. Lo enhebramos en la aguja mostacillera. | I cut 1 piece of black mustard thread, approximately 1 meter long, to work on the upper part of the earring. We threaded it on the mustard needle. |
| Paso 2 | Step 2 |
|---|---|
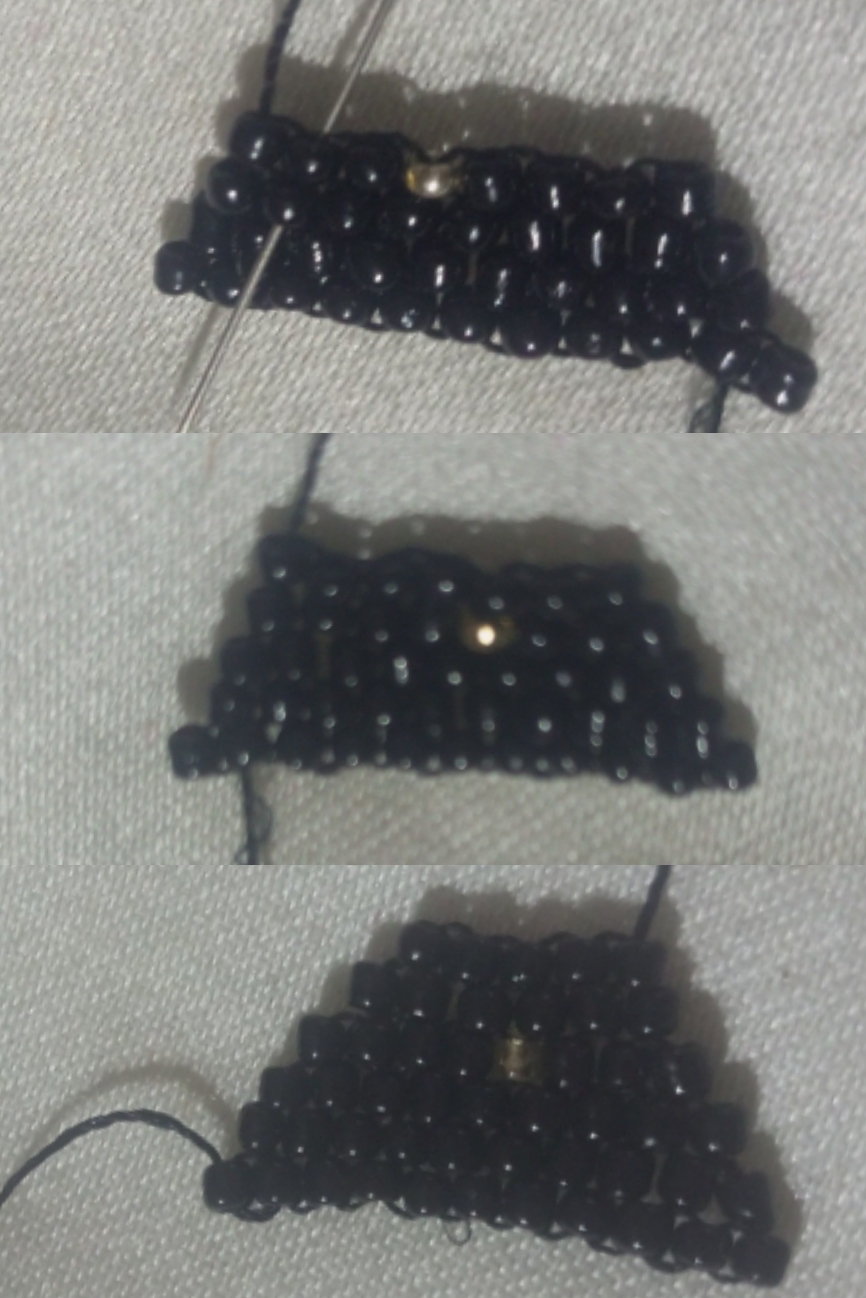
| Para contruir la primera columna de mostacilla que es la base para comenzar a trabajar, utilicé 11 mostacillas negras las mismas las introduje en la aguja y las lleve al extremo del hilo, que sujete a una carpeta con gancho. Esto con la finalidad de trabajar más fácil y no se salgan las mostacillas. Comenzamos introduciendo la aguja de en la segunda mostacilla hacía abajo tensamos el hilo y acomodamos la posición de las mostacillas, seguimos la cadena de a una mostacilla, siempre introduciendo la aguja hacia abajo. Y así concluimos nuestra cadena. | To build the first column of beads, which is the base to start working, I used 11 black beads, which I introduced into the needle and took them to the end of the thread, which I attached to a folder with a hook. This is to make it easier to work and not to let the beads come off. We start introducing the needle in the second bead downwards, we tighten the thread and we adjust the position of the beads, we continue the chain from one bead to another, always introducing the needle downwards. And thus we conclude our chain. |
| Paso 3 | Step 3 |
|---|---|
| La segunda fila la iniciamos con una reducción , es decir una mostacilla menos, y culminamos con una mostacilla menos también. Debemos posicionar el hilo en la segunda mostacilla por lo que introduje la aguja por la siguiente mostacilla. Volteamos el tejido para iniciar con la segunda fila. Quedan dos hilos, el hilo que sale en la primera mostacilla nos puede servir para la cascada, o podemos cortar y quemar, yo lo conserve hasta el final de mi trabajo, Seguimos construyendo uniendo las mostacillas a la columna principal introduciendo la aguja por el puente de hilo que une a cada mostacilla de la cadena o columna principal. | The second row starts with a reduction, that is, one less stitch, and ends with one less stitch. We must position the yarn in the second stitch, so we introduce the needle through the next stitch. We turn the fabric over to start with the second row. There are two threads left, the thread that comes out in the first bead can be used for the cascade, or we can cut and burn, I kept it until the end of my work. We continue building by joining the beads to the main column introducing the needle through the thread bridge that joins each bead of the main chain or column. |
| Paso 4 | Step 4 |
|---|---|
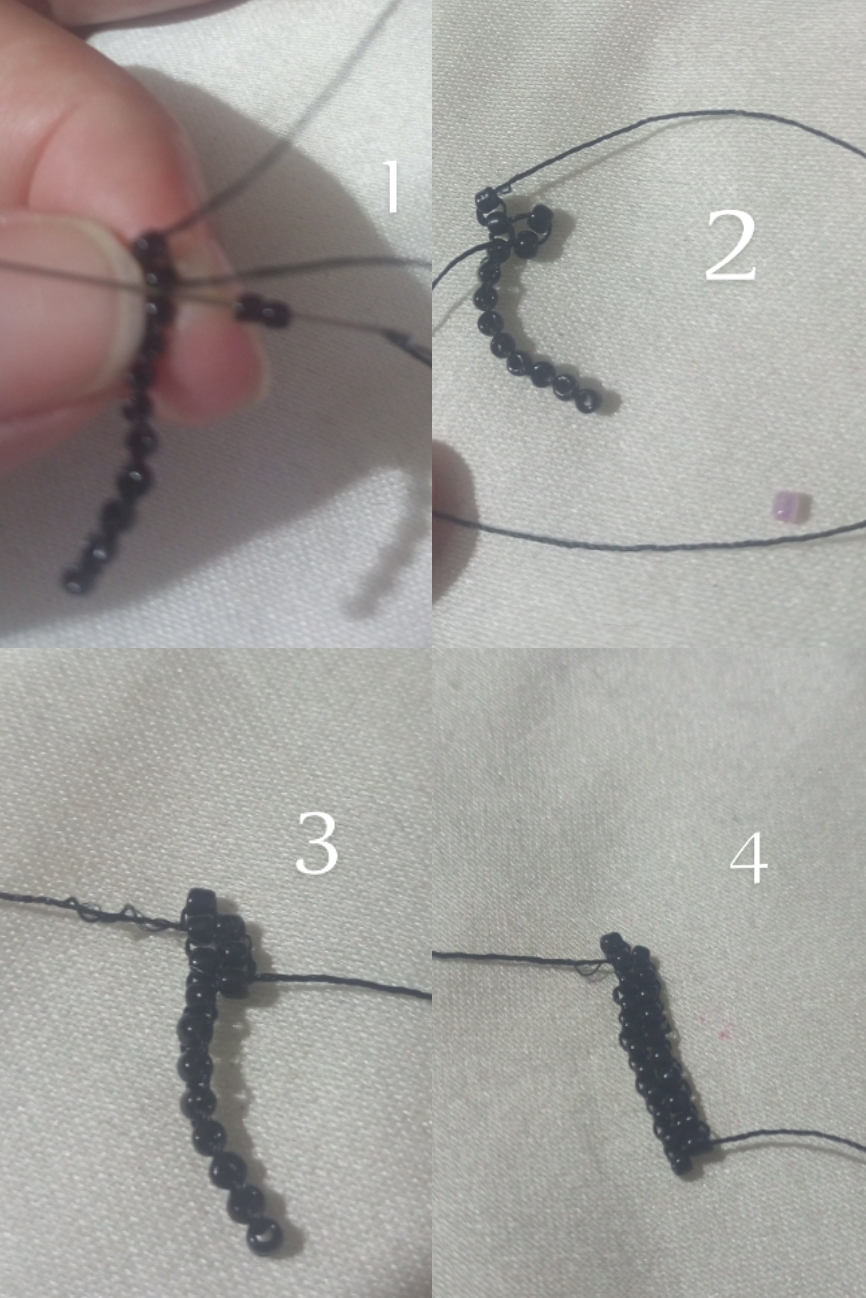
| Seguiremos construyendo de fila en fila, siempre en reducciones hasta llegar a dos mostacillas. En está imagen observamos la tercera fila. | We will continue building from row to row, always in reductions until we reach two beads. In this image we observe the third row. |
| Paso 5 | Step 5 |
|---|---|
| En está imagen vemos la cuarta fila, quise colocar una mostacilla plateada en el medio. | In this image we see the fourth row, I wanted to place a silver bead in the middle. |
| Paso 6 | Step 6 |
|---|---|
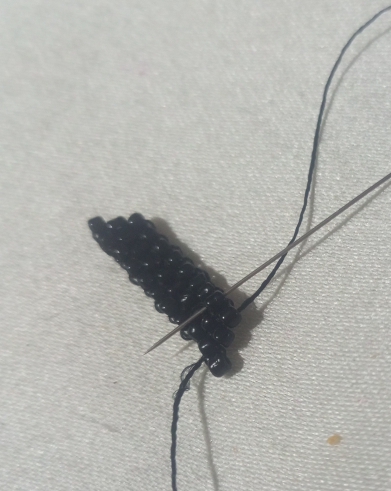
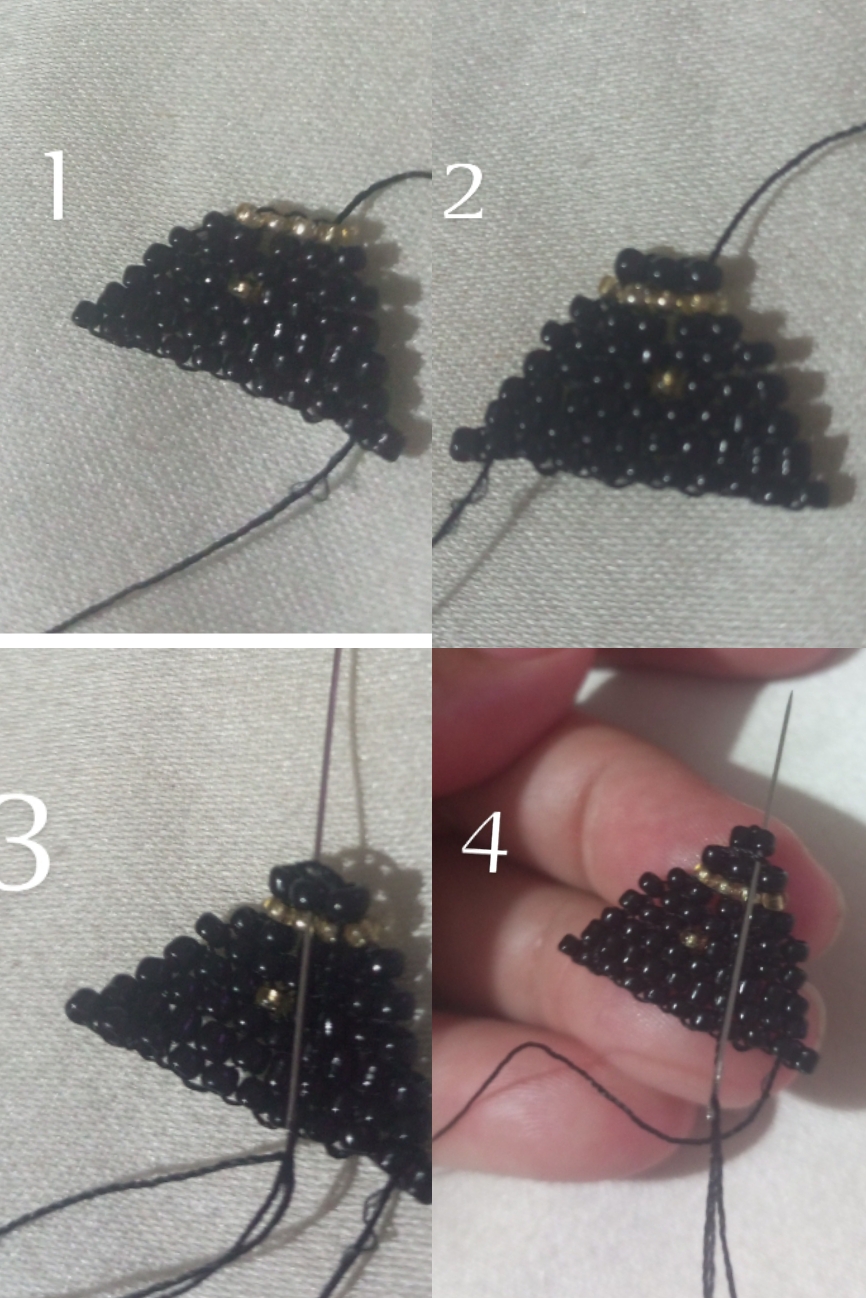
| En las siguientes imágenes observamos las filas construidas y vemos que va en reducción y en forma de piramide. | In the following images we observe the rows built and we can see that it goes in reduction and in pyramid shape. |
| Paso 7 | Step 7 |
|---|---|
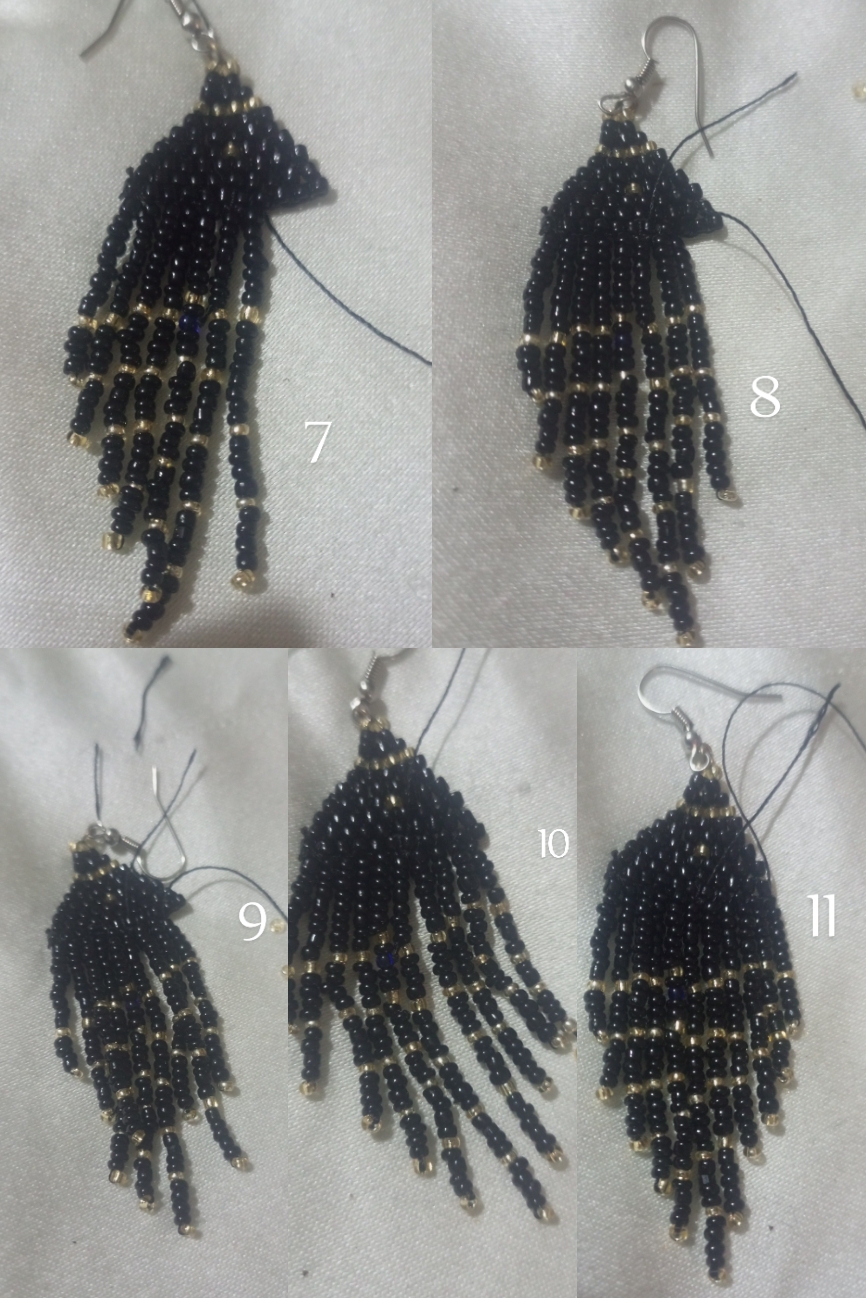
| En las siguientes imágenes vemos ya la primera parte de nuestra pieza construida reducida en la cima o punta a dos mostacillas. | In the following images we can already see the first part of our constructed piece reduced at the top to two beads. |
| Paso 8 | Step 8 |
|---|---|
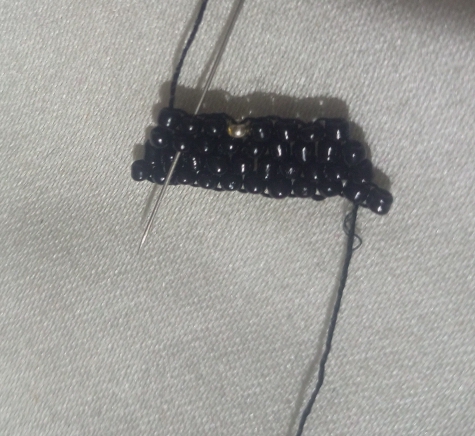
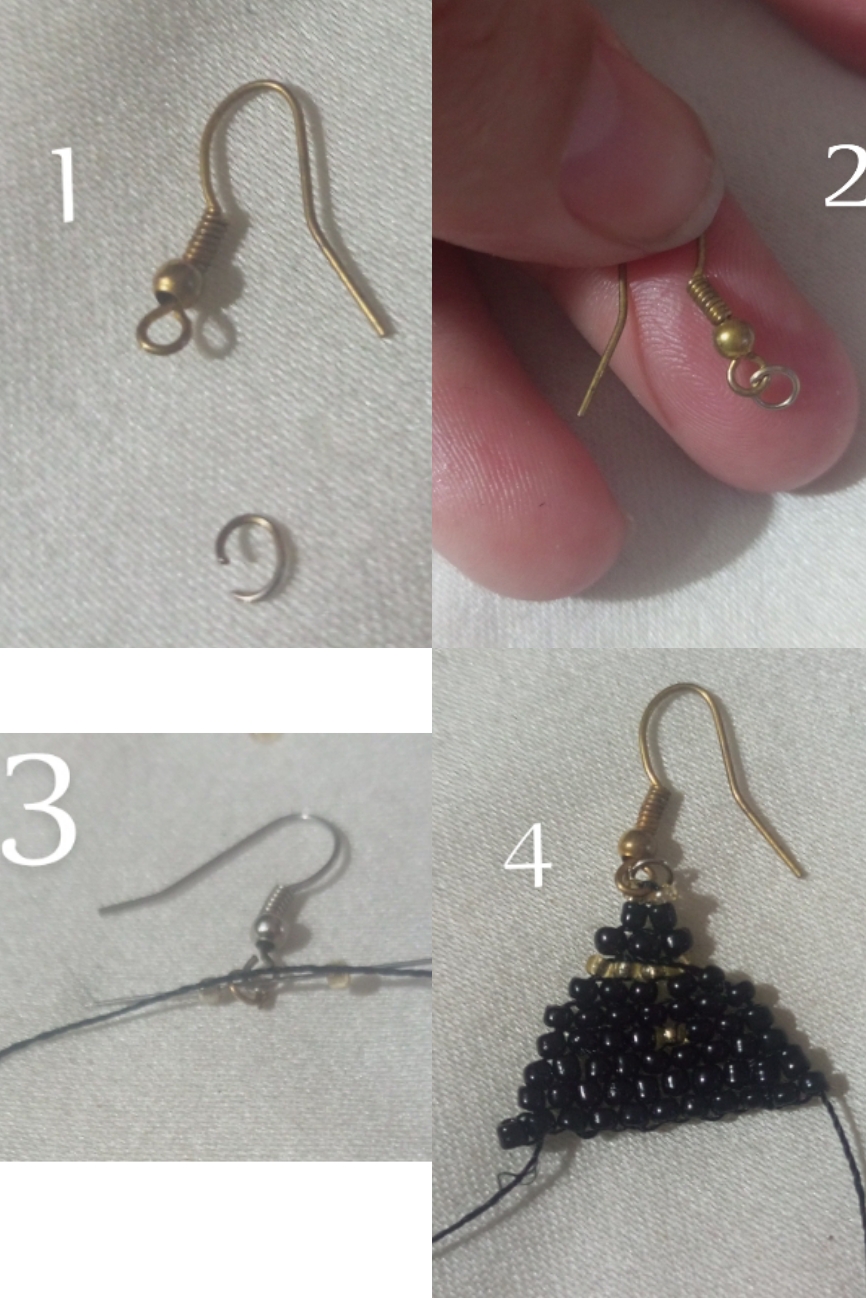
| El siguiente paso es introducir la argolla en la argolla del azuelo para eso me ayude de unas pinzas. En la aguja introduje 1 mostacilla plateada la argolla con el azuelo y una mostacilla plateada, introduje la aguja en la tercera mostacilla y lleve el hilo hasta la primera mostacilla de la columna principal para comenzar a tejer la cascada. | The next step is to insert the ring into the eye of the hook with the help of a pair of tweezers. In the needle I introduced 1 silver bead, the ring with the hook and a silver bead, I introduced the needle in the third bead and took the thread to the first bead of the main column to begin to weave the cascade. |
| Paso 9 | Step 9 |
|---|---|
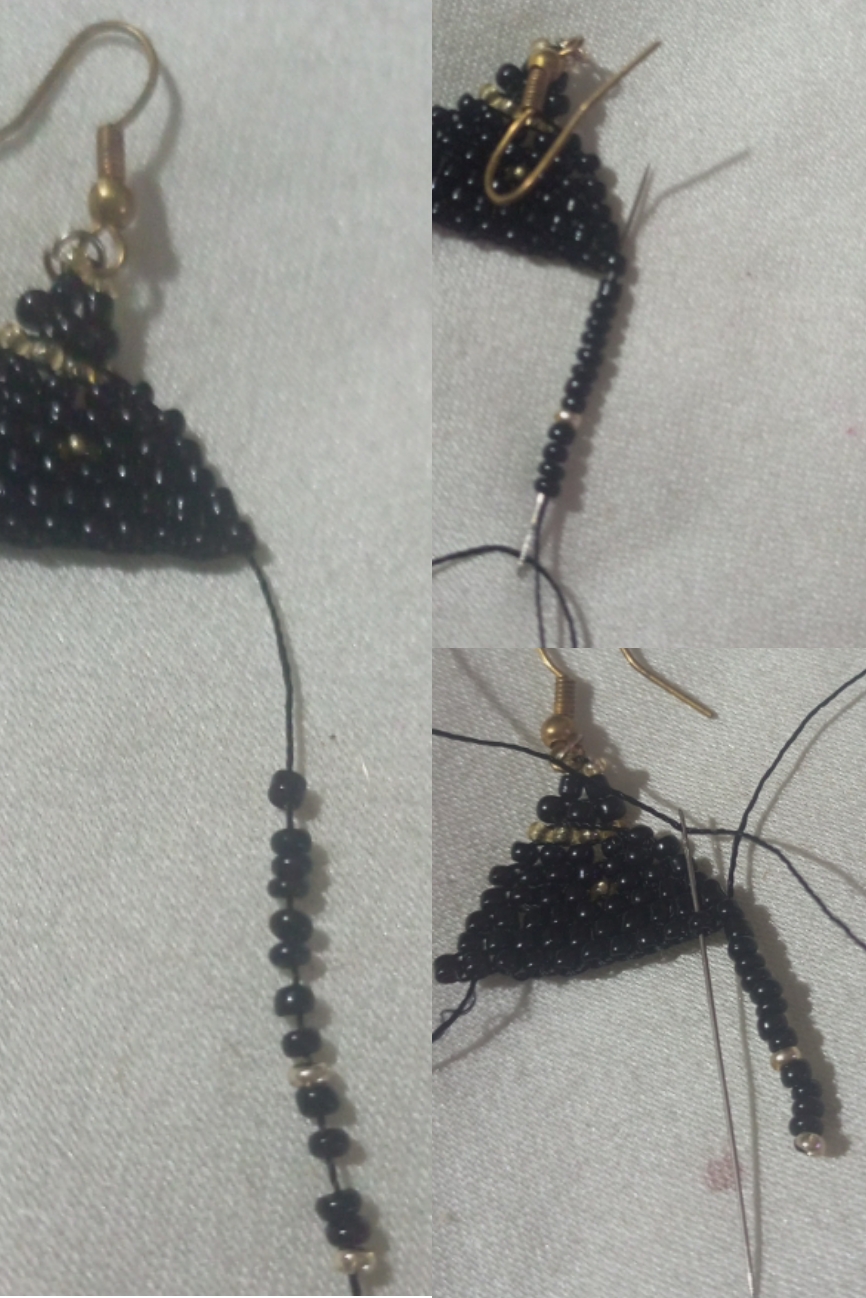
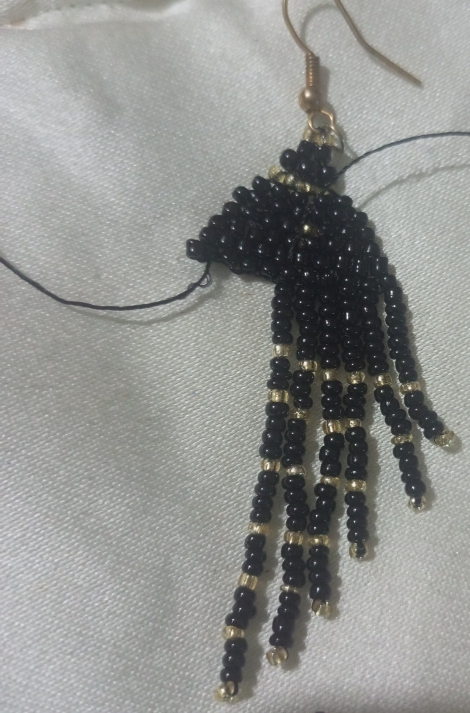
| Para hacer la cadena introduje 14 mostacillas en la aguja y luego la introduje en las mostacillas, dejando la primera mostacilla plateada para que sirva de tapón, e introduzco la aguja en la segunda mostacilla de la cadena principal. | To make the chain I inserted 14 beads into the needle and then inserted the needle into the beads, leaving the first silver bead to serve as a stopper, and inserted the needle into the second bead of the main chain. |
| Paso 10 | Step 10 |
|---|---|
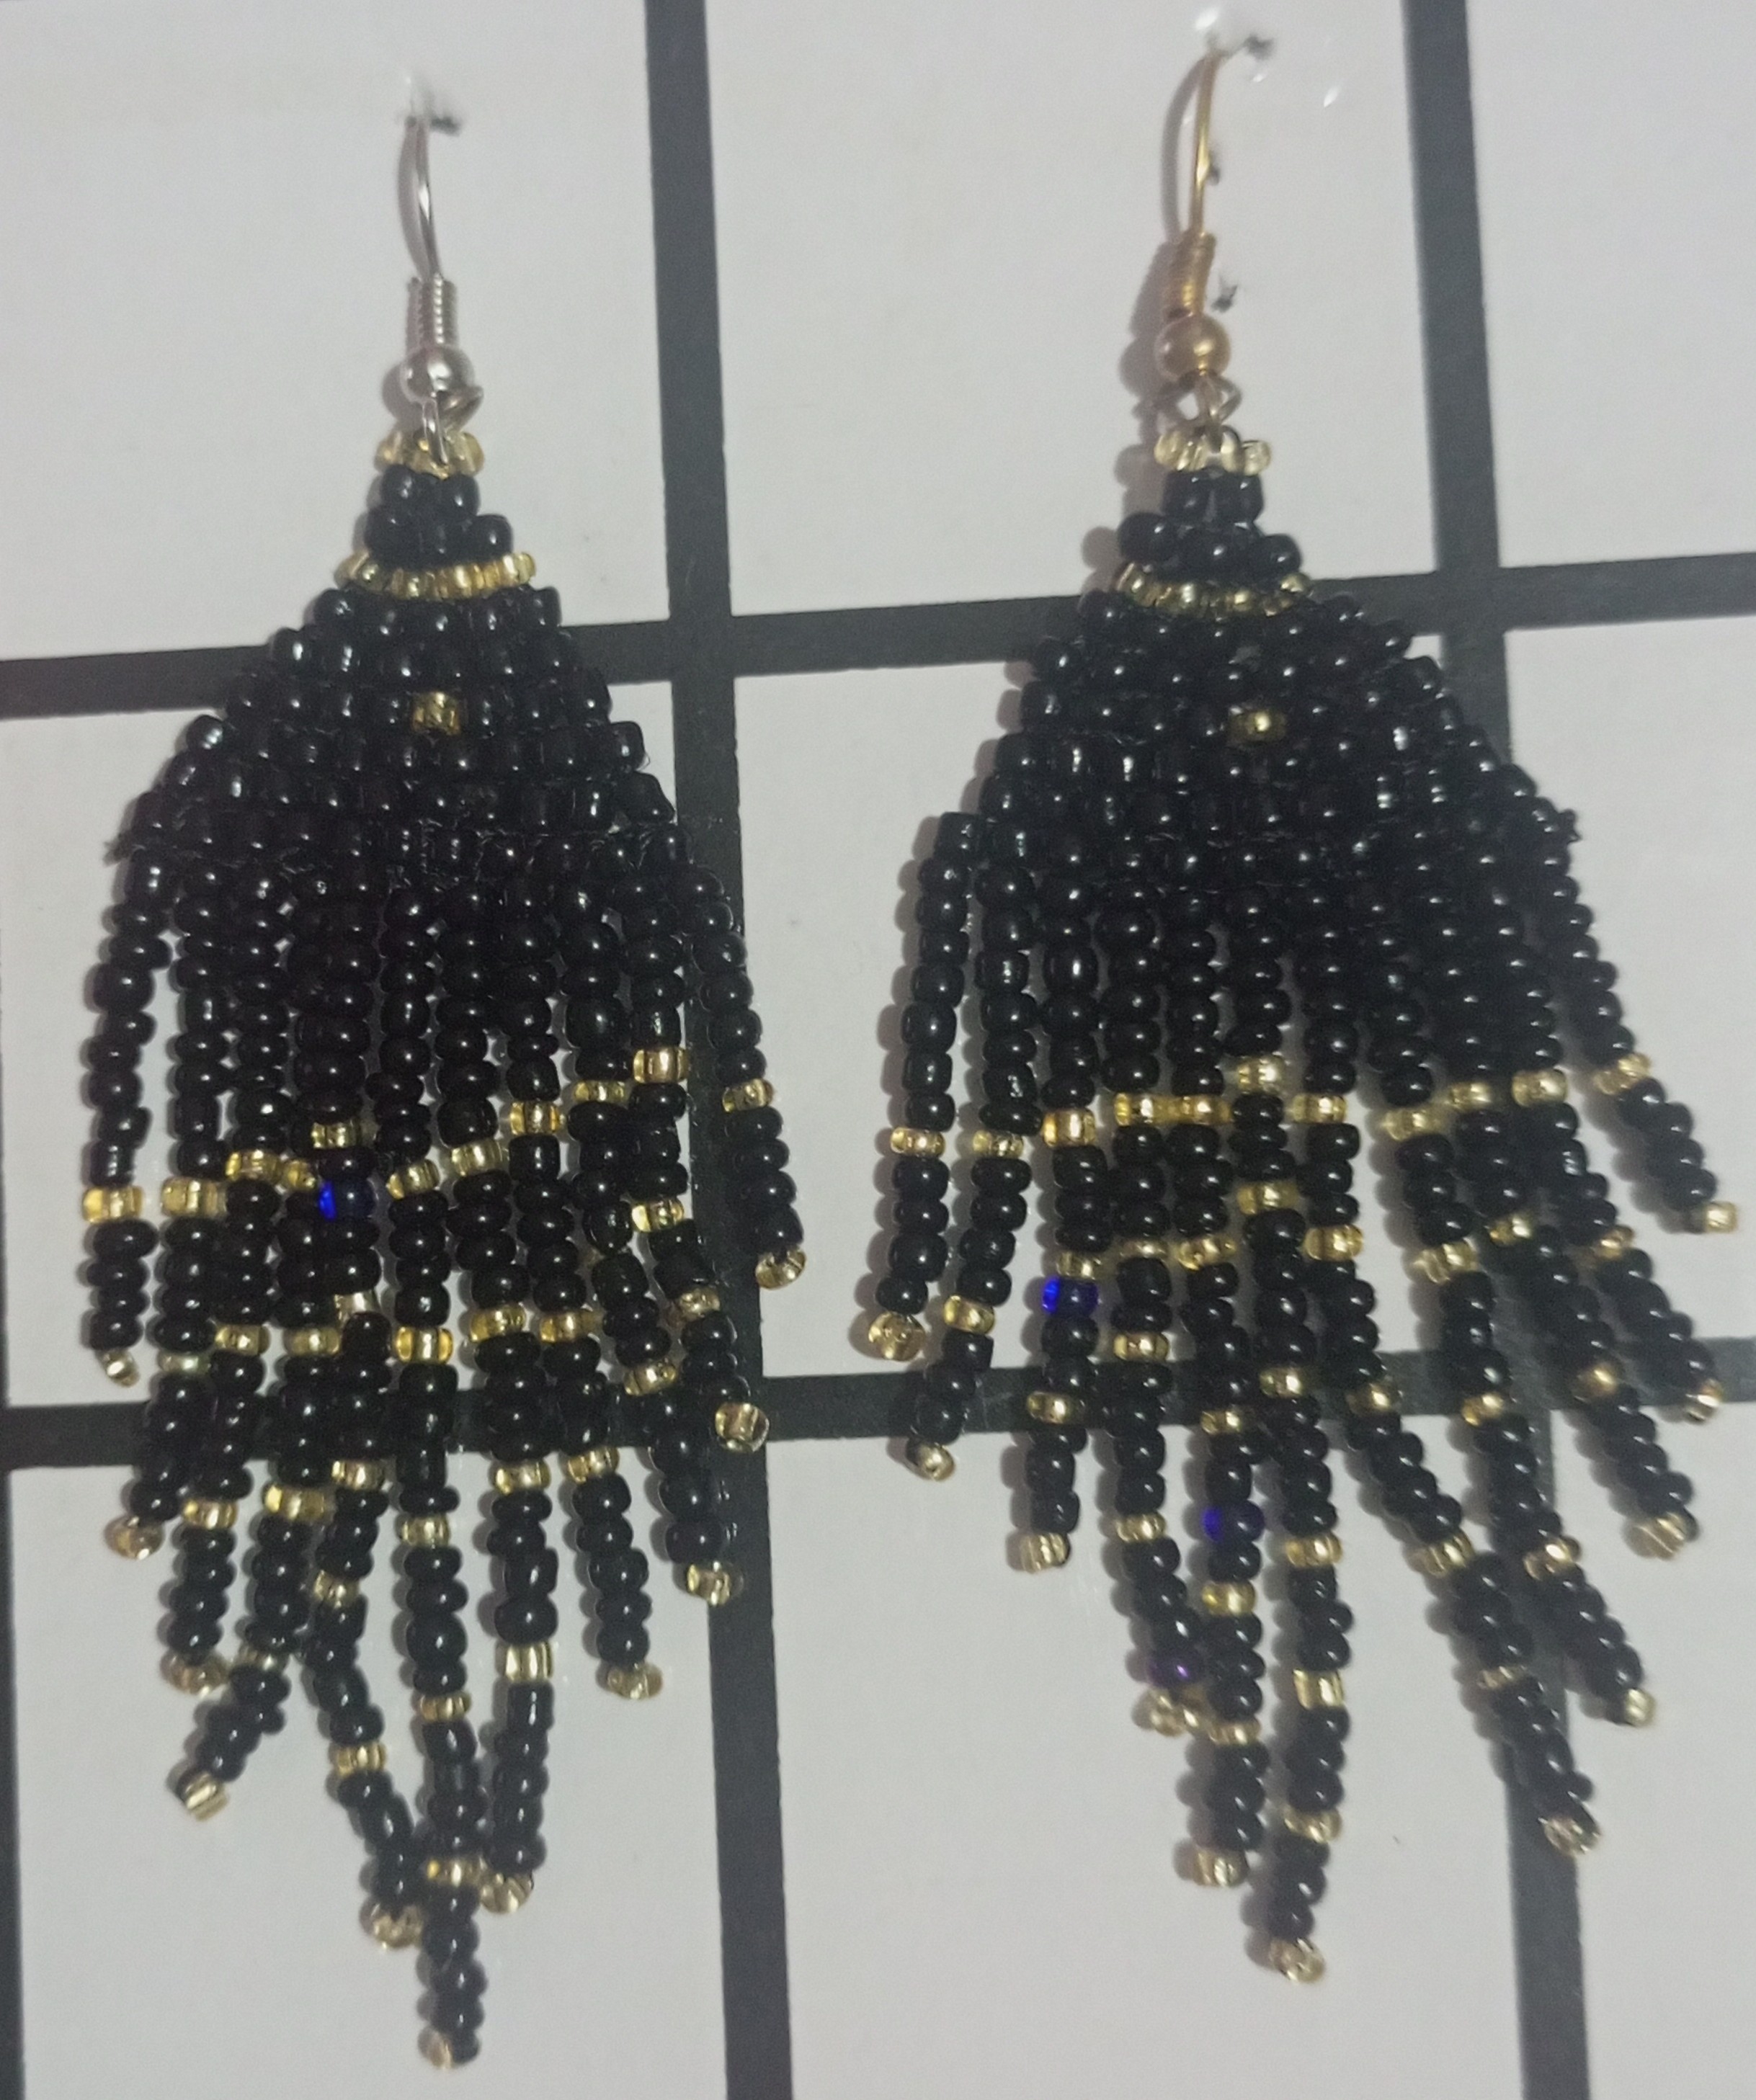
| Para seguir con los siguientes flecos vamos a ir añadiendo mostacillas, la idea es que las mostacillas plateadas hagan una linea, o podamos formar la figura que queramos, por eso el número adicional de mostacillas en cada fleco es entre 5 negras al final, pero como no estoy usando mostacillas calibradas de calidad debo ir reduciendo o adicionando mostacillas cuidando quede una lineas con las mostacillas plateadas. | To continue with the following bangs we are going to add beads, the idea is that the silver beads make a line, or we can form the figure we want, so the additional number of beads in each fringe is between 5 black at the end, but as I am not using quality calibrated beads I must be reducing or adding beads taking care to leave a line with the silver beads. |

| Paso 11 | Step 11 |
|---|---|
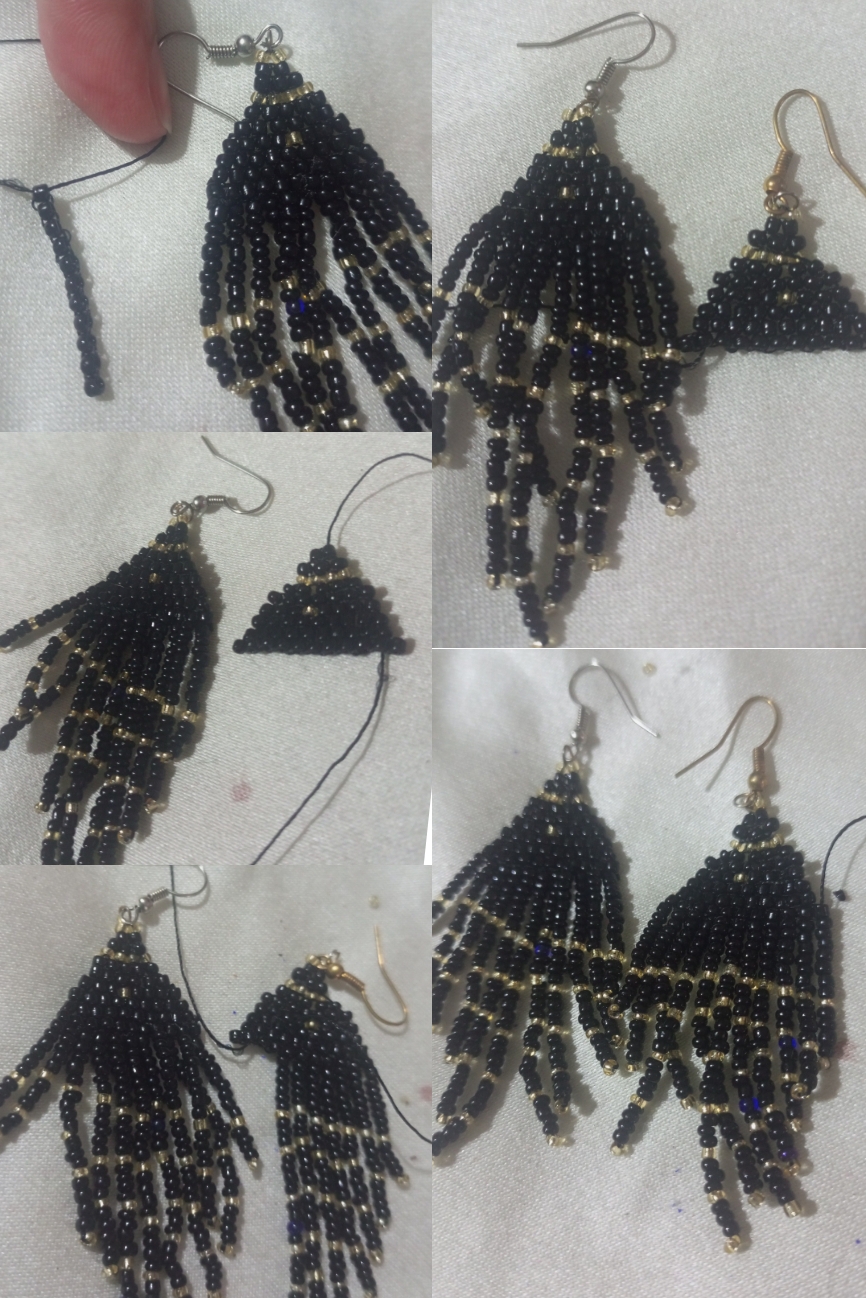
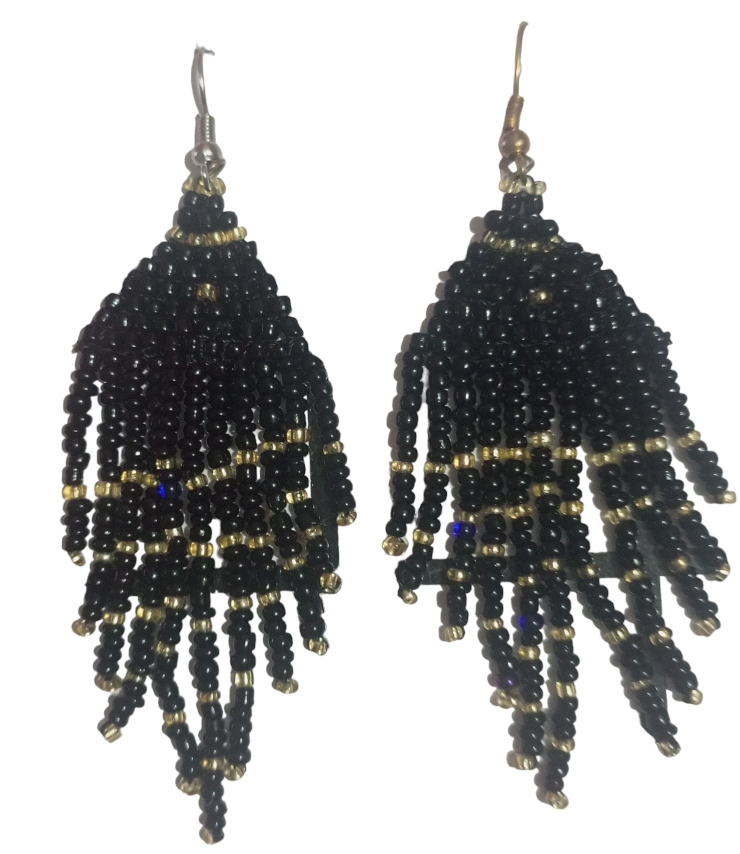
| Son 11 flecos 5 de cada lado y un fleco del medio que debe ser el más largo, para que quedé con esa forma de pluma. | There are 11 bangs, 5 on each side and one fringe in the middle, which must be the longest, so that it has the shape of a feather. |
| Paso 12 | Step 12 |
|---|---|
| En la siguiente imagen observamos la otra parte de los flecos, que estaremos reduciendo hasta llegar al fleco más corto, cuidando que se debe ir midiendo que queden las mostacillas plateadas al mismo nivel. | In the following image we observe the other part of the bangs, which we will be reducing until we reach the shortest fringe, taking care to measure the silver beads at the same level. |
| Paso 13 | Step 13 |
|---|---|
| Repetí todo el proceso para el segundo arete. | I repeated the whole process for the second earring. |
| Despedida | Farewell |
|---|---|
| Y está es mi propuesta para el día de hoy LINDOS Y ELEGANTES ARETES DE MOSTACILLAS. Un post hecho con amor, espero les guste y disfruten mi post. | And this is my proposal for today BEAUTIFUL AND ELEGANT BEADS EARRINGS. A post made with love, I hope you like it and enjoy my post. |

| Créditos | Credits |
|---|---|
| Traductor: www.DeepL.com/Translator (free version).Las fotos fueron tomadas con mi Celular Tecno Sport 7T. Foto de portada editada con Canva y PhotoRoom. Banner Pixabay.com. | Translator: www.DeepL.com/Translator (free version). The photos were taken with my Tecno Sport 7T cell phone. Cover photo edited with Canva and PhotoRoom. Banner Pixabay.com. |