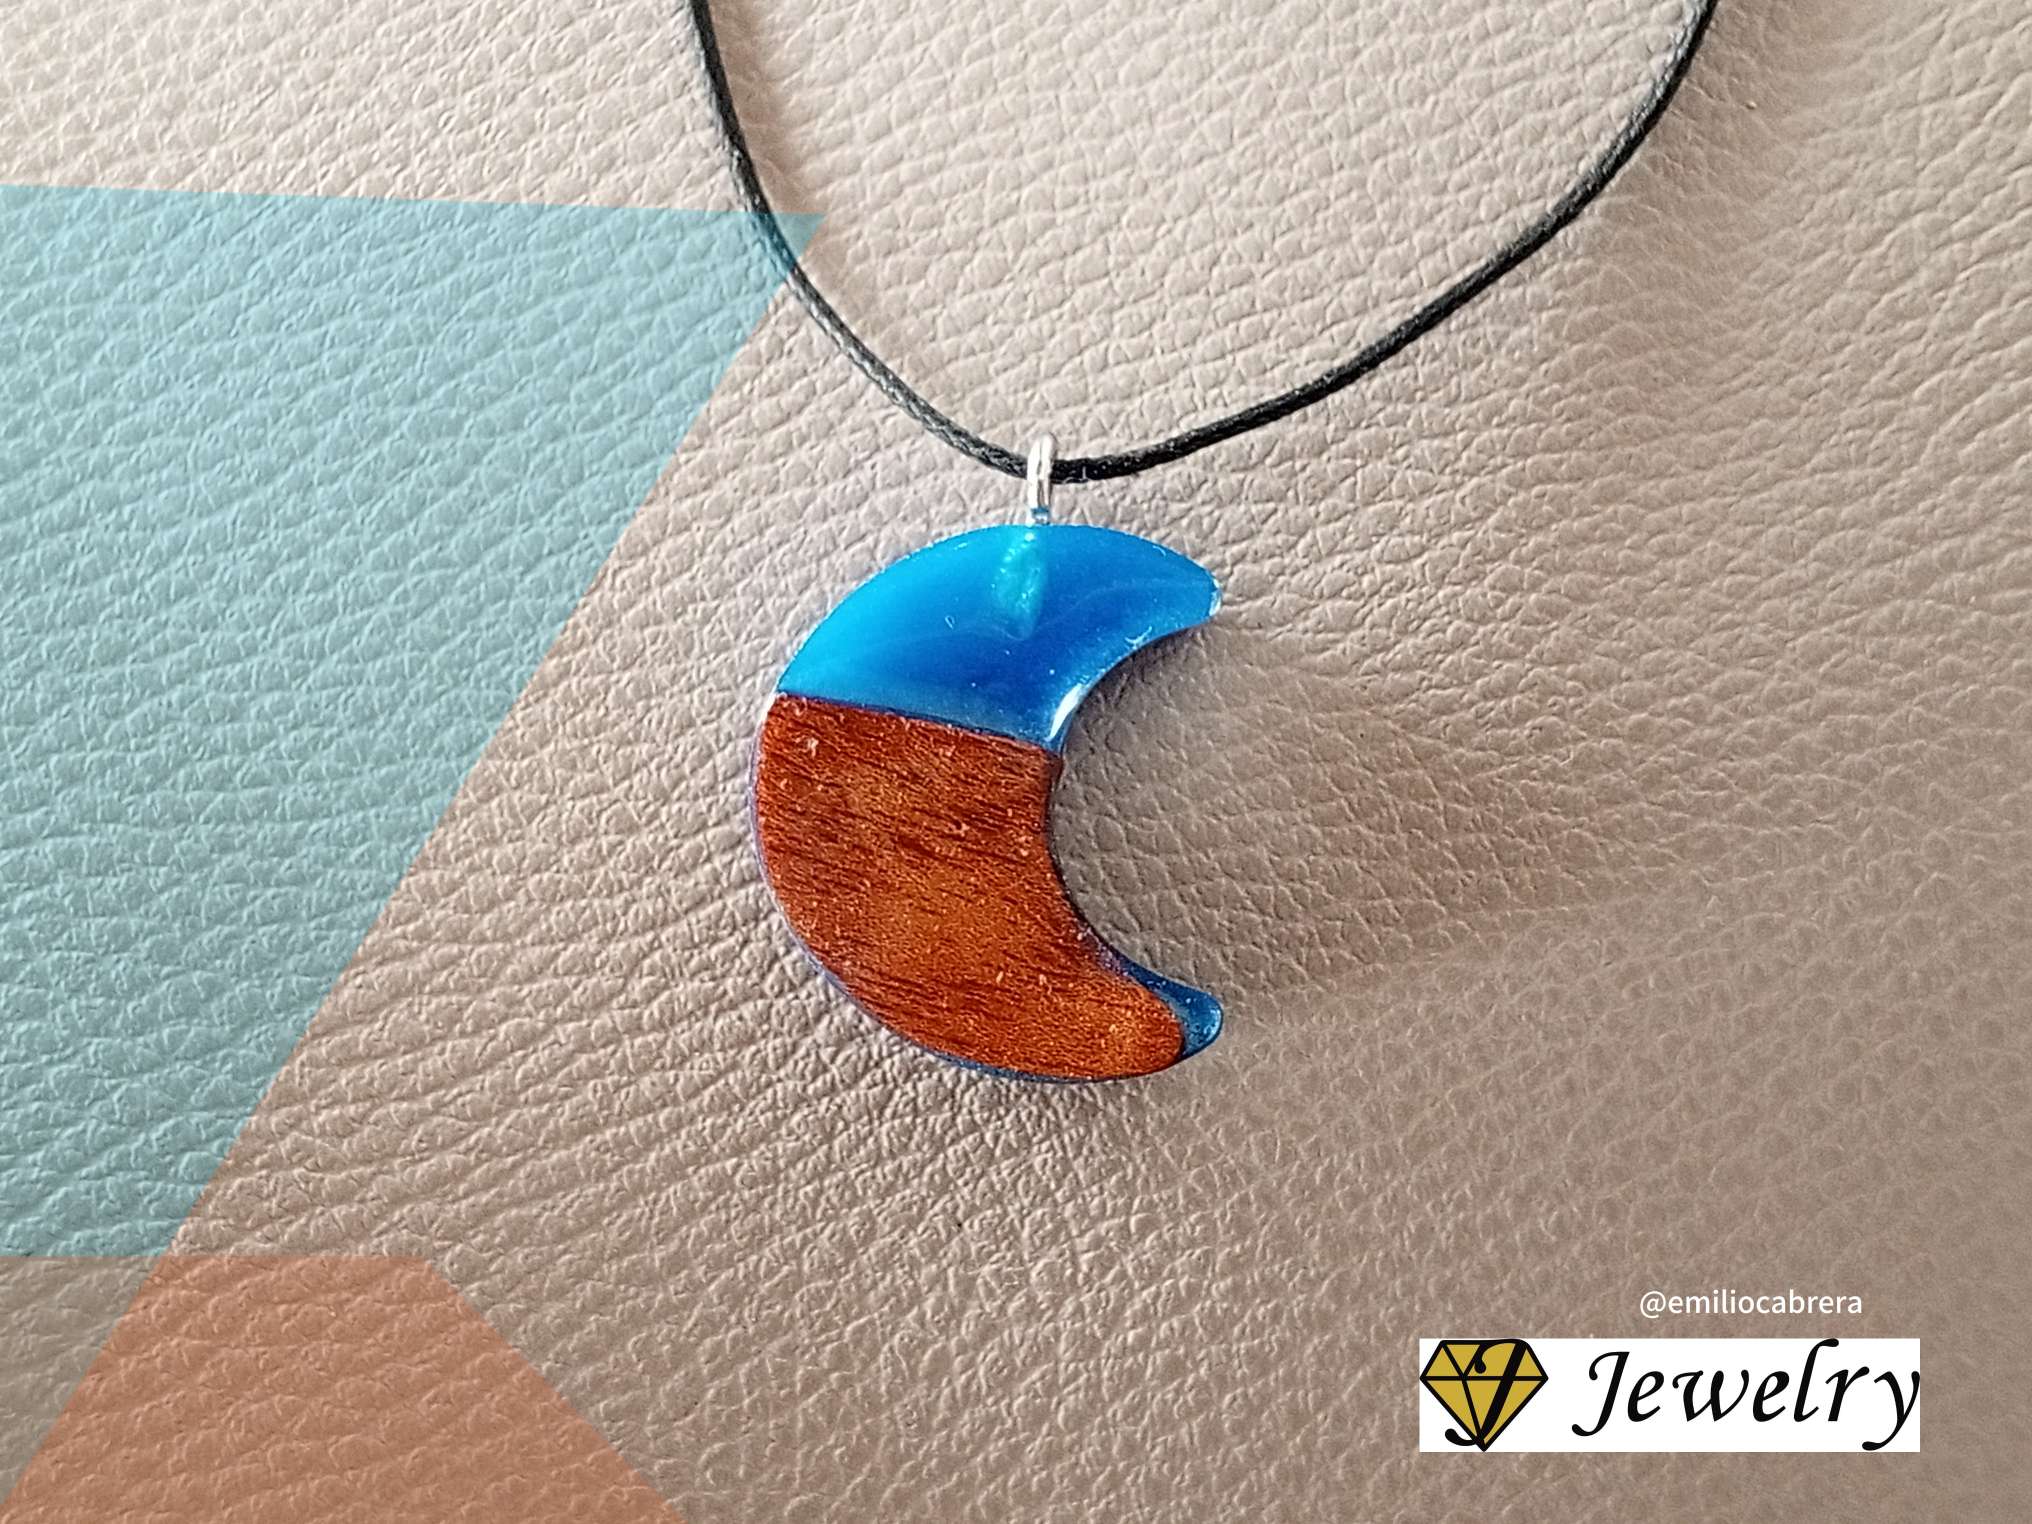
I wanted to make a moon combining cedar wood and resin with electric blue pigment. Below I describe the step by step and the materials I used
¡Hola a todos! ¡Bienvenidos!
Deseo mostrarles un pequeño proyecto con resina y madera que acabo de culminar, si bien es cierto que, todo tipo de trabajo involucra diferentes técnicas y herramientas, la resina epóxica es un componente muy facil de utilizar y se puede poner en marcha la creatividad a la hora de trabajar con ella porque combinada con ciertos elementos se puede hacer arte.
Quise hacer una luna combinando madera de cedro y resina con pigmento azul eléctrico. A continuación describo el paso a paso y los materiales que utilicé
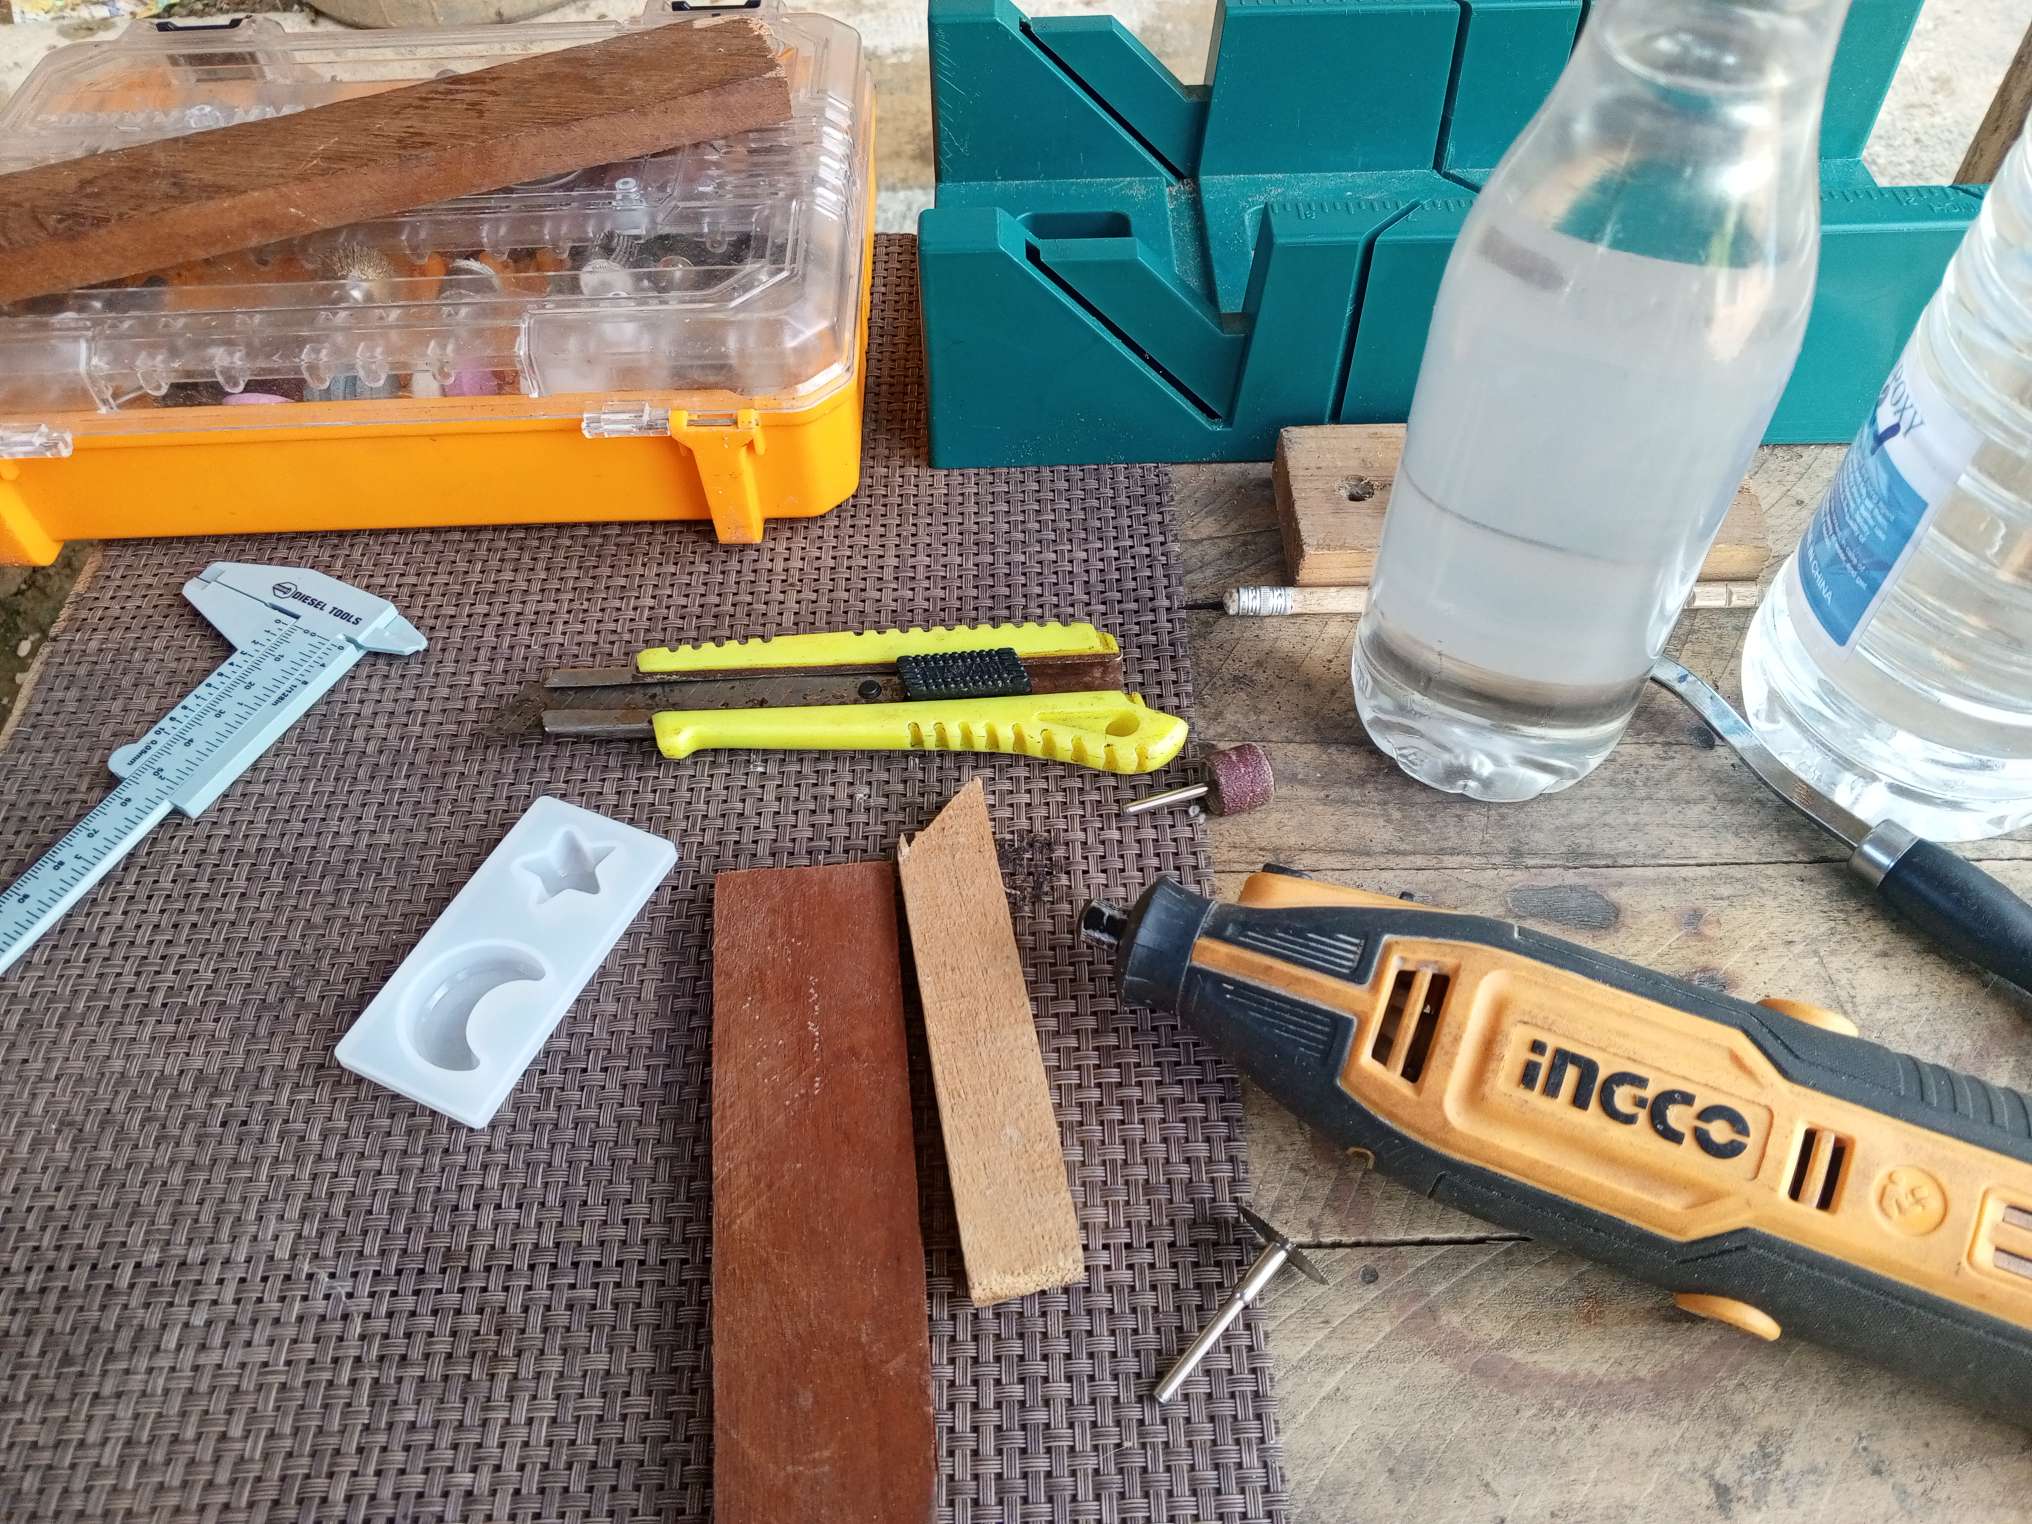
Materiales:
Madera
Barniz
Lija n° 1000
Resina
Moldes
Pigmento azul
Accesorios de bisutería
Dremel
Lápiz
cúter
Cinta adhesiva
Materials:
Wood
Varnish
Sandpaper No. 1000
Resin
Molds
blue pigment
Jewelry accessories
Dremel
Pencil
cutter
Adhesive tape
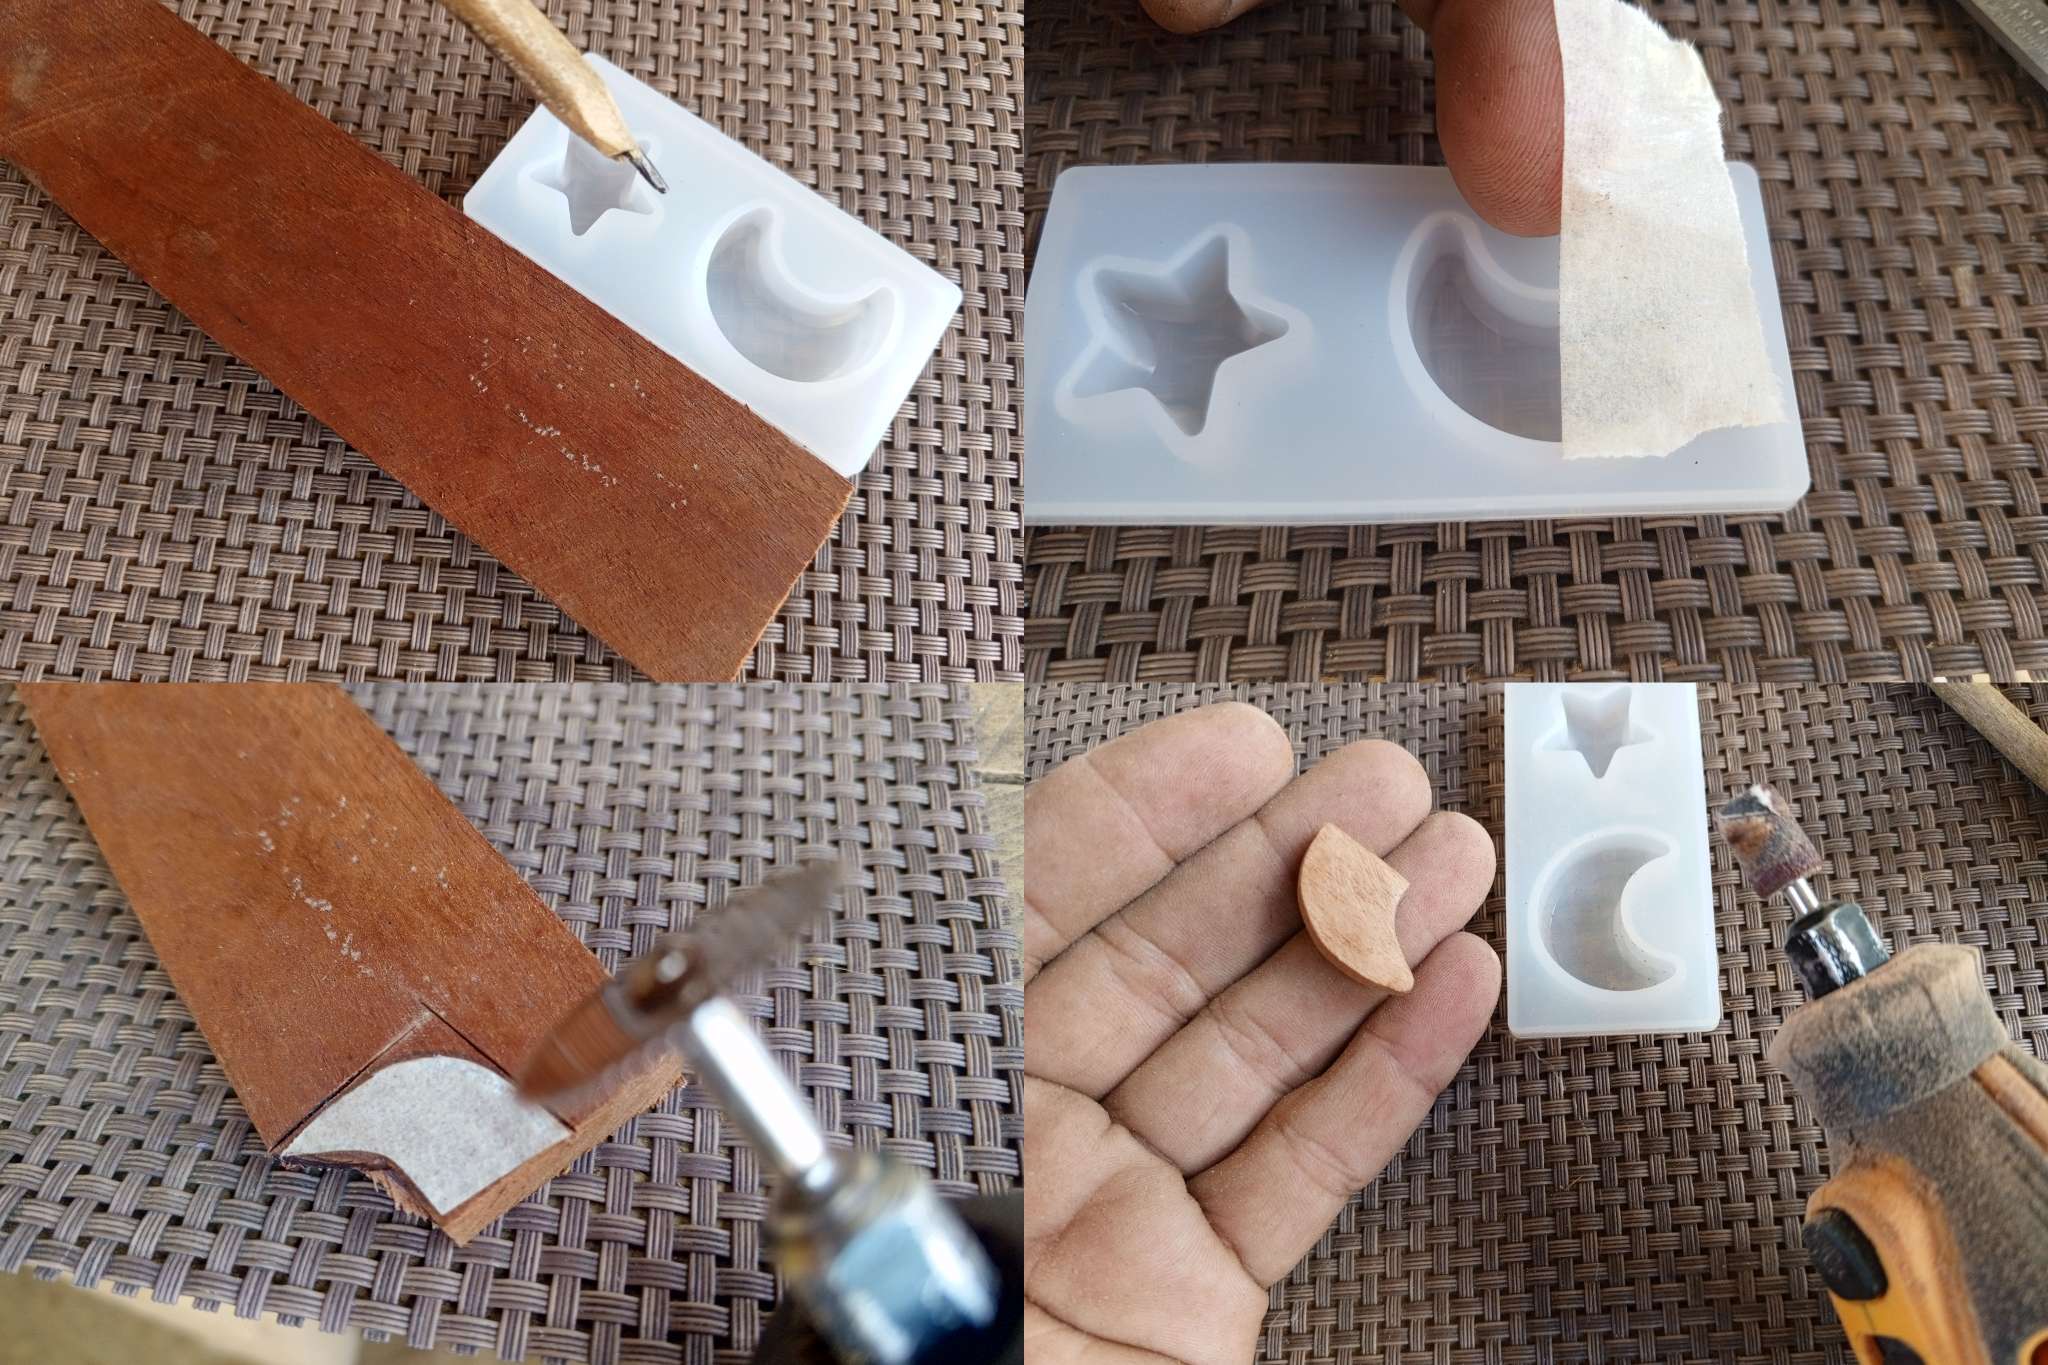
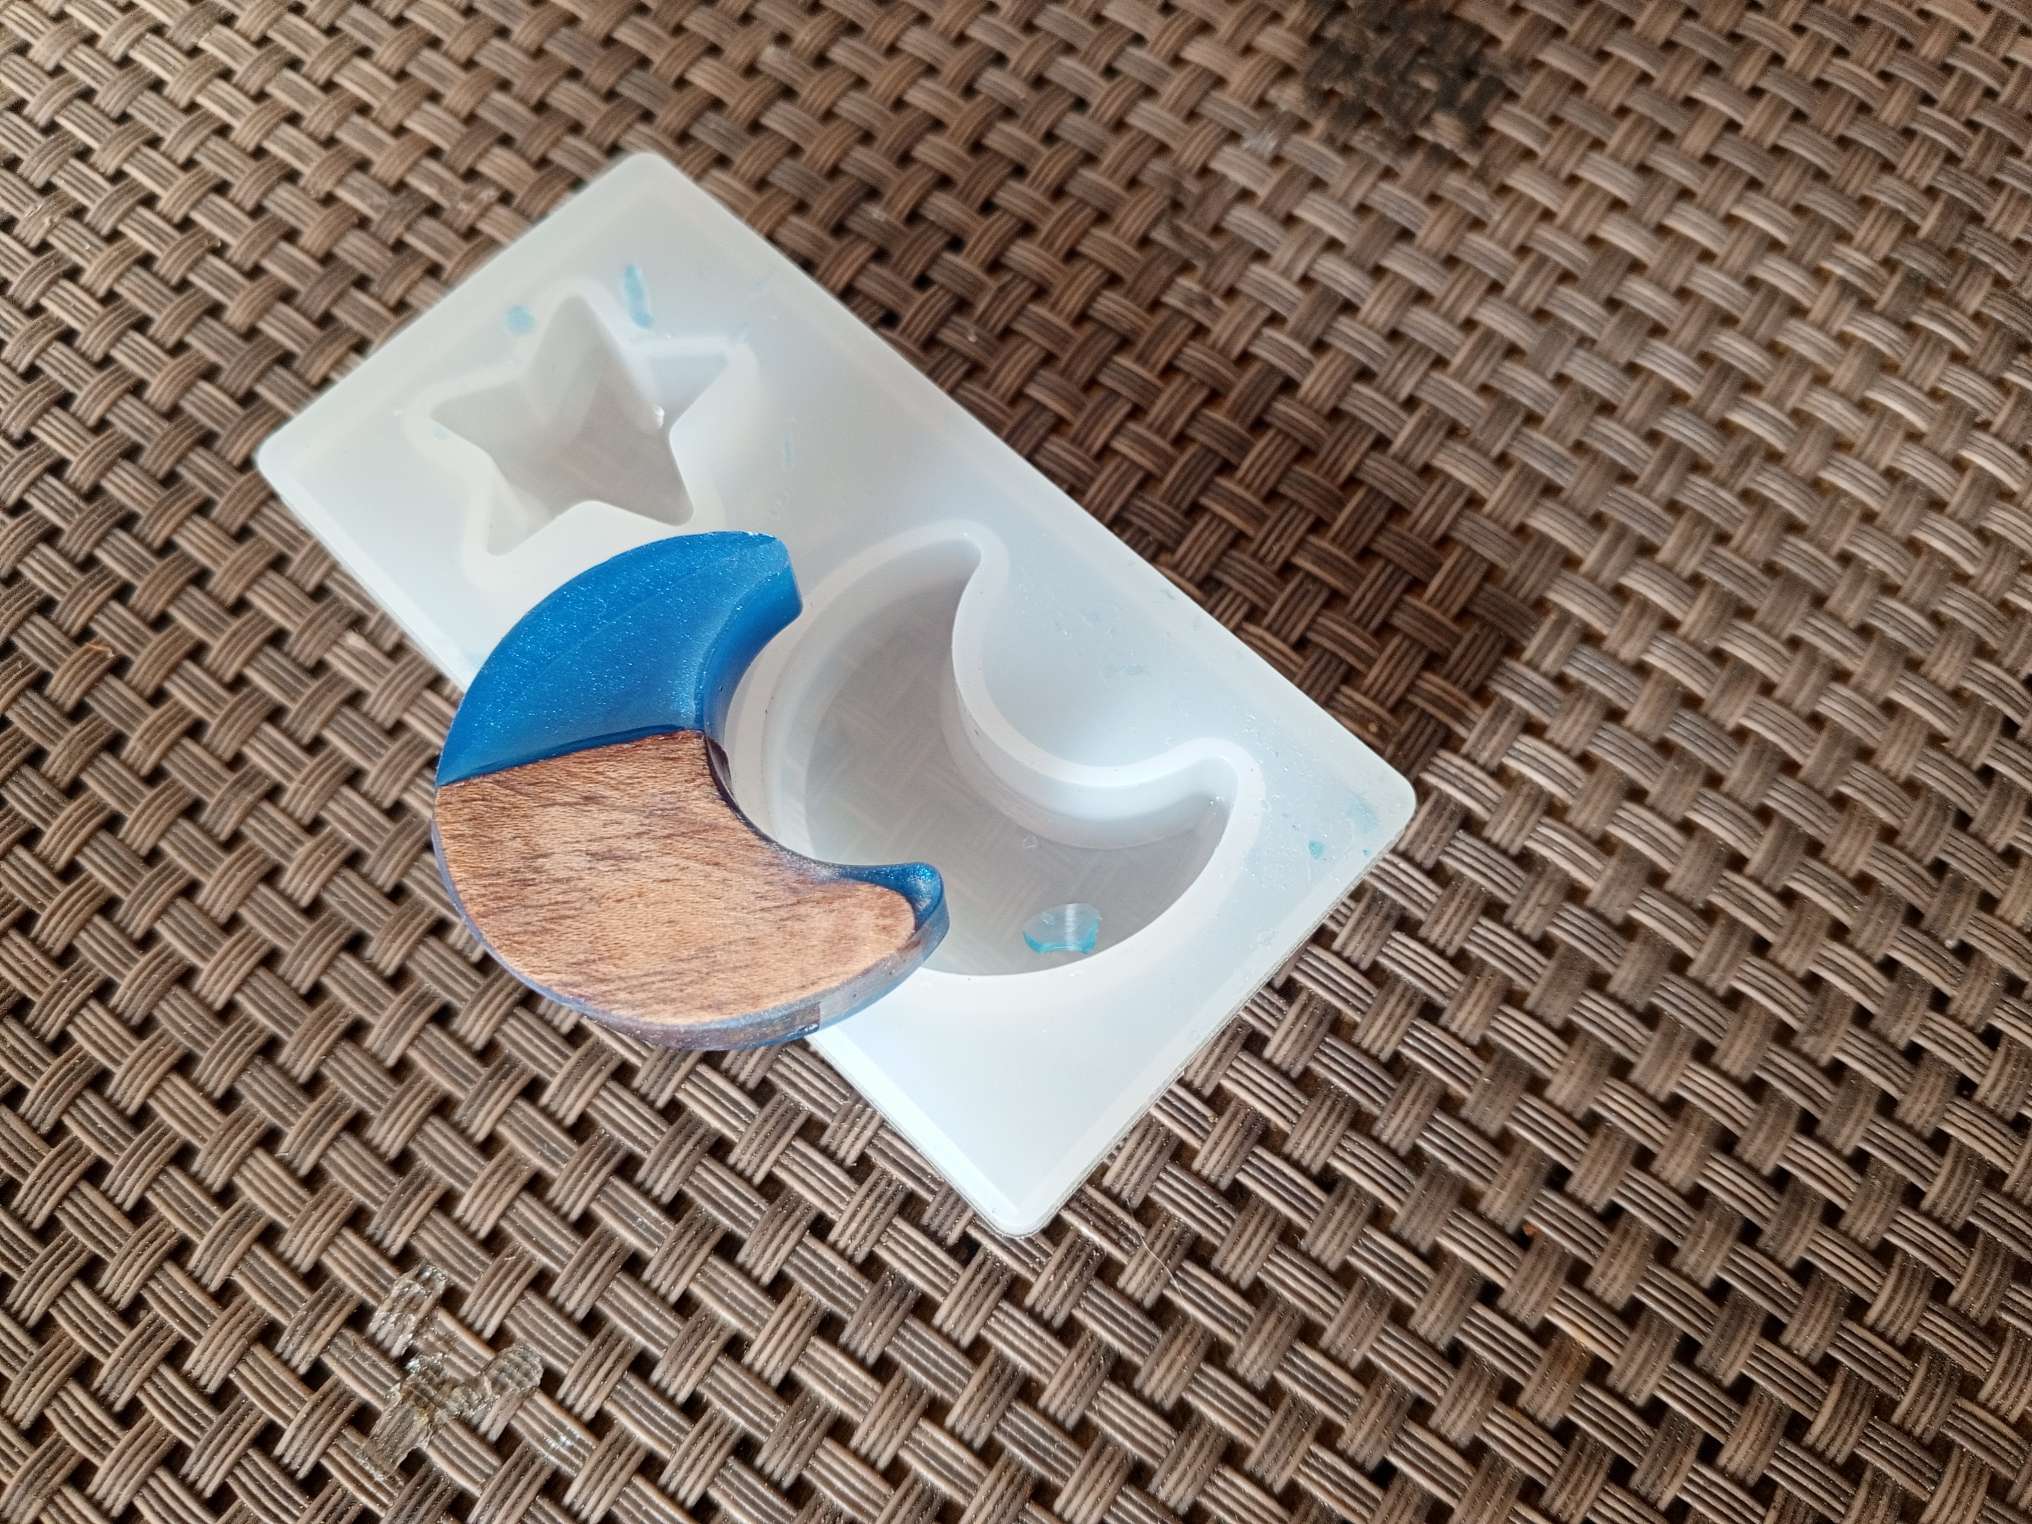
Iniciamos marcando el tamaño de la luna de acuerdo al tamaño del molde , para ésto tome un recorte de cinta adhesiva y pegue a la mitad al molde para tomar las medidas exacta.
La idea es recordar la luna para que sea mitad madera y mitad resina.
Con la ayuda de un Dremel y un disco de corte extraje el diseño de media luna haciendo cortes y lijando hasta encontrar el tamaño ideal al molde
We start by marking the size of the moon according to the size of the mold, for this take a piece of adhesive tape and stick half of it to the mold to take exact measurements.
The idea is to remember the moon so that it is half wood and half resin.
With the help of a Dremel and a cutting disc I extracted the half-moon design by making cuts and sanding until I found the ideal size for the mold.
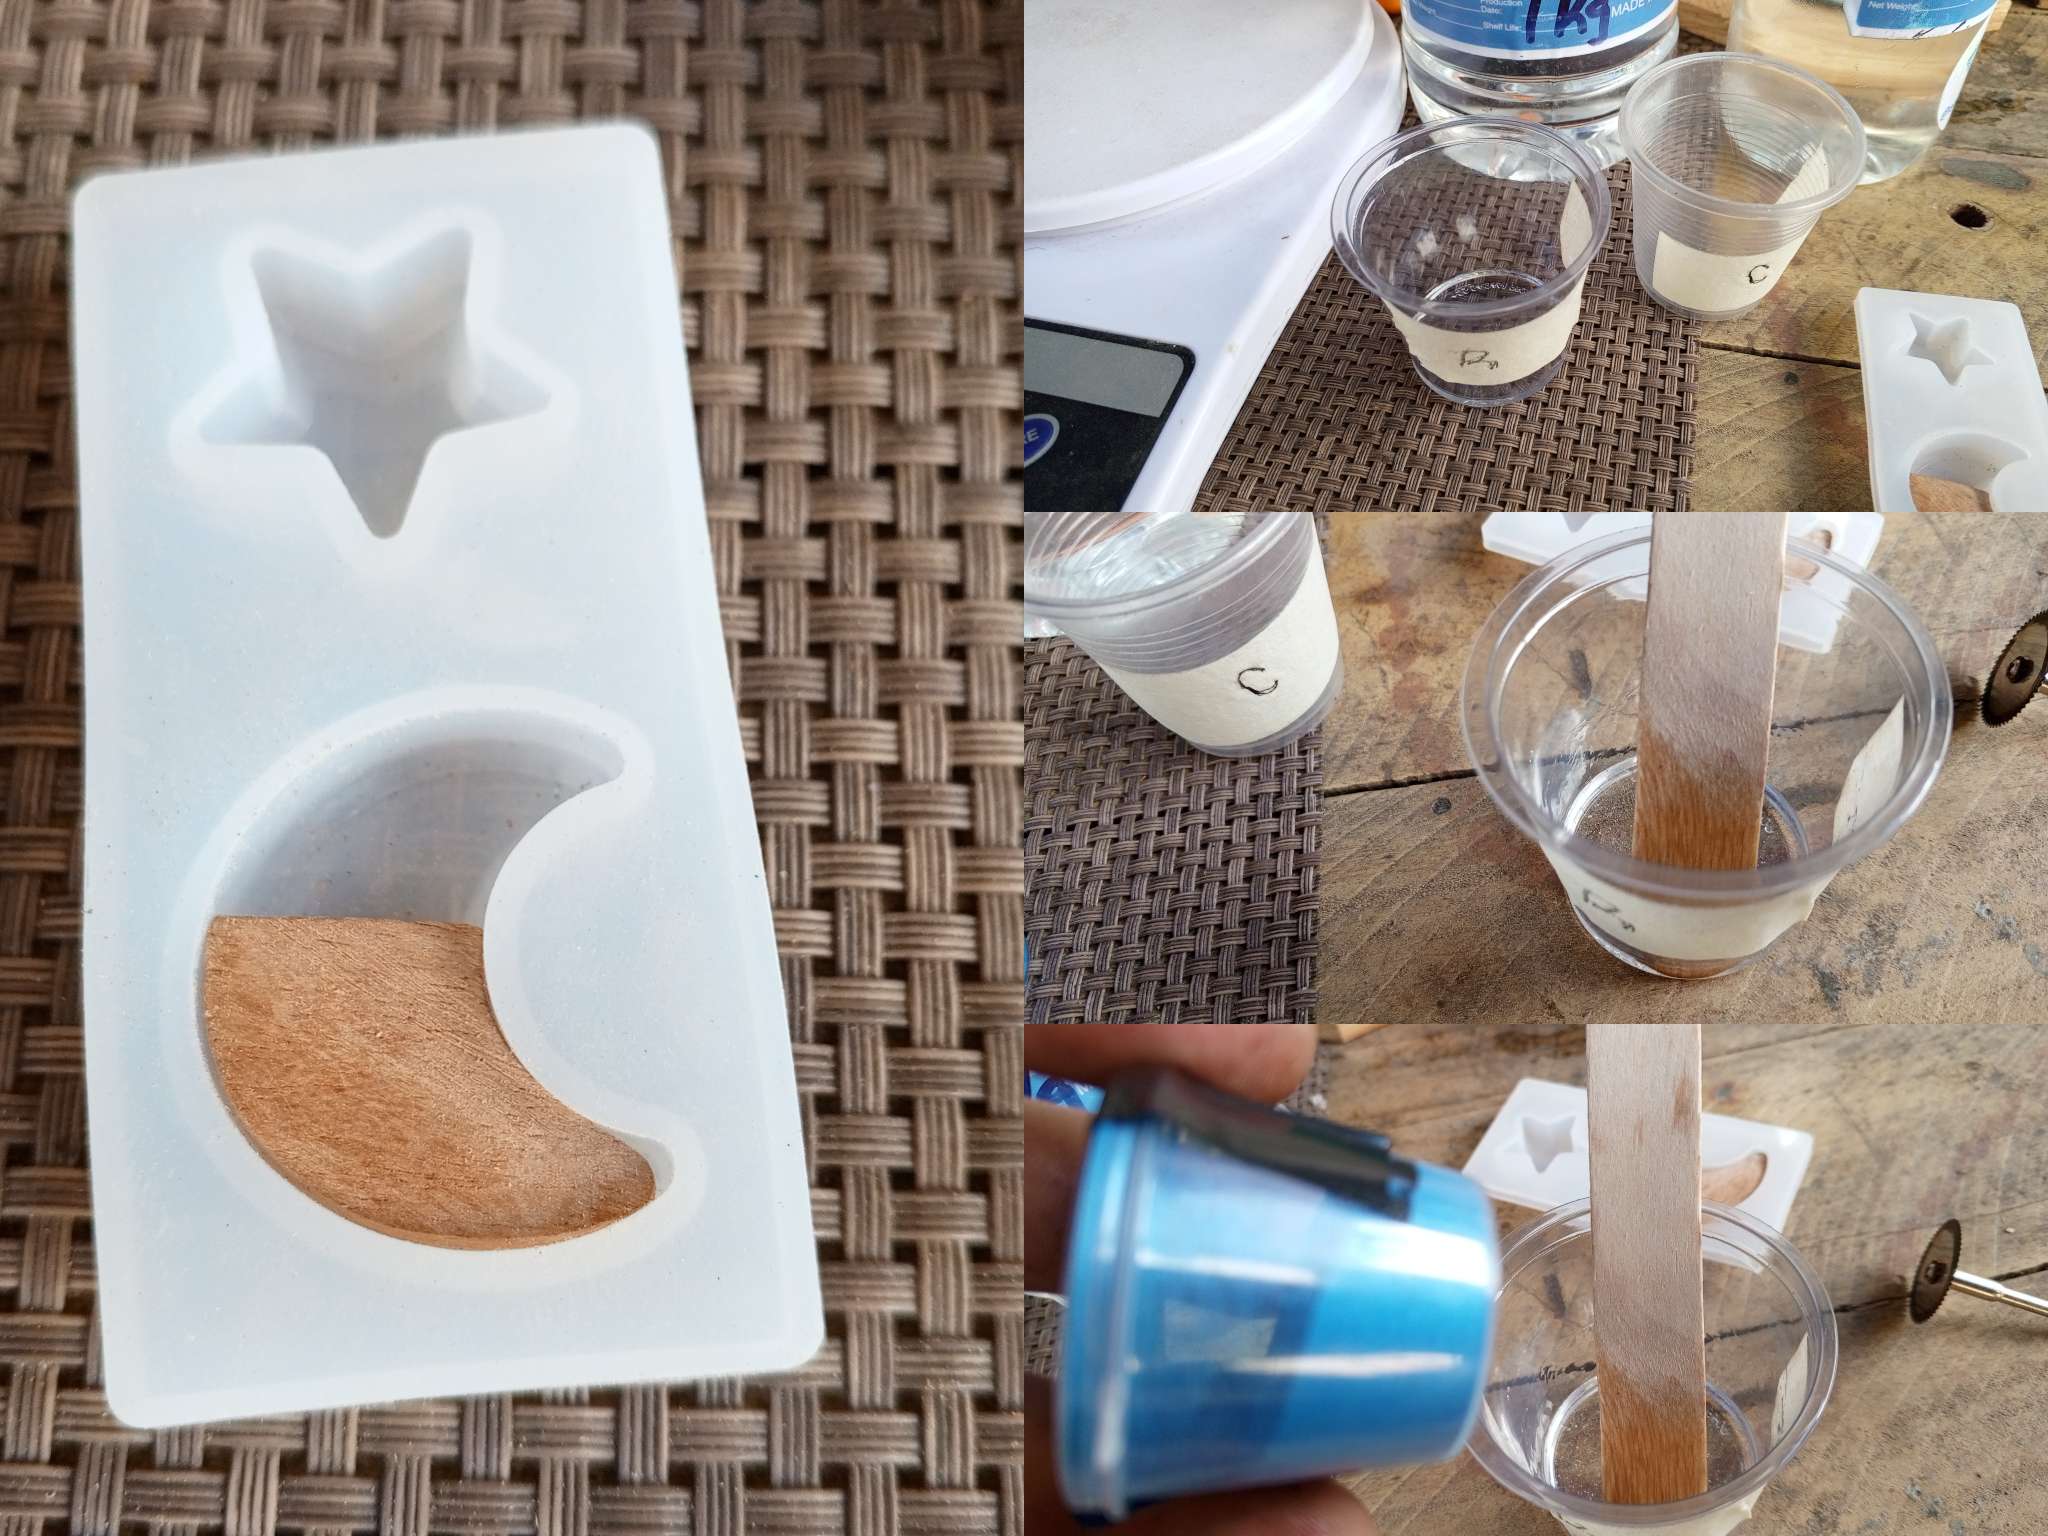
Luego colocamos la mitad d la luna dentro del molde y procedemos a mezclar la resina, este tipo es de 2 por 1, es decir se mezcla 50 % de resina y un 25% de catalizador o endurecedor
Para ésto se utiliza un peso , en este caso utilice uno eléctrico para medir las proporciones exactas de manera que no se queme la resina con el catalizador si es mucho, o quede blando si el poco.
Para agregar el pigmento se saca un porcentaje de la resina y se mezcla durante 5 minutos.
En este caso utilice un pigmento azul que es uno de mis colores favoritos.
Then we place half of the moon inside the mold and proceed to mix the resin, this type is 2 by 1, that is, 50% resin and 25% catalyst or hardener are mixed.
For this, a weight is used, in this case use an electric one to measure the exact proportions so that the resin does not burn with the catalyst if it is too much, or remains soft if it is too little.
To add the pigment, a percentage of the resin is removed and mixed for 5 minutes.
In this case I used a blue pigment which is one of my favorite colors.
Luego de mezcla se rellena el otro espacio del molde y pacientemente esperamos que endurezca.
El secado de esta resina es de 24 horas aproximadamente, se puede manipular hasta los primeros 28 minutos después de mezclar con el catalizador.
After mixing, the other space of the mold is filled and we patiently wait for it to harden.
The drying time of this resin is approximately 24 hours; it can be handled up to the first 28 minutes after mixing with the catalyst.
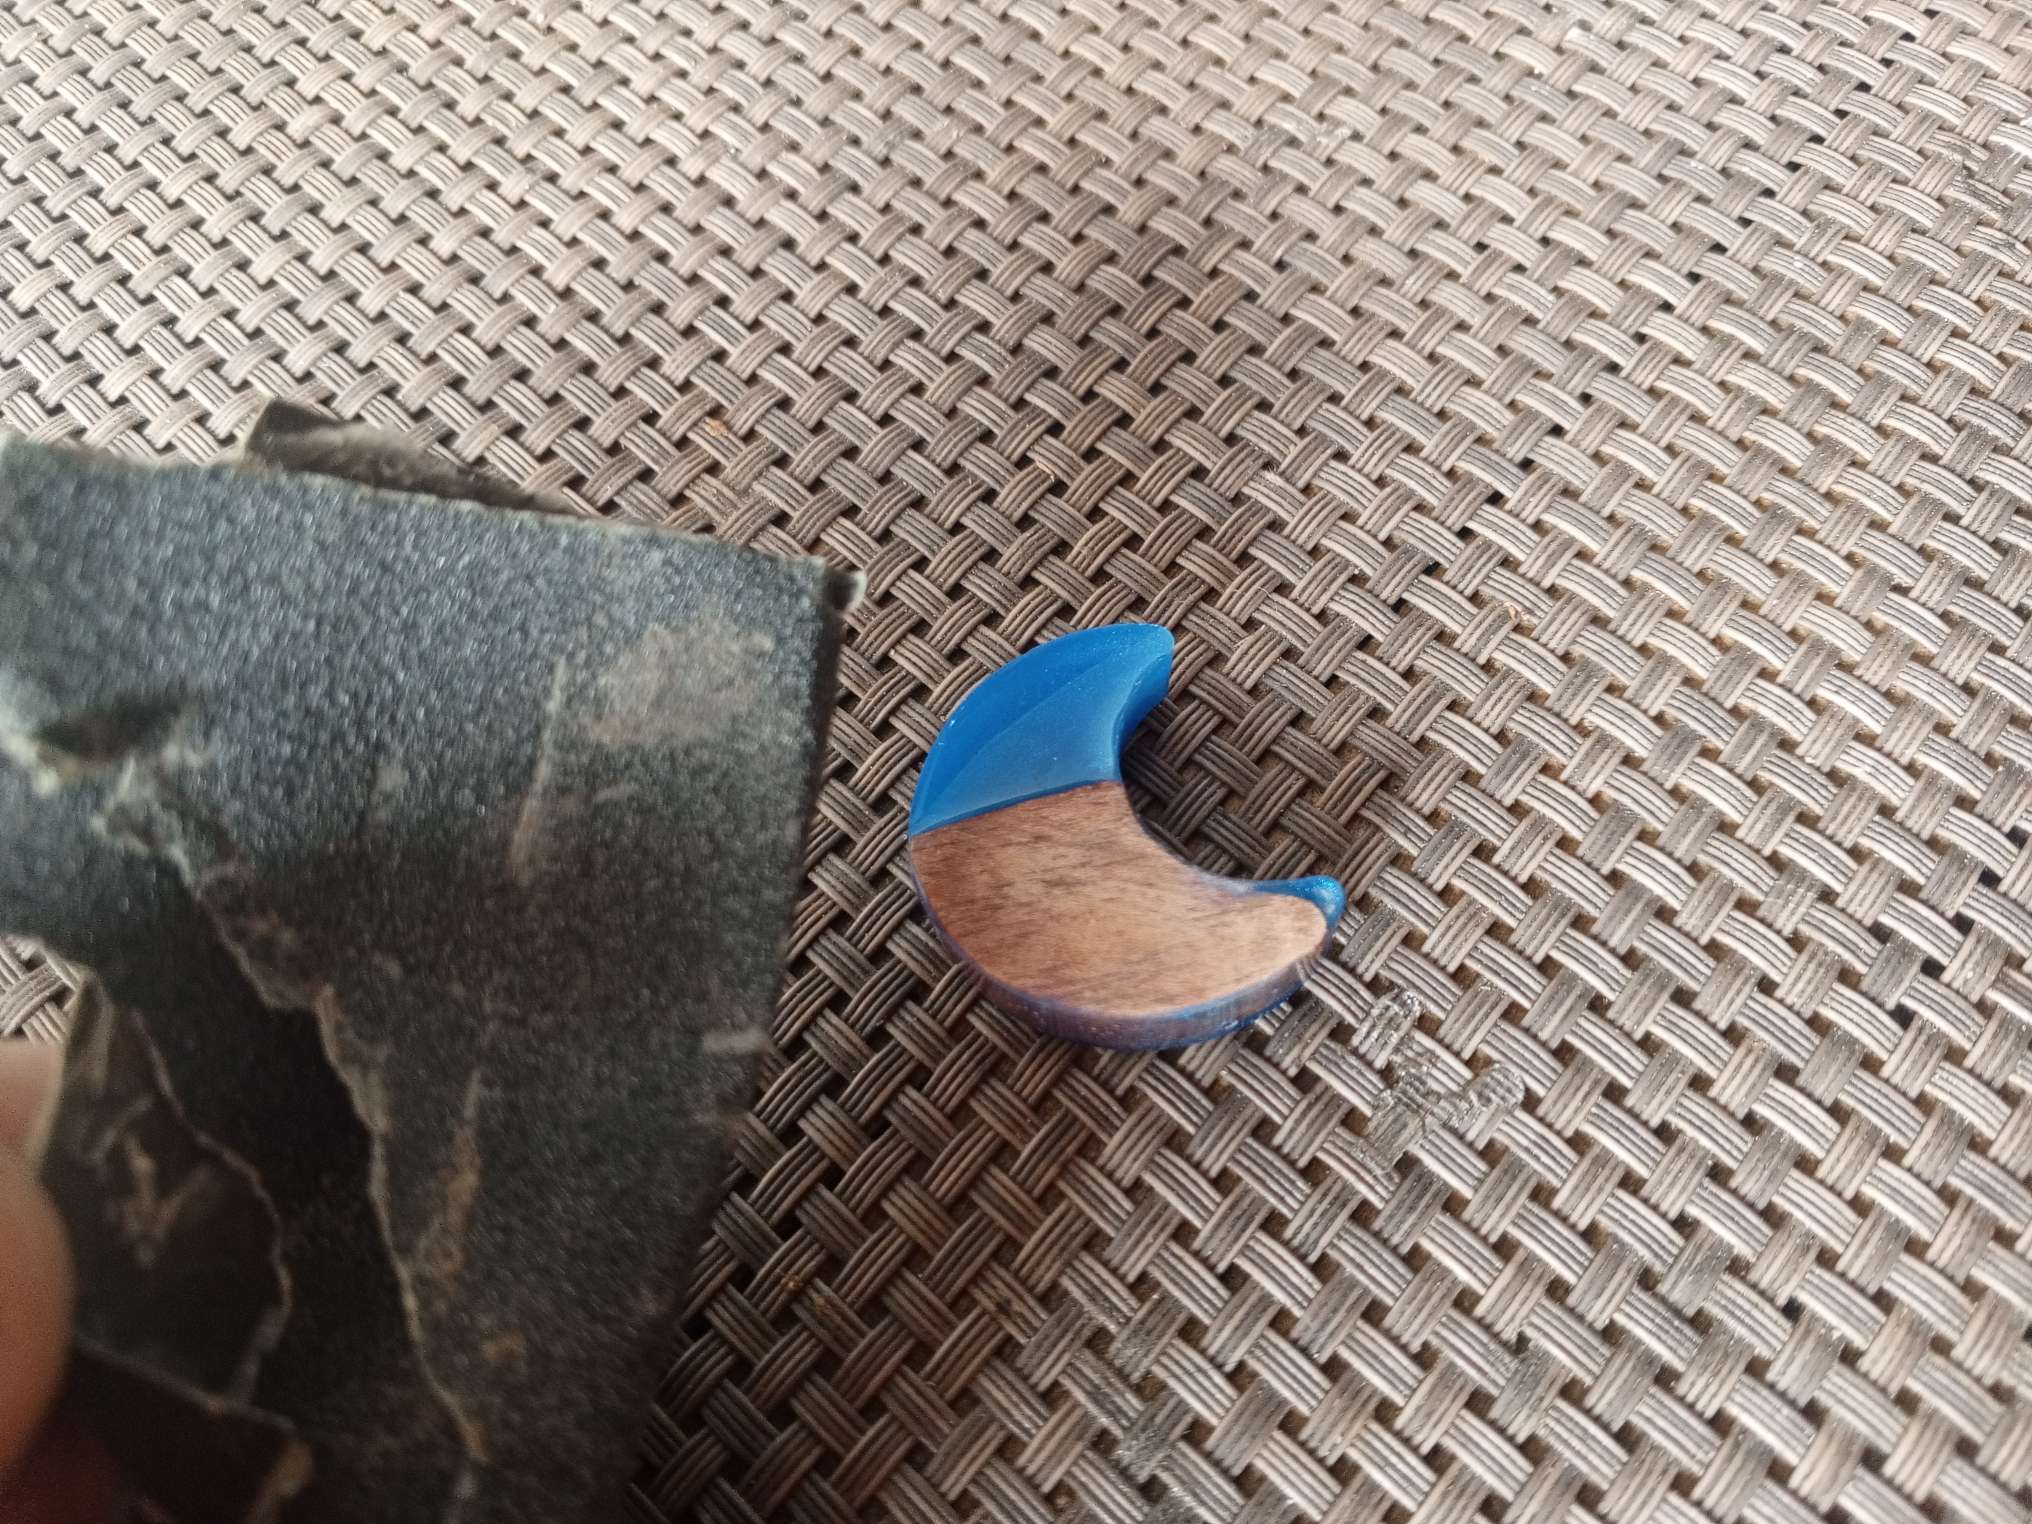
El último paso es lijar y barnizar la madera, puedes cubrir también toda la madera con la resina , pero prefiero barnizar, antes de eso pase una lija número mil al agua hasta conseguir un acabado prolijo.
The last step is to sand and varnish the wood, you can also cover the entire wood with the resin, but I prefer to varnish, before that I use a thousand-thousand water-based sandpaper until I get a neat finish.
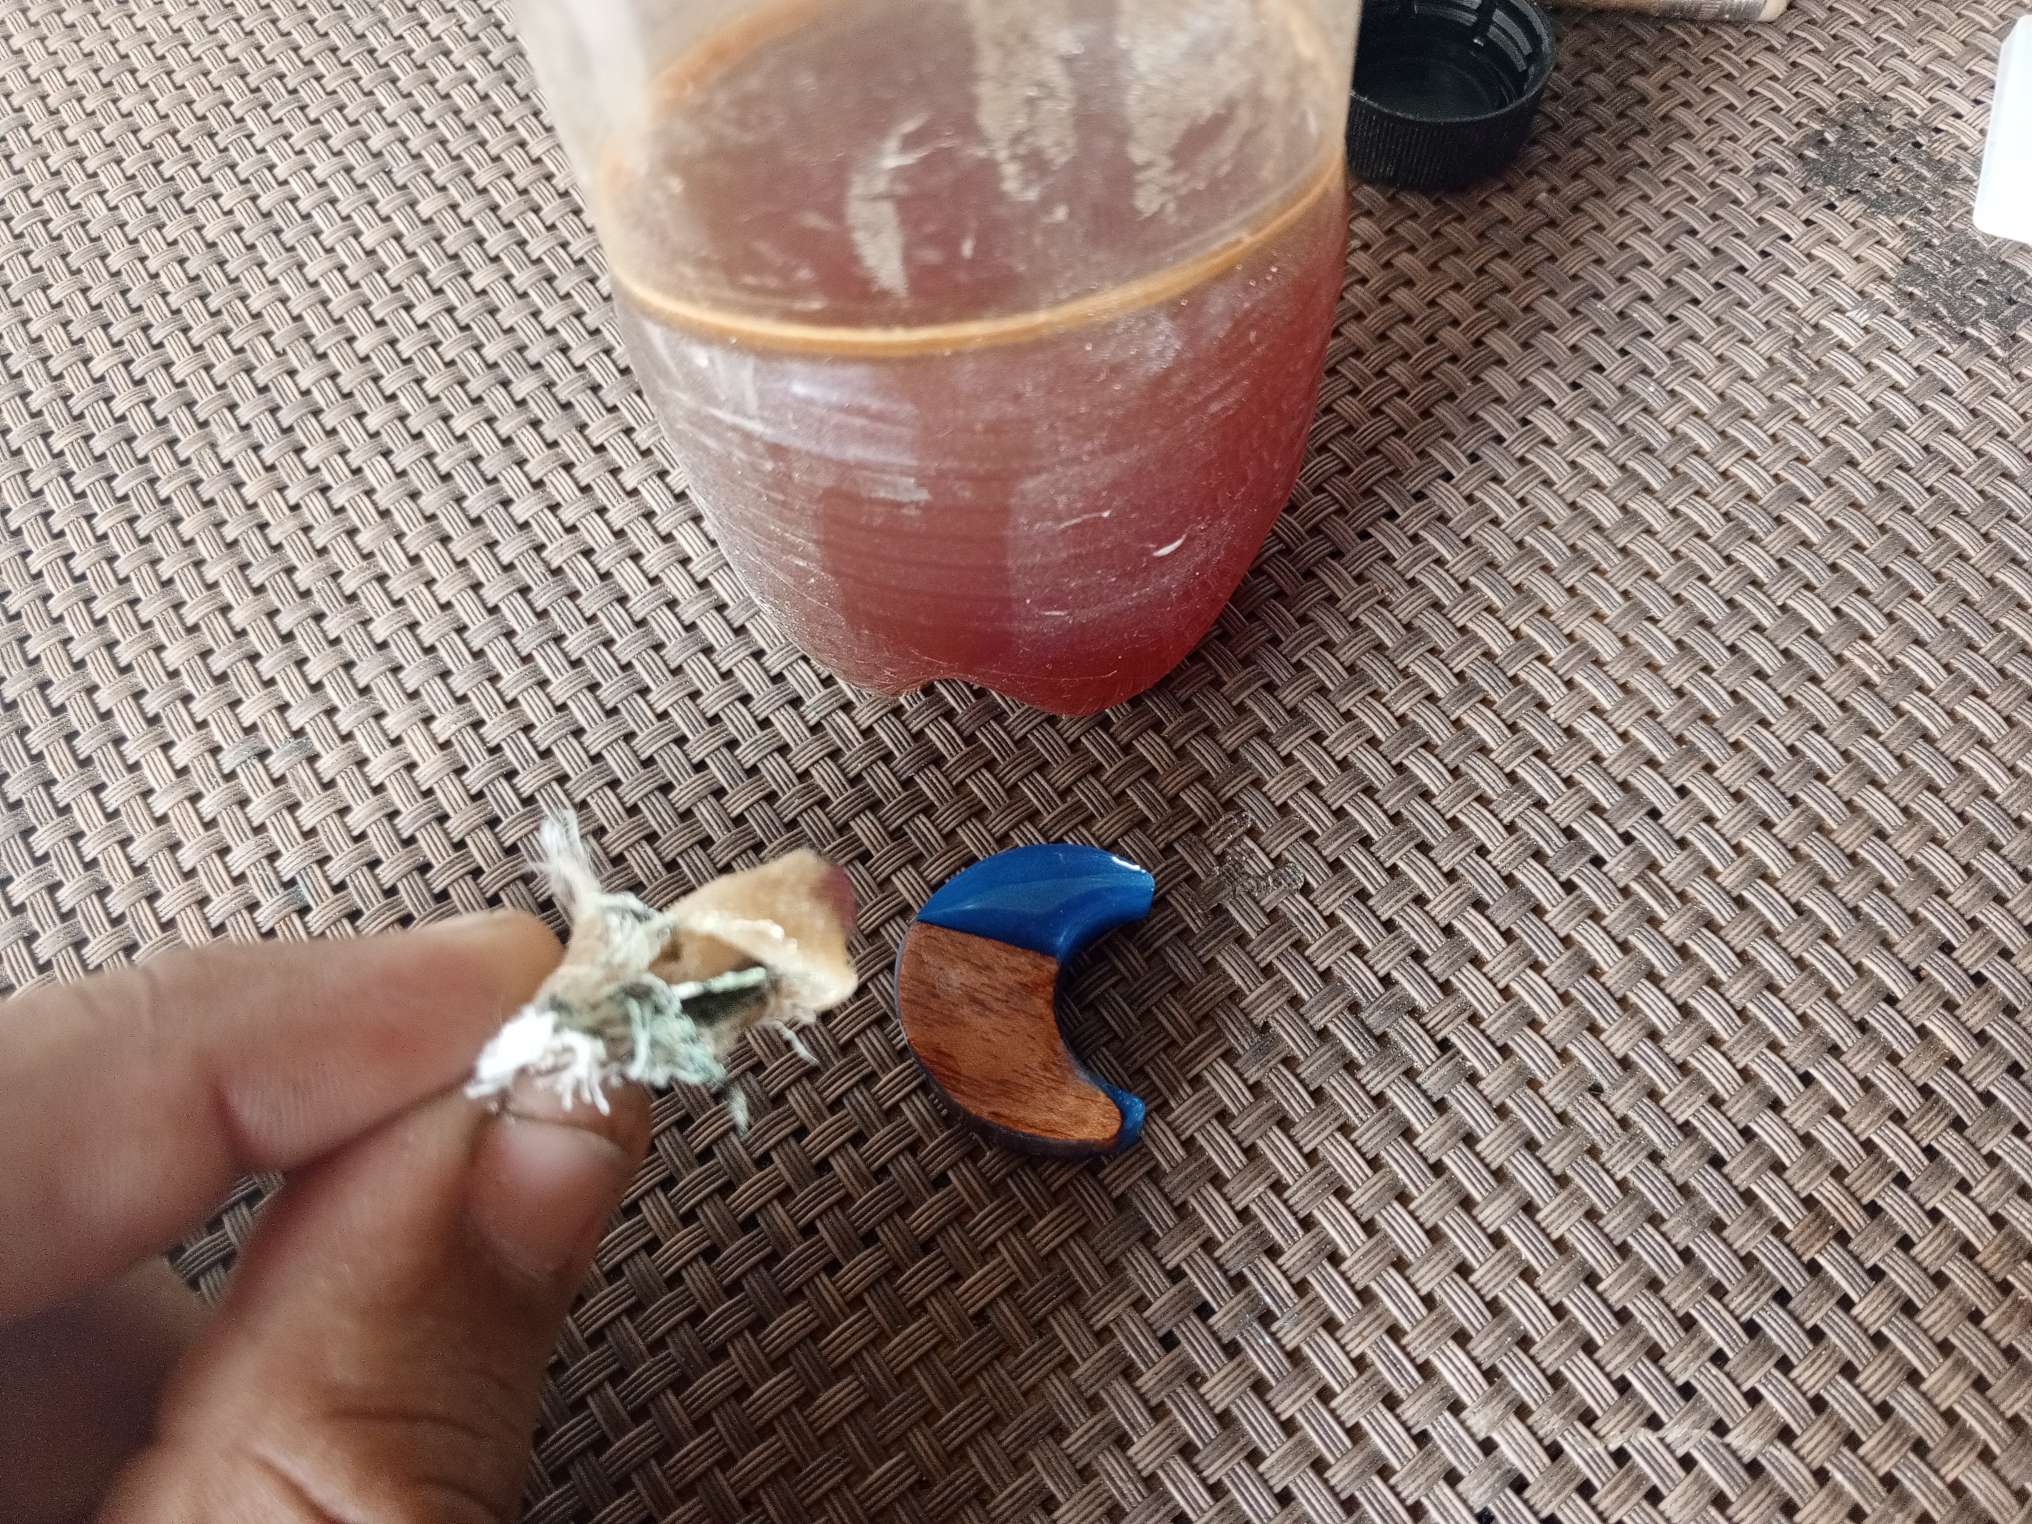
Aplique con un trapo limpio el barniz y deje secar durante 1 hora, a medida que vamos viendo el acabado , nos vamos emocionando con nuestro pequeño proyecto jeje
Apply the varnish with a clean cloth and let it dry for 1 hour. As we see the finish, we get excited about our little project hehe
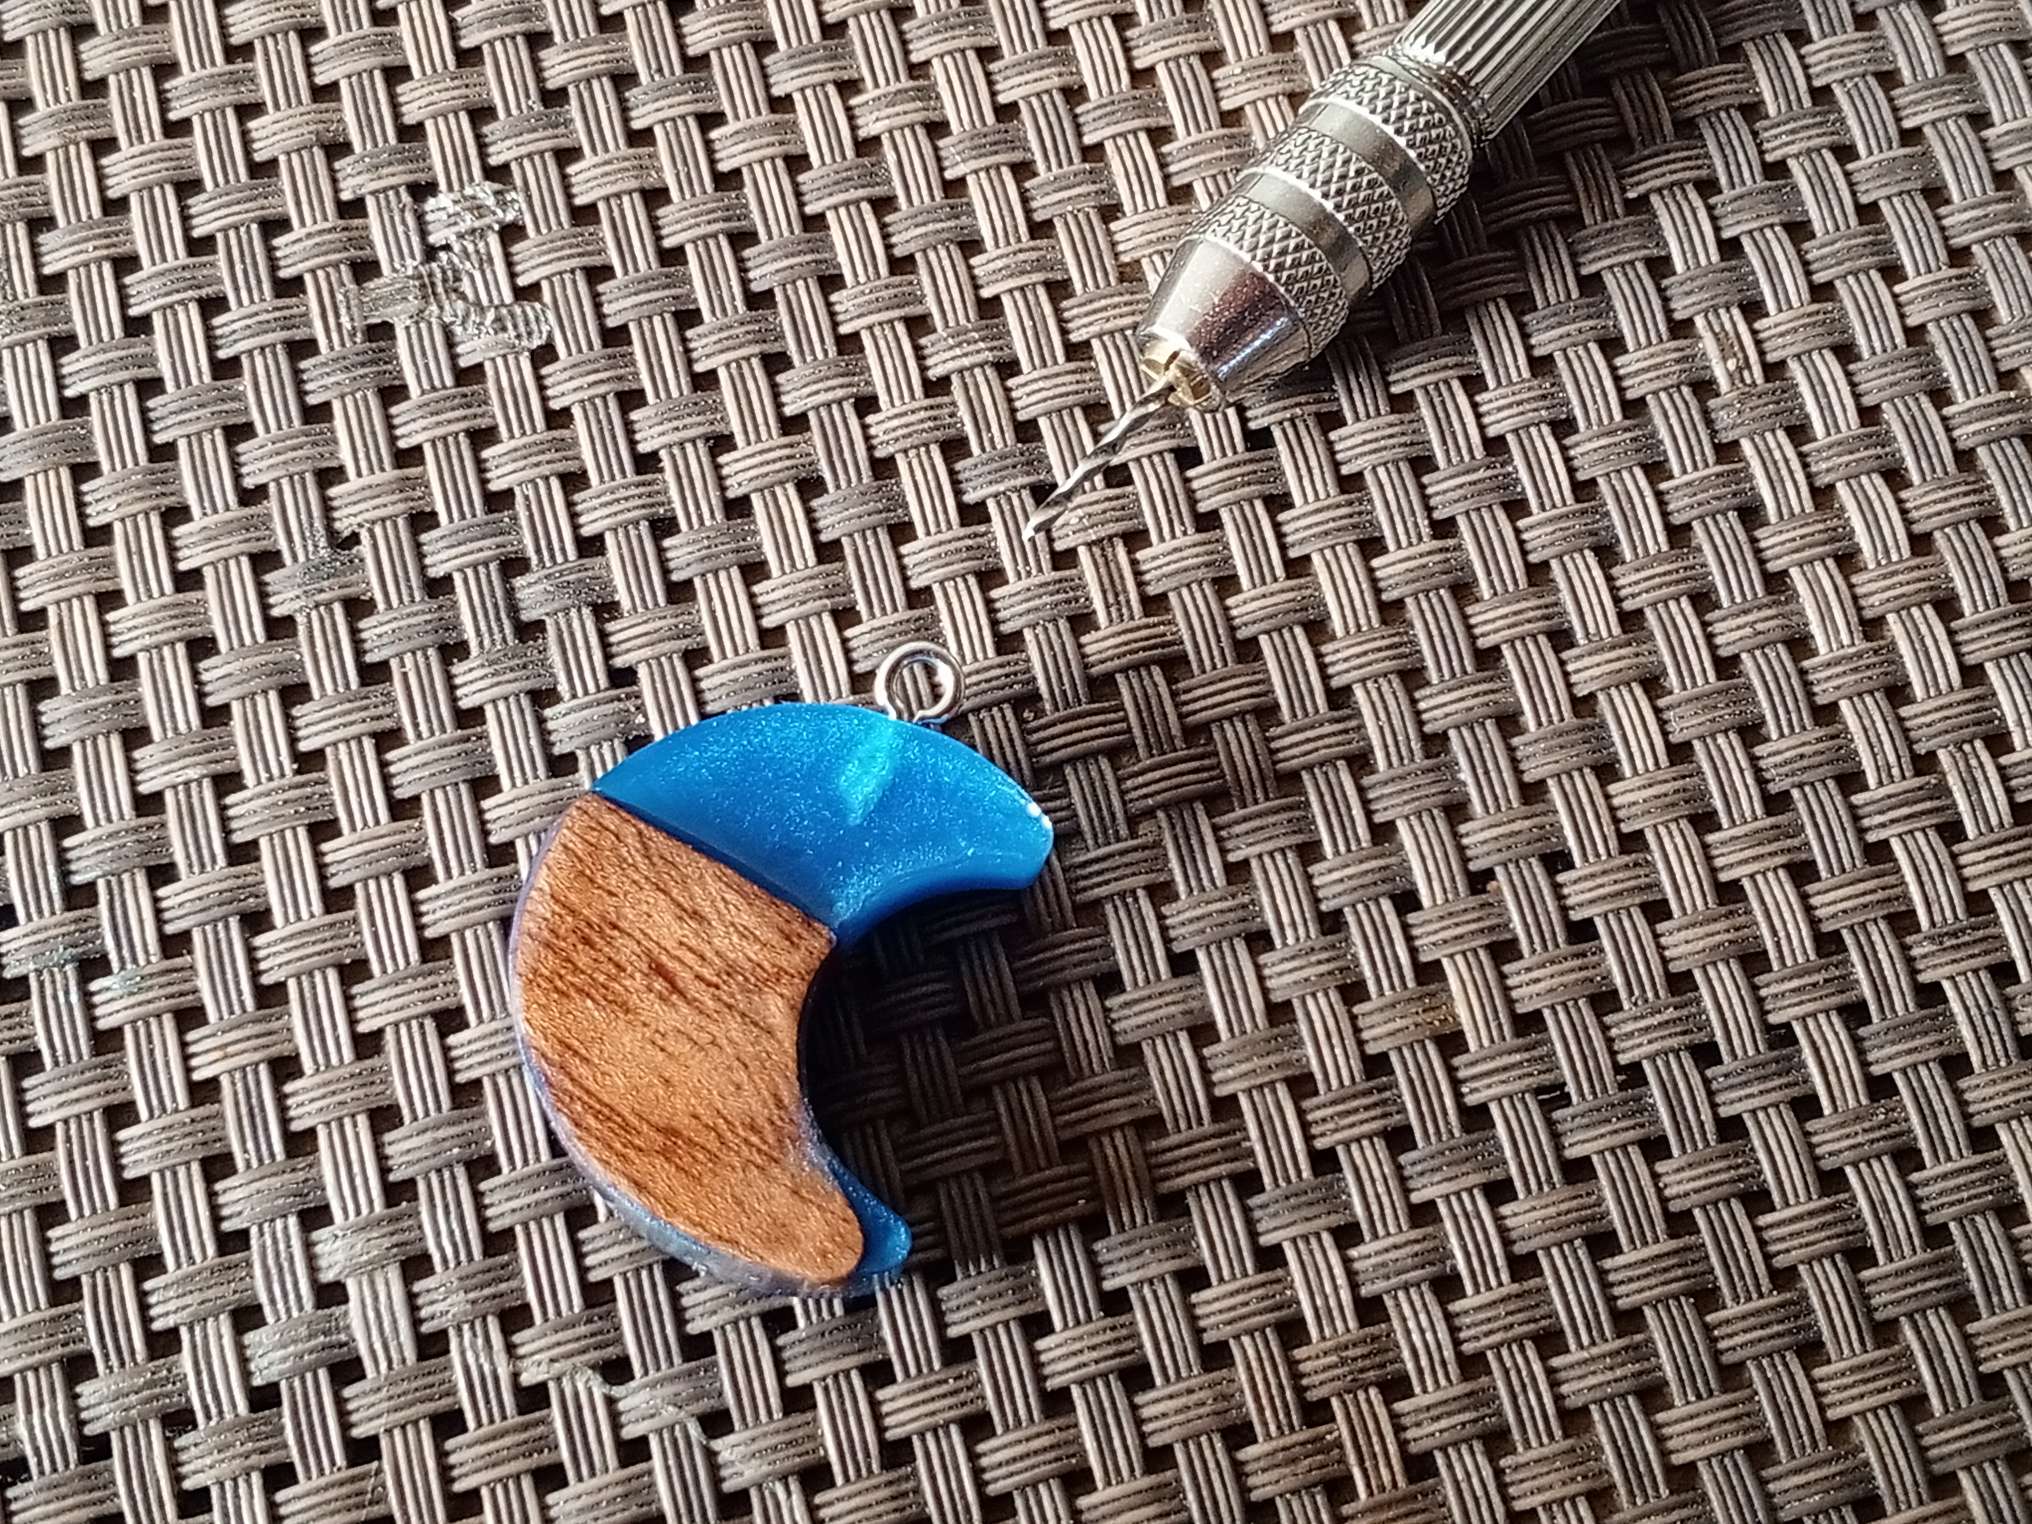
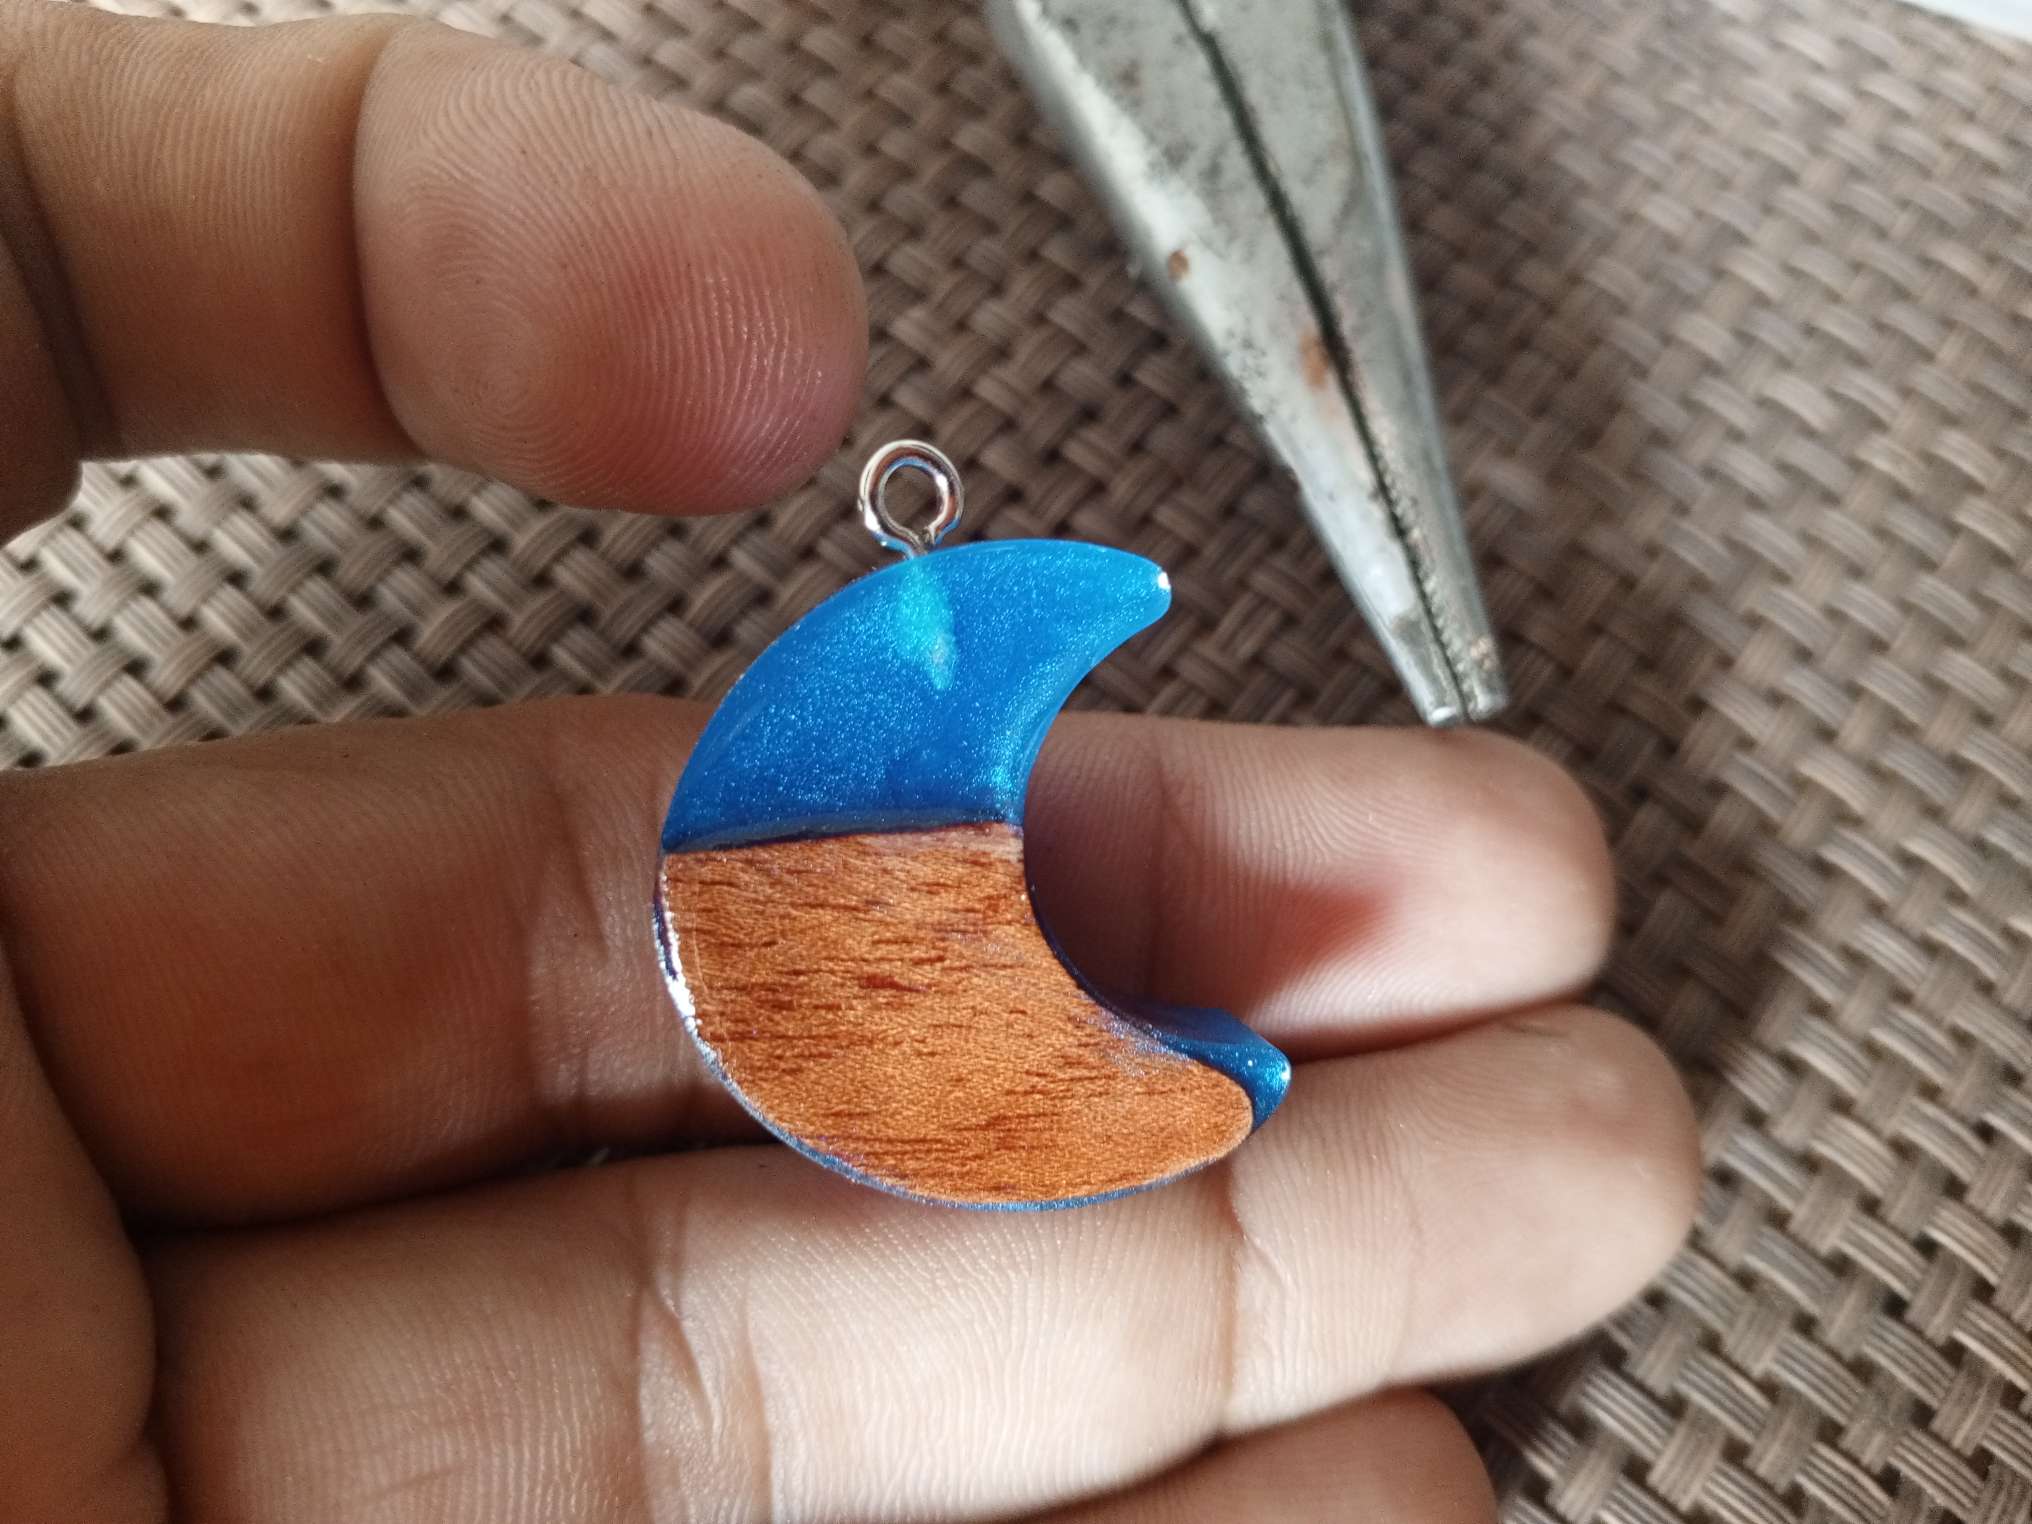
Por último inserte un aro con tornillo para colocar el cordón y poder colgar en el cuello.
Finally, insert a ring with a screw to place the cord and hang it around the neck.
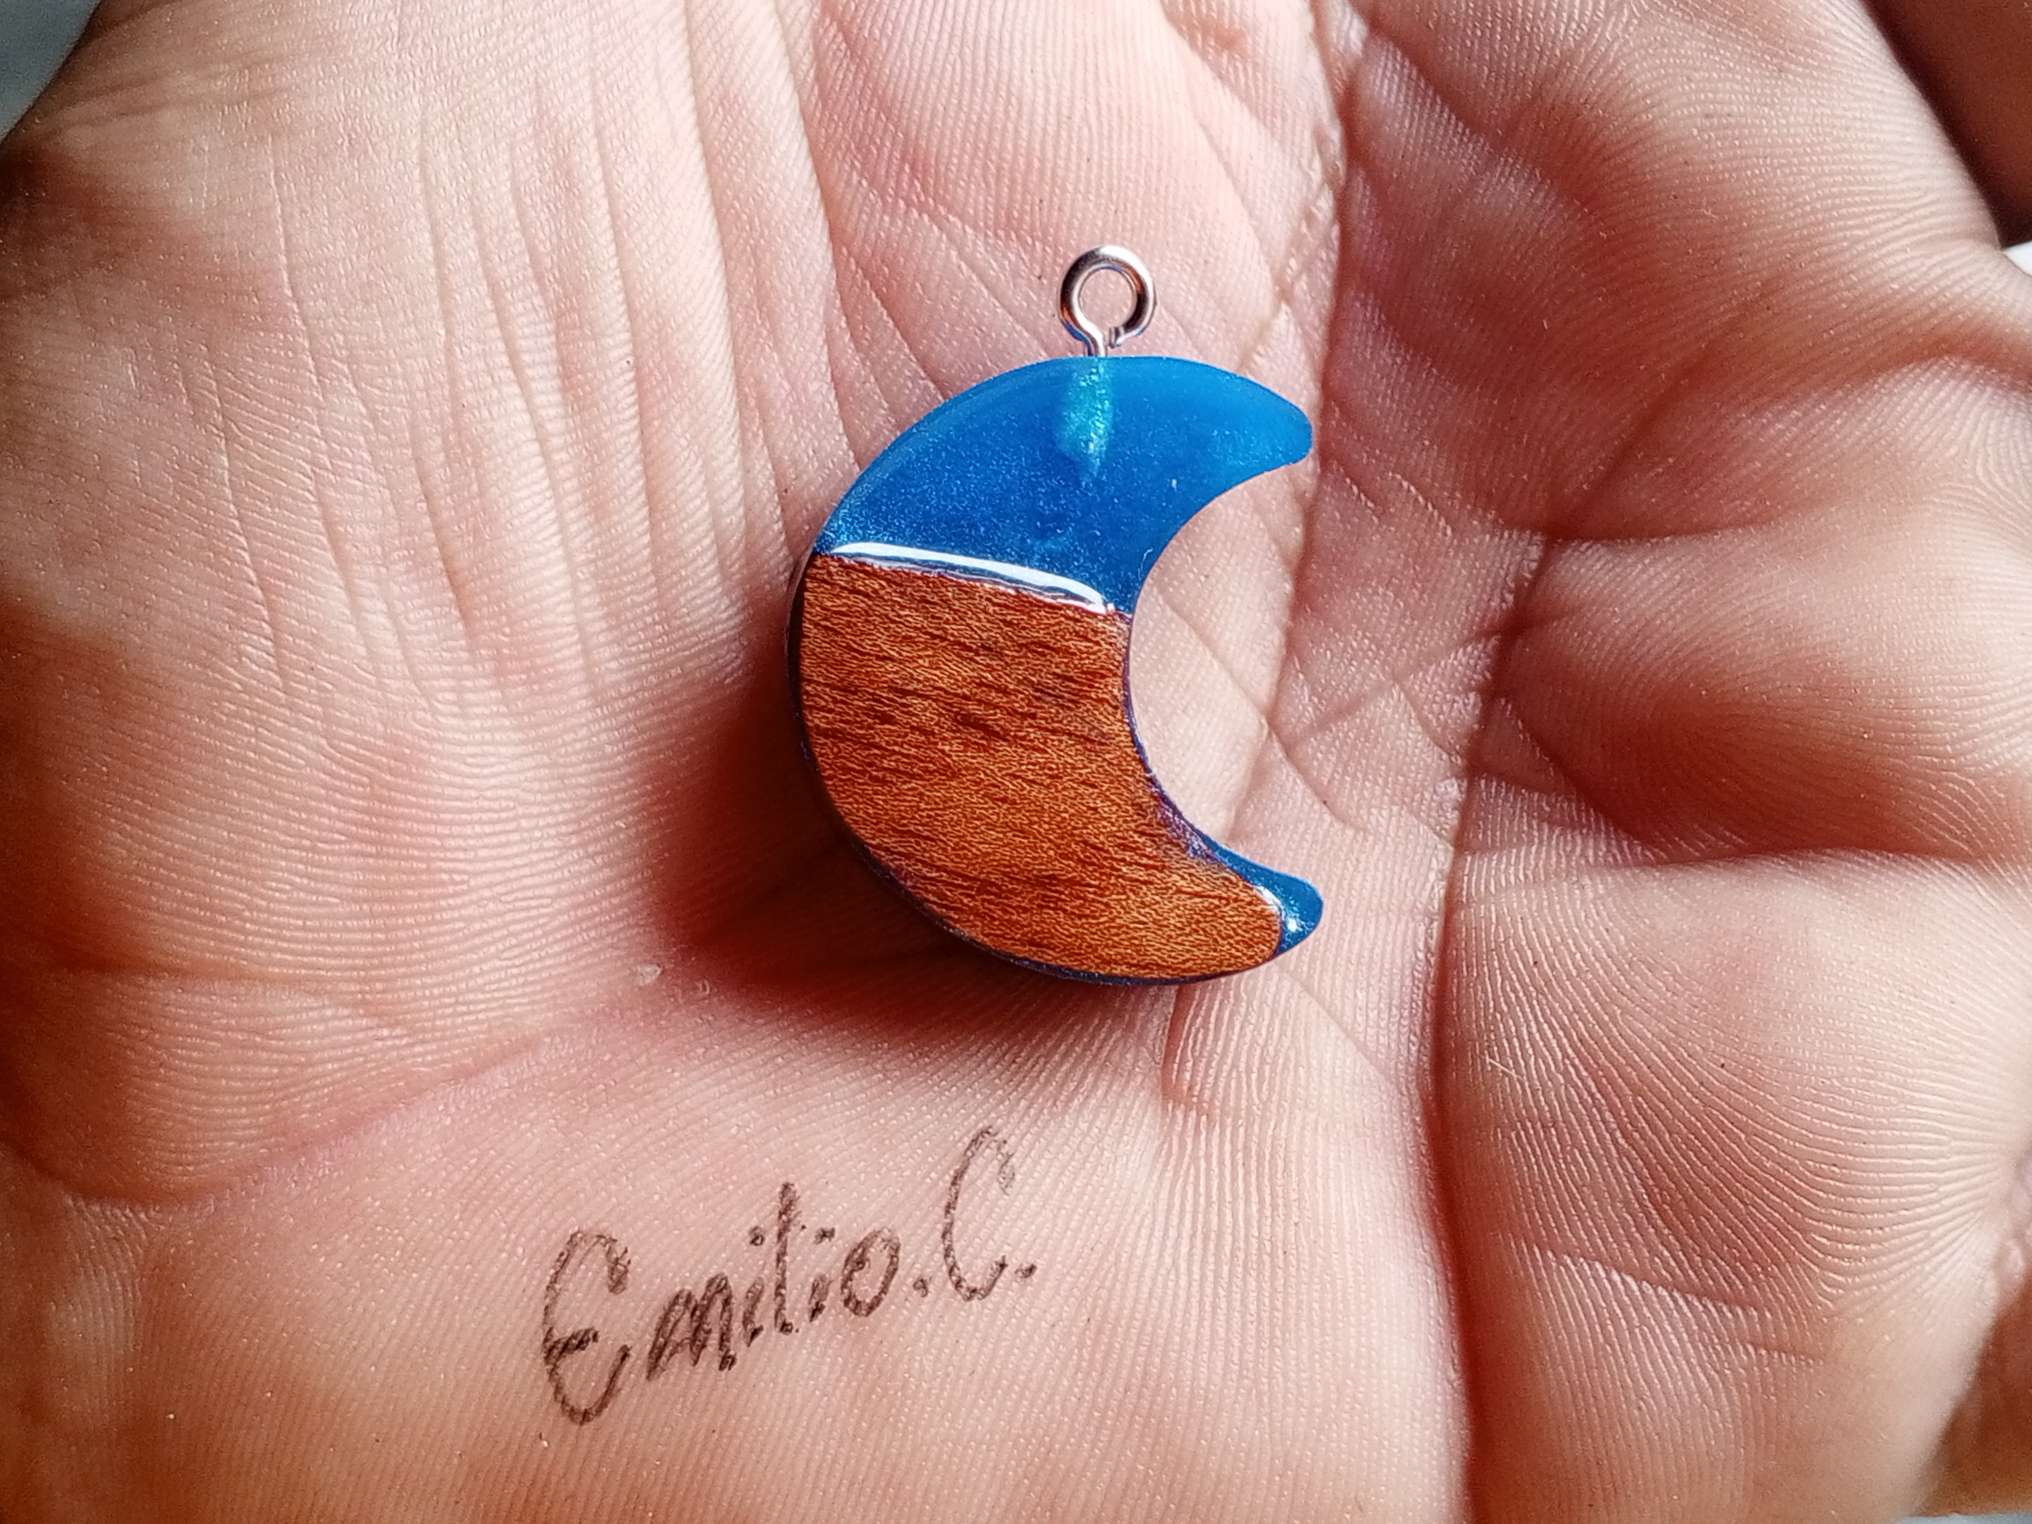
A pesar de que son mis primeros trabajos con resina , me siento bien de poder aprender algo nuevo , espero poder seguir en mis prácticas y presentar nuevos proyectos pronto.
Agradecido por leerme , espero tengan un lindo día !
Even though these are my first works with resin, I feel good about being able to learn something new, I hope to continue my practices and present new projects soon. Thank you for reading, I hope you have a nice day!