
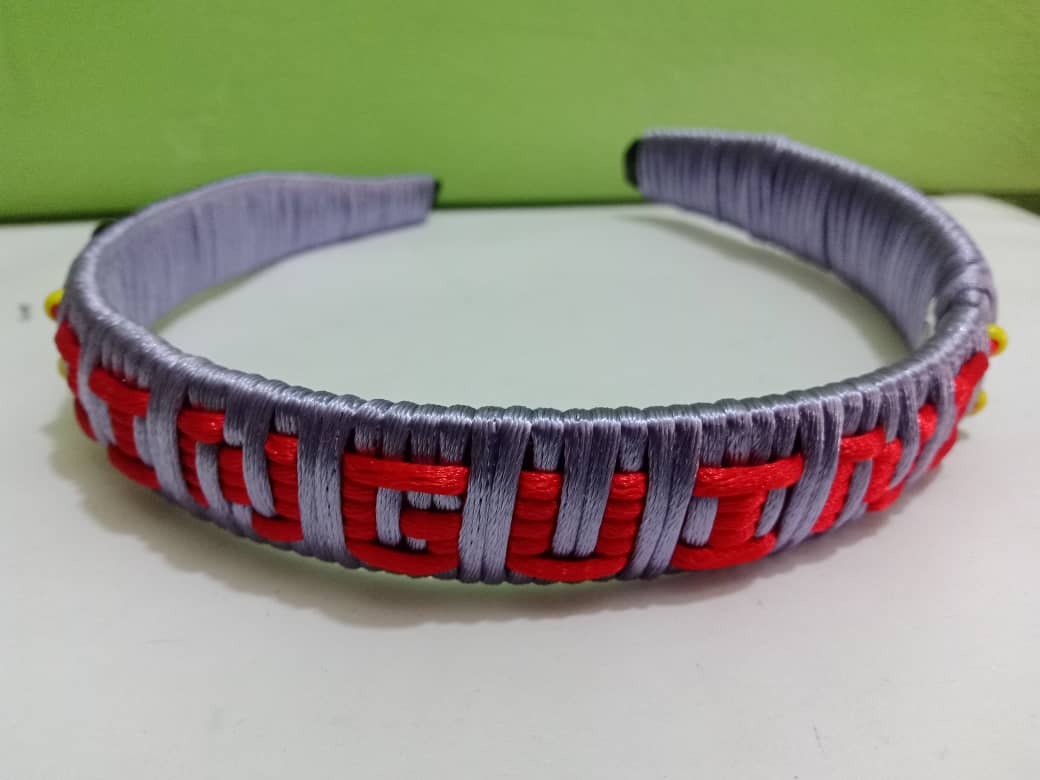
Hello #holozing community, I am delighted to greet you and wish you a happy and blessed Thursday. This time I share with you a fan art inspired by ZINGUINI. This character caught my attention and I decided to be inspired by him because of the characteristics he possesses such as the variety of very vibrant colors he has.
My fan art is a beautiful personalized headband about this character ZINGUINI.
Hola comunidad #holozing encantado en saludarles y desearles feliz y bendecido jueves. En esta ocasión les comparto un fan art inspirado en ZINGUINI. Éste personaje captó mi atención y decidí inspirarme en él por las características que posee como la variedad de colores muy vibrantes que posee.
Mi fan art es un hermoso cintillo personalizado sobre este personaje ZINGUINI

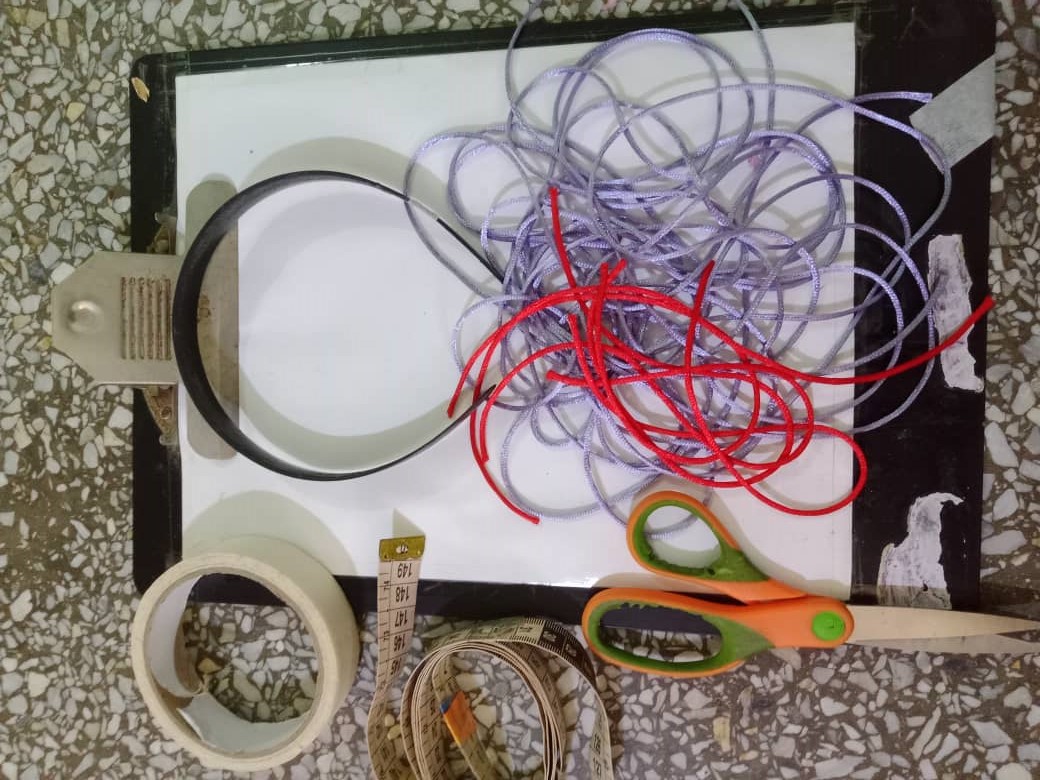
The materials I used to make this fan art are the following:
Headband piece
Mouse tail thread
Scissors
Tinder
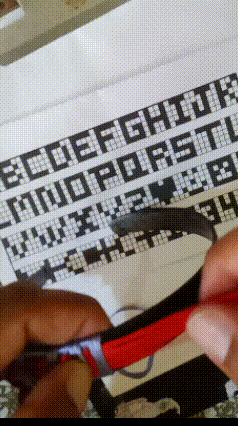
Letter mold
Adhesive tape
Los materiales que usé para realizar éste fan art son los siguientes:
Pieza de cintillo
Hilo cola de ratón
Tijera
Yesquero
Molde de letras
Cinta adhesiva
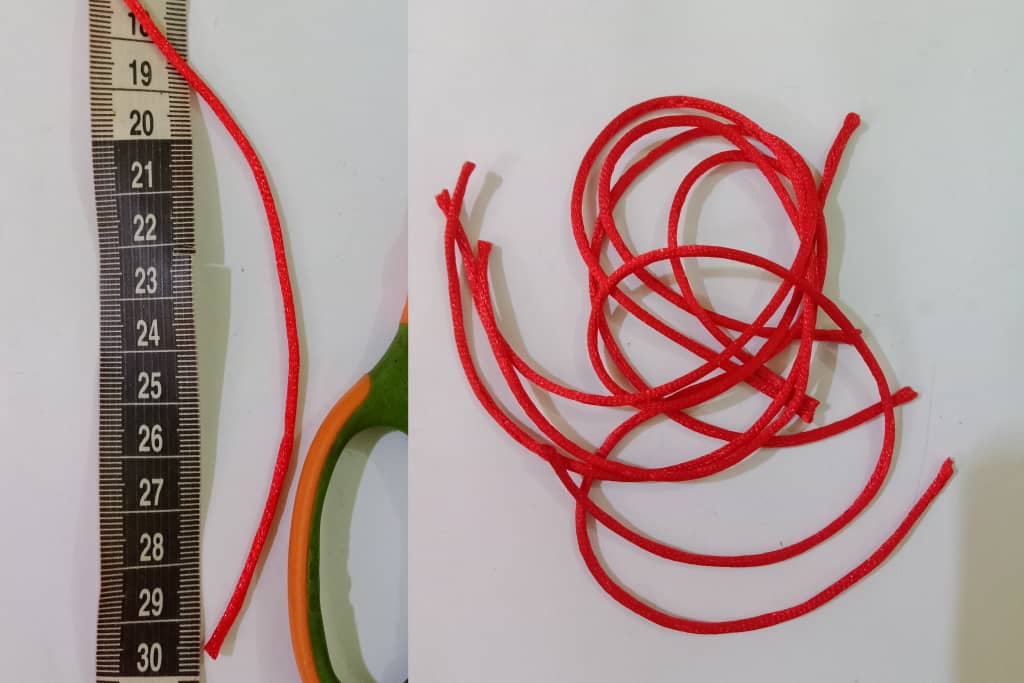
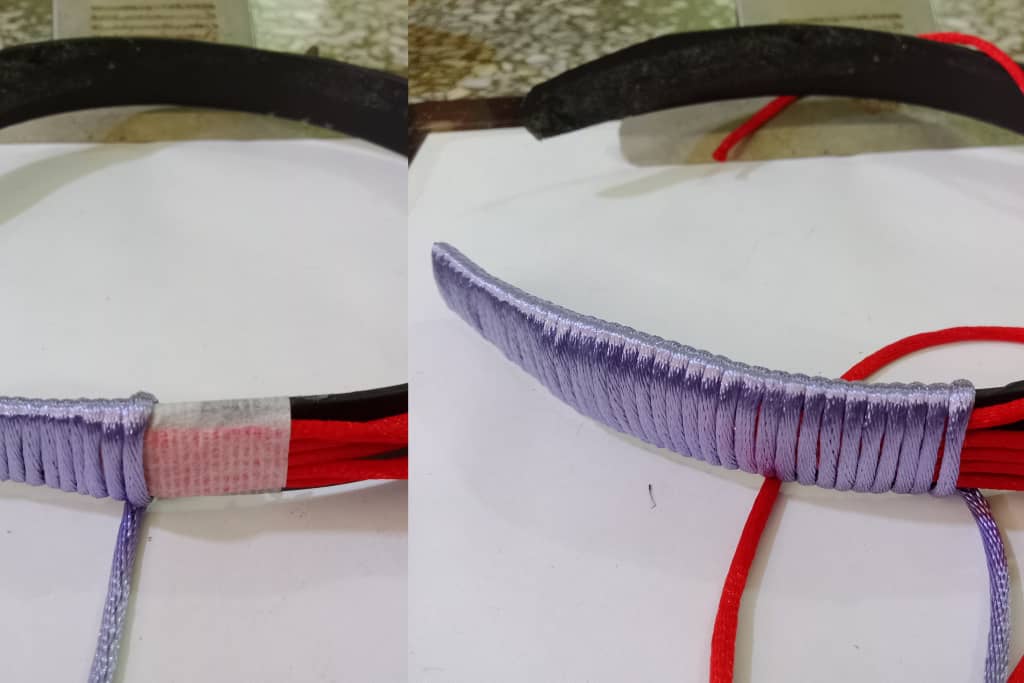
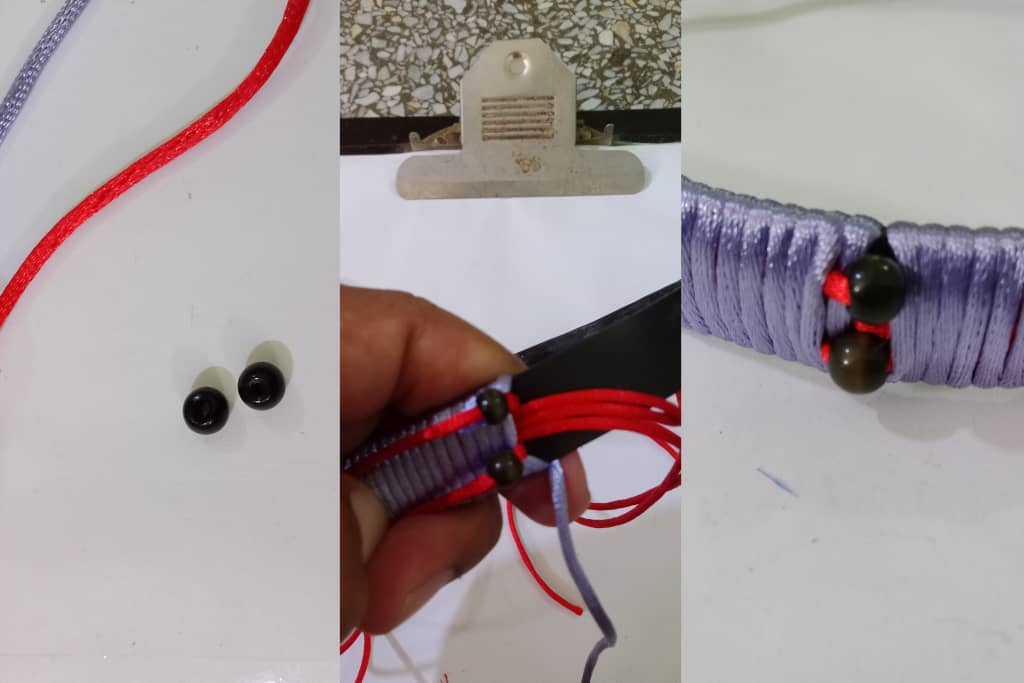
I started by cutting five 30cm strands of yarn that I will use to make the letters of the character. Then I measured three meters of mouse tail yarn that I will use to weave the headband.
Inicié cortando cinco hebras de hilos de 30cm que usaré para realizar las letras del personaje Después medí tres metros de hilos de cola de ratón que usaré para realizar el tejido del cintillo
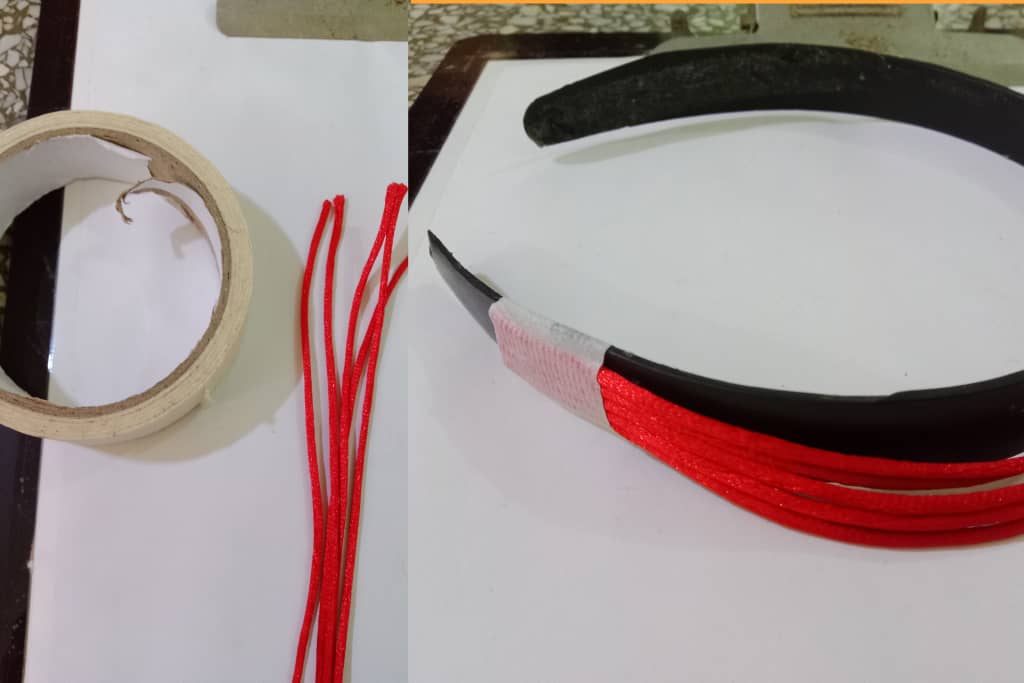

Después tomé el hilo de color morado y empecé a tejer el cintillo desde la punta del cintillo hasta pasar por encima del hilo de color rojo hasta cubrir la zona que tiene cinta adhesiva
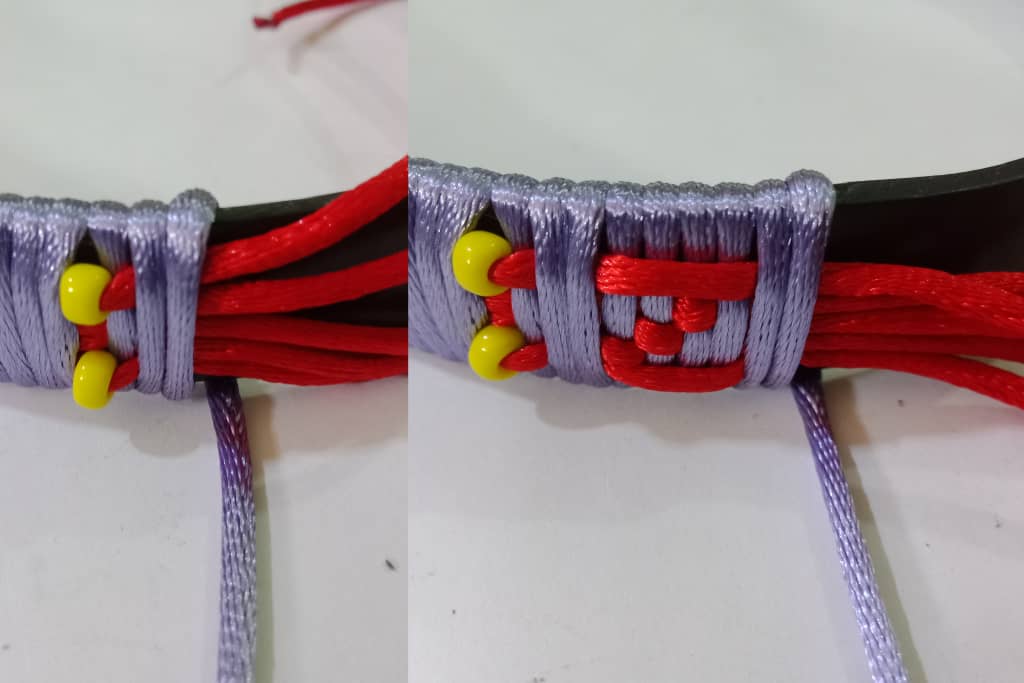
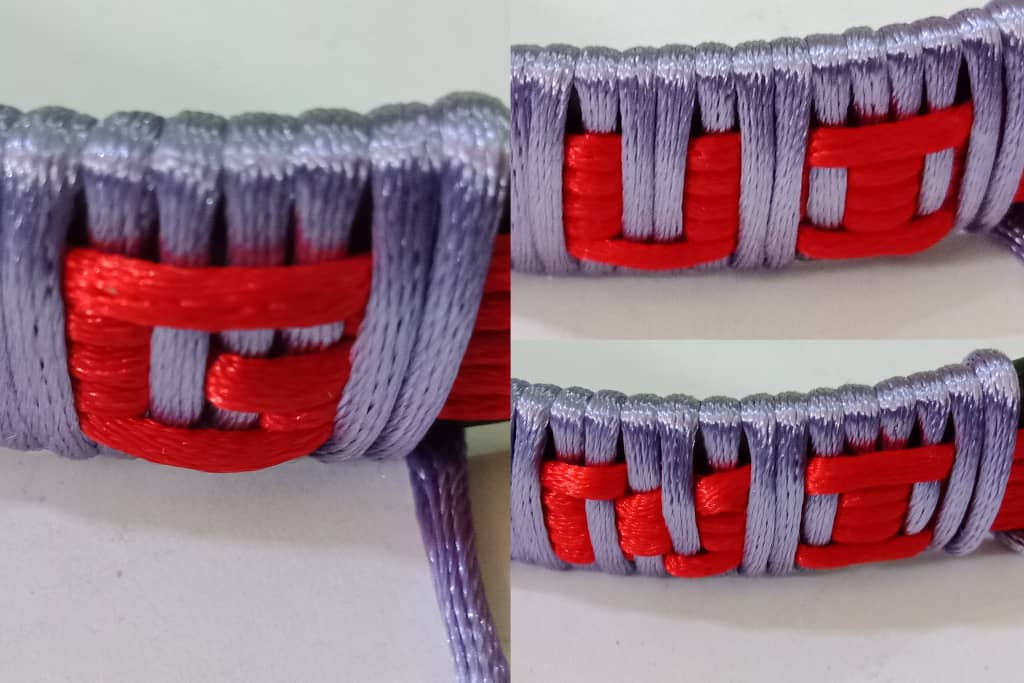
Now I started with the first letter of the character using the letter mold. This time I started with the letter (Z) of the character ZINGUINI. To make this letter we do it as follows:
We take the row 1 ,4 and 5 we pass it over and then with the purple thread which is the column we pass it under once. Then we pass the row 1, 2 and 3 over it and the column we pass it twice and finally the row 1, 2 and 5 we pass it over it and the column we pass it once. Thus we have our first letter Z.
Ahora inicié con la primera letra del personaje utilizando el molde de letras. En esta ocasión comencé con la letra (Z) del personaje ZINGUINI. Para realizar esta letra la hacemos de la siguiente forma:
Tomamos la fila 1 ,4 y 5 la pasamos por encima y después con el hilo de color morado que es la columna la pasamos por debajo una vez. Luego la fila 1 , 2 y 3 la pasamos por encima y la columna le damos dos vueltas y finalmente la fila 1, 2 y 5 la pasamos por encima y la columna le damos una vuelta . Así tenemos nuestra primera letra Z
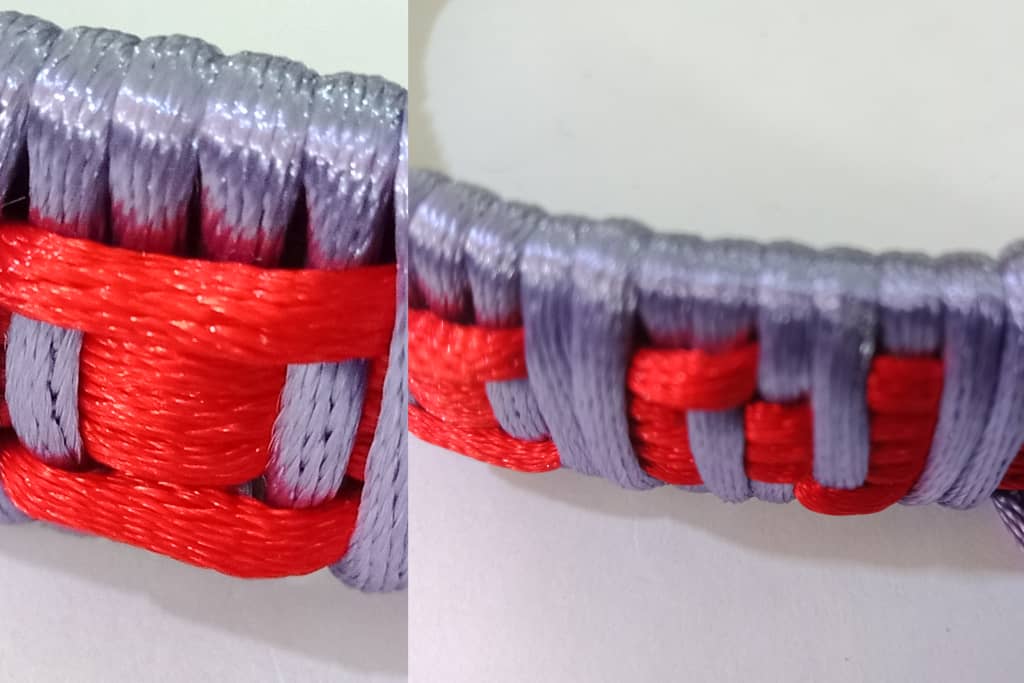
Then I continued with the same procedure and made the letters U and I.
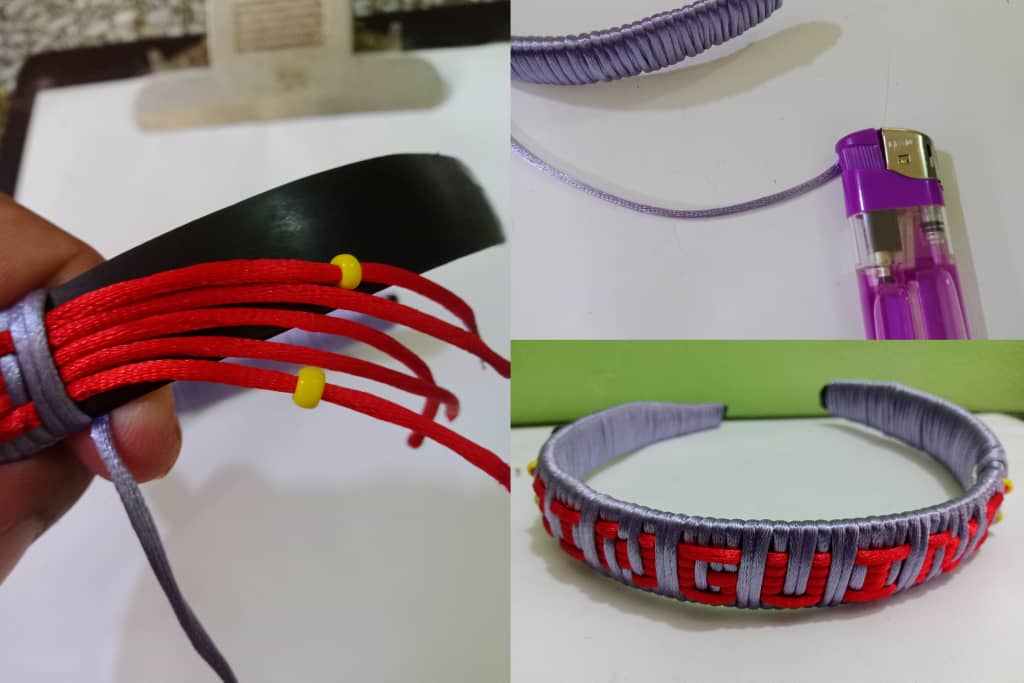
This is how the personalized headband inspired by ZINGUINI turned out.
Así quedó el cintillo personalizado inspirado ZINGUINI
Translated with https://www.deepl.com/translator
                  All images are my own, dividers courtesy of @kattycrochet.


             Todas las imágenes son de mi autoría, divisores cortesía de @kattycrochet.