Hi HIVE DIY friends
Today I want to make another hand creation using origami paper, what I made today is a woman's dress using a piece of red origami paper.
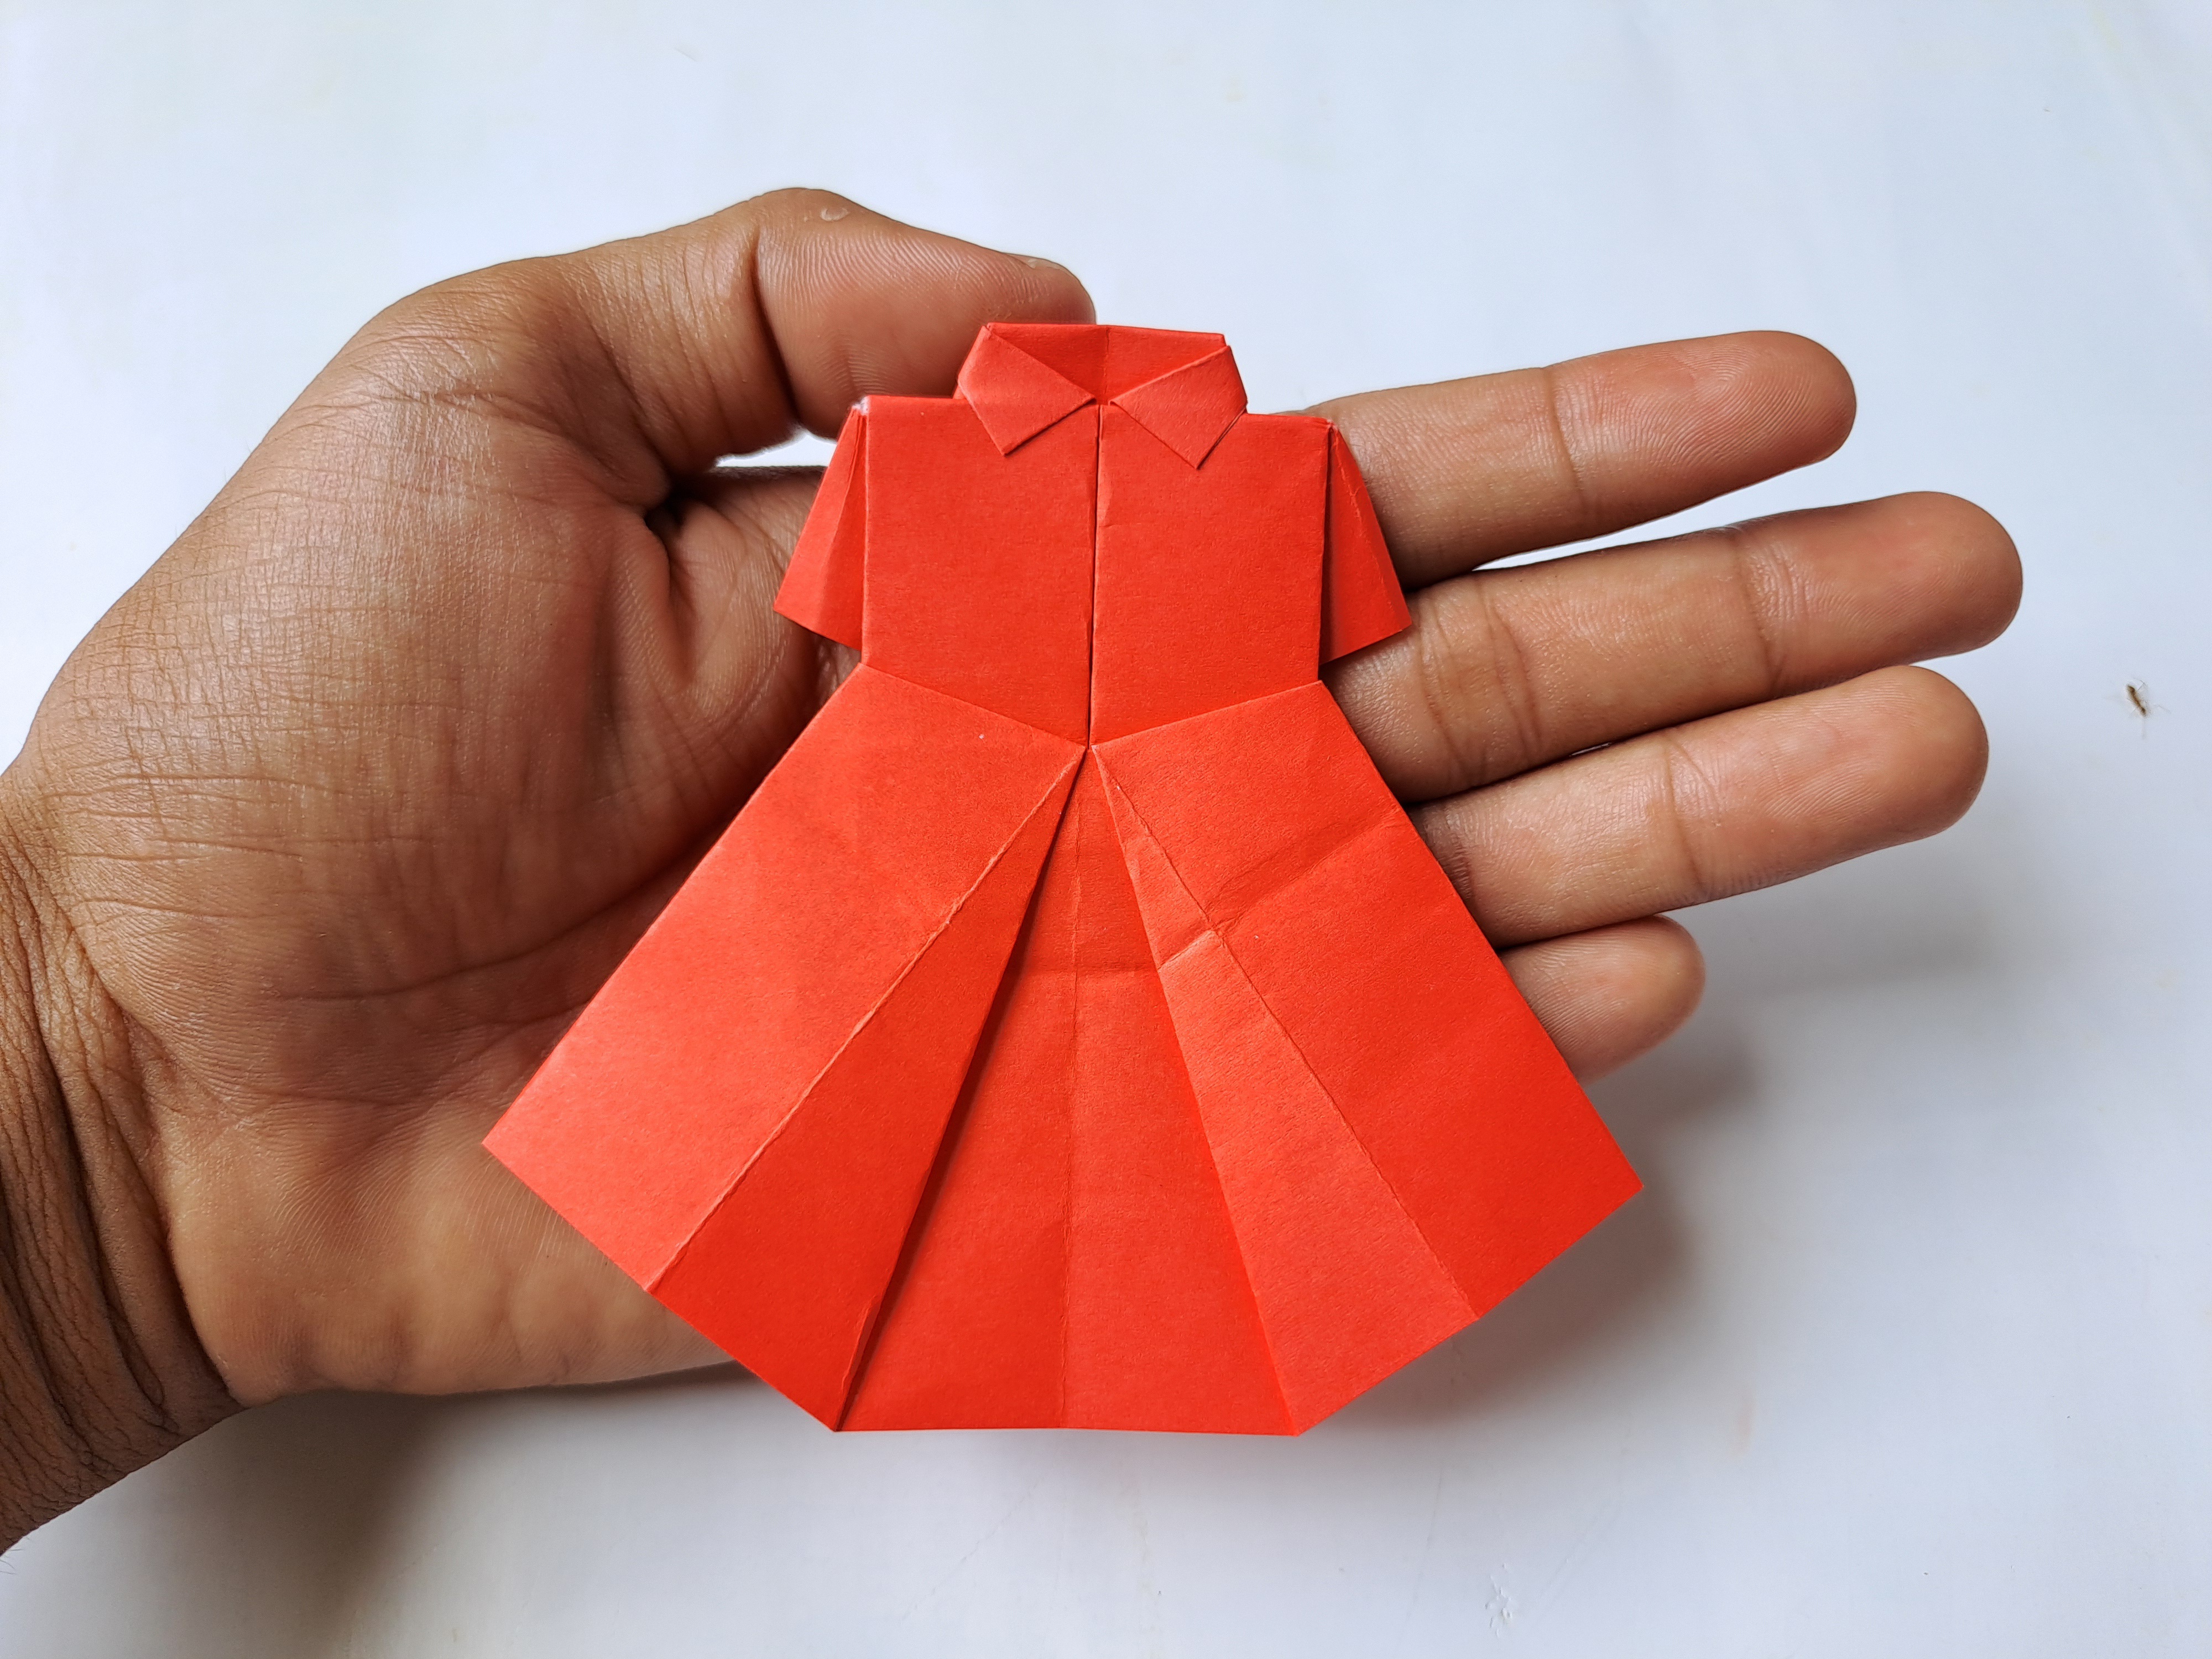
Later, I will give this beautiful red dress made from origami paper to my younger cousin who really likes origami creations.
Here's a tutorial for making a dress from a piece of origami paper.
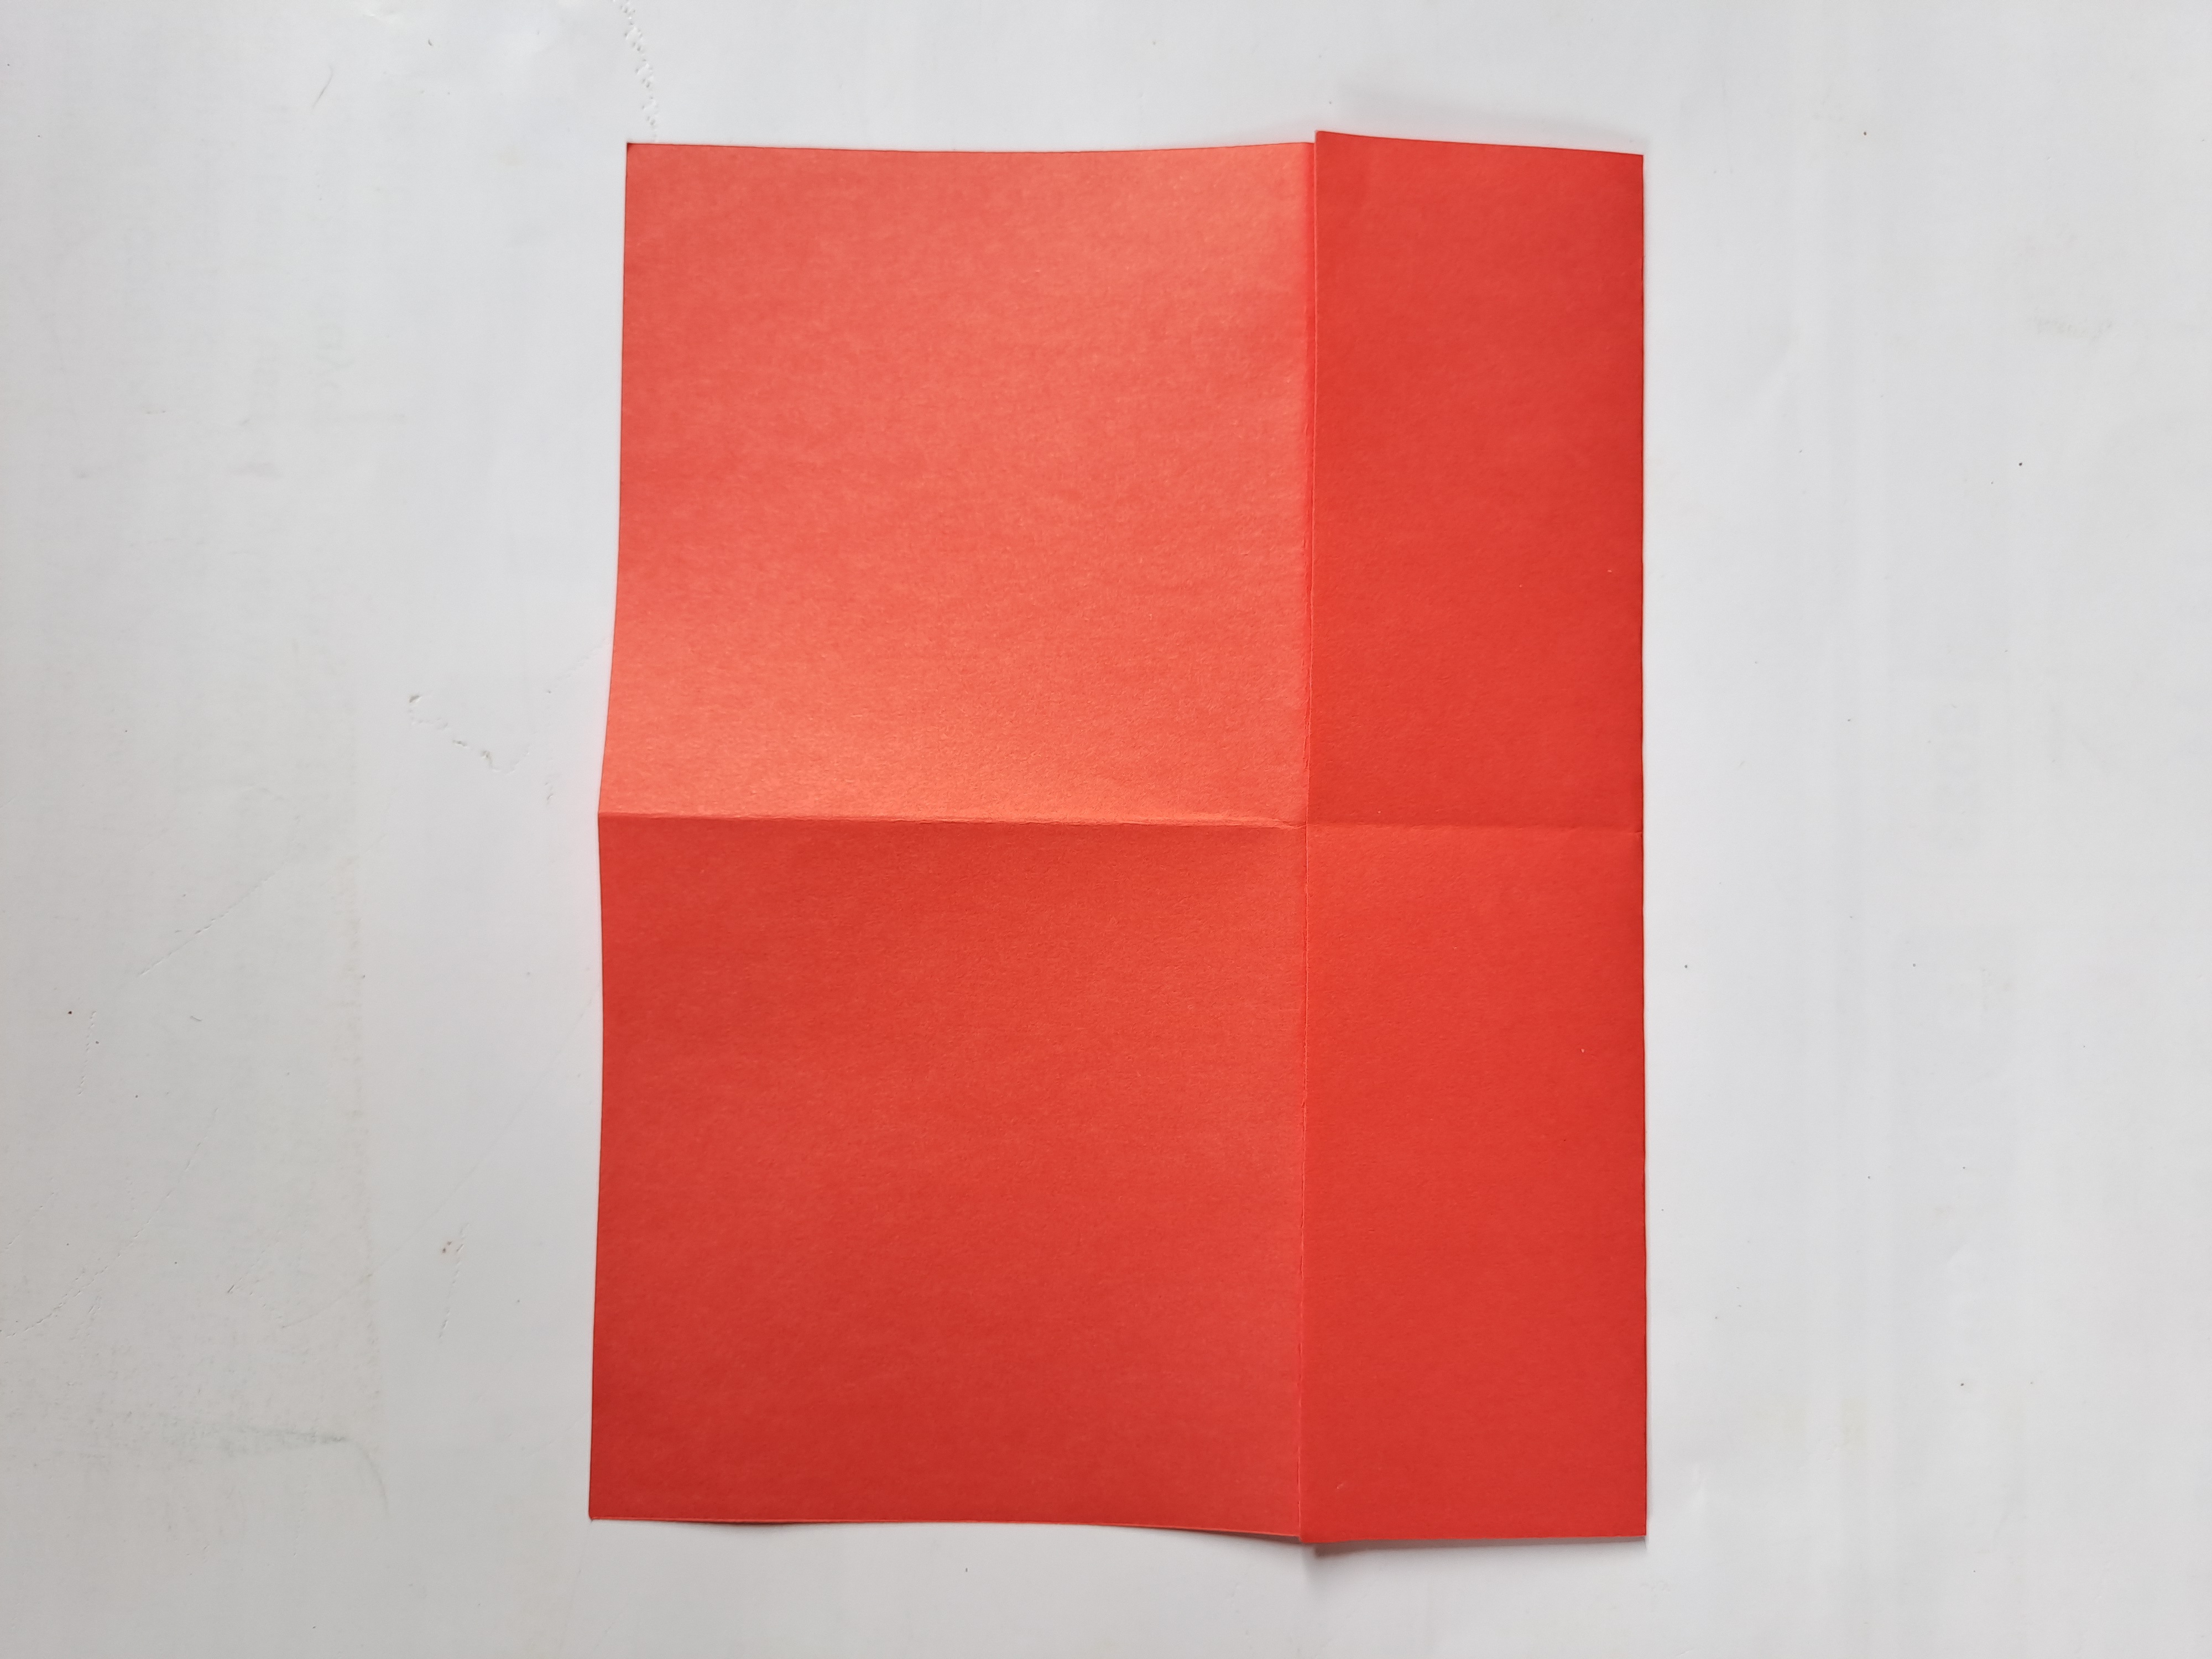
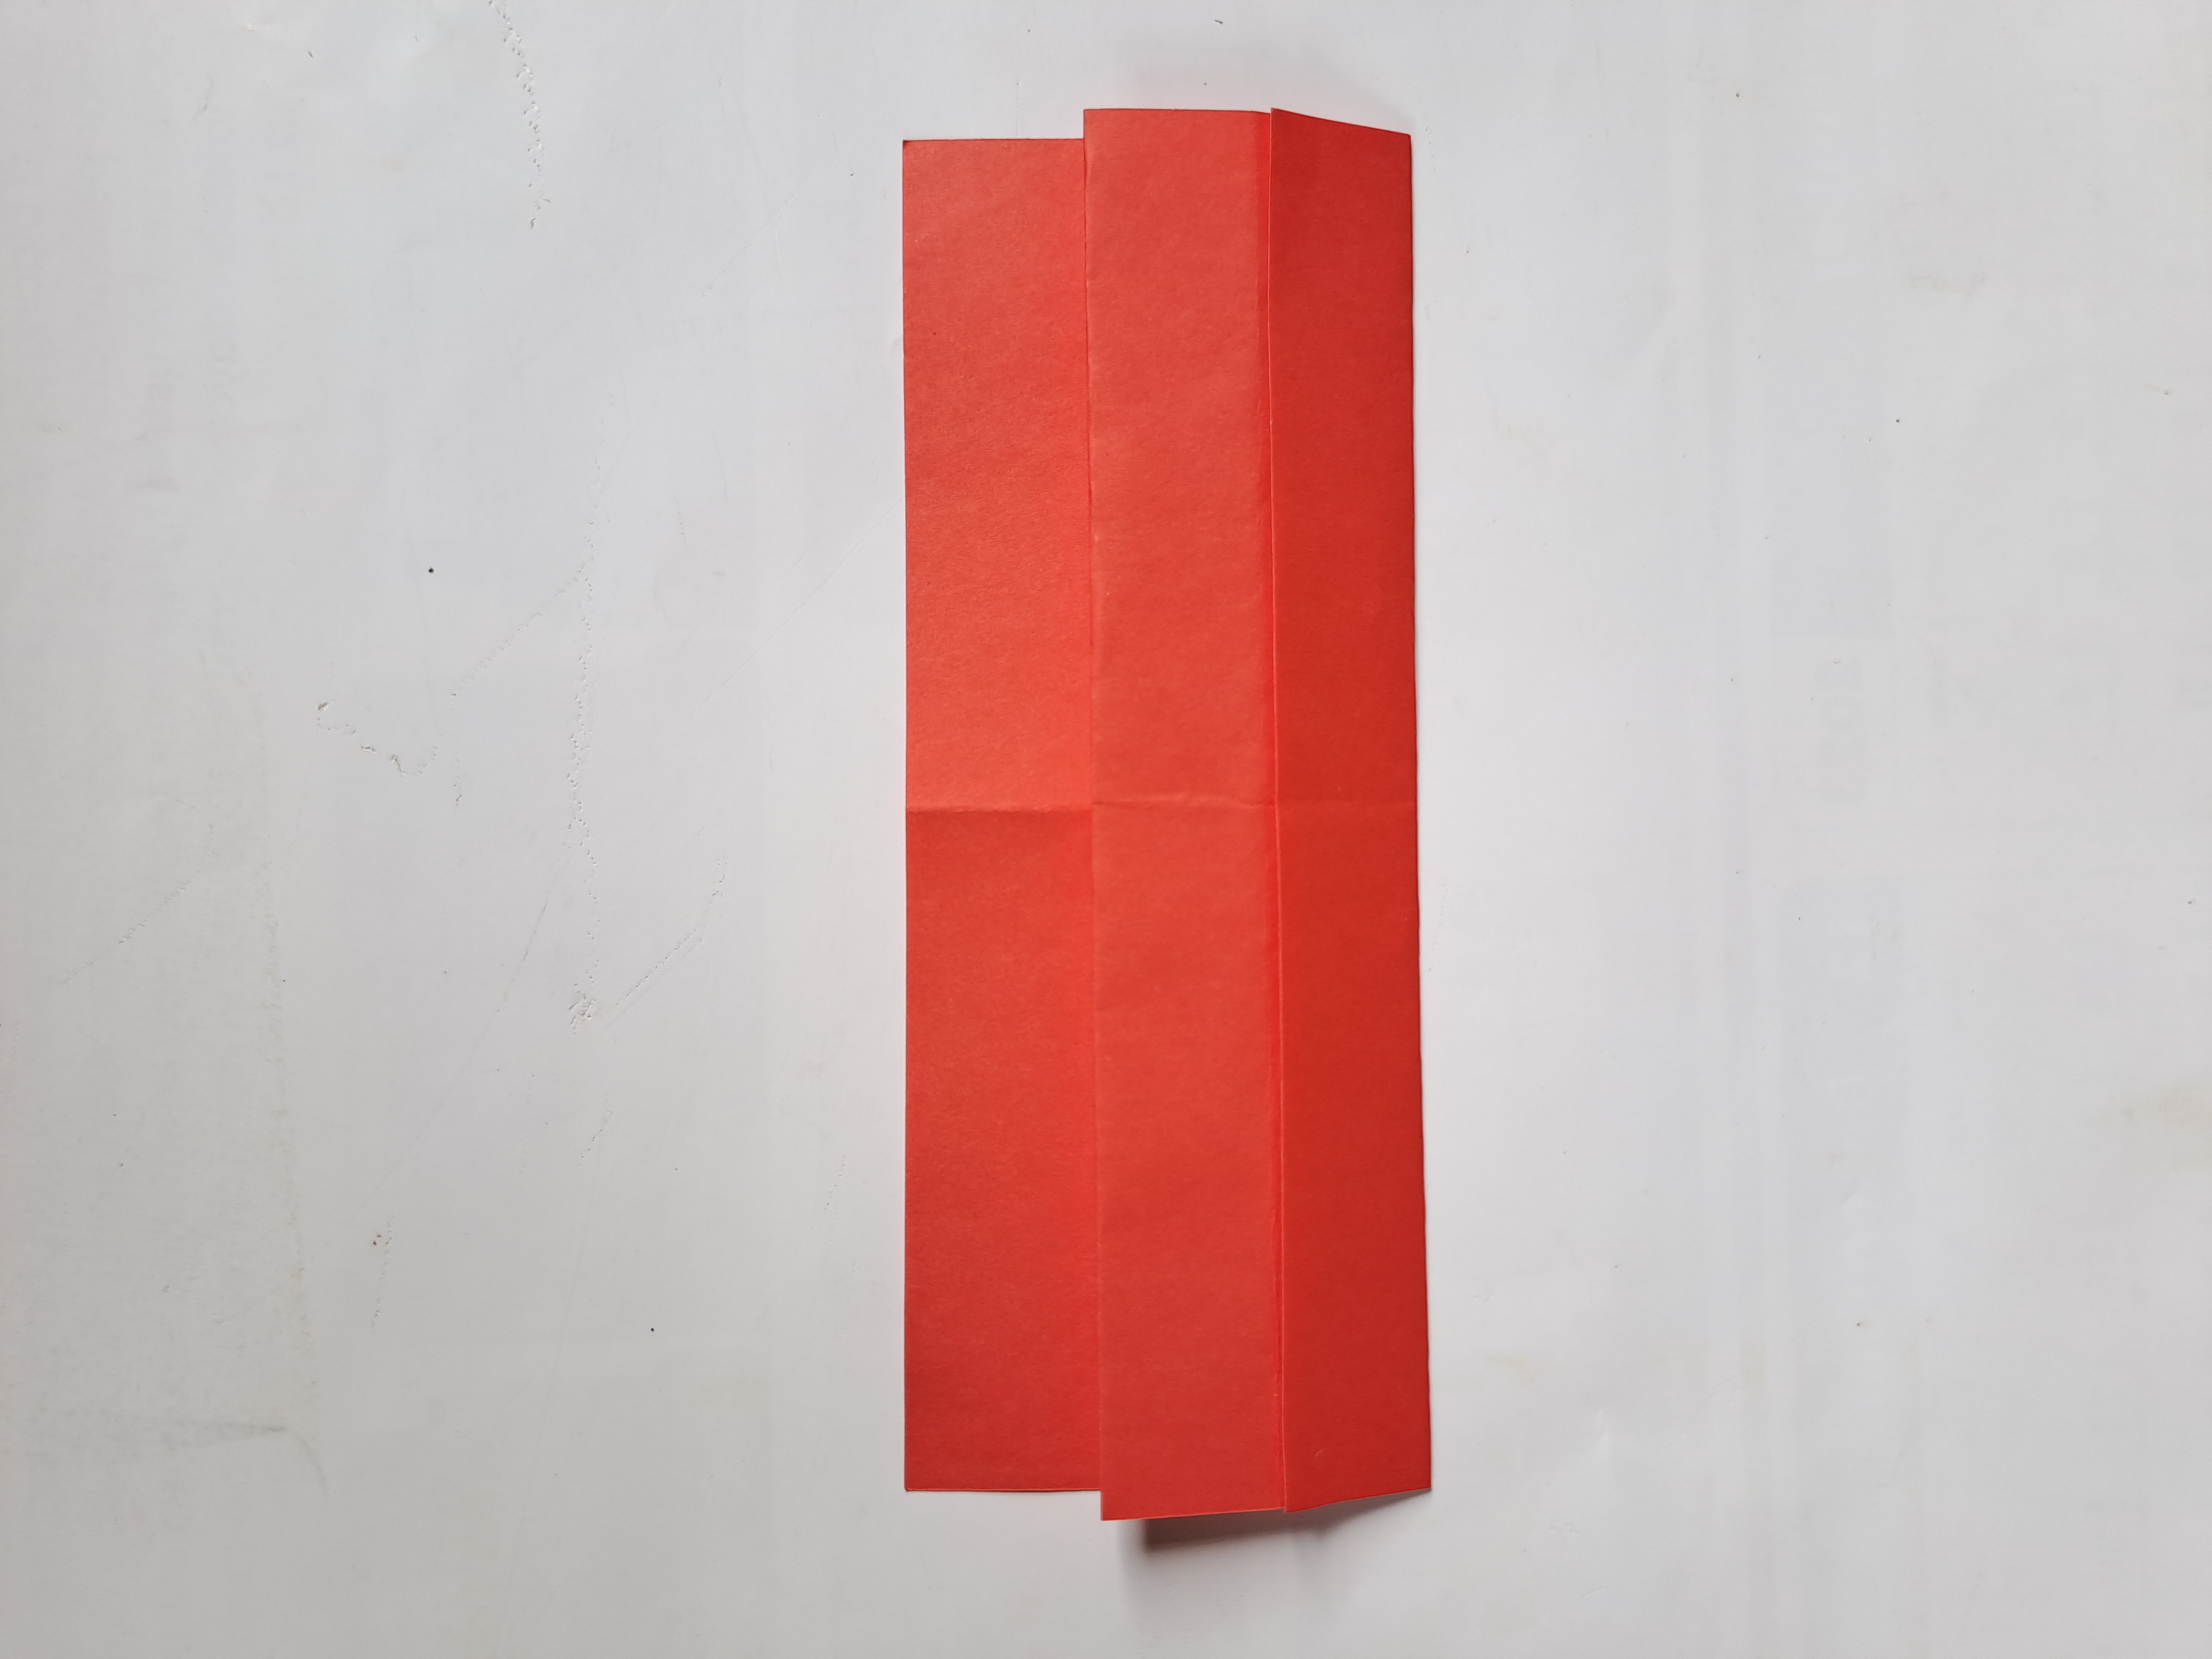
First of all, fold the origami paper in half parallel, after that open the fold and then continue folding the origami paper in half again from the opposite direction as in the picture below.
 |  |
|---|
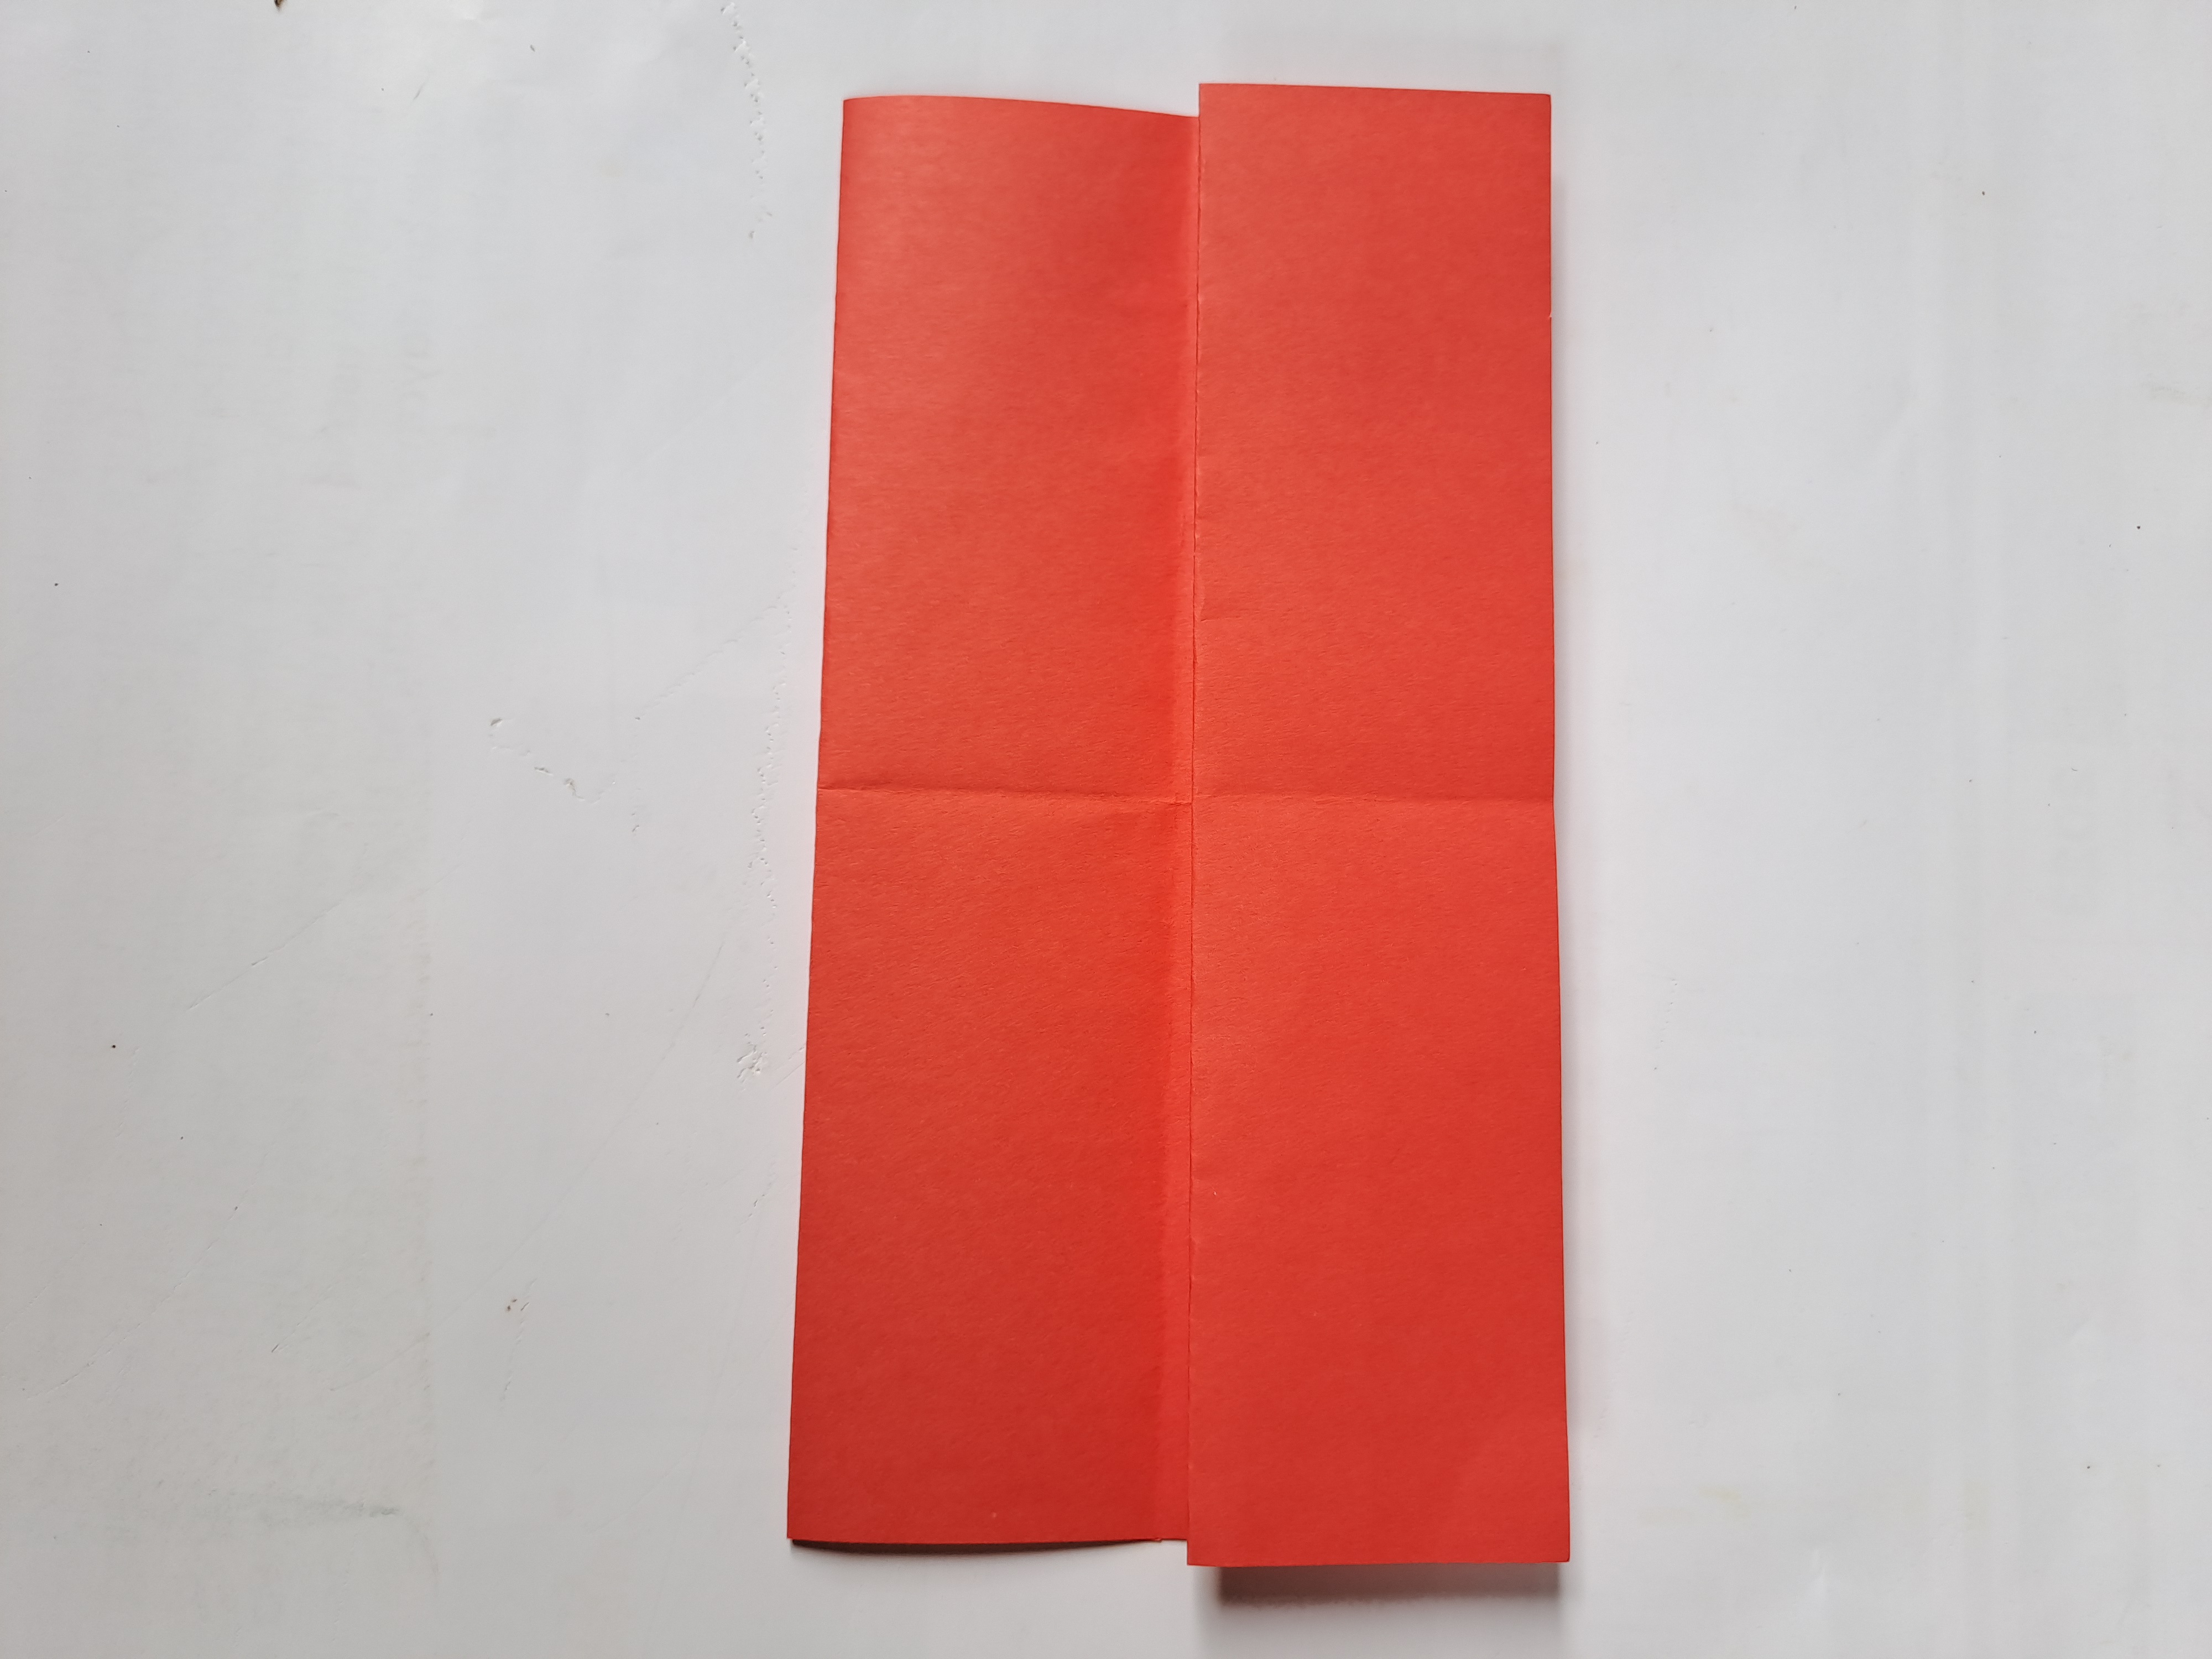
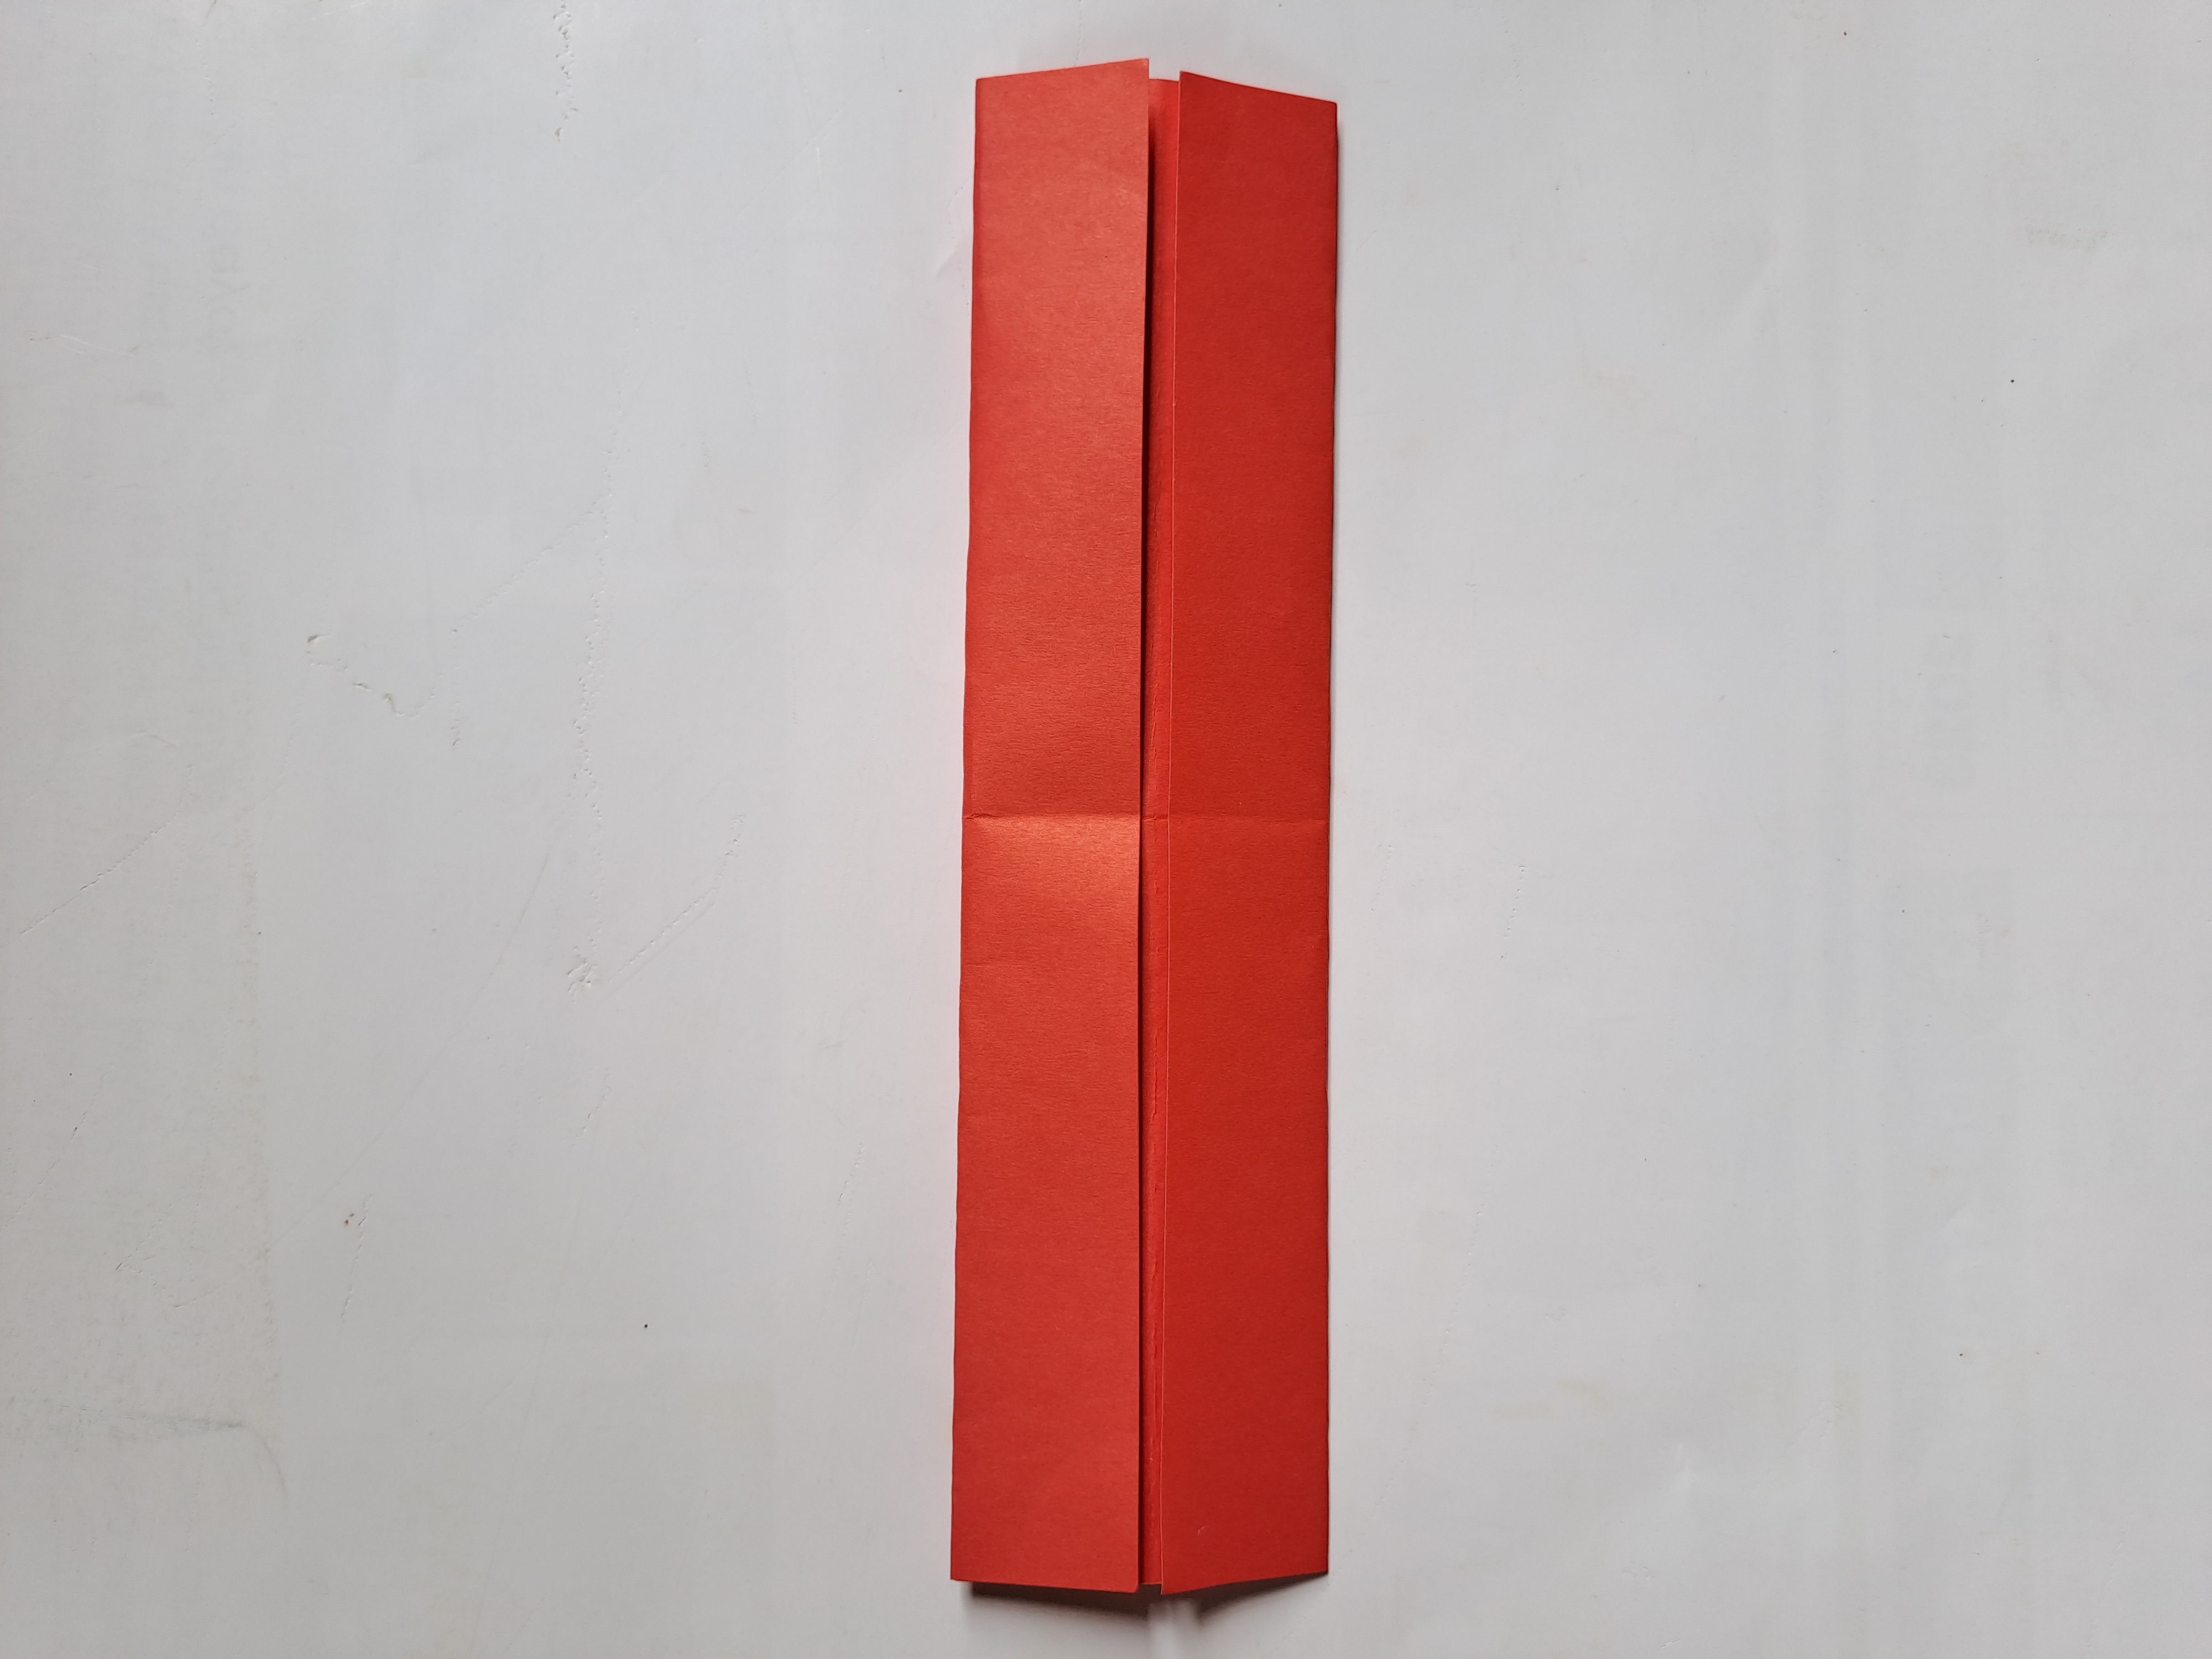
After that, turn the origami paper over, then fold the right and left sides of the origami half inwards like the picture I share below.
 |  |
|---|
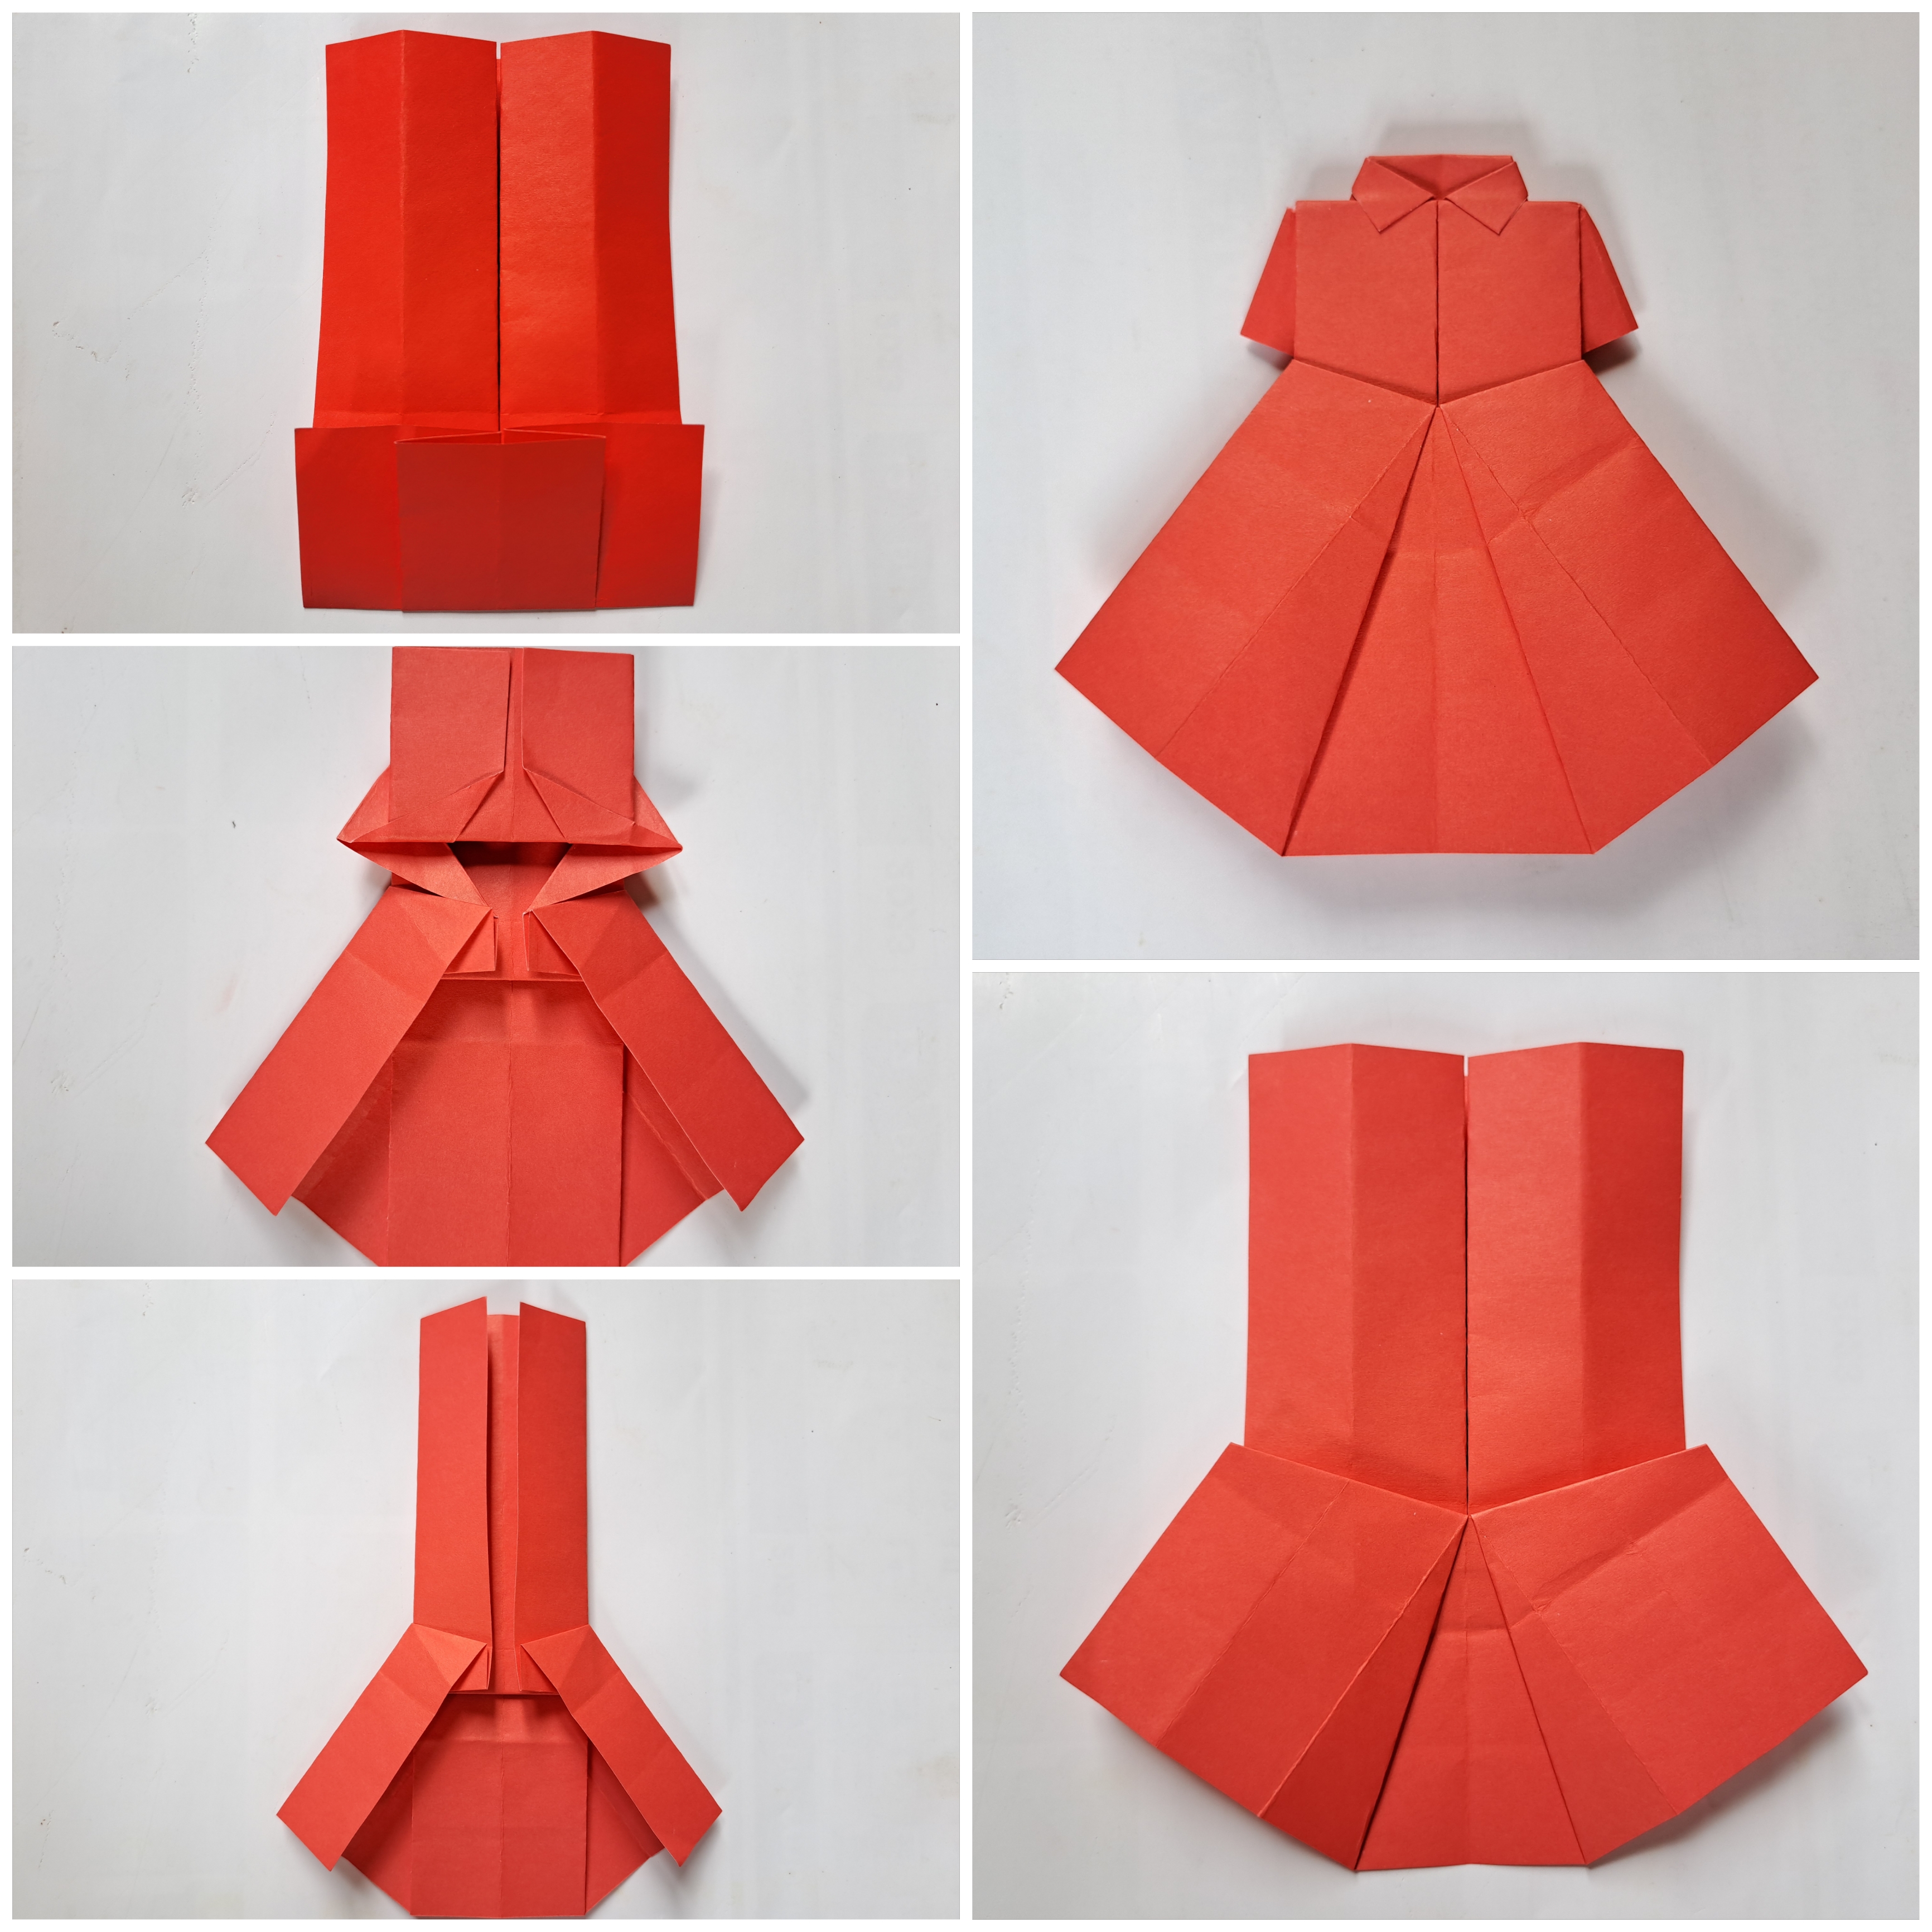
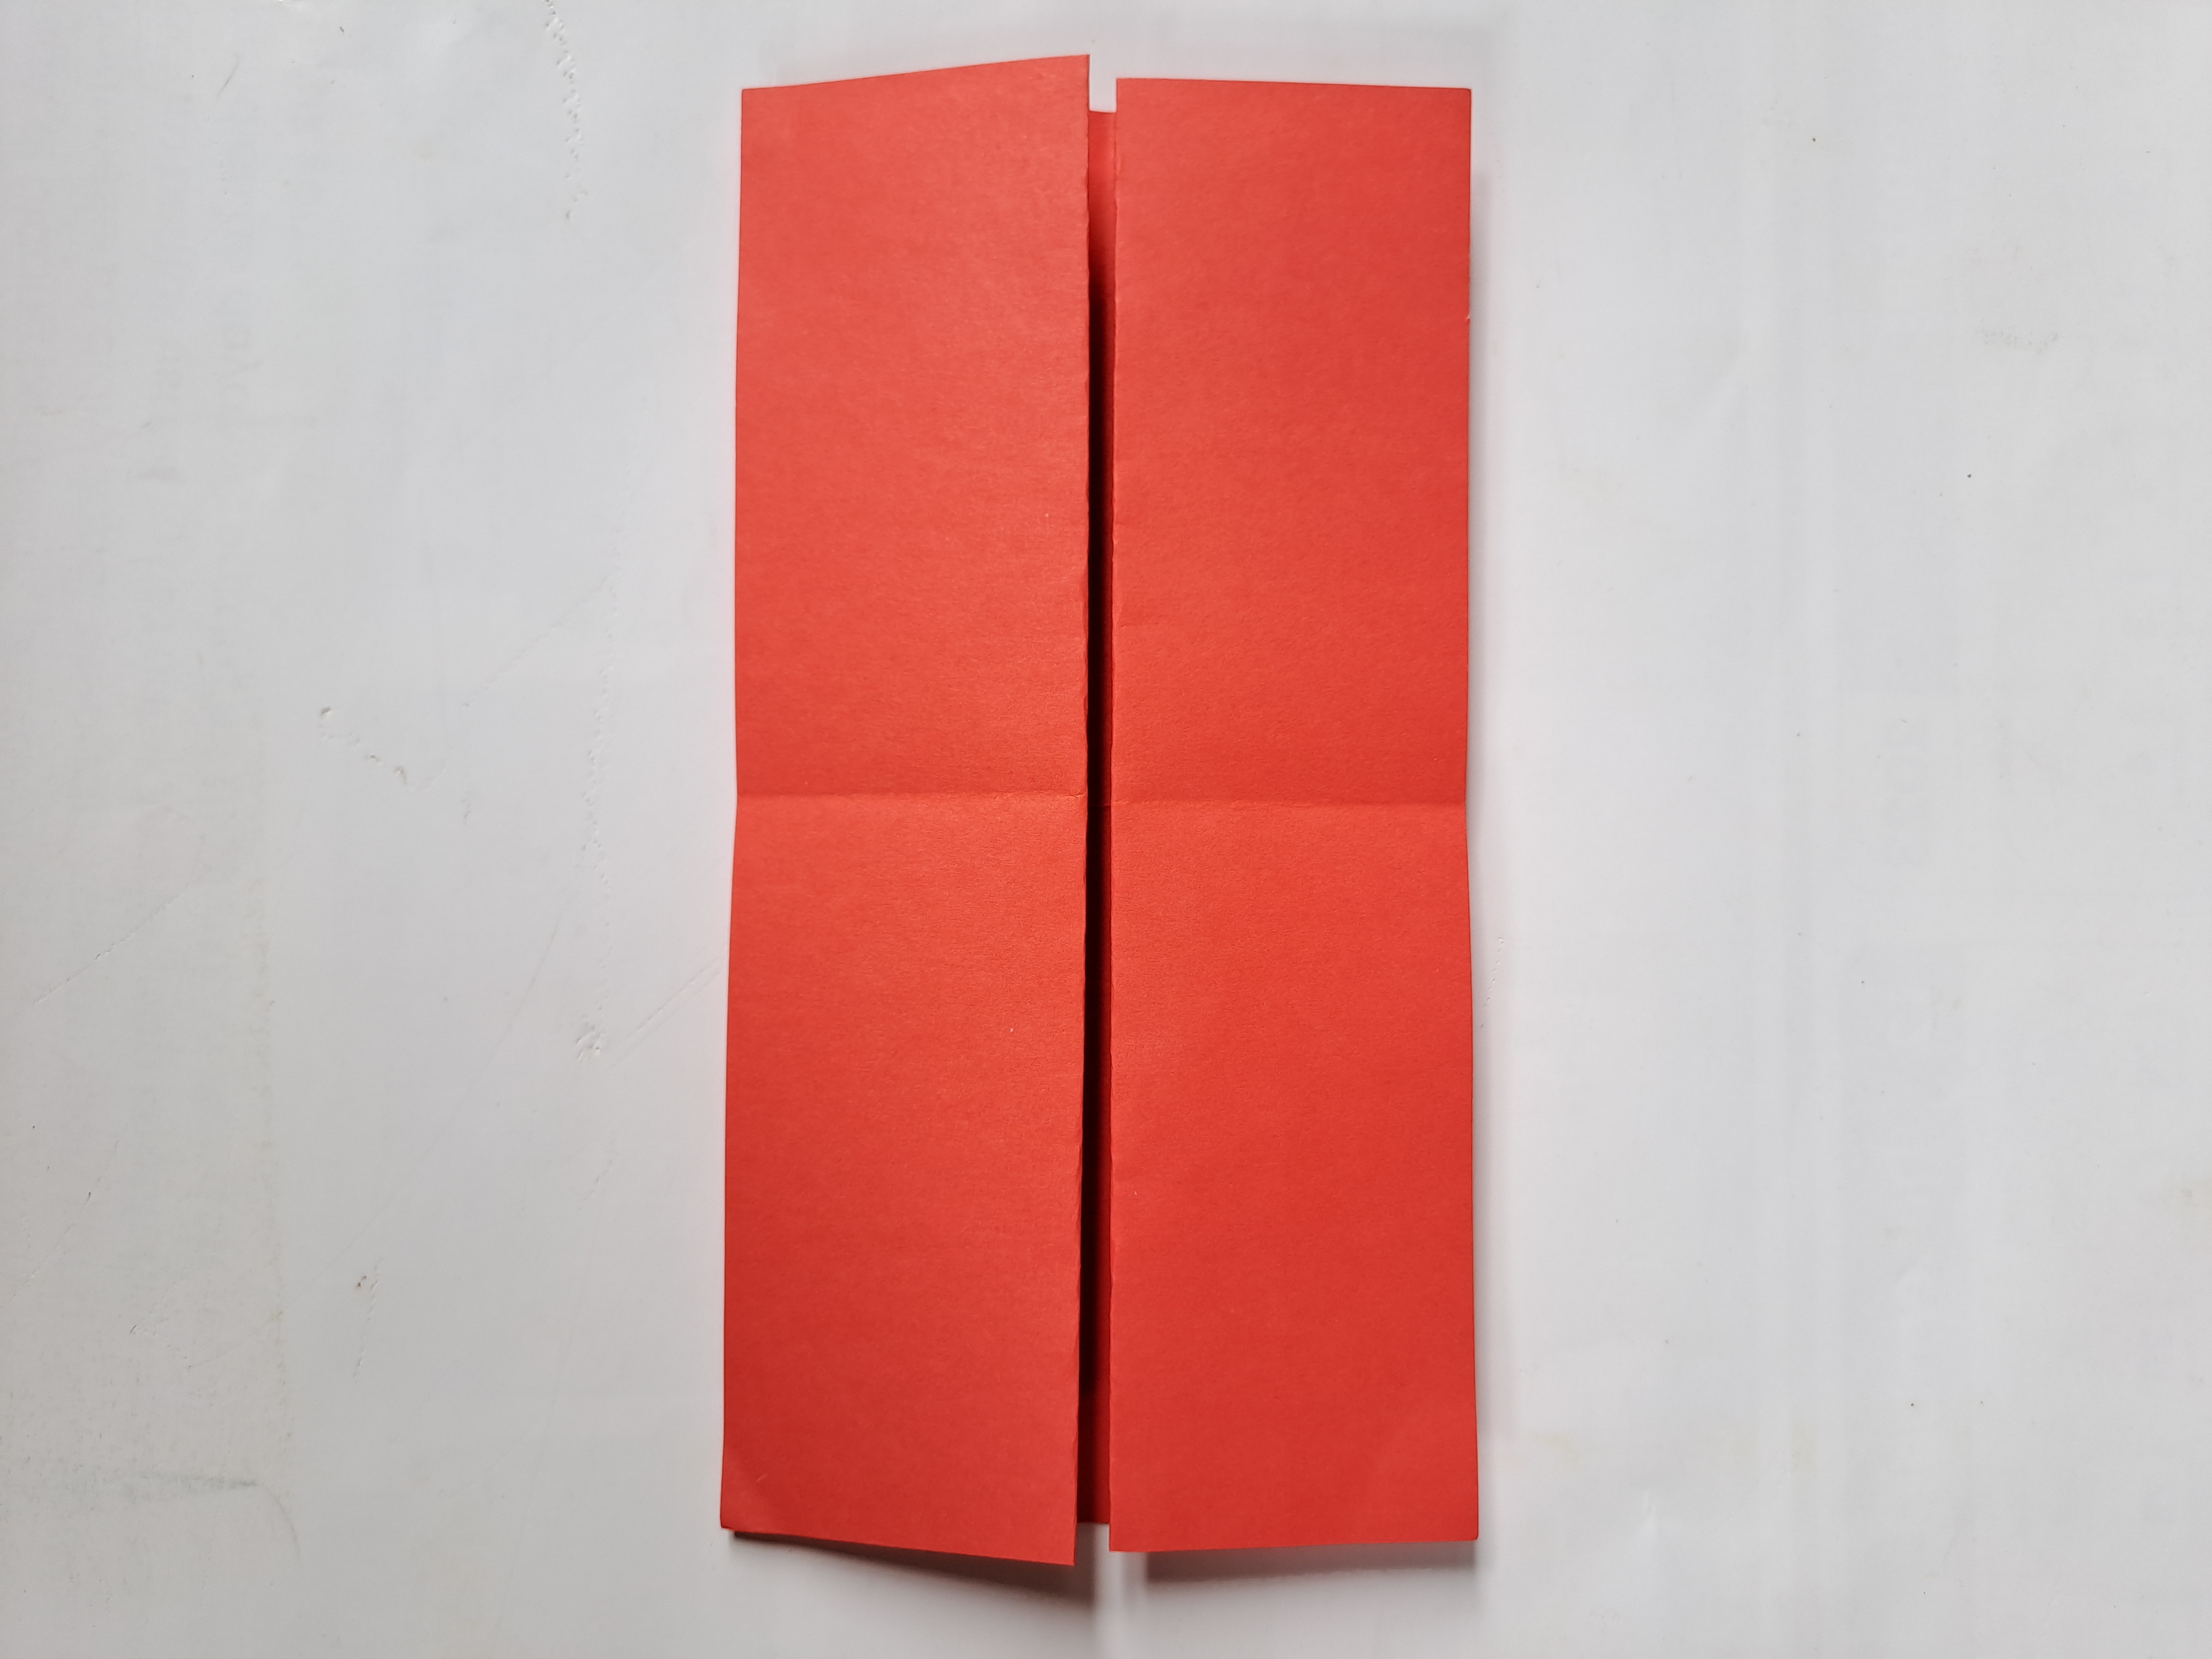
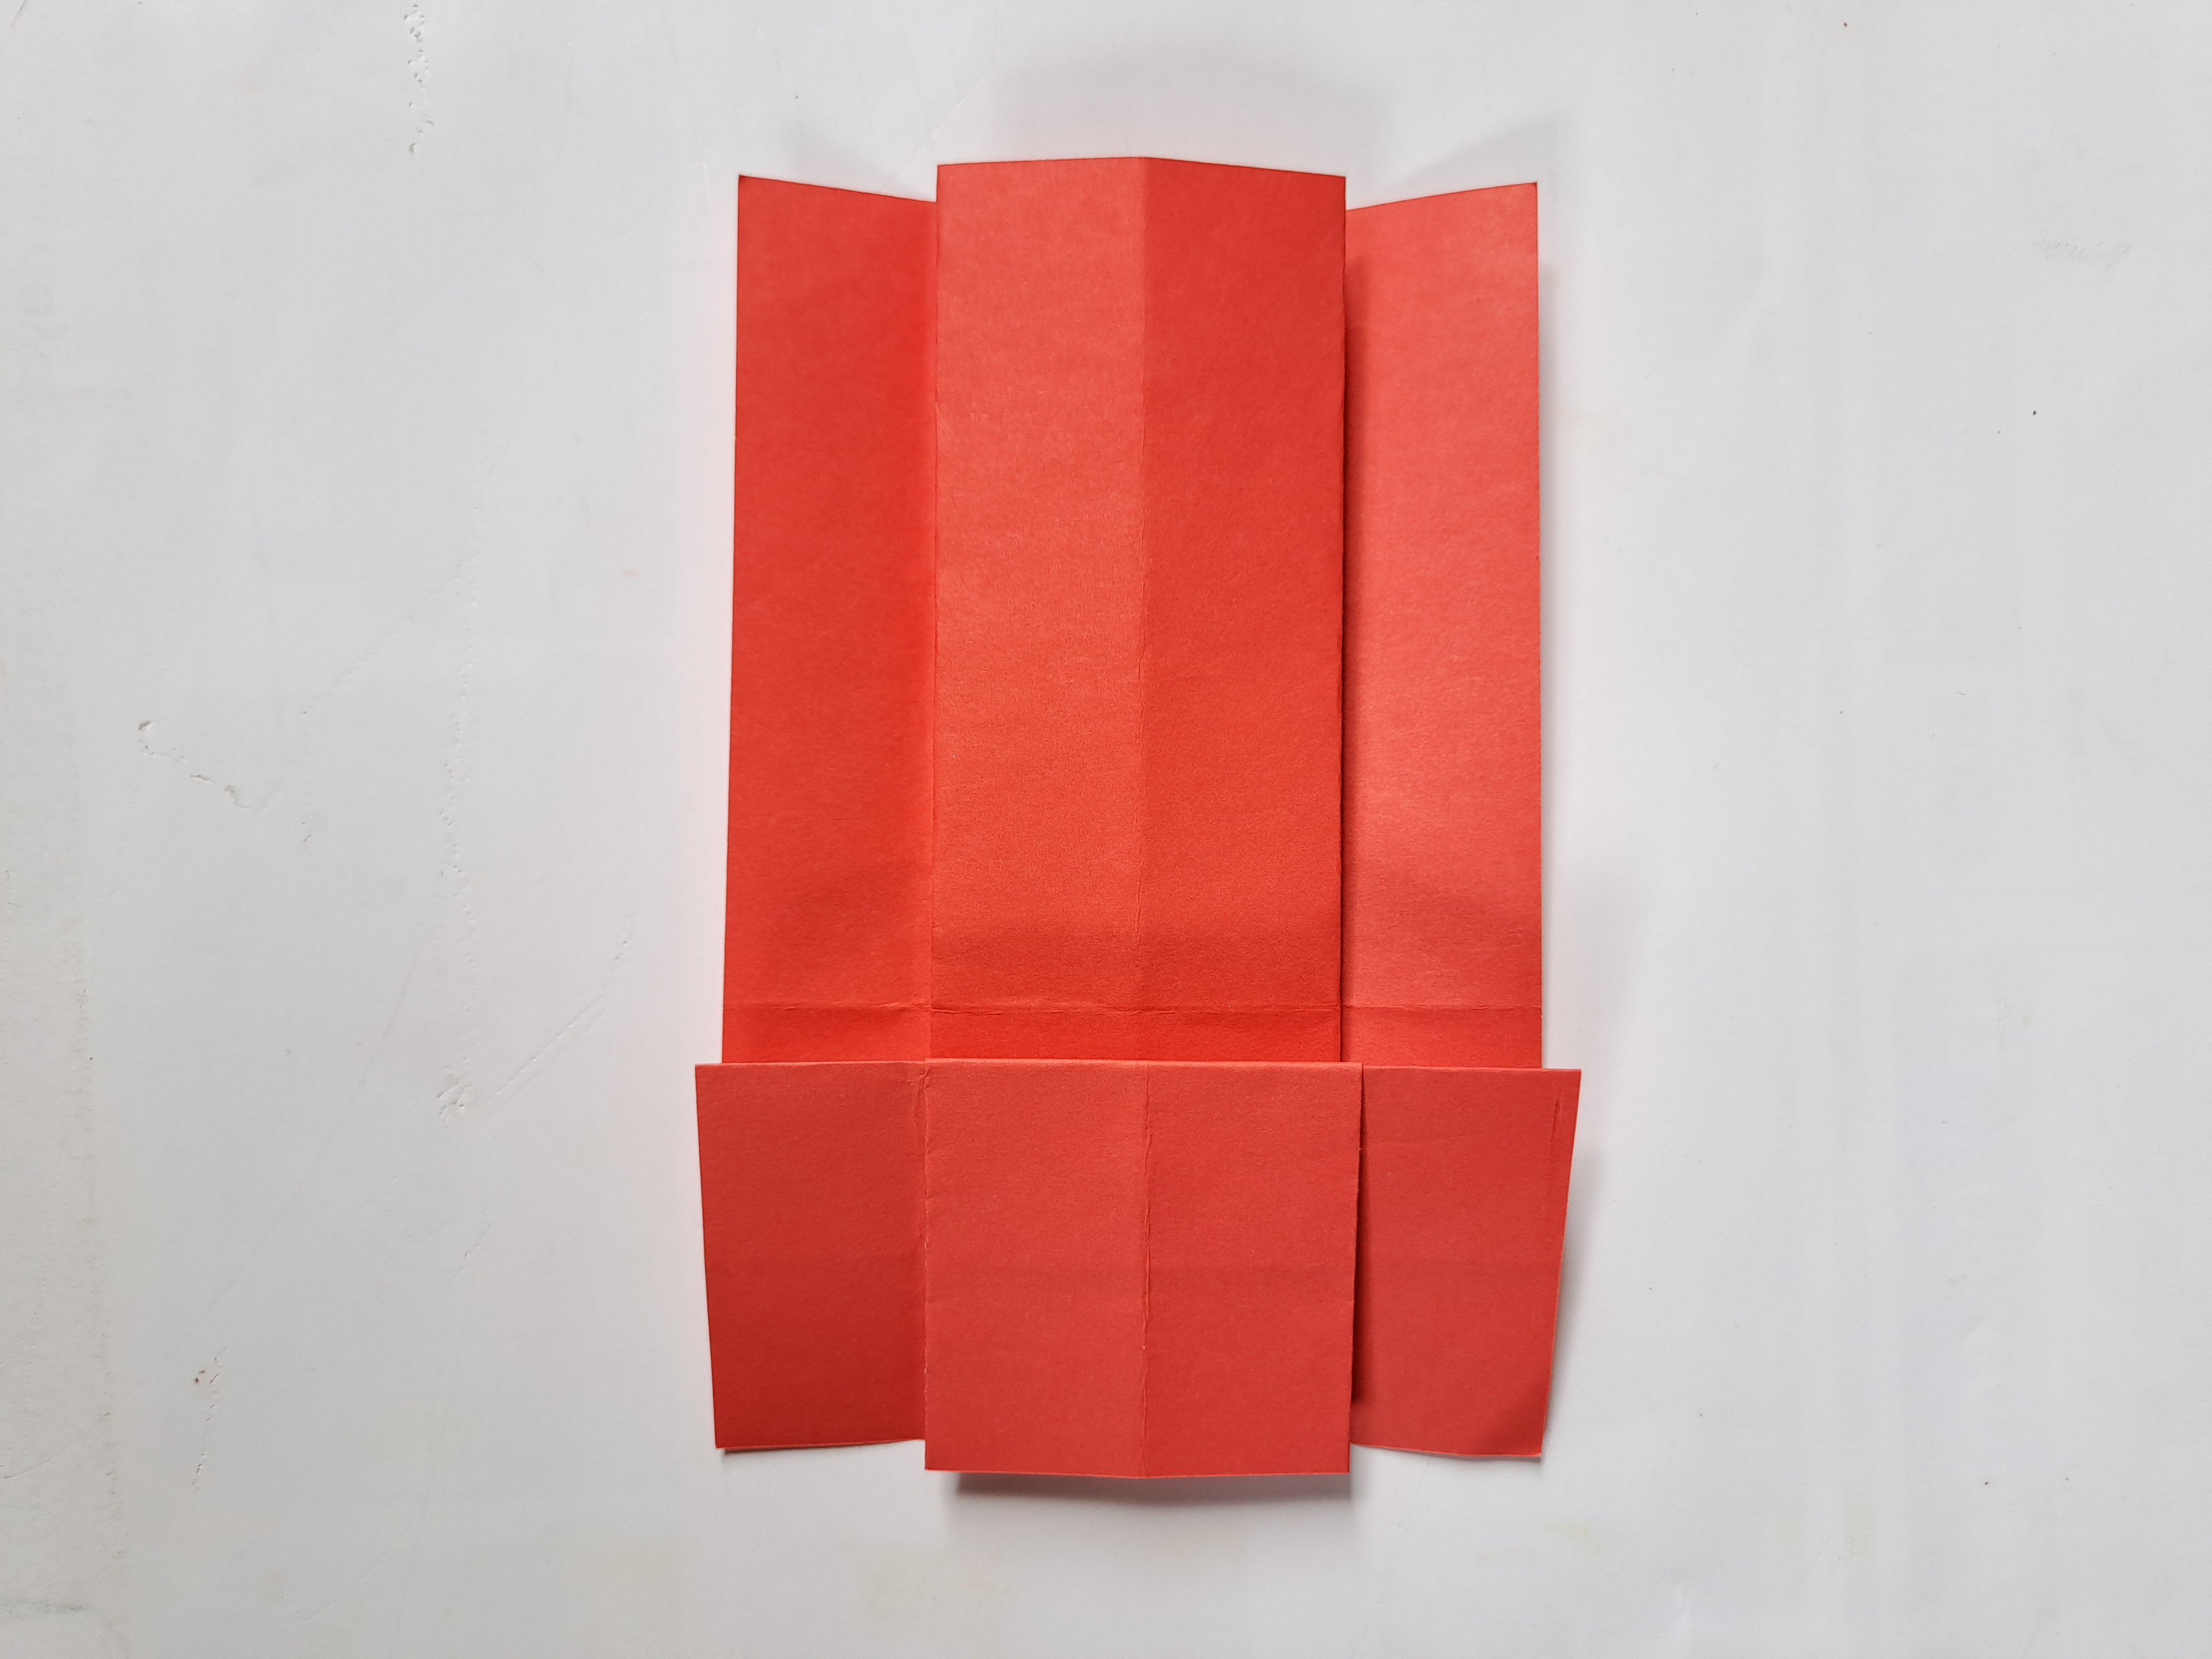
Then turn the origami paper over and fold the left and right sides of the origami paper half inward again, but in this fold we only need to fold the bottom layer of the origami paper, while we leave the top layer of paper following the fold of the bottom layer.
 |  |
|---|
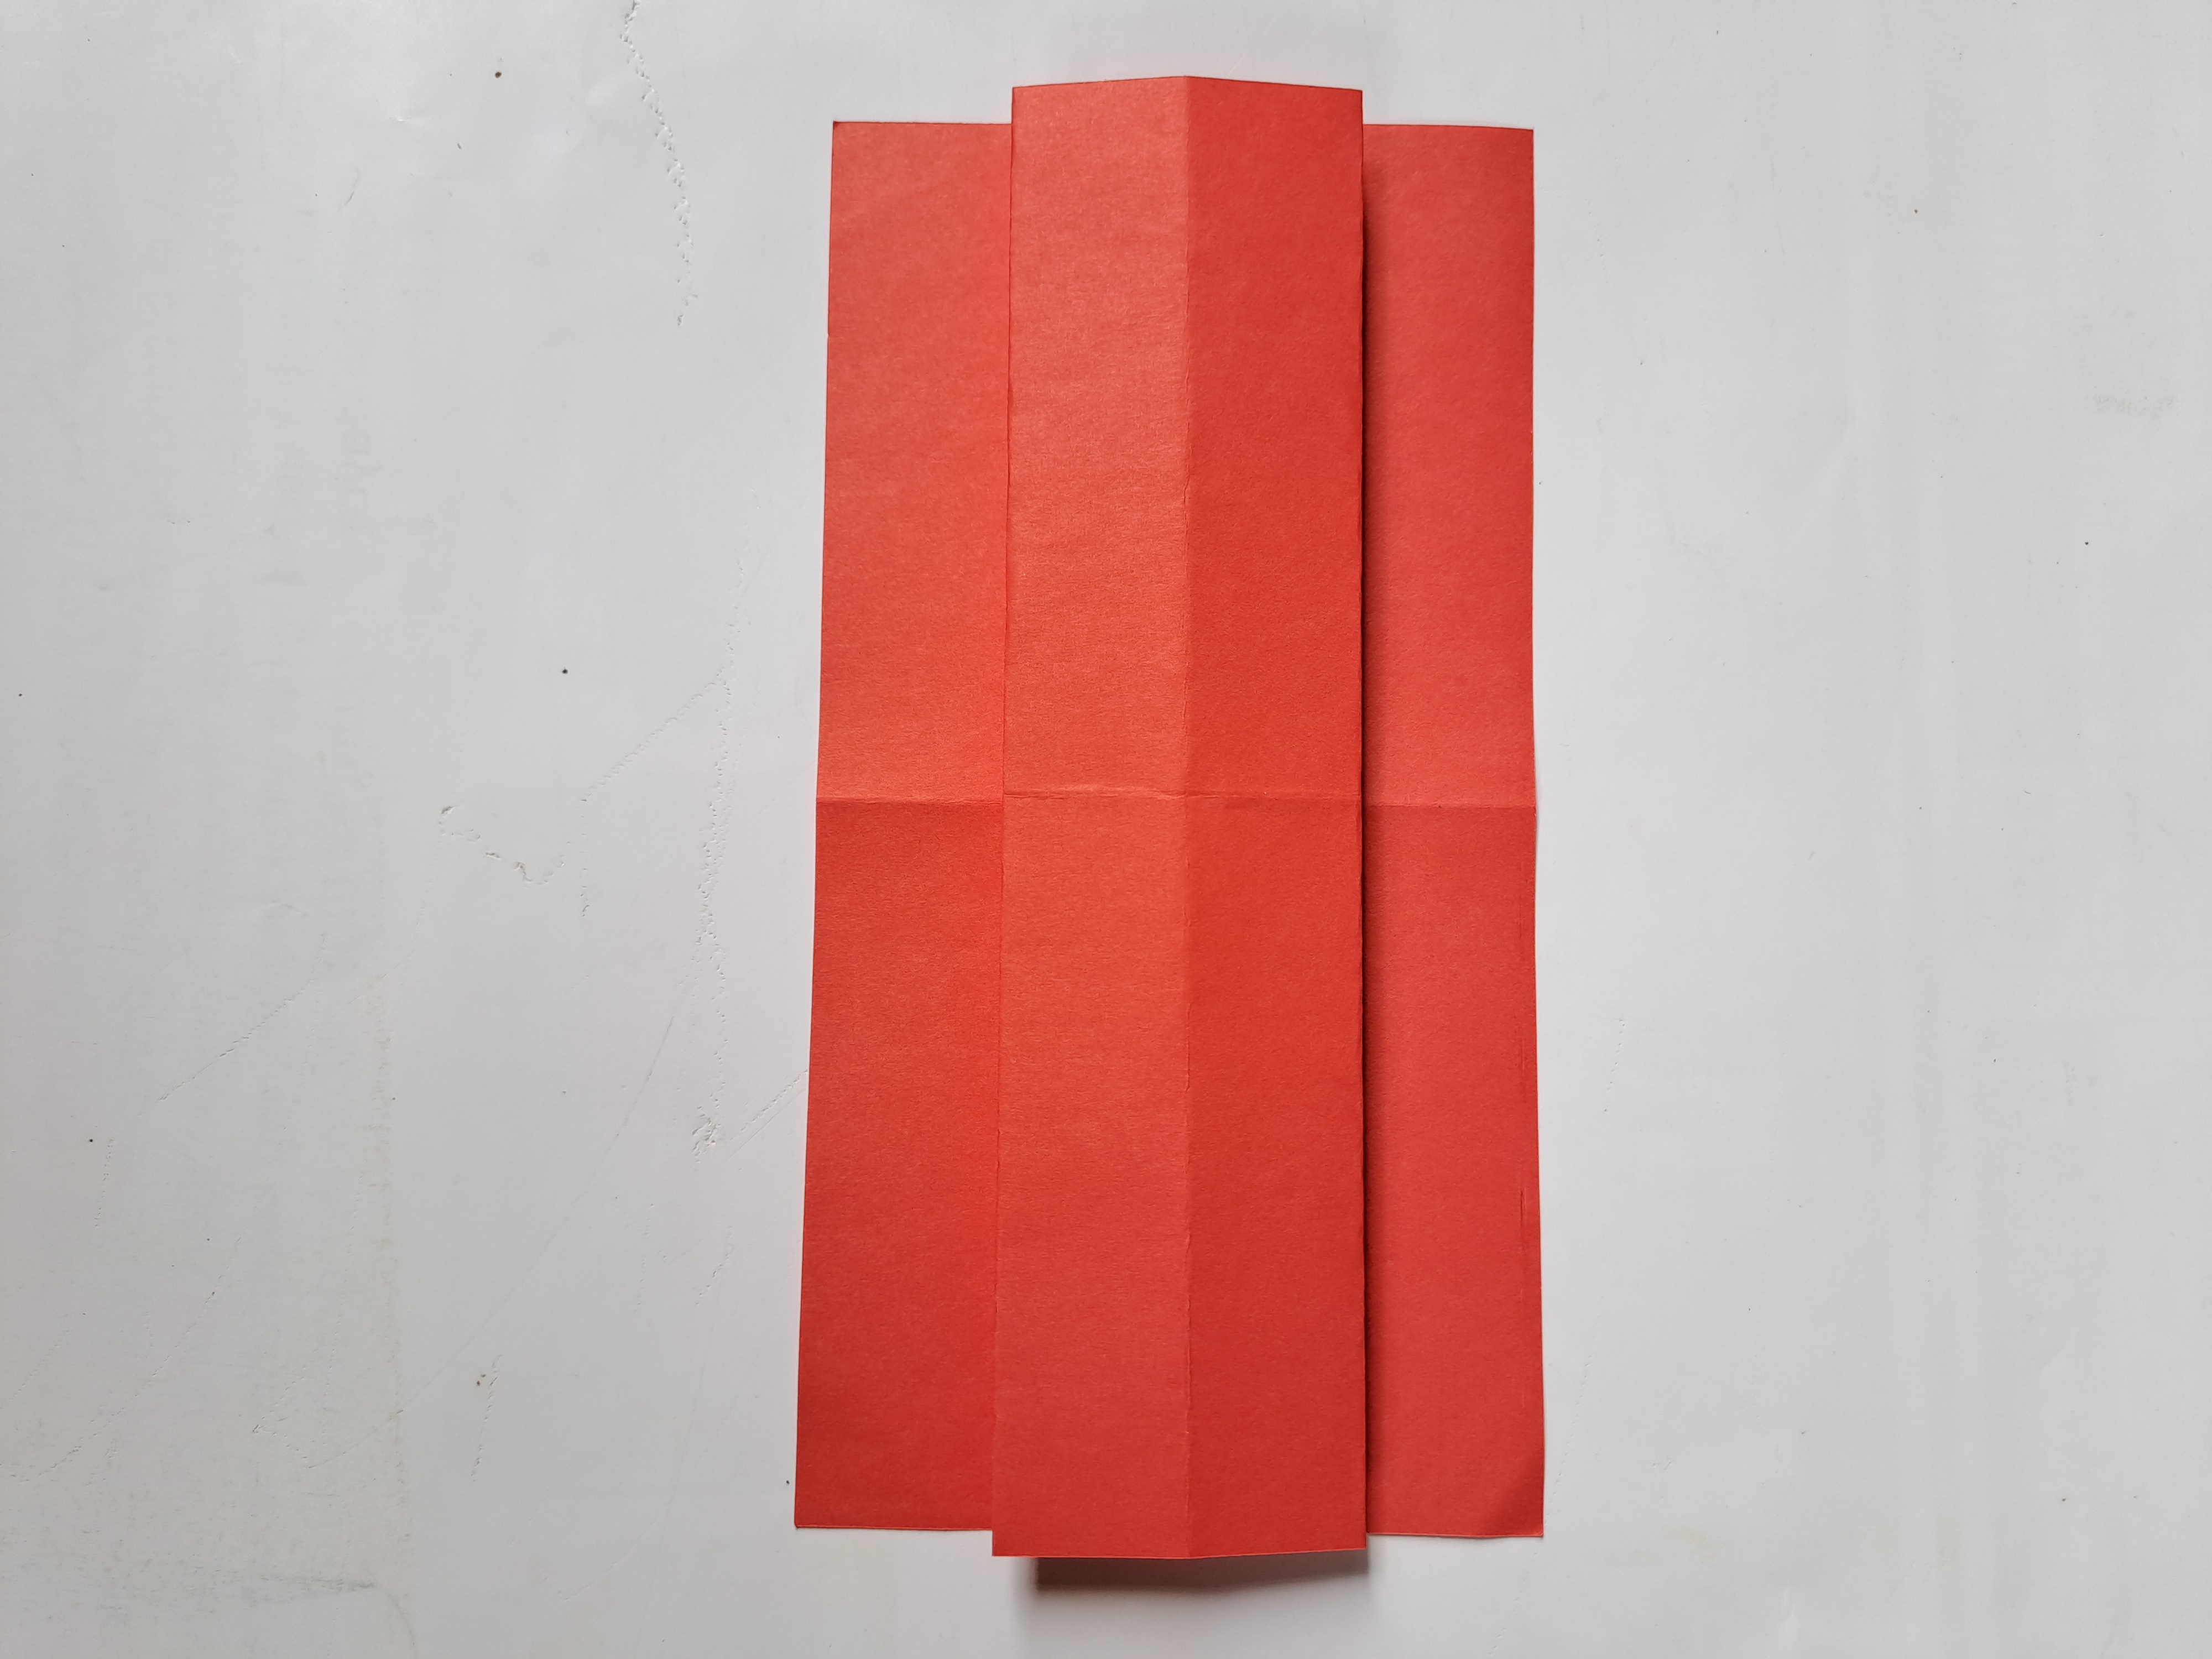
After that, turn the origami paper over again, then fold the right and left sides of the origami paper that are still out until the shape of the origami paper becomes small and elongated like the picture below.
 |  |  |
|---|
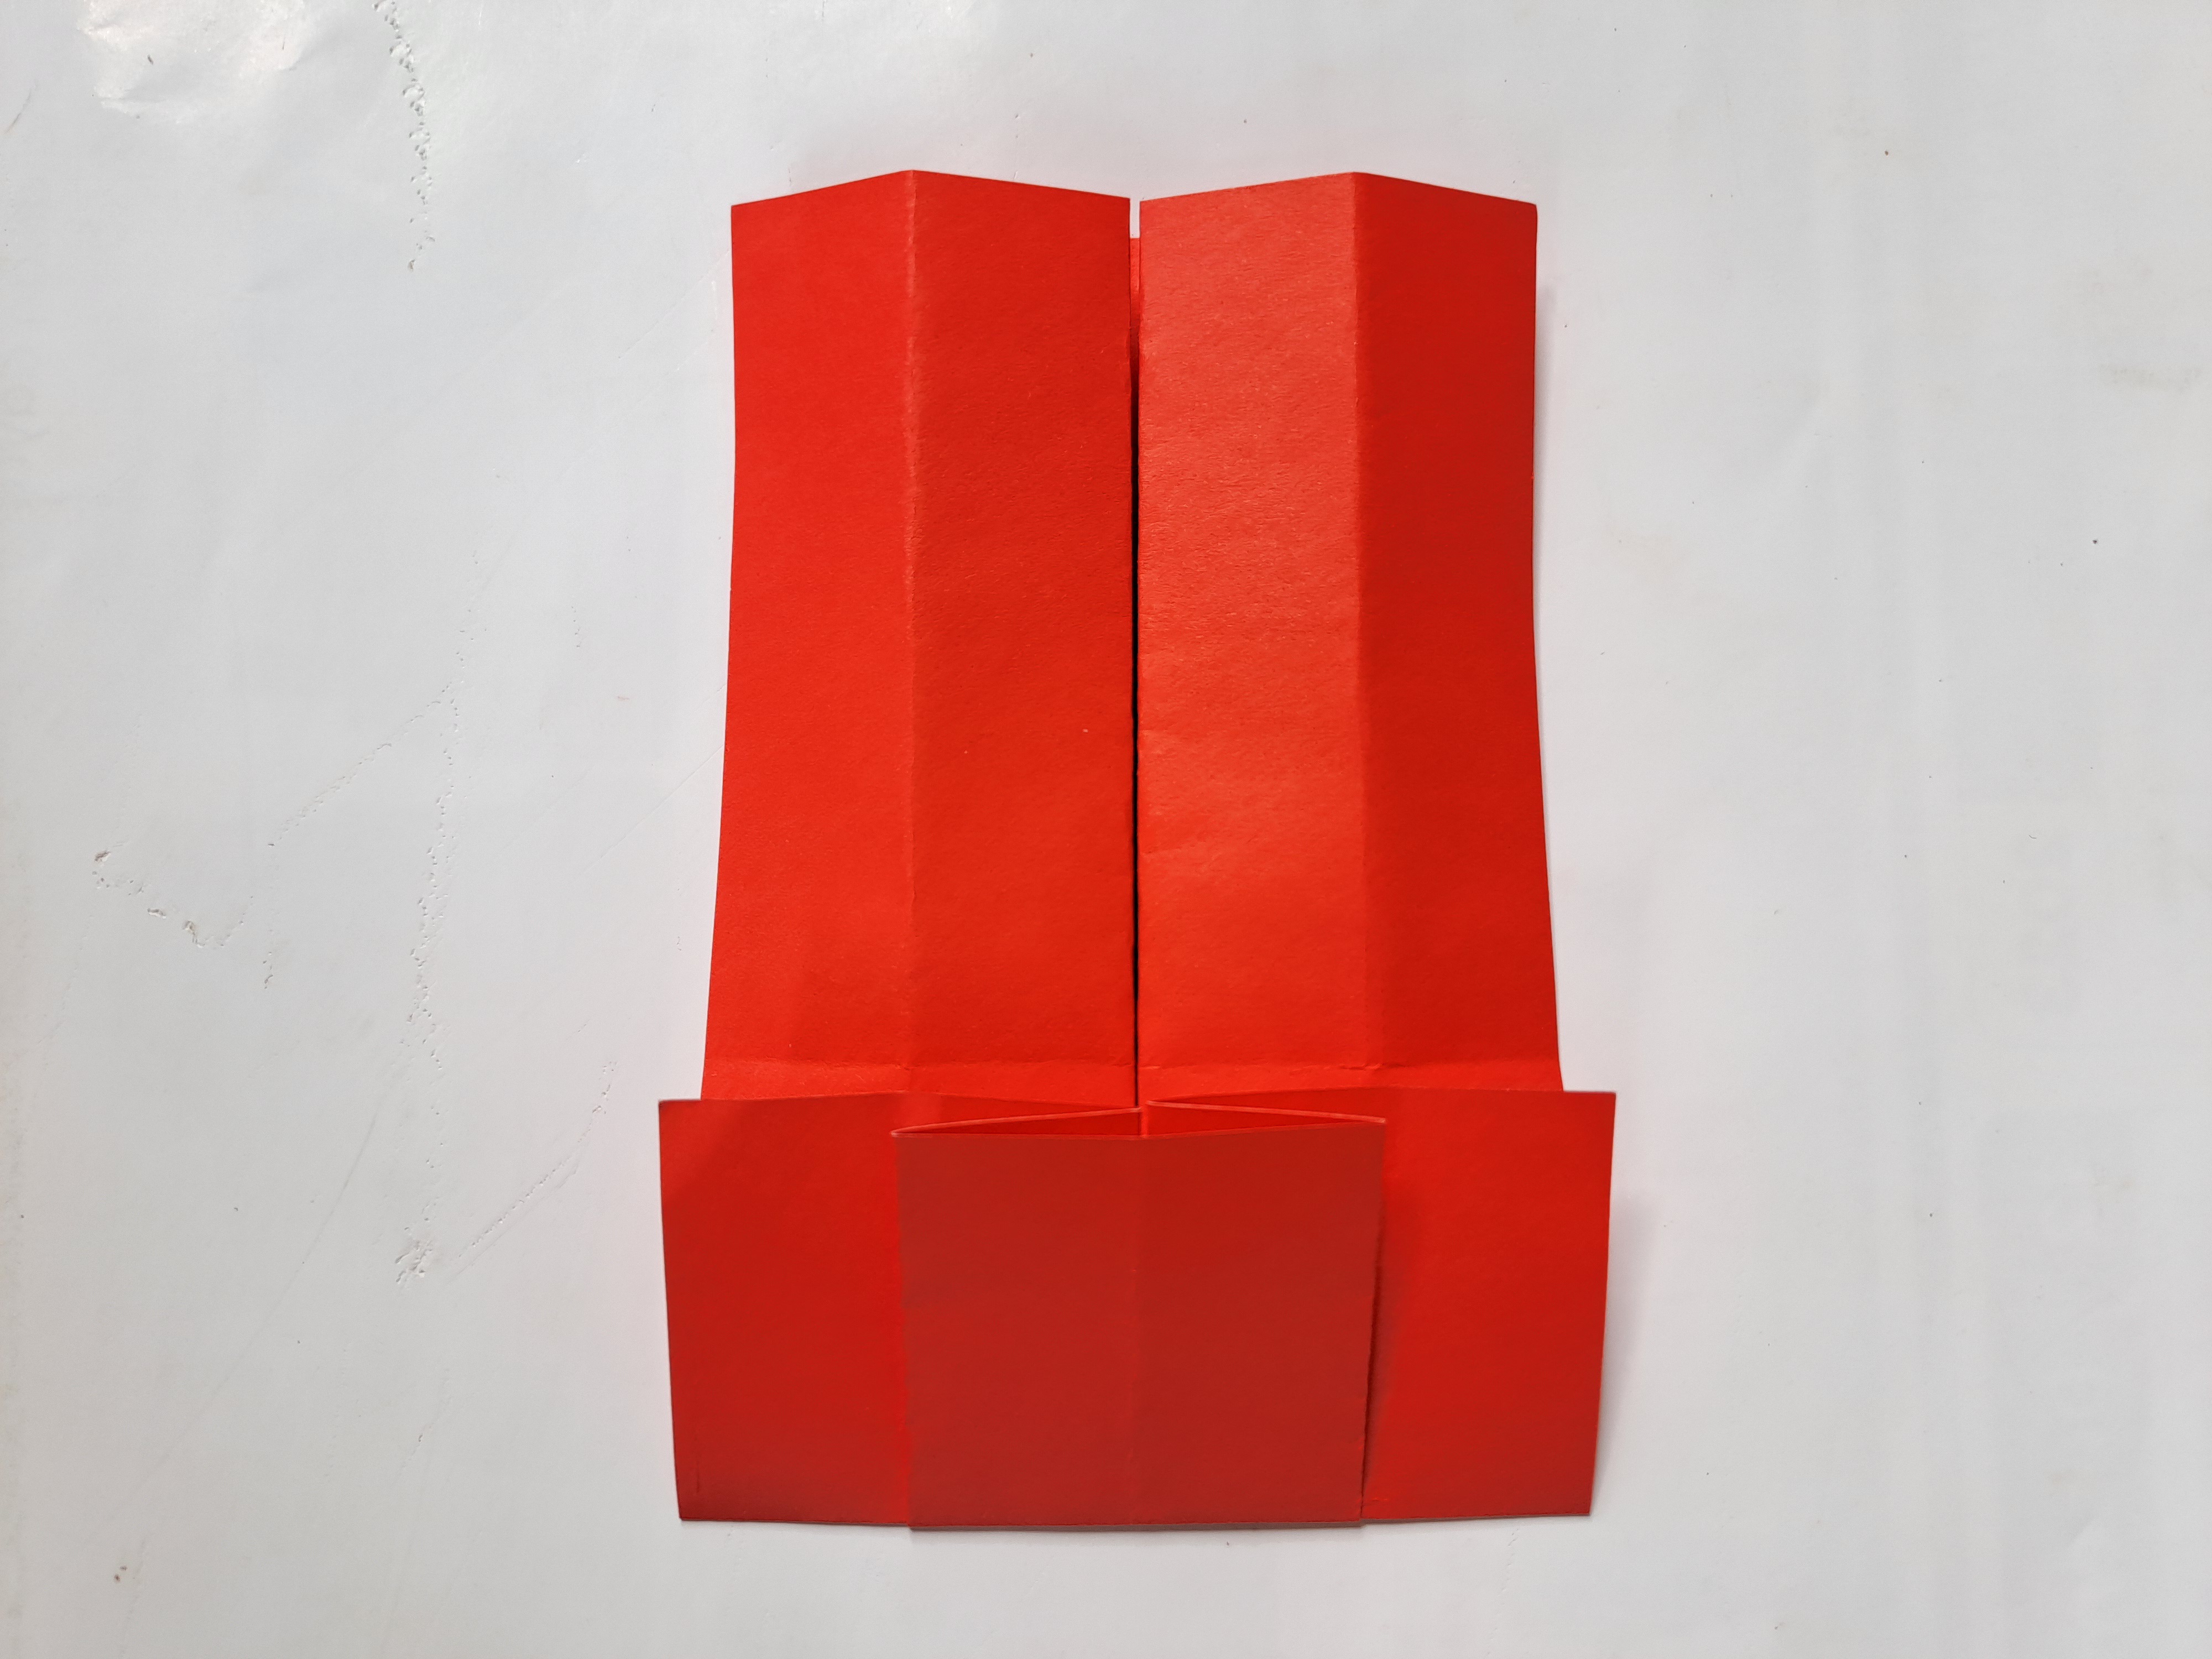
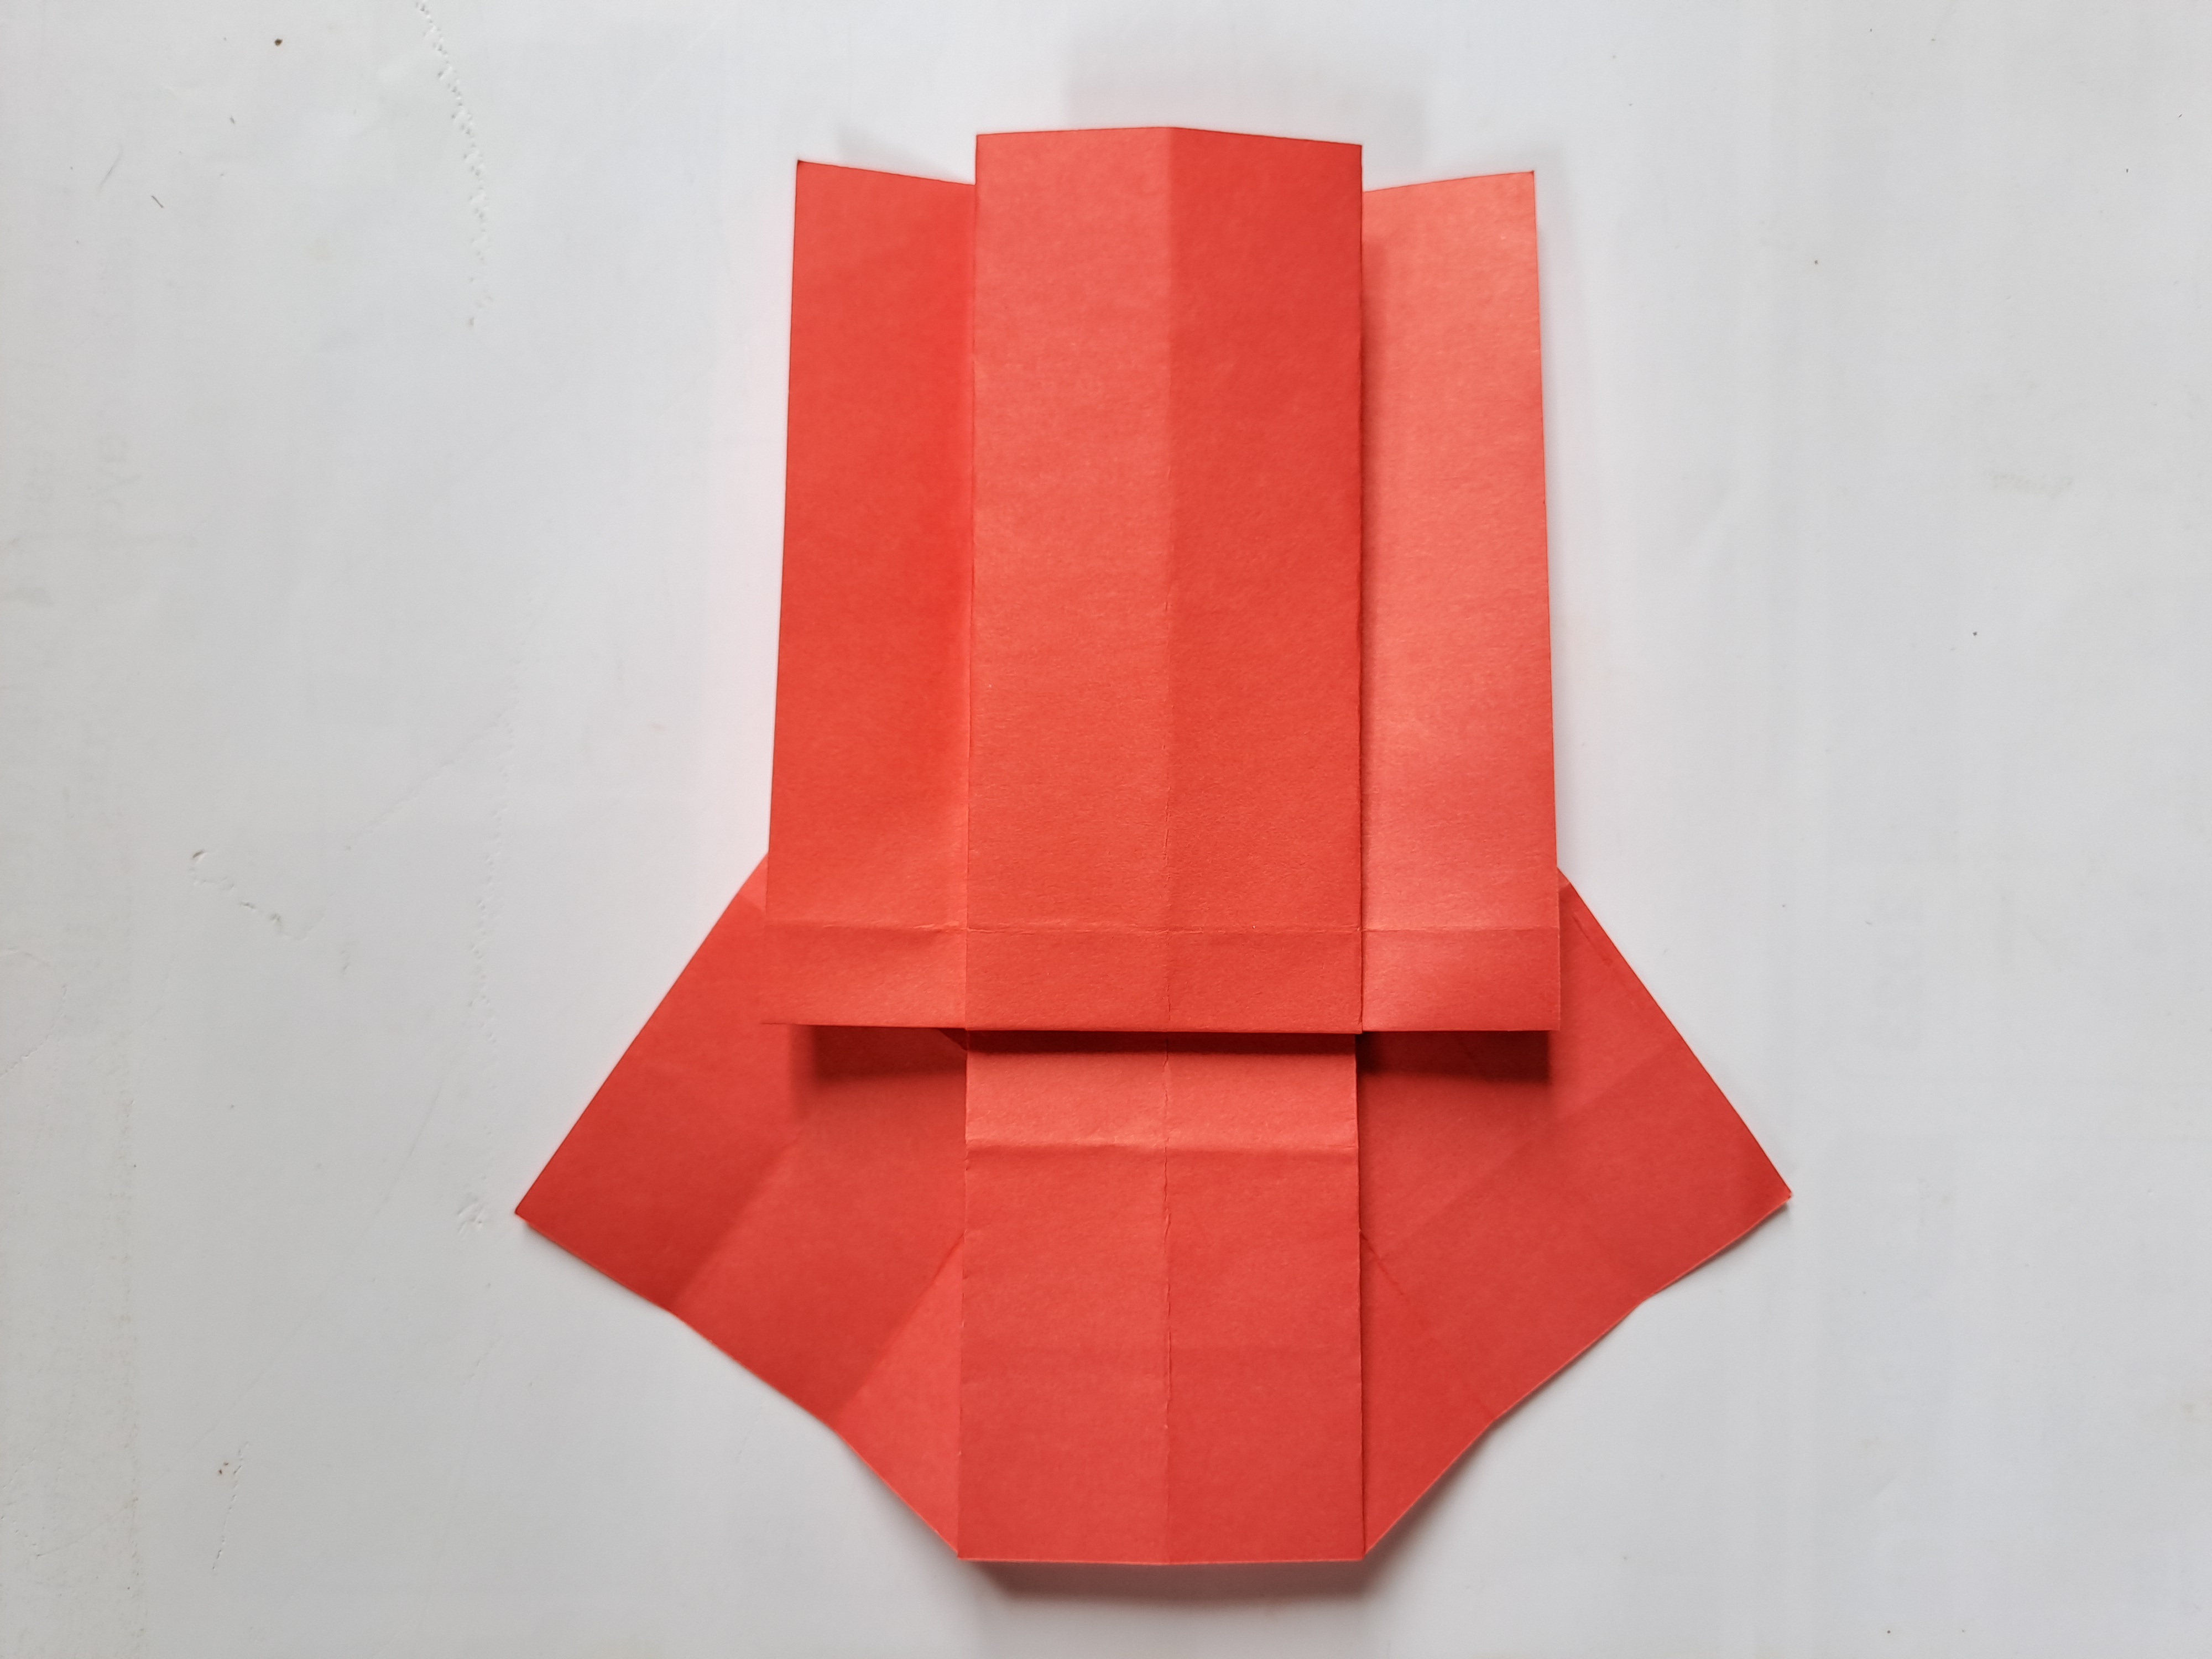
Then turn the origami paper over again and now open the fold above again, then fold the bottom of the origami paper halfway up like the picture below.
 |  |
|---|
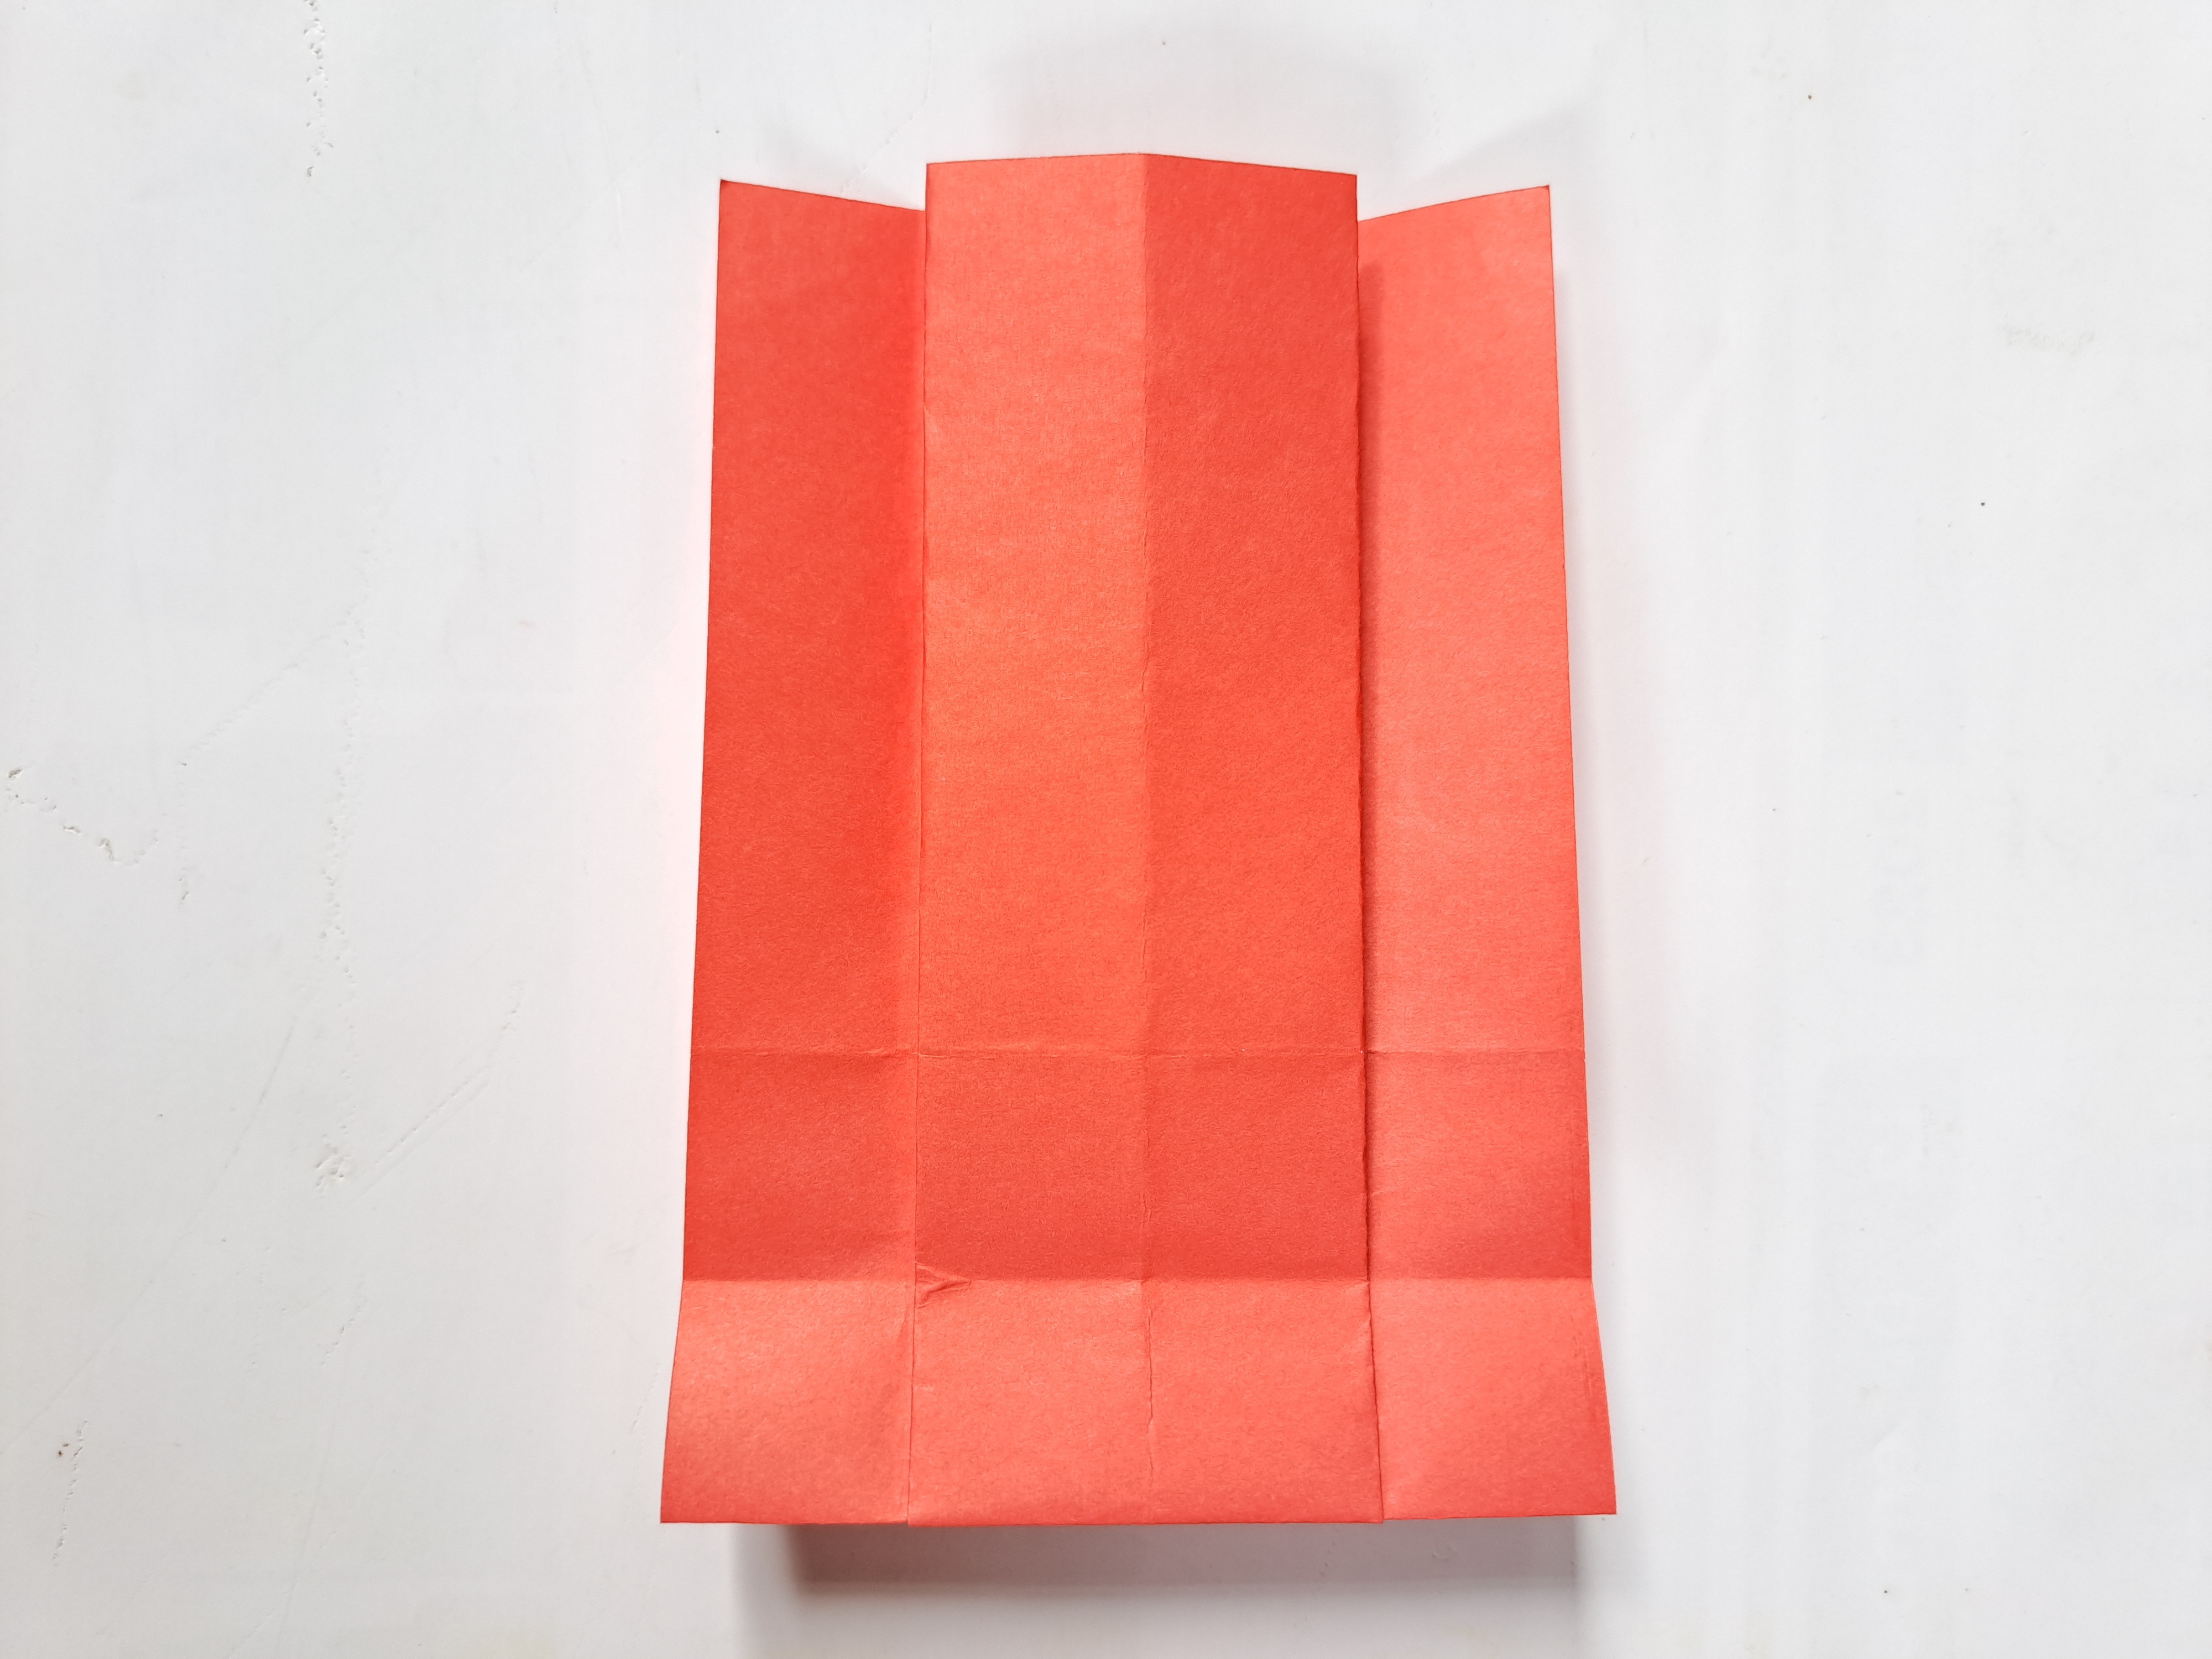
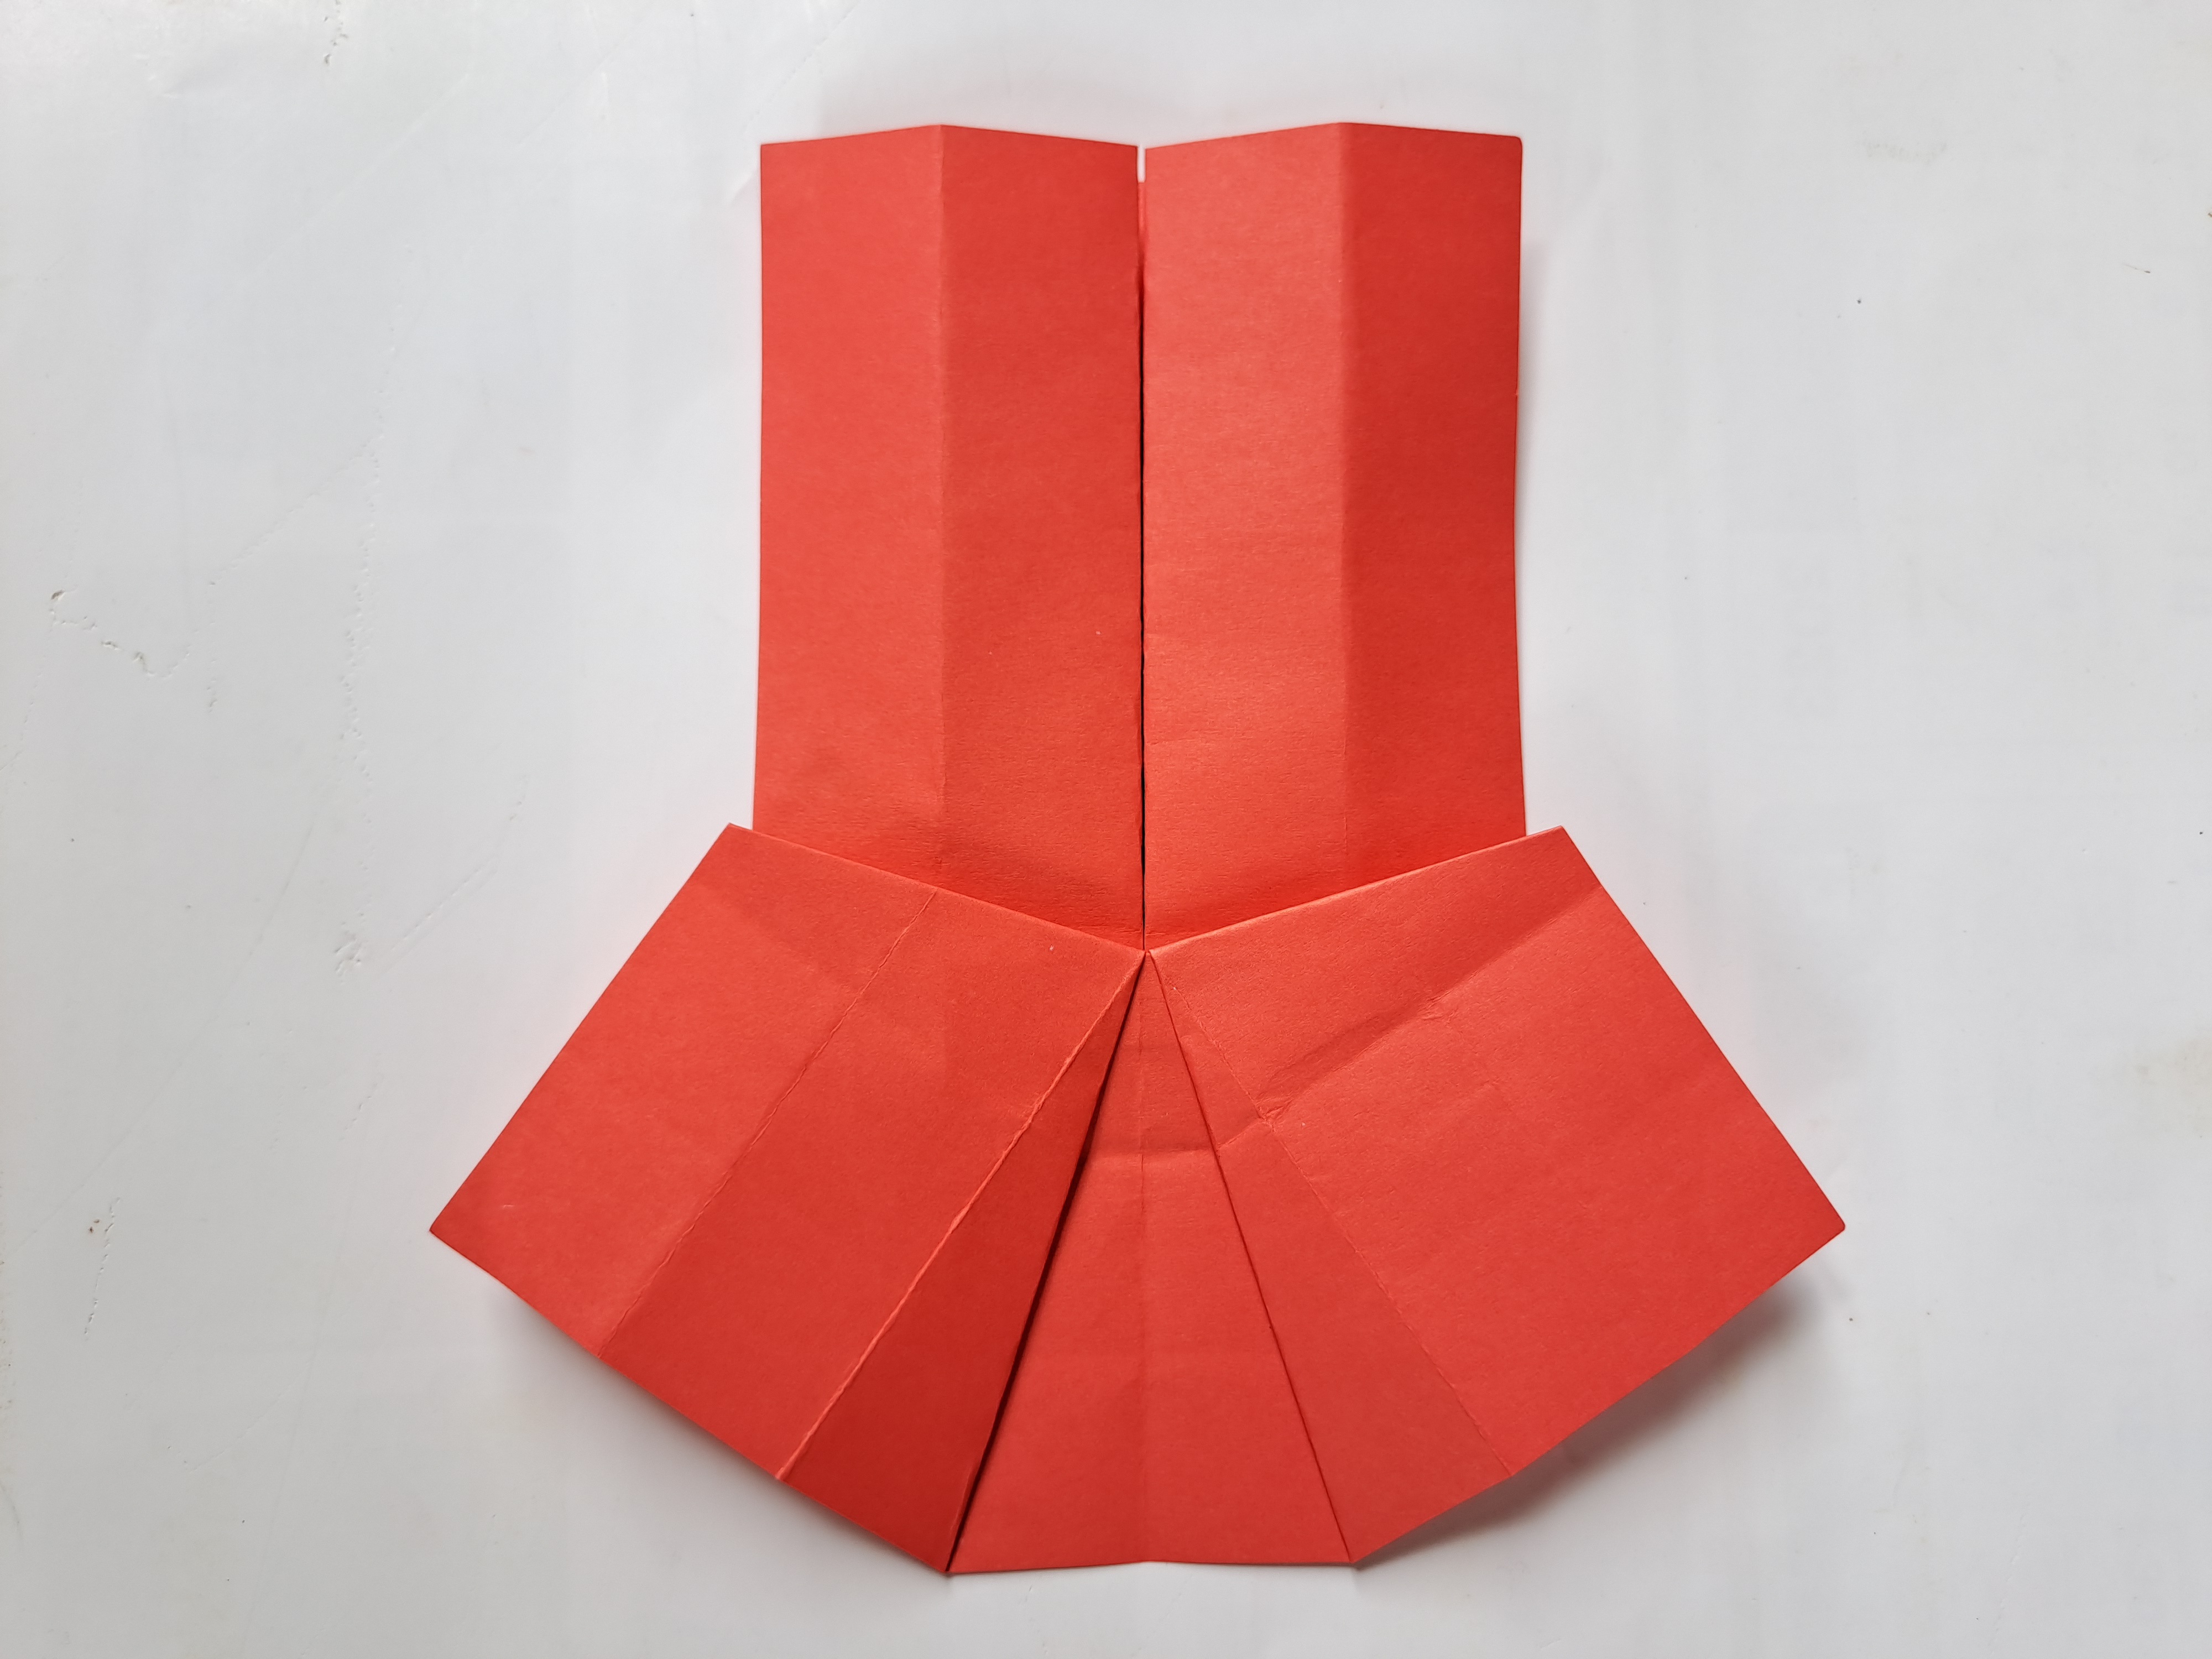
After that, open the fold again, then slightly fold the bottom side of the paper between the fold line and the middle fold line of the paper as shown in the image below.
 |  |
|---|
Then, open it slightly and fold the right side of the bottom paper sideways like the picture below to make the pattern for the bottom dress. Do the same thing on the left side so that the bottom side of the dress looks perfect.
 |  |
|---|
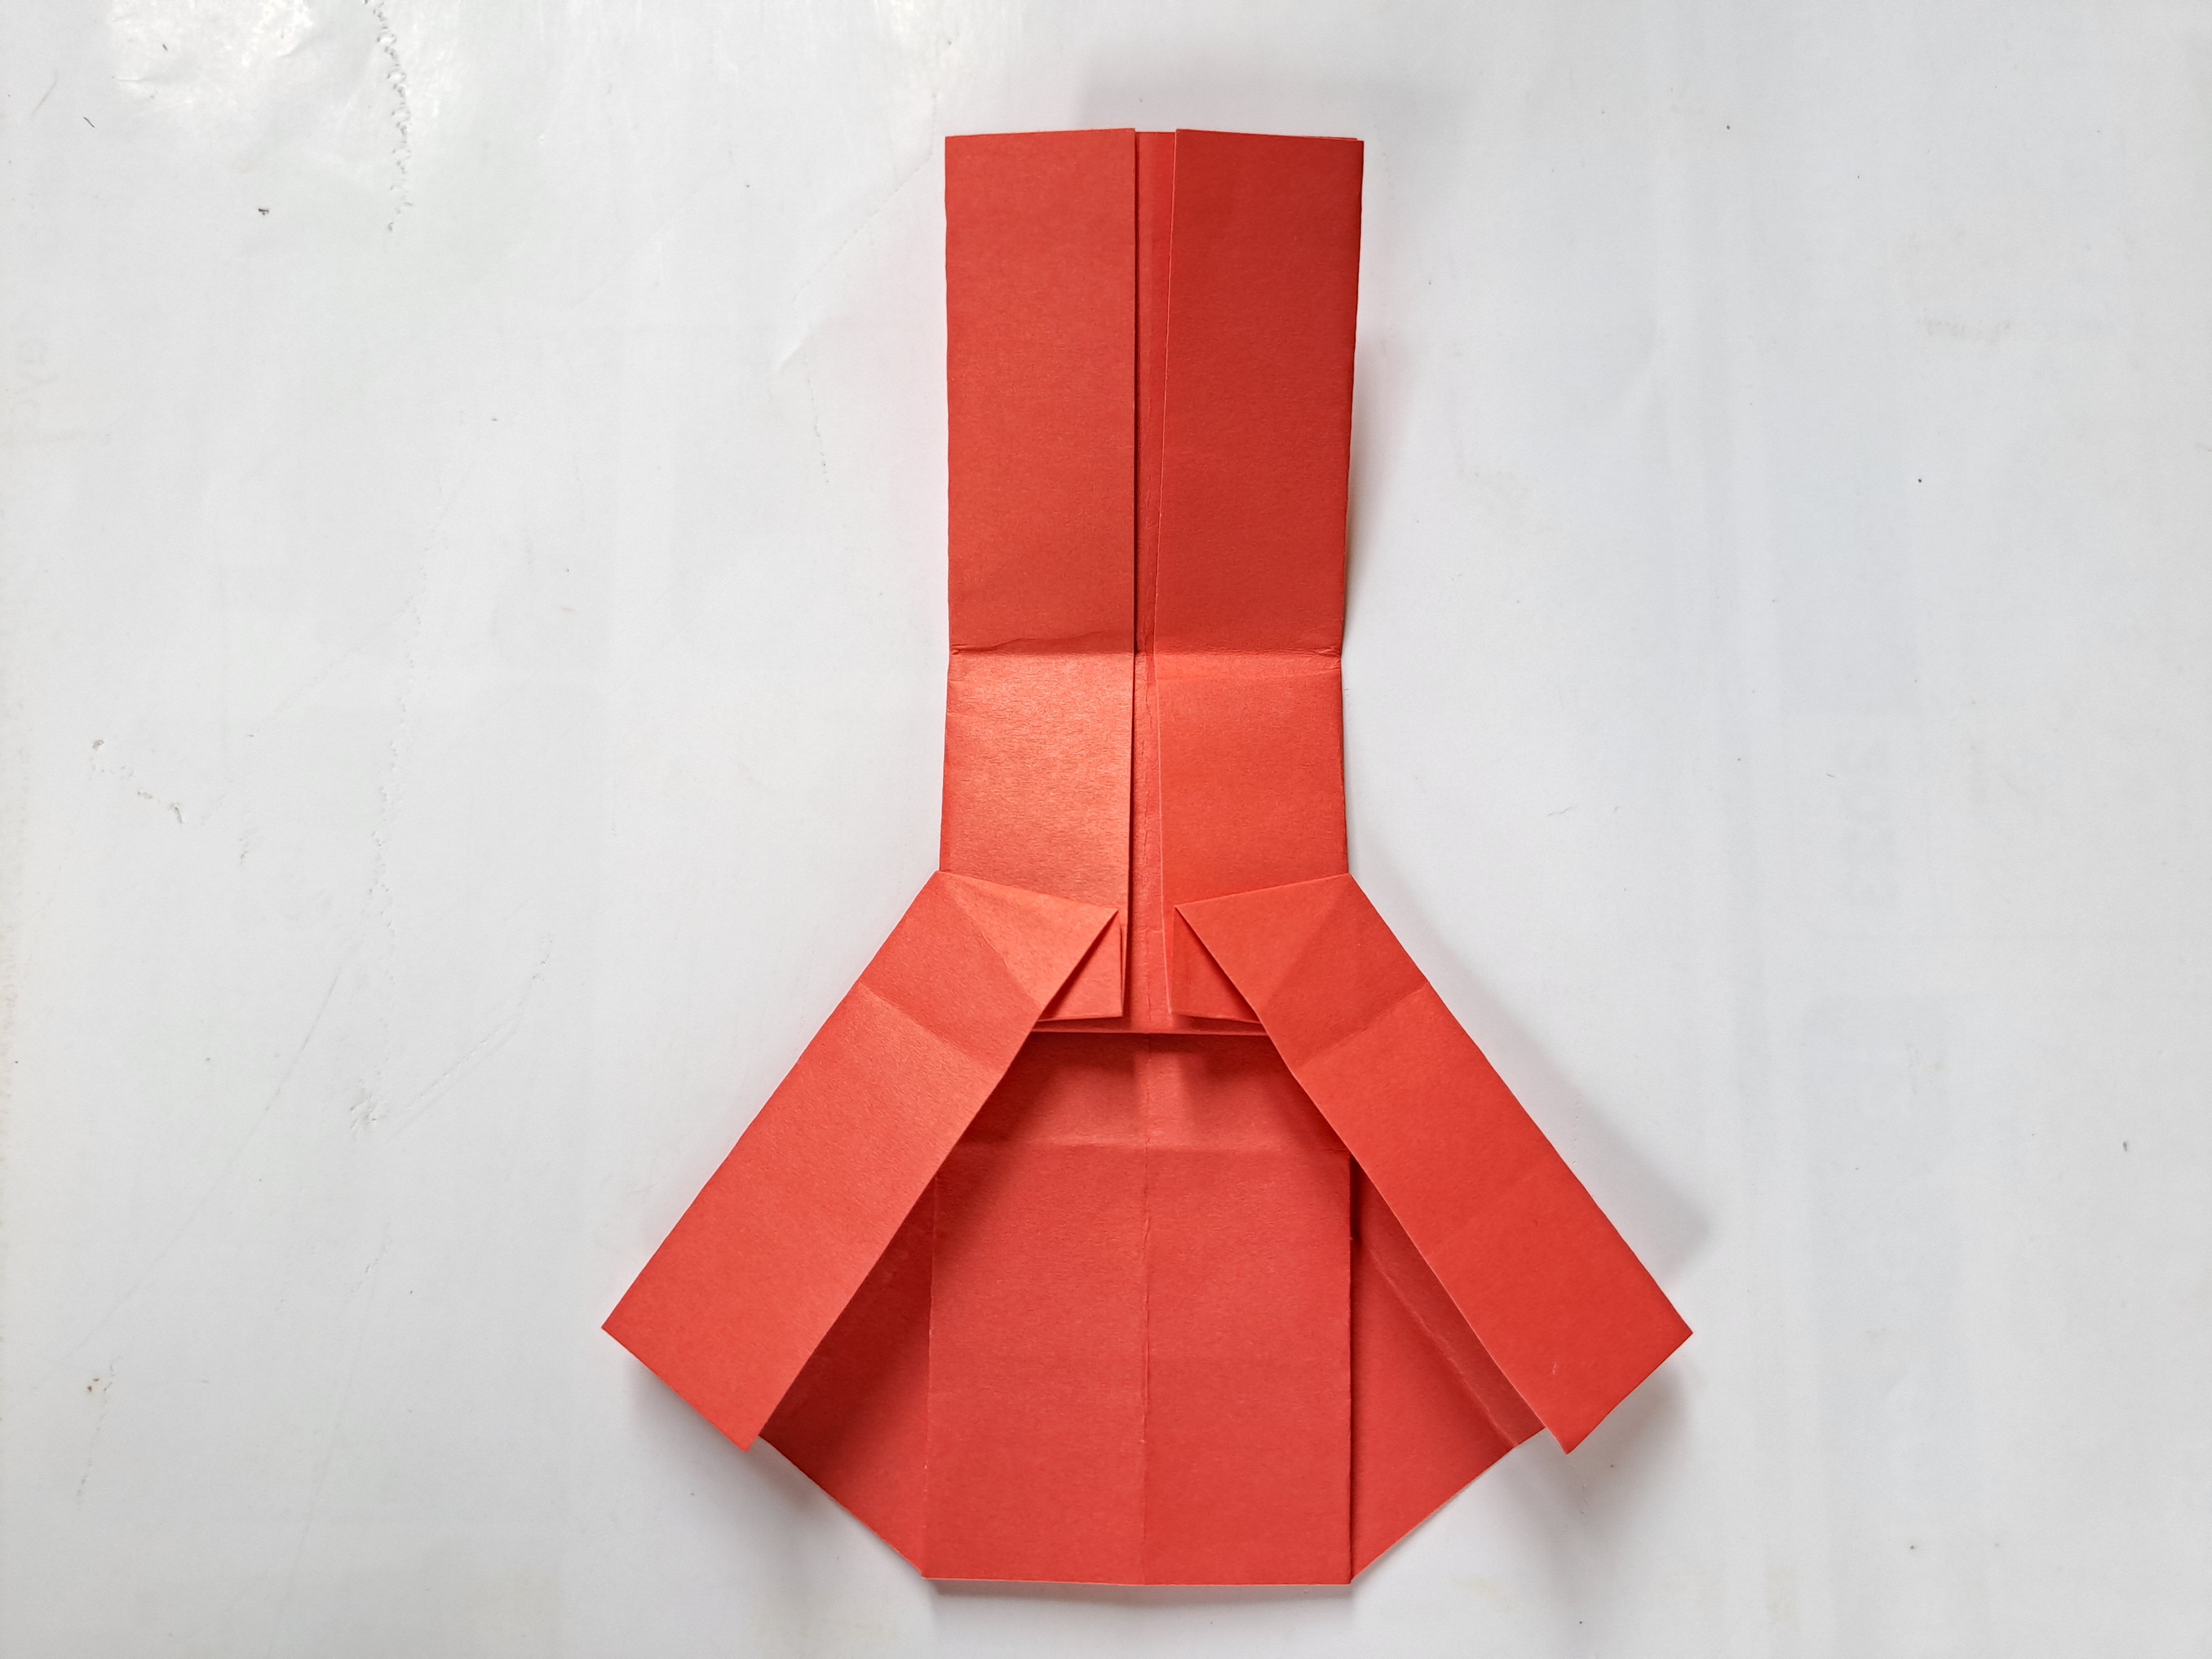
Then turn the dress over, and fold the left and right sides of the dress inwards following the line pattern until the shape looks like the picture below.
 |  |
|---|
Then fold the top of the paper inward like the picture below.
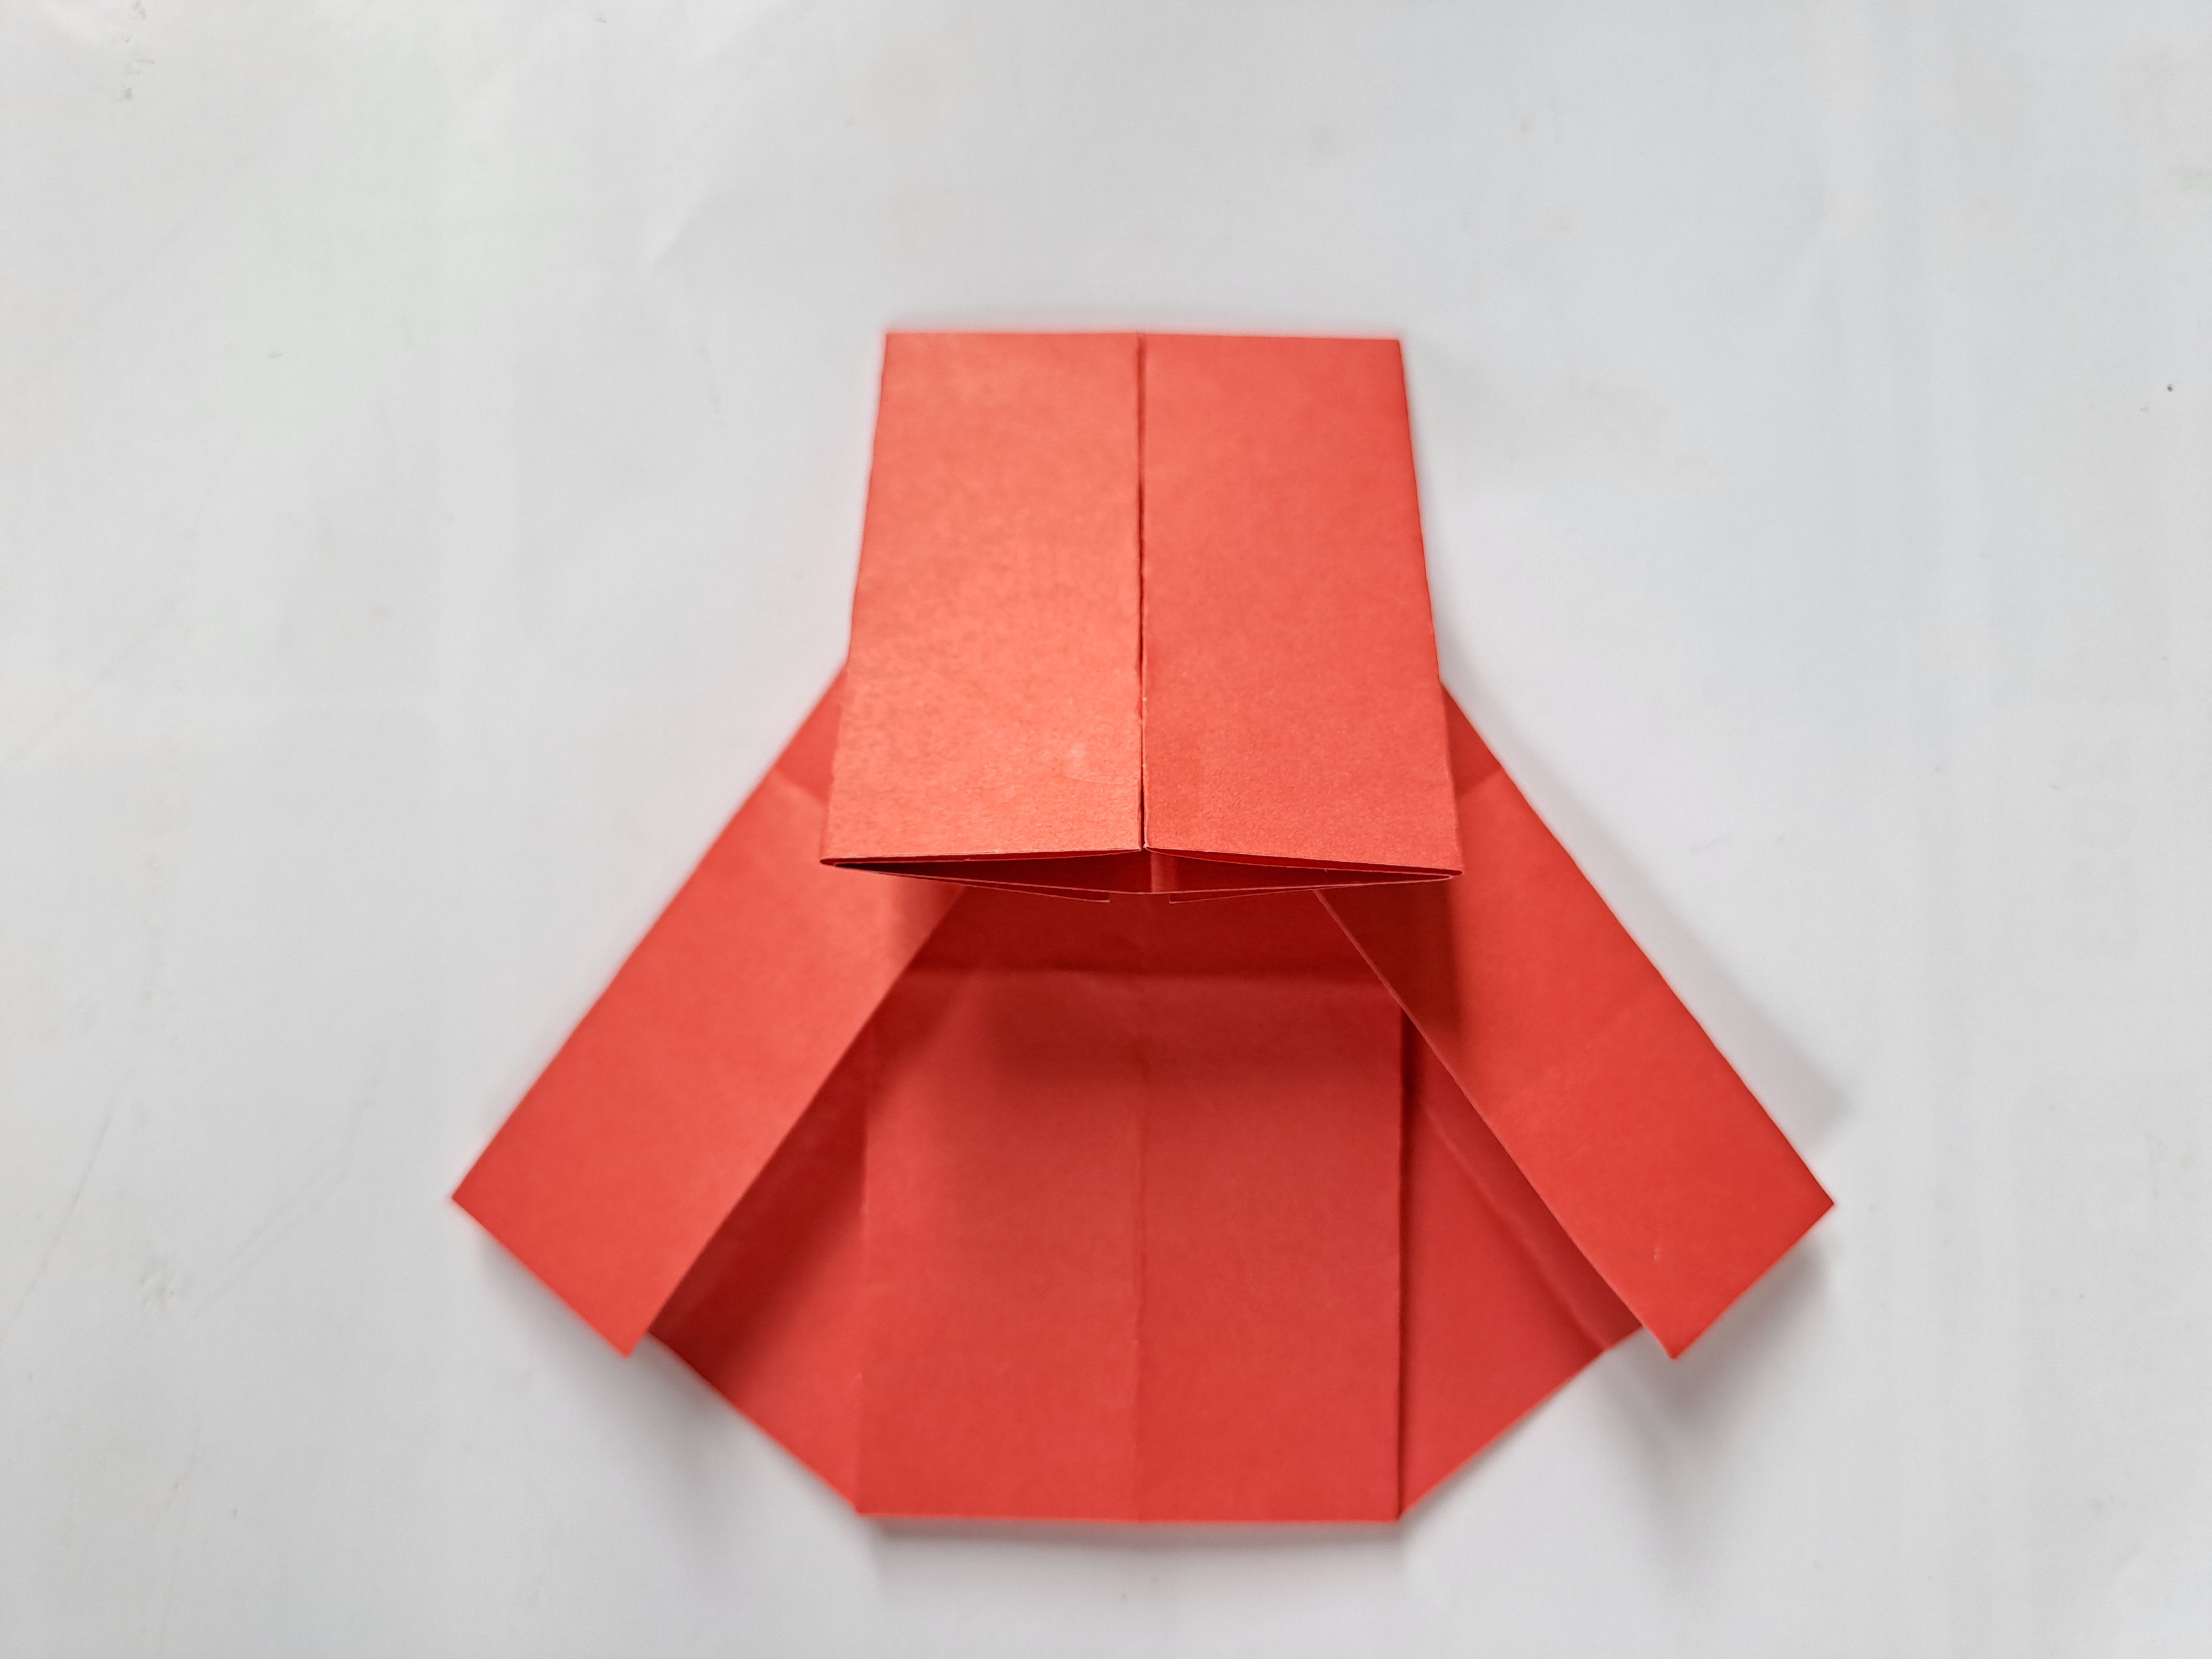
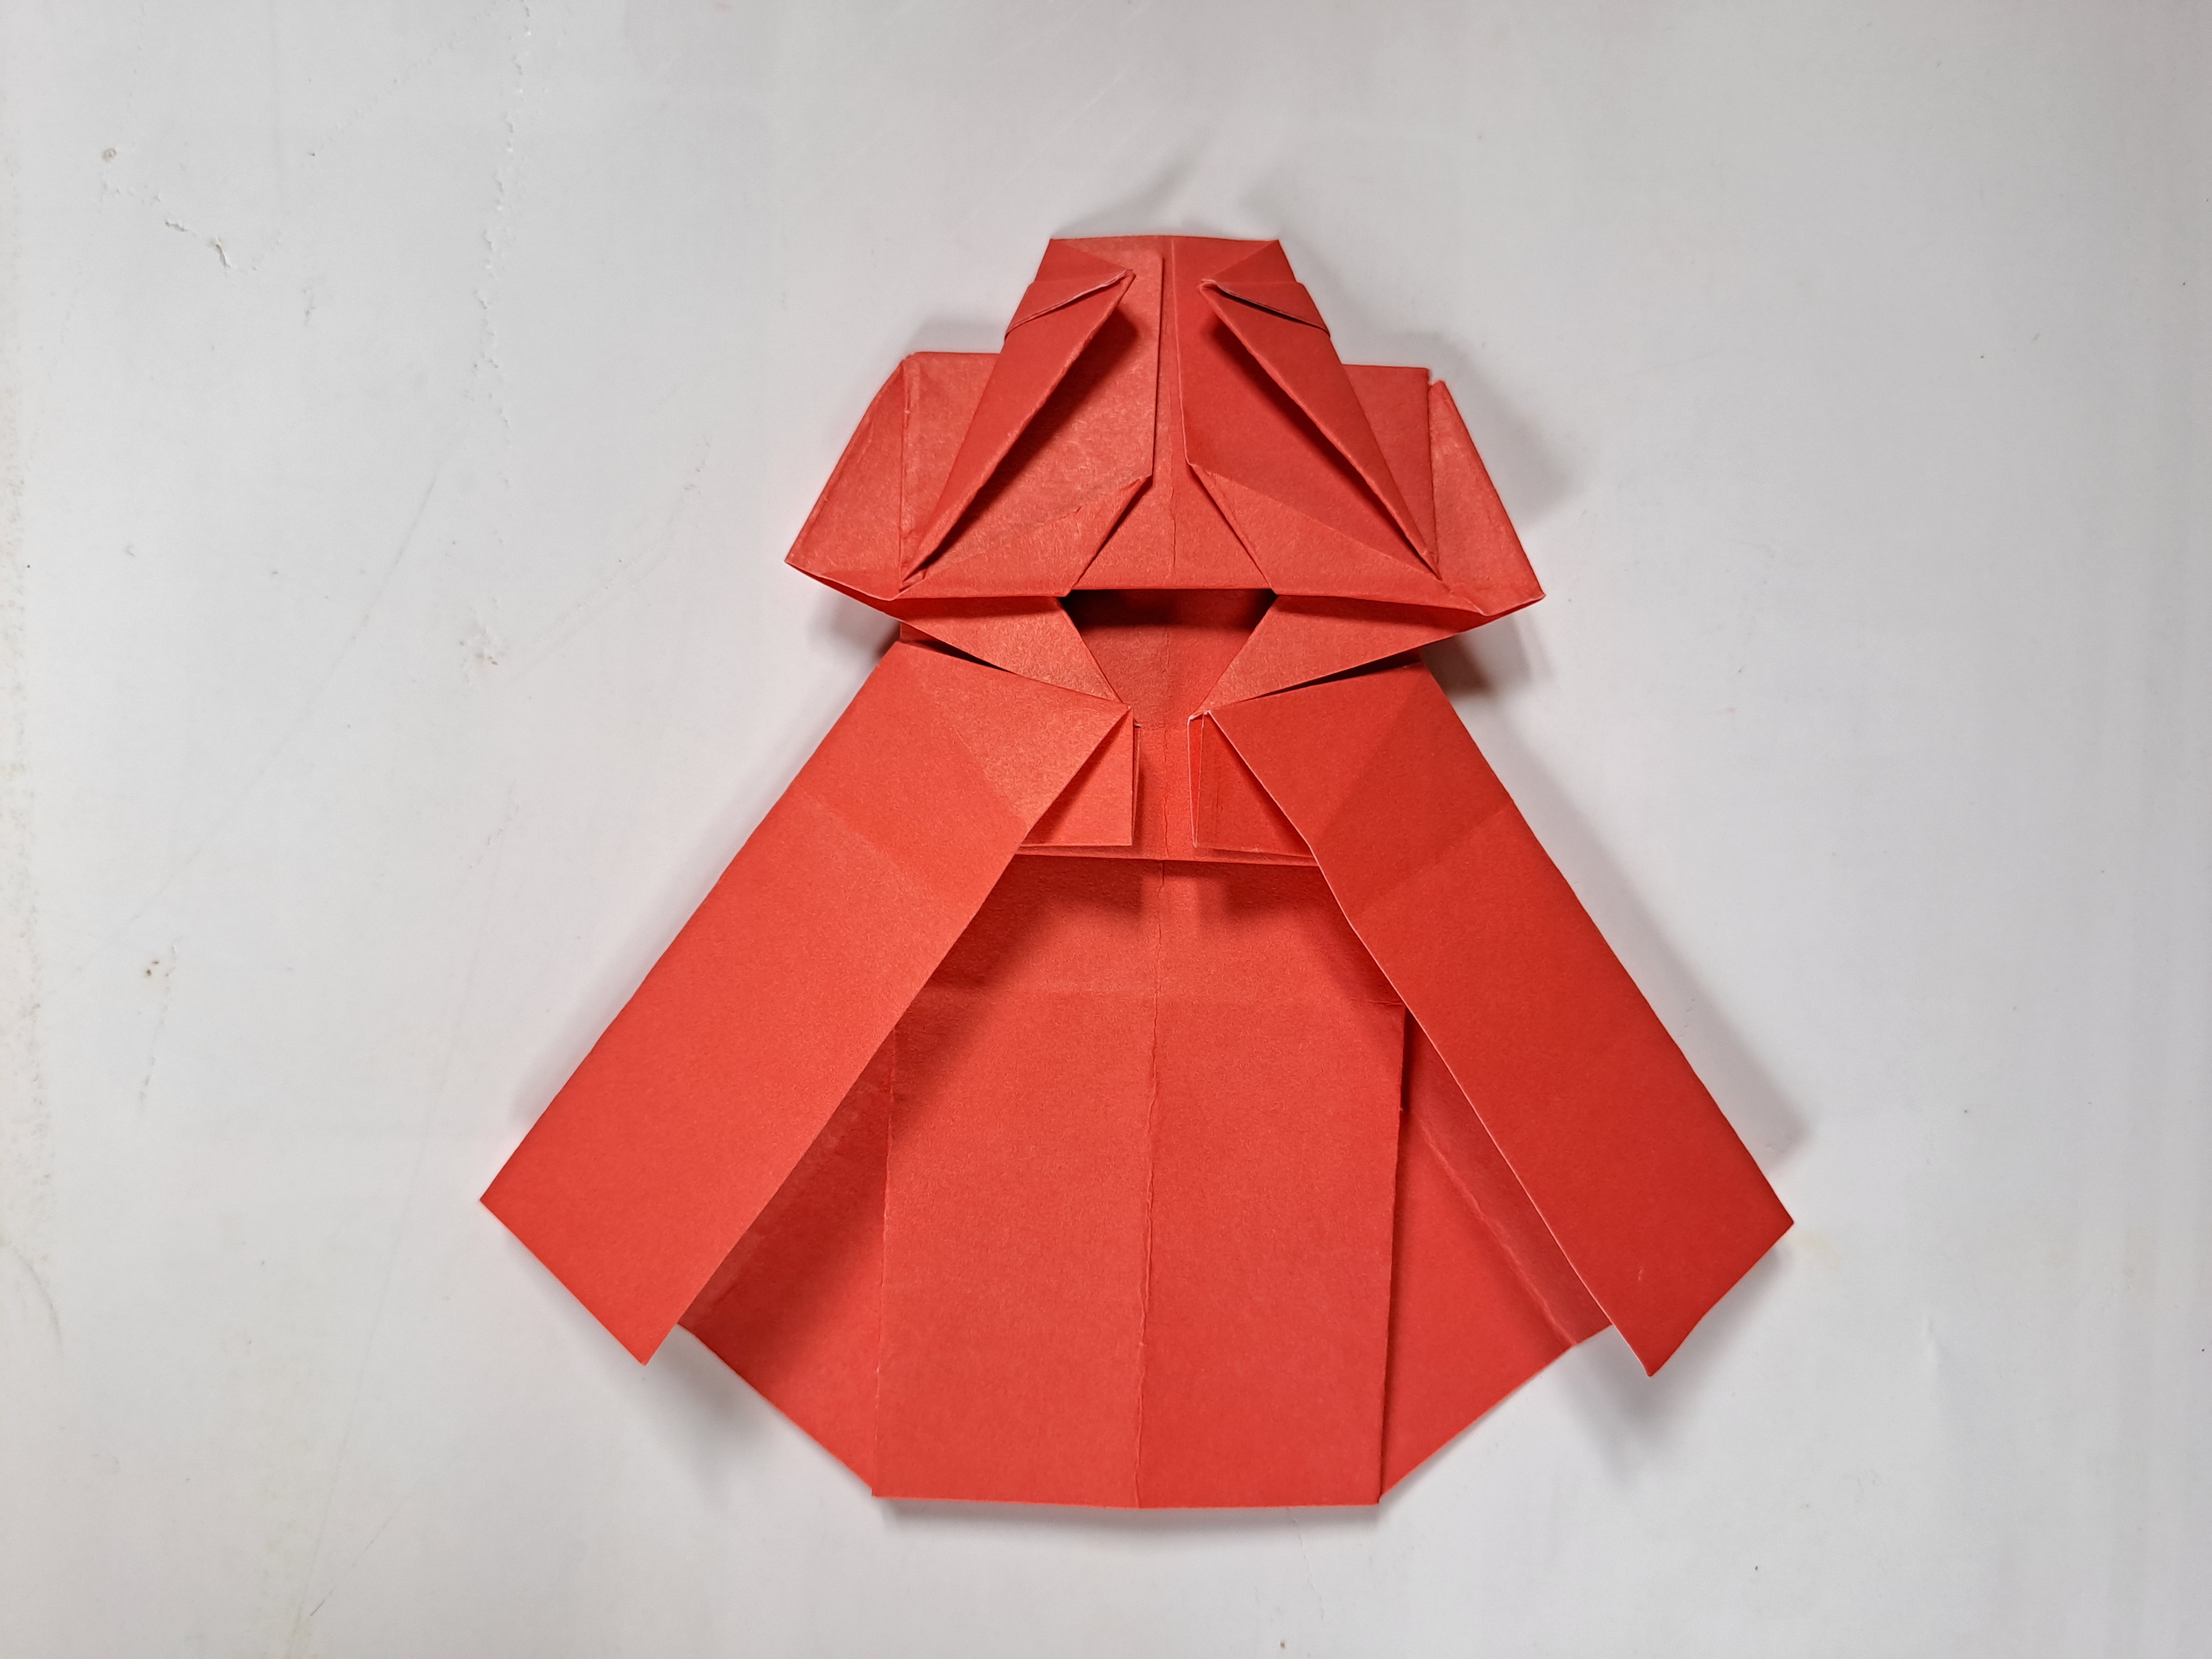
After that, open the folds again and then slightly open the folds on the right side of the dress to pull them outwards like the picture below, this outward fold is done to make the dress sleeve pattern, then do the same thing on the left side to make the dress sleeves. The shape is perfectly formed, and don't forget to fold it again towards the bottom of the paper as before.
 | 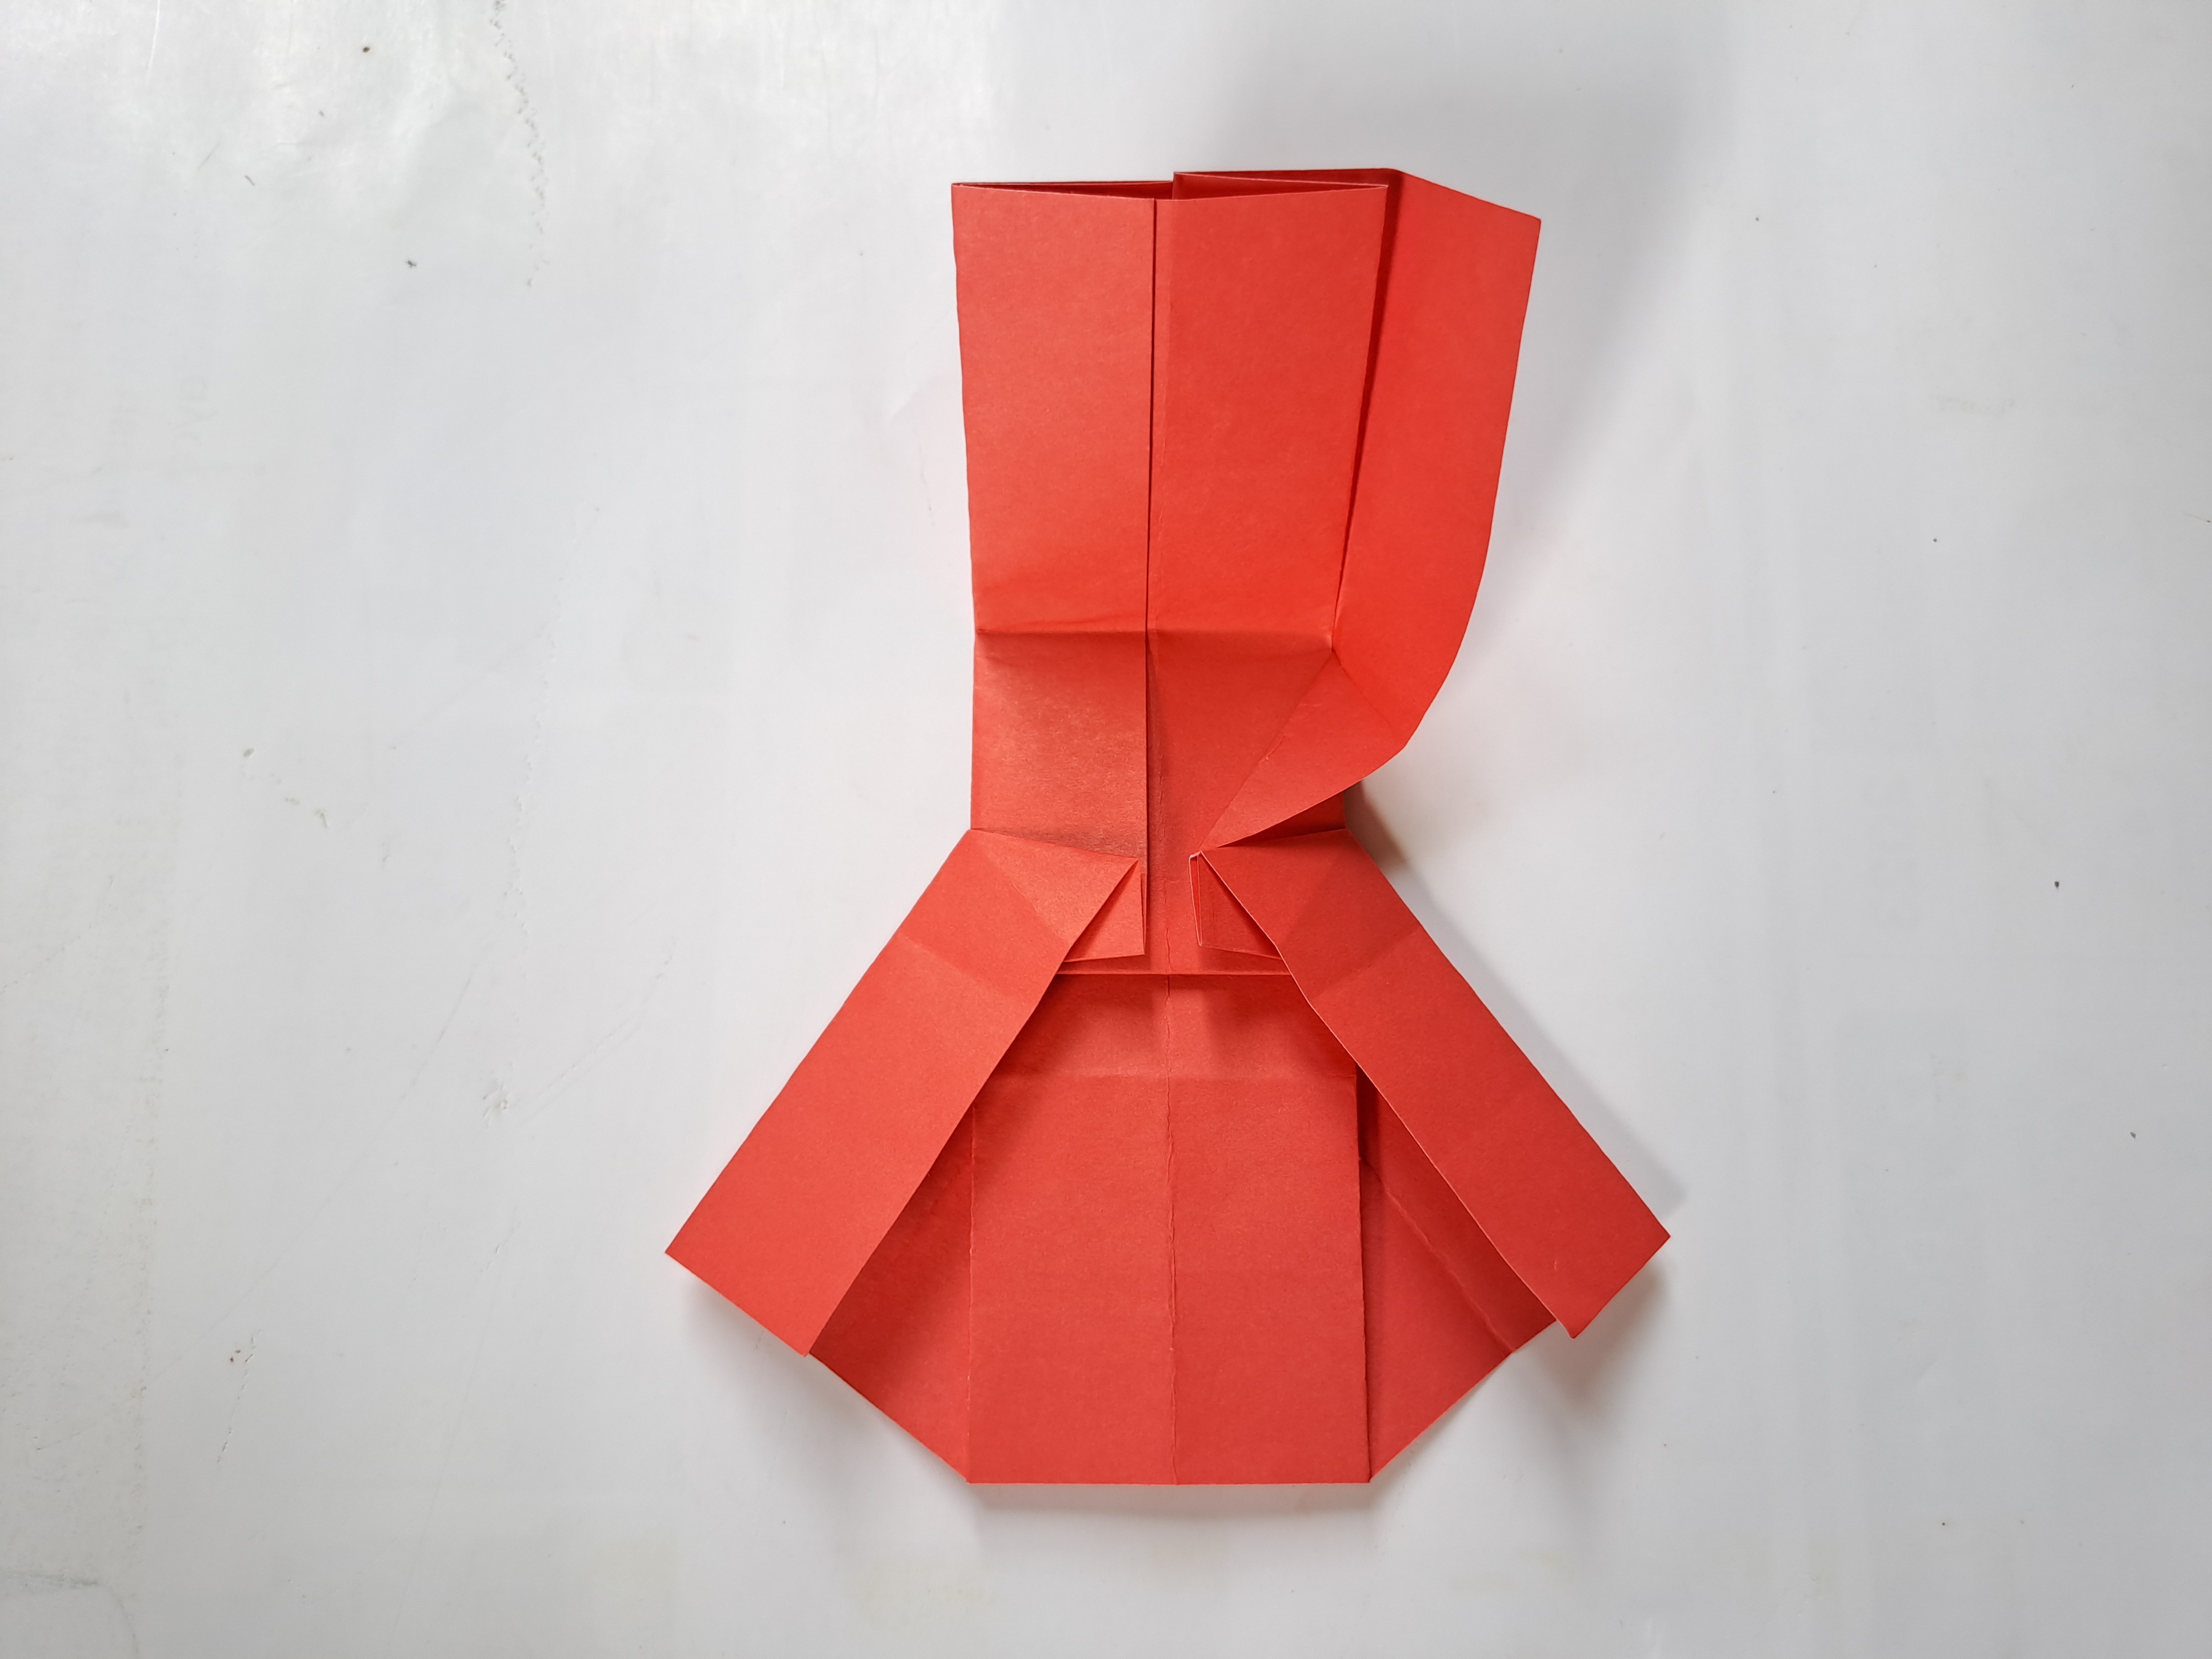 |
|---|
 |  |
|---|
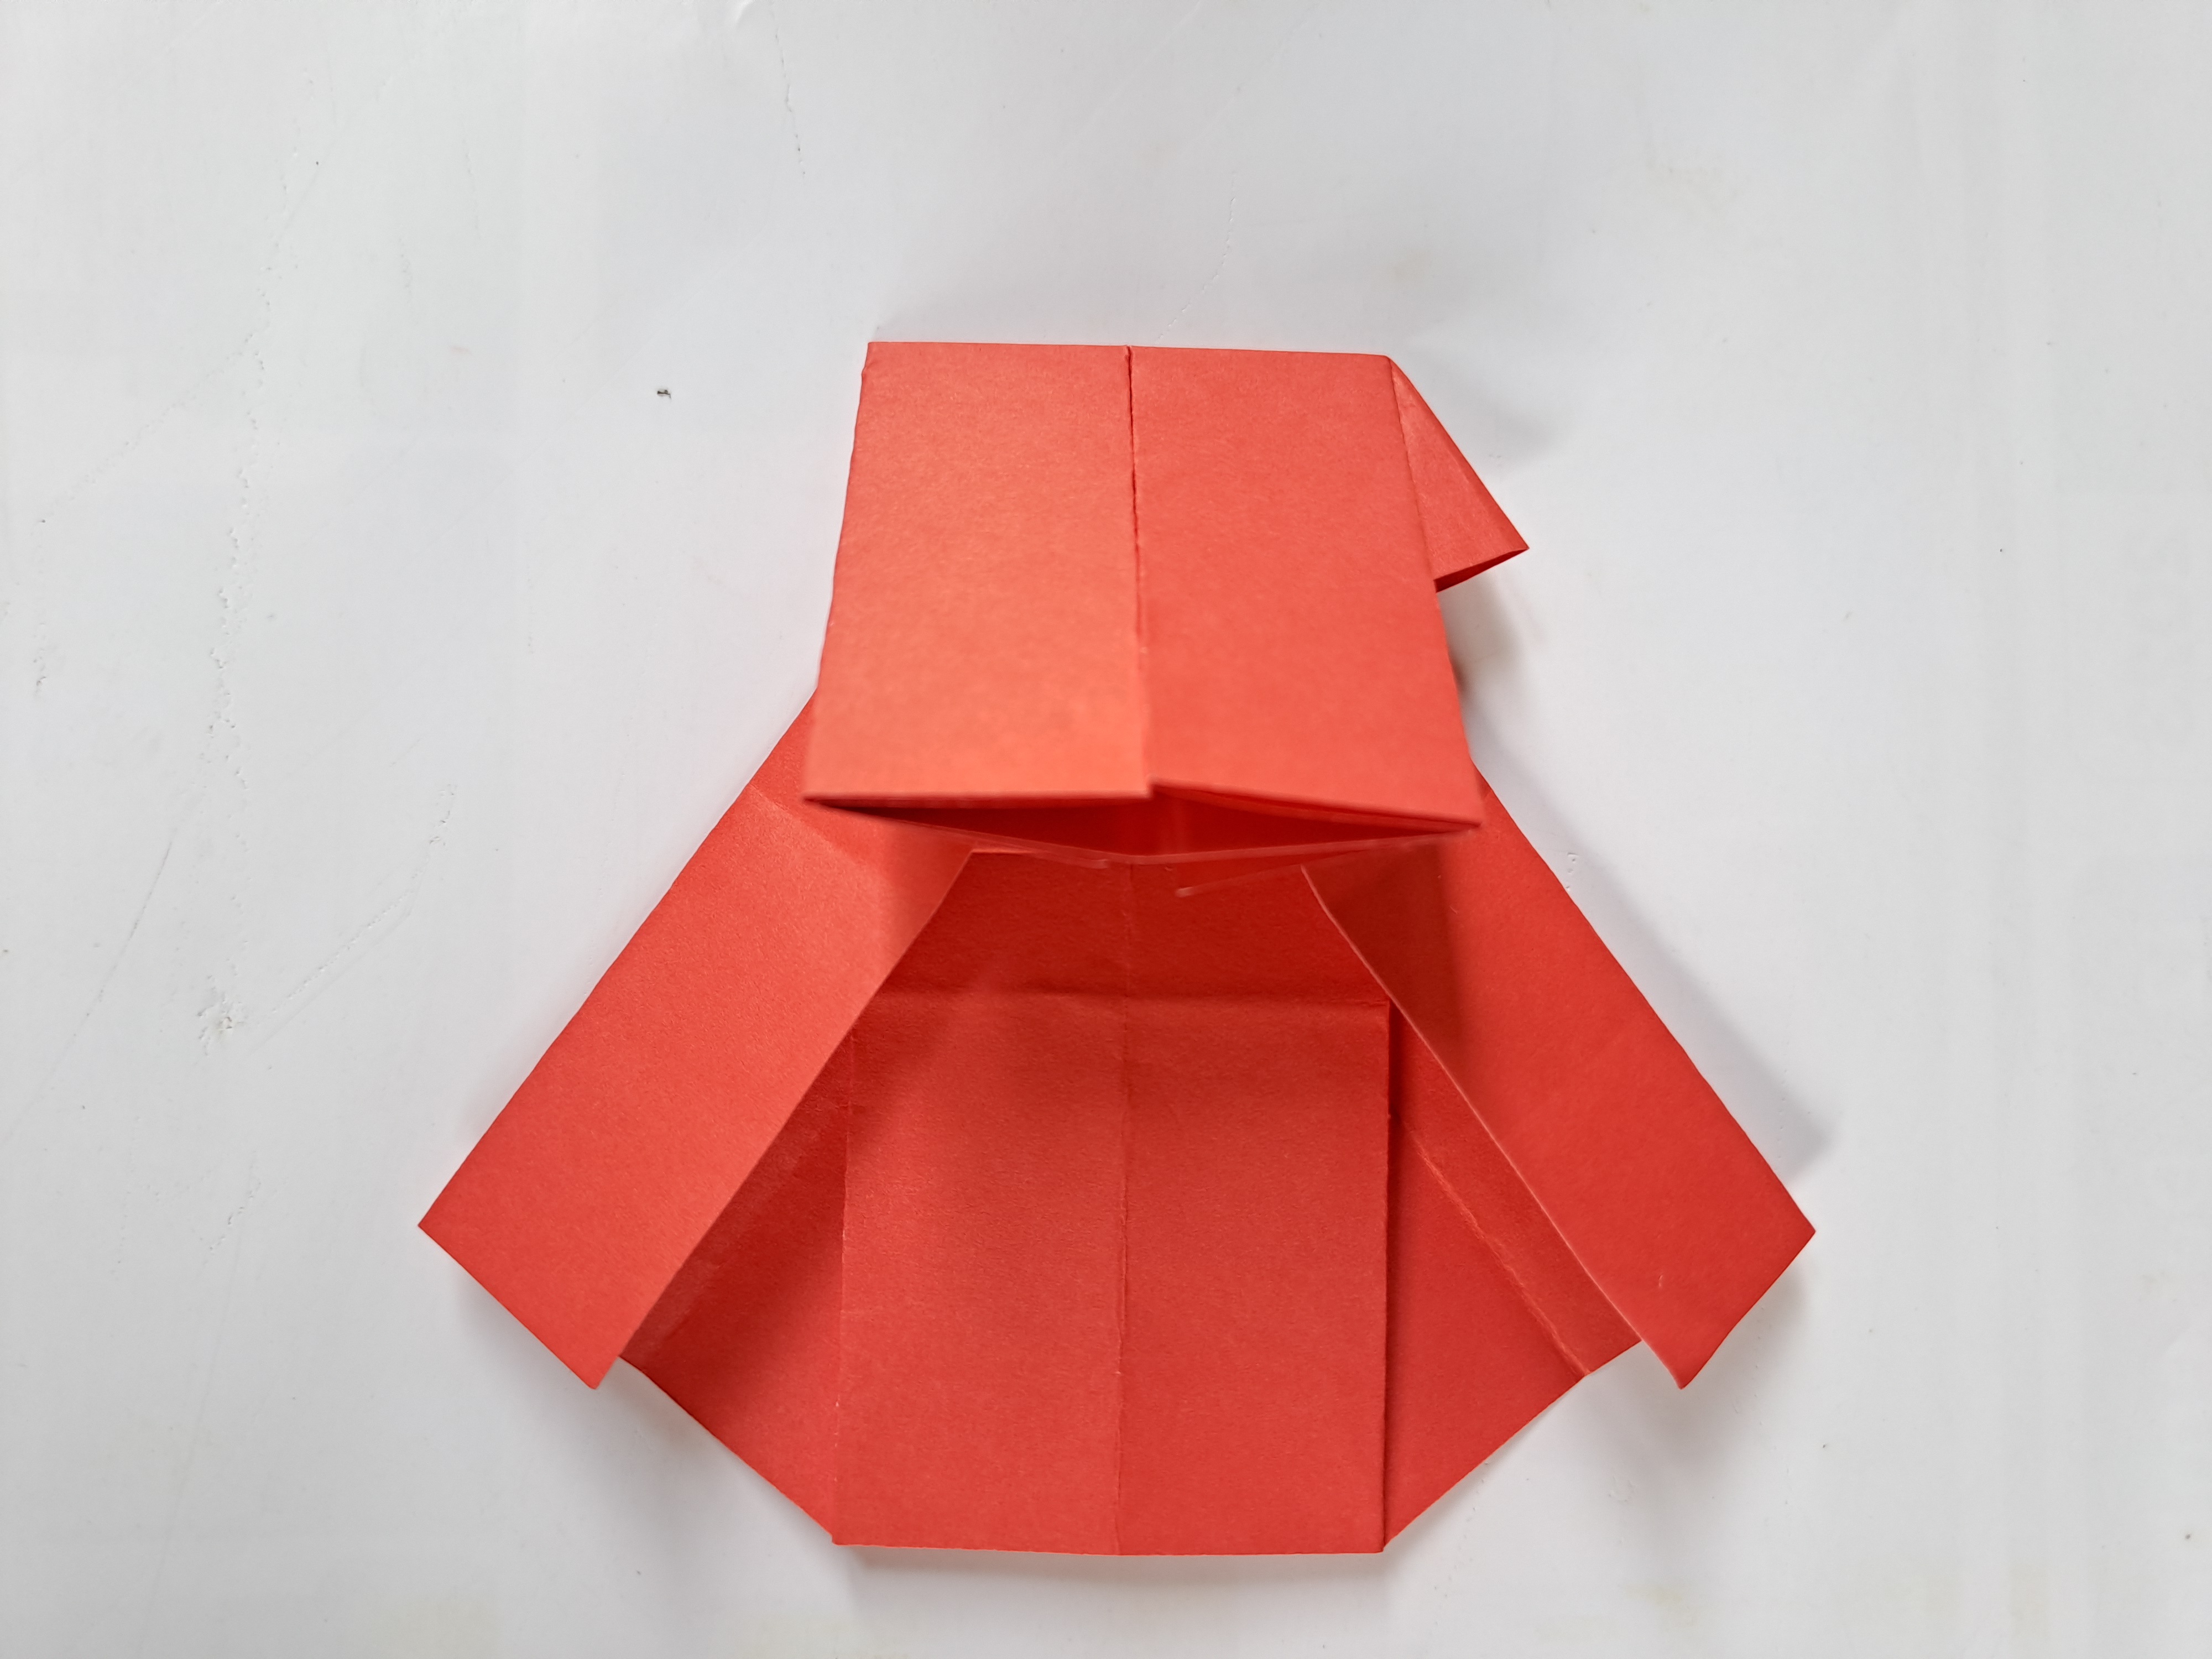
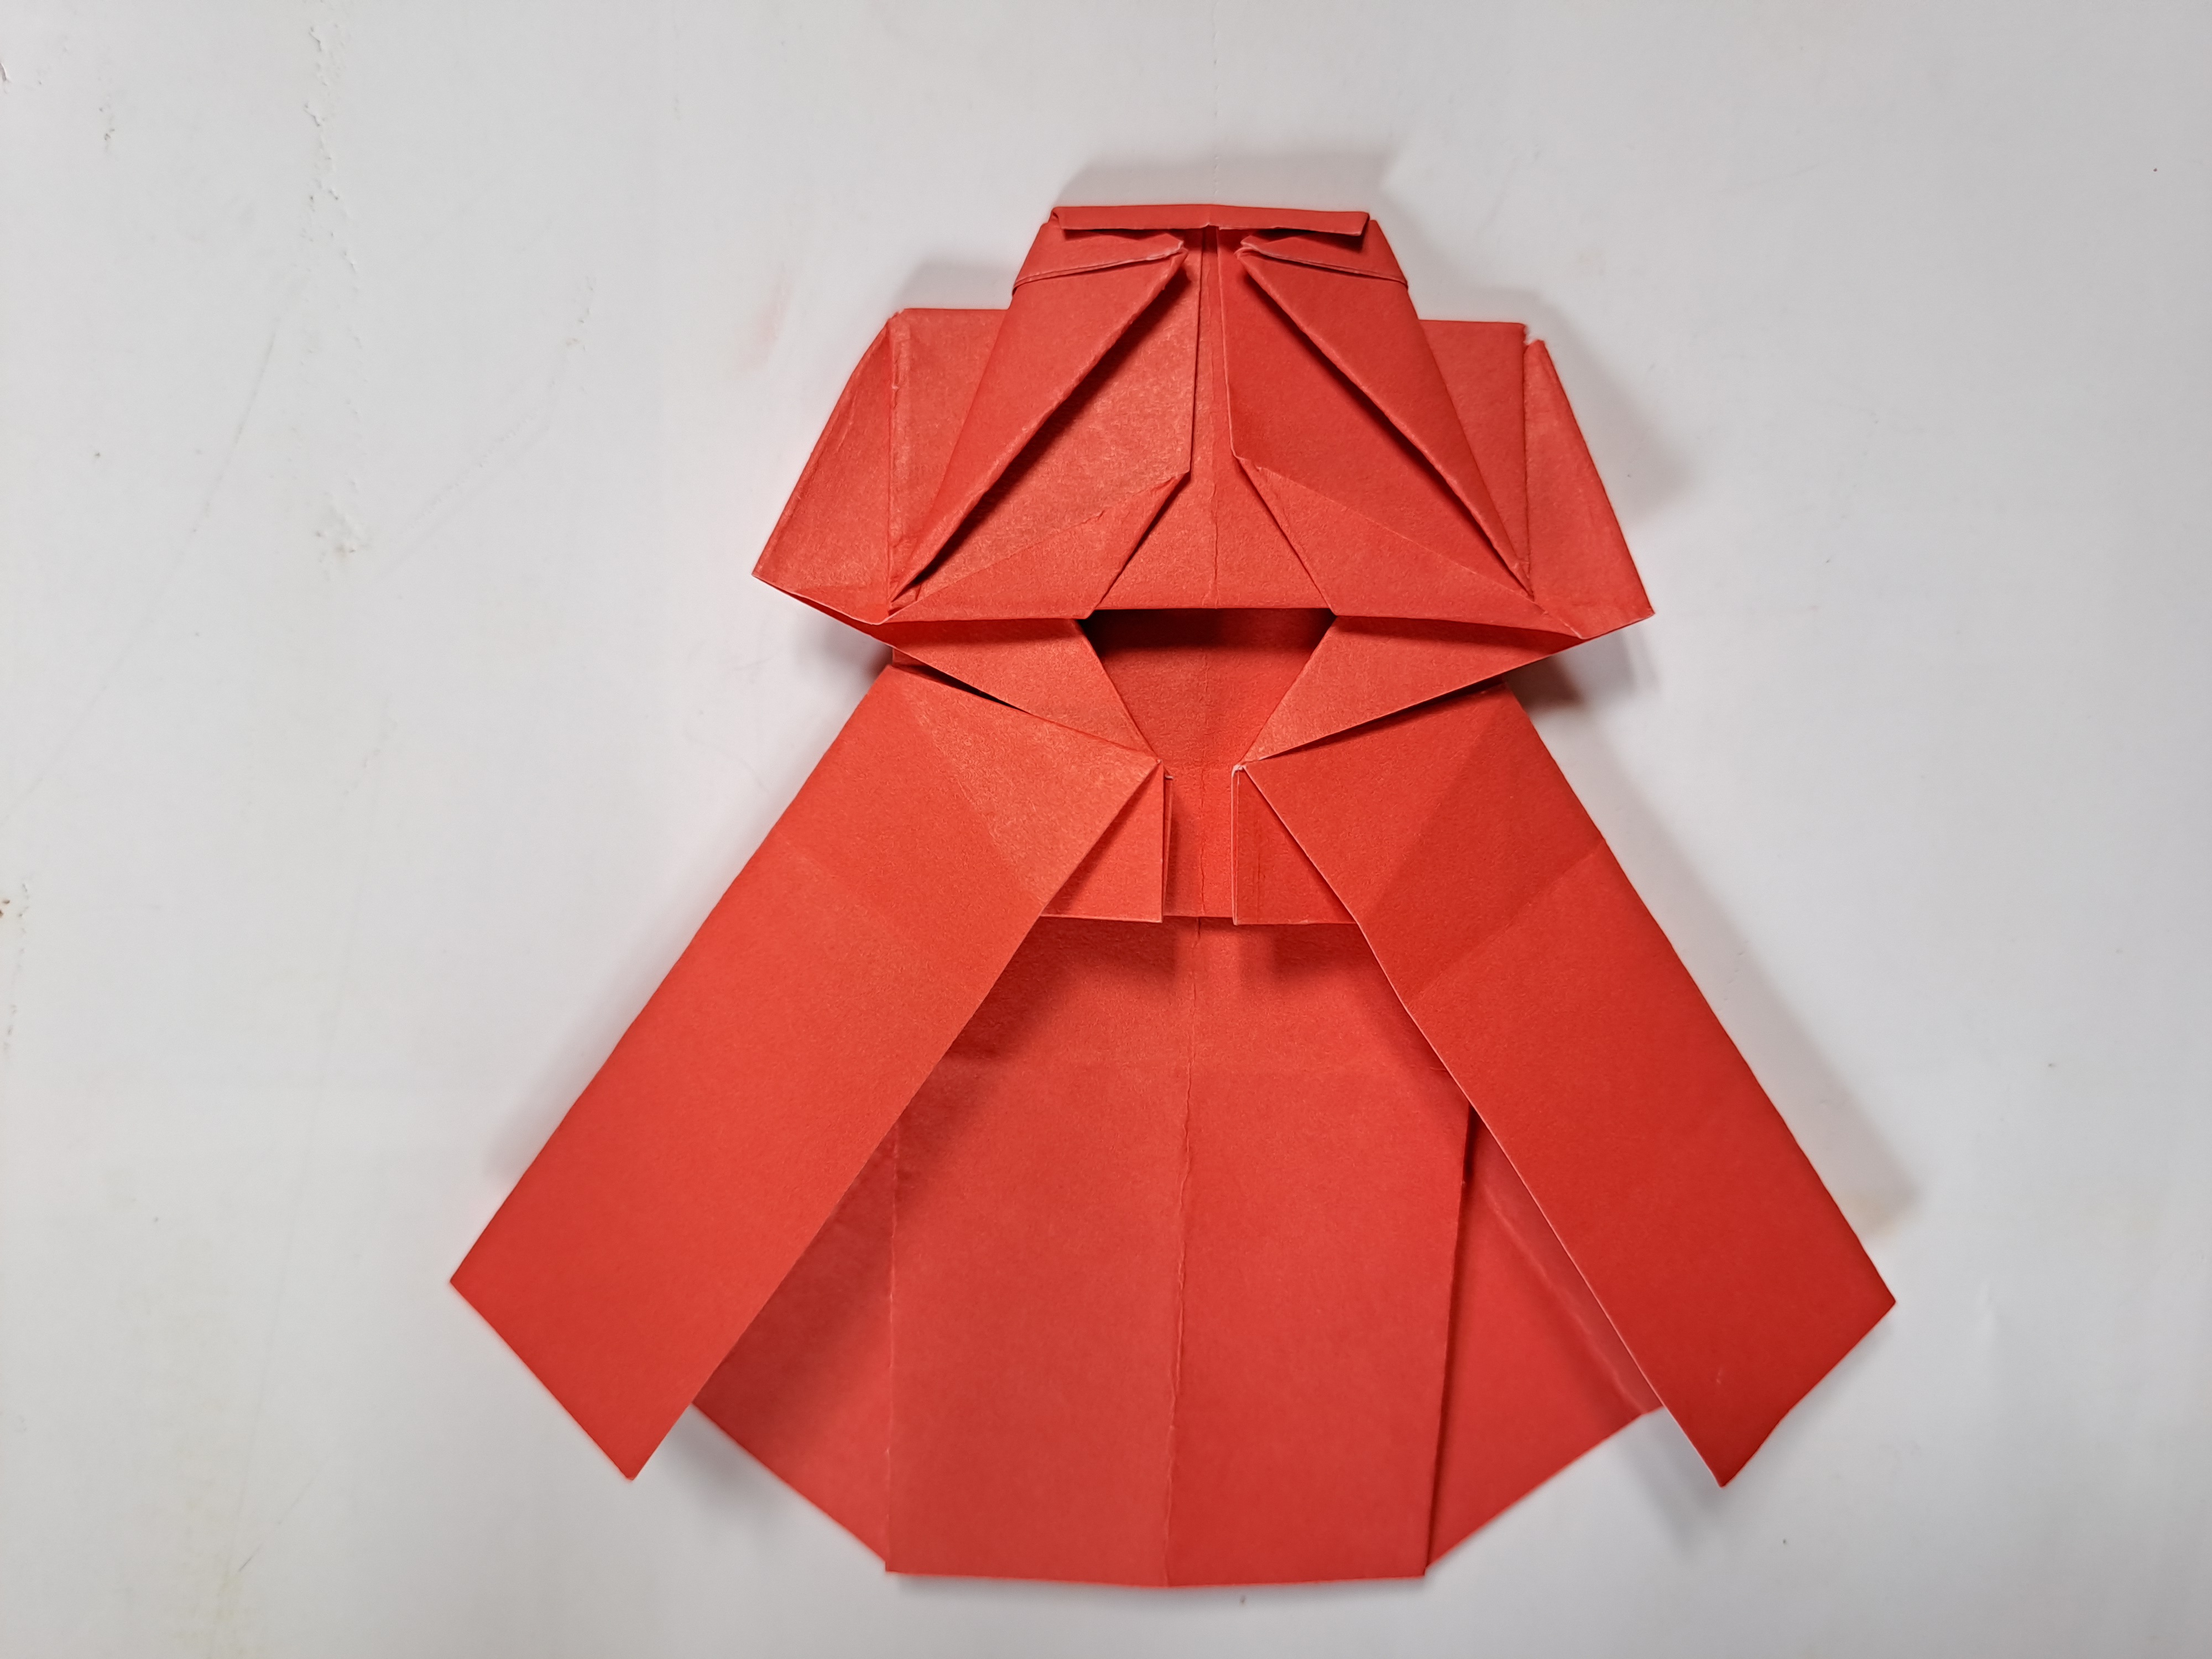
After that, fold the back of the dress in half again, like in the picture below, until when you turn it over, the shape of the dress is almost perfect.
 | 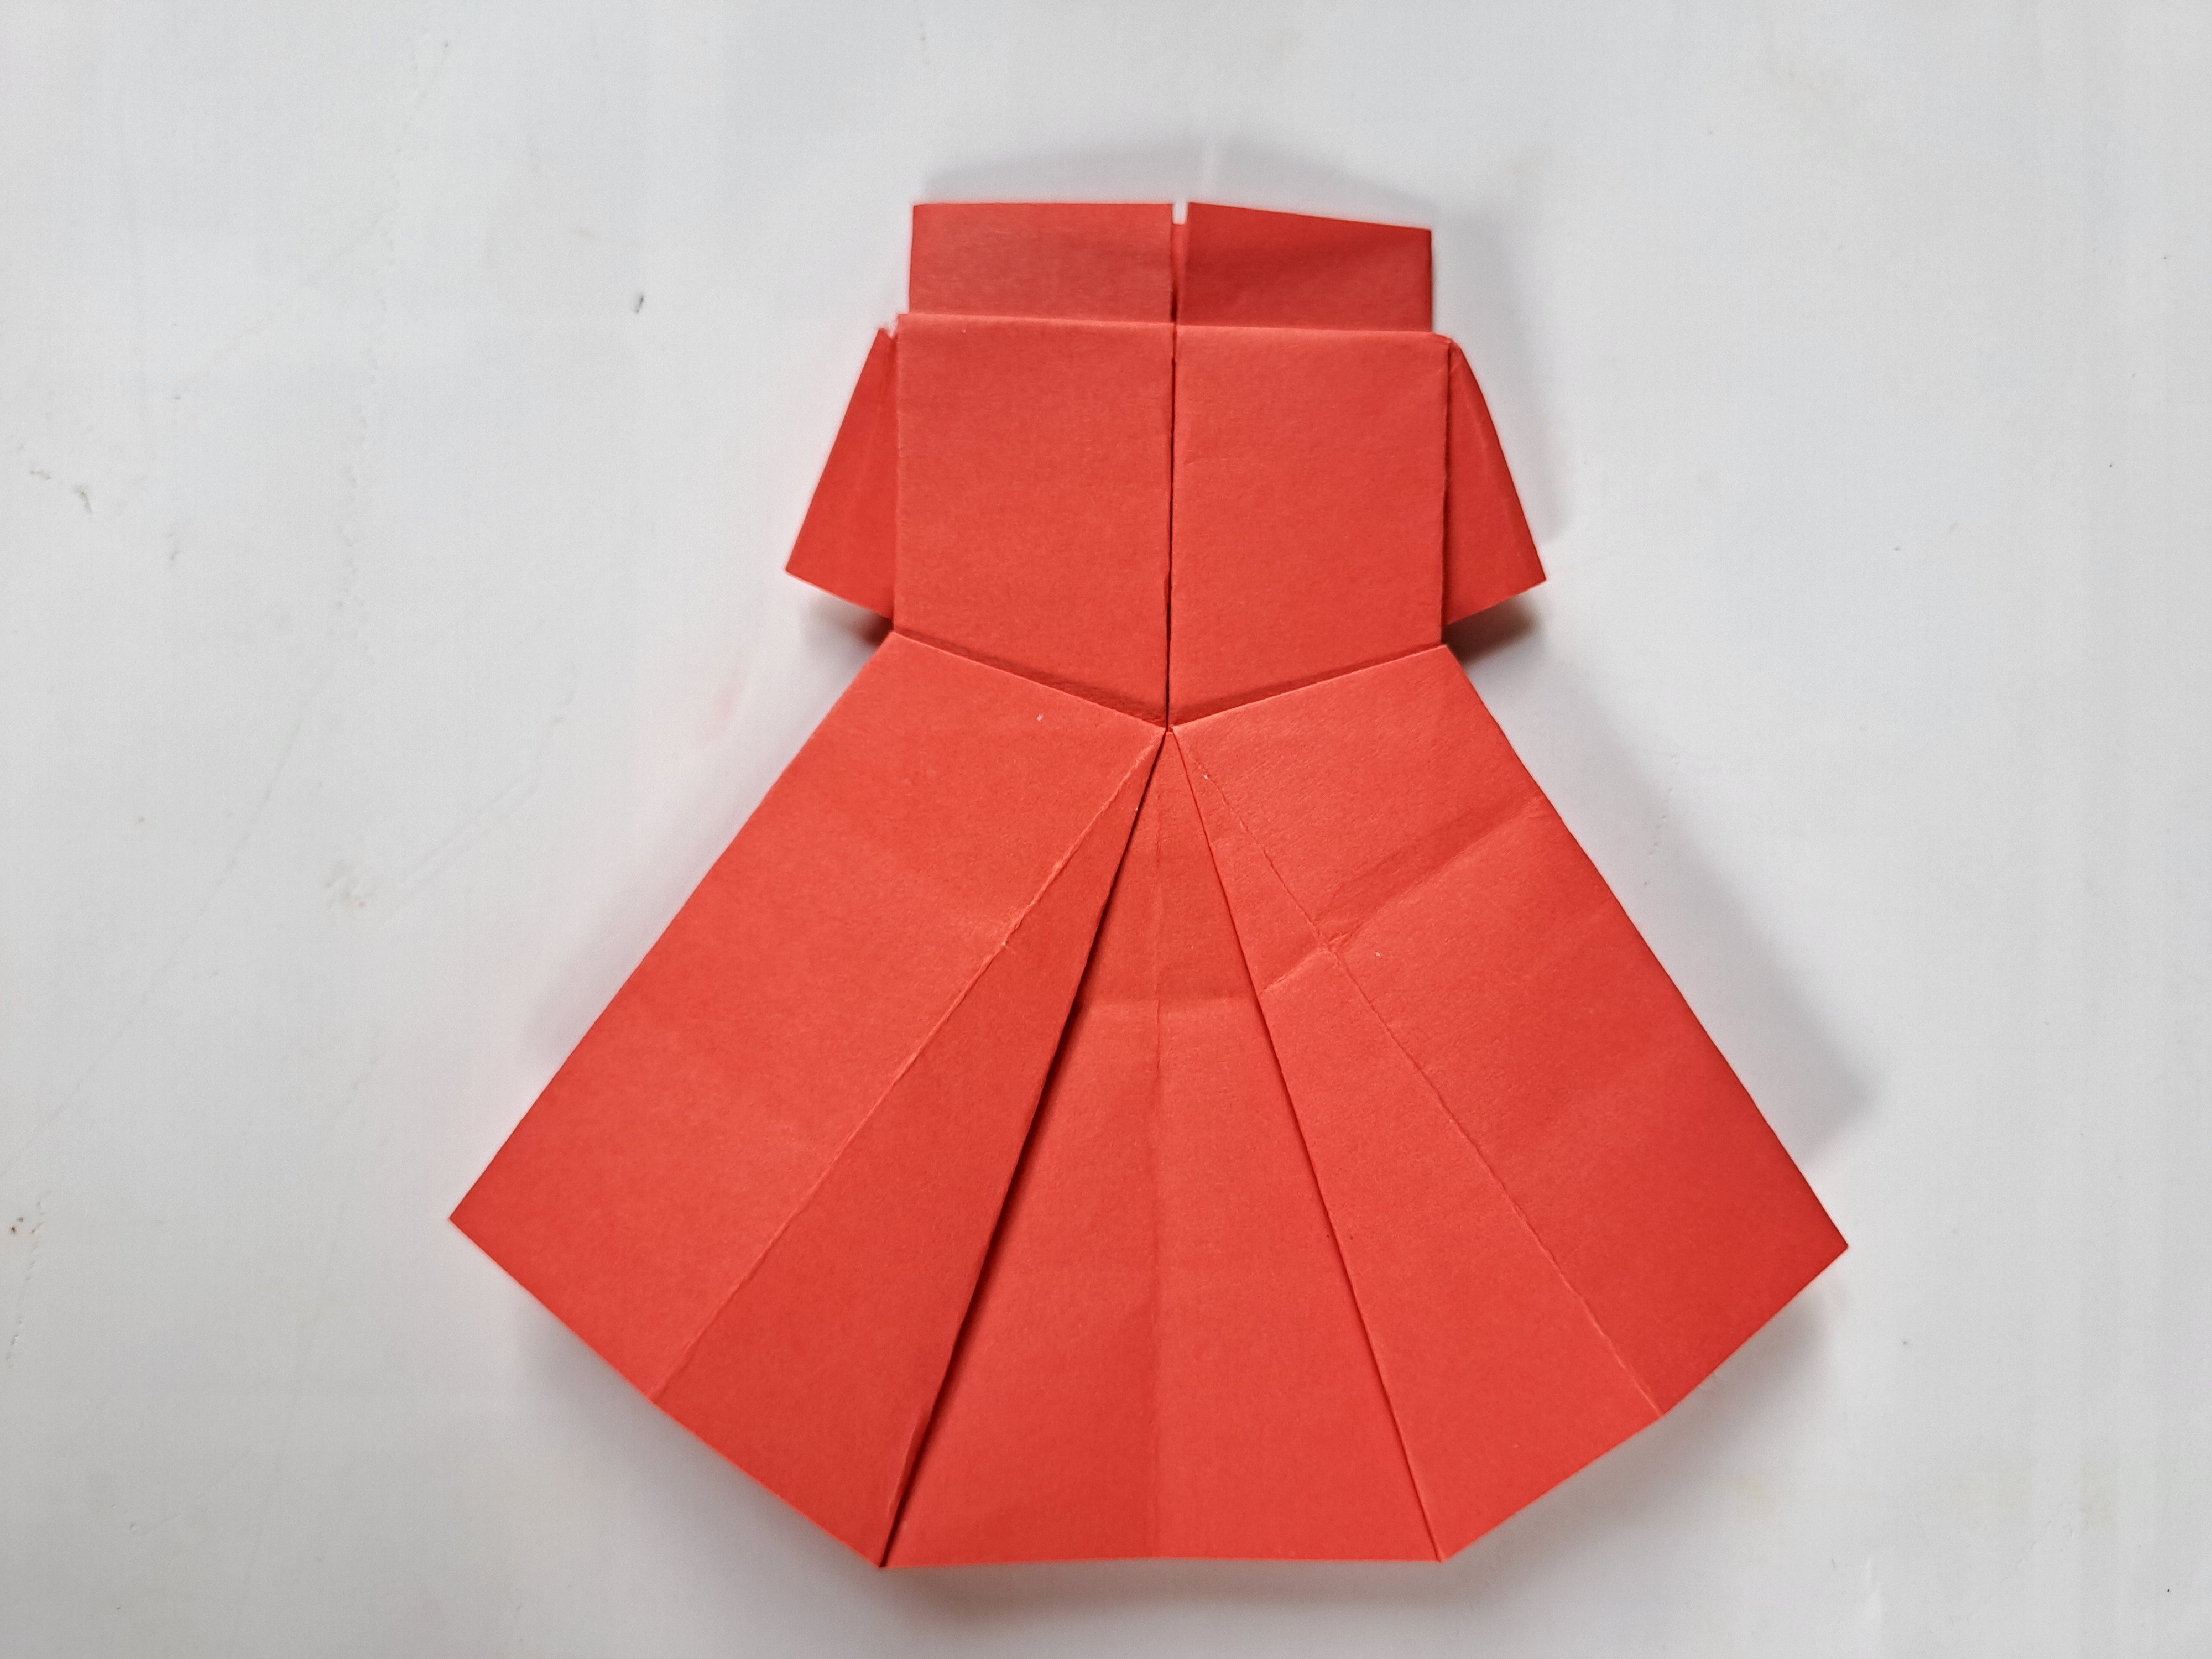 |
|---|
Now what we have to do is fold the top left and right sides of the dress a little to create a dress collar pattern like the picture below.
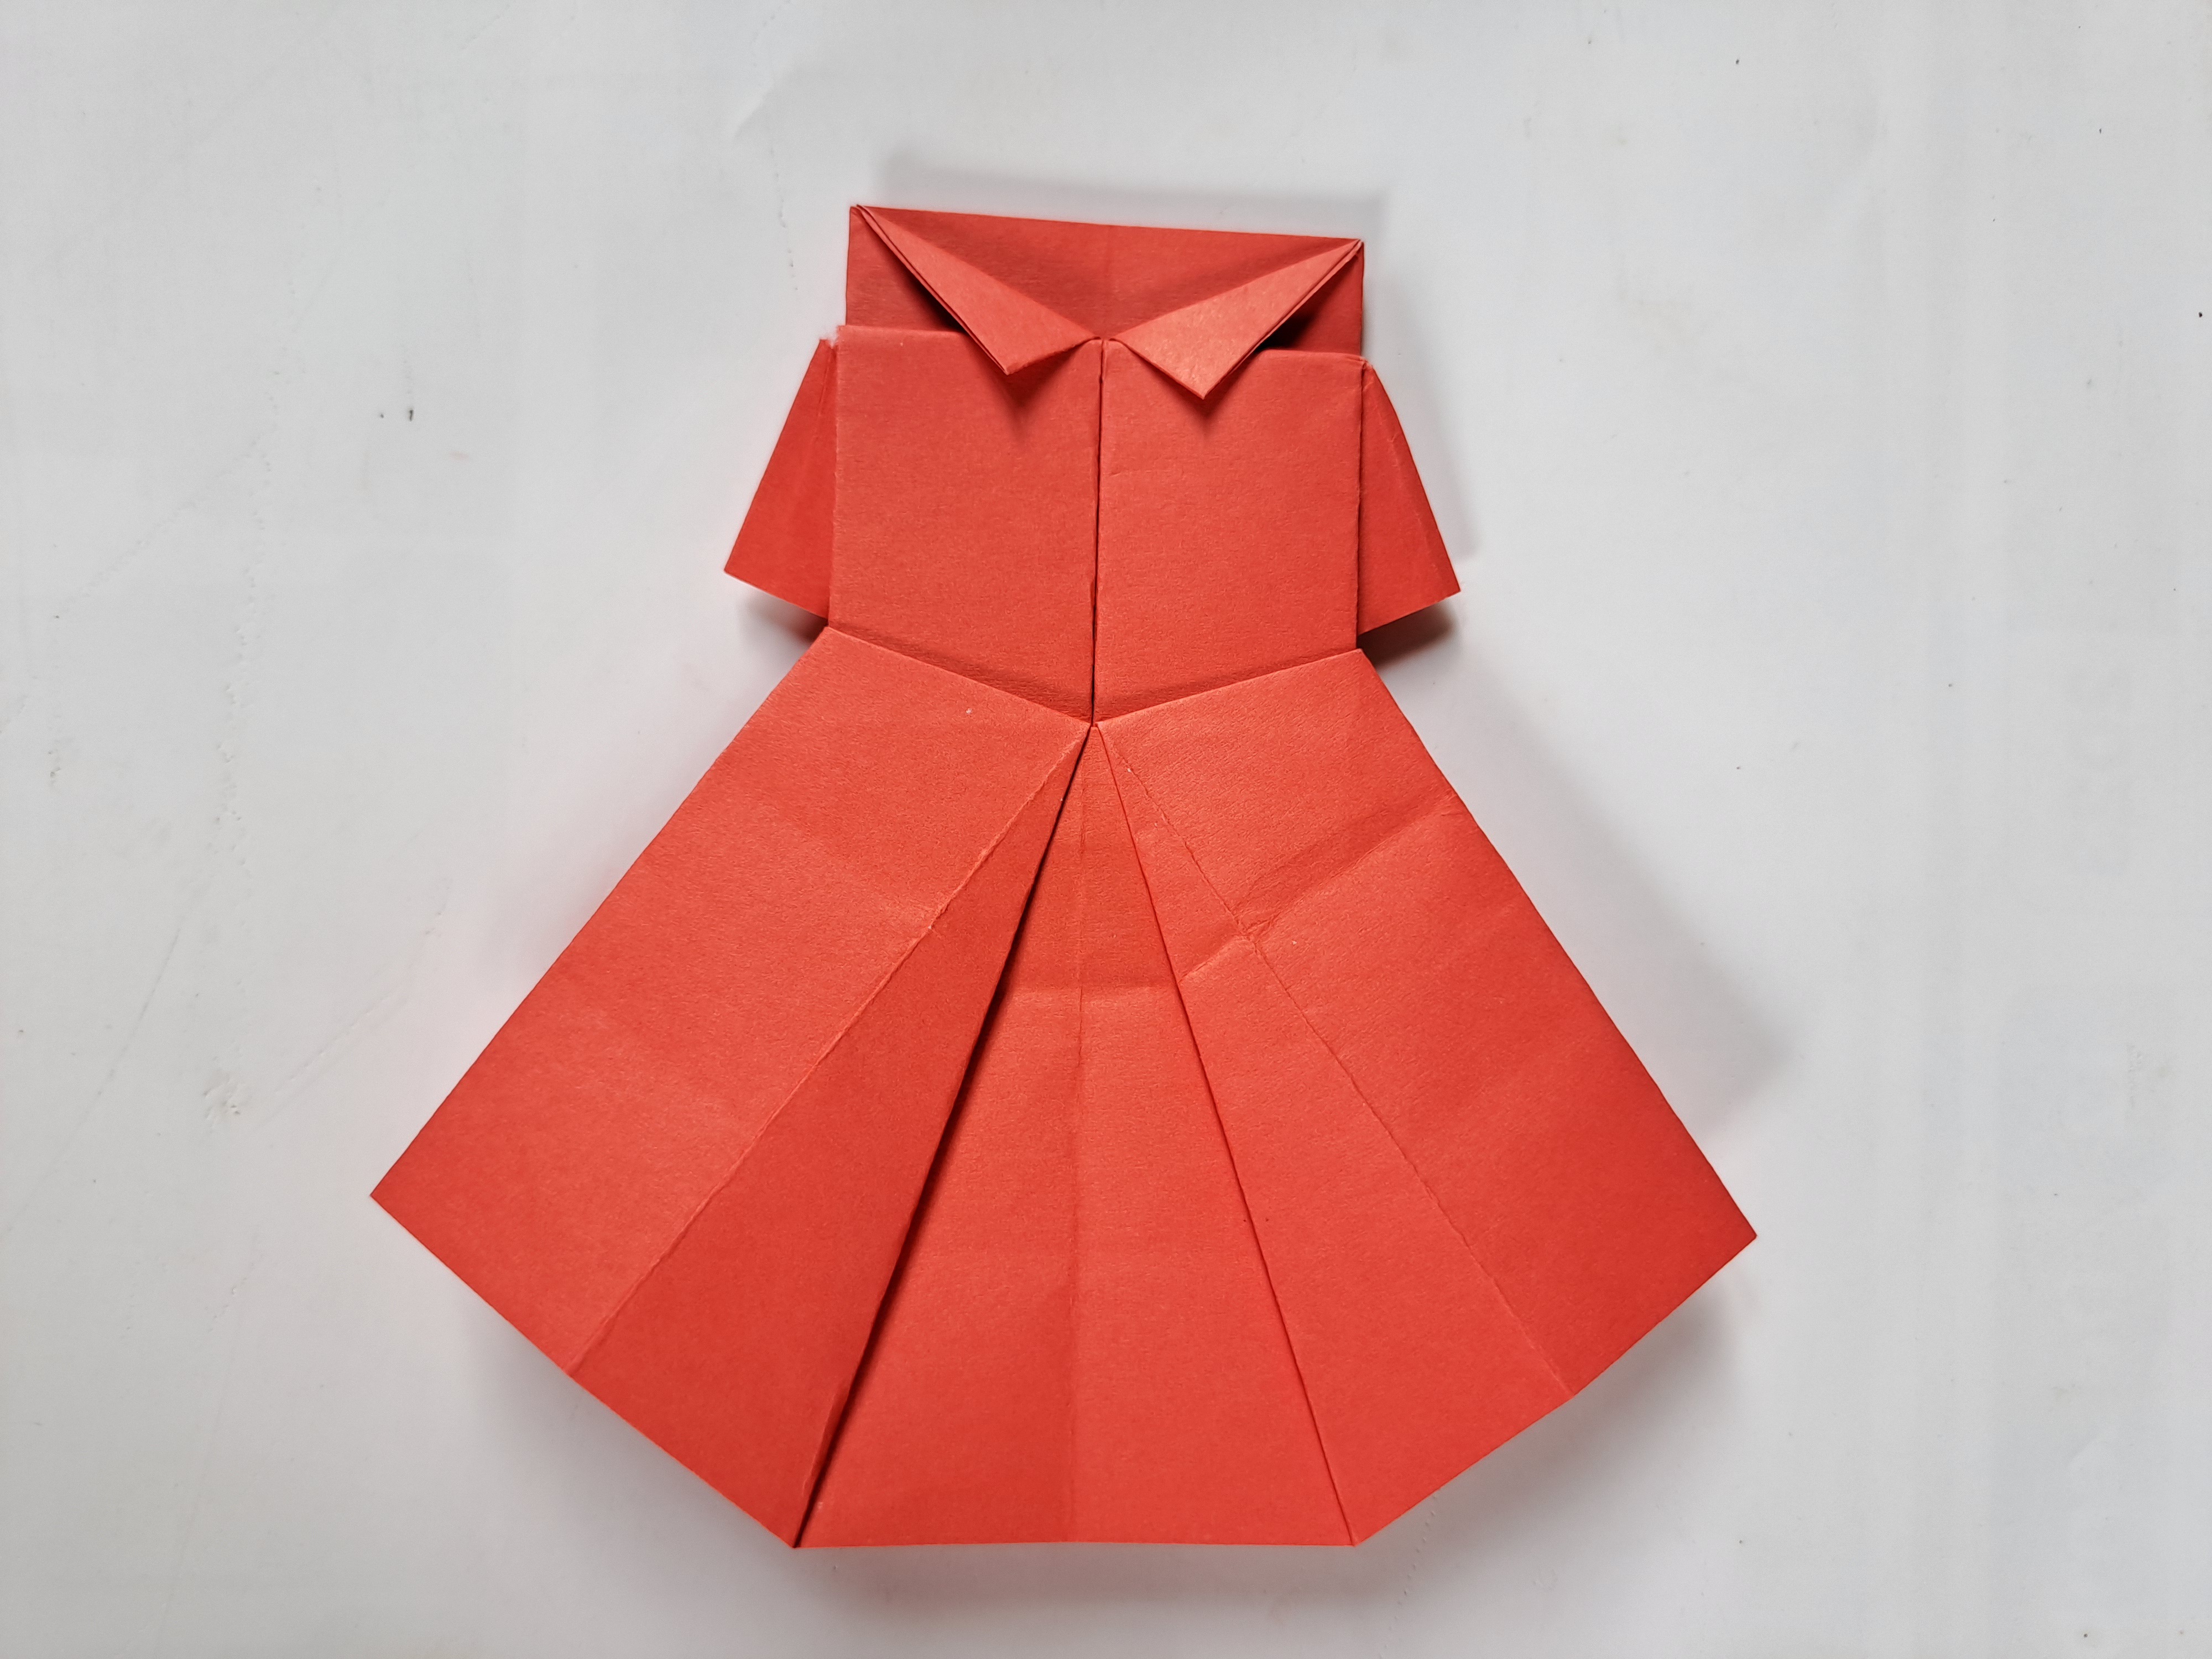
Then turn the dress over again and fold it slightly inward on the right and left sides of the dress to make the collar pattern of the dress more perfect, like the picture below.
 |  |
|---|
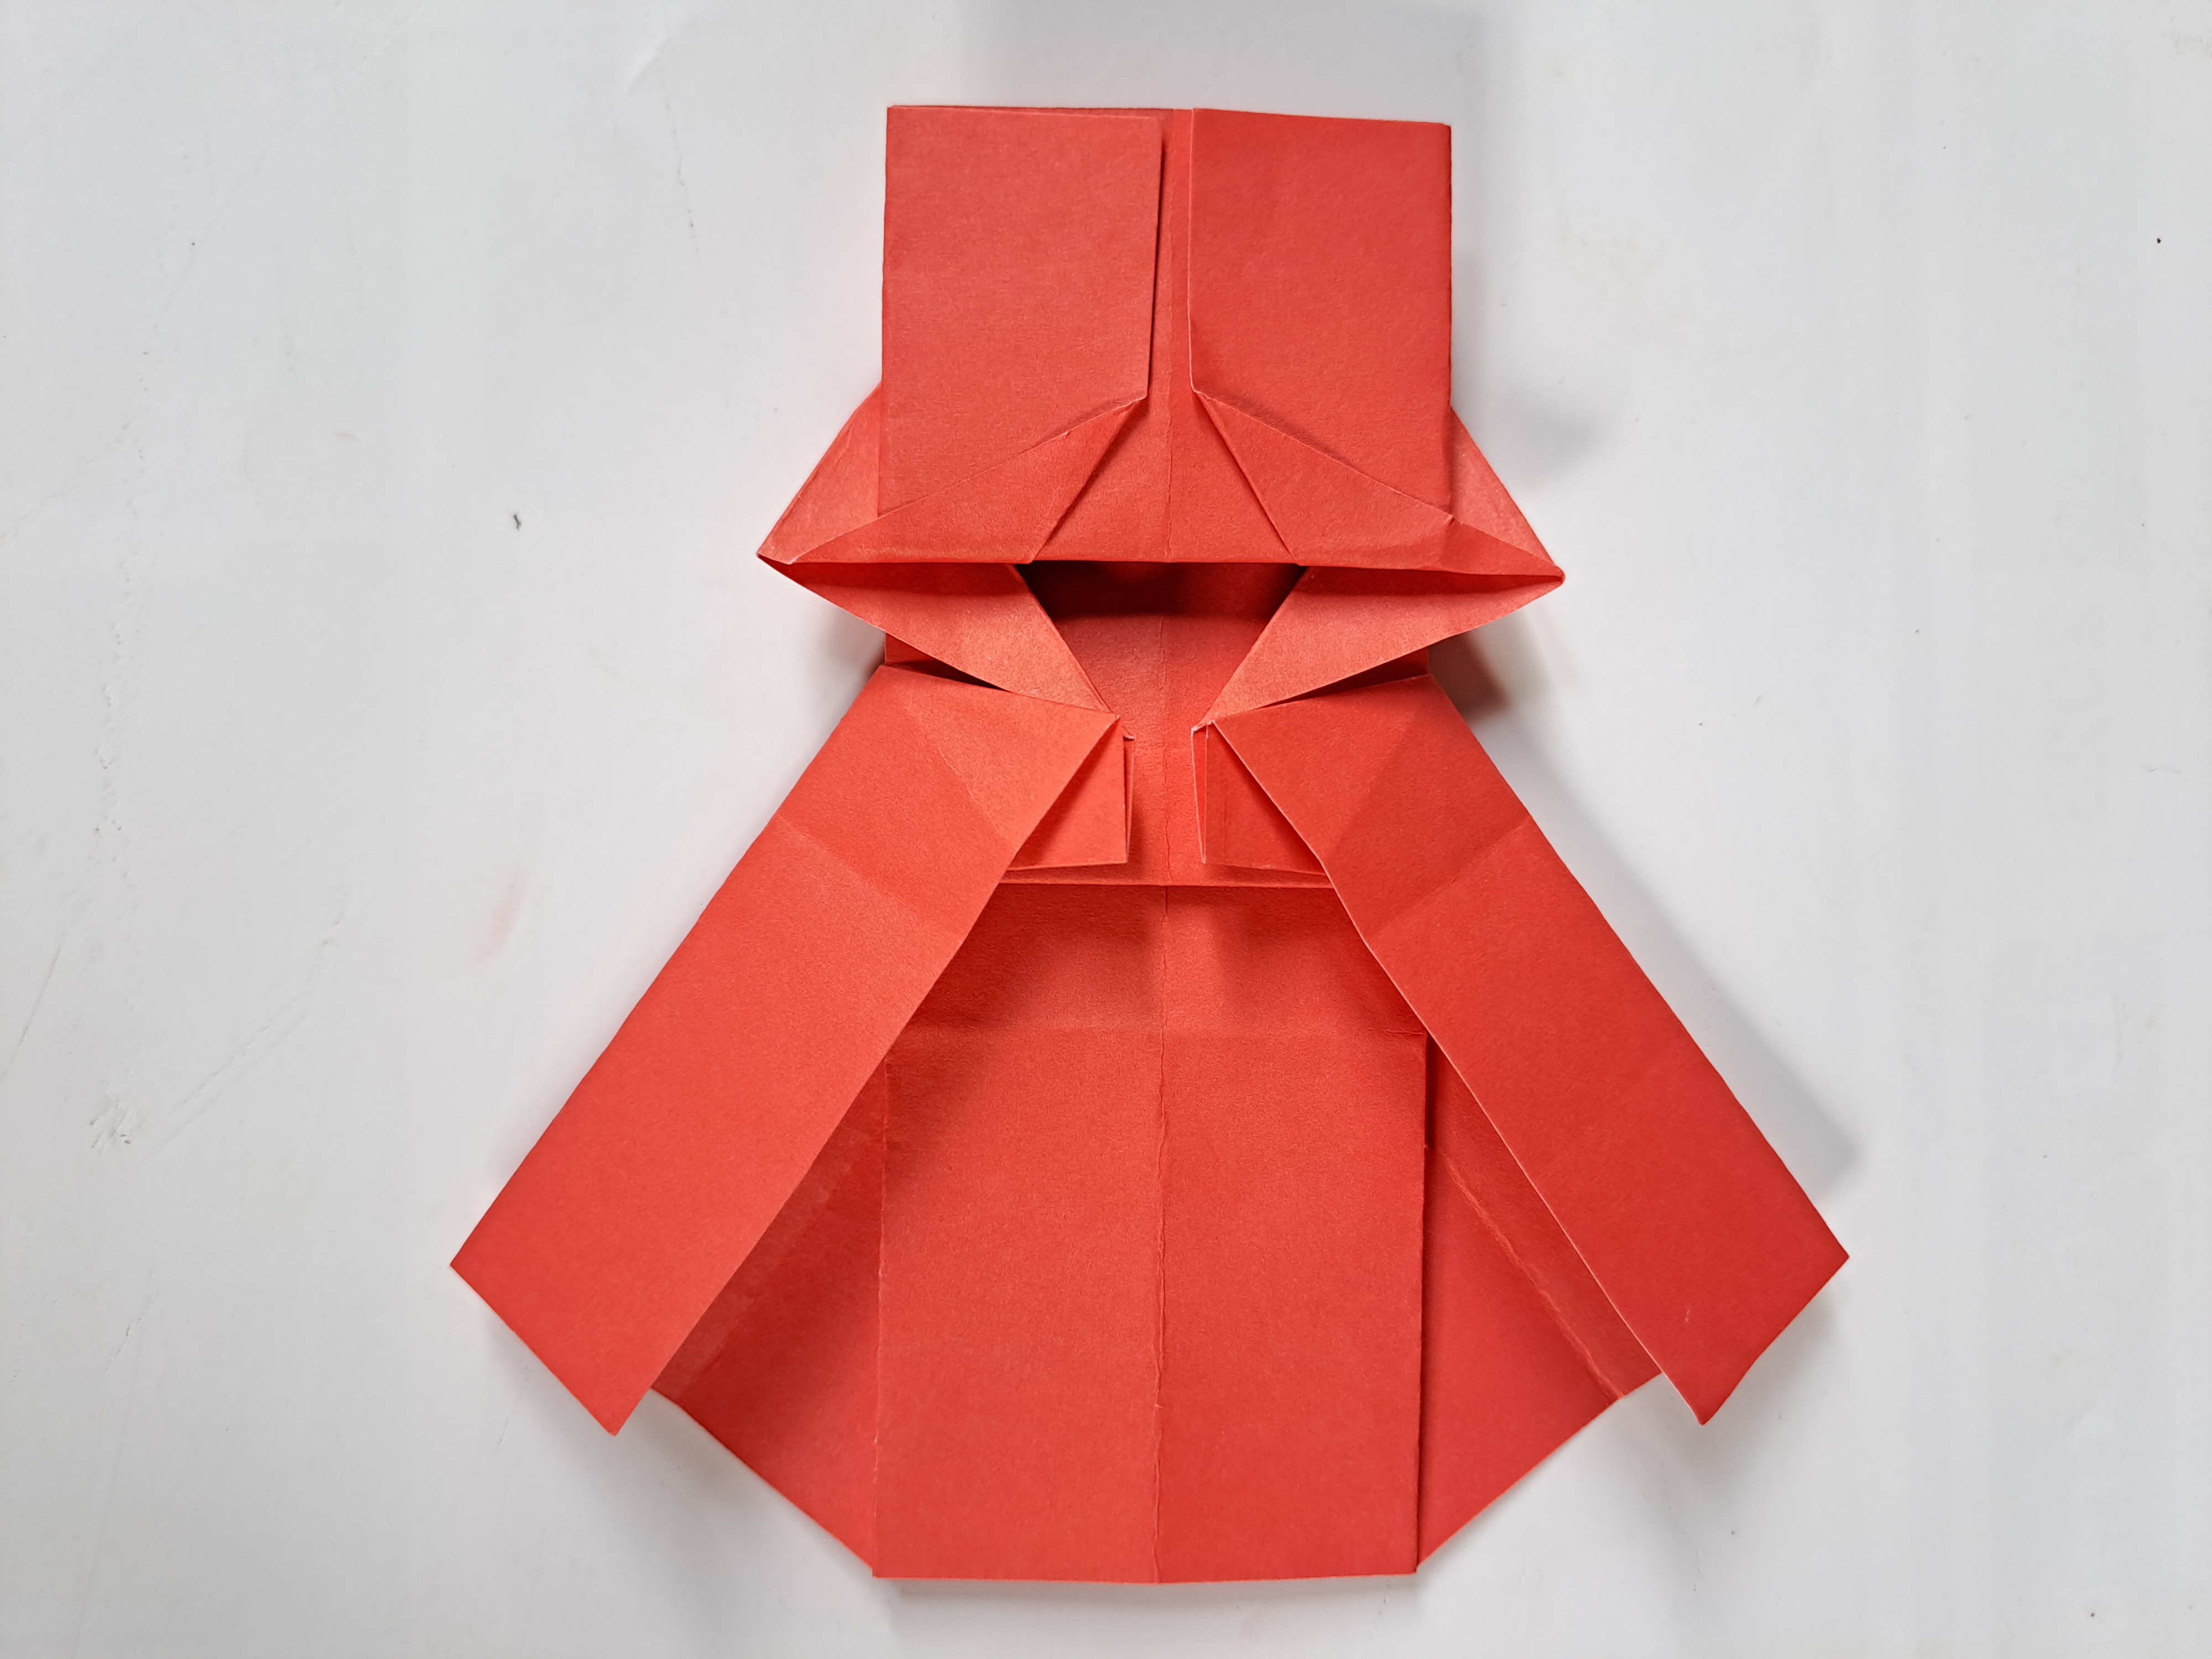
Then turn the dress over again and fold the top side of the dress slightly to create a perfect collar pattern like the picture below.
 | 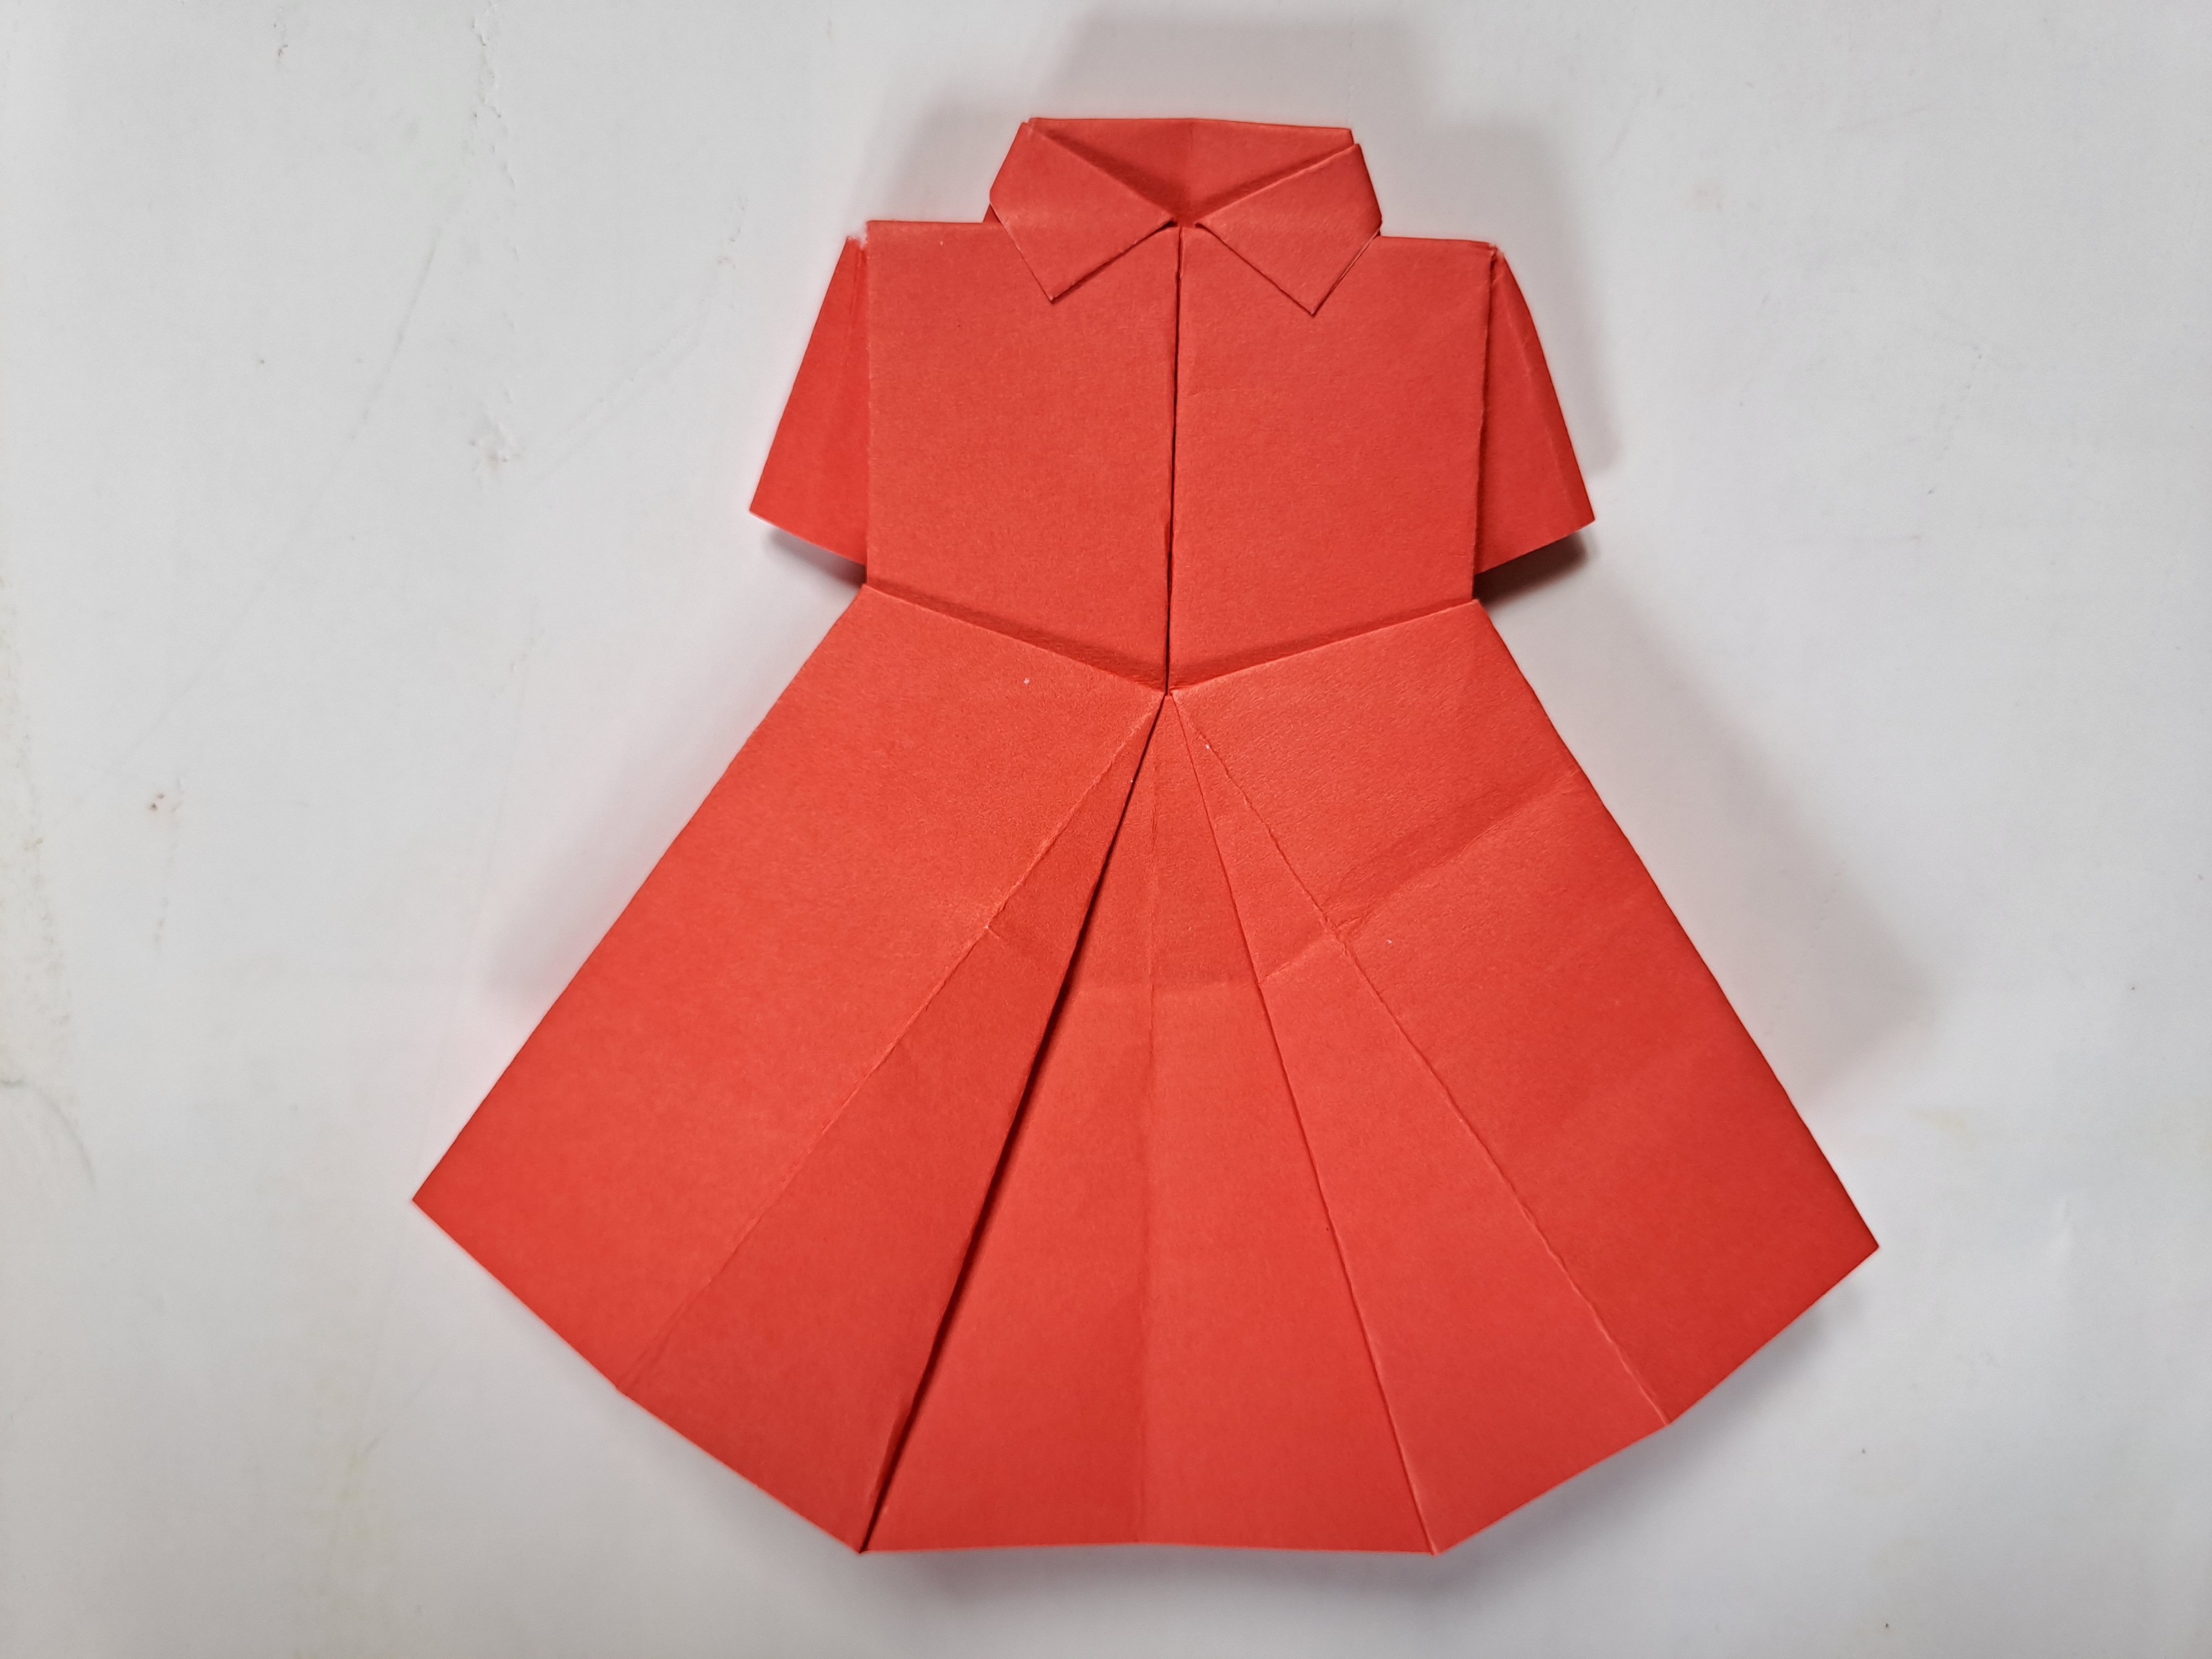 |
|---|
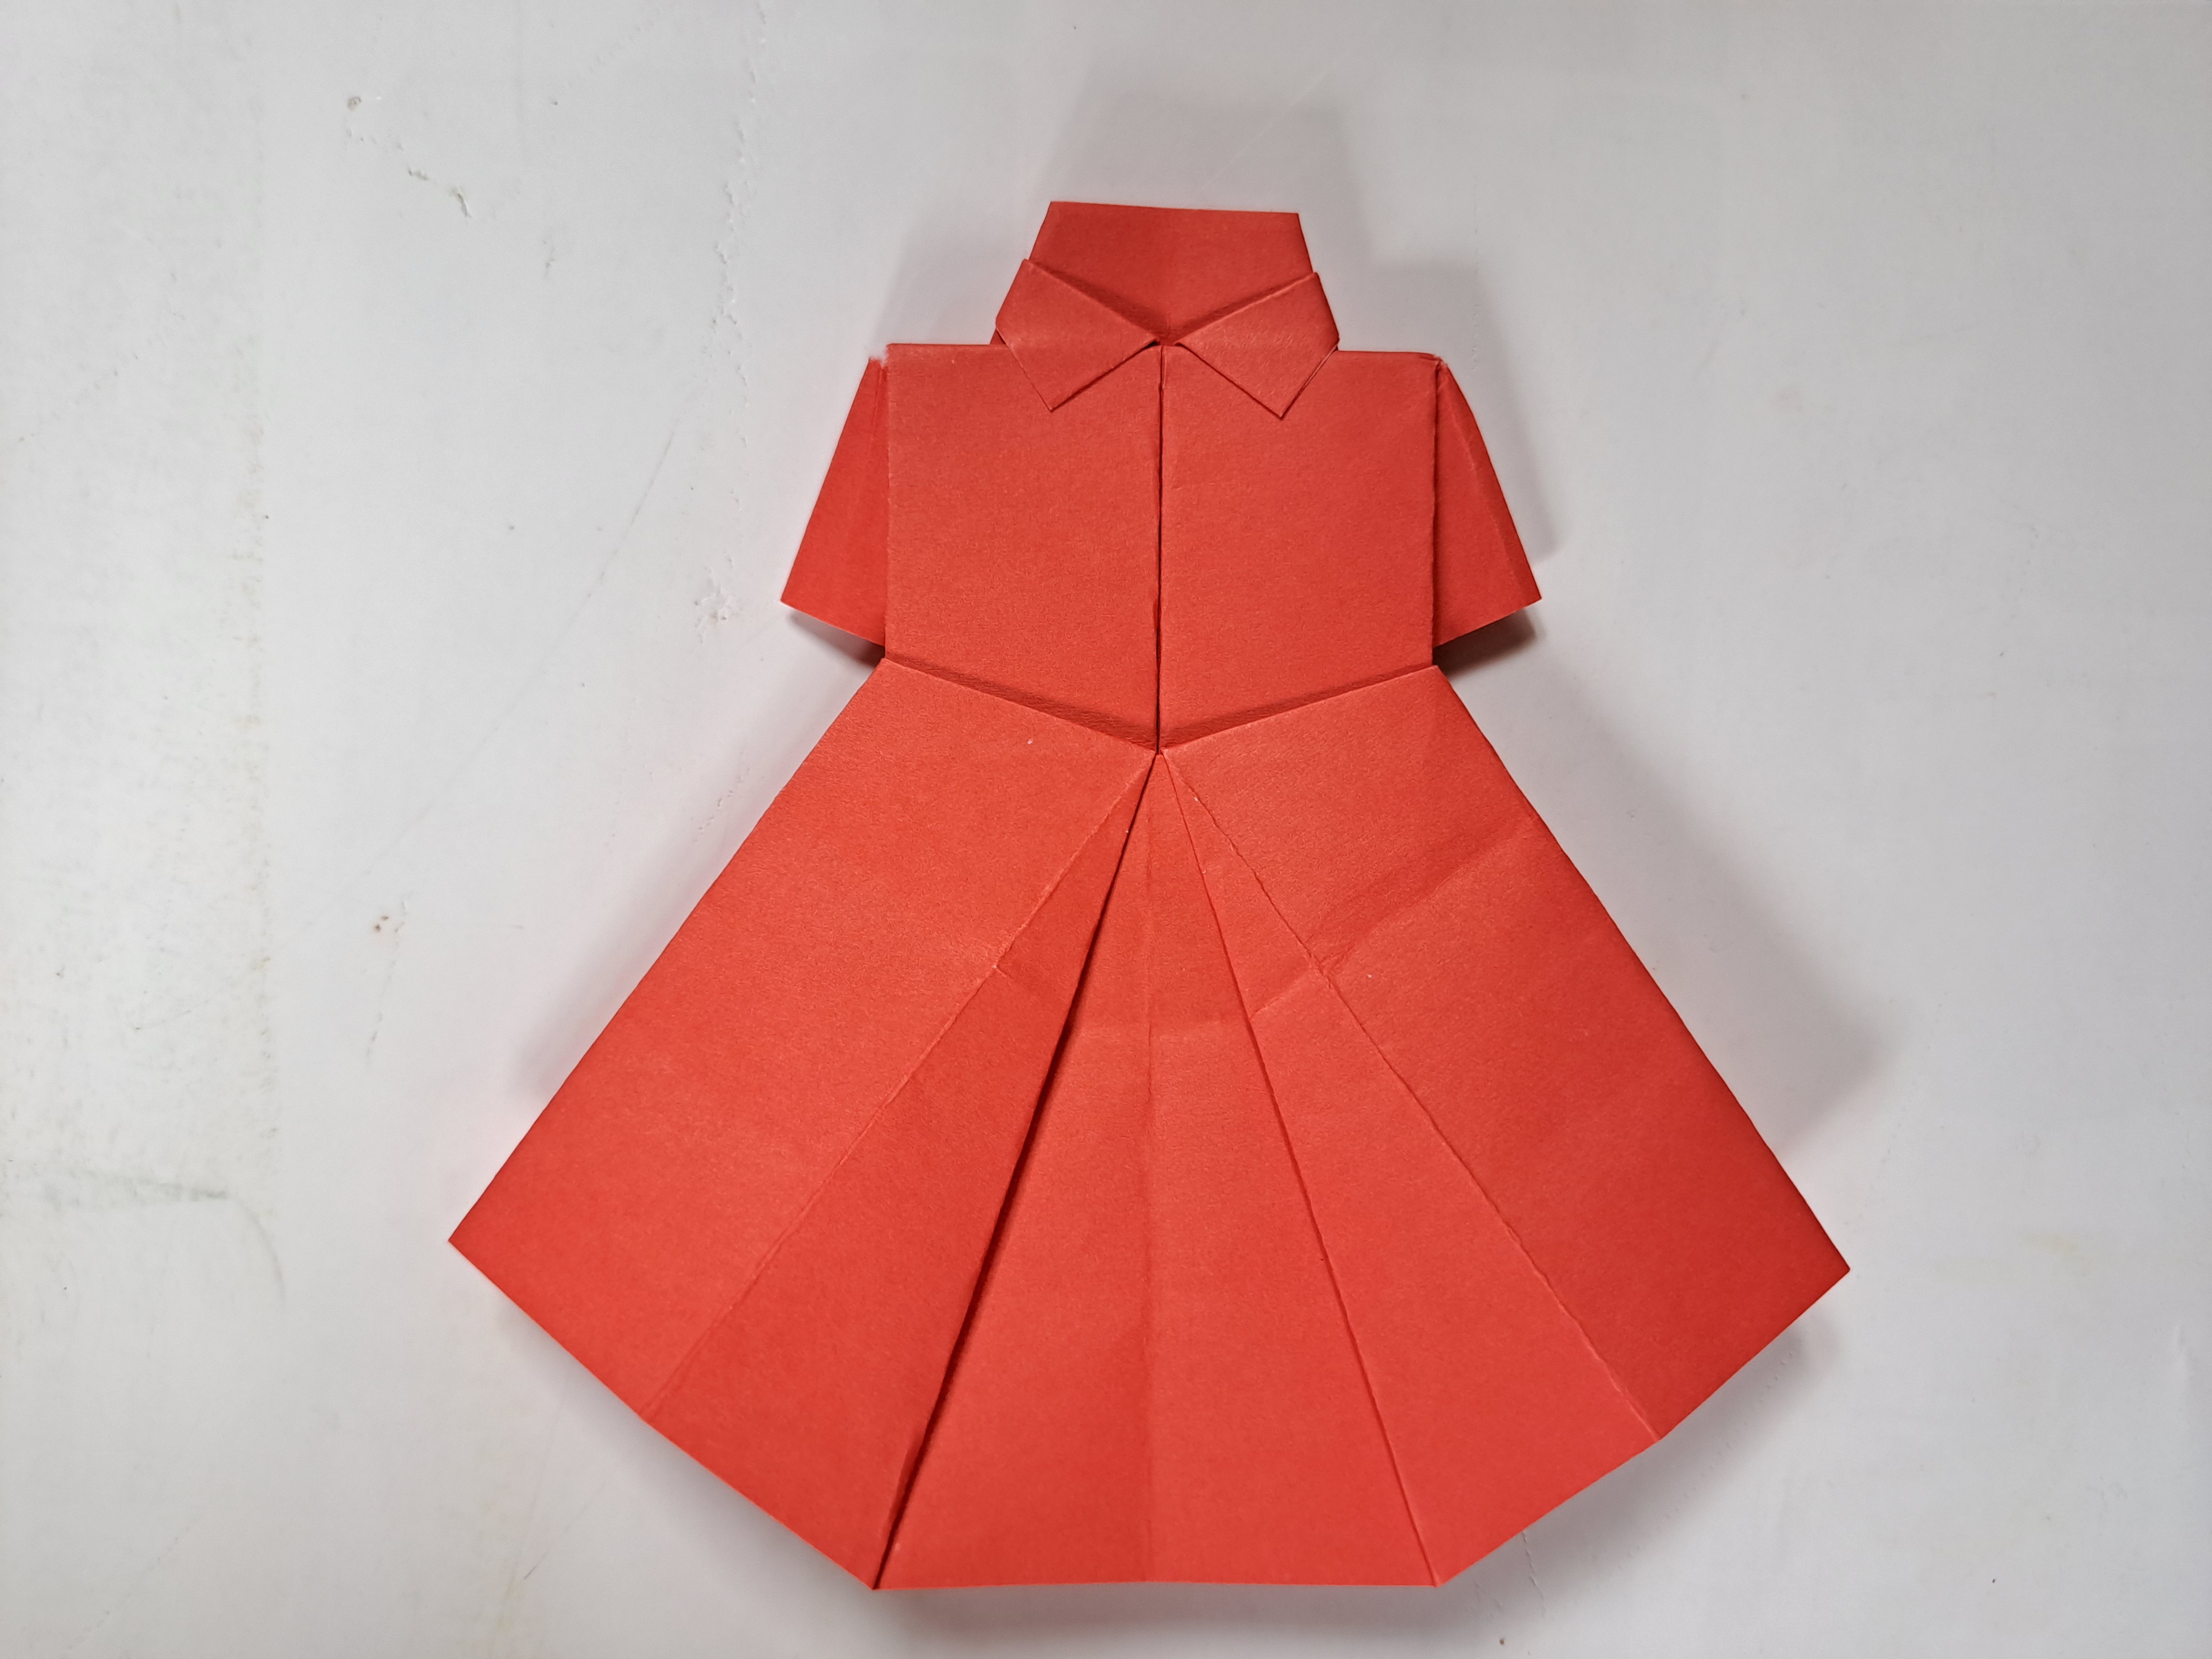
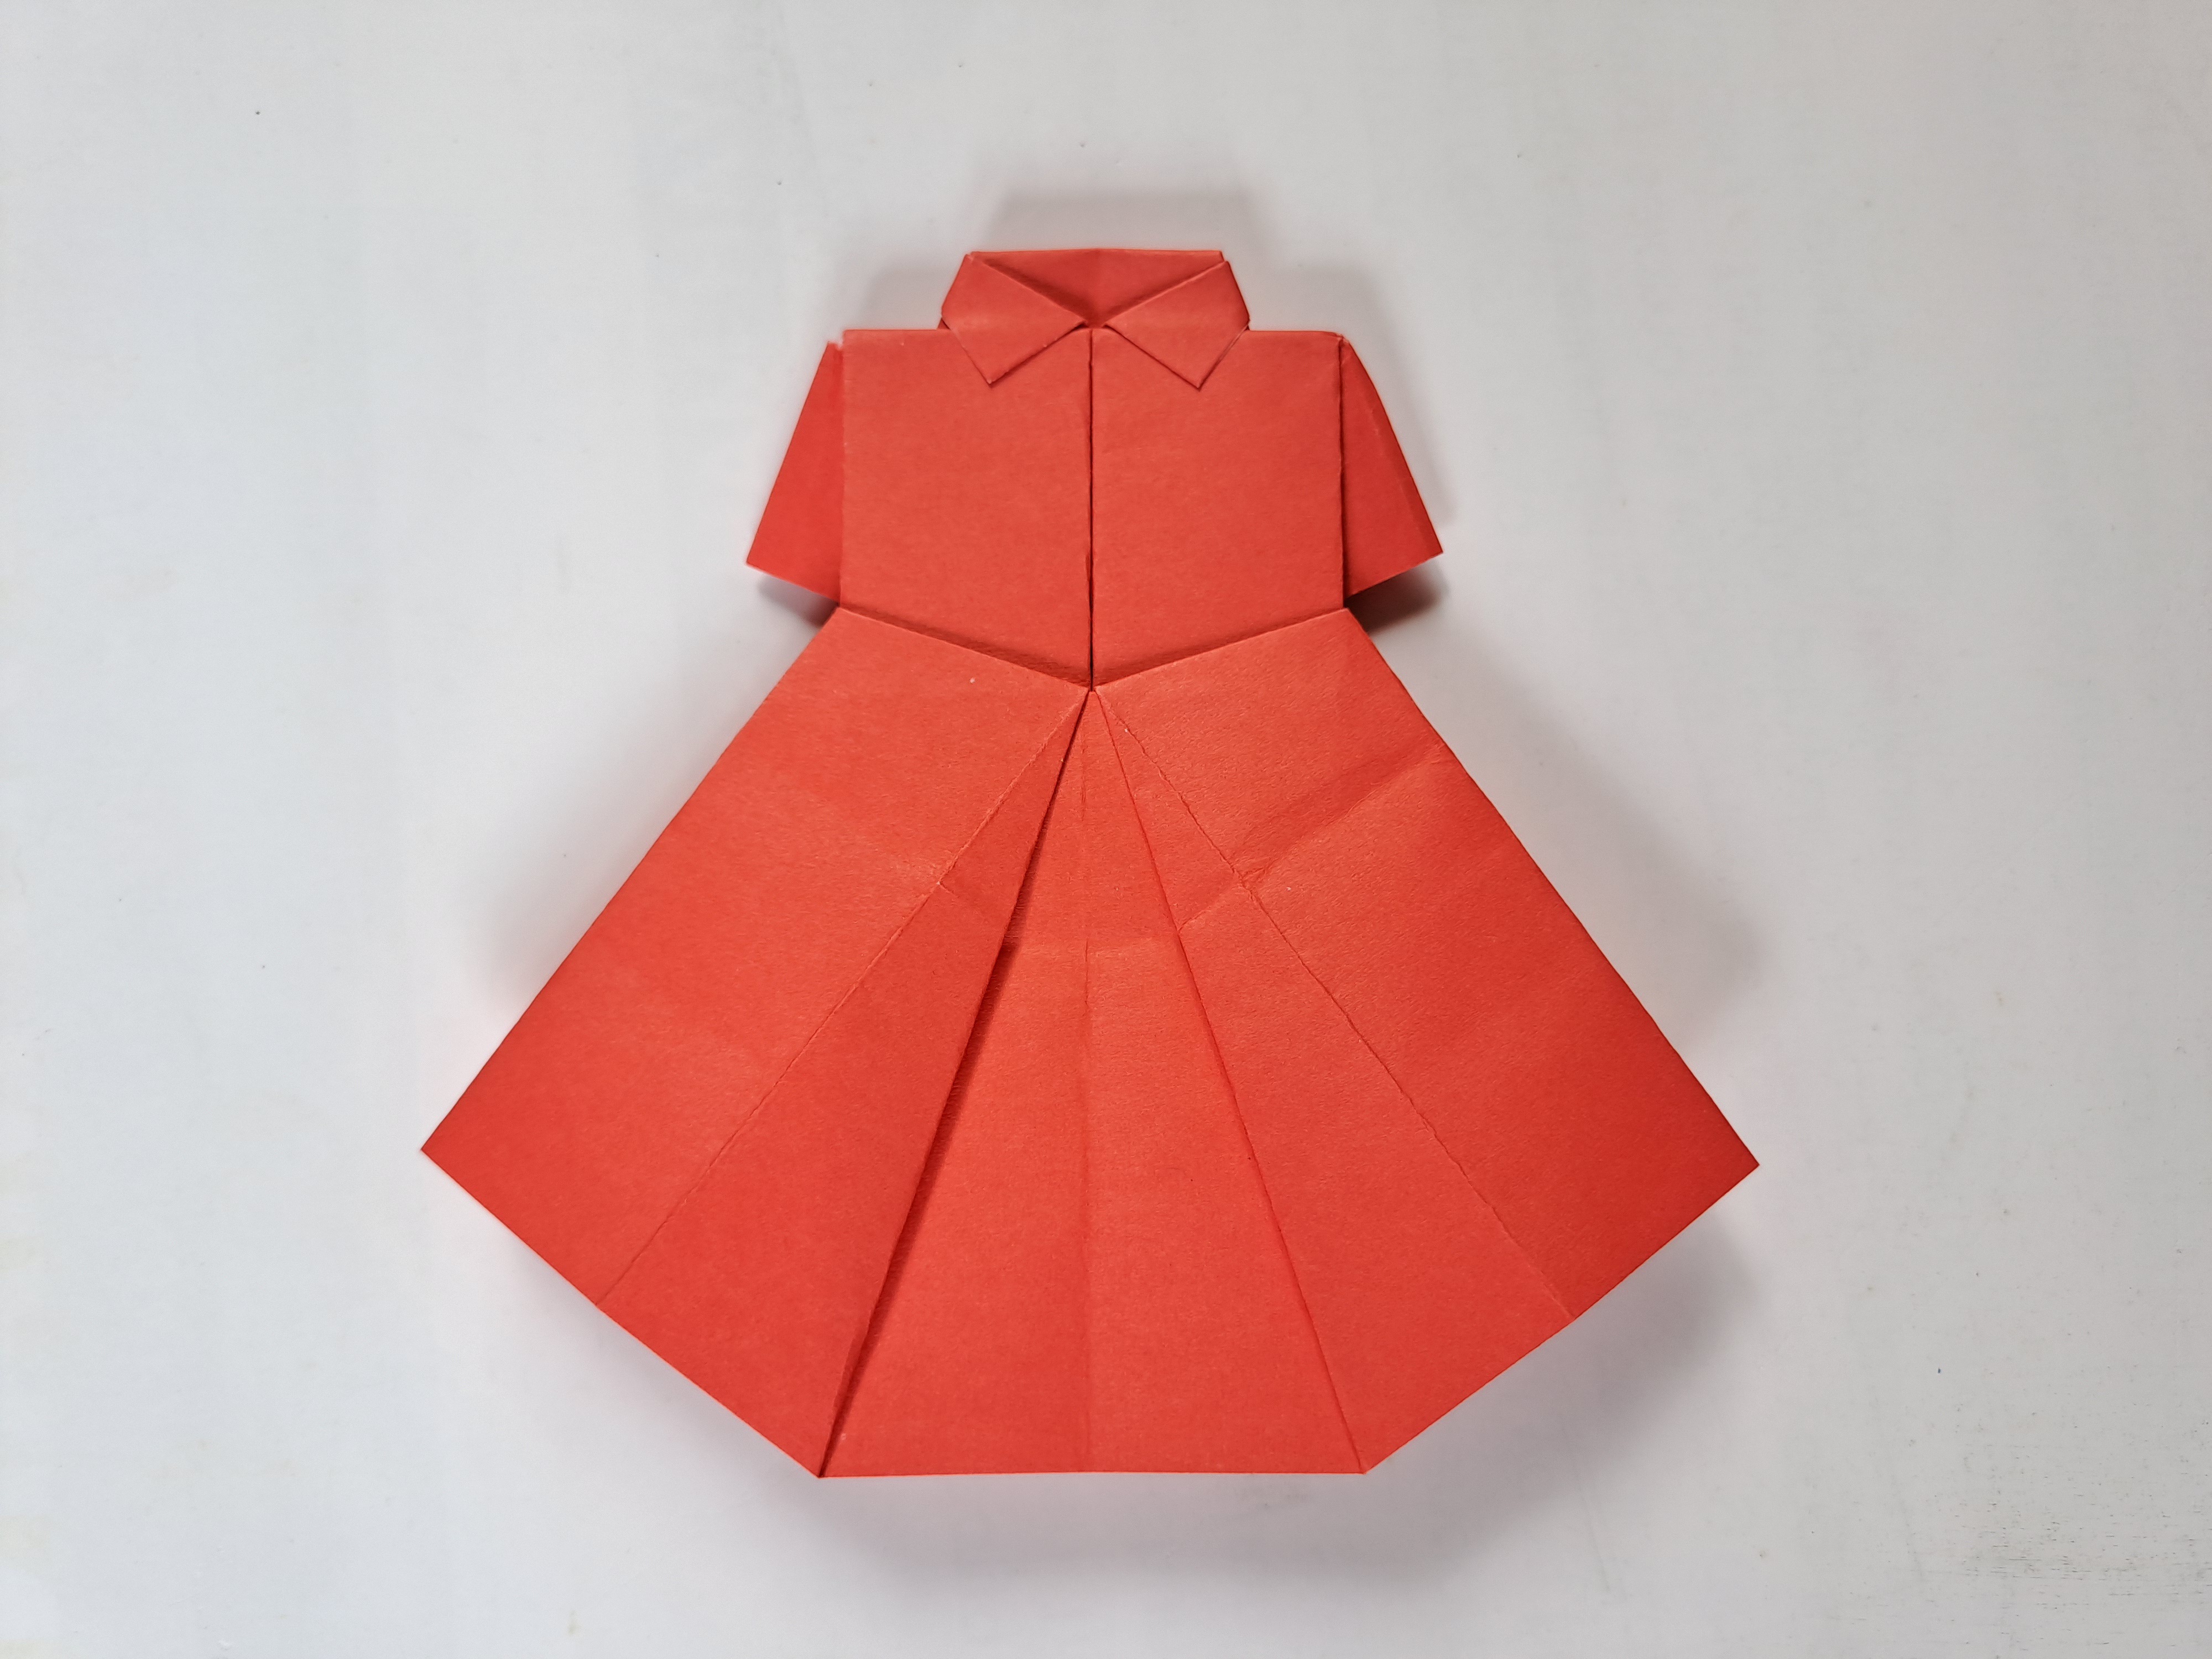
After all the steps I wrote above have been followed properly, the origami dress we made is now complete and looks very beautiful.
This is a tutorial on how to make a dress from origami paper that I can share with friends today, see you in my other hand creations in the next post.