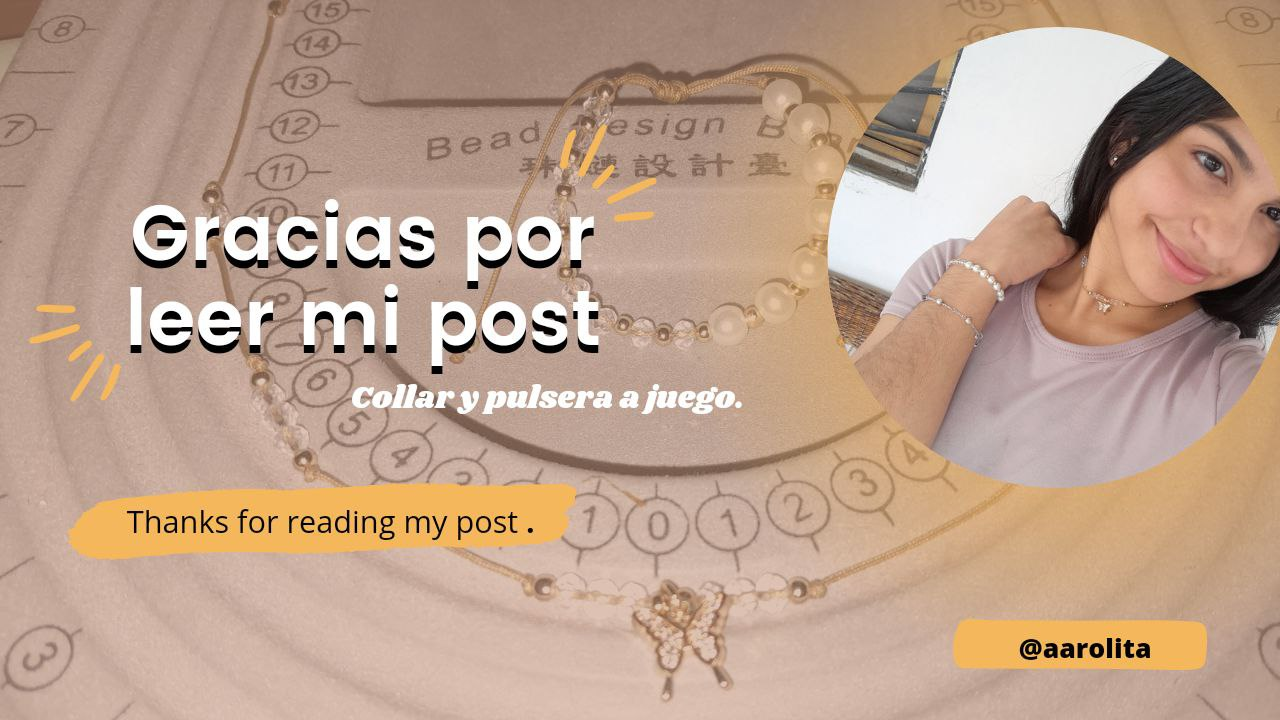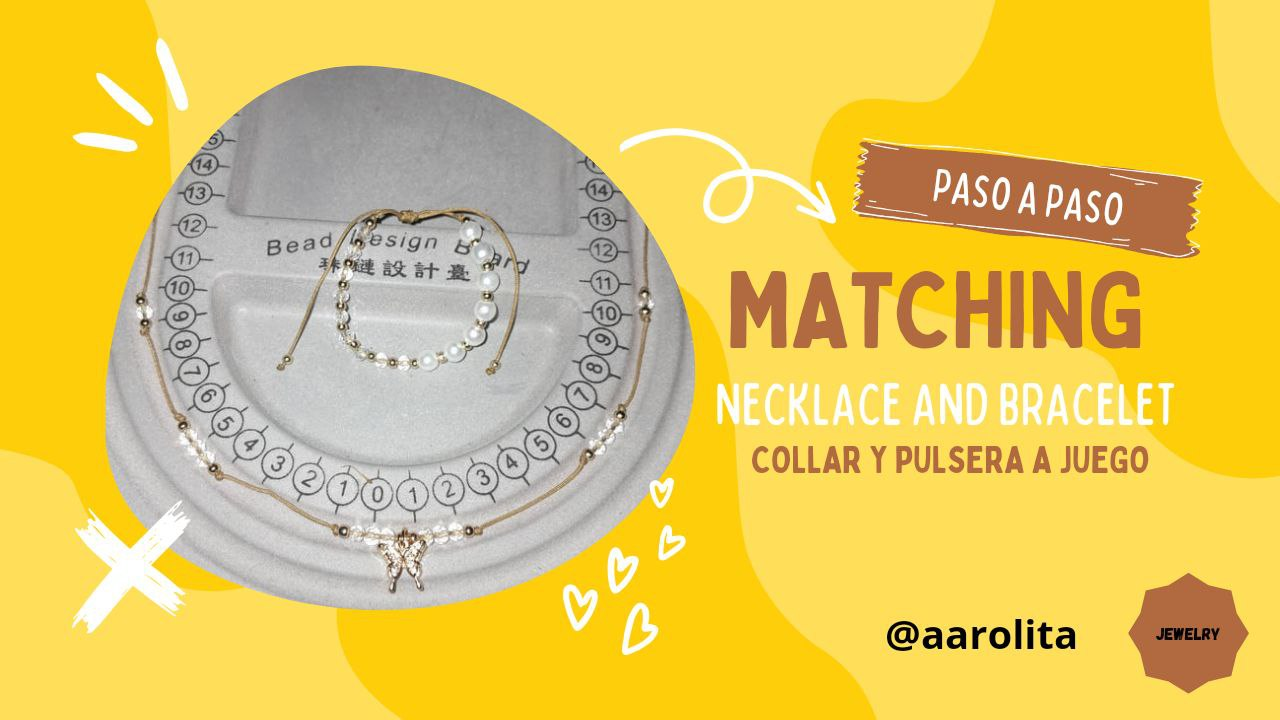
Hello hello, my creative people of the Jewelry community. I greet you again here to show you my latest creation. I have made a matching necklace with a bracelet using Chinese thread, crystals, beads and pearls, I think it looks great and would look good with any clothing we wear, it looks very beautiful and is extremely easy to make. So here I leave you step by step.
Hola hola, mi gente creativa de la comunidad de Jewelry. Les saludo nuevamente por acá para mostrarle mi última creación. He realizado un collar a juego con una pulsera utilizando hilo chino, cristales, balines y perlas, me parece que viste muchísimo y se vería bien con cualquier ropa que utilicemos, se ve muy hermoso y es sumamente sencillo de realizar. Así que acá les dejo el paso a paso.
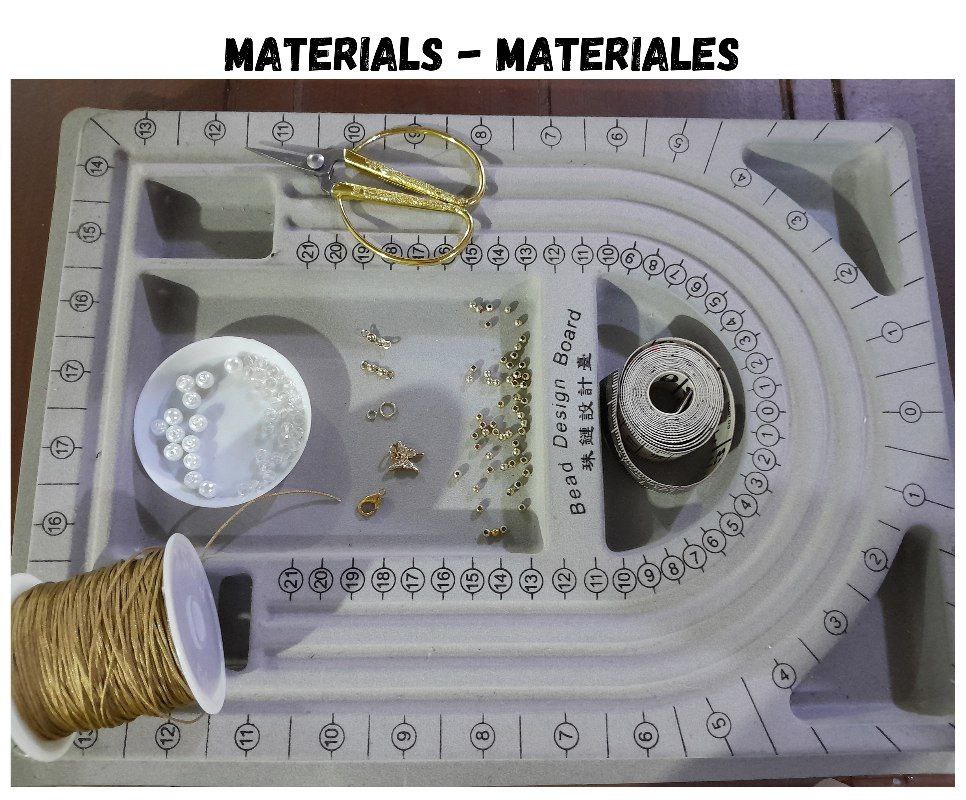
Materials:
- Golden Chinese thread.
- I said with stones or preferably.
- Rings.
- Perico Brooch.
- Crystals.
- Pearls.
- Golden ball.
- Knot cover.
- Scissors.
- Lighter.
- Meter.
Materials:
- Golden Chinese thread.
- I said with stones or preferably.
- Rings.
- Perico Brooch.
- Crystals.
- Pearls.
- Golden ball.
- Knot cover.
- Scissors.
- Lighter.
- Meter.
Step by Step:
Paso a paso:
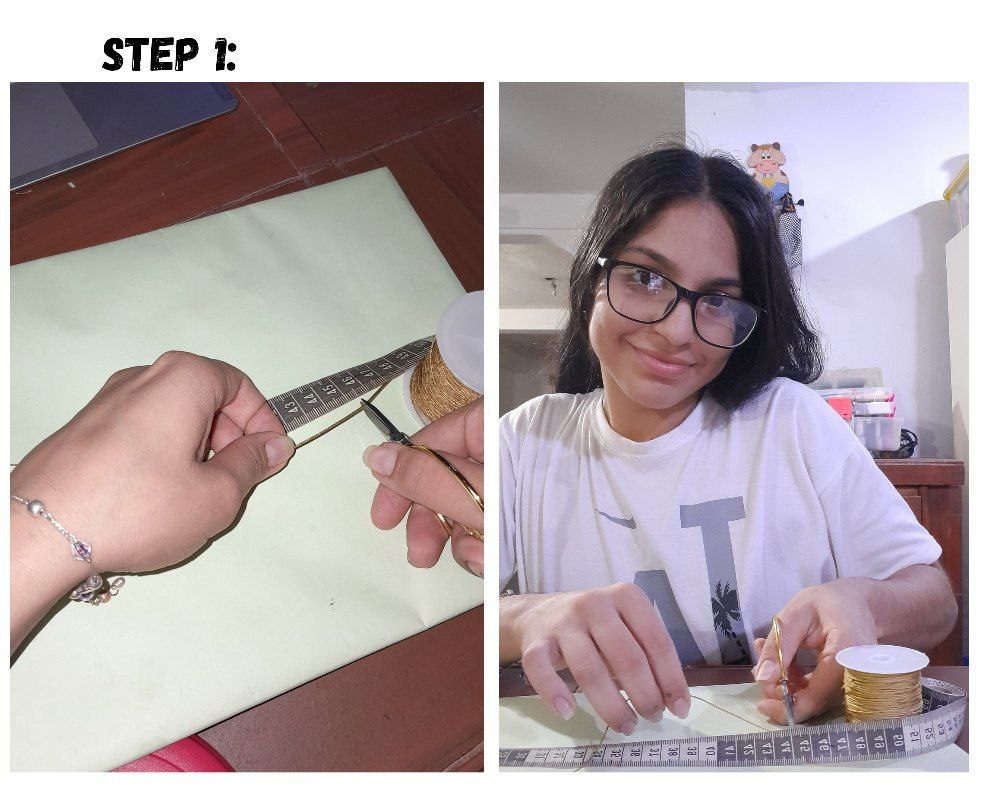
1.- We are going to start by cutting a 45cm thread or the size you want for your necklace, this is up to each person as they prefer the length.
1.- Vamos a iniciar cortando un hilo de 45cm o de la medida que quieren su collar, esto es a gusto de cada quien como prefieran el largo.
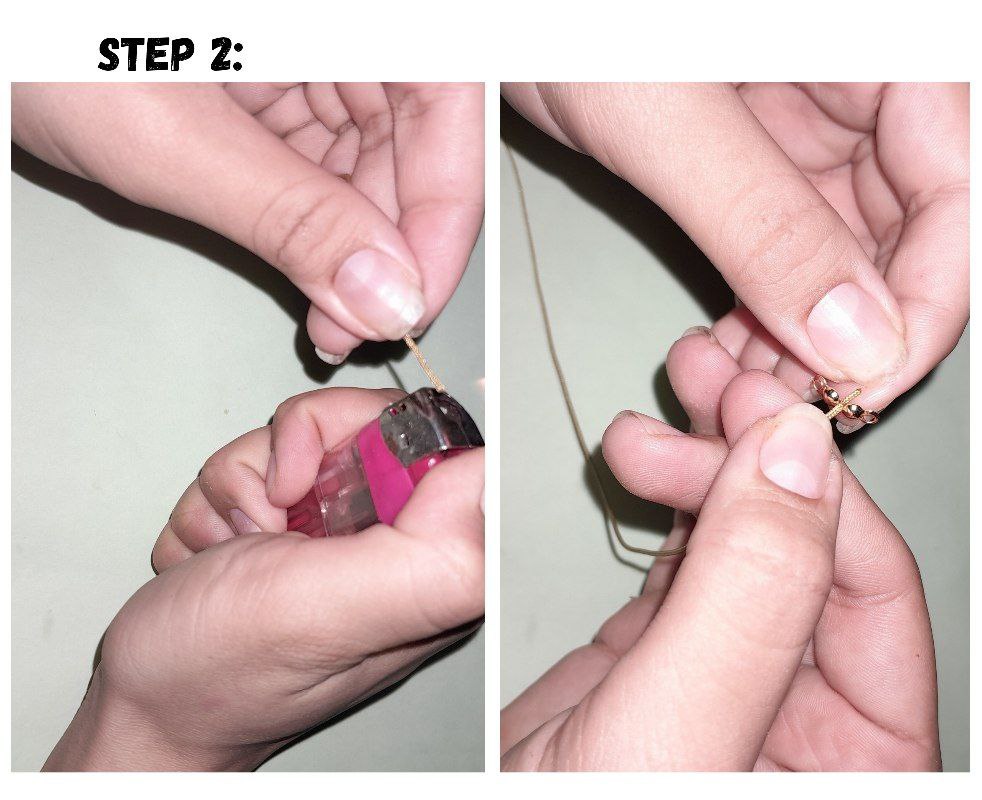
2.- I'm going to take a lighter and burn one of the ends a little and I'm going to put the knot cover on, then I'm going to tie a knot trying to make it close to the tip but so as not to waste so much thread, and I cut off the excess . Once the knot is ready, close the knot cover.
2.- Voy a tomar un encendedor y quemar un poco uno de los extremos y paso a poner el tapa nudo, enseguida voy a hacer un nudito tratando de que nos quede cerca de la punta pero para no desperdiciar tanto hilo, y corto el excedente. Una vez listo el nudo para a cerrar el tapa nudos.
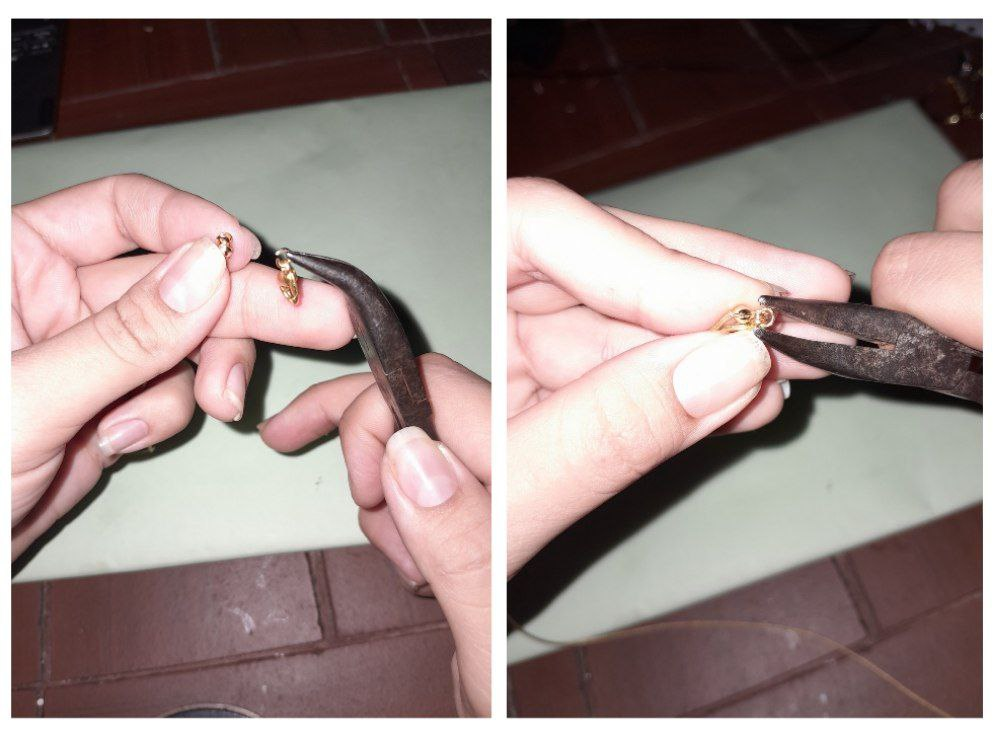
3.- Now I am going to place a ring and I am going to place my parakeet brooch on it. We place it on our knot cover and close our rings perfectly.
3.- Ahora voy a colocar una argolla y le voy a colocar mi broche perico. Se lo colocamos a nuestro tapa nudo y cerramos perfectamente nuestras argolla.
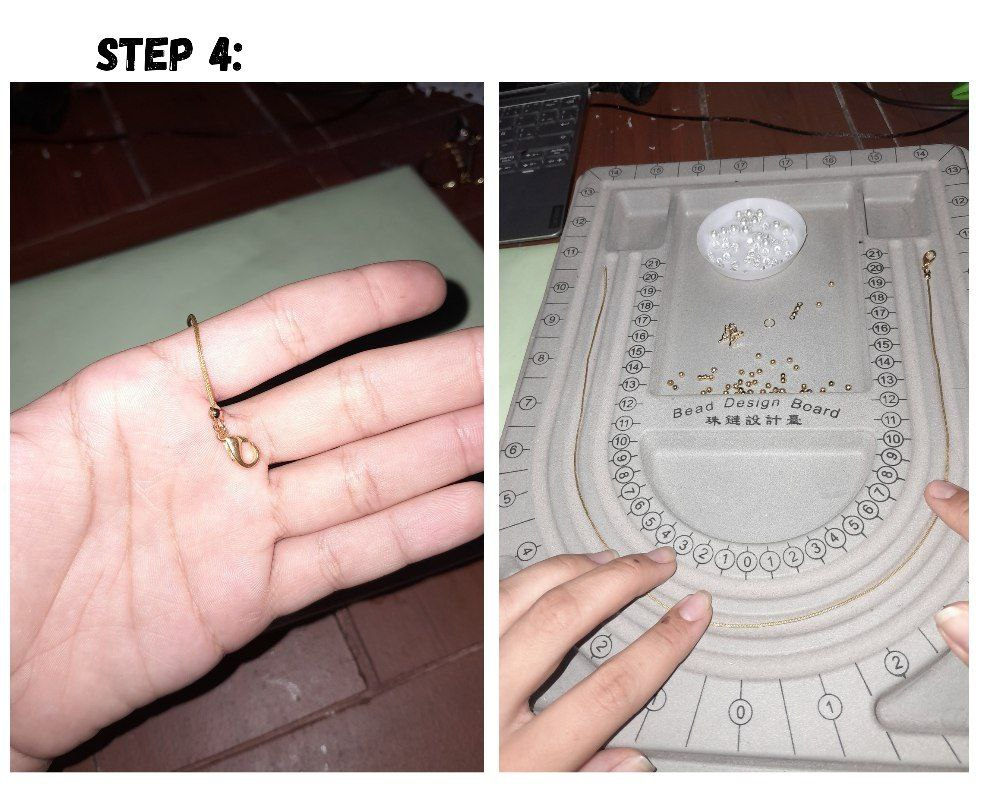
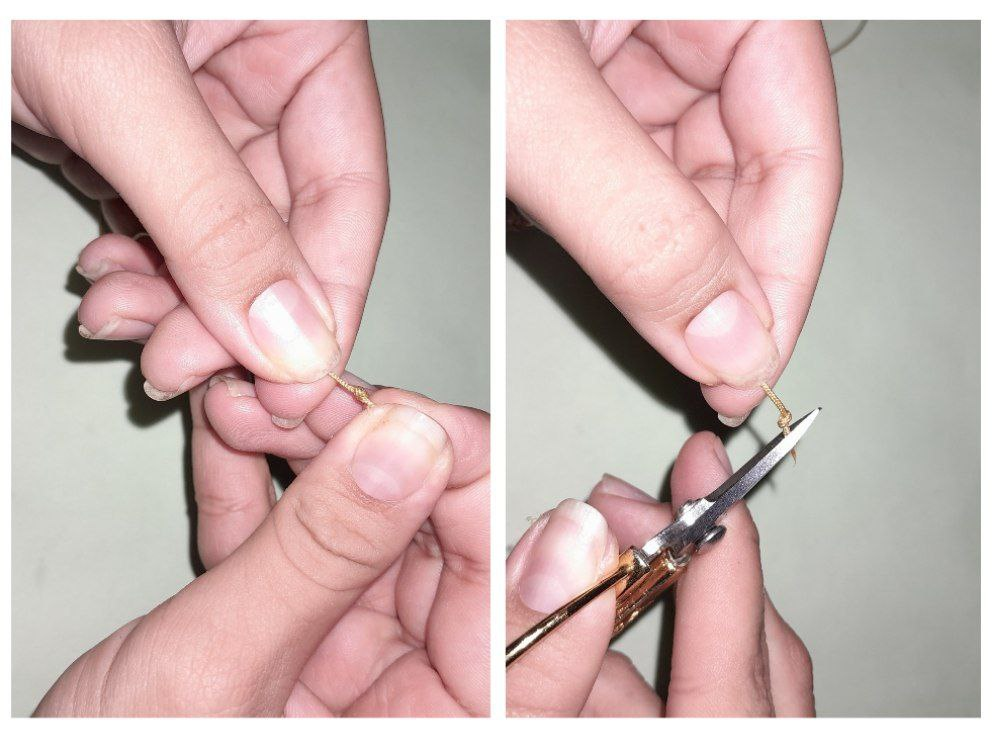
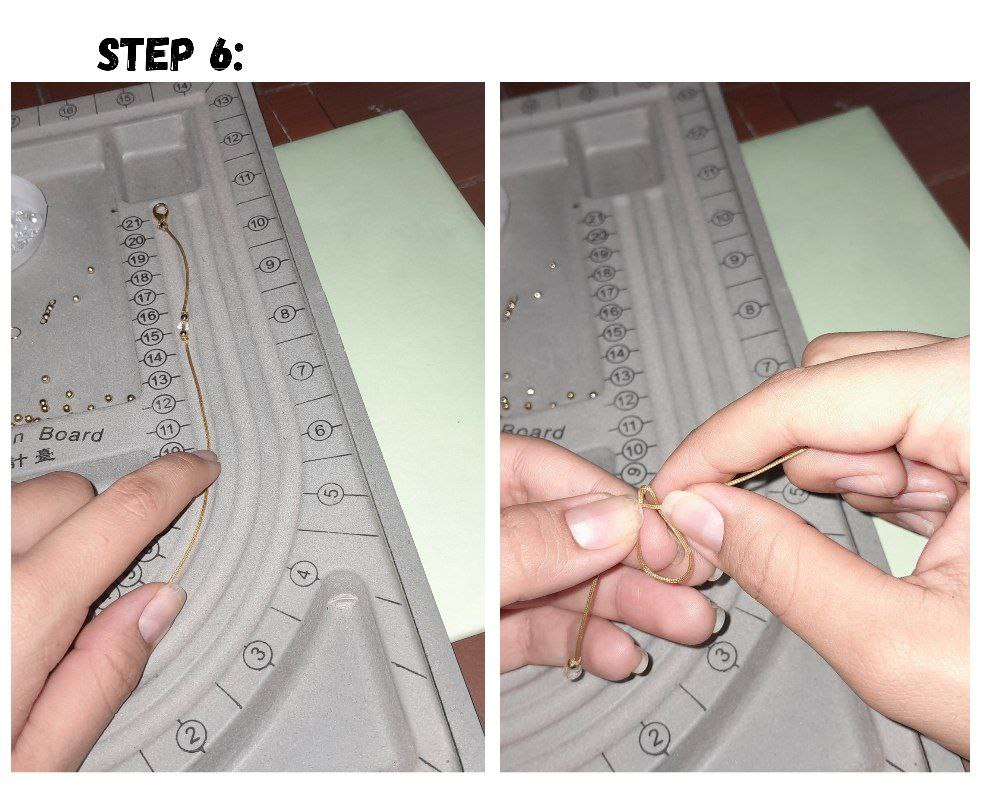
4.- Since my necklace is short, at the neck, I am going to take a measurement of 5 cm from the clasp to the back and there I am going to tie a simple knot.
4.- Como mi collar es corto, al cuello, voy a tomar una medida de 5cm desde el broche para atrás y ahí voy a hacer un nudito simple.


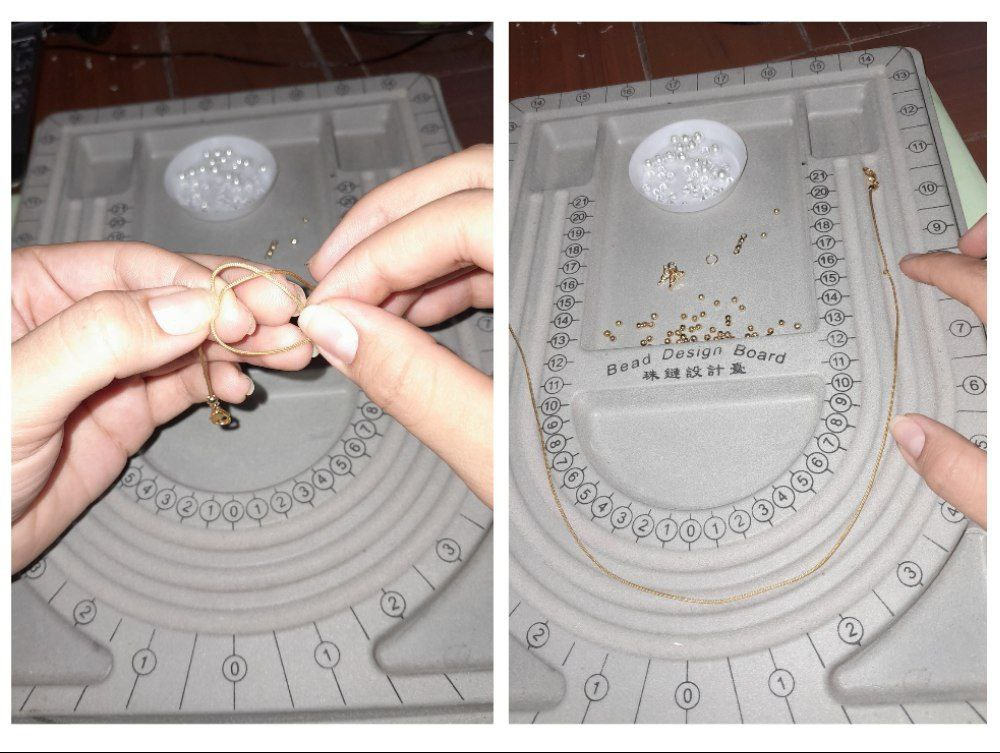
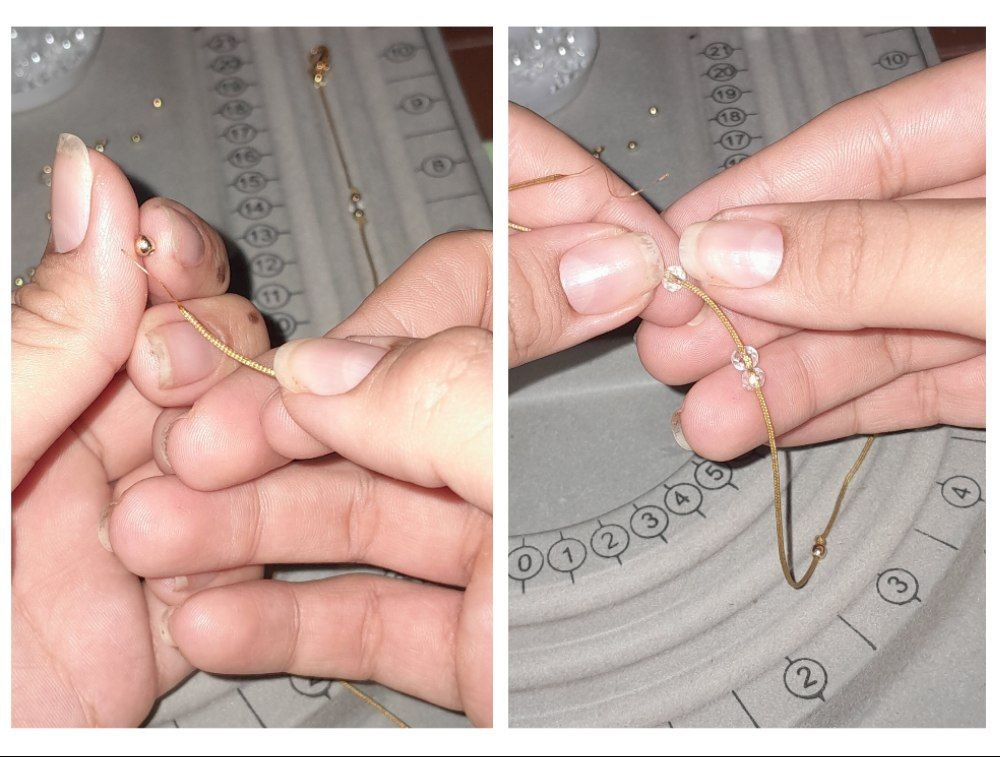
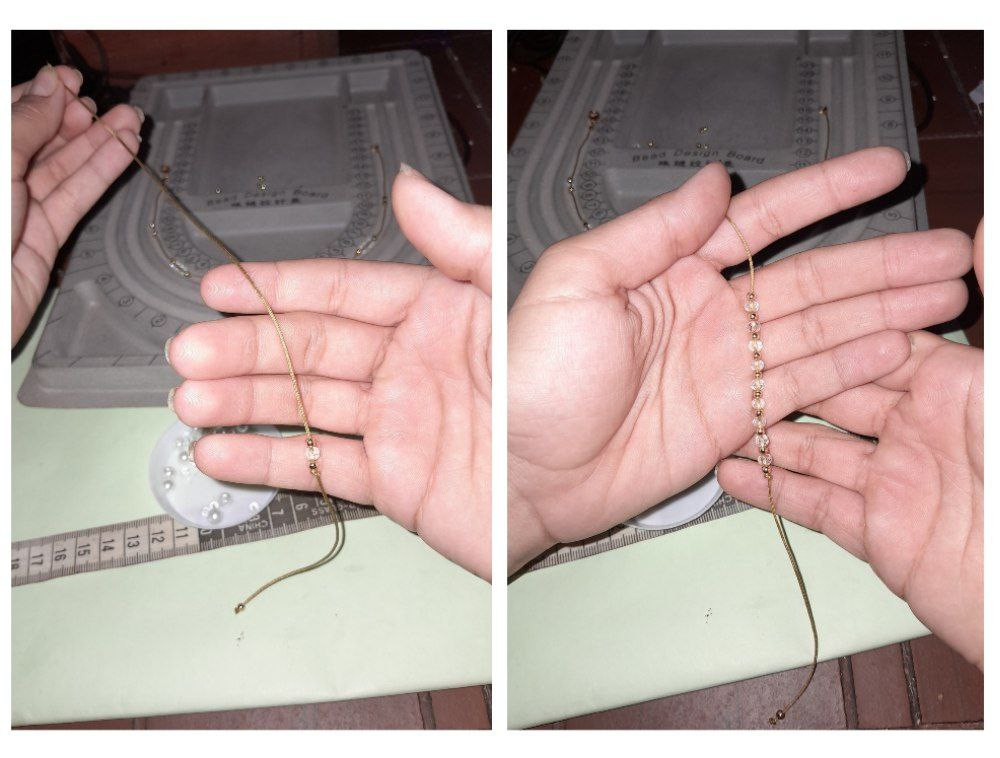
5.- Now I am going to take the end and pass a ball, followed by a glass and again a ball, we take it to the knot, and we tie another knot again.
5.- Ahora voy a tomar el extremo y pasar un balín, seguido de un cristal y nuevamente un balín, lo llevamos hasta el nudito, y volvemos a hacer otro nudo.
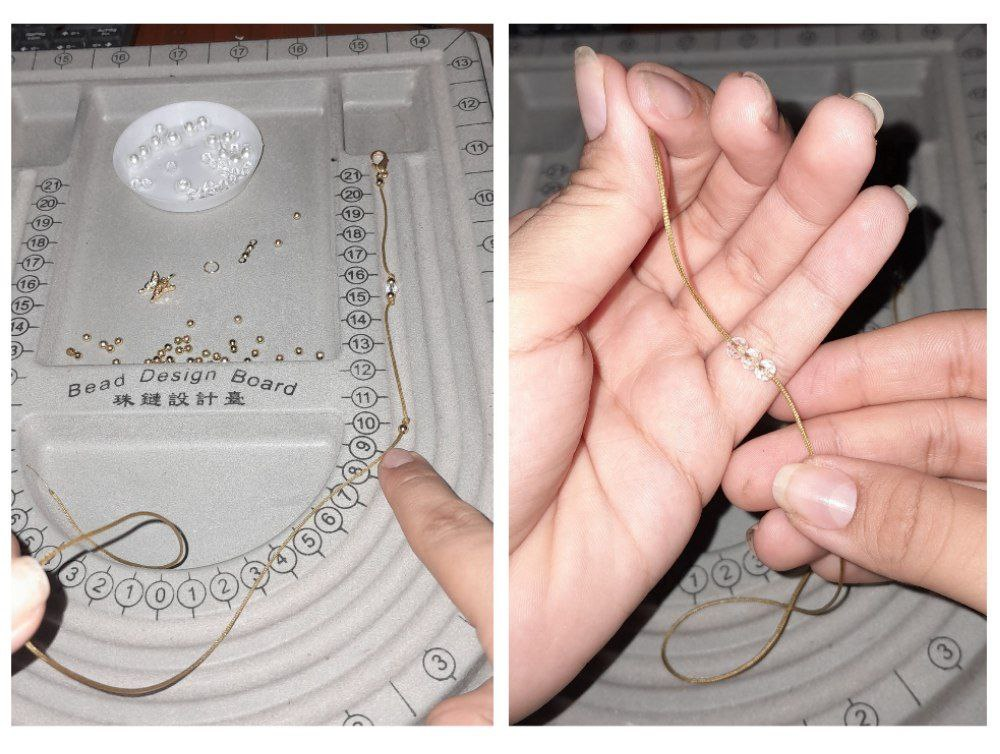
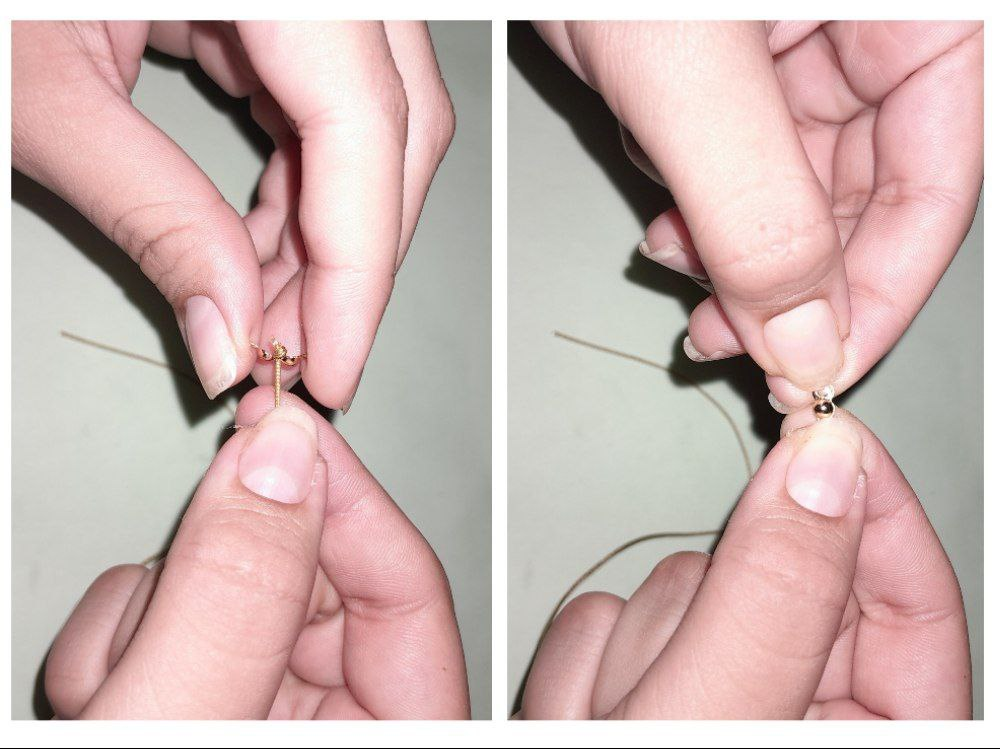
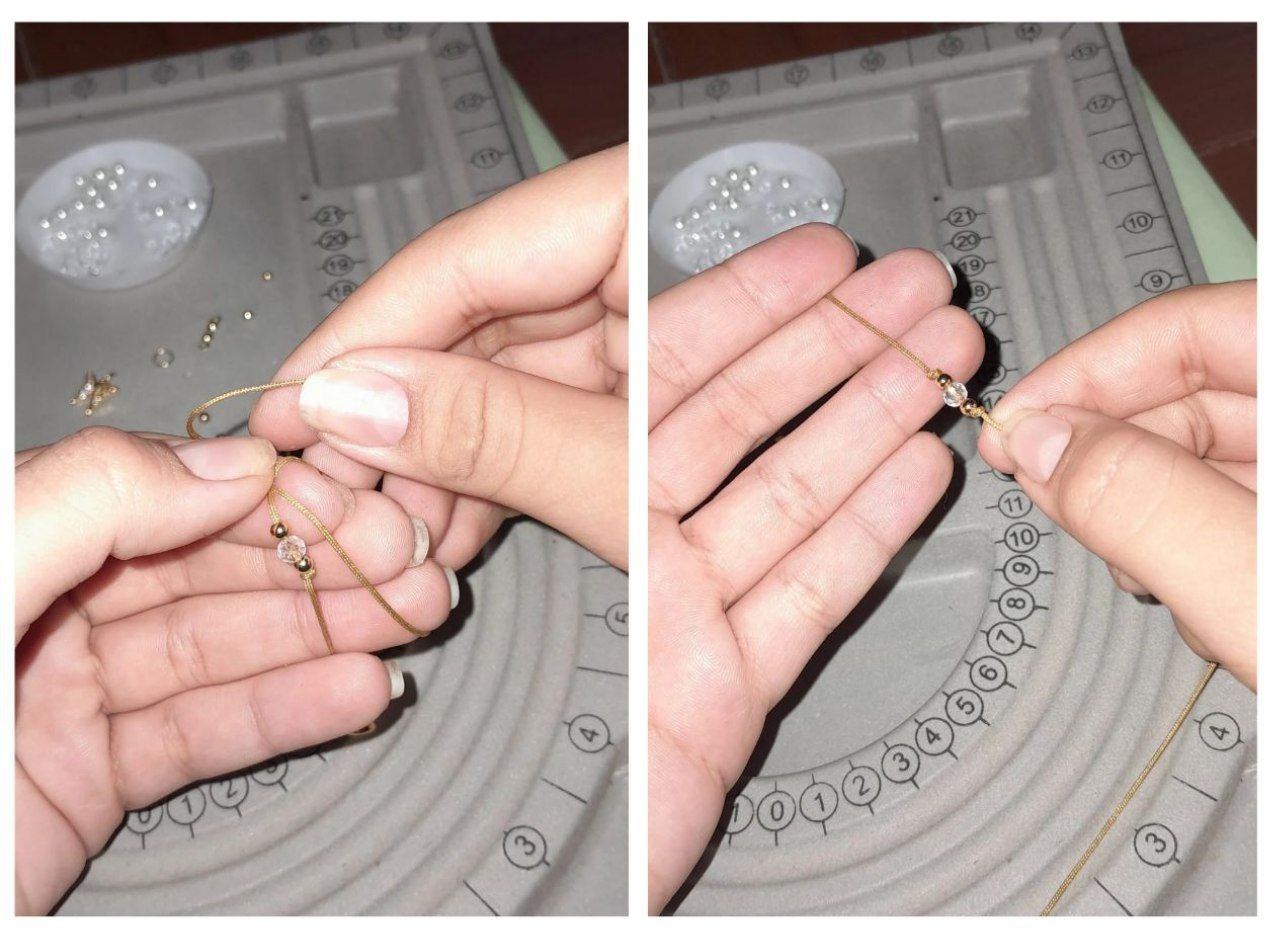
6.- Now I am going to leave a space of about 3cm or 5cm and I will tie a knot again. This time I am going to place a bead, three crystals and another bead, and finished with a knot.
6.- Ahora voy a dejar un espacio de unos 3cm o 5cm y vuelvo a hacer un nudo. Esta vez voy a colocar un balin, tres cristales y otro balin, y finalizó con un nudo.
7.- I measure a space of 3cm again and repeat to tie a knot and pass a ball, three crystals and another ball.
7.- Vuelvo a medir un espacio de 3cm y repito a hacer un nudo y pasar un balín, tres cristales y otro balin.
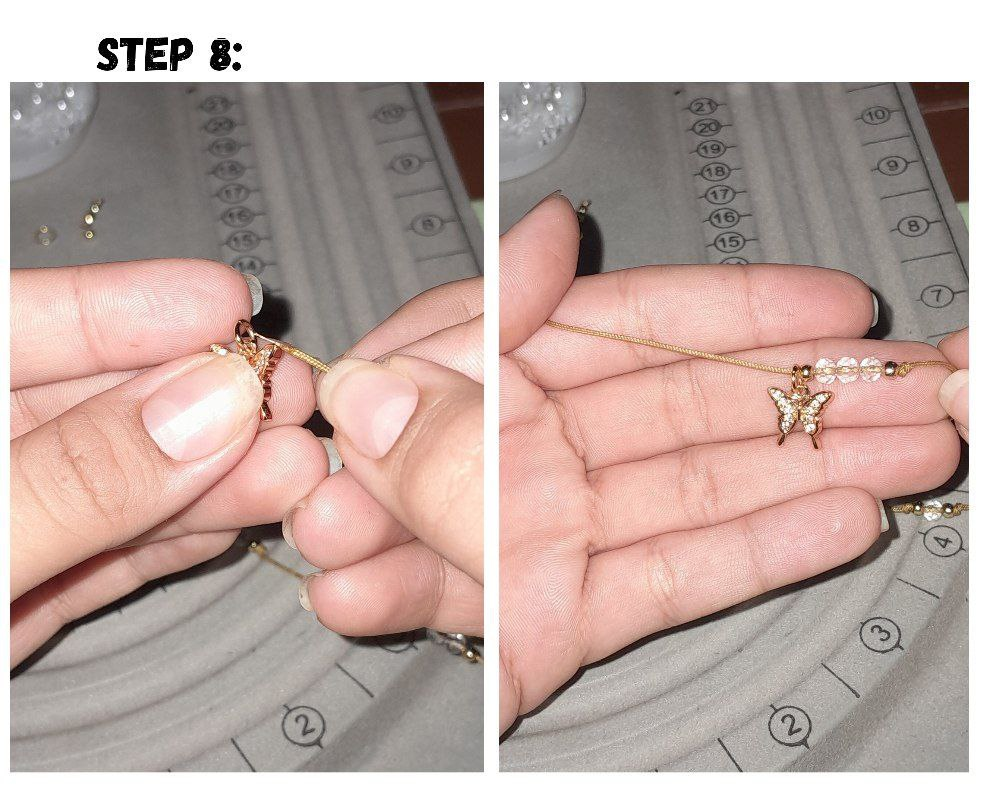
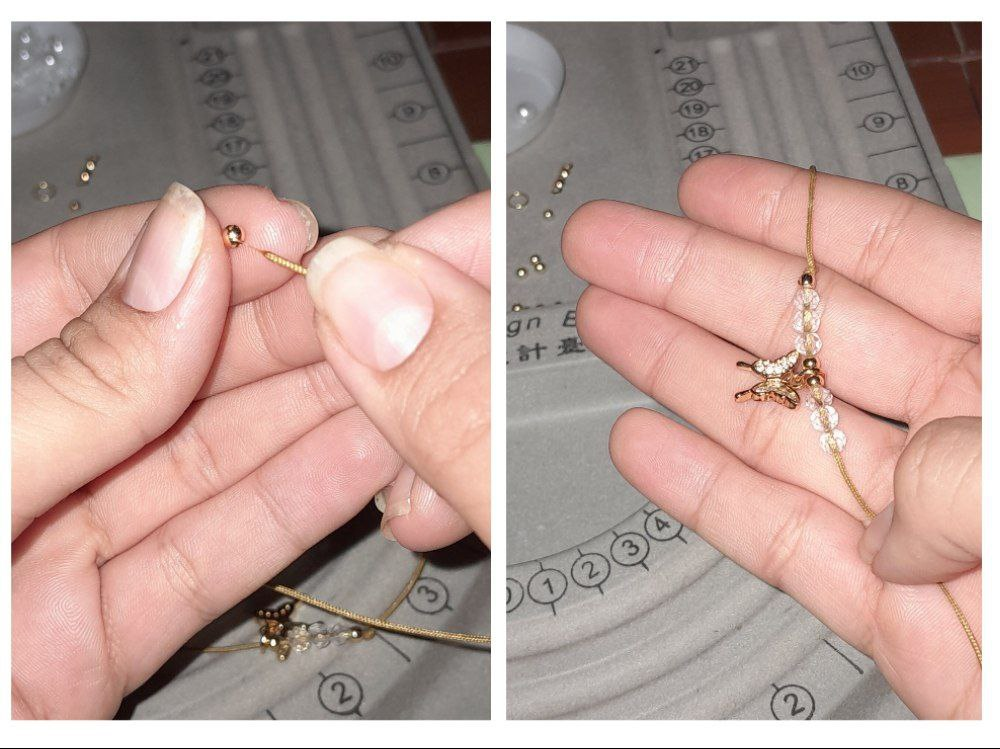
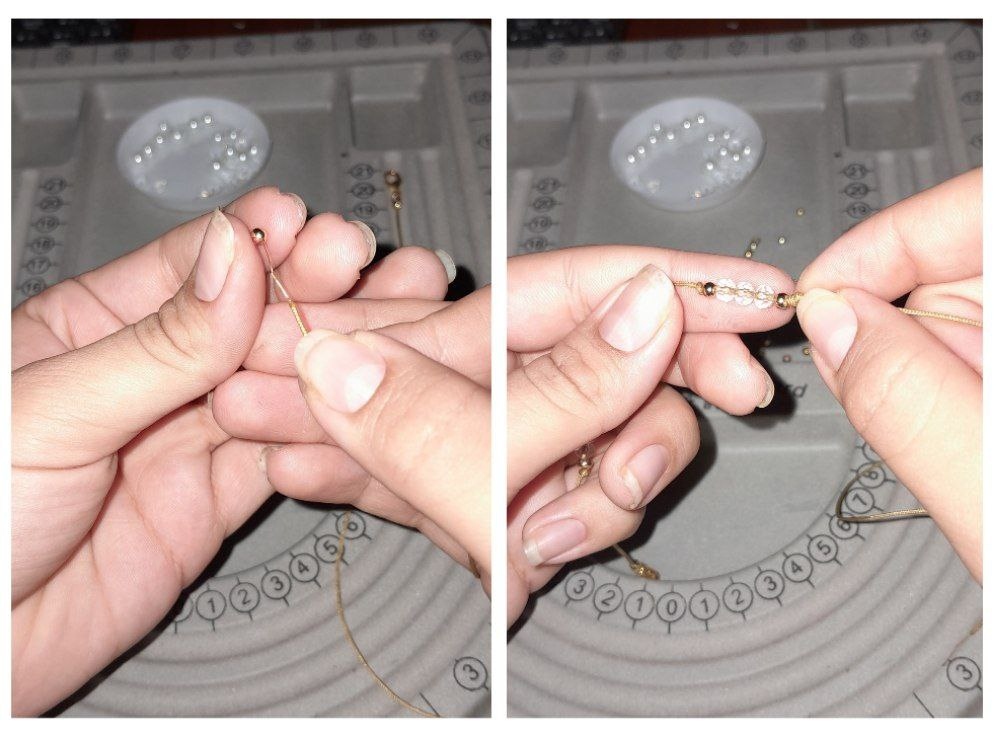
8.- Now when I reach the center of my necklace, I am going to pass my pendant followed by a bead, three crystals and another bead, and I close with a knot.
8.- Ahora al llegar al centro de mi collar, voy a pasar mi dije seguido de un balin, tres cristales y otro balín, y cierro con un nudo.
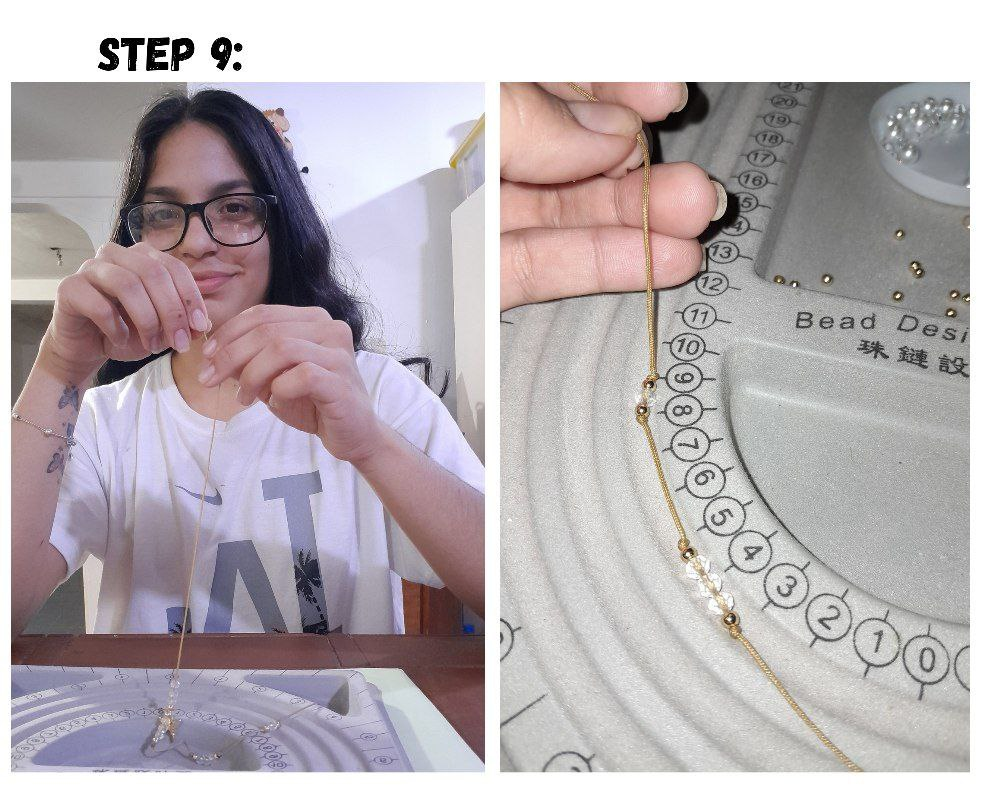
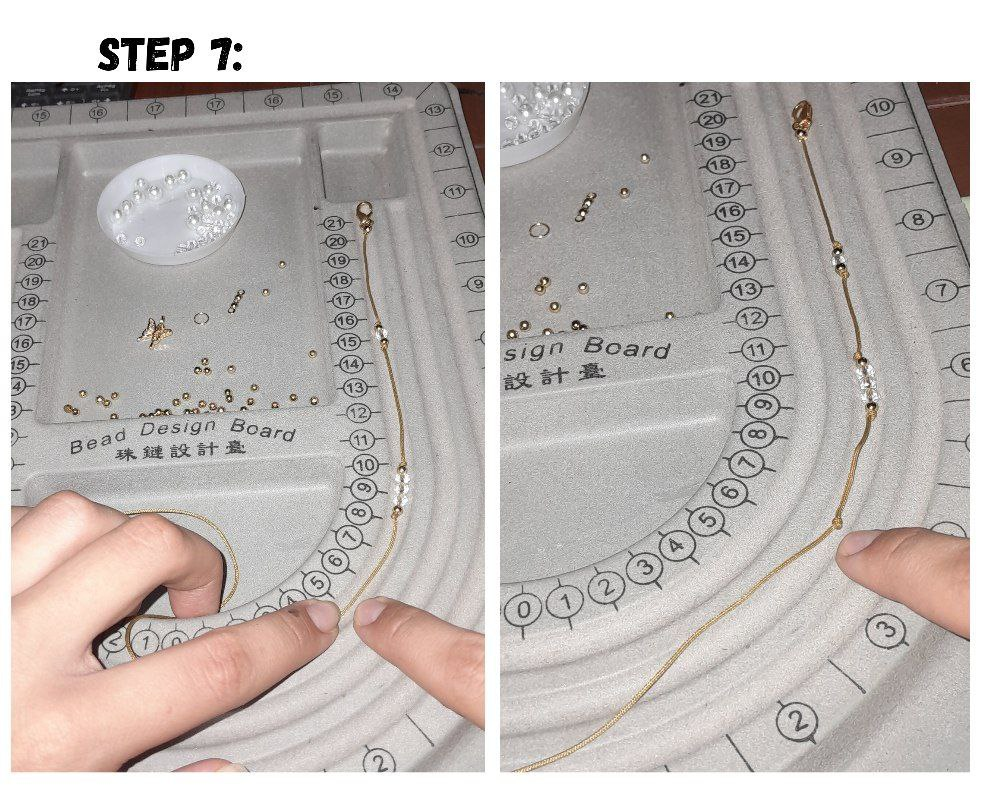
9.- From here I do the same procedure again but from front to back, with the same measurements on the other side and the same quantities of stones.
9.- A partir de acá vuelvo a hacer el mismo procedimiento pero de adelante para atrás, con las mismas medidas del otro lado y las mismas cantidades de piedras.
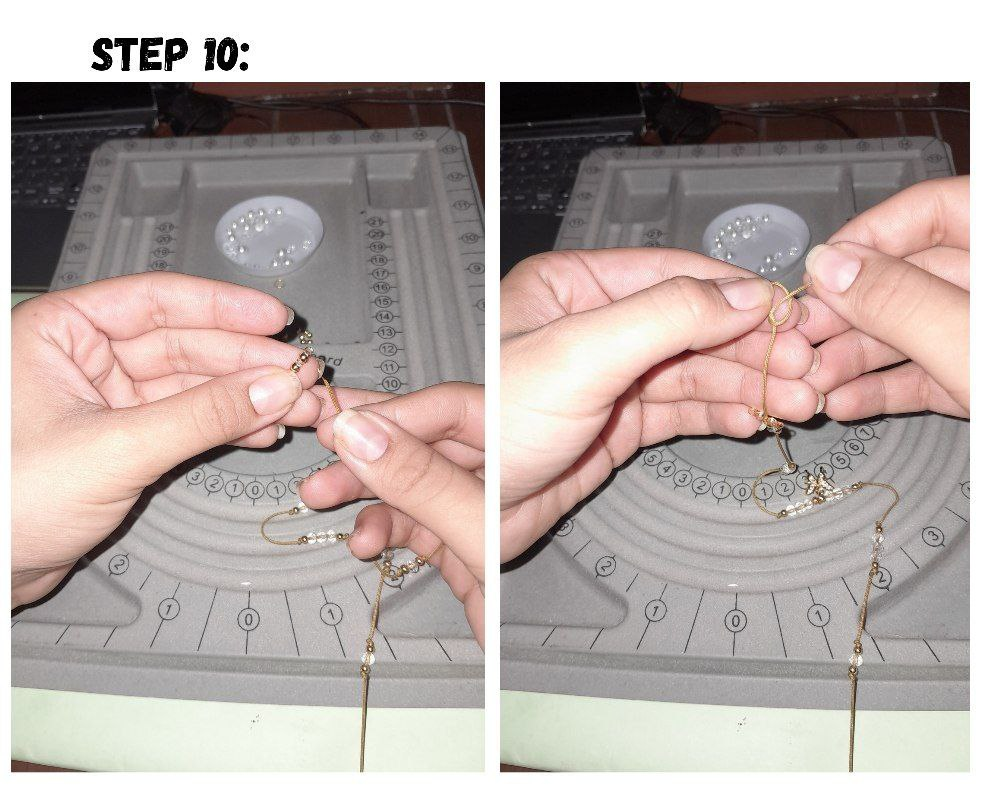
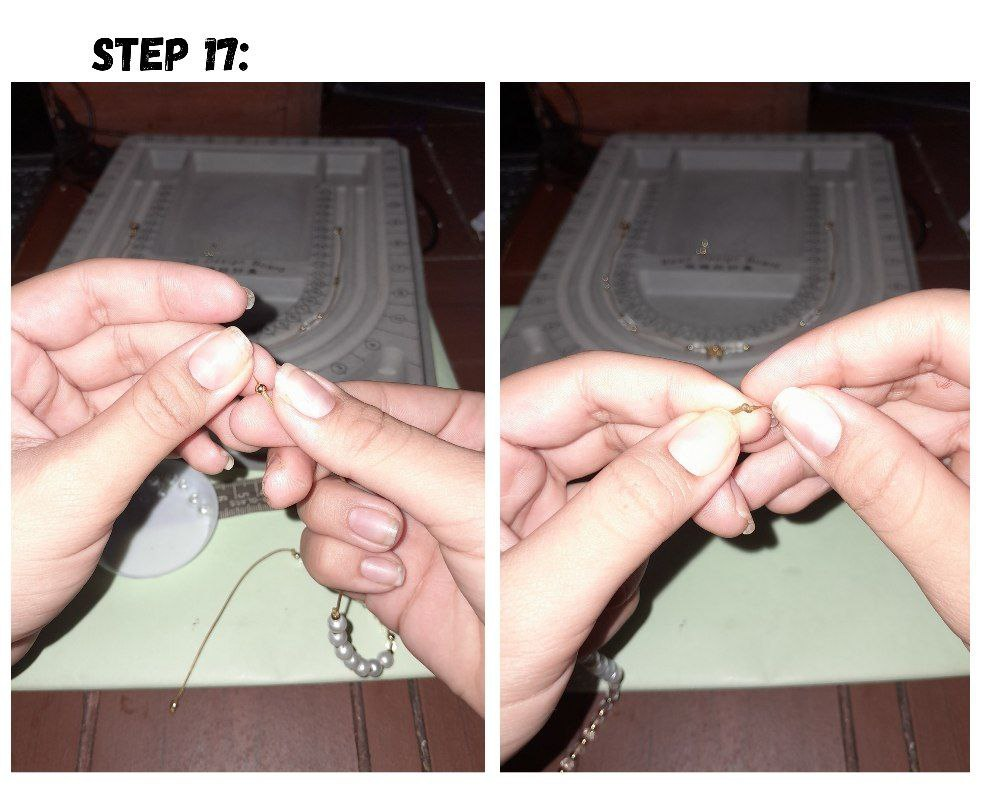
10.- When I get to the end I am going to pass my top knot and I am going to tie a knot at the end making sure it is the same size as the previous side and I cut off the excess.
10.- Al llegar al final voy a pasar mi tapa nudo y voy a hacer un nudito al final asegurándome que quede del mismo tamaño que el lado anterior y corto el excedente.
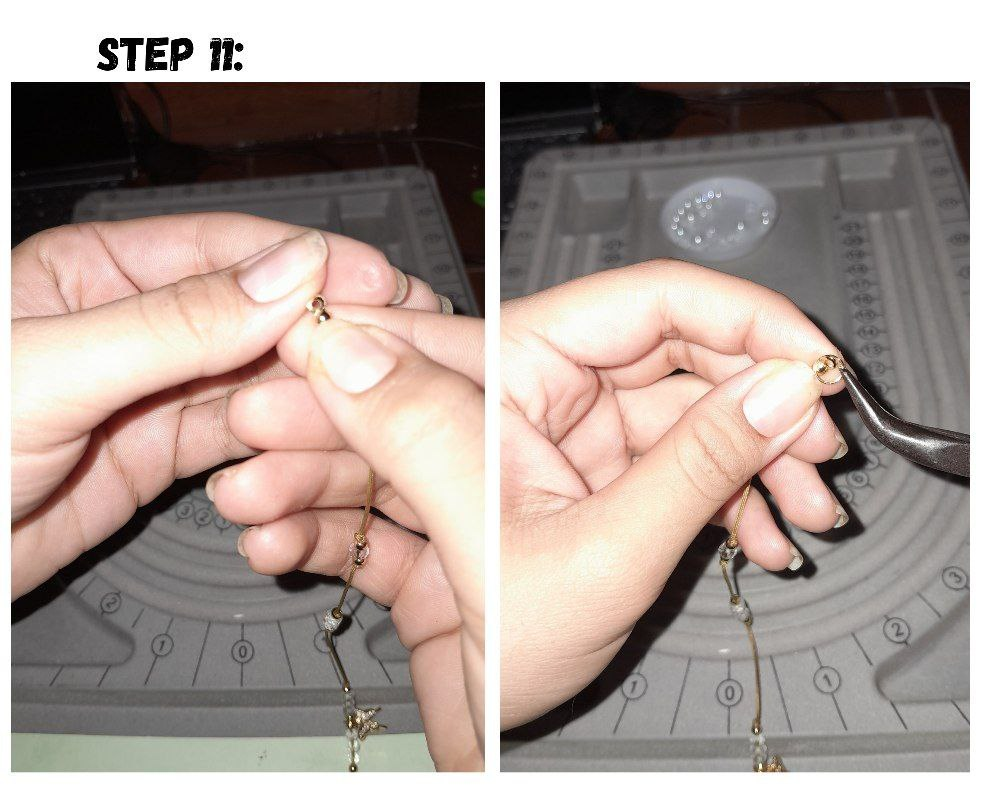
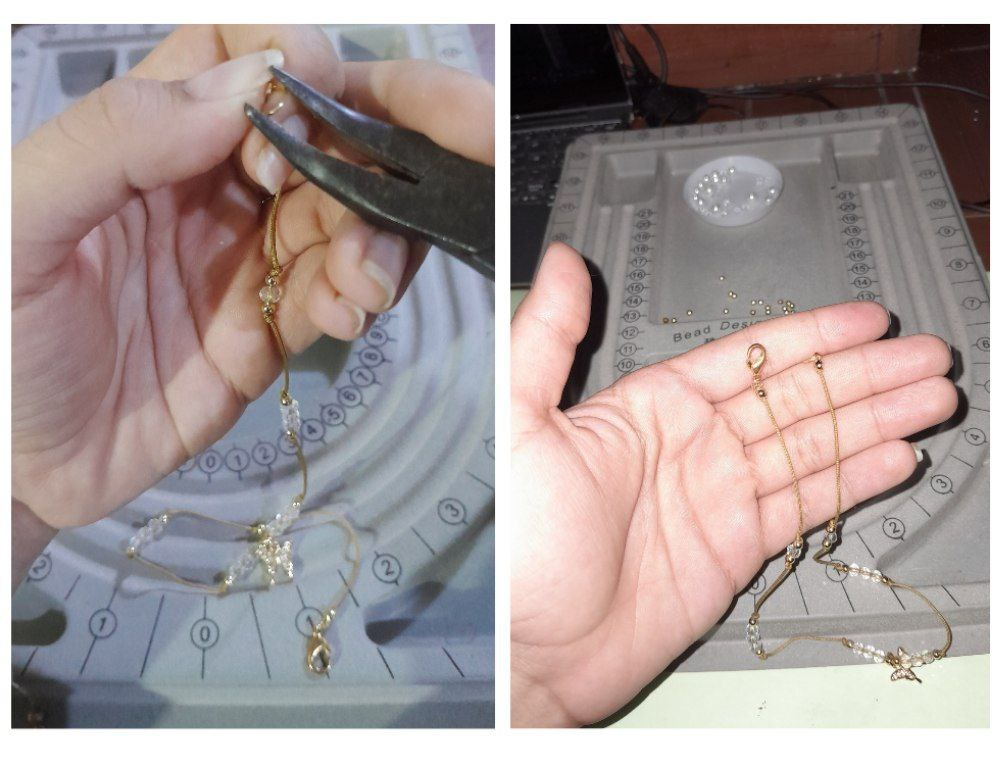
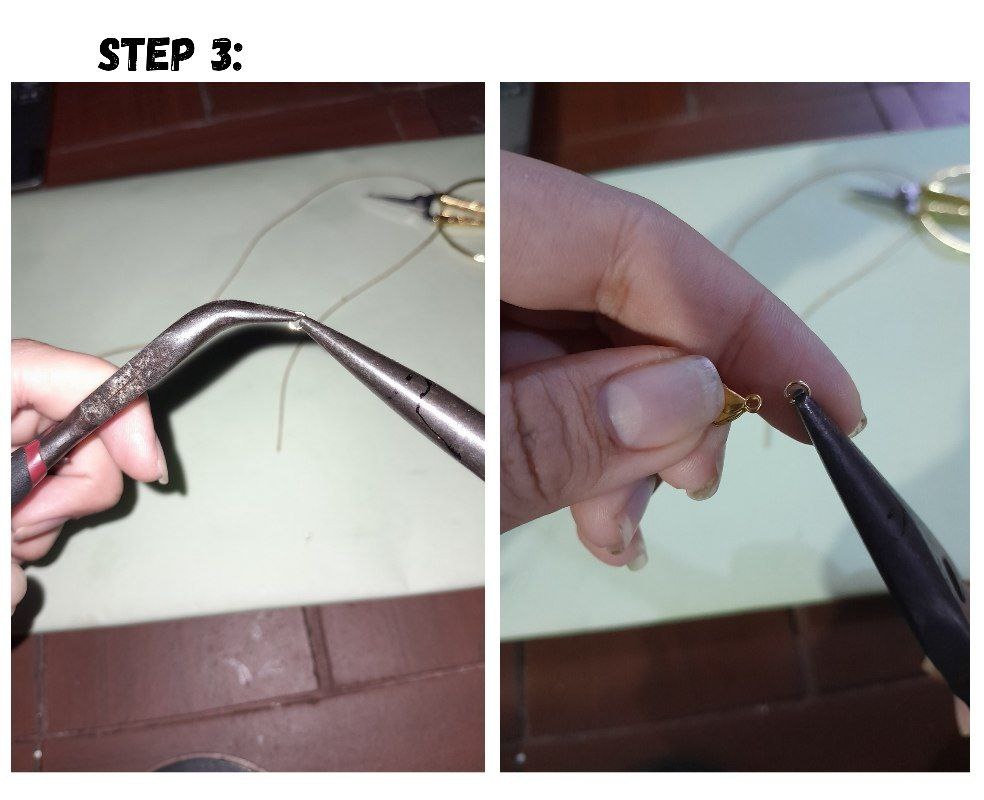
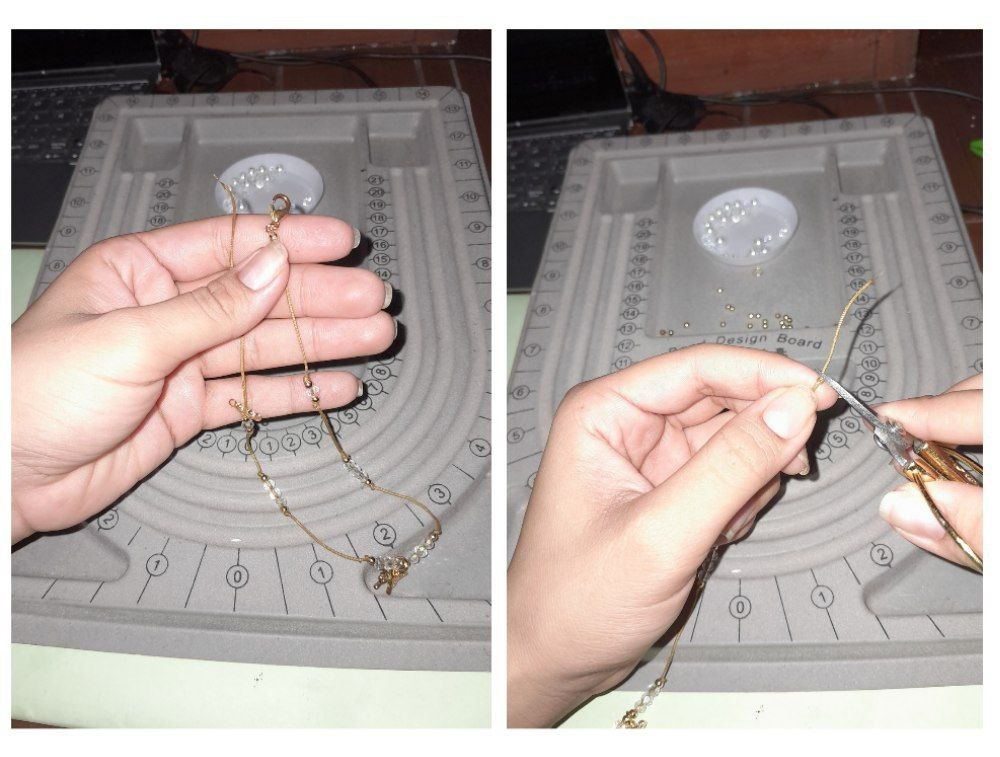
11.- Now, we are going to raise our knot cover to close it and with a clamp we place a ring on it.
11.- Ahora sí, vamos a subir nuestro tapa nudo para cerrarlo y con una pinza le colocamos una argolla.
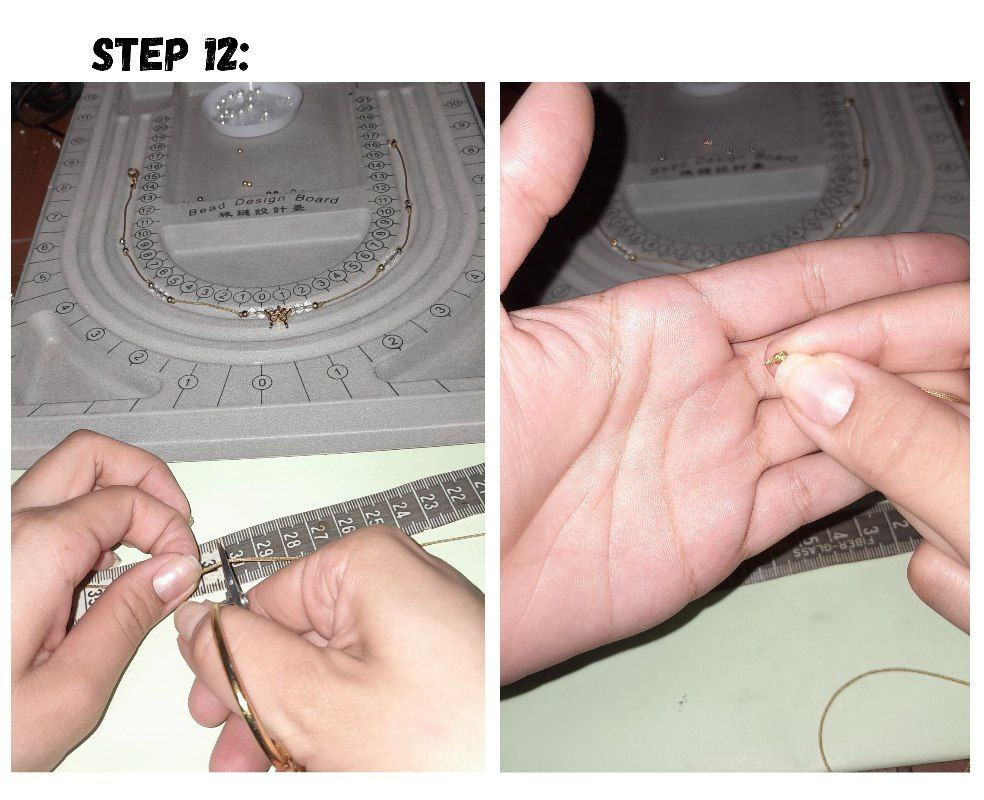
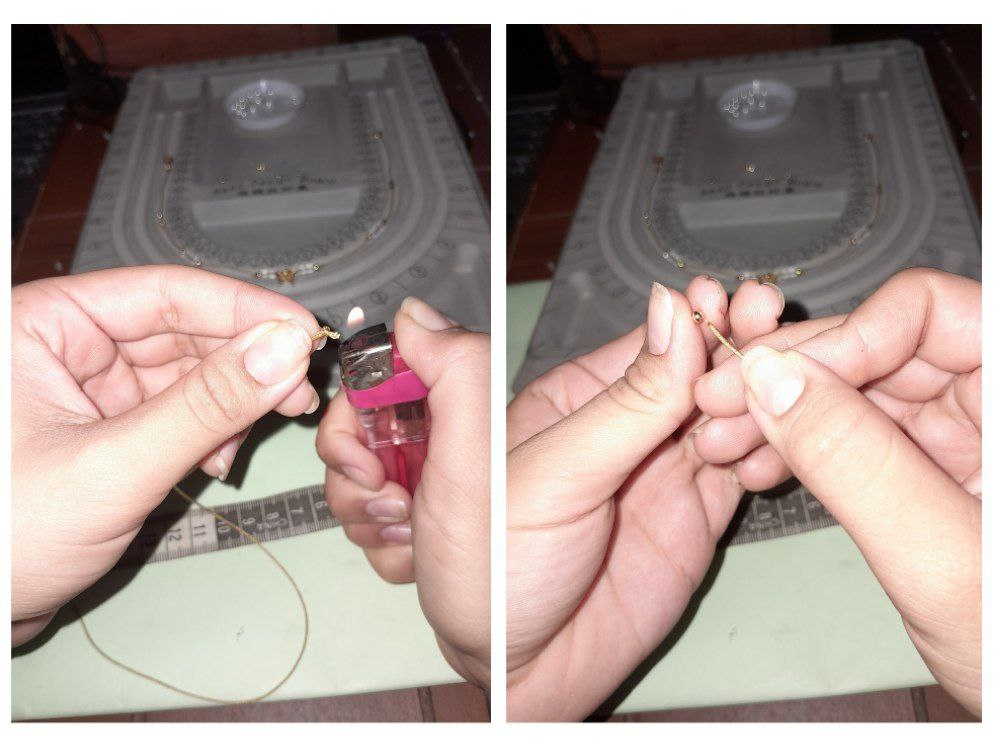
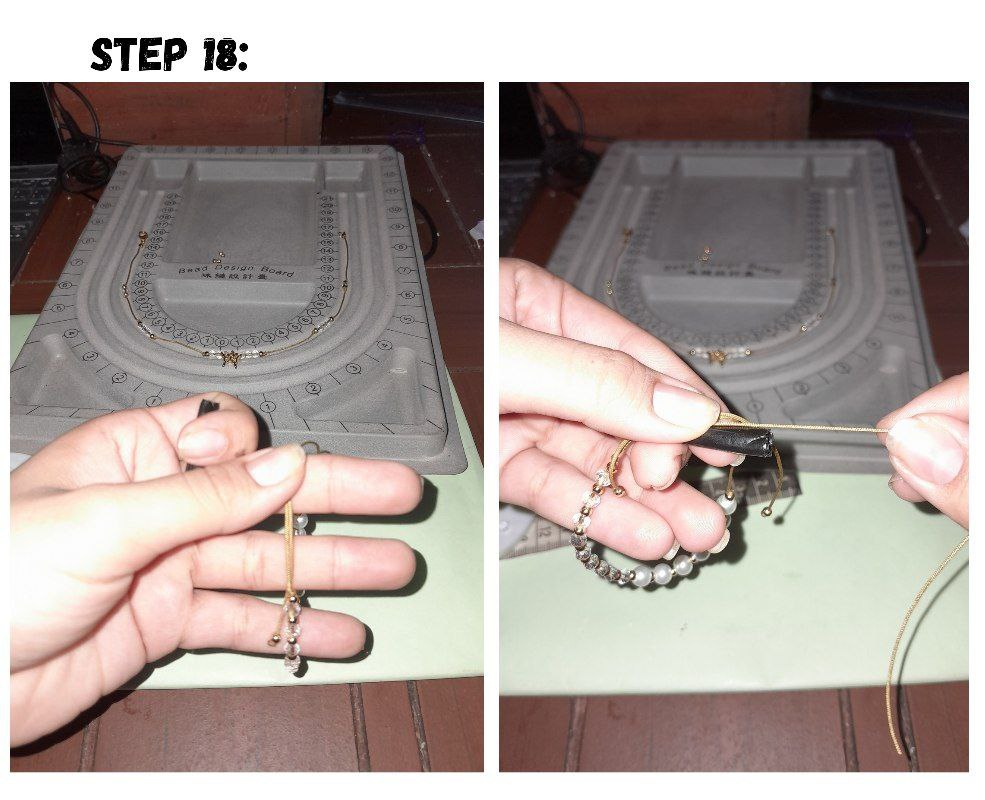
12.- Once the necklace is ready, I proceed to make the matching bracelet by cutting a 30cm thread. I tie a knot at one end, burn it, and pass a pellet through the other end until it reaches the end of the knot.
12.- Una vez listo el collar paso a hacer la pulsera a juego cortando un hilo de 30cm. Le hago un nudo en uno de los extremos, lo quemo, y paso un balín por la otra punta hasta llevarlo al final del nudo.
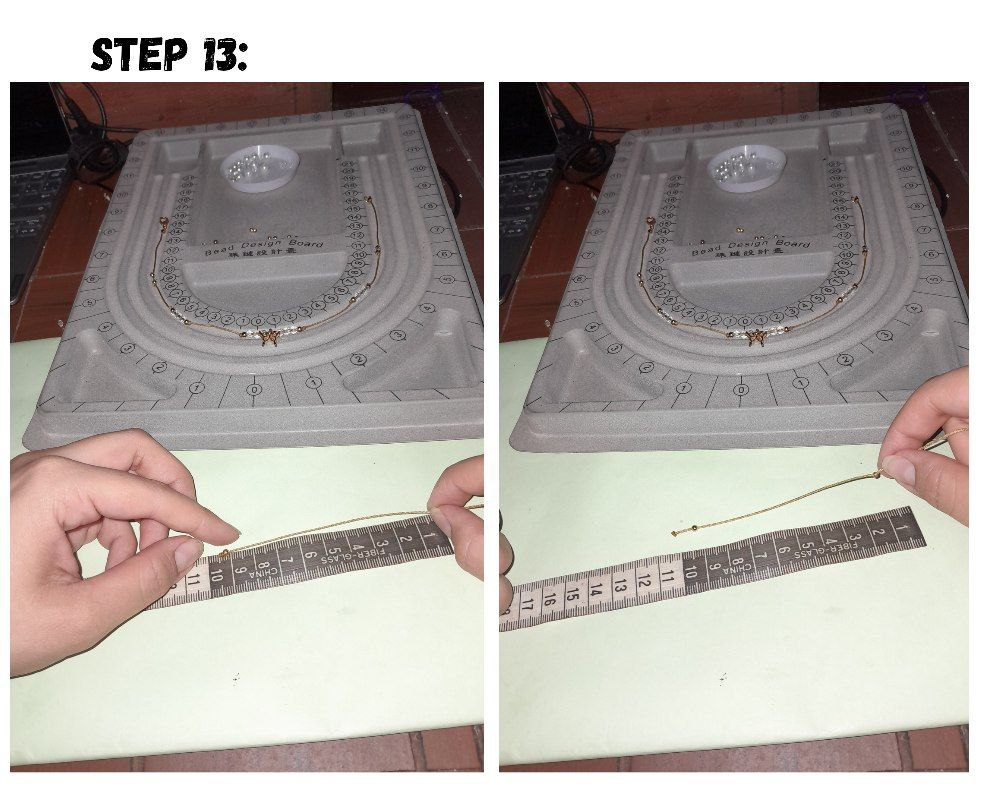
13.- I am going to measure a space of 10cm and proceed to tie another knot.
13.- Voy a medir un espacio de 10cm y paso a hacer otro nudo.
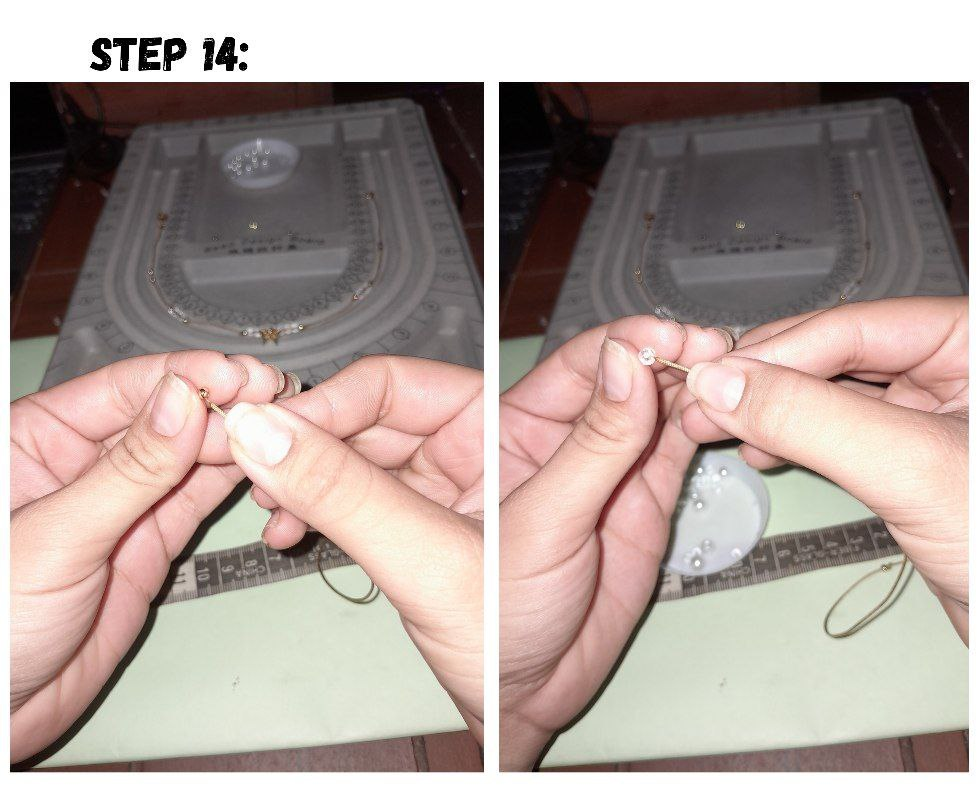
14.- I am going to proceed to insert a pellet and a crystal, followed by a pellet and another crystal, and so on until I reach the center of the bracelet.
14.- Voy a proceder a introducir un balín y un cristal, seguido de un balin y otro cristal, y así sucesivamente hasta llegar al centro de la pulsera.
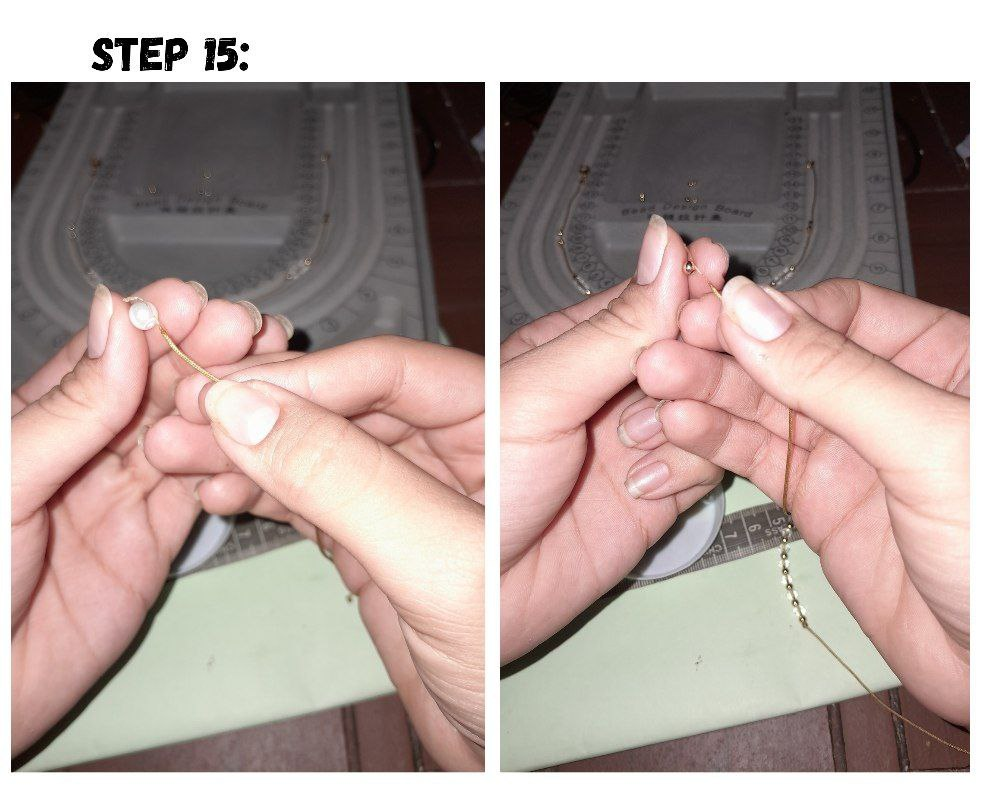
15.- I am now going to continue passing some beads, alternating them with the beads until I reach the same length as the other half.
15.- Voy a continuar pasando ahora unas perlas intercalándolas con los balines hasta llegar al mismo largo que la otra mitad.
16.- I tie a knot at the end to prevent them from coming off.
16.- Hago un nudo al final para evitar que se salgan.
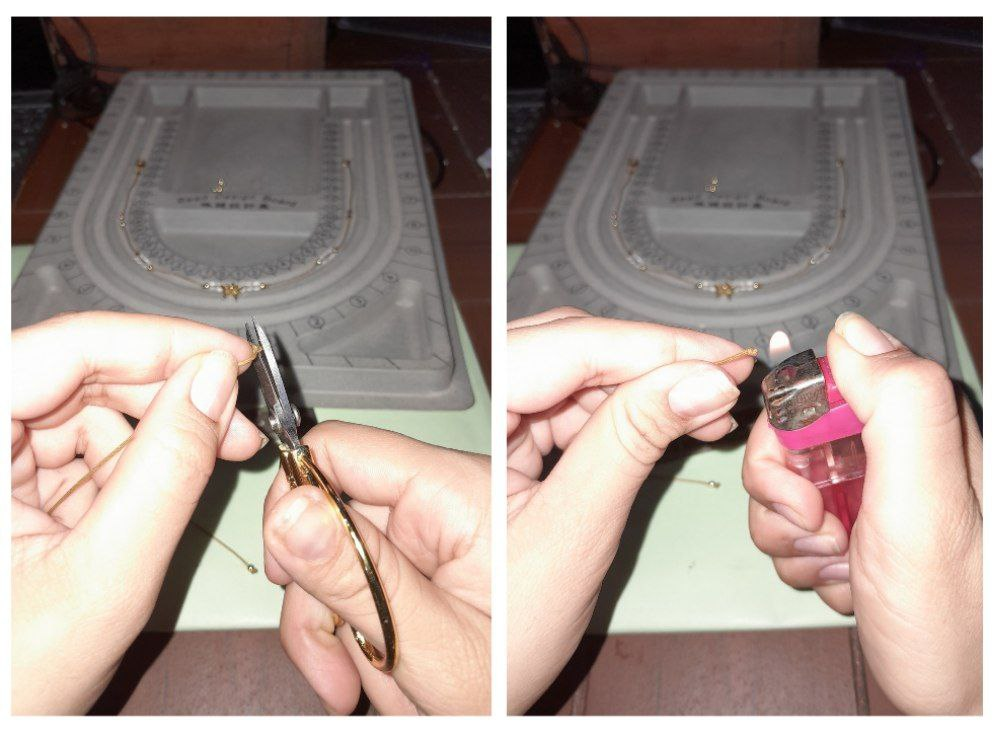
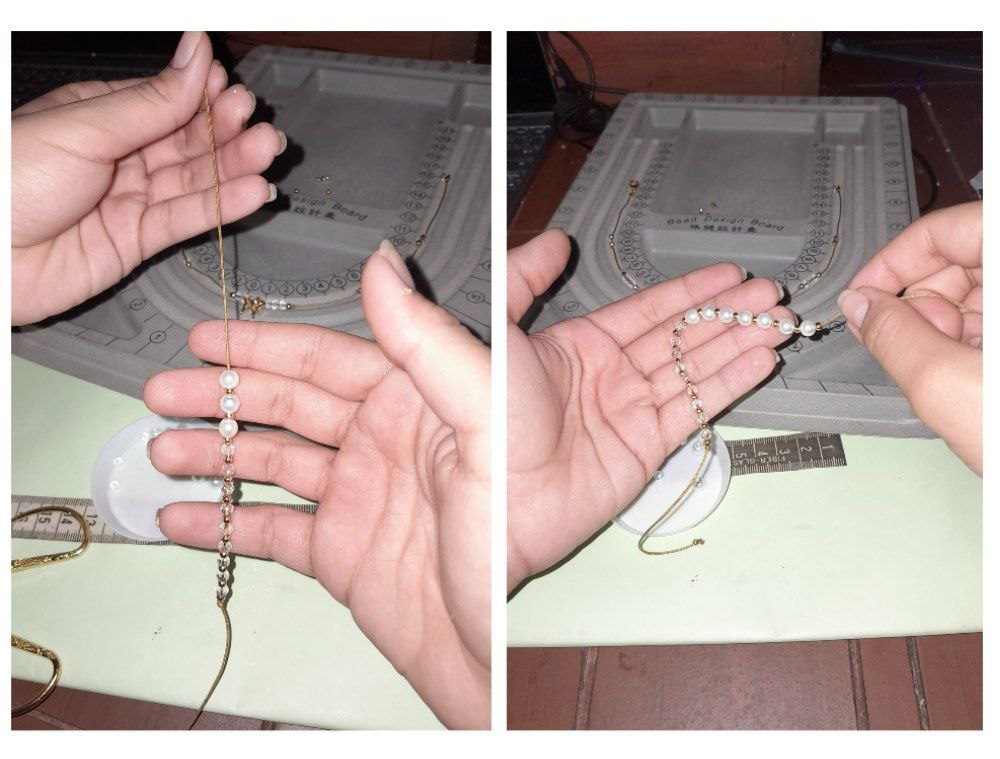
17.- Pass the last ball and finish by tying a knot at the tip, leaving the other end the same length. I proceed to cut off the excess and burn the knot.
17.- Paso el último balin y finalizó realizando un nudo en la punta dejando el mismo largo del otro extremo. Paso a cortar el excedente y a quemar el nudito.
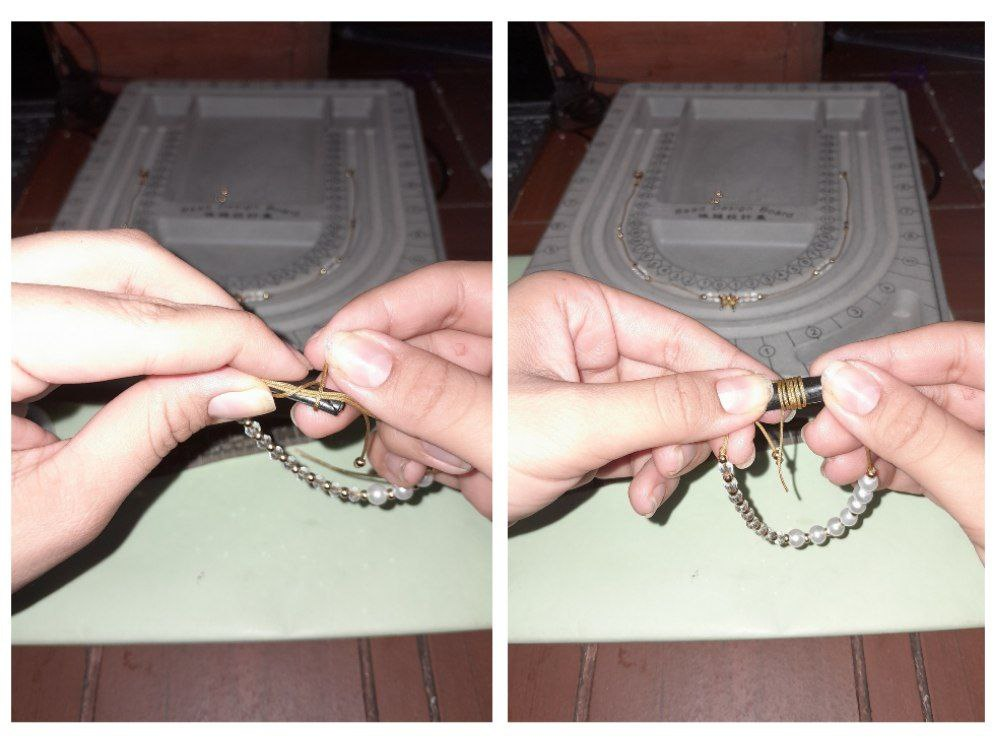
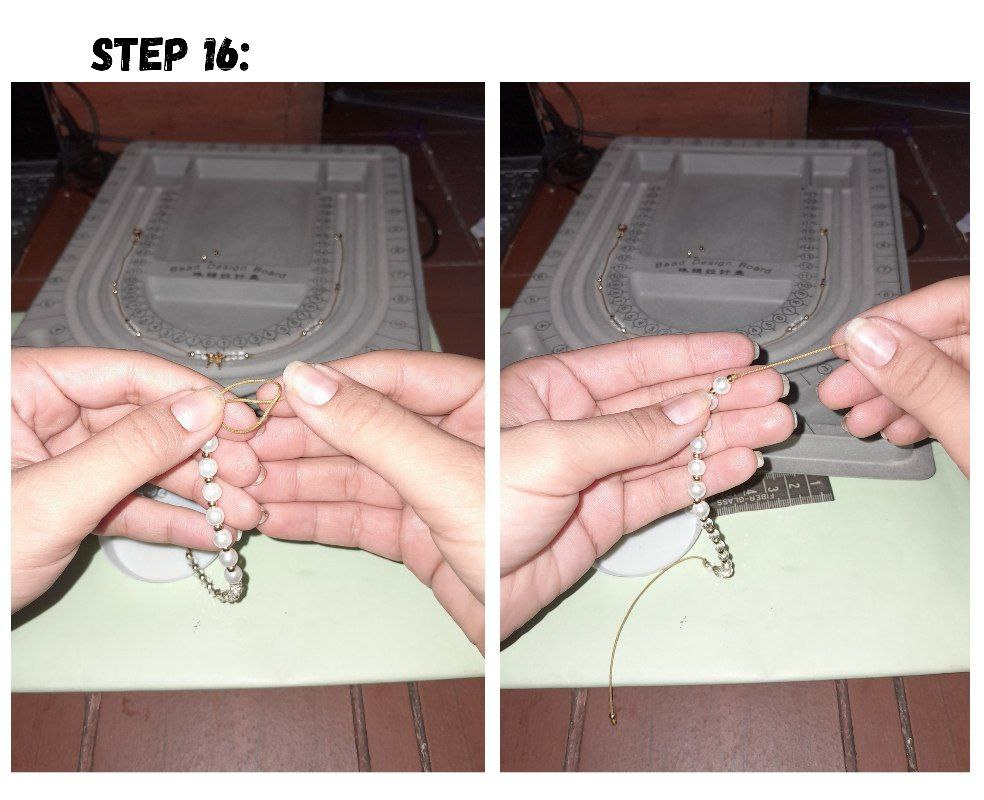
18.- To finish the bracelet we are going to close it like a Franciscan knot. I take a thread of about 15cm and a straw, I place them above both ends of the bracelet and I wind it around from right to left.
18.- Para terminar la pulsera vamos a cerrarla como un nudo franciscano. Tomo un hilo de unos 15cm y un pitillo, los coloco por encima de ambos extremos de la pulsera y voy enrollando alrededor de derecha a izquierda.
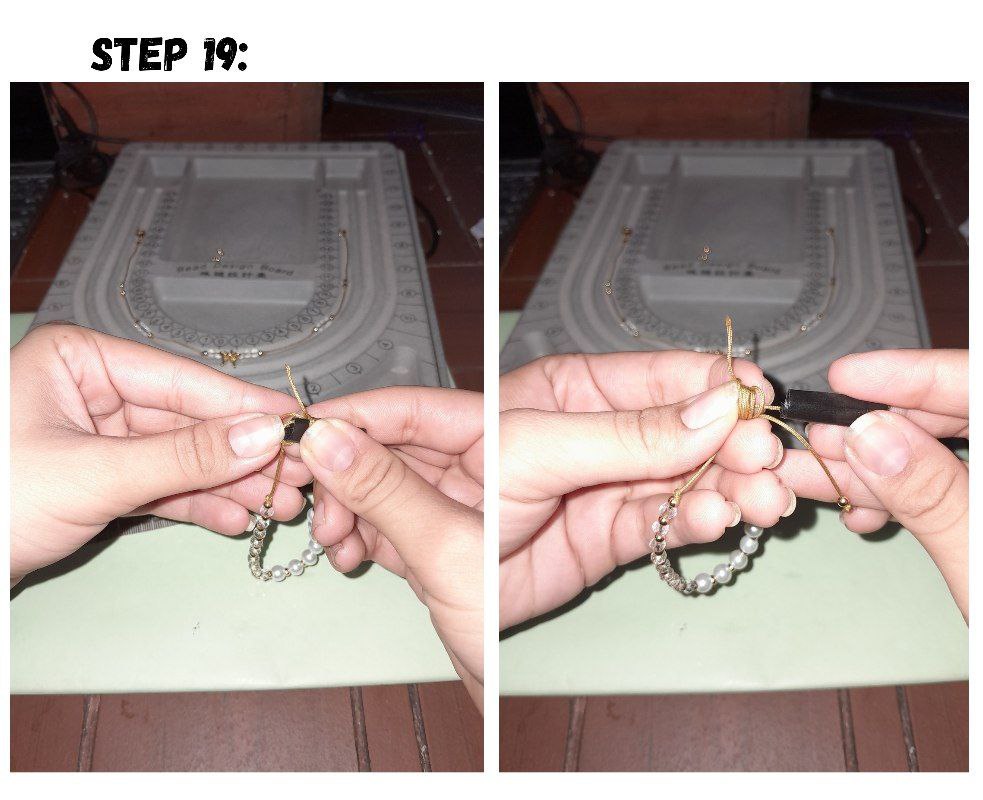
19.- I insert the tip inside the straw and take out the thread from the straw, and pull both ends.
19.- Introduzco la punta por dentro del pitillo y saco el hilo del pitillo, y jalo ambos extremos.
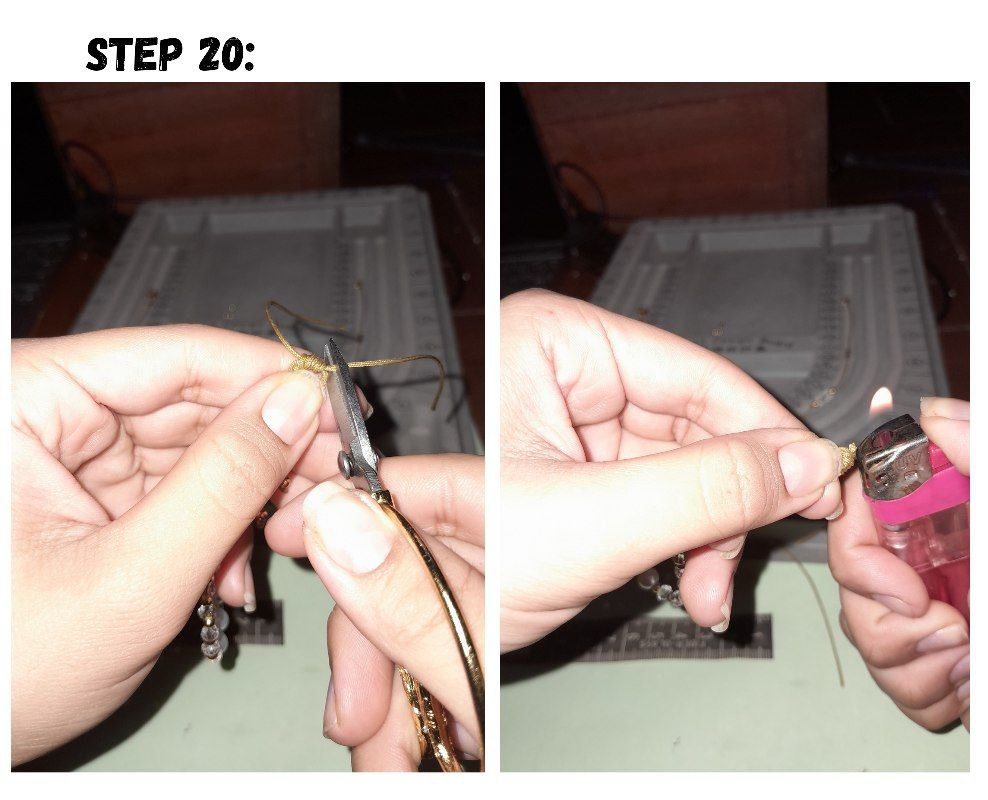
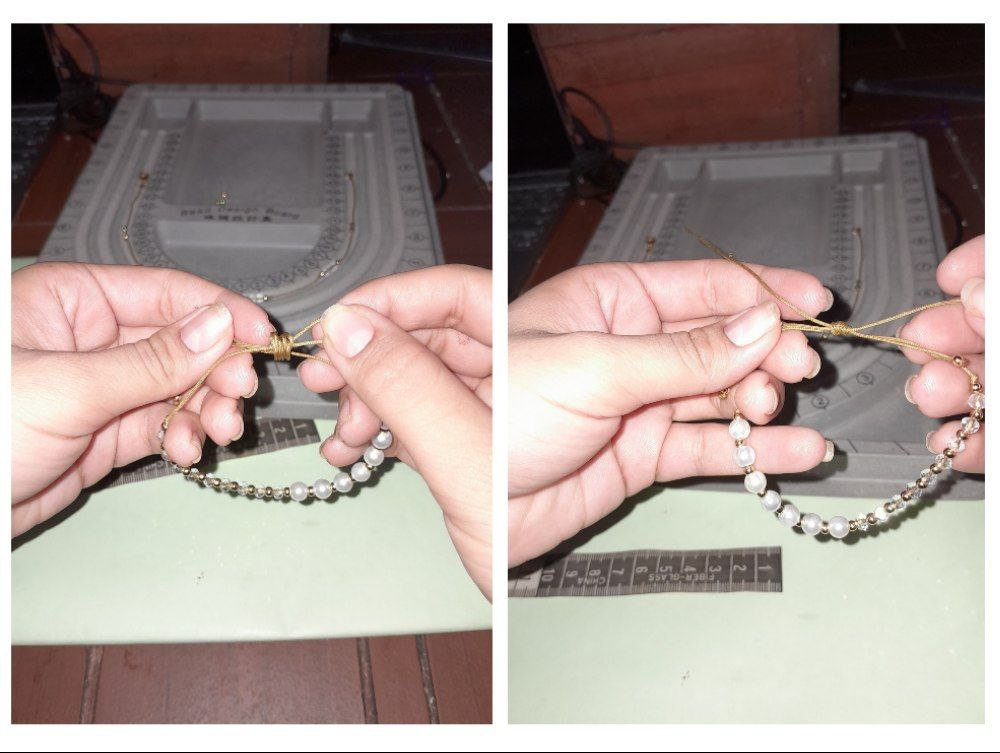
20.- Once the knot is ready I am going to cut the excess knots and burn.
20.- Una vez listo el nudo voy a cortar los nudos excedentes y quemo.
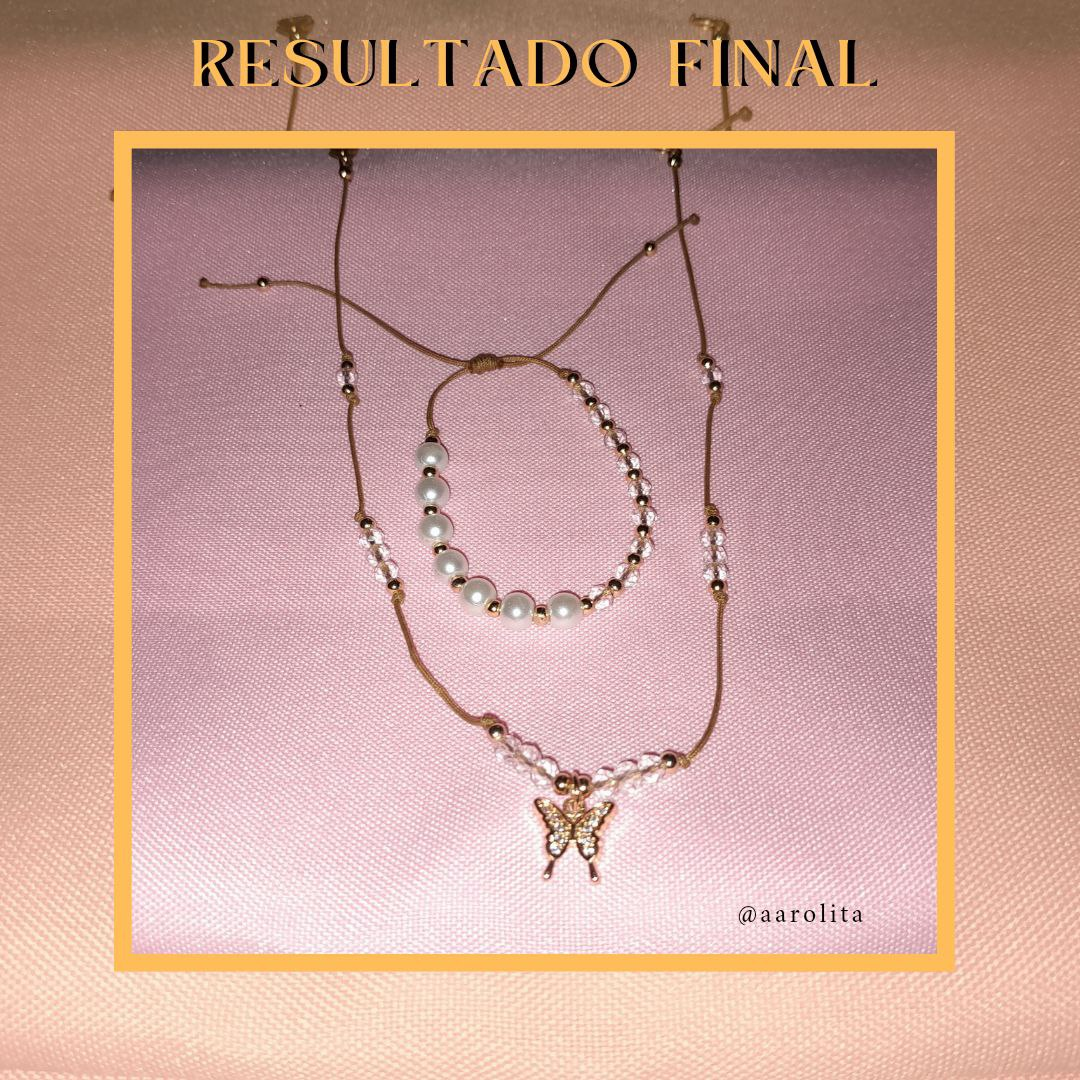
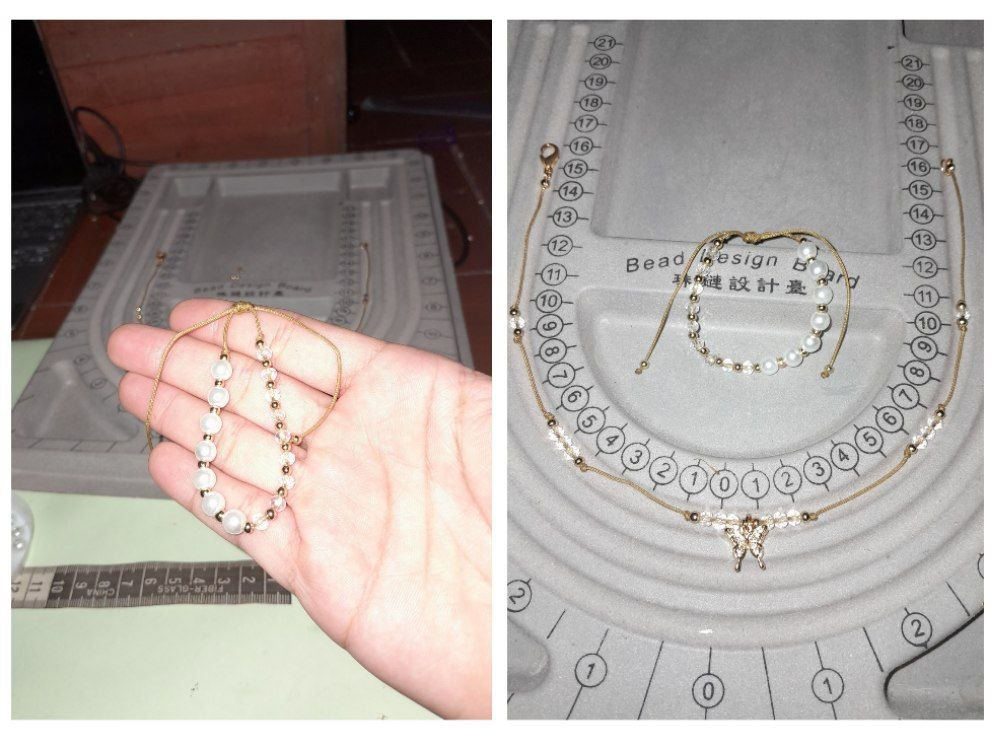
And that's how beautiful it turned out, I hope you like it as much as I do. Greetings to everyone who made it to the end of the post.
Y así de hermoso quedó, espero que les guste tanto como a mí. Un saludo para todos los que llegaron hasta el final del post.