Hello again, my coffee loving friends. With the release of Rebellion, Earth mages are now quite viable for low mana fights. Moxian Rebel's Weapons Training helped a lot making this come true.
With Moxian Rebel and Obsidian, you don't need a lot of mana to make an outstanding team of mages. It's really amazing what some cards can do when combined with other cards.

RULE SETS
 | Active:  Fire, Fire,  Water, Water,  Earth, Earth,  Life, Life,  Death, Death,  Dragon Dragon |
|---|---|
 | Broken Arrows: Ranged attack Units may not be used in battles. |
! [Click here to see the lists of all the rule sets] https://splinterlands.fandom.com/wiki/Category:Rule_Sets
STRATEGY
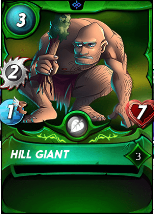
Since I have better mages than melee units, I decided to use mages for this battle. Hill Giant is my go-to tank when there's a lack of mana as he has very high health for a very low mana. The others do damage while Hill Giant does the defending.
Alternative Strategy: Fire is also a reliable element when there's low mana. They have Tarsa, which adds max health and melee damage, which fixes the problem of most low mana units. You can also add units like Uraeus and Antoid Platoon to boost your defense.
CARD POSITIONING

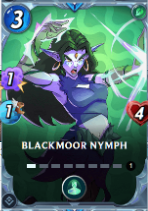
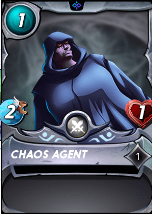
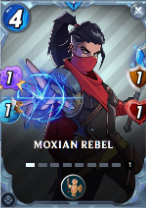
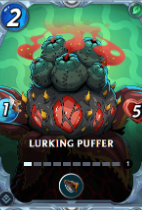
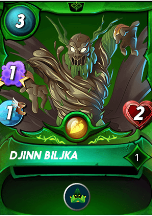
In this battle, I used the summoner, Obsidian and units, Hill Giant, Blackmoor Nymph, Chaos Agent, Moxian Rebel, Lurking Puffer, Djinn Biljka .
Quick Stats
 |
Level 2: Rare Summoner. Allows level 3 common, level 2 rare, level 2 epic and level 1 legendary.  +1 Magic: Gives all friendly Units +1 Magic attack +1 Magic: Gives all friendly Units +1 Magic attack |
 |
 |
 |
 Immunity |
||
| 1. Level 3: A really strong unit when there's very limited mana to use. He's also fairly cheap to put in up to level 3. | 2. Level 1: While Immunity is not really strong unless on specific situations, she's still a mage that is compatible with Obsidian. | 3. Level 1: With Weapons Training from Moxian Rebel, a 1 mana unit with 2 damage is amazing. |
 |
 |
 |
 Weapons Training |
 Corrosive Ward |
 Camouflage |
| 4. Level 1: You only need 4 mana and the result are more damage with Obsidian. The Weapons Training is amazing in this situation. | 5. Level 1: I placed her at the back in order to deal with unwanted Sneaks. While the enemy didn't use Sneak this battle, it's still a good practice to always be prepared at all times. | 6. Level 1: He would always be placed at the very back since his Camouflage makes him protected from attacks. |
BATTLE REPLAY
https://splinterlands.com?p=battle&id=sl_14a0bcf35f035c3276dc8aaa07d1ef9b&ref=kpgamingch
| Turn | Description |
|---|---|
| 1-5 | Summoners and Units with abilities that can be applied at the start of battle, used their effects to the appropriate targets. |
| 6 | ENEMY Coastal Sentry used Reach! ENEMY Coastal Sentry deals 3 damage to Hill Giant's Health. |
| 7 | ENEMY Coastal Sentry used Reach! ENEMY Coastal Sentry deals 3 damage to Hill Giant's Health. |
| 8 | Chaos Agent attacks! Chaos Agent deals 2 damage to ENEMY Cruel Sethropod's Health. |
| 9 | ENEMY Cruel Sethropod attacks! ENEMY Cruel Sethropod deals 2 damage to Hill Giant's Health. |
| 10 | ENEMY Cruel Sethropod used Trample! ENEMY Cruel Sethropod deals 2 damage to Blackmoor Nymph's Health. |
| 11 | Hill Agent dies! Hill Agent is unable to continue! Blackmoor Nymph takes the front! |
| 12 | Djinn Biljka attacks! Djinn Biljka deals 2 damage to ENEMY Cruel Sethropod's Health. |
| 13 | Blackmoor Nymph attacks! Blackmoor Nymph deals 2 damage to ENEMY Cruel Sethropod's Health. |
| 14 | ENEMY Cruel Sethropod dies! ENEMY Cruel Sethropod is unable to continue! ENEMY Coastal Sentry takes the front! |
| 15 | Moxian Rebel attacks! Moxian Rebel deals 2 damage to ENEMY Coastal Sentry's Health. |
| 16 | Lurking Puffer attacks! Lurking Puffer deals 2 damage to ENEMY Coastal Sentry's Health. |
| 17 | ENEMY Hardy Stonefish used Reach! ENEMY Hardy Stonefish deals 1 damage to Blackmoor Nymph's Health. |
| Turn | Description |
|---|---|
| 1 | ENEMY Coastal Sentry attacks! ENEMY Coastal Sentry deals 3 damage to Blackmoor Nymph's Health. |
| 2 | ENEMY Coastal Sentry used Trample! ENEMY Coastal Sentry deals 3 damage to Chaos Agent's Health. |
| 3 | Blackmoor Nymph dies! Blackmoor Nymph is unable to continue! Chaos Agent takes the front! |
| 4 | Chaos Agent dies! Chaos Agent is unable to continue! Moxian Rebel takes the front! |
| 5 | ENEMY Coastal Sentry attacks! ENEMY Coastal Sentry deals 3 damage to Moxian Rebel's Armor. |
| 6 | Djinn Biljka attacks! Djinn Biljka deals 2 damage to ENEMY Coastal Sentry's Health. |
| 7 | Moxian Rebel attacks! Moxian Rebel deals 2 damage to ENEMY Coastal Sentry's Health. |
| 8 | ENEMY Coastal Sentry dies! ENEMY Coastal Sentry is unable to continue! ENEMY Hardy Stonefish takes the front! |
| 9 | Lurking Puffer attacks! Lurking Puffer deals 2 damage to ENEMY Hardy Stonefish's Health. |
| 10 | ENEMY Hardy Stonefish attacks! ENEMY Hardy Stonefish deals 1 damage to Moxian Rebel's Health. |
| 11 | ENEMY Hardy Stonefish used Trample! ENEMY Hardy Stonefish deals 1 damage to Lurking Puffer's Health. |
| 12 | ENEMY Lurking Puffer used Corrosive Ward! ENEMY Lurking Puffer deals 2 damage to Hardy Stonefish's Armor. |
| 13 | Moxian Rebel dies! Moxian Rebel is unable to continue! Lurking Puffer takes the front! |
| Turn | Description |
|---|---|
| 1 | Djinn Biljka attacks! Djinn Biljka deals 2 damage to ENEMY Hardy Stonefish's Health. |
| 2 | ENEMY Hardy Stonefish dies! ENEMY Hardy Stonefish is unable to continue! |
| 3 | ENEMY ZORKIZELLE have no more Units to play! KPGAMINGCH wins this battle! |
If you have suggested combos or questions, feel free to comment it down below.
If you are planning to play and is inspired by my post, please consider using my referral link: https://splinterlands.com?ref=kpgamingch
I do not own any of the photos in this post. All credits goes to:
- Splinterlands
- Peakmonsters
- Canva
- Giphy