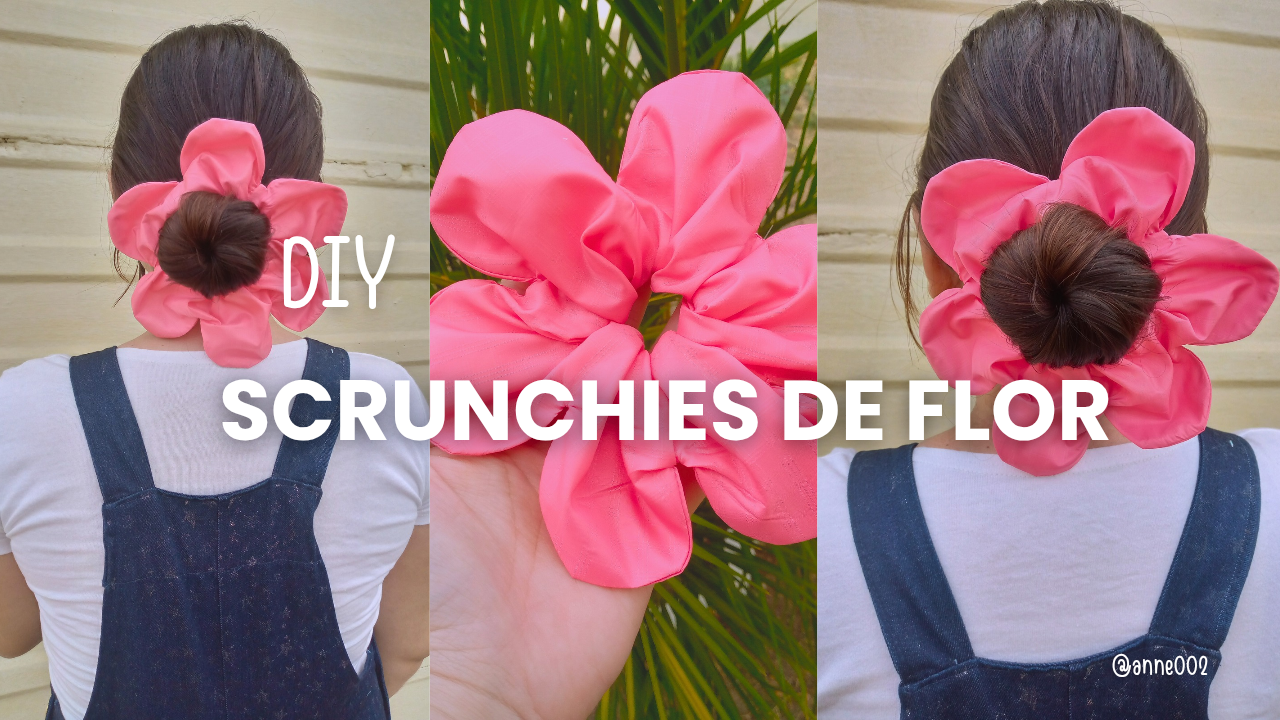
Good morning friends, how are you? I hope you are all well. Today we are going to learn how to make flower-shaped scrunchies 🌸. Yes, flower-shaped, my dear needle-loving friends🪡. These scrunchies are very comfortable to wear in our hair because they are soft and do not damage our hair when using them.
.jpg)
We will be using our fabric scraps that we have at home to make them and there is an advantage that you can make them from any fabric you want, so here I bring you this simple tutorial if you want to make them someday then save it so that you have it available there whenever you want to make them in the comfort of your home and also undertake with these scrunchies making them in different colors of fabrics and prints.🌸🪡✨
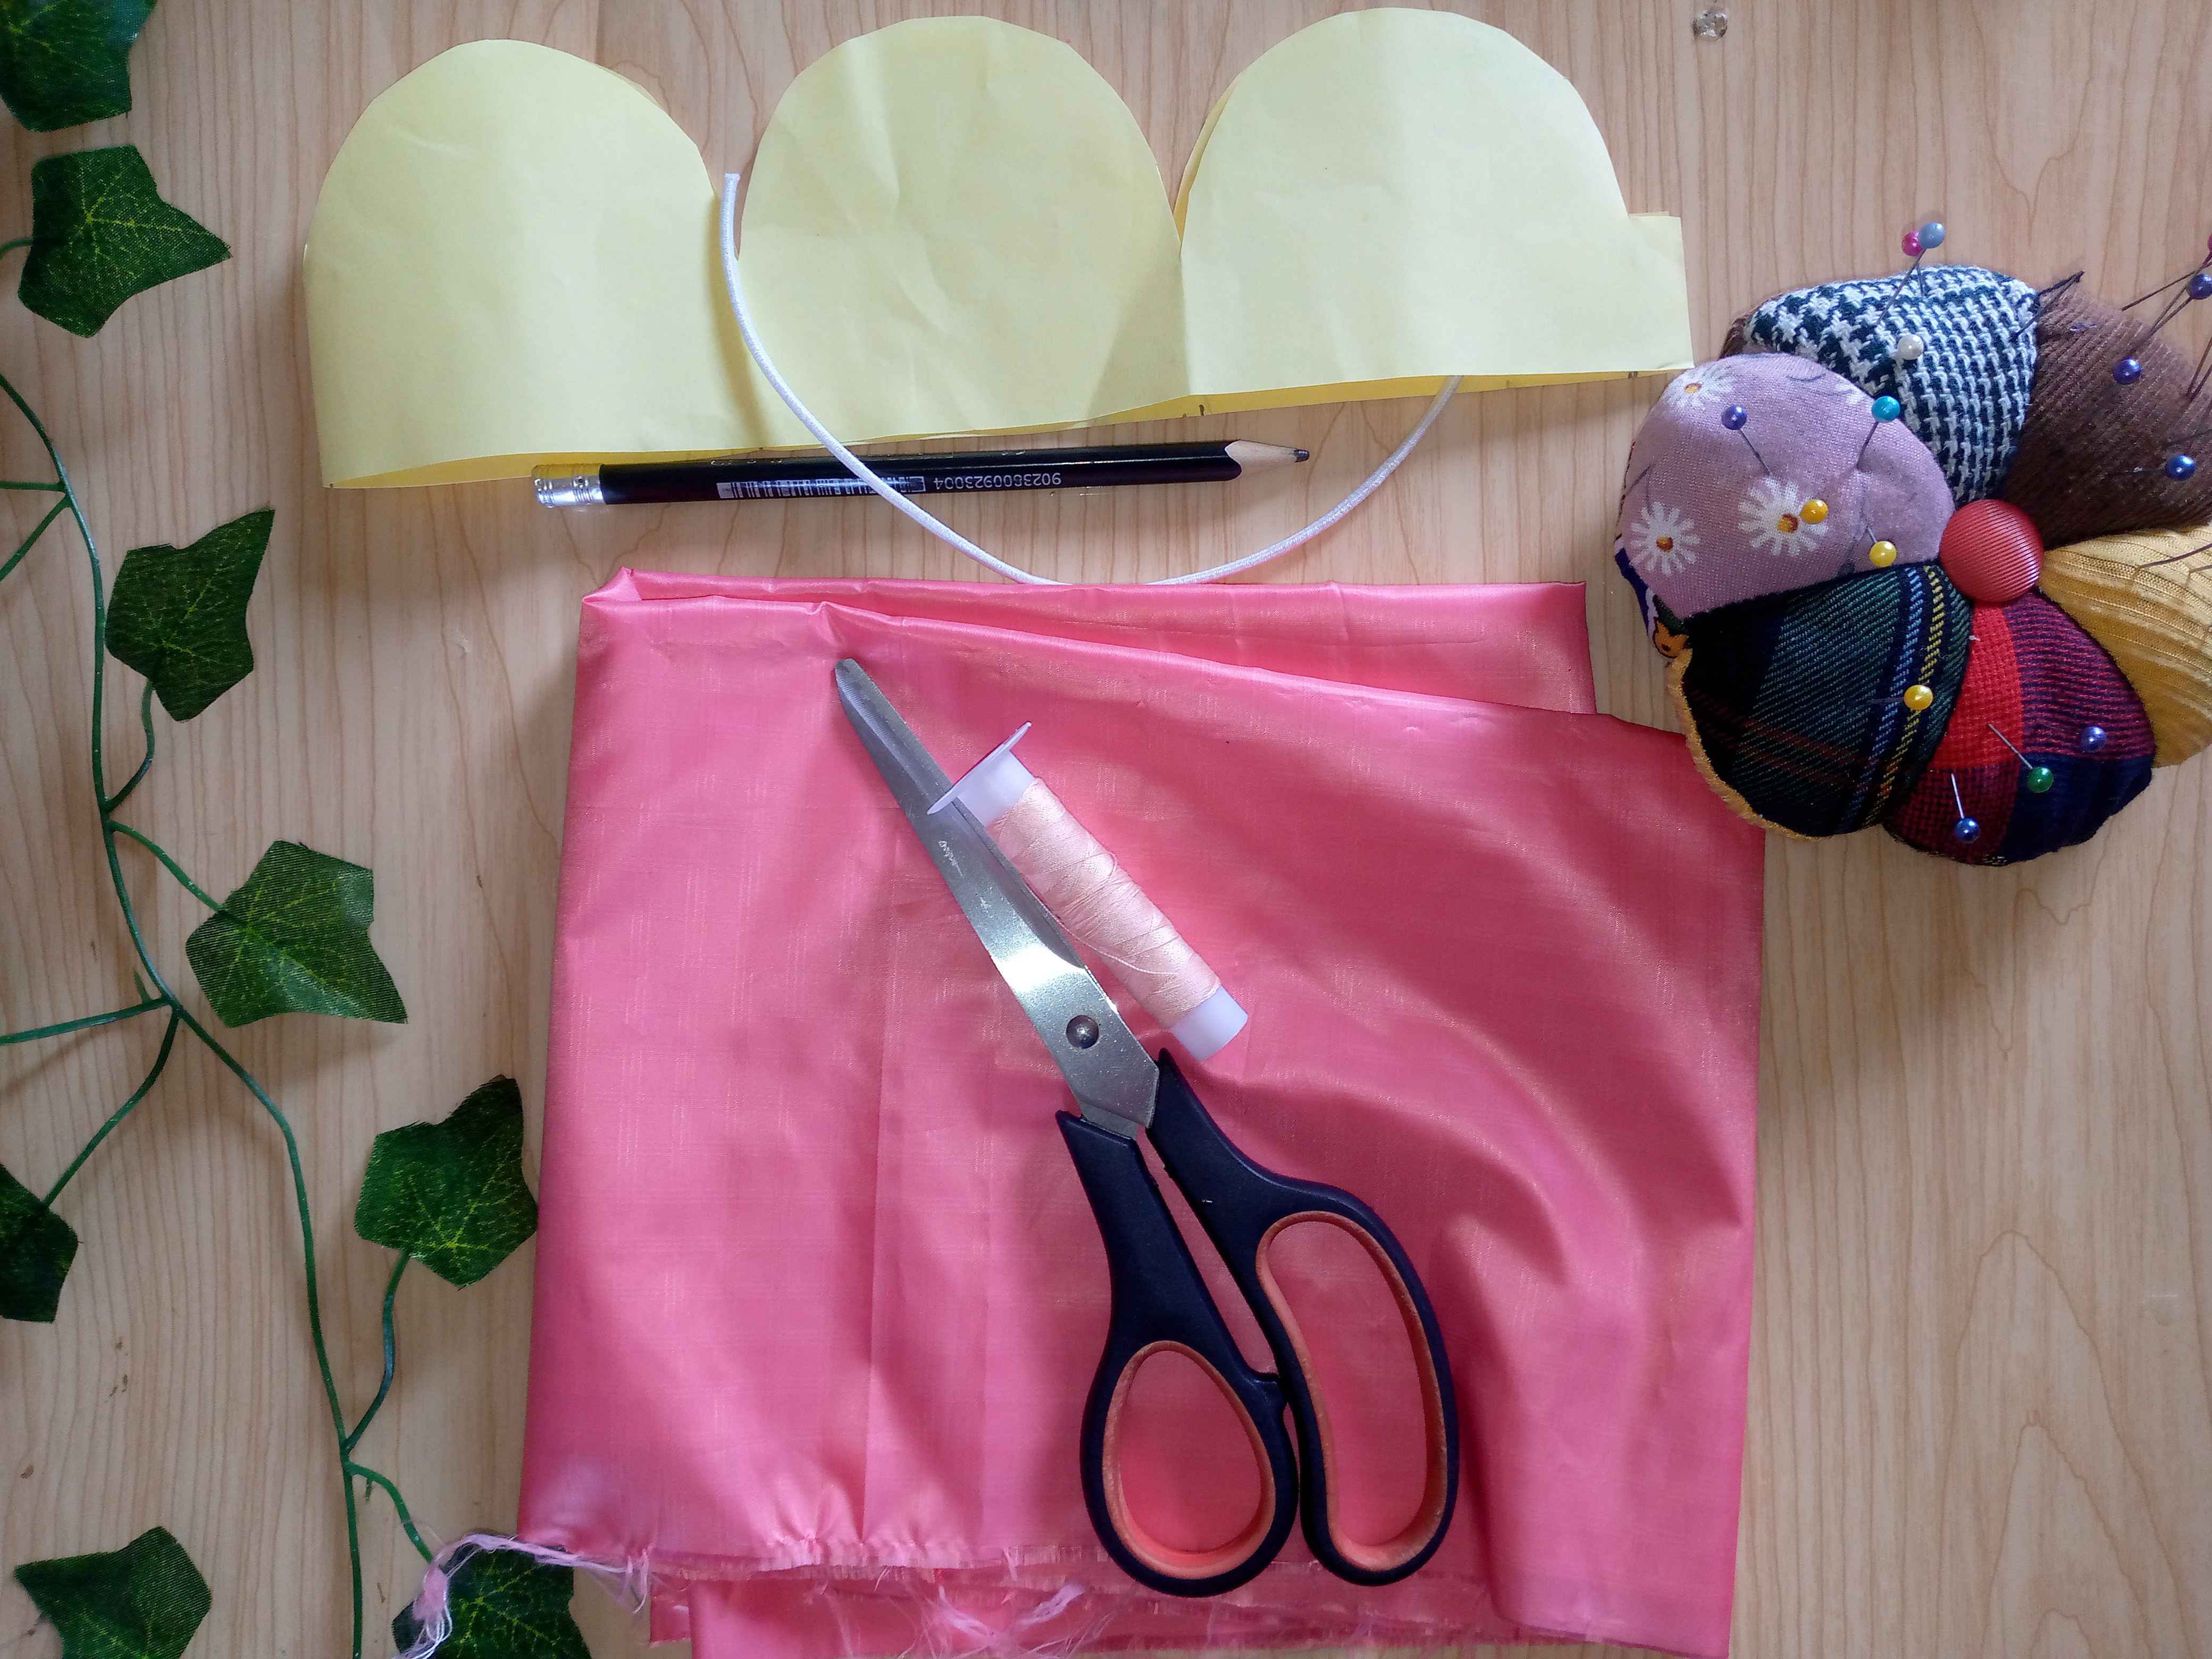
Materiales:// Materials:
- Hilo
- Recortes de telas
- Tijera
- Maquina de coser
- Elástico de 13 cm
- Patrones
- Lápiz
- Thread
- Fabric scraps
- Scissors
- Sewing machine
- 13 cm elastic
- Patterns
- Pencil
Pasos a seguir://Steps to follow:
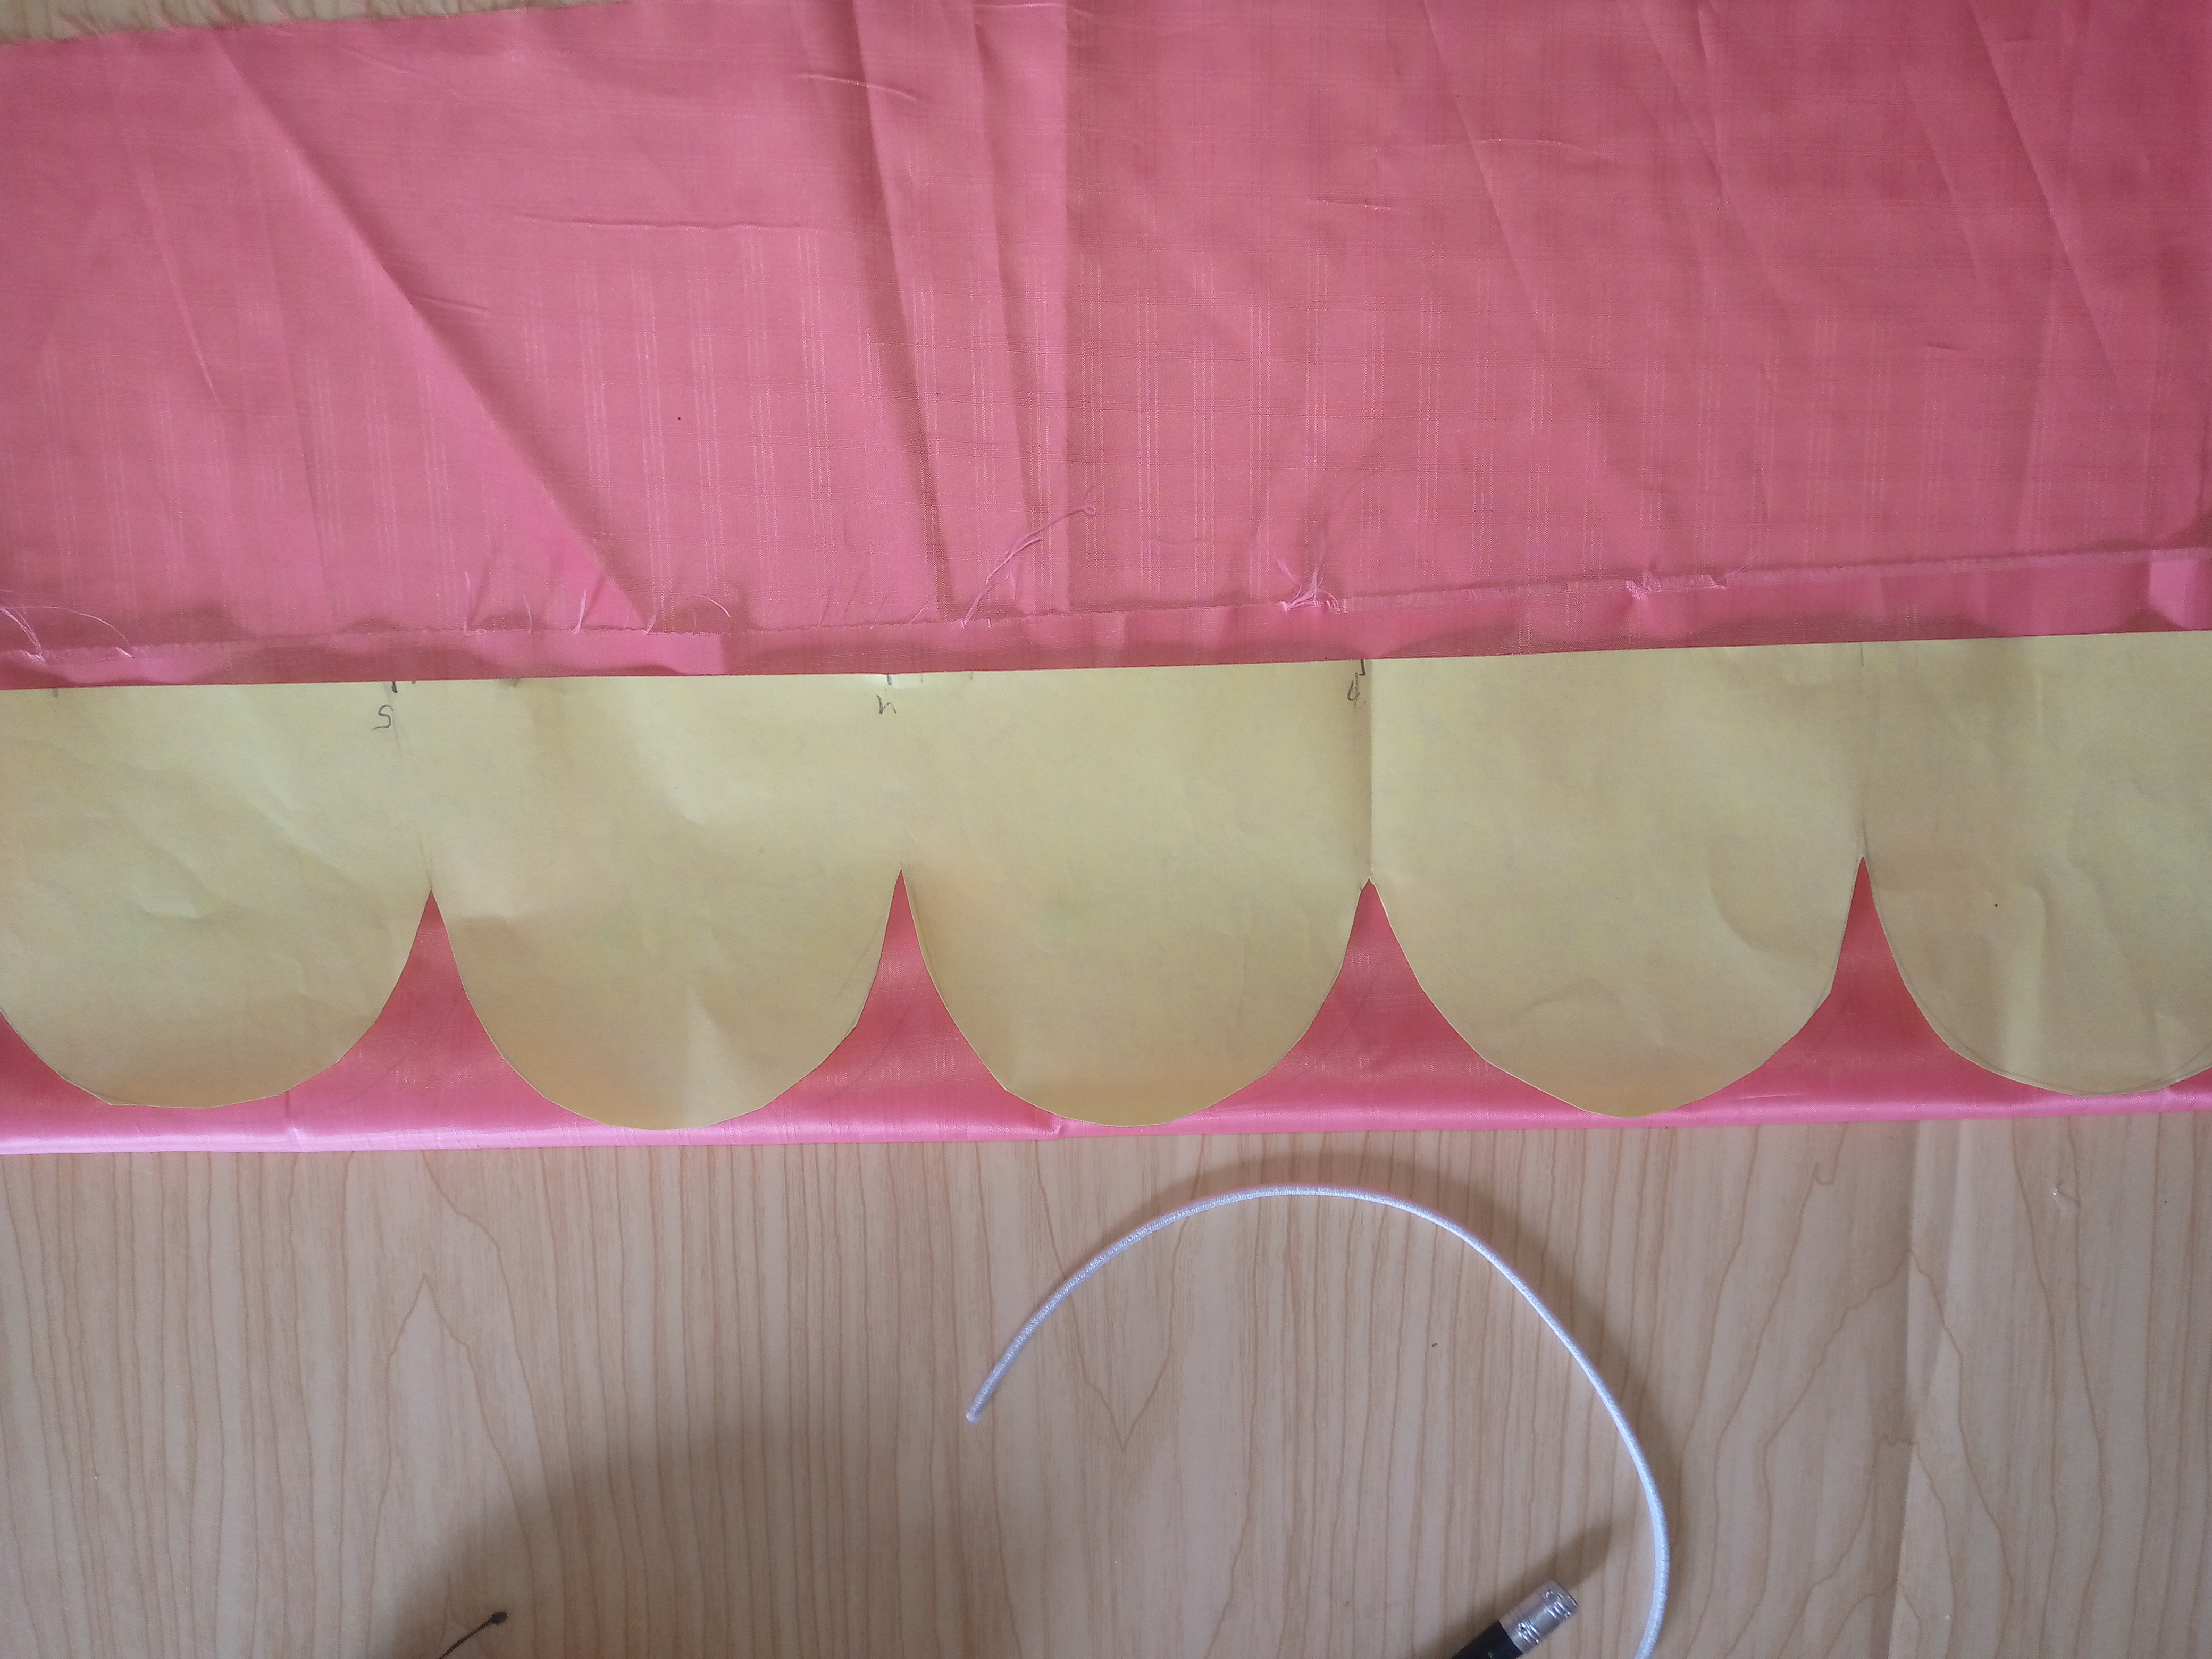
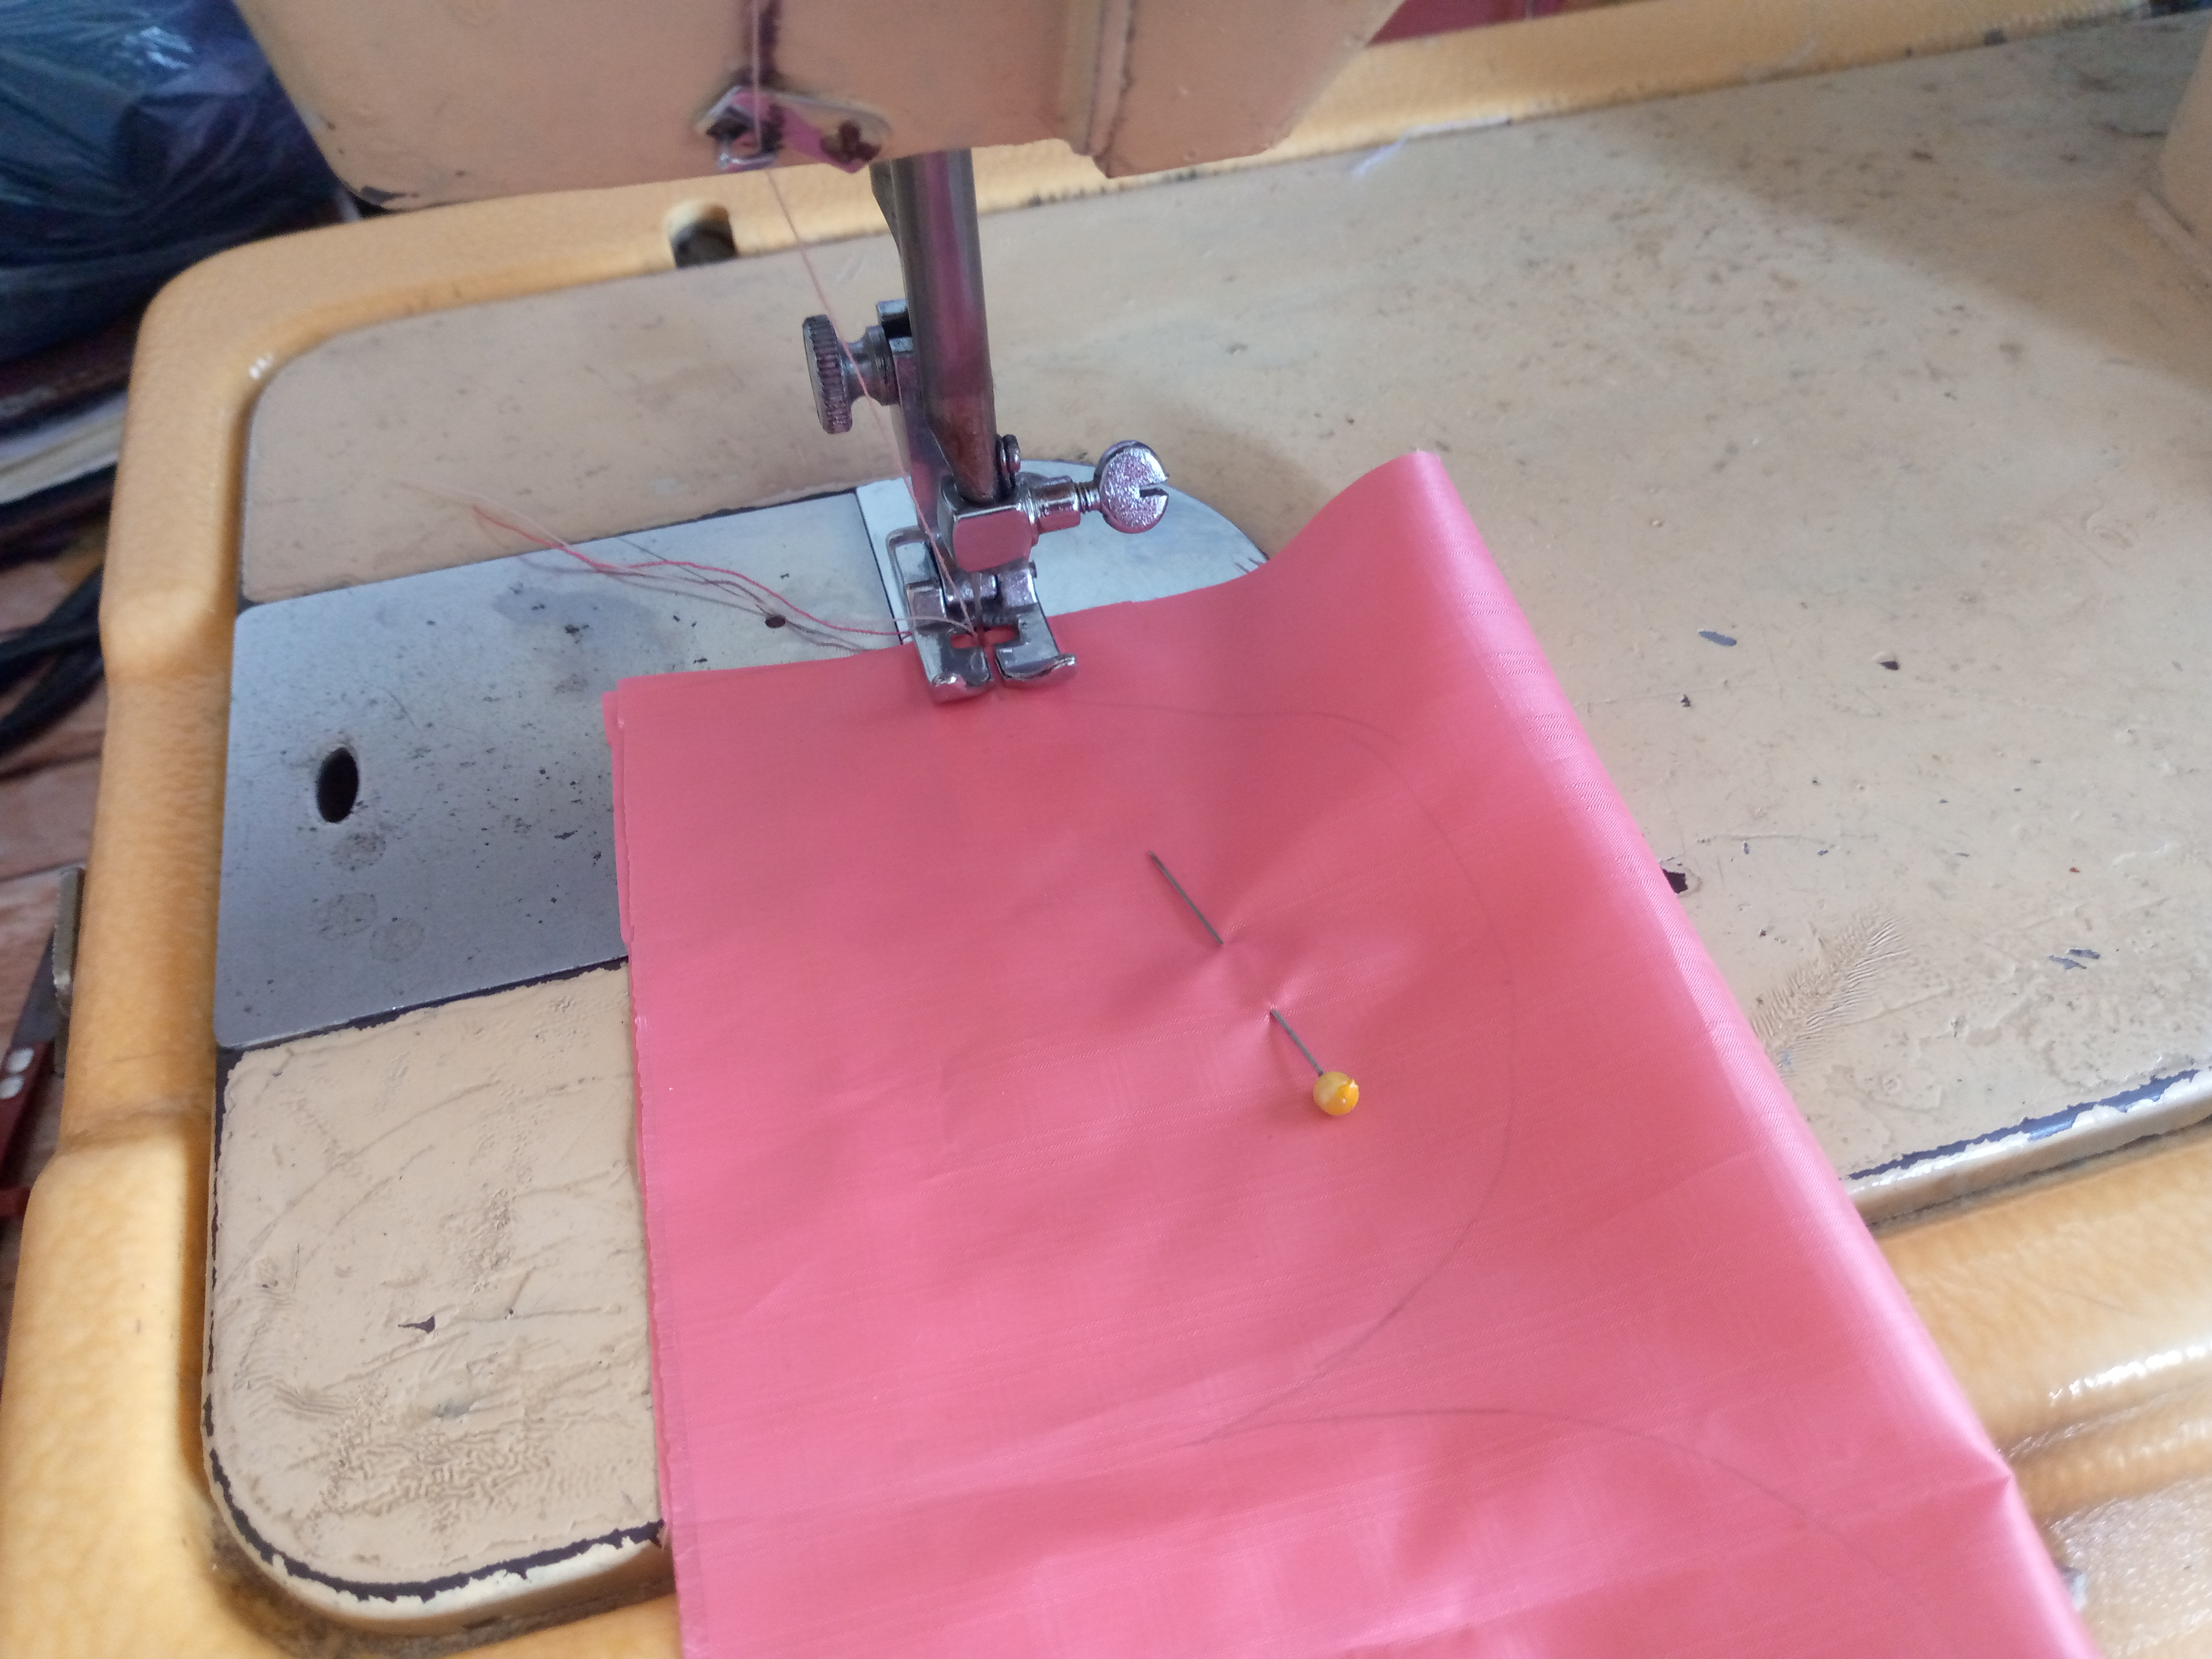
Paso 01
Step 01
Good friends, we begin this project by folding our fabric in half and placing our pattern and we are going to mark it with the pencil around the entire outline of the pattern without leaving any space or seam allowance because our pattern already has it included, well then we hold it with pins so that the fabric does not roll up and more so if it is a type of satin fabric that tends to roll up a lot and we move on to sewing.
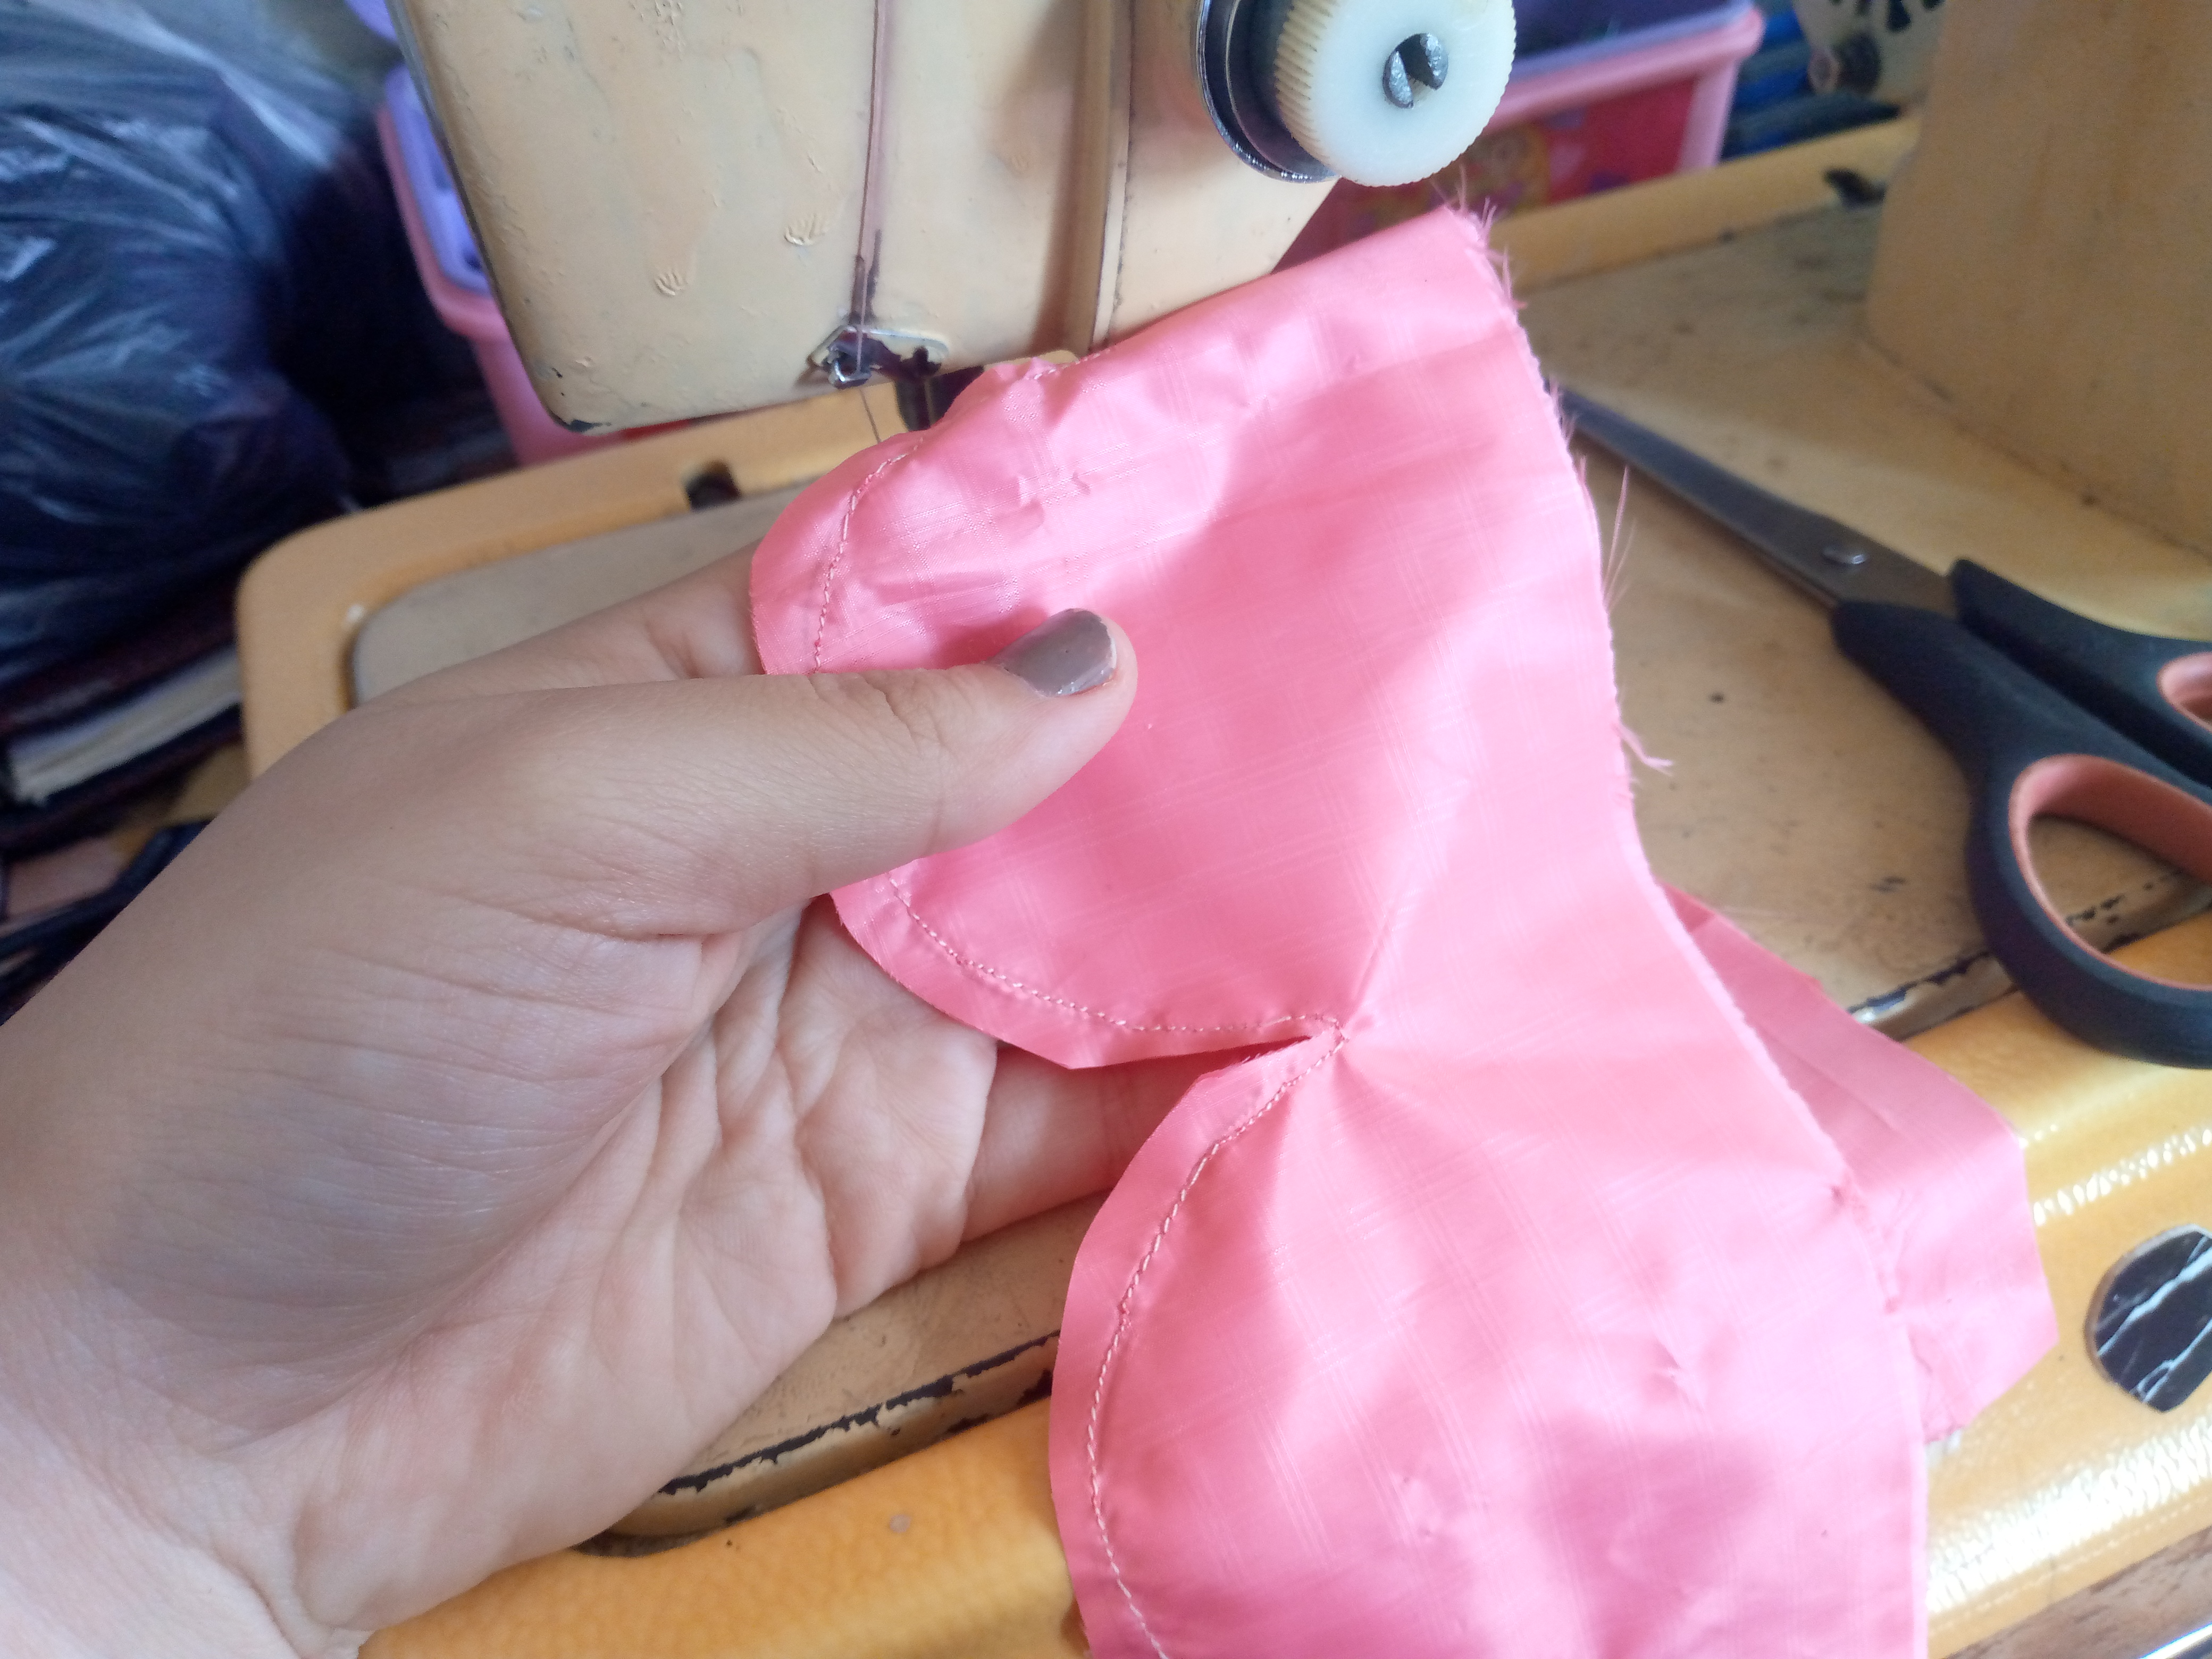
Paso 02
Step 02
I then proceed to sew along the outline of my flower petals and then I simply cut off the excess fabric and what I will do next is turn the piece over.

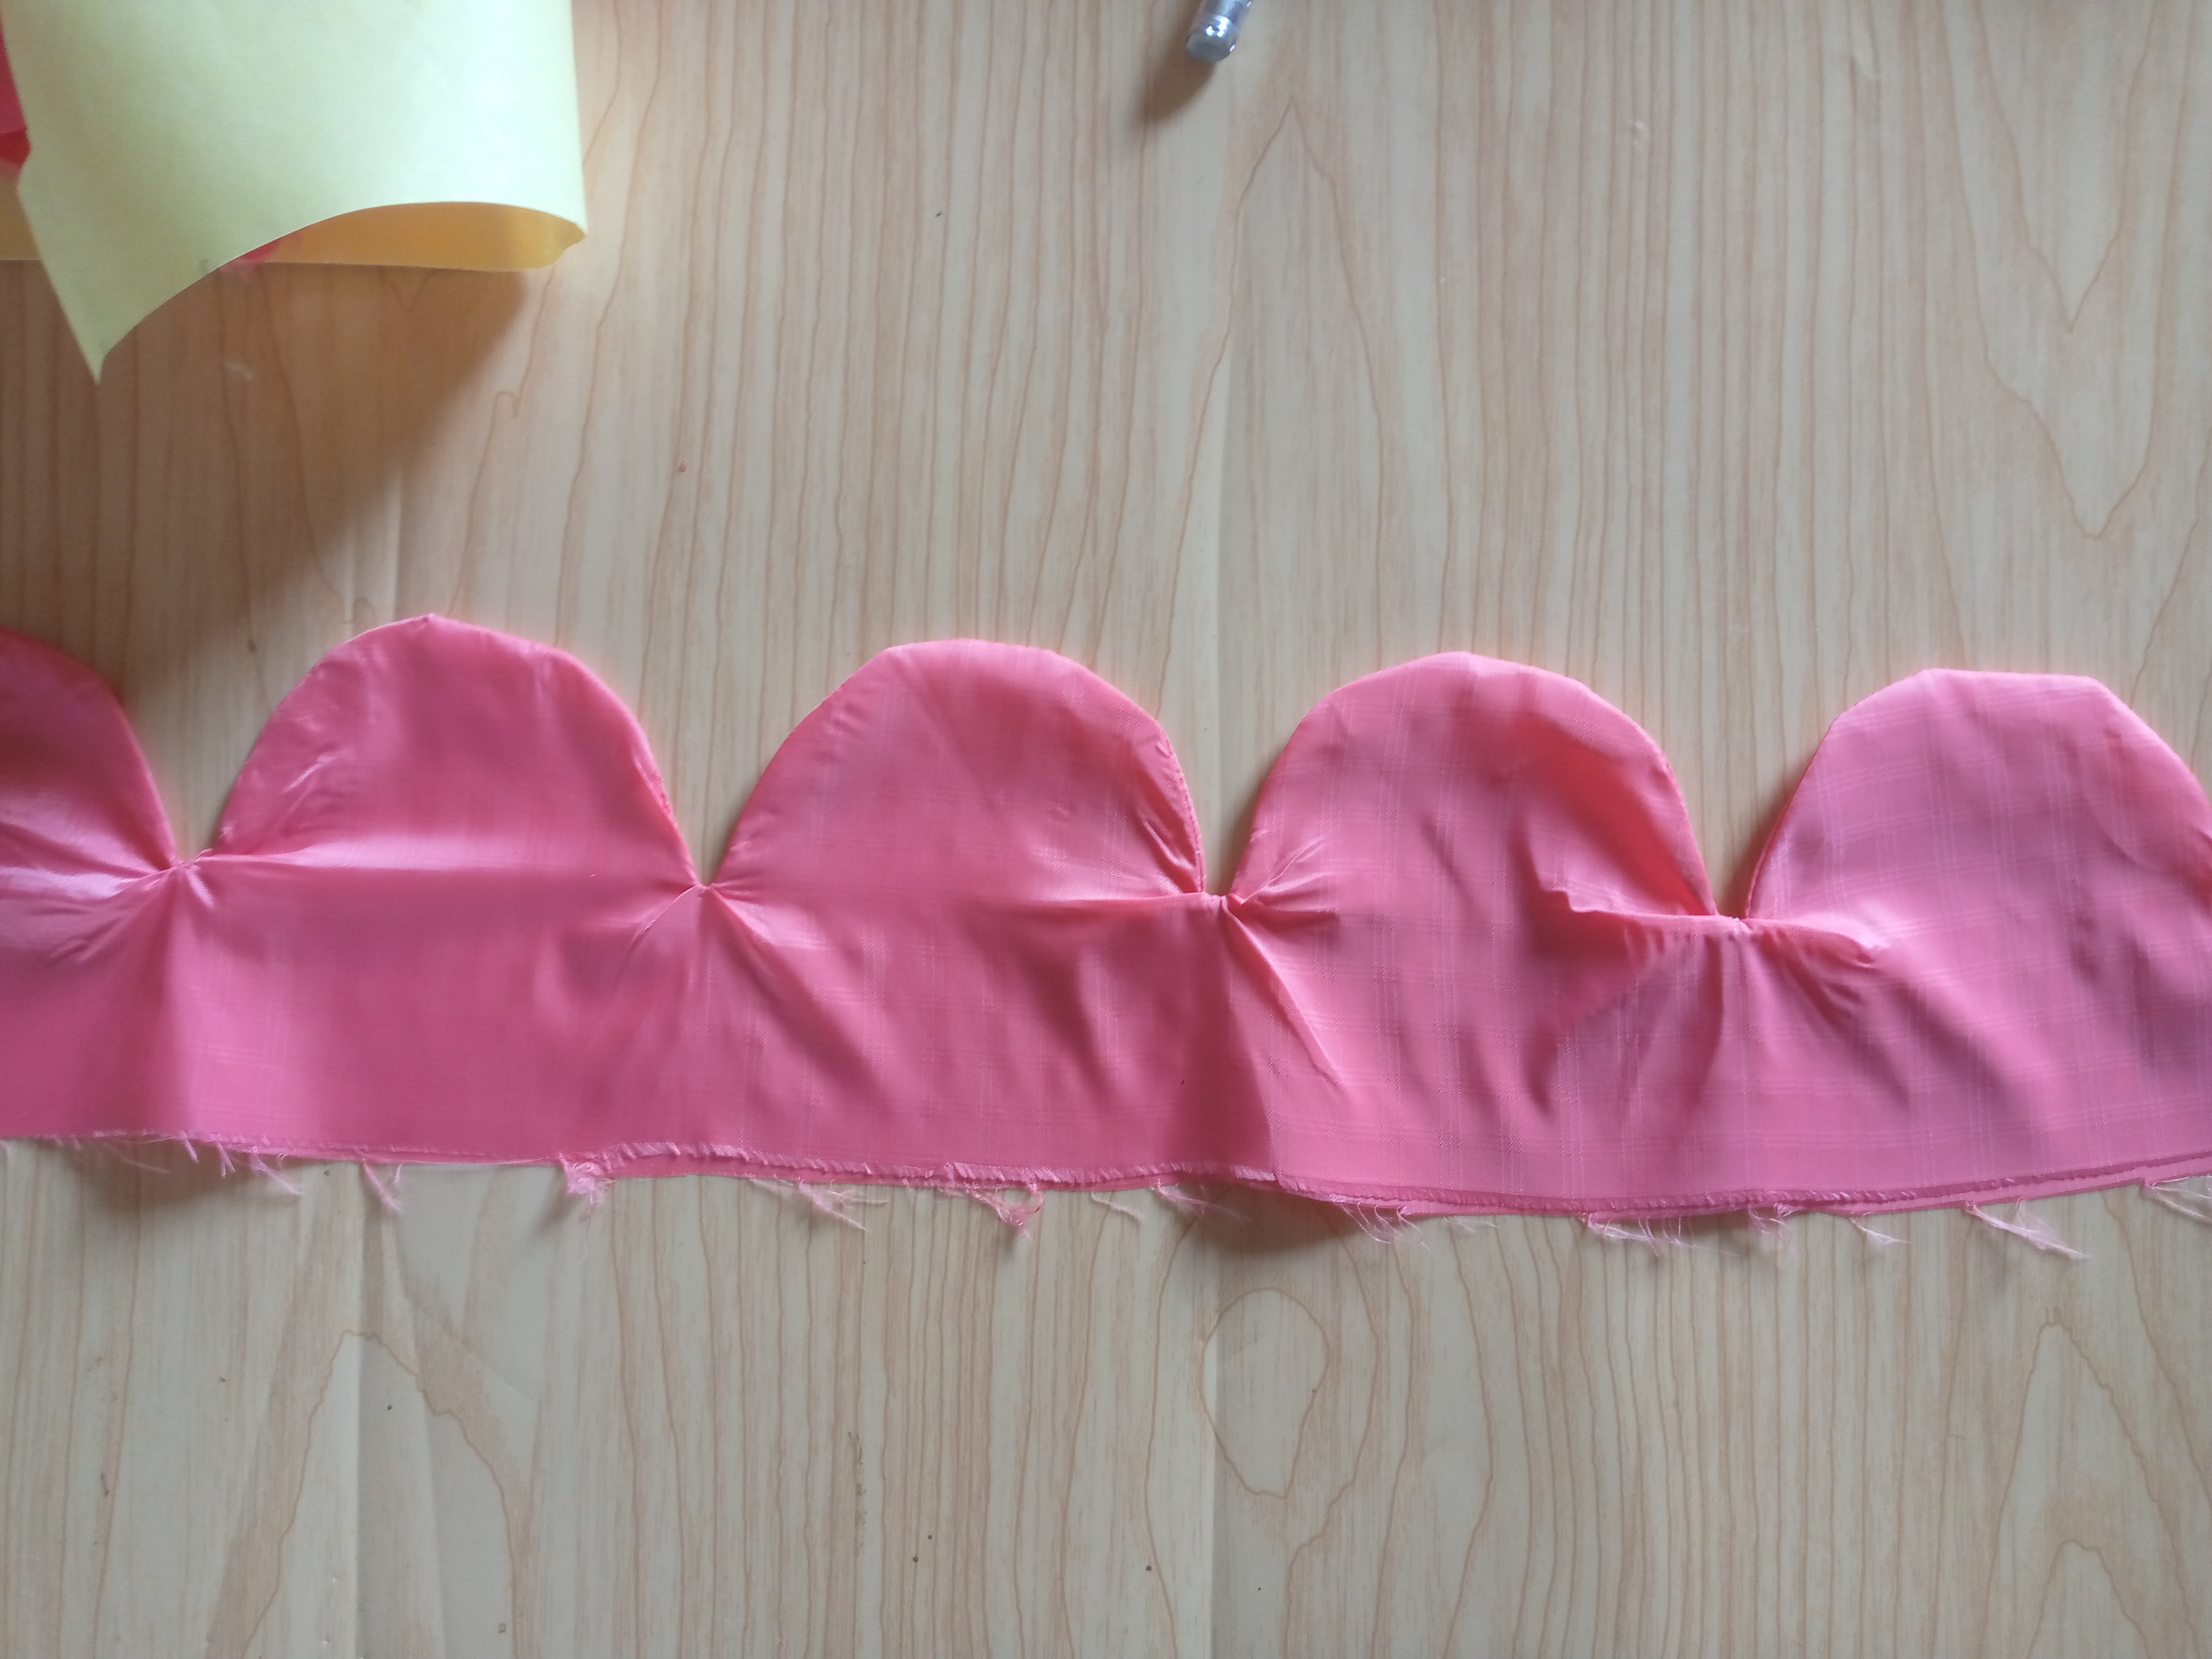
Paso 03
Step 03
Then we fold the fabric on the bottom side and sew a straight seam along the bottom to join the scrunchie and we turn it over again so that both sides are sealed with a seam and with a tape tool we will hold the elastic that we will insert inside the scrunchie.
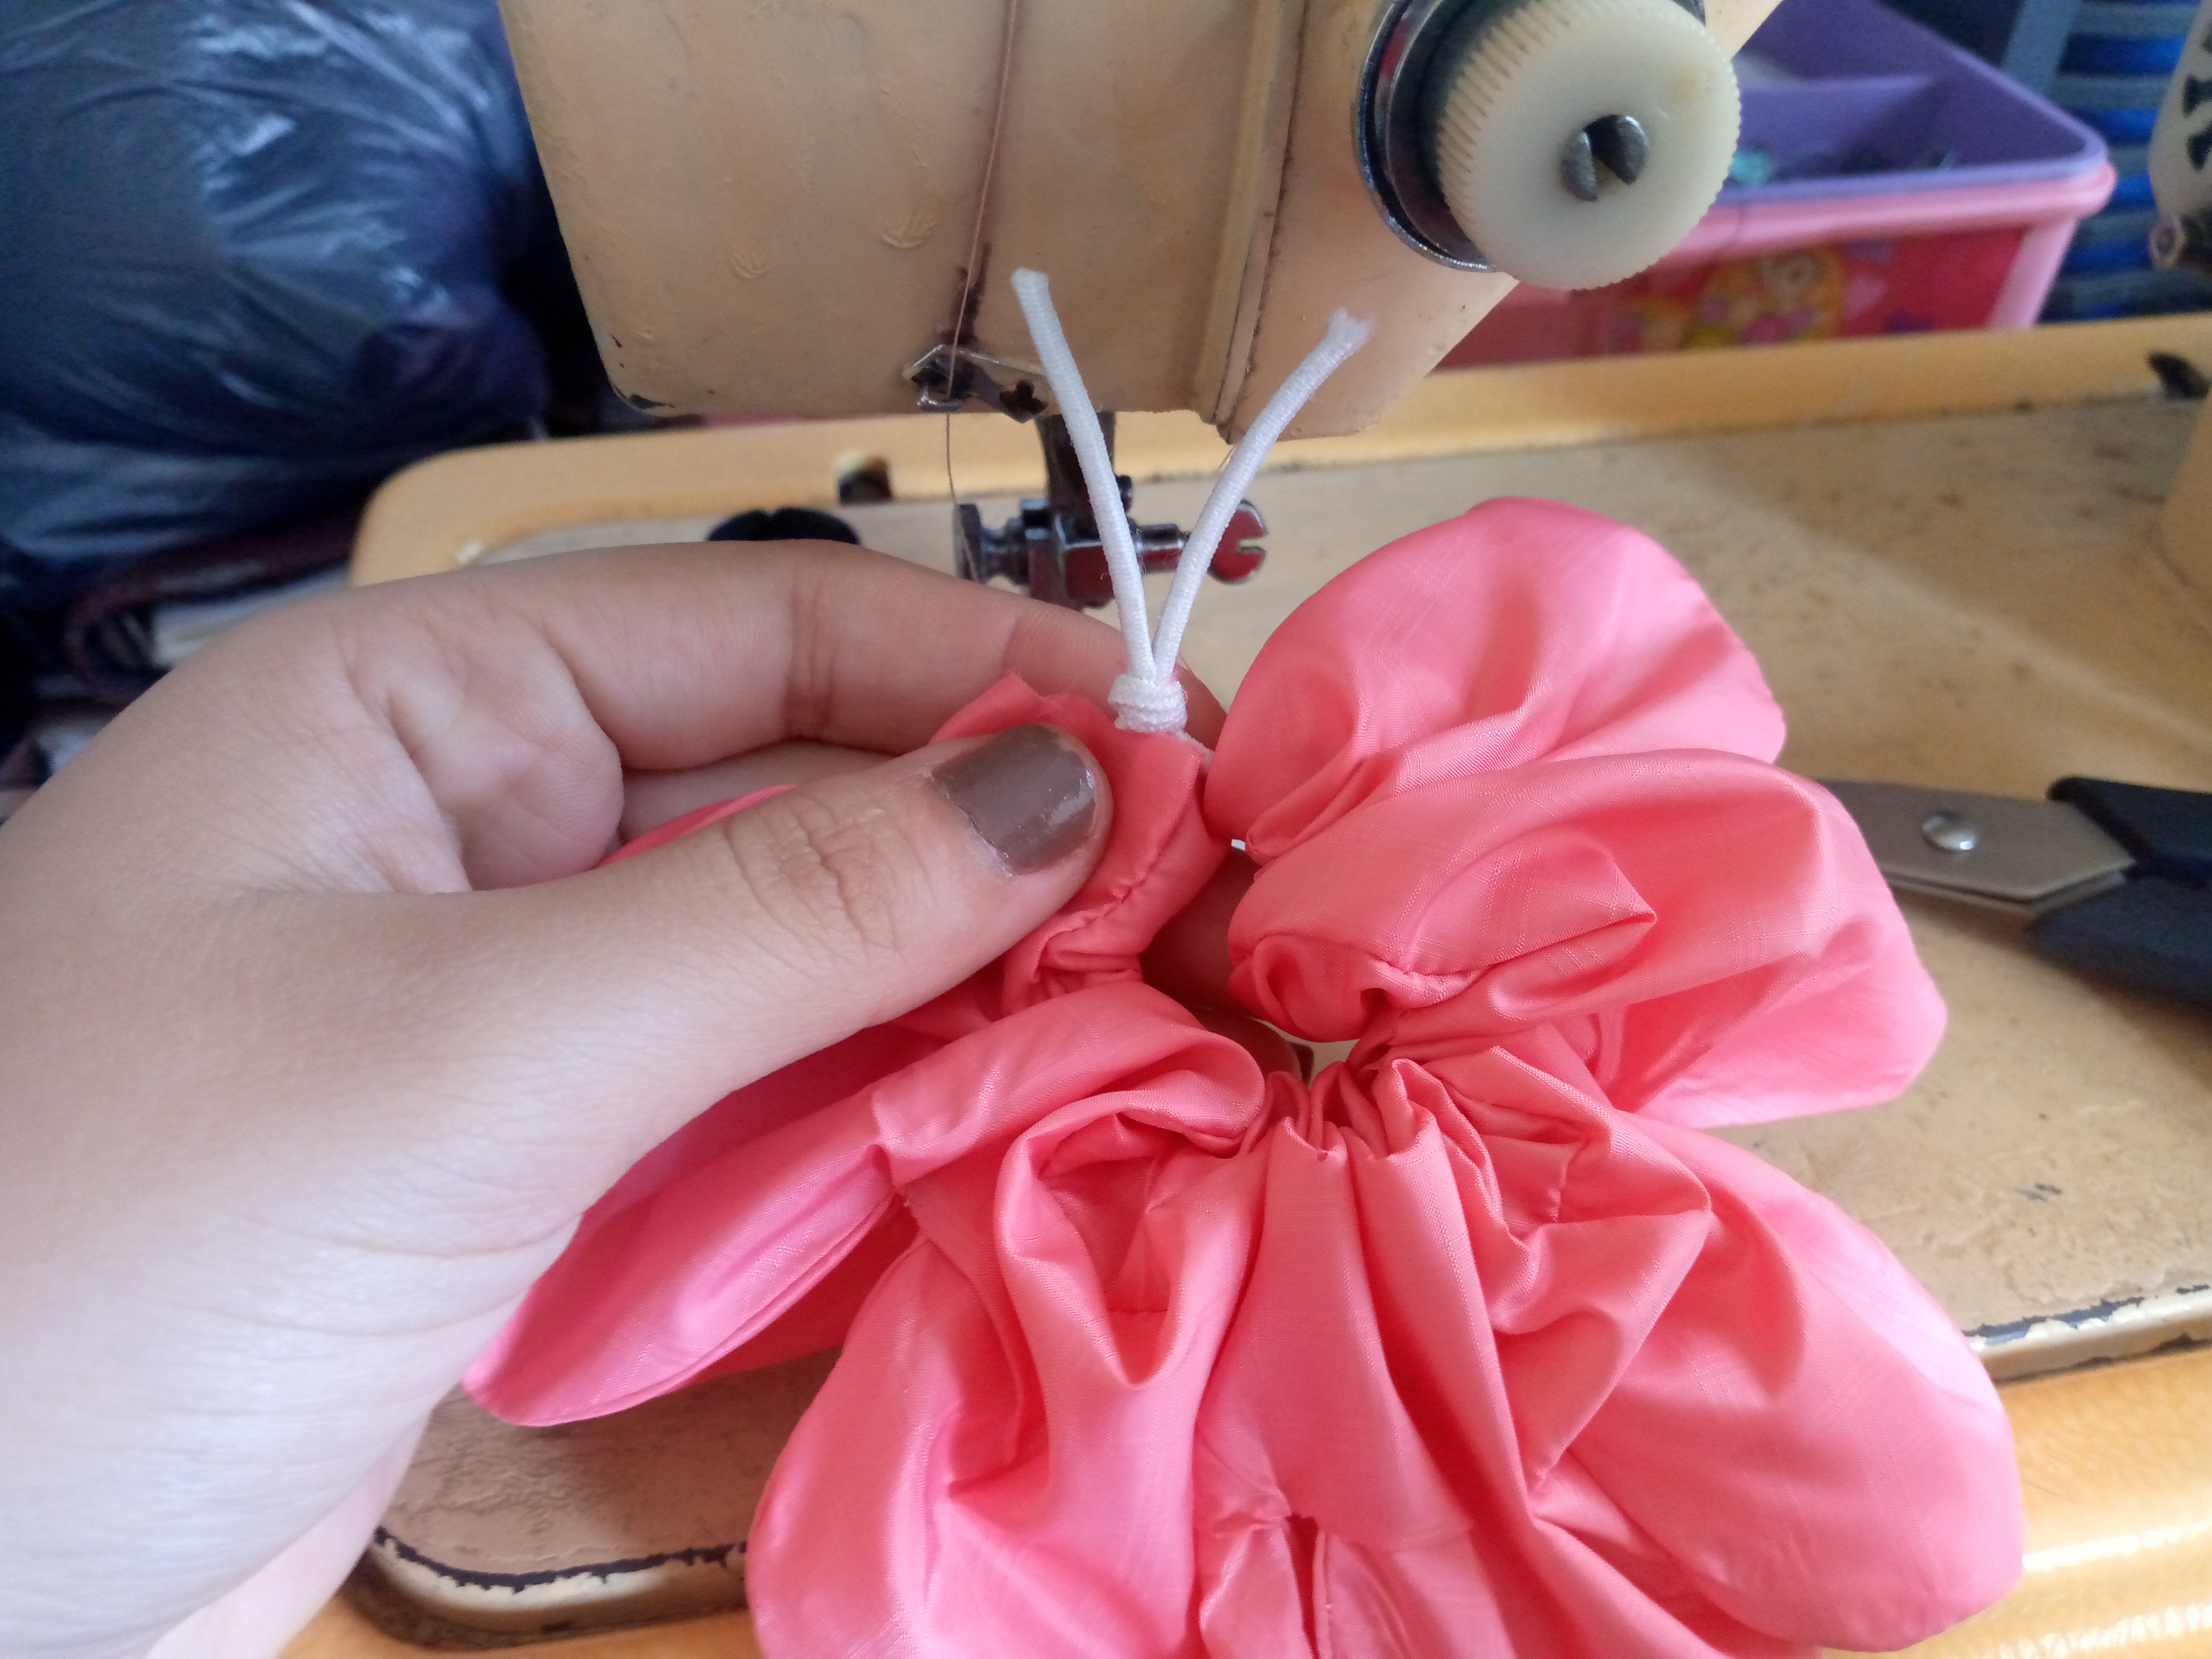
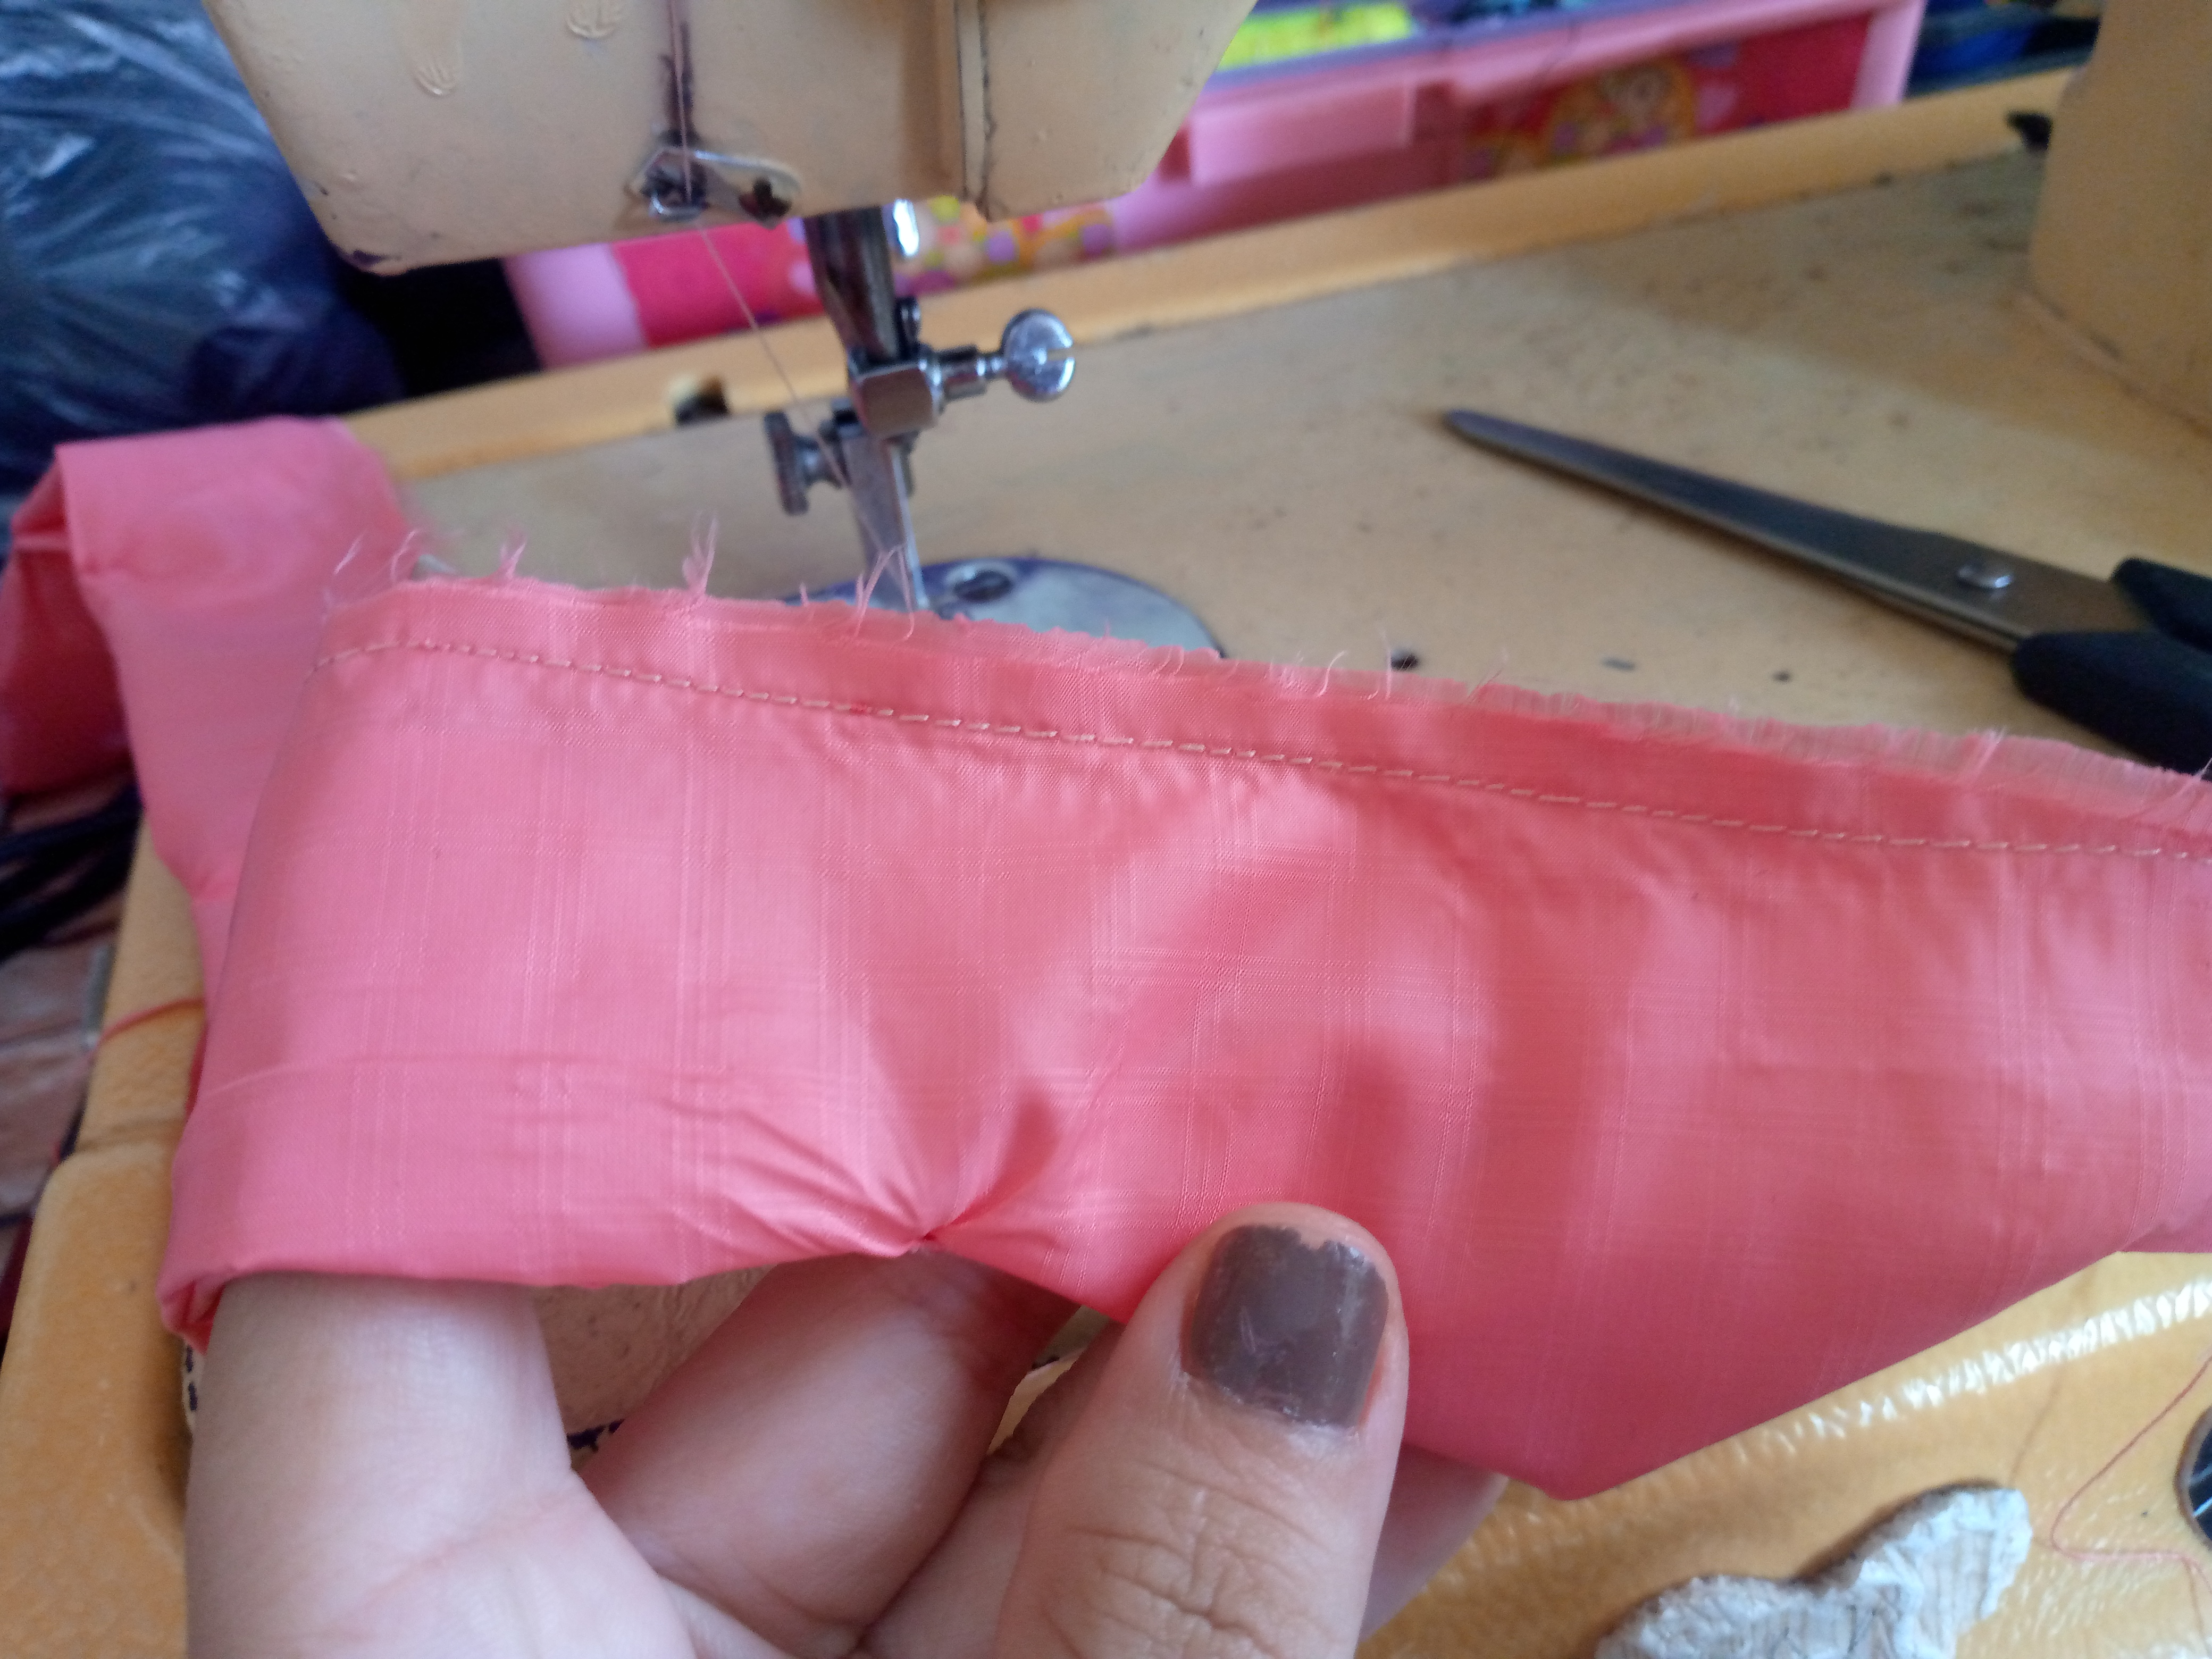
Paso 04
Step 04
I finish by passing my elastic through and then we make a small knot to hold the scrunchie's elastic band well inside. What we will do is join the fabrics at the ends to seal this part and not see the elastic. In this way we proceed to finish it.
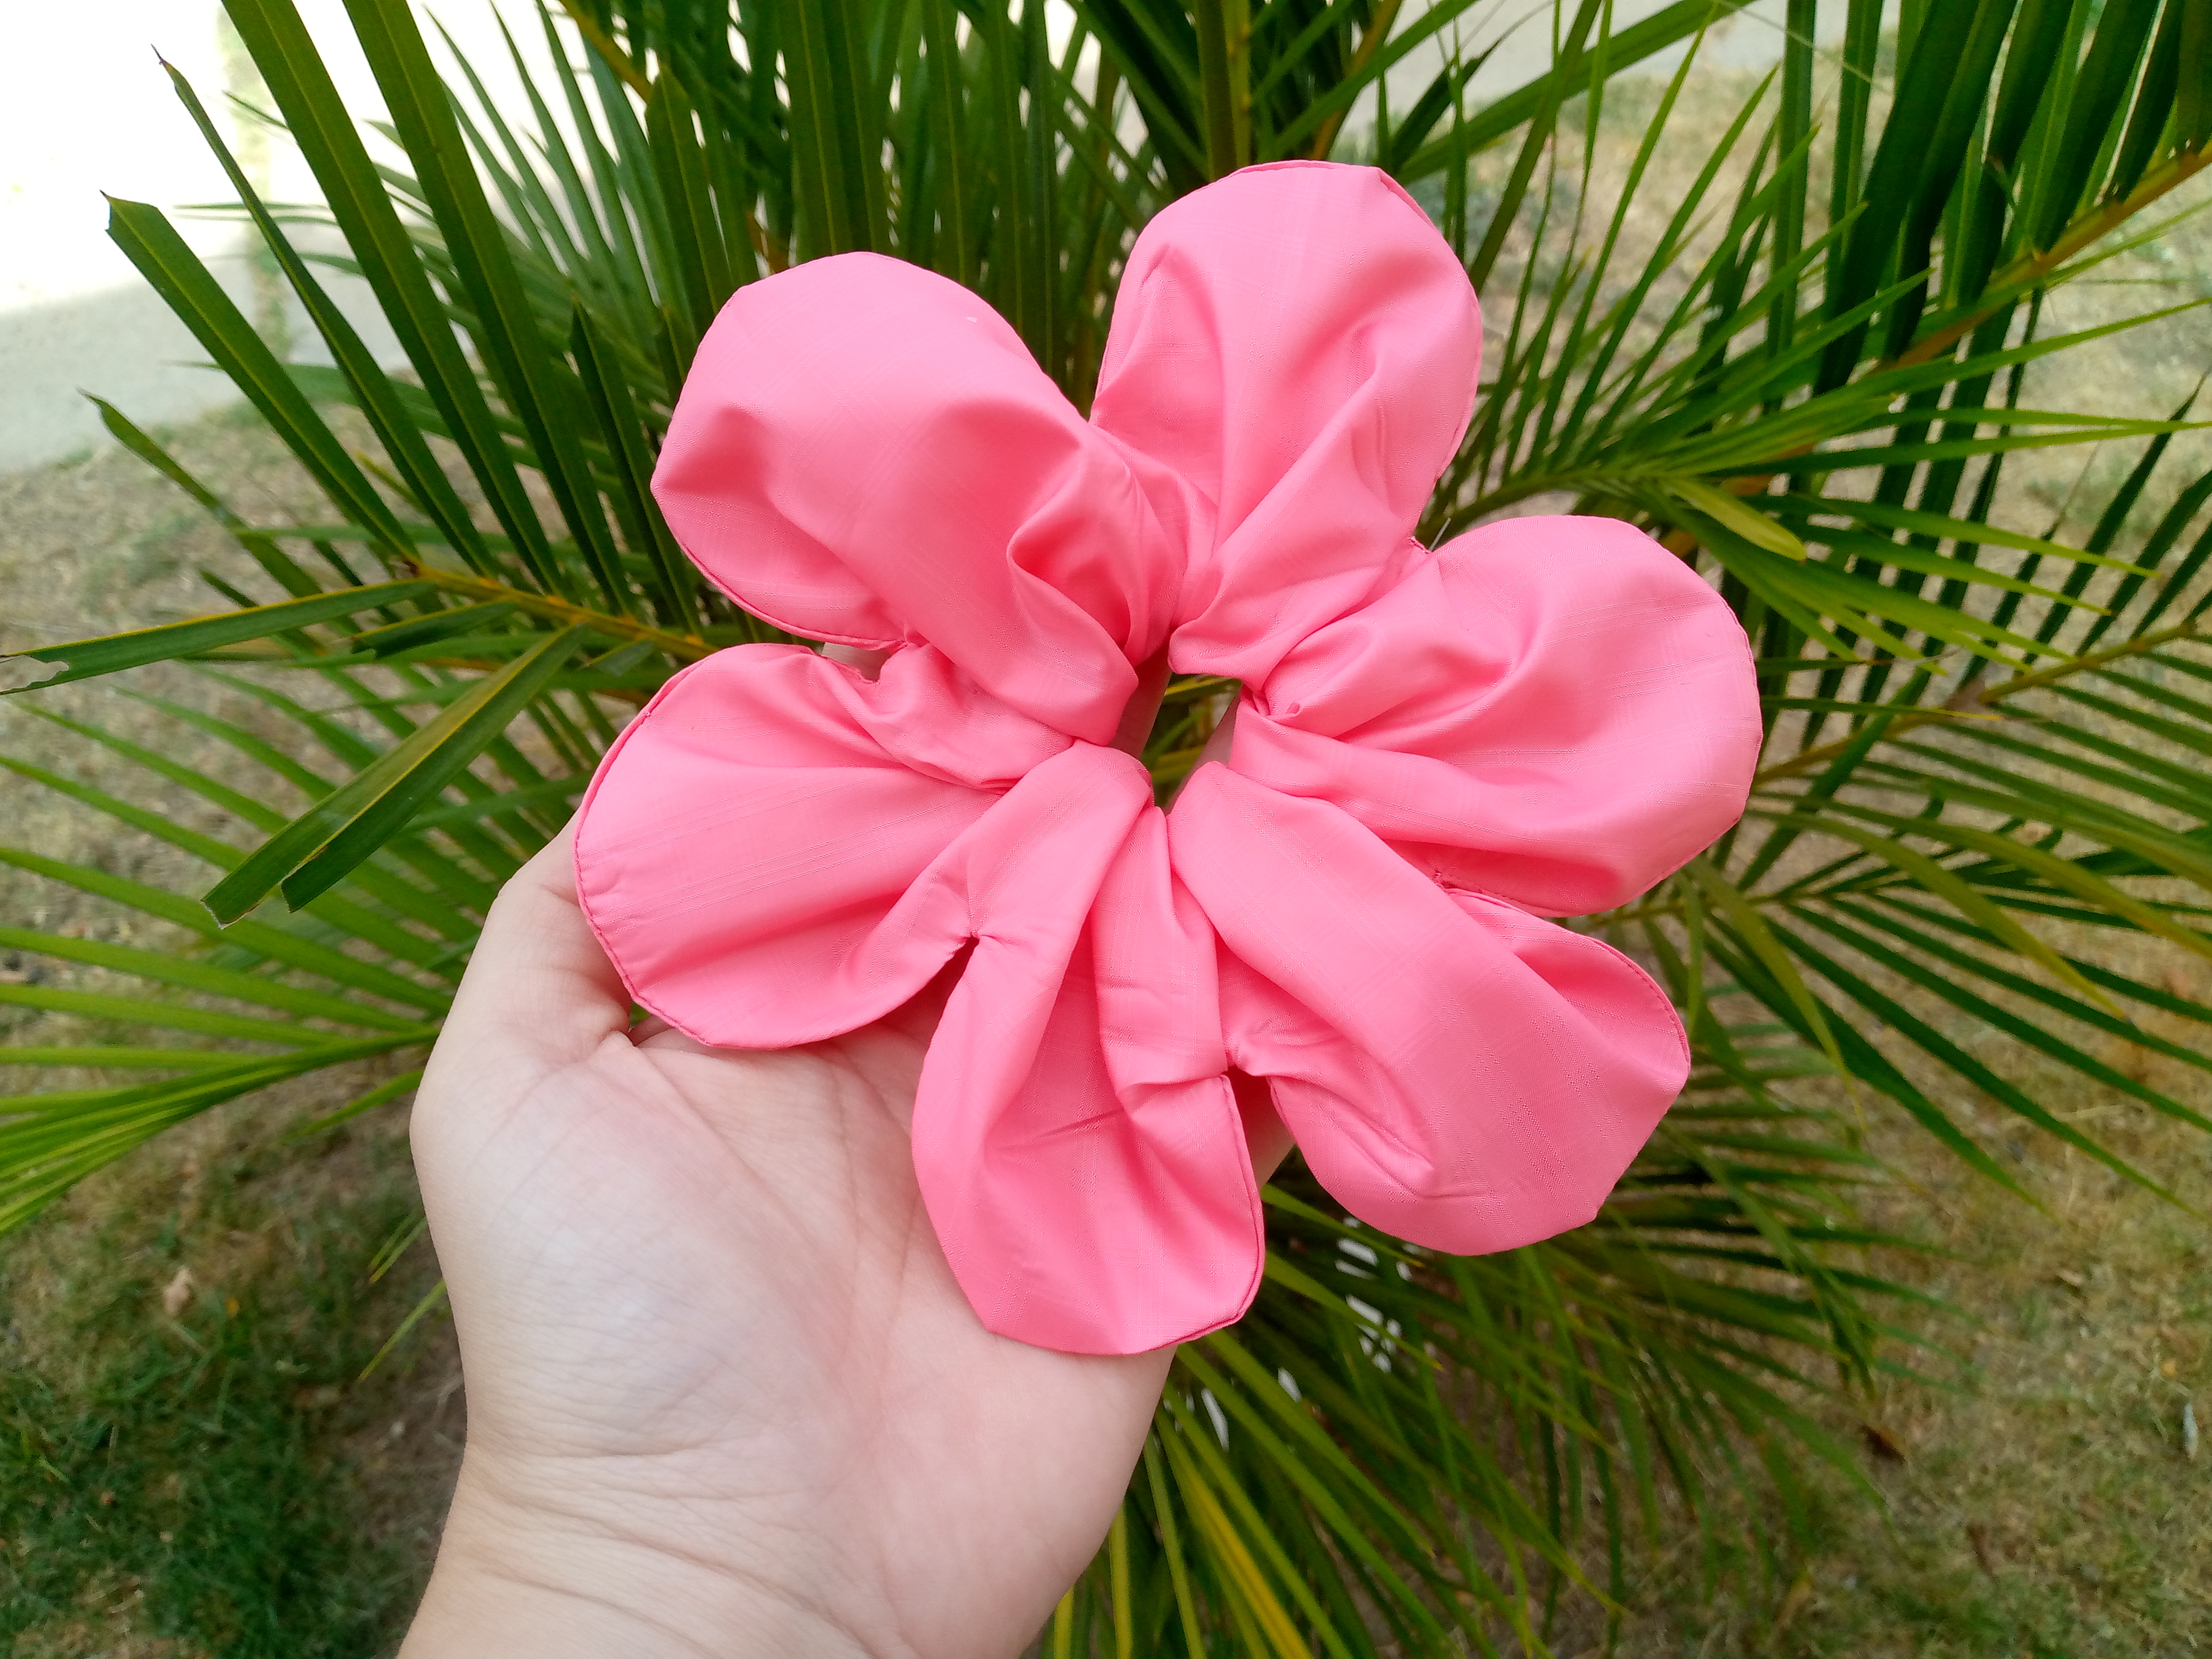
Resultado:// Result:
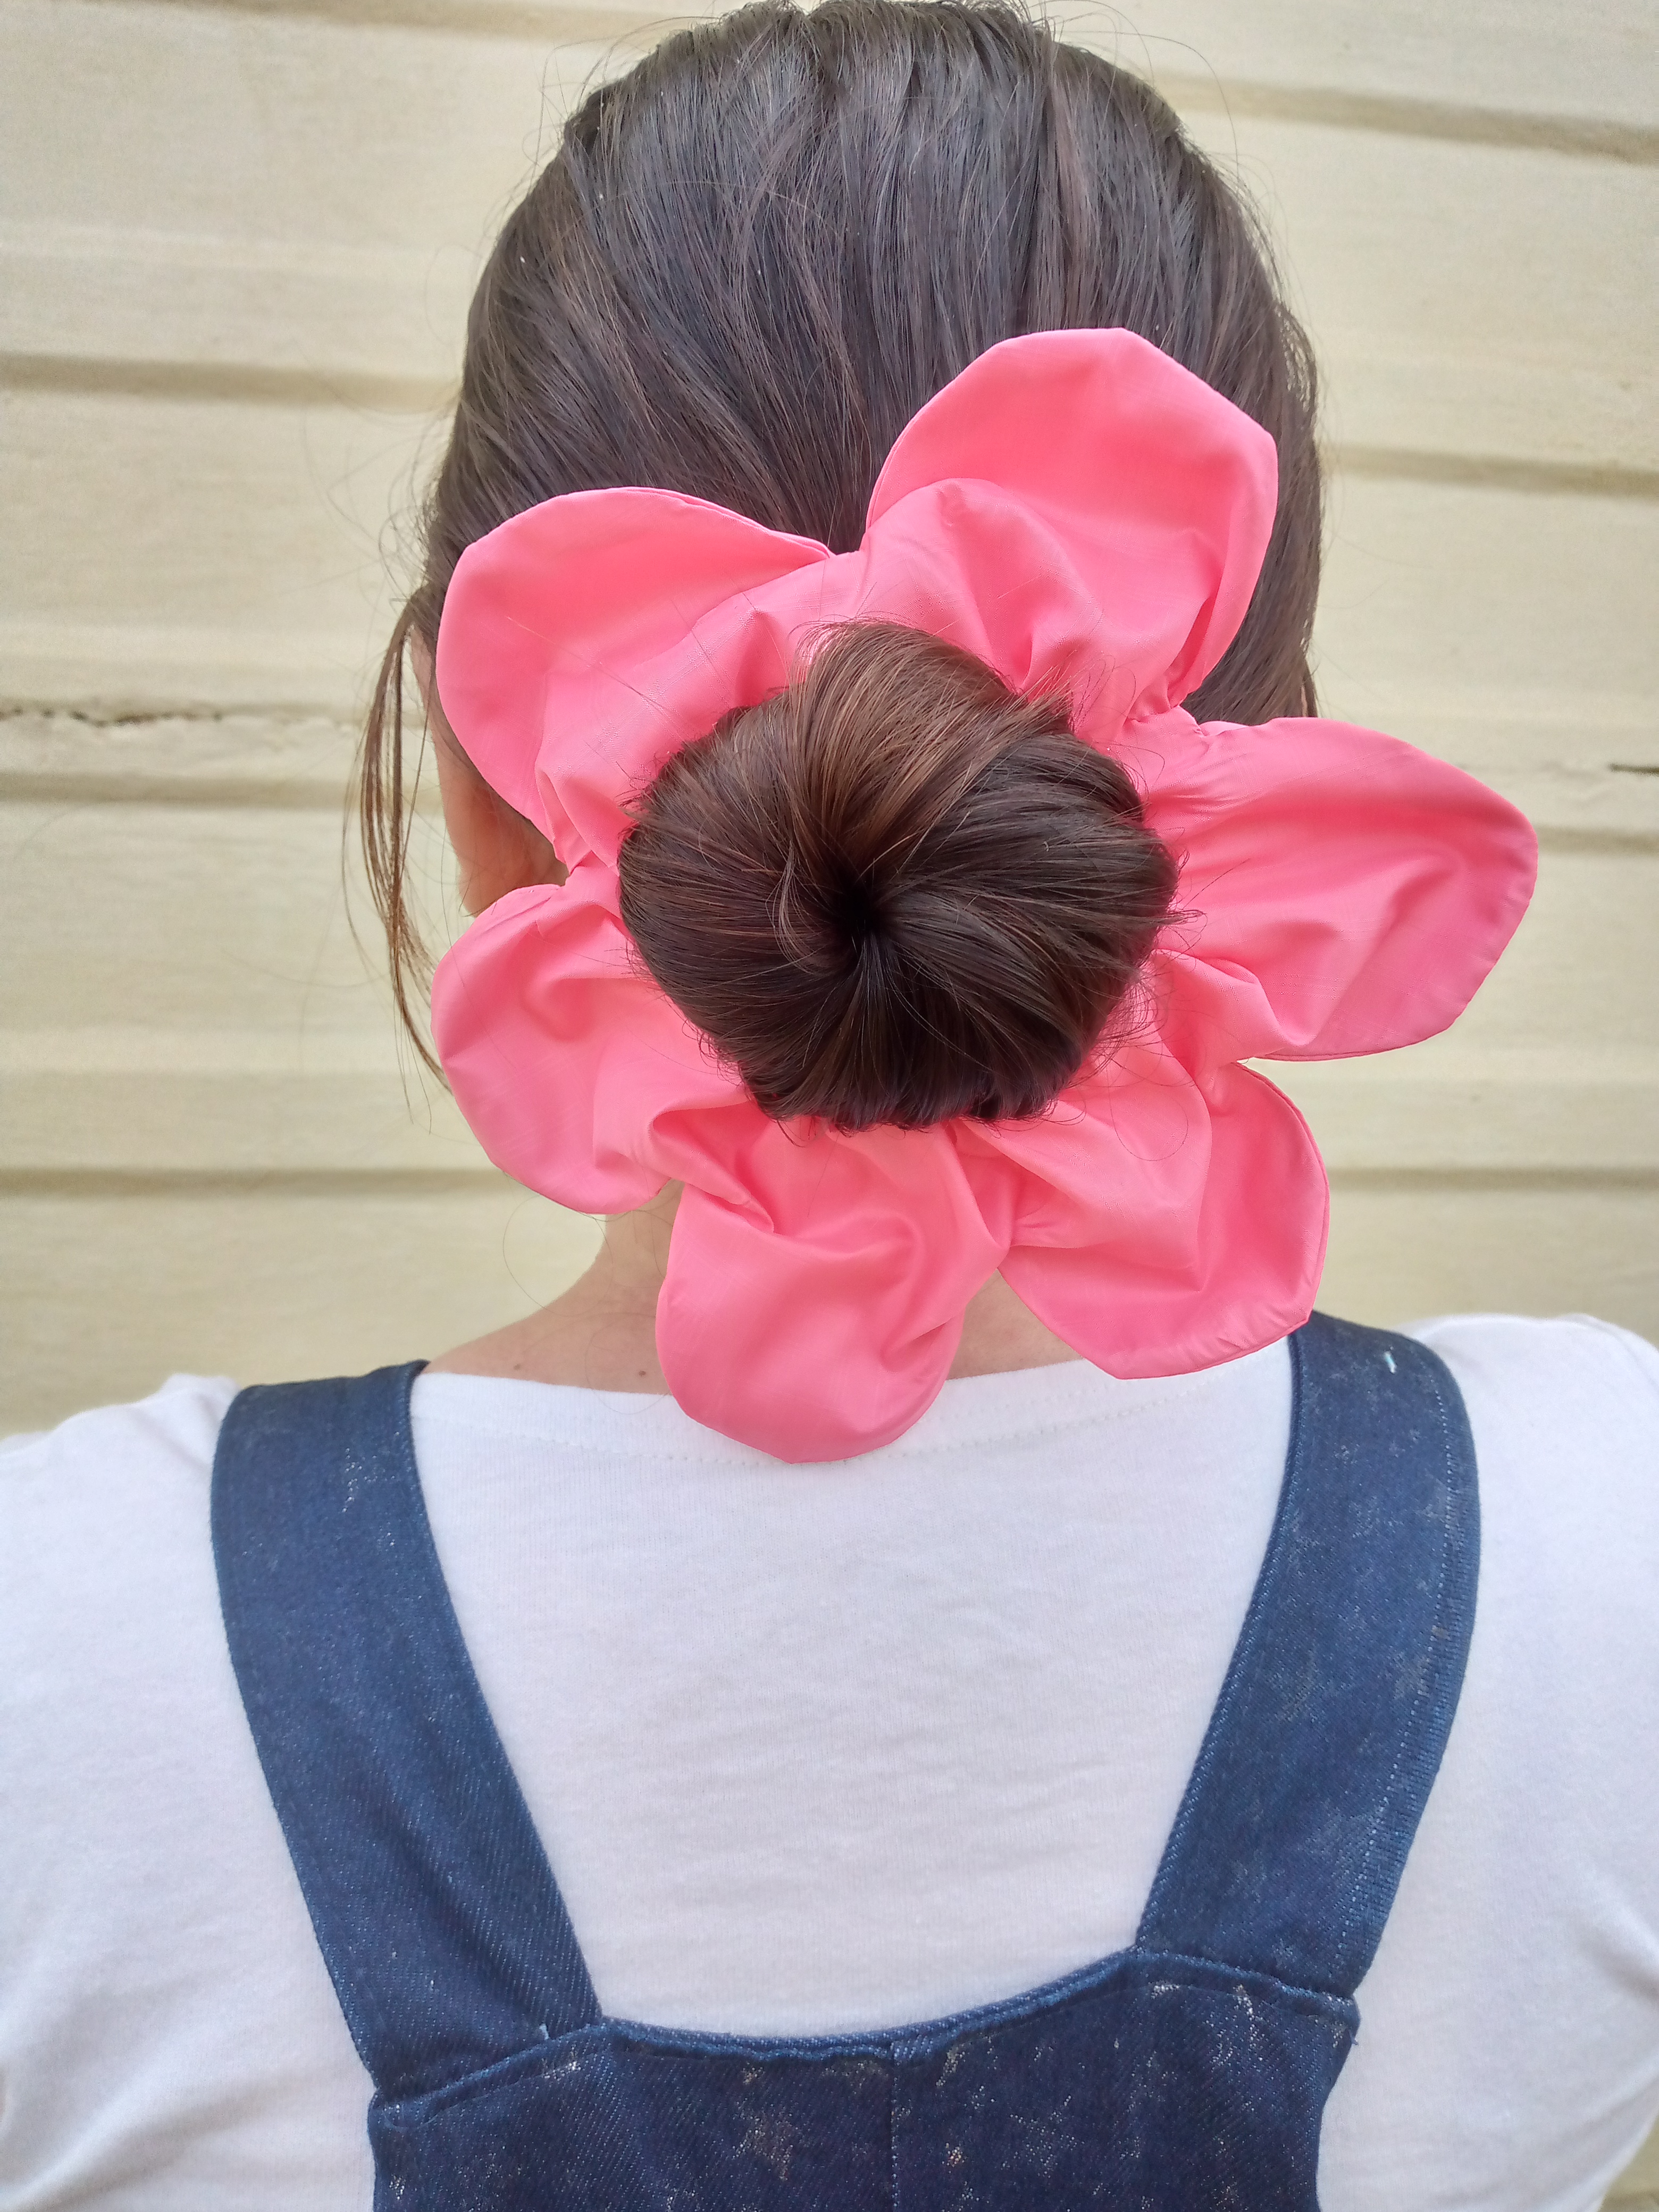
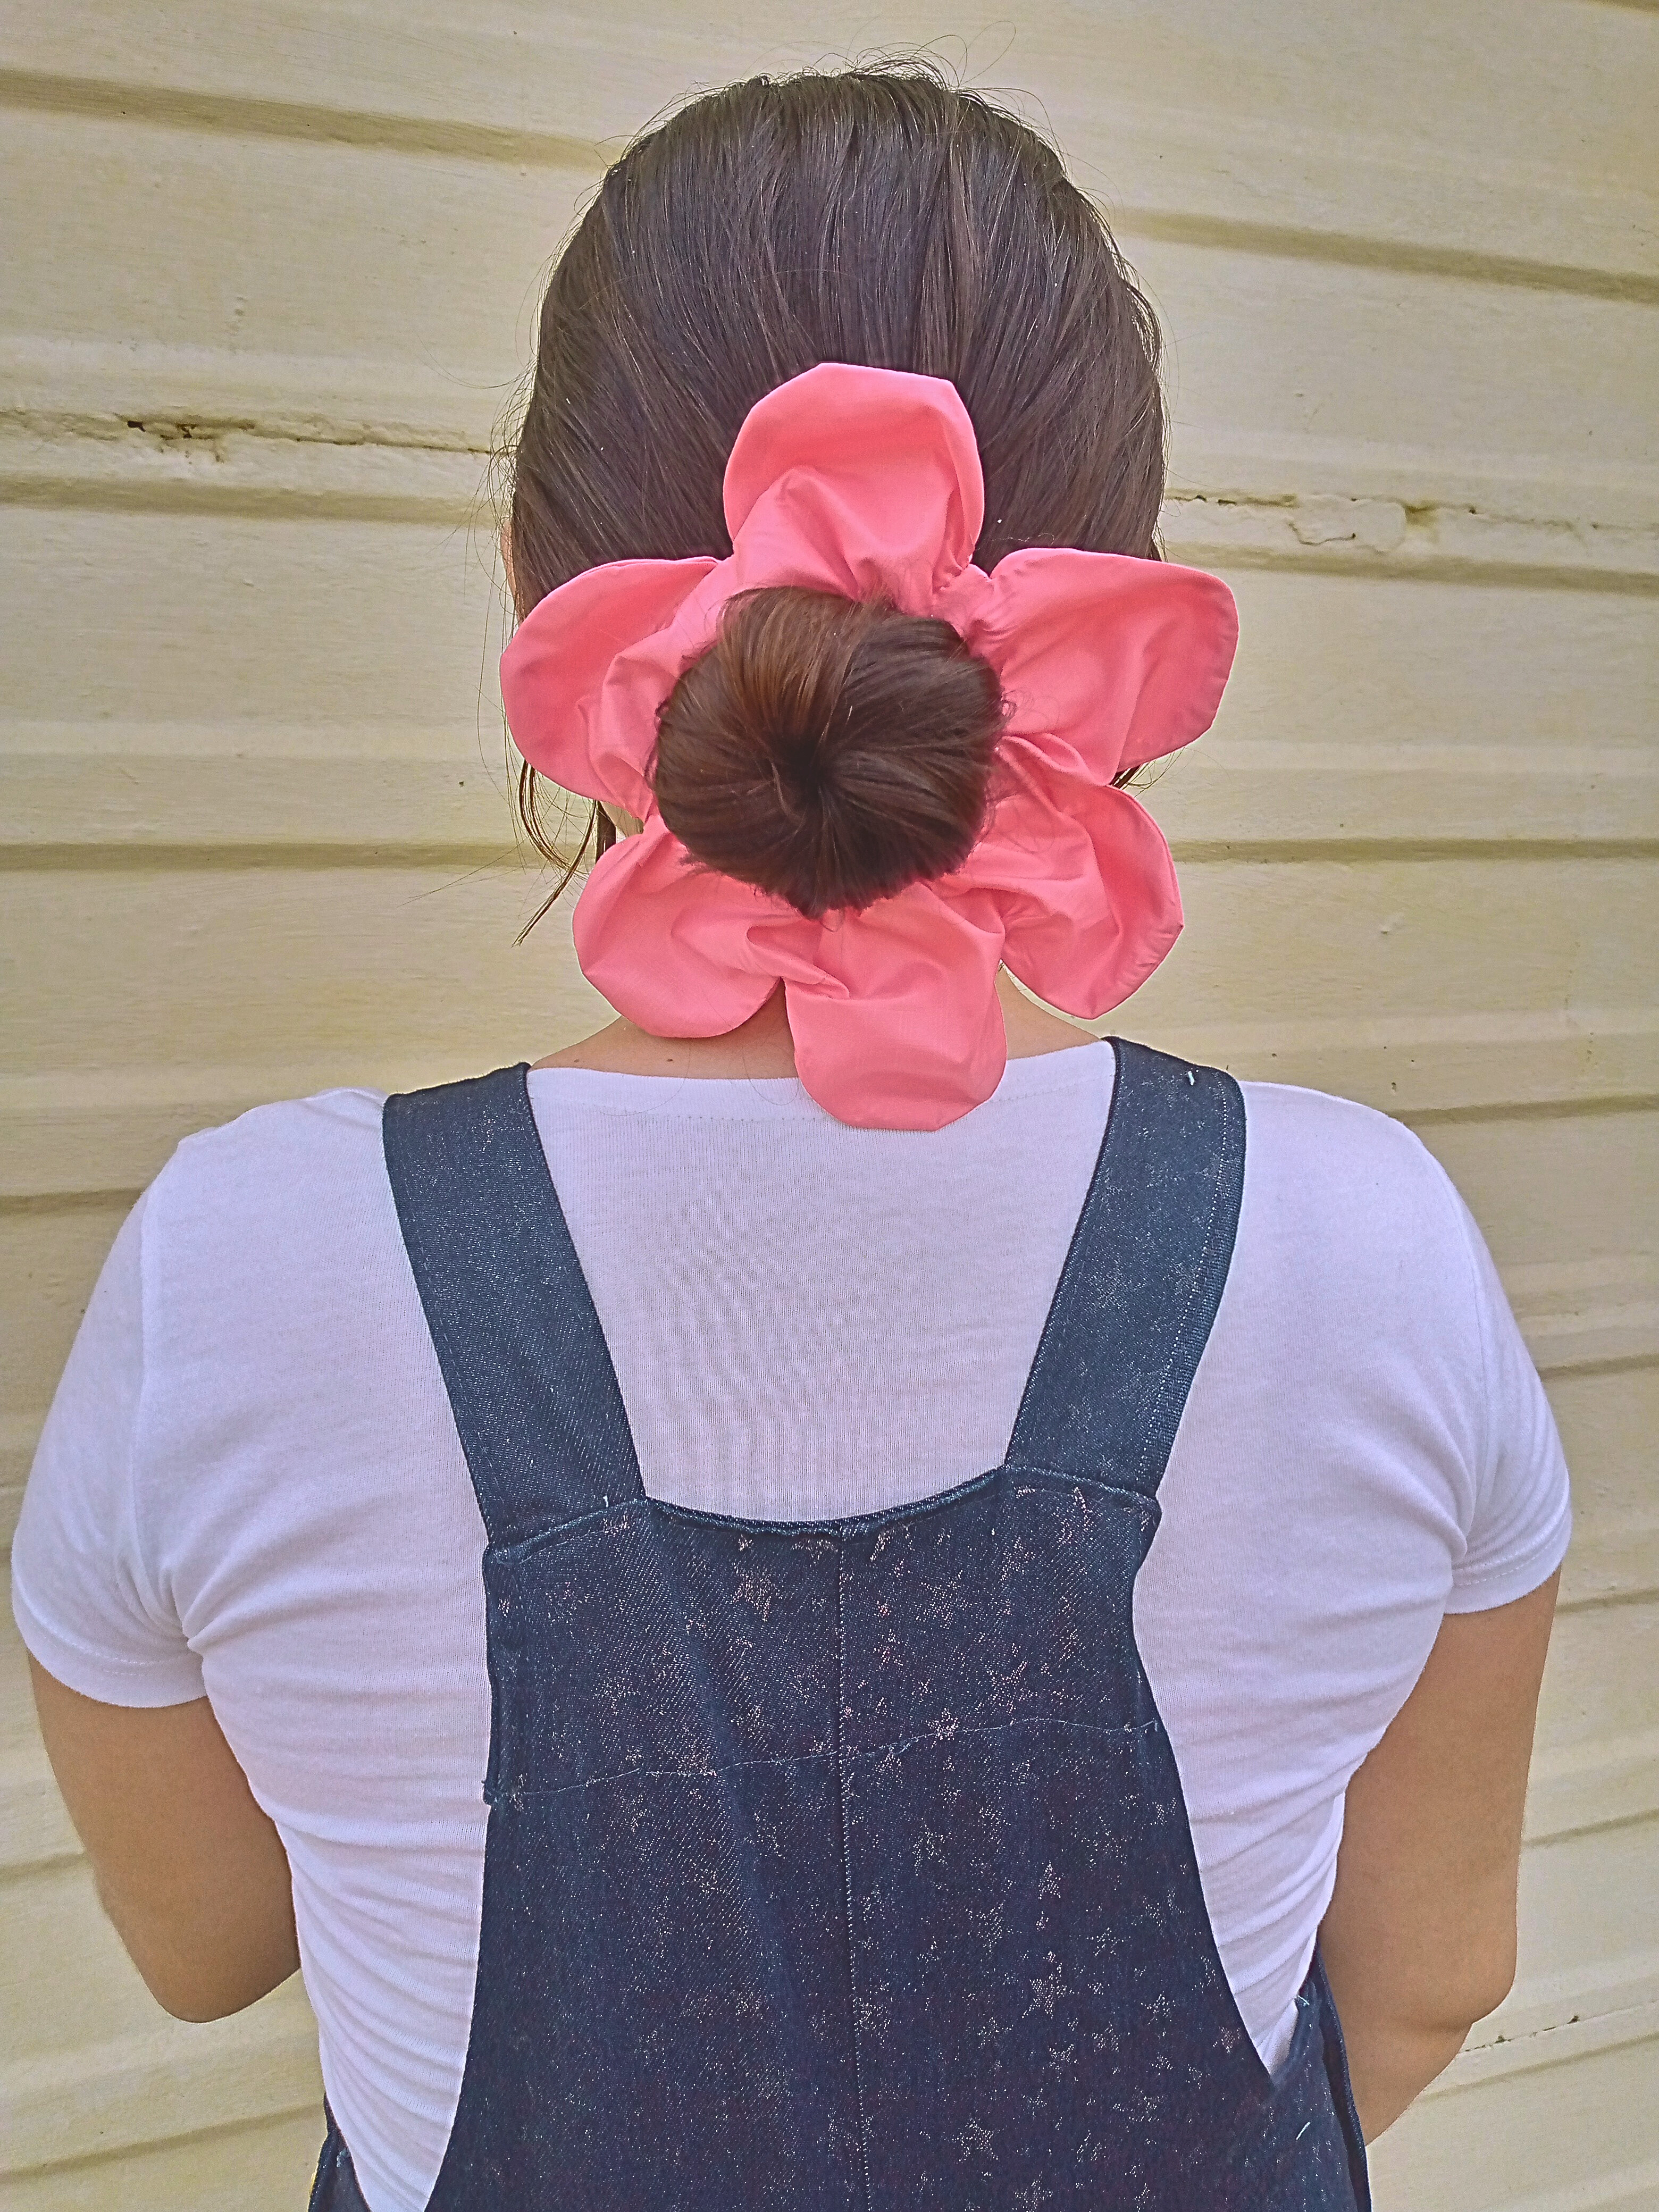
Well, my seamstress friends, this is how the results of this beautiful flower-shaped scrunchie look 🌸💖😍 I really loved how it turned out and this is how it looks when it's already in our hair.
If you liked this simple and beautiful scrunchie idea, don't forget to share it with someone you know who would love to make these tutorials. Tell me if you've already learned how to make them. How would you like to make them, big or small? Would you use them? 😍 Leave me your lovely comments, which I'll be happy to read. I wish you all a beautiful and happy day. See you soon! 🙋🏻♀️.
Creating things with love 🌷❤️
🦋✨ All the images in this publication are my author ,📱taken with my TecnoSpark8C cell phone |📸Photos edited in PicsArt and Canva. Text translated in Google Translate.