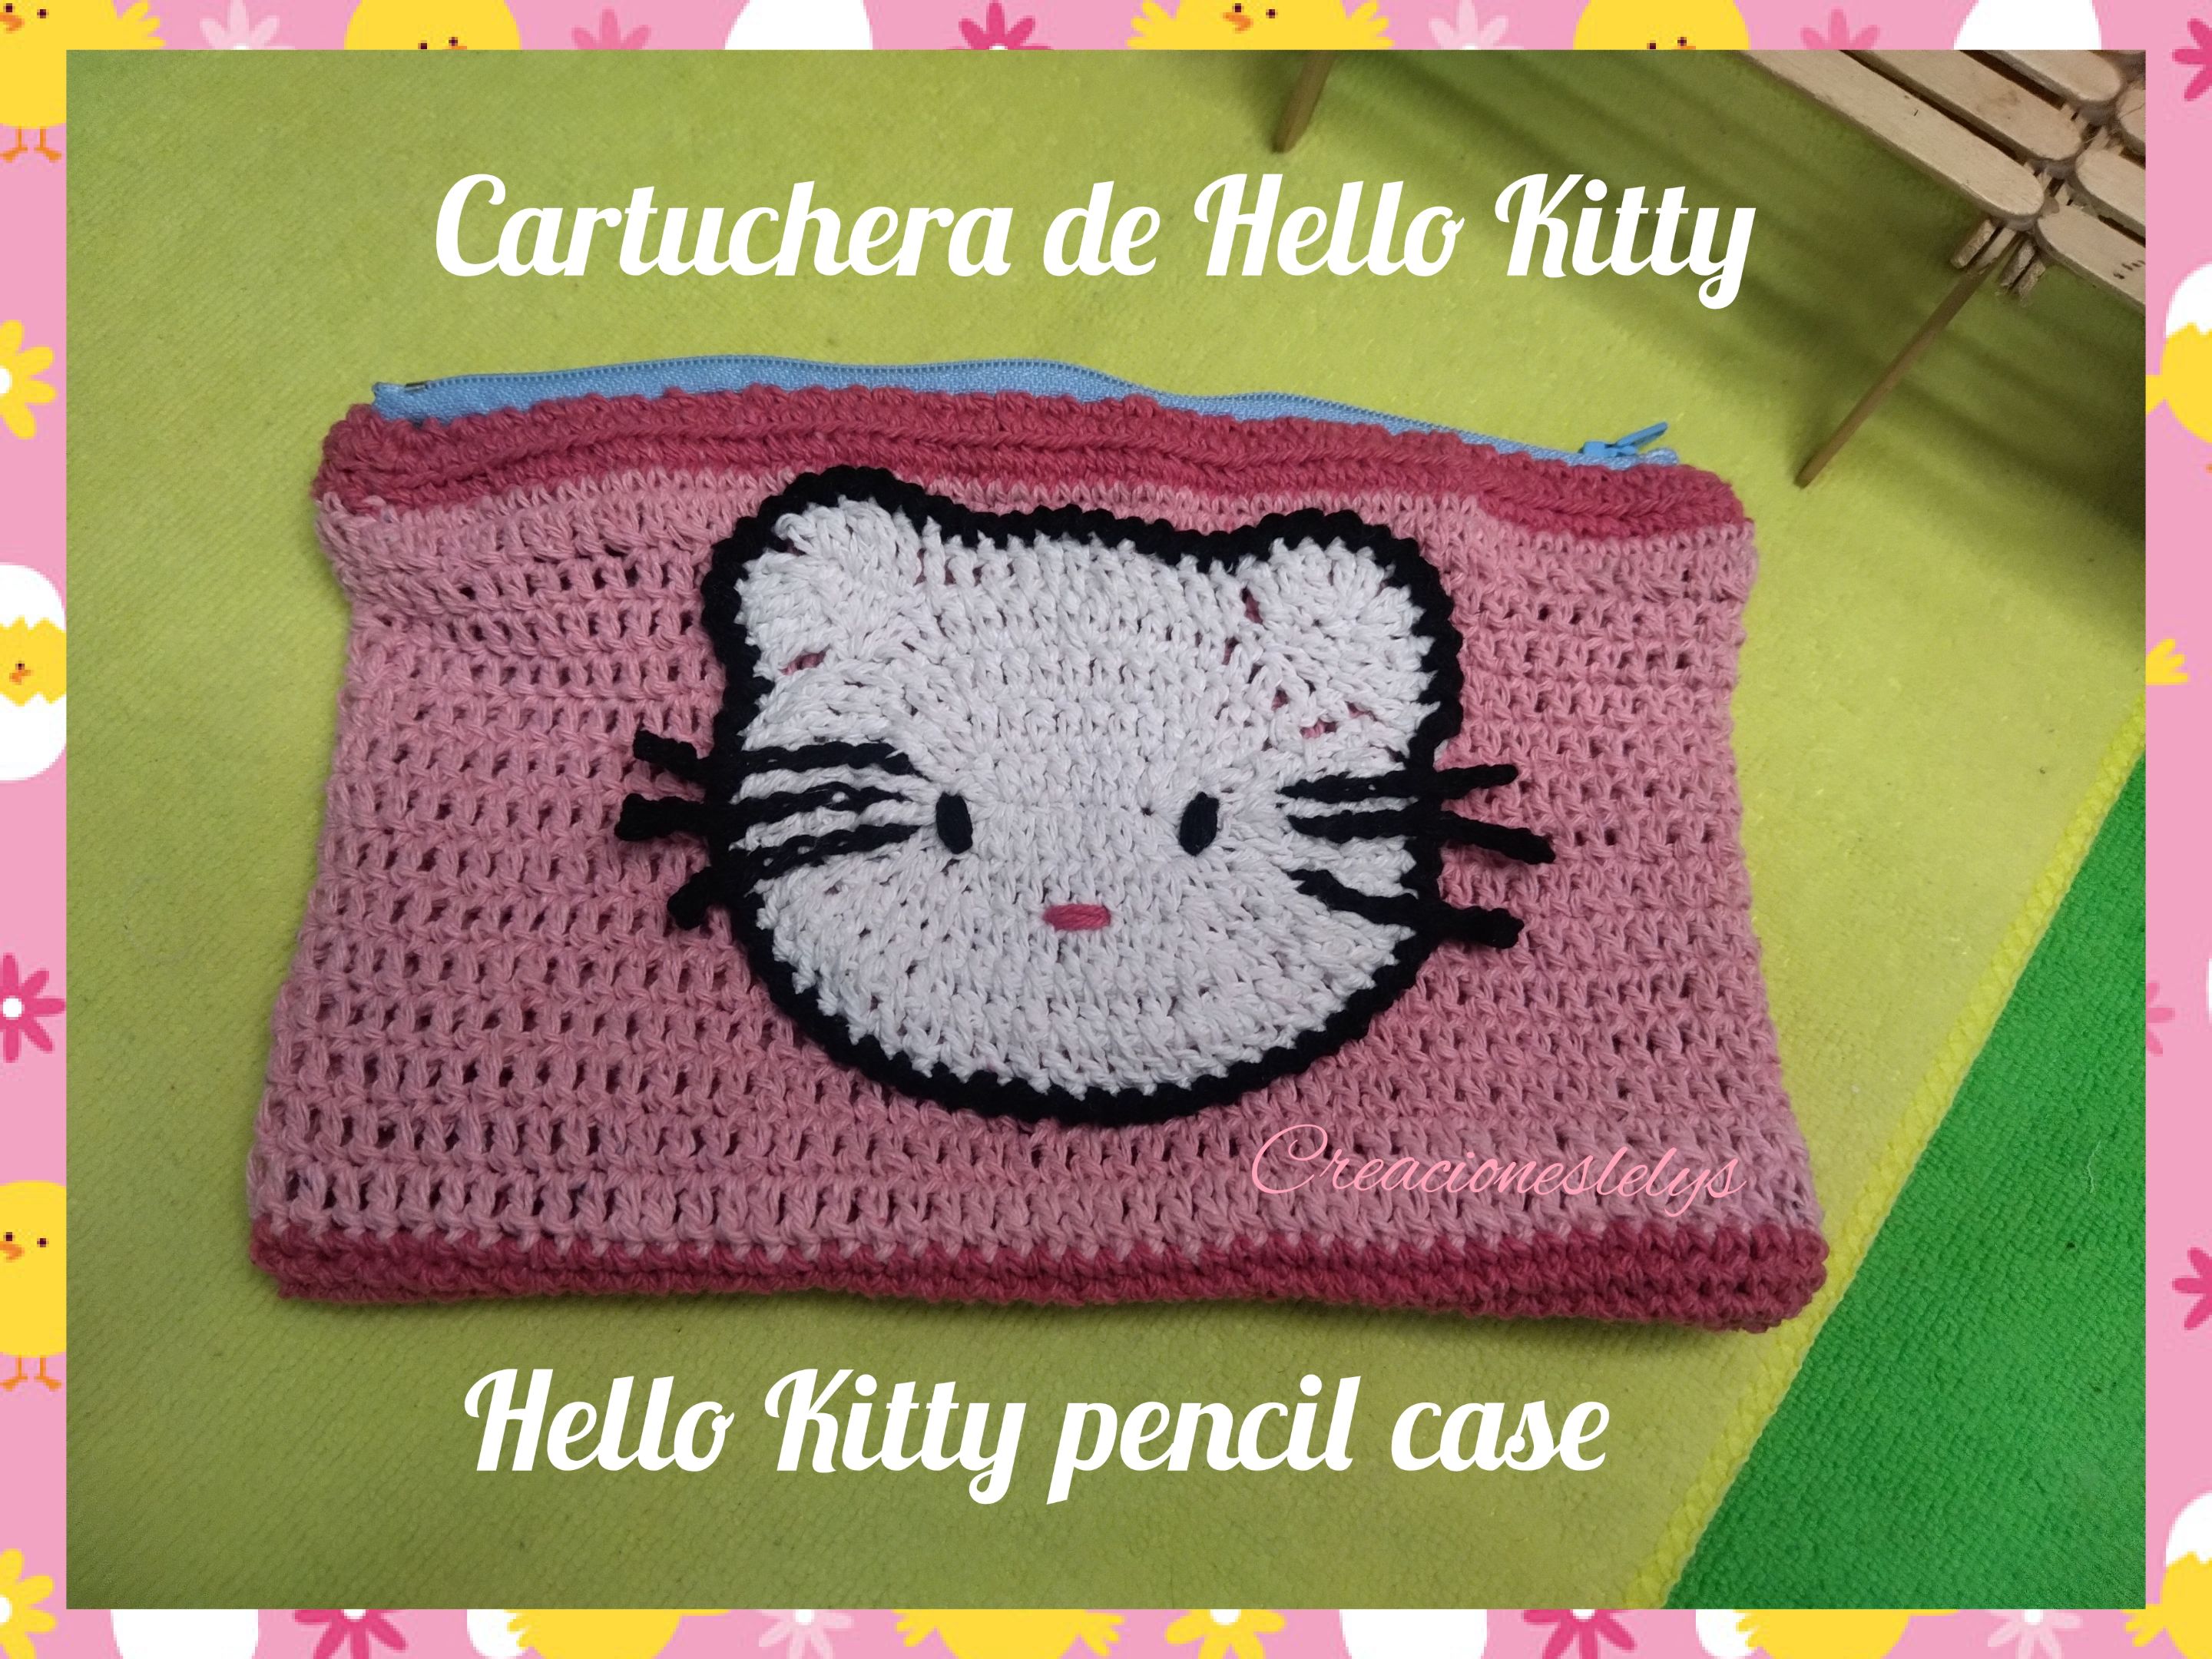
Cartuchera de Hello Kitty.
Hello Kitty pencil case.
Hola amigos. Espero que estén muy bien. Hace unos días les compartí la experiencia que tuve al tejer un diseño de Hello Kitty que me encantó, fue todo un reto para mí porque las indicaciones del patrón estaban escritas en un idioma que desconozco, sin embargo me pude guiar por el gráfico y logré realizarlo. Ahora que tengo esta linda figura decidí usarla en un nuevo proyecto. Acompáñenme un rato para puedan disfrutar de parte del proceso. ¡Bienvenidos!
Hello friends. I hope you are doing well. A few days ago I shared with you the experience I had knitting a Hello Kitty design that I loved, it was a challenge for me because the pattern directions were written in a language I don't know, however I was guided by the graphic and I managed to make it. Now that I have this cute figure I decided to use it in a new project. Join me for a while so you can enjoy part of the process, welcome!
😸 Materiales utilizados/Materials used.
- Hilos pabilos.
- Cierre plástico de 20 cm.
- Tijeras.
- Aguja de coser.
- Aguja lanera.
- Threads wicks.
- Plastic zipper of 20 cm.
- Scissors.
- Sewing needle.
- Wool needle.

😸 Procedimiento/Procedure.
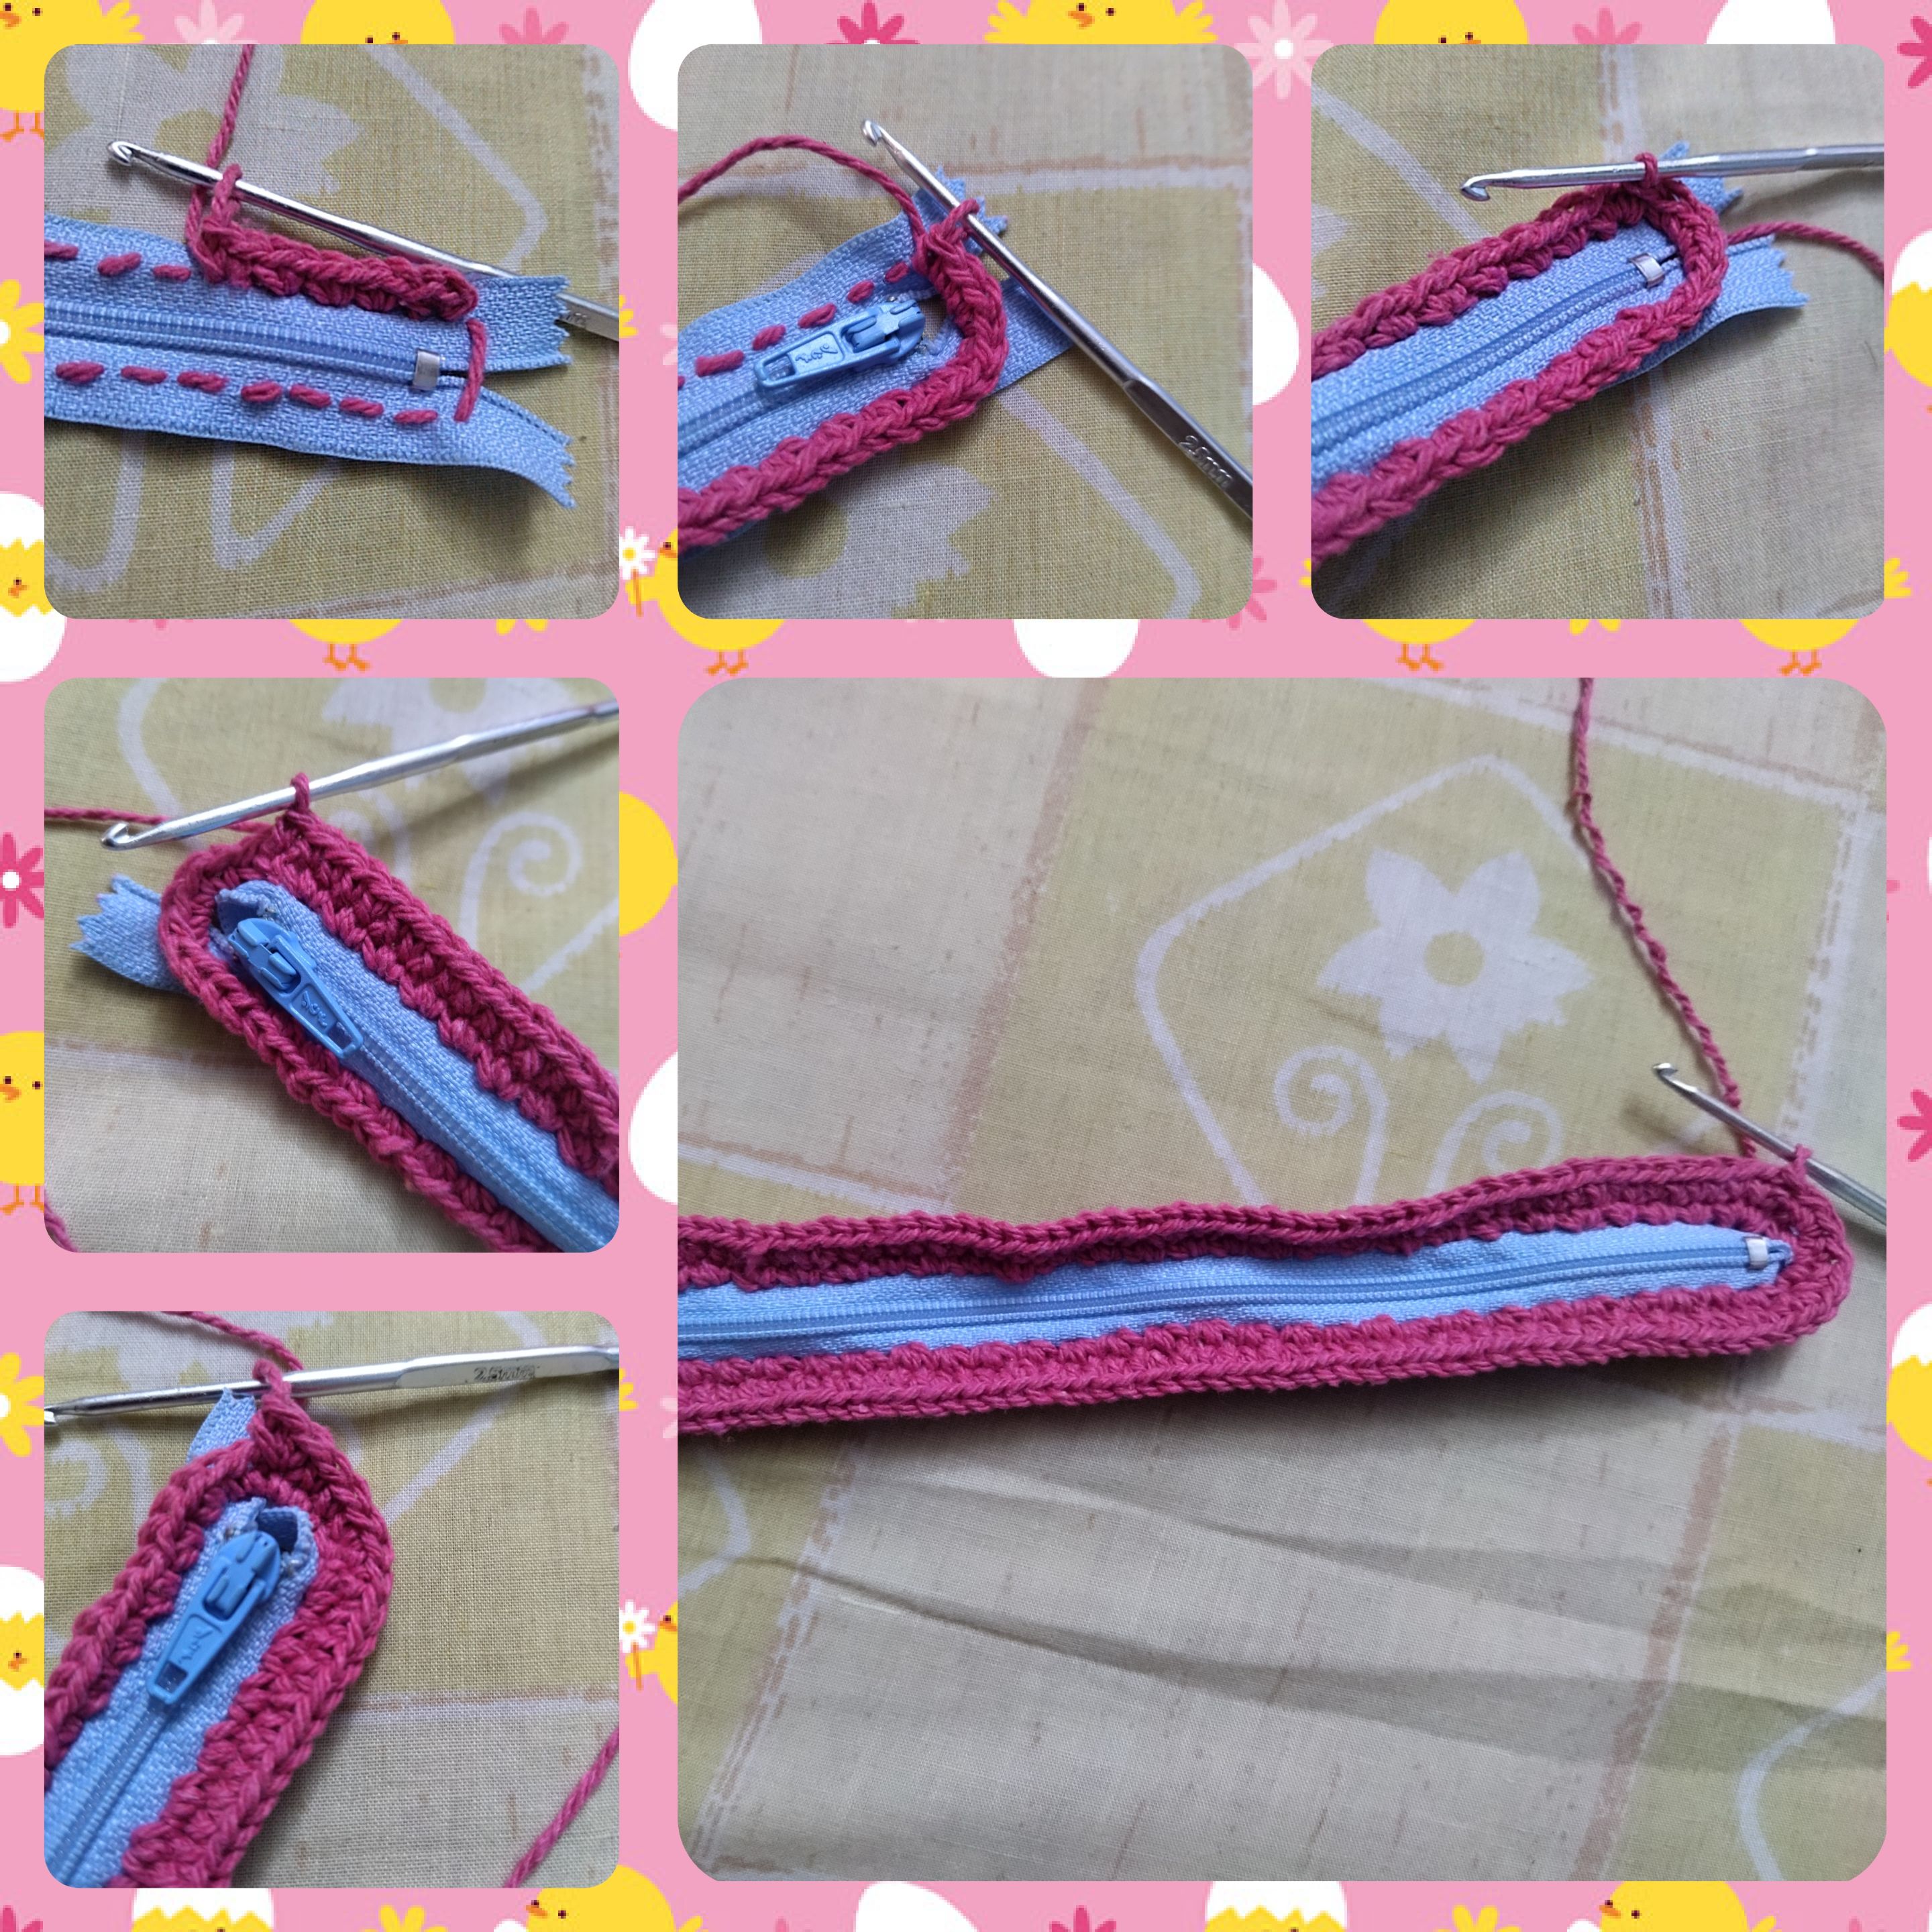
😸 Empecé haciendo un despunte por todo alrededor del cierre, procurando hacerlo a una distancia de por lo menos 0,50cm de separación de la cremallera.
😸 Como pueden ver pasé el hilo por detrás de los extremos del cierre para pasar de un lado a otro. Hice un nudo y corte el hilo.
😸 I started by stitching all around the zipper, trying to do it at least 0.50cm away from the zipper.
😸 As you can see I passed the thread behind the ends of the zipper to pass from one side to the other. I tied a knot and cut the thread.

😸 Realicé un nudo corredizo con el mismo color de hilo y empecé a tejer 2pb en cada puntada realizada sobre el cierre.
😸 En el hilo que pasé por los extremos del cierre tejí 4pb.
😸 I made a slip knot with the same color yarn and started to weave 2pb in each stitch made over the clasp.
😸 In the yarn that I passed through the ends of the clasp I wove 4bp.
😸 Después de esa primera vuelta tejí una vuelta completa de solo pb, en los 4pb de los extremos tejí 1aum de pb-2pb-1 aum de pb.
😸 La siguiente vuelta la tejí tomando solo la hebra de atrás del punto (BLO).
😸 After that first round I knit a complete round of just bp, in the 4pb of the ends I knit 1aum of bp-2pb-1 aum of bp.
😸 The next round I knitted taking only the back strand of the stitch (BLO).
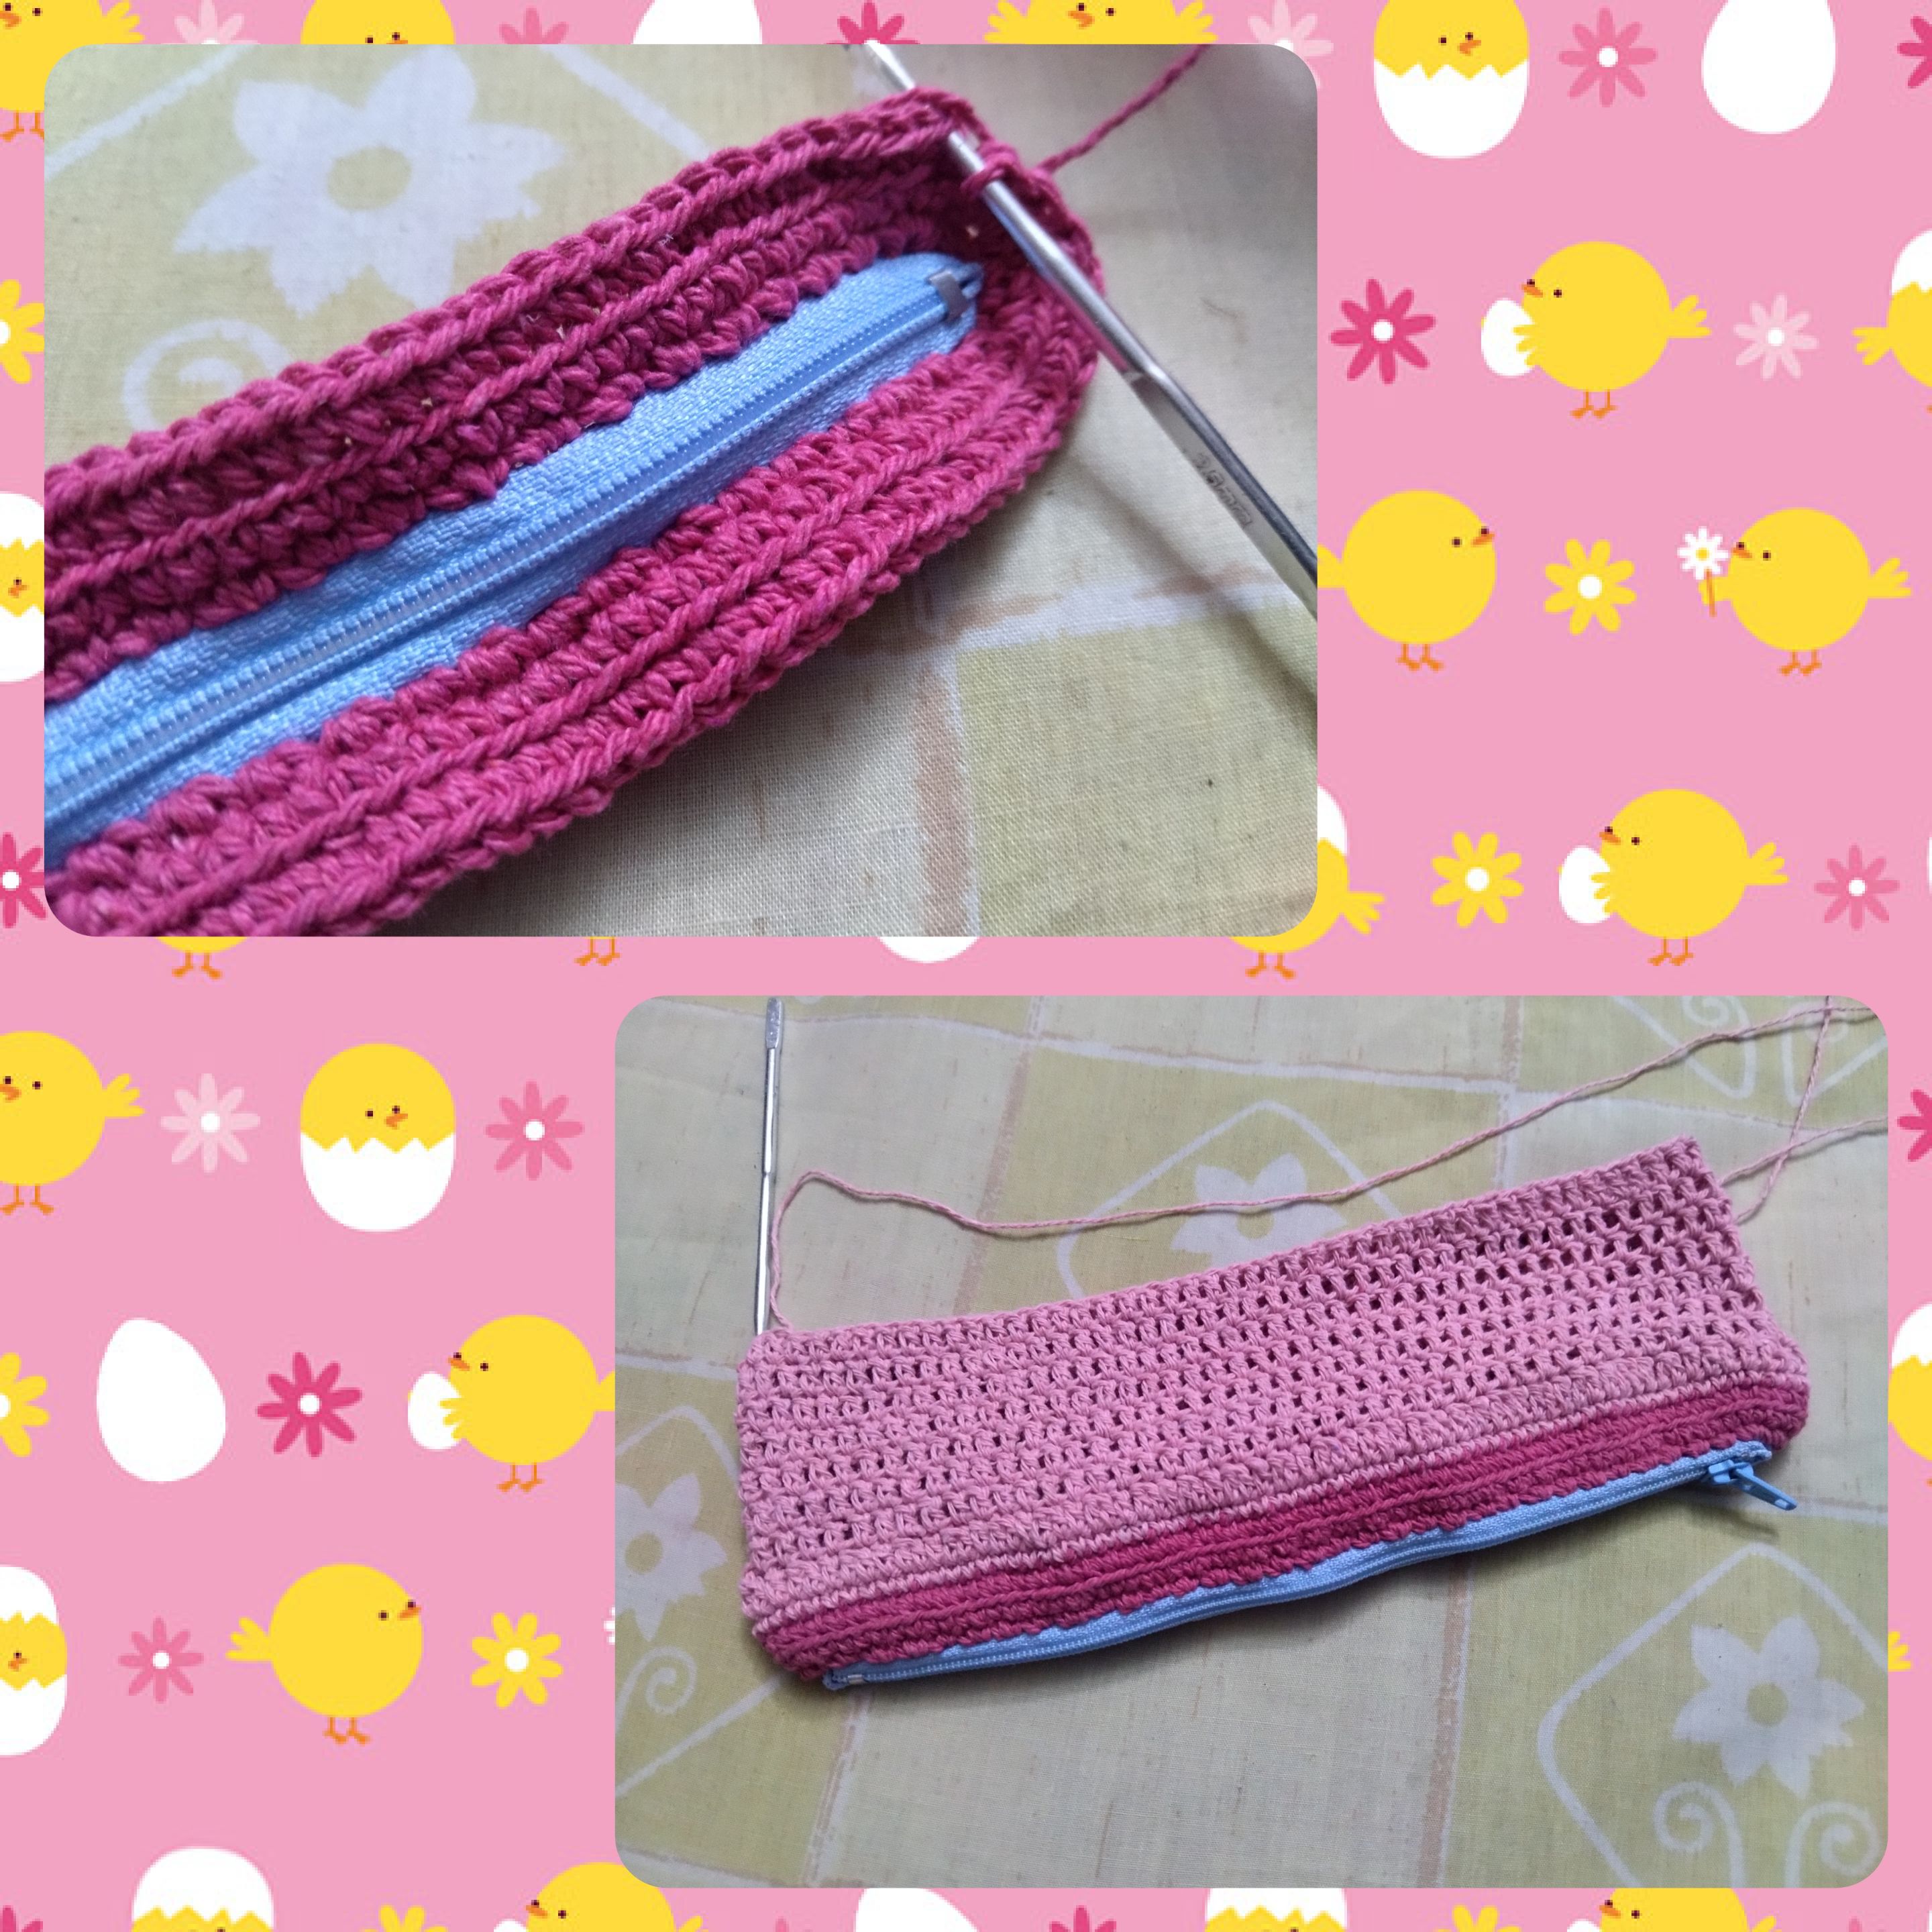
😸 A partir de esta vuelta empecé a tejer todo el cuerpo de la cartuchera, pero en puntos altos. Además hice un cambio de color.
😸 From this round on I started to knit the whole body of the cardigan, but in high stitches. I also made a color change.
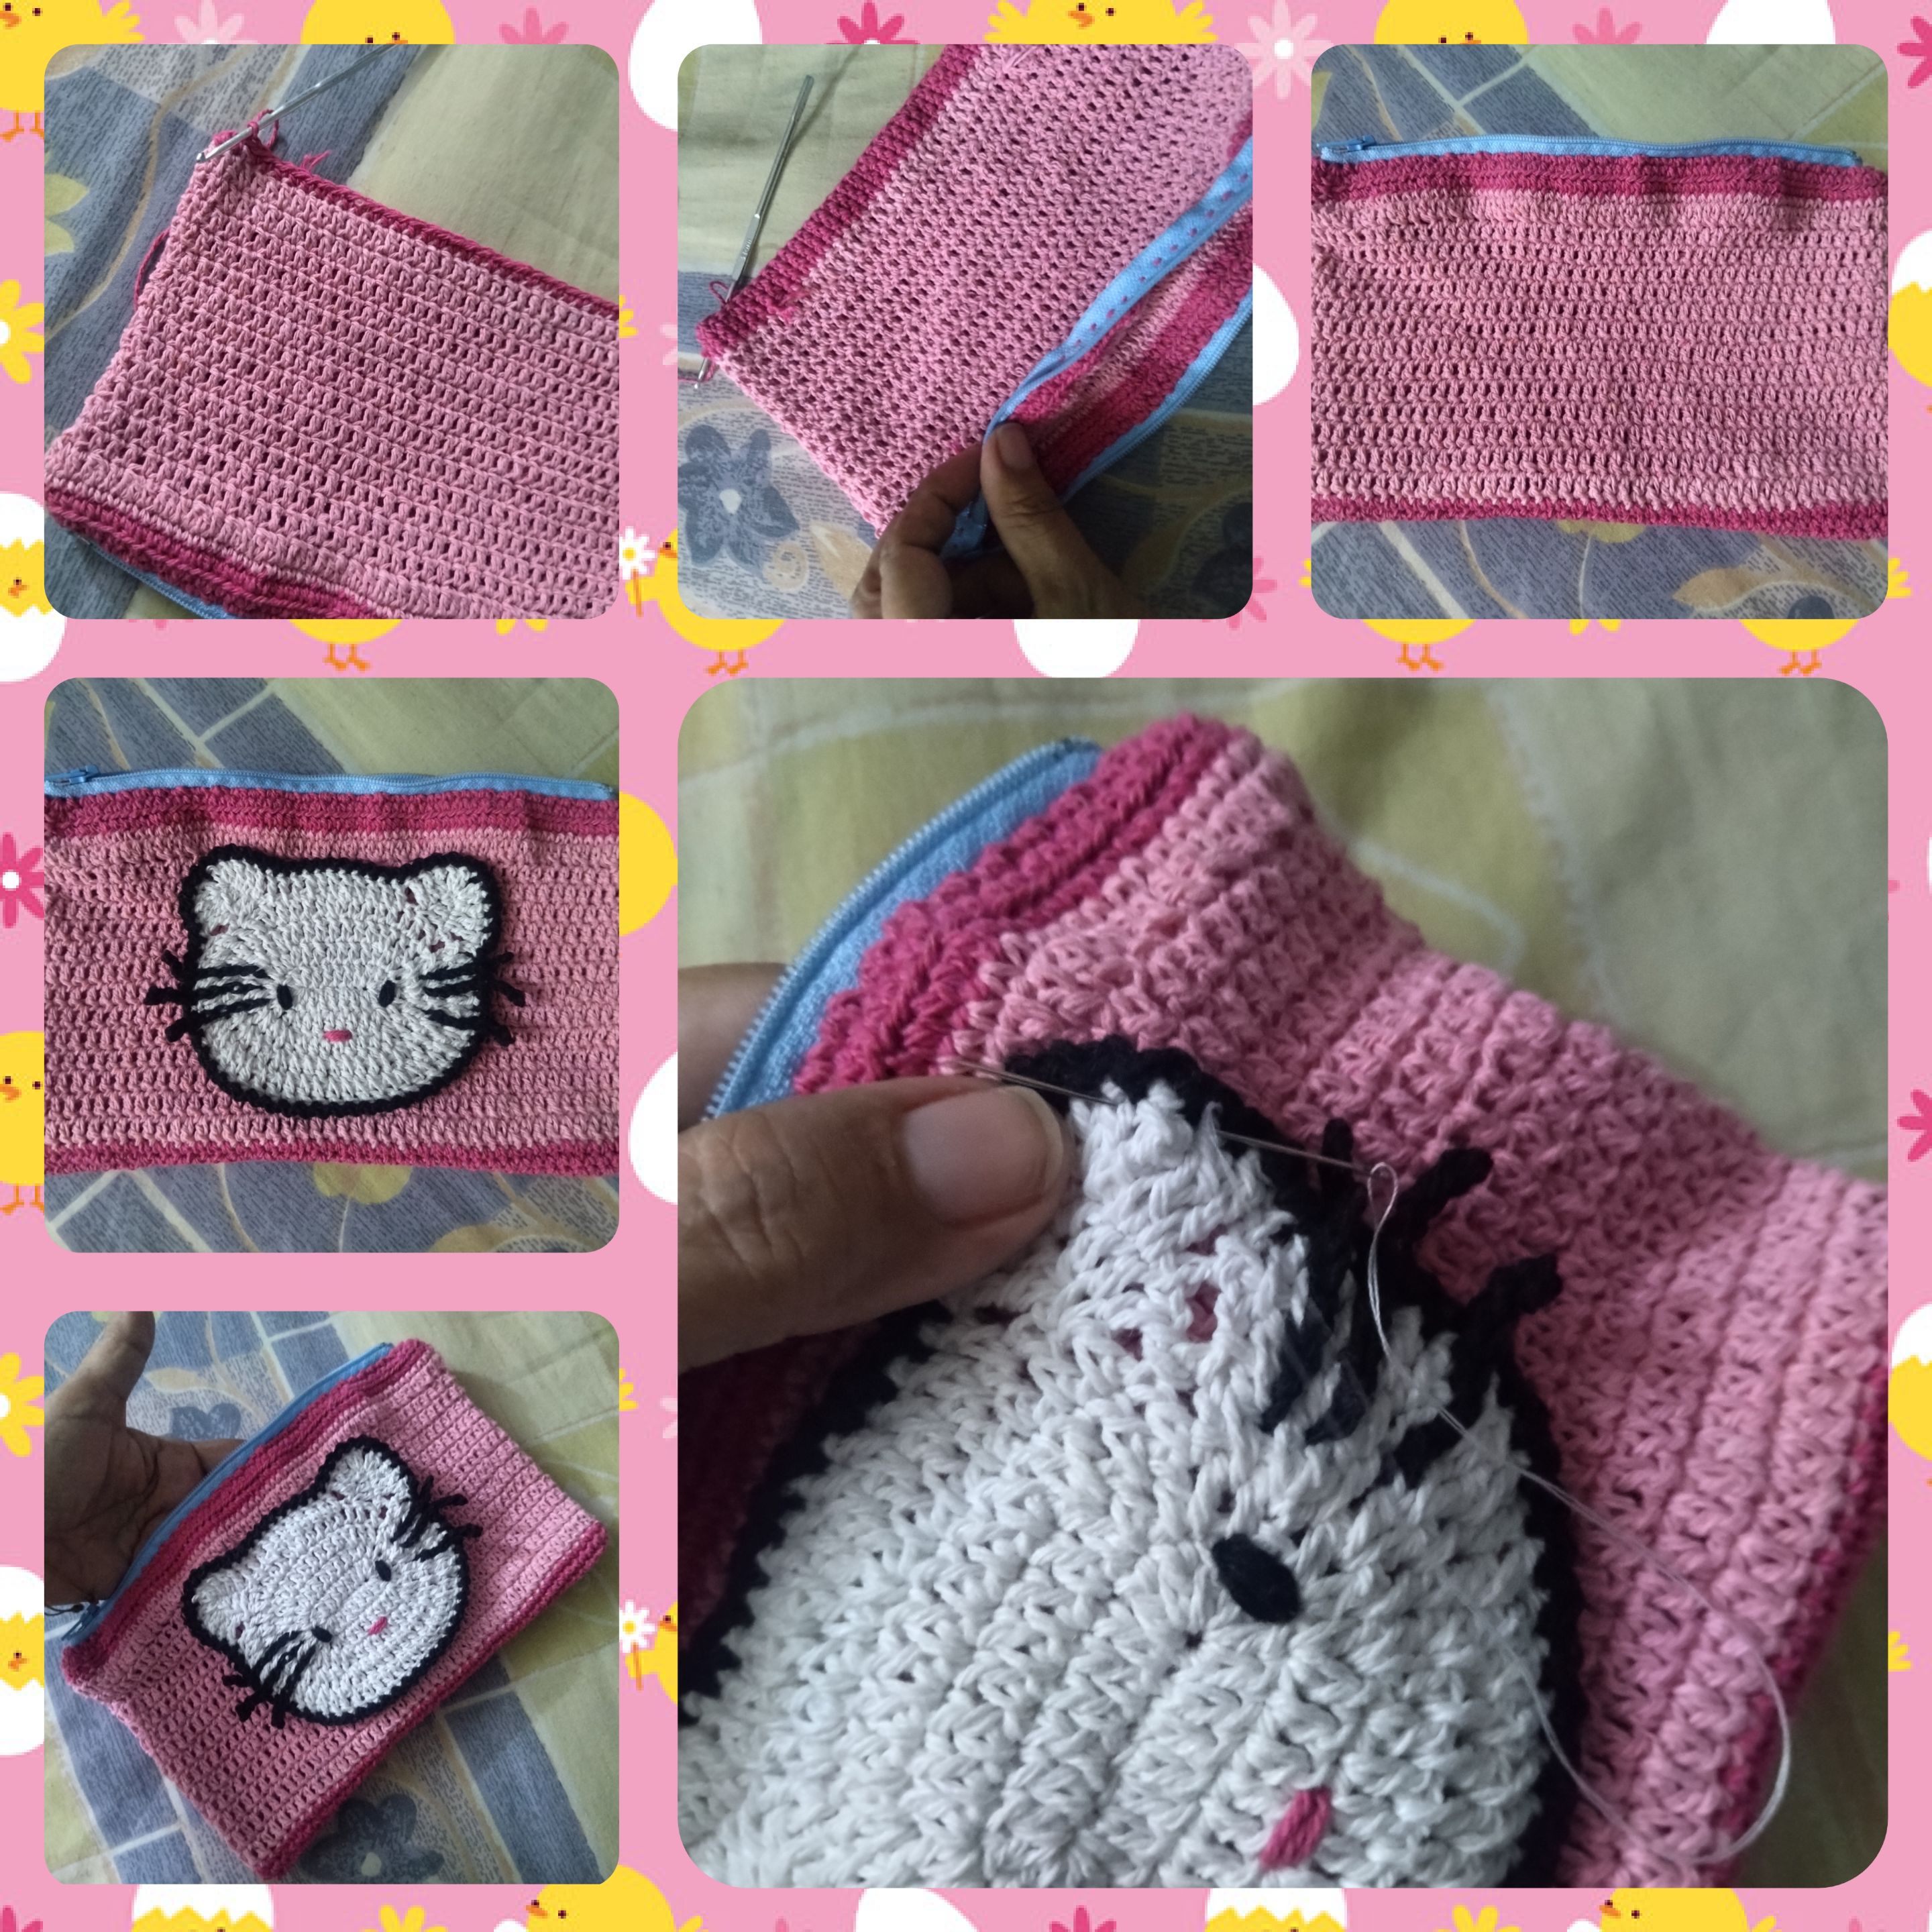
😸 Decidí cambiar el punto bajo a punto alto para aligerar el proceso del tejido. Si deseas tejer en punto bajo procura seleccionar un hilo de hebra gruesa para que tejas pocas vueltas y tú cartuchera crezca rápido. A veces cuando tejemos con hilos muy delgados y puntos bajos el trabajo se hace pesado. Preferiblemente este tipo de proyectos se tejen en puntos bajos, para que quede bien cerrado el tejido. Sin embargo al tejerlo con punto alto tenemos la opción de colocarle por dentro a la cartuchera un forro de tela.
😸 Una vez que terminé de tejer todo el cuerpo lo que hice fue voltear el tejido y unir o cerrar con puntos deslizados. Después volví a voltear la cartuchera y así se ve de bonita.
😸 Y para finalizar cosí en la parte del frente de la cartuchera esta bella figura de Hello Kitty que había tejido días atrás. La verdad es que estoy muy satisfecha con el trabajo. Se ve súper linda y dentro de la cartuchera entran muchos lápices y demás cositas.
😸 I decided to change the low stitch to high stitch to lighten the knitting process. If you want to knit in garter stitch try to select a thick yarn so that you knit few rows and your cardigan will grow fast. Sometimes when we knit with very thin yarns and low stitches the work becomes heavy. Preferably this kind of projects are knitted in low stitches, so that the knitting is well closed. However when knitting it with high stitch we have the option of placing a fabric lining inside the pencil case.
😸 Once I finished knitting the whole body, I turned the fabric over and joined or closed it with slipped stitches. Then I flipped the cardigan again and that's how pretty it looks.
😸 And to finish I sewed on the front part of the pencil case this beautiful Hello Kitty figure that I had knitted days before. The truth is that I am very satisfied with the work. It looks super cute and inside the pencil case fit many pencils and other little things.
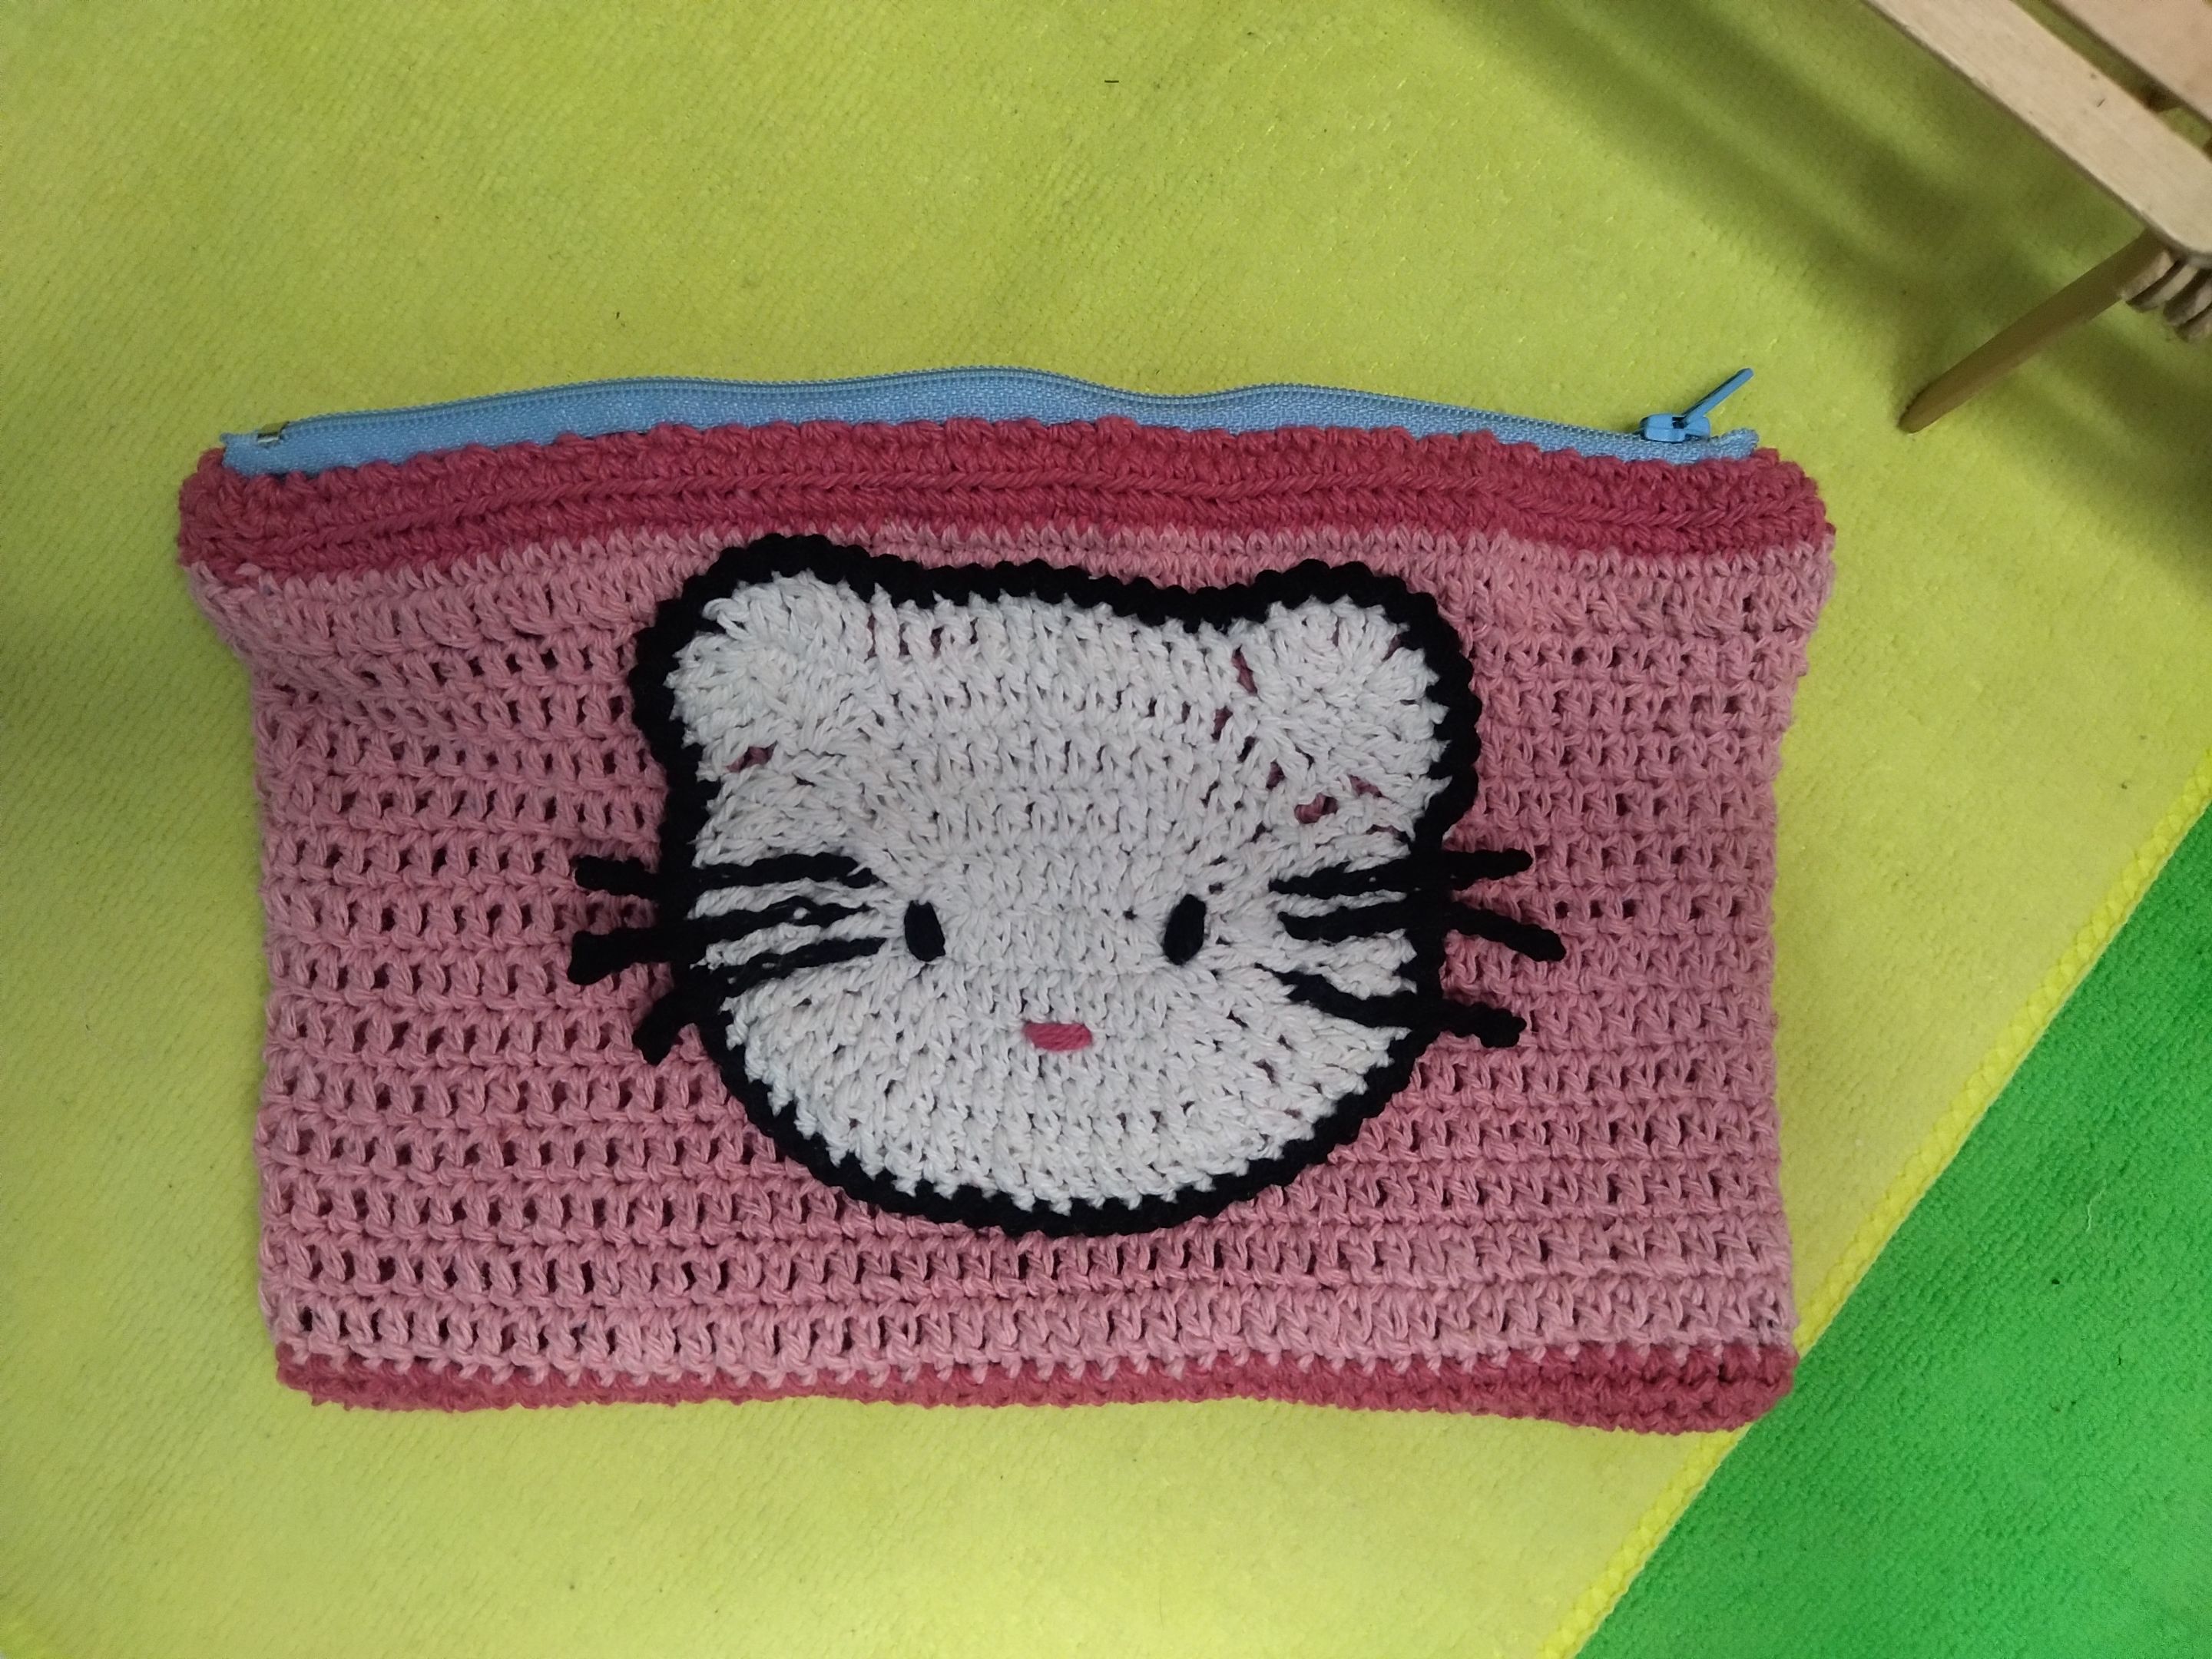
😸 La cartuchera termino midiendo 21cm de largo por 14cm de ancho. La figura de Hello Kitty mide 9cm de alto por 10cm de largo. Me encantó hacer este proyecto. Cuando empecé a tejer la figura de Hello Kitty no tenía pensado aún en qué otro proyecto usarla. Se me ocurrió hacer esta cartuchera porque quiero regalarla a una amiga quien es fans de este personaje. Como aún estamos en el mes de la amistad esta publicación formars parte del concurso del mes de la comunidad #diyhub.
😸 The pencil case ended up measuring 21cm long by 14cm wide. The Hello Kitty figure measures 9cm tall by 10cm long. I loved making this project. When I started knitting the Hello Kitty figurine I had no idea yet what other project to use it for. I decided to make this pencil case because I want to give it to a friend who is a fan of this character. As we are still in the month of friendship this publication will be part of the #diyhub community contest of the month.
Muchas gracias por el apoyo. Todas las fotos son de mi propiedad. Edité con Polish. Usé el traductor de Deelp. Bendiciones y hasta pronto.
Thank you very much for your support. All photos are my property. I edited with Polish. I used Deelp translator. Blessings and see you soon.