Diy cardboard basket

in voilk •  18 days ago

    Happy New month to all the creative users of this community and I welcome you all to my post once again. In a world grappling with environmental concern, repurposing materials such as cardboard is a small but significance step towards sustainability. Cardboard often considered as waste and discarded after it's intial use has now become a material I used to craft various diy project and today I present to you a diy cardboard basket made from cardboard.

    3jpR3paJ37V8JxyWvtbhvcm5k3roJwHBR4WTALx7XaoRovZFqRBxzqyEDTuKXJejtqJCzee79JyckH91j8VZn1nvjJUhovYeJACydh68BEnYEyfAQUsv7xDNSmZnFHr8biia2.jpeg

    Materials

    Carton
    Scissors
    Ruler
    paper cutter
    Pencil
    Evostik gum
    Adhesive

    3jpR3paJ37V8JxyWvtbhvcm5k3roJwHBR4WTALx7XaoRovaQLEw4tKwrmFt3Ht5hTjaADb5LF44dcKEnQdKBbxJZ2drHeLYSMa28kdWs3Qh4GyETzSPEraJdUkxBizbWvLASJ.jpeg

    MAKING PROCESS

    step I

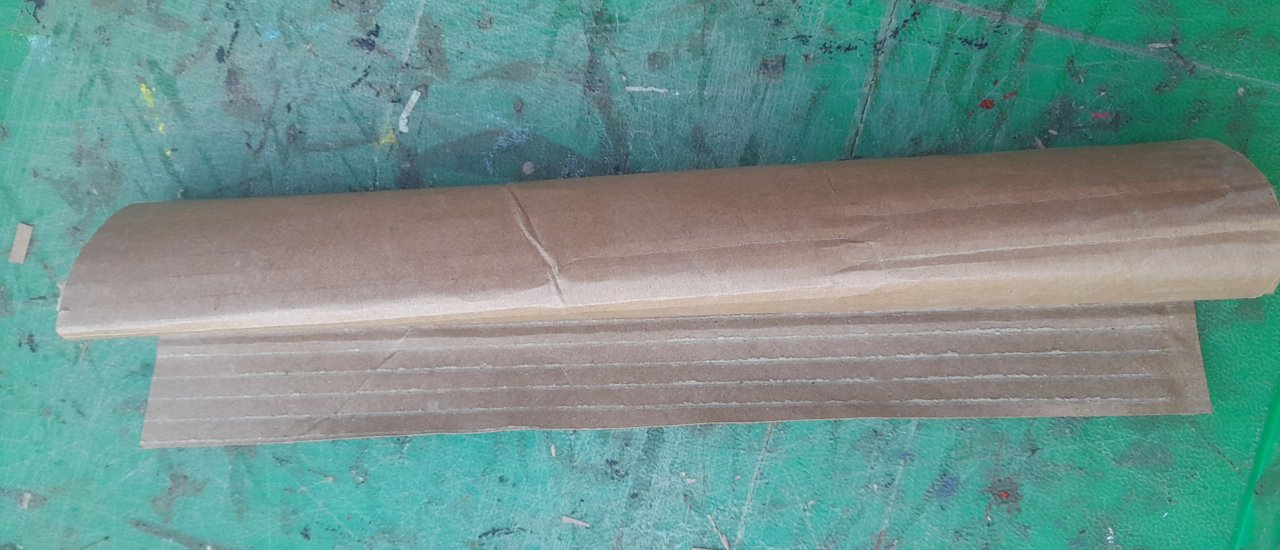
    I began by peeling one side of my cardboard, I peeled an entire piece of cardboard and I decided to make use of the lighter part of the cardboard.

    3jpR3paJ37V8JxyWvtbhvcm5k3roJwHBR4WTALx7XaoRovaWu1936Ler12gc2vvtHMzYKZMA6NVMK4pFPTAyC6XtVi72vcM9DqnrqjzcssQHBXjPcXUMhRpqBUmEWiBtiH8a2.jpeg

    step 2

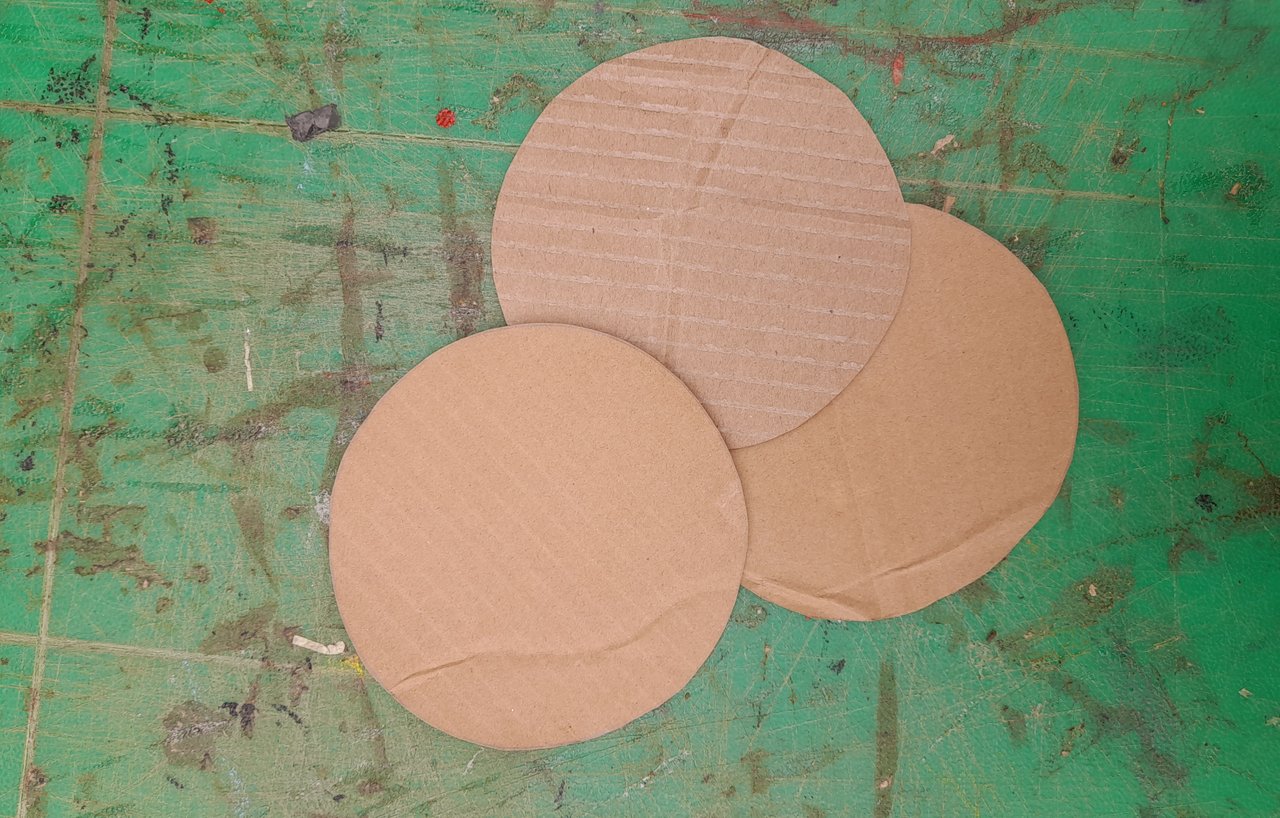
    Then I made circular cardboard shape and cut it out, then I duplicated it into two pieces.

    3jpR3paJ37V8JxyWvtbhvcm5k3roJwHBR4WTALx7XaoRovo8X48zeFkexBYXhonji1xXrLdaJpAcyKh92Gq97aovY3aPB8Q8yH4viW7hcg1AY1oGiNEbTSg8jrWsKH1aM3vpW.jpeg

    step 3

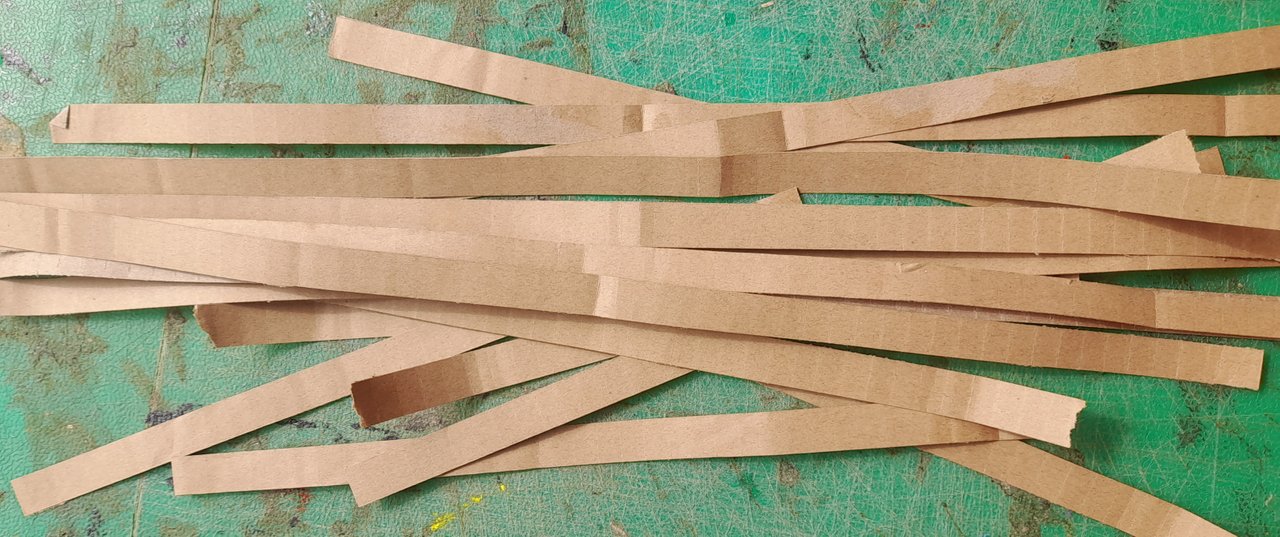
    At this step, I cut out some strips measuring one centimetre wide from the carton. I made a good number of it. After the cutting, I doubled the strips with the help of Evostic gum to make them thick and strong not easy to cut.

    3jpR3paJ37V8JxyWvtbhvcm5k3roJwHBR4WTALx7XaoRovfF7n7vwsYzD7SrgMT9EyPWMae7hid6jMjaA4QVdpycevoqrN8btocLiztwzdSXCvwQ8BazdSMtf4aMQkStimSbY.jpeg

    step 4

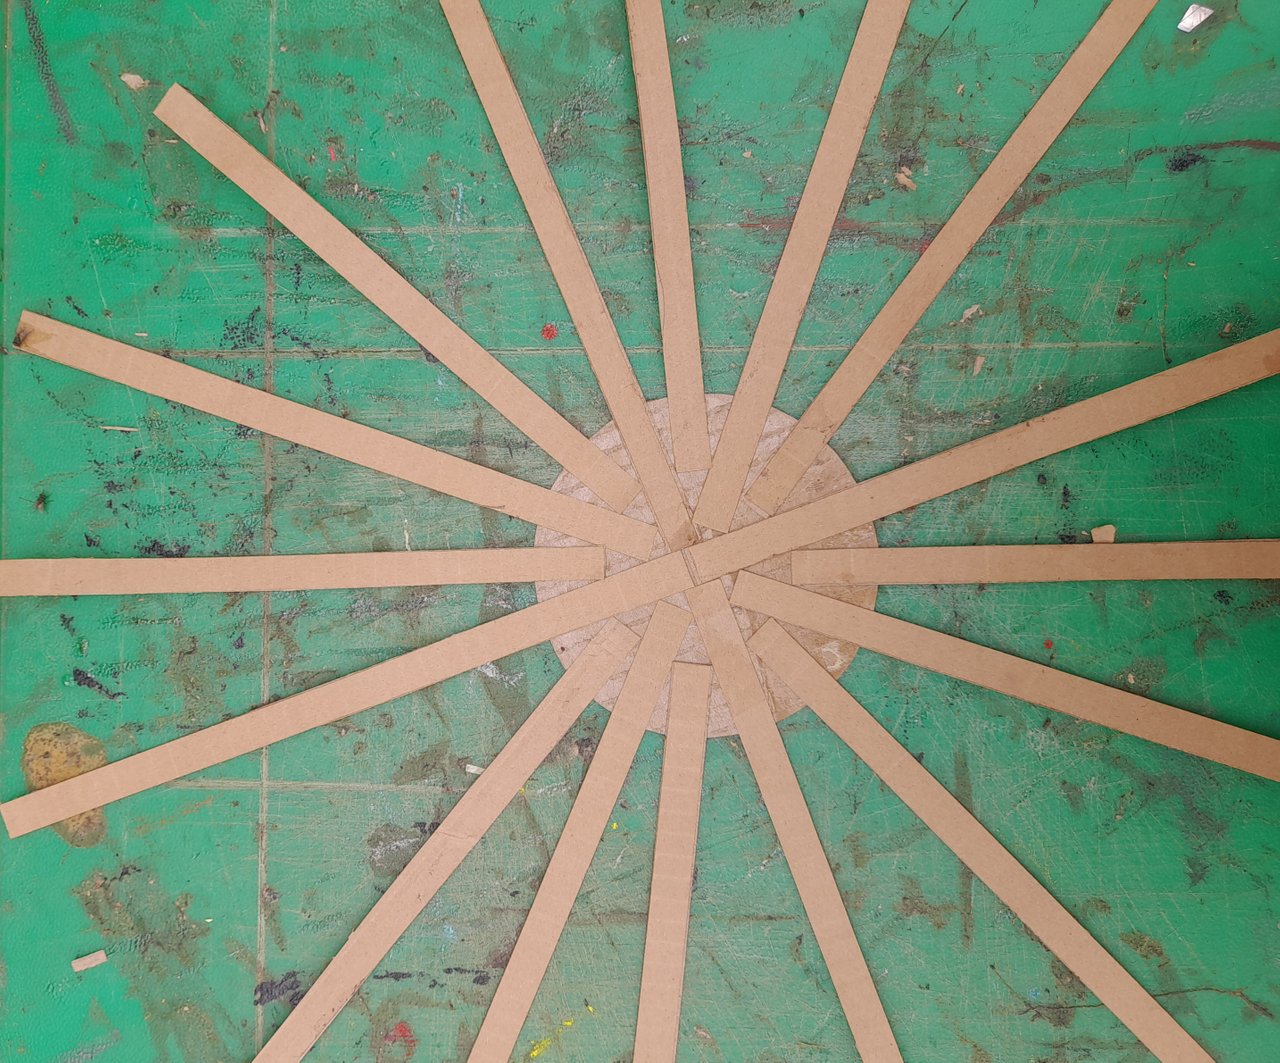
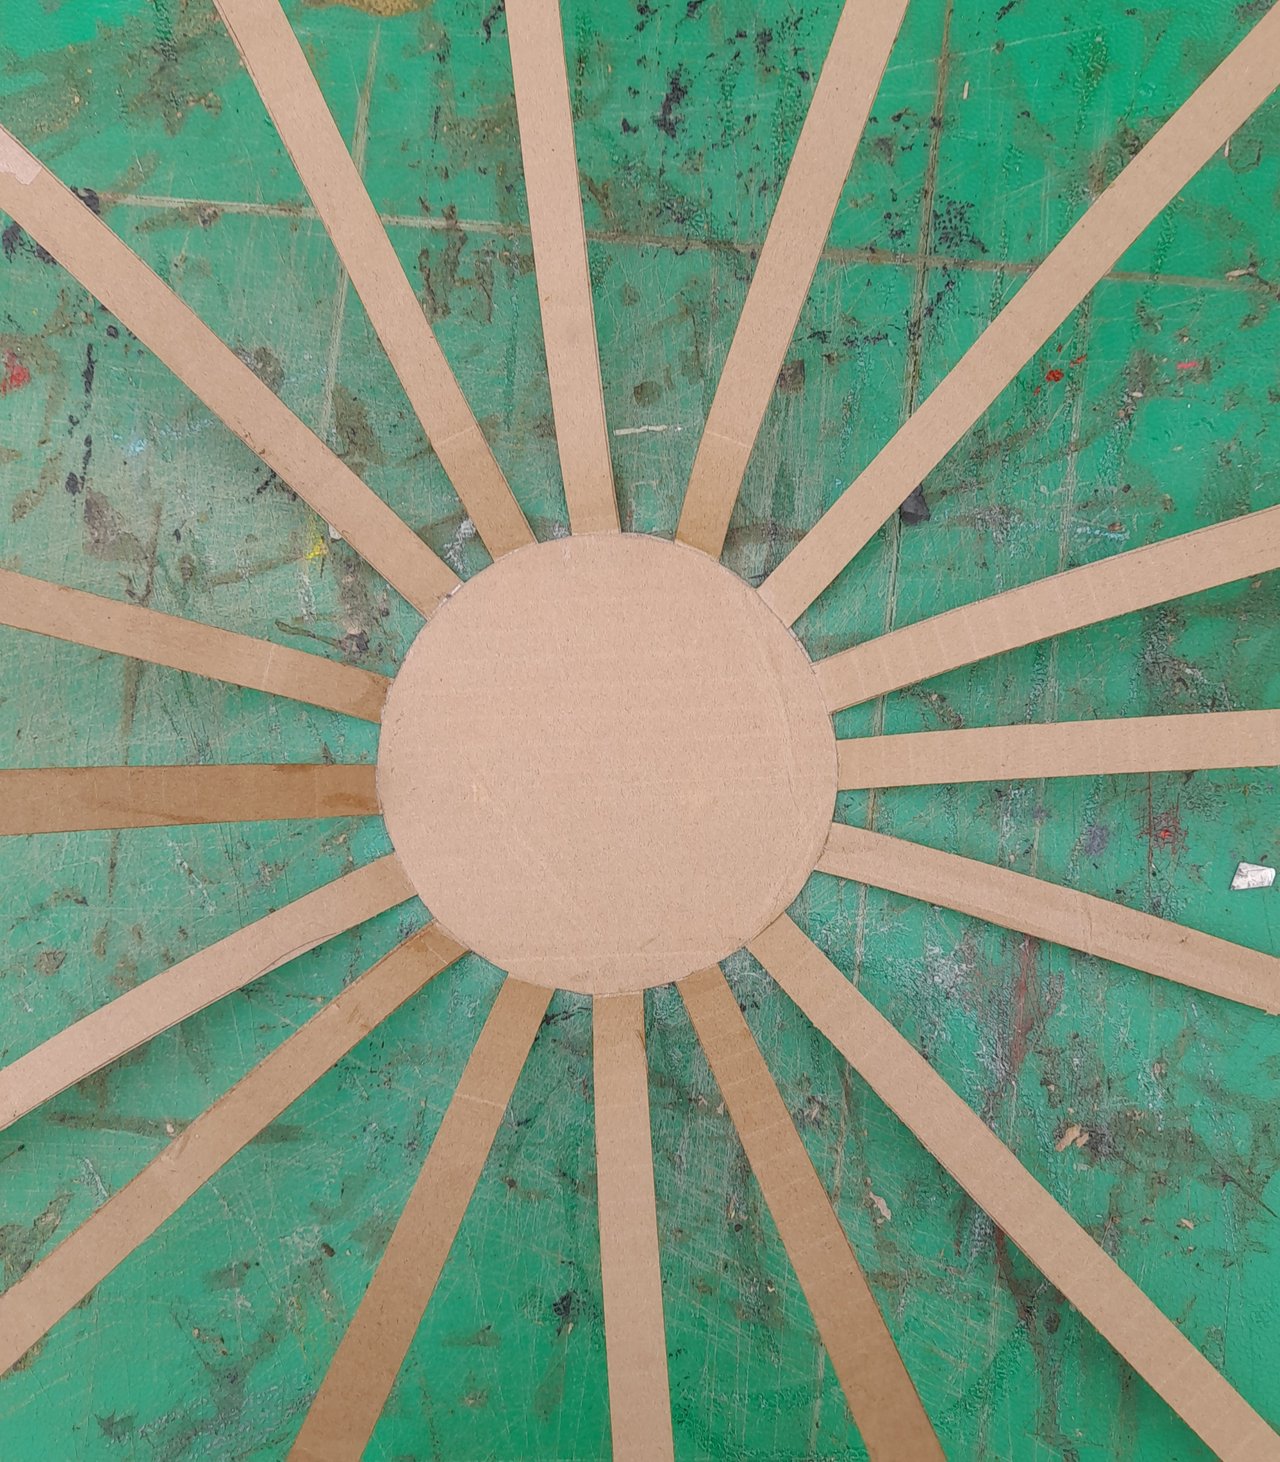
    After doing that, I then began the base of my basket construction and gum the stripes of cardboard which I made and attach them on the circular cardboard as shown below.

    3jpR3paJ37V8JxyWvtbhvcm5k3roJwHBR4WTALx7XaoRovpMXAZoghYCqNRidokKXTBQATykTVtsxzMgWsgxhA7SSxMNmU9VcGtGLdBdwgGUsFomSXrUWd85UgDoJeJ25bwJ6.jpeg

    step 5

    Next i gummed the other circular cardboard together and used it to cover the first one to give me the base.

    3jpR3paJ37V8JxyWvtbhvcm5k3roJwHBR4WTALx7XaoRovYG57BUQQiKFDwUxfcmfjzE7cgLHCnU3HFjZAWU7Z1YgvJ3XZE8B9t4oKVbEnZeQuYX6qQPBYYjWPe5tn7VpCvbQ.jpeg

    step 6

    After doing that I then cut some strips again measuring 0.4 cm wide and then gummed them together using adhesive to form a very long strip.
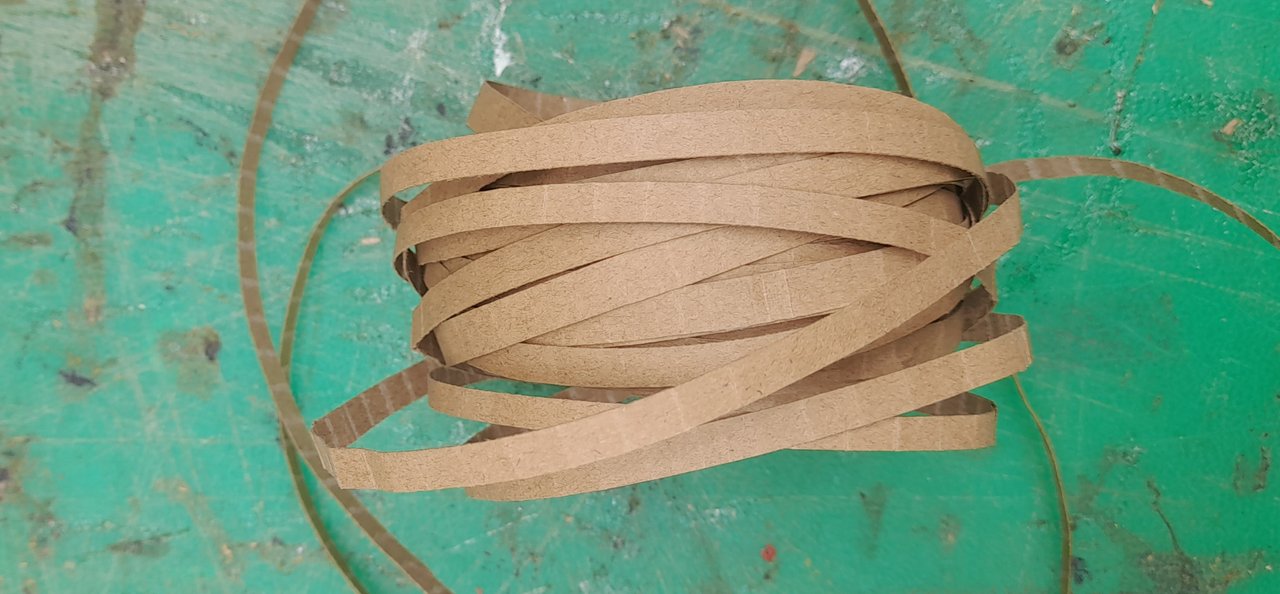
    3jpR3paJ37V8JxyWvtbhvcm5k3roJwHBR4WTALx7XaoRovUdKYApHAaaEr5AkfNFR3jN5W8j52R964d6h4swjExKvY1vFtyPq2jc8LstNMNSdJUoTHUHJRHFeaf2dtgdHEJdL.jpeg

    step 7

    At this step, I then used the 0.4 cm wide strips to weave the base of the basket.
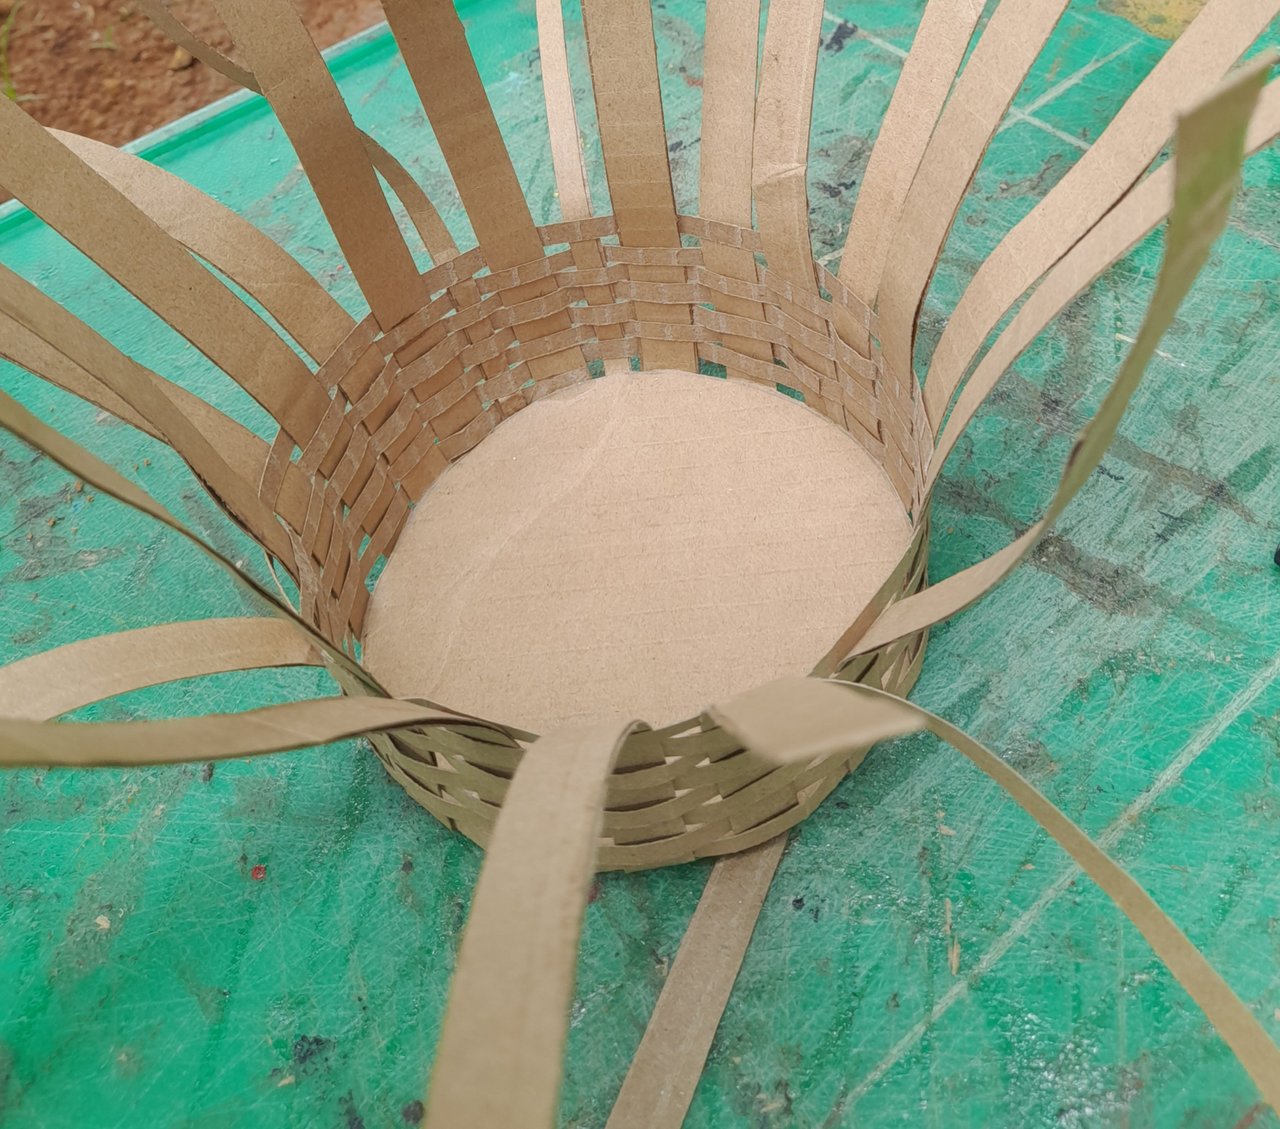
    3jpR3paJ37V8JxyWvtbhvcm5k3roJwHBR4WTALx7XaoRovRM5tYpYPYv6TPv9LoCmnzkrQCCjNPAM293RvhiPLqS43sVm1QZ4iM9bqqAoTurdGAuCZy1Eai9QU5soNiFHiwJE.jpeg

    step 8

    After doing that, I then finished weaving the entire basket and I trimmed the top edges of the basket with my scissors.
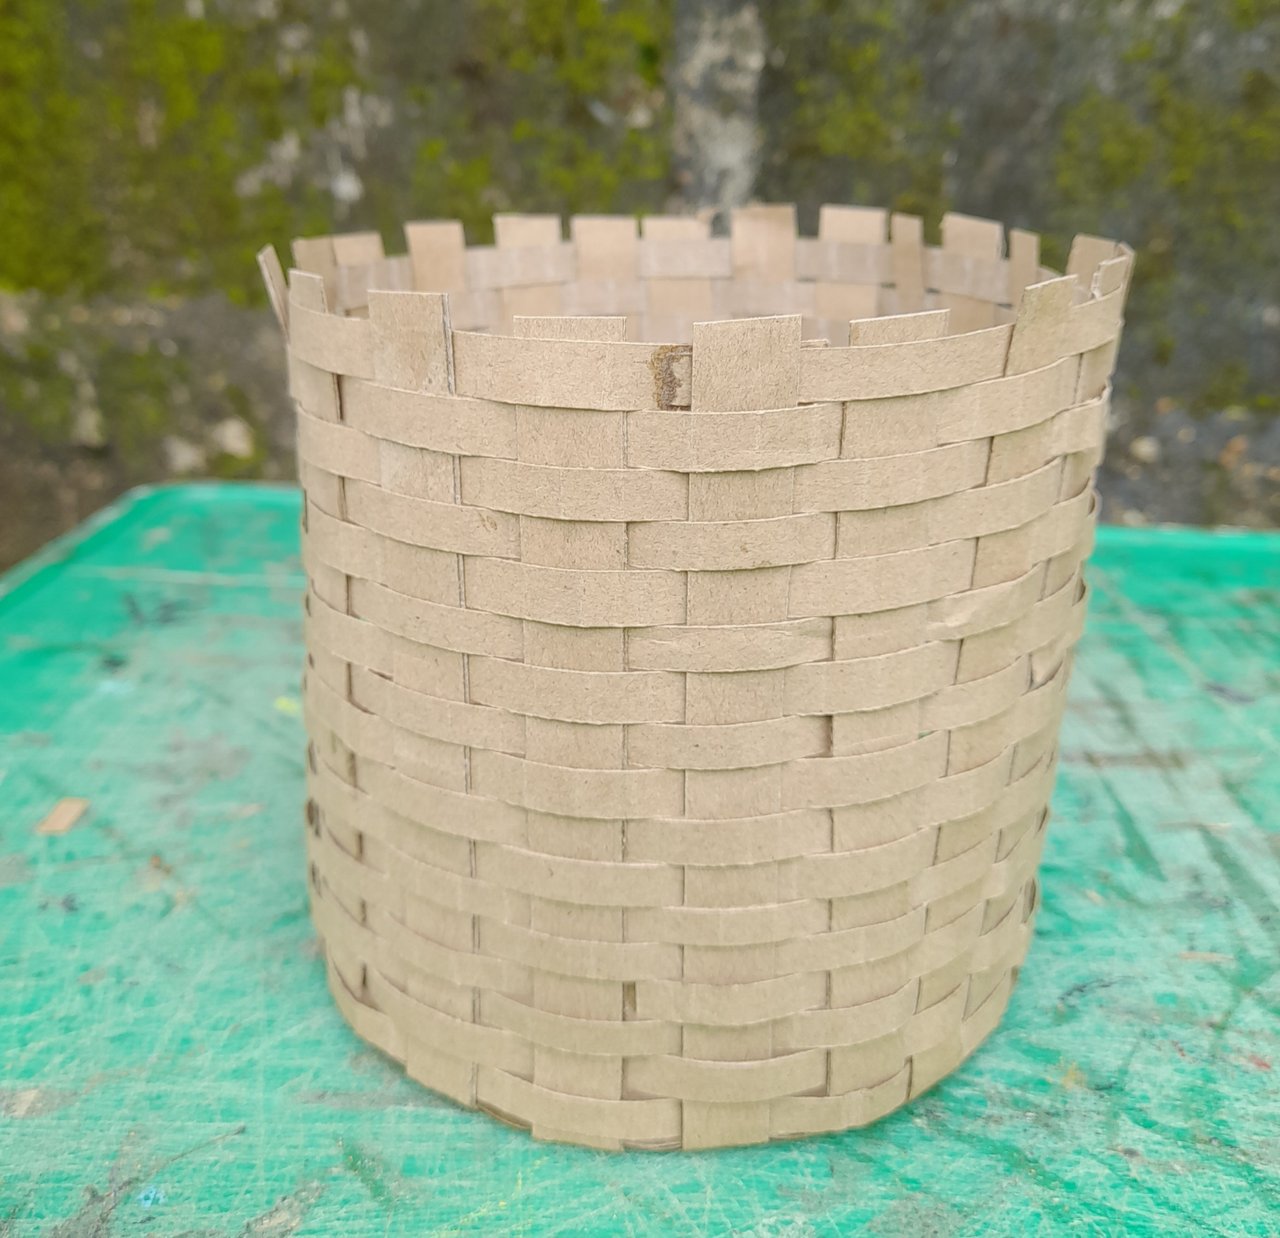
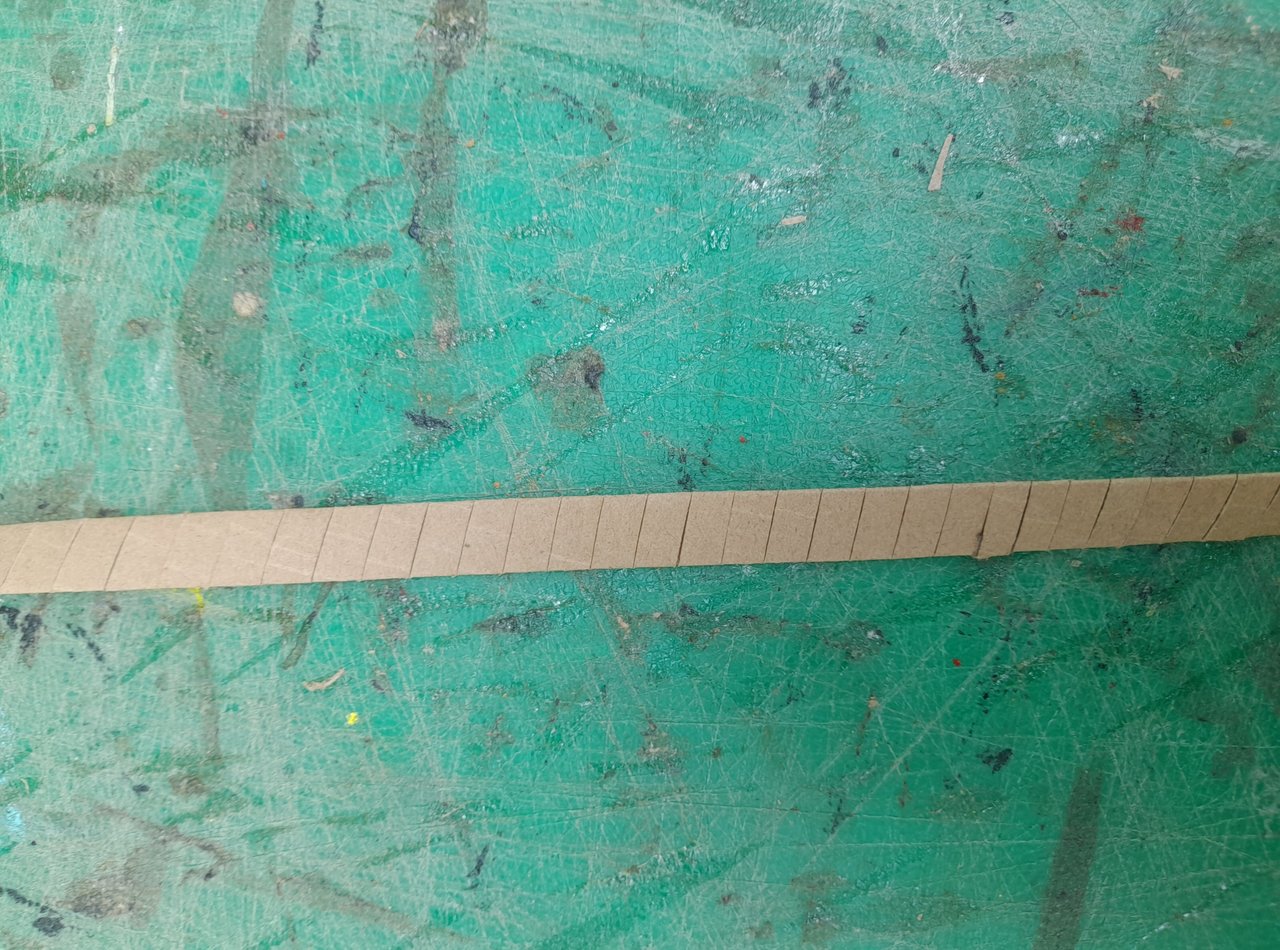
    3jpR3paJ37V8JxyWvtbhvcm5k3roJwHBR4WTALx7XaoRovo45cHC33hwXX5qjcMUNE1pXURVg33CfabCJ5vaqb7BQTPz45kkG2J3yCMXbmqq4dd7dkHwQgaZ1Vh2yTHNKBKTk.jpeg

    step 9

    At this stage, I then constructed the top edge of the basket, first I picked a 1 cm strip of cardboard that can round the top of the basket and used another cardboard and weave it from edge to edge. After that I then gummed them together to form a circle.
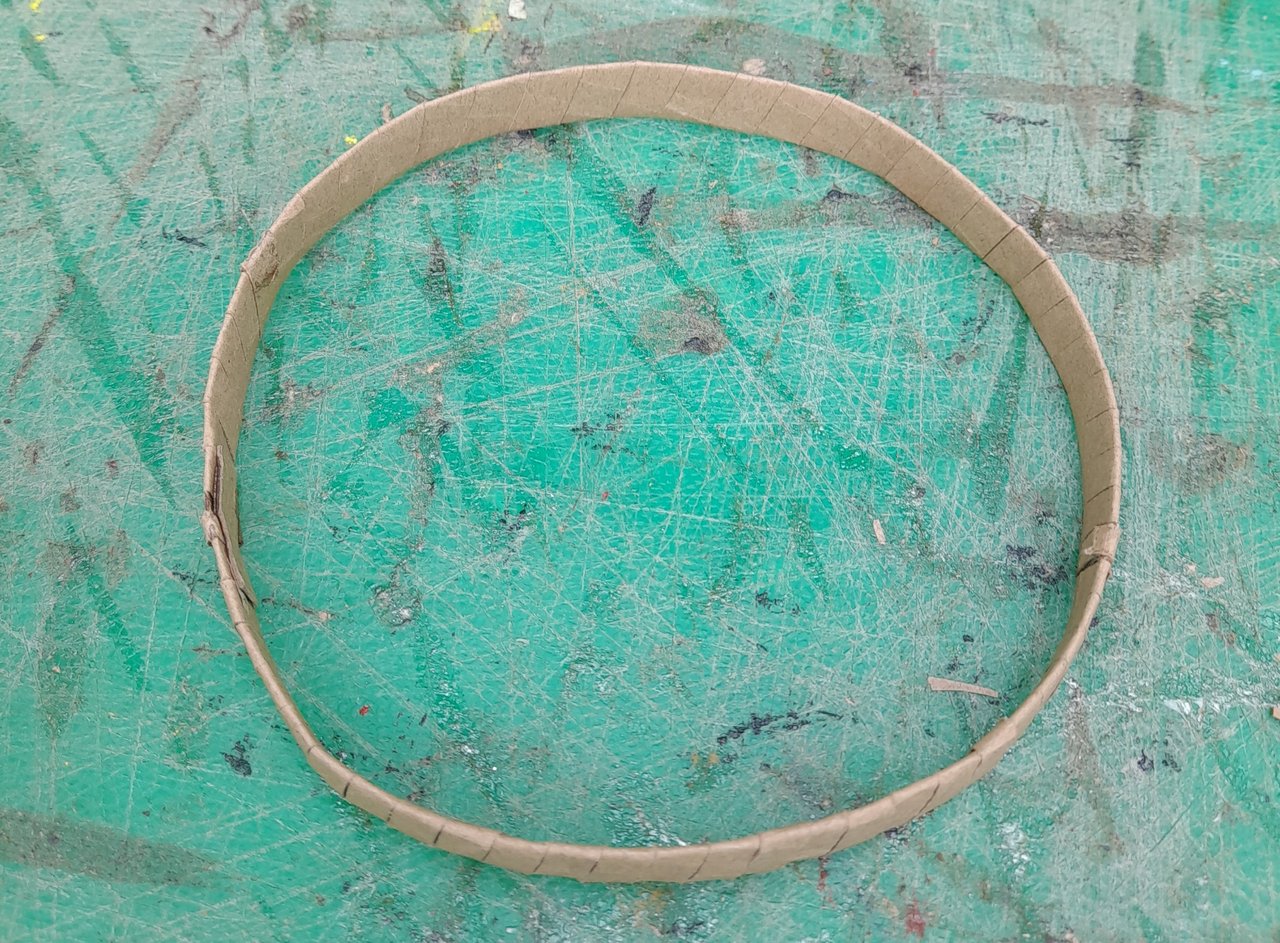
    3jpR3paJ37V8JxyWvtbhvcm5k3roJwHBR4WTALx7XaoRovaWtLyVB6HwwmpB77YbFJ12EV8pGacKcX8jNxxU3nuQDQM9sZnoGkTHjLP1bzwWmfPf2XYHB8TFCWyhiu58VLBq8.jpeg


    3jpR3paJ37V8JxyWvtbhvcm5k3roJwHBR4WTALx7XaoRovaUXSxHT4WovrPorD3S3JFtGS3VGv9hbjGan7BQTVxdBTCuhznE4dCbce1SSBHBEE3ZktT5H8pESHZb8LQUzU5Xc.jpeg

    step 10

    Then I mounted the constructed edge on the basket and gummed it with adhesive.

    3jpR3paJ37V8JxyWvtbhvcm5k3roJwHBR4WTALx7XaoRove2zDPxRwFeE3Fpq3V69ANg4URNYfB186W4E1HJf8nBDKpb8tB65jMNtr9p8YKSDkJCrTd3Je7wipANuUa6RRZWv.jpeg

    step 11

    After doing that I then constructed the handle of the basket using cardboard and I gummed it to the top of the basket.

    3jpR3paJ37V8JxyWvtbhvcm5k3roJwHBR4WTALx7XaoRovZFqRBxzqyEDTuKXJejtqJCzee79JyckH91j8VZn1nvjJUhovYeJACydh68BEnYEyfAQUsv7xDNSmZnFHr8biia2.jpeg


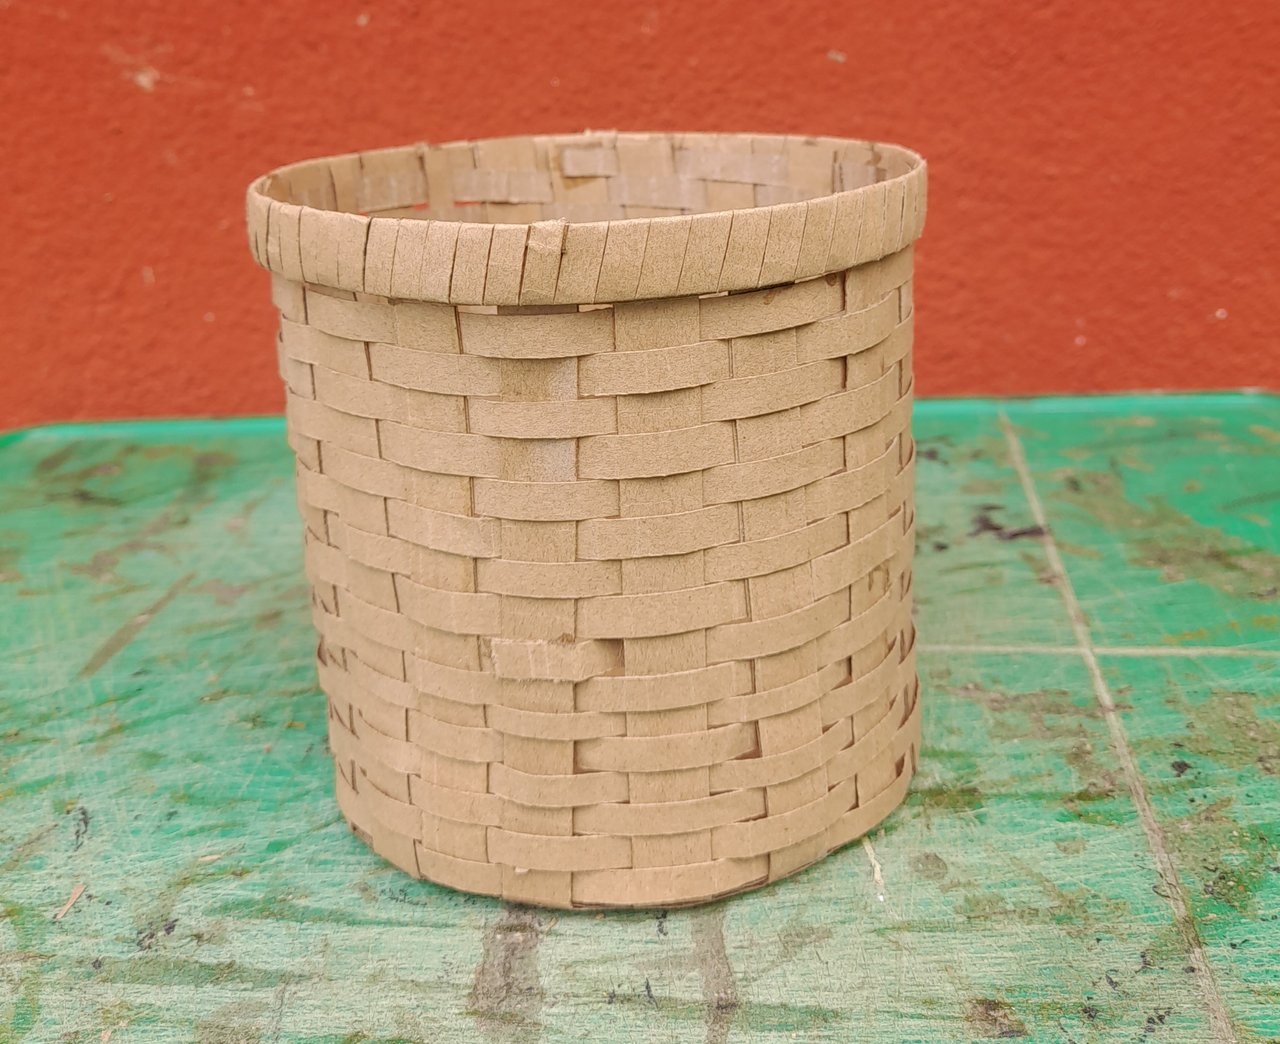
    After completing my craft here is my final result

    3jpR3paJ37V8JxyWvtbhvcm5k3roJwHBR4WTALx7XaoRovZFqRBxzqyEDTuKXJejtqJCzee79JyckH91j8VZn1nvjJUhovYeJACydh68BEnYEyfAQUsv7xDNSmZnFHr8biia2.jpeg


    With these few steps and some crafting skills I have been able to create a cardboard basket that can serve as a multiple purpose tool. I have come to the end of my crafting and I hope you all liked my craft very much. Till we meet again and bye for now.

    THANKS FOR READING THROUGH


      Authors get paid when people like you upvote their post.
      If you enjoyed what you read here, create your account today and start earning FREE VOILK!