Un saludo mi querida comunidad @needleworkmonday, desde algún tiempo no me entusiasmaba en crear algo para mi, pero en esto días compre una tela de algodón con una textura bien agradable que de inmediato dije esta es para elaborar algo para mi, además me encanto ese tono rosa tan delicado. Al igual que encontré un sticker con lentejuelas en el mismo tono para decorarlo y así arme todo el rompecabezas del diseño que quería. Aunque mi ciudad es calurosa me gusta este estilo y lo uso para salir en horas de la noche donde el ambiente es mas fresco. Quede encantada con el resultado además la satisfacción de lucir una prenda elaborada por mi.
Greetings my dear community @needleworkmonday, for some time I was not enthusiastic about creating something for me, but these days I bought a cotton fabric with a nice texture that immediately said this is to develop something for me, plus I loved that pink tone so delicate. I also found a sticker with sequins in the same tone to decorate it and so I put together the whole puzzle of the design I wanted. Although my city is hot I like this style and I use it to go out at night where the atmosphere is cooler. I was delighted with the result and the satisfaction of wearing a garment made by me.
- Tela de algodon
- Hilo para coser
- Alfileres
- Tijera
- Stiker de lentejuelas
- Cotton fabric
- Sewing thread
- Pins
- Scissors
- Sequin stiker


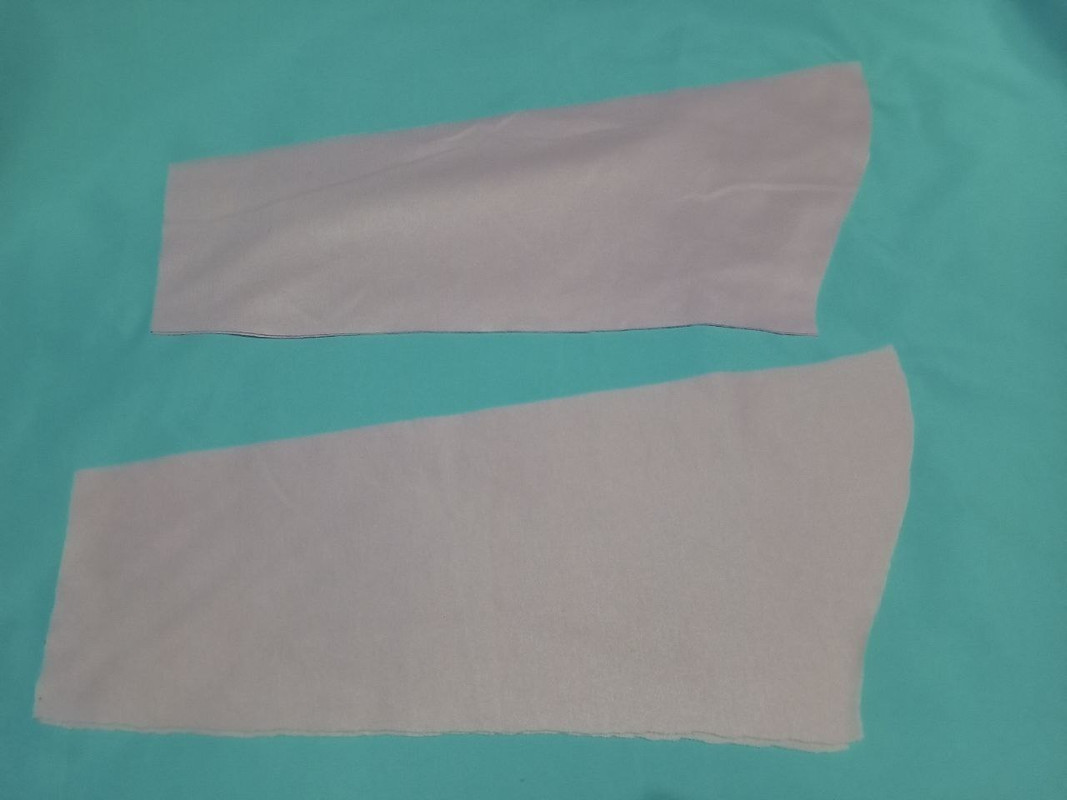
Como les comente anteriormente muy poco me animo a realizar cosas para mi, la mayoría de las veces es cuando tengo algún compromiso o invitación algún lugar y quiero vestir algo diferente. Pues esta vez no era la diferencia, aunque ya desde hace días me habia llamado la atención este diseño, hasta que decidí concretar la idea. Primeramente corte todas las piezas usando otro suéter similar que tengo como molde. Corte la parte delantera y espalda, las mangas y unas tiras en rib color rosa para realizar el cuello, los puños y un fajín en la parte inferior
As I mentioned before, I rarely dare to make things for myself, most of the time it is when I have an engagement or invitation somewhere and I want to wear something different. This time it was no different, although this design had already caught my attention a few days ago, until I decided to realize the idea. First I cut all the pieces using another similar sweater that I have as a mold. I cut the front and back, the sleeves and some strips in pink rib to make the collar, cuffs and a sash at the bottom.

Como siempre al comenzar hacer una camisa, franela o blusa iniciamos uniendo la parte de los hombros, para después poder colocar las mangas que en este caso son largas.
As always when starting to make a shirt, flannel or blouse, we begin by joining the shoulders, and then we can place the sleeves, which in this case are long.


Esta vez antes de cerrar los costados aproveche para coser en la parte central delantera un sticker de lentejuelas muy hermoso, que en un post anterior habia usado uno parecido pero termoadhesivo y solo debía utilizar la plancha para fijarlo, pues este es otro estilo, con un poco mas de dificultad ya que tenemos que llevar a la maquina de coser. Sin embargo para evitar que se mueve y nos quede torcido le voy a dar dos trucos, le pueden colocar los alifleres necesarios o sencillamente bastear. De esta manera les quedara con un buen acabado que es lo que buscamos al momento de elaborar una prenda de vestir.
This time before closing the sides I took the opportunity to sew a very beautiful sequin sticker on the center front, in a previous post I had used a similar one but thermoadhesive and I only had to use the iron to fix it, well this is another style, with a little more difficulty since we have to take it to the sewing machine. However, to prevent it from moving and being crooked I will give you two tricks, you can place the necessary alifleres or simply baste it. This way it will have a good finish, which is what we are looking for when making a garment.


Después de esto si podemos cerrar por ambos costados, como tambien colocar los detalles en tela de rib en el cuello, puños y fajín. Estas piezas le agregaran al diseño de este sueter un poco de originalidad que va parecer de fabrica. Últimamente en la mayoría de las franelas que he realizado les coloco este tipo de tela acanalada en los cuellos que le dan ese acabado y resultado que buscamos en nuestras prendas de vestir.
After this we can close both sides, as well as place the rib fabric details on the collar, cuffs and sash. These pieces will add to the design of this sweater a little bit of originality that will look like it was made in the factory. Lately in most of the flannels that I have made I place this type of ribbed fabric on the collars that give it that finish and result that we are looking for in our garments.


De esta manera he finalizado este paso a paso de este lindo sueter que confeccione especialmente para mi y estar compartiéndolo con ustedes este lunes de aguja, espero que mi trabajo sea de su agrado y les sirva de mucho. Con esmero y dedicación podemos lograr muchas cosas que nos proponemos
!! Un saludo y nos vemos en una próxima oportunidad!!
In this way I have finished this step by step of this nice sweater that I made especially for me and I will be sharing it with you this Monday of needlework, I hope you like my work and that it will be useful to you. With care and dedication we can achieve many things that we propose.
!! Greetings and see you in a next opportunity!


| Pueden seguirme en 💙: | You can follow me on 💙: |
|---|---|
| eveyese1312 | |
| Discord | eveyese1312#6211 |
Las fotos y el contenido son de mi autoria
Imágenes editadas en PowerPoint Canva y PicMonkey
Para la traducción usé el traductor: DeepL
The photos and content are my own.
Images edited in PowerPoint Canva and PicMonkey
For the translation, I used the translator: DeepL