
In this second installment to @spknetwork's Call To Action (CTA) post to Create Storage Contracts Using Dlux.io Frontend, we'll continue the remaining steps. For the first part, please refer to this post.
1. Creating Storage Contracts Using Dlux.io Frontend
In the first part, we were able to do until the fourth step - Creating a Paid Contract using BROCA.
Register your account on the SPK NetworkGet some SPKPower up SPK to get BROCACreate a Paid Contract using BROCA- Upload Files to Your New Contract
- Create a Free Contract
- Extend a Contract Expiration Date
- Encrypt a File
Step 5. Upload Files to Your New Contract
Step 5.1. Action
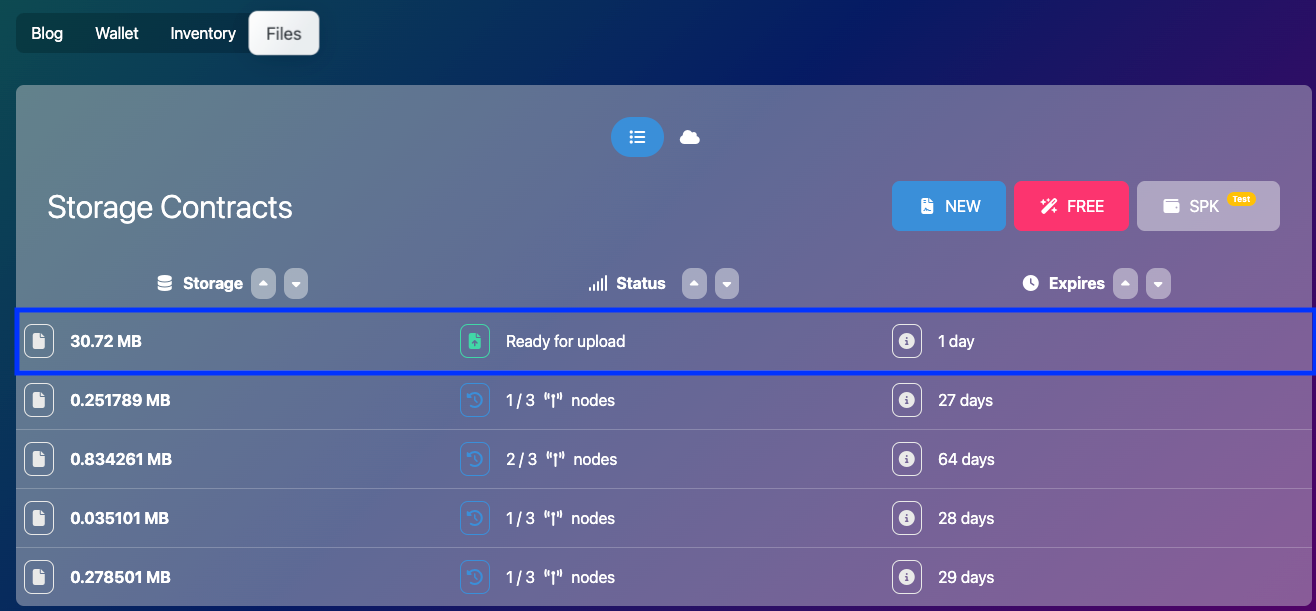
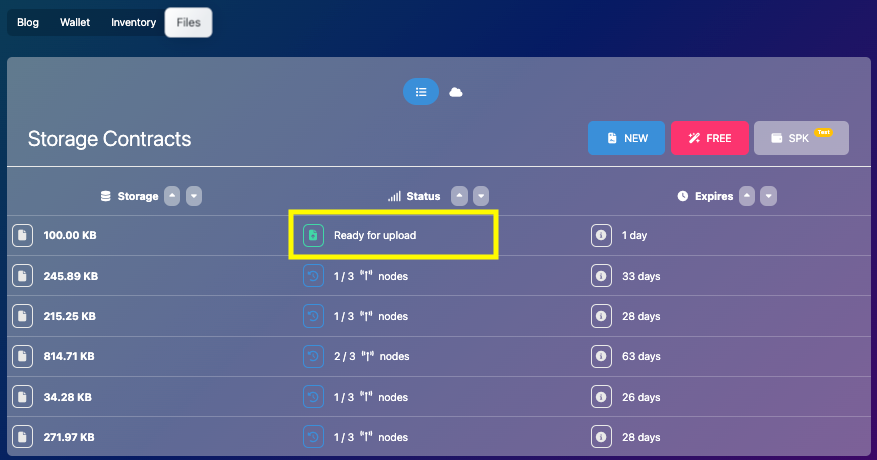
Continuing from where we left of, we can now use our created contract to upload files to the SPK Network. Let's click the "Ready for upload" button.
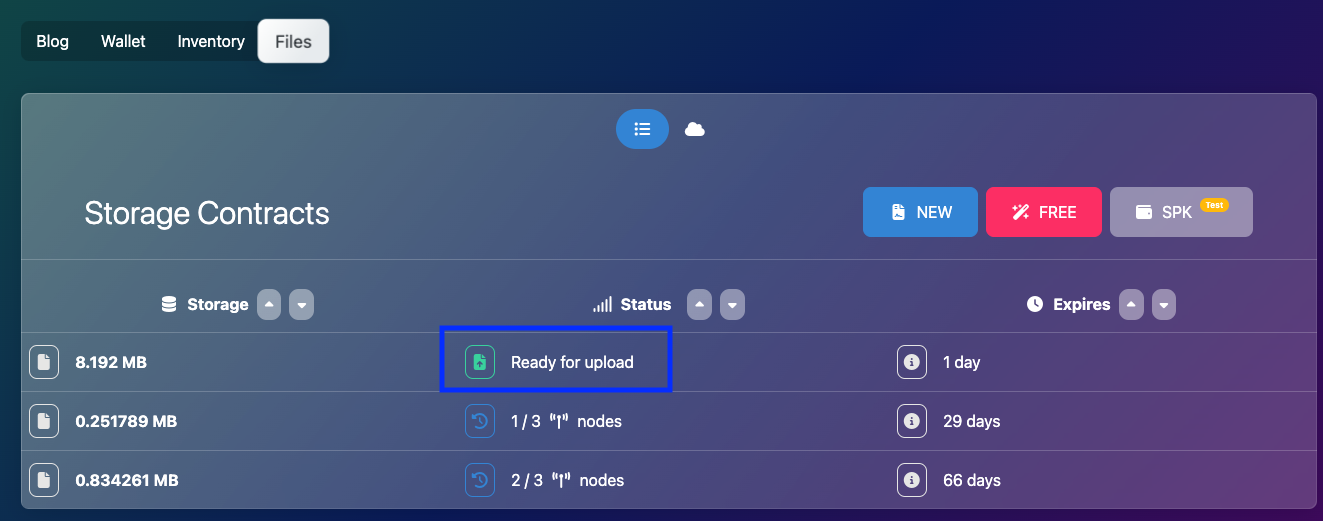
It will prompt us to upload a file (as indicated in the hint displayed, we have 1 day to start the contract).
Select or drag and drop any file on your PC or desktop whose file size is within the file size allowed by the contract. For this case, our newly created contract can accommodate a file of around 8.192 MB.
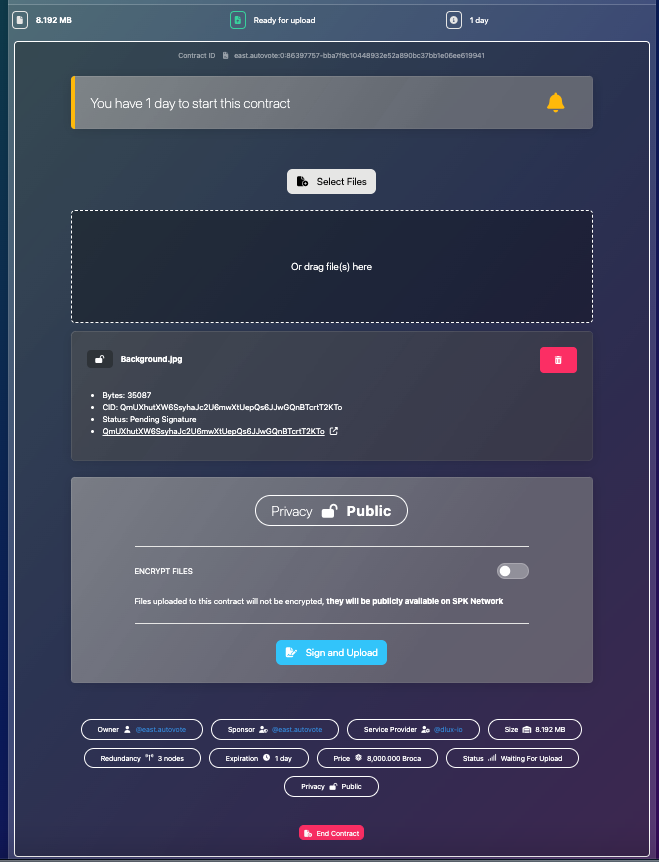
Also, let's follow what was instructed in the guide to store the file as Public:
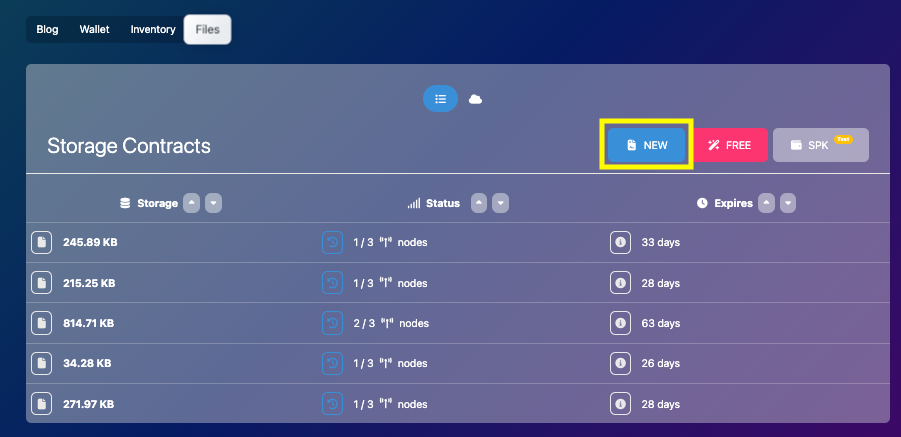
- Once your new contract is visible, you will see the storage, status, and expiration details.
- Click on the storage to upload your files. Start the contract within one day.
- Ensure your files do not exceed the storage capacity.
- Choose to make them Public or Encrypted. For this example, select Public.
- Click "Sign and Upload", confirm the transaction, and wait for the page to reload.
- Your contract will now be active for 30 days. You can view details such as price, expiration time, size, and more in the info section.
Once we're good with the file, let's click "Sign and Upload" it and wait for the page to reload.

Step 5.2. Feedback
For this step, a possible improvement could be an option to set the duration of the contract instead of the default 30 days. This will help in the UX that the user won't need to go through the Extend Contract process (the last step in this CTA category).
Step 6. Create a Free Contract
Step 6.1. Action
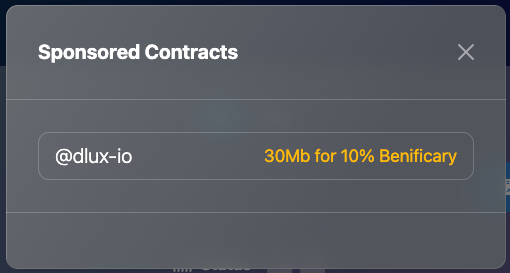
In this step, we'll be creating a contract using dlux.io's Sponsored Contract. Here, we're not required to have any BROCA since the contract provider will take care of it in exchange for having dlux-io as a 10% beneficiary for the post.
To start, let's click the "Free" button.
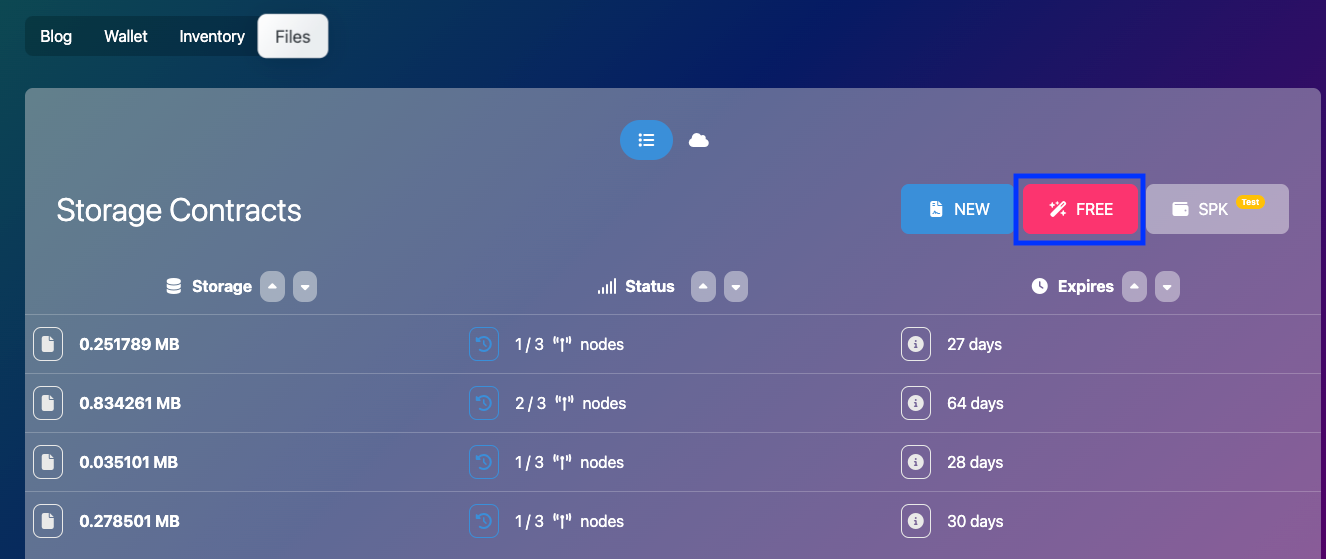
It will display the Sponsored Contracts modal. Although it may not seem obvious, we need to click "30Mb for 10% Benificary." (Obviously, "Benificary" is misspelled)
Once we've clicked that, the page will reload and we'll see the Free Contract created for us.
The same with what we did with our paid contract, we can select or drag any file we want to upload. Once we're happy with our selection, let's click "Sign and Upload."
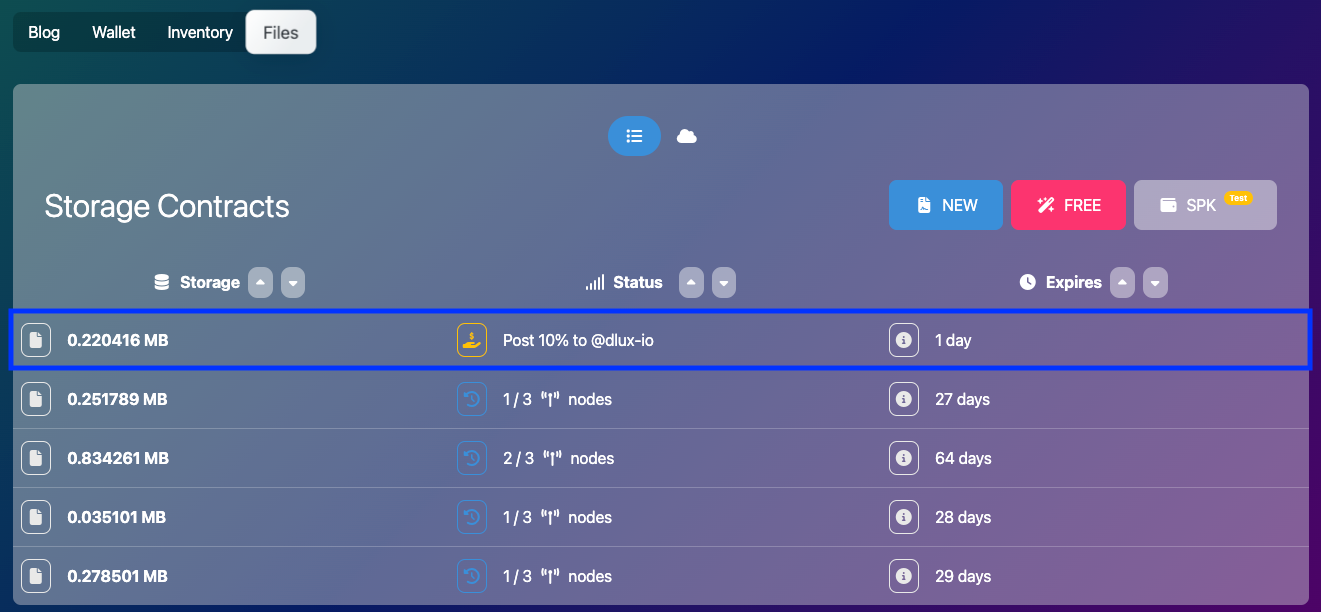
We can see that its status is "Post 10% to @dlux-io." The main difference between a Paid Contract and a Free (Sponsored) Contract is that in the latter, it has an integrated post creator/editor, compared to the former which only has a link to the file.
| Paid Contract | Free (Sponsored) Contract |
|---|---|
 | 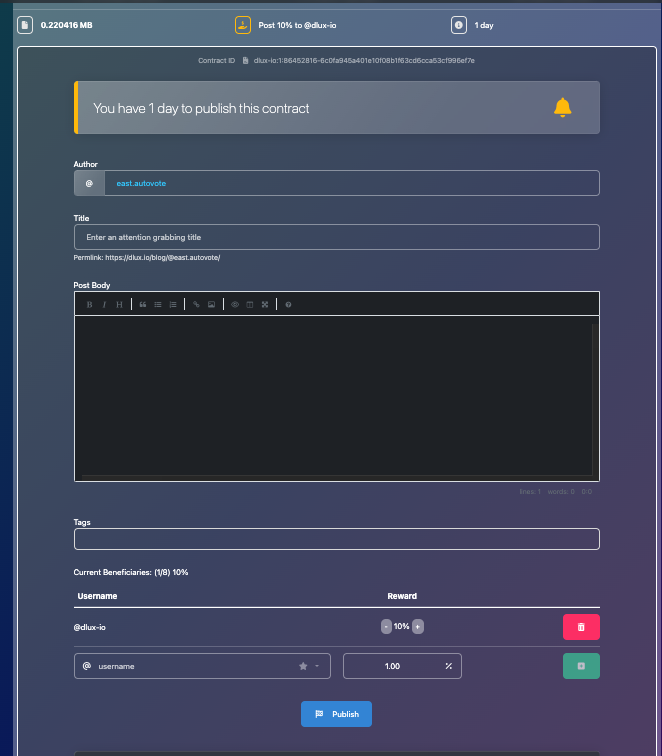 |
This difference can be mainly attributed to the concept of a Free/Sponsored Contract. For a Free/Sponsored Contract to be honored, we need to create a post for it to become active.
- Go to the Dlux Files Page and click on the "FREE" icon.
- This allows you to upload up to 30 MB by setting a 10% beneficiary to @dlux-io. The beneficiary applies to one post, which you must publish to create the FREE storage contract.
- We recommend using a dummy or test account for this purpose.
- Click "Ready to Upload" and upload your files, following the same steps as the paid contract.
- Once uploaded, click on the storage contract again to create a post.
- Enter the Title, body, and tags. You can add the images you just uploaded to the post.
- Click "Publish".
- Note: This will create a post on Hive social media networks. Use a dummy account if just testing.
- If nothing happens, reload the page to see your contract for 30 days. Do not post again to avoid duplications.
Step 6.2. Feedback
As mentioned, there was a typo error in the Free Contract modal where "beneficiary" was misspelled as "beneficary." Already created a PR fix for this:
https://github.com/dluxio/dlux-iov/pull/2
Another feedback for this step I guess is the adaptability of this feature or function. If we're not using IPFS, for example, the default editor we use in Hive or Peakd, when we paste a screenshot from the clipboard, the editor automatically uploads the file to SC3 and inserts a link in our post.
Of course, this is a limited view of the usage of Storage Contracts. As mentioned by @starkerz in his latest interview, there are other use cases for storage contracts - particularly in the field of AI.
Step 7. Extend a Contract Expiration Date
Step 7.1. Action
For cases that the default 30 days to store our file is not enough, we can extend the duration of our contract. Let's see how to do that.
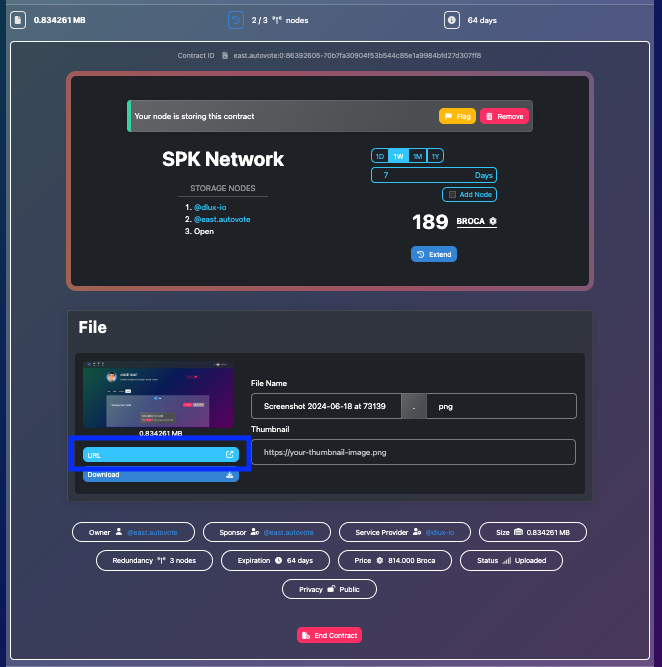
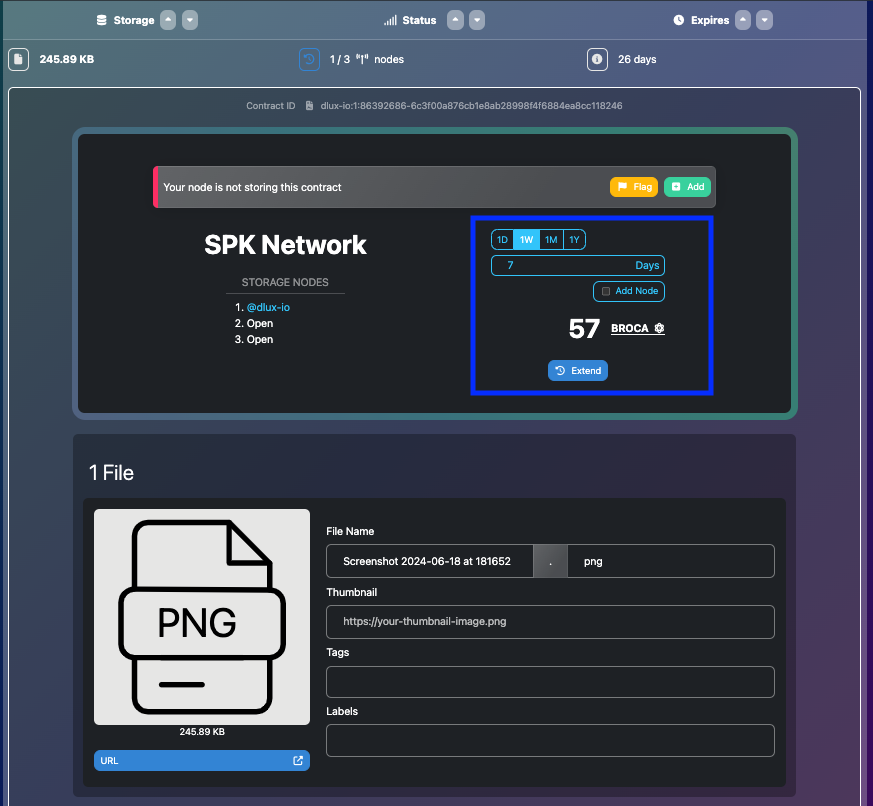
Let's click on any of our existing contracts.
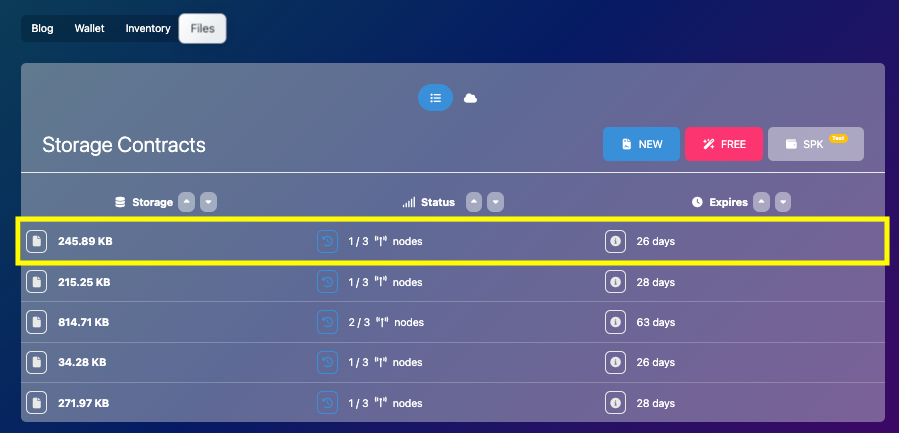
We'll see four options to extend our contracts by 1 Day, 1 Week (default), 1 Month, and 1 Year. Depending on the size of our file, it displays the amount of BROCA needed to extend the contract.
For this case, let's extend it by the default 1 Week which will cost us 57 BROCA. Let's click "Extend" and sign the transaction when prompted.
The page does not automatically reload, as such we need to manually reload it for the contract extension to reflect on our contracts list.
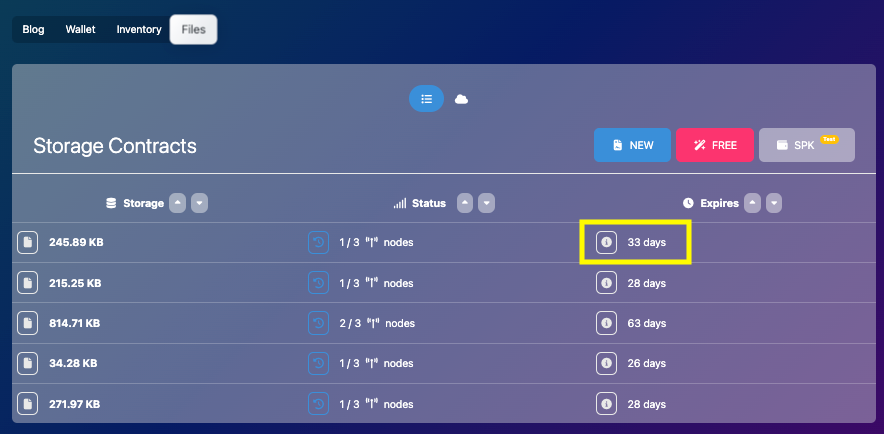
We can see that our contract has been extended from 26 Days to 33 Days. We can now proceed to the last step.
Step 7.2. Feedback
A valid feedback for this step I guess, is the obvious one - to automatically reload the page so that the extended contract is displayed or reflected on the page automatically without any need for the user to do a manual page reload.
Step 8. Encrypt a File
Step 8.1. Action
We're now finally at the final step - Encrypting a File. Let's review what's written on the guide:
- Create a new contract and upload files as before (paid or free). At DLUX this currently only works with text files, other files types are planned.
- Ensure you have your private MEMO key in your Hive Keychain Wallet. If not, import it.
- In the "Privacy" section, choose "ENCRYPT FILES".
- By default, files are encrypted for yourself, but you can add more users.
- Under "Sharing", type the desired username(s) (without @) and click the plus sign.
- Add as many usernames as needed.
- Click "Encrypt Keys" and confirm the transactions. This encrypts the files for all specified users, including yourself.
- Finally, click "Sign and Upload".
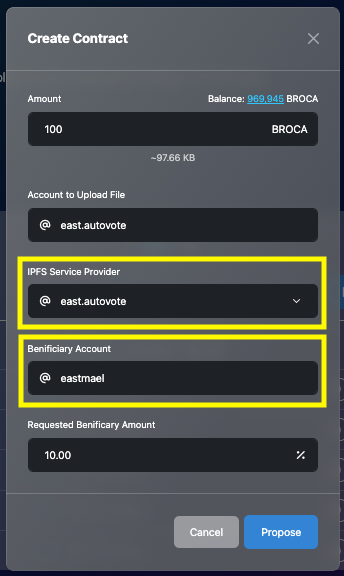
For this step, we'll go with an encrypted file that uses a paid contract. In our files page, let's click on New.
For this step, let's experiment a bit by choosing a different provider and setting a beneficiary, then click "Propose."
Once the page reloads, let's click on "Ready to Upload" for our newly created contract.
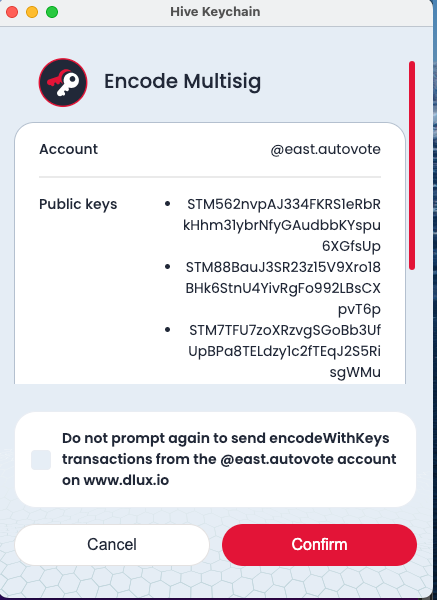
We can see here the options to encrypt our file. Let's switch the Encrypt Files switch to ON, then add users who can decrypt and view the files, and then finally click "Encrypt Keys."
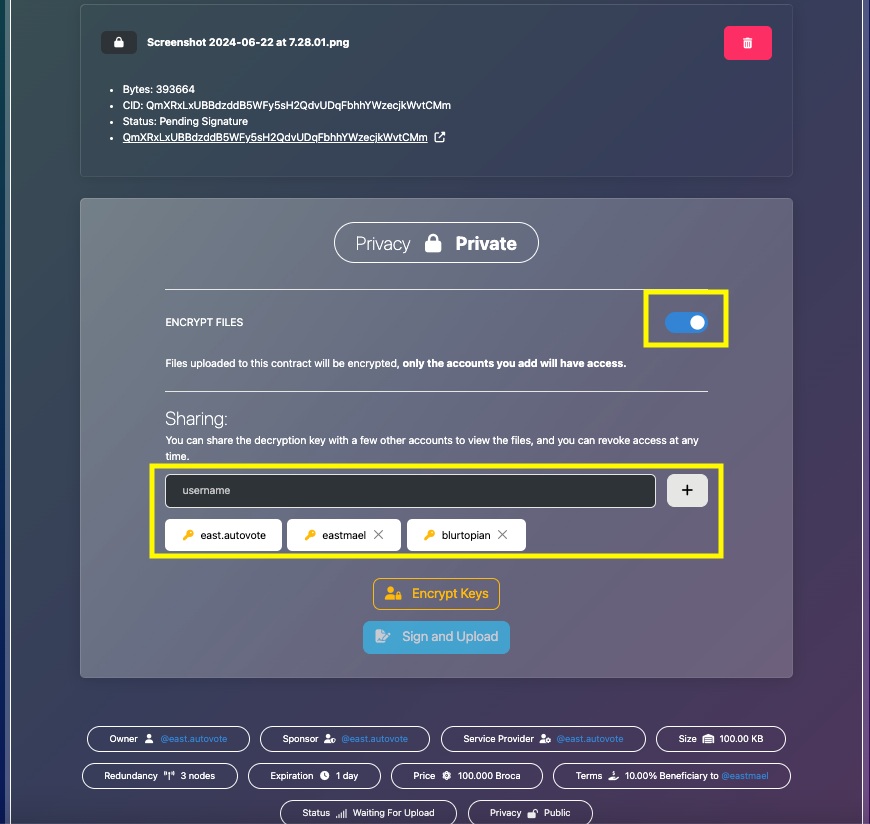
Keychain will prompt us to encrypt the files. We just click or accept that transaction.
After which, the "Sign and Upload" button becomes active. Let's finally click on "Sign and Upload" to finally complete the whole process.

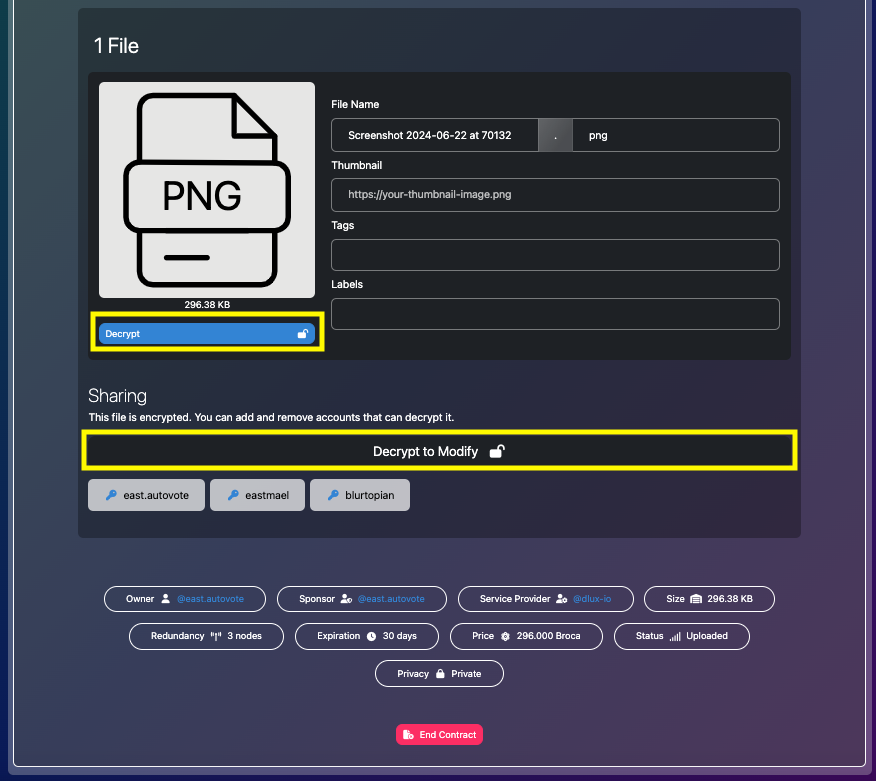
Let's click on our newly created file and check if it was indeed encrypted.
Given that the "Decrypt" and the "Decrypt to Modify" buttons are displayed, it seems that file encryption worked. However, when I click on these buttons, nothing happens - details follows.
Step 8.2. Feedback
An issue we encountered in this step is that after creating a contract, the "New" button is unclickable.

Another issue is that the other IPFS Provider doesn't seem to work? I guess for a better UX, we can hide providers that has errors and cannot support IPFS file uploads. Also, perhaps hide the beneficiary field if it causes any issue when creating contracts.
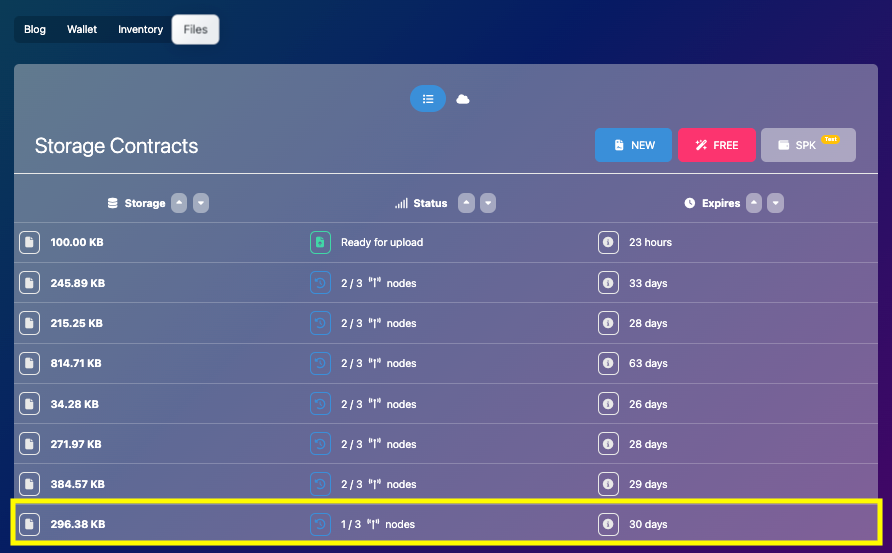
Another, there was a time I had to manually reload the page for the encrypted contract to properly display. After automatic reload, the contract still displayed Ready for Upload. But when I reloaded the page manually, it then displayed as expected (how many nodes store the file).
| Before Reload | After Reload |
|---|---|
 | 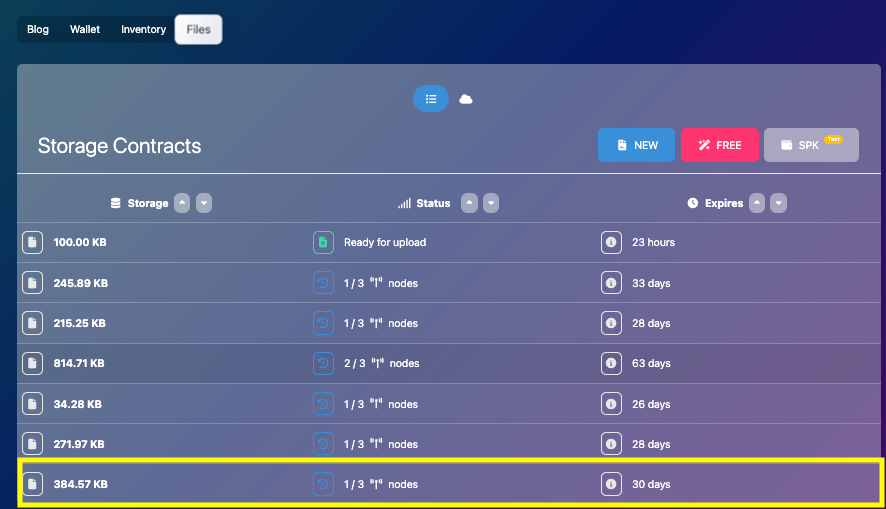 |
Lastly, the "Decrypt" and the "Decrypt to Modify" buttons in the File details doesn't work. Nothing happens when I click them and displays the following error in the browser console.

Uncaught (in promise) ValidationError: "message" with value ""#zTSHxw<encrpted string>" fails to match the required pattern: /^#/
3. Summary
We were finally able to finish all steps in the CTA to Create Storage Contracts on Dlux.io Frontend. Although it took us only a few hours to test the functionality, documenting and posting about it took longer than expected.
To complete the final four steps of the CTA, we uploaded files to our created paid contract, we created a free contract using dlux-io as provider and post beneficiary, we extended a contract, and finally encrypted our uploaded files so that only a selected number of users will be able to view and decrypt it.
Same as the previous post, we provided feedback as we completed each step. For the file upload, we suggested to have an option to set X number of days to store the file instead of the default 30 days. For the free contract creation, we submitted a PR for a misspelled "benificiary". For the contract extension, we suggested to reload the page automatically for the period extension to automatically reflect on the page. And lastly for the file encryption,
In a few words the best I can describe the experience is "We're finally getting there" or "It's finally taking shape."