Hola amigos, cuánto placer volver por aquí.
Hoy el tema que les traigo es el de una botella decorada, y mostrarles a través de una breve explicación y las fotografías del proceso, como lo he hecho.
Estoy seguro de que les gustará y que algunos lo podrán realizar en casa adecuando los recursos.
En este caso utilicé excepto un poco de gasolina, recursos que están al alcance de todos.
Por aquí anoto pedazos de polis puma,
un poquito de gasolina,
talco industrial,
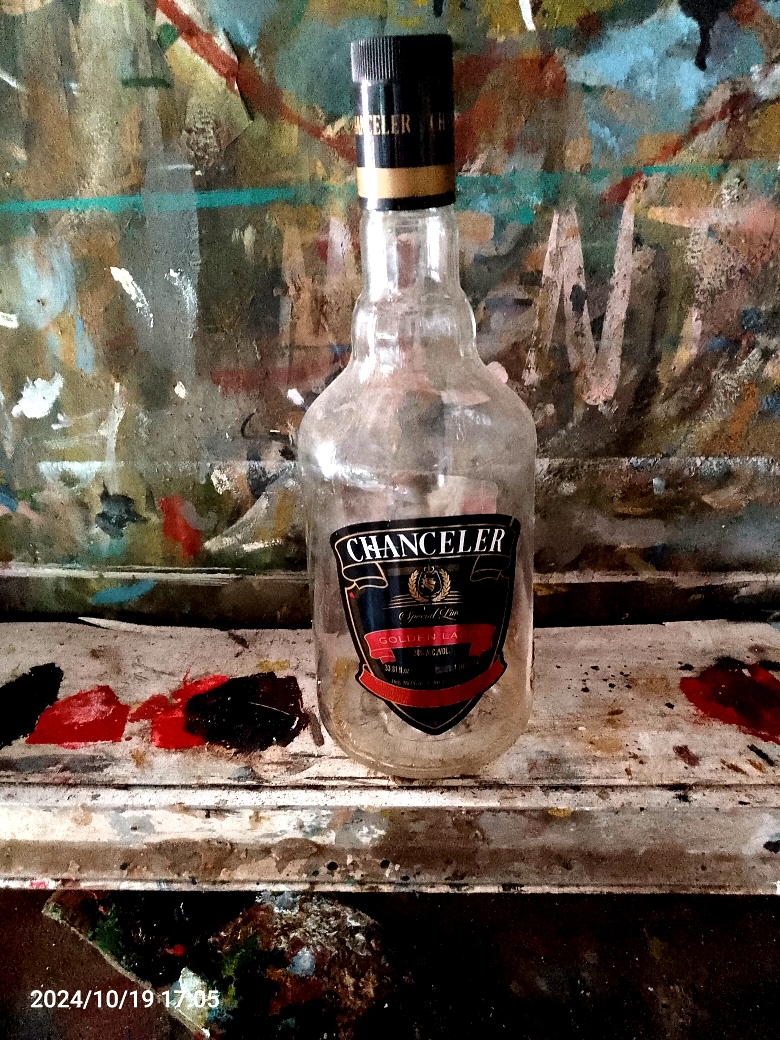
una botella.
Aditamento plástico de botella para Ron
, espátula, pequeñas arandelas de metal
y pigmentos de pintura de aceite
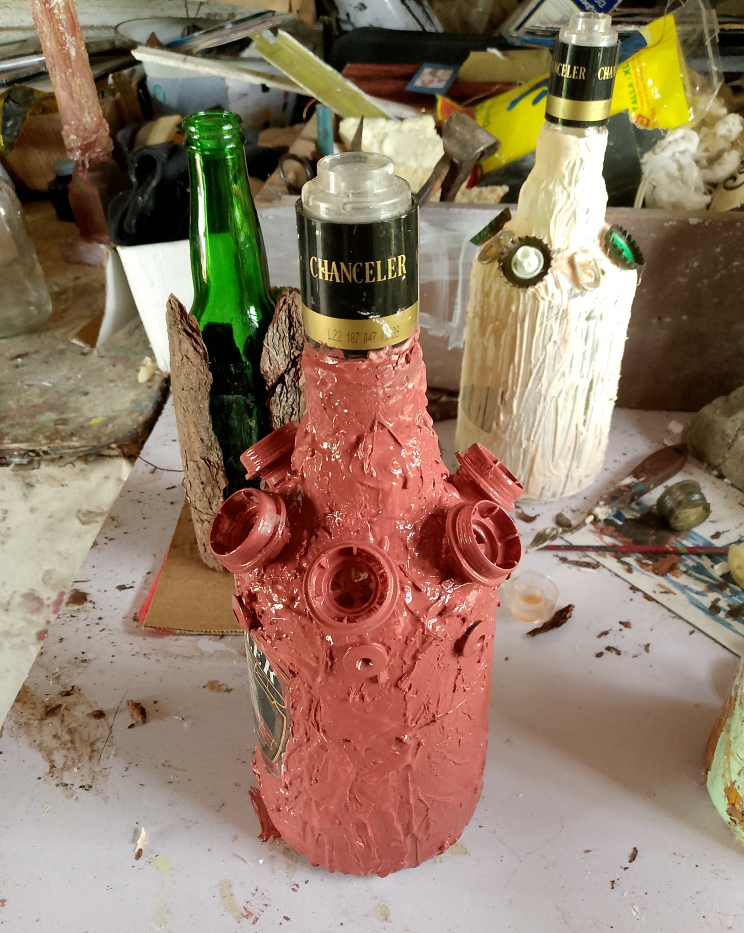
En la decoración de esta botella del exquisito y demandado Ron Chanceler quince acercarme al efecto de cerámica en la modalidad de terracota. O sea, cerámica quemada, pero sin esmaltar. Pero recuerden qué esto es solo una ilusión, una botella de cristal, y que esto es solo para una ilusión óptica.
Primero tomé un poco de pegamento de polis puma y con un poco más de gasolina lo fui disolviendo hasta ponerlo en una consistencia tipo barniz.
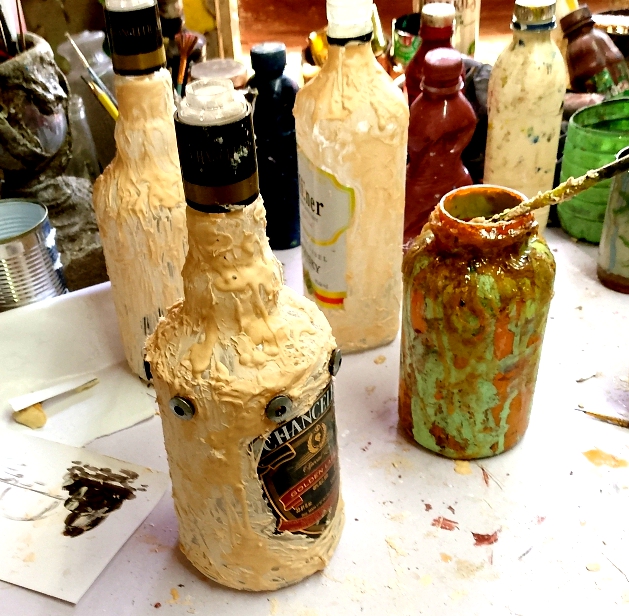
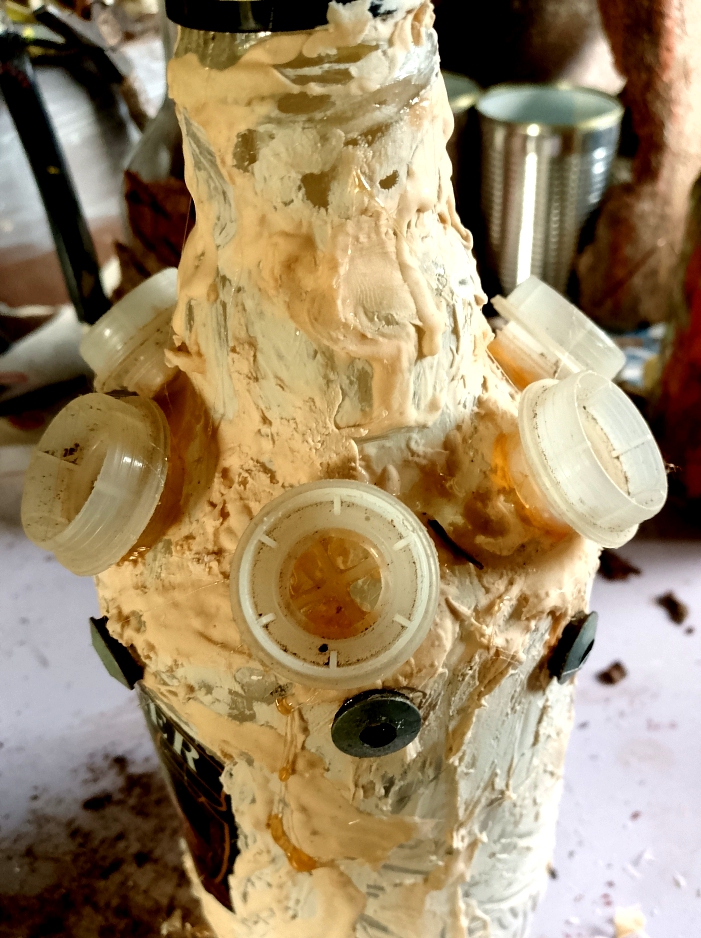
Después tomé un poco de talco industrial con lo que hice una pasta blanda o viscosa y con una pequeña espátula expandí de manera caótica la pasta por el cuerpo liso del envase, respetando solo la parte de la etiqueta para que la pueda guarde la identidad de la bebida.
Después fui pegando las arandelitas de meta a una misma altura y distancia. Así como las boquillas plásticas de otras botellas de ron. Para así ir creo por encima de la pasta, la idea de protuberancias y relieves más acentuados, y por qué ni, cierto carácter místico y de antigüedad, a la pieza.
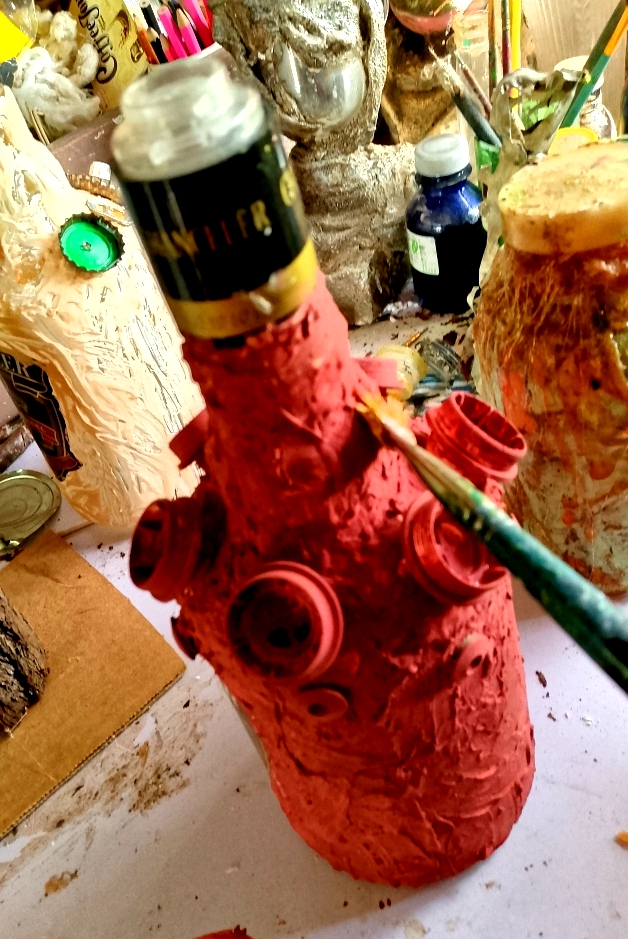
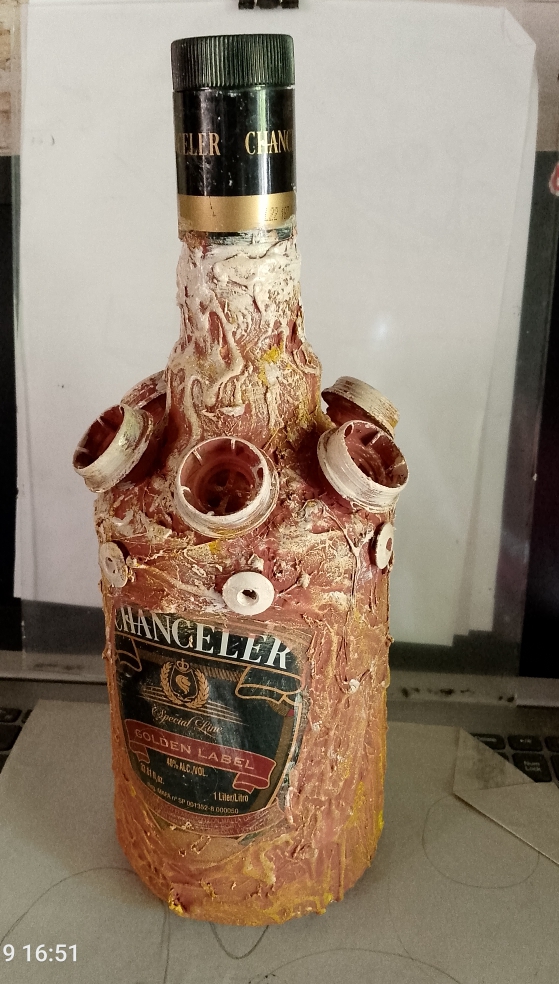
Cómo cierre del proceso solo resta la aplicación del color general, en este caso un poquito de color terracita. Después del secado el uso de la técnica de pincel seco con tonos amarillos y blancos para ir oí haciendo que aparezcan las texturas de la pasta que antes aplique.
Ya con este paso queda realizado el proceso de elaboración del decorado, que puede utilizar distintos tipos de objetos y materiales para darle expresividad.
Espero les haya gustado este tipo de decoración, y gracias por acompañarme hasta aquí.
Texto traducido con Deelp traductor.
Fotos tomadas con mi Tecno Spark.
PROCESO CREATIVO


ENGLIS VERSIÓN
Hello friends, what a pleasure to be back here.
Today the theme I bring you is that of a decorated bottle, and show you through a brief explanation and photographs of the process, as I have done.
I am sure you will like it and that some of you will be able to do it at home by adapting the resources.
In this case, I used except a little bit of gasoline, resources that are within everyone's reach.
Here I write down pieces of puma cops,
a little bit of gasoline,
industrial talcum powder,
a bottle.
Plastic bottle attachment for Ron
spatula, small metal washers, and oil paint pigments.
and oil paint pigments
In the decoration of this bottle of the exquisite and demanded Ron Chanceler, fifteen years ago I approached the ceramic effect in the terracotta modality. That is, burnt ceramic, but unglazed. But remember that this is only an illusion, a glass bottle, and that this is only for an optical illusion.
First I took a bit of polis puma glue and with a little more gasoline I dissolved it to a varnish-like consistency.
Then I took some industrial talcum powder with which I made a soft or viscous paste and with a small spatula I expanded the paste chaotically along the smooth body of the container, respecting only the label part so that it could keep the identity of the drink.
Then, I glued the little goal washers at the same height and distance. As well as the plastic nozzles of other rum bottles. In order to create over the paste, the idea of more accentuated protuberances and reliefs, and why not, a certain mystical and antique character to the piece.
As closing of the process only remains the application of the general color, in this case a little bit of terracita color. After drying the use of the dry brush technique with yellow and white tones to make the textures of the paste that I applied before appear.
With this step the process of elaboration of the decoration is done, which can use different types of objects and materials to give it expressiveness.
I hope you liked this type of decoration, and thank you for joining me here.
Text translated with Deelp translator.
Photos taken with my Tecno Spark.