🔸Sin más que añadir, a continuación los dejo con el paso a paso:
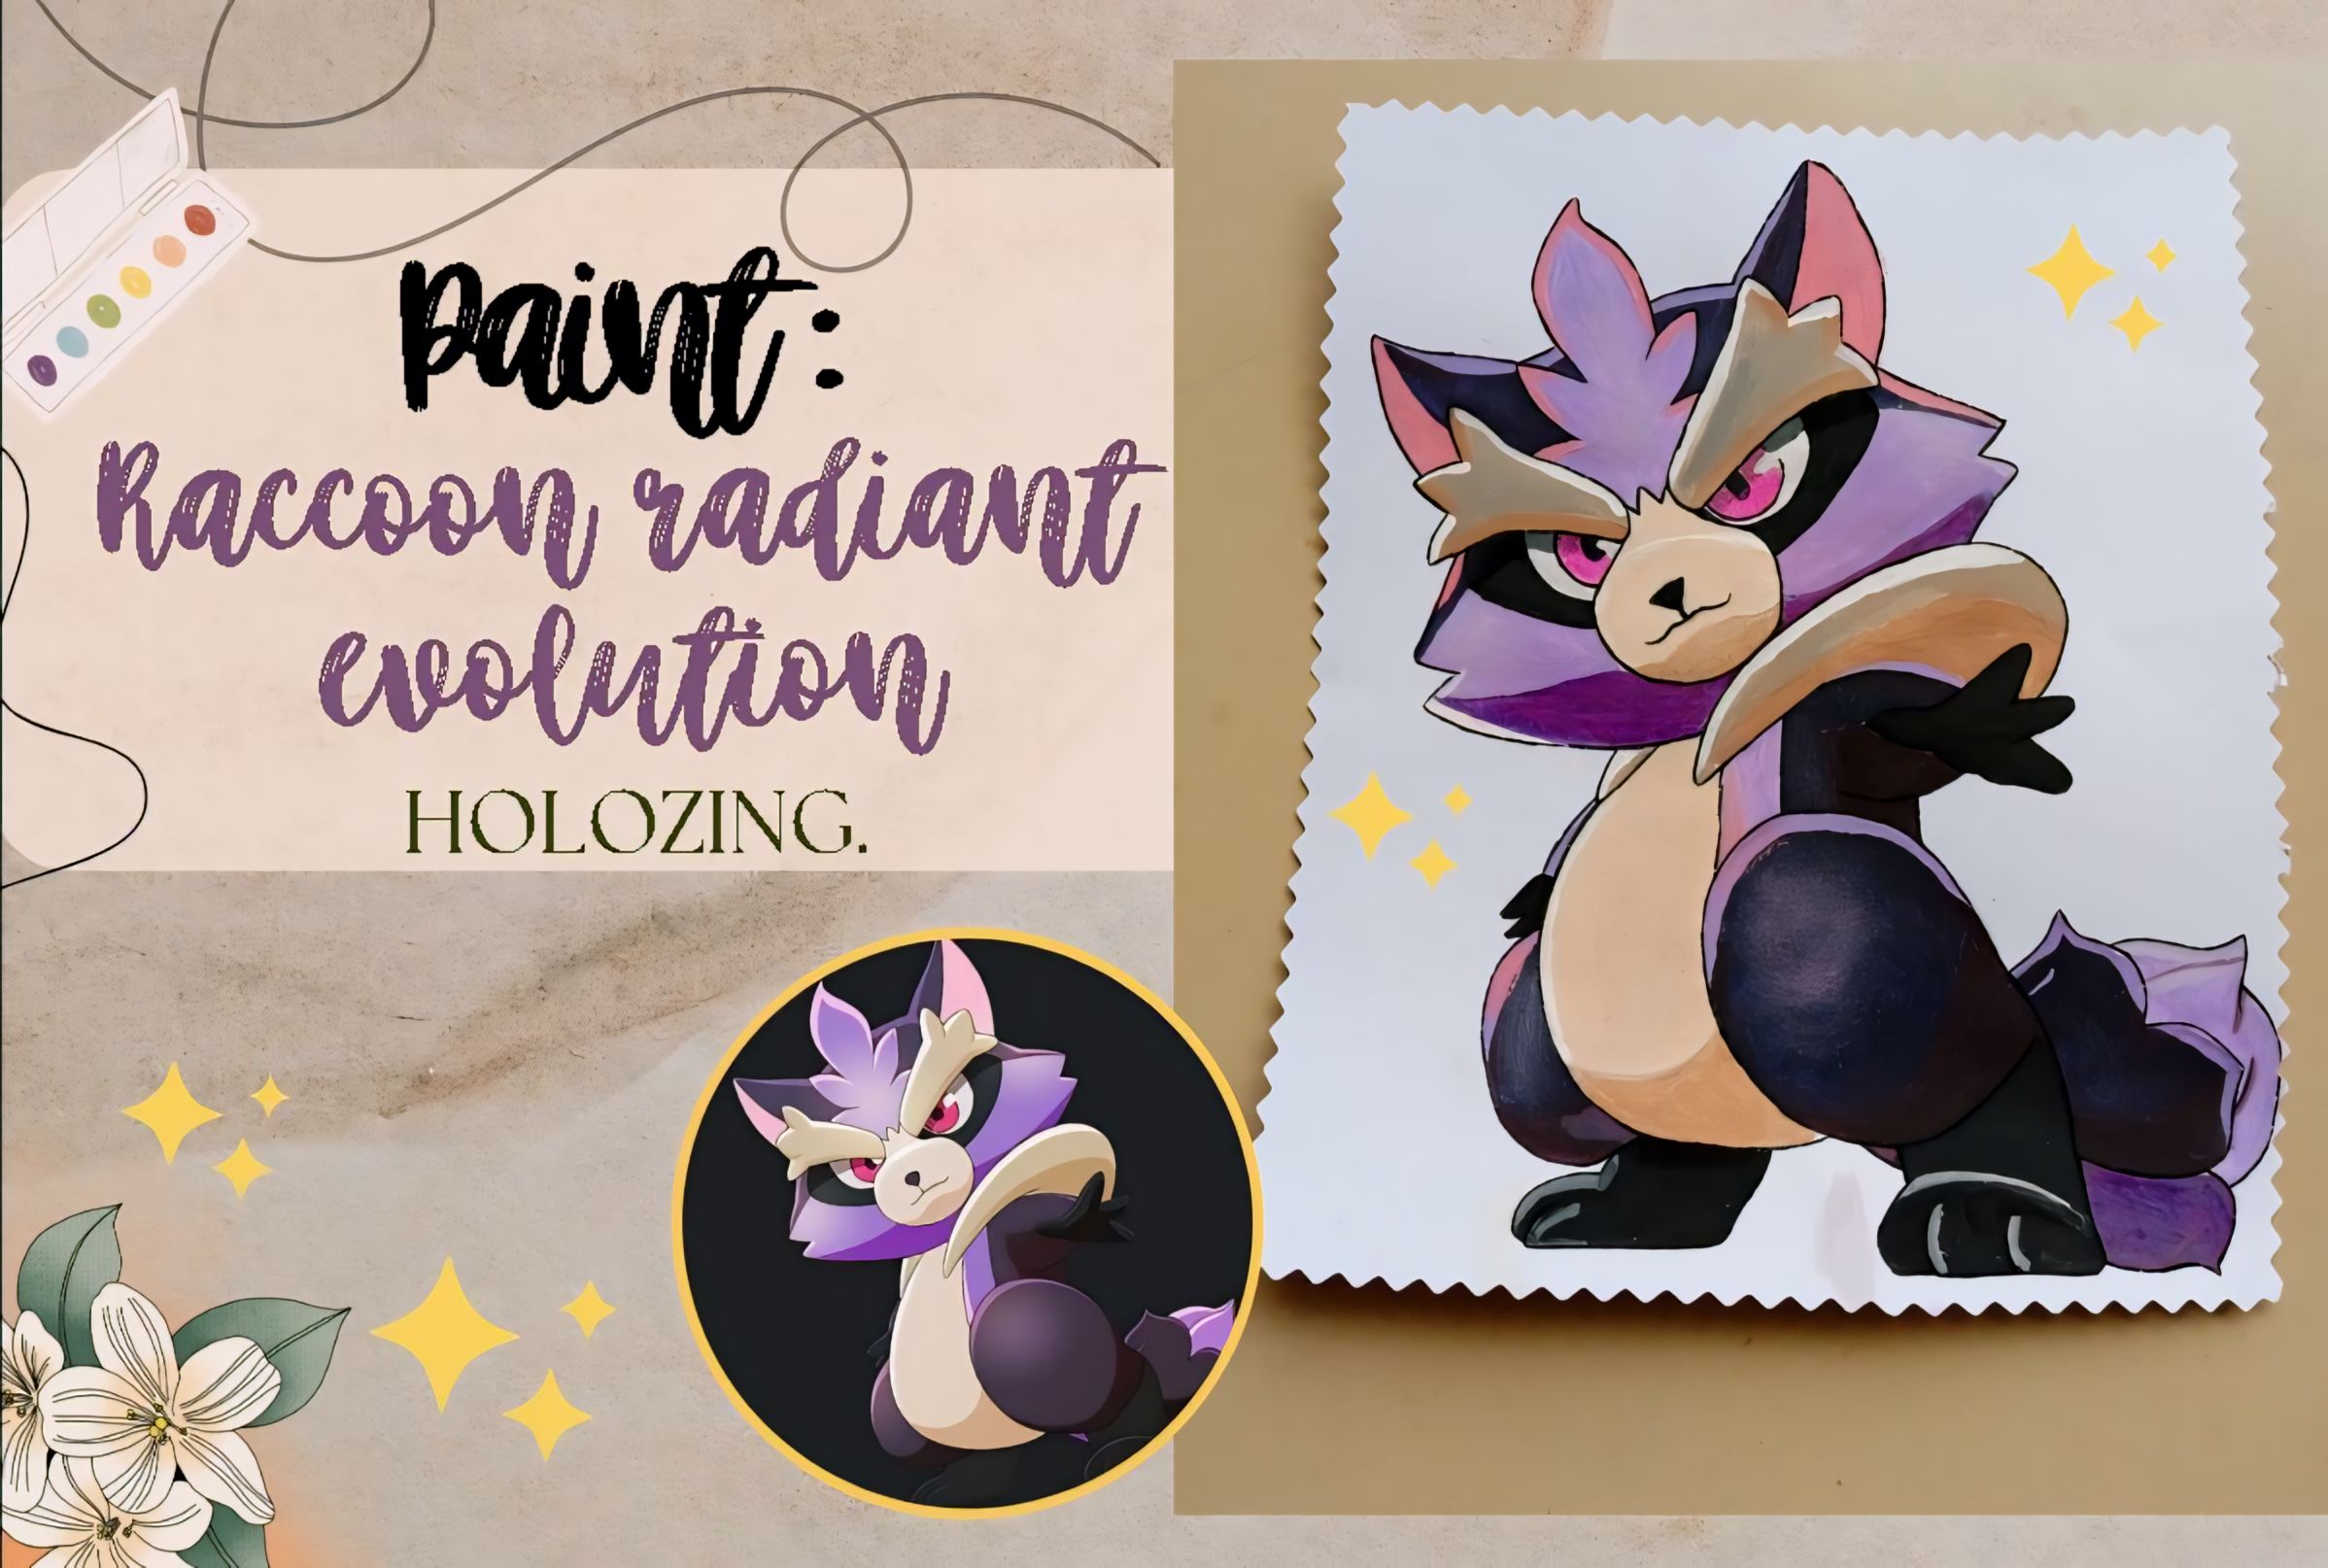
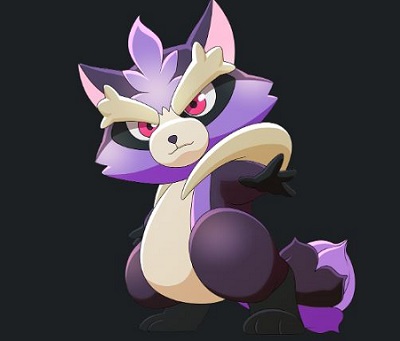
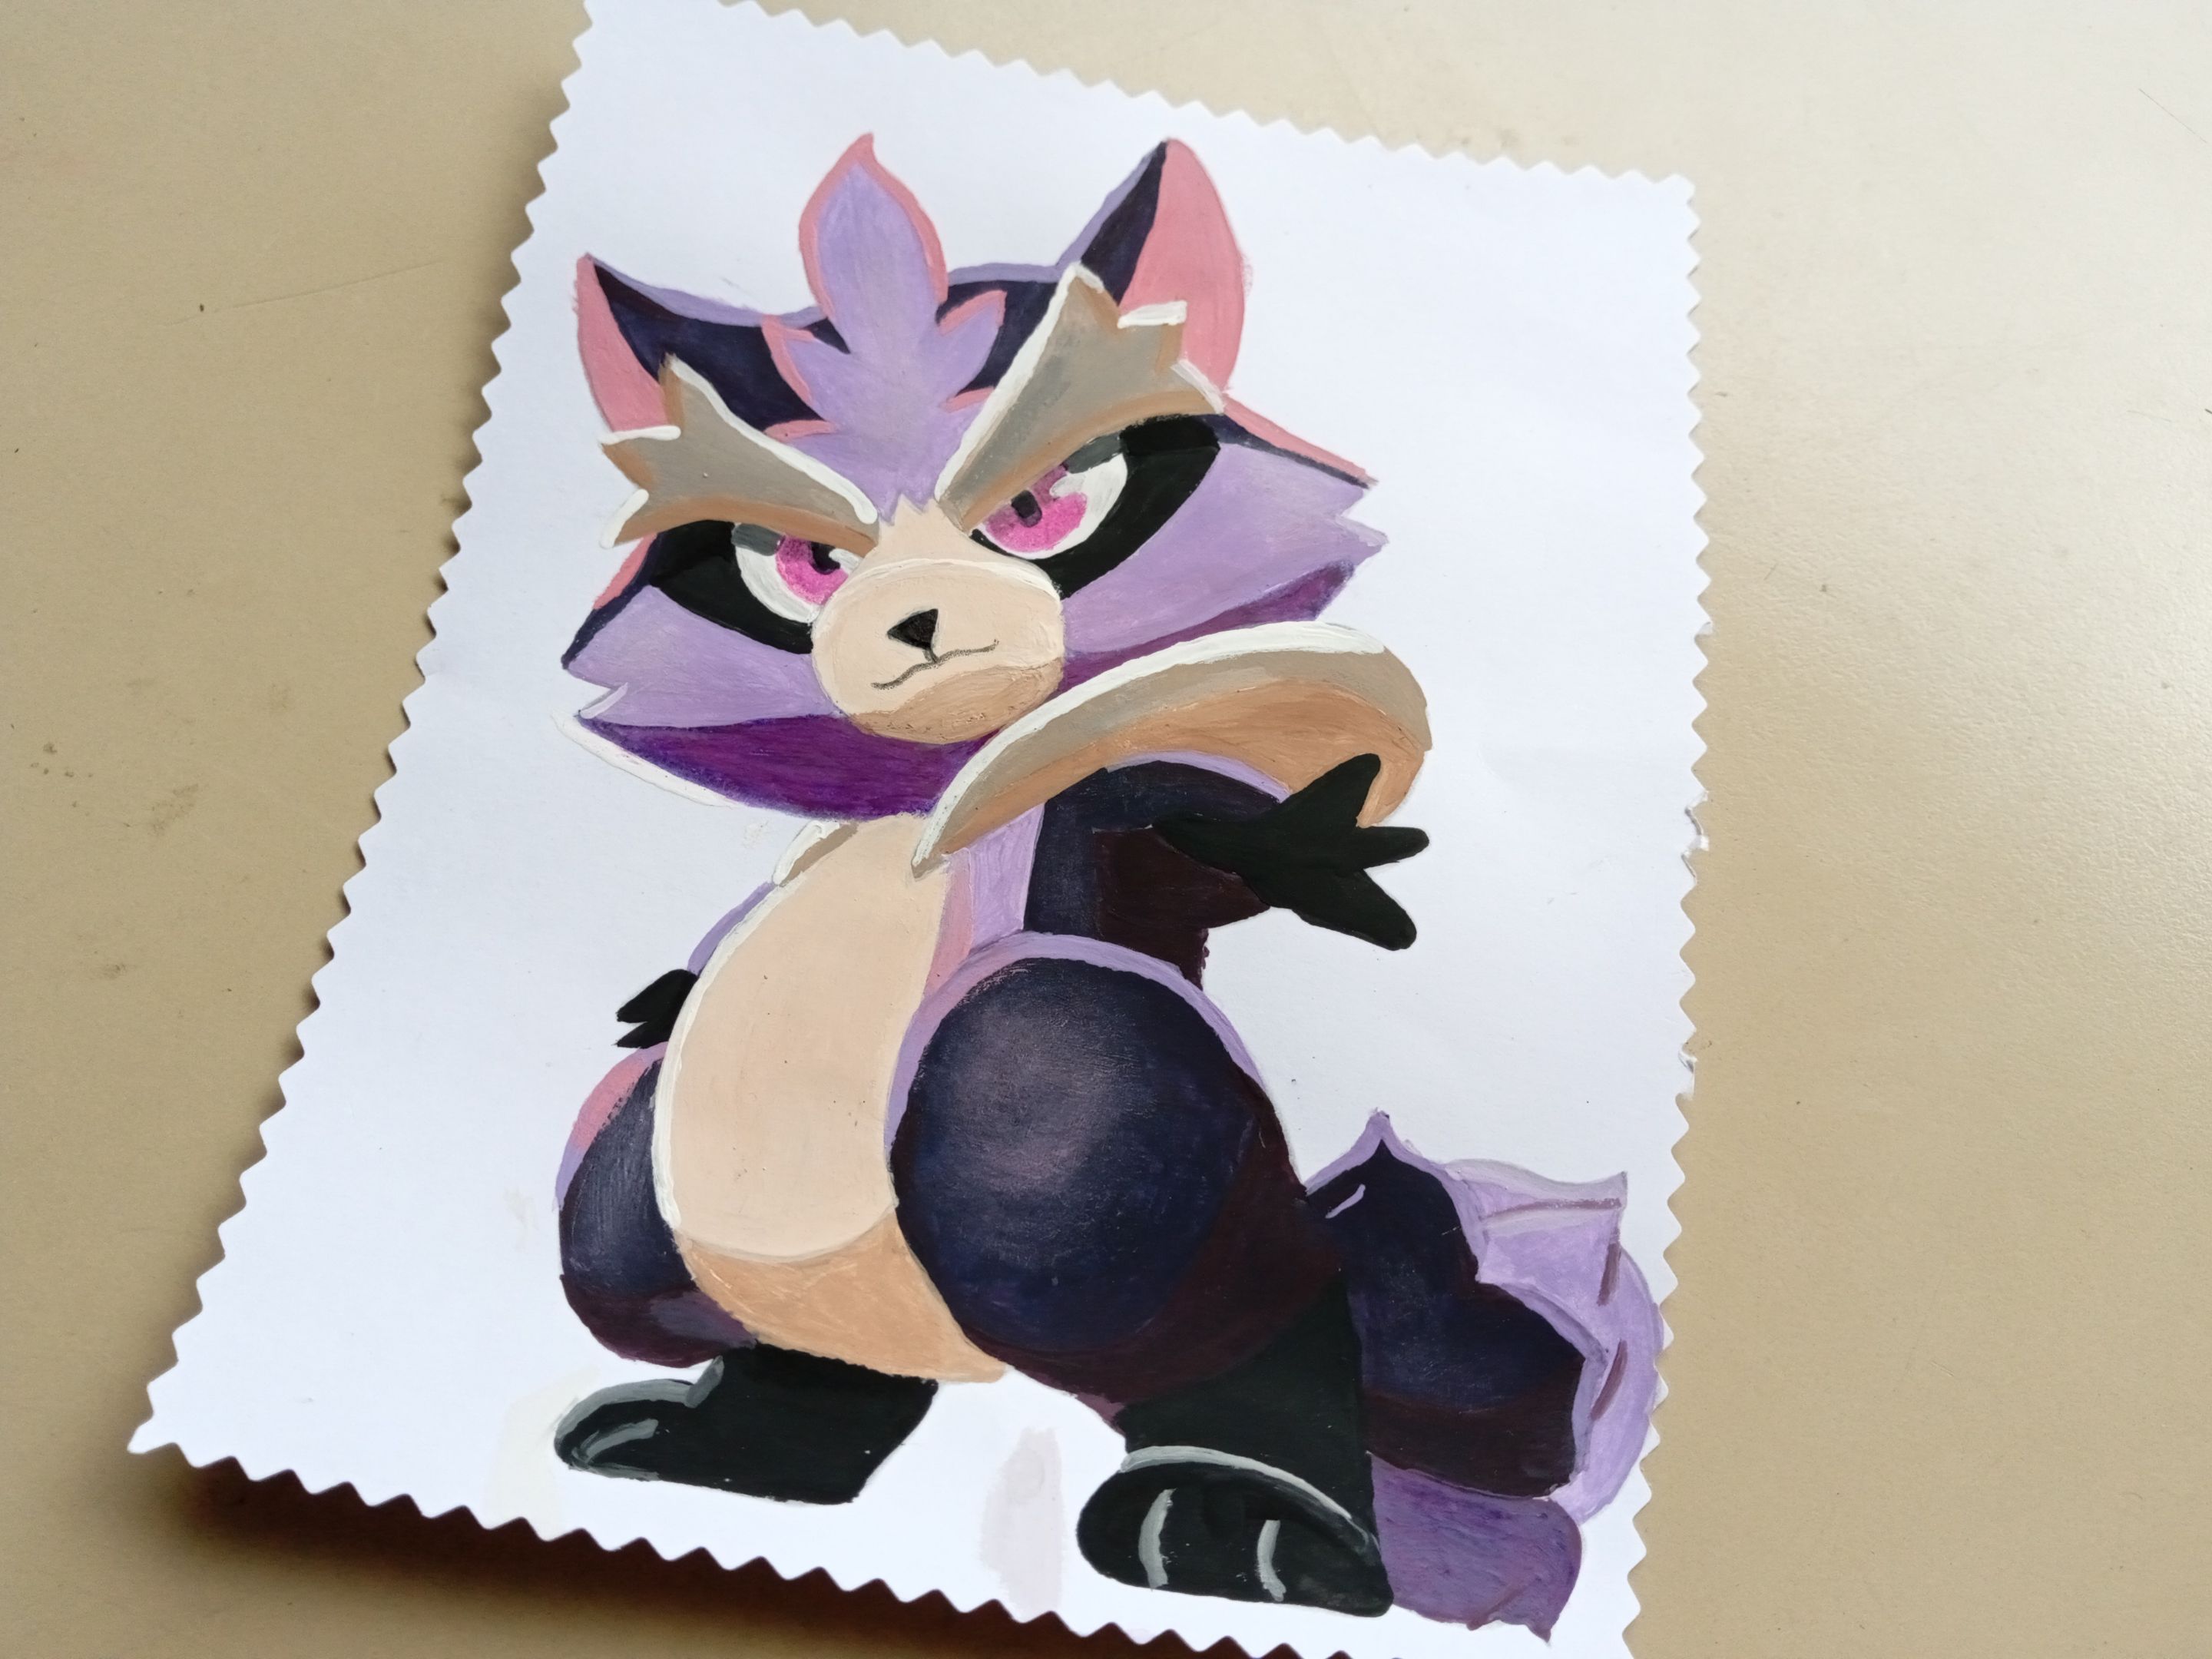
Good afternoon, holozing friends! I am happy to stop by again to share with you a new painting, this time of the grass raccoon in its radiant evolution. Honestly, I was very excited to see these incredible evolutions, because they look really beautiful with so many colors and I am sure that the artists will share beautiful works of art.
In my case, at the moment I had not painted any of the creatures in full body, with their original form and just when I felt ready to do so I saw the version of the grass raccoon in its radiant evolution, which is practically like its original version , but in purple and pink colors, a very pretty color palette and I wanted to take a chance to see how it turned out. I was very happy with the result, I think that little by little I am improving, but I don't know, you tell me, right? 🤭
🔸Without more to add, then I leave you with the step by step:
♥️ESPERO QUE TE GUSTE,
¡Empecemos!
♥️I HOPE YOU LIKE IT,
Let's start!

✂️ MATERIALES | ✂️ MATERIALS
- Opalina o cartulina blanca.
- Pinceles.
- Marcador negro.
- Pinturas.
- Lápiz.
- Opaline or white cardboard.
- Brushes.
- Black marker.
- Paintings.
- Pencil.
PROCEDIMIENTO | PROCESS
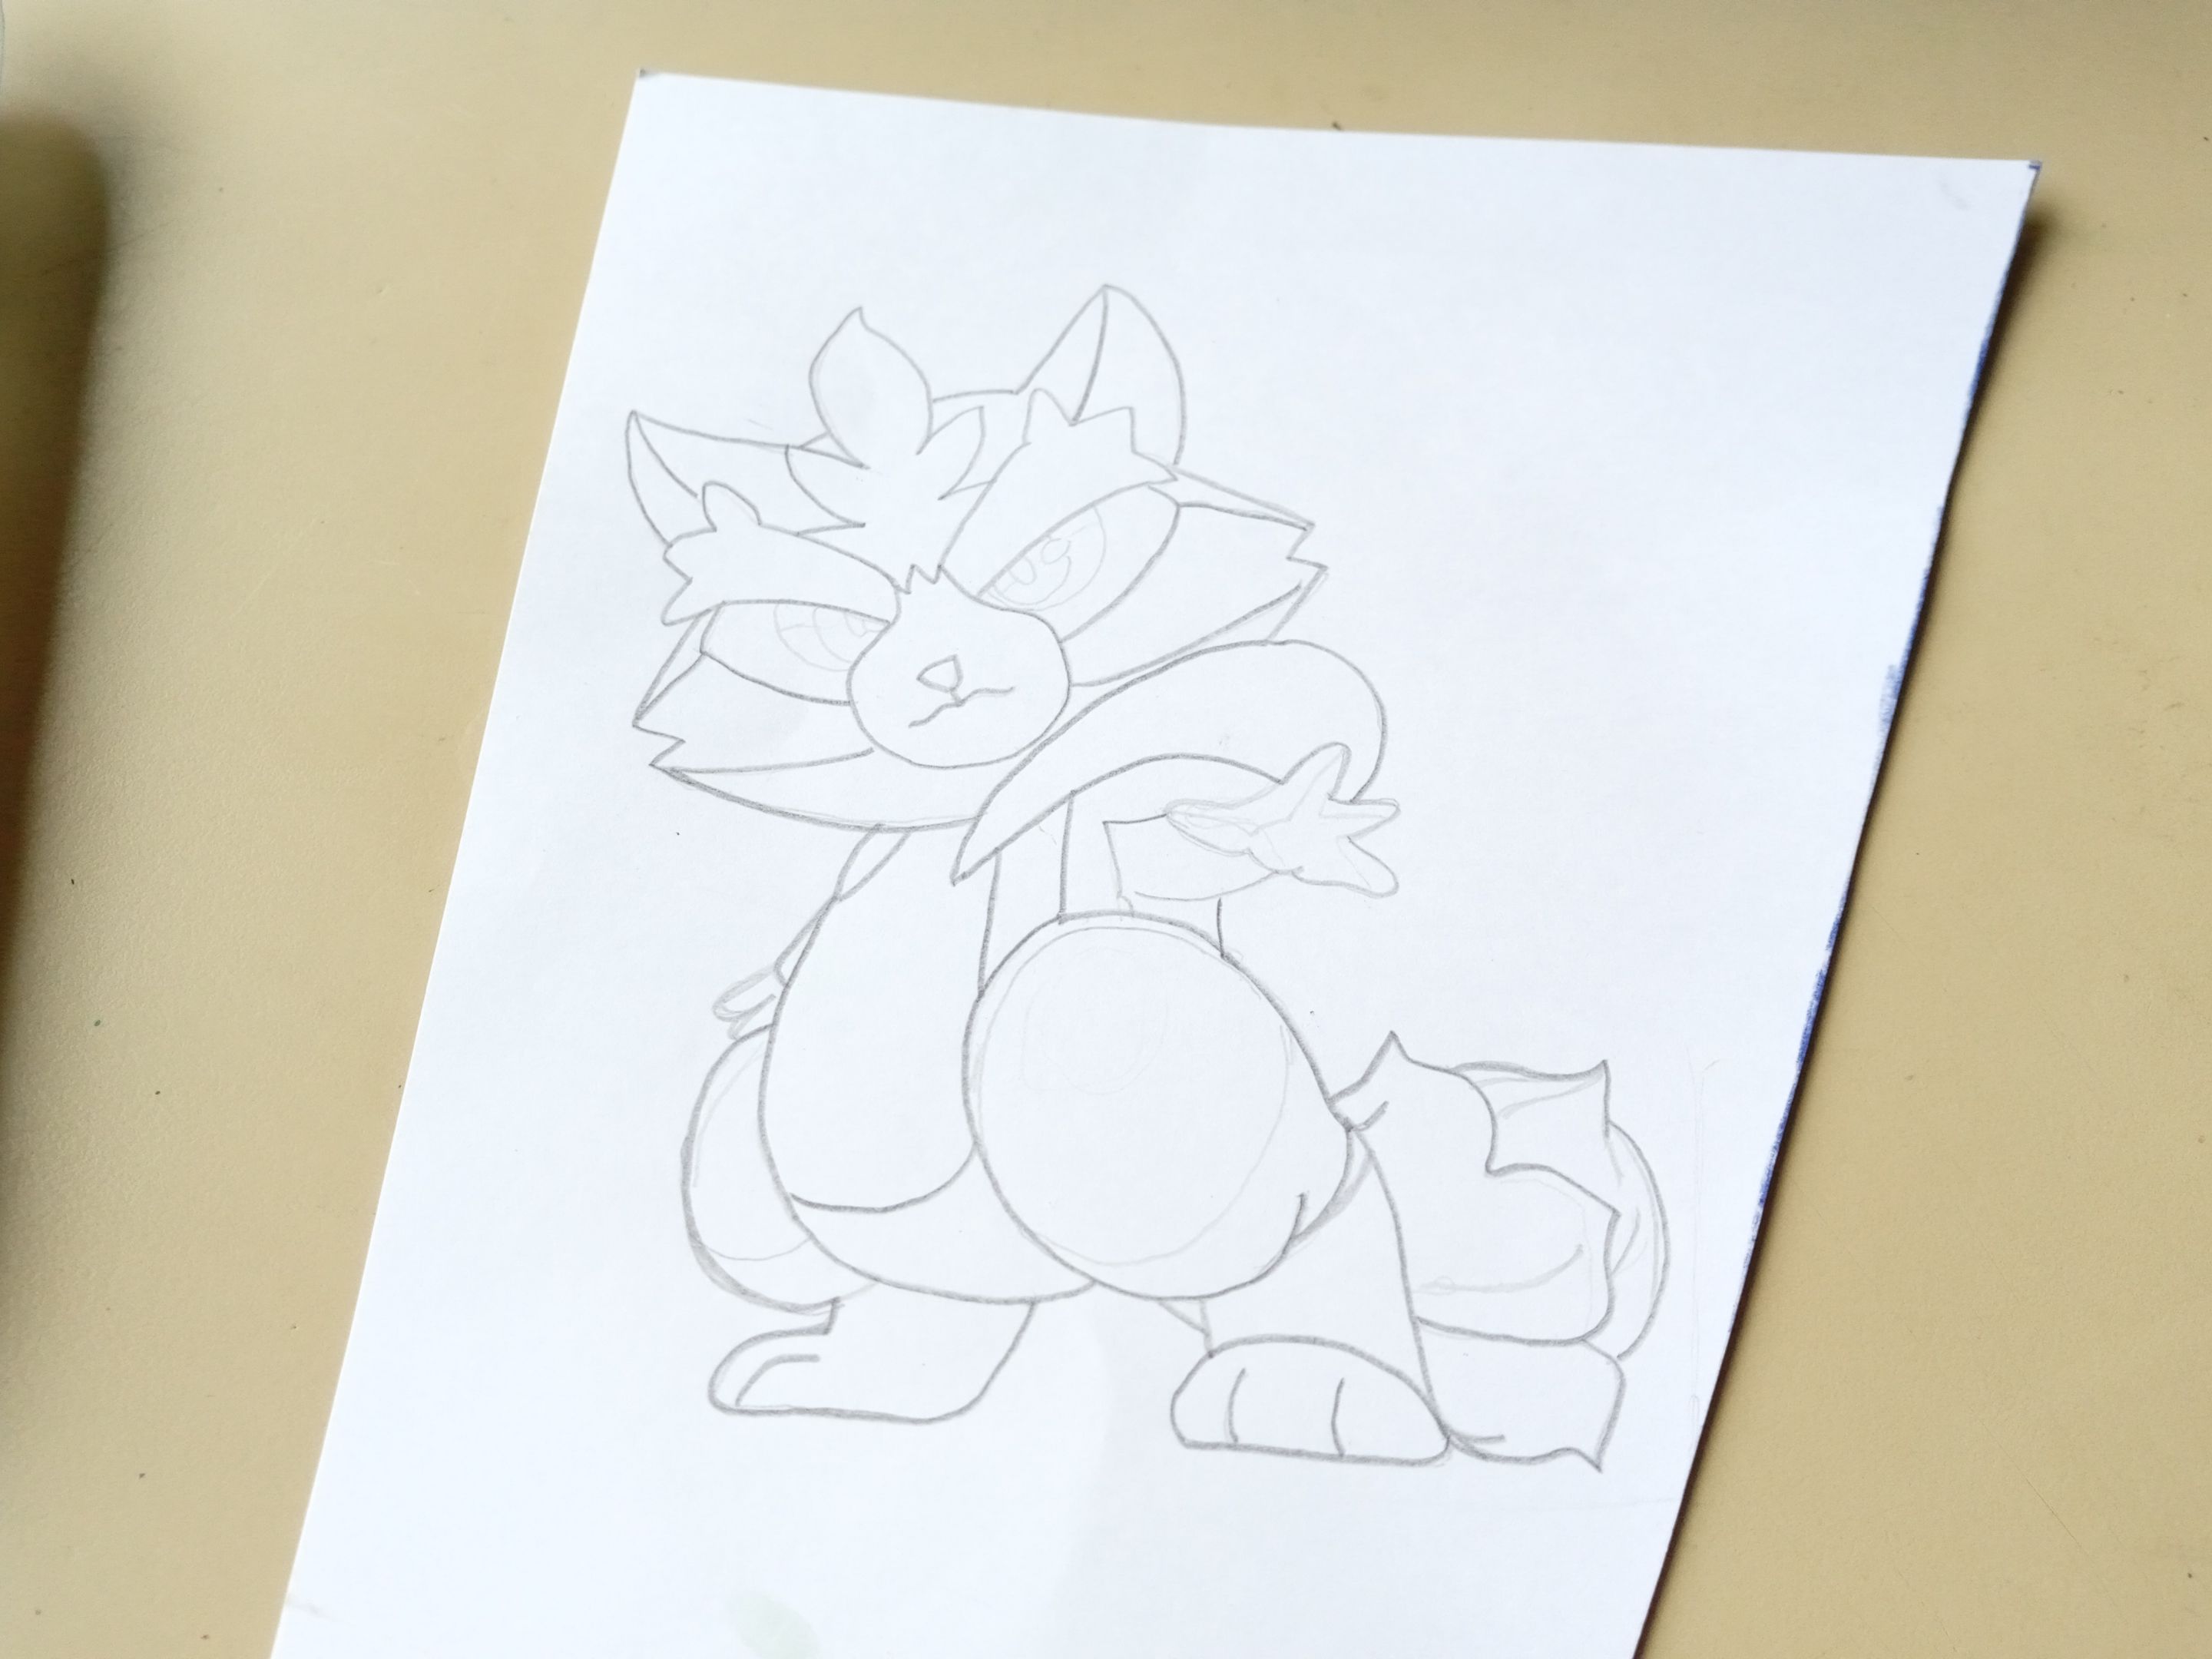
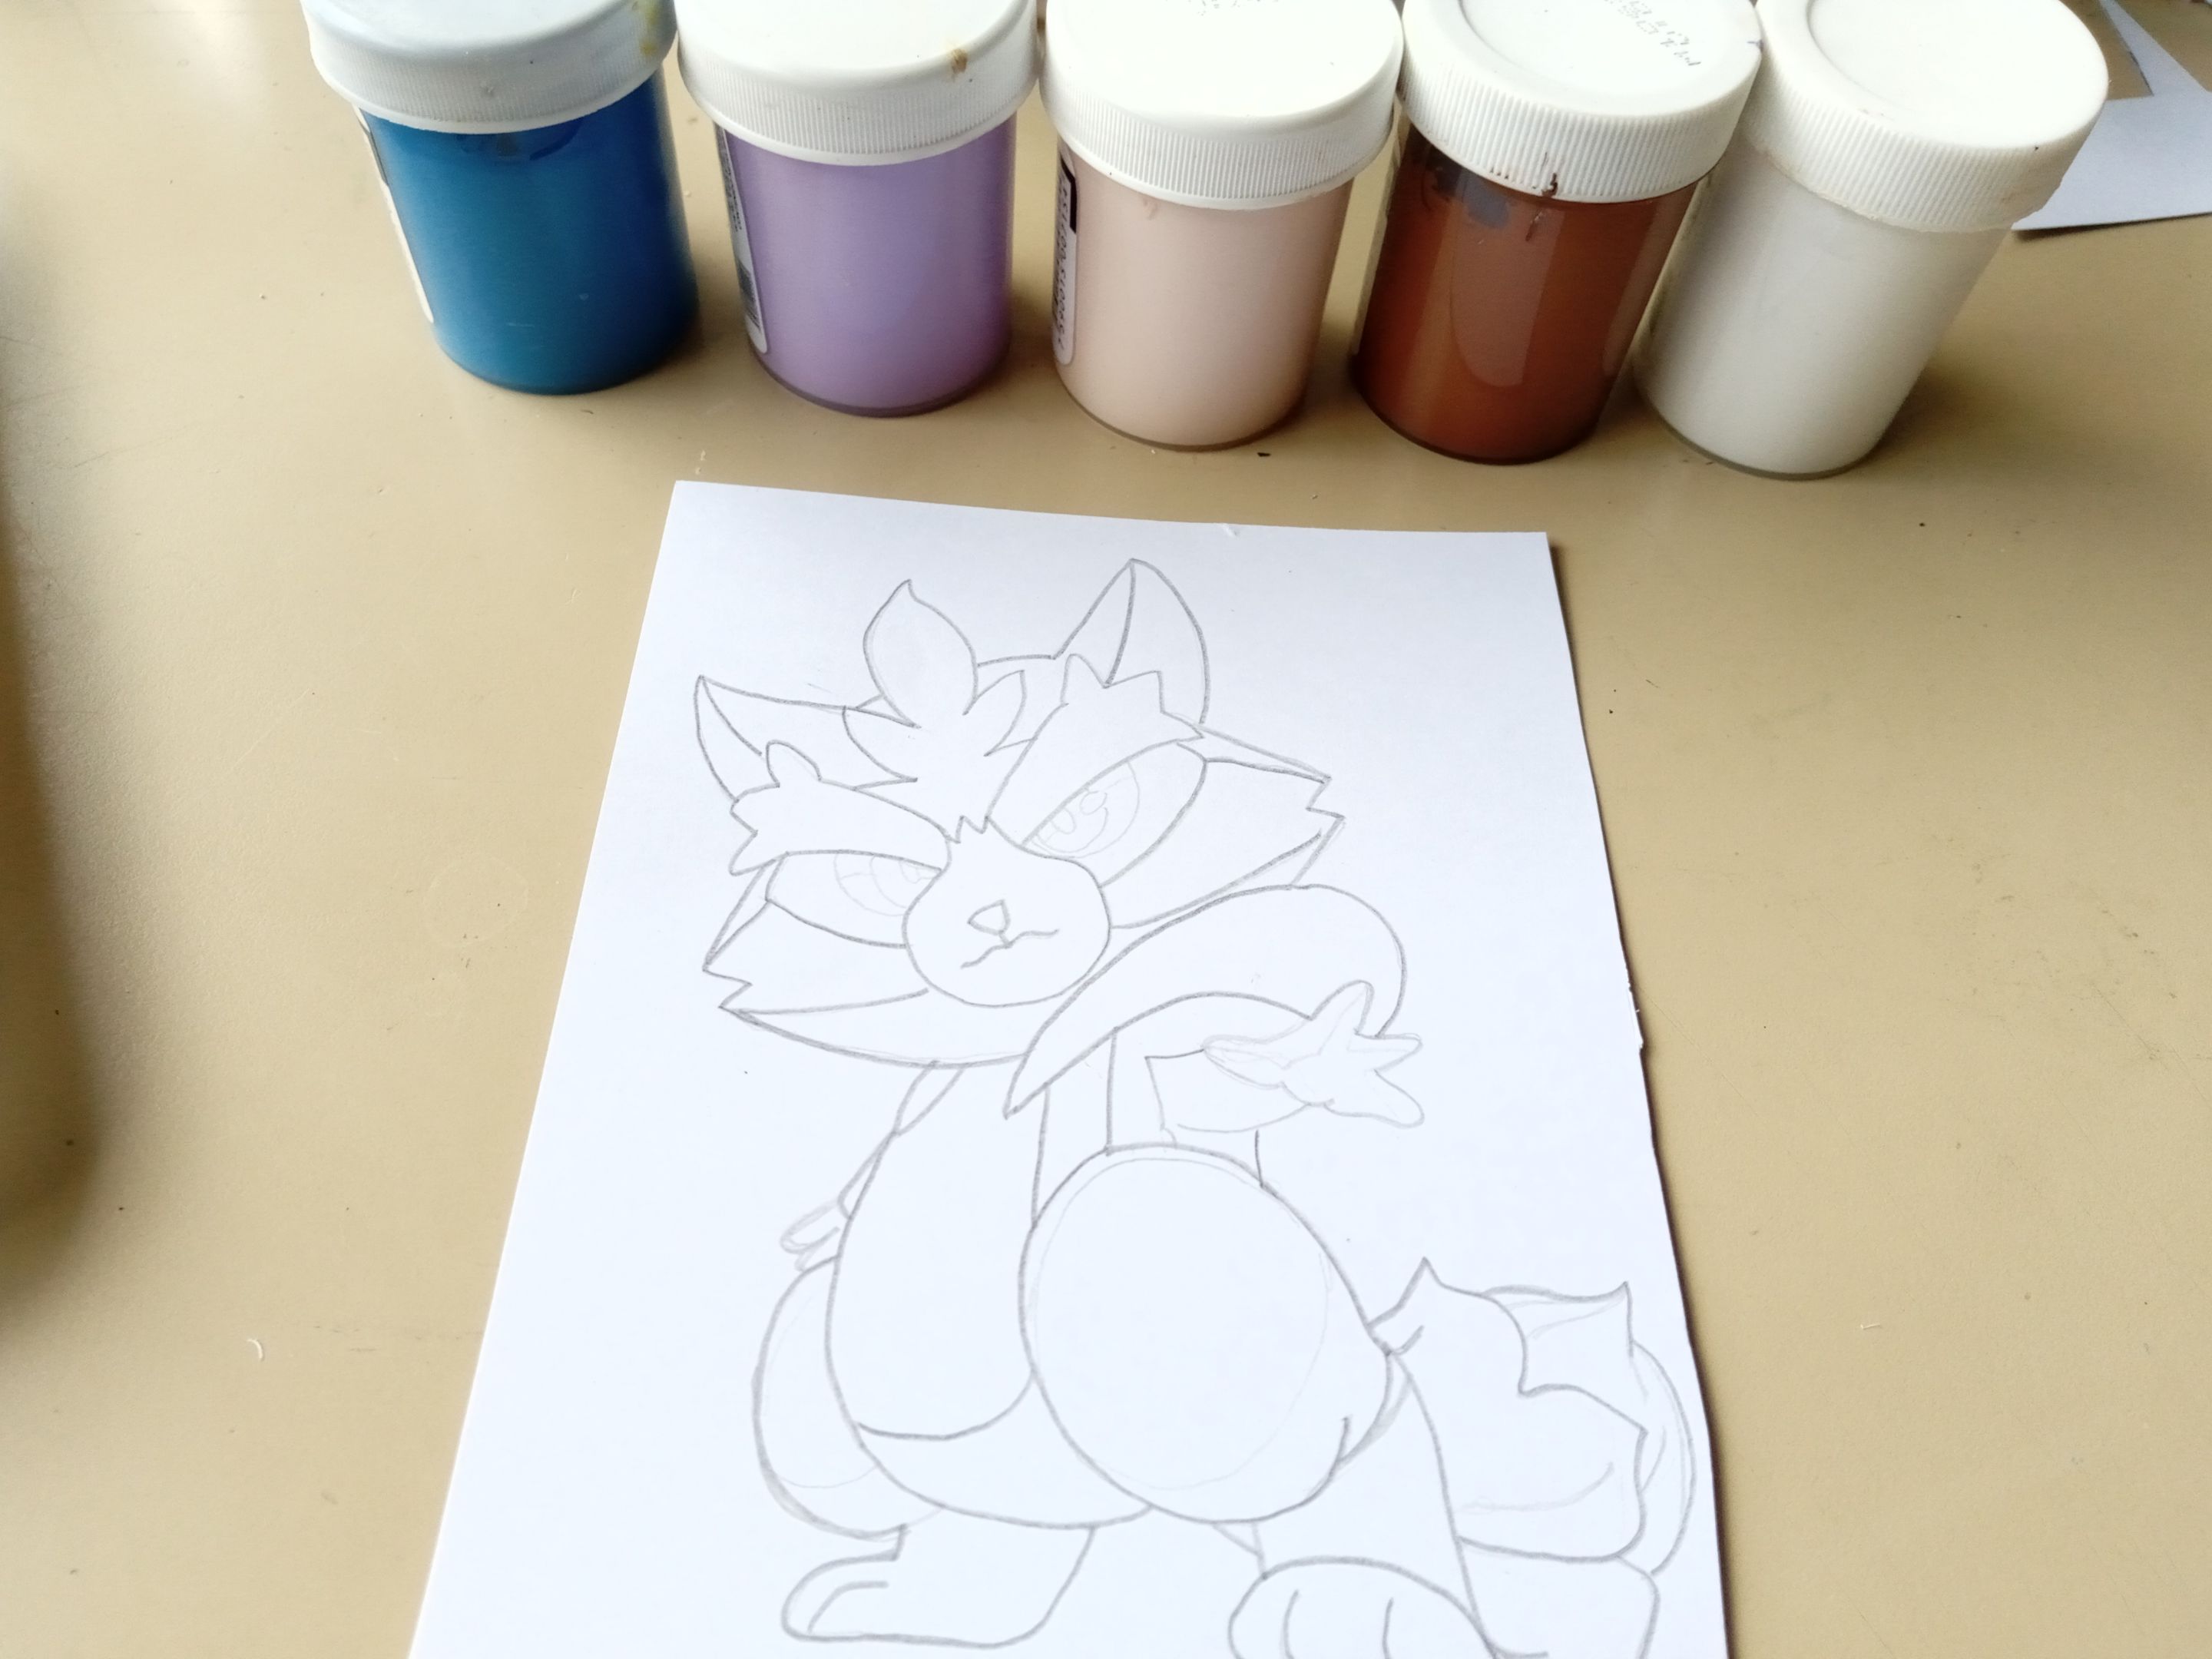
- ✨ PASO 1:
Comencé dibujando al mapache de las hierbas en la opalina, en este caso solo me centré en la criatura, así que no quise hacerle nada de fondo, pero al final le di un diseño a la hoja con tijeras, pero como tal, no quise agregar nada más al fondo. Una vez listo, seleccioné las pinturas que iba a estar utilizando, pinceles, agua para lavar y un pañito para secar.
- ✨ STEP 1:
I started by drawing the grass raccoon on the opaline, in this case I only focused on the creature, so I didn't want to do anything in the background, but in the end I gave a design to the leaf with scissors, but as such, I didn't want to add nothing more in the background. Once ready, I selected the paints I was going to be using, brushes, water to wash and a cloth to dry.
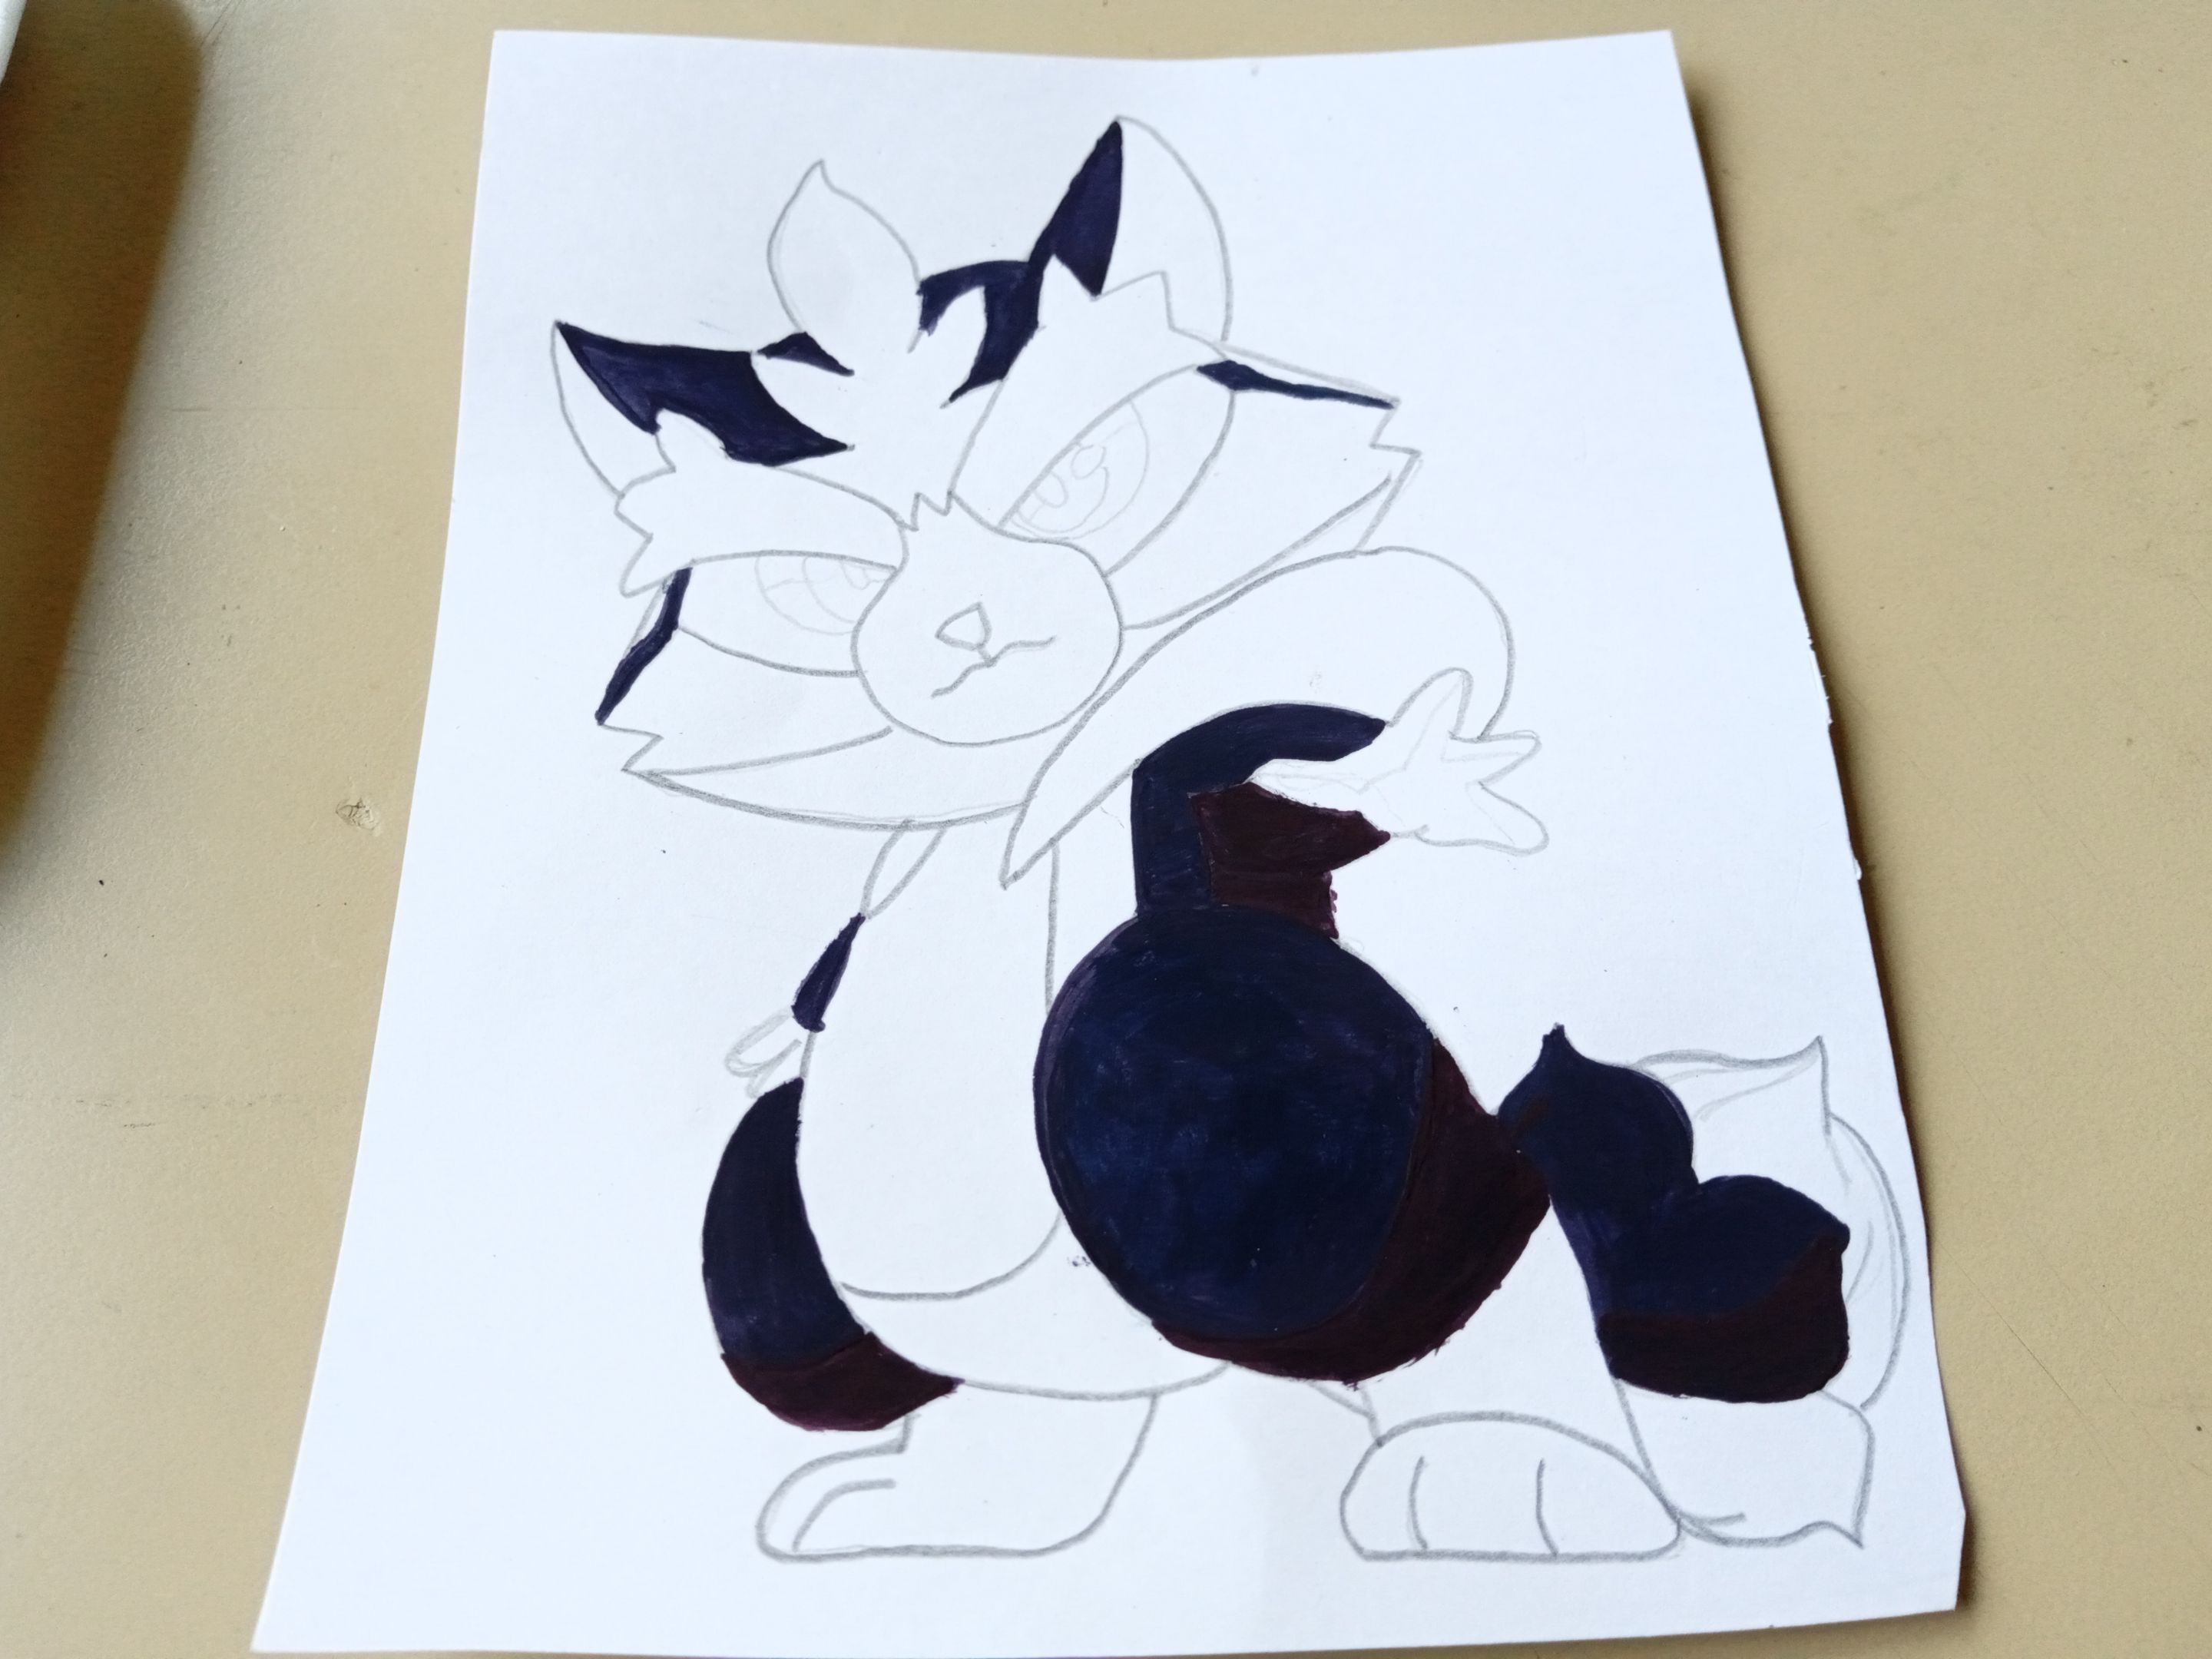
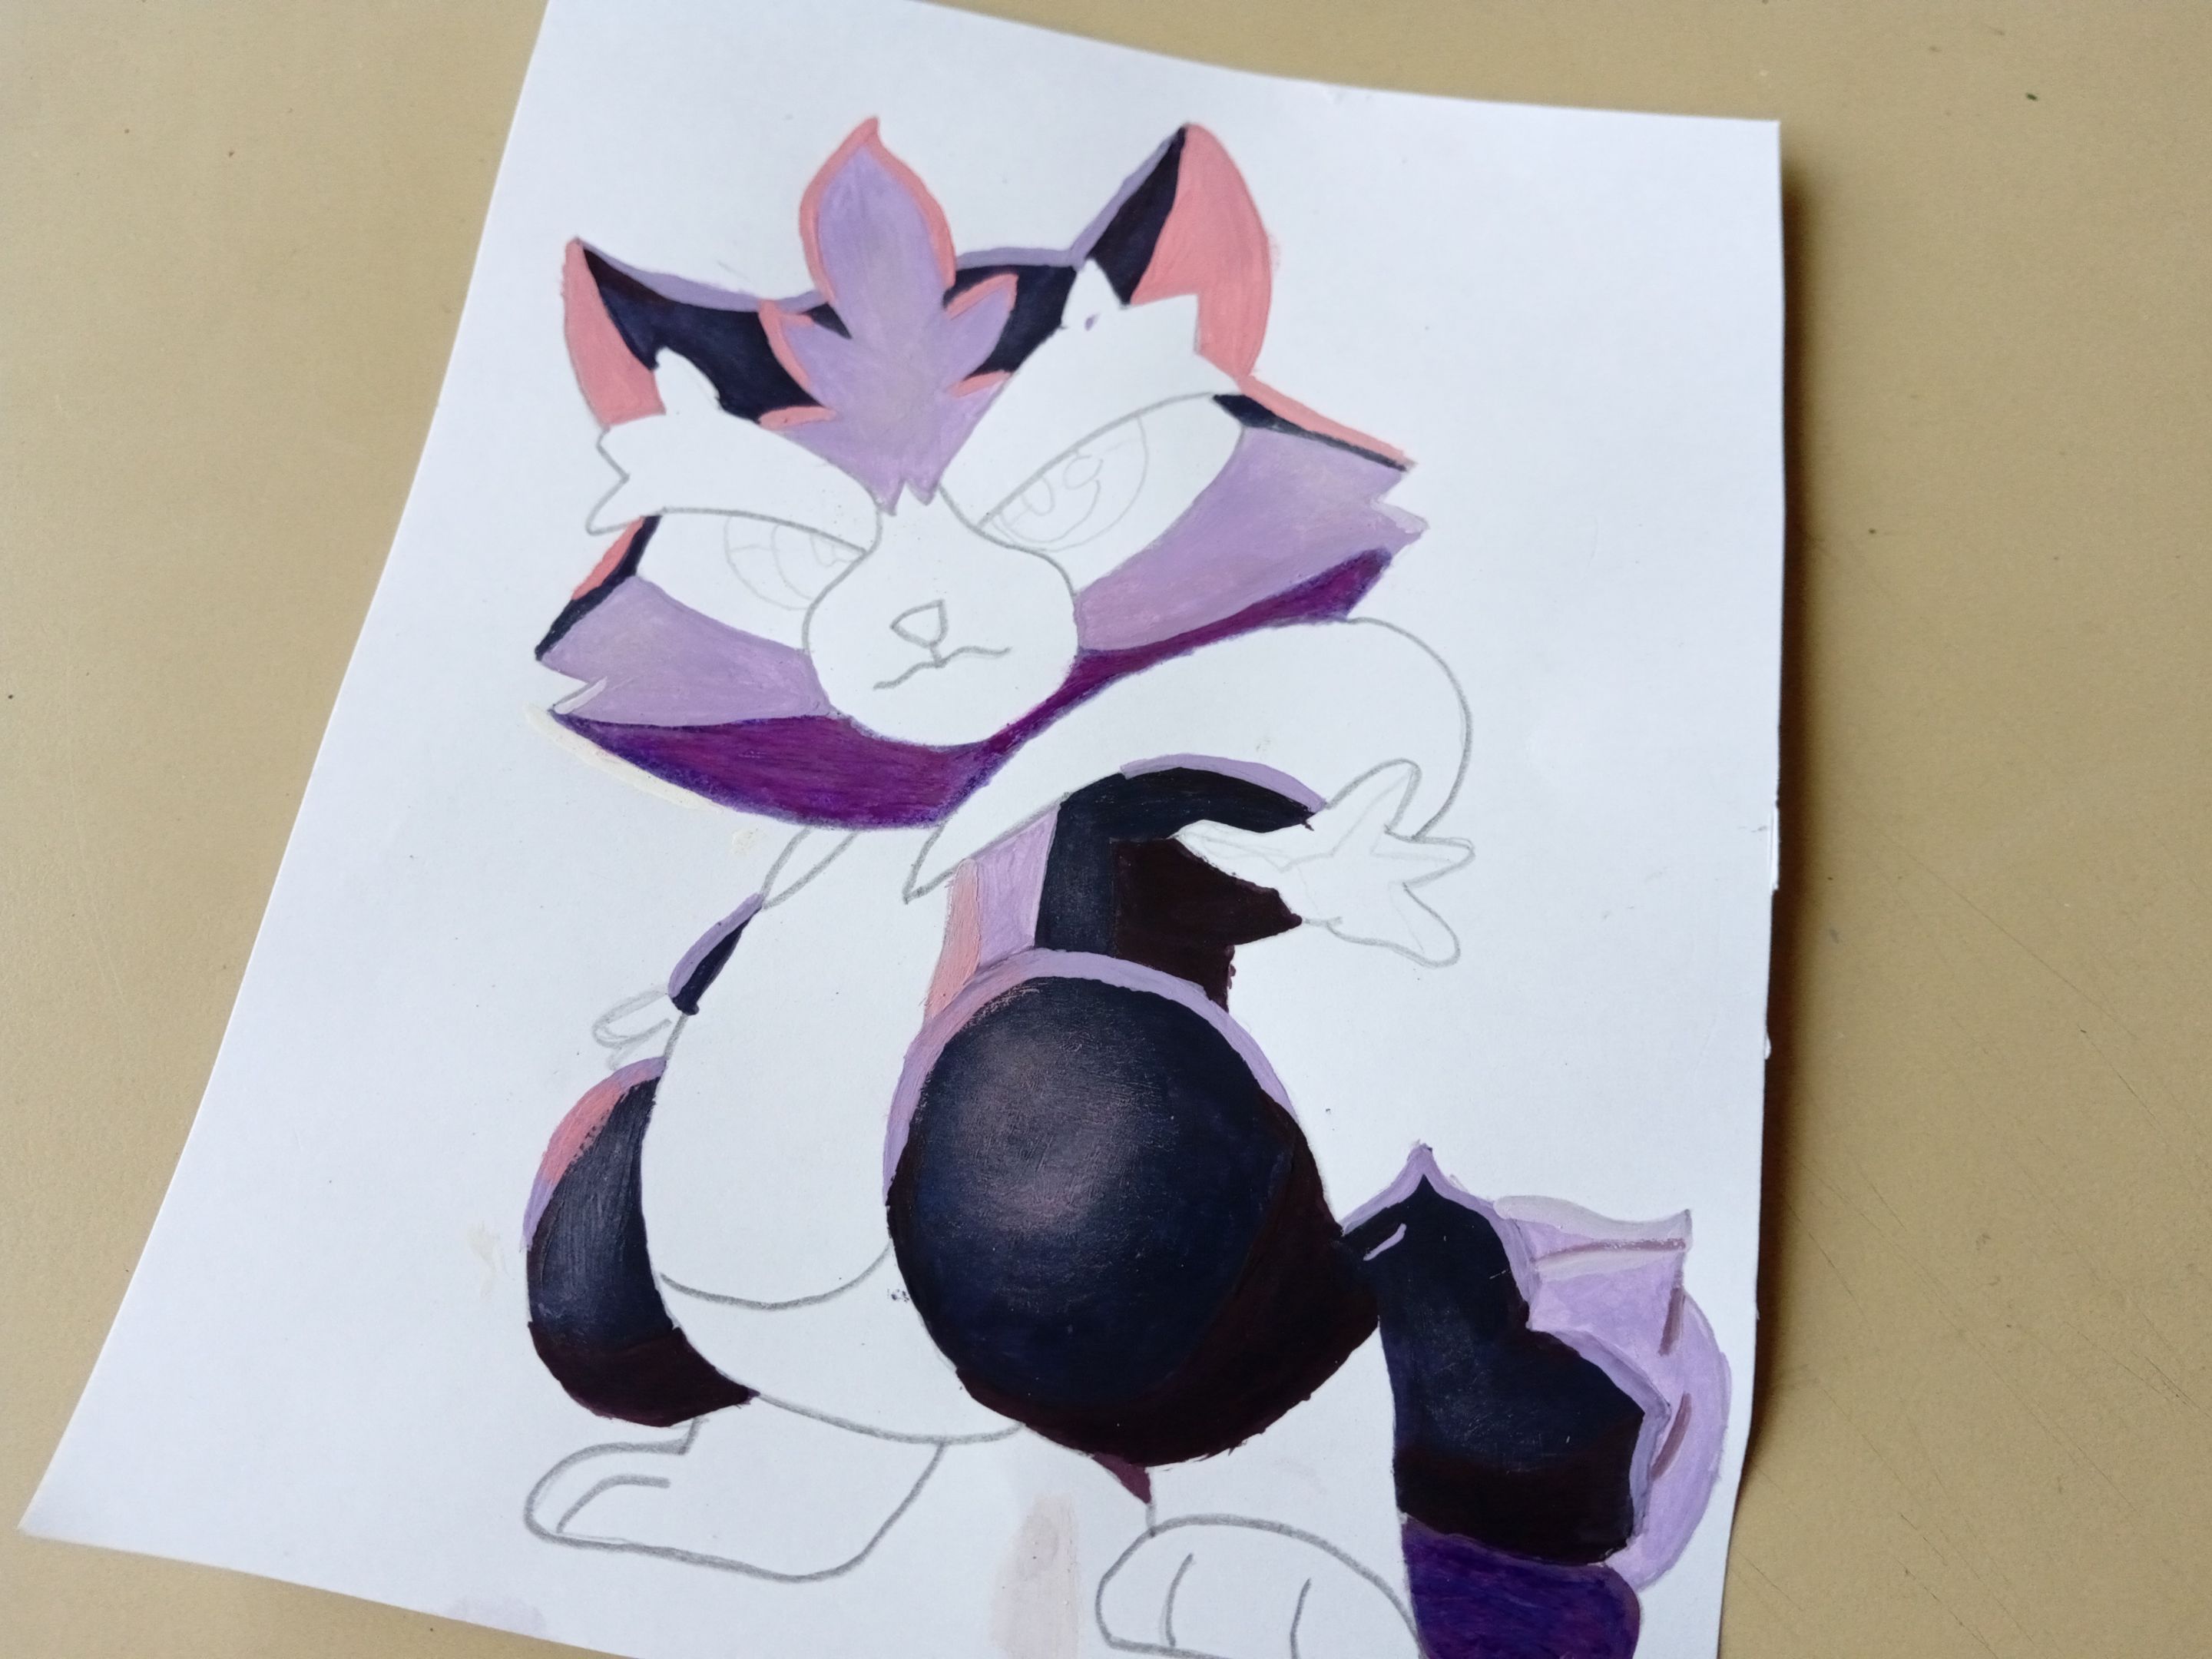
- ✨ PASO 2:
Una vez tenía todo bien ordenado, comencé mezclando un poco de azul con más cantidad de rojo para hacer un morado bien intenso y así pintar las partes más oscuras de este color que tiene su cuerpo. Una vez seco, aprovecho de aplicar la luz a estas zonas que, en este caso, utilicé color lila. Para las rodillas que también tienen luz para dar ese contraste, pero difuminado, utilicé un pincel seco y con poca cantidad de lila, lo pase por estas zonas, como si estuviera haciendo círculos.
- ✨ STEP 2:
Once I had everything well organized, I started mixing a little blue with more red to make a very intense purple and thus paint the darkest parts of his body of this color. Once dry, I take advantage of applying light to these areas, which, in this case, I used lilac. For the knees that also have light to give that contrast, but blurred, I used a dry brush with a small amount of lilac, I passed it through these areas, as if I were making circles.

- ✨ PASO 3:
Para la zona de la barbilla, no conseguía mezclar ese tono y la verdad que fue super complicado, incluso le pregunte a mi bella @alizmarpaola qué podía hacer jaja. Después de mezclar y mezclar, nada me gustaba, así que lo pinté con crayones en tonos morados y arriba pasé un poco de la misma pintura que mezclé al inicio combinado con una gota de agua para cubrir los espacios en blanco y la apariencia del crayón.
- ✨ STEP 3:
For the chin area, I couldn't mix that tone and the truth is that it was super complicated, I even asked my beautiful @alizmarpaola what she could do haha. After mixing and mixing, I didn't like anything, so I painted it with crayons in purple tones and on top I passed a little of the same paint that I mixed at the beginning combined with a drop of water to cover the white spaces and the appearance of the crayon.
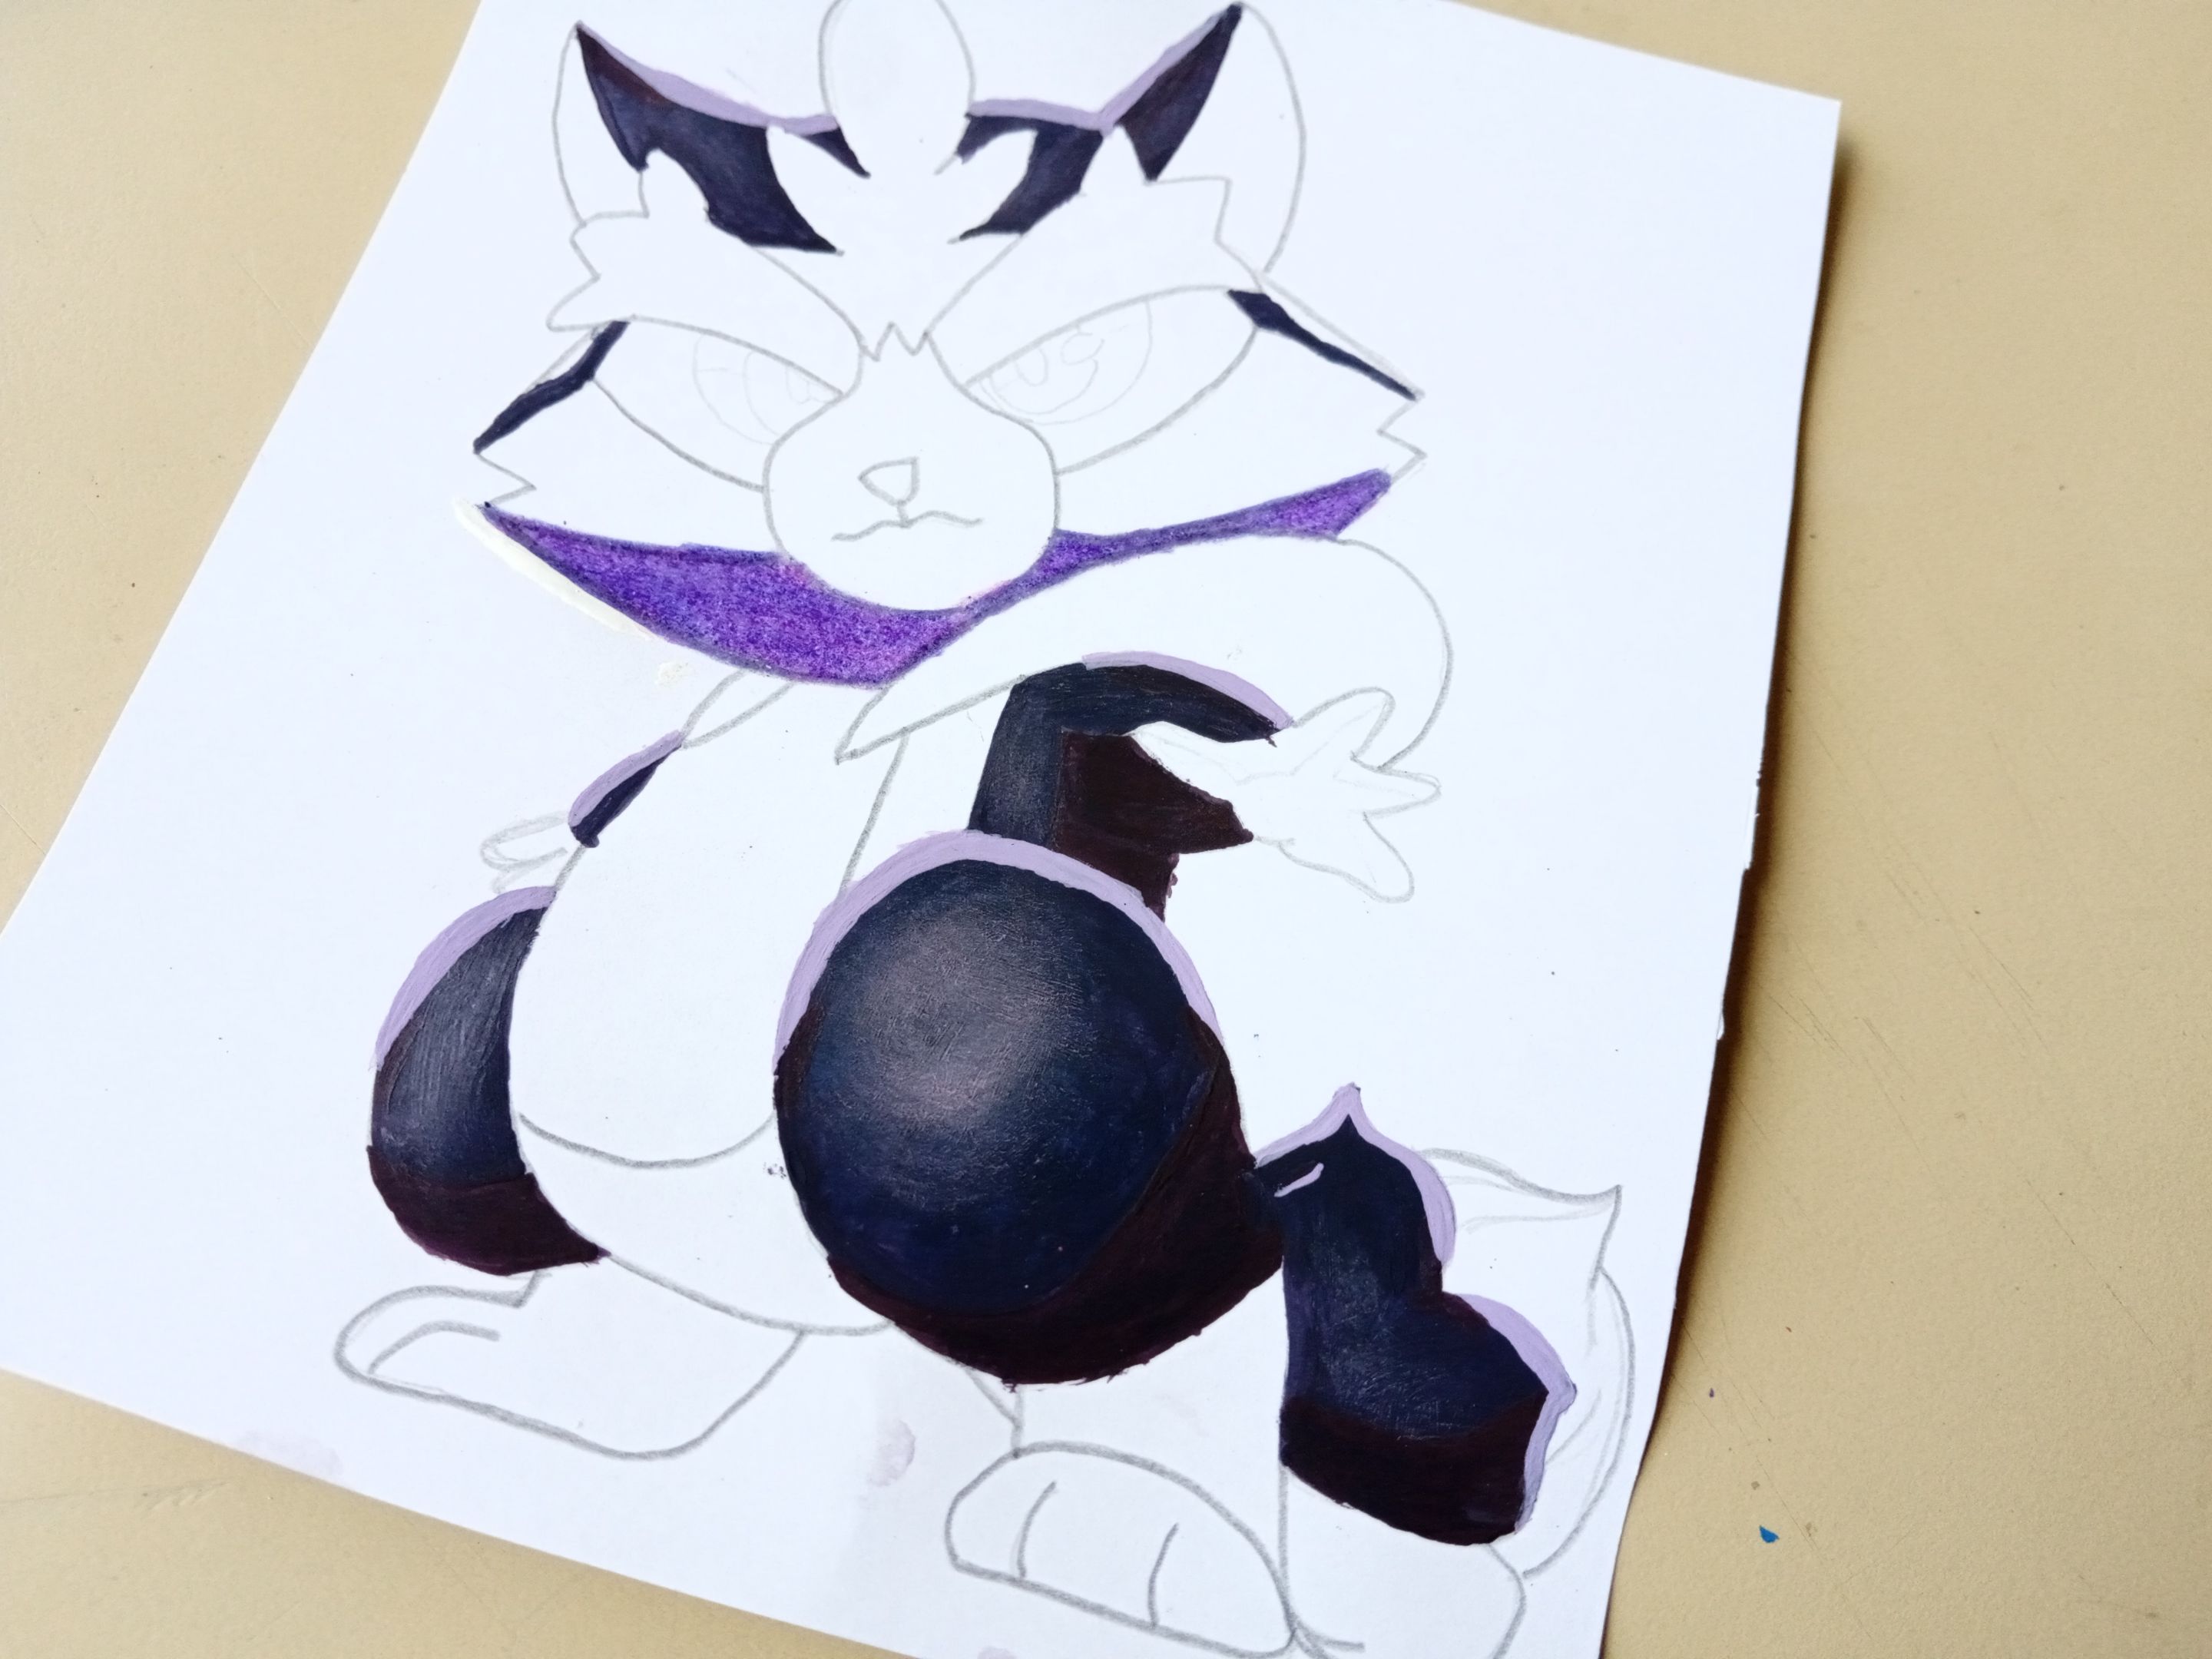
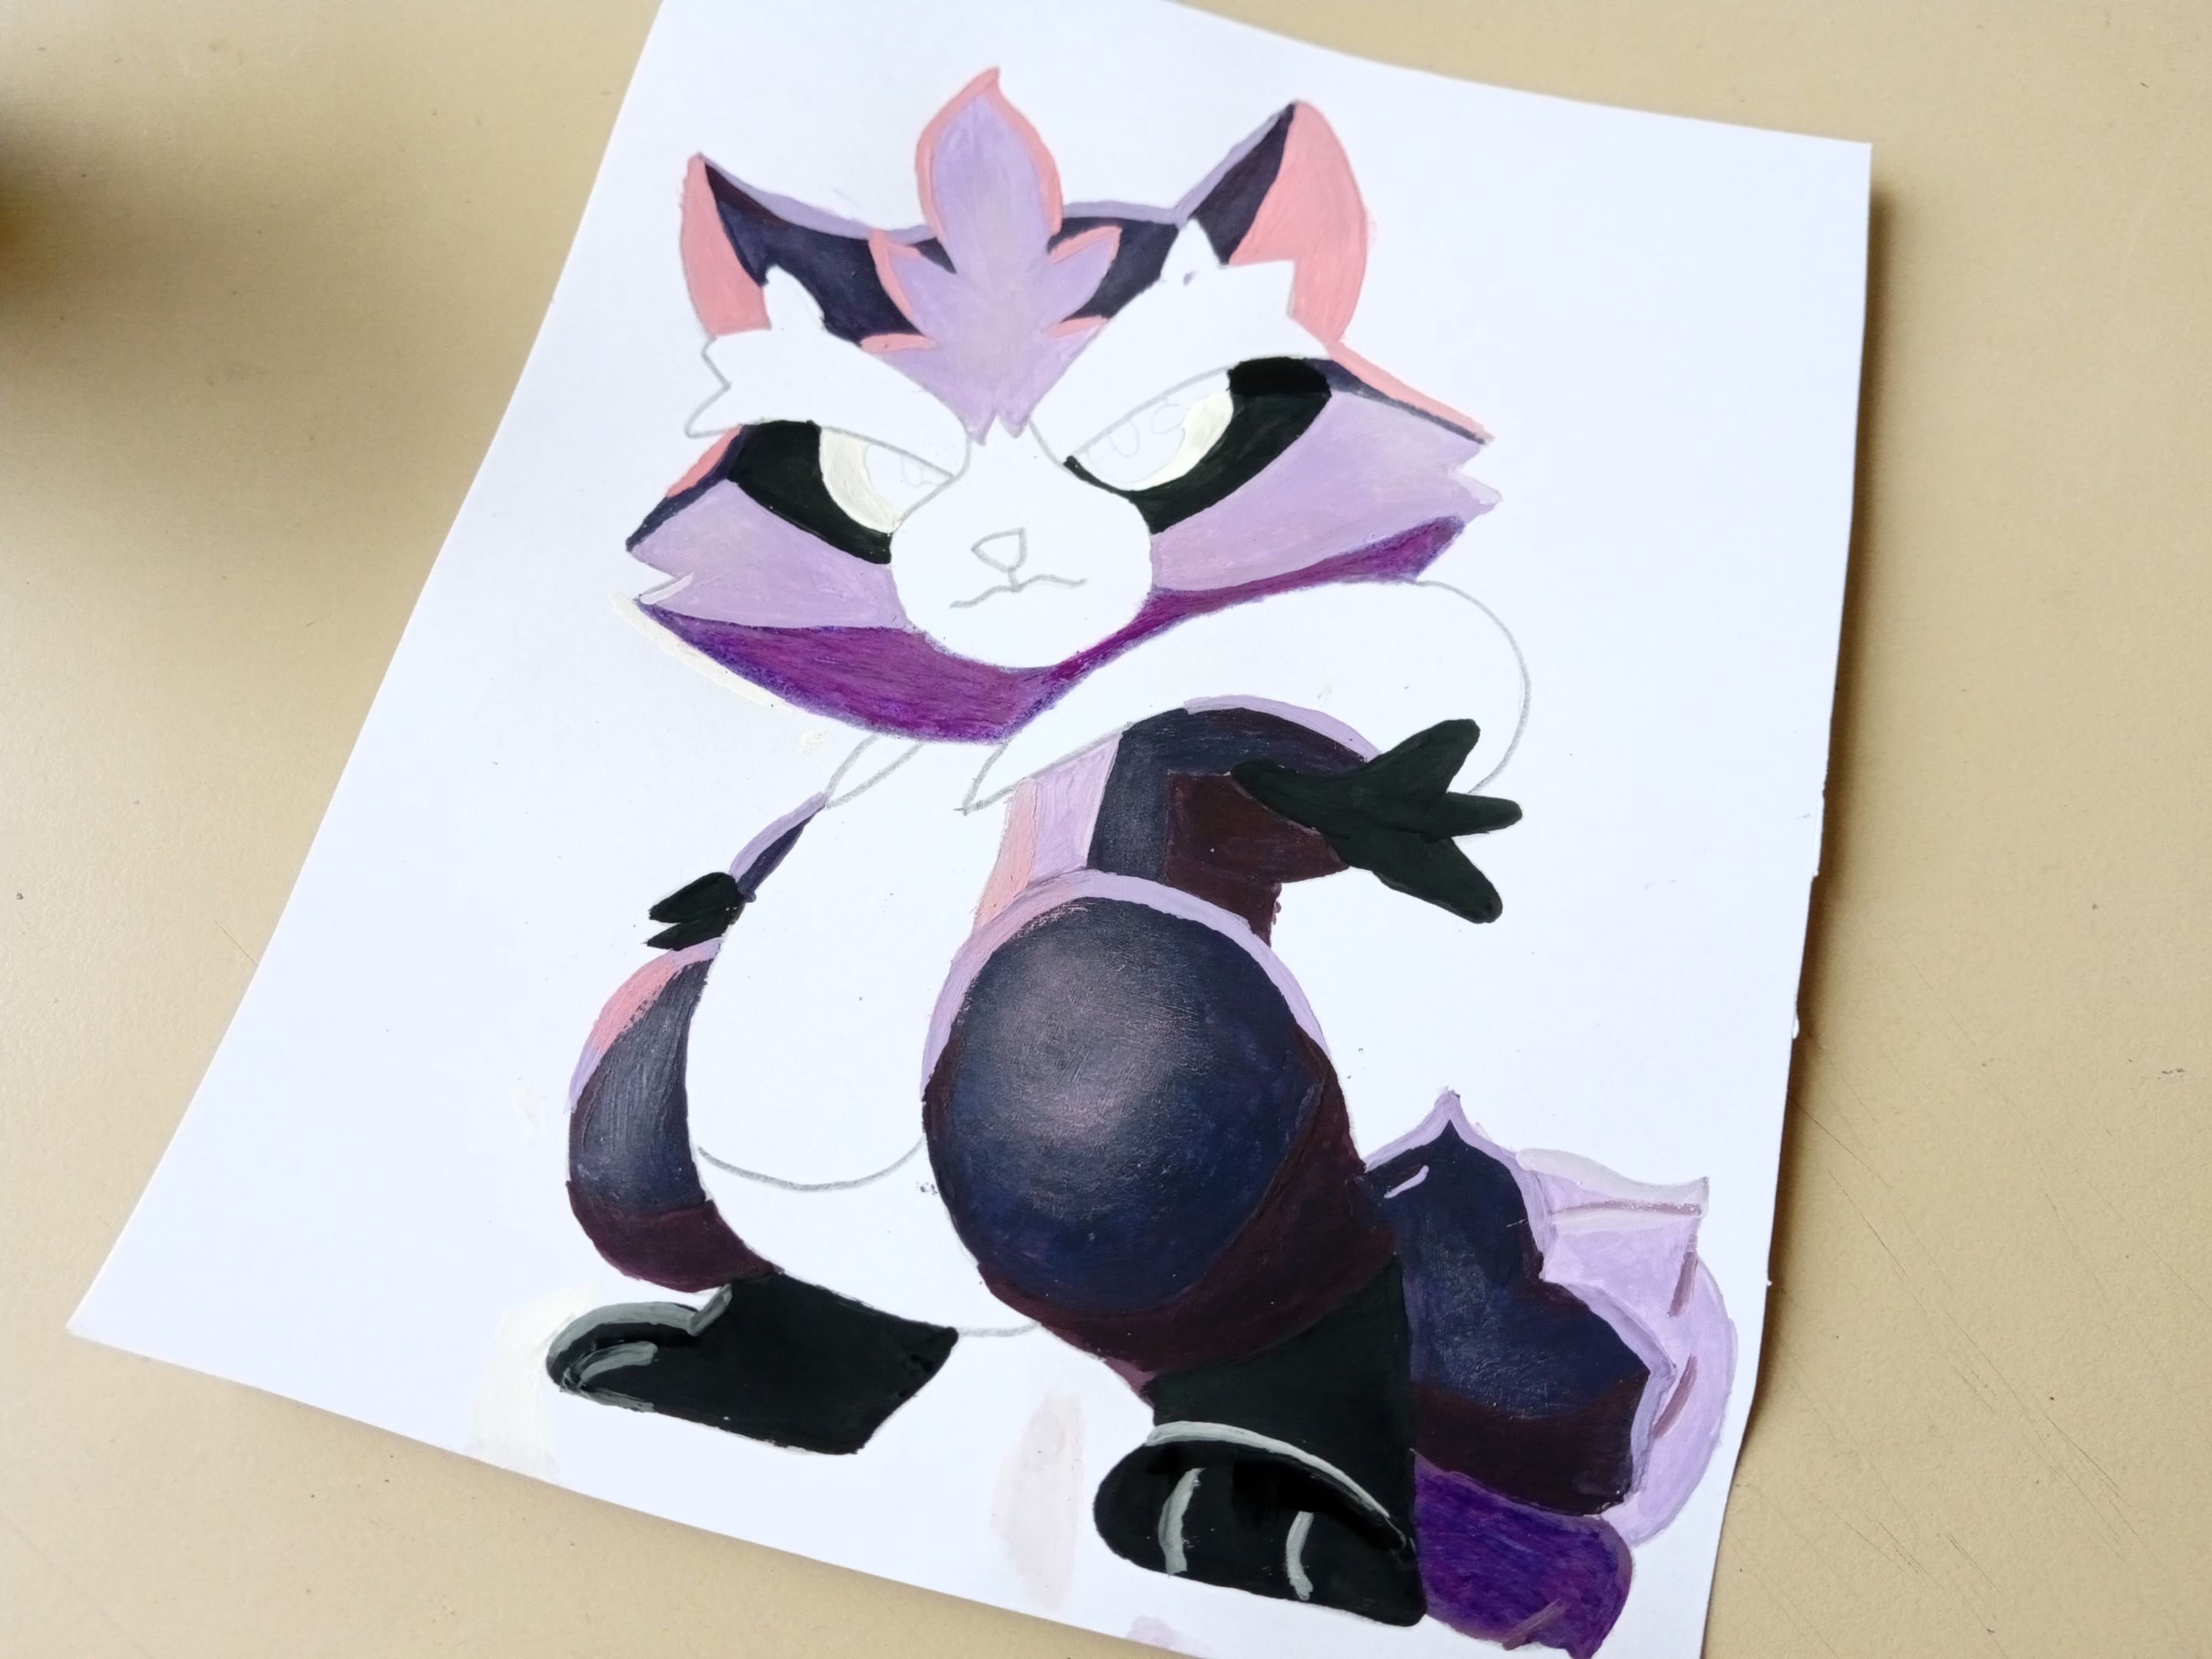
- ✨ PASO 4:
En las zonas más claras del rostro y cuerpo, utilicé color lila y para dar luz o contraste, combiné rojo con blanco para obtener un rosado, el cual también utilicé para la parte interna de las orejas.
- ✨ STEP 4:
In the lighter areas of the face and body, I used lilac and to give light or contrast, I combined red with white to obtain a pink, which I also used for the inner part of the ears.
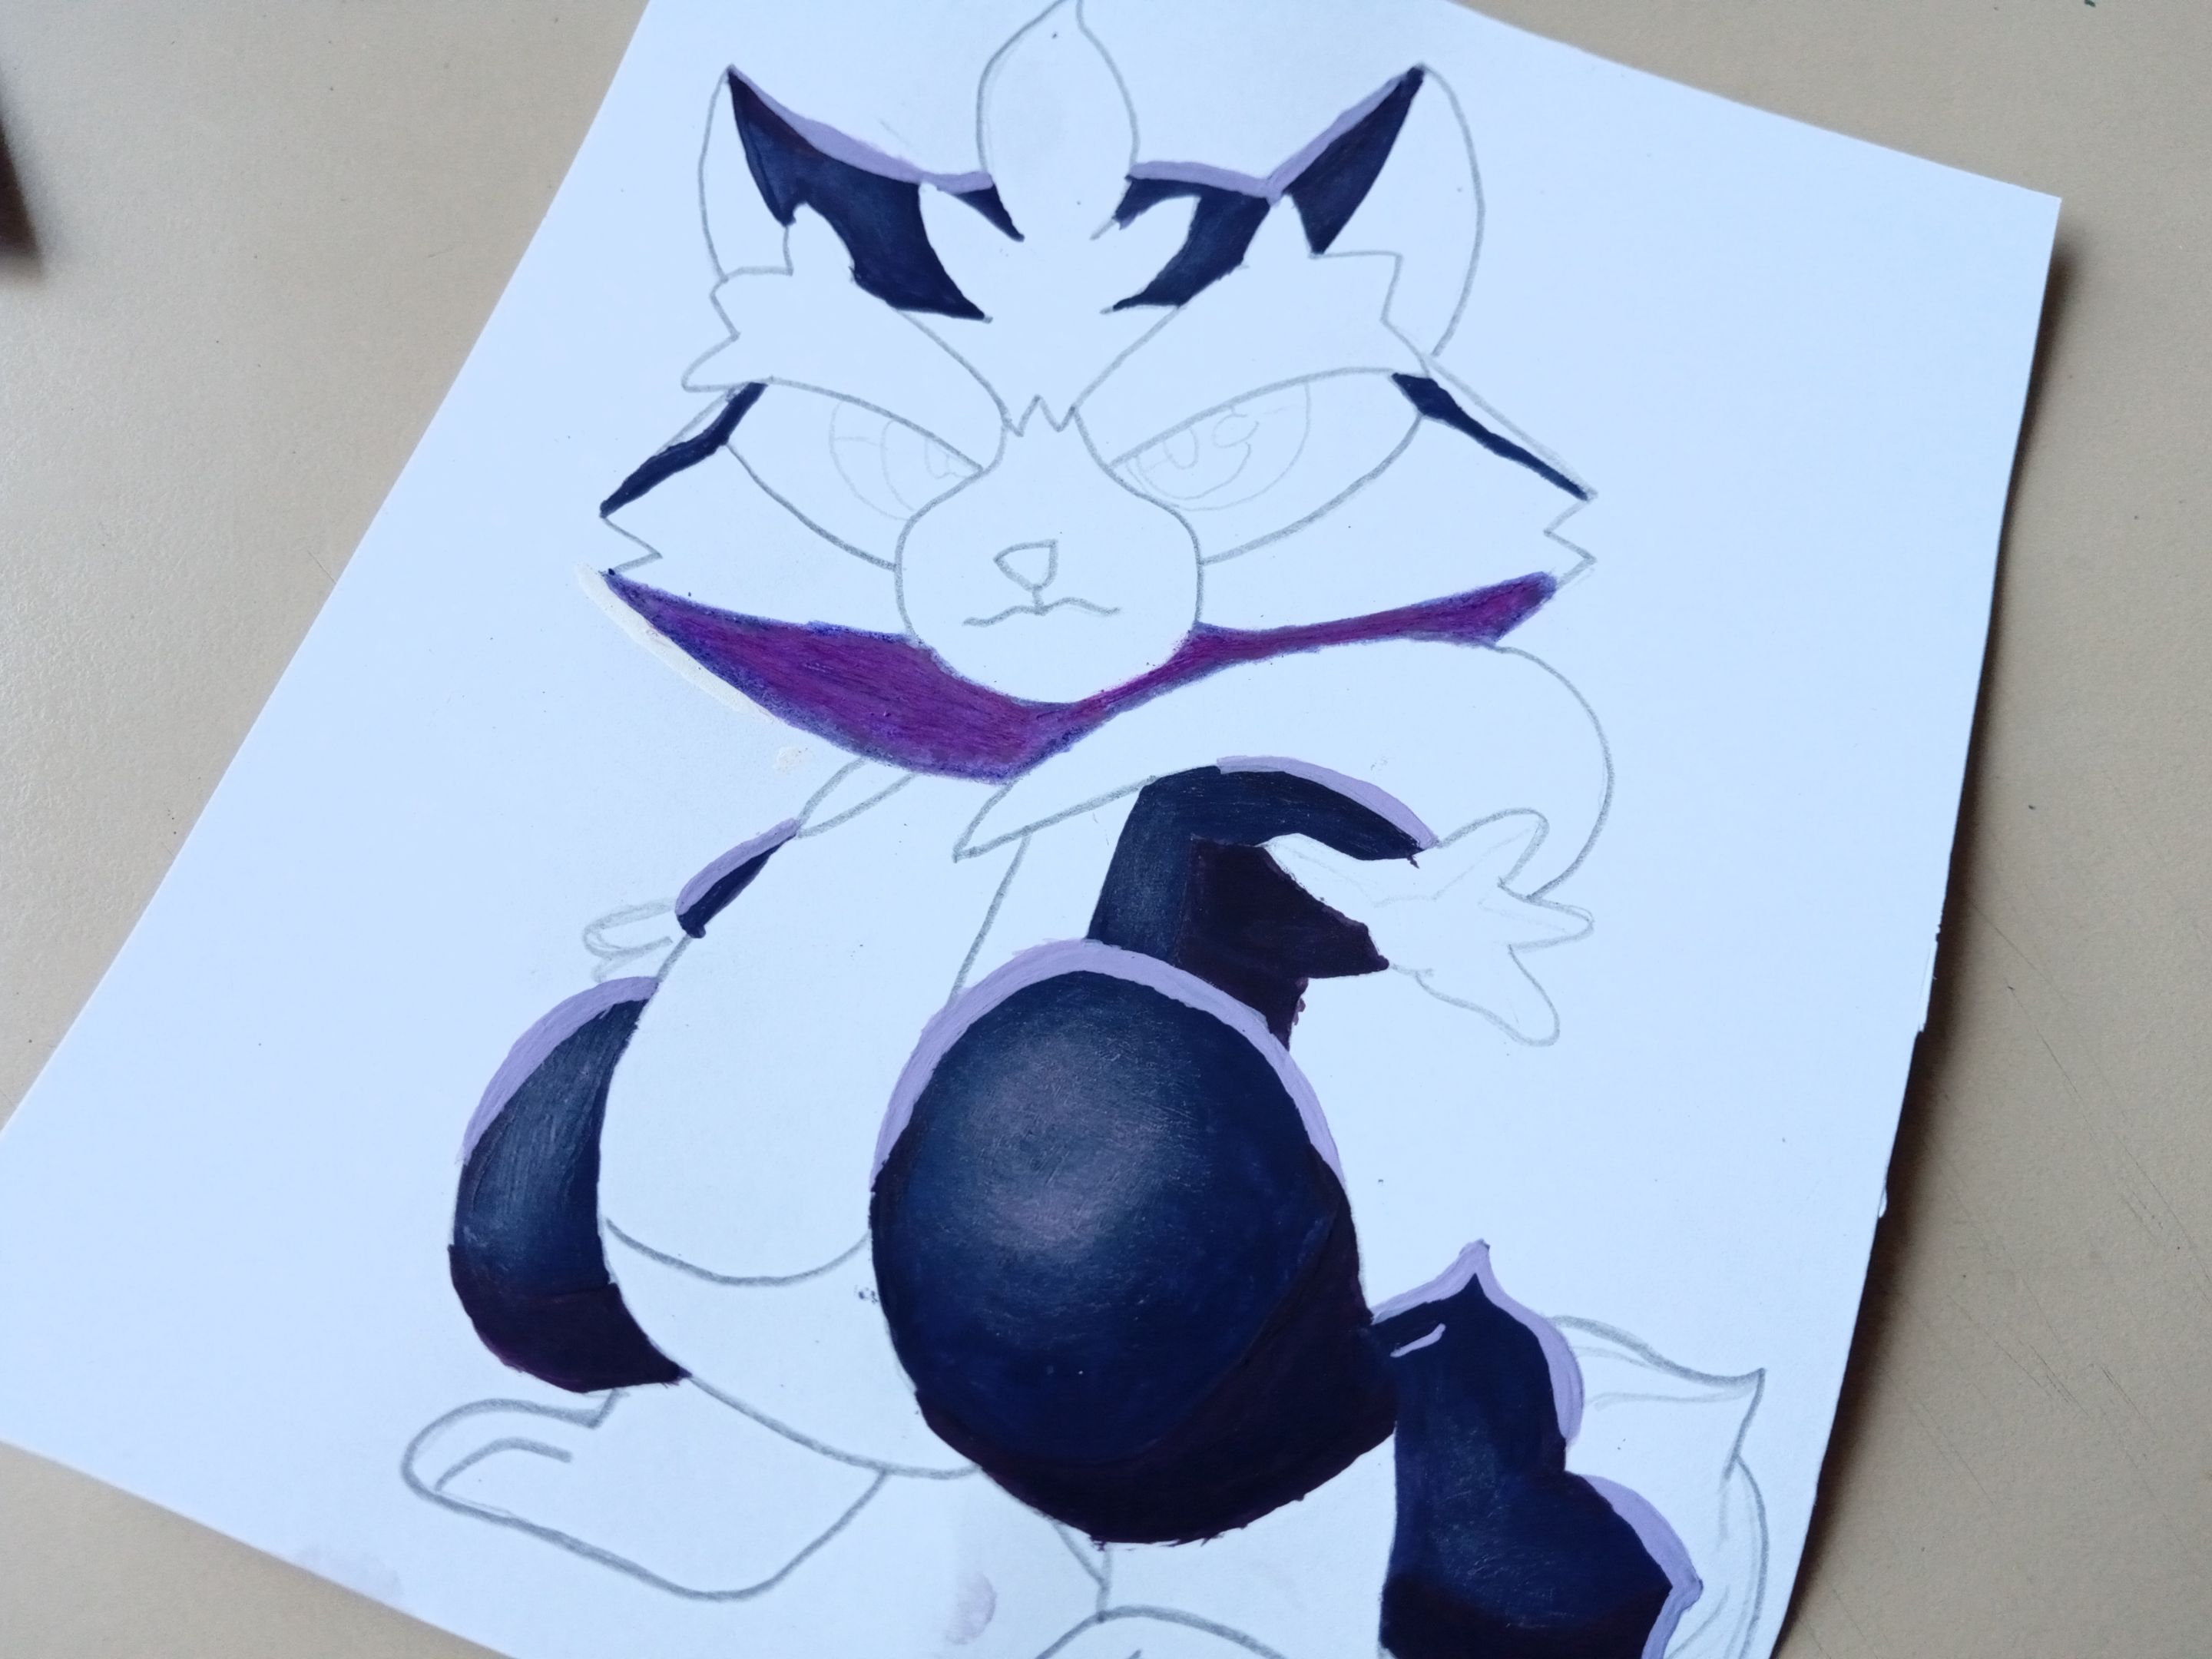
- ✨ PASO 5:
Luego, pinté con negro las patas y partes más oscuras del cuerpo del mapache. A las patas le di luz con blanco y aproveché de pintar los ojos con un crayón fucsia, la pupila de negro y pinté la sombra utilizando un gris en la parte superior.
- ✨ STEP 5:
Next, I painted the legs and darker parts of the raccoon's body with black. I gave light to the legs with white and I took advantage of painting the eyes with a fuchsia crayon, the pupil black and I painted the shadow using gray on the top.
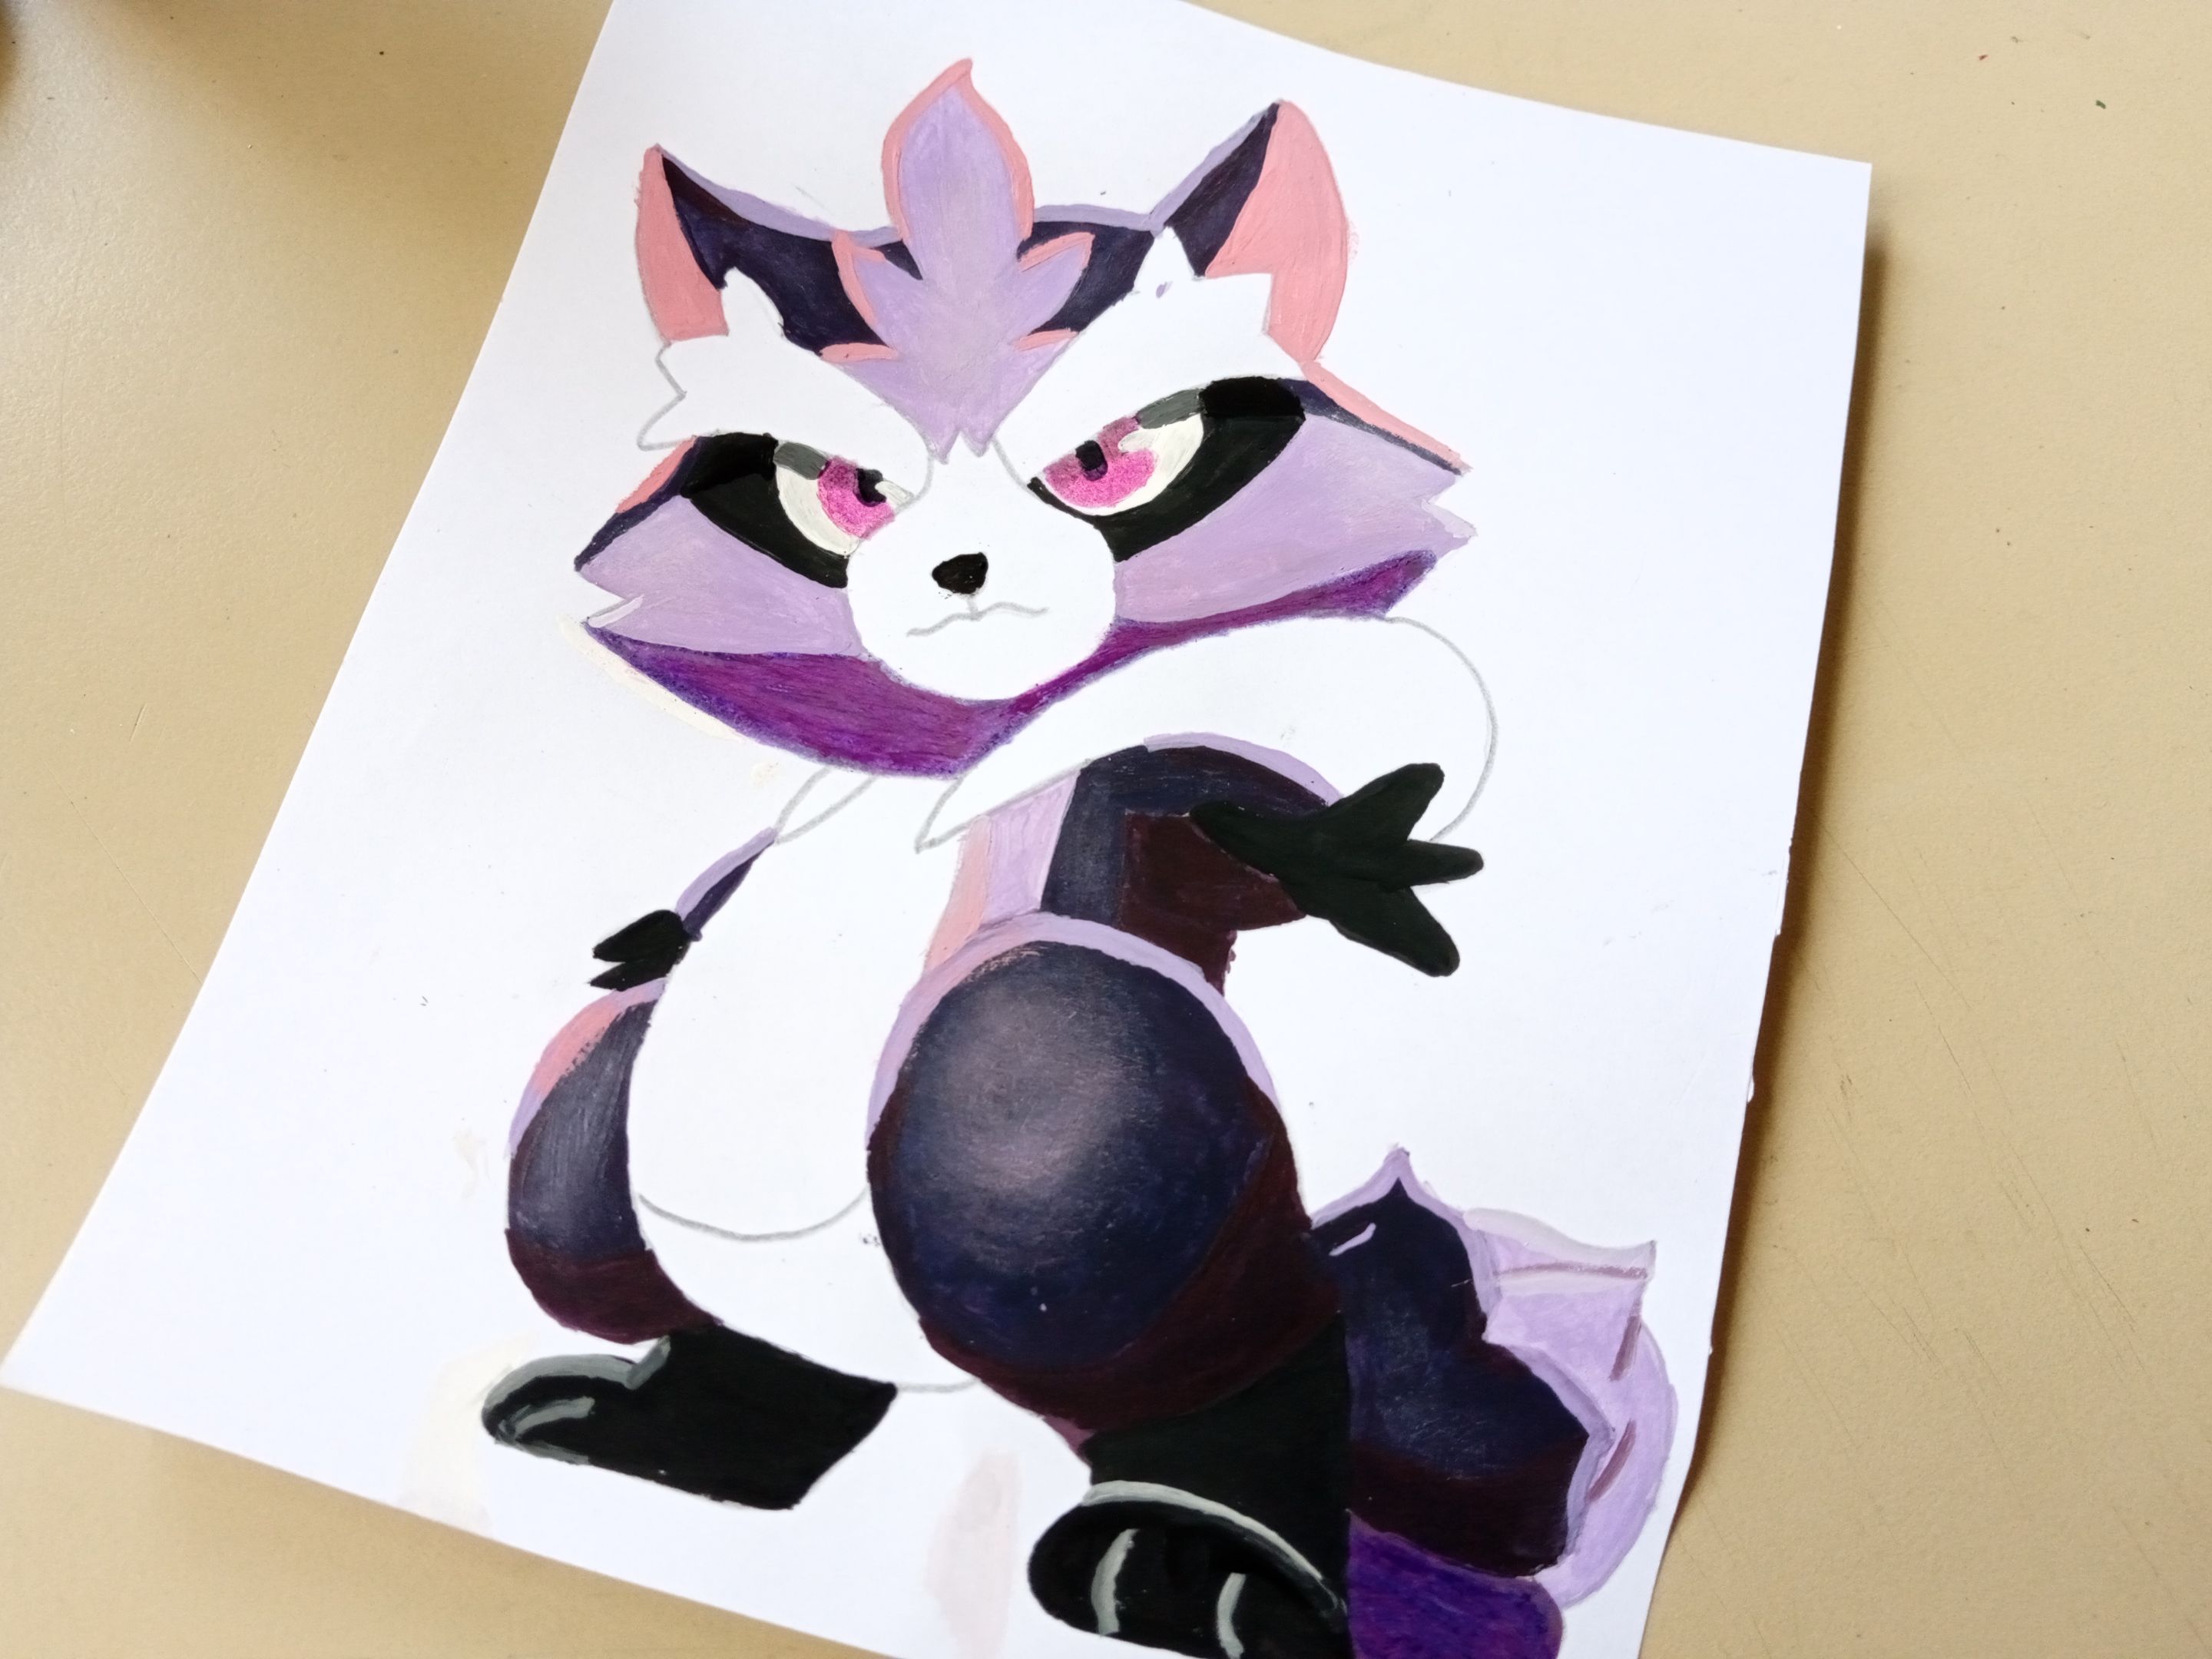
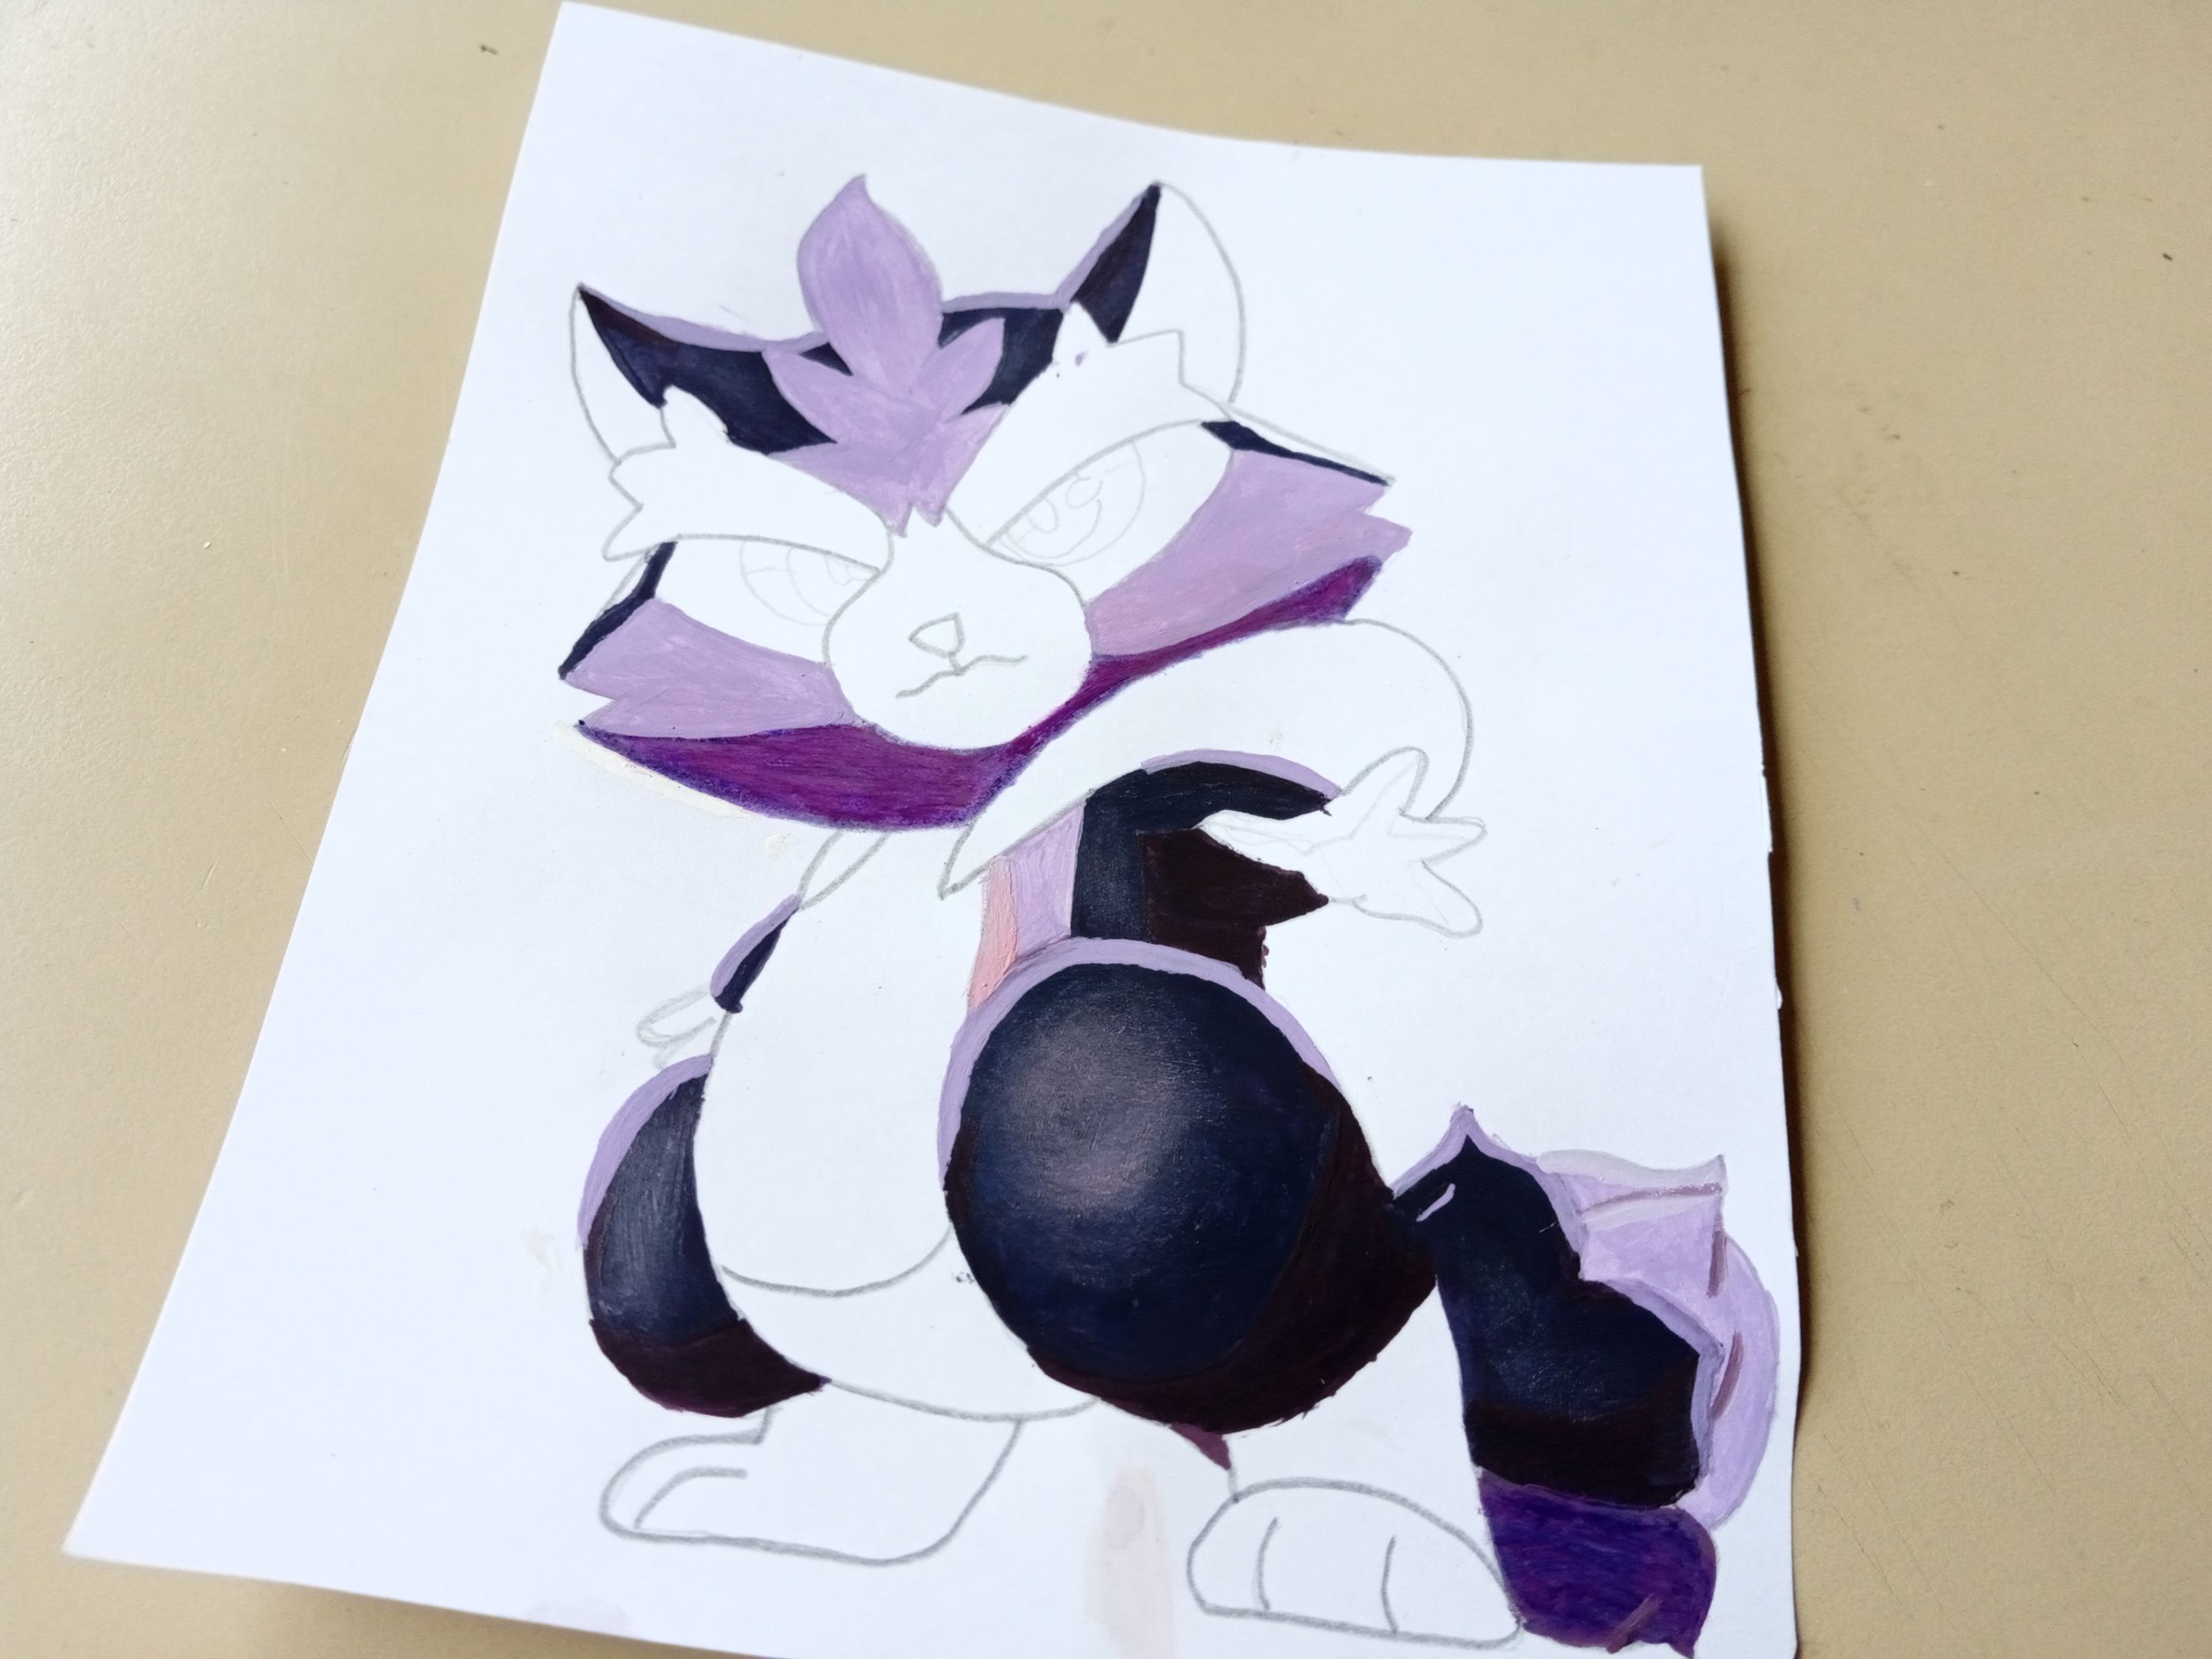
- ✨ PASO 6:
Para el resto del cuerpo, utilicé color crema y pinté las partes más claras. Para las sombras mezclé el color crema con un poco de marrón y el resto mezclé esos mismos colores con un tono de gris, di contraste con pintura marrón, di toques de luz a esas zonas y, por último, pinté la boca y delineé todo el dibujo.
- ✨ STEP 6:
For the rest of the body, I used cream color and painted the lighter parts. For the shadows I mixed the cream color with a little brown and the rest I mixed those same colors with a tone of gray, I contrasted with brown paint, I gave highlights to those areas and, finally, I painted the mouth and outlined the entire drawing.
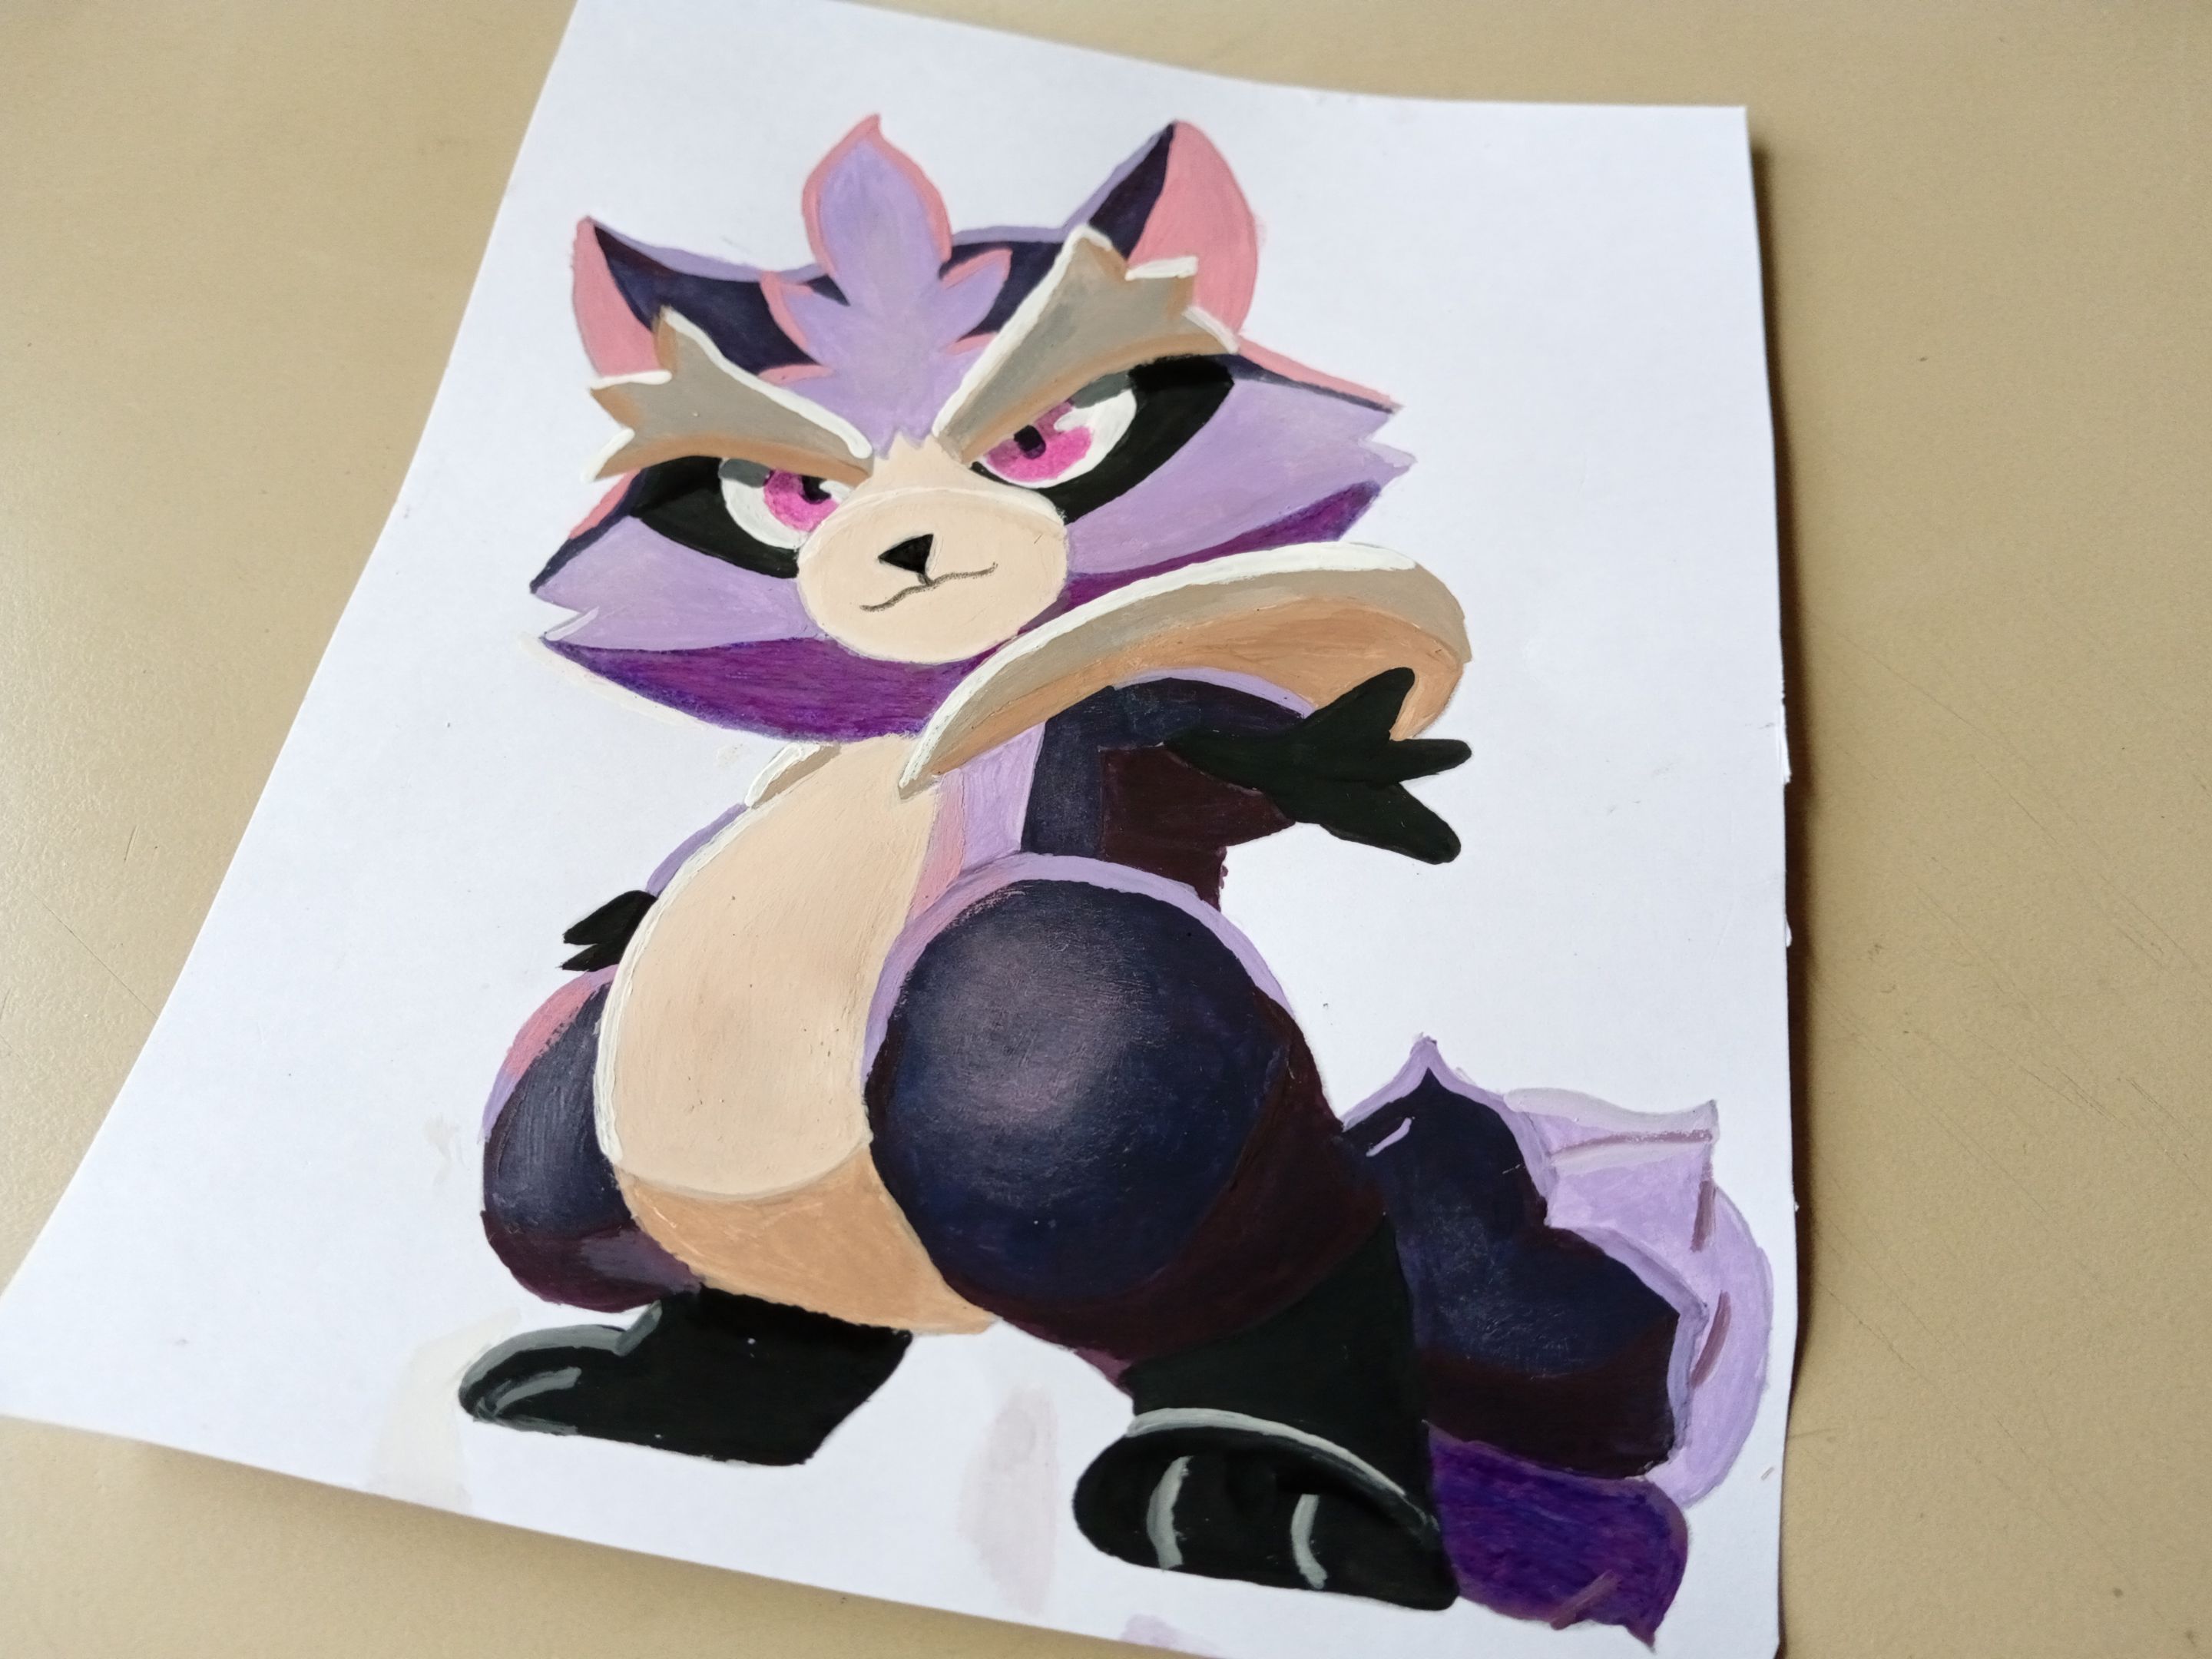
❤️ Hasta la próxima publicación.
❤️ Until the next post.


Todas las fotografías son de mi propiedad.
Separador y Fotos editadas en Canva
All photographs are my property.
Photos edited in Canva