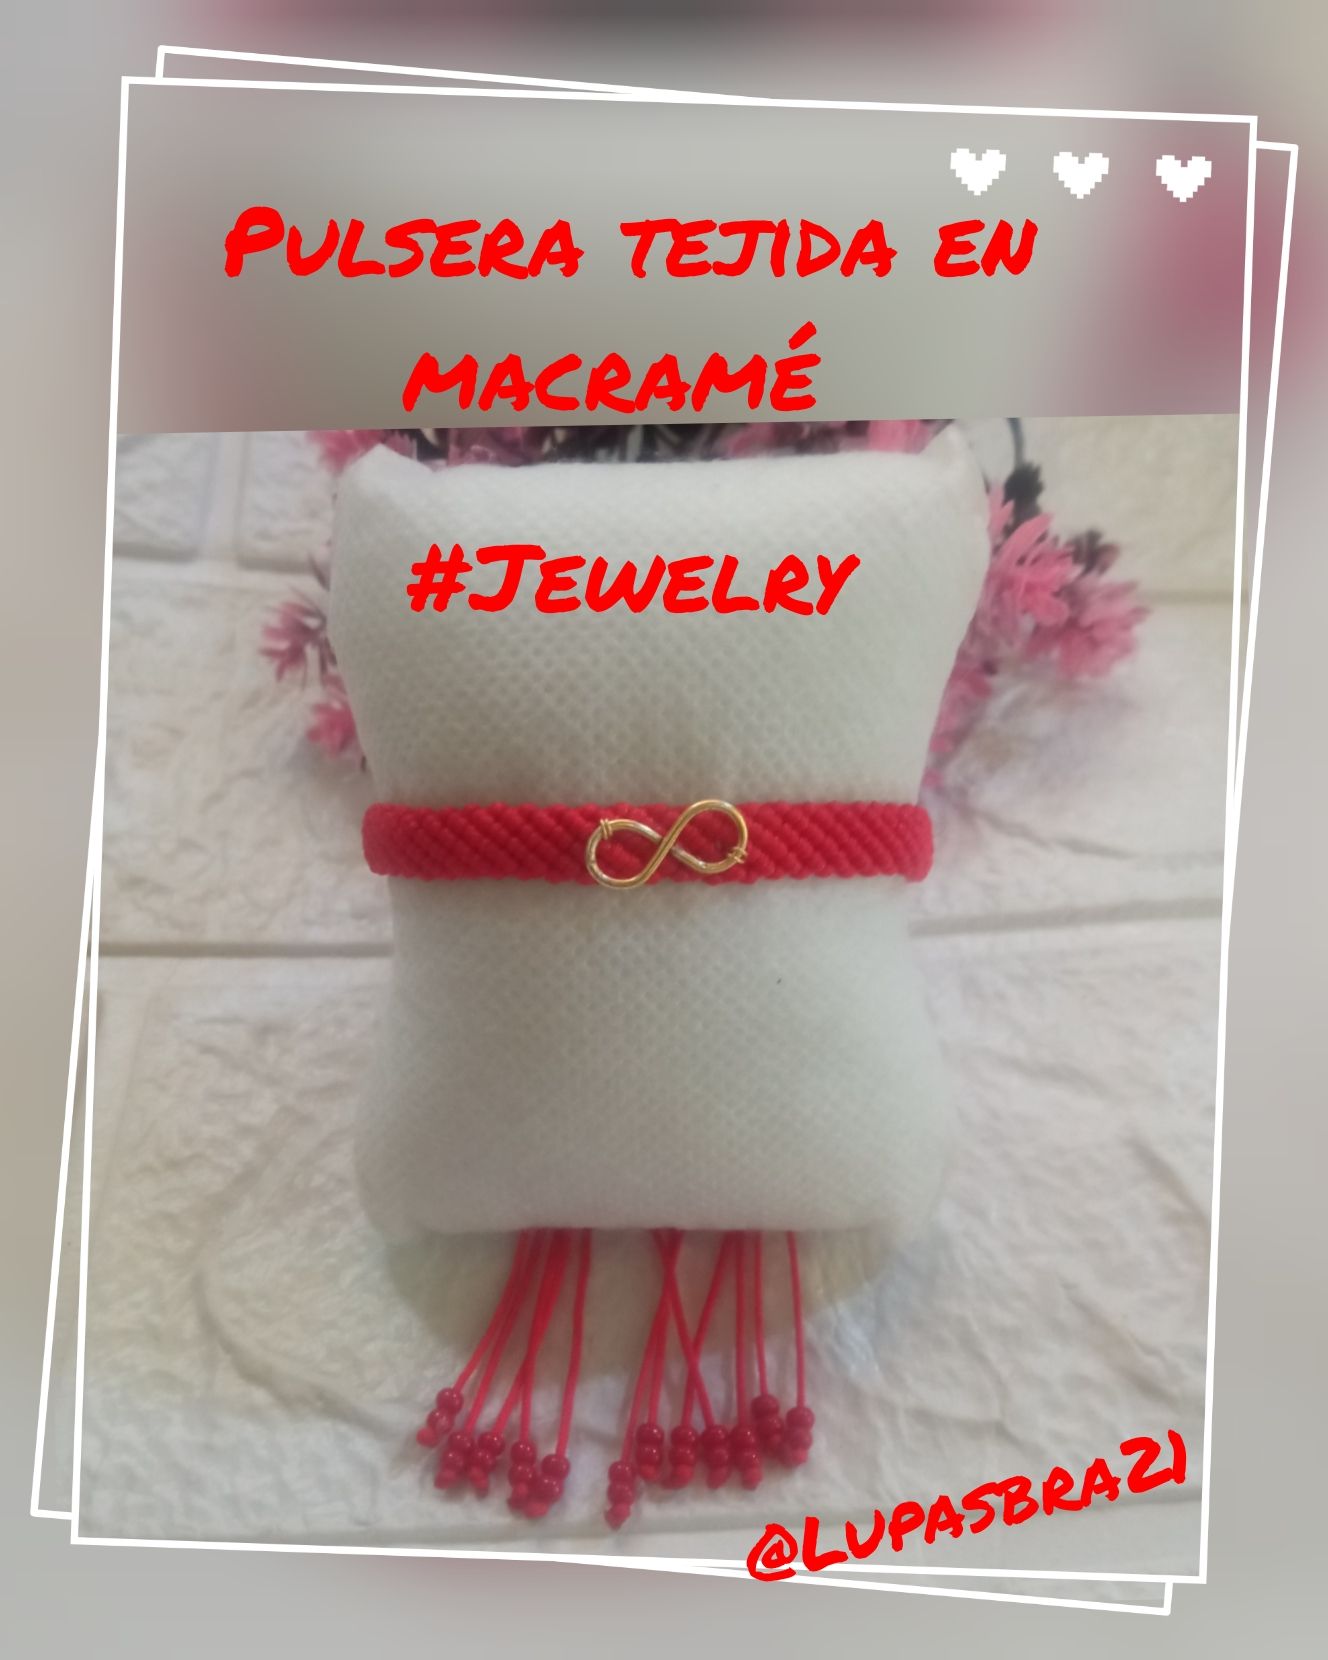
Hola, hola comunidad de #hive y comunidad de #Jewelry les deseo a todos un feliz y bendecido día sábado, yo por acá trayendo el tutorial o pasa a paso de un bello proyecto como lo es el tejido de una pulsera en macramé, este punto hace muchos años lo realicé en tejidos para la elaboración de sandalias y la verdad se me había olvidado, pero luego de ver un tutorial y practicarlo logré elaborar esta pulsera, me gustó el modelo porque es un poco ancha y se ve muy bonita, podemos usar diferentes tipos de hilos como hilo chino, hilo cola de ratón, piel de serpiente, terlenca entre otros y a parte con este modelo de pulseras podemos colocarle dijes y la hace ver más bonita , yo le coloque un dije de infinito. espero lleguen hasta el final del post para que disfruten del paso a paso, así que sin más paso a describir el procedimiento, espero les guste, este es uno de los puntos macramé que estoy haciendo nuevo.
Hello, hello #hive community and #Jewelry community I wish you all a happy and blessed Saturday, I'm here bringing the tutorial or step by step of a beautiful project as it is the weaving of a macrame bracelet, this point many years ago I made it in fabrics for the development of sandals and the truth I had forgotten, but after watching a tutorial and practicing I managed to make this bracelet, I liked the model because it is a little wide and looks very nice, we can use different types of threads such as Chinese thread, mouse tail thread, snakeskin, terlenca among others and also with this model of bracelets we can place charms and makes it look prettier, I placed an infinity charm. I hope you get to the end of the post to enjoy the step by step, so without further ado I will describe the procedure, I hope you like it, this is one of the macramé stitches I am making new.
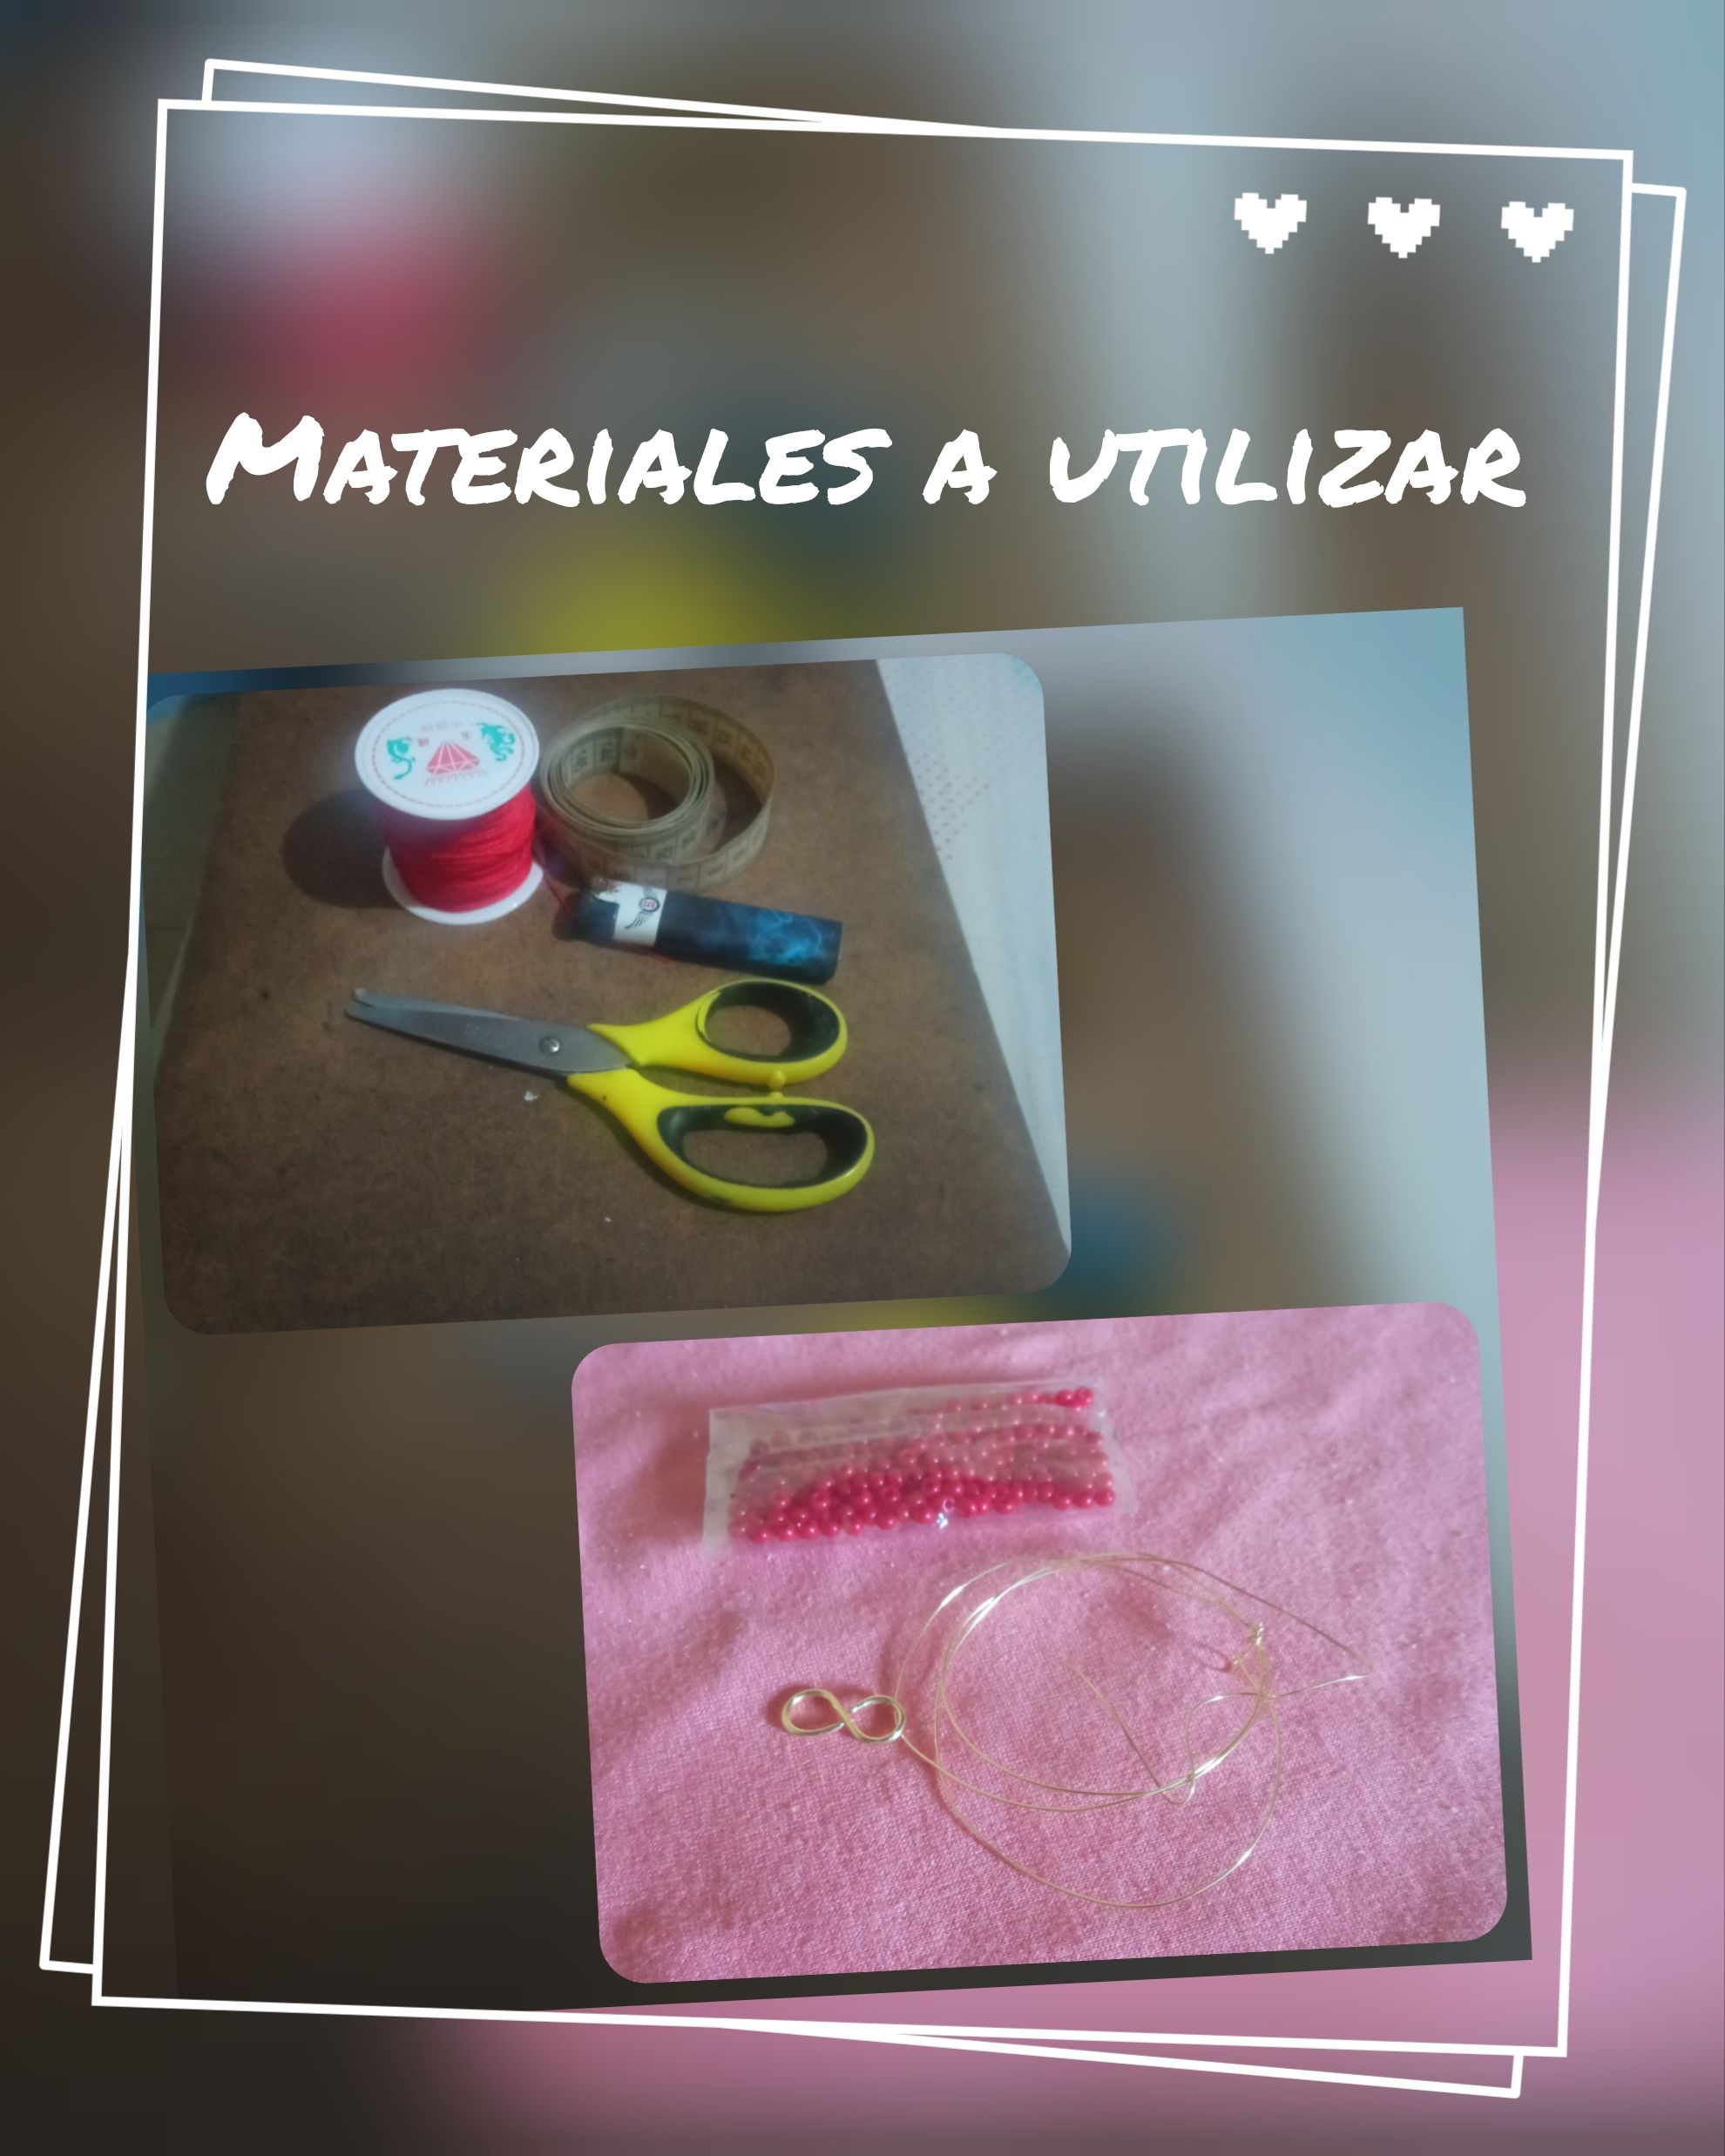
Materiales a utilizar
☑️ Hilo chino en esta oportunidad utilicé de color rojo .
☑️ Tijera
☑️ Tabla con gancho.
☑️ Yesquero o encendedor.
☑️ Cinta métrica.
☑️ Dije en alambre tpc No 20.
☑️ Alambre tpc No 24.
☑️ Mostacillas.
Materials to use
☑️ Chinese thread, this time I used red.
☑️ Scissors
☑️ Board with hook.
☑️ Tinder or lighter.
☑️ Tape measure.
☑️ Tpc No 20 wire.
☑️ Wire tpc No 24.
☑️ Beads.
Tutorial o paso a paso.
Comienzo midiendo y cortando 6 hilos chinos de 90 cm cada uno, luego dejo 8 cm y realizo un nudo básico con los 6 hilos ,prendo todos estos hilos con el gancho de la tabla,empiezo tomo el primer hilo del lado derecho y empiezo a realizar el tejido el cual consiste en realizar nudos alondra ( 1 al 6).
Tutorial or step by step.
I start by measuring and cutting 6 Chinese threads of 90 cm each, then I leave 8 cm and I make a basic knot with the 6 threads, I tie all these threads with the hook of the board, I start taking the first thread of the right side and I begin to make the weaving which consists of making knots lark (1 to 6).
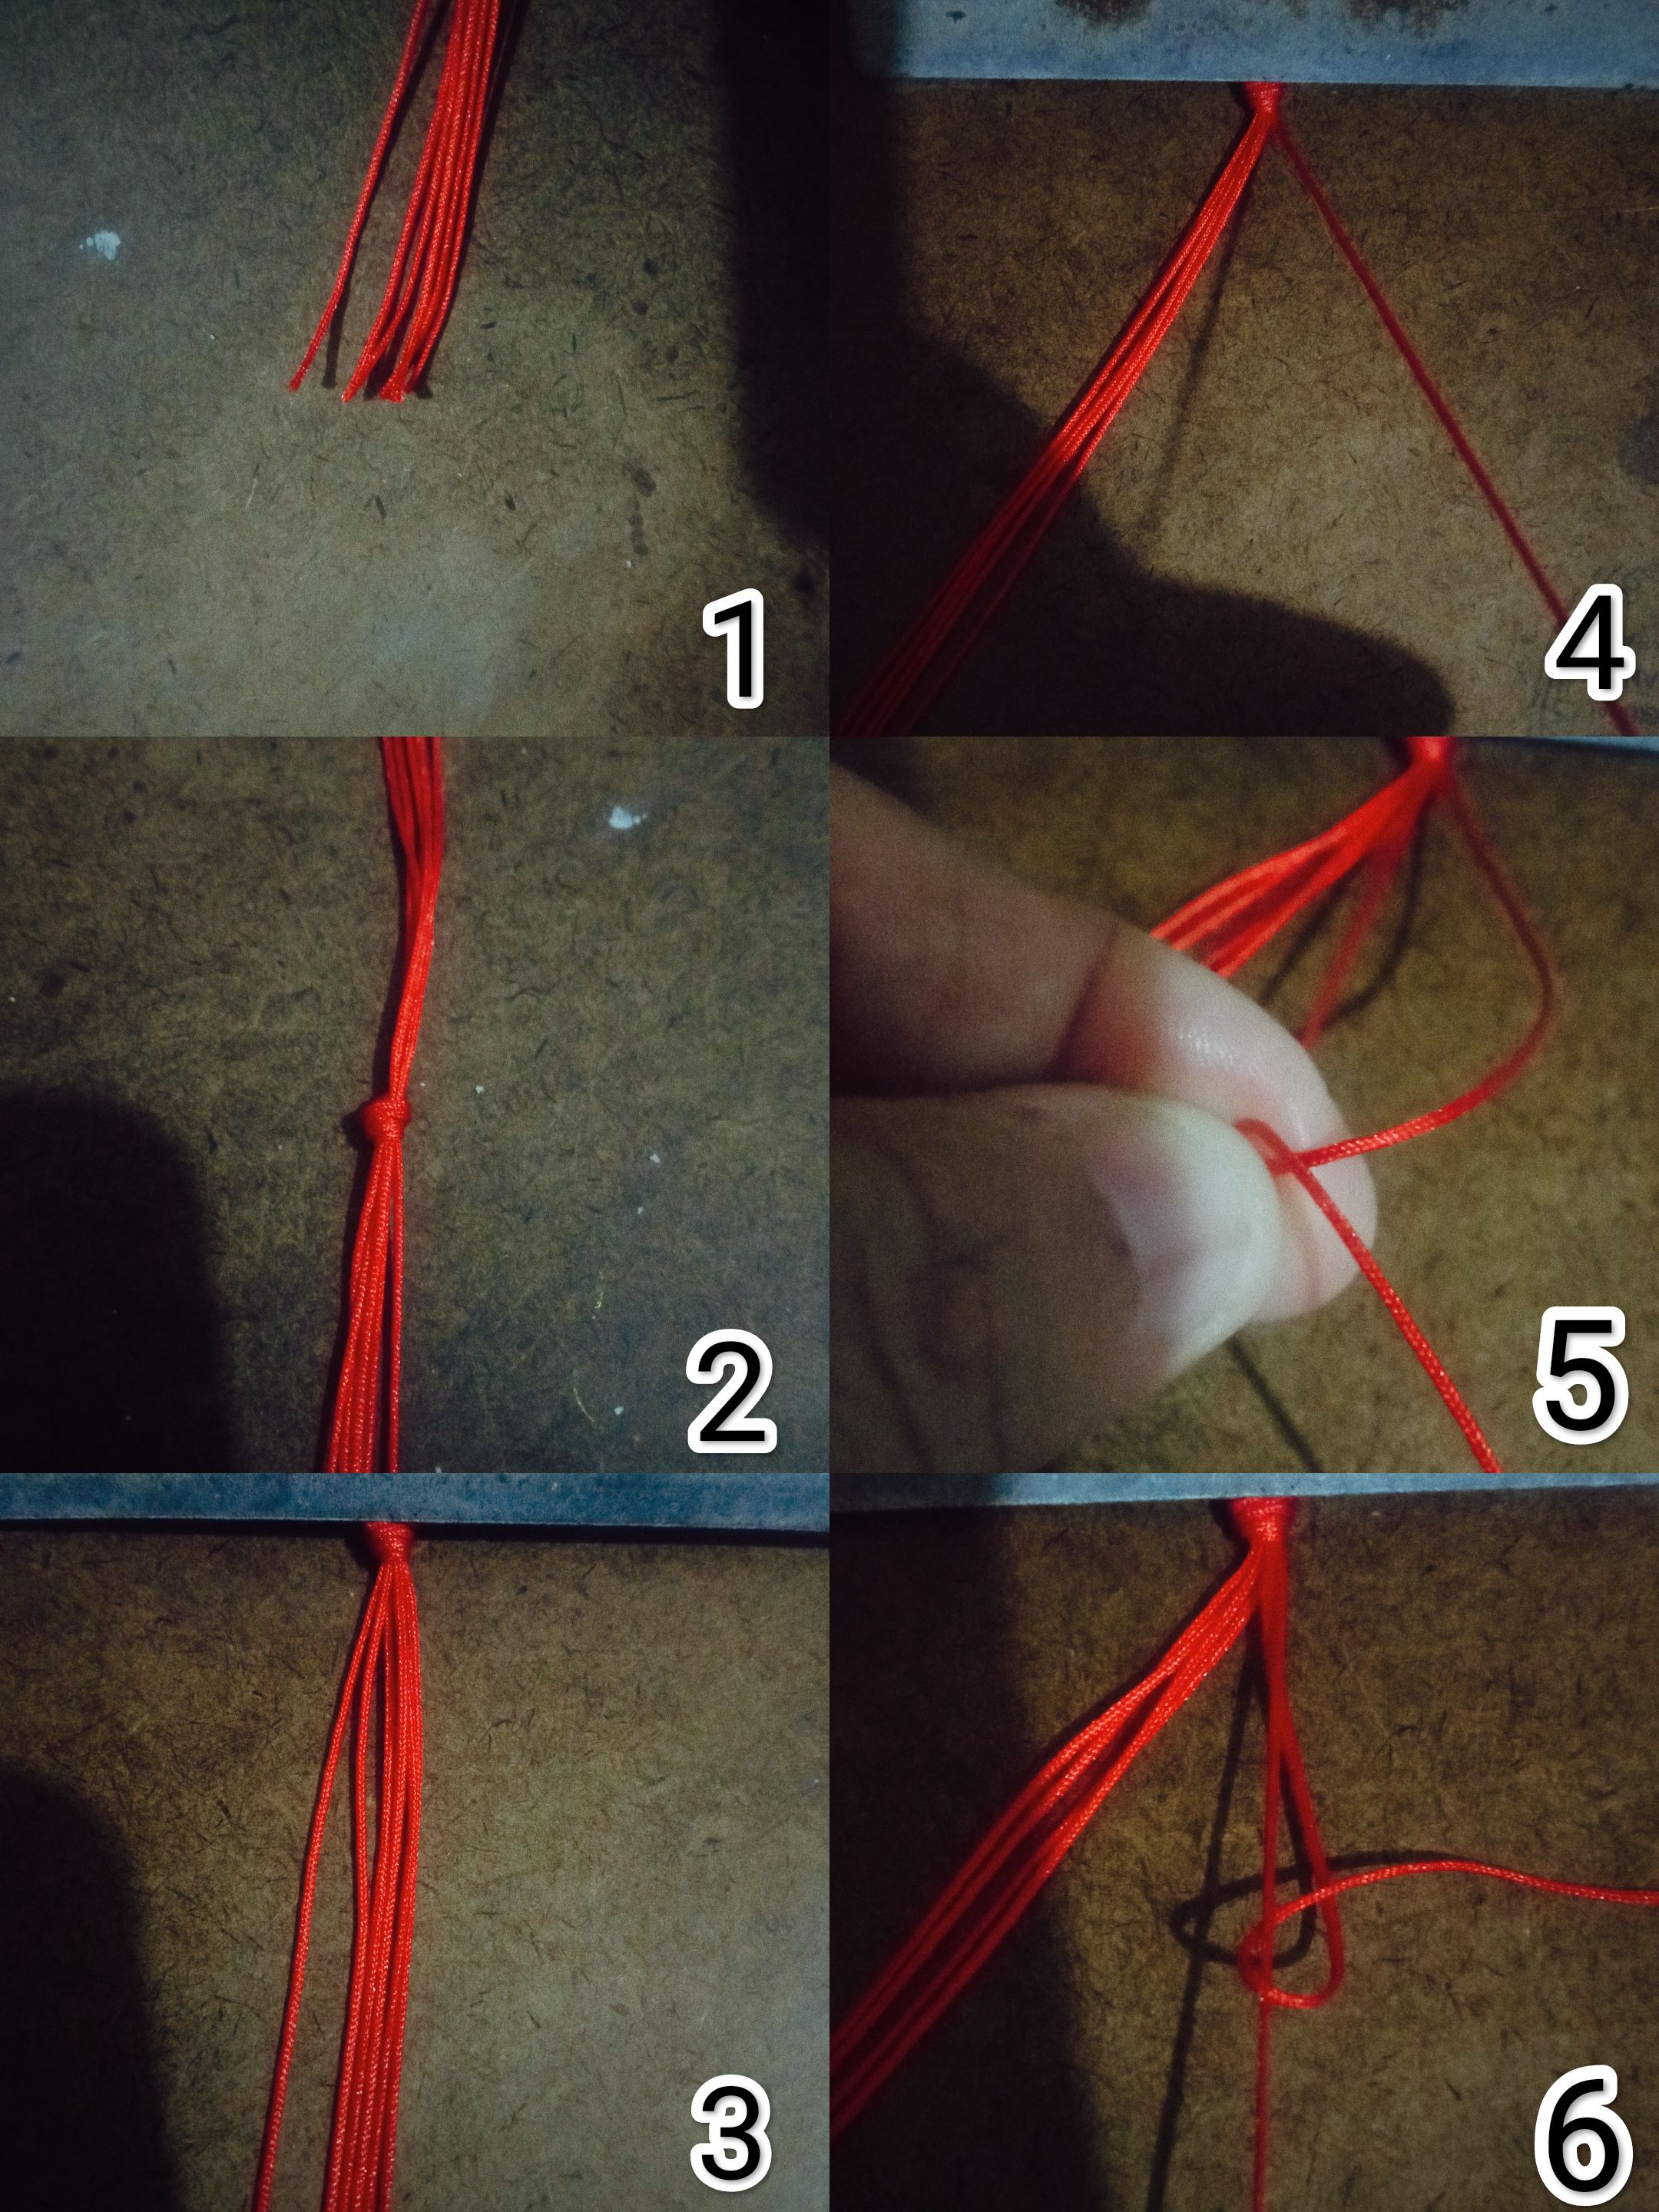
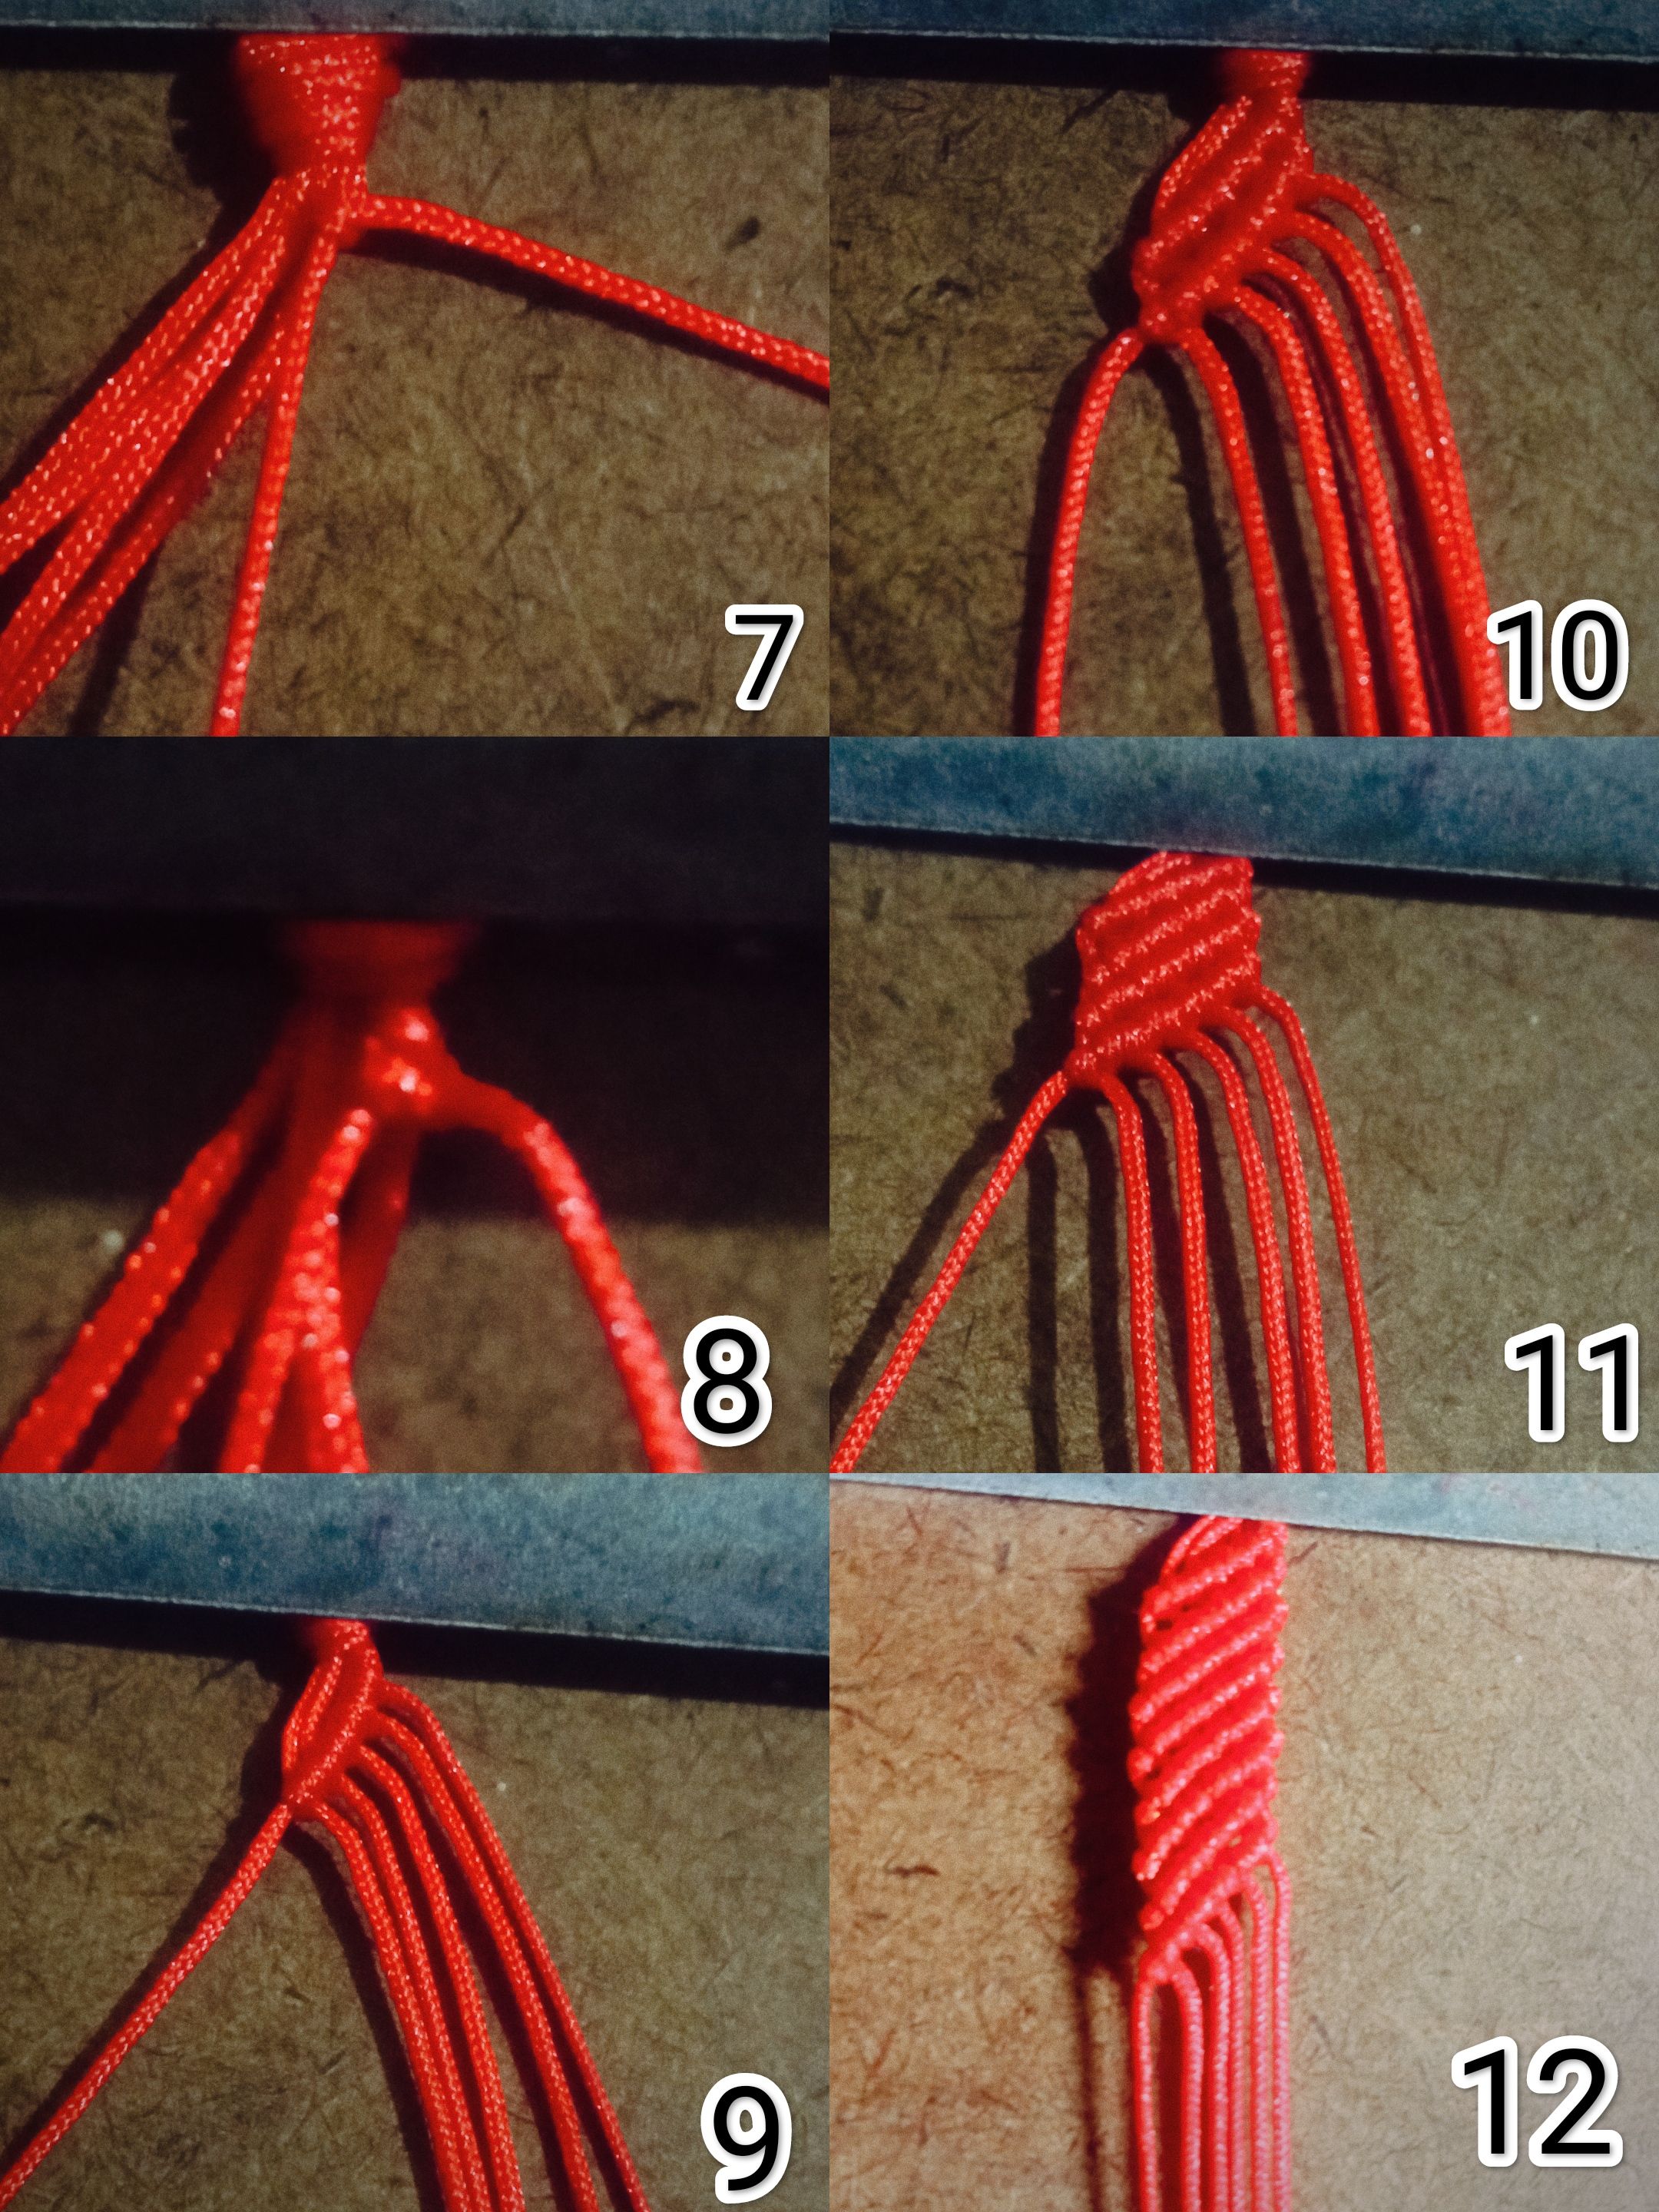
Empiezo a realizar el nudo alondra y ese hilo del lado derecho pasa entonces al lado izquierdo, ese procedimiento lo voy a repetir con todos los hilos , va a ser una secuencia, debemos apretar bien el hilo con el cual realizamos el nudo y el hilo en dónde realizamos el nudo debemos mantenerlo pegado hacía los que ya están tejidos , con esto evitamos que haya separación entre el tejido ( 7 al 12).
I begin to make the lark knot and that thread of the right side then passes to the left side, I will repeat this procedure with all the threads, it will be a sequence, we must tighten well the thread with which we make the knot and the thread where we make the knot we must keep it glued to those that are already woven, with this we avoid that there is separation between the fabric (7 to 12).
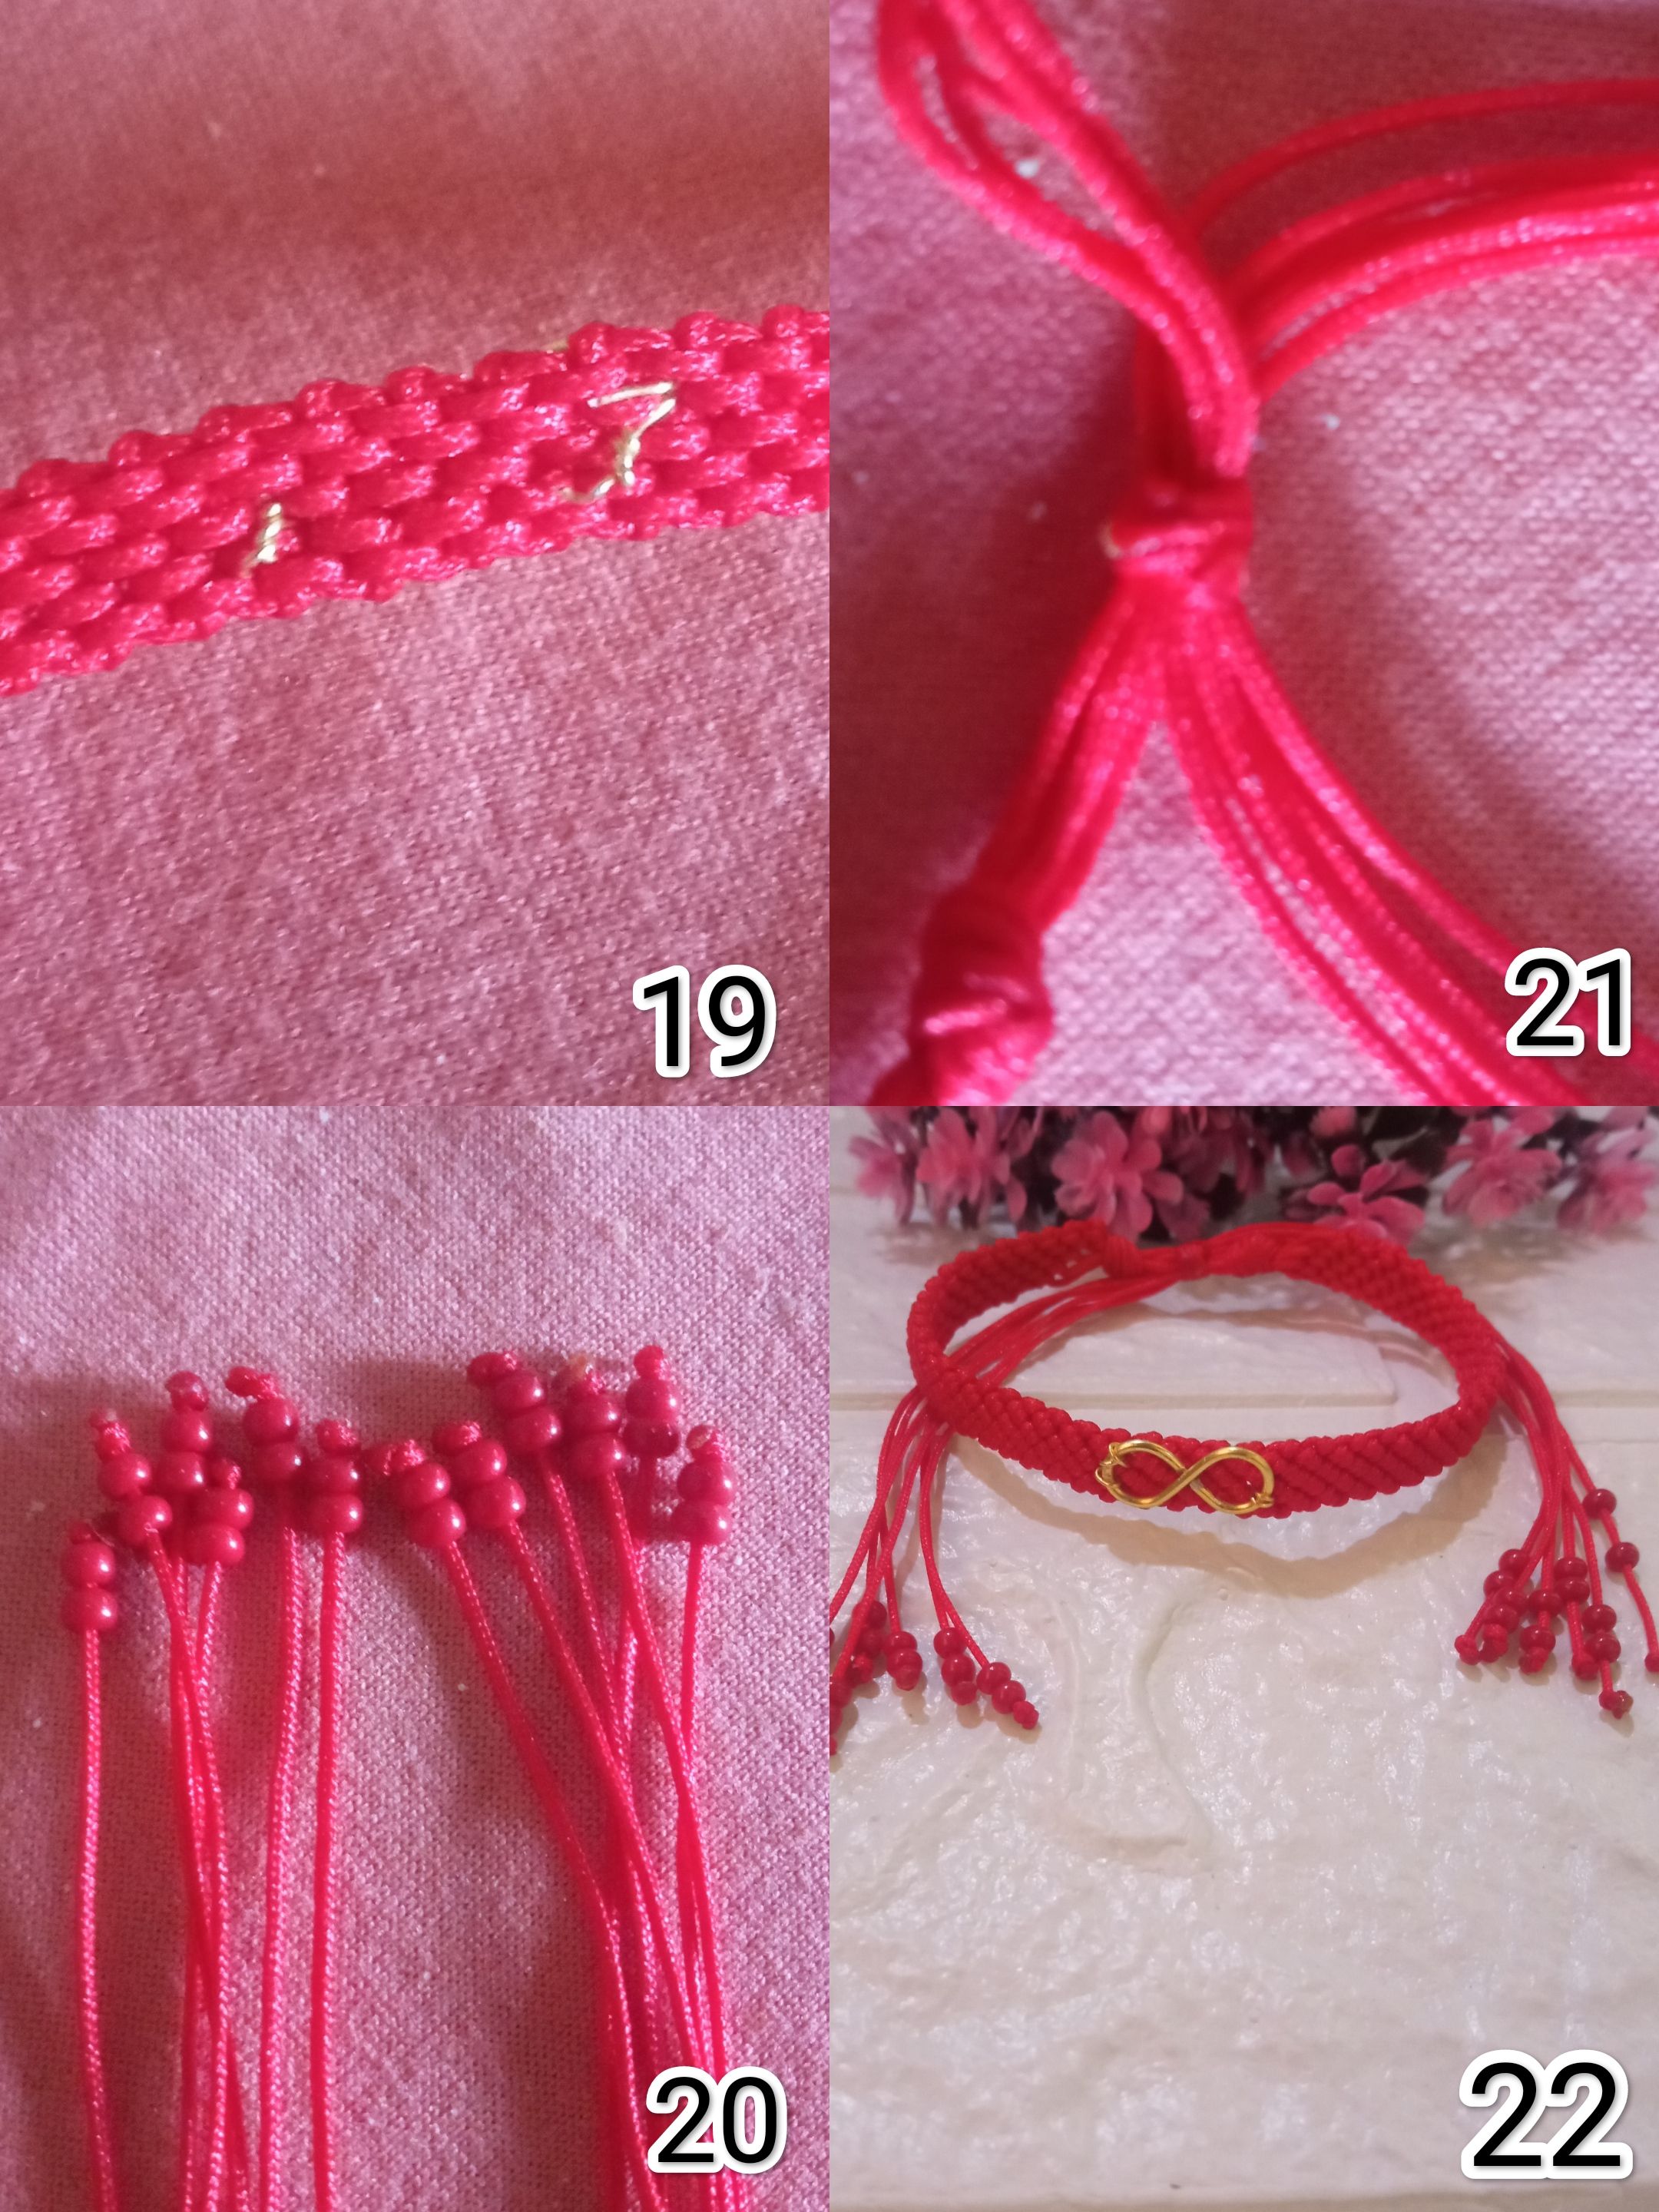
Luego al tener el largo deseado en este caso 14 cm, procedo a realizar un nudo básico con los 6 hilos , luego coloco el dije de infinito en todo el centro del tejido y doy dos vueltas con alambre 24 en ambos extremos del dije asegurando bien el alambre en parte de abajo del tejido para e otra que pueda presentar molestias al momento de usar (13 al 18).
Then when I have the desired length, in this case 14 cm, I proceed to make a basic knot with the 6 threads, then I place the infinity pendant in the center of the fabric and make two turns with wire 24 at both ends of the pendant, securing the wire well at the bottom of the fabric to avoid any discomfort at the time of use (13 to 18).

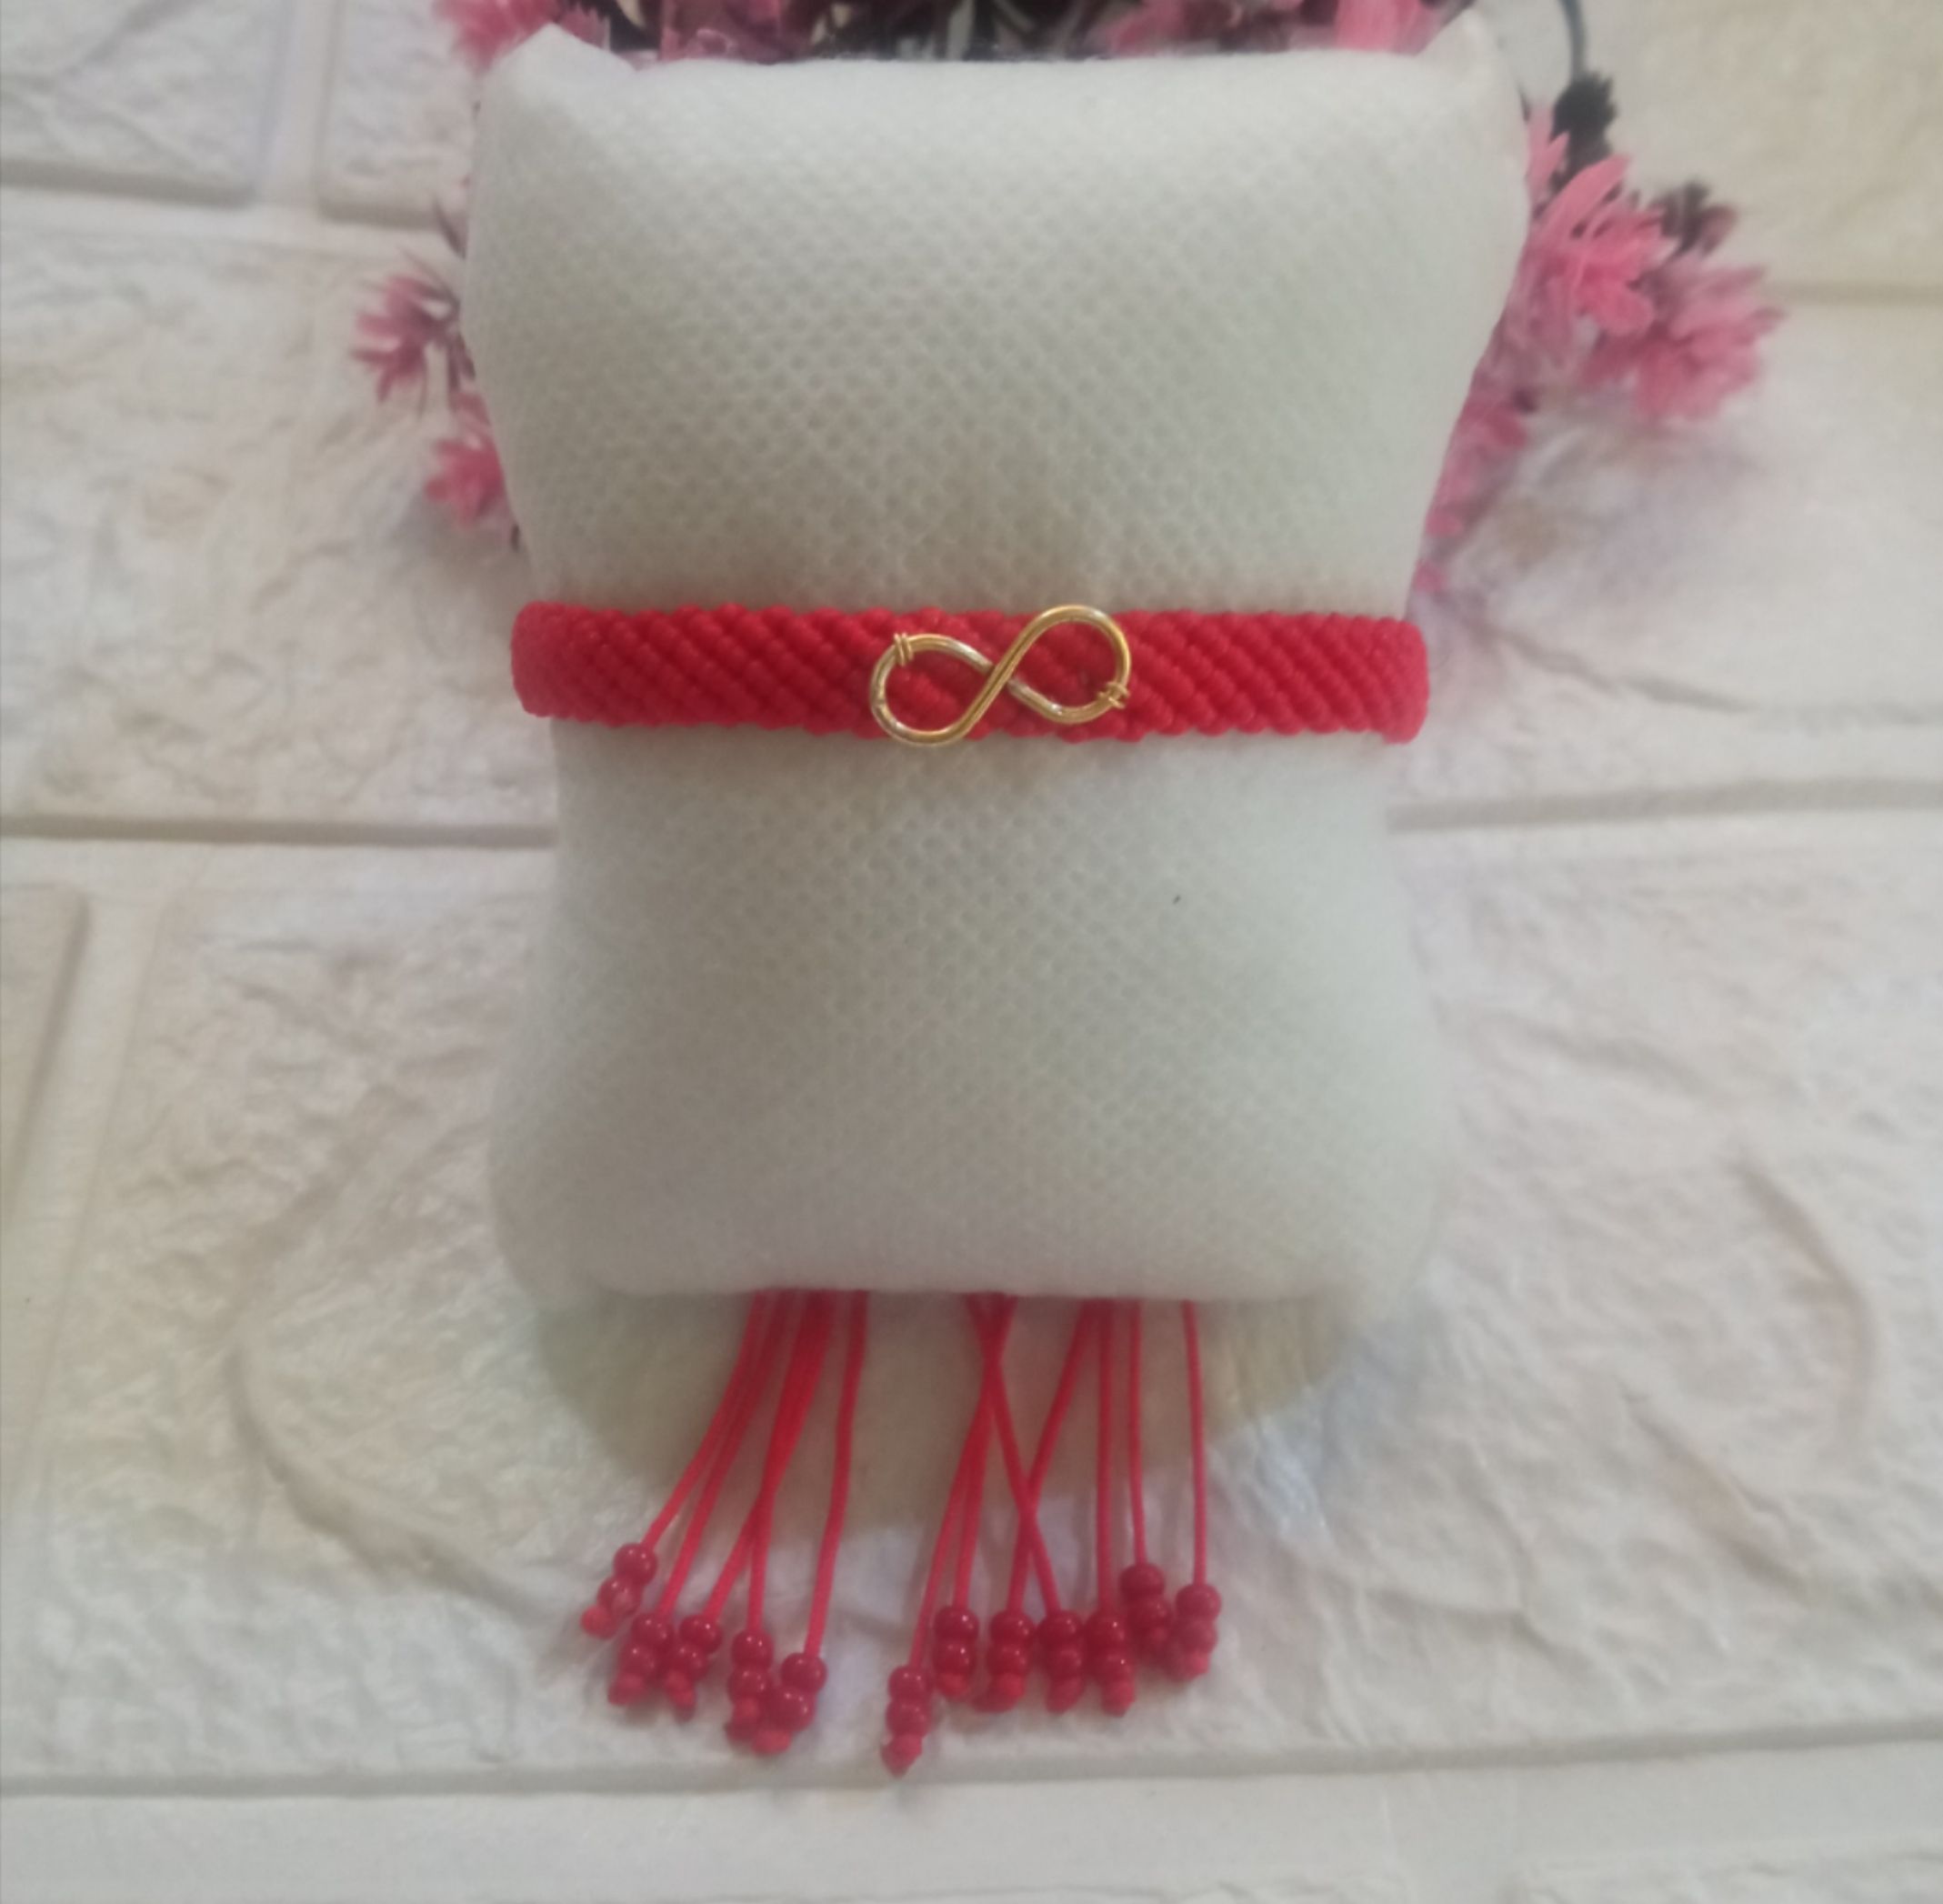
Luego de asegurar bien el dije procedo a colocar 2 mostacillas en cada una de las puntas , corto el excedente de hilo y quemo , en total 24 mostacillas , luego realizo el cierre de la pulsera con un nudo corredizo, verifico que este todo bien y doy por terminado la pulsera (19 al 22).
After securing the pendant I proceed to place 2 beads on each of the ends, cut the excess thread and burn, a total of 24 beads, then I make the closure of the bracelet with a slip knot, I check that everything is okay and I give the bracelet finished (19 to 22)
Espero les haya gustado este bello tejido y el resultado final, esta pulsera la podemos usar sola o acompañada con otras pulseras.
Las fotos son de mi autoría, fueron tomadas con mi teléfono inteligente Redmi note, usé la aplicación polish para la edición de fotos y usé el traductor Deepl translate, será hasta una próxima oportunidad, tengan todos un feliz fin de semana.
I hope you liked this beautiful weaving and the final result, this bracelet can be used alone or with other bracelets.
The photos are of my authorship, they were taken with my Redmi note smartphone, I used the polish application for photo editing and I used the translator Deepl translate, it will be until next time, have a happy weekend.