Protectores para lámparas con material reciclado
Lampshades made from recycled material
Hola amigas y amigos de HIVE DIY.En esta oportunidad les estaré presentado la elaboración de unos protectores y soportes para lámparas tipo led, los cuales tendrán la función de proteger dichos circuitos, ya sea, de la lluvia o de la constante exposición al sol. Este proyecto se ha realizado utilizando láminas recicladas de viejos ordenadores, espero y sea de su total agrado.
Hi friends of HIVE DIY.In this opportunity I will be presenting the elaboration of some protectors and supports for led lamps, which will have the function of protecting these circuits, either from the rain or from the constant exposure to the sun. This project has been made using recycled sheets from old computers, I hope you like it.
Primer paso
First step
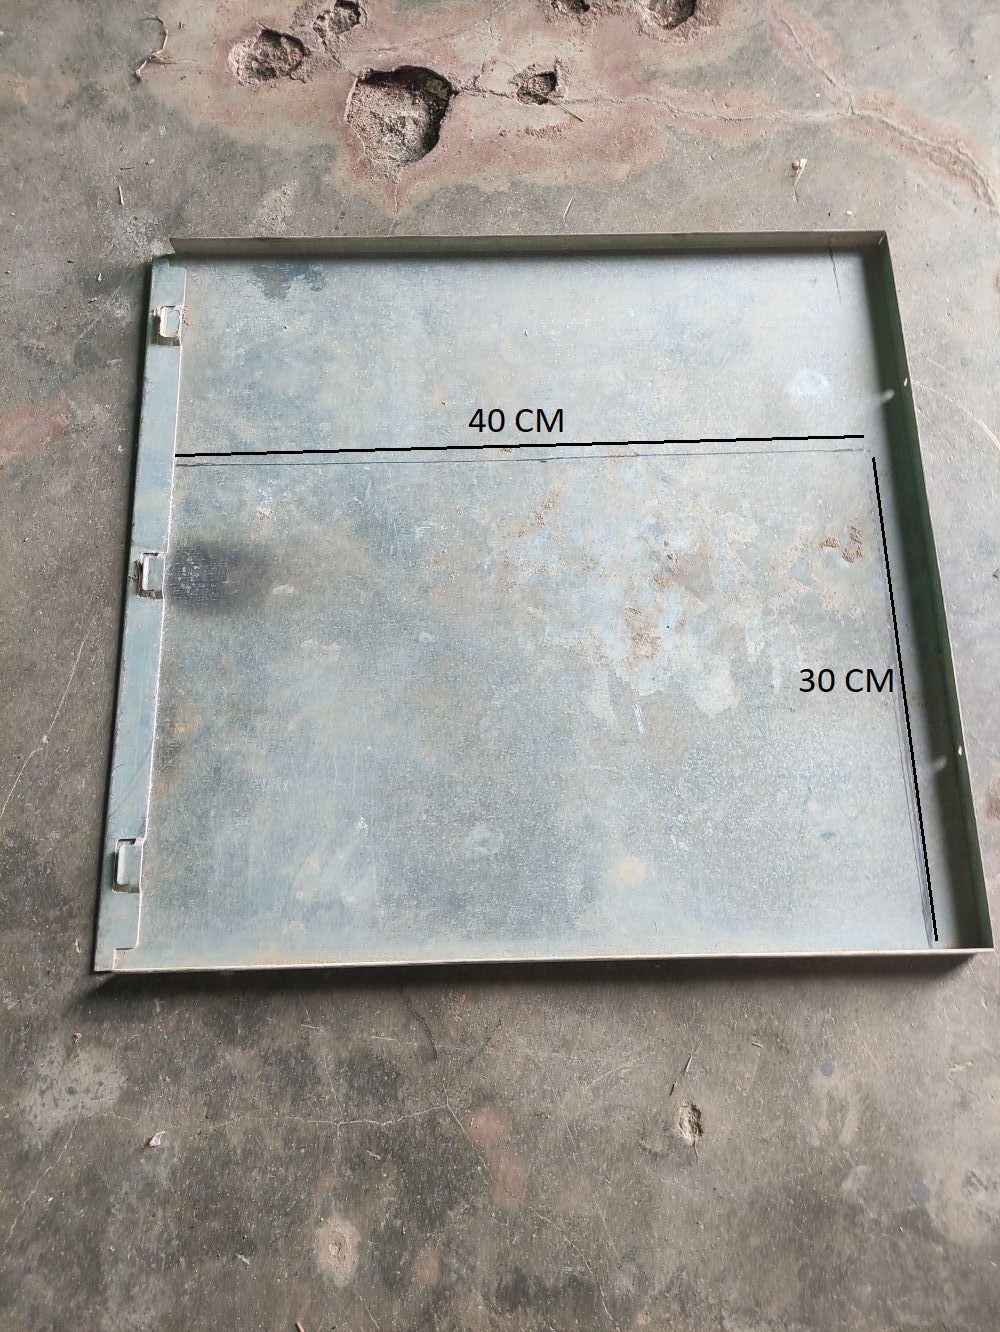
Procedemos a cortar una de nuestras láminas a una medida de 40 centímetros de ancho por 30 centímetros de altura, como se muestra en la imagen.
We proceed to cut one of our sheets to a measure of 40 centimeters wide by 30 centimeters high, as shown in the image.
Segundo paso
Second step

Partiendo de los laterales y midiendo hacia el centro de la lámina, en dirección vertical, procedemos a realizar un corte superficial a una distancia de 10 centímetros, con el fin de poder doblar la lámina con mayor facilidad posteriormente.
Starting from the sides and measuring towards the center of the sheet, in a vertical direction, we proceed to make a superficial cut at a distance of 10 centimeters, in order to be able to fold the sheet more easily later on
.
Tercer paso
Third step

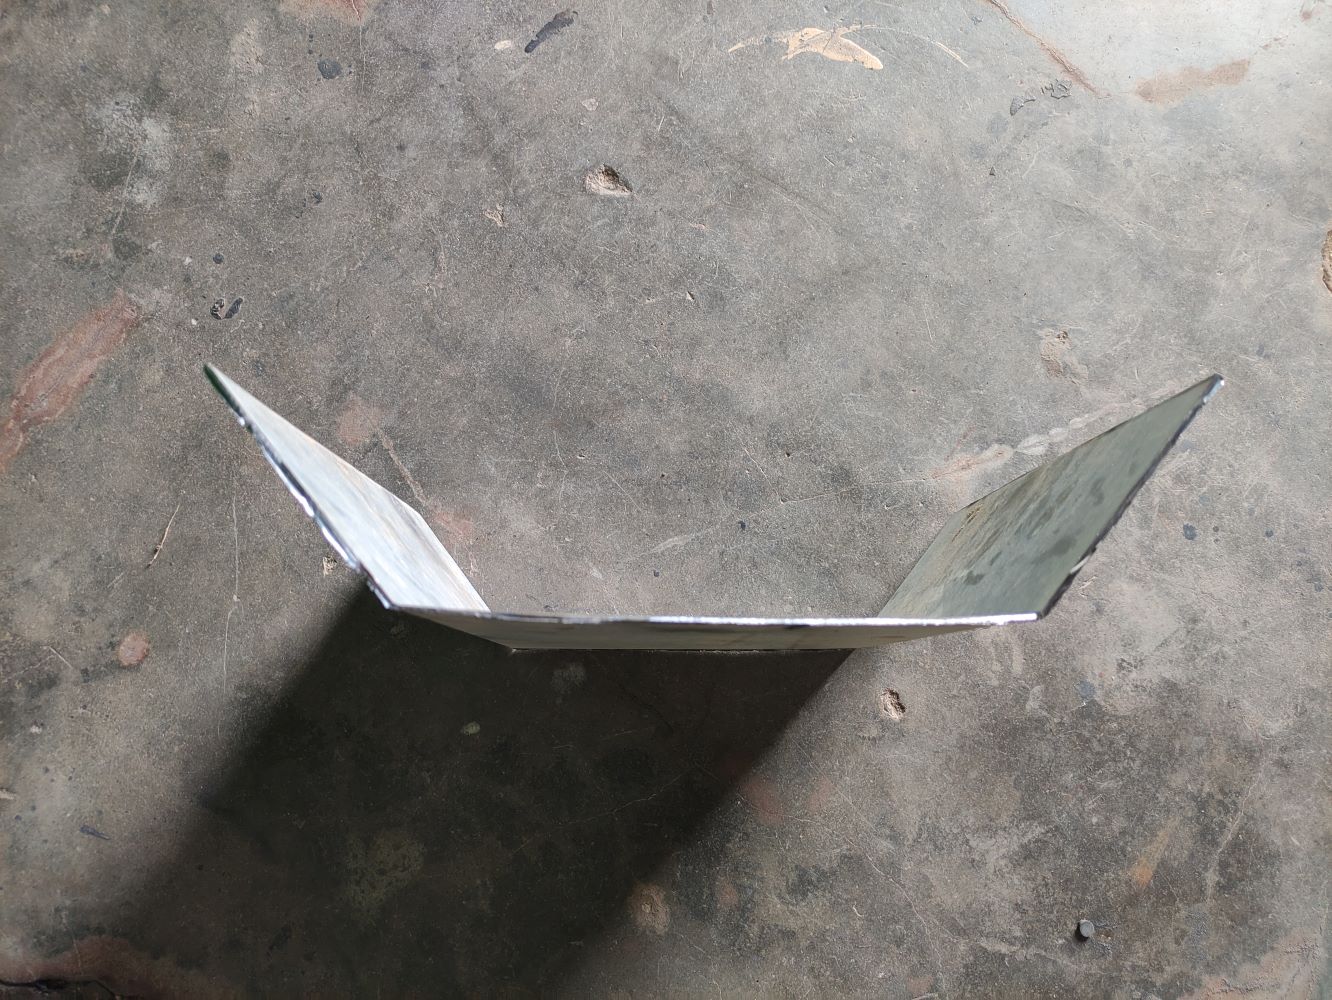
Utilizando los cortes que hemos realizado anteriormente, procedemos a doblar la lámina en un rango aproximado de 45 grados o dependiendo de las necesidades de iluminación o el tamaño de nuestras lámparas.
Using the cuts we have previously made, we proceed to bend the sheet in an approximate range of 45 degrees or depending on the lighting needs or the size of our lamps.
Cuarto paso
Fourth step
Luego de doblar la primera lámina, precedemos a transferir su perfil a una segunda lámina, con el fin de realizar las tapas laterales faltantes.
After bending the first sheet, we proceed to transfer its profile to a second sheet, in order to make the missing side covers.
Quinto paso
Fifth step

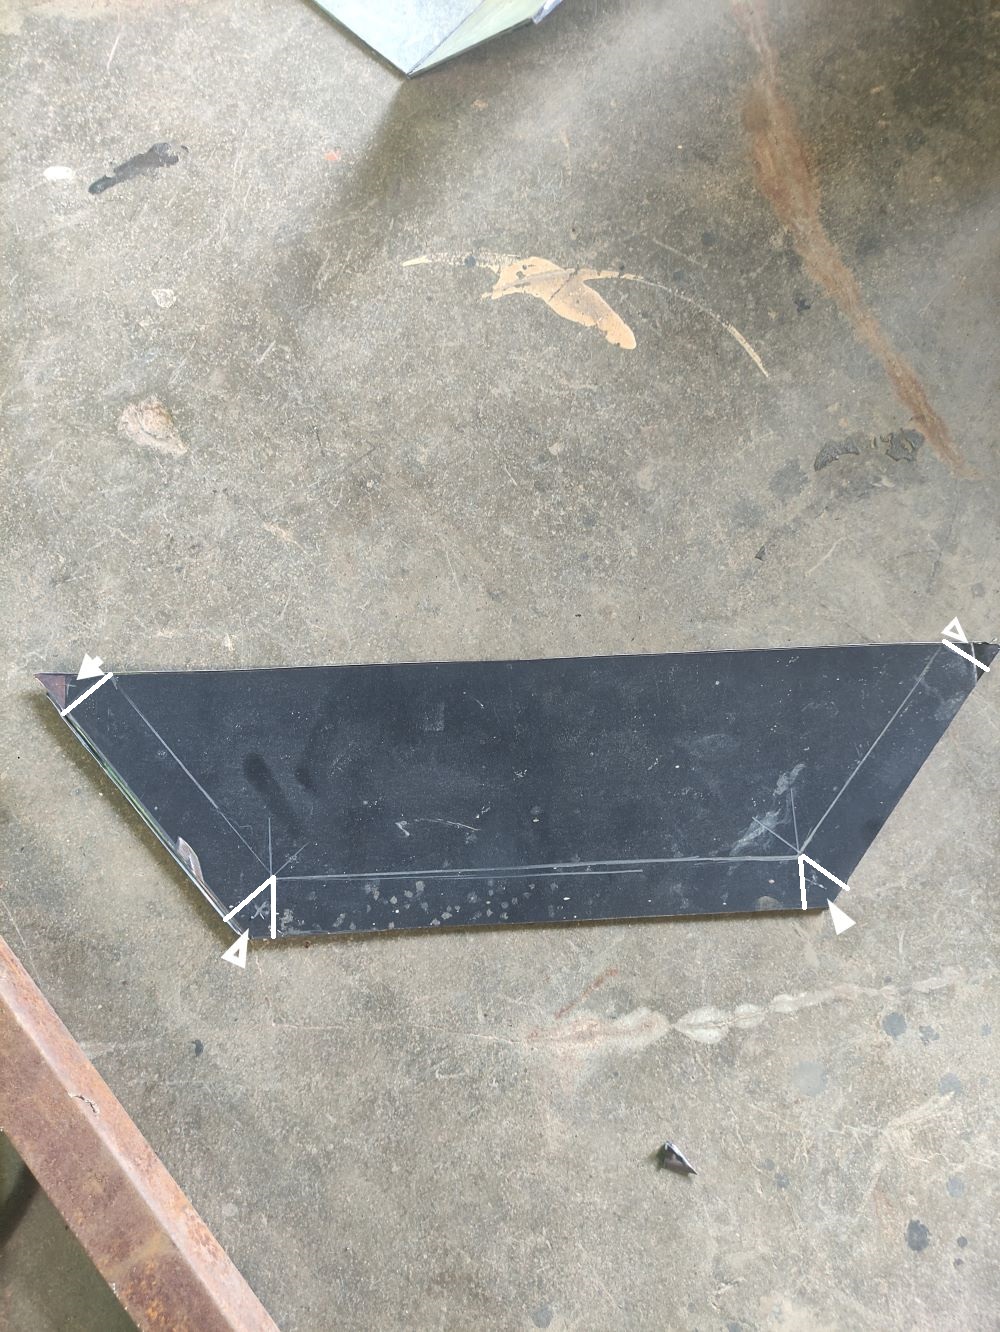
Partiendo de las líneas obtenidas de la primera lámina, procedemos a realizar tres líneas paralelas a las primeras líneas, a una distancia de dos centímetros de distancia, como se muestra en la imagen.
Starting from the lines obtained from the first sheet, we proceed to make three lines parallel to the first lines, at a distance of two centimeters apart, as shown in the image.
Sexto paso
Sixth step
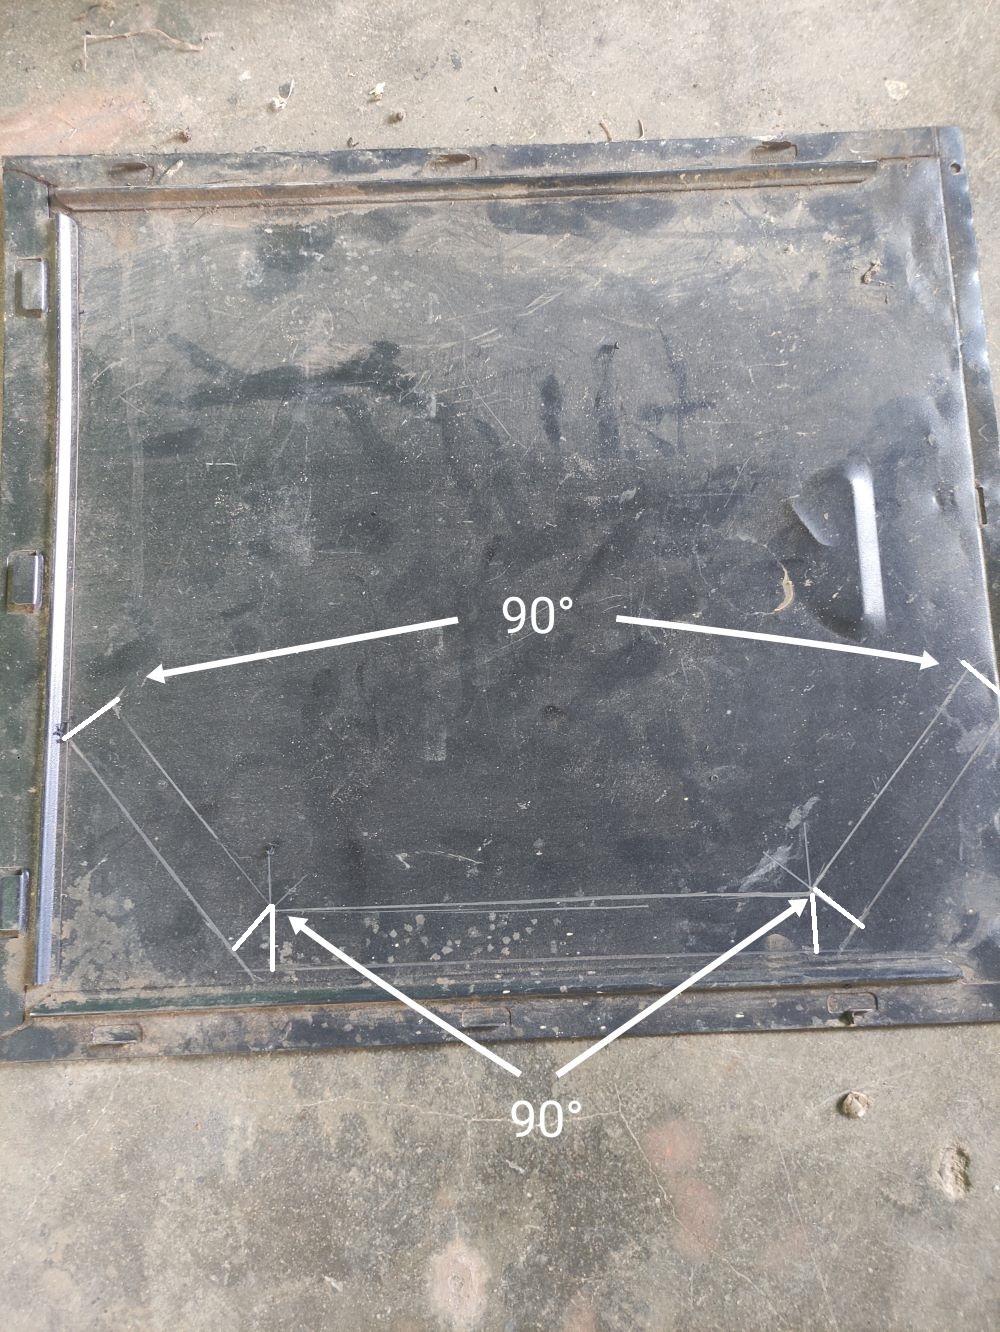
Procedemos a realizar líneas en las intercepciones de las líneas internas y en sus extremos en dirección a las líneas externas, con una inclinación de 90 grados con relación a ellas, como se muestra en la imagen.
We proceed to make lines at the interceptions of the internal lines and at their ends in the direction of the external lines, with an inclination of 90 degrees in relation to them, as shown in the image.
Séptimo paso
Seventh step

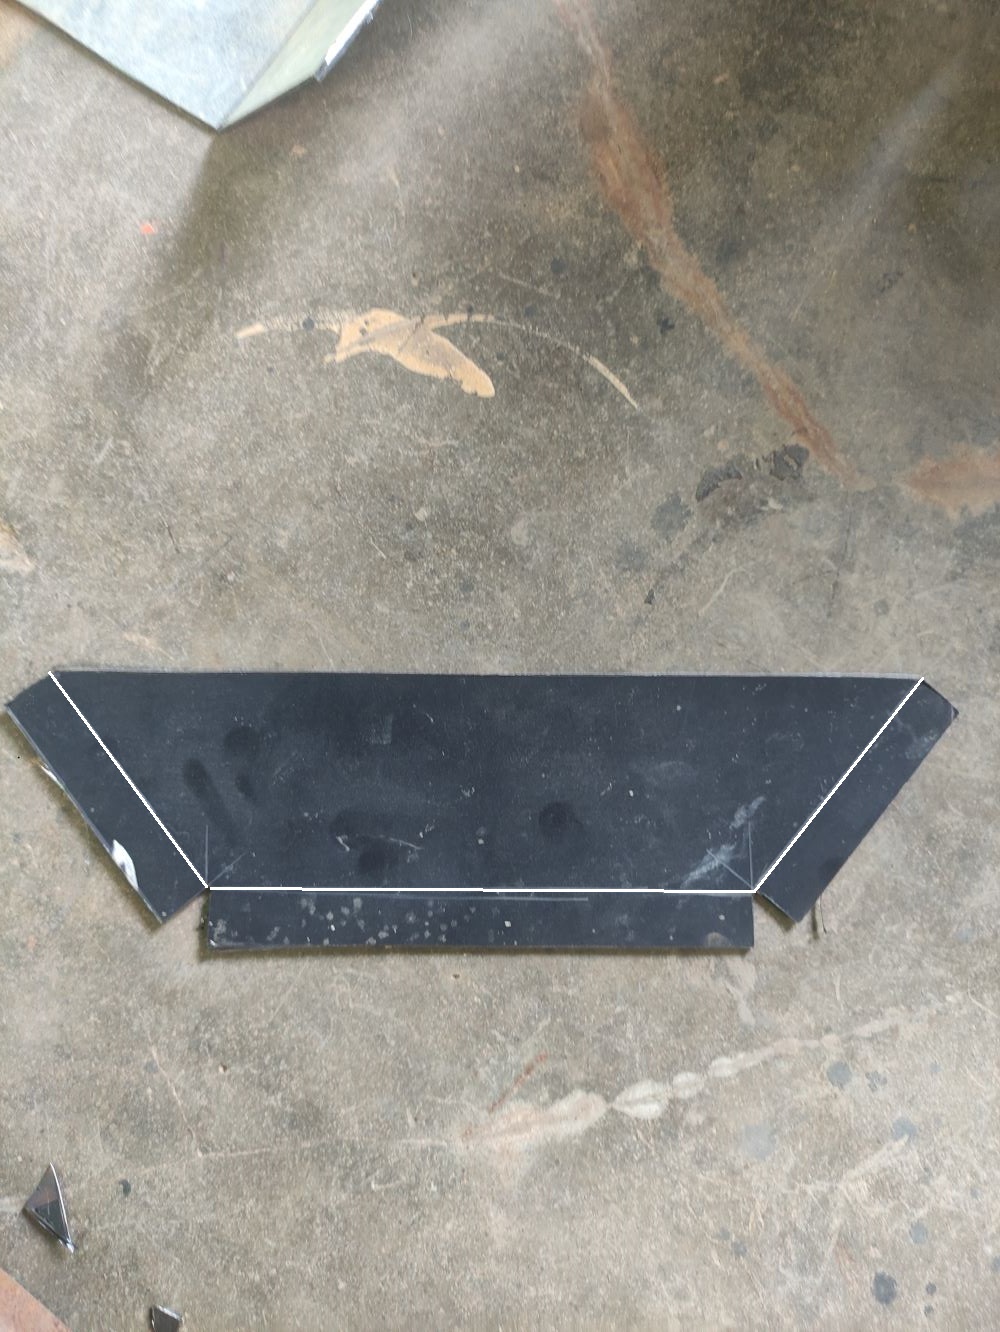
Con el fin de agilizar el proceso, vamos a realizar varios pasos de forma consecutiva. Primeramente, trazamos una línea entre los extremos superiores, para así tener un marco externo, el cual cortaremos. Luego cortaremos cada una de las líneas de 90 grados que se muestran en la segunda imagen. Y ya para finalizar esta etapa, con ayuda de unas pinzas, procedemos a doblar a 90 grados las partes de la lámina que se muestran en la tercera imagen. Estos serán los puntos de apoyo para unir las tapas laterales a la tapa principal.
In order to speed up the process, we will perform several steps consecutively. First, we draw a line between the upper ends, so that we have an outer frame, which we will cut. Then we will cut each of the 90 degree lines shown in the second image. And to finish this step, with the help of tweezers, we proceed to bend at 90 degrees the parts of the sheet shown in the third image. These will be the support points to join the side covers to the main cover.
Octavo paso
Eighth step
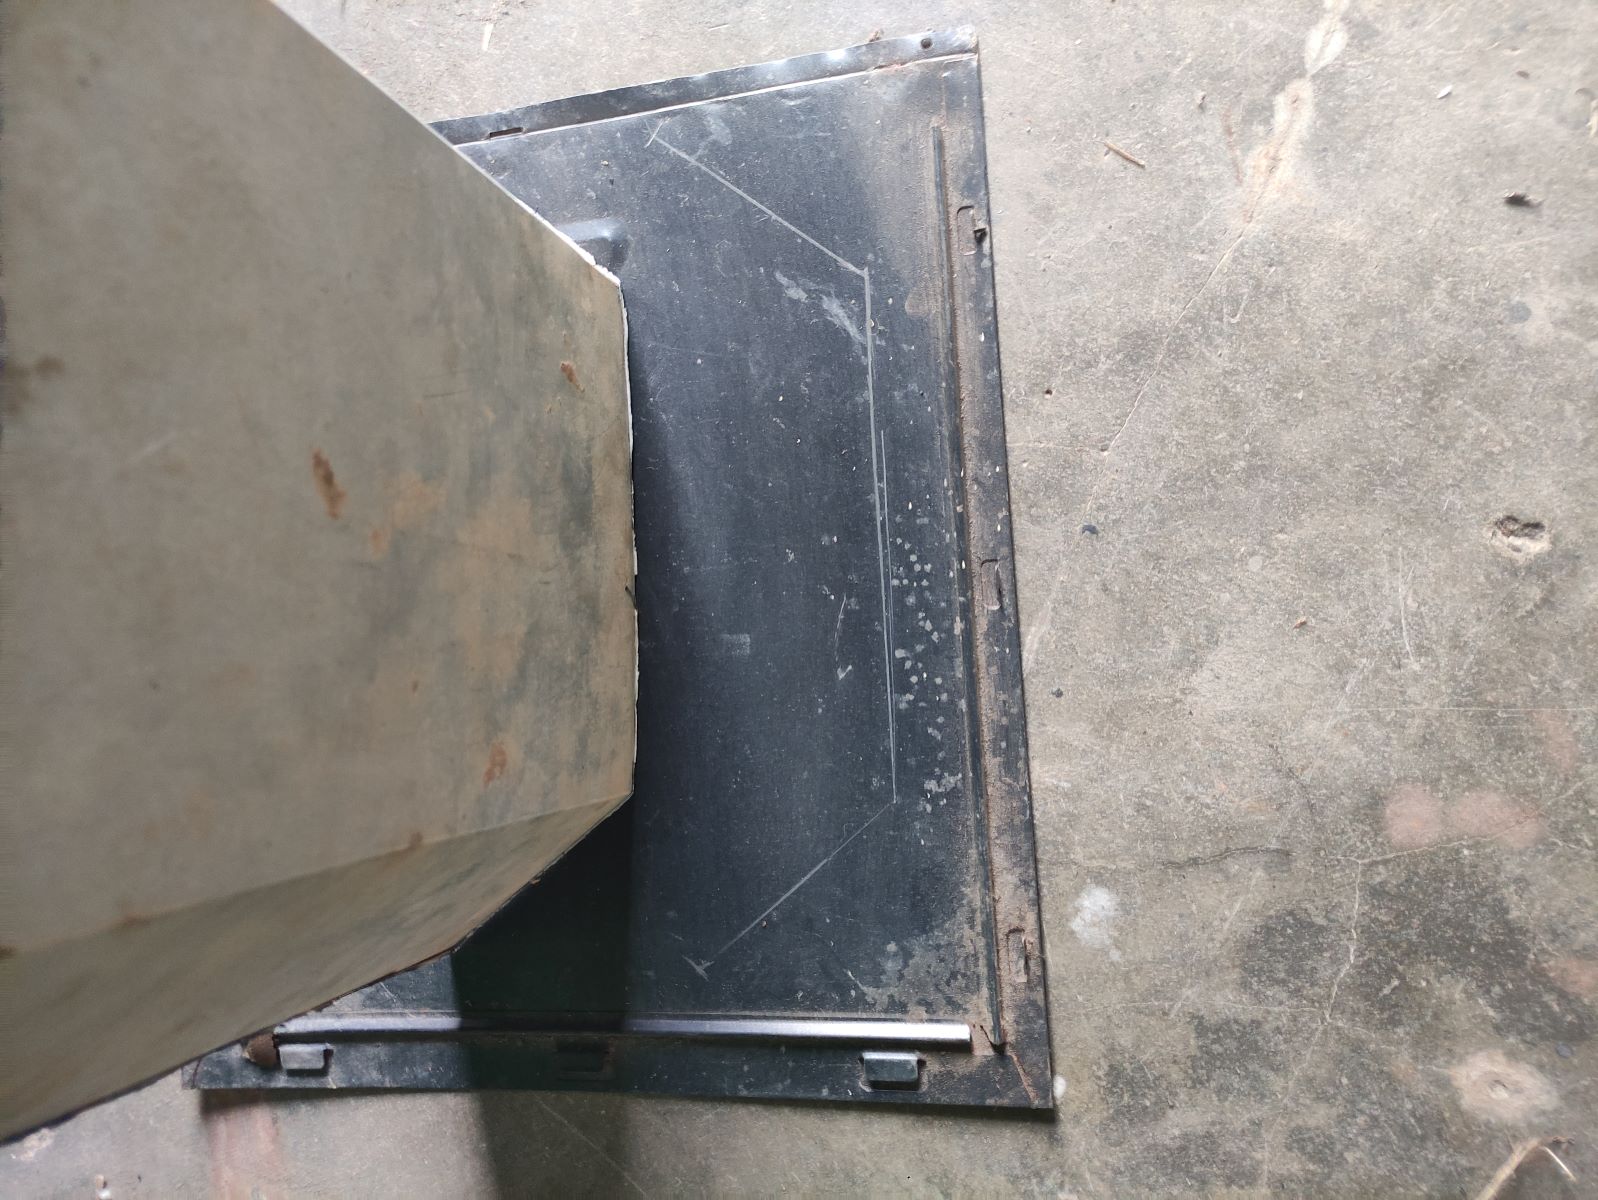
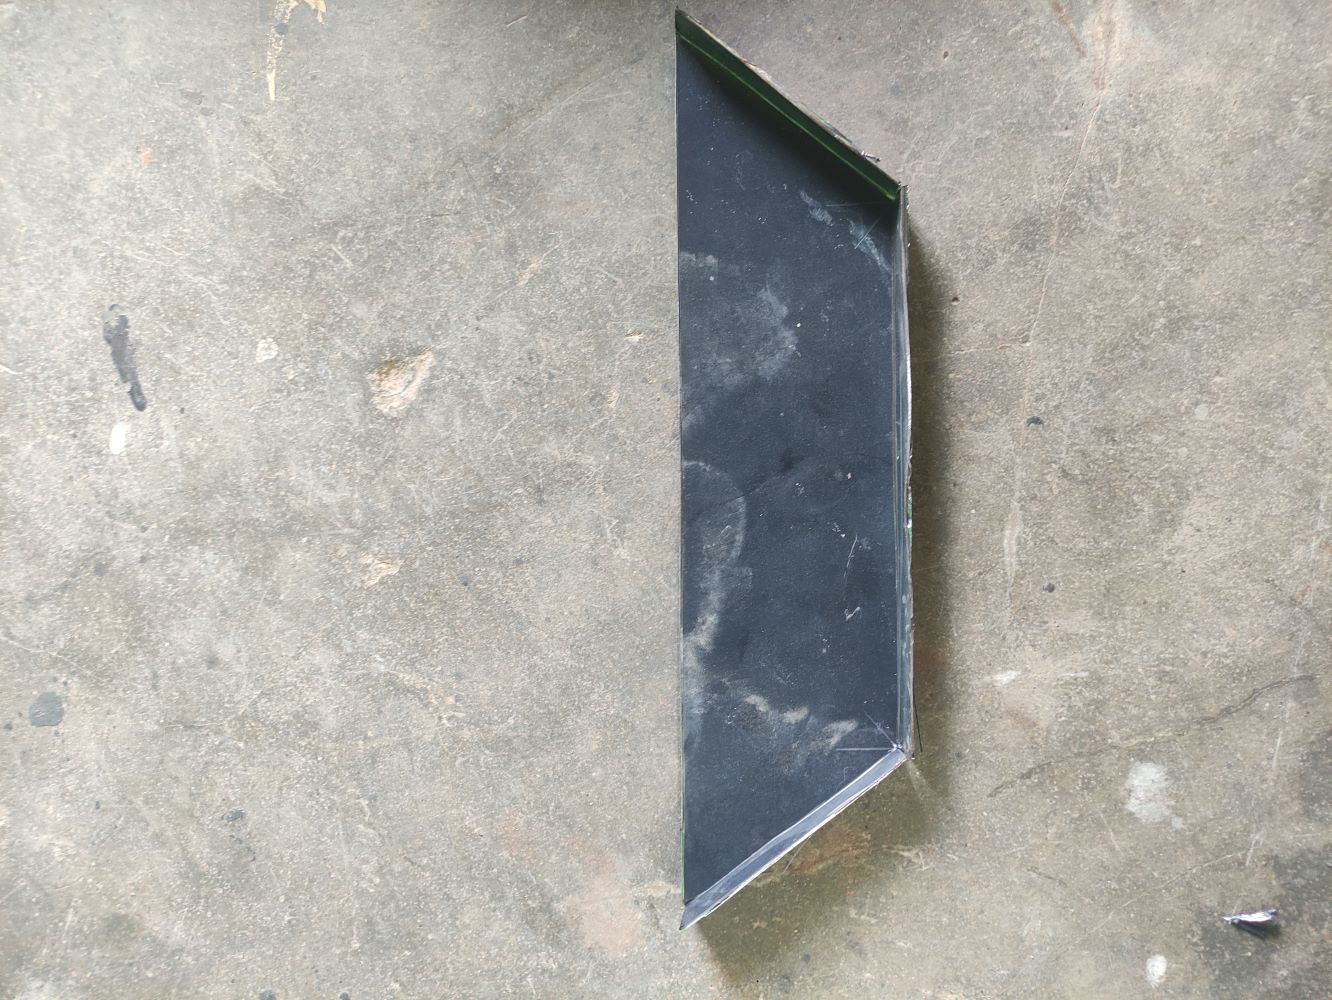
Ya para finalizar la etapa de ensamble, procedemos a unir las tapas laterales utilizando remaches de 1/8 de pulgada, además agregaremos una pequeña lámina para soportar nuestra lámpara en la parte interna. Posteriormente, debemos agregar un tubo que cumplirá la función de brazo, el cual será unido por la parte superior externa. Y así, pues, solo debemos sellar los puntos de posibles filtraciones utilizando silicona caliente.
To finish the assembly stage, we proceed to join the side covers using 1/8 inch rivets, and we will also add a small sheet to support our lamp on the inside. Subsequently, we must add a tube that will serve as an arm, which will be joined at the top outside. And so, we only have to seal the points of possible leaks using hot silicone.
Noveno paso
Ninth step
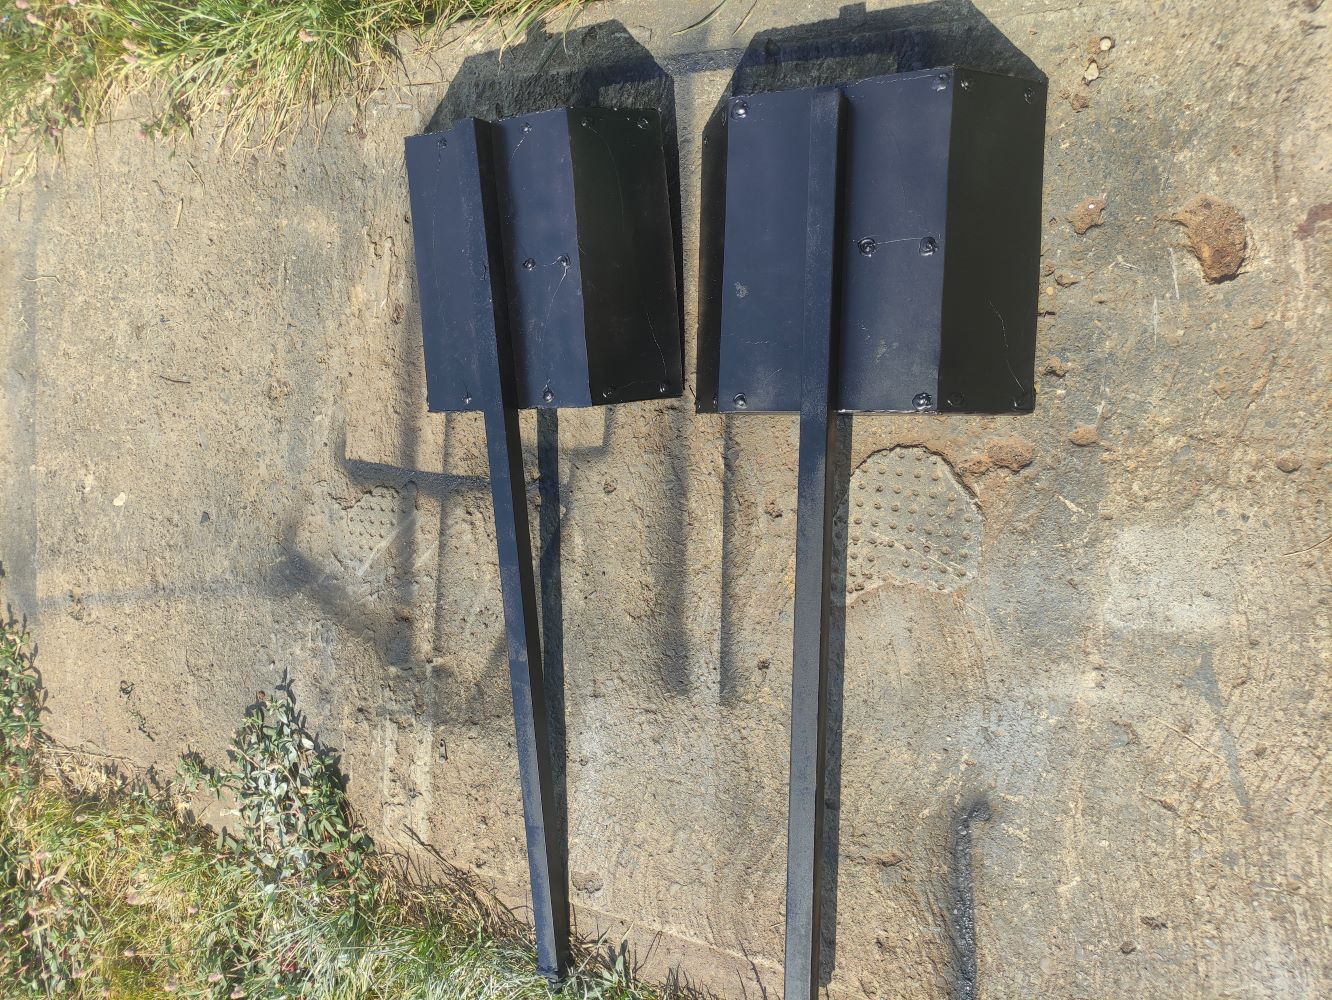


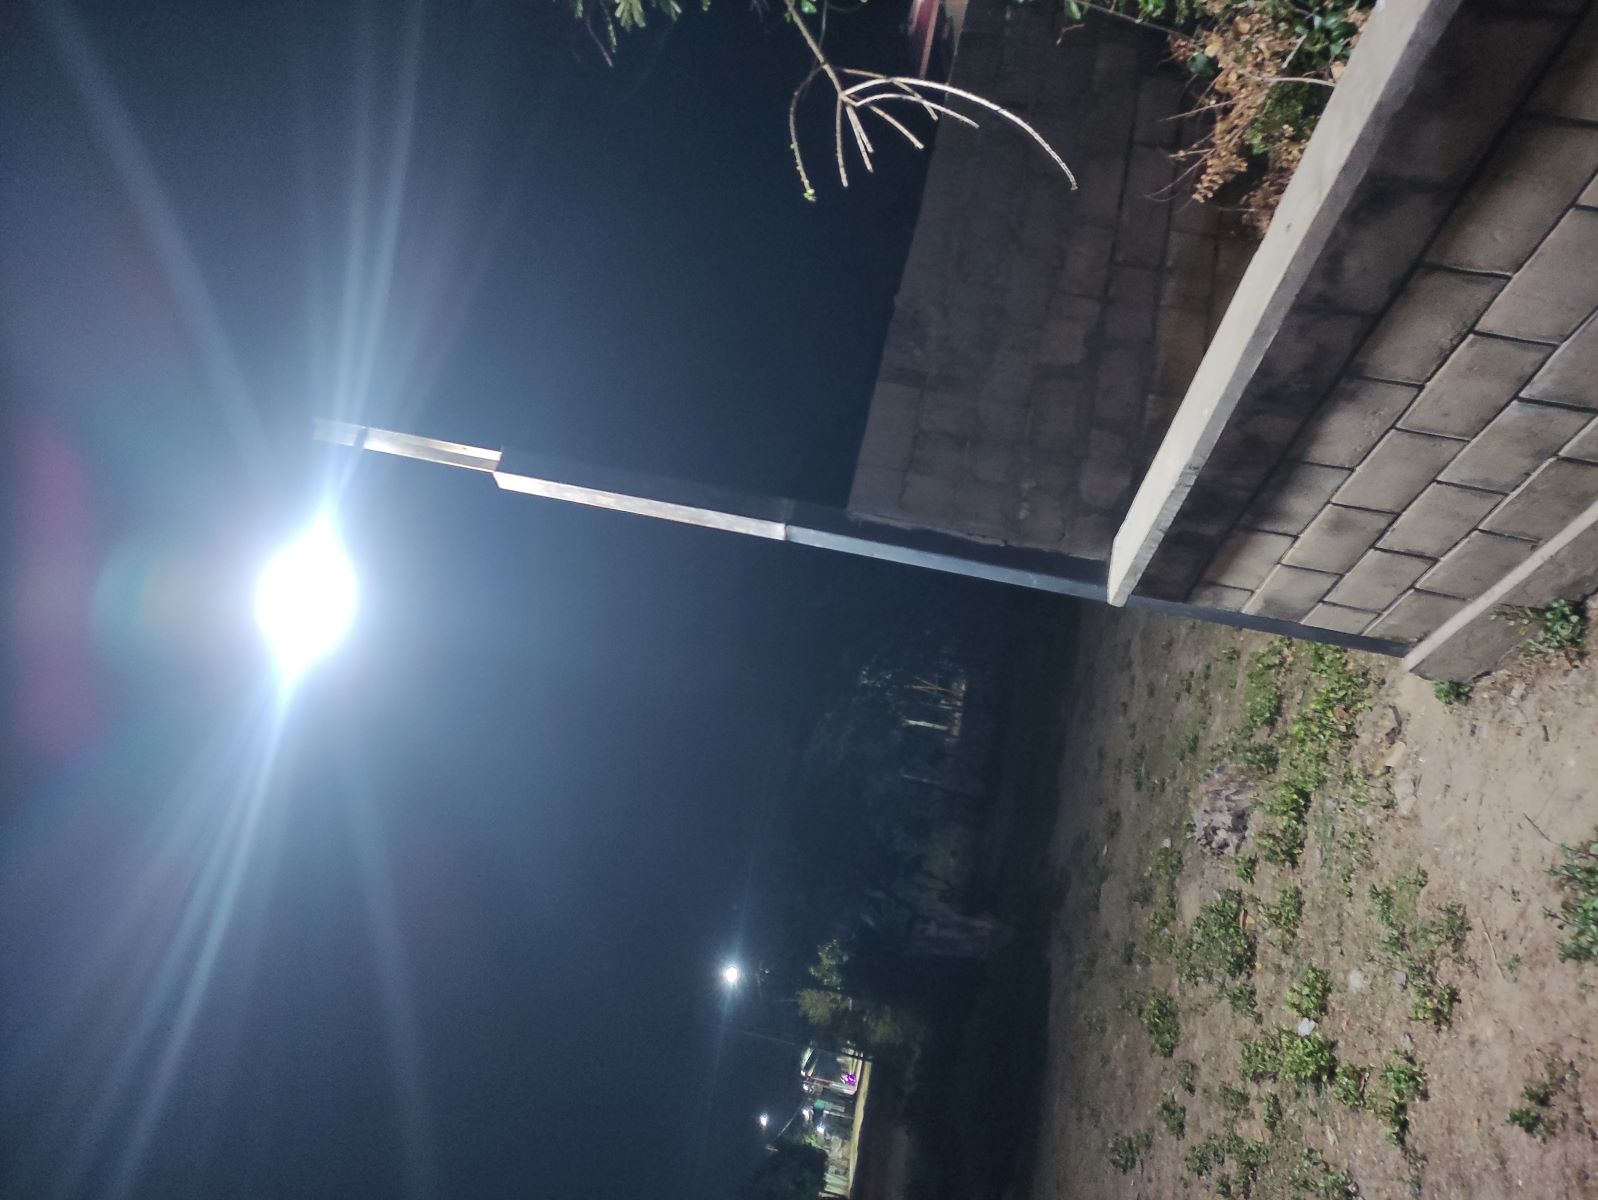
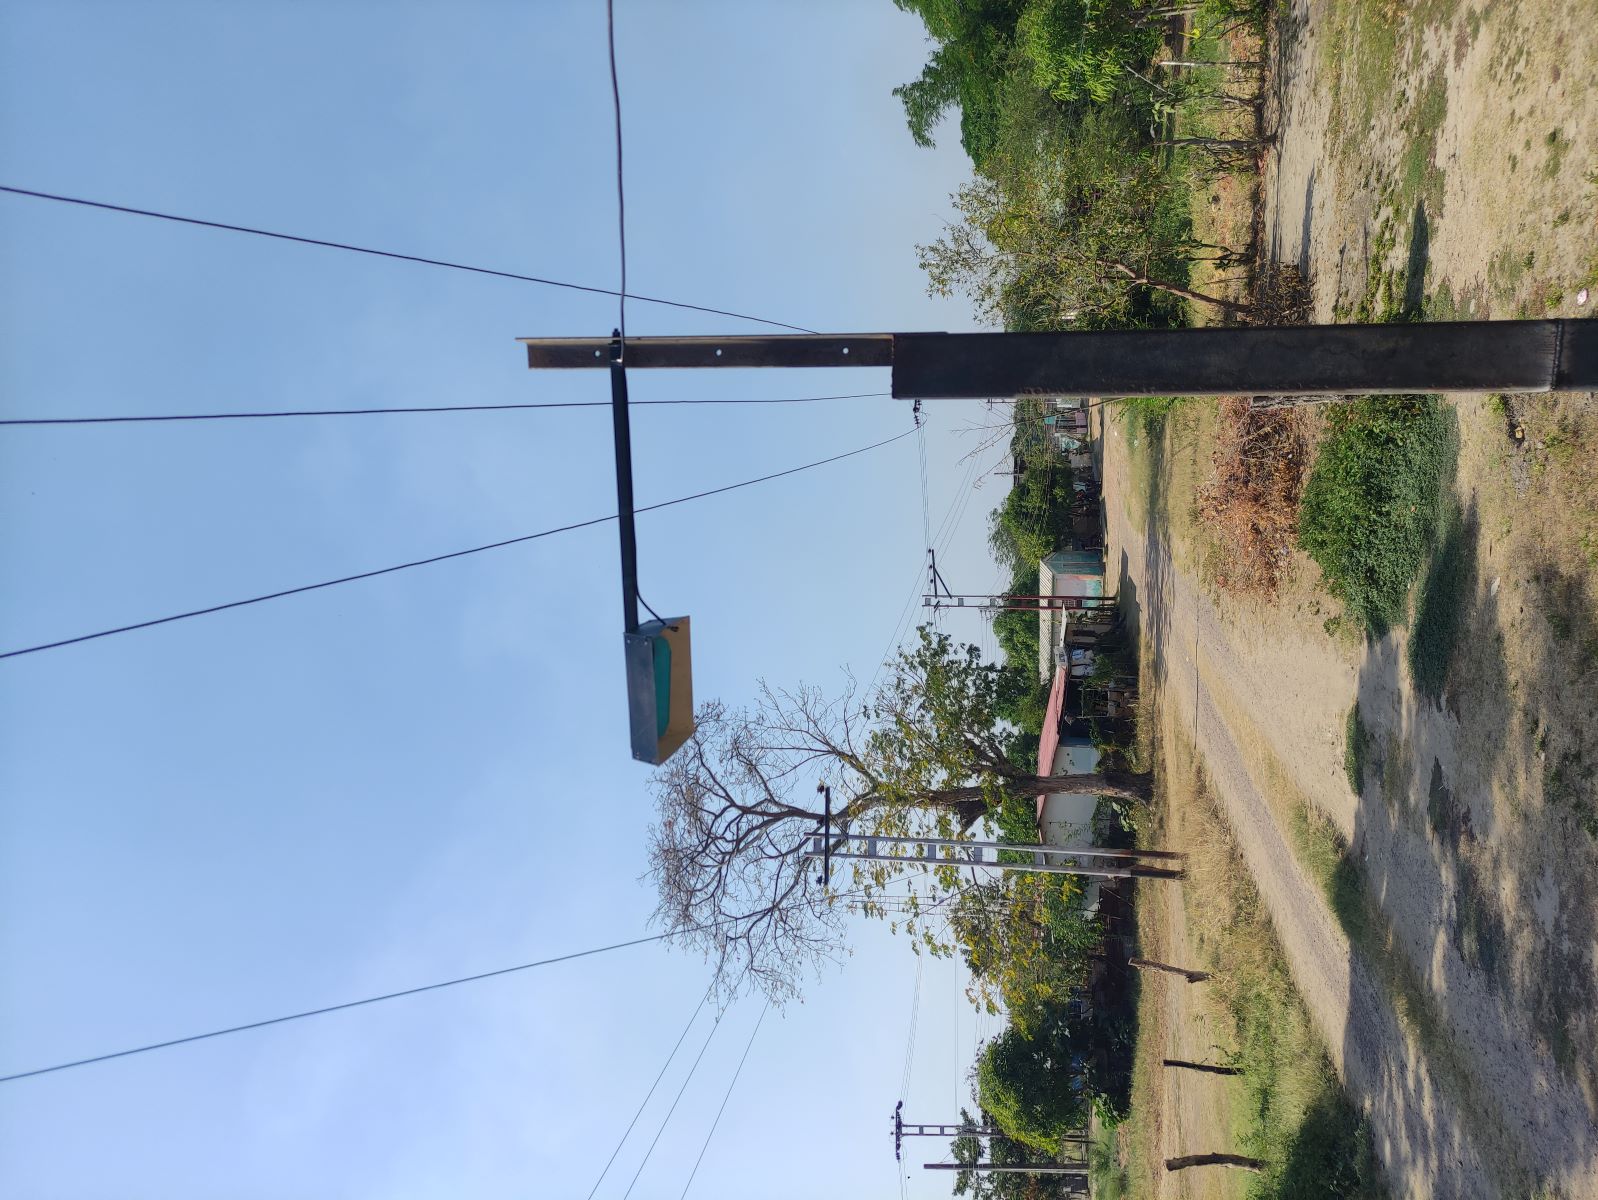
Para finalizar nuestro proyecto, procedemos a pintar nuestros soportes. En este caso se han pintado con fondo anticorrosivo blanco en su parte interna y negro en la parte externa. Luego de haber secado la pintura, colocamos las lámparas en el interior de los protectores, realizando posteriormente su conexión eléctrica. Así, pues, solo restó unir los brazos a una columna vertical; en este caso fueron unidos mediante un tornillo pasante, ya que el puto de apoyo era un ángulo perforado de 3 pulgadas.
To finish our project, we proceed to paint our supports. In this case, they have been painted with white anticorrosive primer on the inside and black on the outside. After the paint had dried, we placed the lamps inside the protectors and then made the electrical connection. Then, the only thing left to do was to attach the arms to a vertical column; in this case they were attached by means of a through screw, since the support point was a 3-inch perforated angle.
- Espero le haya gustado, nos vemos en otra oportunidad.
- I hope you liked it, see you another time.