
Hello my dear friends of this community a pleasure to greet you again, I hope you are very well with great energy in this new week and on this first day of the month of April I am very pleased to continue creating content.
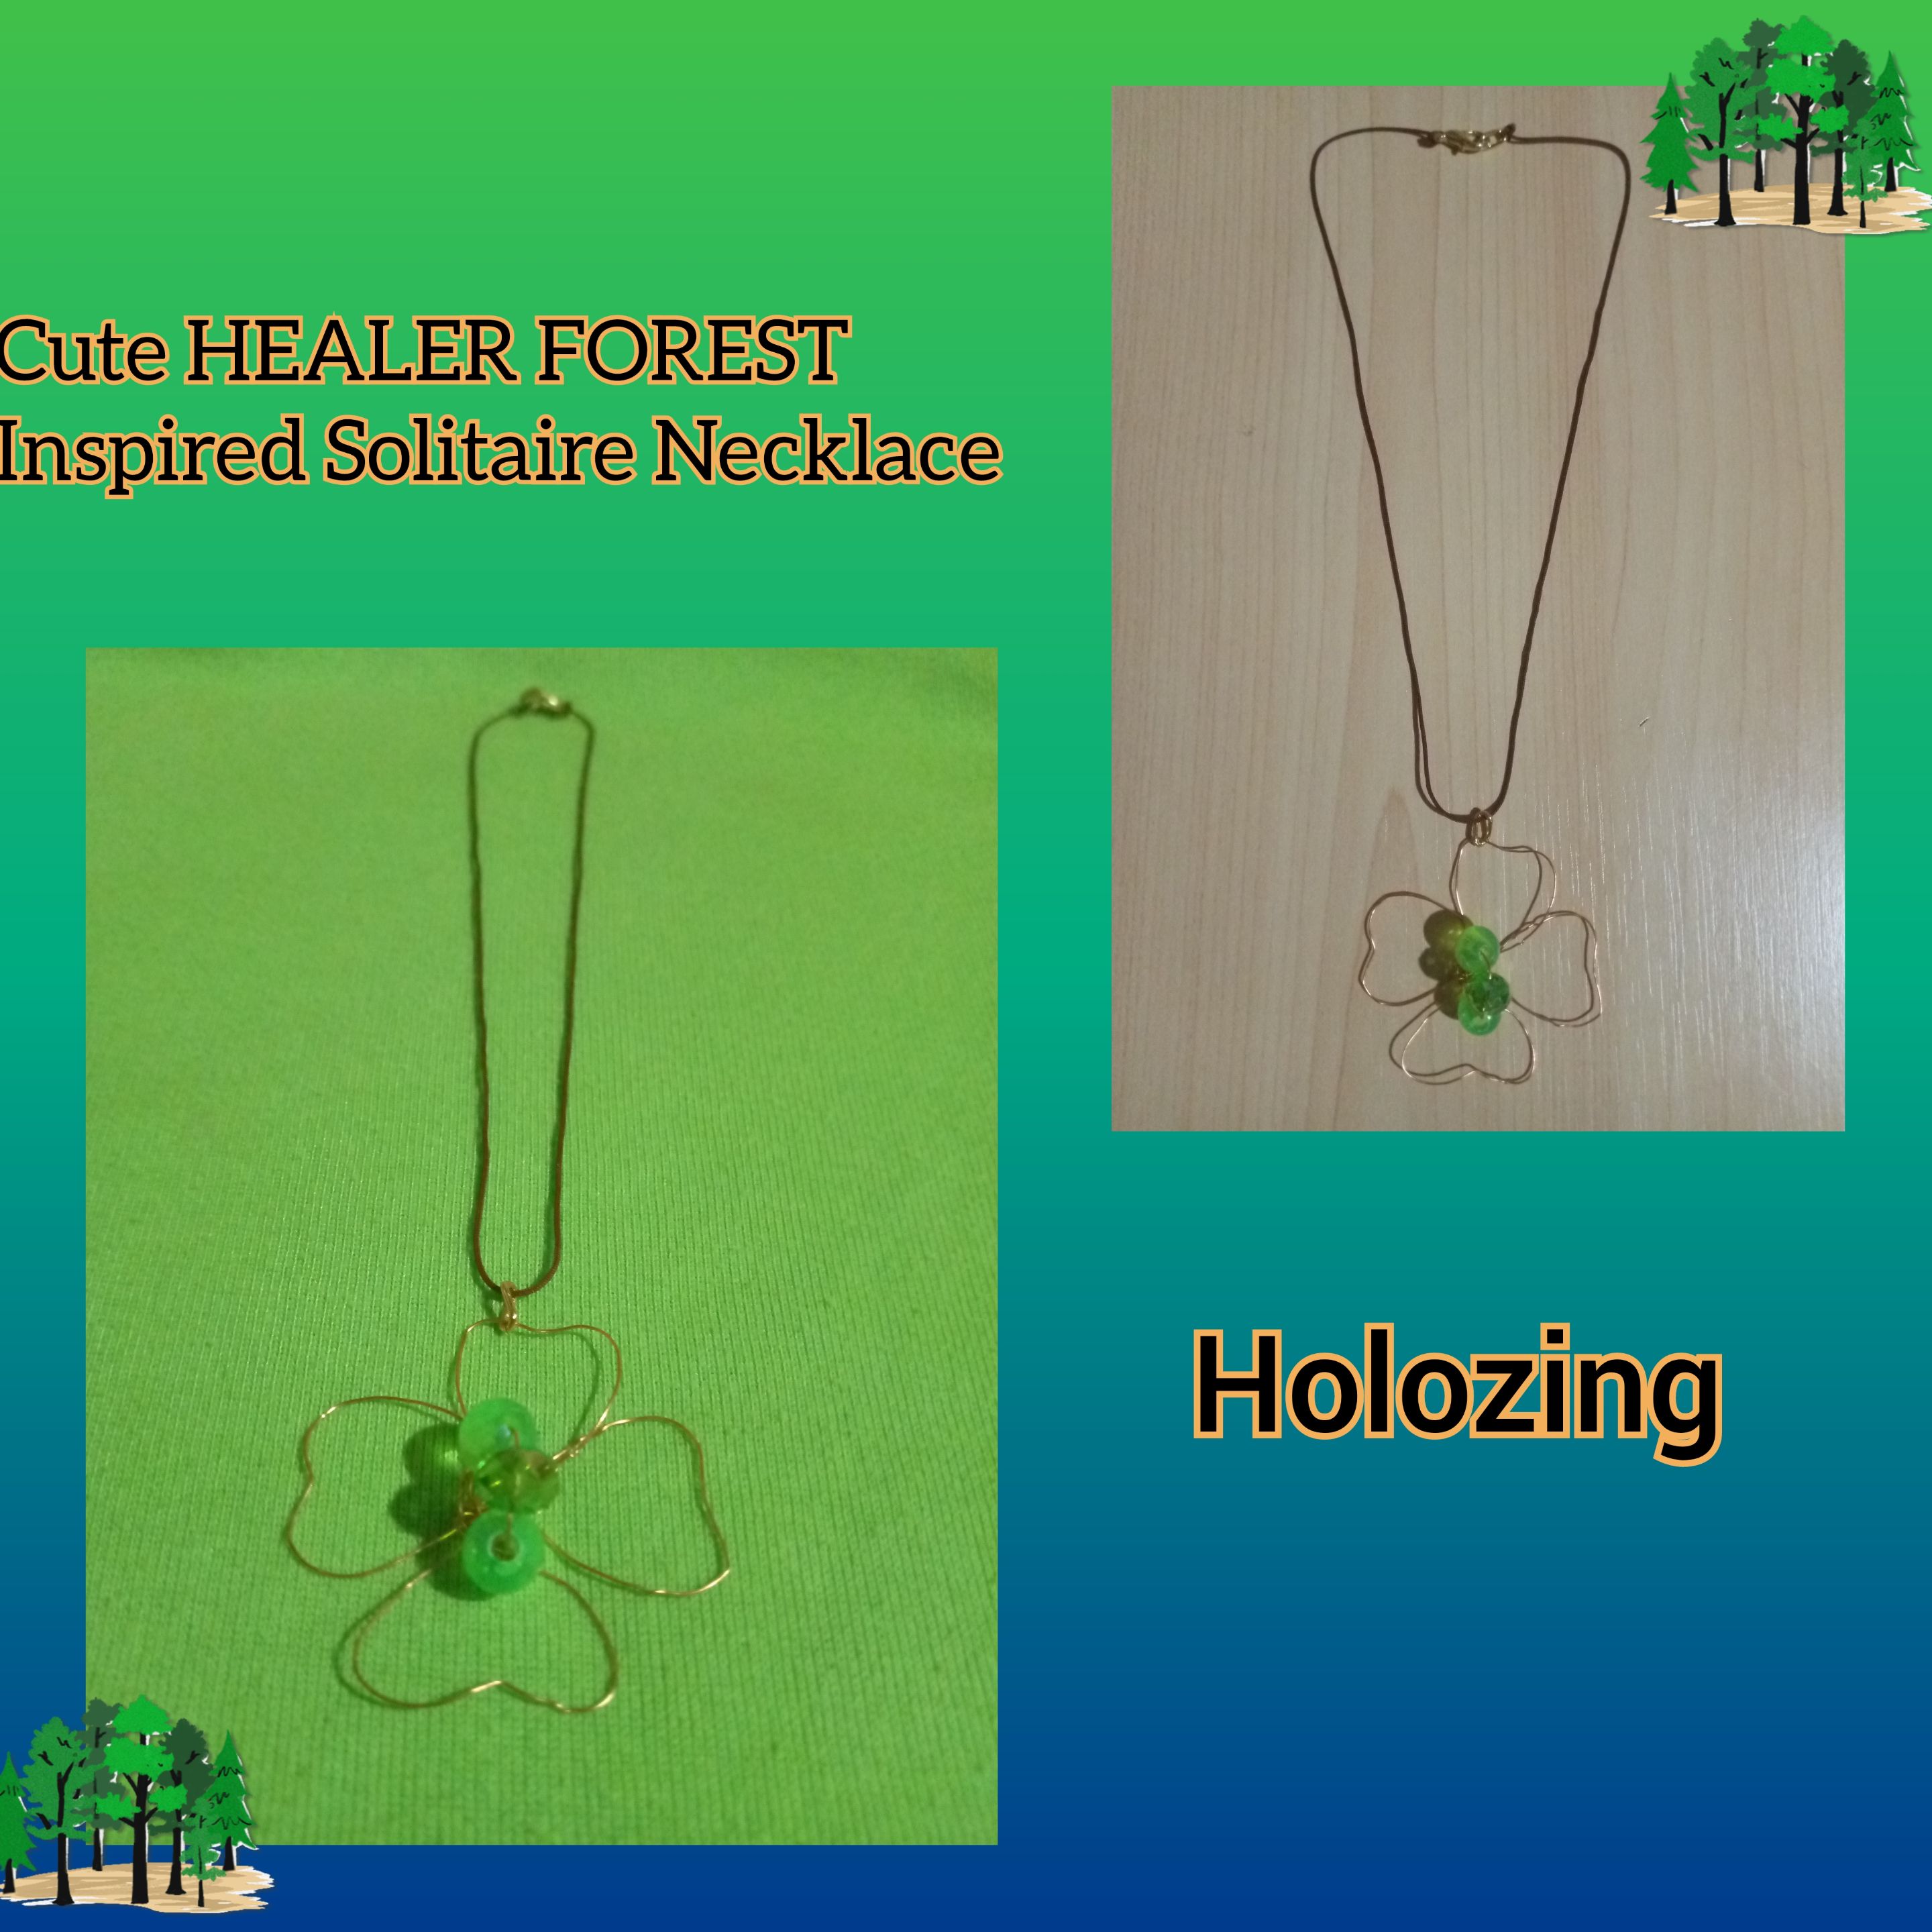
Today I wanted to make a solitaire necklace with clover charm inspired by the healer forest healer forest, really this is one of my favorites, she inspires me a lot and I love the color that represents nature, I hope you can encourage you to make beautiful and delicate creations difficult and easy to do as is this necklace.
The materials used in the elaboration were the following:
- Three green stones
- Tweezers
- Brown Chinese thread
- Wire of costume jewelry
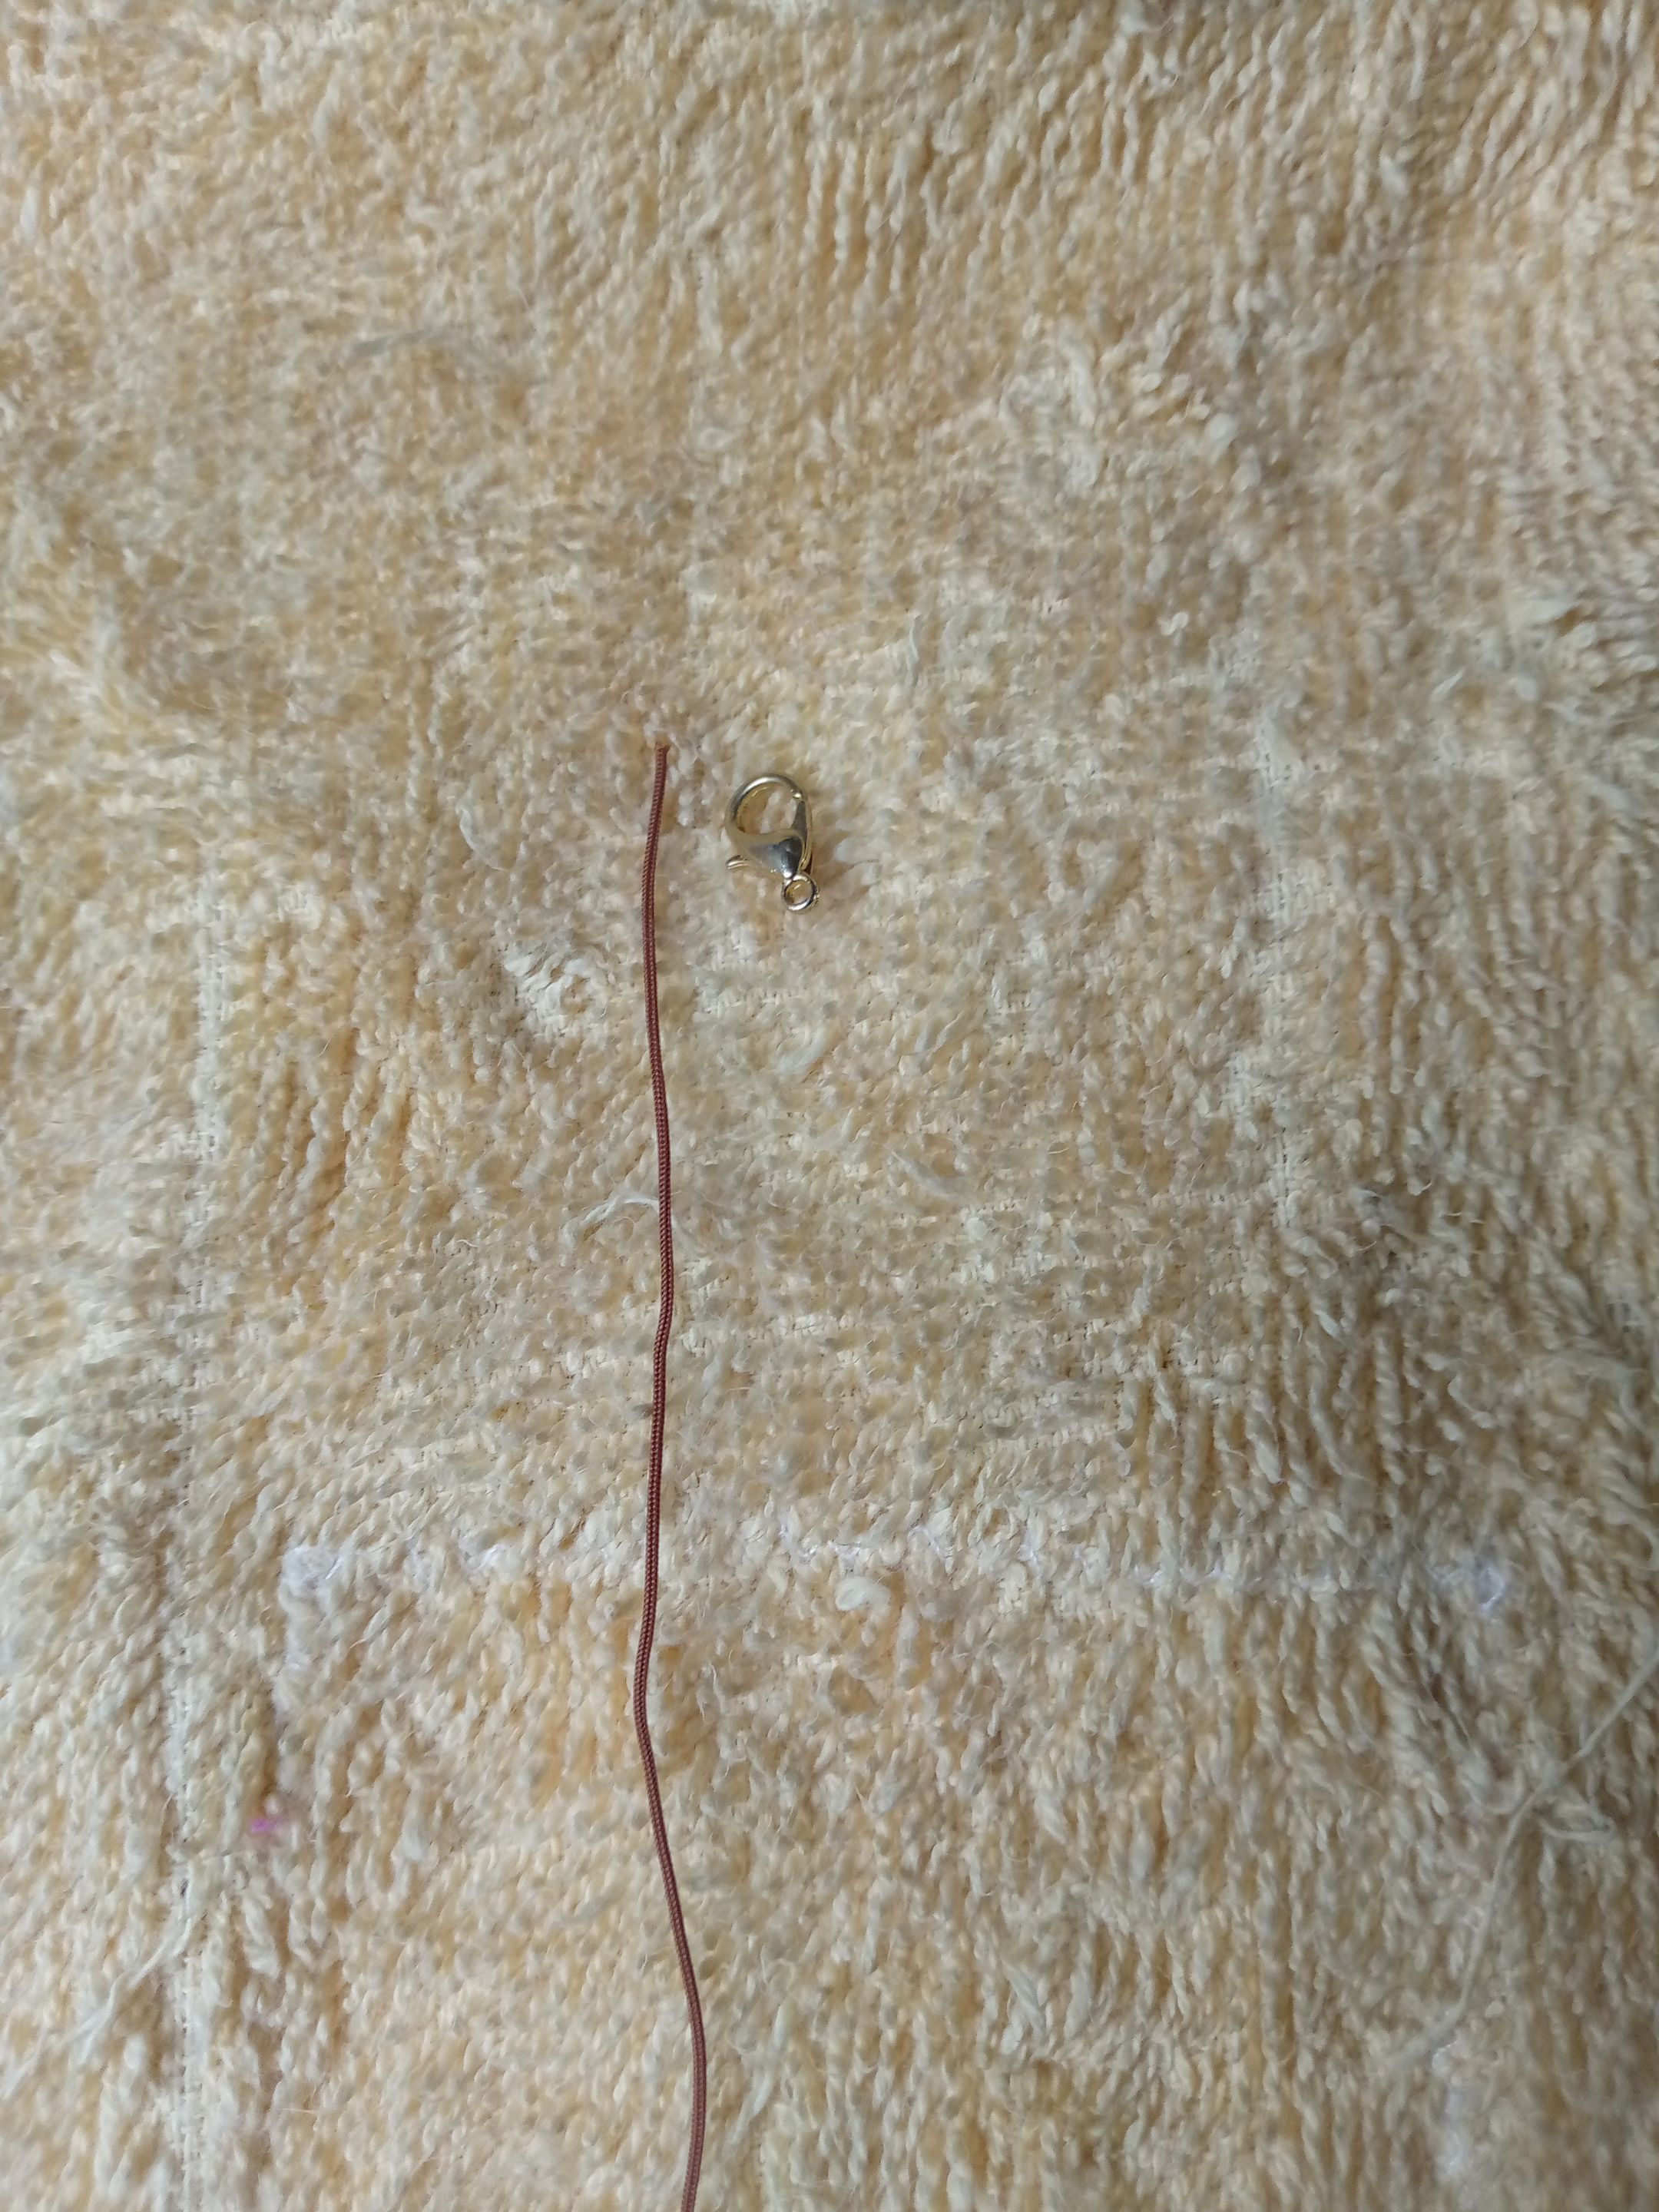
- Ring
- Safety catch
- Thread winding base
Let's get to work!

Step 1
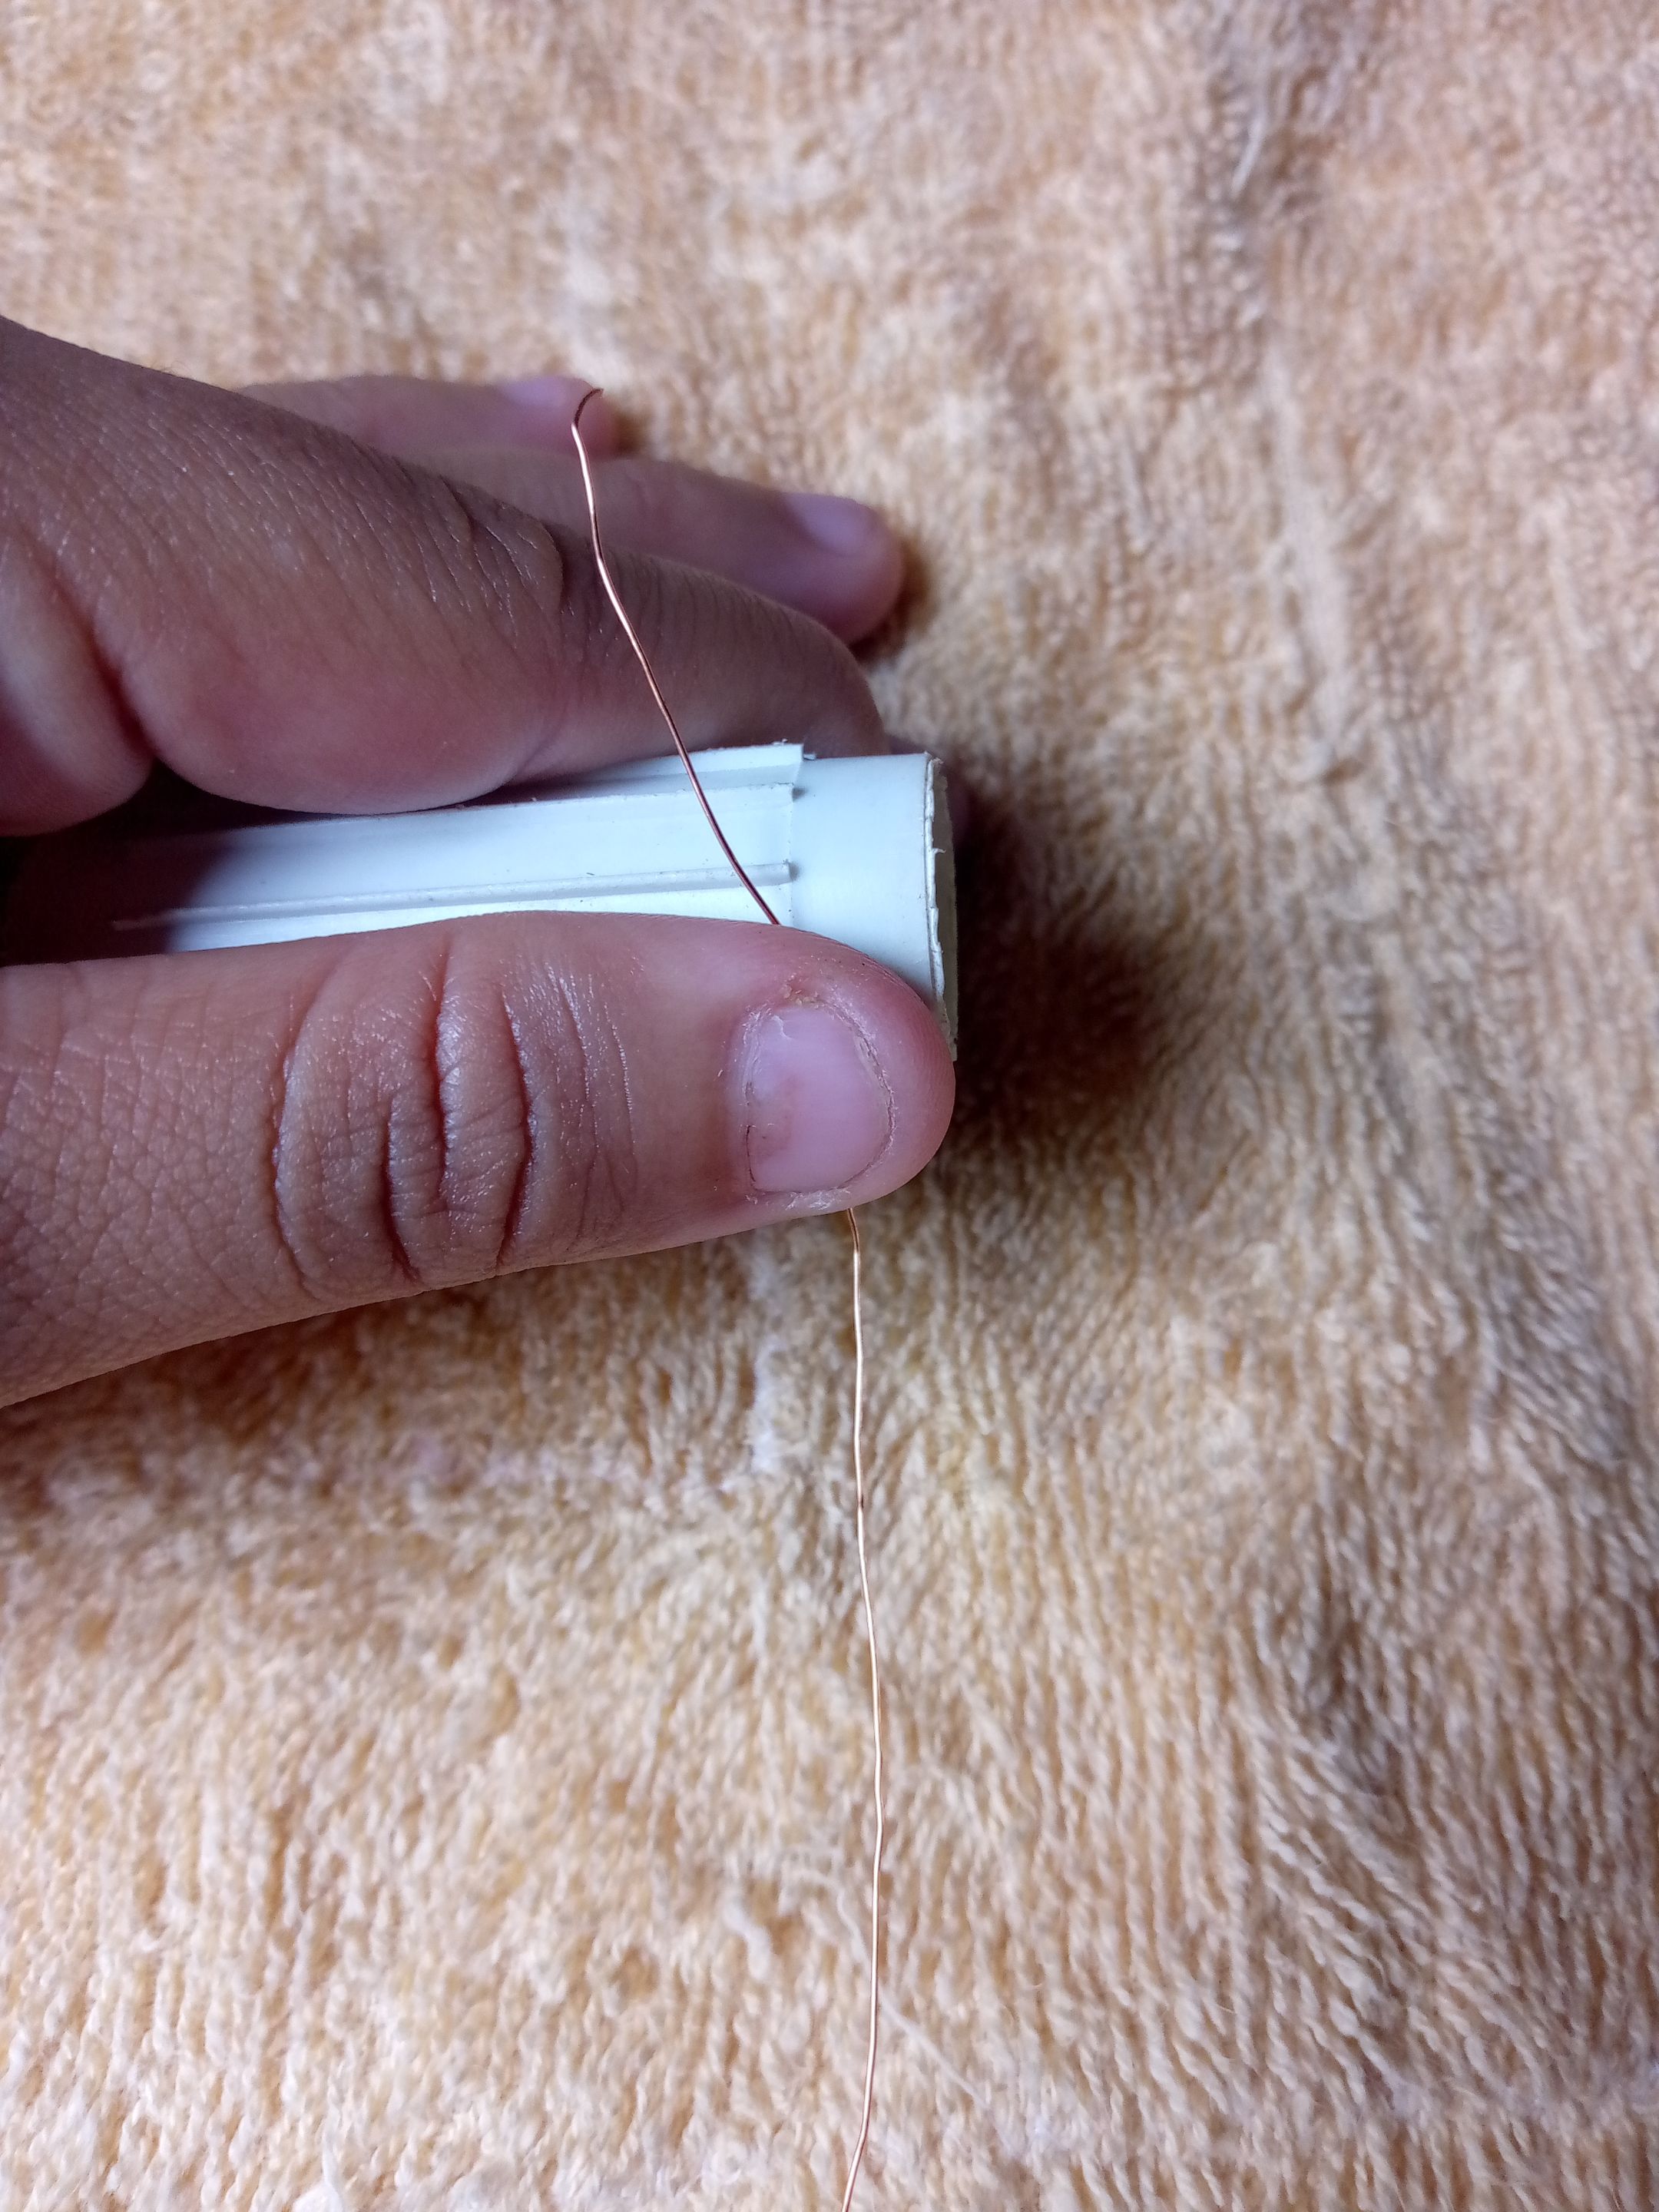
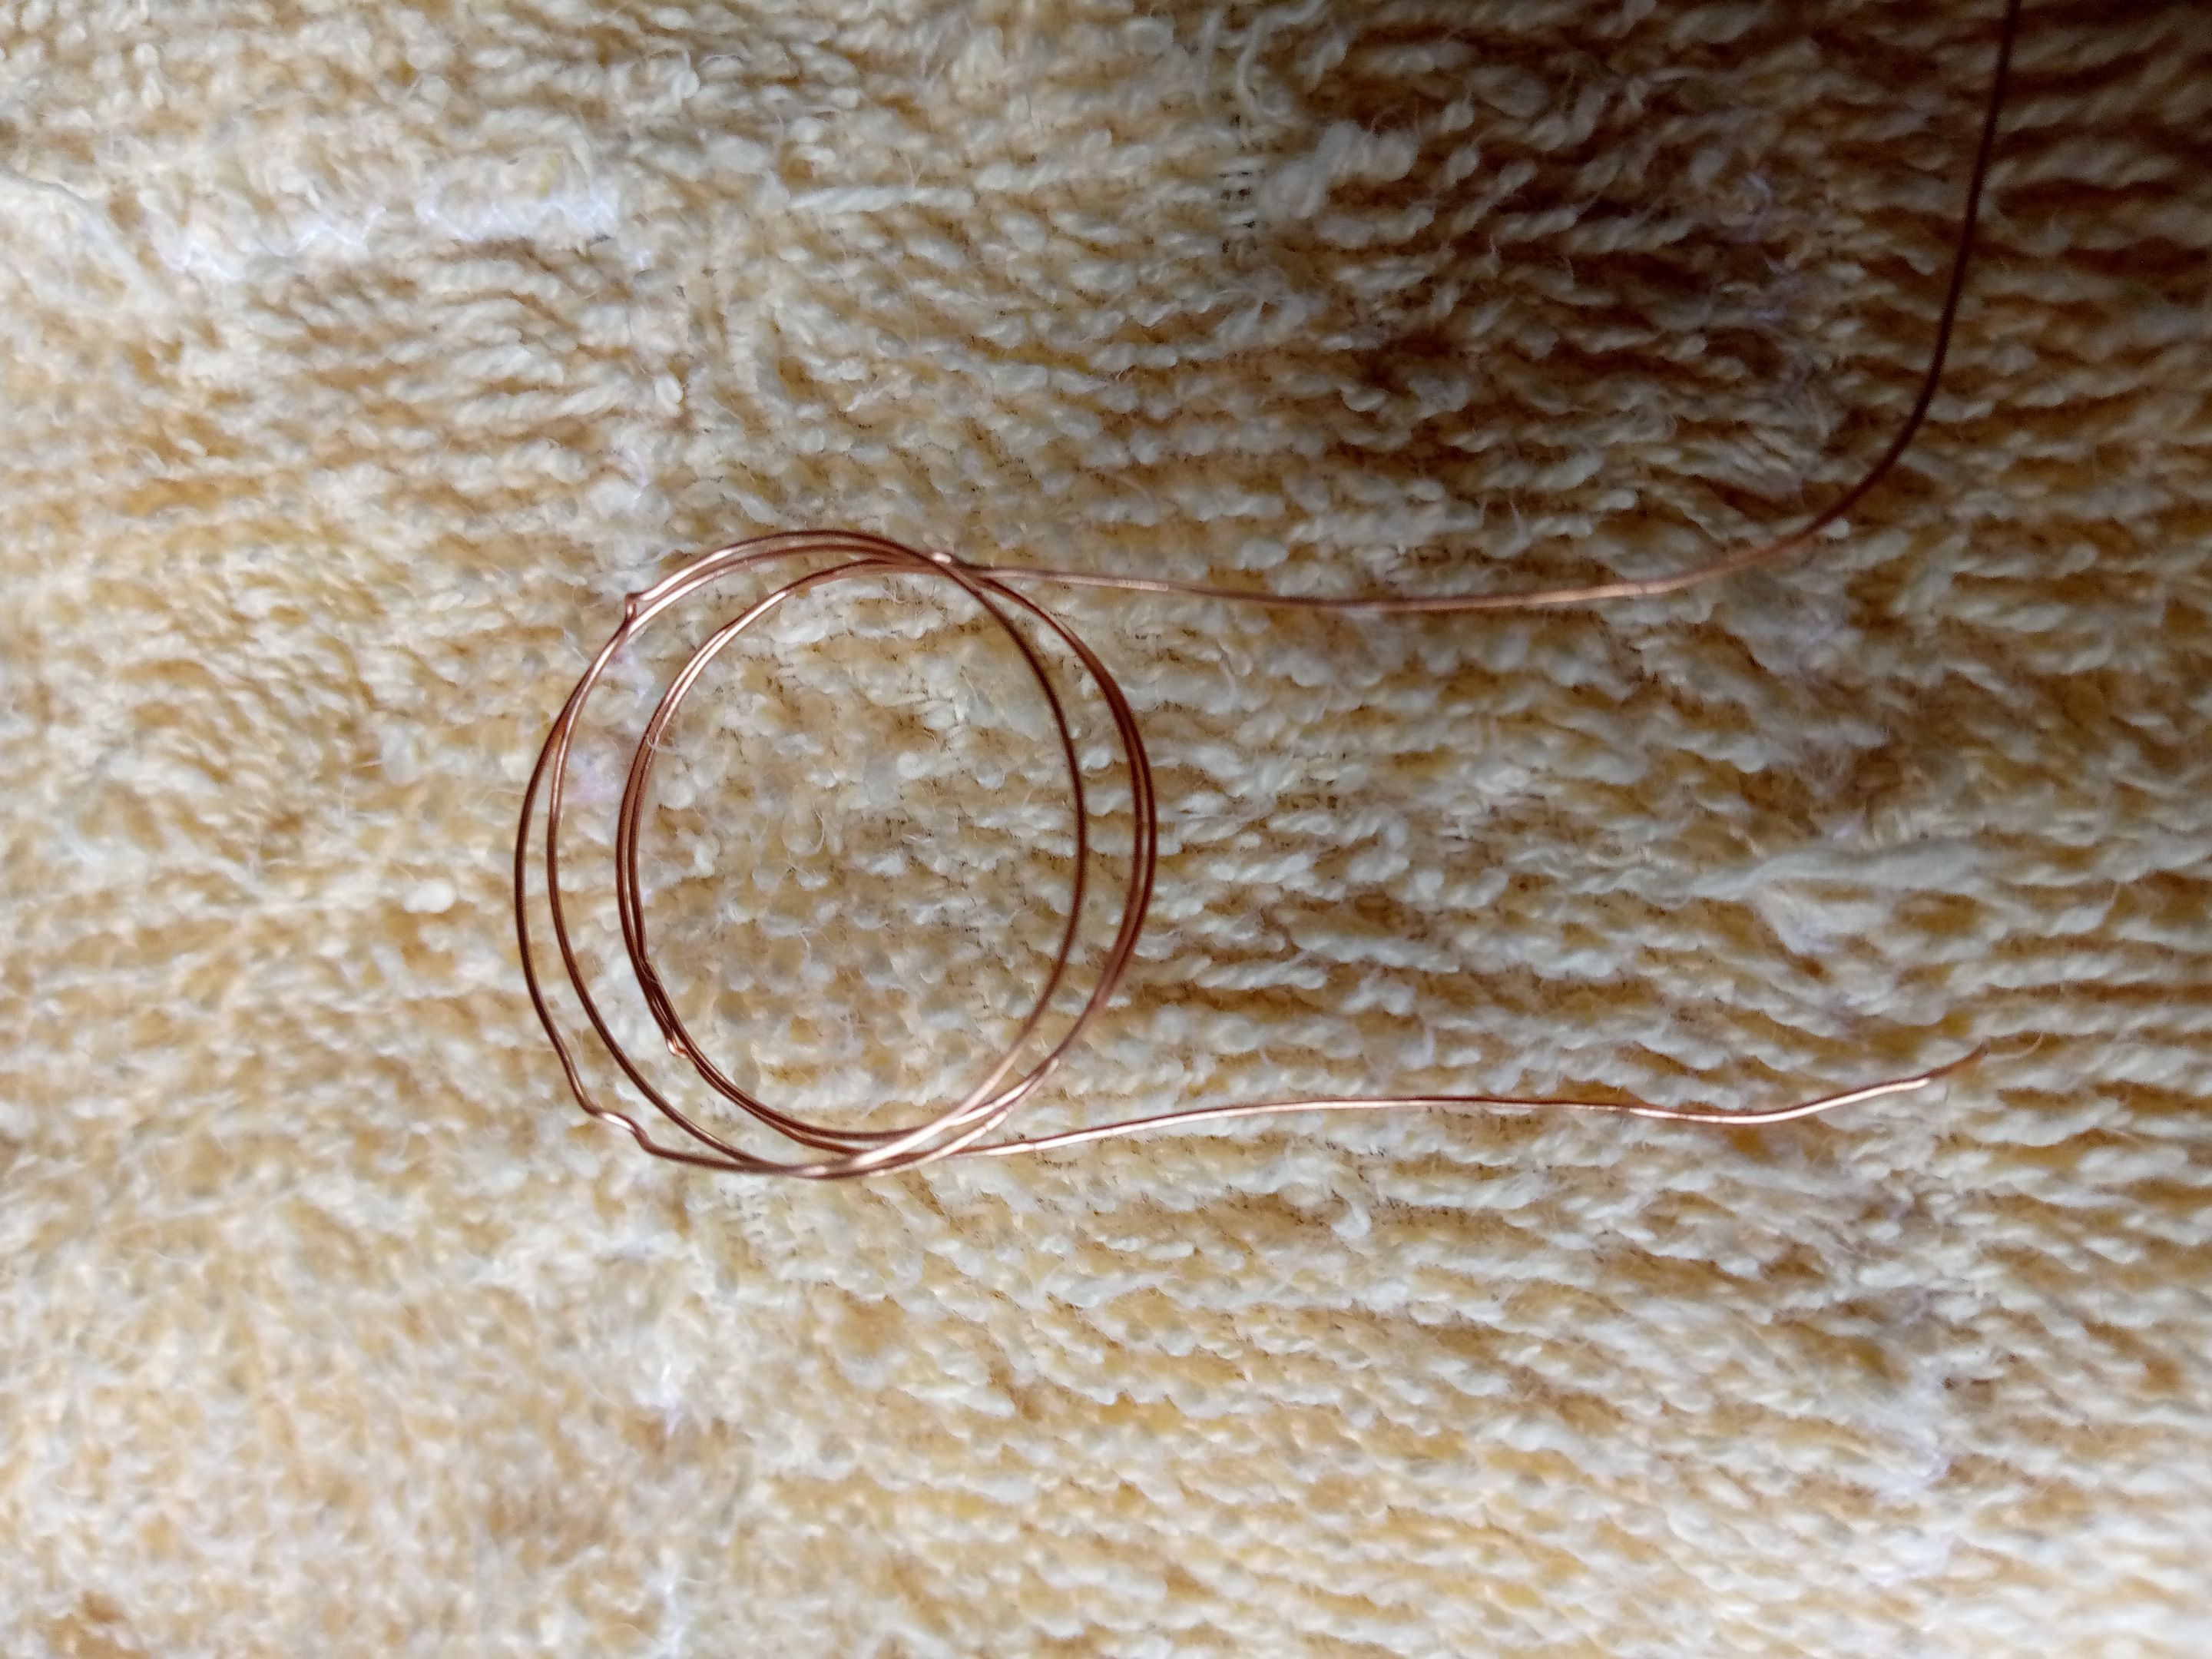
The first thing we are going to do is to take the wire and we are going to measure it, we are going to leave a suitable length so that it will be enough to make our design.
Step 2
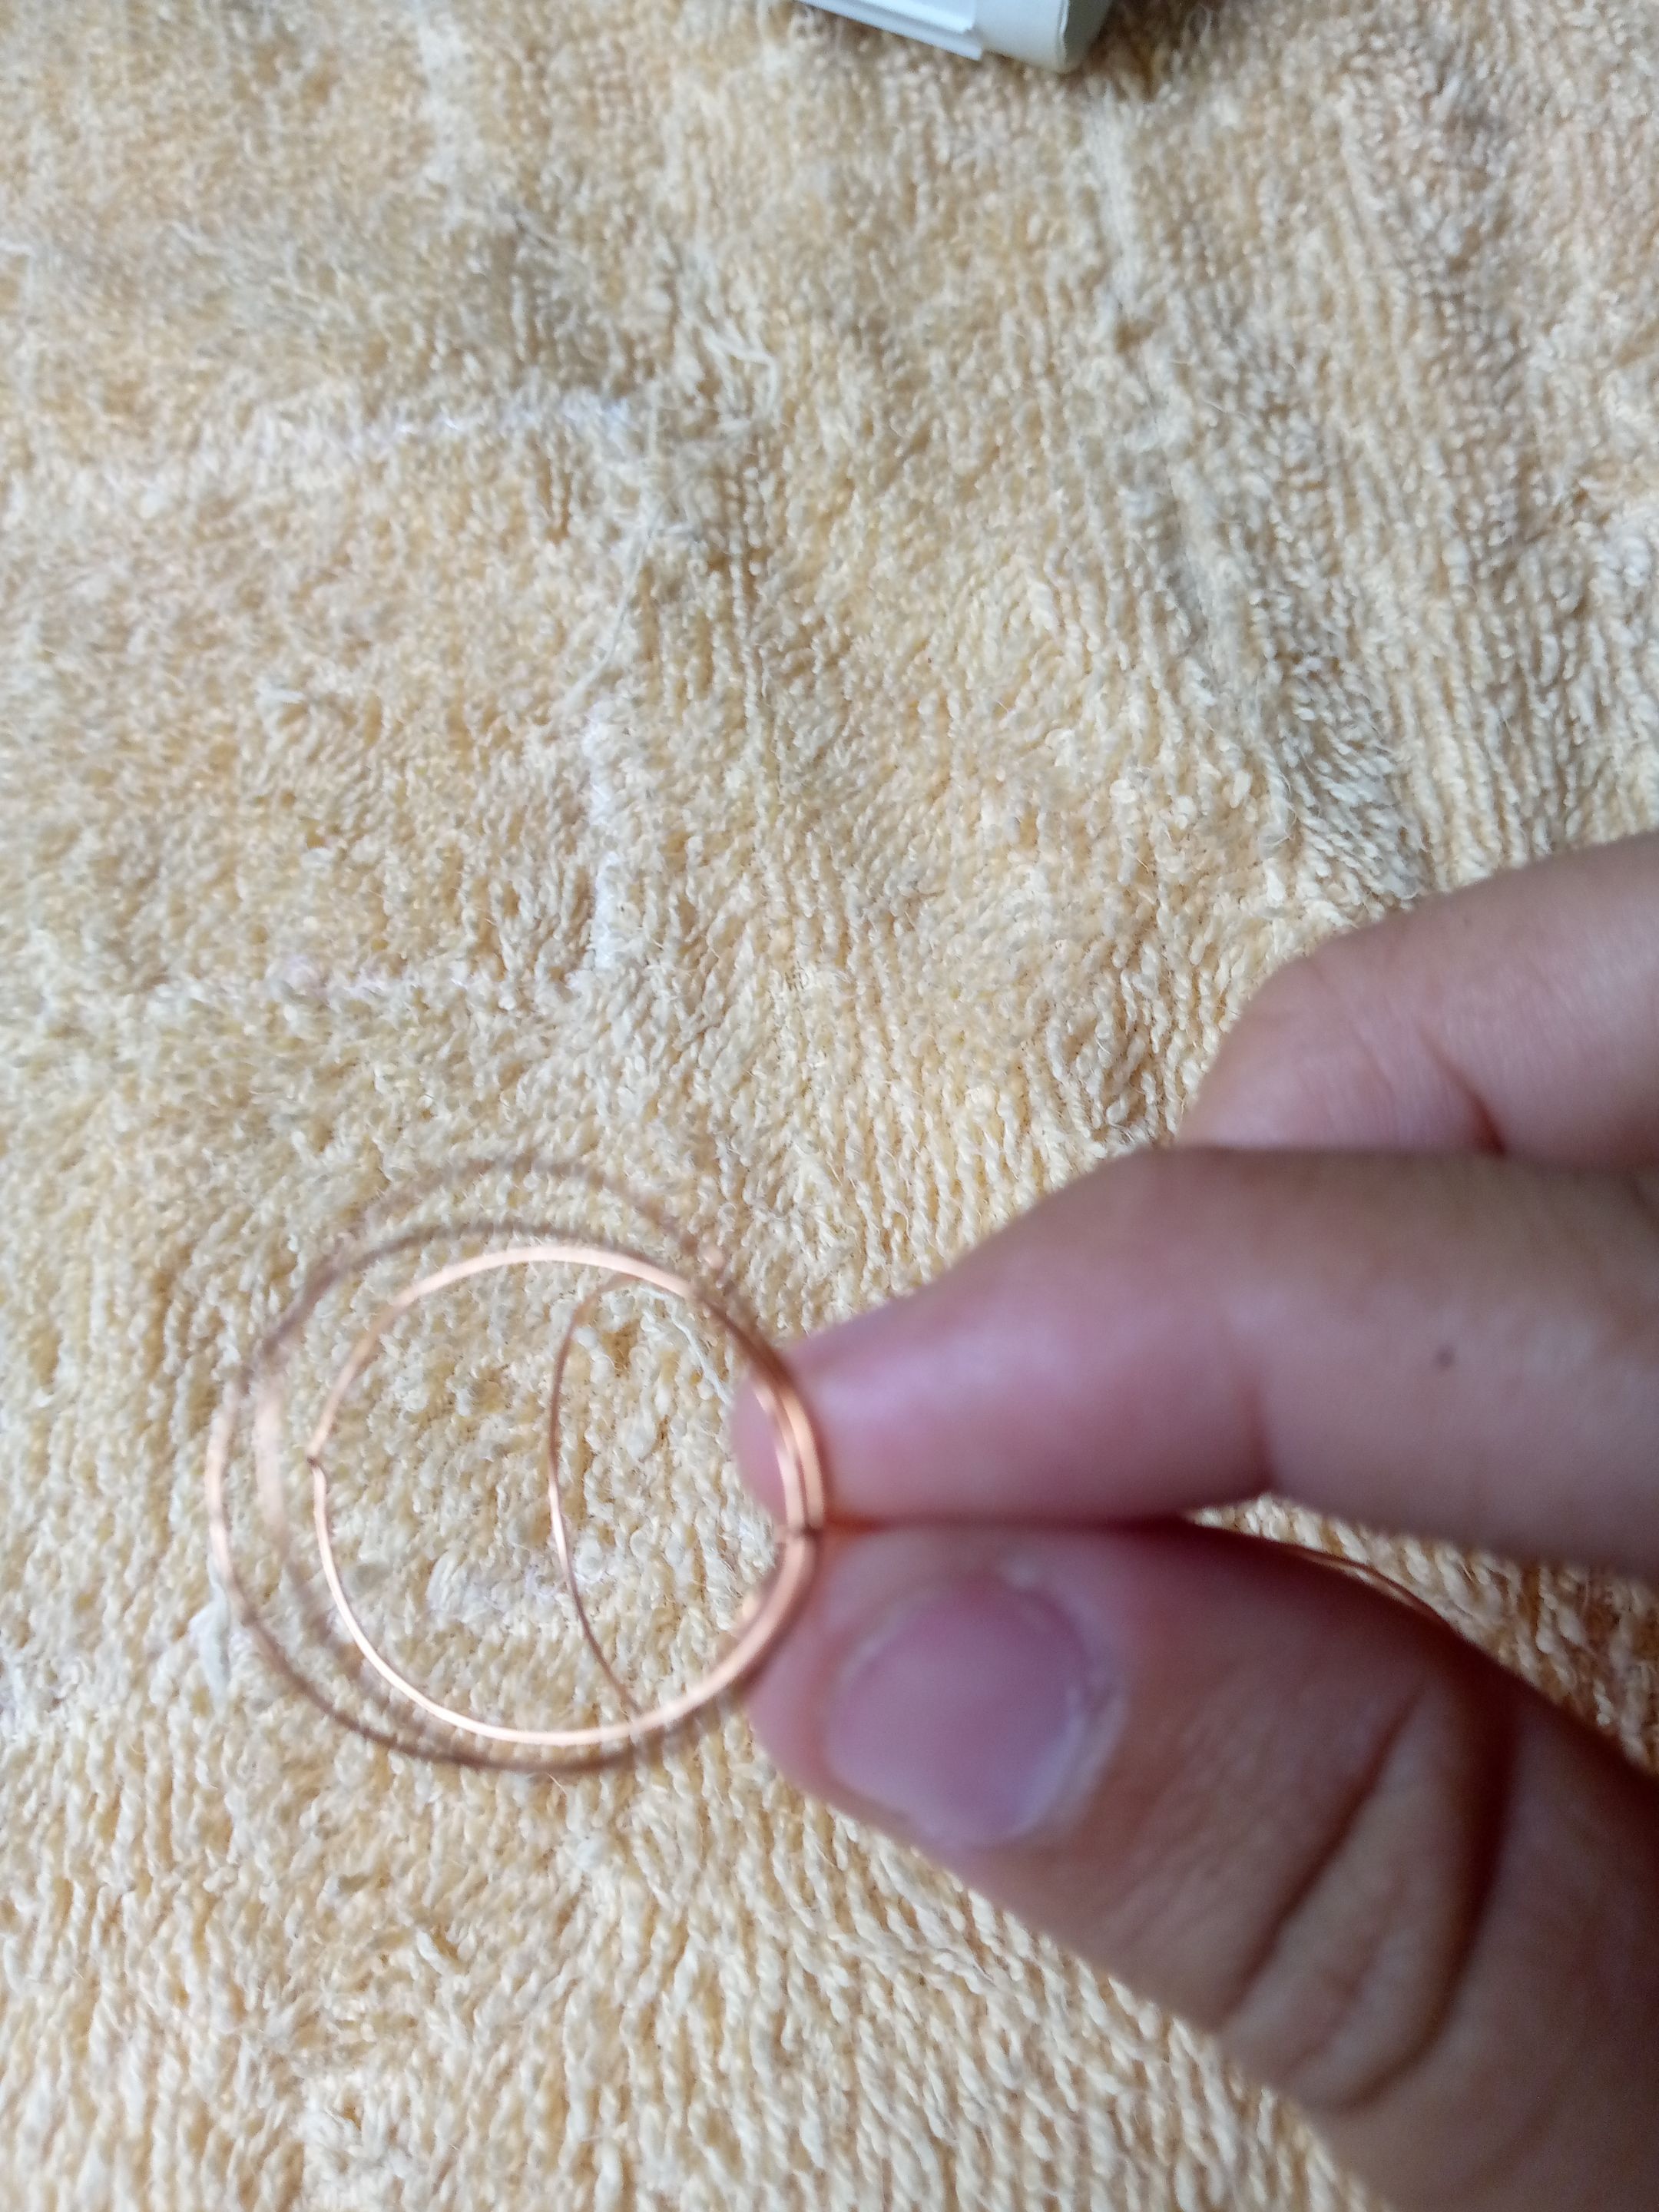
Now what we are going to do is to take the base of winding the thread true that was one of the things that I got to be able to make the circle in the wire so that it is the same size and shape all we are going to do is put the wire.
Step 3
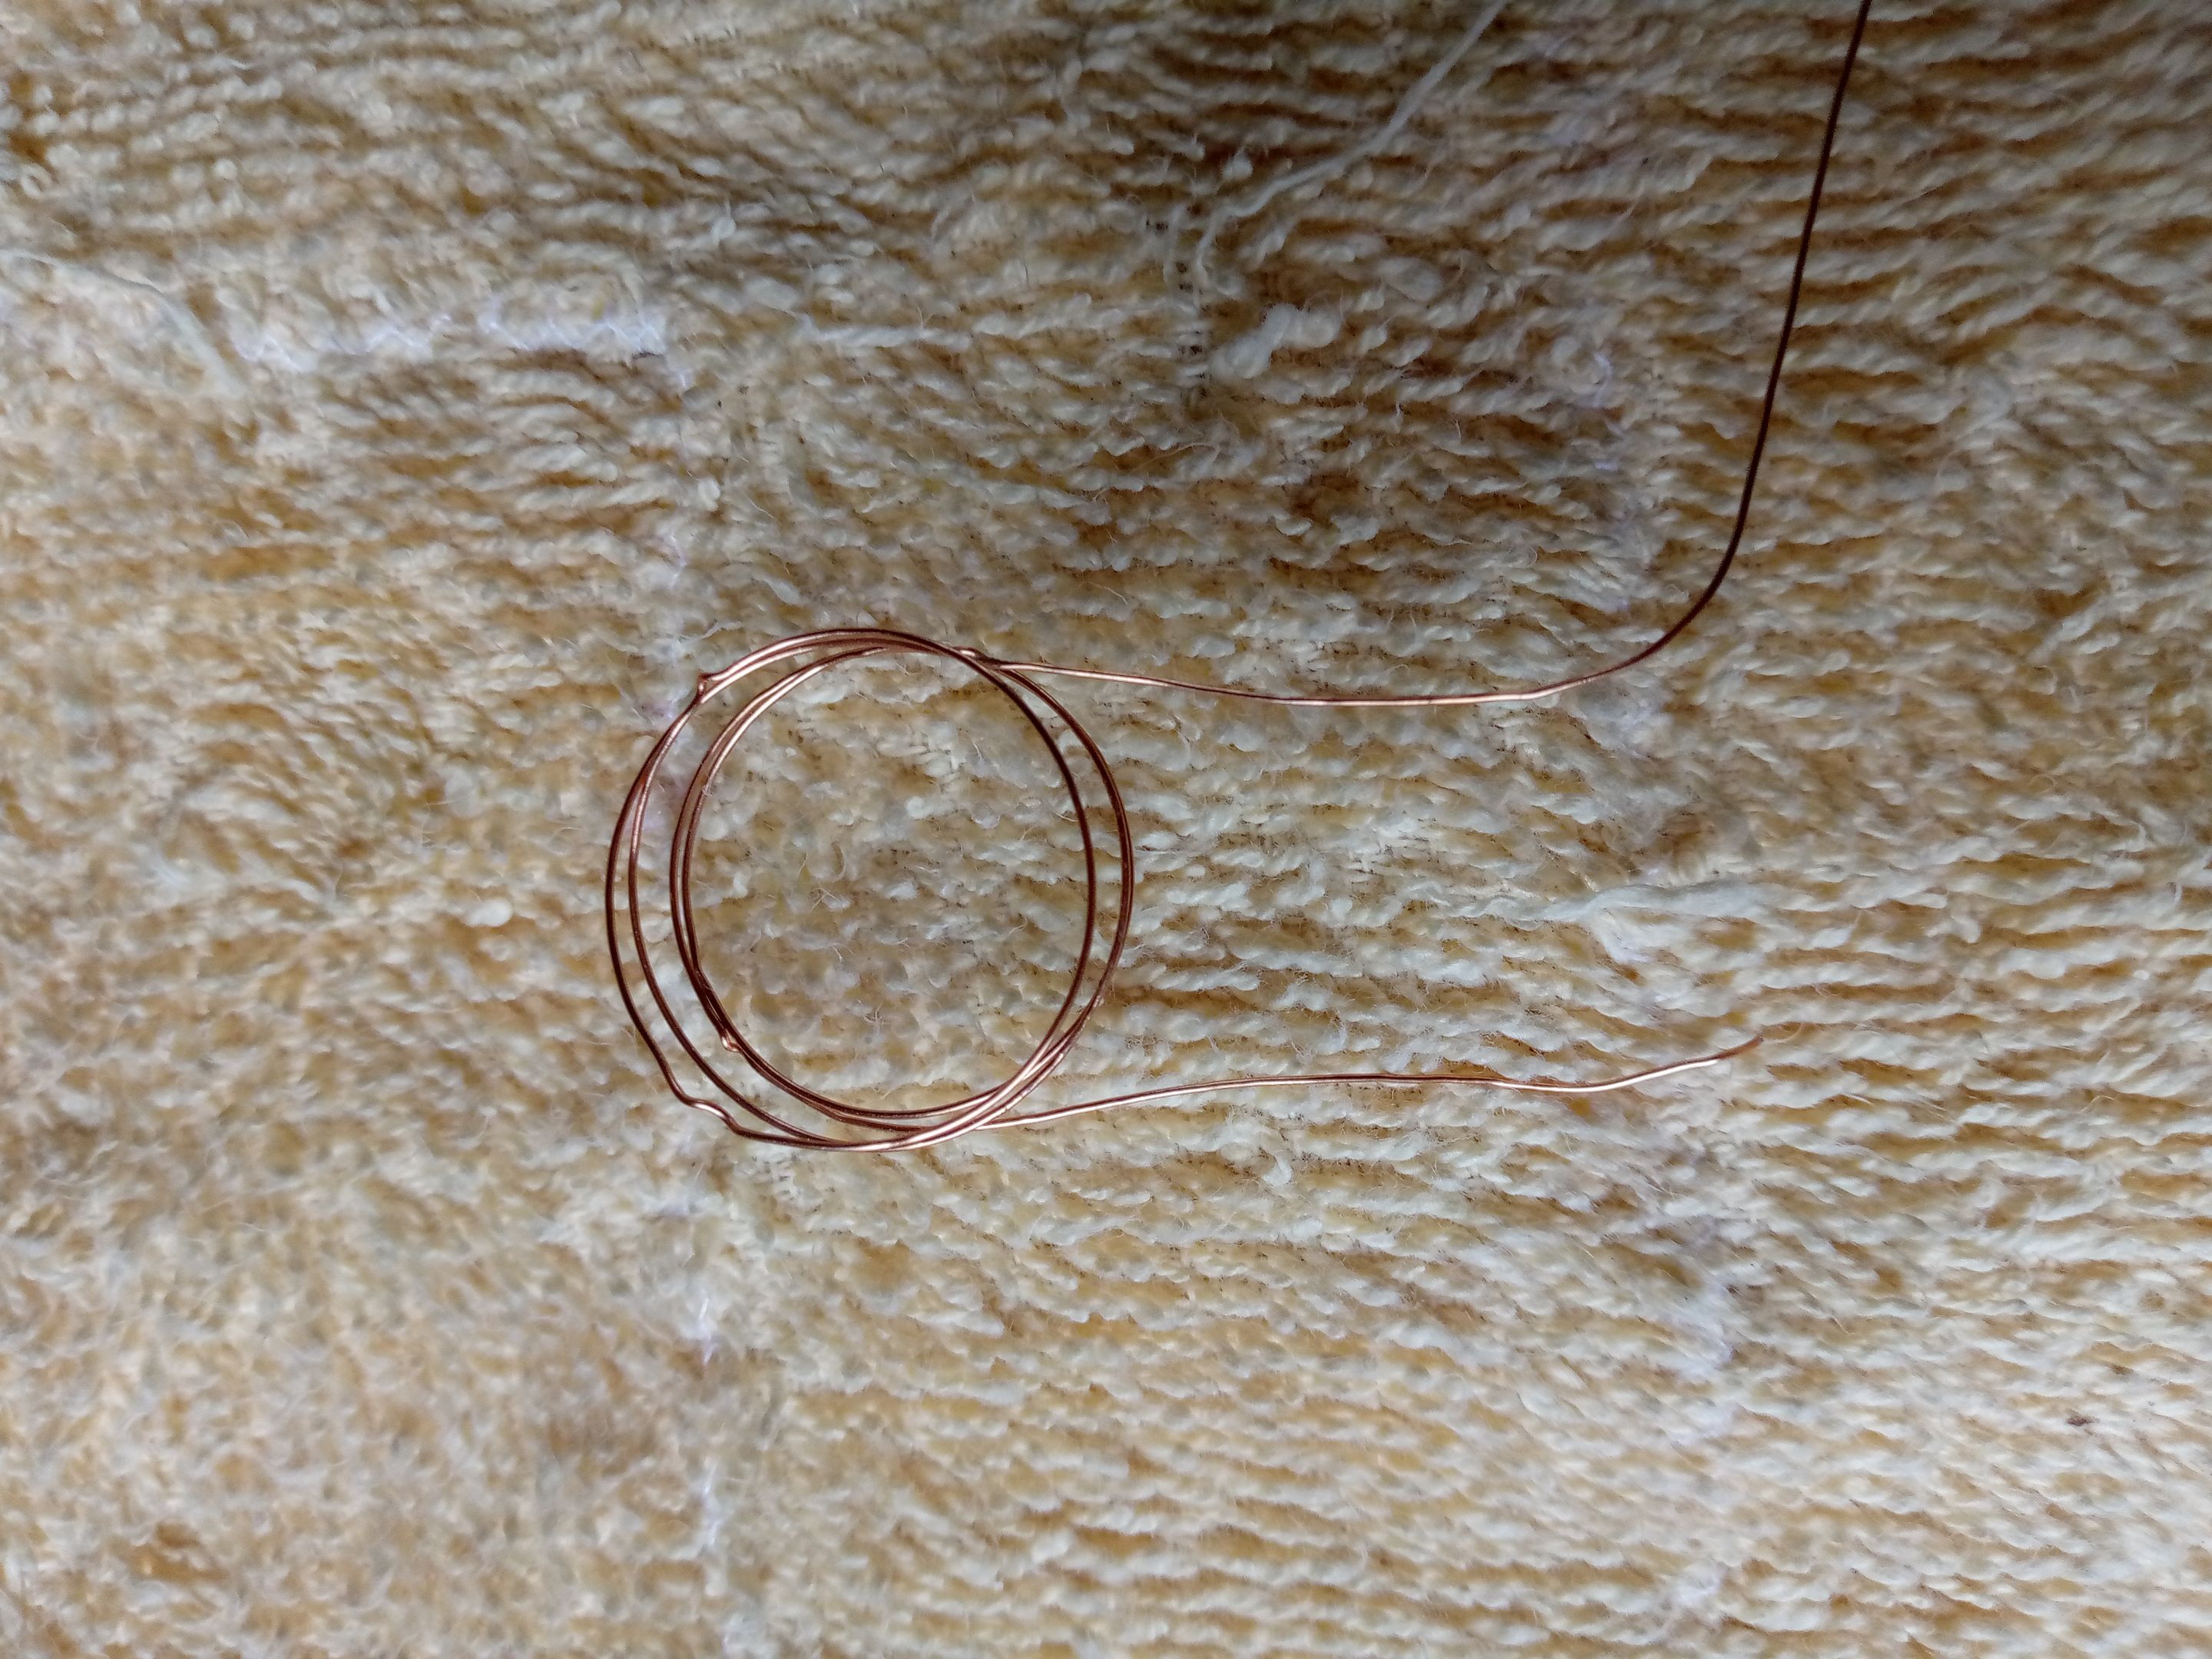
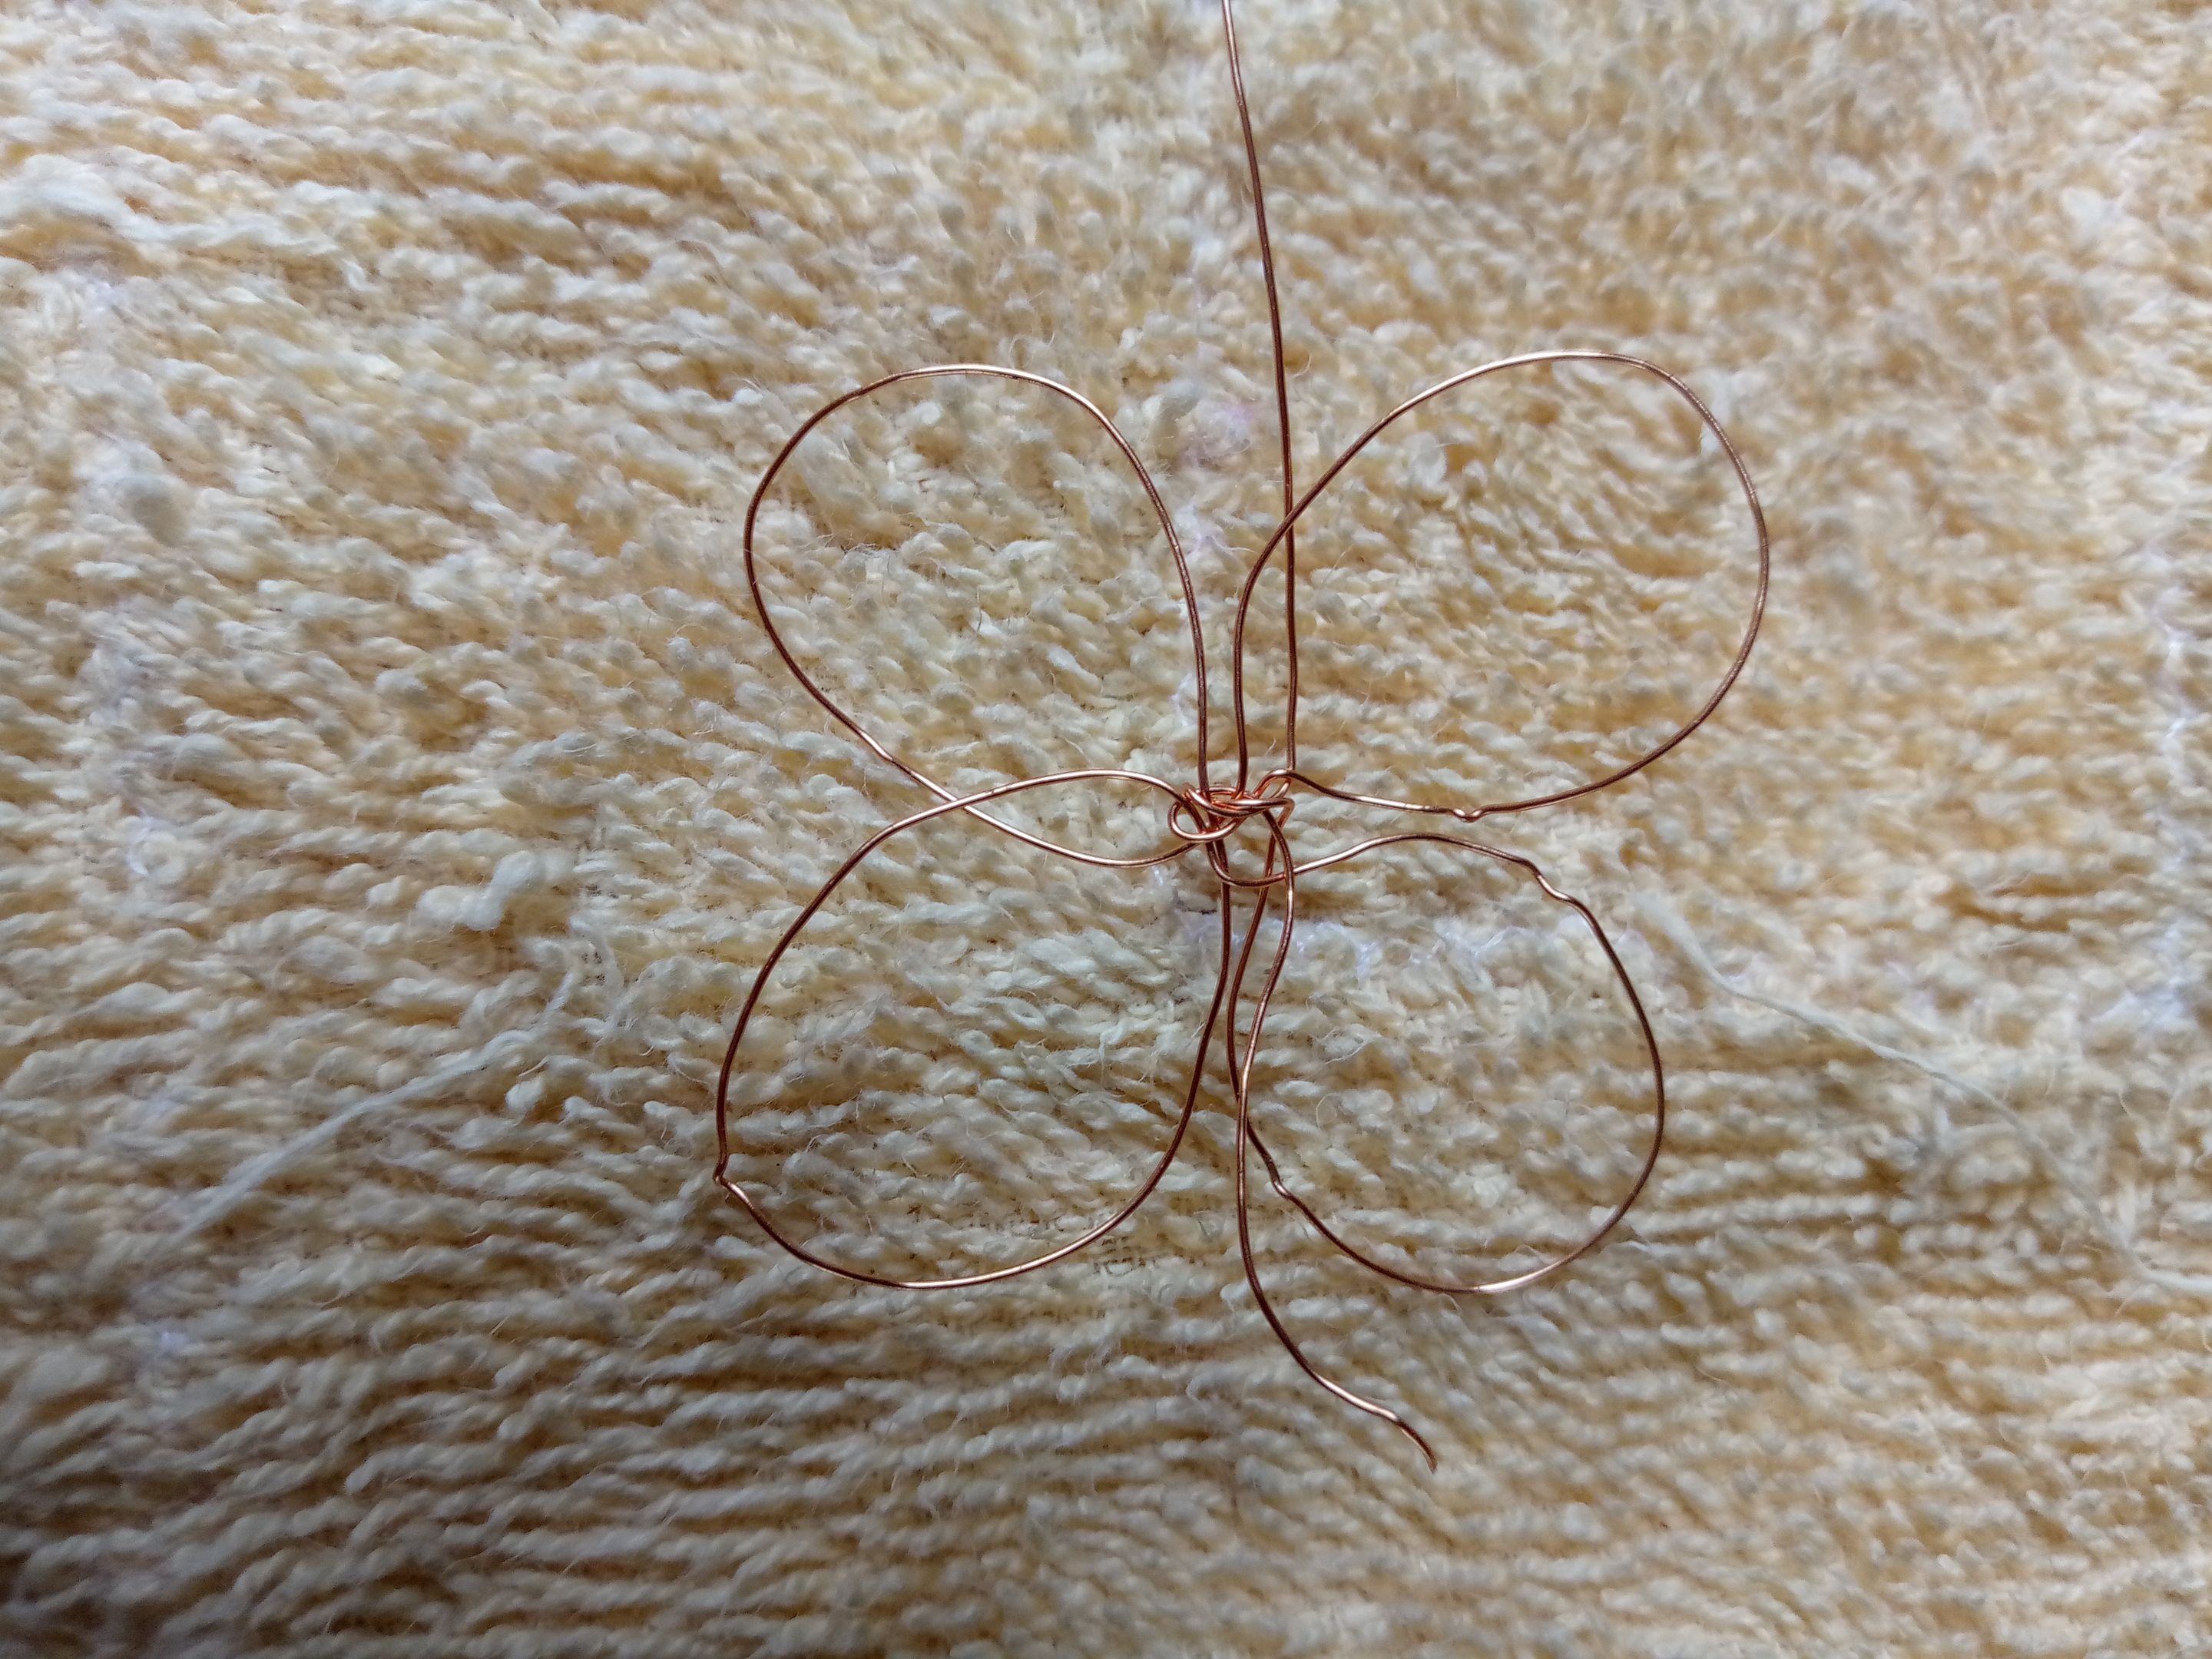
After we have the wire in the base we will hold it with our finger and we will roll it up to form the four circles with the wire and it will look like this.
Step 4
Now what we are going to take care of is to make the turns of the four sides but flatly once the hoops or circles are already in place.
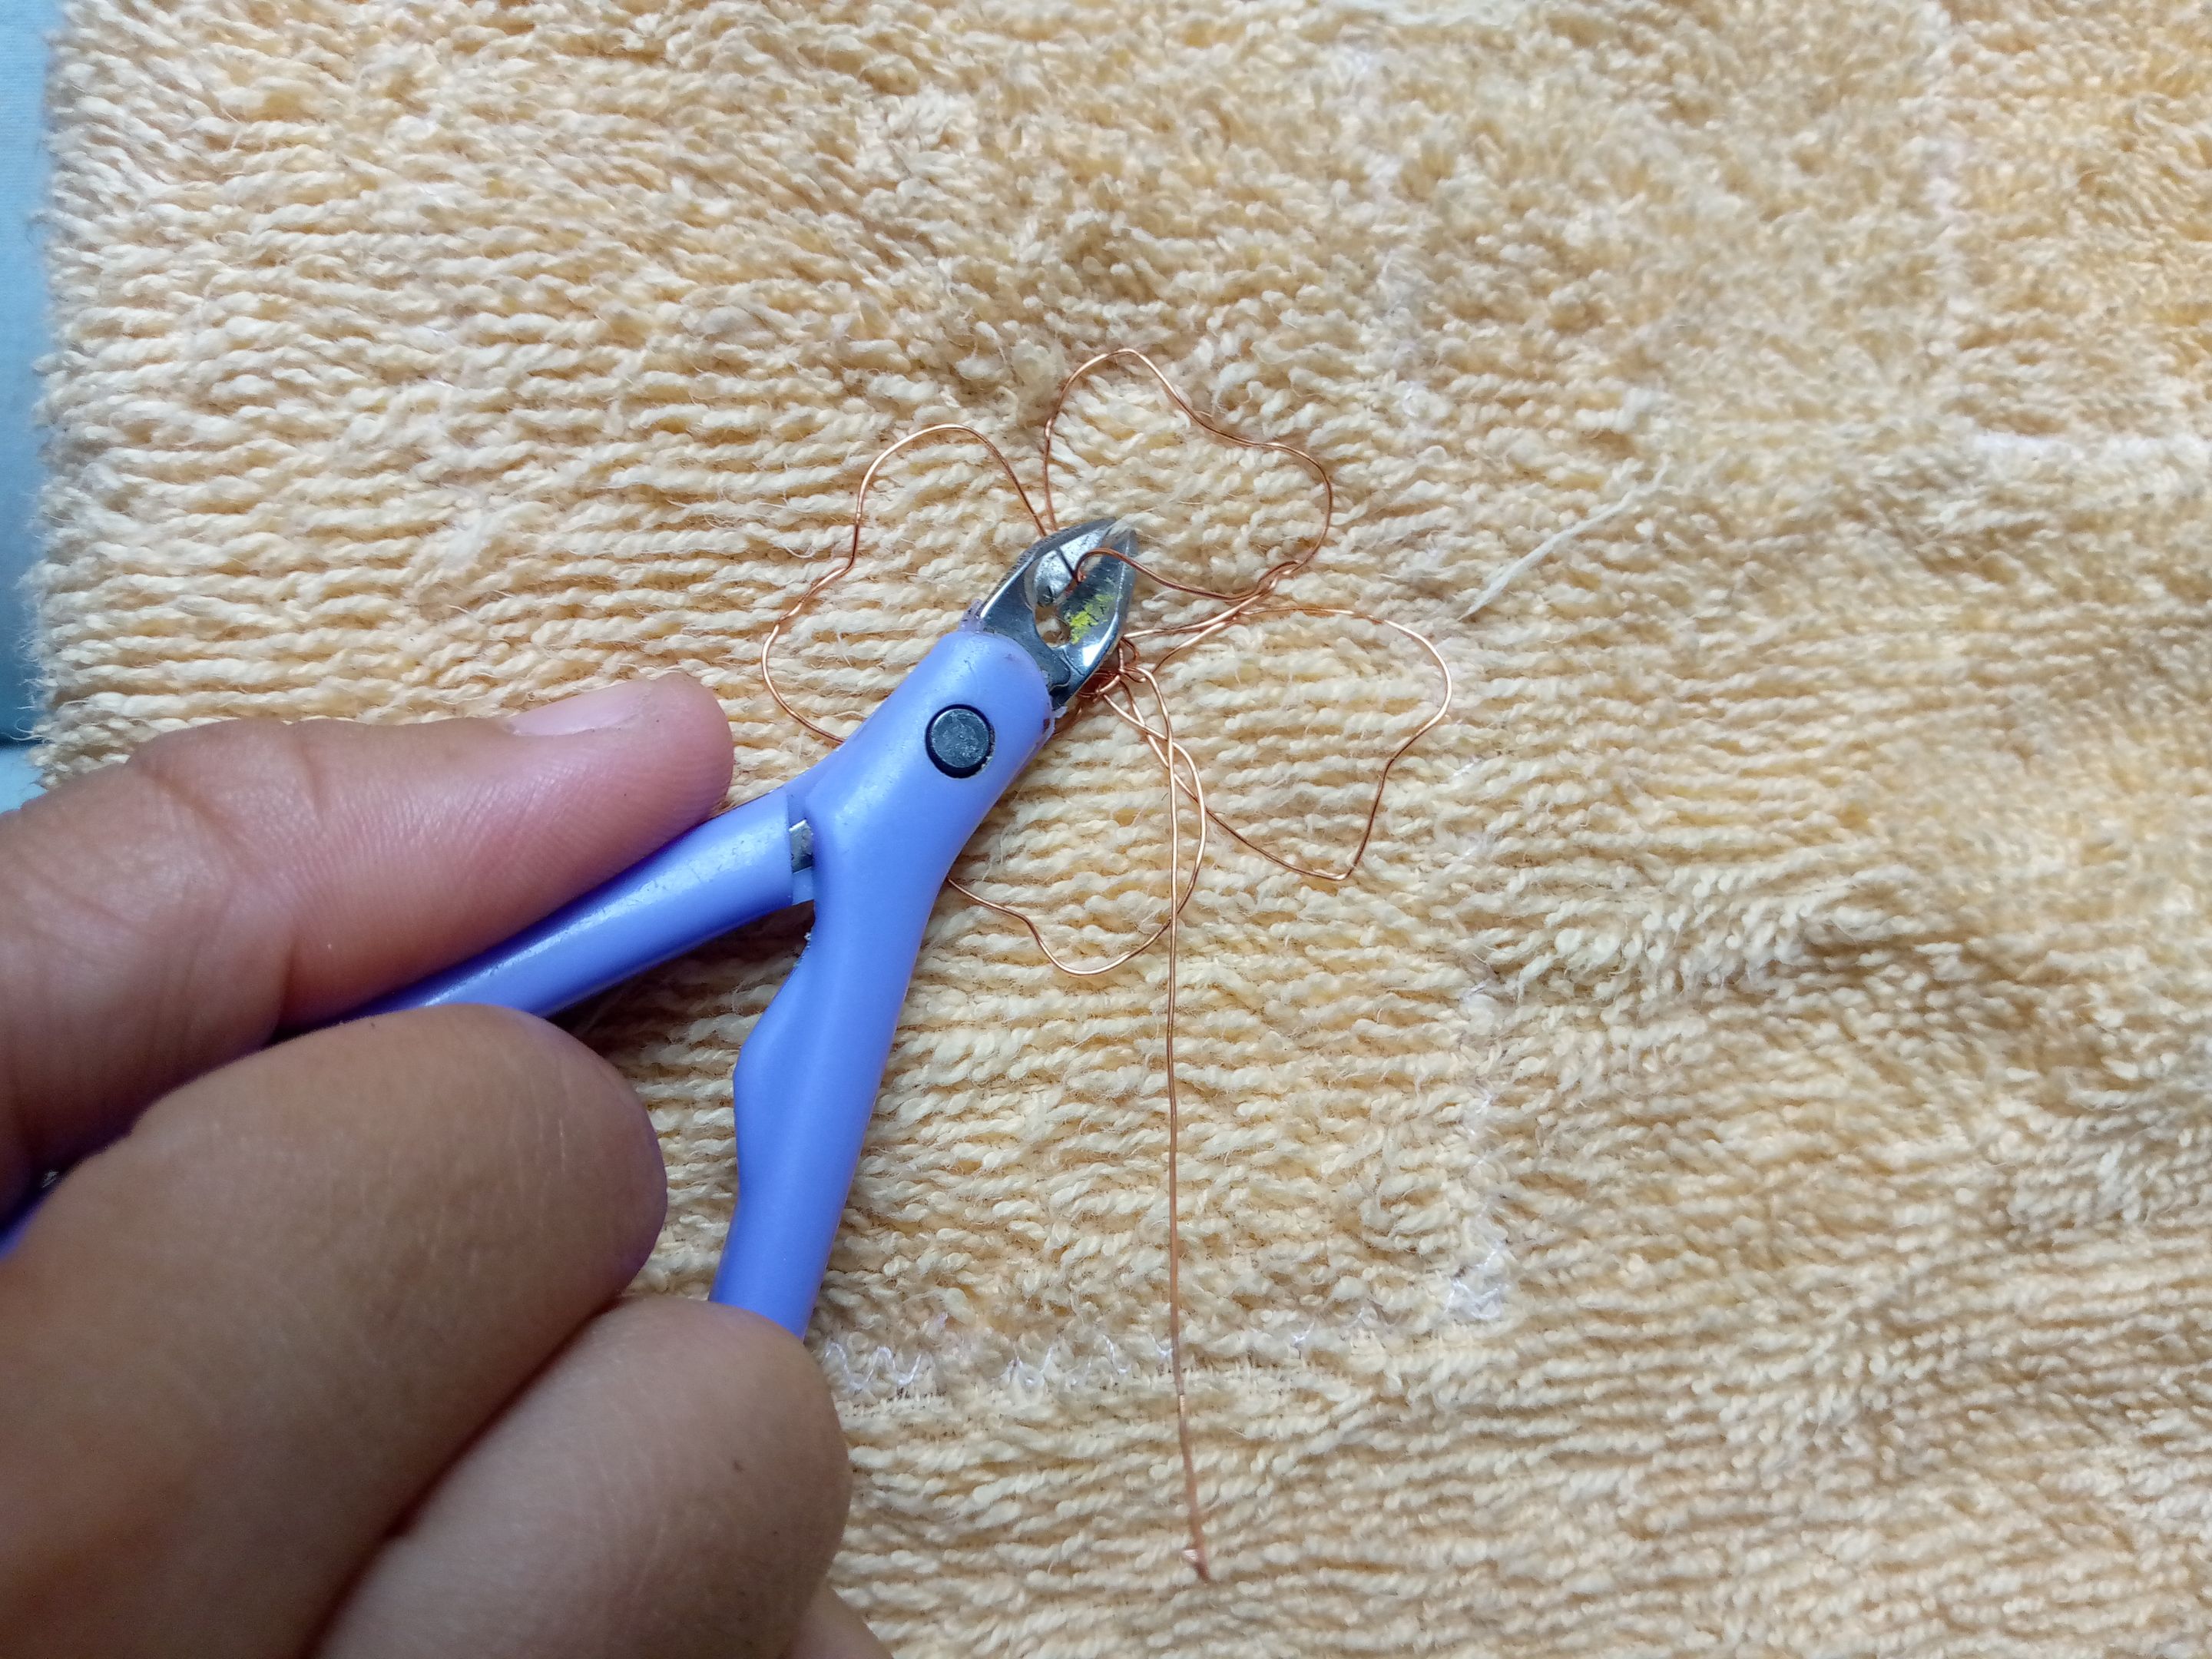
Step 5
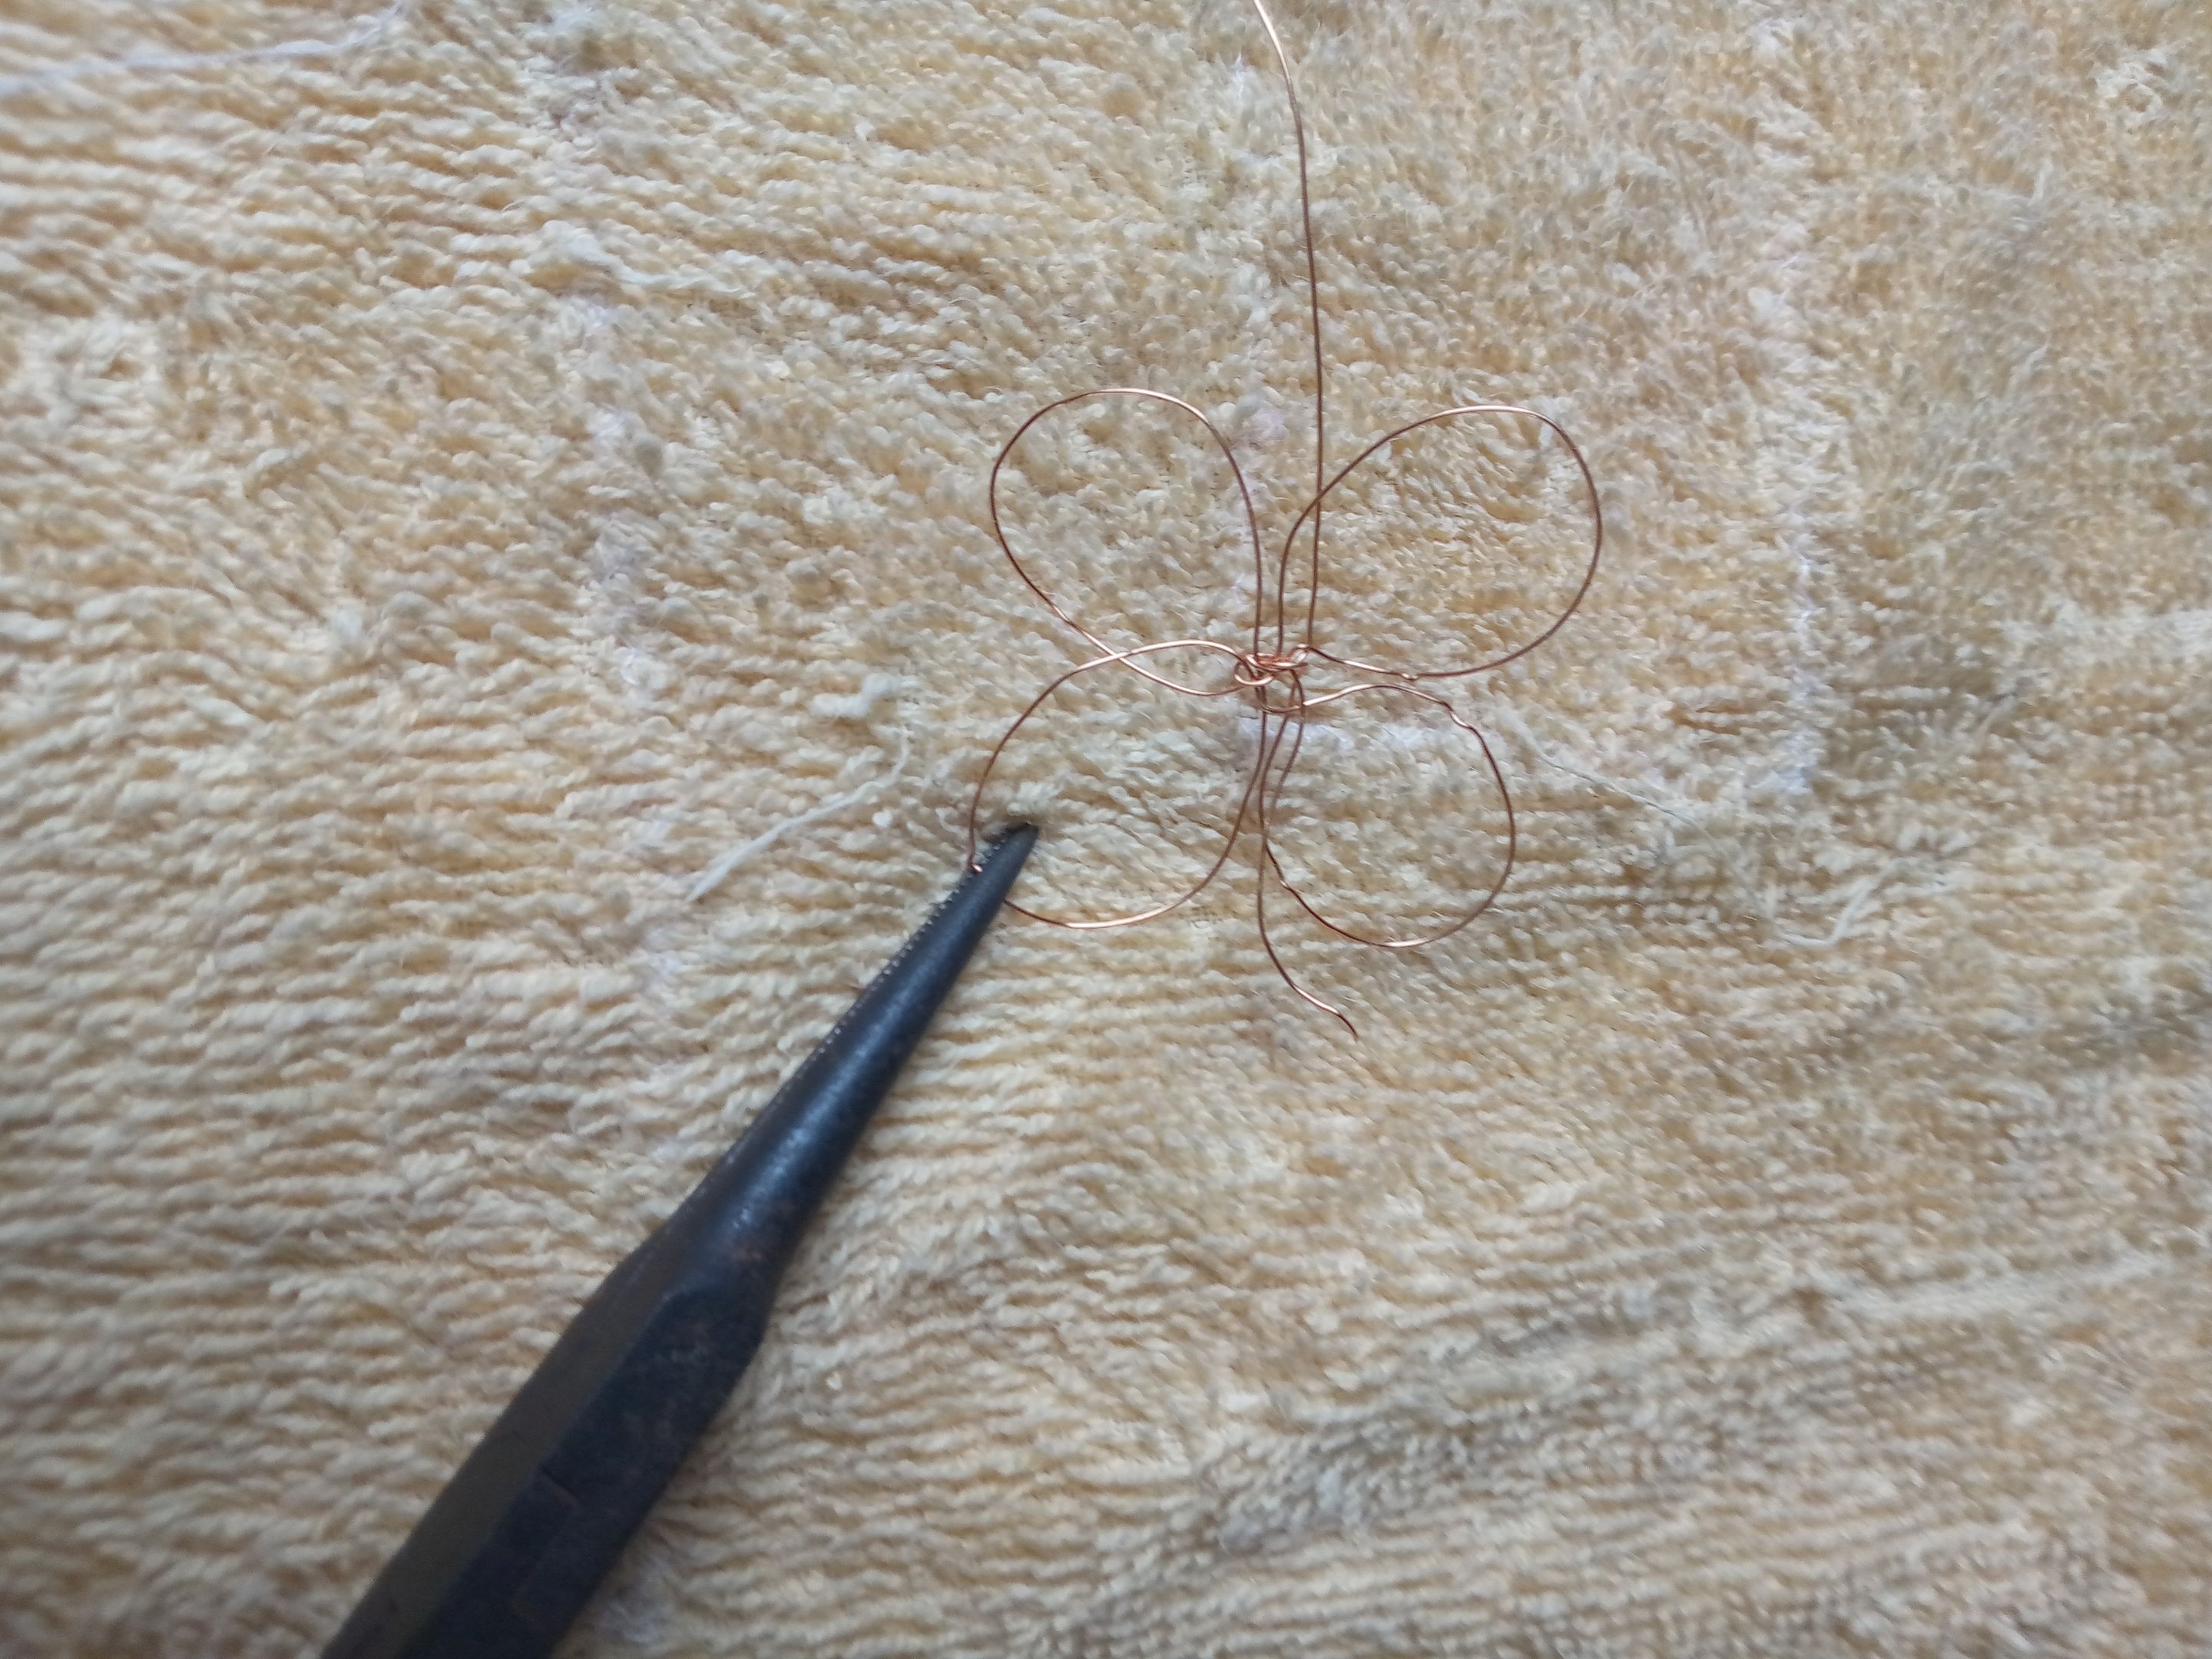
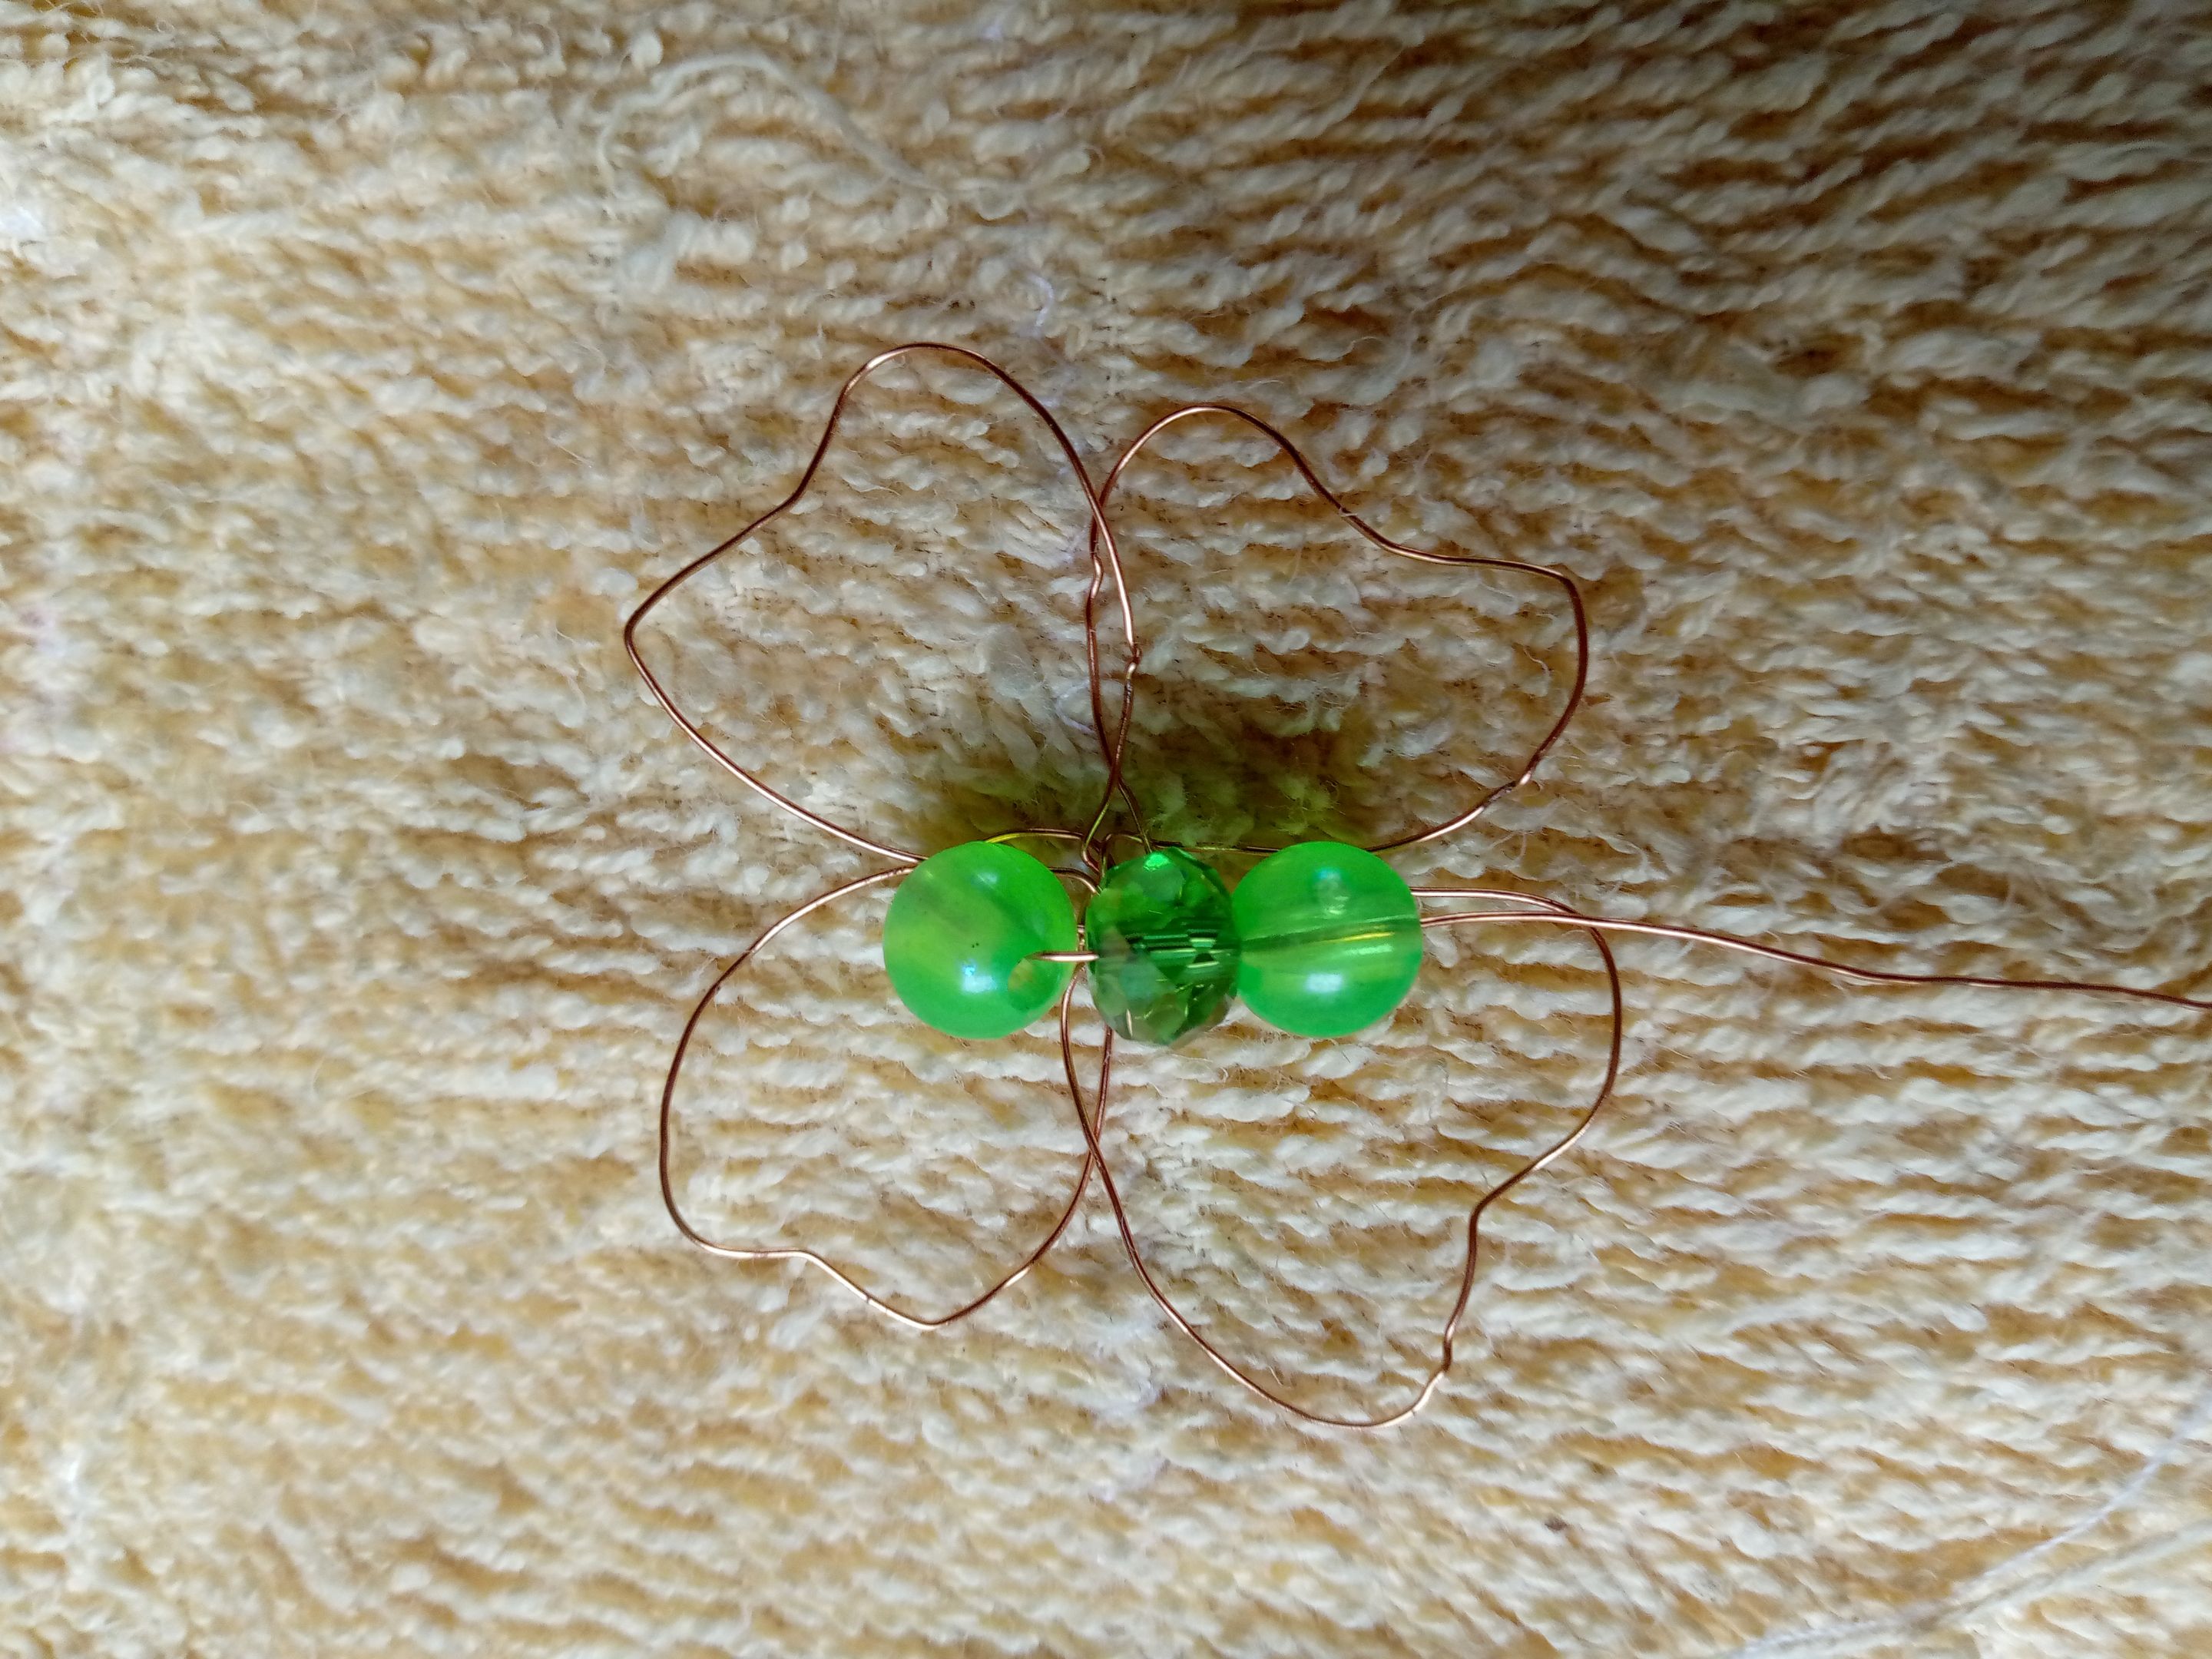
Now we are going to tighten with the pliers little by little and delicately take the wire and pass it through the middle of the four as it comes out like this.
Also when the circles are already assembled with the hands we will give the wavy touches in the form of heart so that it really looks like a clover.
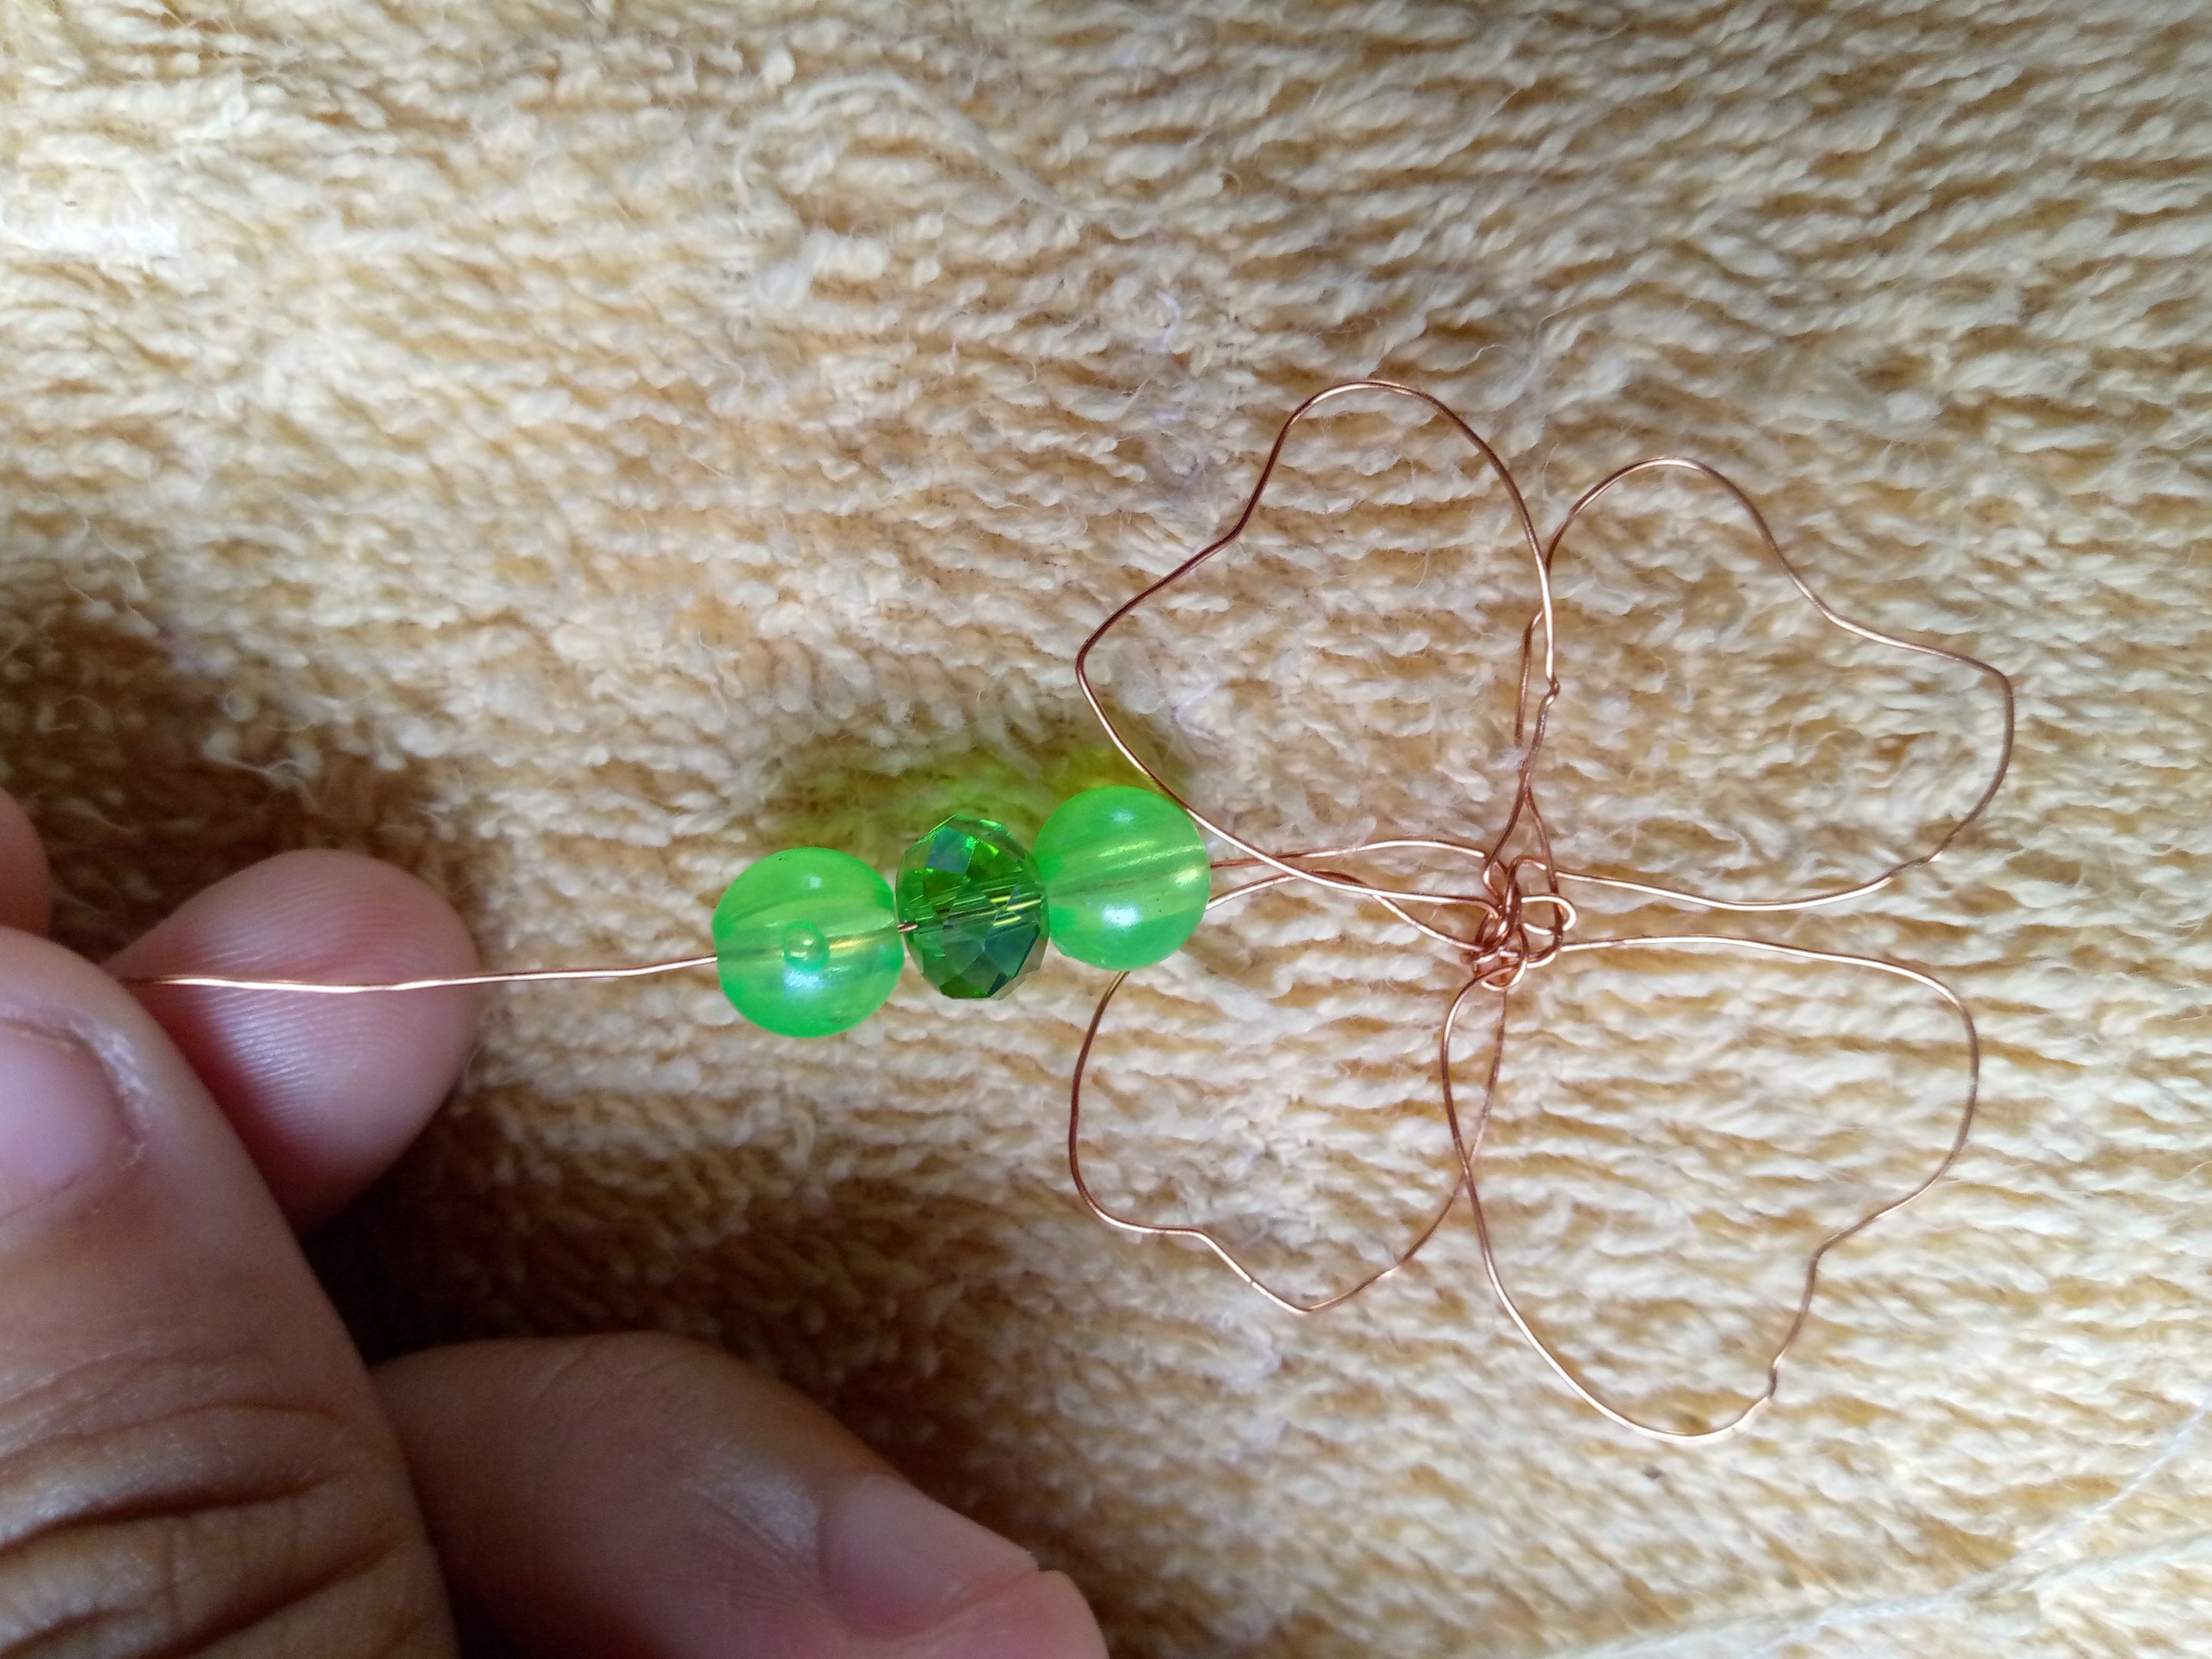
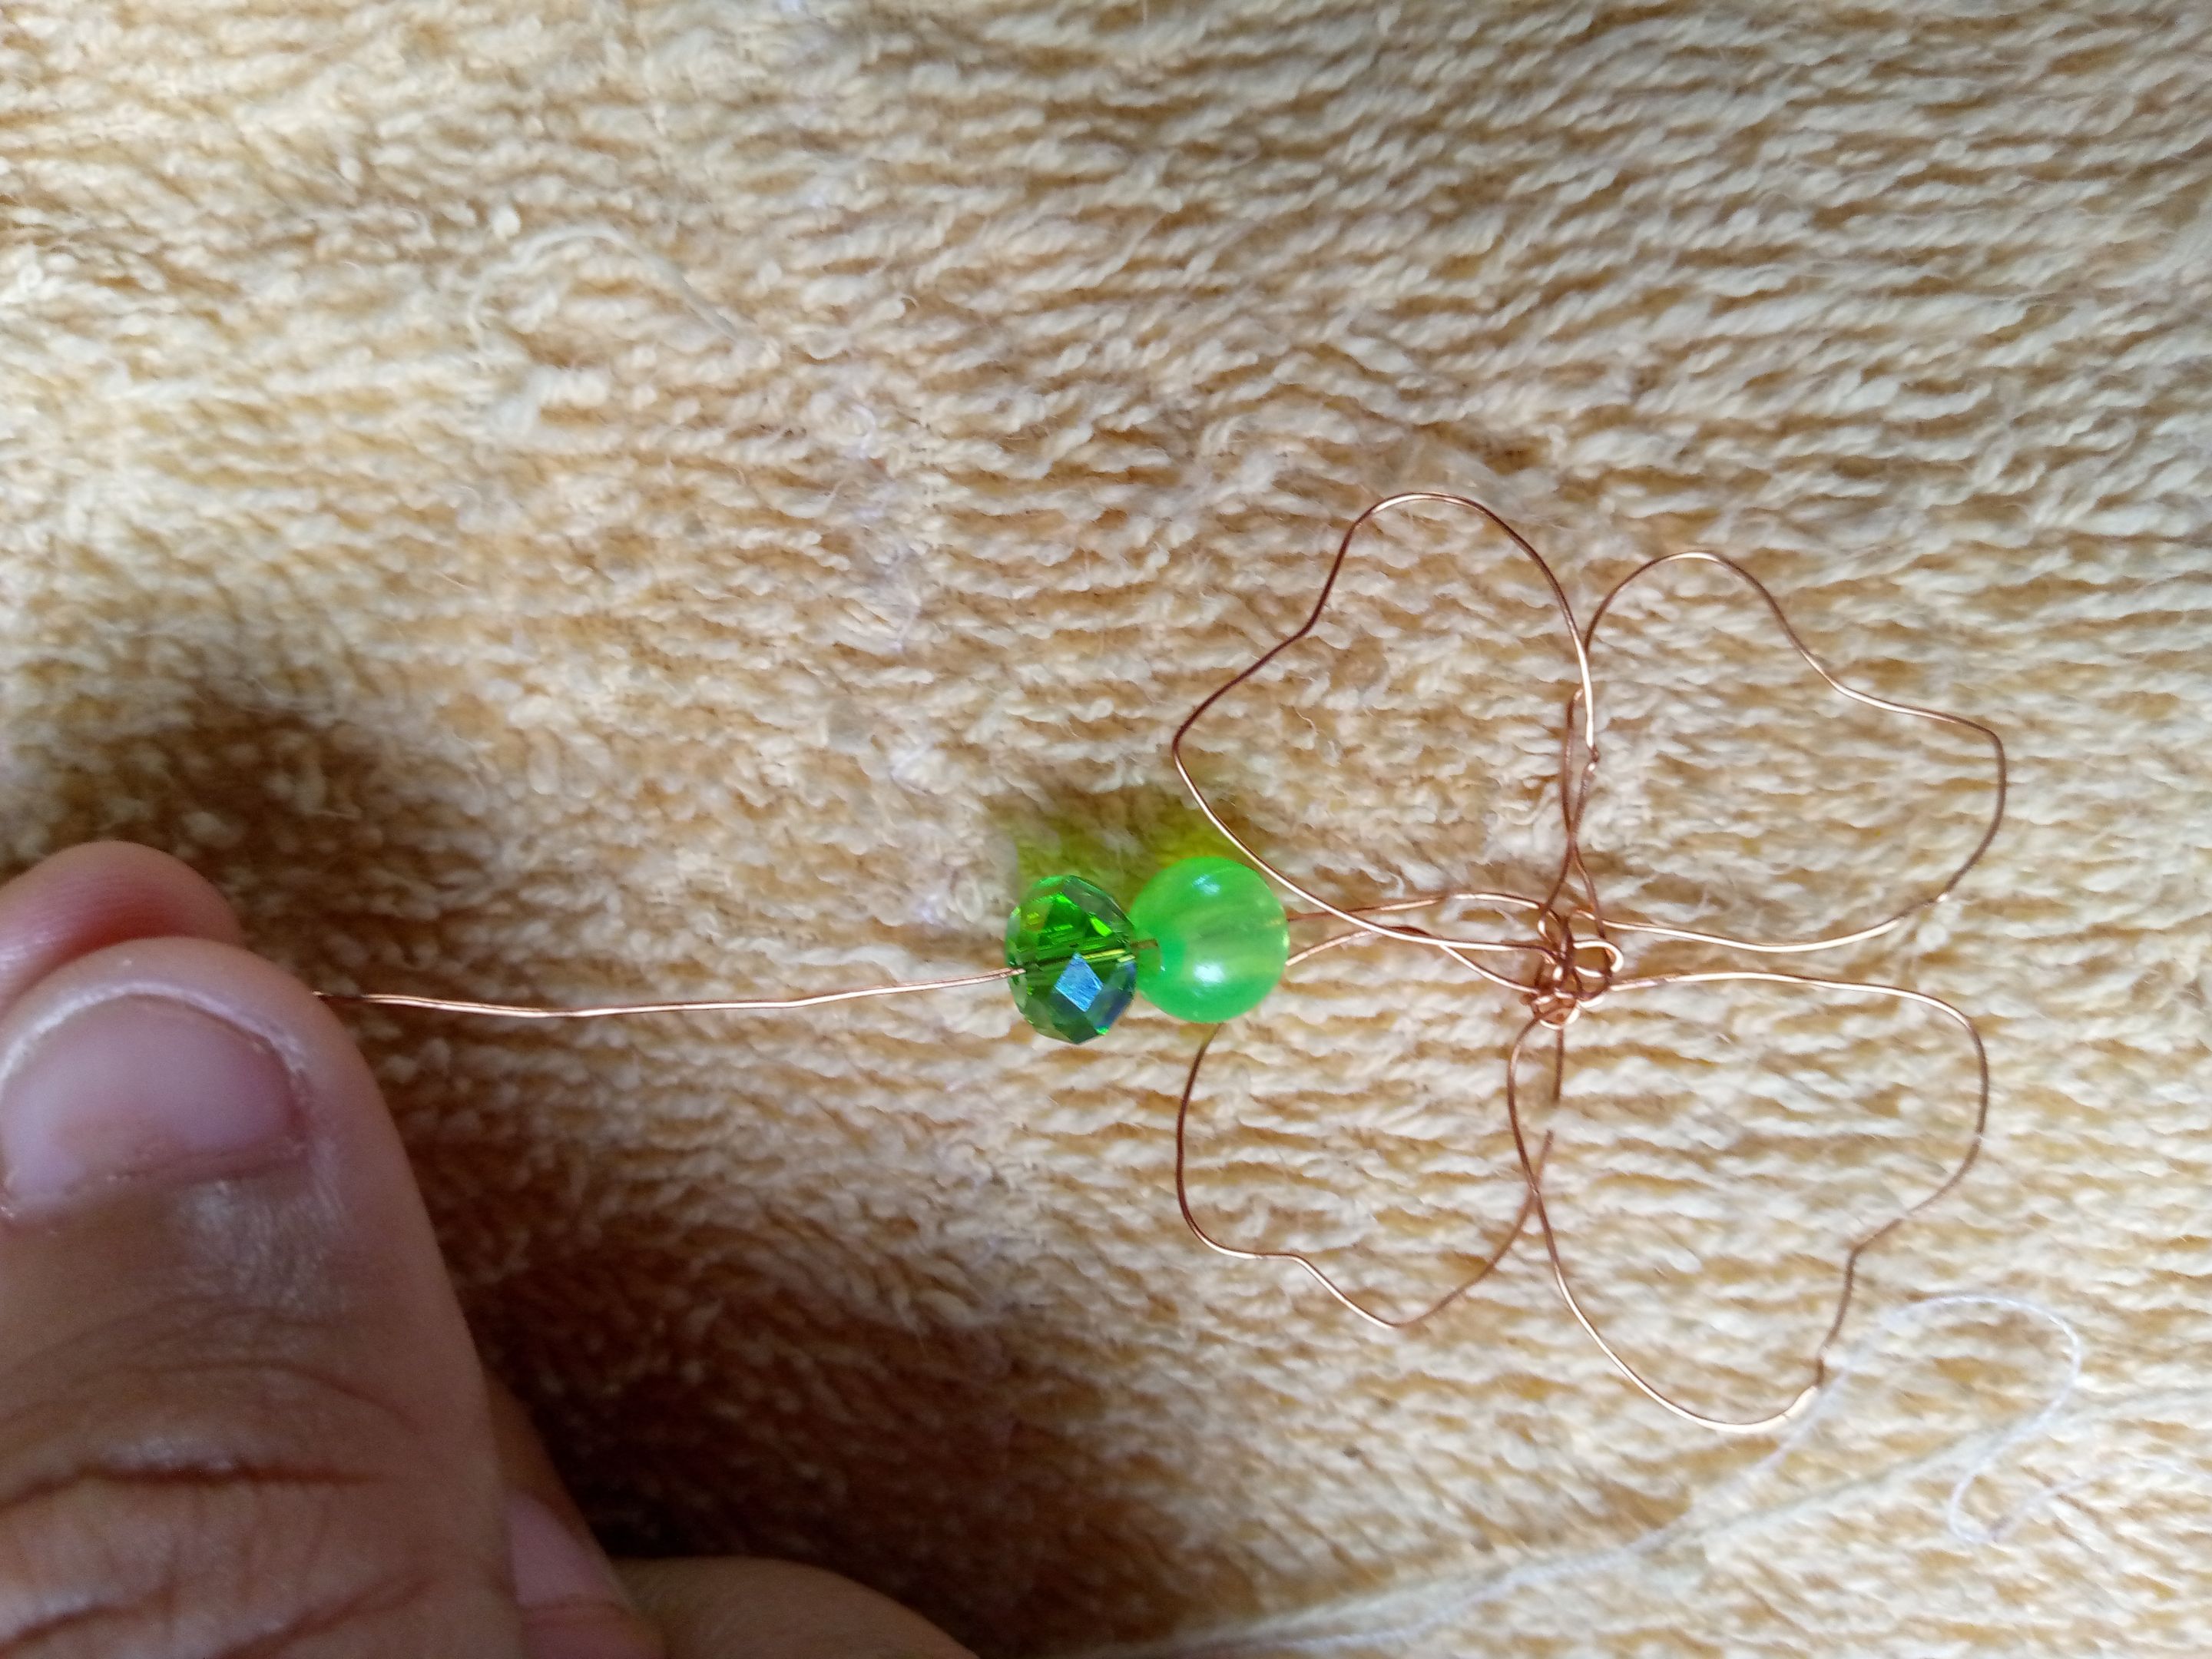
Step 6
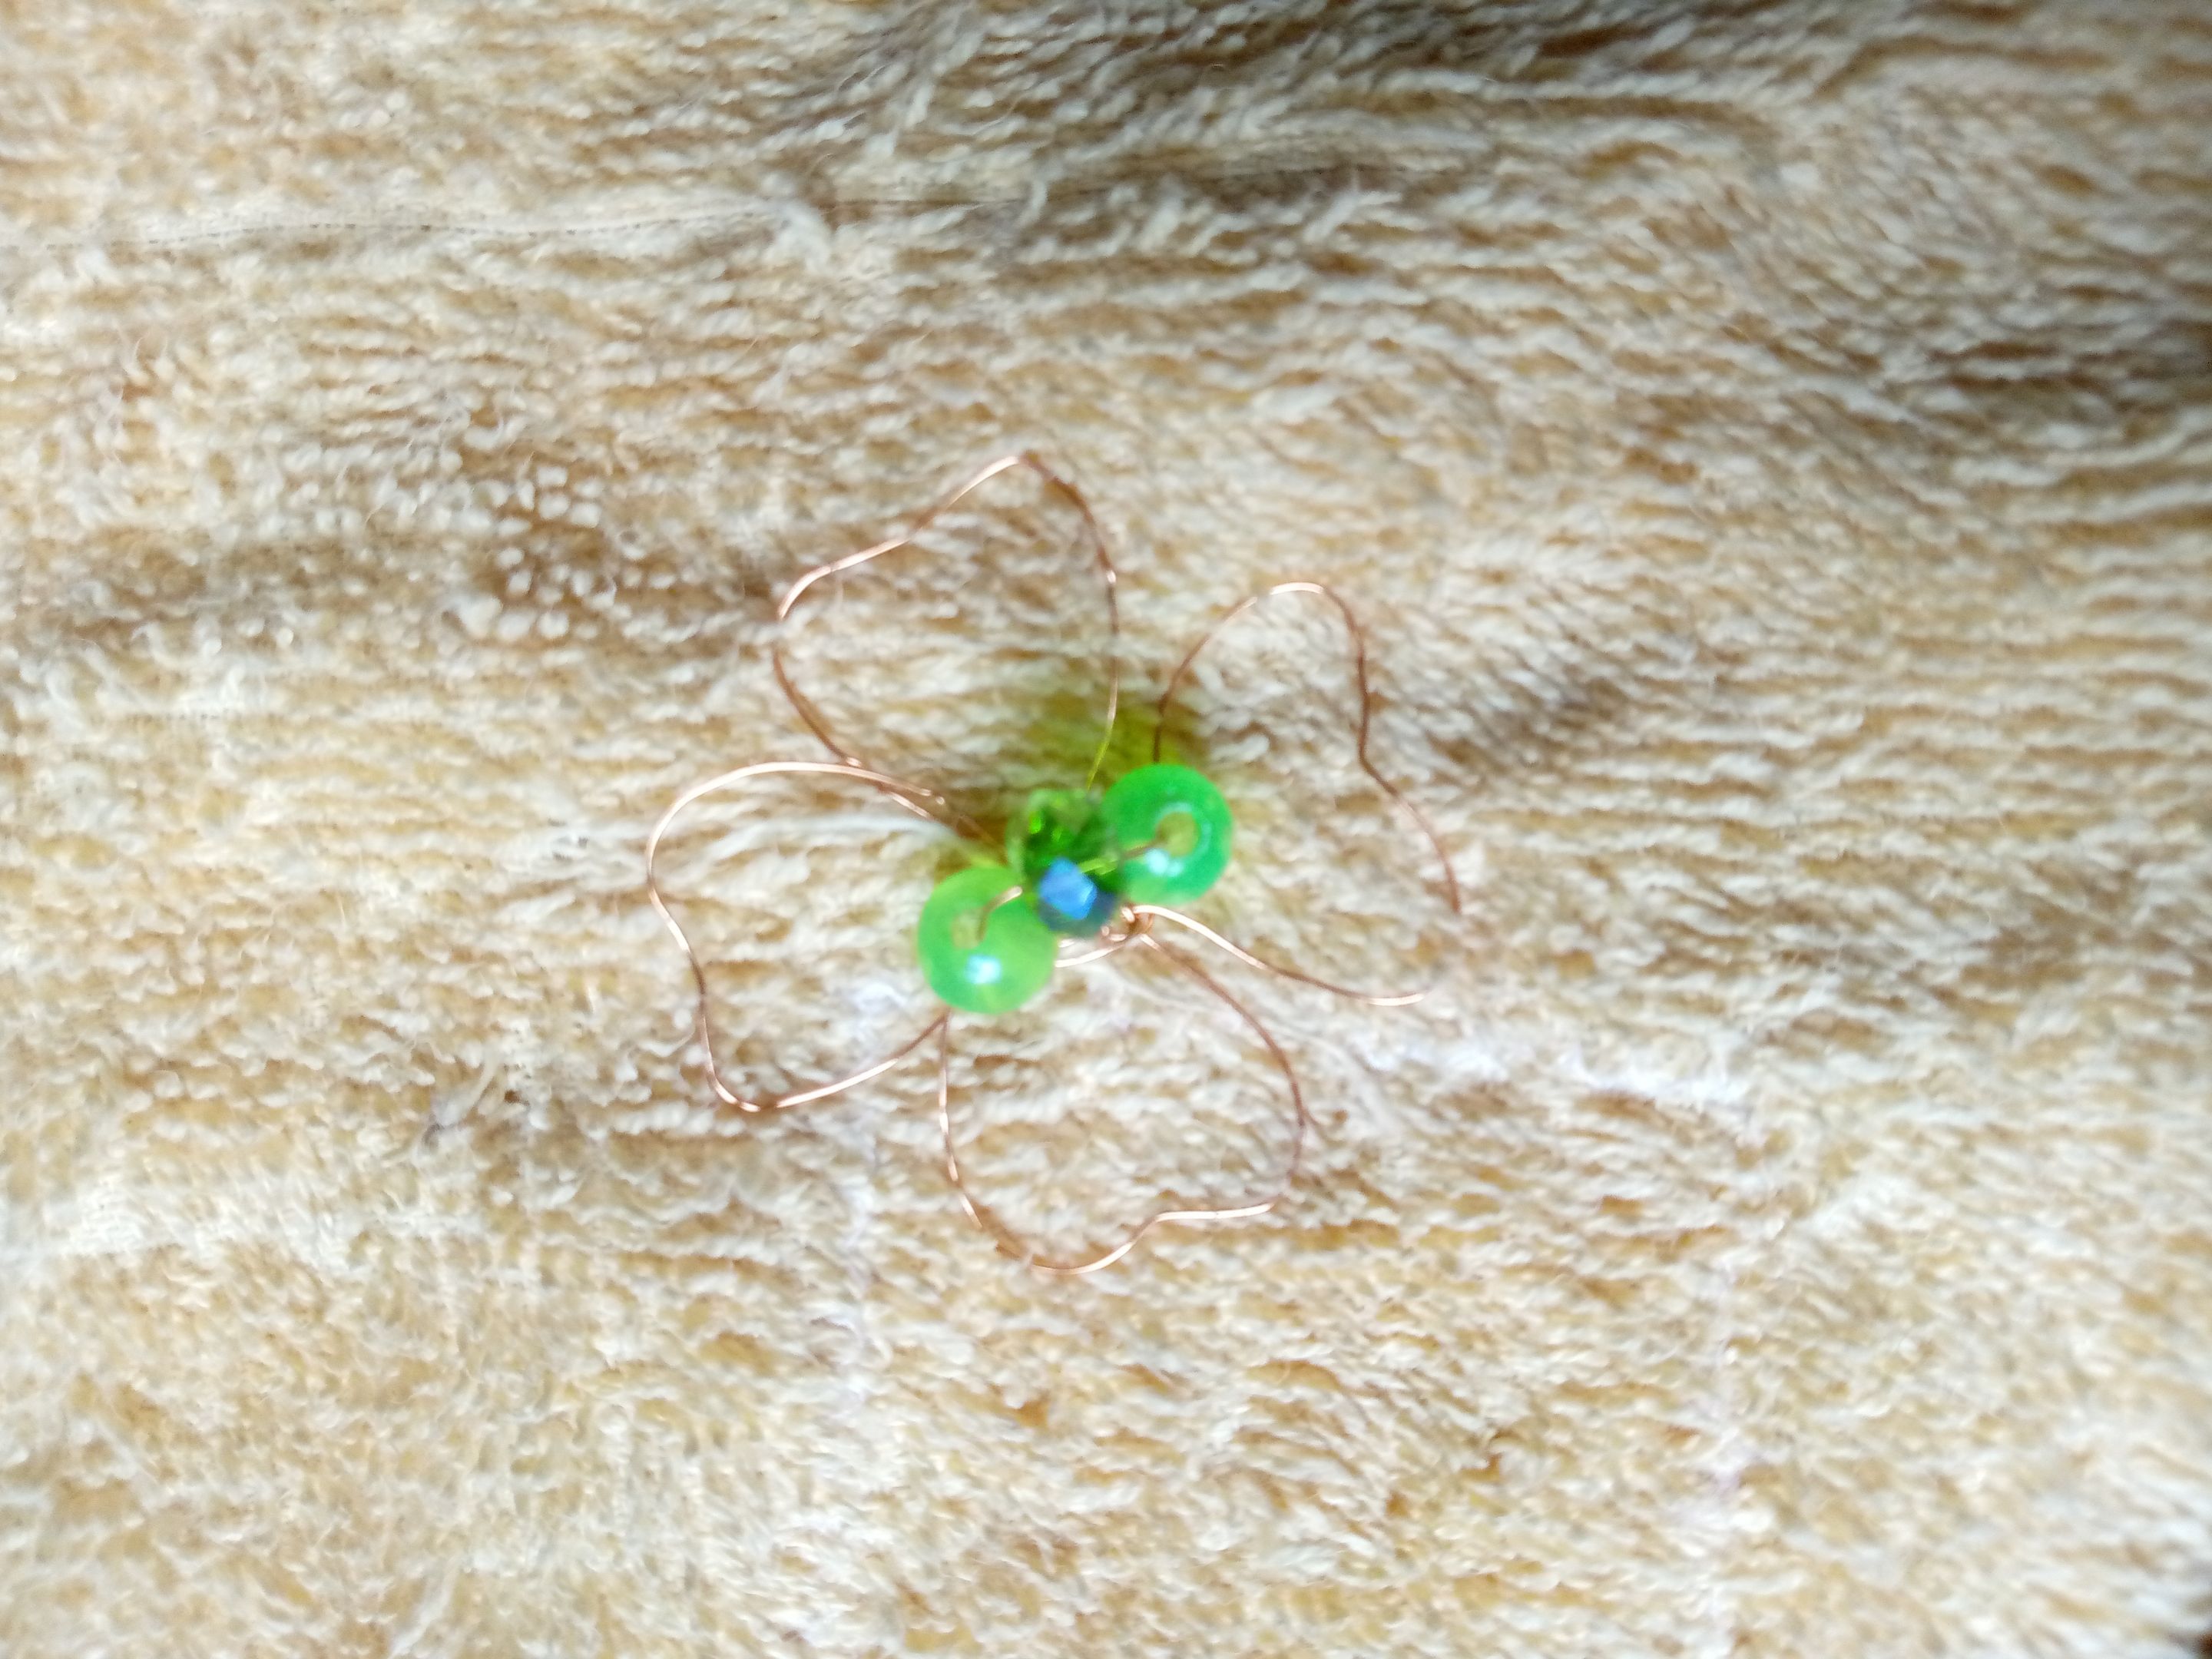
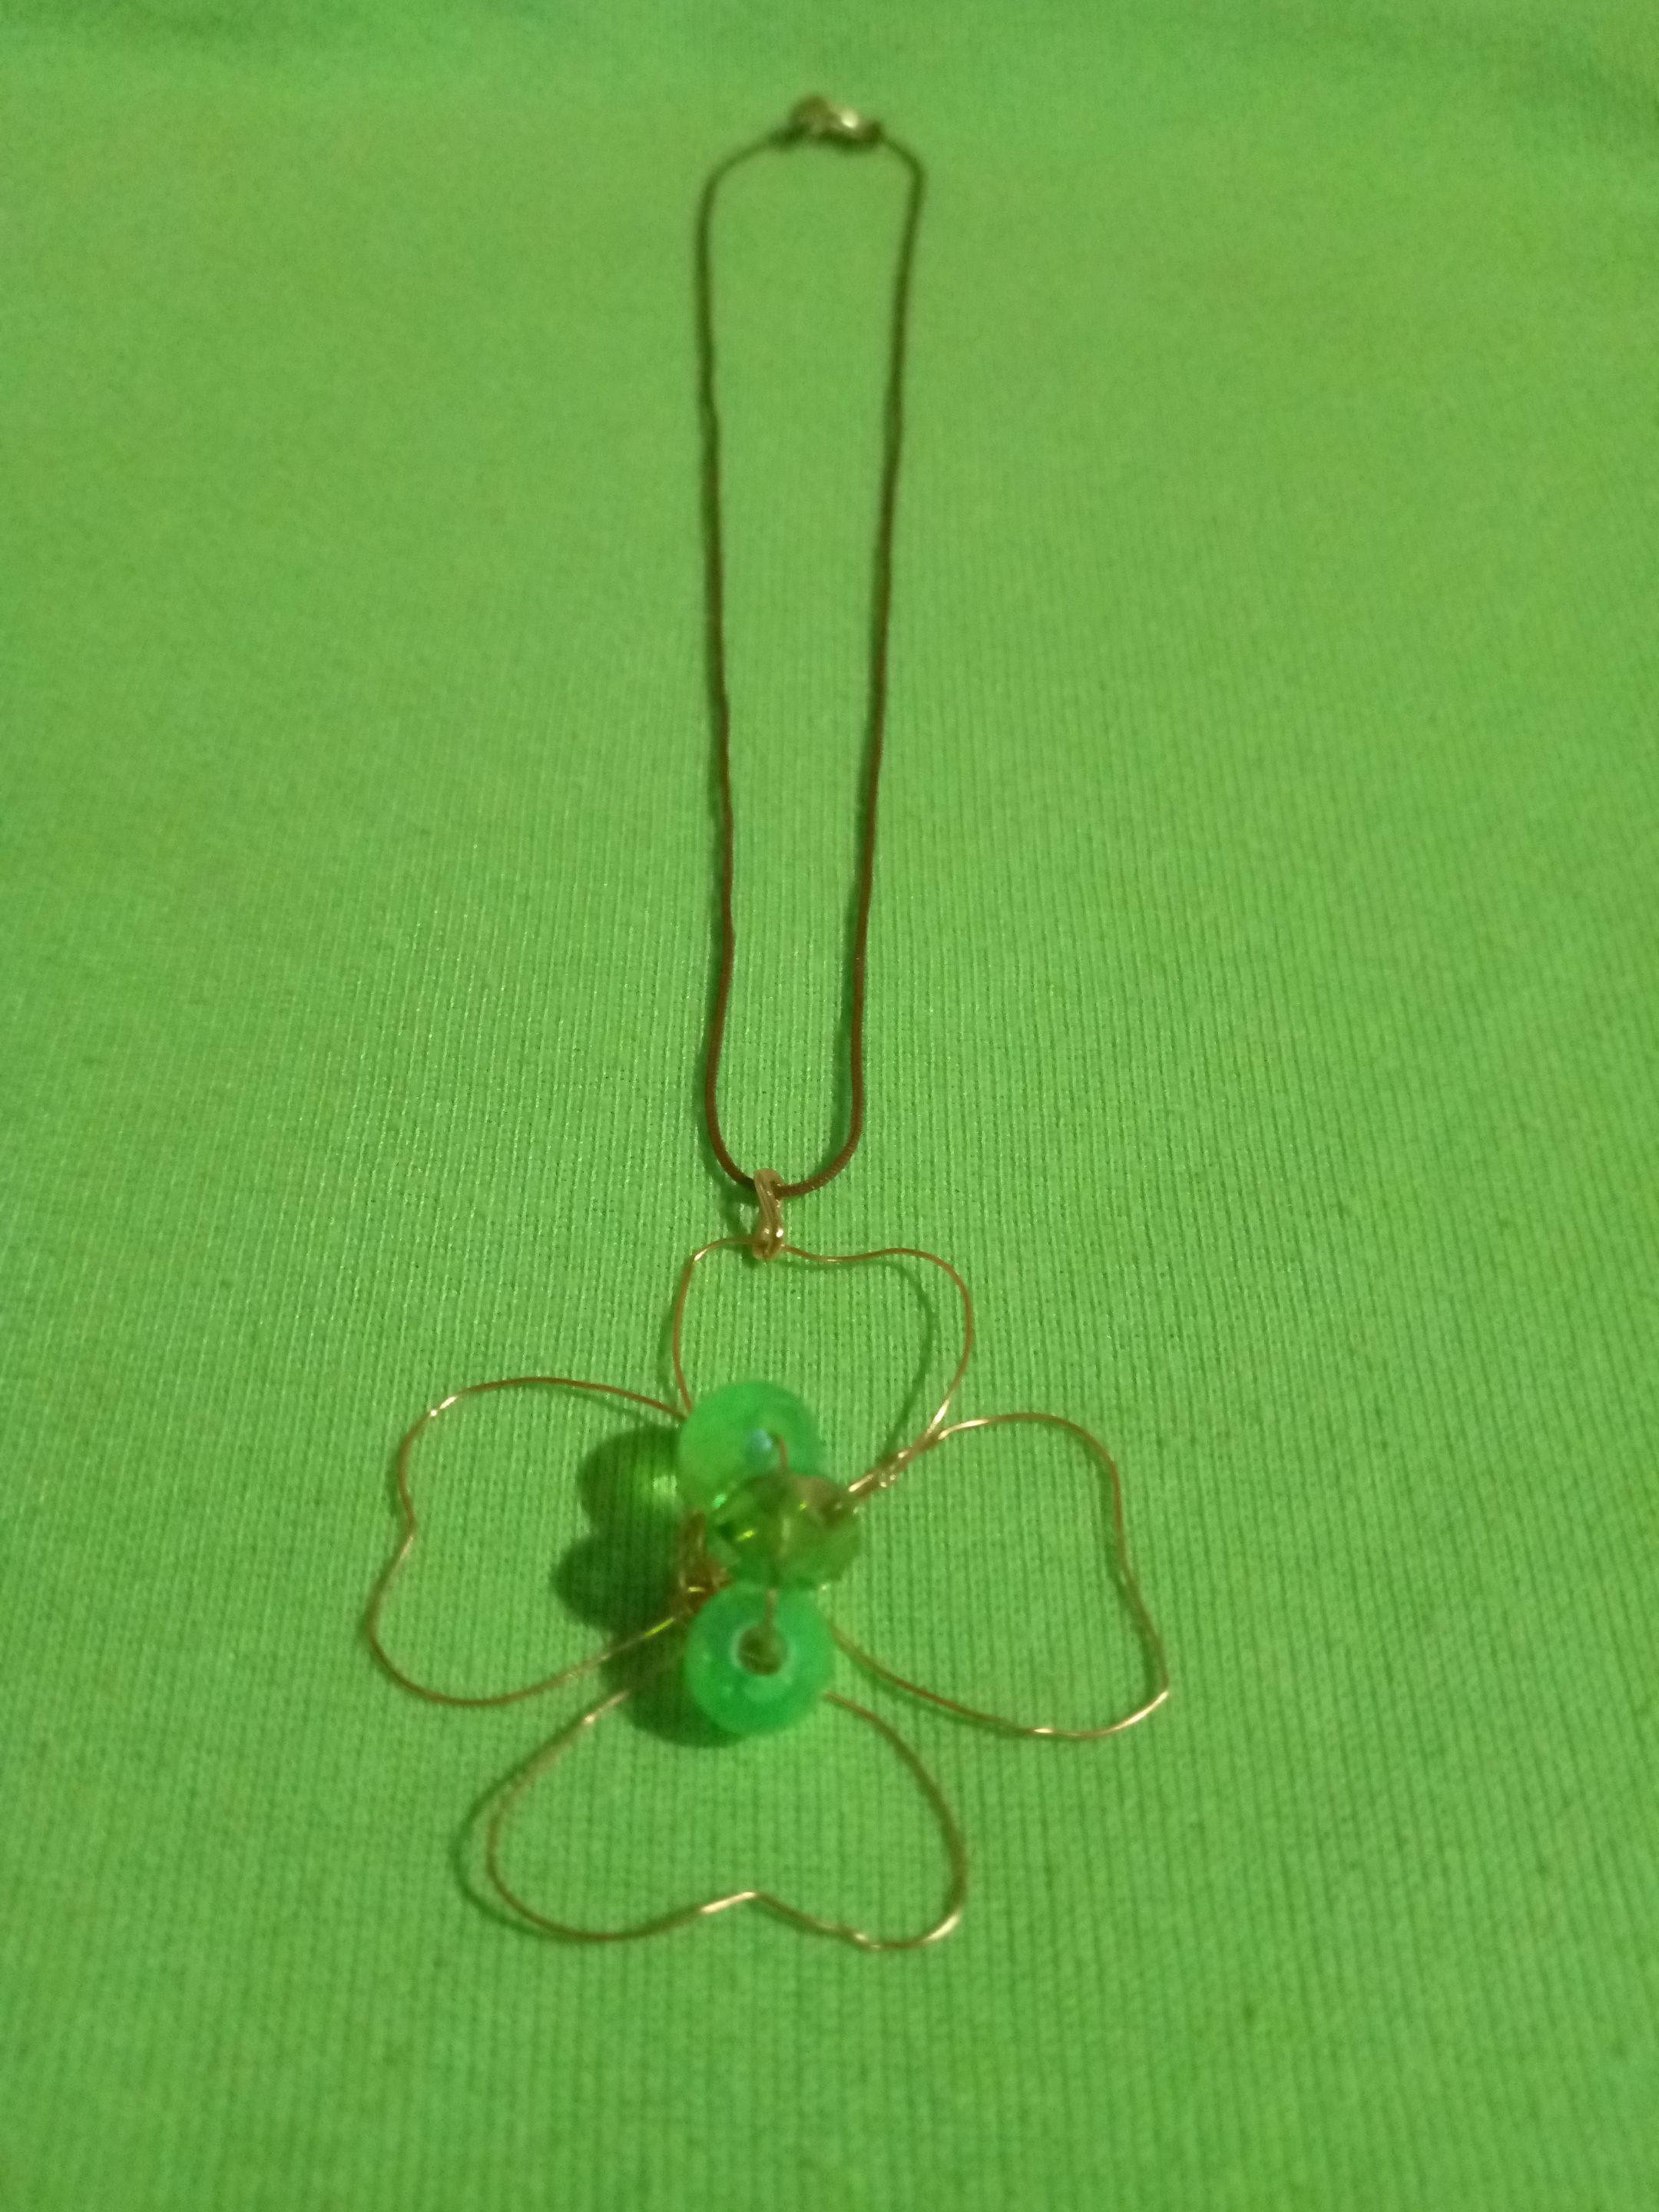
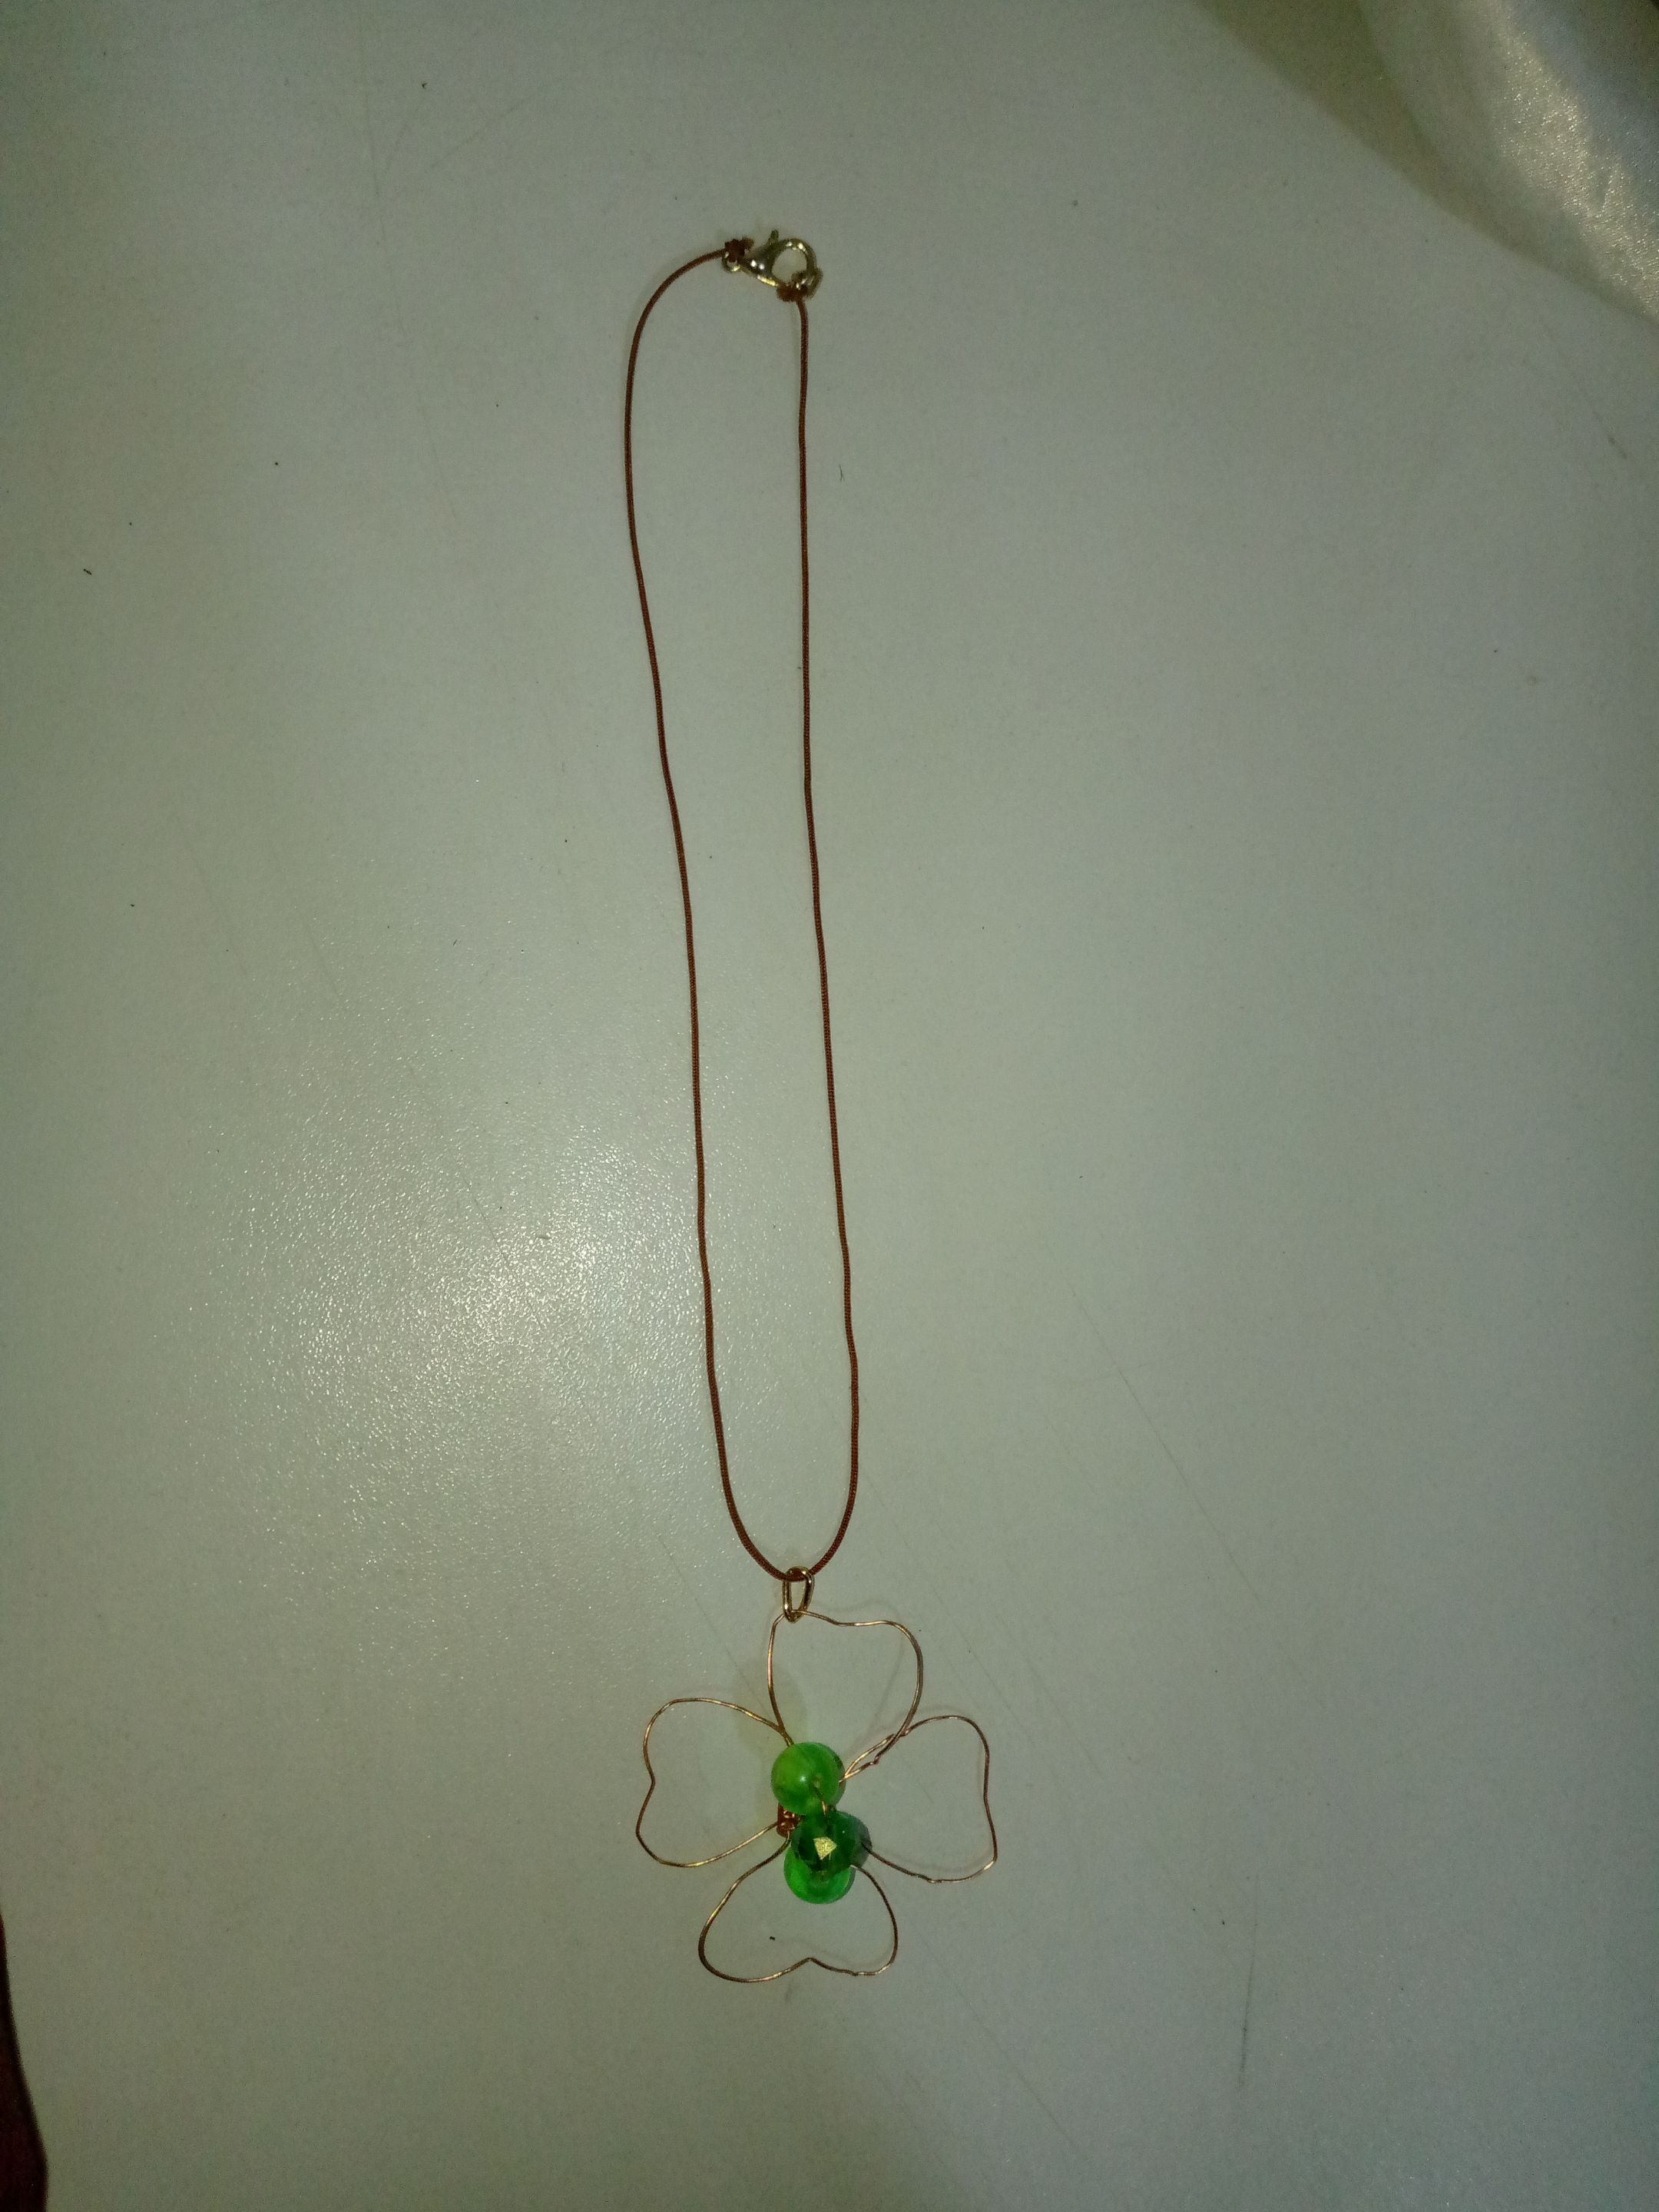
Once ready we will only introduce the stones and we will place them vertically in the clover charm and also once it is ready we take care of closing the back with twists and knots with the wire and clamps so that it is stable and can be tight, it is very easy to do this technique we just have to do it with patience.
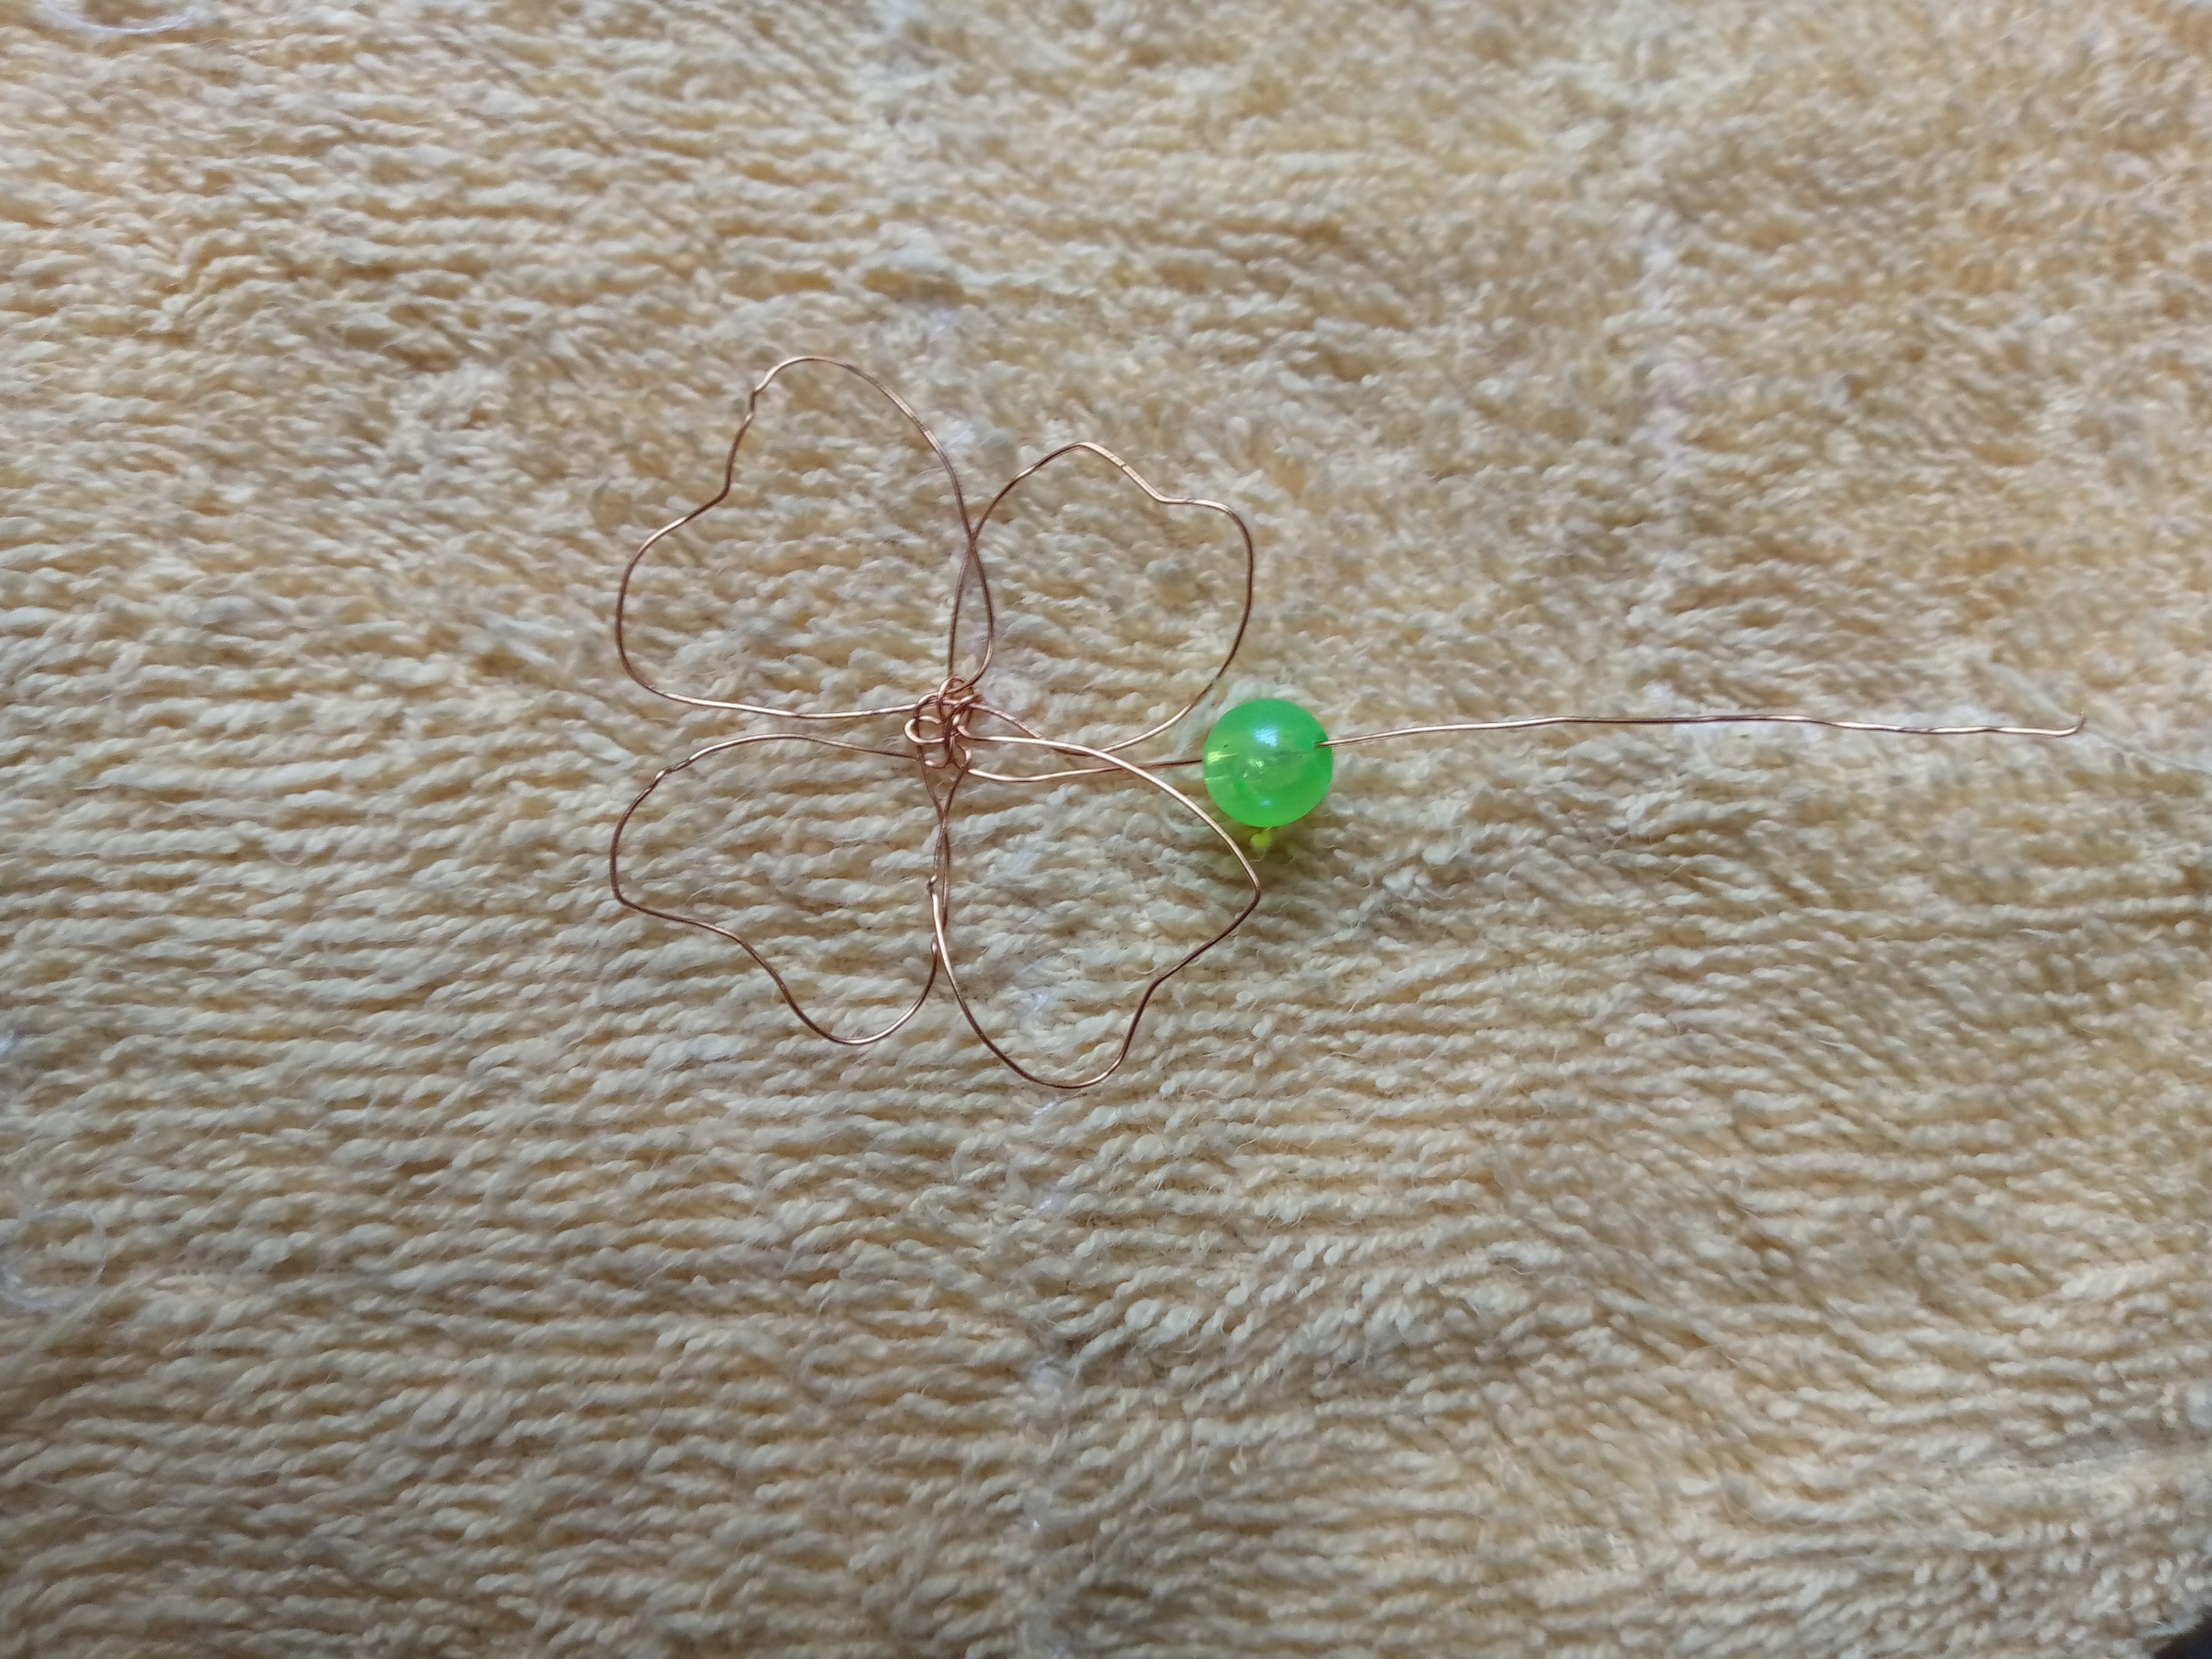
With this we are done with our pendant now what we need to do is to make the body so we can make the solitaire clover necklace.
Step 7
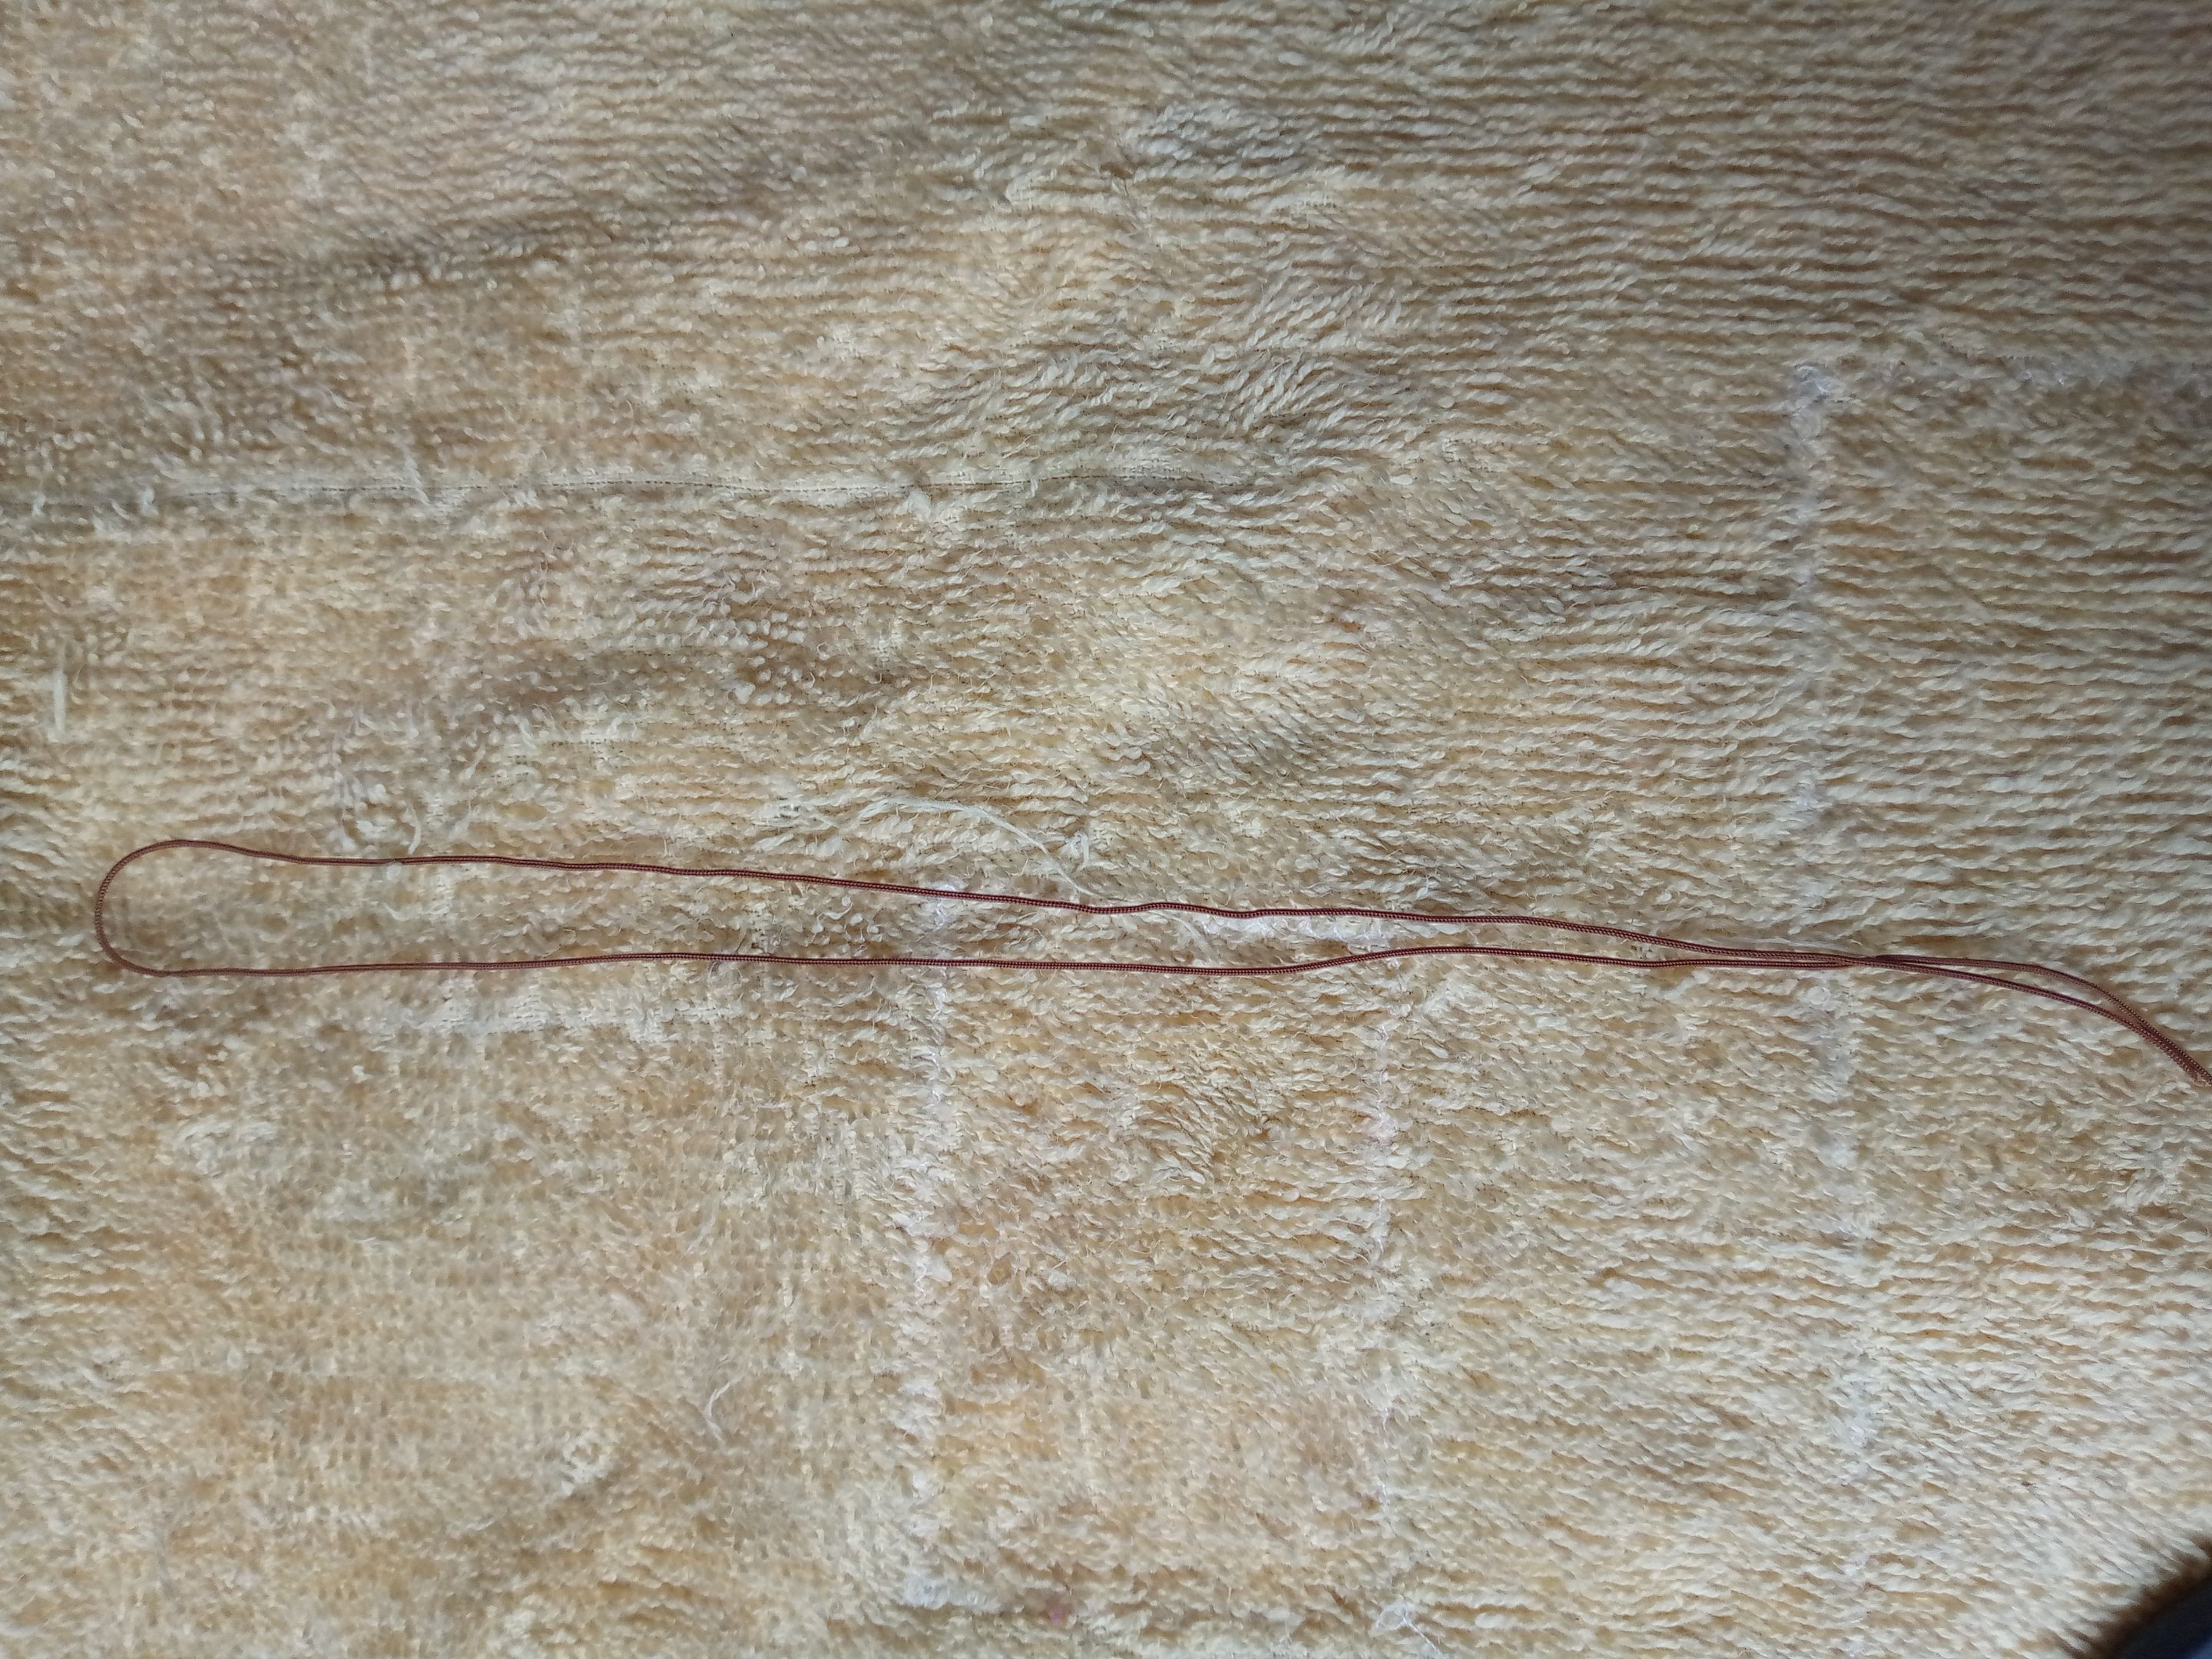
Now we are just going to select the brown Chinese thread to be able to make the body part of the necklace we are going to measure it to our neck, so we can have a little measure of what we are going to do,
Step 8
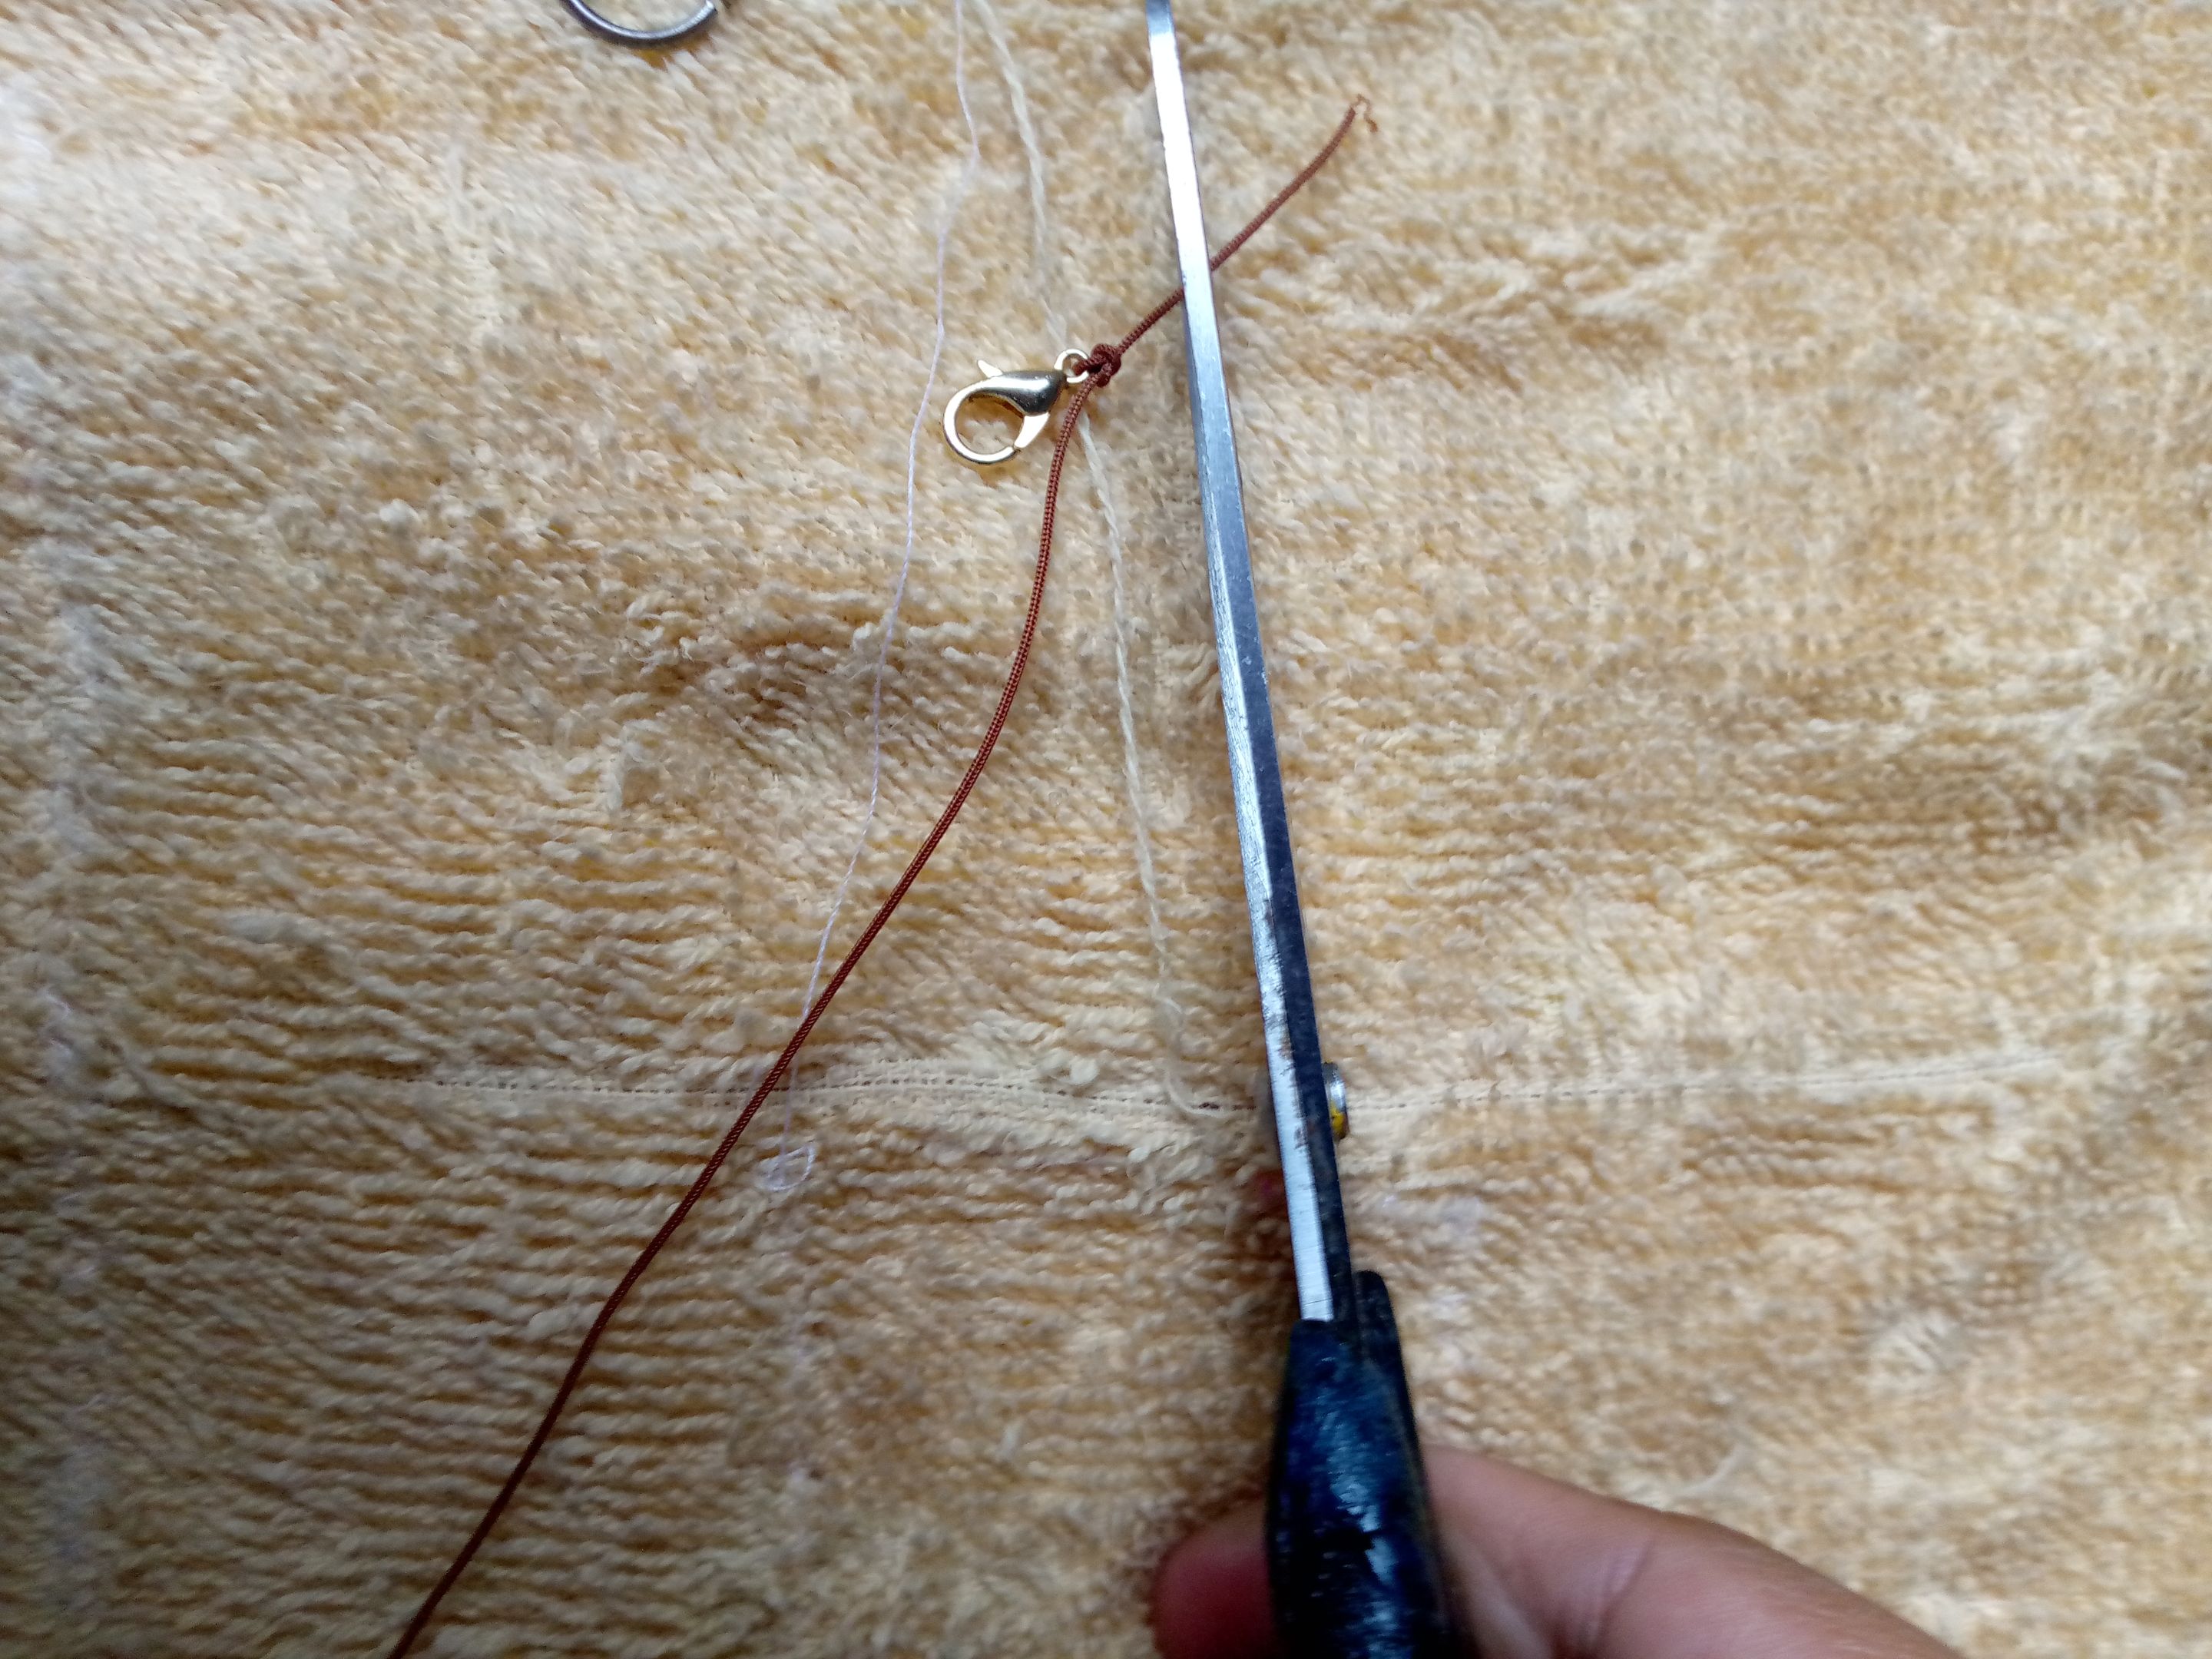
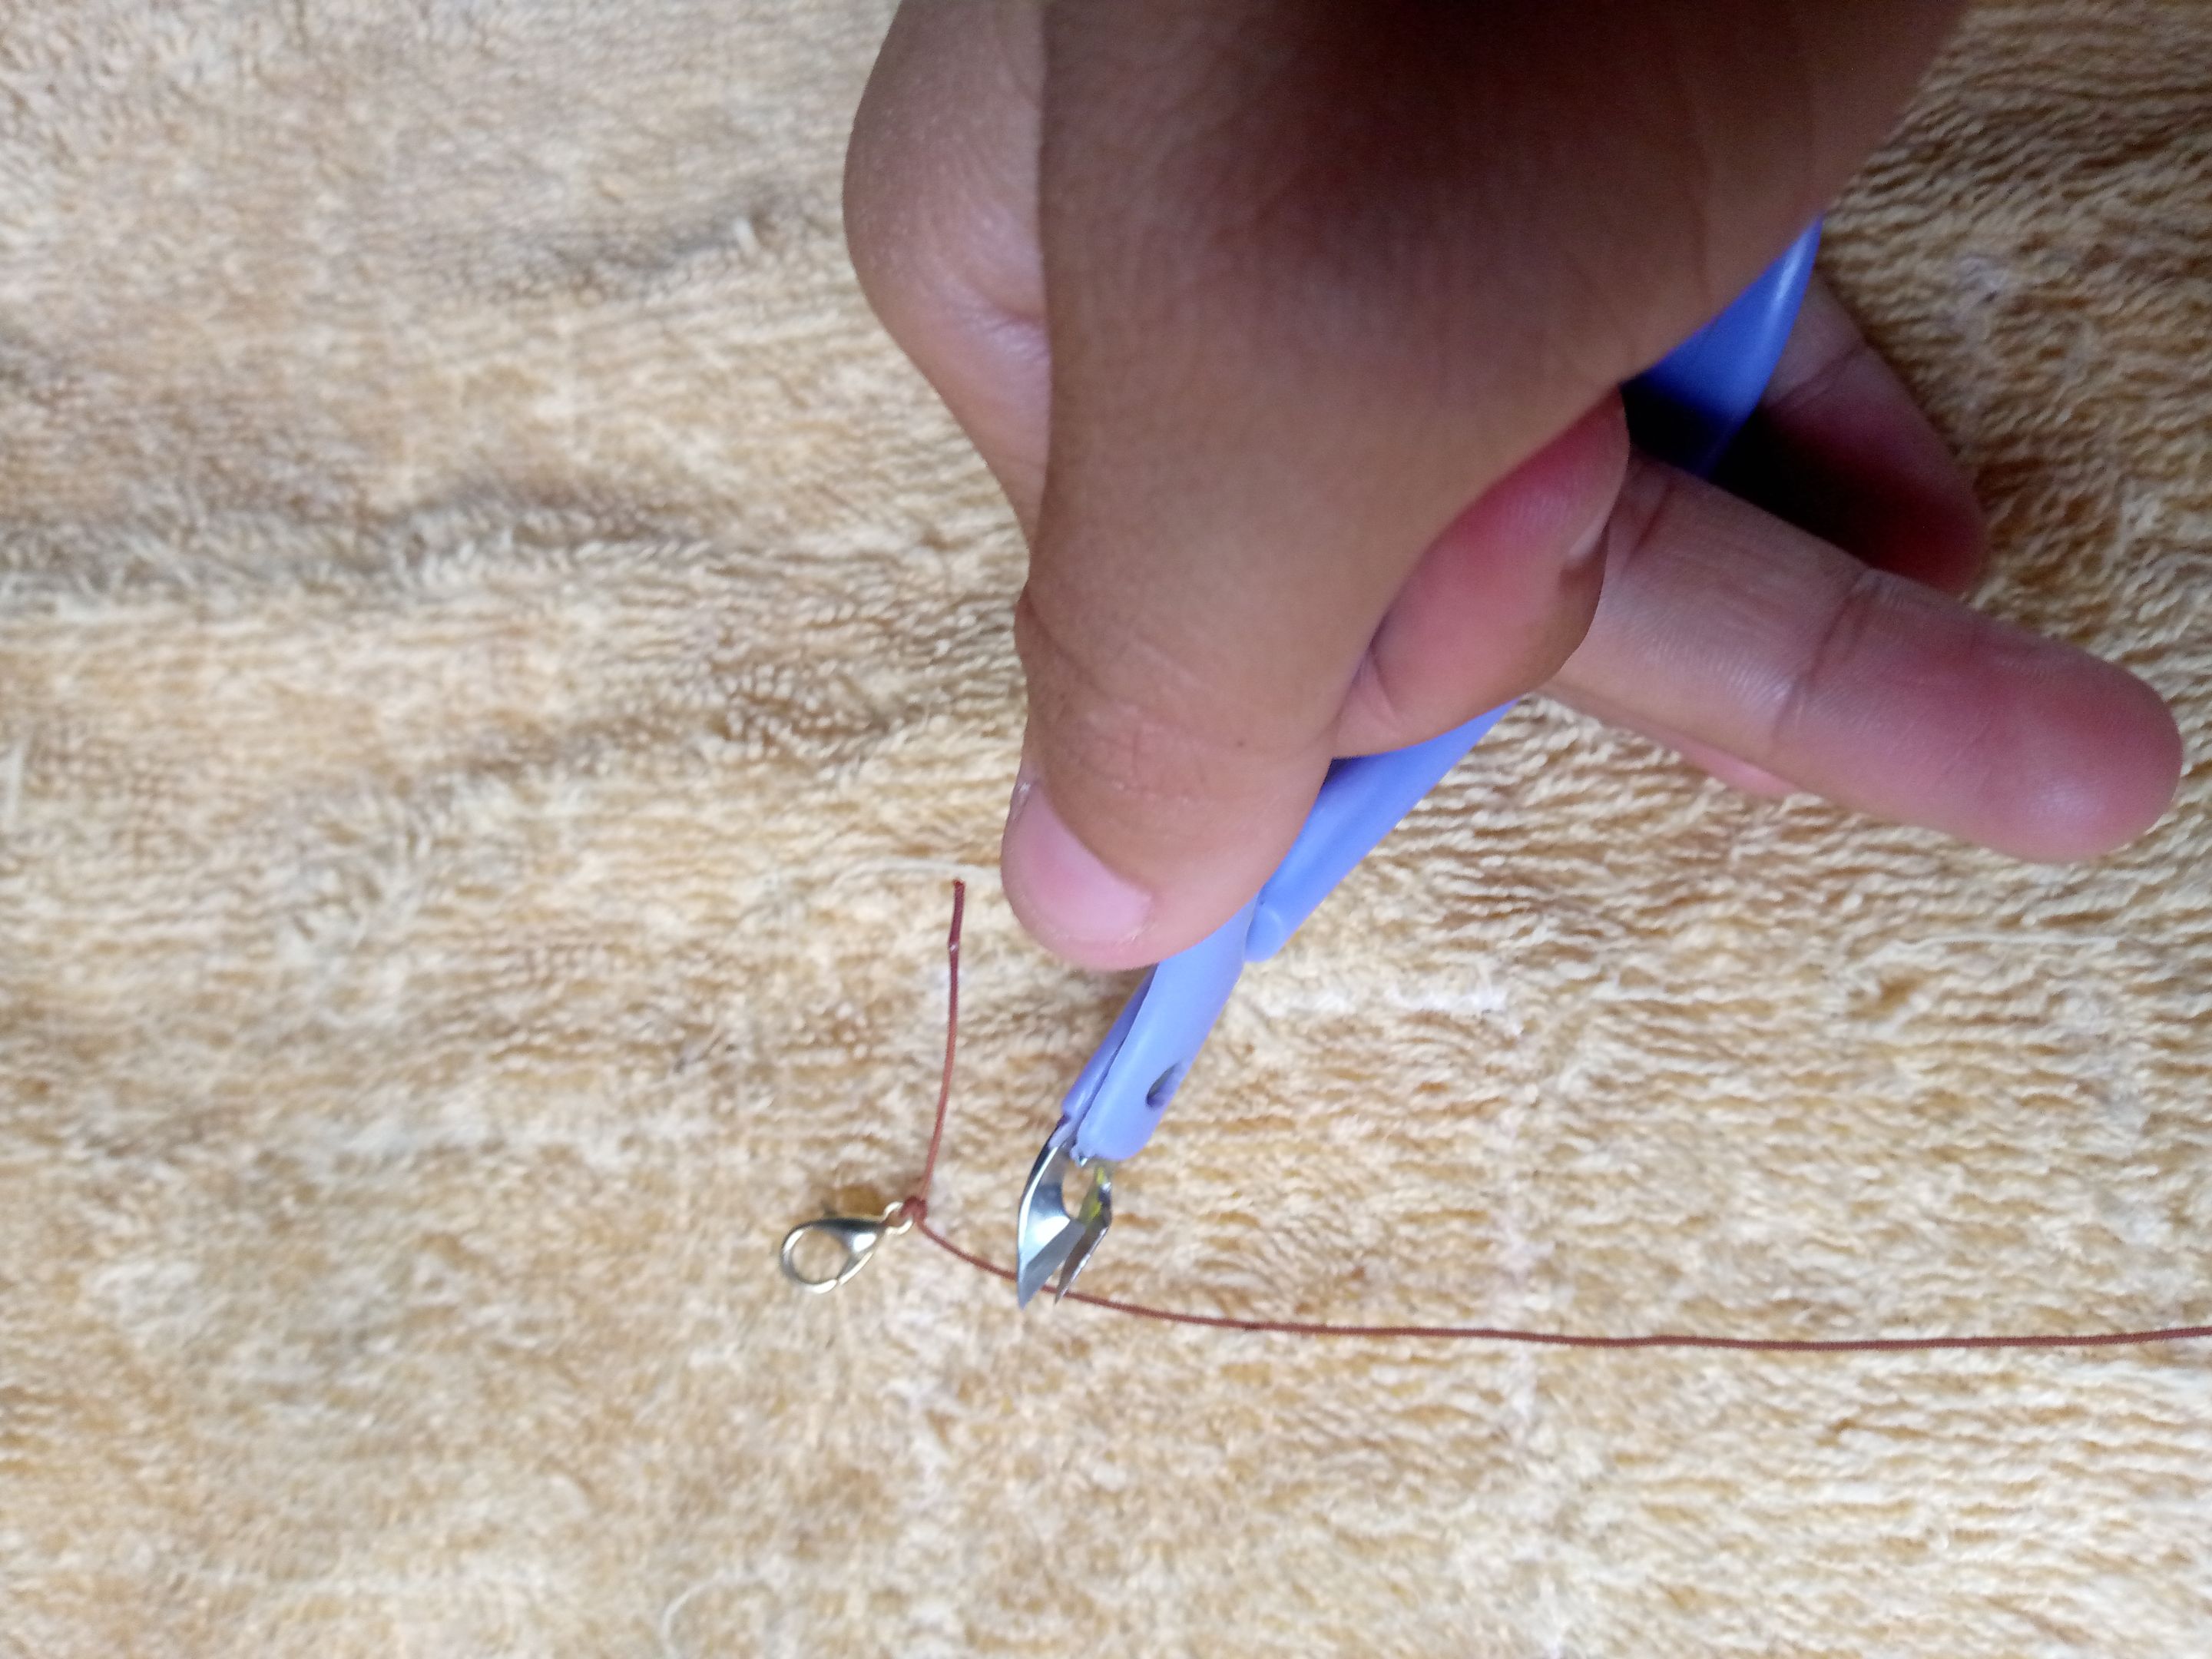
Now we are only going to place the hoop and the insurance in both threads of right and left side and these we are going to make two knots in each side and then the excess threads we are going to cut and if it is to our reach to burn the ends, with a lighter I because I did not have at home but if you can it is much better.
Step 9
Next, we are just going to place a ring on any part of the clover and we are going to place it in the middle of our Chinese thread so that it can have a body and be a solitaire necklace inspired by HEALER FOREST.

I hope you like it very much and I hope you can join this wonderful community of @Holozing a big hug my dear readers thanks for stopping by to support blessings and success for all.
UNTIL NEXT TIME!😊


Hola mis queridos amigos de esta comunidad un gusto saludarles nuevamente, Espero que se encuentren muy bien con grandes energías en esta nueva semana y en este primer día de el mes de abril estoy muy encantada de seguir creando contenido.
El día de hoy quise hacer un collar solitario con dije de trébol inspirado en la curadora del bosque healer forest, Realmente esta es una de mis favoritas, ella me inspira mucho y me encanta el color que representa la naturaleza, Espero que puedan animarse a realizar hermosas y delicadas creaciones difíciles y fácil de hacer como lo es este collar.
Los materiales utilizados en la elaboración fueron los siguientes:
- Tres piedras verdes
- Pinza
- Hilo Chino color marron
- Alambre de bisutería
- Aro
- Seguro
- Base de enrollar Hilo
!Comencemos a Trabajar!
Paso 1
Lo primero que vamos a hacer es tomar el alambre y vamos a medirlo vamos a dejar un largo adecuado para que así nos sobre y no falta a la hora de realizar nuestro diseño.
Paso 2
Ahora lo que vamos a hacer es tomar la base de enrollar el hilo verdad que fue una de las cosas que conseguí para poder hacer el círculo en el alambre de manera a que quede del mismo tamaño y forma lo único que vamos a hacer es poner el alambre.
Paso 3
Luego de ya tener el alambre en la base vamos a sujetar con el dedo y vamos a ir enrollando hasta formar los cuatro círculos con el alambre va a quedar así de esta manera.
Paso 4
Ahora lo que nos vamos a encargar es de realizar los giros de los cuatro lados pero planamente una vez ya estando Los aros o los círculos mejor dicho.
Paso 5
Ahora vamos a ir apretando con la pinza poco a poco y delicadamente tomamos el alambre y lo pasamos por el medio de los cuatro así como sale de esta manera.
También cuando ya estén armados los círculos con las manos le daremos los toques ondulados de forma de corazón para que así parezca realmente un trébol.
Paso 6
Una vez ya listo solo vamos a introducir las piedras y estás la vamos a colocar de manera vertical en el dije de trébol a también una vez ya cuando esté listo nos encargamos de cerrar por la parte detrás con giros y nudos con el alambre y las pinza de manera que quede estable y pueda quedar apretado, es muy fácil de hacer esta técnica solo tenemos que hacerlo con paciencia.
Ya con esto terminamos con nuestro dije ahora lo que nos falta es hacer el cuerpo para así poder hacer el collar solitario de trébol.
Paso 7
Ahora solo vamos a seleccionar el hilo chino color marrón para poder hacer la parte del cuerpo del collar vamos a medirlo a nuestro cuello, para así poder tener un poco de medida de lo que vamos a hacer,
Paso 8
Ahora solo vamos a colocar el aro y el seguro en ambos hilos de lado derecho e izquierdo y estos le vamos a realizar dos nudos en cada lado y luego los hilos sobrantes vamos a cortar y si está a nuestro alcance quemar las puntas,con un encendedor yo porque no tenía en casa pero si ustedes pueden es mucho mejor.
Paso 9
Después solo vamos a colocar una argolla en cualquiera parte del trébol y este lo vamos a colocar en el medio de nuestro hilo chino para que así pueda quedar con un cuerpo y ser un collar solitario inspirado en HEALER FOREST.
Así de esta manera ah quedado nuestro bonito collar espero que les guste mucho ojalá y puedan unirse a esta maravillosa comunidad de @Holozing un fuerte abrazo mis queridos lectores gracias por pasar apoyar bendiciones y éxitos para todos.
HASTA LA PRÓXIMA!😊