✨🍬Hello community! Welcome | ¡Hola comunidad! Bienvenido/a🍬✨
How about surprising your loved ones with a unique, sweet and creative gift? In this post we invite you to discover how to create a beautiful candy bouquet, a delicious and colorful gift alternative that will surely bring smiles and brighten the day of that special person. Through this step-by-step tutorial, you will learn how to combine candies, chocolates and sweets in an original and elegant way, creating a gift made with love and sweetness that will captivate the senses and the heart of the recipient. Get ready to dive into a world of flavors, colors and fun, and discover how a candy bouquet can become the perfect gift for any special occasion! Read on and get ready to spark creativity and sweeten the lives of your loved ones with this charming and delicious detail. 🍬🌸✨
¿Qué tal sorprender a tus seres queridos con un regalo único, dulce y creativo? En este post te invitamos a descubrir cómo crear un hermoso ramo de dulces, una deliciosa y colorida alternativa para regalar que seguramente arrancará sonrisas y alegrará el día de esa persona especial. A través de este tutorial paso a paso, aprenderás a combinar golosinas, chocolates y caramelos de manera original y elegante, creando un regalo hecho con amor y dulzura que cautivará los sentidos y el corazón de quien lo reciba. ¡Prepárate para sumergirte en un mundo de sabores, colores y diversión, y descubre cómo un ramo de dulces puede convertirse en el regalo perfecto para cualquier ocasión especial! Sigue leyendo y prepárate para despertar la creatividad y endulzar la vida de tus seres queridos con este encantador y delicioso detalle. 🍬🌸✨

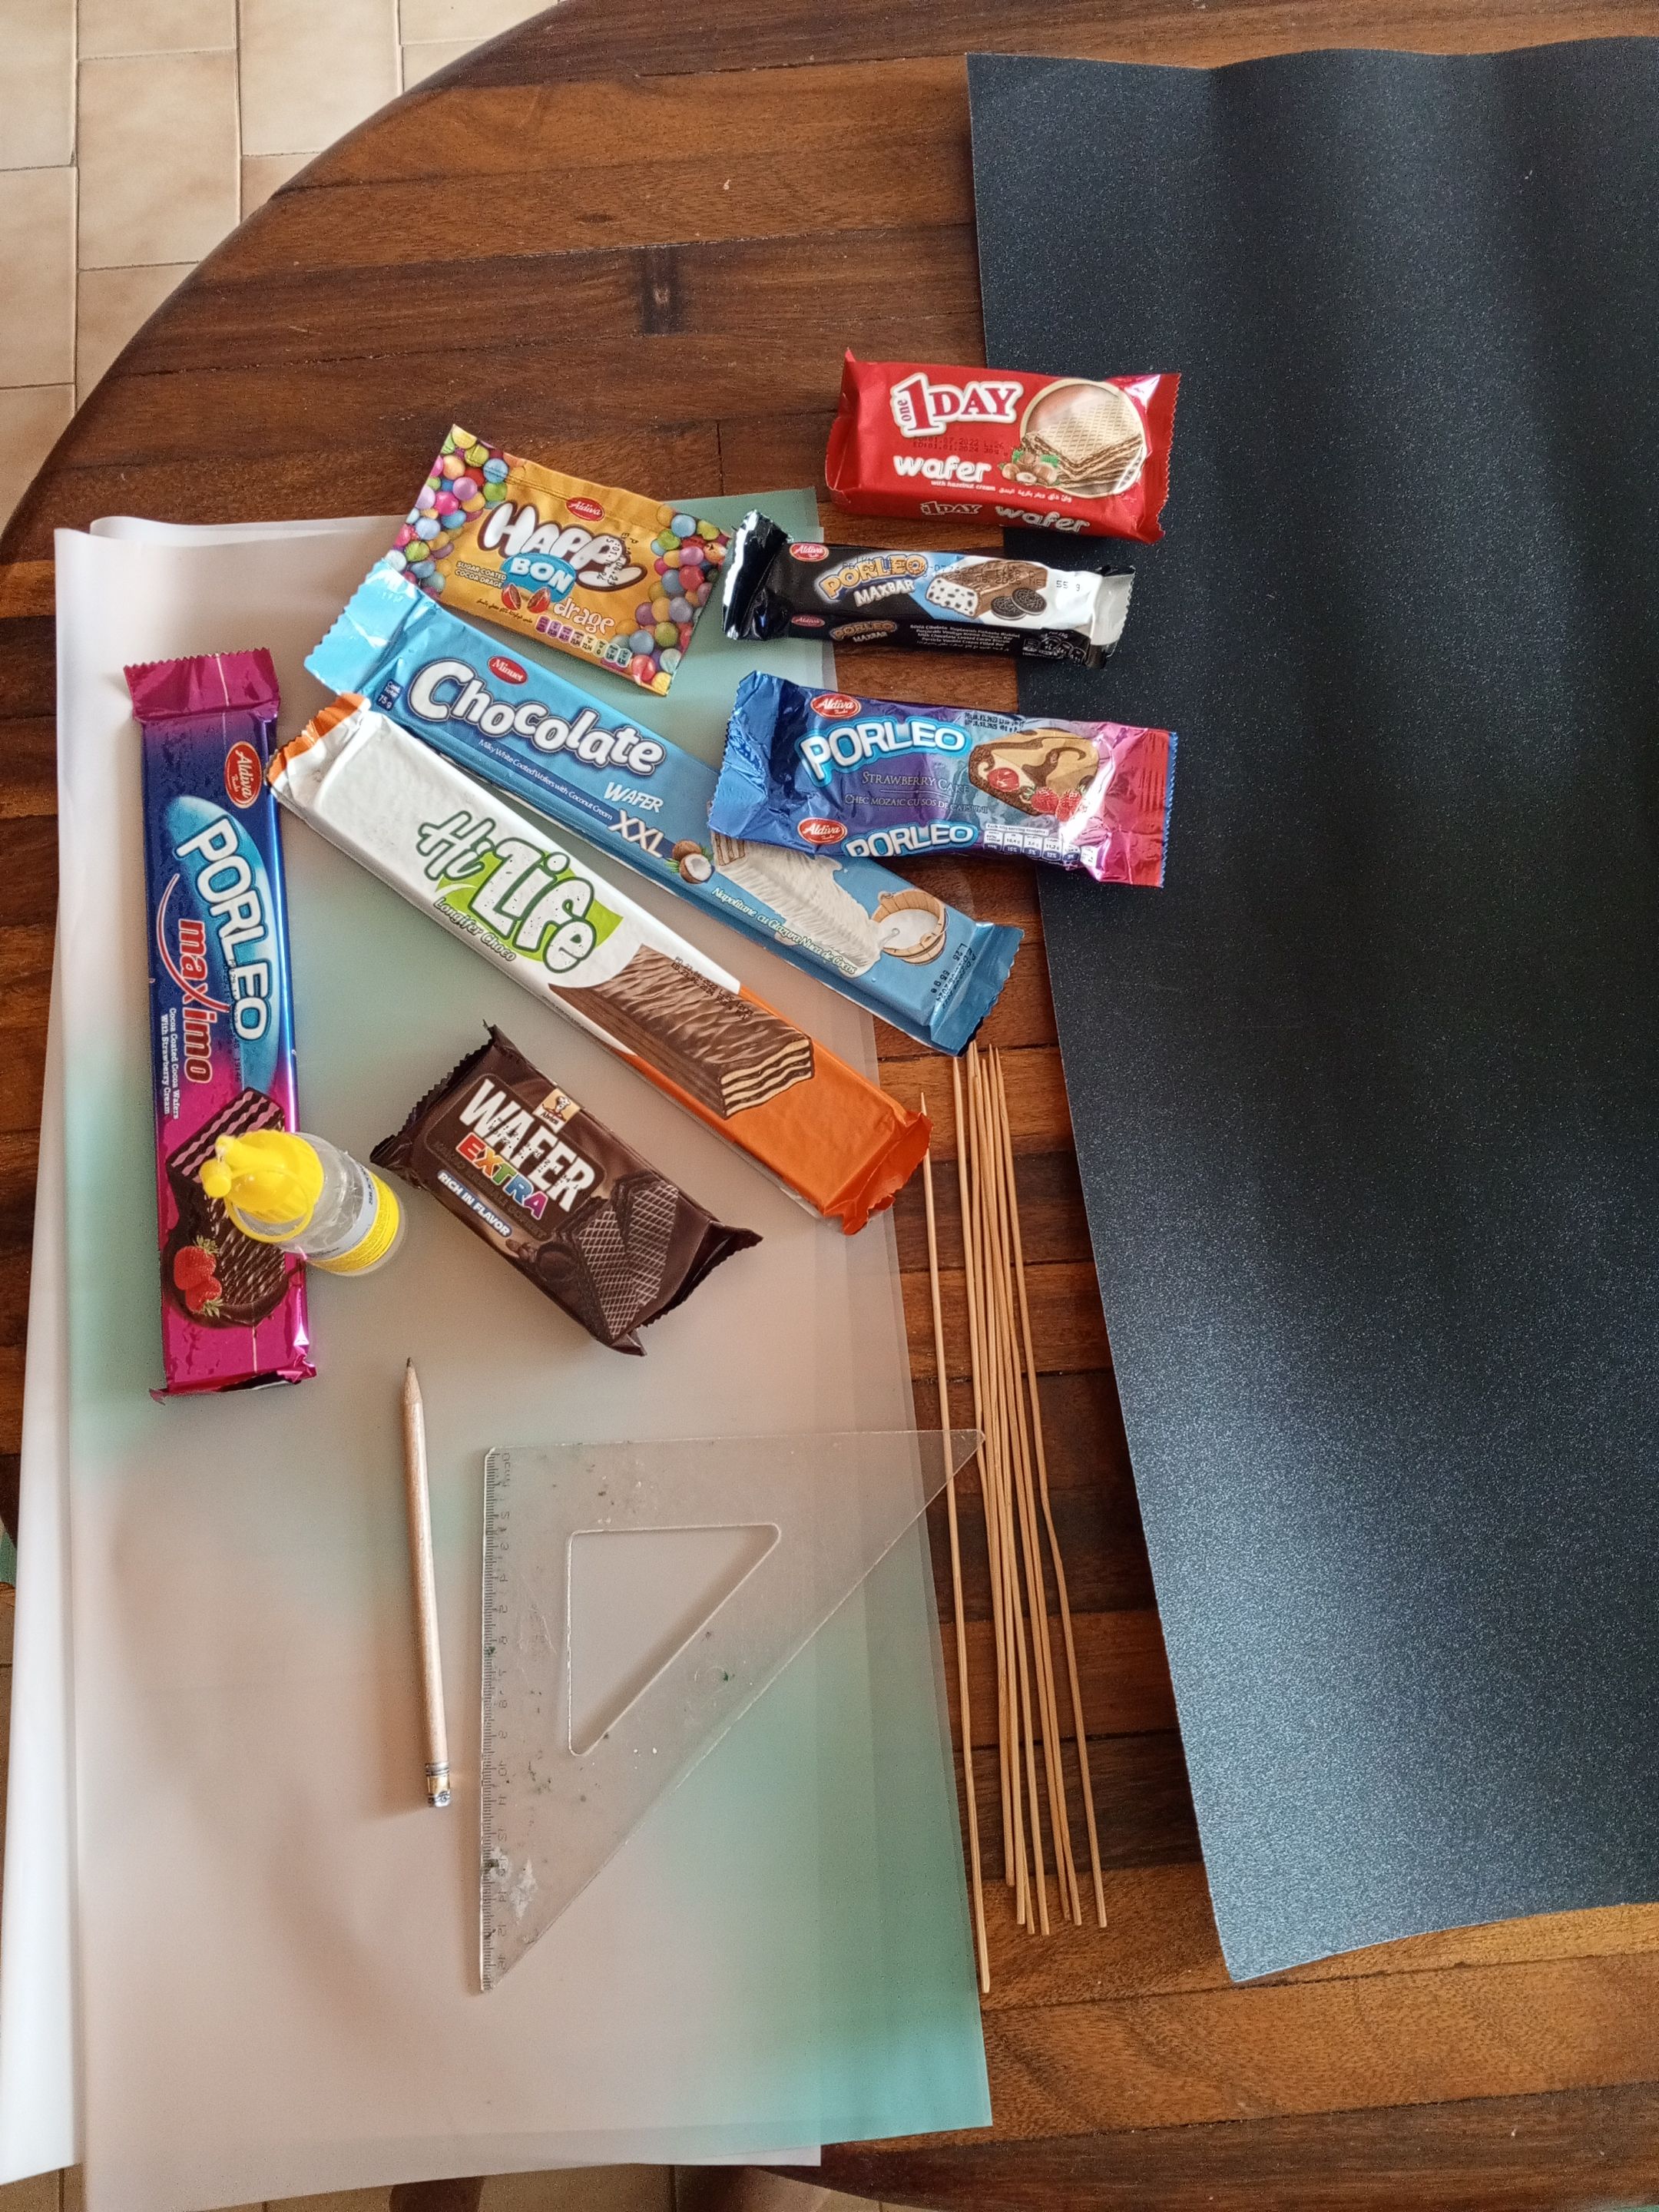
•🍬Materials to be used🍬•
•🍬Materials to be used🍬•
| - Scissor | - Tijera | |
|---|---|---|
| - Hot and cold silicone | - Silicón caliente y frío | |
| - Variety of sweets | - Variedad de dulces | |
| - Korean paper | - Papel coreano | |
| - Height sticks | - Palitos de altura | |
| - Black and red markers | - Marcadores negro y rojo | |
| - Satin ribbon gift ribbon (1m) | - Cinta de regalo de de raso (1m) | |
| - Pencil | - Lápiz | |
| - Rule | - Regla | |
| - Normal black cardboard | - Cartulina negra normal | |
| - Adhesive tape | - Cinta adhesiva | |
| - Black frosted cardboard | - Cartulina escarchado negra |
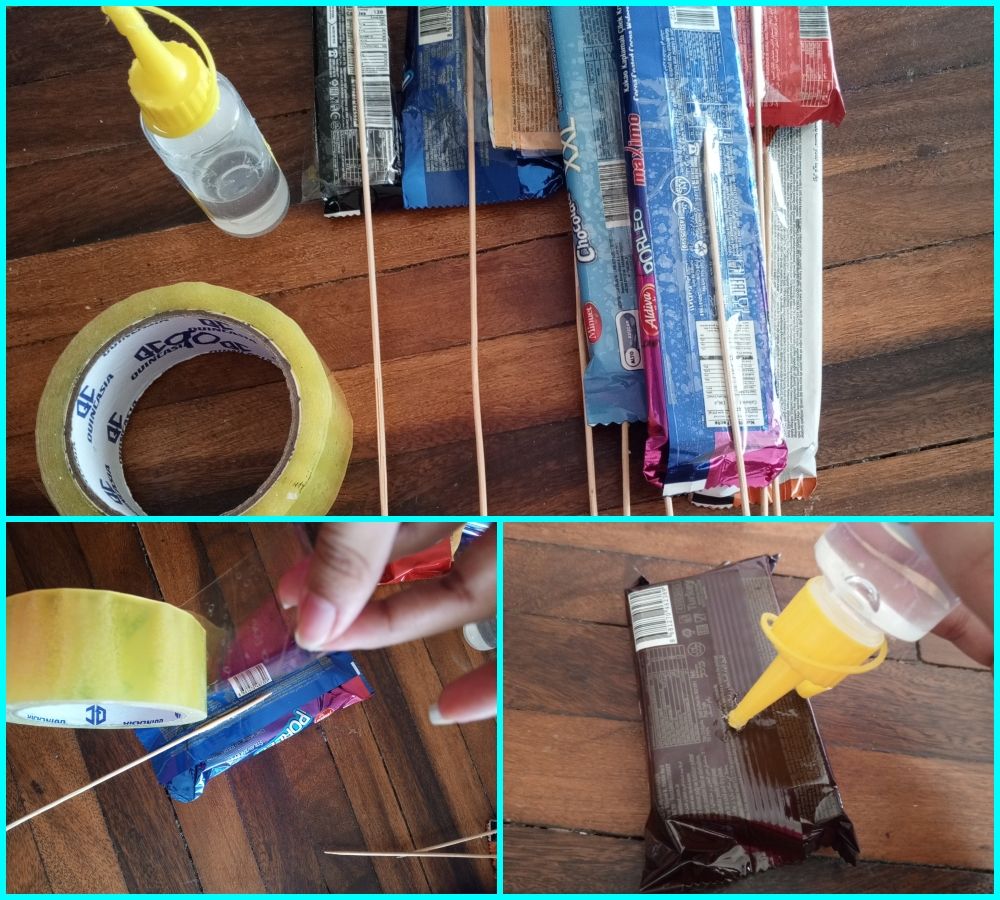
•🍬STEP BY STEP🍬•
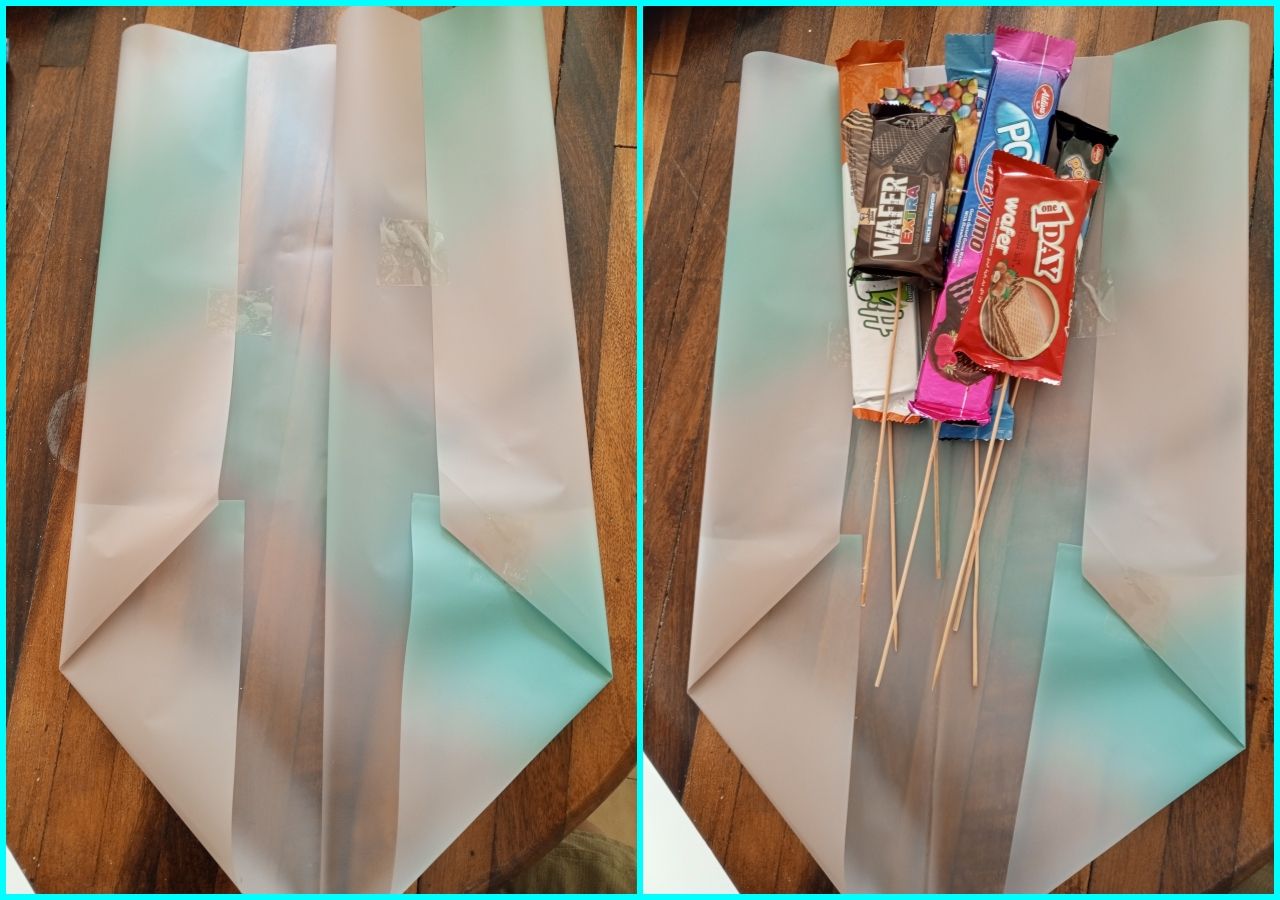
•🍬STEP BY STEP🍬• Comenzaremos agarrando los dulces que compramos para el ramo y le vamos a poner atrás unas góticas de silicón al frio, colocaremos los palitos de altura atrás y encima de esta góticas y finalizamos cortando cinta adhesiva y sellando todo con la cinta. Esto dará más soporte y se adherirá mejor a los dulces porque hay barras de chocolate o galletas que son muy pesadas y puede que se rompan hasta los palitos de altura. Si notas que tus palitos de altura son muy delgados te recomiendo unir dos palitos y envolverlos con cinta adhesiva para darle más fuerza.
We will start by taking the candies we bought for the bouquet and we will put some cold silicone gothic sticks on the back, we will place the tall sticks on the back and on top of the gothic sticks and we will finish by cutting adhesive tape and sealing everything with the tape. This will give more support and will adhere better to the candy because there are chocolate bars or cookies that are very heavy and may break even the height sticks. If you notice that your tall sticks are too thin I recommend joining two sticks together and wrapping them with tape to give them more strength.
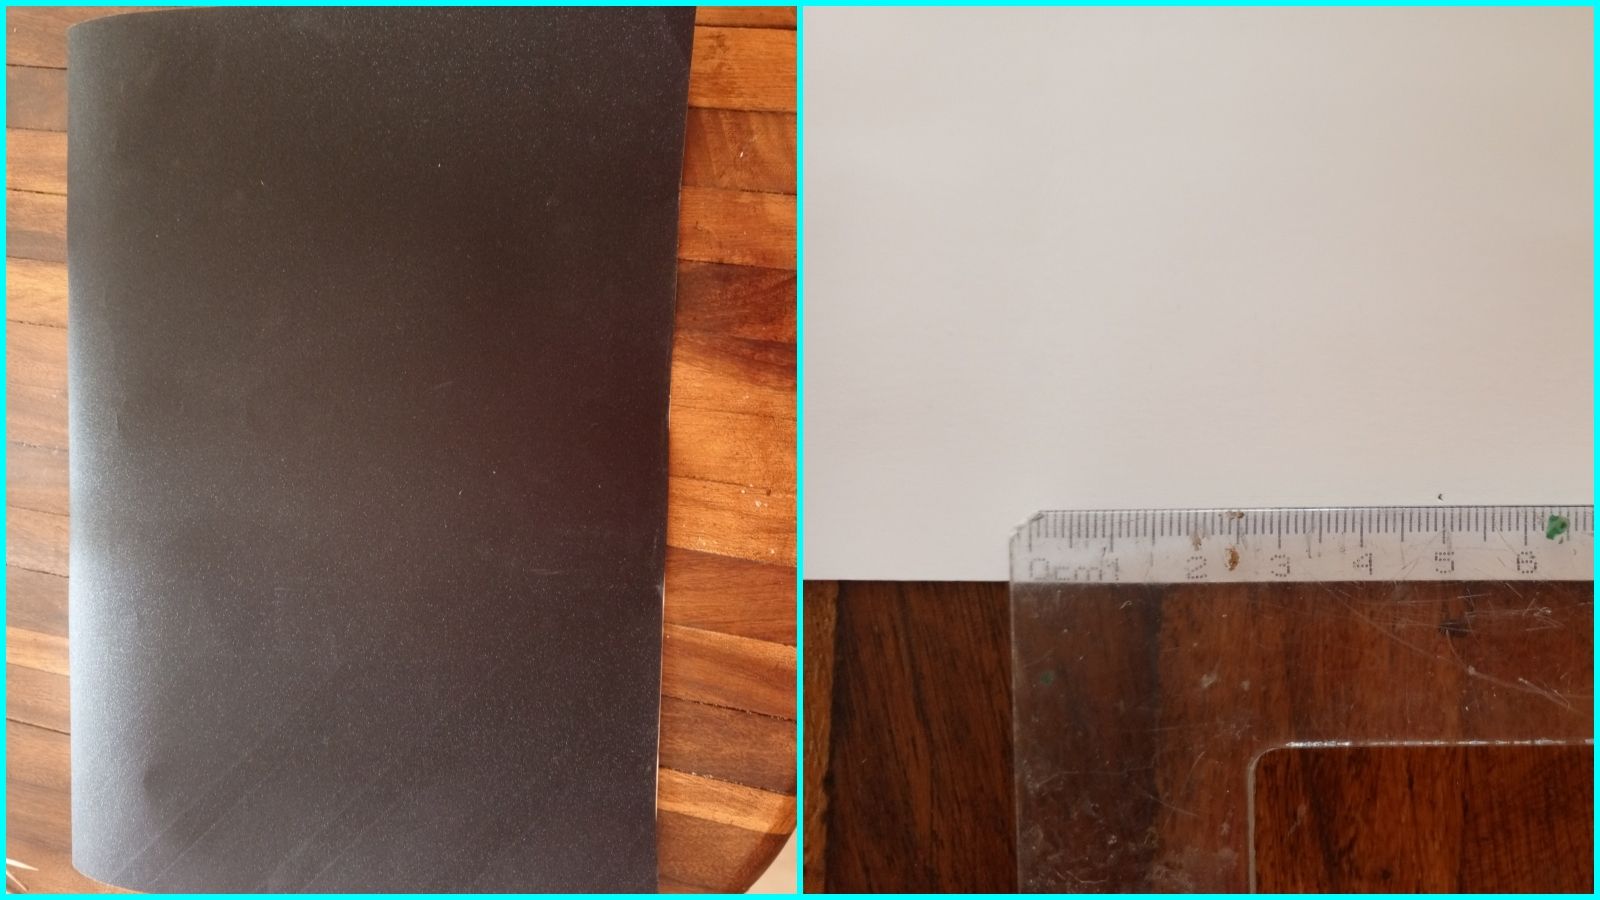
En este paso vamos a doblar nuestra cartulina por la mitad horizontalmente y marcaremos los dobles por la mitad más o menos. La desplegamos y tomando como referencia la línea del centro marcaremos un espacio de 4cm por ambos lados. Cogemos una esquina y la doblamos hacia el centro de la cartulina respetando la marca que ya hemos hecho y haremos lo mismo por el otro lado. Ahora por el lado superior doblaremos 12cm, no obstante, depende de la cantidad de caramelo, si vas a utilizar muy poco caramelo tendrás que doblar más esa solapa. Repite todos los pasos con el papel coreano. Ahora para hacer la parte superior triangular del ramo vamos a coger nuestra cartulina estándar y en una esquina mediremos la longitud de la base inferior, trazamos, cortamos y pegamos.
In this step we are going to fold our cardboard in half horizontally and mark the doubles in half more or less. We unfold it and taking as reference the line in the middle we will mark a space of 4cm for both sides. We take one corner and fold it to the center of the cardboard respecting the mark we have already made and we will do the same on the other side. Now for the top side we will fold 12cm, however, it depends on the amount of candy, if you are going to use very little candy you will have to fold that flap more. Repeat all the steps with the Korean paper. Now to make the triangular top of the bouquet we are going to take our standard cardboard and in one corner we will measure the length of the bottom base, trace, cut and glue.
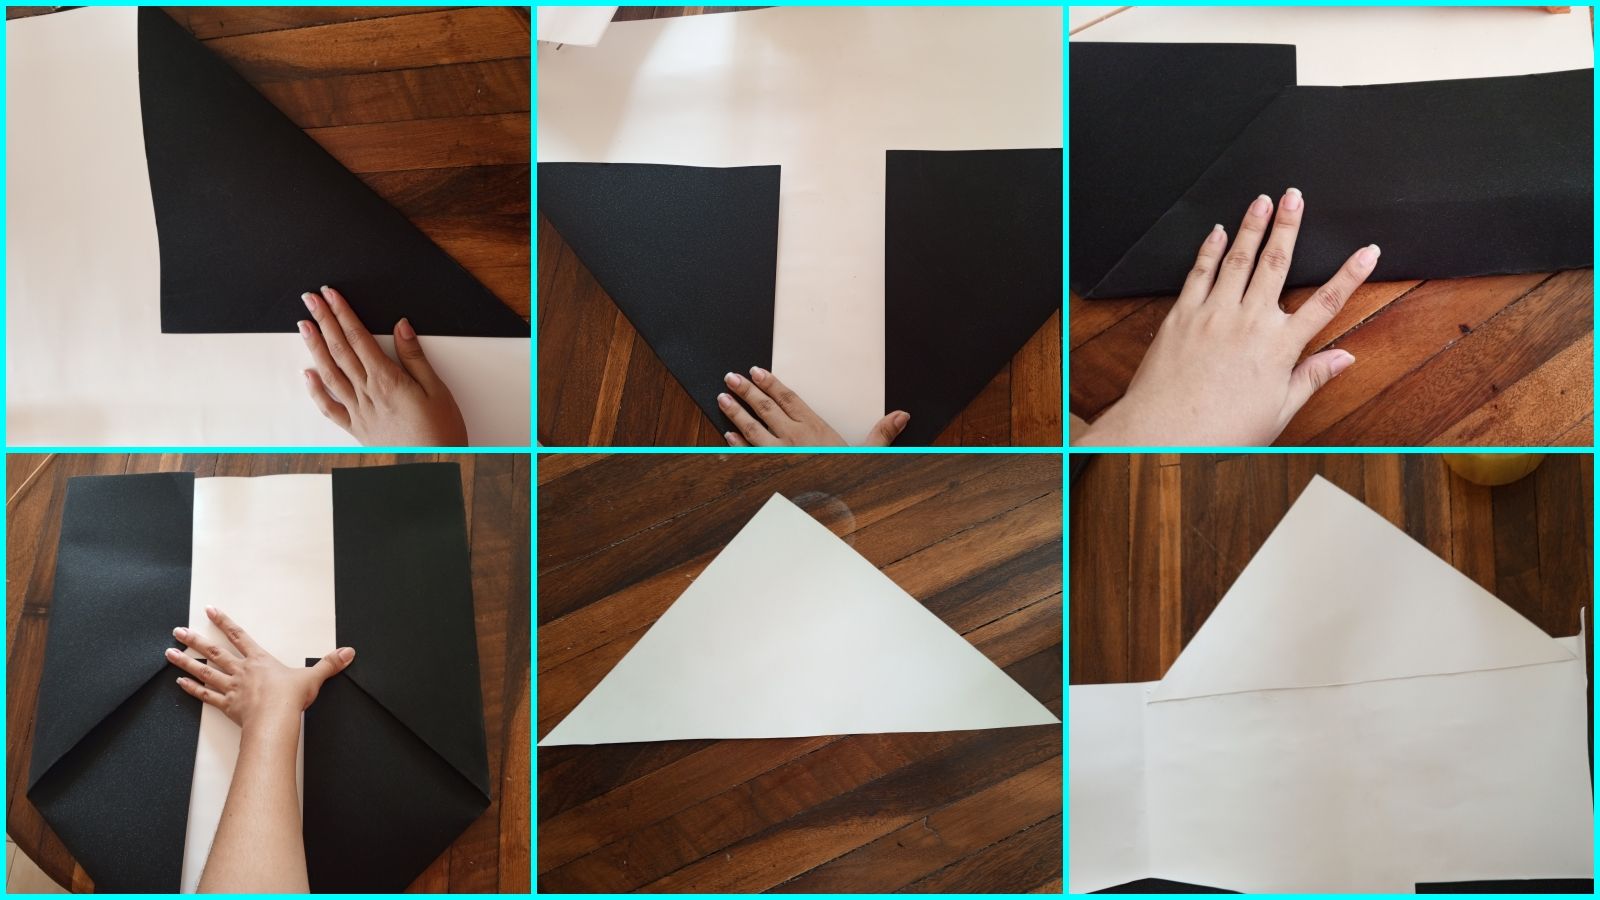
Tips: A tip I give you is that if you bought a small amount of candies, try to fold half of the cardboard, cut it and use the cut part to make the bouquet because it will be too big for the candies you bought.
Tips: Un tips que les doy es que si las chucherías de compraron son pocas traten de doblar la mitad de la cartulina, cortarla y utilizar la parte cortada para hacer el ramo porque luego les va a quedar muy grande para las chucherías que compraron.
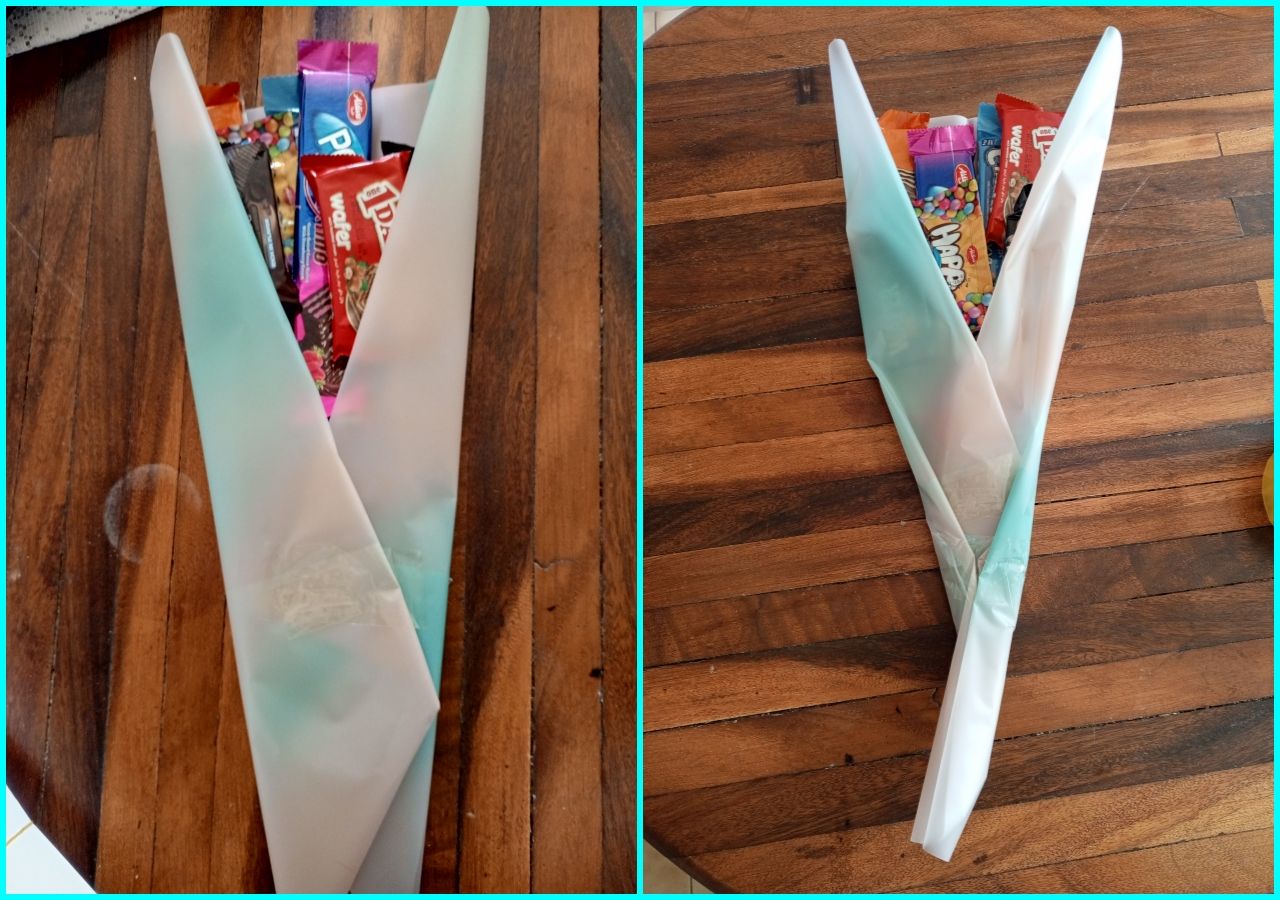
Ahora vamos a organizar los dulces, si tienen dulces más grandes acomódelos los más grandes atrás y los más pequeños adelante. Si no quiere que se les mueva, colóquenle cinta adhesiva doble atrás de los dulces y péguenlos en el papel coreano y así mismo encima de los otros dulces cosa de que se vea organizado. Ahora envolvemos los dulces con el papel coreano con ayuda de nuestra cinta adhesiva. Para que quede más firme vamos a enrollar por la parte de abajo con más cinta y lo vamos a envolver con la cartulina dándole la forma, pegándolo con cinta (yo en este caso tuve que disponer de silicón caliente para que se adhiriera más) y para que se viera más bonito le agregue una felicitación de cumpleaños y le hice un moño con una cinta raso rosada que tenía.
Now let's organize the candies, if you have larger candies, place the larger ones in the back and the smaller ones in the front. If you don't want them to move, put double-stick tape on the back of the candies and stick them on the Korean paper and on top of the other candies so that it looks organized. Now wrap the candies in the Korean paper with the help of our tape. To make it firmer we are going to roll the bottom part with more tape and we are going to wrap it with the cardboard giving it the shape, sticking it with tape (in this case I had to use hot silicone so that it would adhere more) and to make it look nicer I added a birthday greeting and I made a bow with a pink satin ribbon I had.

•💐💖RESULT💐💖•
•💐💖RESULT💐💖•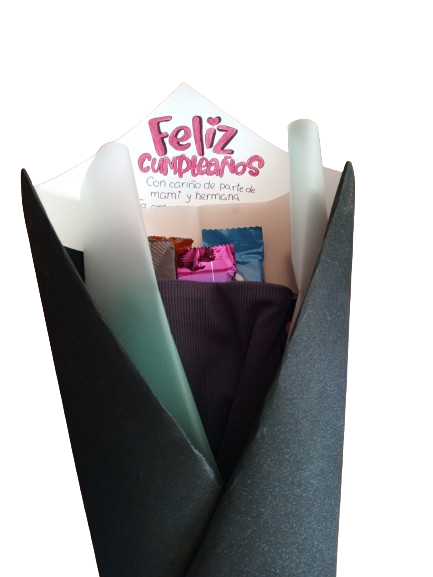
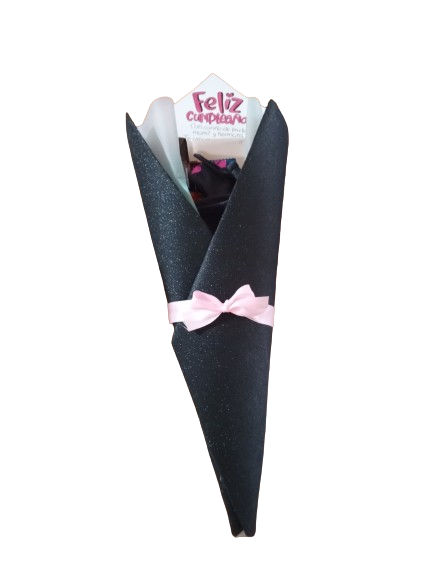
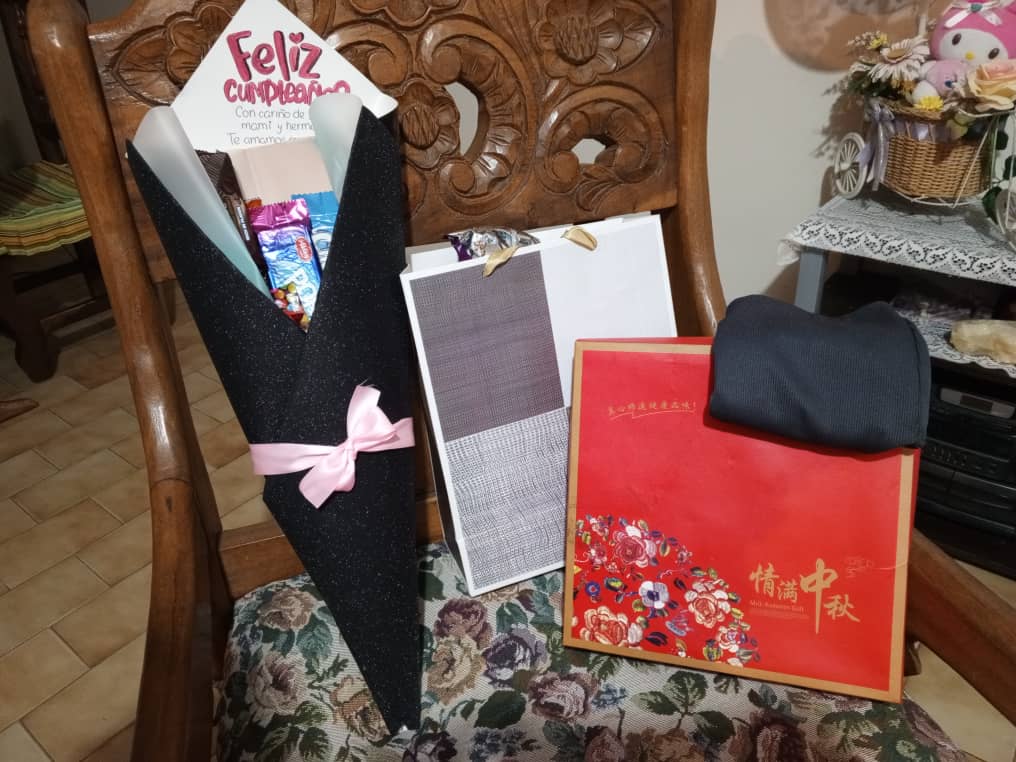
Y este es el resultado😊
And that concludes our tutorial to create a beautiful candy bouquet that will surely sweeten the hearts of those who receive it! We hope you enjoyed this creative experience and that you feel inspired to surprise your loved ones with a gift full of sweetness and affection. Remember that it's the little details that make the difference and that giving a bouquet of sweets is not only a delicious gesture, but also a way to transmit love, joy and gratitude in an original and colorful way. We encourage you to put into practice what you have learned and give smiles with a sweet and charming touch! See you next time and may sweetness always accompany you in every special moment! 🍭🌷✨
¡Y así concluye nuestro tutorial para crear un hermoso ramo de dulces que seguramente endulzará los corazones de quienes lo reciban! Esperamos que hayas disfrutado de esta experiencia creativa y que te sientas inspirado/a para sorprender a tus seres queridos con un regalo lleno de dulzura y cariño. Recuerda que los pequeños detalles son los que marcan la diferencia y que regalar un ramo de dulces no solo es un gesto delicioso, sino también una forma de transmitir amor, alegría y gratitud de una manera original y colorida. ¡Anímate a poner en práctica lo aprendido y a regalar sonrisas con un toque dulce y encantador! ¡Hasta la próxima y que la dulzura siempre te acompañe en cada momento especial! 🍭🌷✨

💞Thank you so much for making it this far! I hope you liked my post, I'll see you next time!💞
💞¡Muchas gracias por llegar hasta aquí! Espero que te haya gustado mi post. ¡Nos vemos en una próxima oportunidad!💞
📲 Todas las fotografías fueron tomadas con un teléfono Tecno Spark 10 pro
📷 TODAS LAS FOTOS SON DE MI PROPIEDAD