
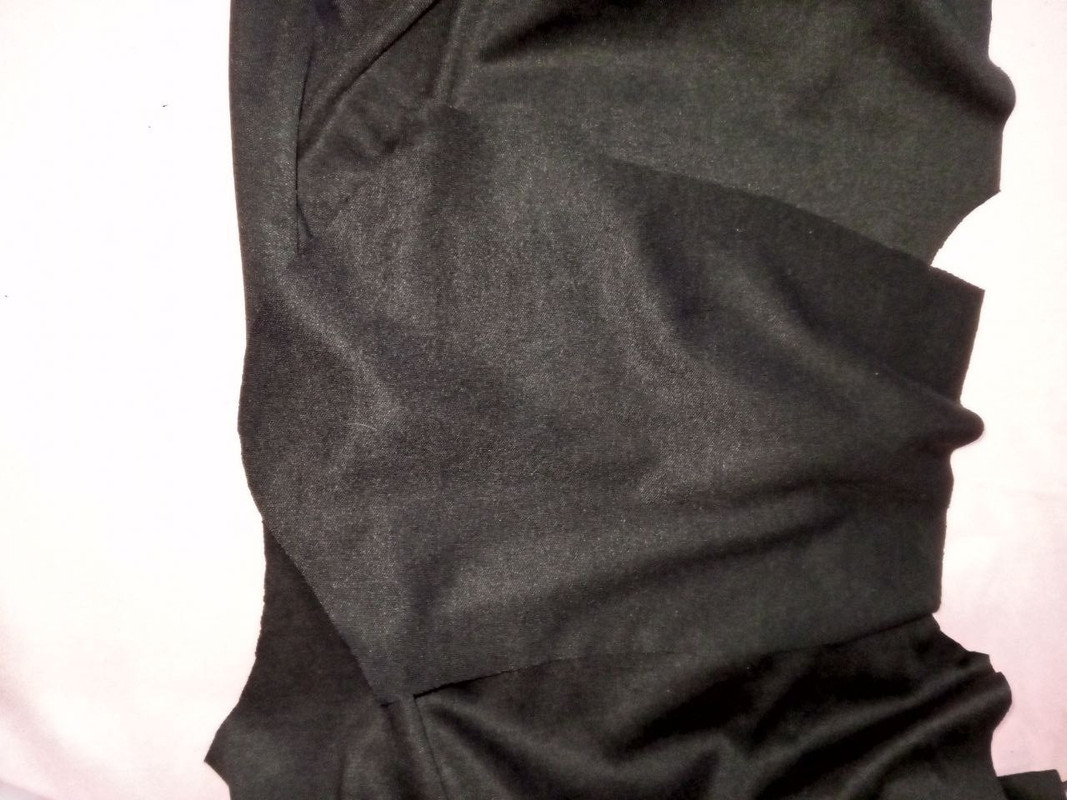
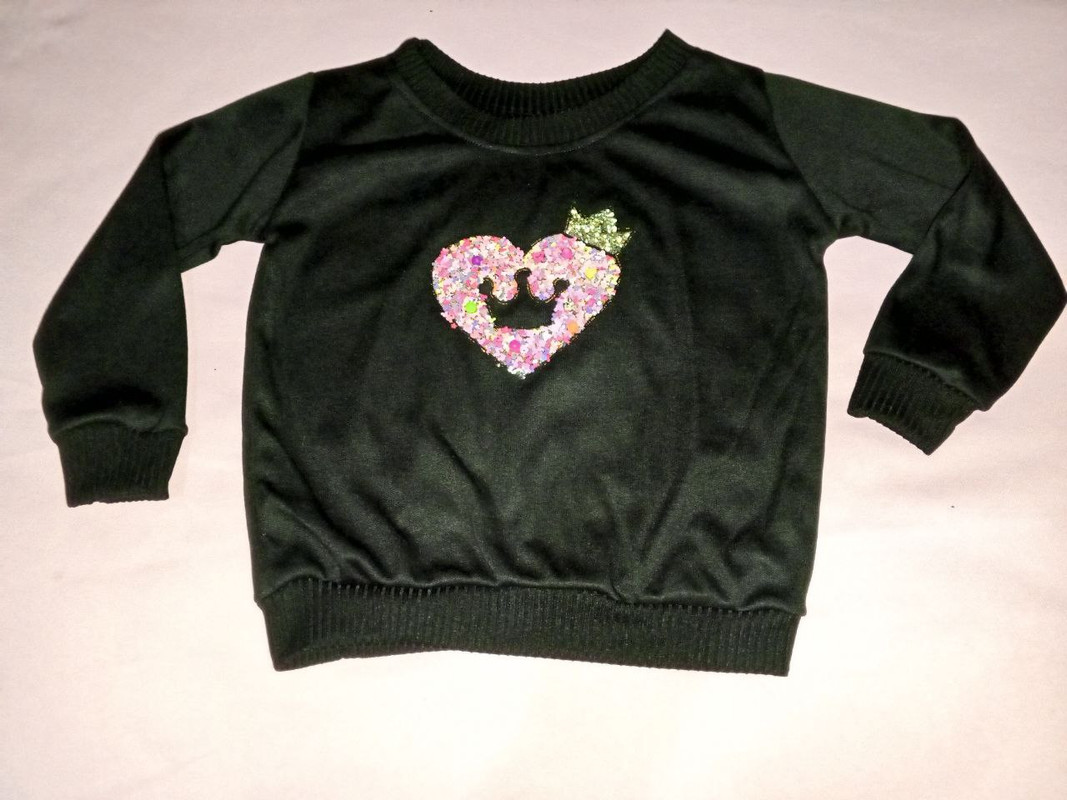
Un saludo mi querida comunidad @needleworkmonday, hace algunos dias les mostre un jogger para bebe estampado de Minie Mouse que era parte de un conjunto, pues hoy les traigo la segunda parte que es el suéter, decidí usar para esta pieza el color negro por la tematica como tambien para hacer juego con el estampado, además que son los dos colores característico de este personaje. Sin embargo como siempre ando en búsqueda de materiales que le den un acabado bien lindo a las prendas de vestir, encontré en una mercería un sticker textil decorado con lentejuelas que además es termoadhesivo, aunque he usado otros que son muy sencillos nunca habia visto de este estilo y además me encanto el toque tan hermoso que le agrego a este suéter.
Greetings my dear community @needleworkmonday, a few days ago I showed you a jogger for baby Minie Mouse print that was part of a set, today I bring you the second part which is the sweater, I decided to use for this piece the black color for the theme as well as to match the print, plus they are the two characteristic colors of this character. However, as I am always looking for materials that give a nice finish to the garments, I found in a haberdashery a textile sticker decorated with sequins that is also thermoadhesive, although I have used others that are very simple I had never seen this style and I loved the beautiful touch that I add to this sweater.
- Tela de algodón
- Hilo
- Alfileres
- Tijera
- stickers textil termoadhesivo
- Tela acanalada o rib
- Cotton fabric
- Thread
- Pins
- Scissors
- thermo-adhesive textile stickers
- Ribbed or ribbed fabric


Para iniciar con este proyecto con el que finalizo este conjunto de dos piezas como es un suéter y un jogger que ya anteriormente lo compartí con ustedes. Comenzamos cortando todas las piezas como son la parte delantera y la espalda, las mangas como tambien unas tiras de diferentes anchos para los puños, el cuello y la parte inferior del sueter
To start with this project with which I finish this set of two pieces such as a sweater and a jogger that I previously shared with you. We started by cutting all the pieces such as the front and back, the sleeves as well as strips of different widths for the cuffs, the neck and the bottom of the sweater.


Seguidamente unimos ambas piezas por los hombros, luego abrimos y con ayuda de unos alfileres le fijamos las mangas antes de llevar a la maquina de coser, por ultimo cerramos por los costados
Then we join both pieces at the shoulders, then we open and with the help of pins we fix the sleeves before taking them to the sewing machine, finally we close the sides.


Teniendo el sueter armado, comenzamos a colocar las tiras, para las misma utilice otro tipo de tela del mismo color pero con textura, que usualmente es la ideal para hacer este tipo de detalles, tanto a franelas como sueter, es la tela conocida como Rib que es acanalada. Con la misma le elabore el cuello, los puños y la parte inferior. Ya anteriormente les he explicado en anteriores publicaciones las técnicas que utilizo para colocar el cuello y que nos quede con un buen acabado
Having the sweater assembled, we begin to place the strips, for the same use another type of fabric of the same color but with texture, which is usually ideal for making this type of details, both flannel and sweater, is the fabric known as Rib which is ribbed. With the same fabric I made the collar, cuffs and bottom. I have already explained in previous publications the techniques I use to place the collar and that we have a good finish.


Por ultimo le coloque el sticker tranfers textix termoadhesivo, si desean comprarlo se llama así, lo ubique el parte delantera del sueter dejando 4 centímetros del cuello a la parte central como tambien de acuerdo a la medida y al tamaño del sticker deben dejar el mismo espacio o medidas de ambos costados. Lo fije con un alfiler en la parte del centro y primeramente con la ayuda de una plancha de comencé a dar calor por el revés de el suéter, cuando ya estaba fijado, retire el alfiler coloque la pieza por el derecho y le coloque por encima al sticker otra tela para luego poder pasar la plancha y no dañar la pieza, nos aseguramos que este bien pegado revisando los bordes del diseño y que no este levantado
Finally I placed the sticker tranfers textix thermoadhesive, if you want to buy it is called so, I placed the front of the sweater leaving 4 centimeters from the neck to the central part as well as according to the size and size of the sticker should leave the same space or measures of both sides. I fixed it with a pin in the center part and first with the help of an iron I began to give heat by the back of the sweater, when it was already fixed, remove the pin and place the piece on the right side and place over the sticker another fabric to then be able to pass the iron and not damage the piece, we ensure that it is well glued by checking the edges of the design and that it is not lifted.


Listo de esta manera terminamos con este paso a paso de ese lindo suéter para bebe, el cual agregando este detalle le da un acabado tan hermoso que puede ser una excelente idea para comenzar un emprendimiento con la venta del mismo. En este caso lo realice como un conjunto para regalar a Sienna en su fiesta de cumple, su mama quedo encantada y yo satisfecha por culminar un trabajo mas haciendo lo que me gusta como es elaborar ropa para bebe. Con esmero y dedicación podemos lograr muchas cosas que nos proponemos
!! Un saludo y nos vemos en una próxima oportunidad!!
Ready in this way we finish with this step by step of this cute baby sweater, which adding this detail gives it such a beautiful finish that can be an excellent idea to start an enterprise with the sale of it. In this case I made it as a set to give to Sienna in her birthday party, her mom was delighted and I was satisfied for finishing one more job doing what I like as it is to make baby clothes. With care and dedication we can achieve many things we set out to do.
!! Greetings and see you in a next opportunity!


| Pueden seguirme en 💙: | You can follow me on 💙: |
|---|---|
| eveyese1312 | |
| Discord | eveyese1312#6211 |
Las fotos y el contenido son de mi autoria
Imágenes editadas en PowerPoint Canva y PicMonkey
Para la traducción usé el traductor: DeepL
The photos and content are my own.
Images edited in PowerPoint Canva and PicMonkey
For the translation, I used the translator: DeepL