Español
Saludos amigos creadores🙋☀.
Siempre me ha resultado fascinante como las personas que práctican el arte de los bonsái, mantienen saludables árboles enormes en pequeñas dimensiones, y logran de estos, una vista hermosa y encantadora ante todos. Hoy, cerrando un mes cargado de decoraciones tenebrosas por la fecha inspiradora de Halloween, me sumó a compartir mis creaciones para esta cercana Navidad, y lo haré comenzando precisamente con la confección de un pequeño bonsái, utilizando la técnica de papel maché, técnica que le ha dado vida a cada una de mis inspiraciones.
Materiales
.Molde :Basija còncava rectangular
.Papel
.Tiras de papel blanco
.Pega elaborada de harina
.Pegamento
.Tijera
.Temperas
.Acuarelas
.Pincel
.Lápiz
.Barníz
Modo de confección
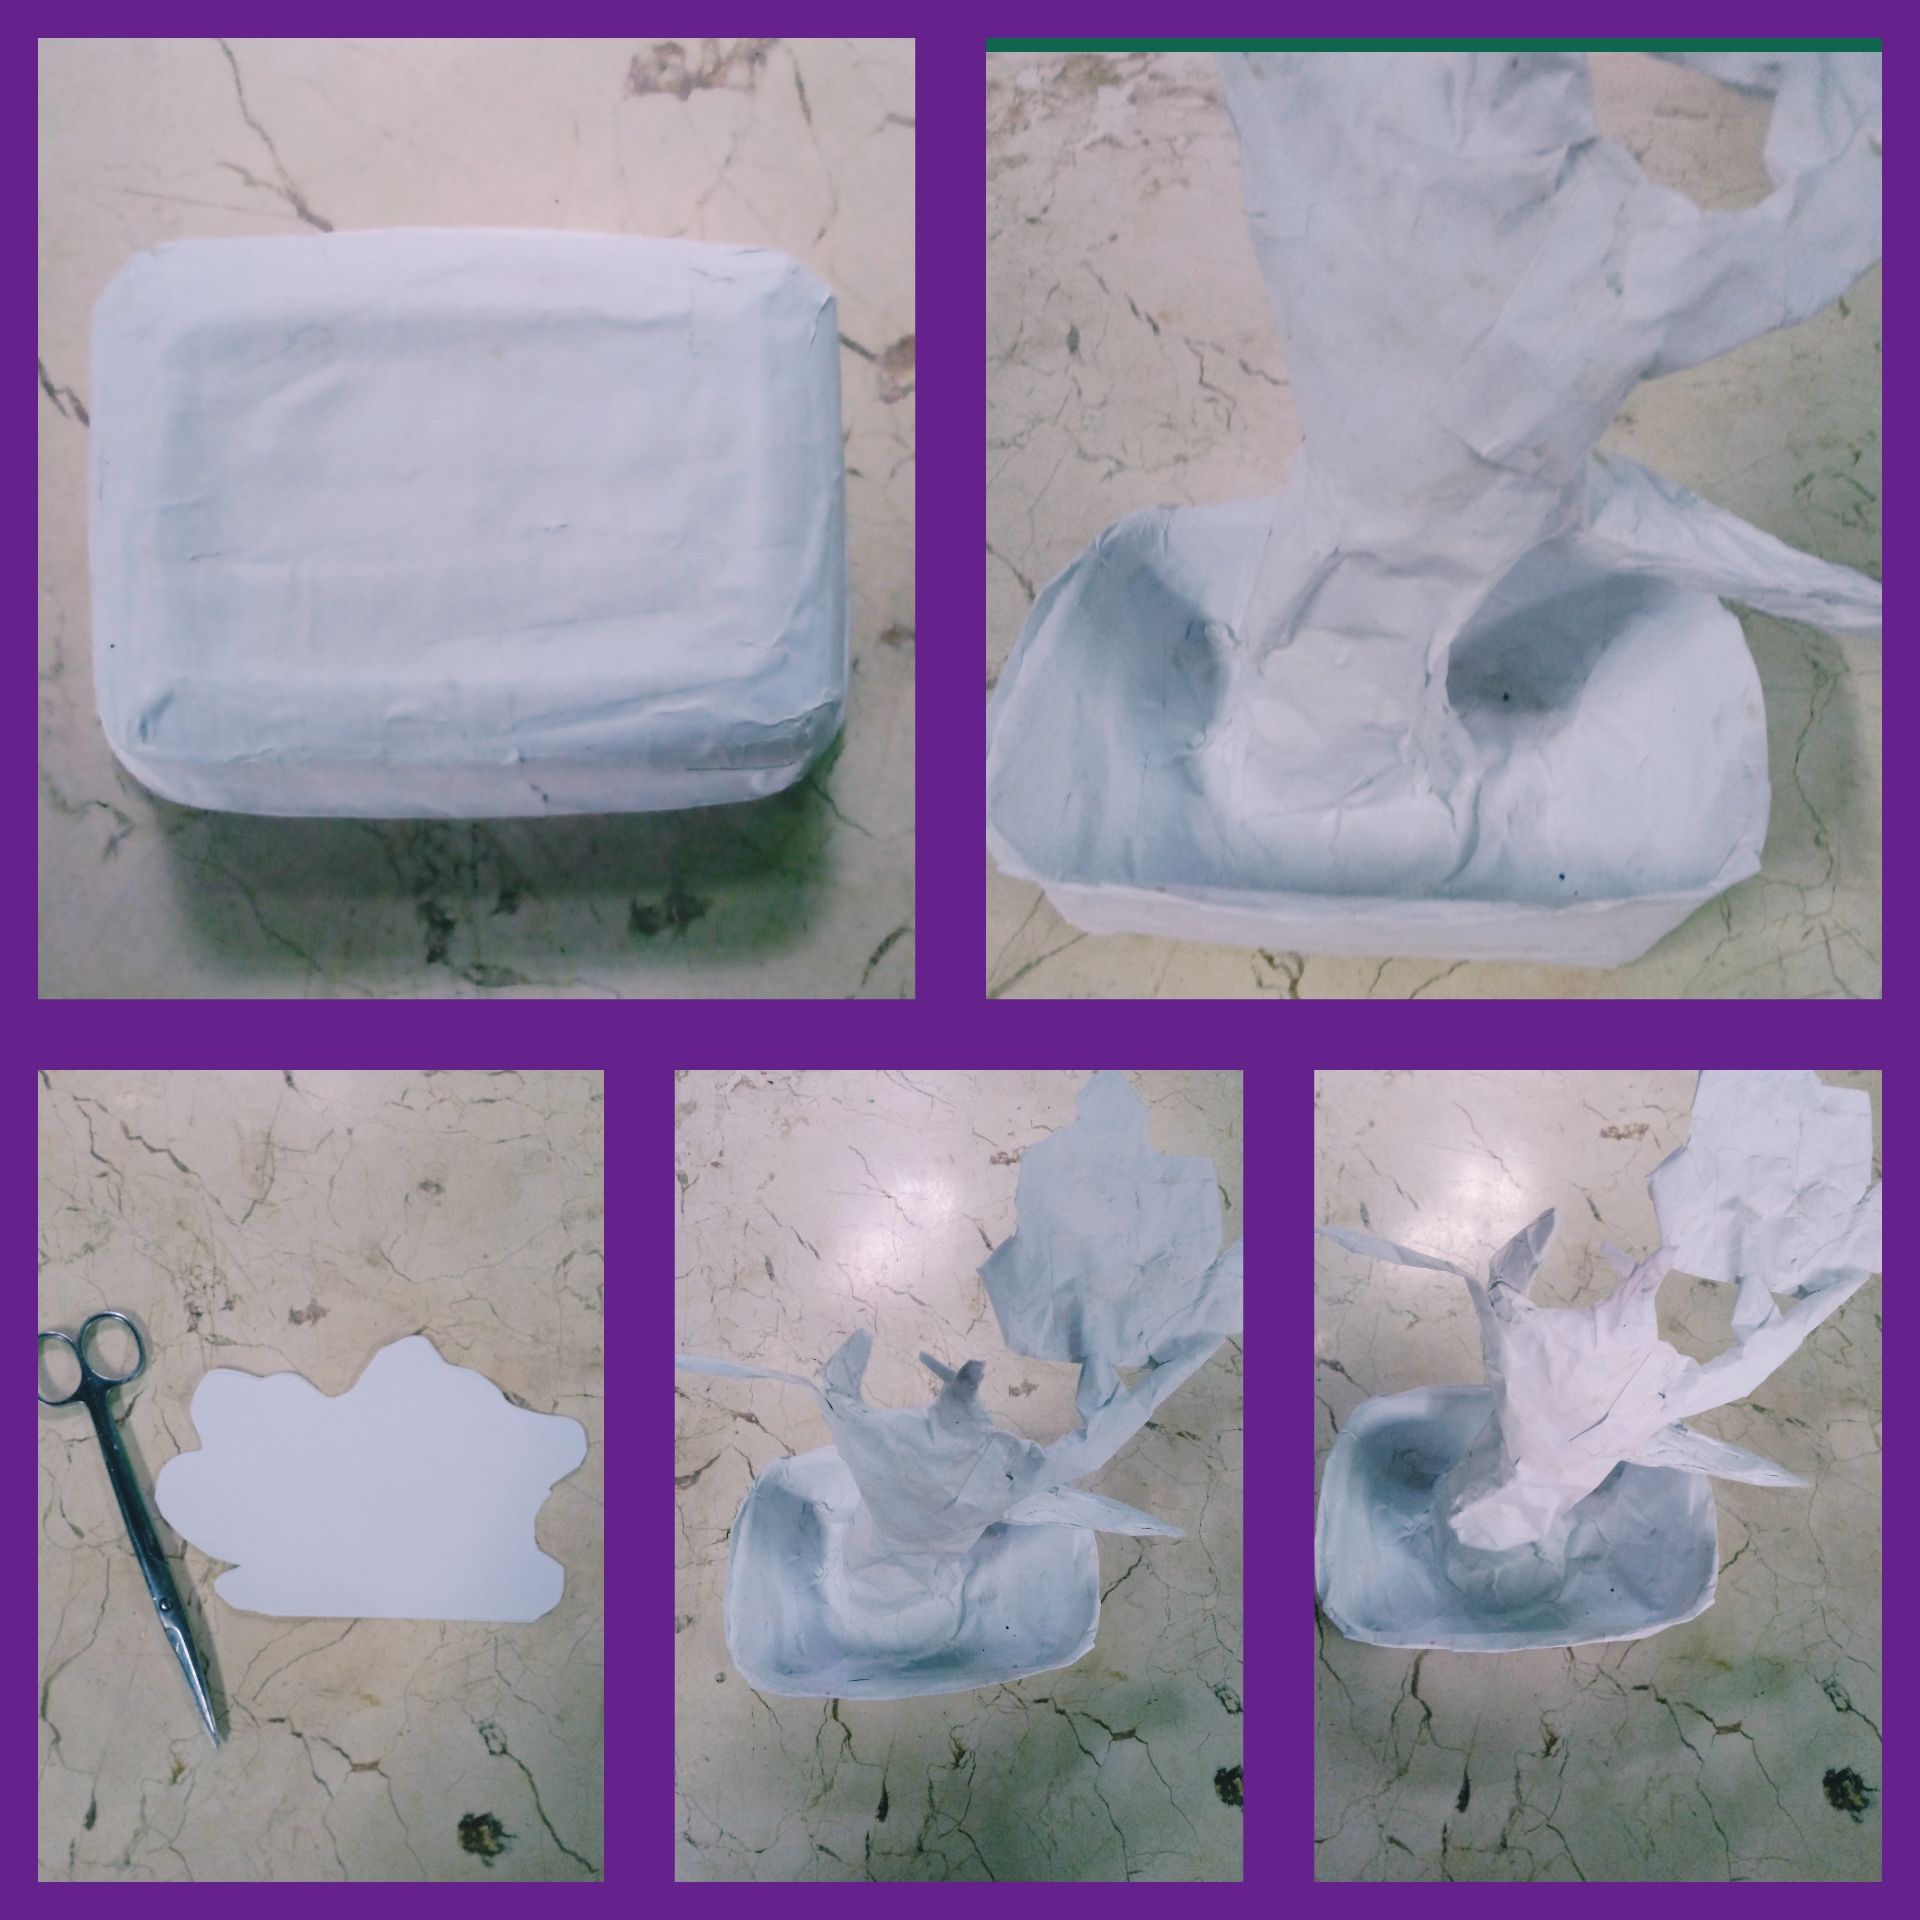
Base
1-Tomar el molde y con un algodonsito humedecido en aceite, impregnar toda su superficie.
2-Realizar tres capas de empapelado, con las tiras de papel blanco y la pega elaborada de harina. Dejar secar por doce horas.
3-Desmontar del molde, y utilizando las tijeras cortar las tiritas sobrantes de los bordes.
Tronco
1-Estrujar un conjunto de papeles , amoldándolos a una forma alargada y ancha, semejante a la de un tronquito.
2- Realizar la técnica de papel maché, cubriendo la estructura resultante con dos capas de tiras de papel blanco y la pega elaborada de harina. Dejar secar ocho horas.
3- Adherir con pegamento el tronco, a la base confeccionada.
Ramas
1-Estrujar varios papeles pequeños de diferentes diámetros, y darle una forma alargada.
2-Darle una capa de empapelado por separado a todas las pequeñas y delgadas estructuras, utilizando las tiras de papel blanco y la pega elaborada de harina. Dejar secar por cuatro horas.
3-Adherir con pegamento al tronco.
Copa
Mi bonsái quise realizarlo frutal, donde las manzanitas o cerezas serán las que embellecerán su copa:
1-Tomar dos hojas cuadradas y doblarlas a la mitad.
2-Cortar en cada una, la forma deseadas para la copa de nuestro arbolito.
3 -Abrir la hojas y entre ellas introducir bolitas redondas de papel estrujados, conformando nuestras pequeñas manzanitas.
4-Pegar los bordes y realizarle una capa de empapelado, utilizando tiras de papel blanco y la pega elaborada de harina. Dejar secar por ocho horas.
5-Adherir con pegamento a las ramitas del tronco.
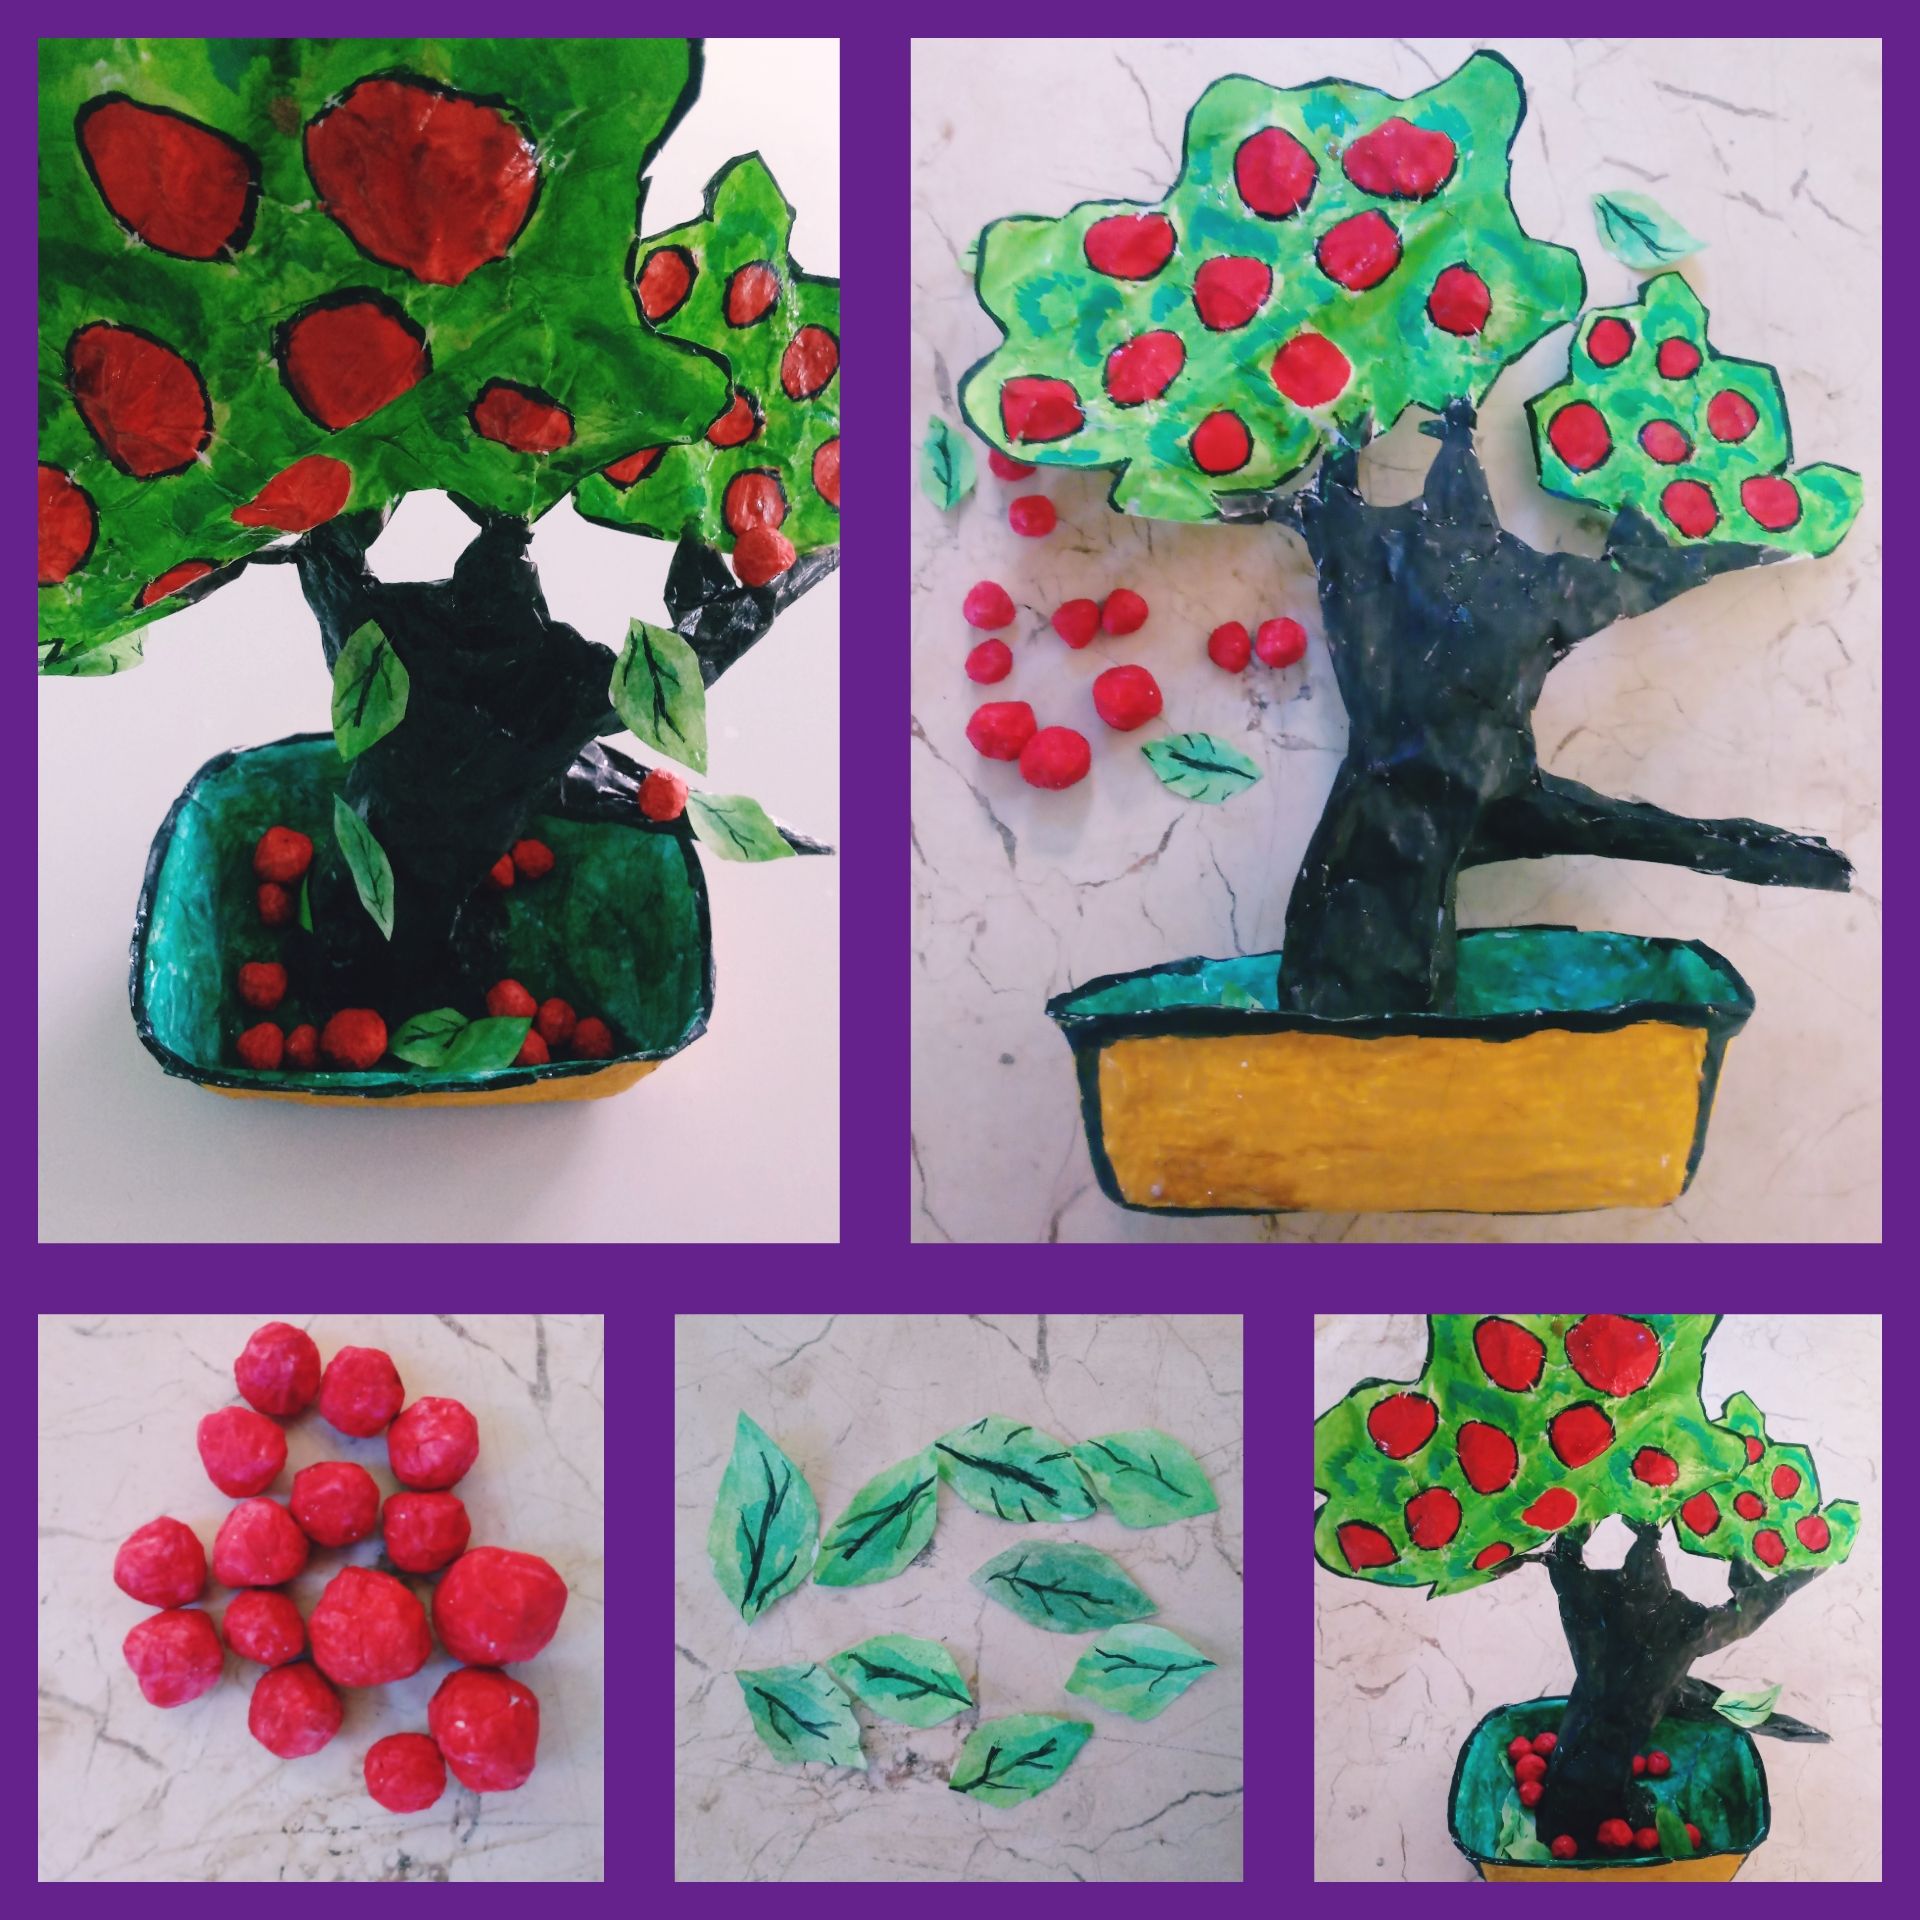
Hojas
1-Tomar cartulina y con un lápiz dibujar la forma deseada para las hojitas .Yo le di forma de goticas pequeñas.
2-Utilizando la tijera cortar por la guía trazada, permitiéndonos obtener hojitas de diversos tamaños.
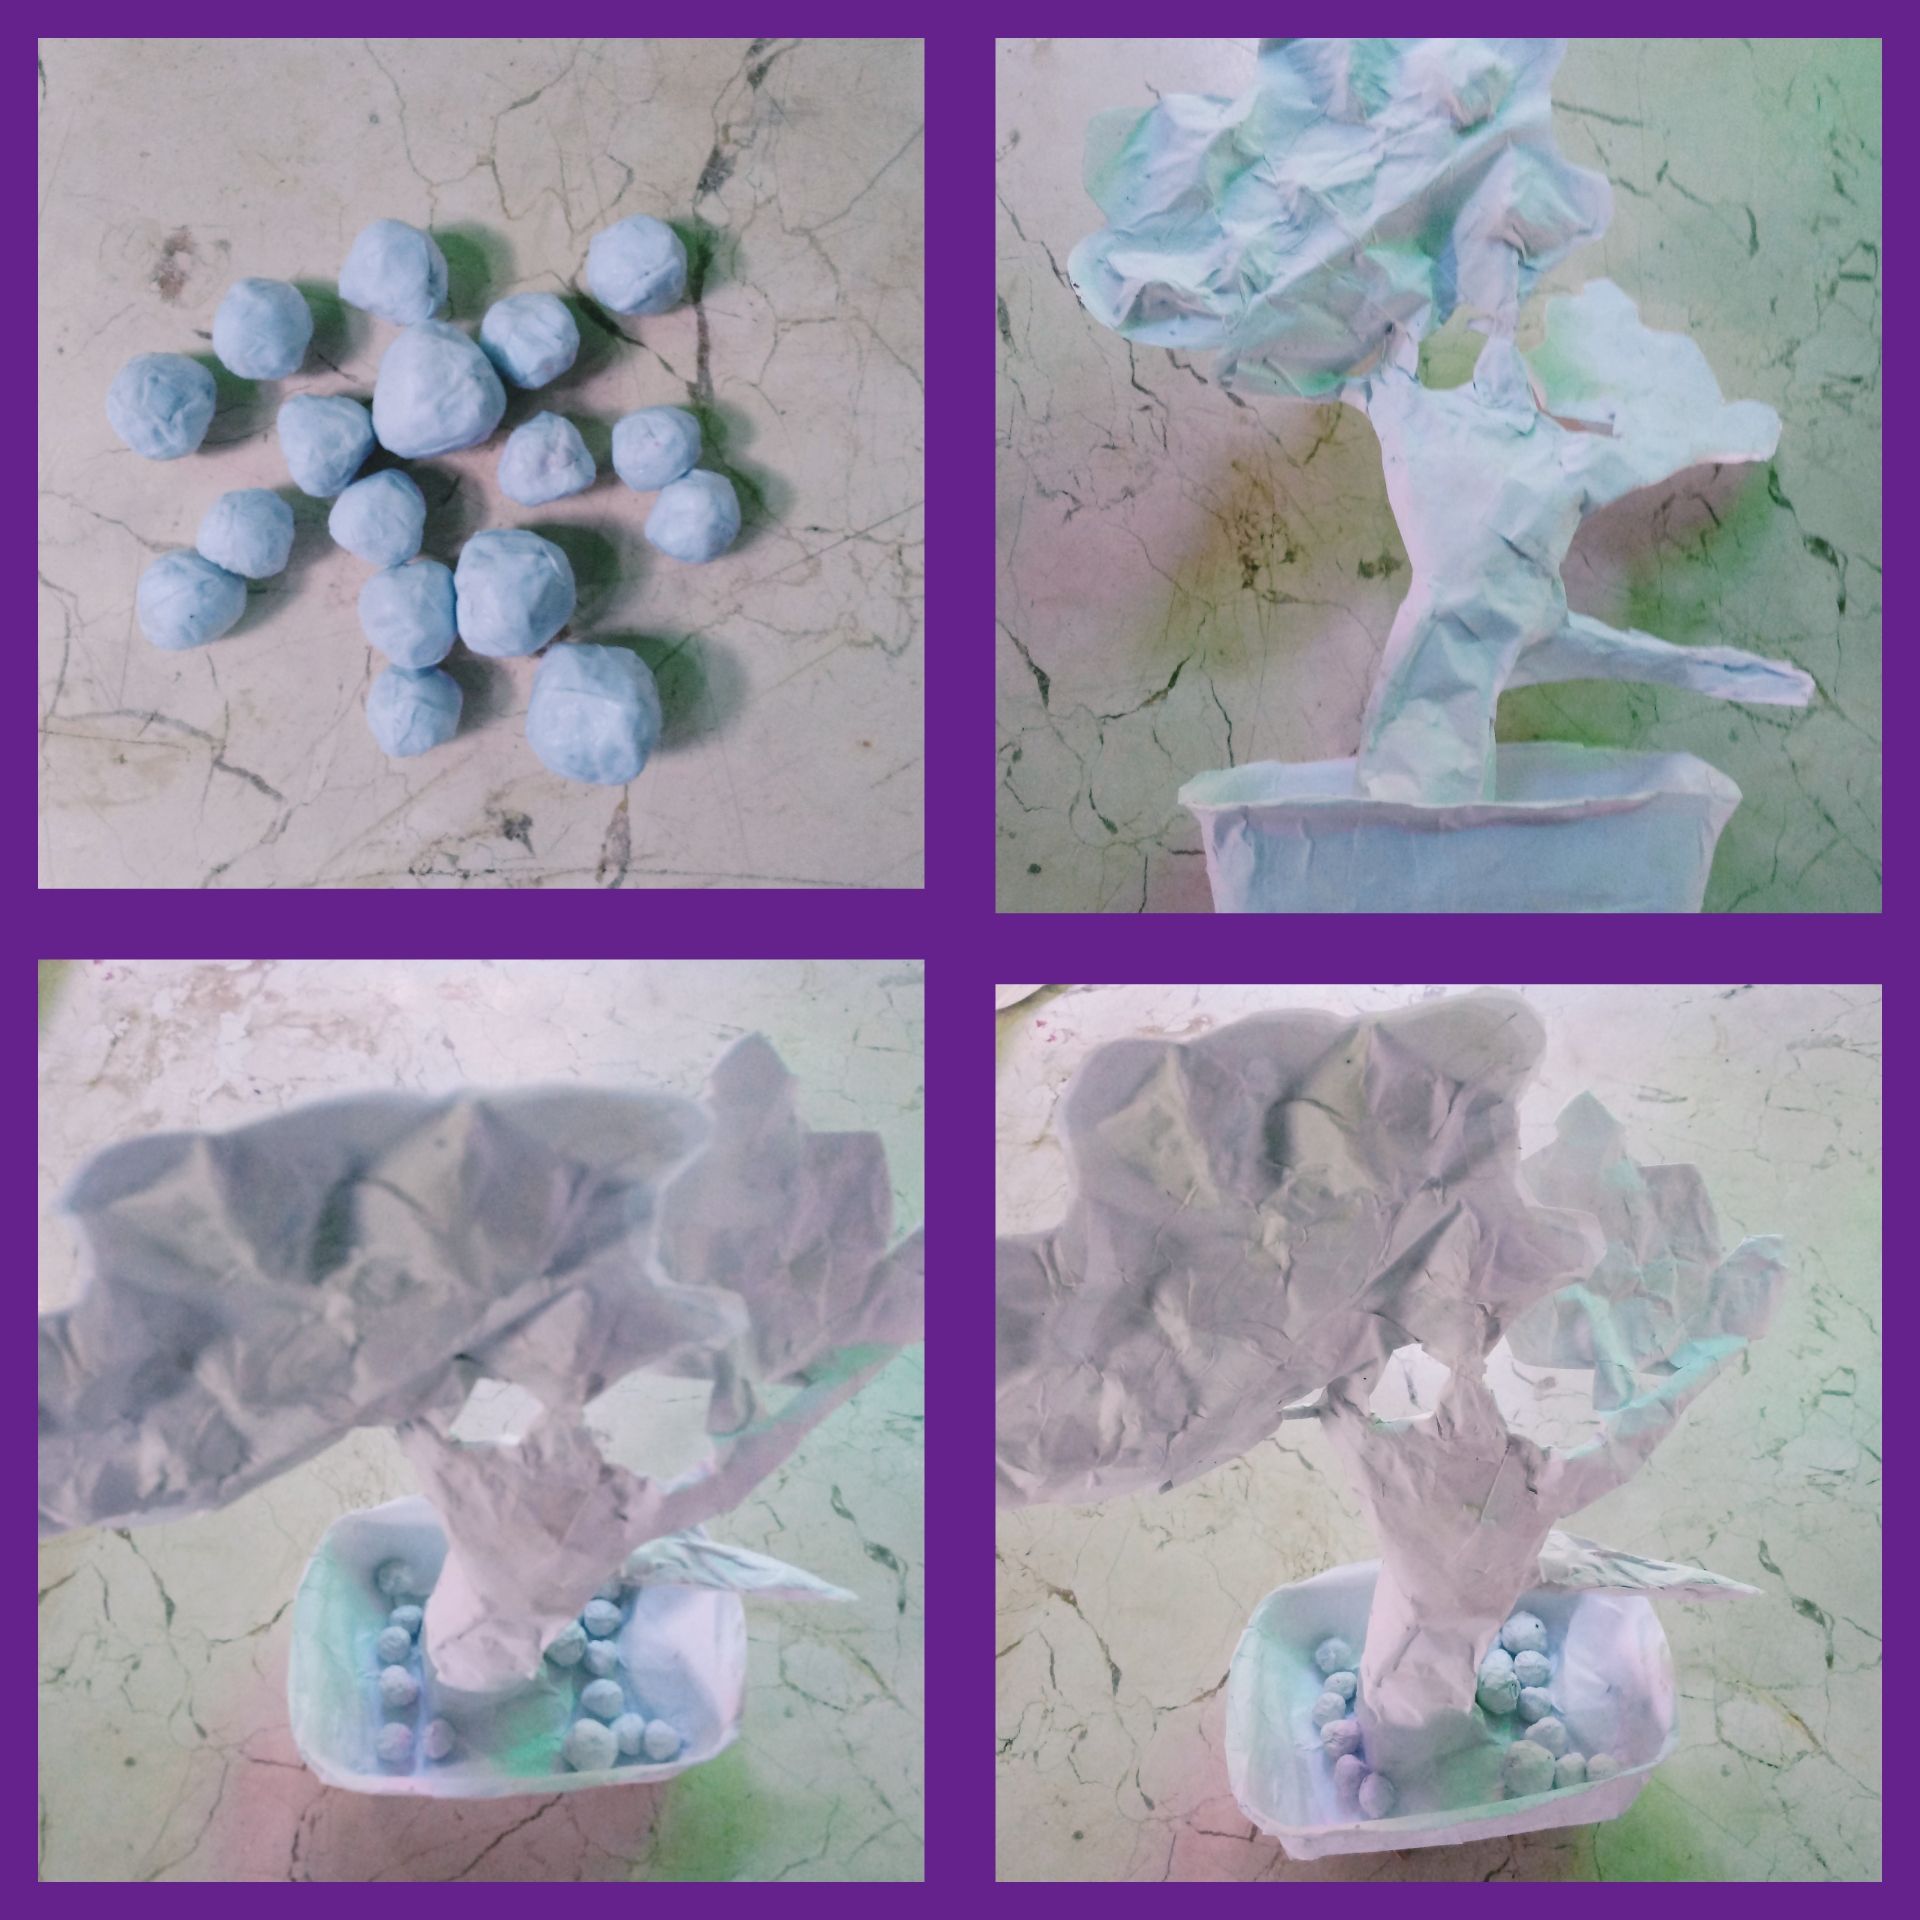
Manzanas
1-Estrujar papeles conformando bolitas de diversos tamaños.
2-Darle una capa de empapelado a las bolitas, utilizando las tiras de papel blanco y la pega elaborada de harina. Dejar secar por ocho horas.
Ya tenemos las estructuras de nuestro arbolito confeccionadas . Ahora pasamos a decorar, dándole nuestro toque personalizado.
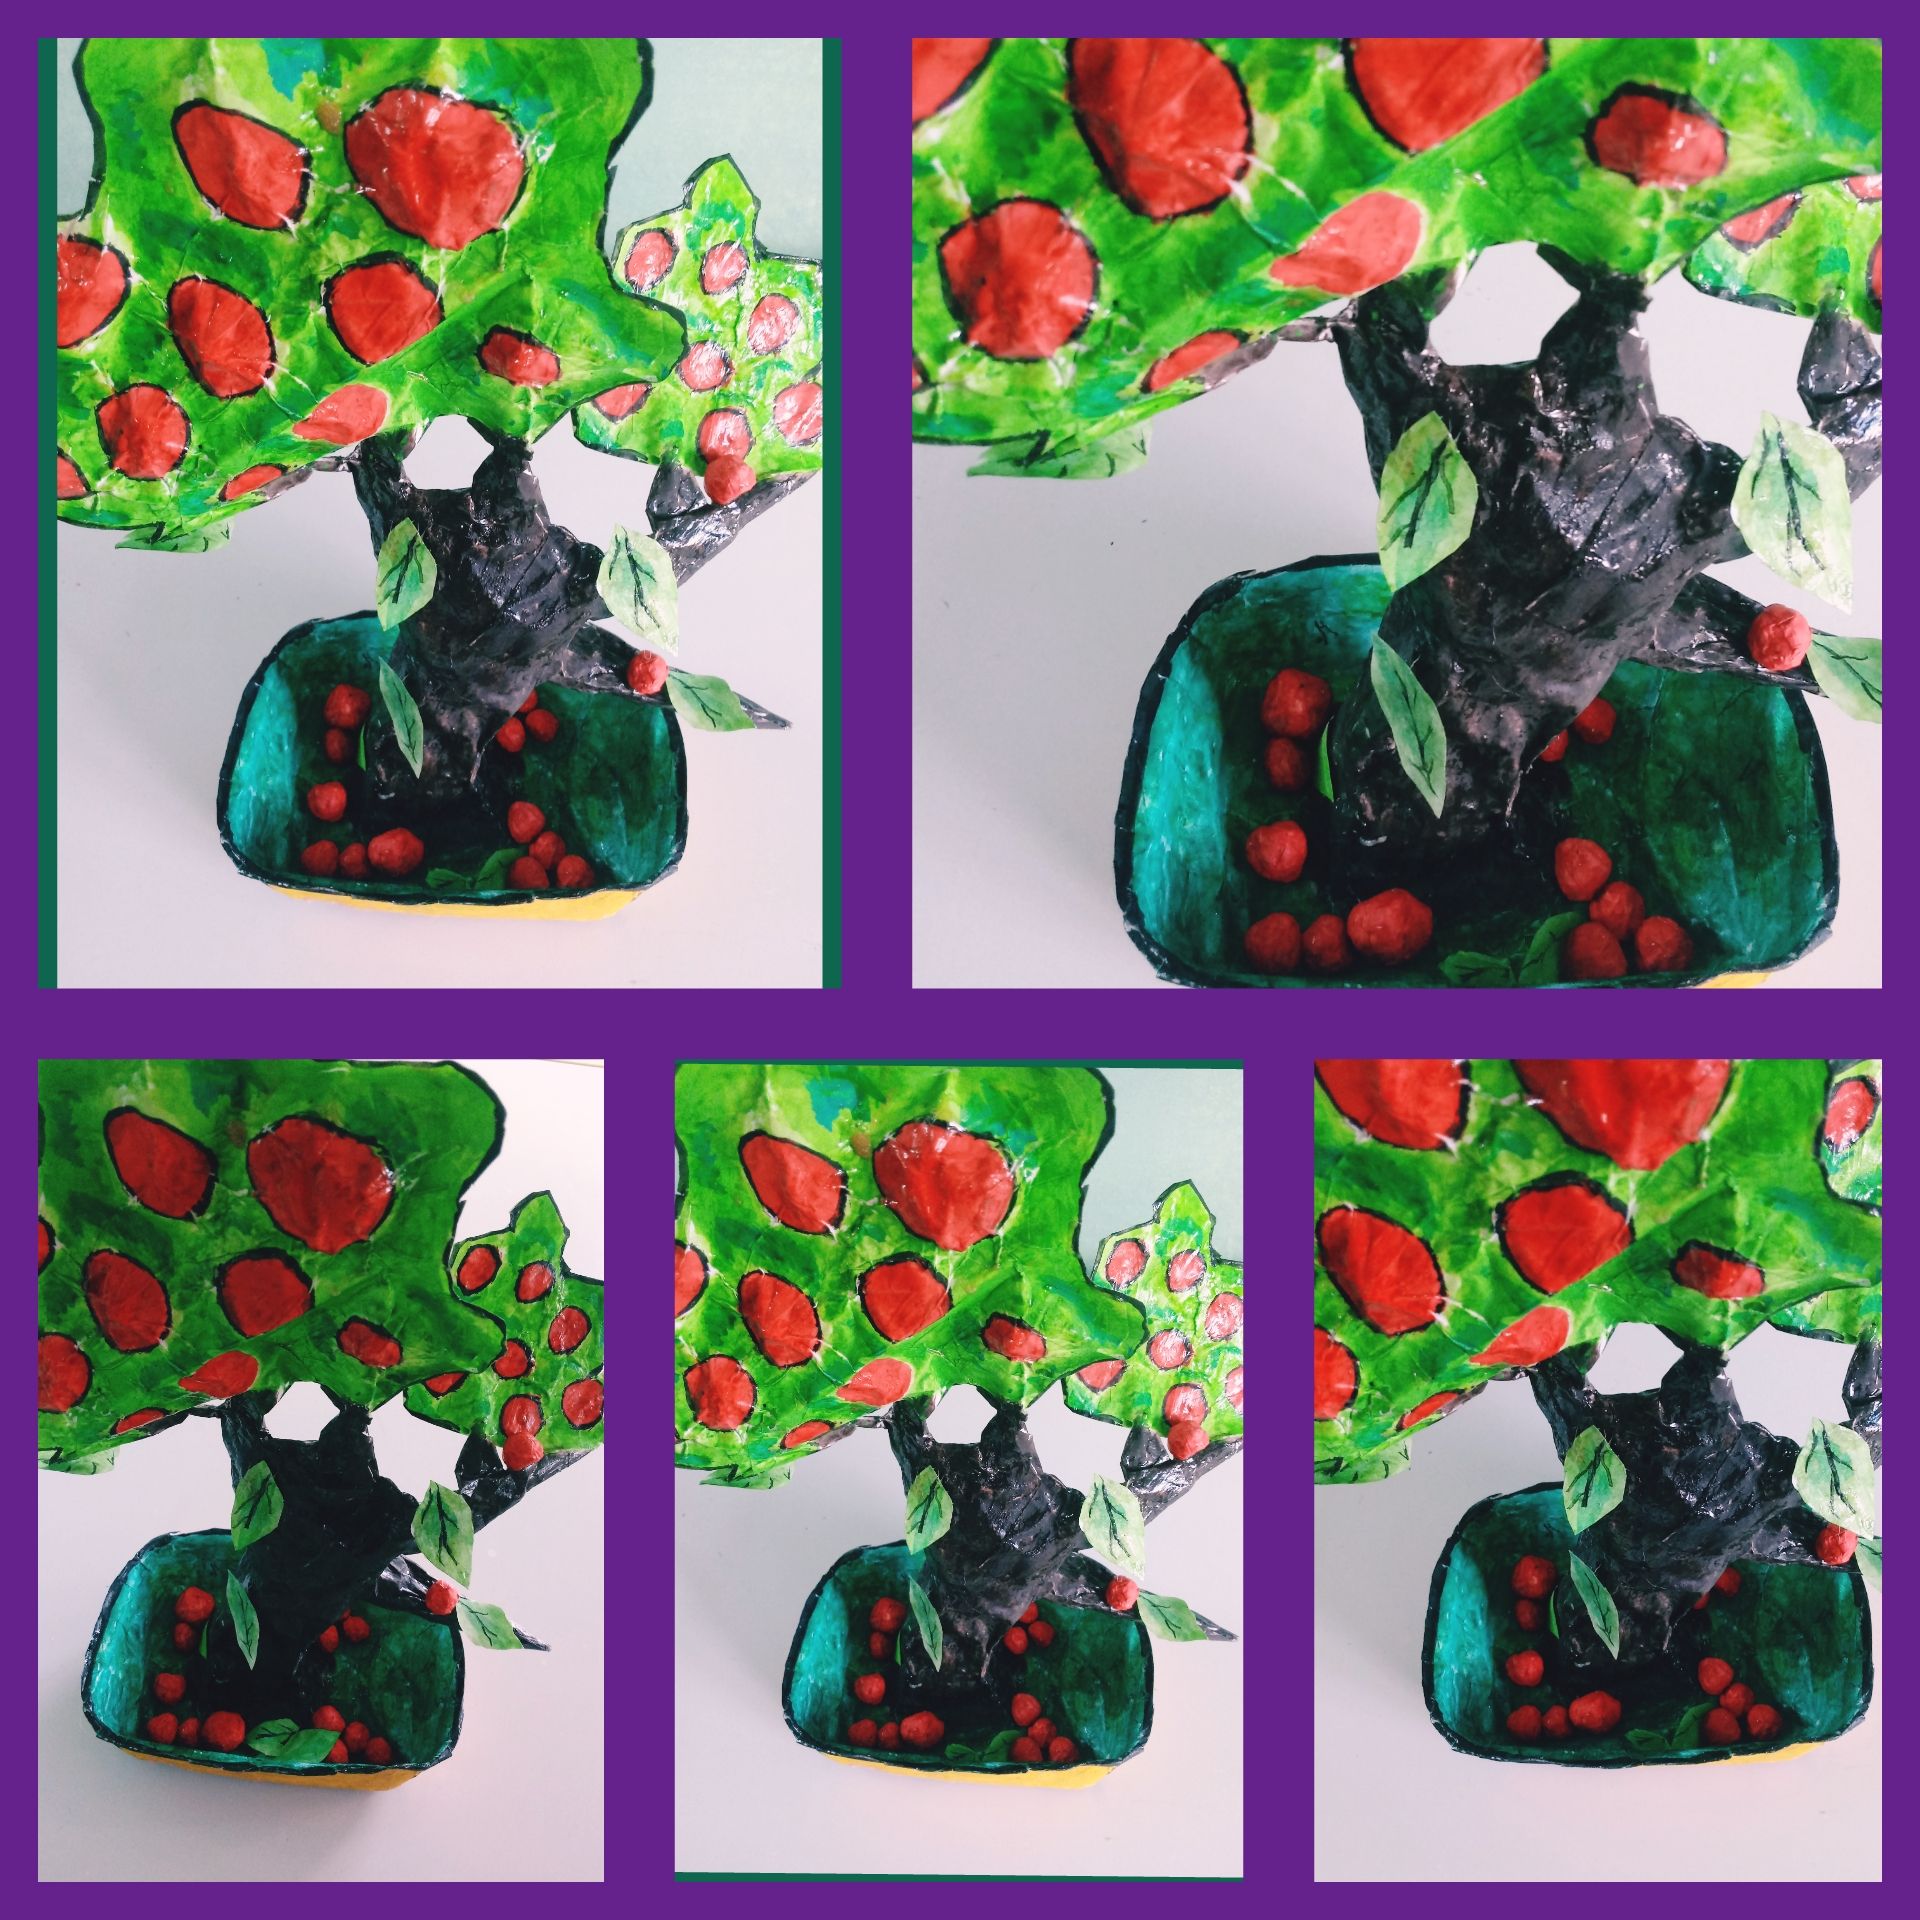
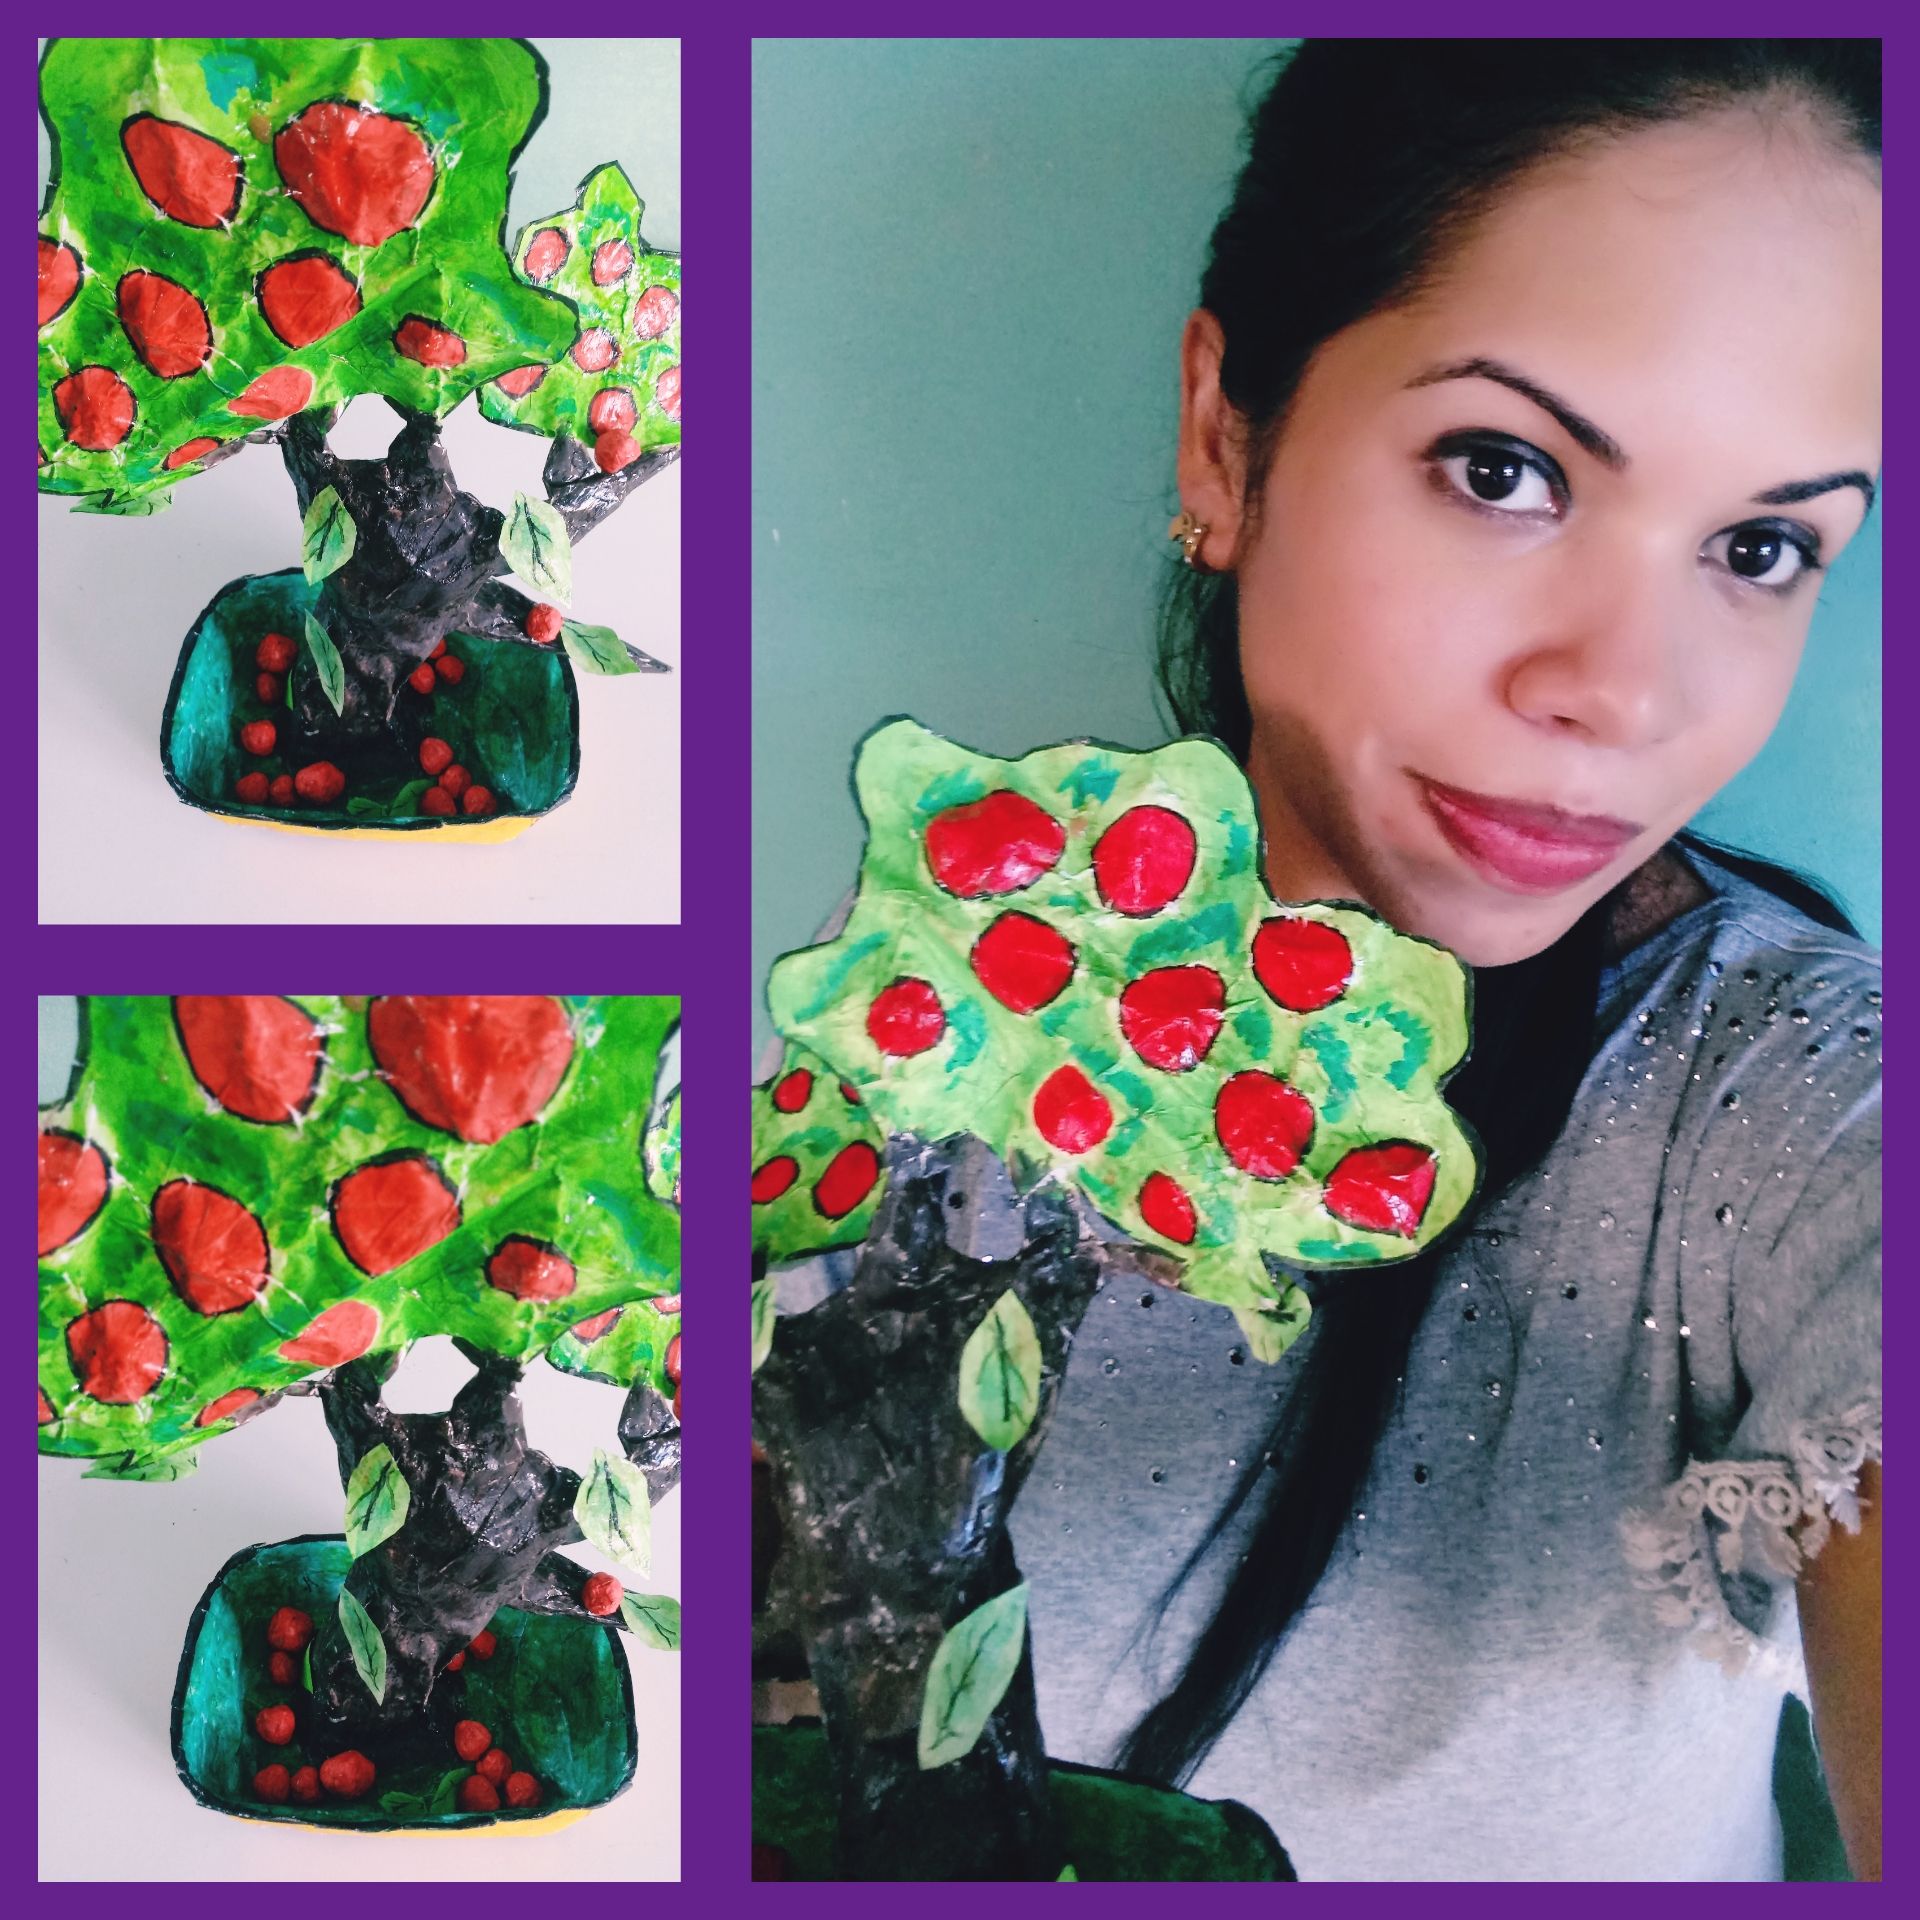
El verde, marrón, rojo, fueron algunos de los colores que empleé, utilizando las acuarelas y pinceles. Para su acabado brilloso utilicé barníz.
El resultado amigos, fue un bonsái frutal de manzanas. Un decorativo capaz de transmitir a la vista una inmensa paz, además, de generarnos esa satisfacción de acercarnos a la naturaleza en una de sus expresiones, las plantas.
Los exhorto amigos, a que confeccionen estos arbolitos bonsái, pues pueden darles varios usos: cómo decorativos , cómo pequeños arbolitos navideños, para obsequios familiares, y sobre todo para disfrutar el proceso creativo.
Excelentes y bendecidos días, comunidad.🙋🌈☀
English
Greetings fellow creators🙋☀.
It has always been fascinating to me how people who practice the art of bonsai, maintain healthy huge trees in small dimensions, and achieve from these, a beautiful and charming view before everyone. Today, closing a month full of scary decorations for the inspiring date of Halloween, joined me to share my creations for this upcoming Christmas, and I will do it starting precisely with the making of a small bonsai, using the papier mache technique, technique that has given life to each of my inspirations.
Materials
.Mould : Rectangular hollow-out basin
.Paper
.White paper strips
.Paste made of flour
.Glue
.Scissor
.Temperas
.Watercolors
.Brush
.Pencil
.Varnish
Mode of preparation
Base
1-Take the mold and with a cotton ball moistened in oil, impregnate its entire surface.
2-Make three layers of wallpaper, with the strips of white paper and the glue made of flour. Leave to dry for twelve hours.
3-Disassemble from the mold, and using the scissors cut the leftover plasters from the edges.
Trunk
1-Squeeze a set of papers, molding them to an elongated and wide shape, similar to that of a log.
2- Perform the papier mache technique, covering the resulting structure with two layers of white paper strips and the glue made of flour. Leave to dry for eight hours.
3- Glue the trunk to the finished base.
Branches
1-Squeeze several small papers of different diameters, and give it an elongated shape.
2-Give a separate layer of wallpaper to all the small and thin structures, using the strips of white paper and the glue made of flour. Leave to dry for four hours.
3-Adhere with glue to the trunk.
Cup
My bonsai I wanted to make it fruity, where the apples or cherries will be the ones that will beautify your glass:
1-Take two square sheets and fold them in half.
2-Cut in each one, the desired shape for the crown of our little tree.
3 -Open the leaves and between them introduce round balls of squeezed paper, forming our small apples.
4-Glue the edges and make a layer of wallpaper, using strips of white paper and glue made of flour. Leave to dry for eight hours.
5-Adhere with glue to the branches of the trunk.
Leaves
1-Take cardboard and with a pencil draw the desired shape for the leaves.I gave it the shape of small drops.
2-Using the scissors cut along the traced guide, allowing us to obtain leaflets of various sizes.
Apple
1-Squeeze papers forming balls of various sizes.
2-Give a layer of wallpaper to the balls, using the strips of white paper and the glue made of flour. Leave to dry for eight hours.
We already have the structures of our little tree ready. Now we move on to decorating, giving it our personalized touch.
Green, brown, red, were some of the colors I used, using watercolors and brushes. For its shiny finish I used varnish.
The result, friends, was a fruit bonsai of apple. A decorative capable of transmitting an immense peace to the eye, in addition, to generate that satisfaction of getting closer to nature in one of its expressions, plants.
I urge you, friends, to make these bonsai trees, because you can give them several uses: as decorative, as small Christmas trees, for family gifts, and above all to enjoy the creative process.
Excellent and blessed days, community.🙋🌈☀