Un saludo mis amigos creativos, en esta ocasión deseo compartirles una manualidad que me encanta, por su dinamismo y versatilidad, además de lo bonita y llamativa que es, se trata de un cubito mágico lleno de mensajitos positivos y mucho amor. Un cubito mágico es un cubo grande formado por cubos más pequeños que permite movimiento, cambiando así de cara y mostrando distinto contenido con cada movimiento, es ideal para transmitir mensajes de una manera diferente y aunque yo he diseñado este con mensajitos de amor, también puede utilizarse incluso como una herramienta educativa. Sigue leyendo para que aprendas a hacer esta manualidad súper creativa.
Greetings my creative friends, this time I want to share with you a craft that I love, for its dynamism and versatility, besides how beautiful and striking it is, it is a magic cube full of positive messages and lots of love. A magic cube is a large cube formed by smaller cubes that allows movement, thus changing face and showing different content with each movement, it is ideal to convey messages in a different way and although I have designed this one with love messages, it can also be used even as an educational tool. Read on to learn how to make this super creative craft.
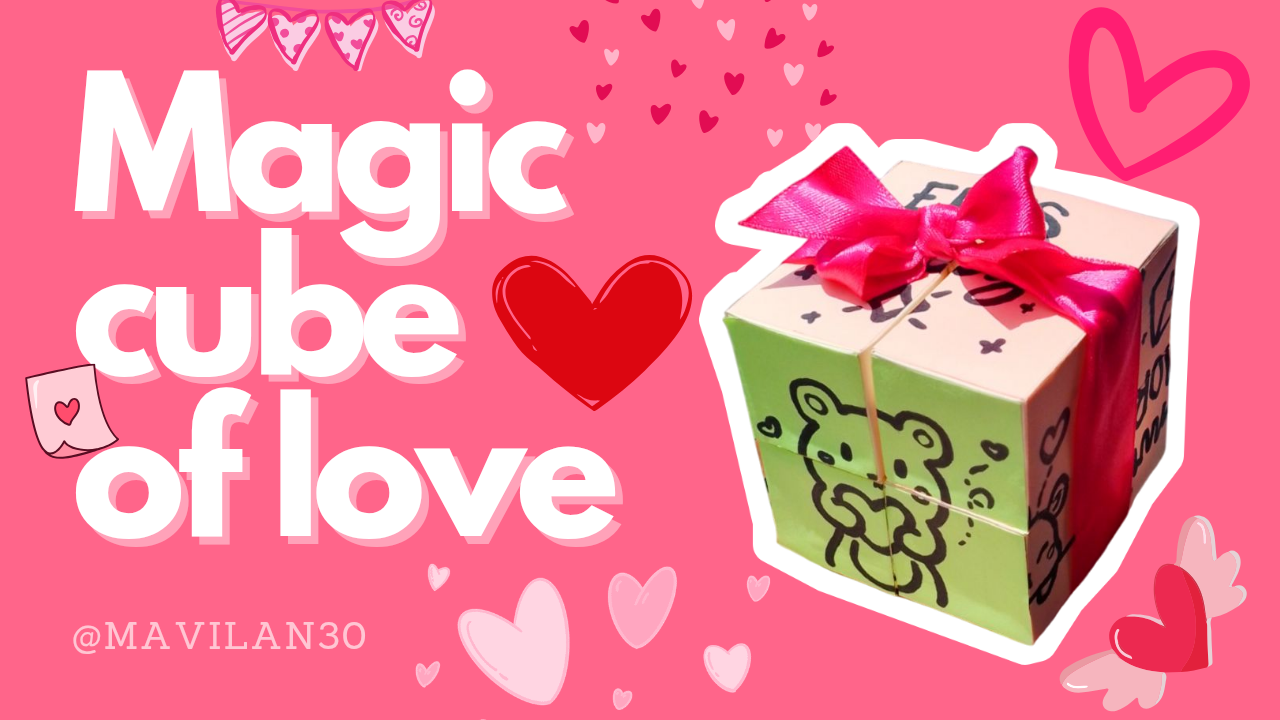
Imagen creada por mí en Canva / Image created by me in Canva
Materiales:
- Cartulina
- Lápiz
- Regla
- Tijeras
- Cúter
- Pegamento
- Papeles de colores
- Marcador
- Cinta adhesiva
Procedimiento:
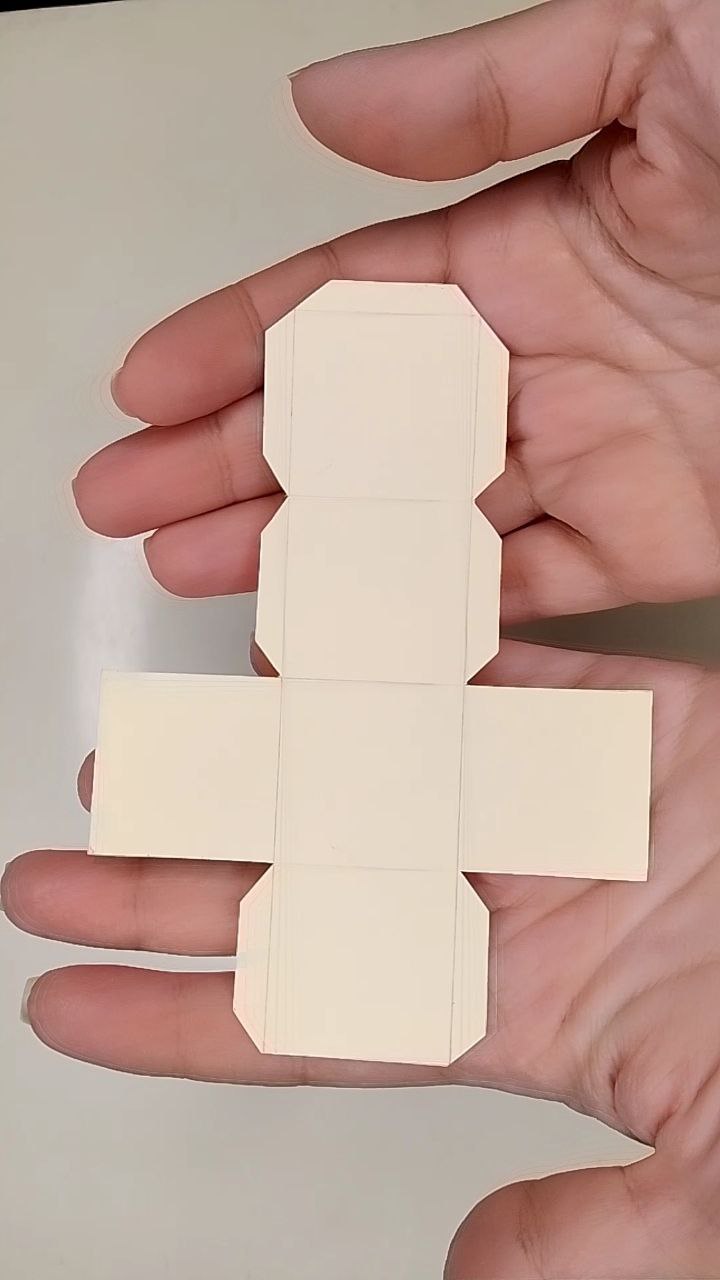
Iniciamos dibujando una cuadrícula en la cartulina, yo he aprovechado de reutilizar la cartulina de unas carpetas amarillas que ya estaban deterioradas. Las dimensiones de la cuadrícula deben corresponder a las aristas de los cubos pequeños que formarán al cubo grande, en otras palabras, medirán la mitad de la arista del cubo grande, ya que cada una de las caras de este último, estará conformada por cuatro cubitos. En la imagen están tachas con una equis las áreas que deben ser recortadas y también he dibujado las pestañas de 0.5cm.
Materials:
- Cardboard
- Pencil
- Ruler
- Scissors
- Cutter
- Glue
- Colored paper
- Marker
- Adhesive tape
Procedure:
We start by drawing a grid on the cardboard, I have taken advantage of reusing the cardboard of some yellow folders that were already deteriorated. The dimensions of the grid should correspond to the edges of the small cubes that will form the large cube, in other words, they will measure half the edge of the large cube, since each of the faces of the latter will be made up of four small cubes. In the image are crossed out with an X the areas to be cut out and I have also drawn the 0.5cm tabs.

Cuadrícula / Grid
Al recortar con las tijeras (no olviden recortar diagonalmente los extremos de las pestañas), nos quedará una forma como la siguiente:
When trimming with the scissors (do not forget to trim diagonally the ends of the tabs), we will have a shape like the following:
Recortando / Trimming
Es momento de hacer los dobleces de las partes del cubo, todos debemos doblarlos hacia el mismo lado, además, yo paso delicadamente el cúter por las líneas de doblado, solo para marcarlas un poco y así se dobla más fácil la cartulina.
It is time to make the folds of the parts of the cube, we must all fold them to the same side, also, I delicately pass the cutter along the folding lines, just to mark them a little and so the cardboard folds easier.
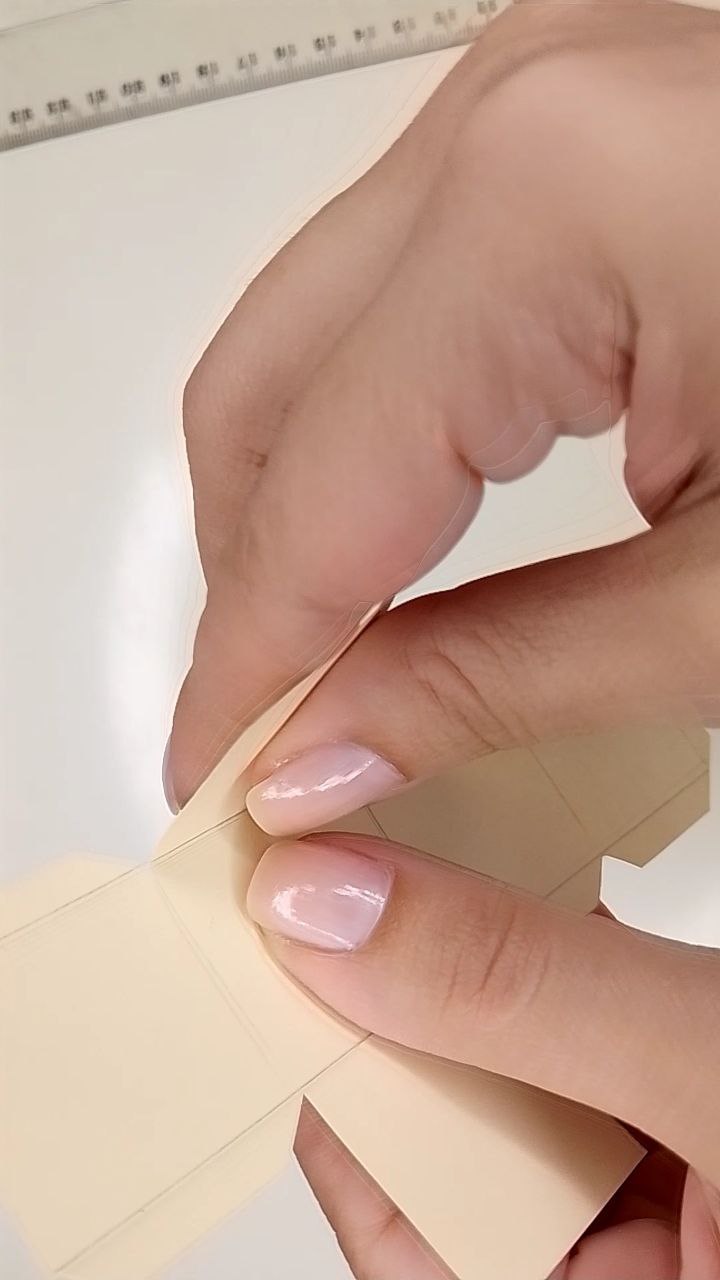
Dobleces / Folds
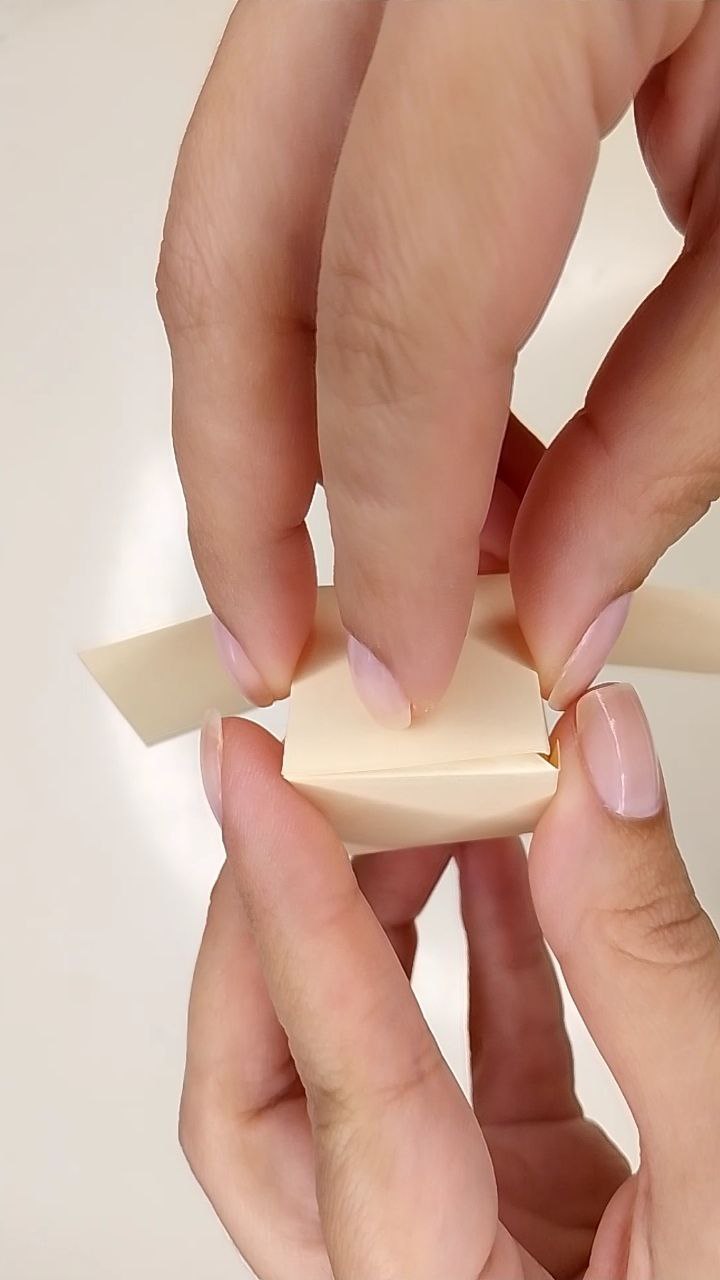
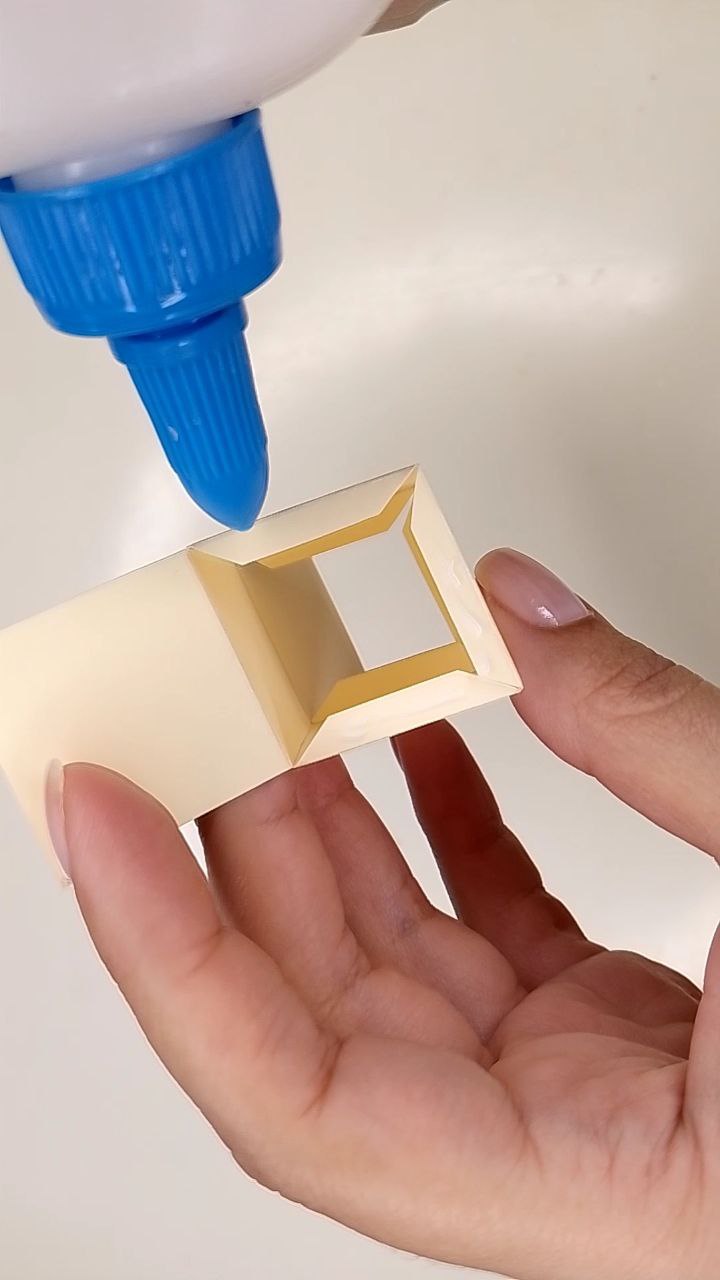
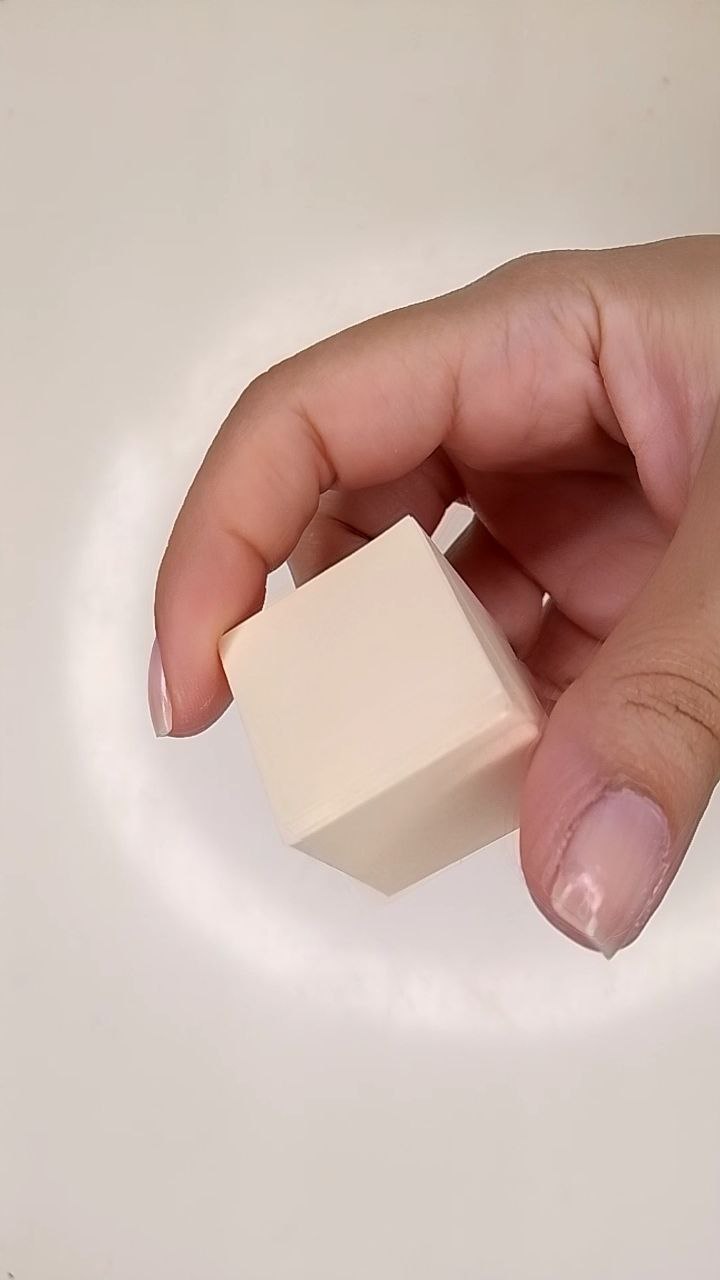
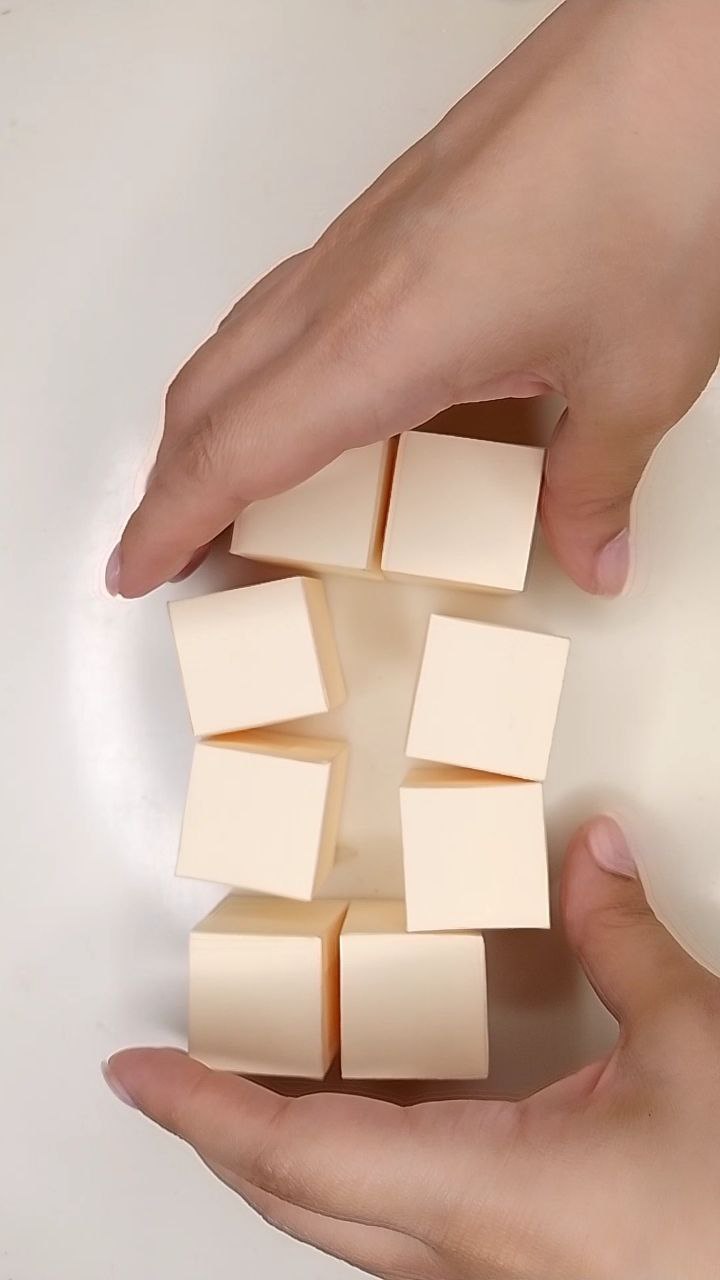
Añadimos un poco de pegamento a las pestañas y formamos el primer cubito. Repitiendo los pasos anteriores, obtendremos 8 cubitos.
Add a little glue to the tabs and form the first cube. Repeating the previous steps, we will obtain 8 cubes.
 |  |
|---|
 |  |
|---|
Formando los cubitos / Forming the cubes
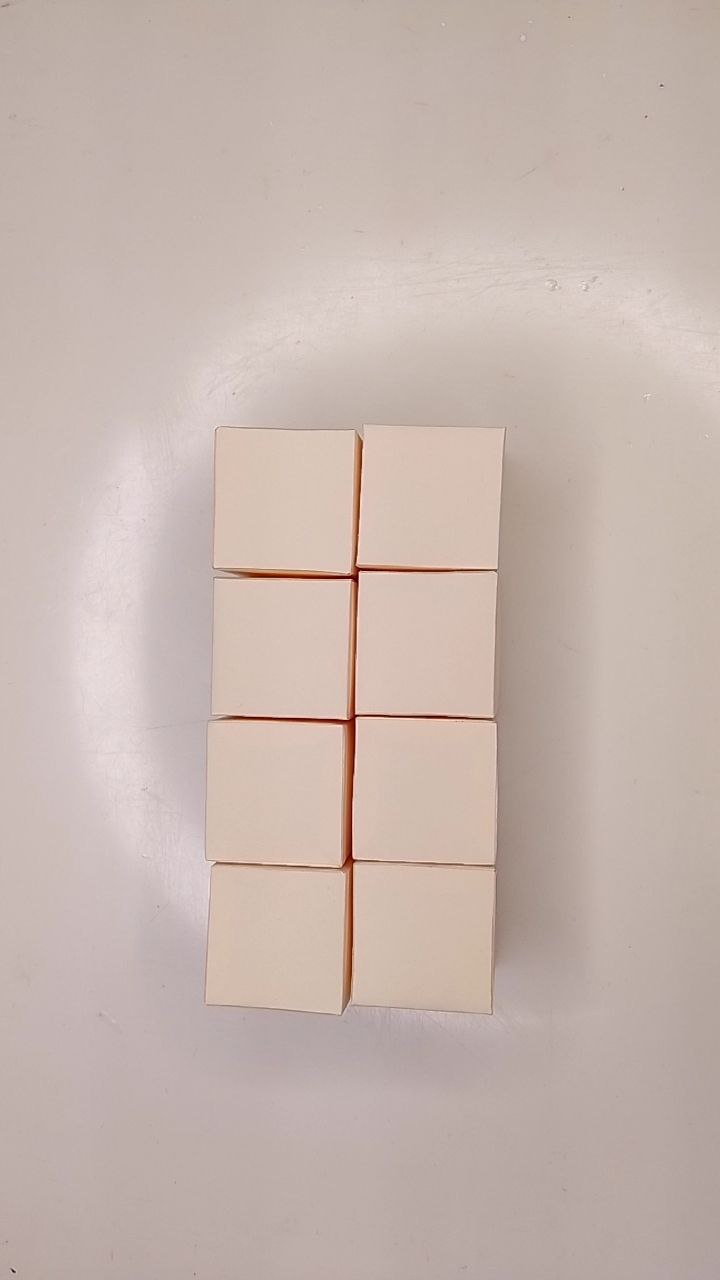
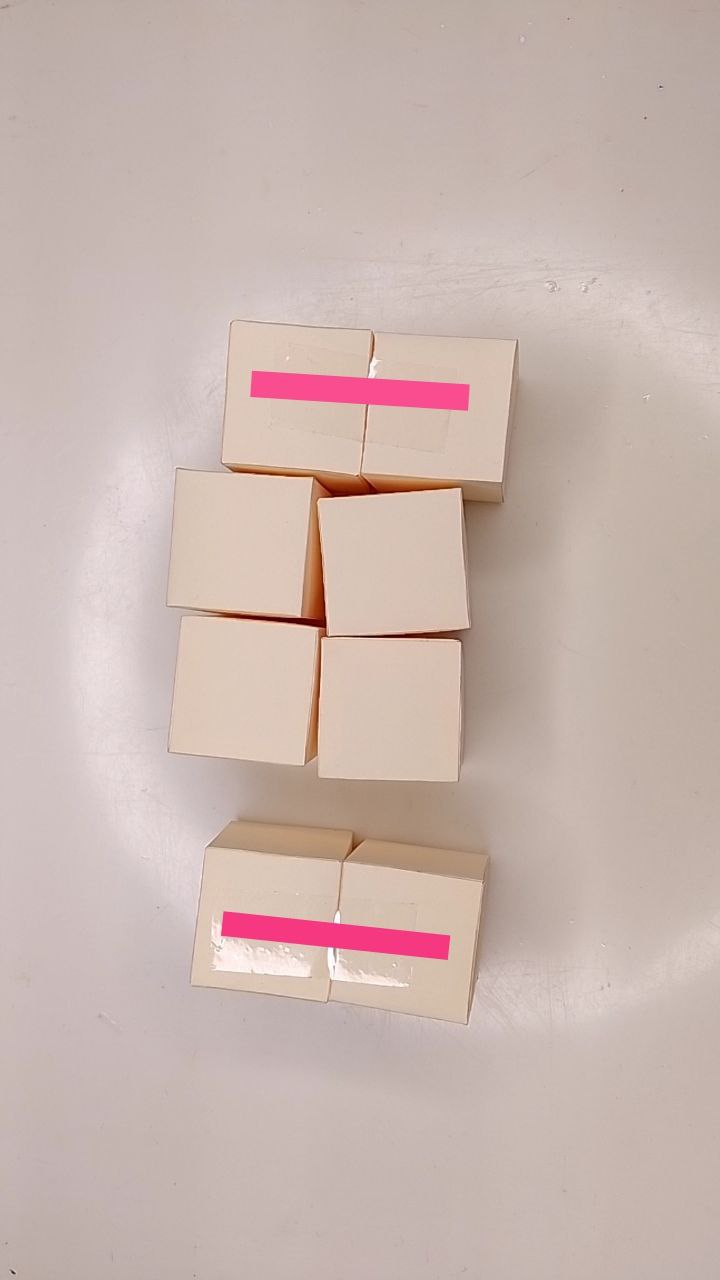
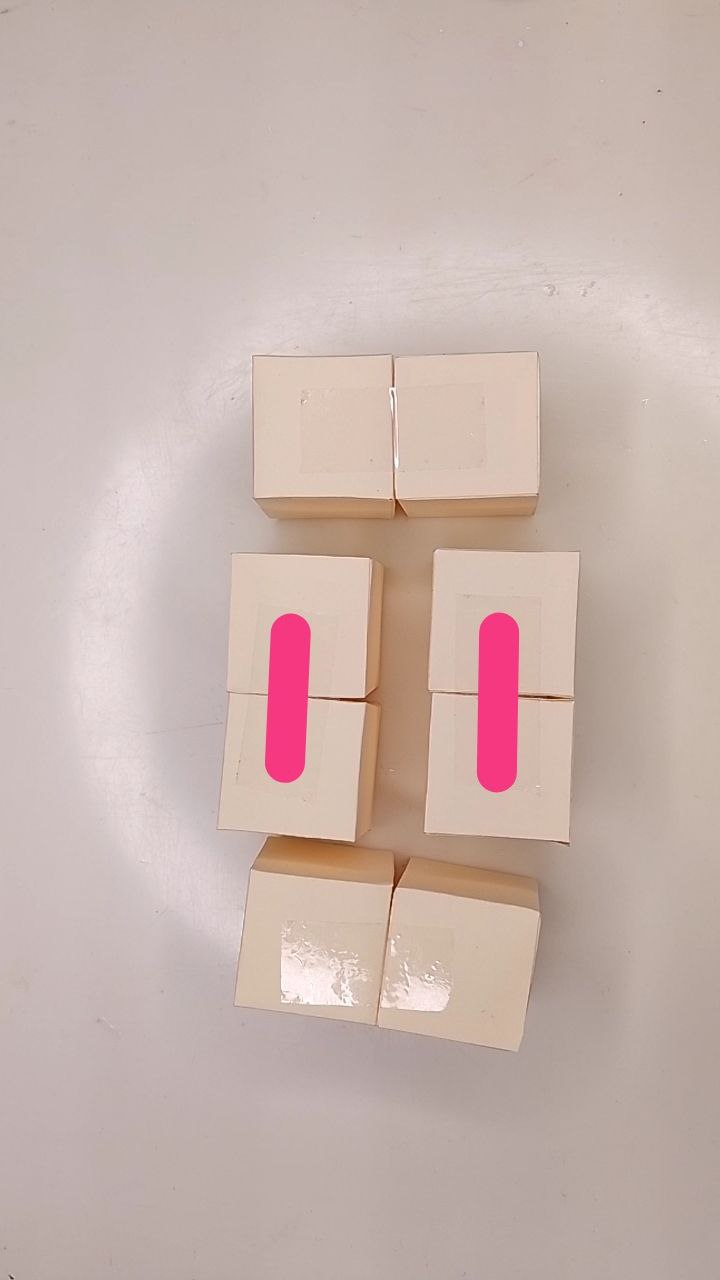
Ahora, con cinta adhesiva pegaremos los cubos entre ellos. Es necesario colocarlos en orden tal como se ve en las imágenes. Pegaremos los dos cubos que se encuentran a cada extremo igual como está señalado en color fucsia. Luego les daremos una vuelta de 180°, abriremos los cubos y pegaremos de nuevo con cinta adhesiva.
Now, with adhesive tape we will glue the cubes together. It is necessary to place them in order as shown in the pictures. We will glue the two cubes at each end as shown in fuchsia color. Then we will turn them 180°, open the cubes and glue them again with adhesive tape.
Pegando los extremos / Gluing the ends
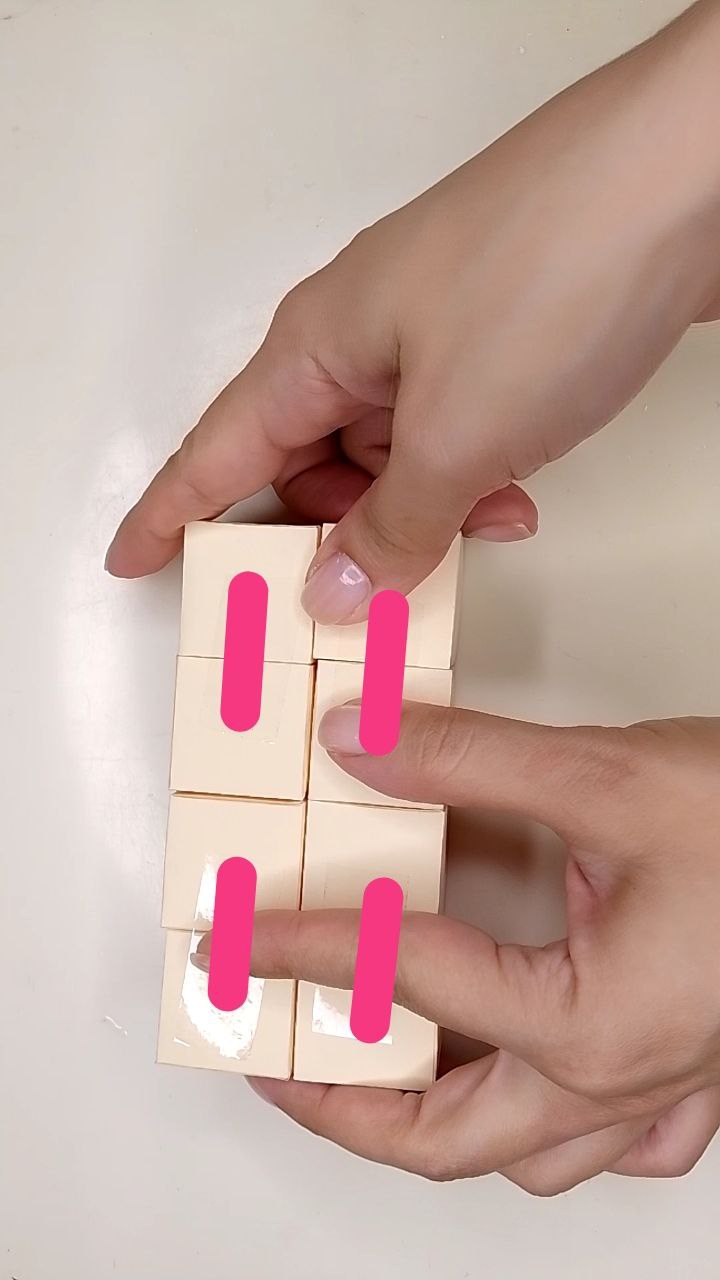
Procederemos entonces con los que se encuentran al centro, una vez más como indica el color fucsia. Igualmente les daremos vuelta, abriremos y aseguraremos con cinta adhesiva también de ese lado.
We will then proceed with the ones in the center, once again as indicated by the fuchsia color. We will also turn them over, open them and secure them with adhesive tape on that side as well.
Pegando el centro / Gluing the center
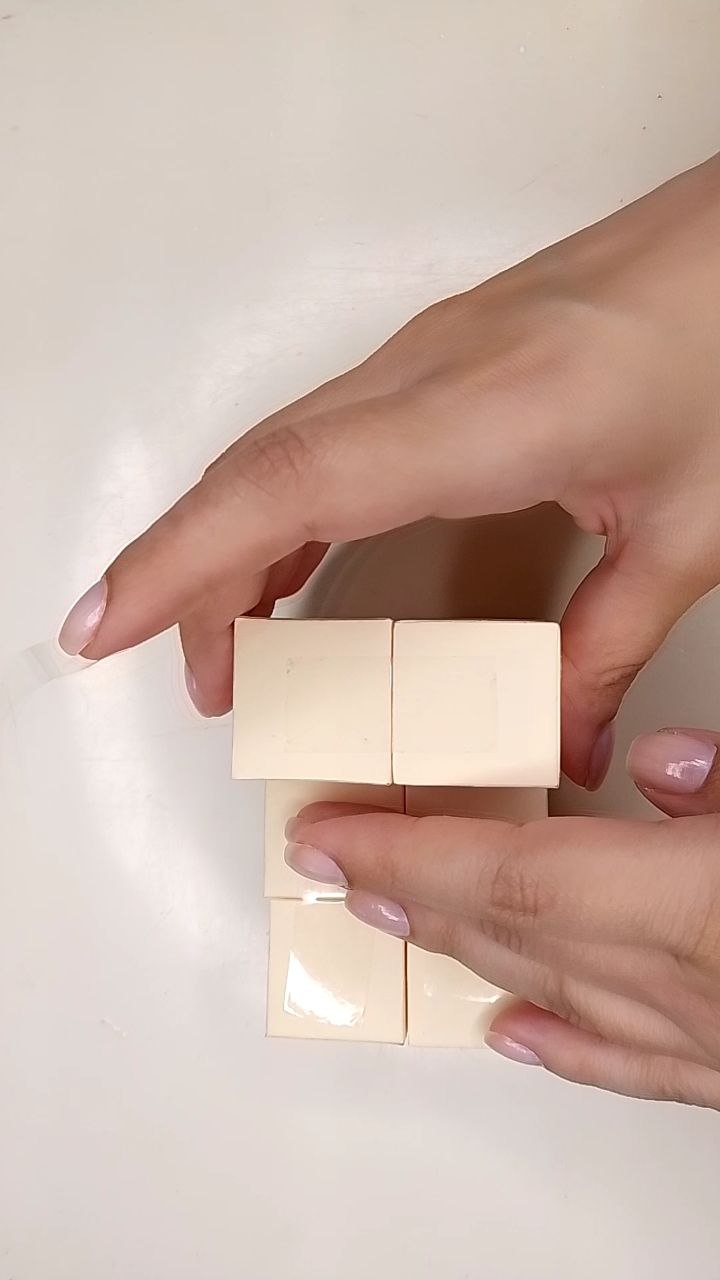
Ahora los giraremos de forma que tenga la posición que se observa en la siguiente imagen, solo deben fijarse hacia donde se abren los cubitos para que lo entiendan mejor y procedemos a pegar con cinta adhesiva como indica el color fucsia.
Now we will turn them so that you have the position shown in the following image, just look at where the cubes open to understand it better and proceed to paste with tape as indicated by the fuchsia color.
 |  |
|---|
Giramos los cubitos / We rotate the cubes
Es momento de doblar un extremo hacia arriba y asegurar esa área con cinta adhesiva tal como hemos venido haciendo hasta ahora. Repetiremos esto para el otro extremo.
It is time to fold one end up and secure that area with tape as we have been doing so far. We will repeat this for the other end.
Doblando los extremos / Folding the ends
Enumeramos entonces las distintas caras del cubo y así sabremos cuántas caras debemos decorar, siendo un total de 10.
We then number the different faces of the cube and thus we will know how many faces we have to decorate, being a total of 10.
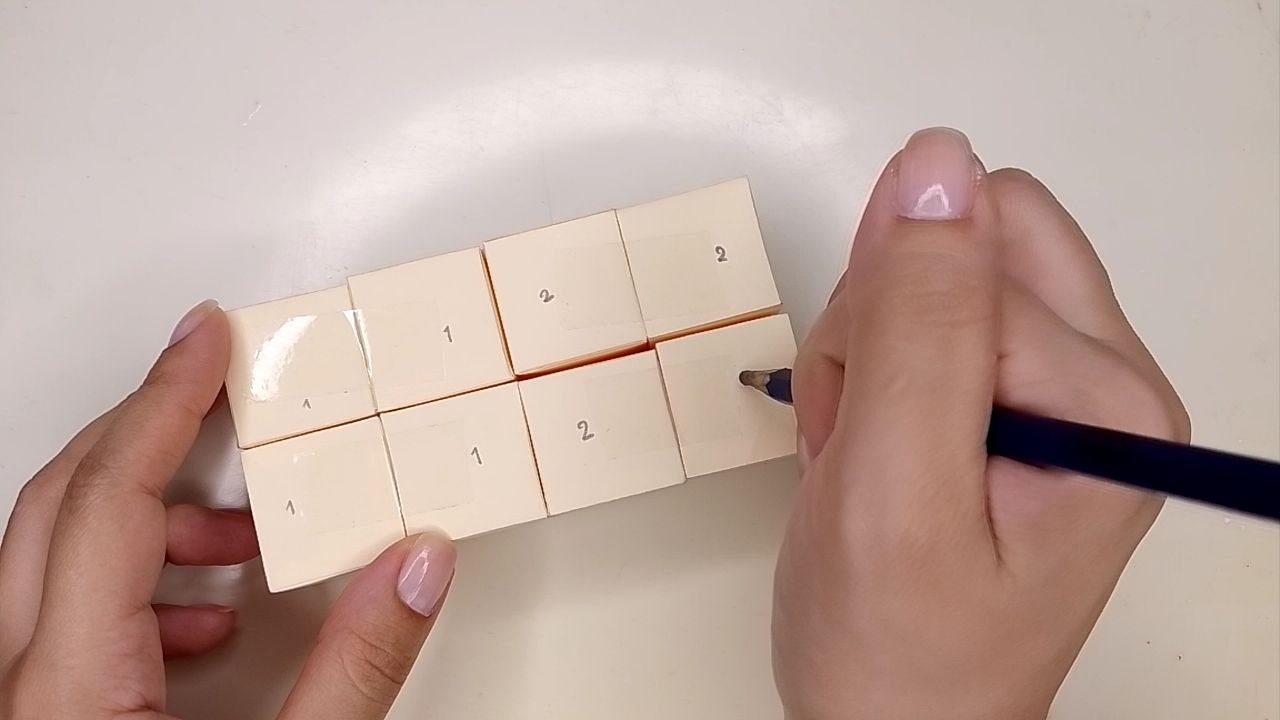
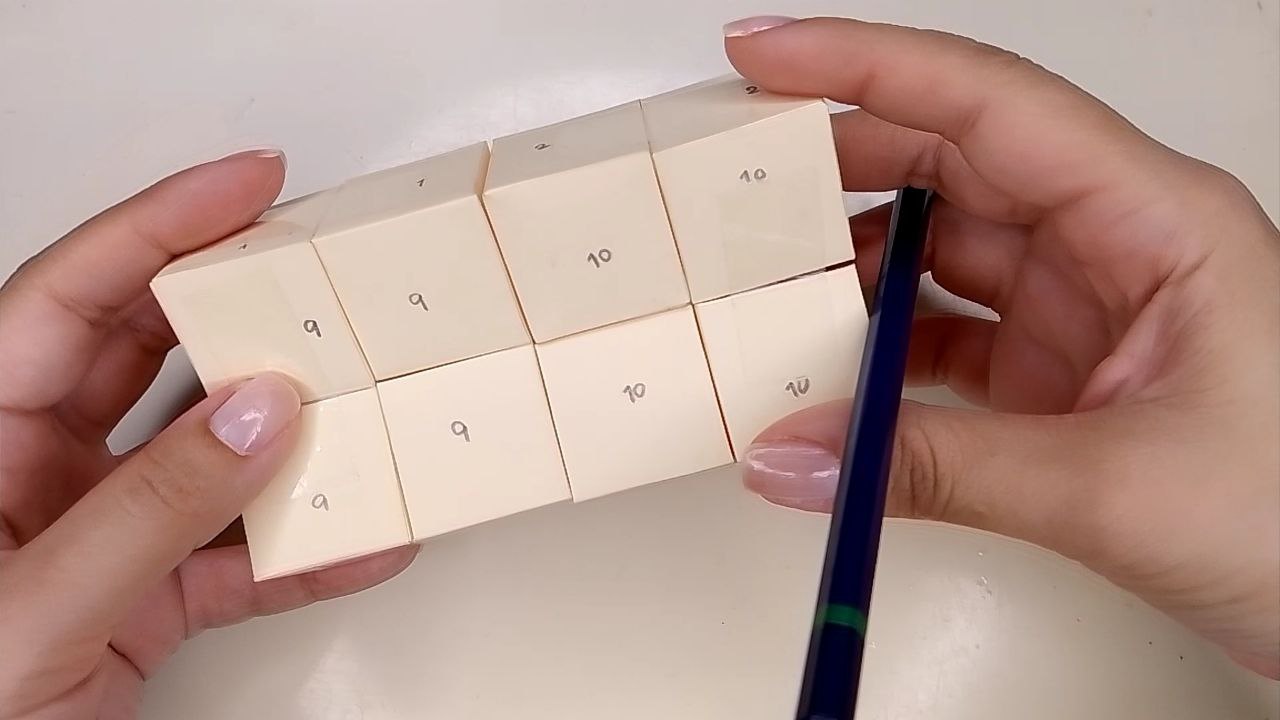
Enumerando las caras / Enumerating the faces
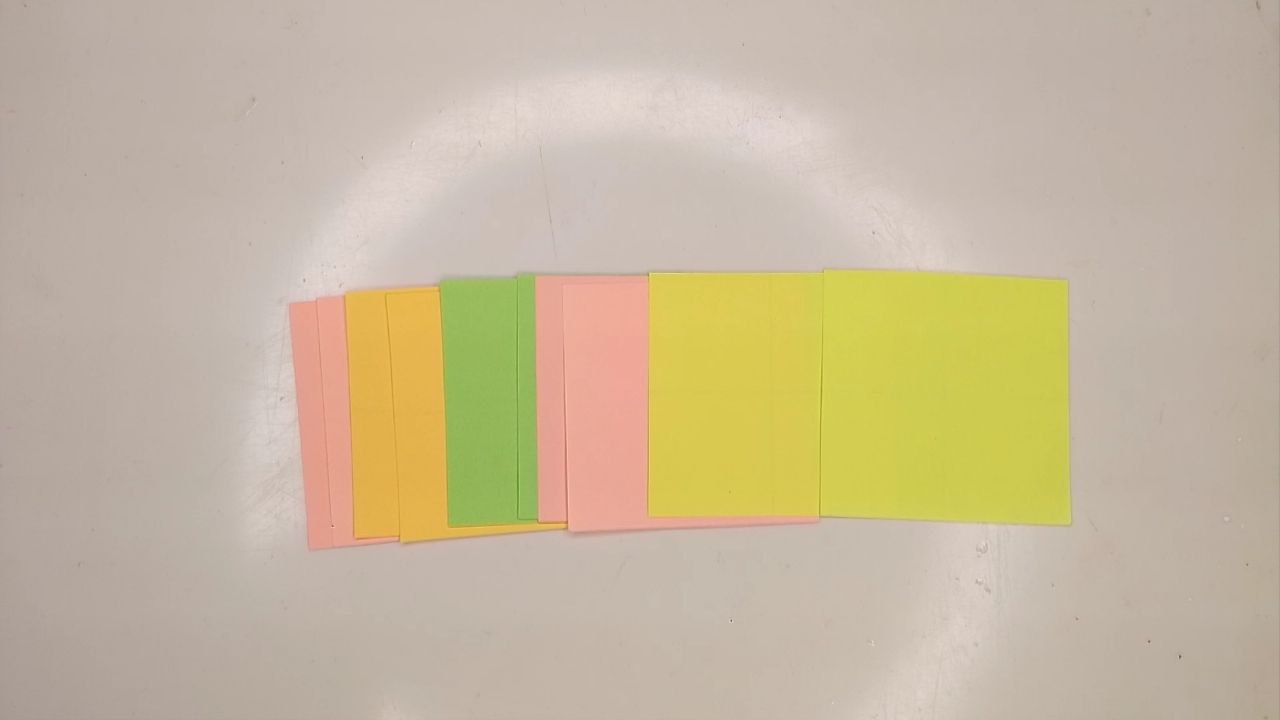
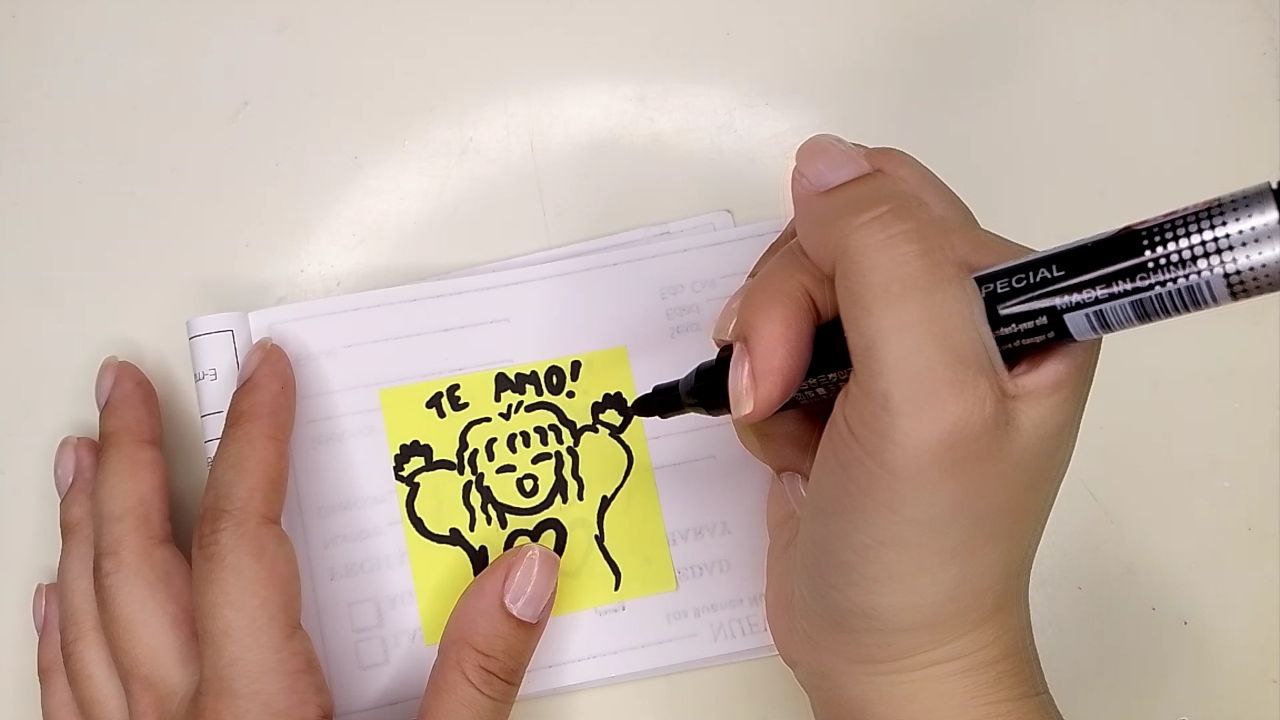
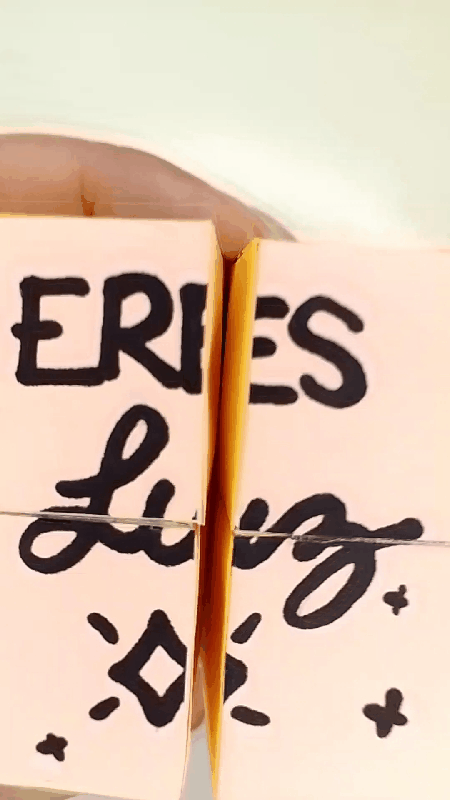
Yo he elegido decorarlas con papeles de colores llamativos en los que hice dibujos o escribí mensajes positivos y amorosos, pero también se pueden utilizar imágenes impresas, fotografías, entre otros.
I have chosen to decorate them with brightly colored papers on which I drew pictures or wrote positive and loving messages, but you can also use printed images, photographs, among others.
Haciendo la decoración / Making the decoration
Cada una de estas decoraciones las dividiremos en 4 cuadrados pequeños que coincidirán con el tamaño de las caras de los cubitos.
Each of these decorations will be divided into 4 small squares that will coincide with the size of the faces of the cubes.
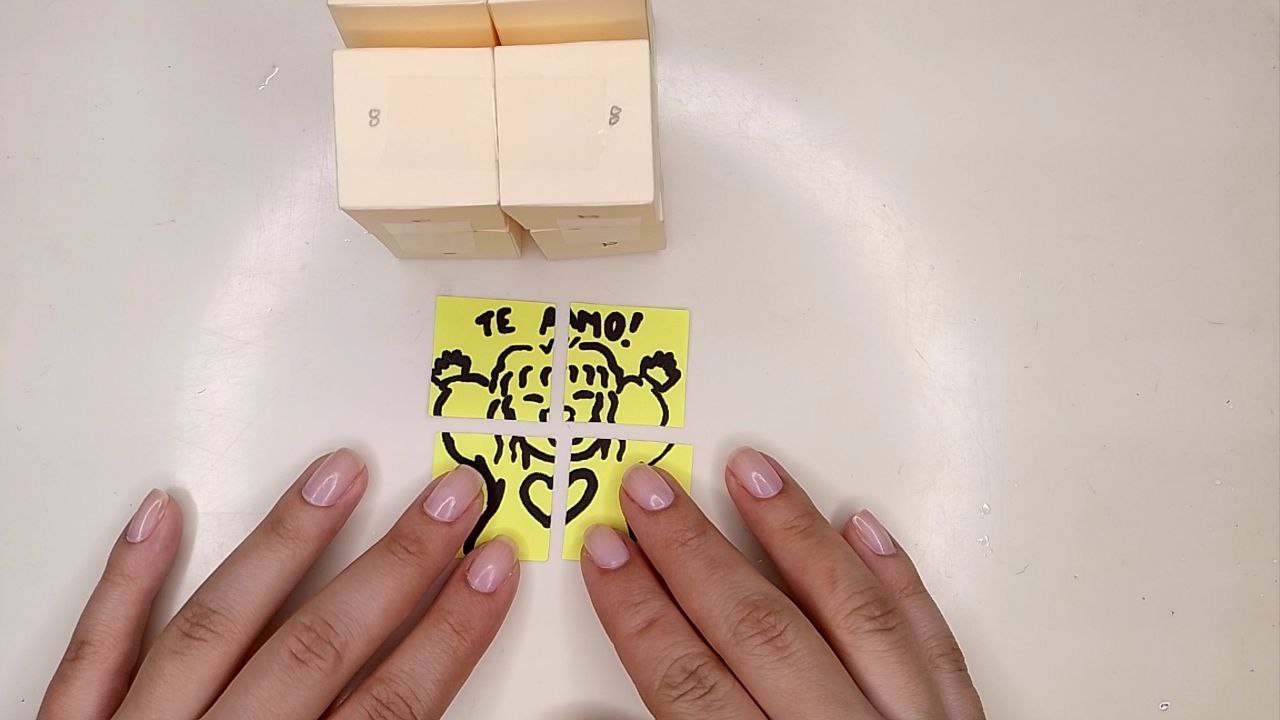
Recortando la decoración / Cutting out the decoration
Añadiendo una capa delgada de pegamento a la superficie de cada una de las caras de los cubitos correspondientes, procedemos a pegar la decoración. Es muy importante asegurarnos de que en el centro todo quede alineado, así las imágenes y escritos se verán sin distorsiones significativas. Decoramos todas las caras del cubo.
Adding a thin layer of glue to the surface of each of the faces of the corresponding cubes, we proceed to glue the decoration. It is very important to make sure that everything is aligned in the center, so that the images and writings will be seen without significant distortions. We decorate all the faces of the cube.
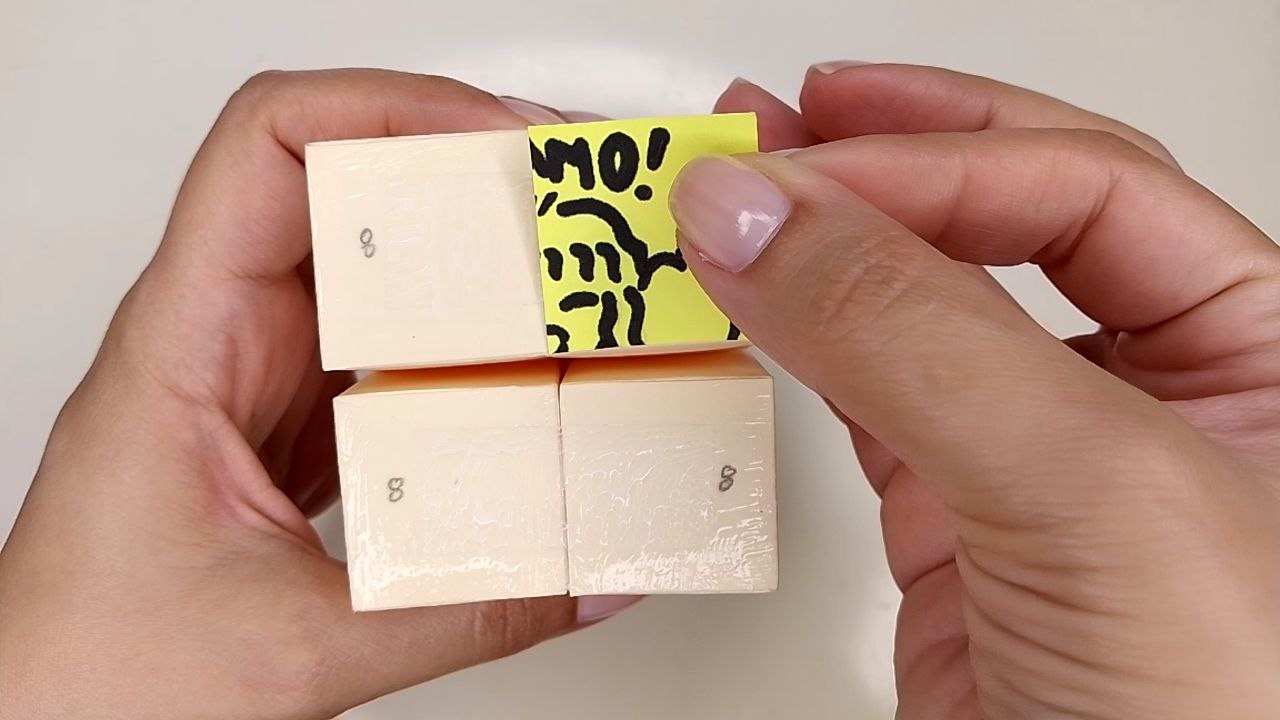
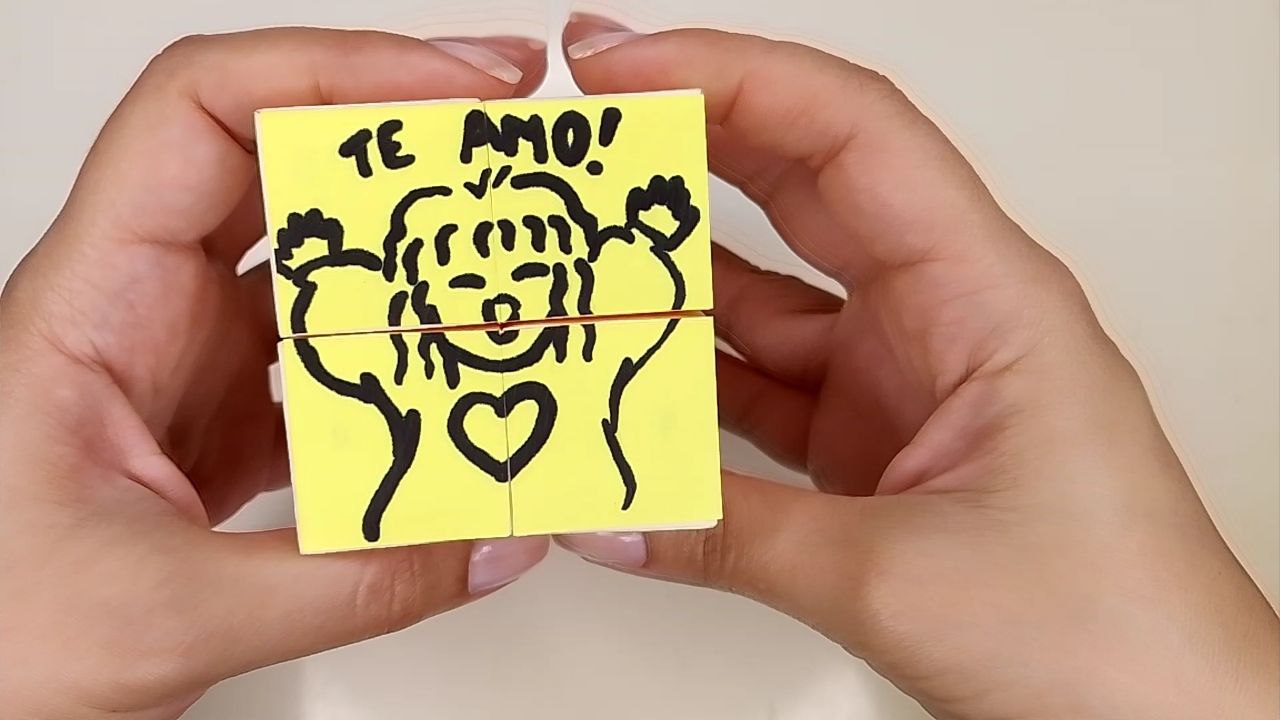
Pegando la decoración / Gluing the decoration
Al final añadí una cinta con un lazo para que se viera más bonito y así quedó:
At the end I added a ribbon with a bow to make it look prettier and that's how it looked:
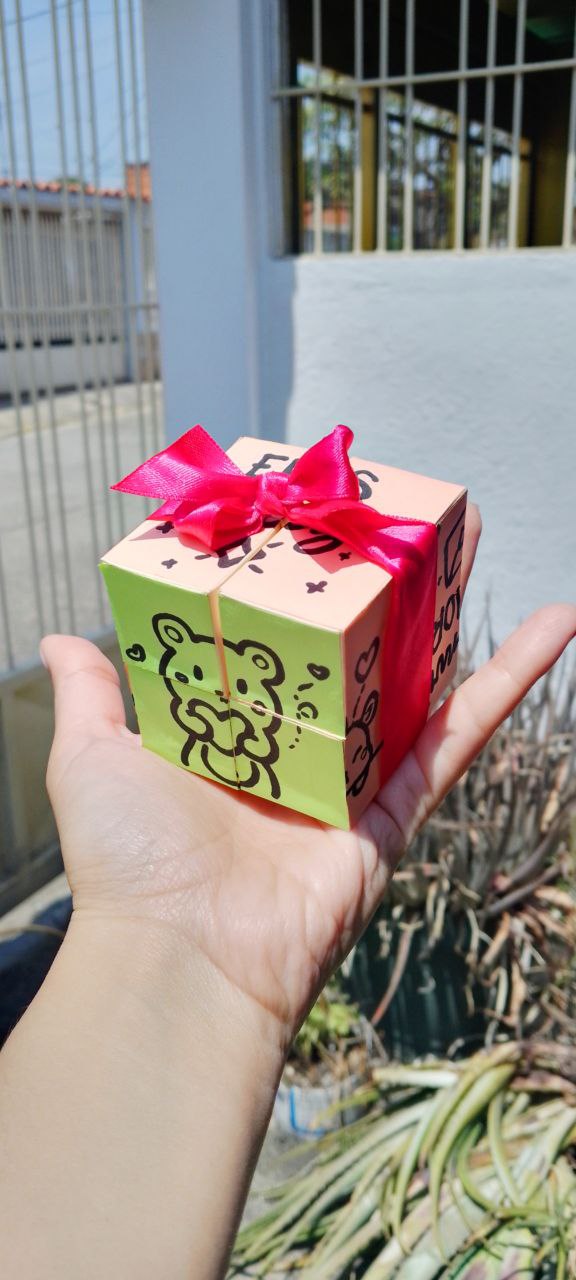
Resultado final / Final result
Y por acá una GIF para que puedan apreciar la magia de este cubo en movimiento:
And here is a GIF so you can appreciate the magic of this cube in motion:
Editado en GIFMaker / Edited in GIFMaker
Fotografías propias, tomadas con mi Tecno Spark 10C.
Ediciones en PicsArt.
Traducido al inglés con DeepL.
Own photographs, taken with my Tecno Spark 10C.
Editions in PicsArt.
Translated to English with DeepL.

Posted Using INLEO