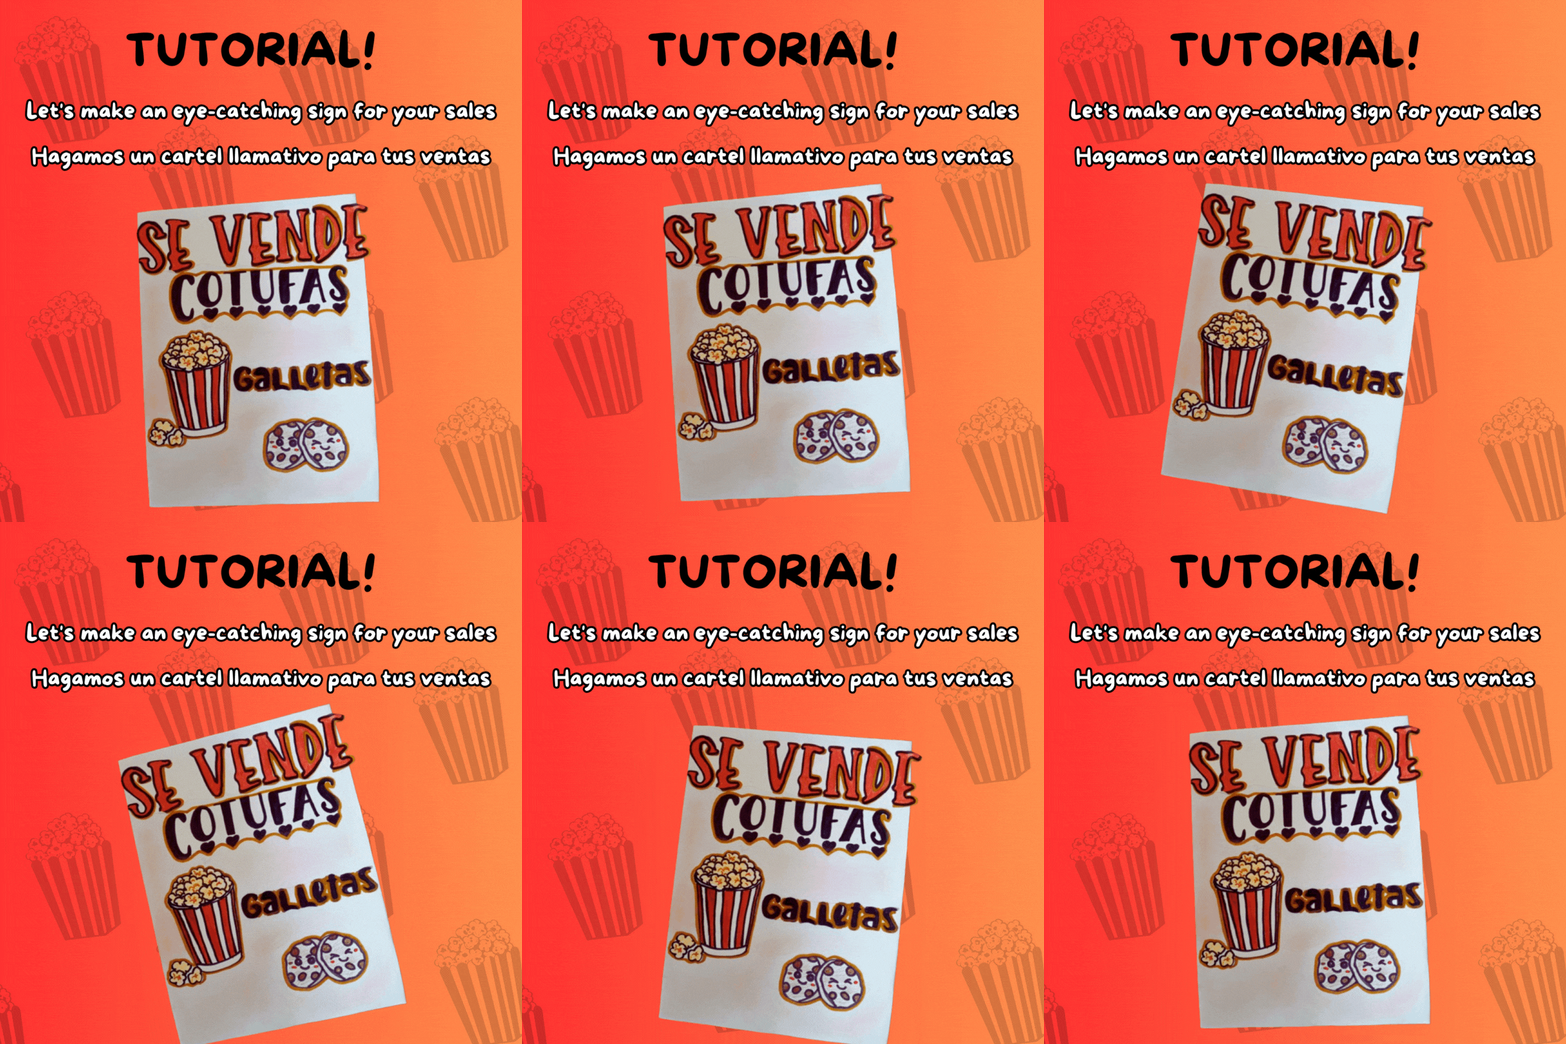
✨Hello community! Welcome| ¡Hola comunidad, bienvenido/a!✨
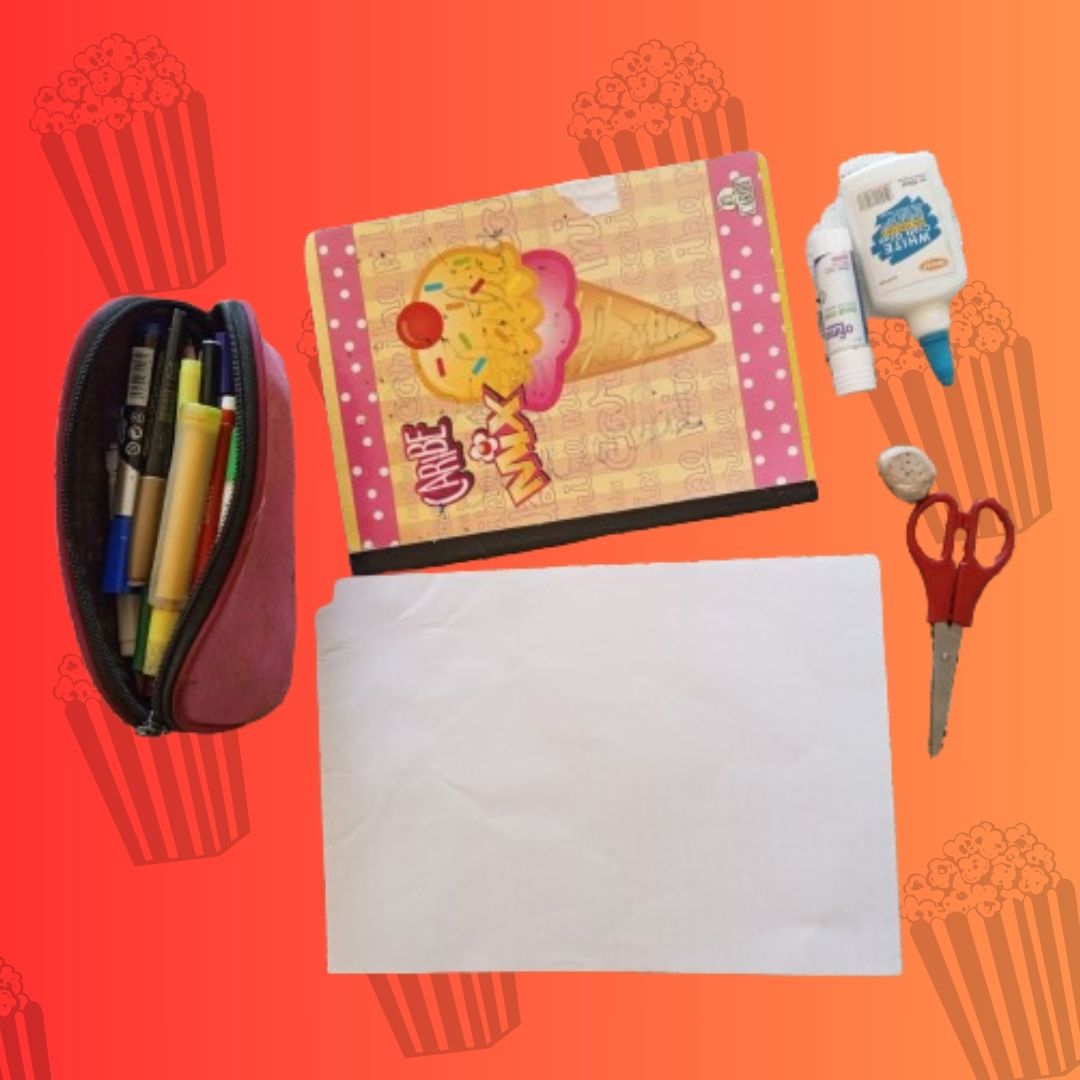
In today's tutorial I thought of a cardboard sign for those entrepreneurs who don't have the resources to have a digital sign made and printed. So, here I bring you a simple tutorial where we will also use recyclable things to be more environmentally friendly. Here I show you the materials:
`✨Materials to be used✨`
| - Scissor | - Tijera | |
|---|---|---|
| - Cardboard (it can be the cover of a notebook that you don't need) | - Cartón (puede ser la caratula de un cuaderno que no te sirva) | |
| - Stick glue | - Pega en barra | |
| - Color markers: Gold, black, orange, red and red | - Marcadores de los colores: Dorado, negro, anaranjado y rojo | |
| - Colors and pink chalk | - Colores y tiza rosada | |
| - Eraser and pencil | - Goma y lapiz | |
| - Pencil sharpener | - Sacapunta | |
| - 2 white sheets and recyclable sheets | - 2 hojas blancas y hojas reciclables |
•STEP BY STEP•
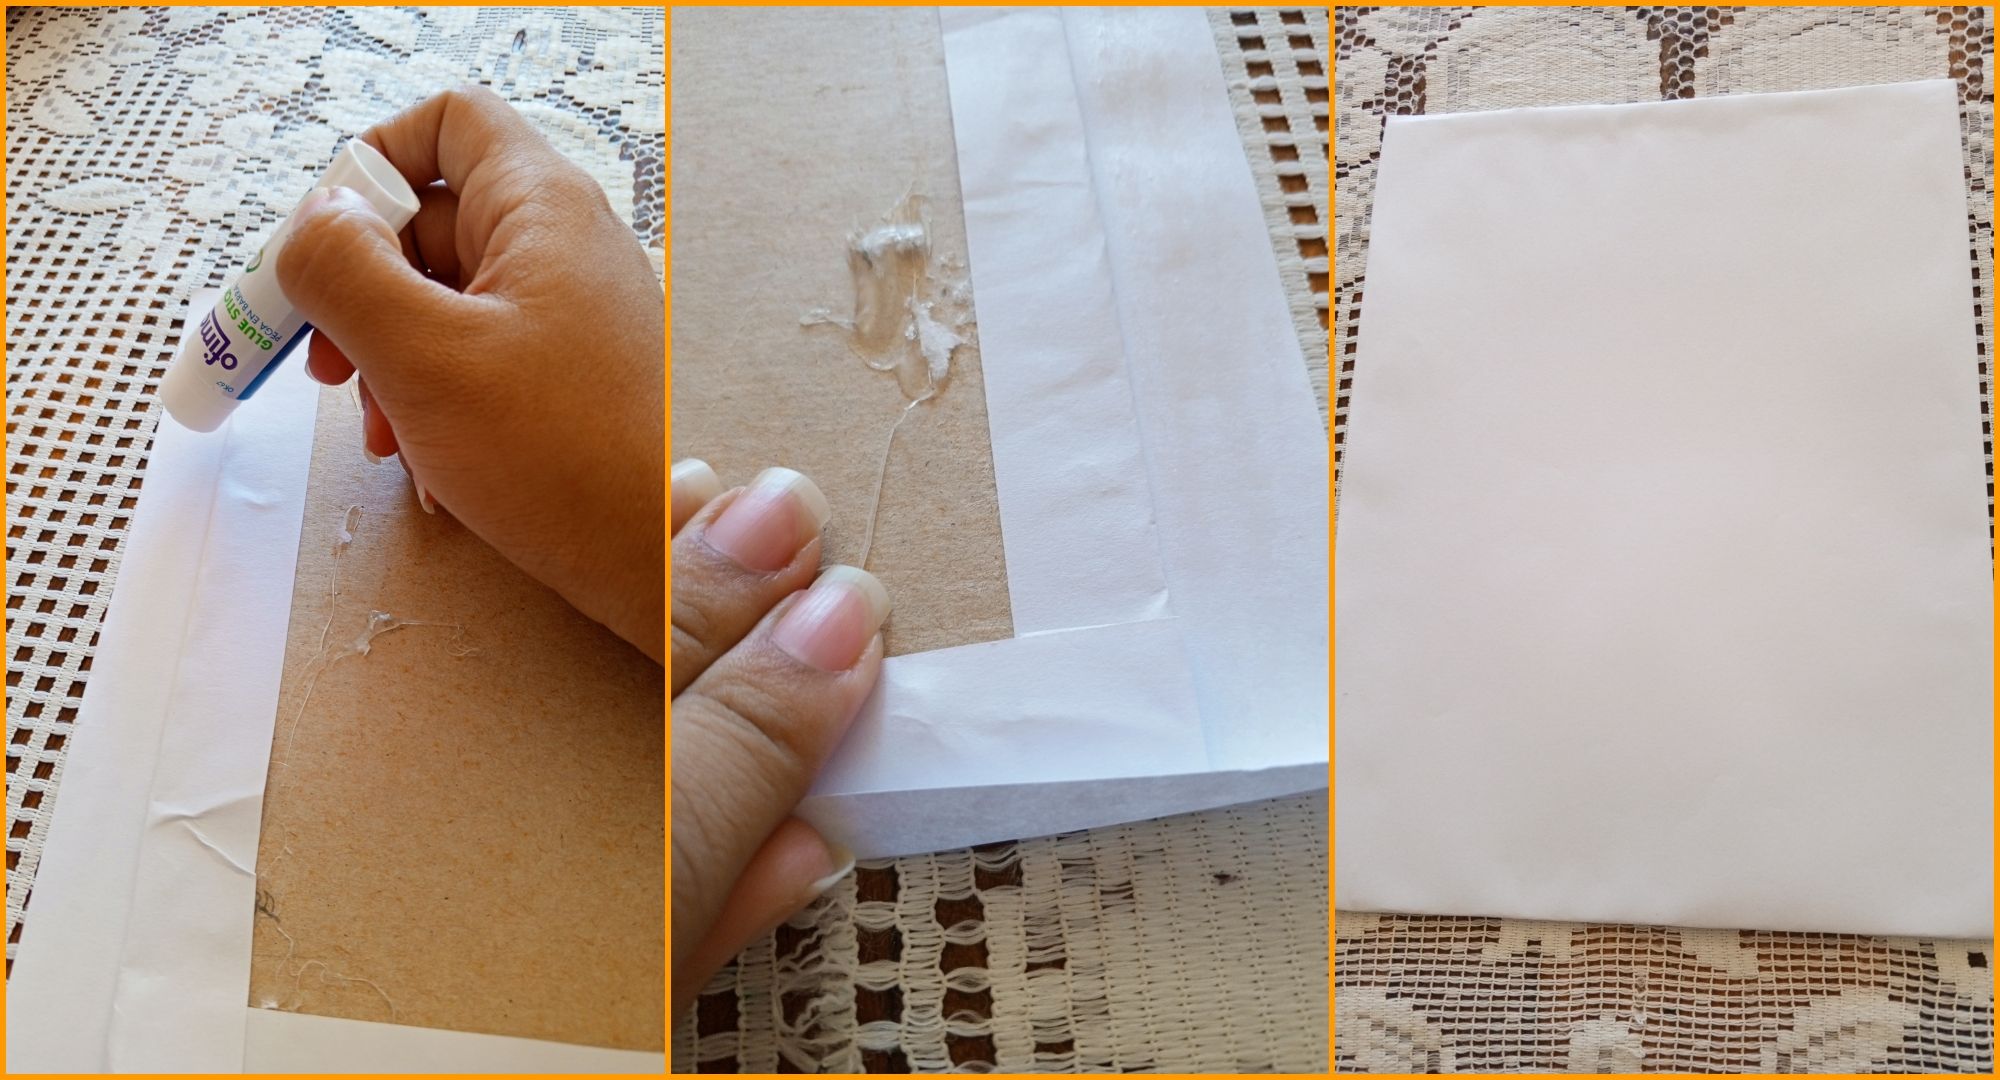
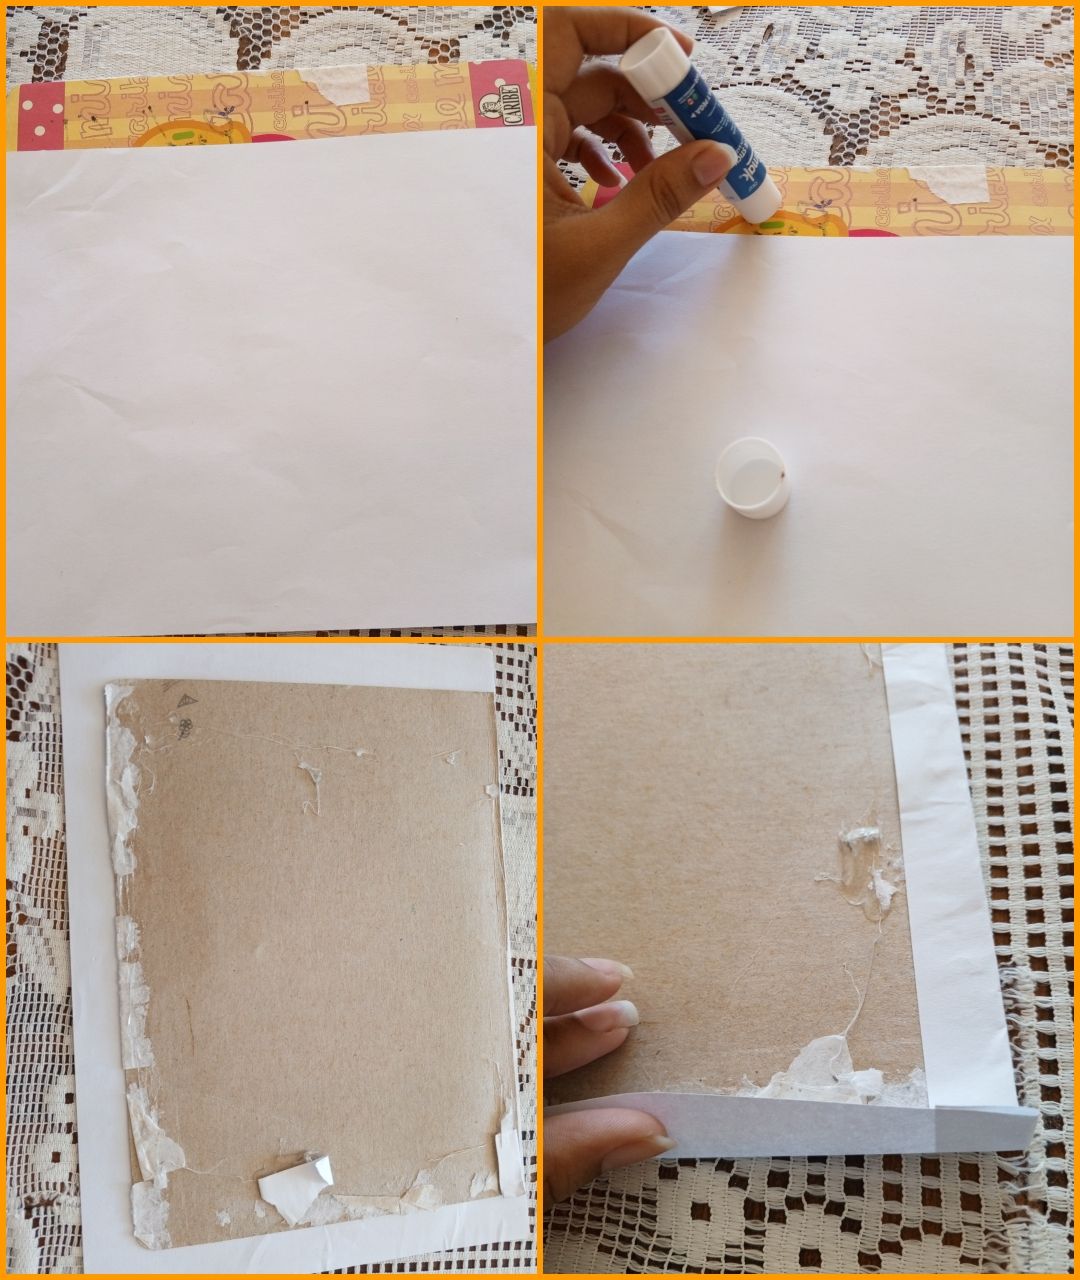
•STEP BY STEP• Vamos a tomar el cartón y lo vamos a forrar con dos hojas blancas, pegando primero una hojas blanca aplicándole bastante pega en barra arriba del cartón, luego pegamos las esquinas y volvemos a repetir el paso con la otra hoja haciendo que quede mucho mas duro.
We are going to take the cardboard and we are going to cover it with two white sheets, gluing first a white sheet applying a lot of glue stick on top of the cardboard, then we glue the corners and repeat the step with the other sheet making it much harder.
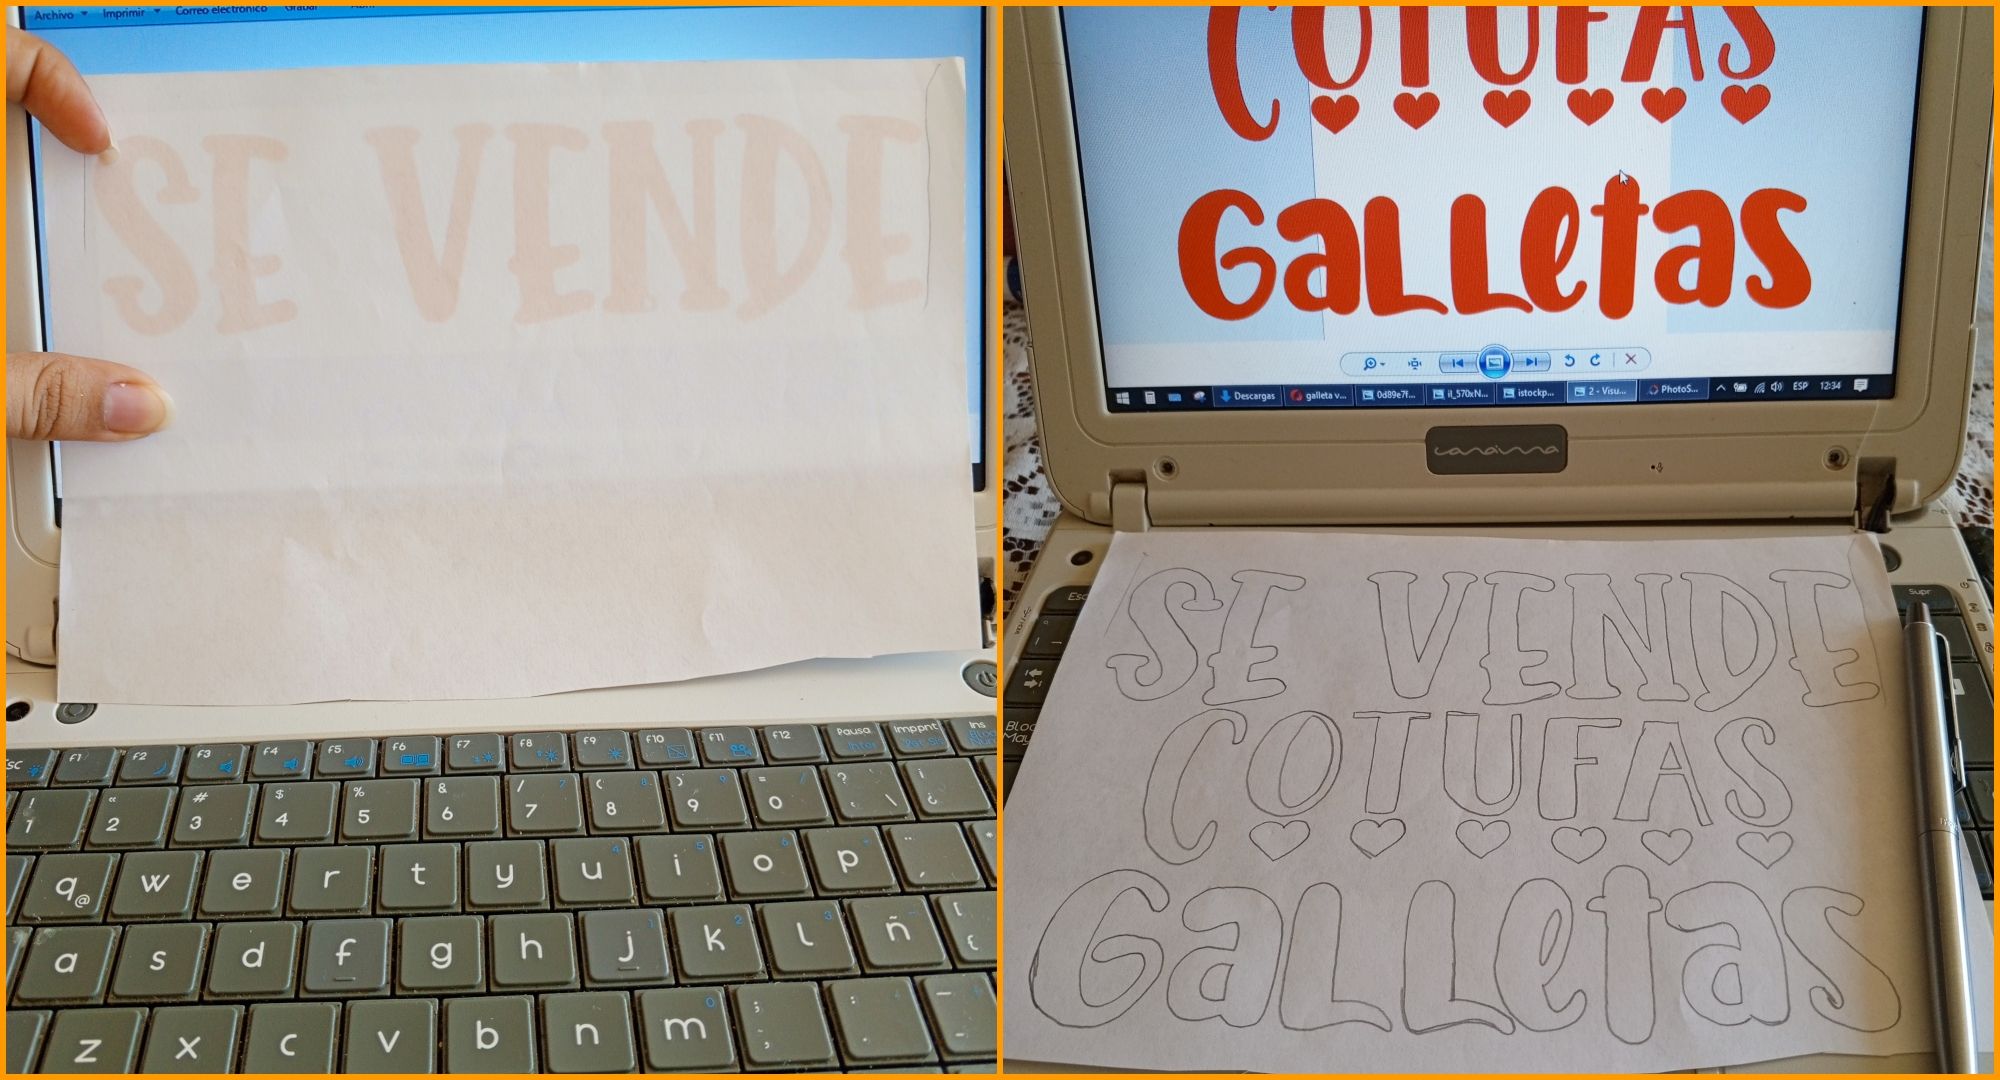
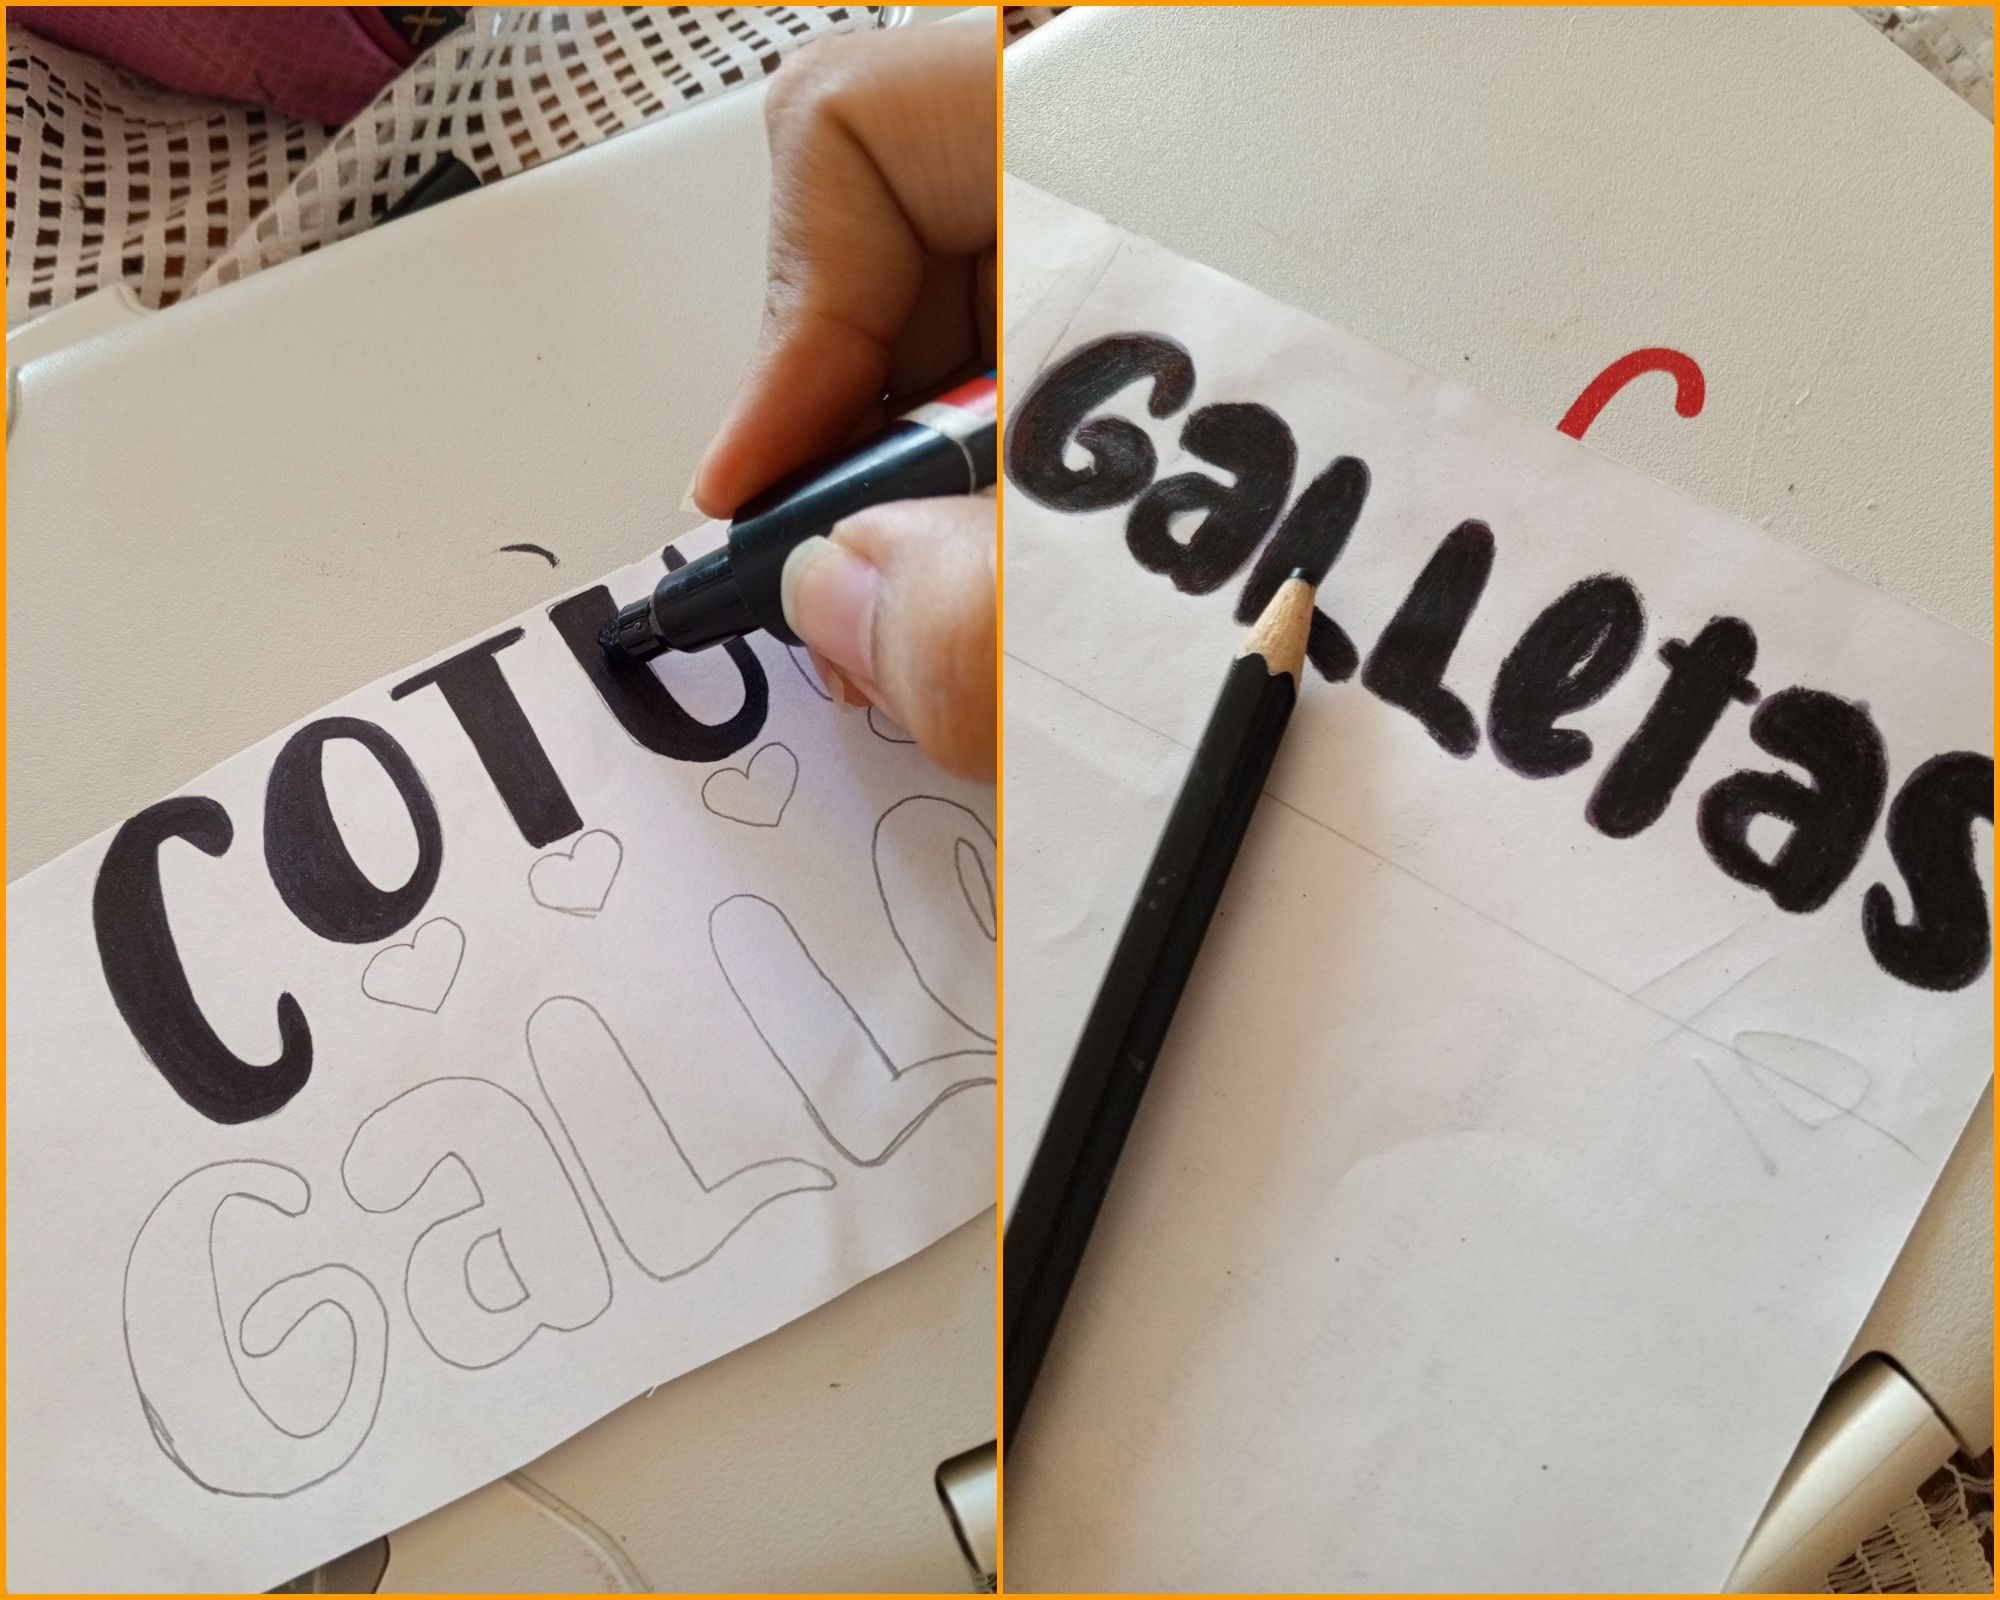
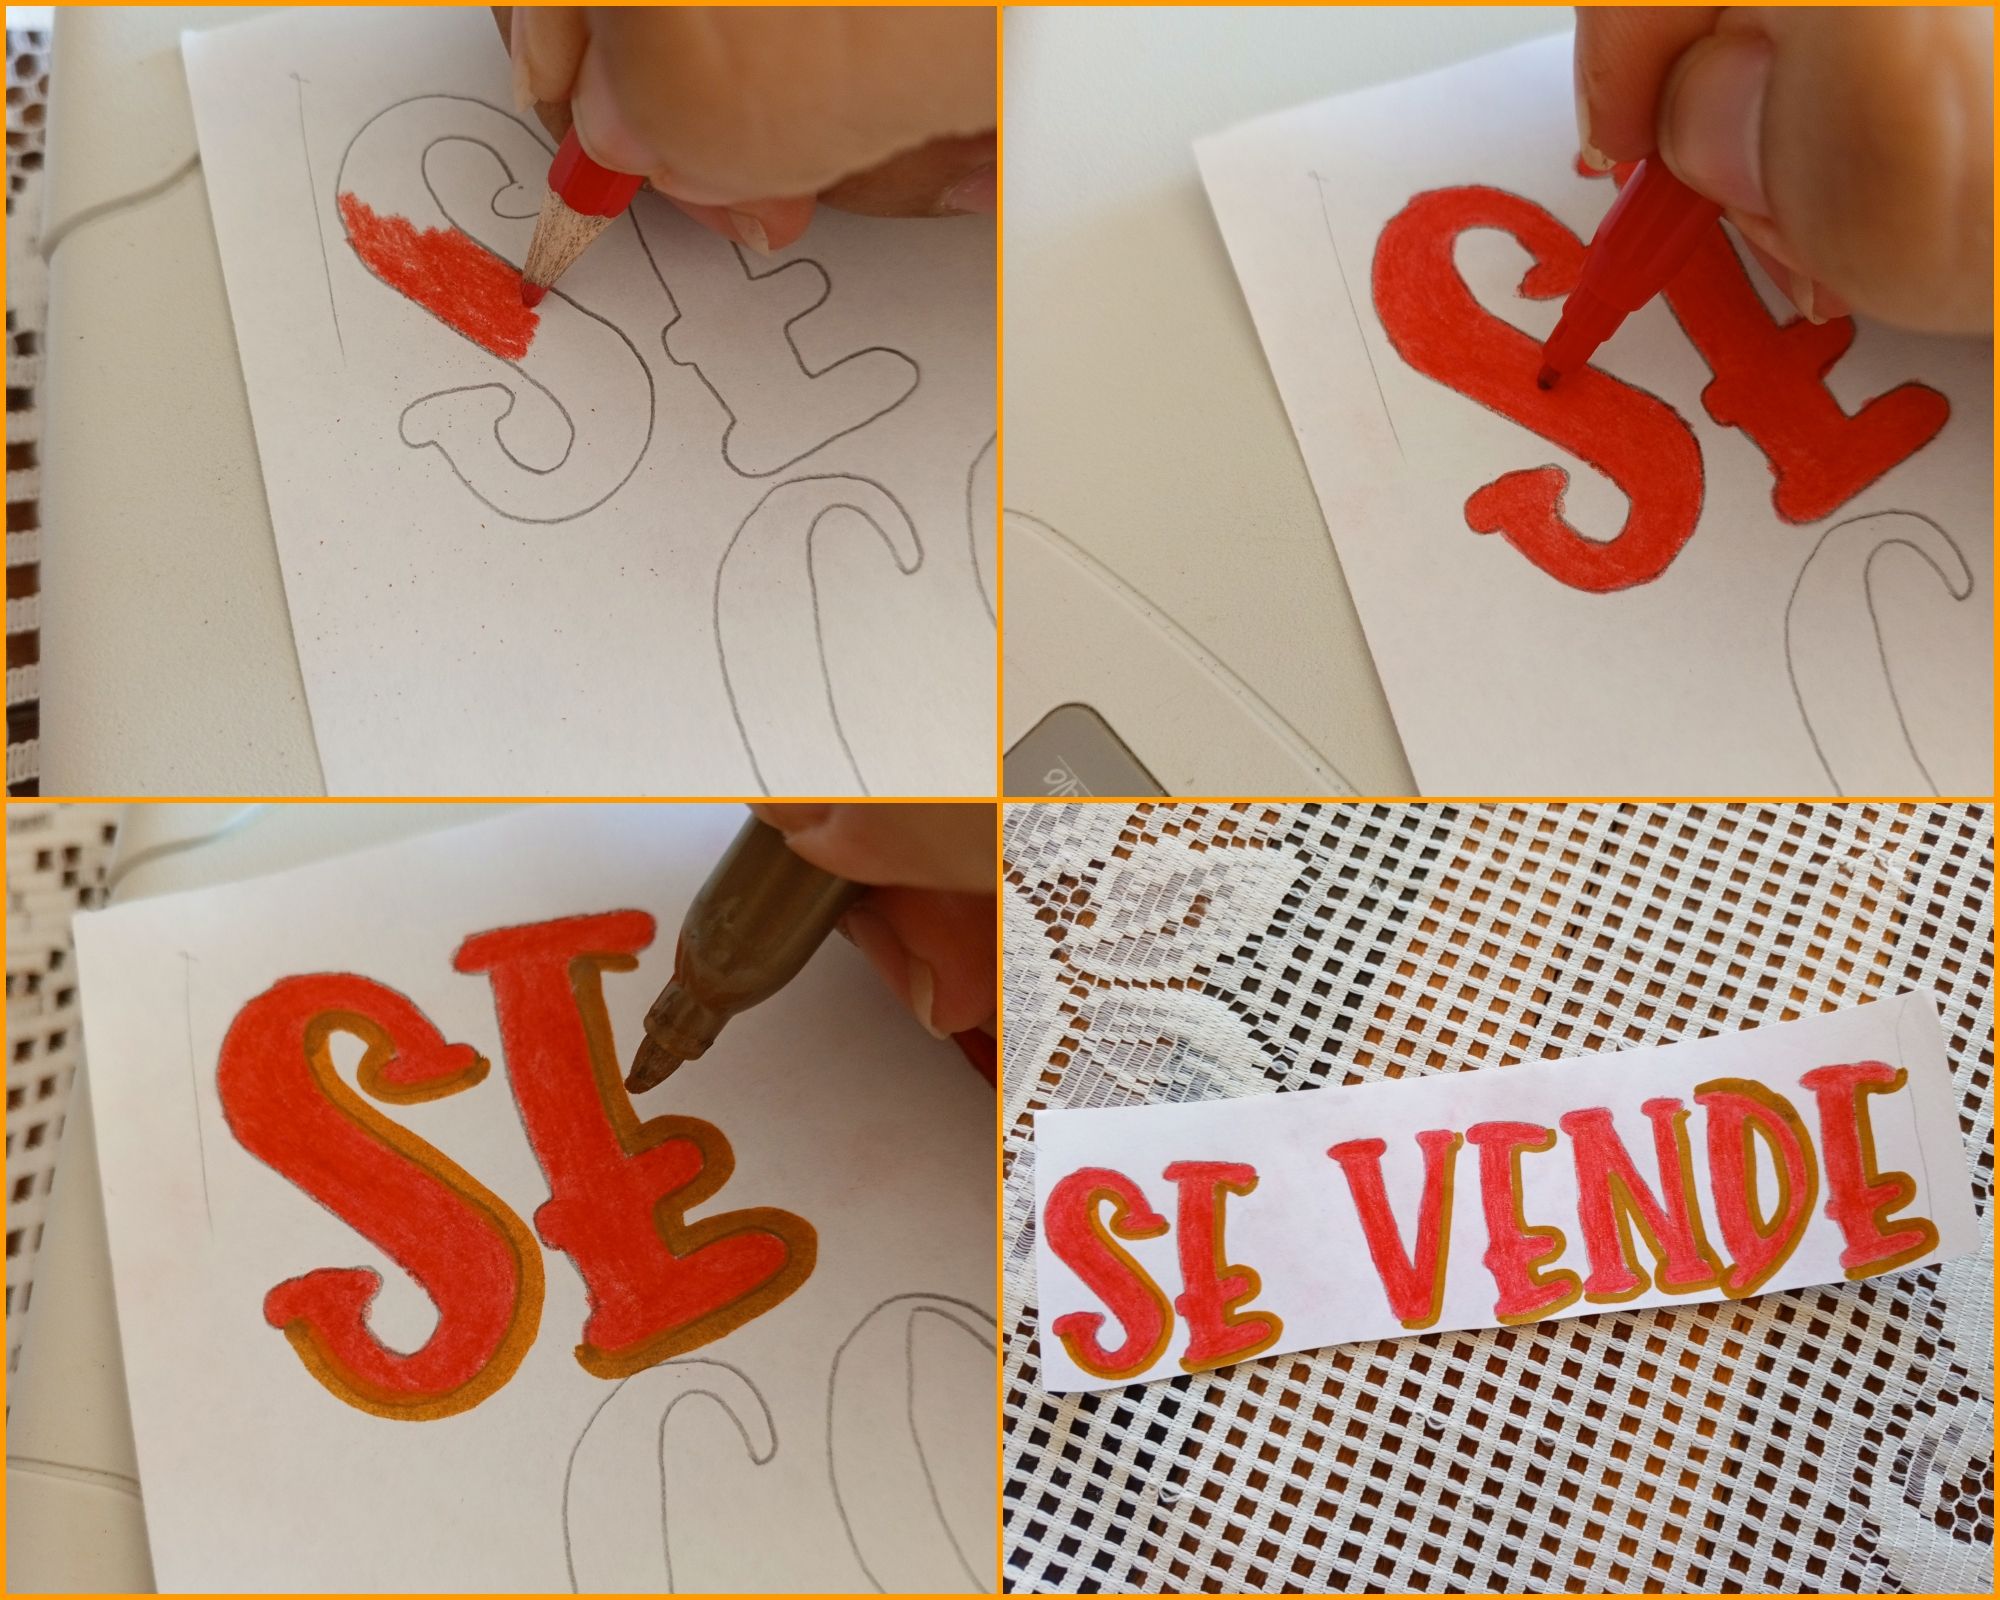
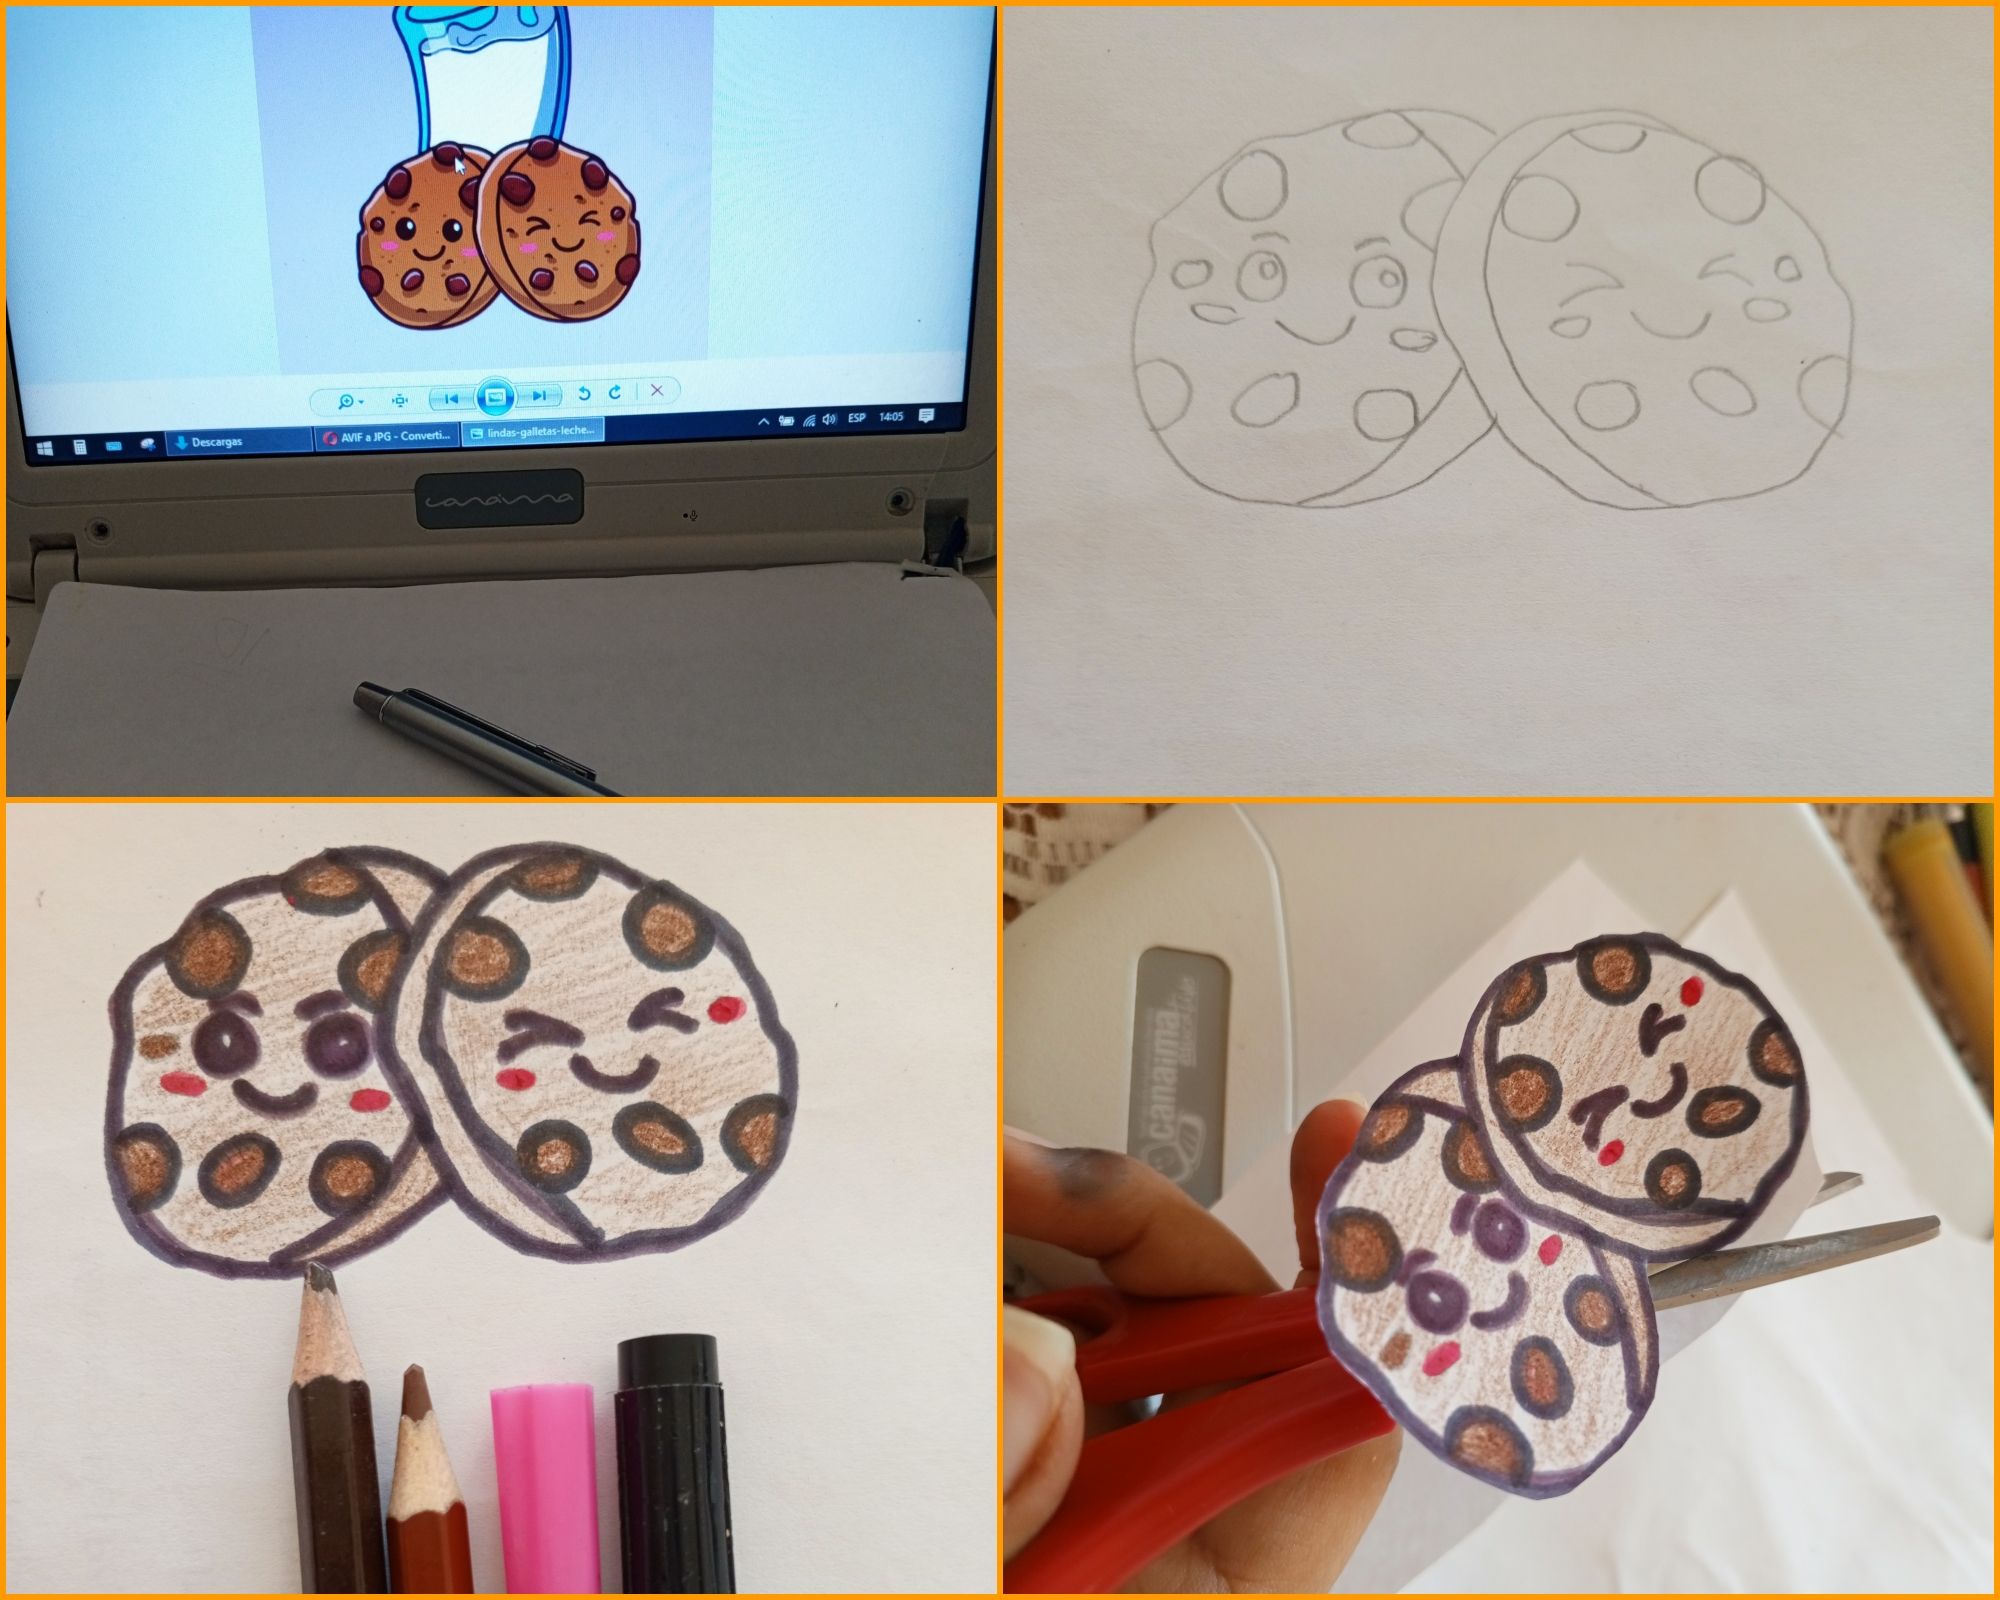
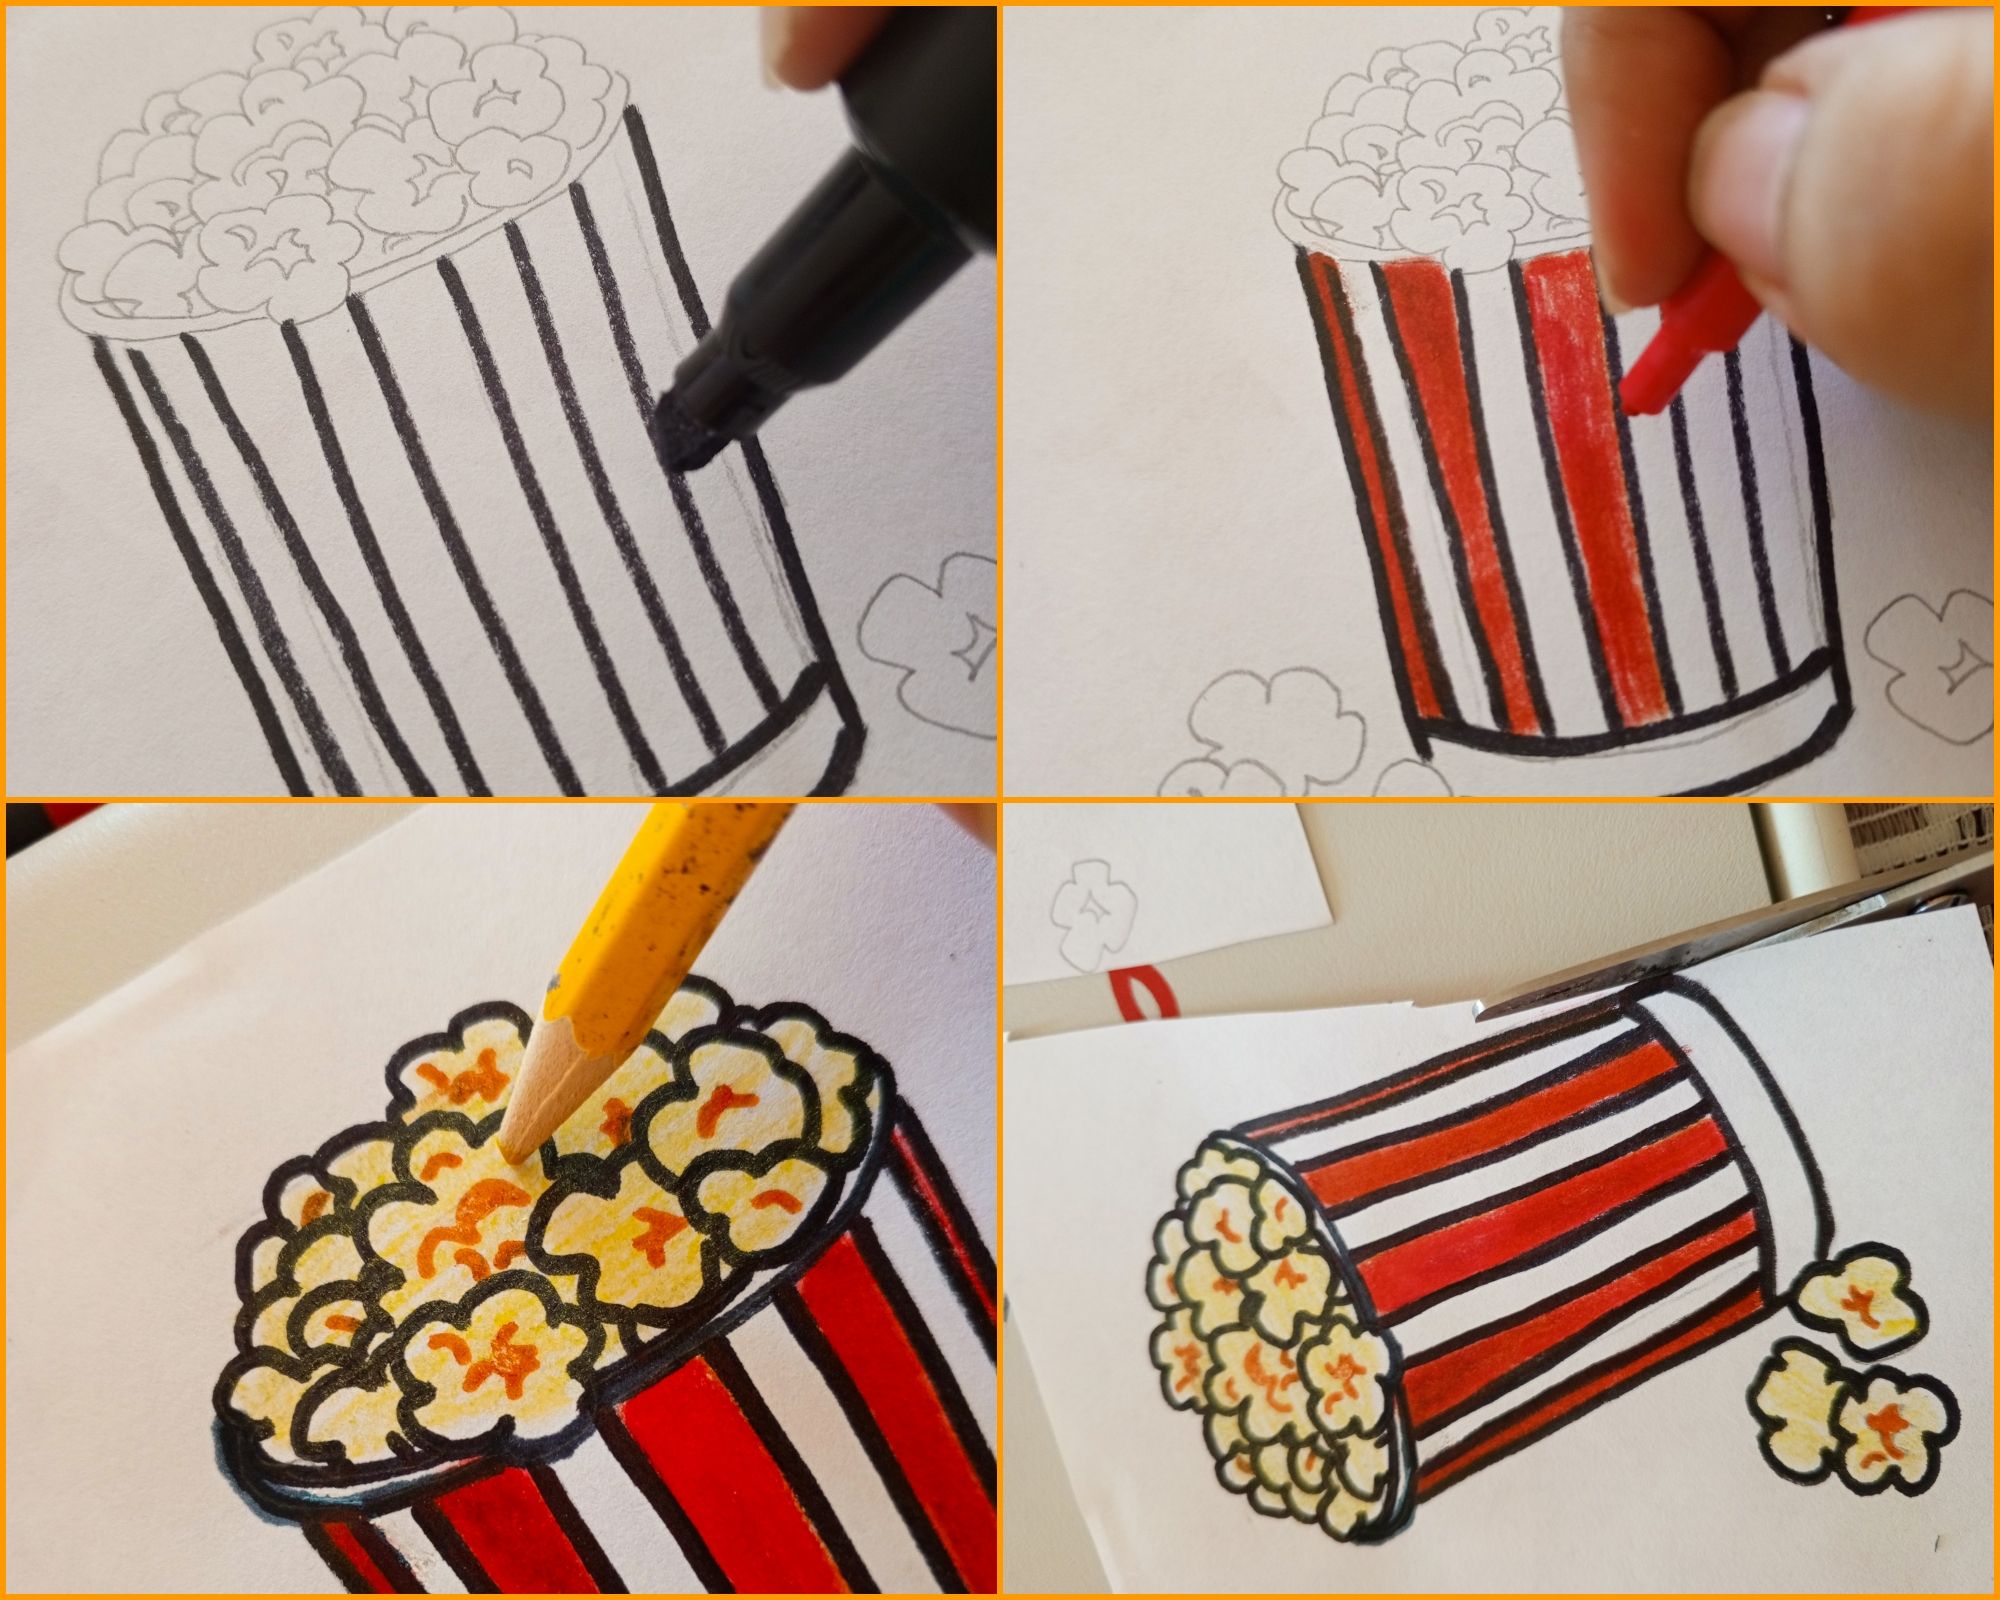
En esta paso vamos a calcar las letras y las imágenes que queremos en el cartel. Por mi parte yo coloque "SE VENDE" "COTUFAS" "GALLETAS" más las imágenes alusivas y llamativas para captar más la atención de os clientes acerca de lo que estaremos vendiendo. Calque primero con lápiz, ayudándome de mi laptop y las letras que hice digitalmente. Las dibuje primero con color, luego las remarque para que se vieran mas bonitos con marcador y borre el excedente de lápiz con borrador. Todo muy fácil y sencillo para las personas que no saben dibujar😊.
In this step we are going to trace the letters and images we want on the sign. For my part I put “FOR SALE“ "POPCORN" ‘COOKIES’ plus the allusive and striking images to capture the attention of customers about what we will be selling. First I traced with pencil, using my laptop and the letters I made digitally. I drew them first with color, then highlighted them to make them look more beautiful with marker and erased the excess pencil with an eraser. All very easy and simple for people who do not know how to draw😊.
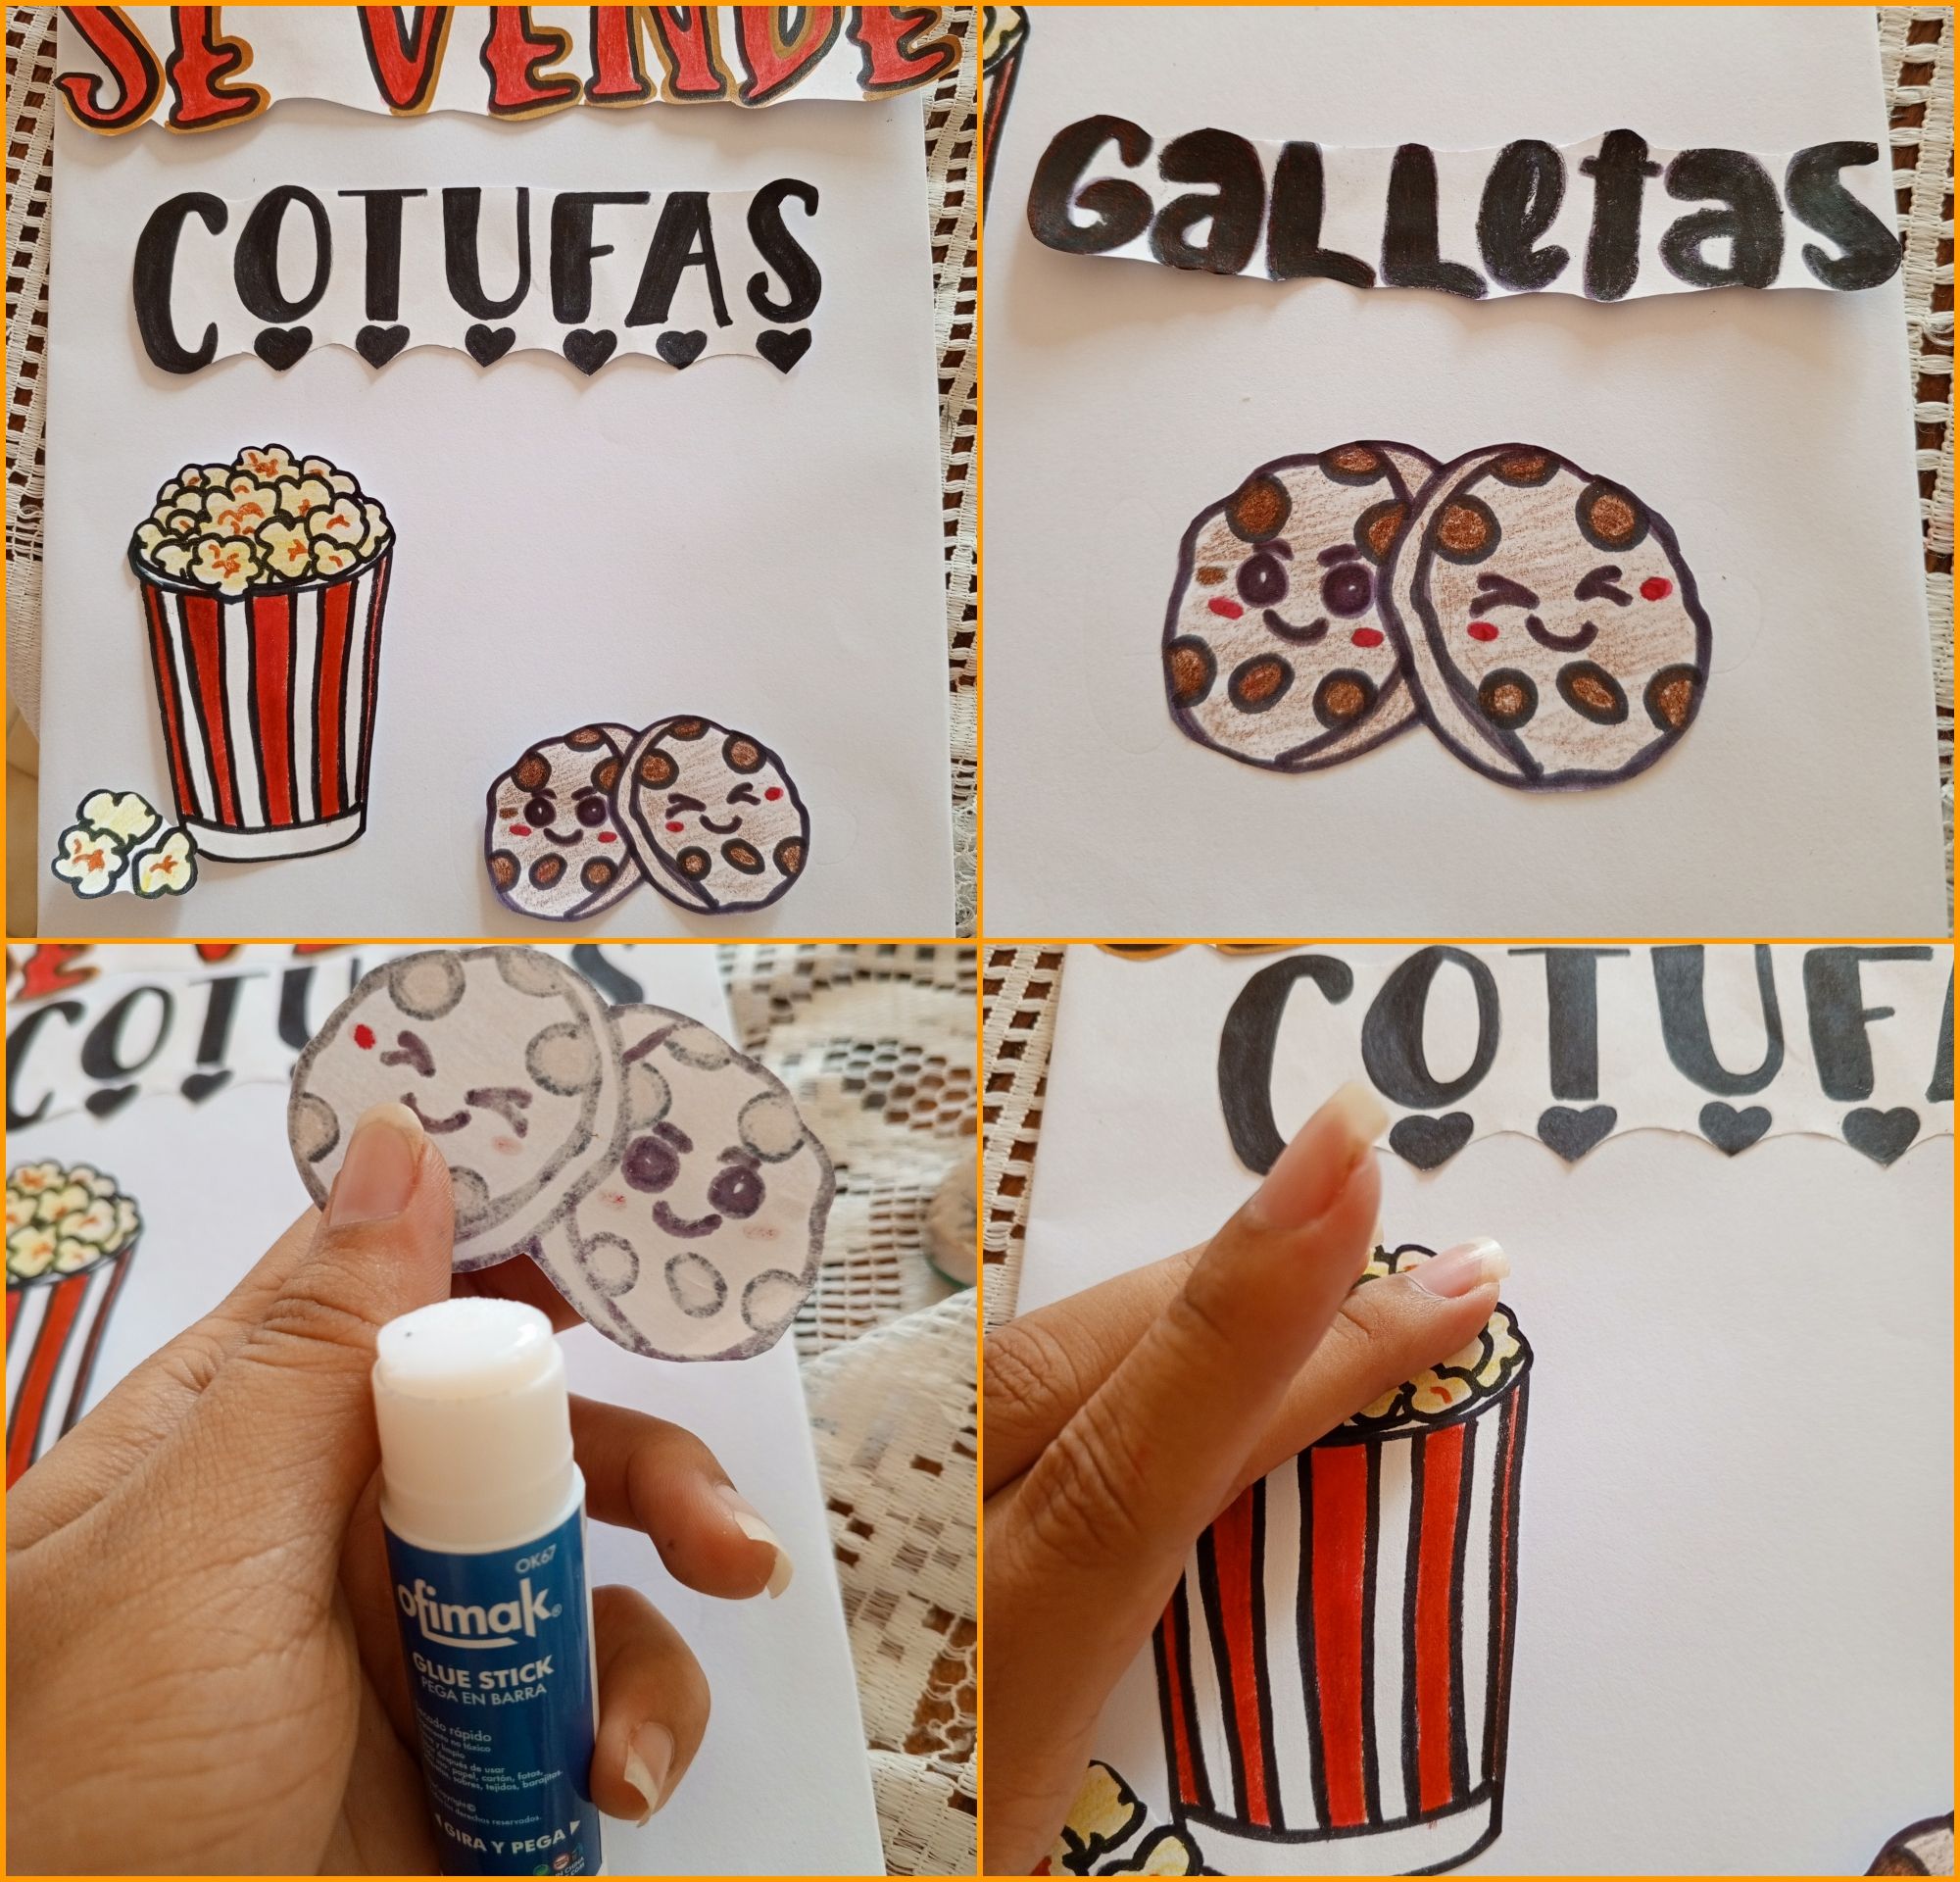
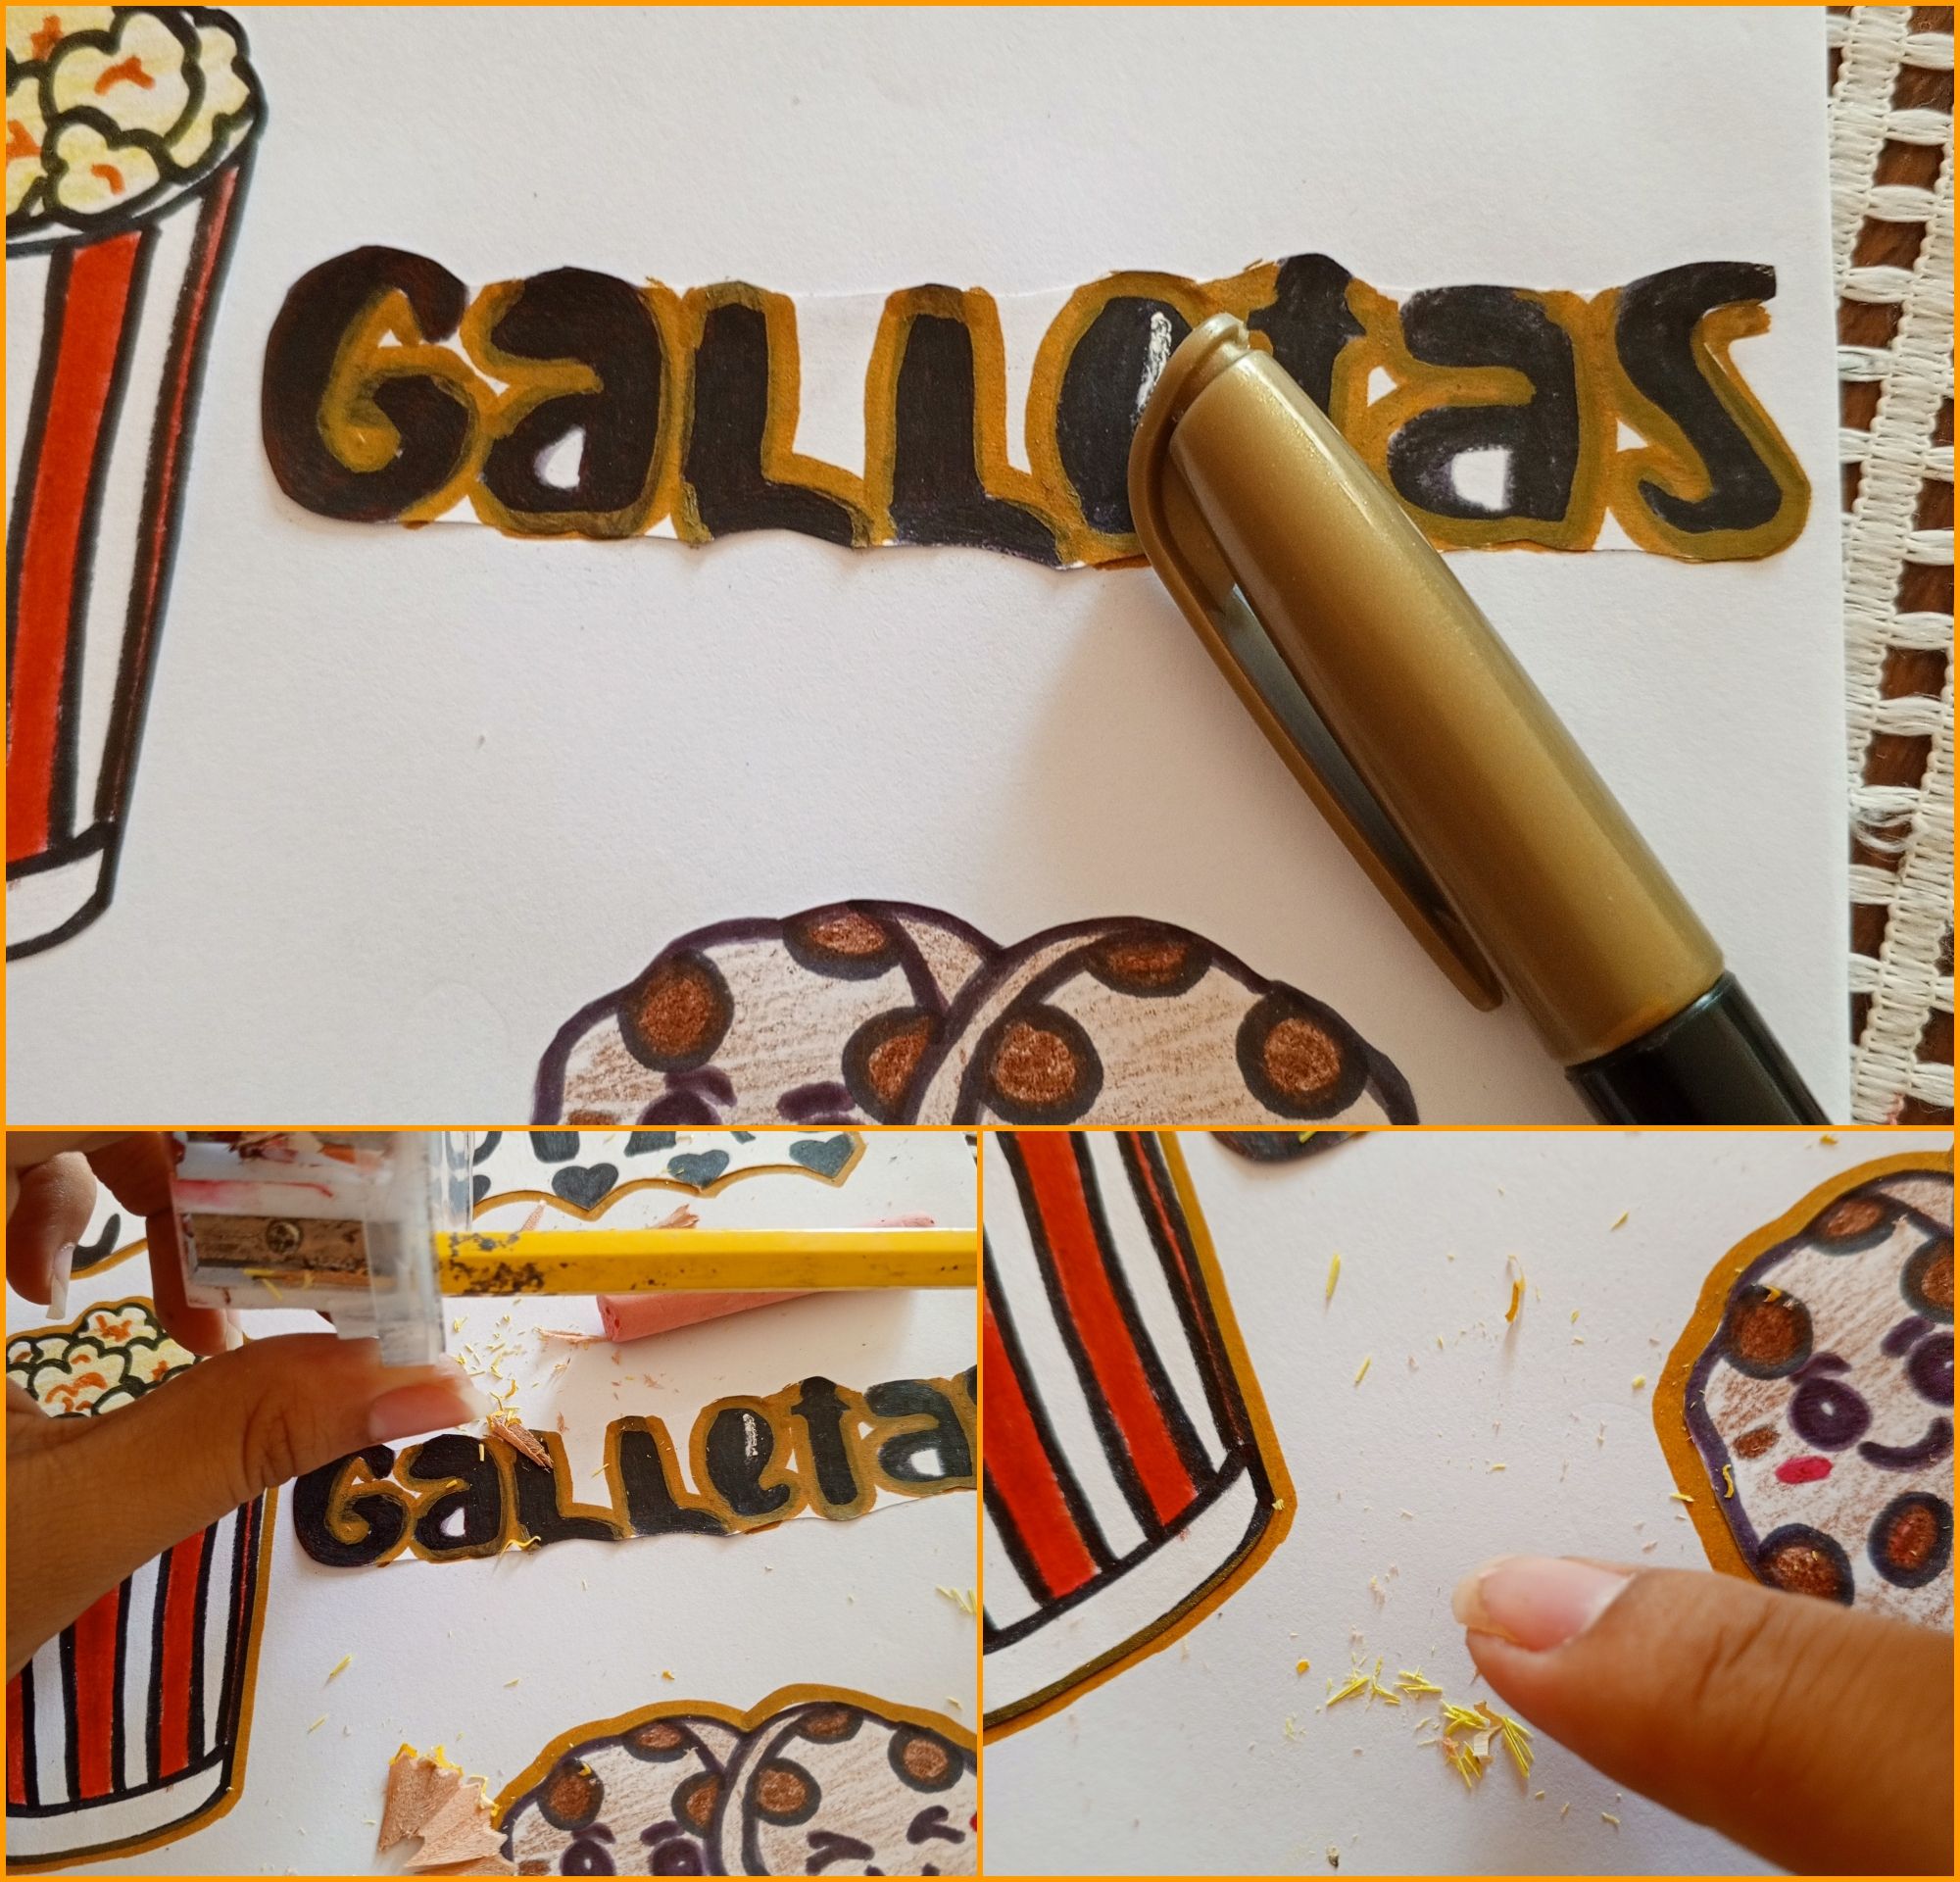
En este ultimo paso vamos a pegar toda las letras y las figuras con la pega en barra donde veas mas conveniente o bien te parezca. Decoramos con un marcador dorado las letras y las figuras por los bordes. Para darle un color más al cartel vamos a sacarle punta a un color, esta vez elegí el color amarillo y con las virutas y nuestro dedo frotamos en toda la parte blanca del cartel. Igual repetimos lo mismo con el creyón hasta que todo este uniforme y bonito.
In this last step we are going to glue all the letters and figures with the glue stick where you see more convenient or you see fit. Decorate with a gold marker the letters and figures around the edges. To give an extra color to the poster we are going to take a tip to a color, this time I chose the yellow color and with the shavings and our finger we rub in all the white part of the poster. We repeat the same with the crayon until everything is uniform and beautiful.
•💖RESULT💖•
•💖RESULT💖•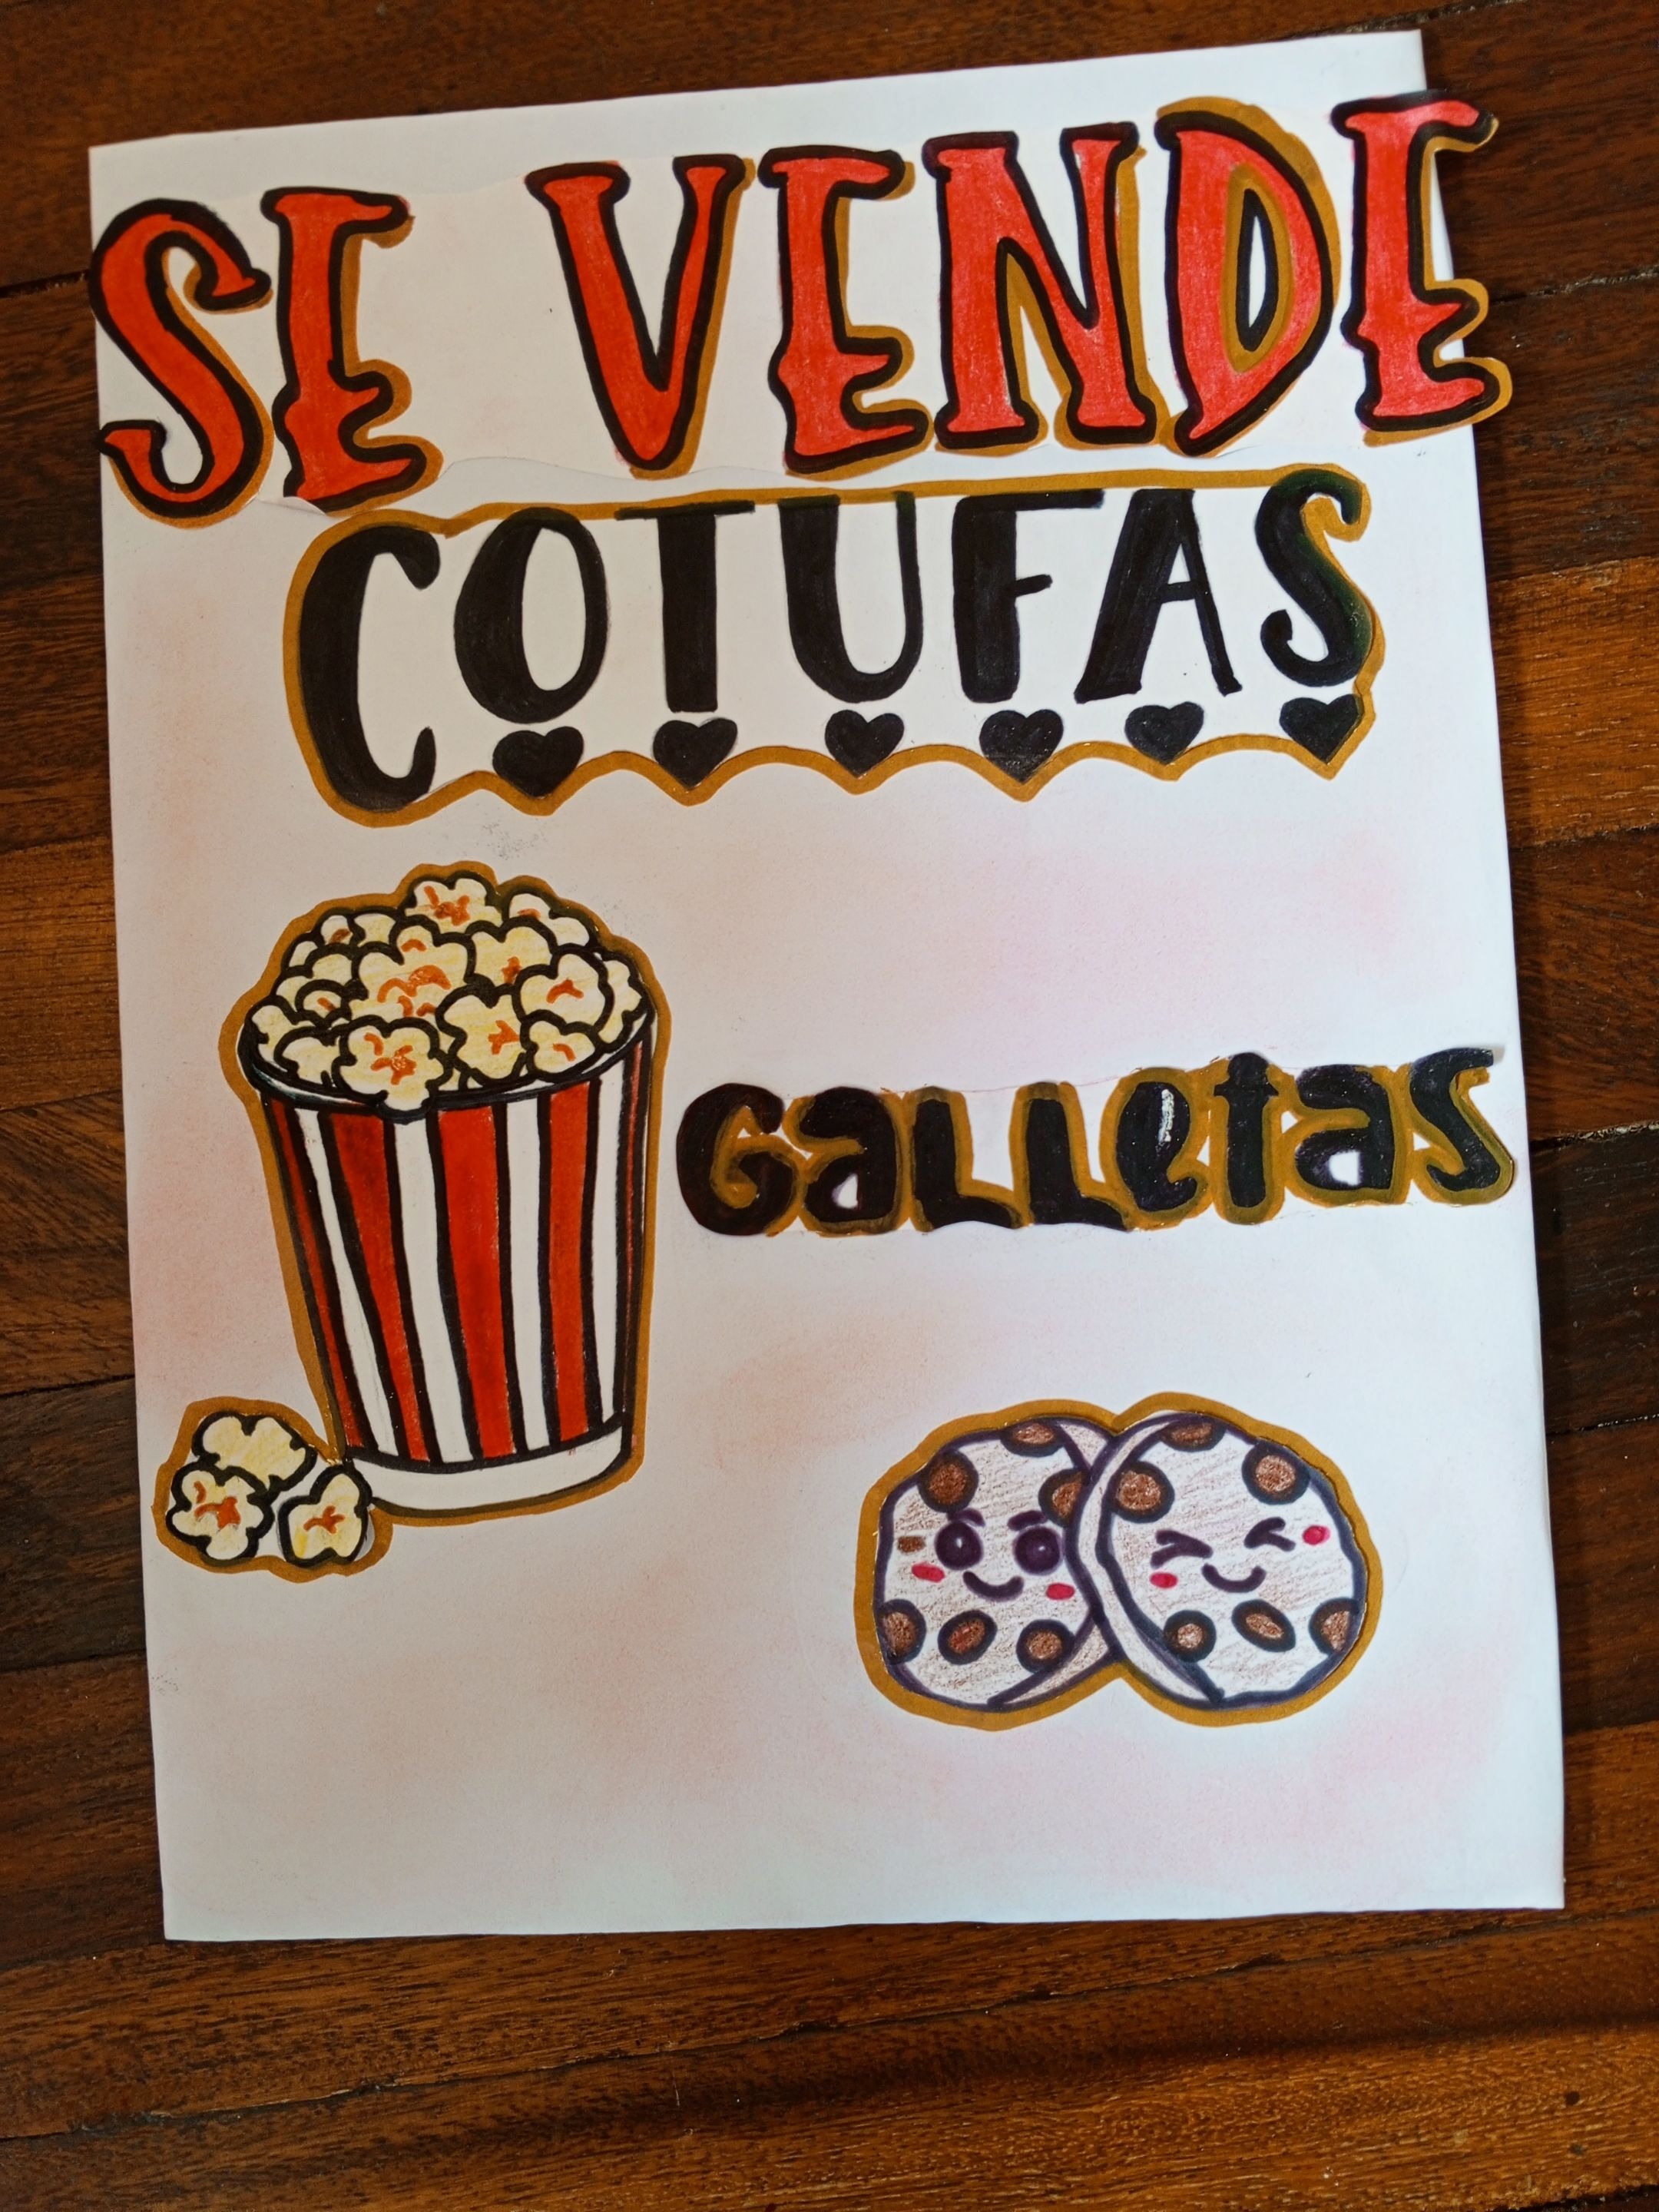
💖Y este es el resultado💖
Como siempre, espero que te haya gustado este tutorial, no olvides dejarme un lindo comentario. Además de que, espero también que tu como emprendedor/a puedas animarte a intentar hacer un cartelito y comenzar a emprender como yo. Te deseo mucha suerte y éxito en todo🙏🙌.
As always, I hope you liked this tutorial, don't forget to leave me a nice comment. Besides that, I hope that you as an entrepreneur can also encourage you to try to make a sign and start entrepreneurship like me. I wish you good luck and success in everything🙏🙌.
💞Thank you so much for making it this far! I hope you liked my post, I'll see you next time!💞
💞¡Muchas gracias por llegar hasta aquí! Espero que te haya gustado mi post. ¡Nos vemos en una próxima oportunidad!💞

📲 Todas las fotografías fueron tomadas con un teléfono Tecno Spark 10 pro
📷 TODAS LAS FOTOS SON DE MI PROPIEDAD
