Greetings,
Dear friends, I hope you are all very well and with the body and mind clear after these days of carnival.
This time a car came to me for preventive maintenance on the timing kit and replacement of tripoids.
The owner thought that the front shock absorbers needed to be replaced, but they are in good condition.
The car is a Fiat Tempra year 1991 1.6 cc engine, when I arrived and opened the hood I saw that the engine is very dirty with oil residues and dirt so the first thing I did was to wash the engine with degreaser with the help of a compressor.
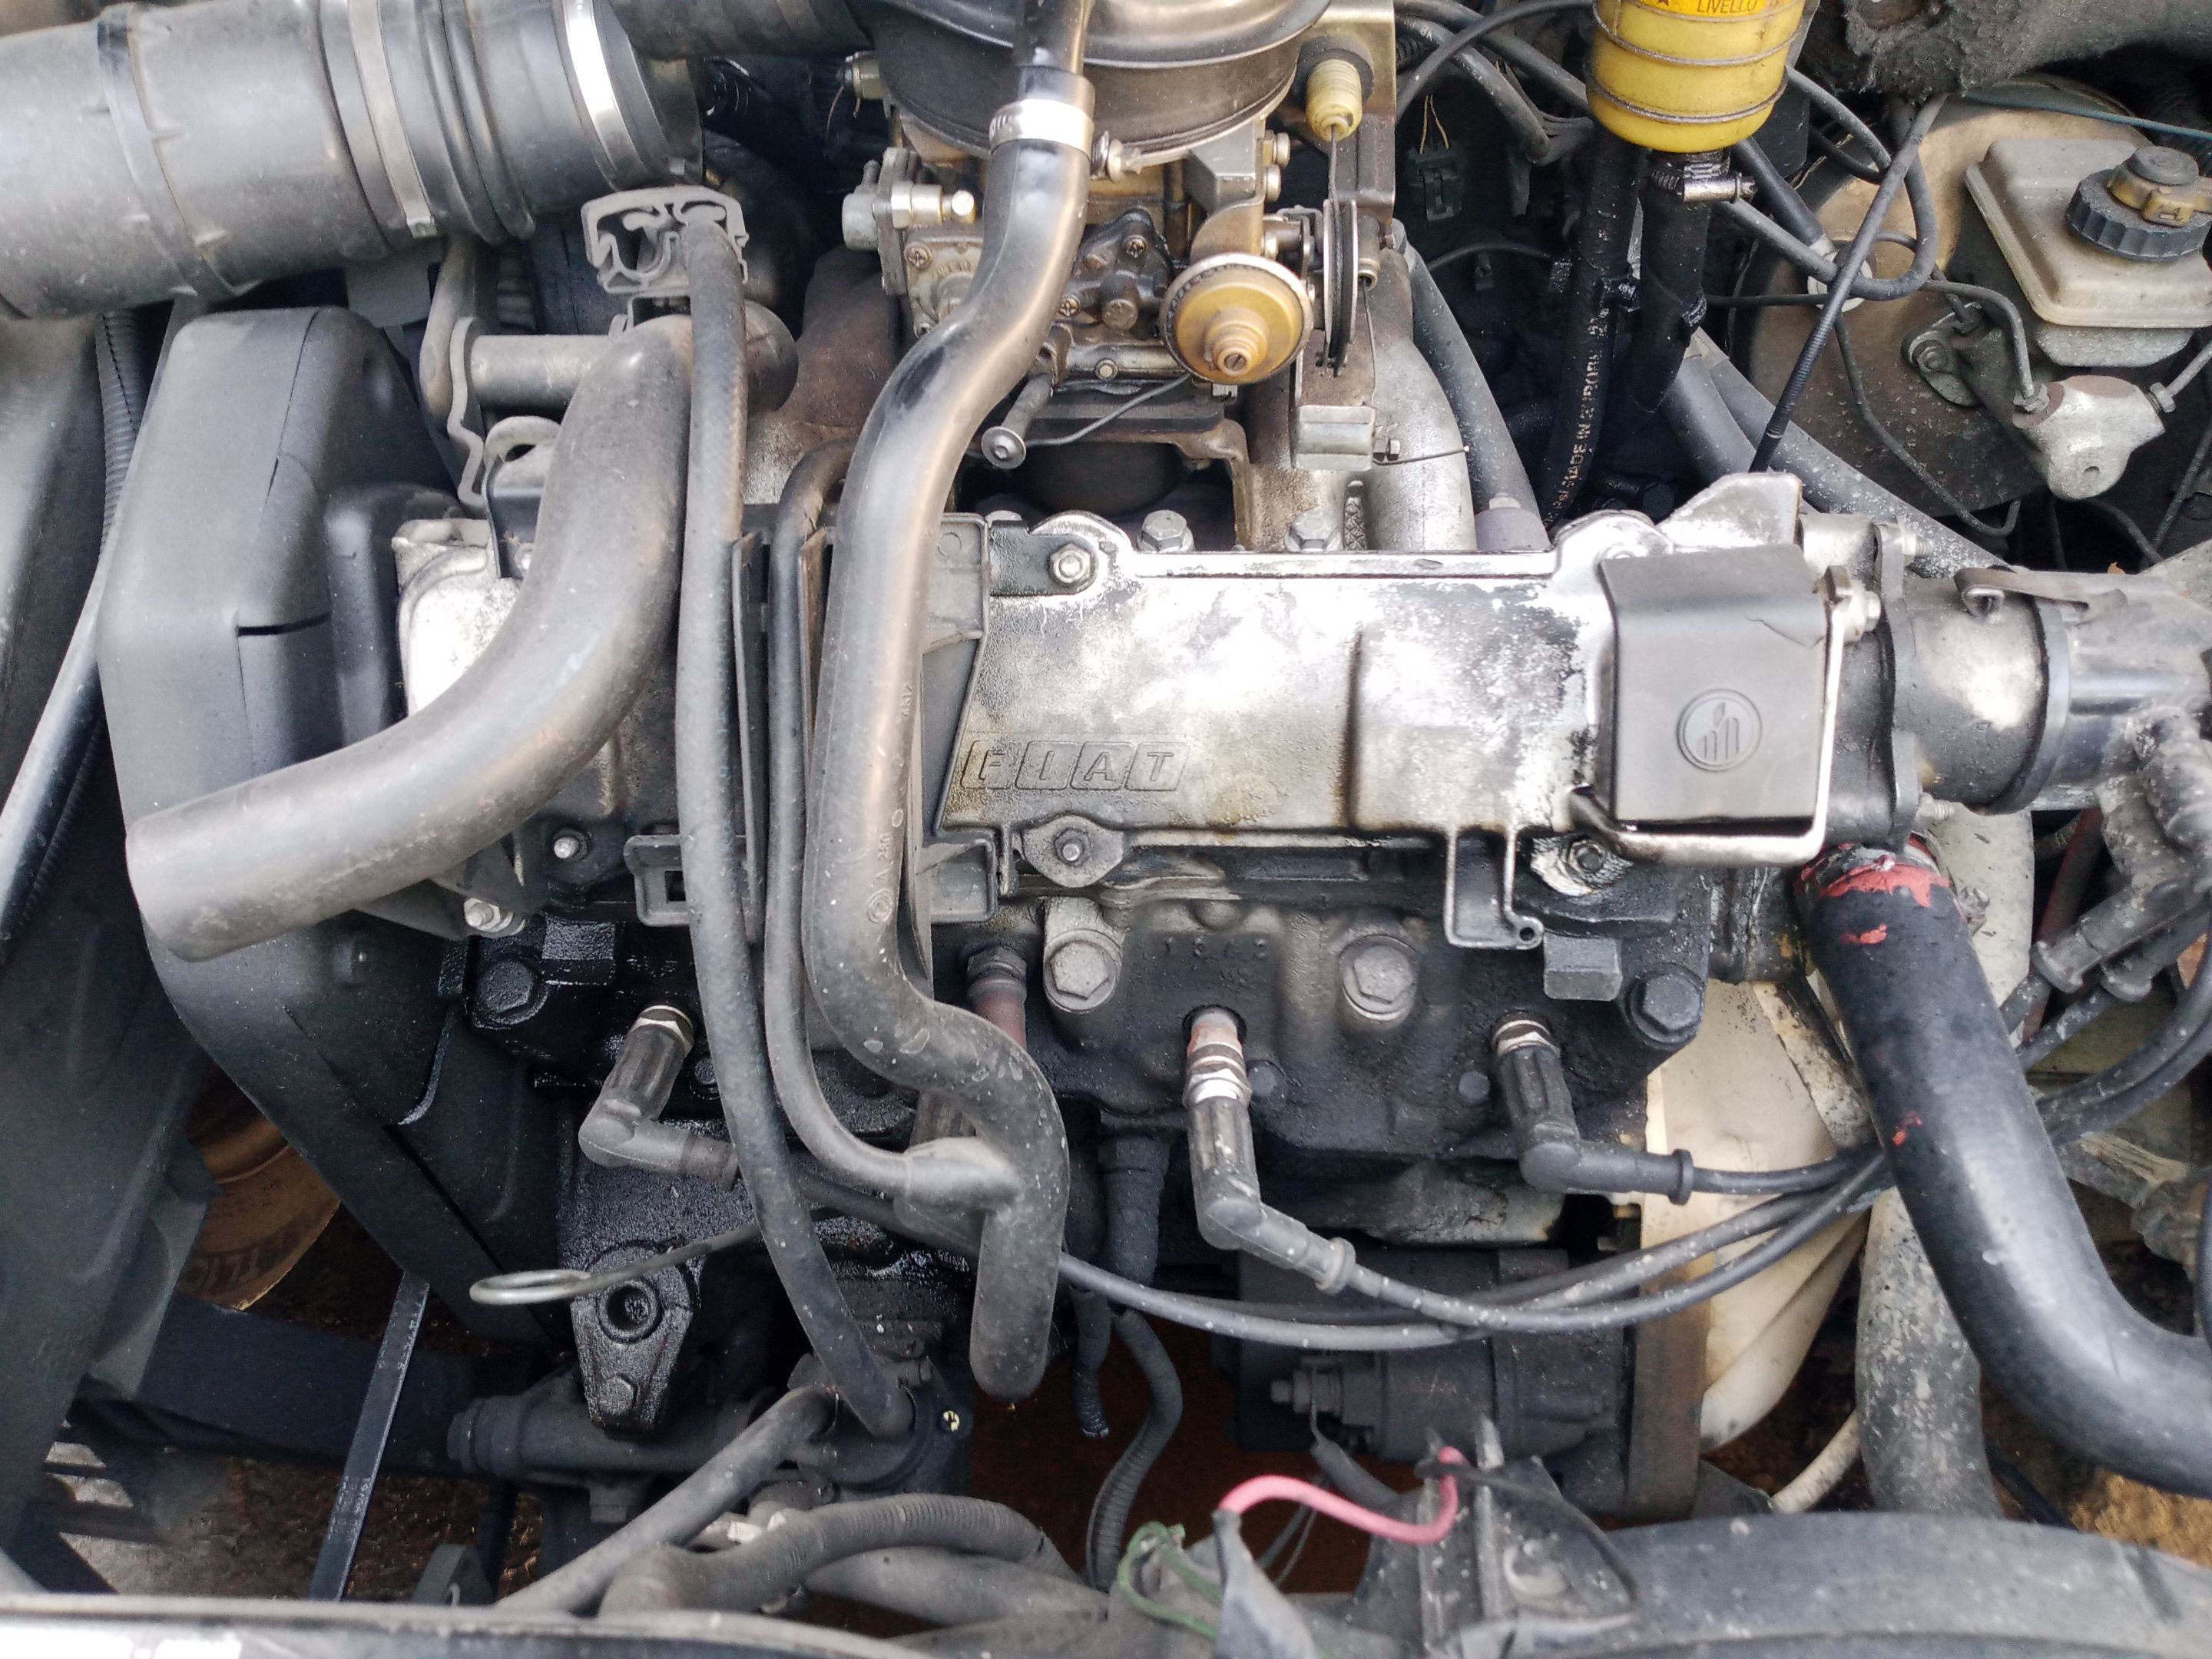
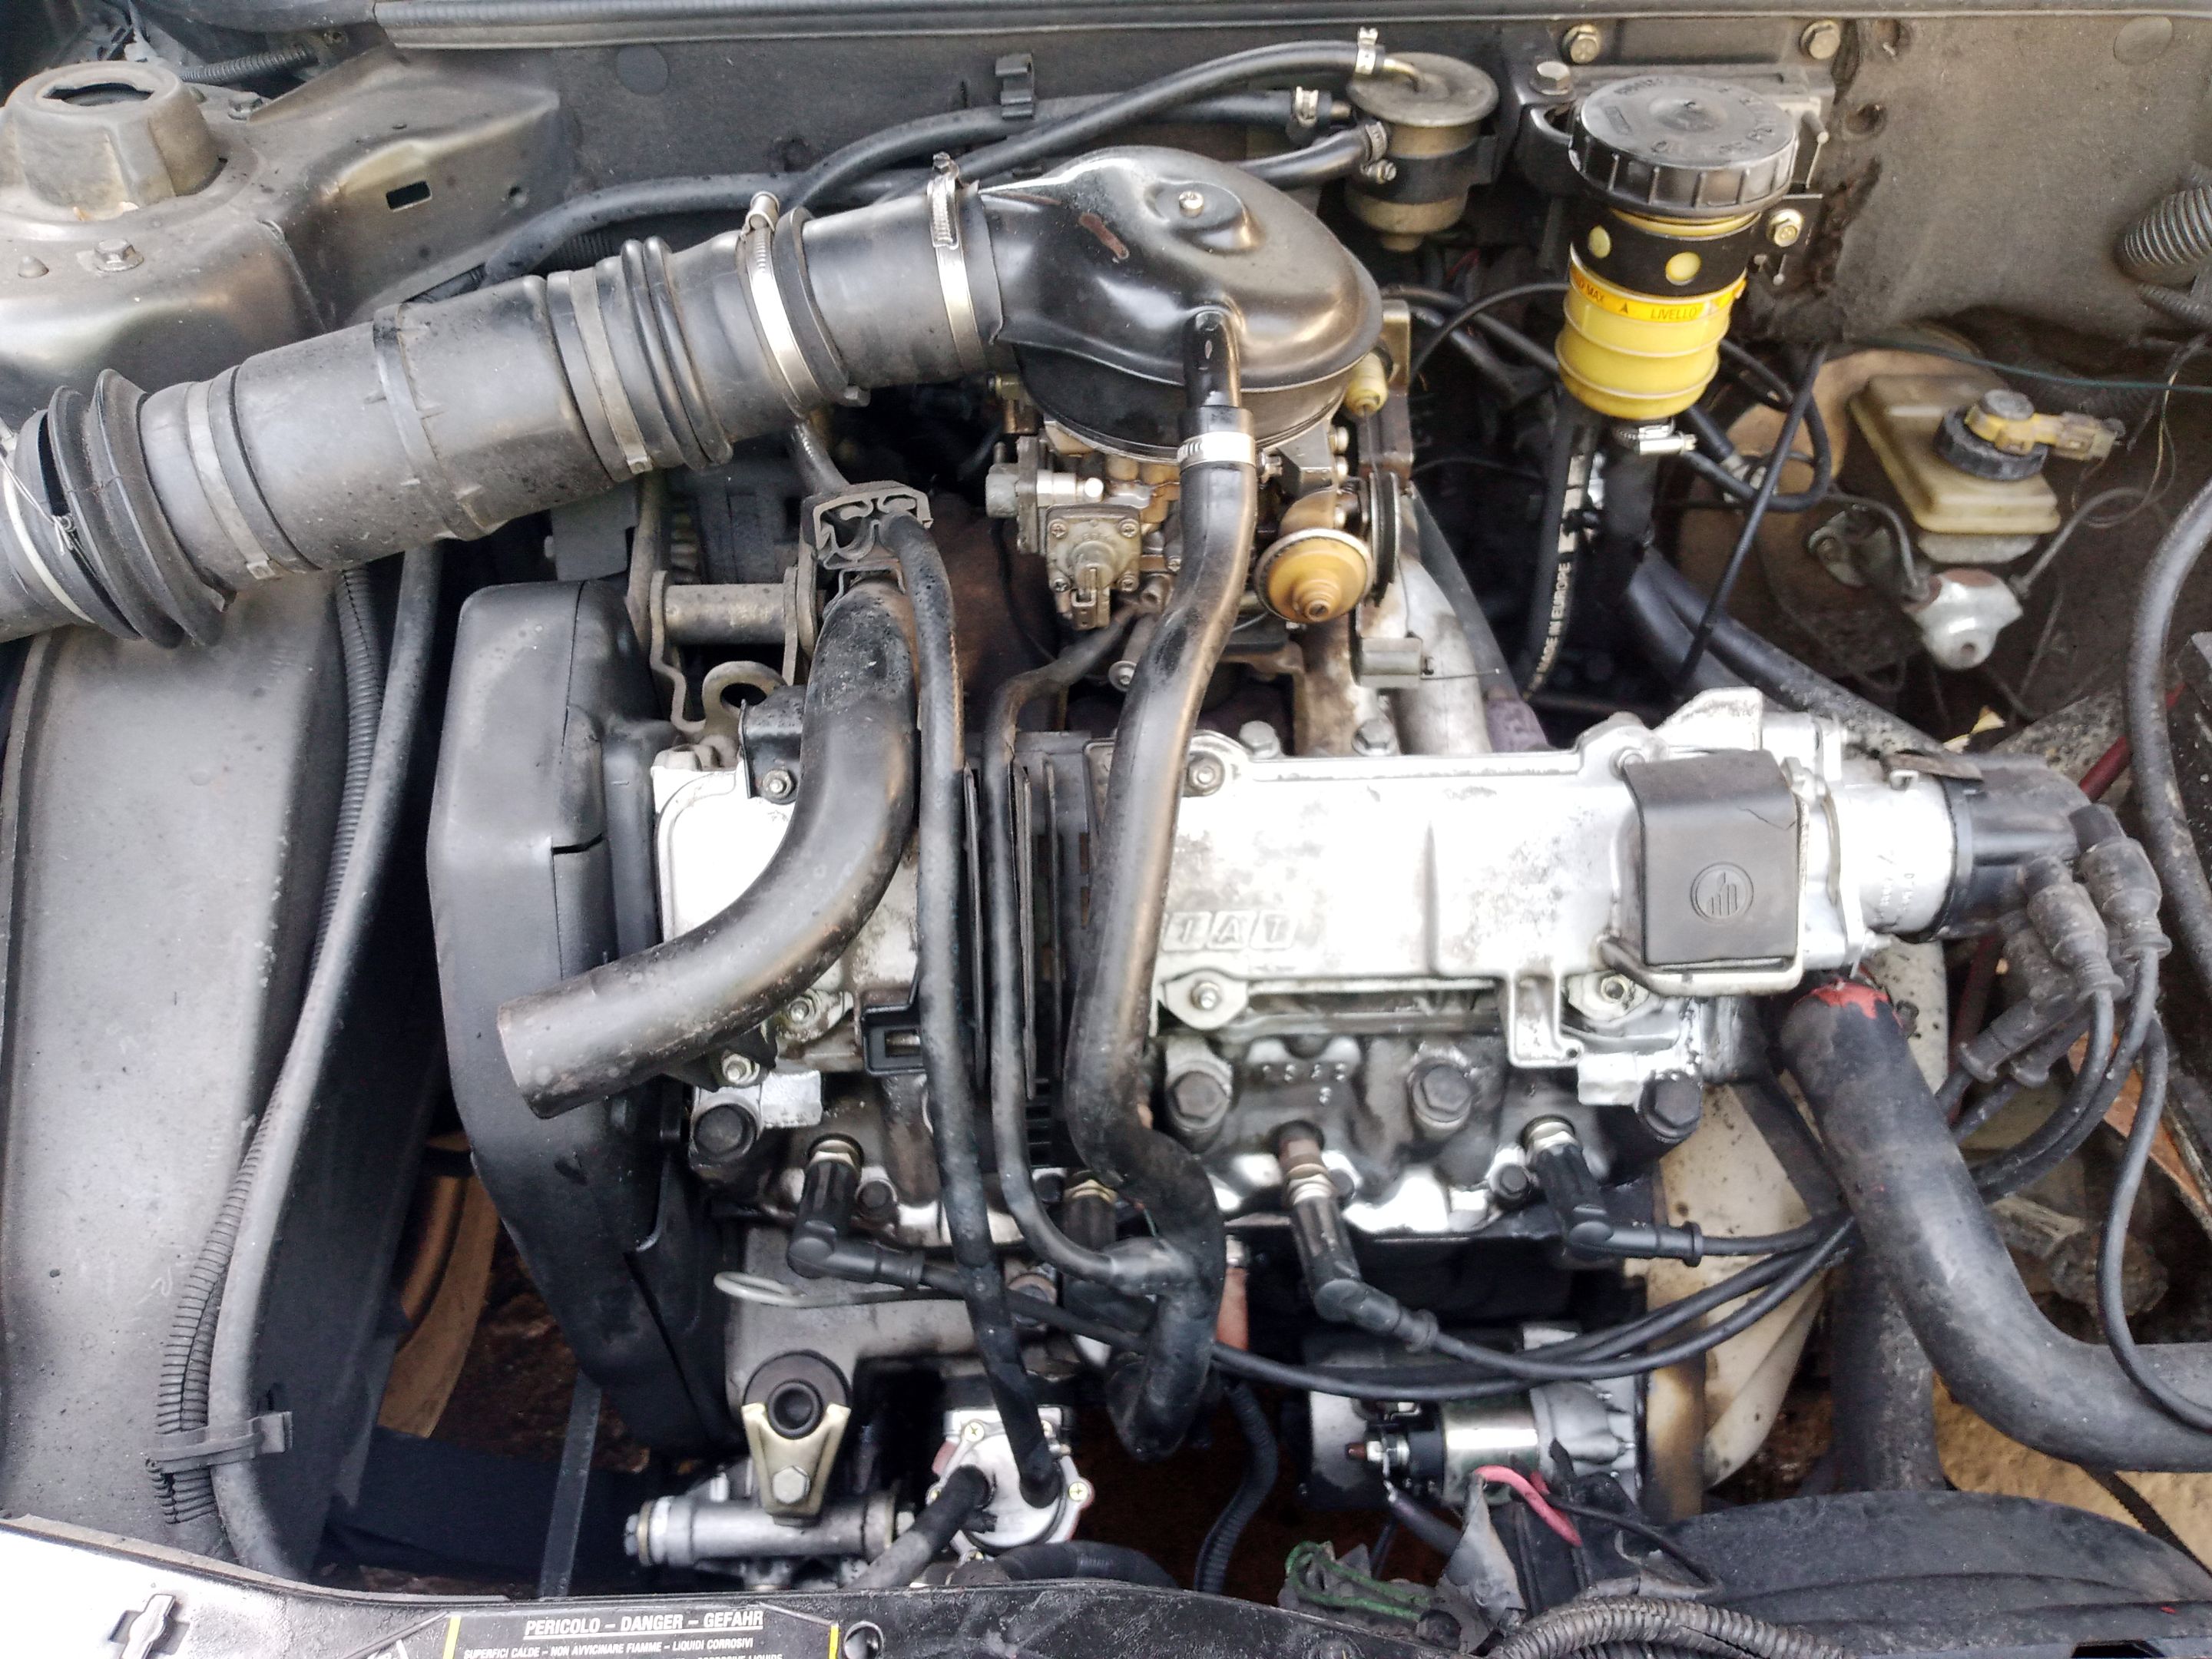
Once the engine is already in a better state of hygiene I start to detect the oil leaks that had it so dirty since the main fault was the noise when crossing the tripoids and the discarding of the shock absorbers.
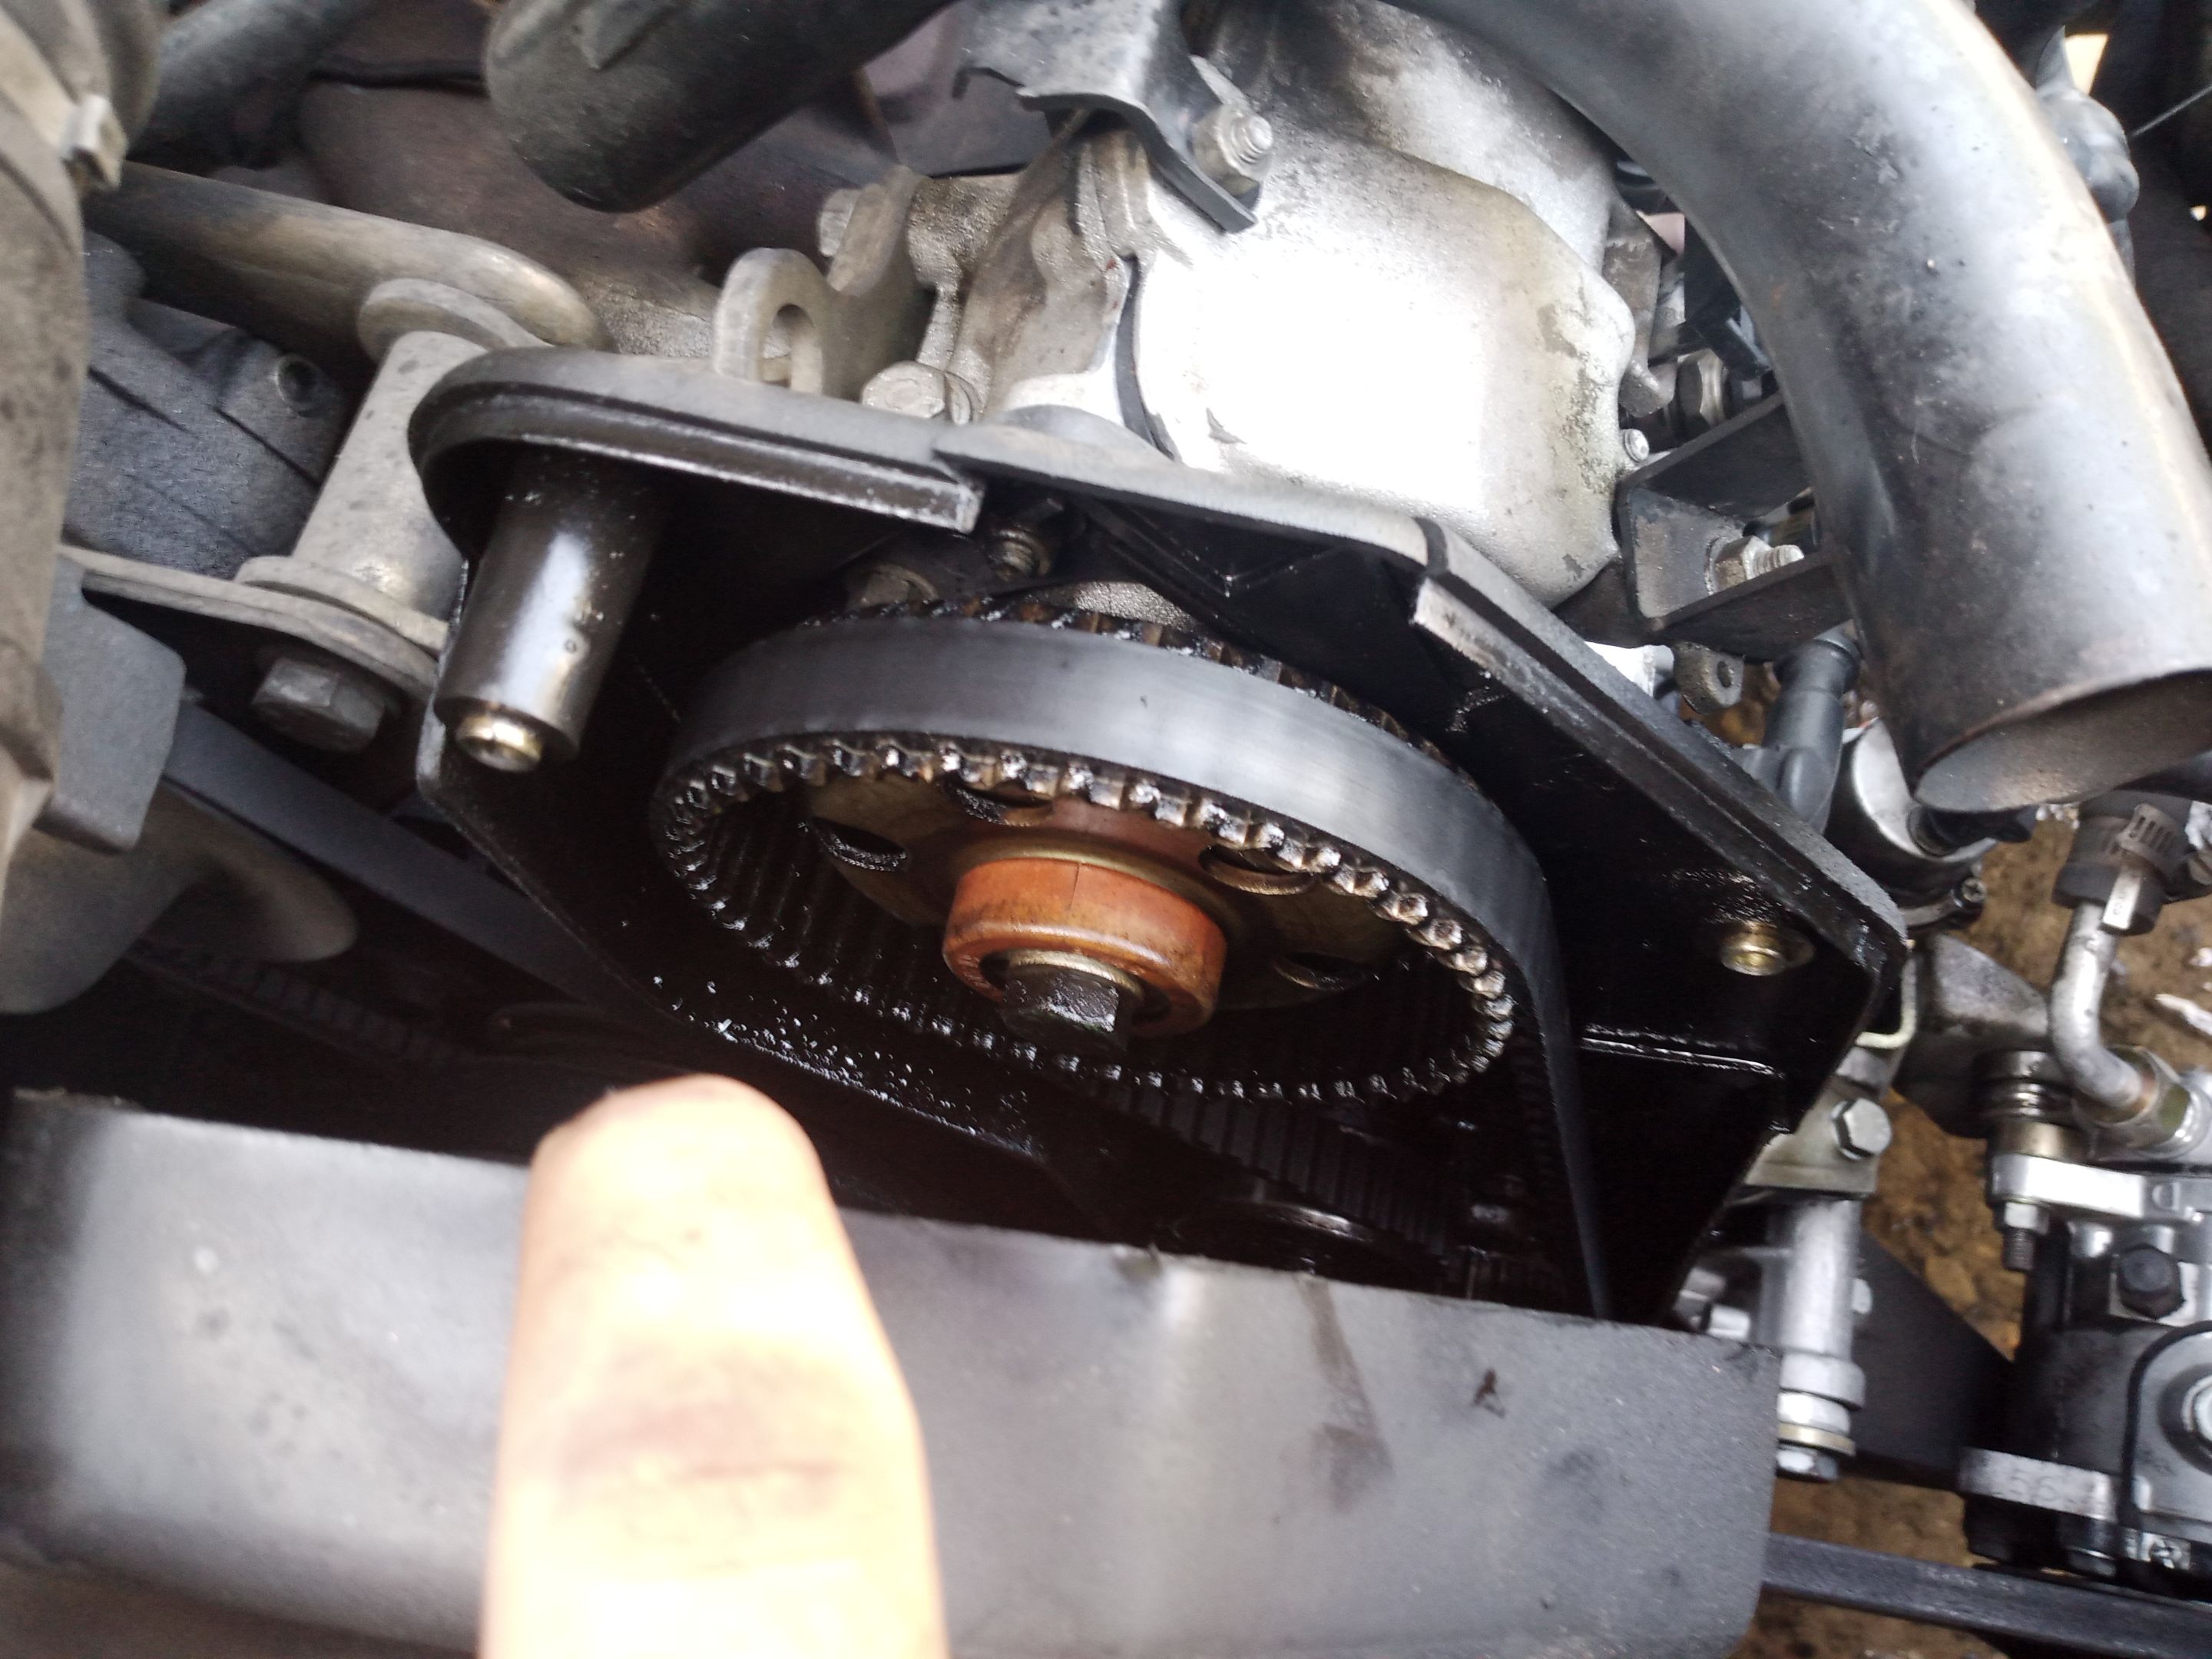
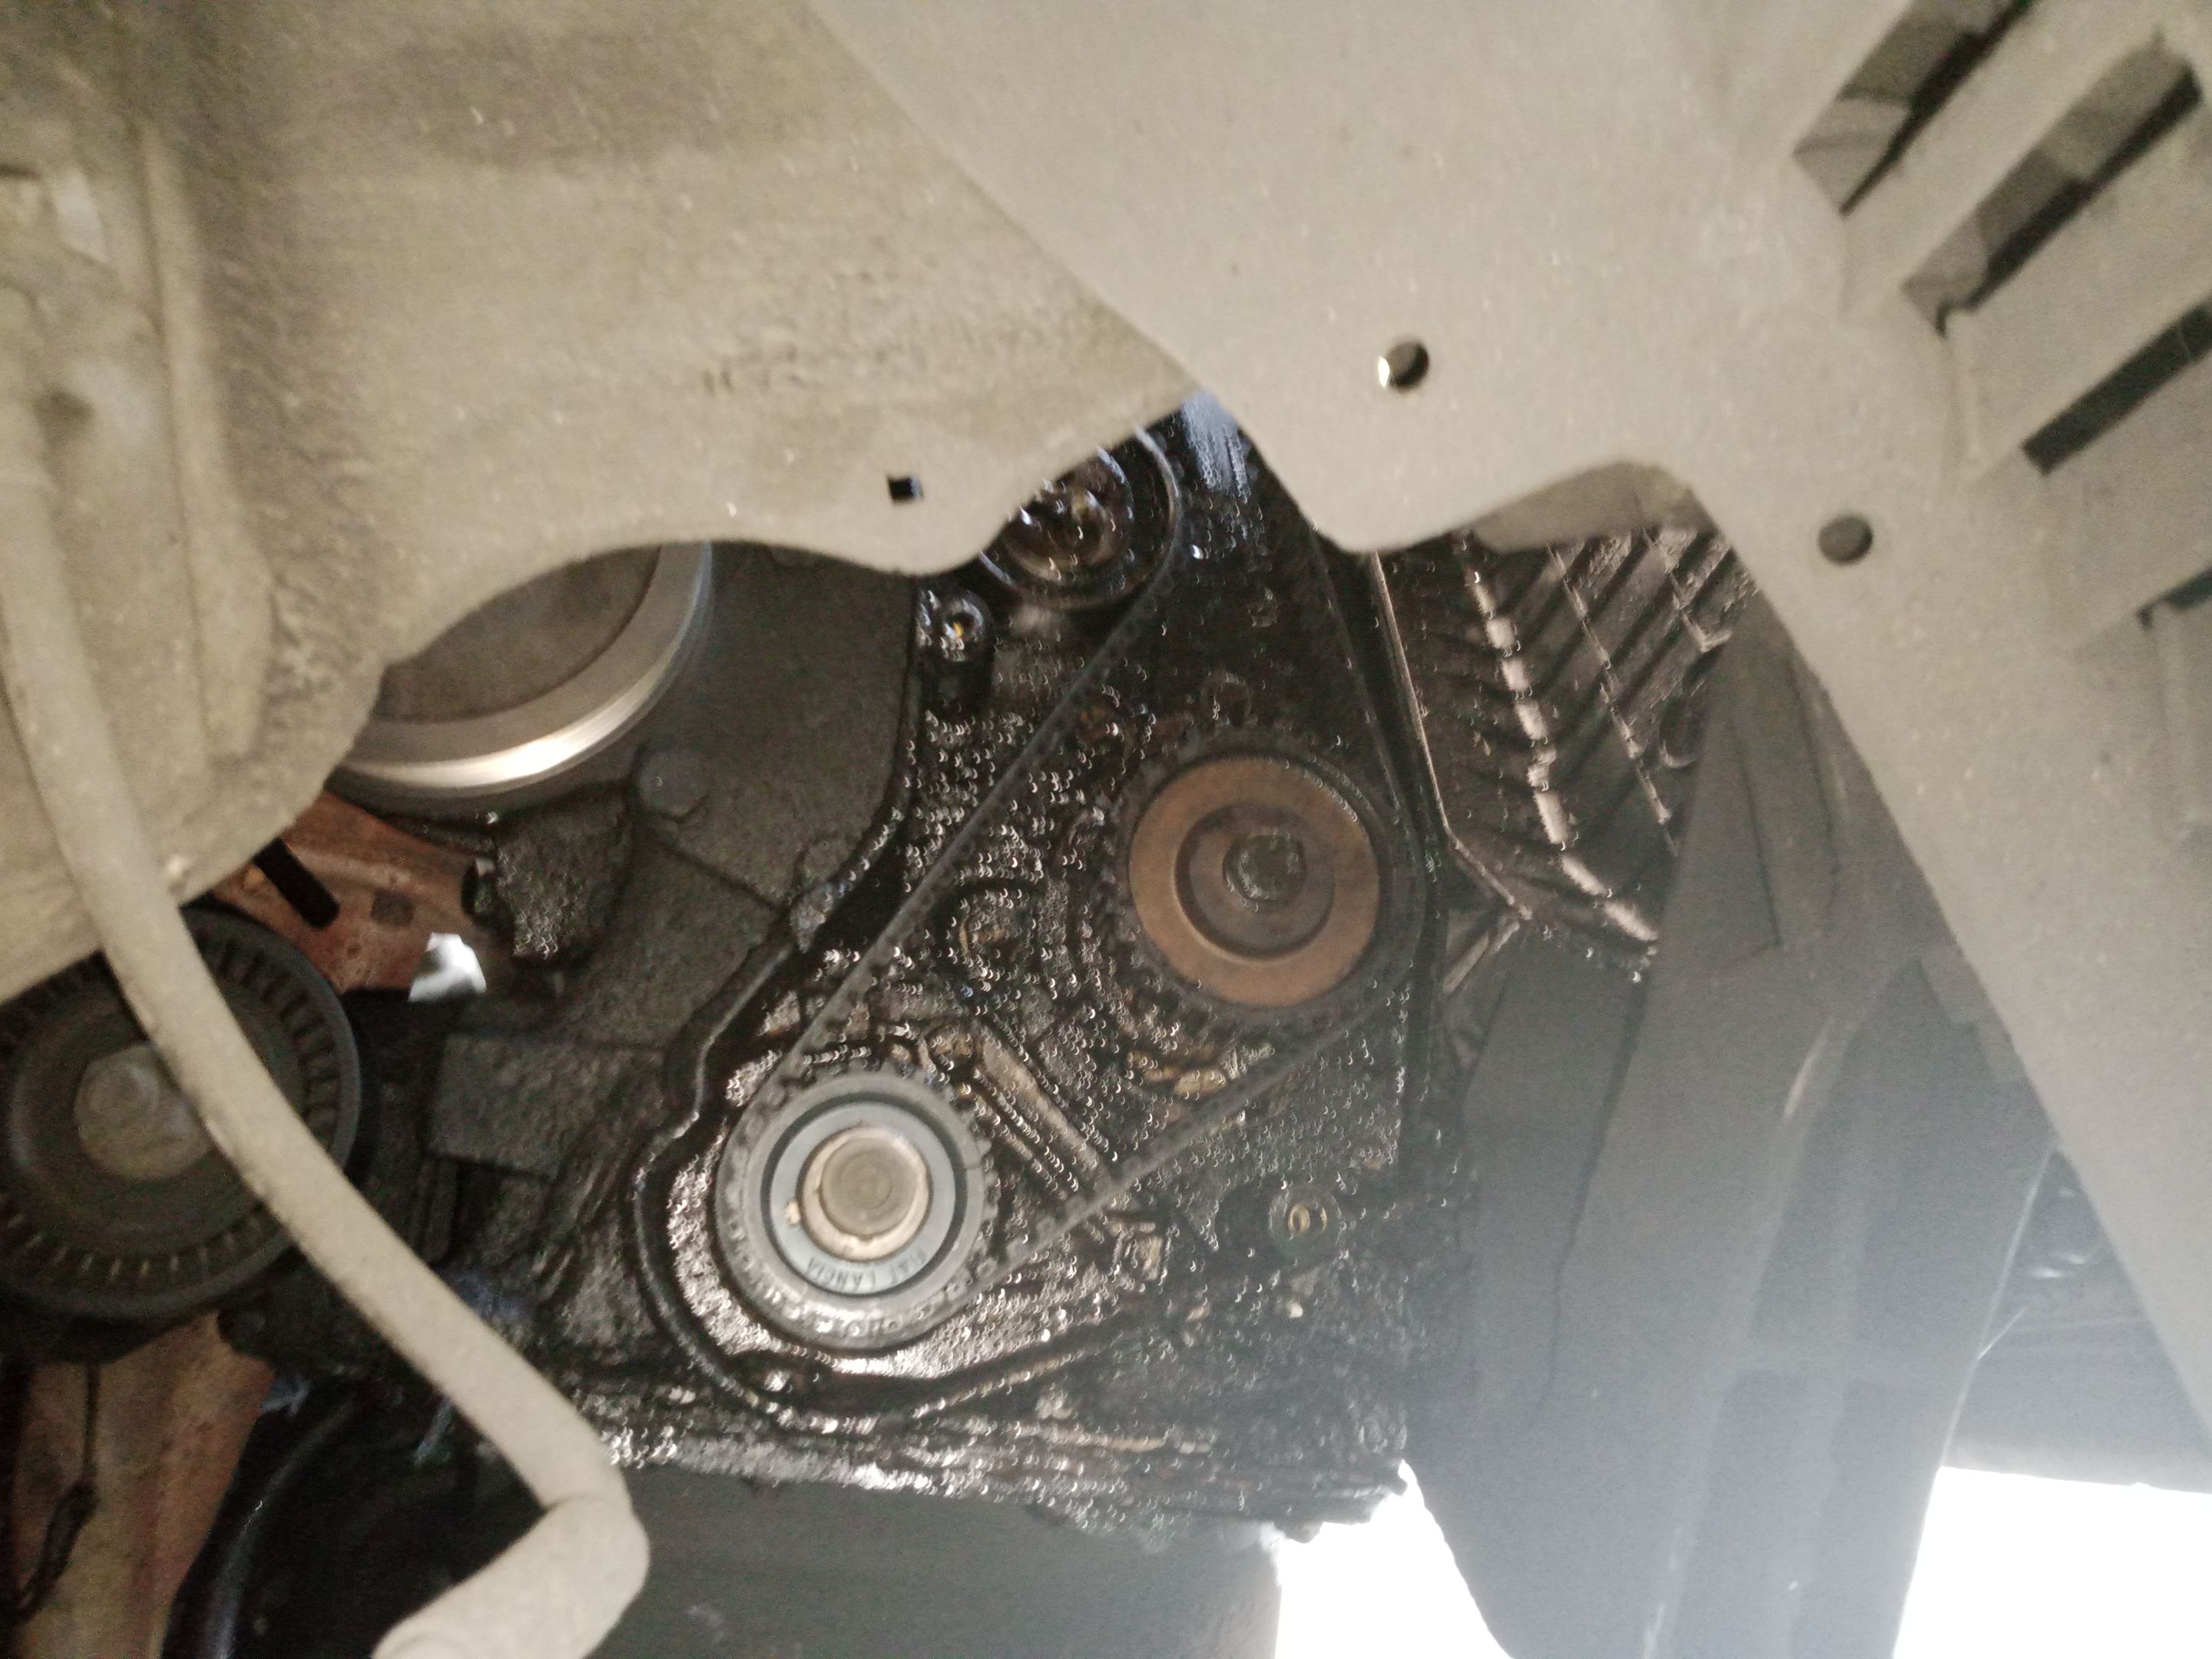
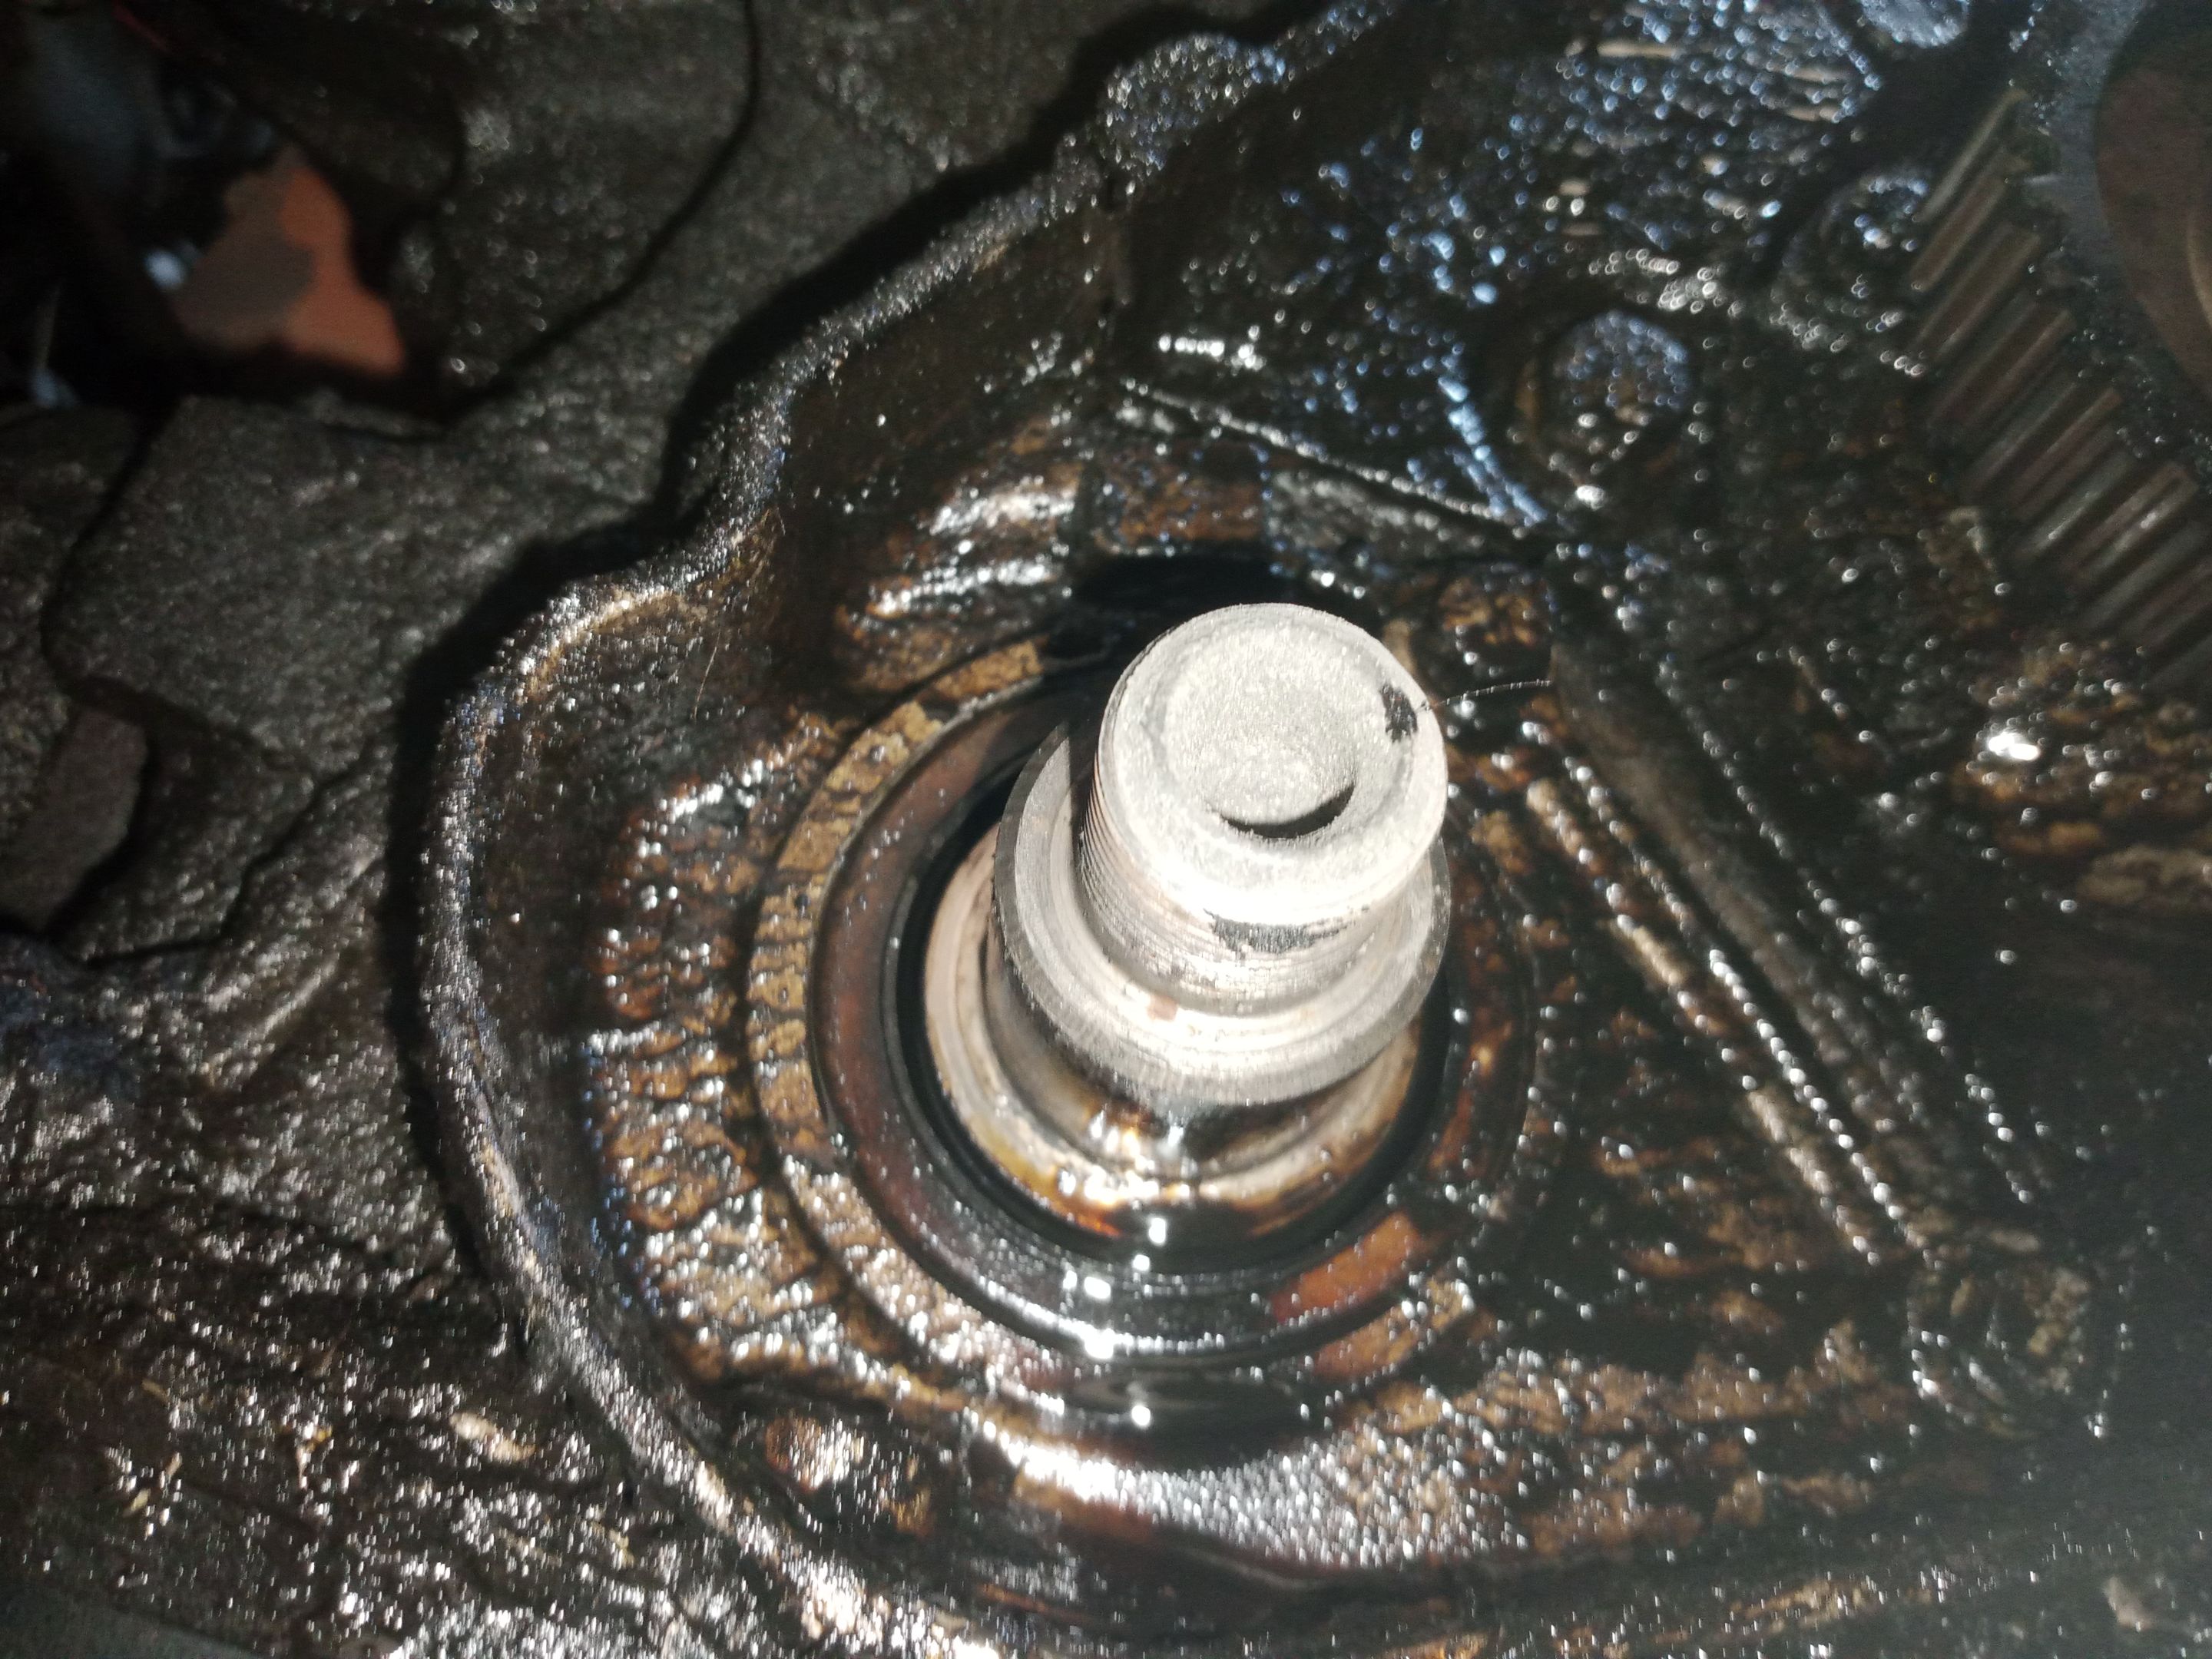
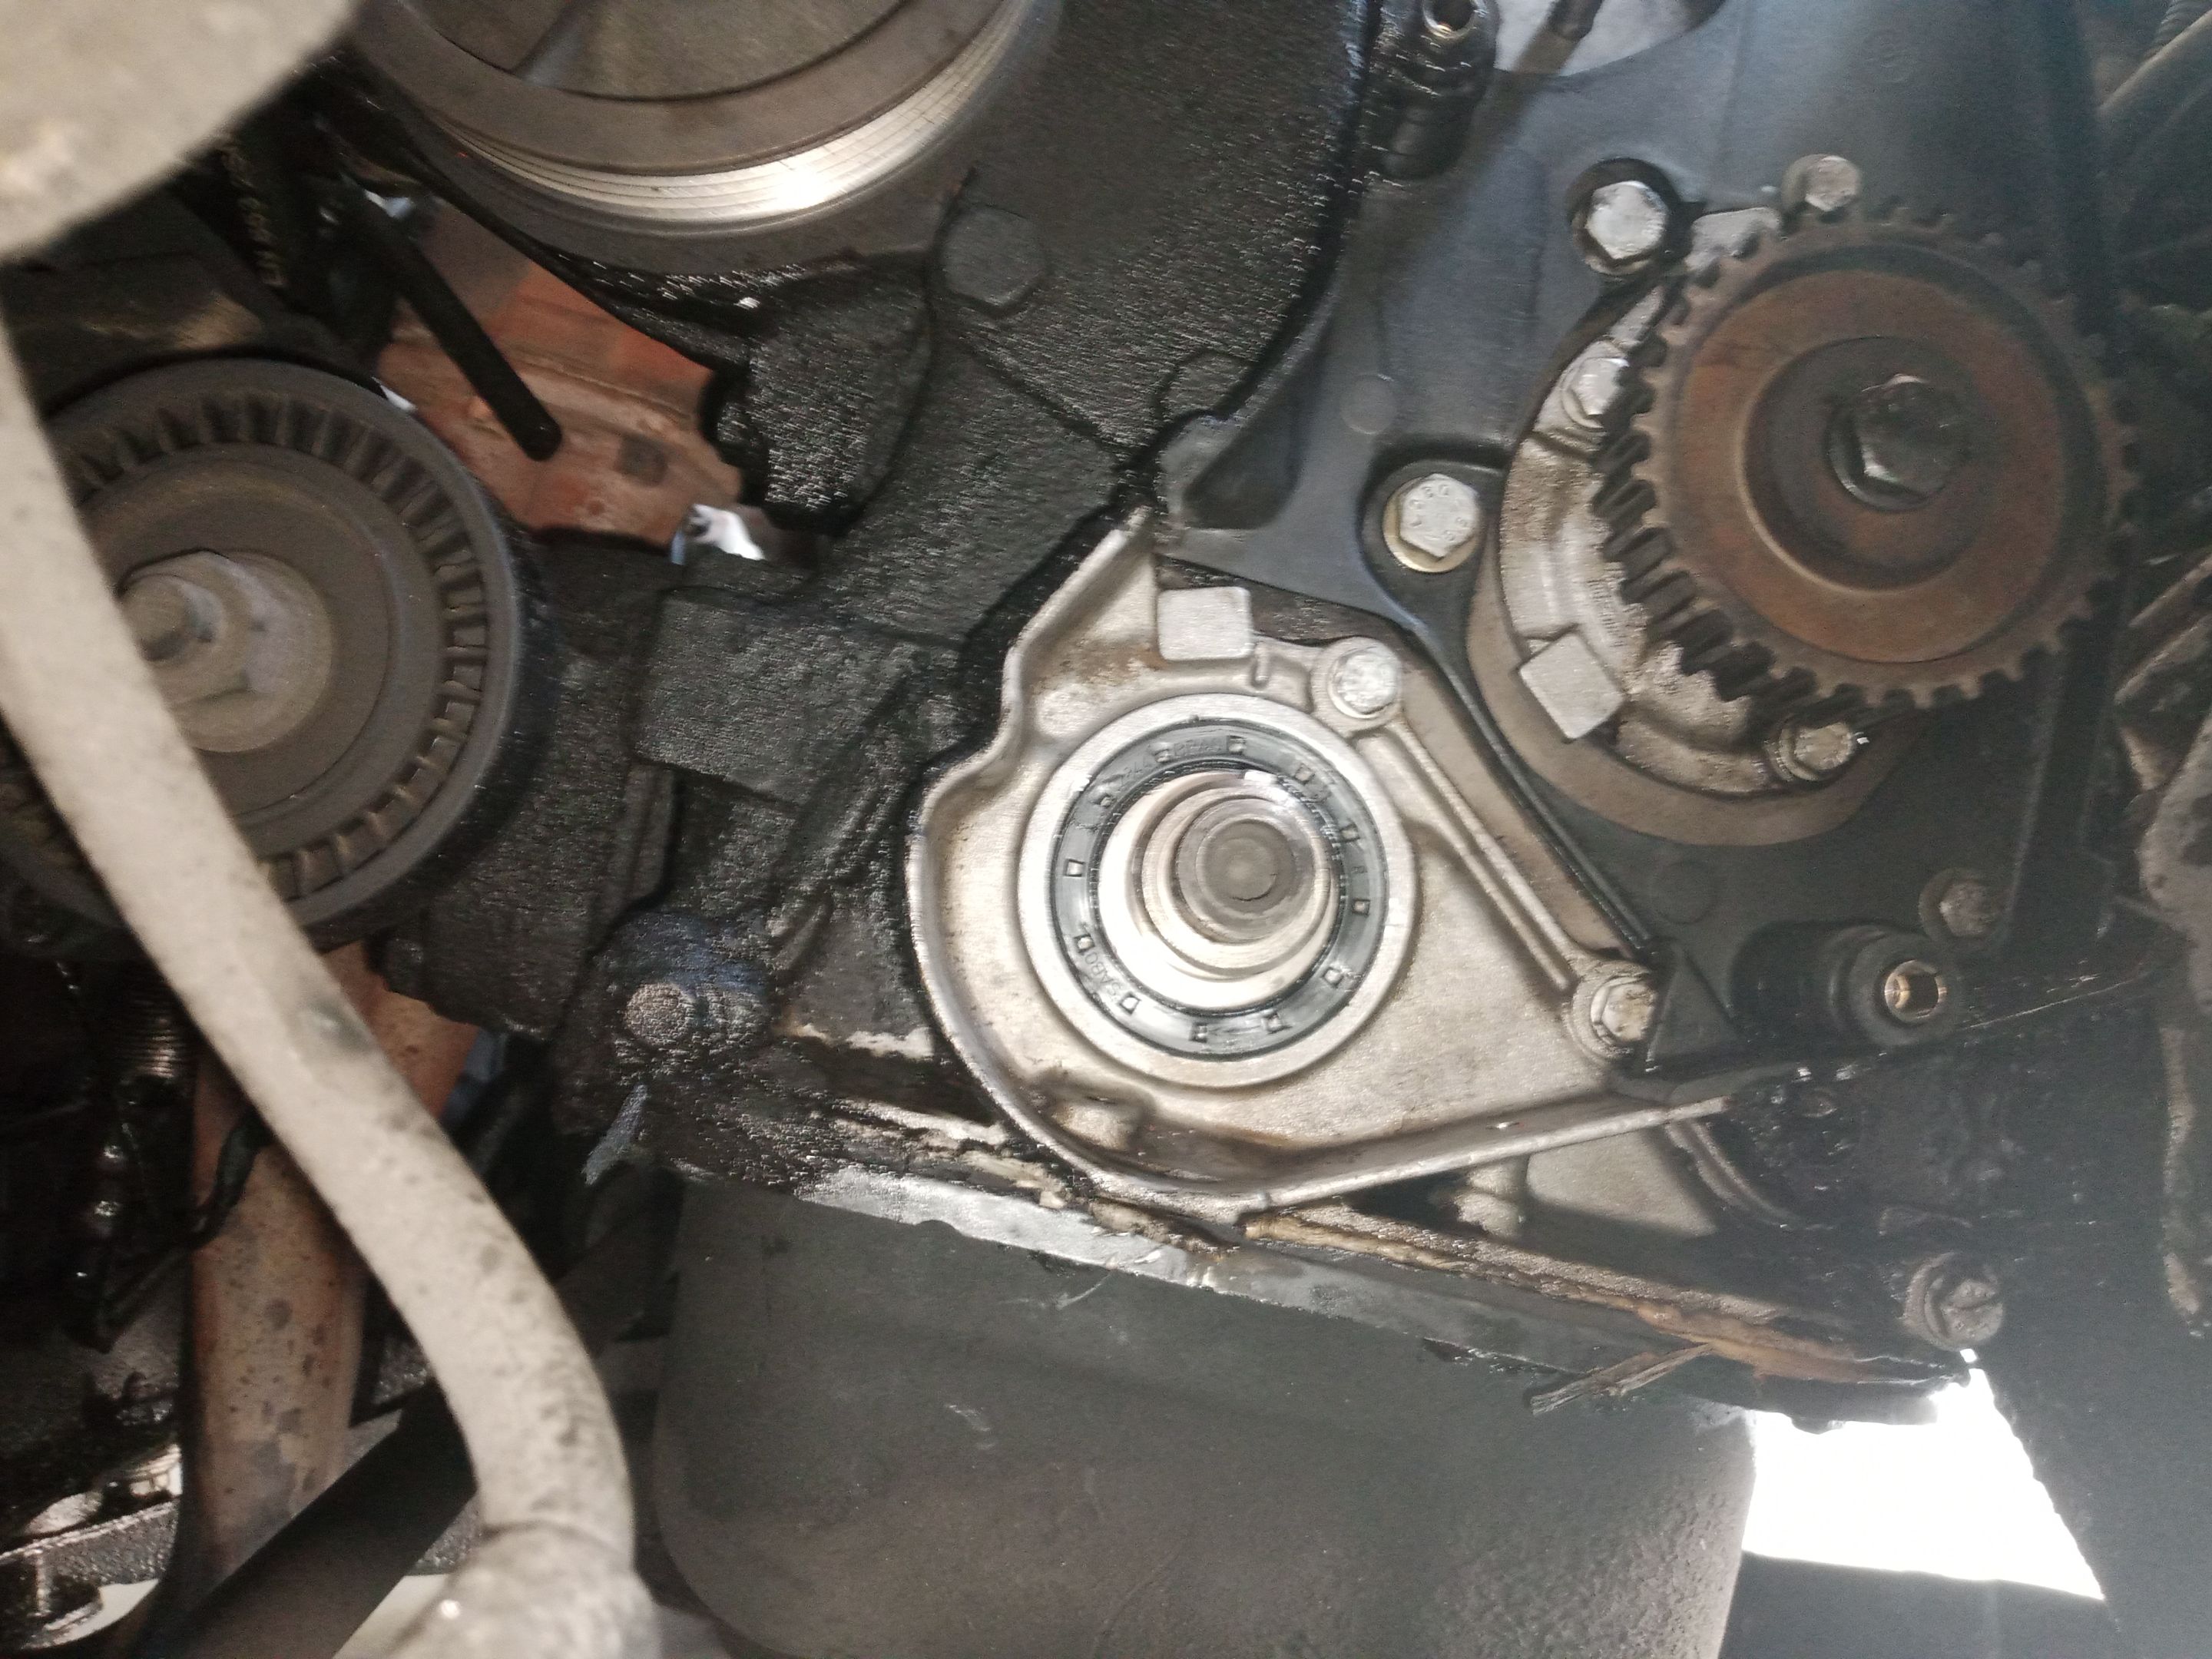
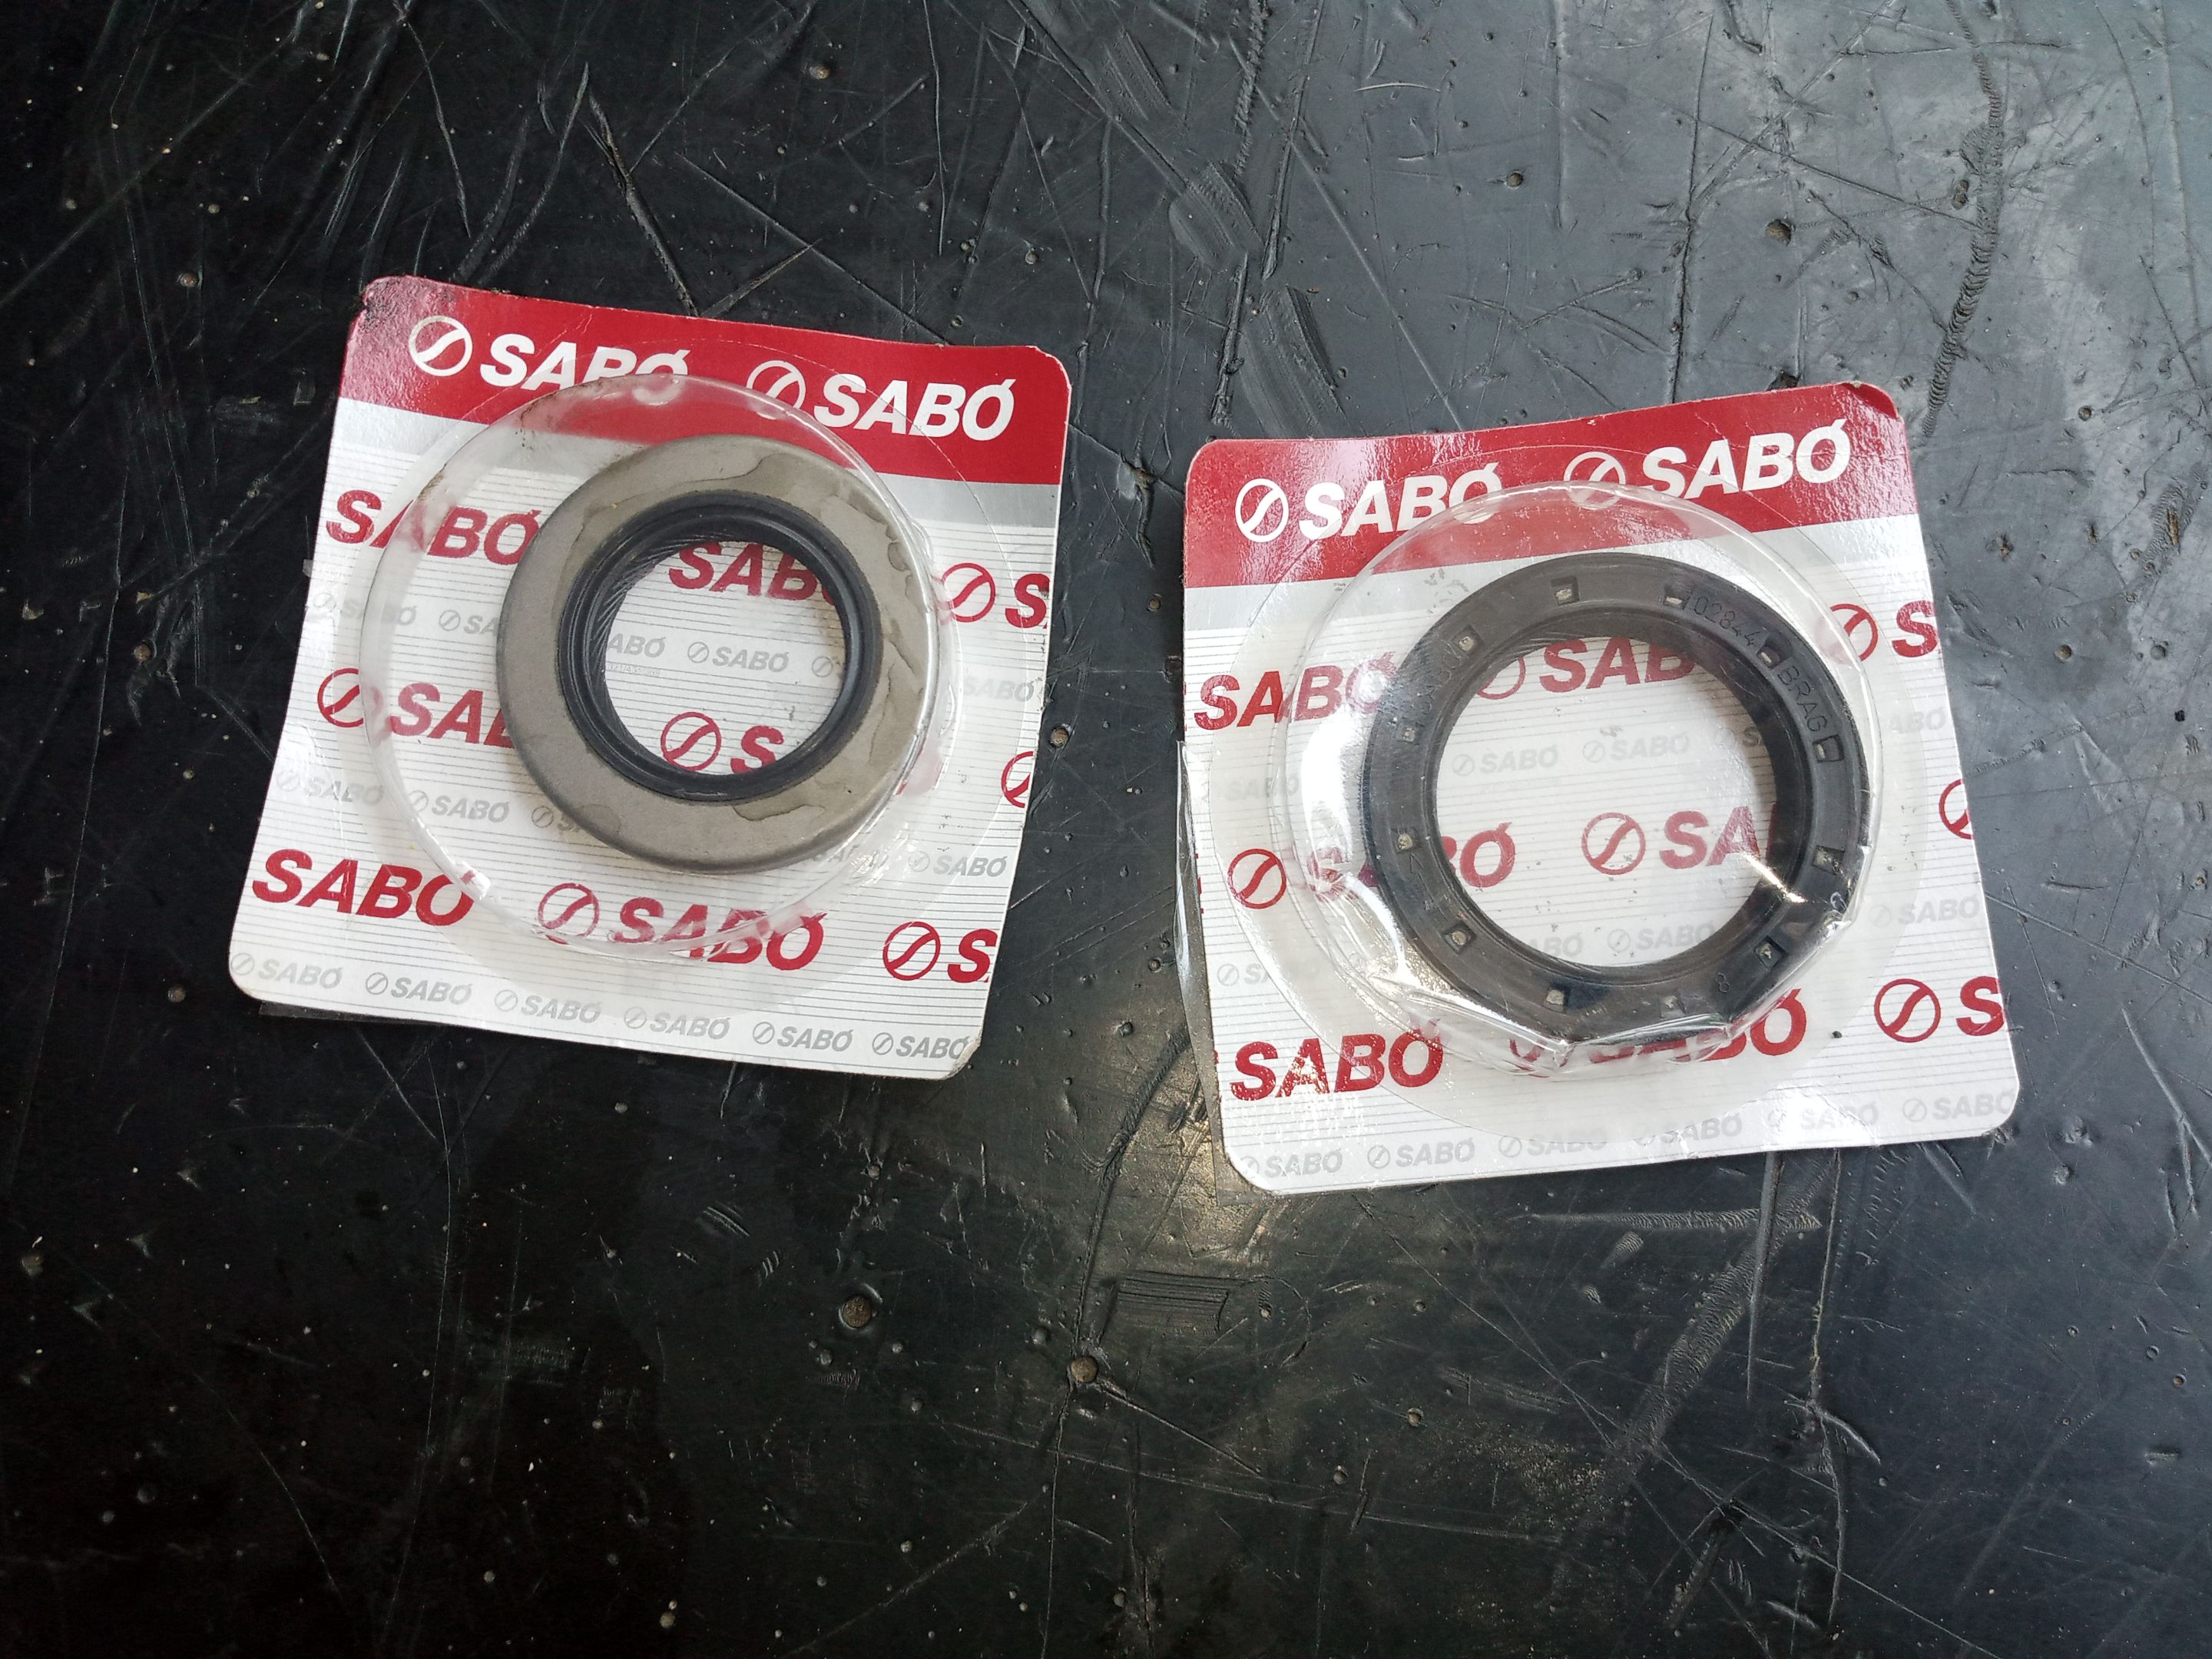
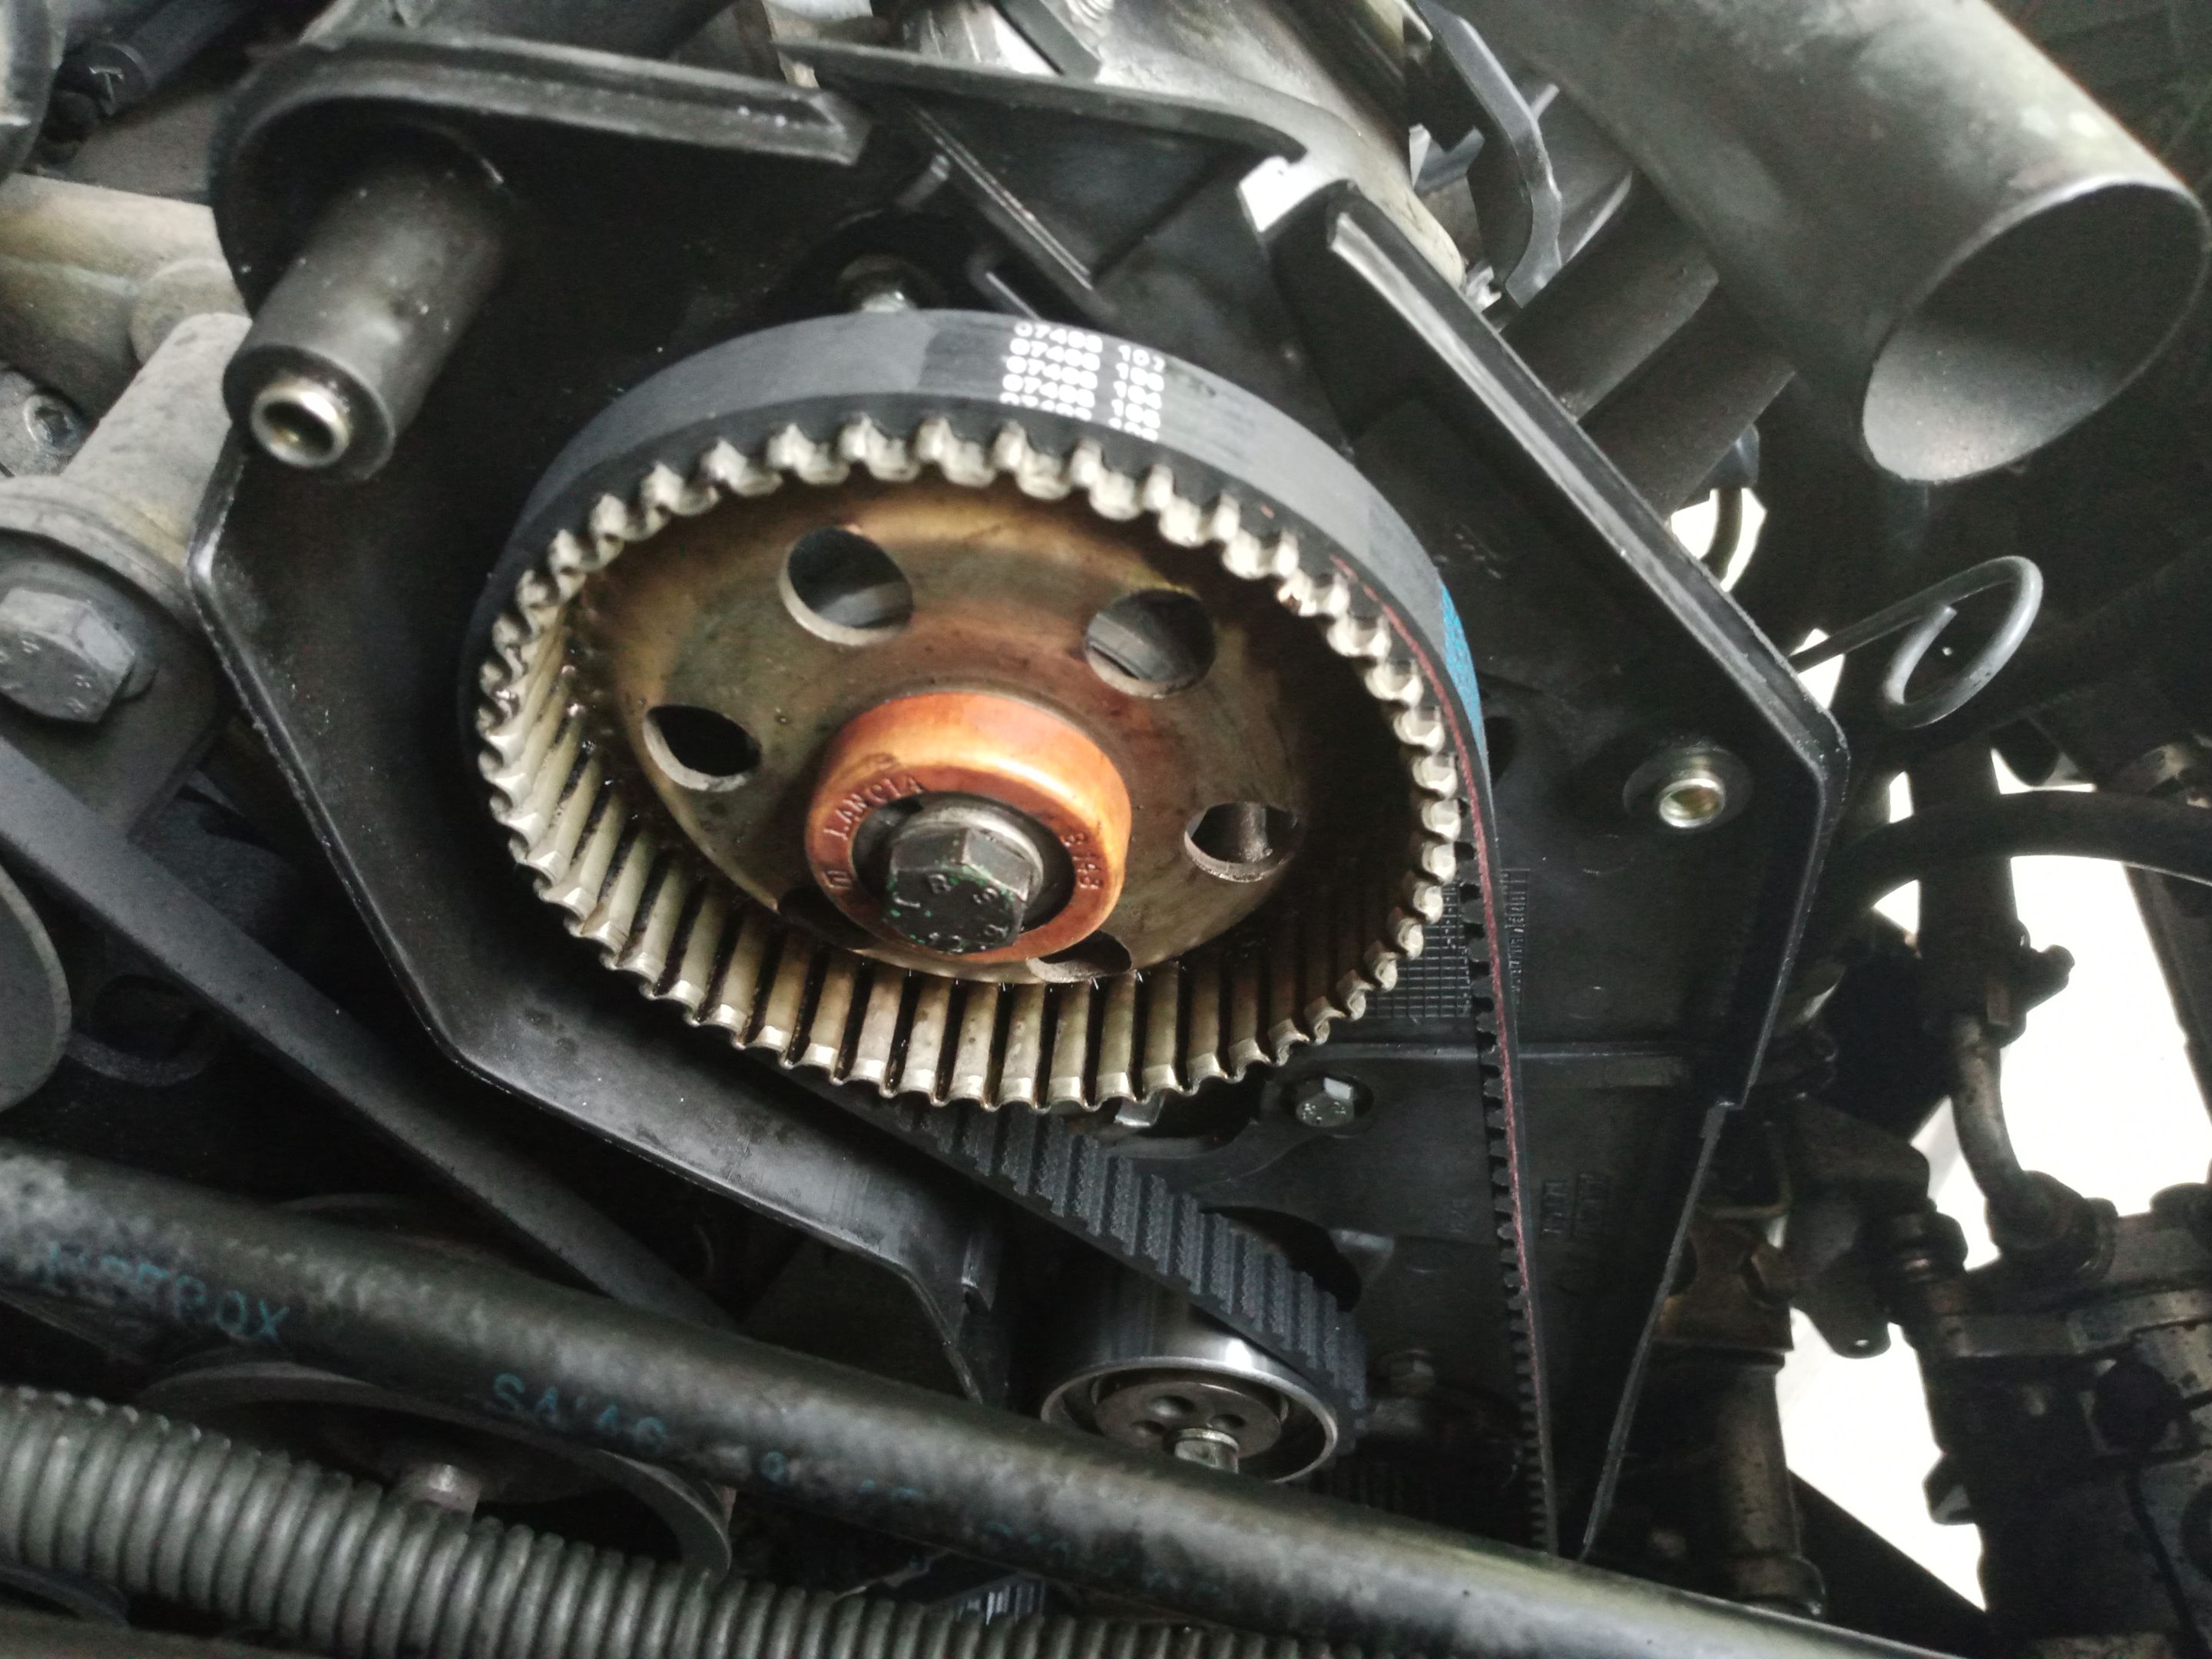
When removing the protector of the timing belt I notice that the main leaks were in the cam and crankshaft caps so at once I did the replacement of the same without evaluating conditions as the oil with the soil shorten its life.
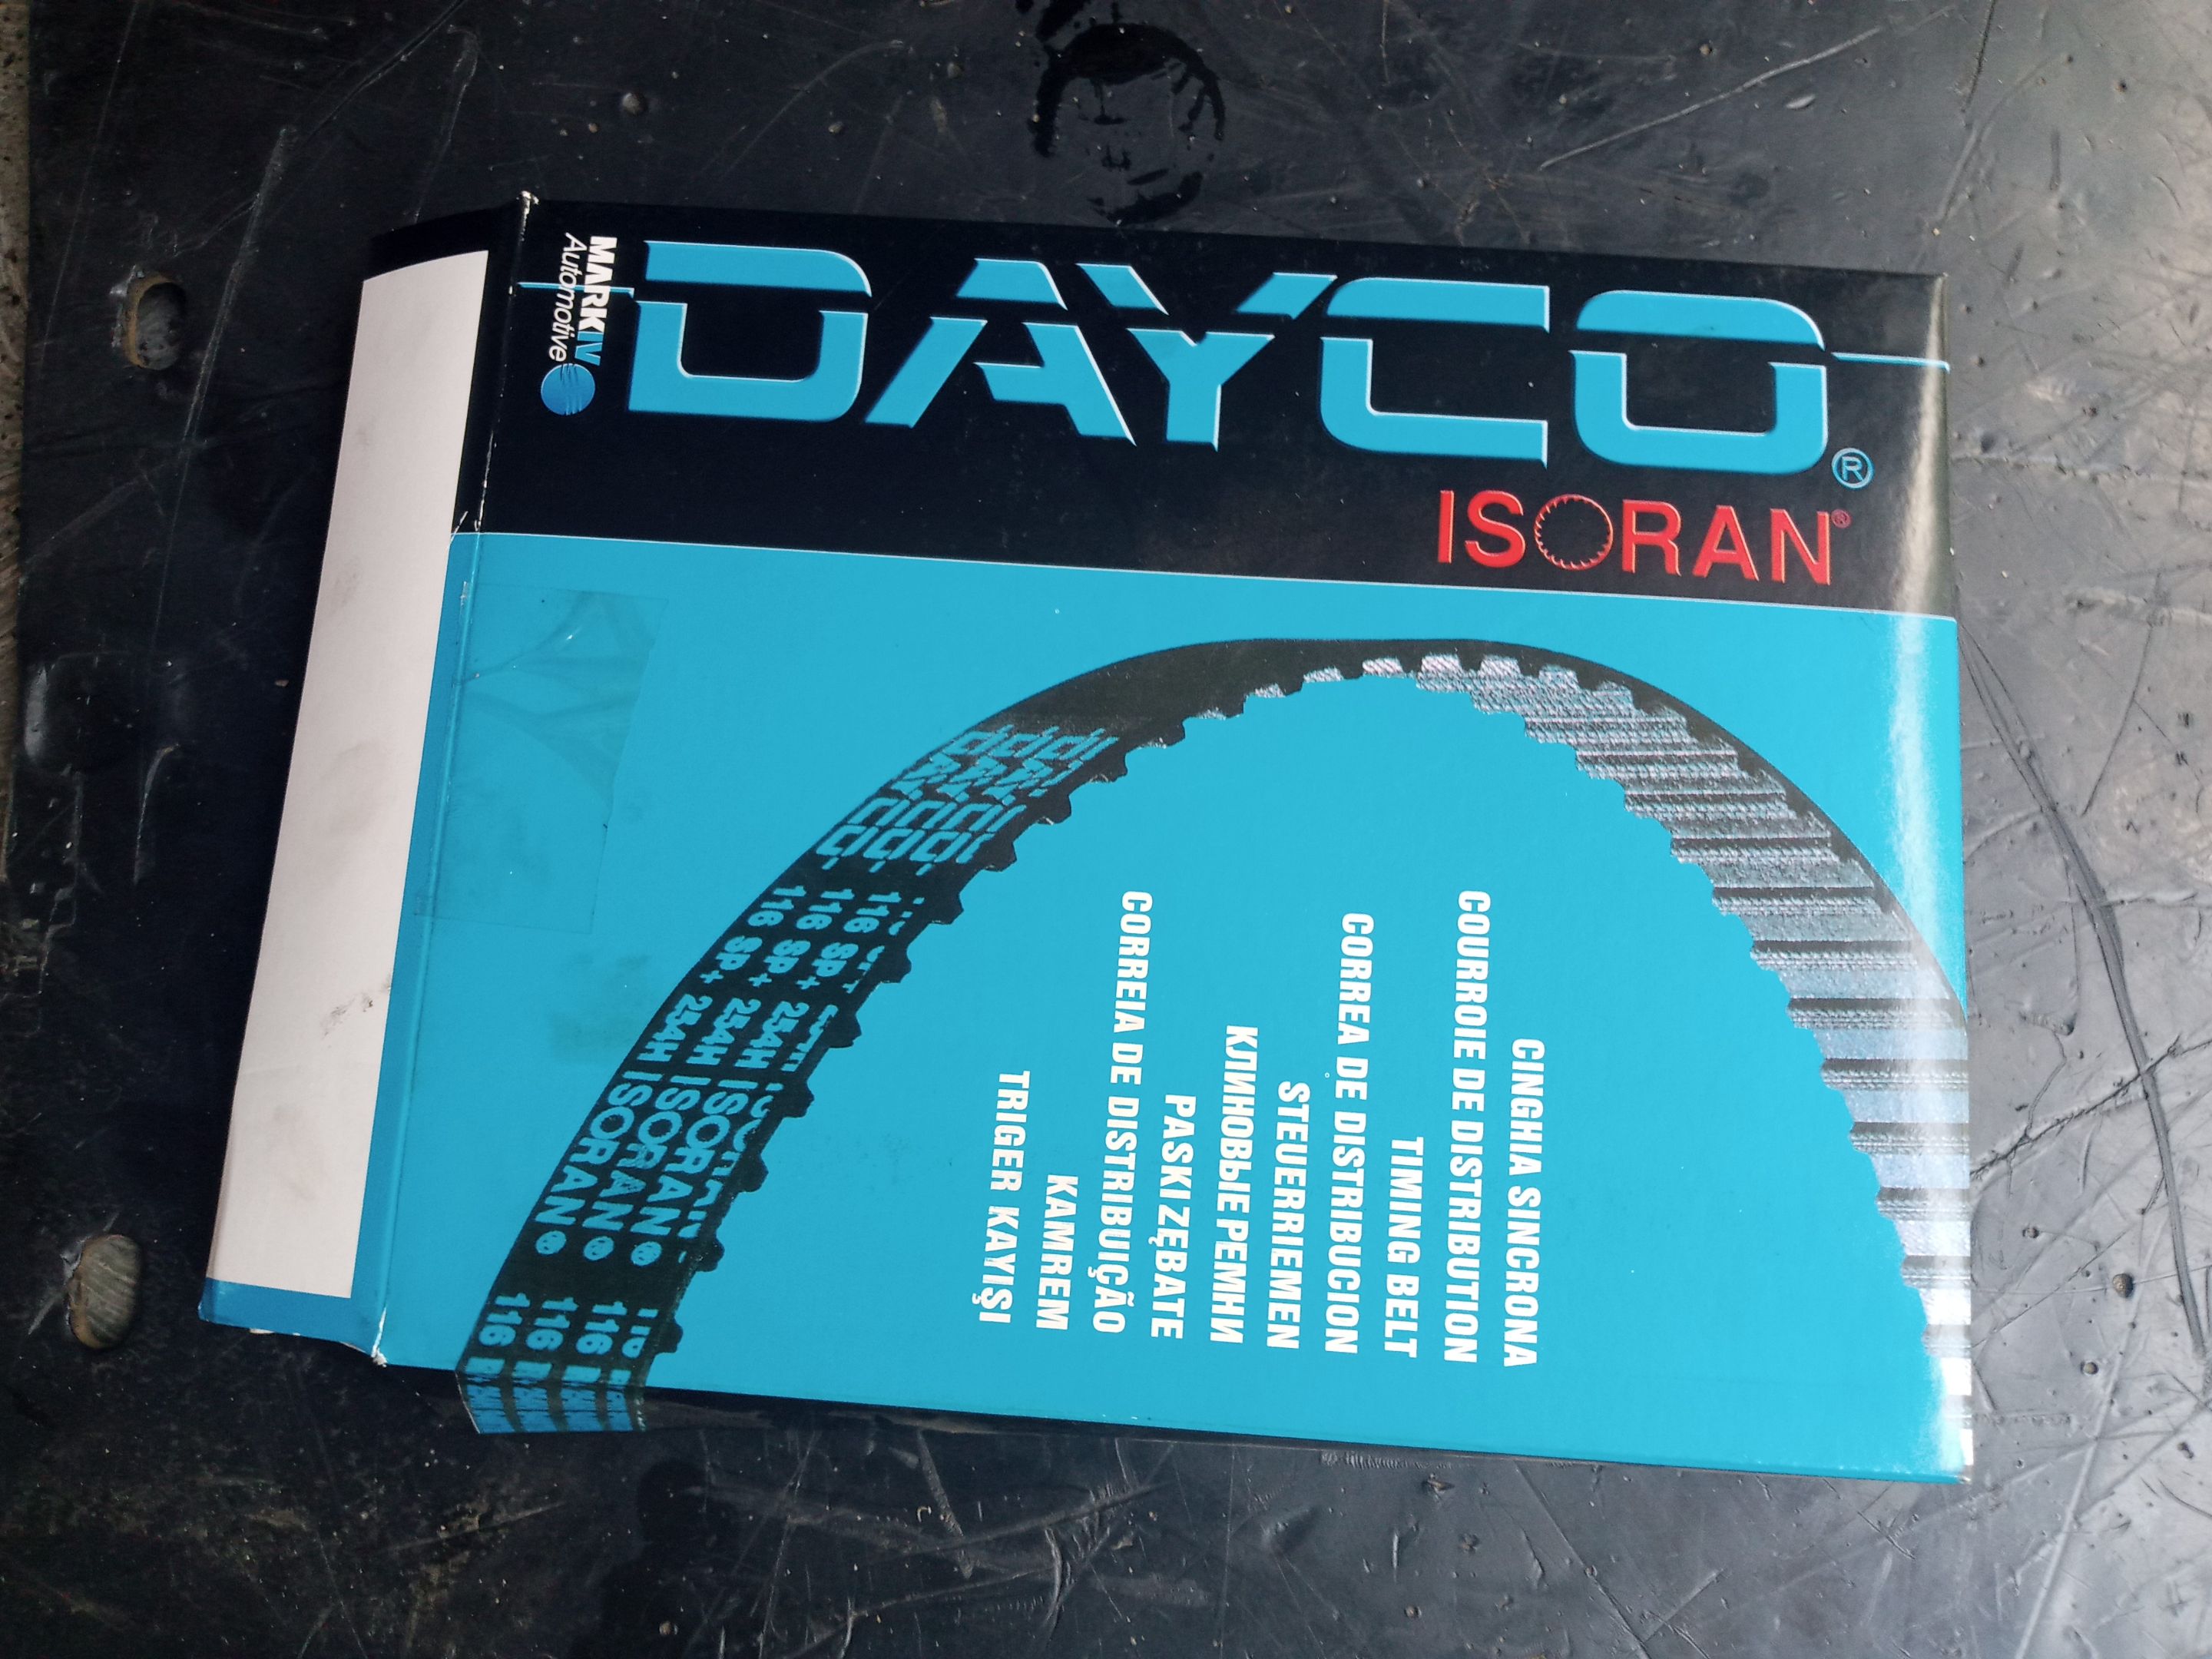
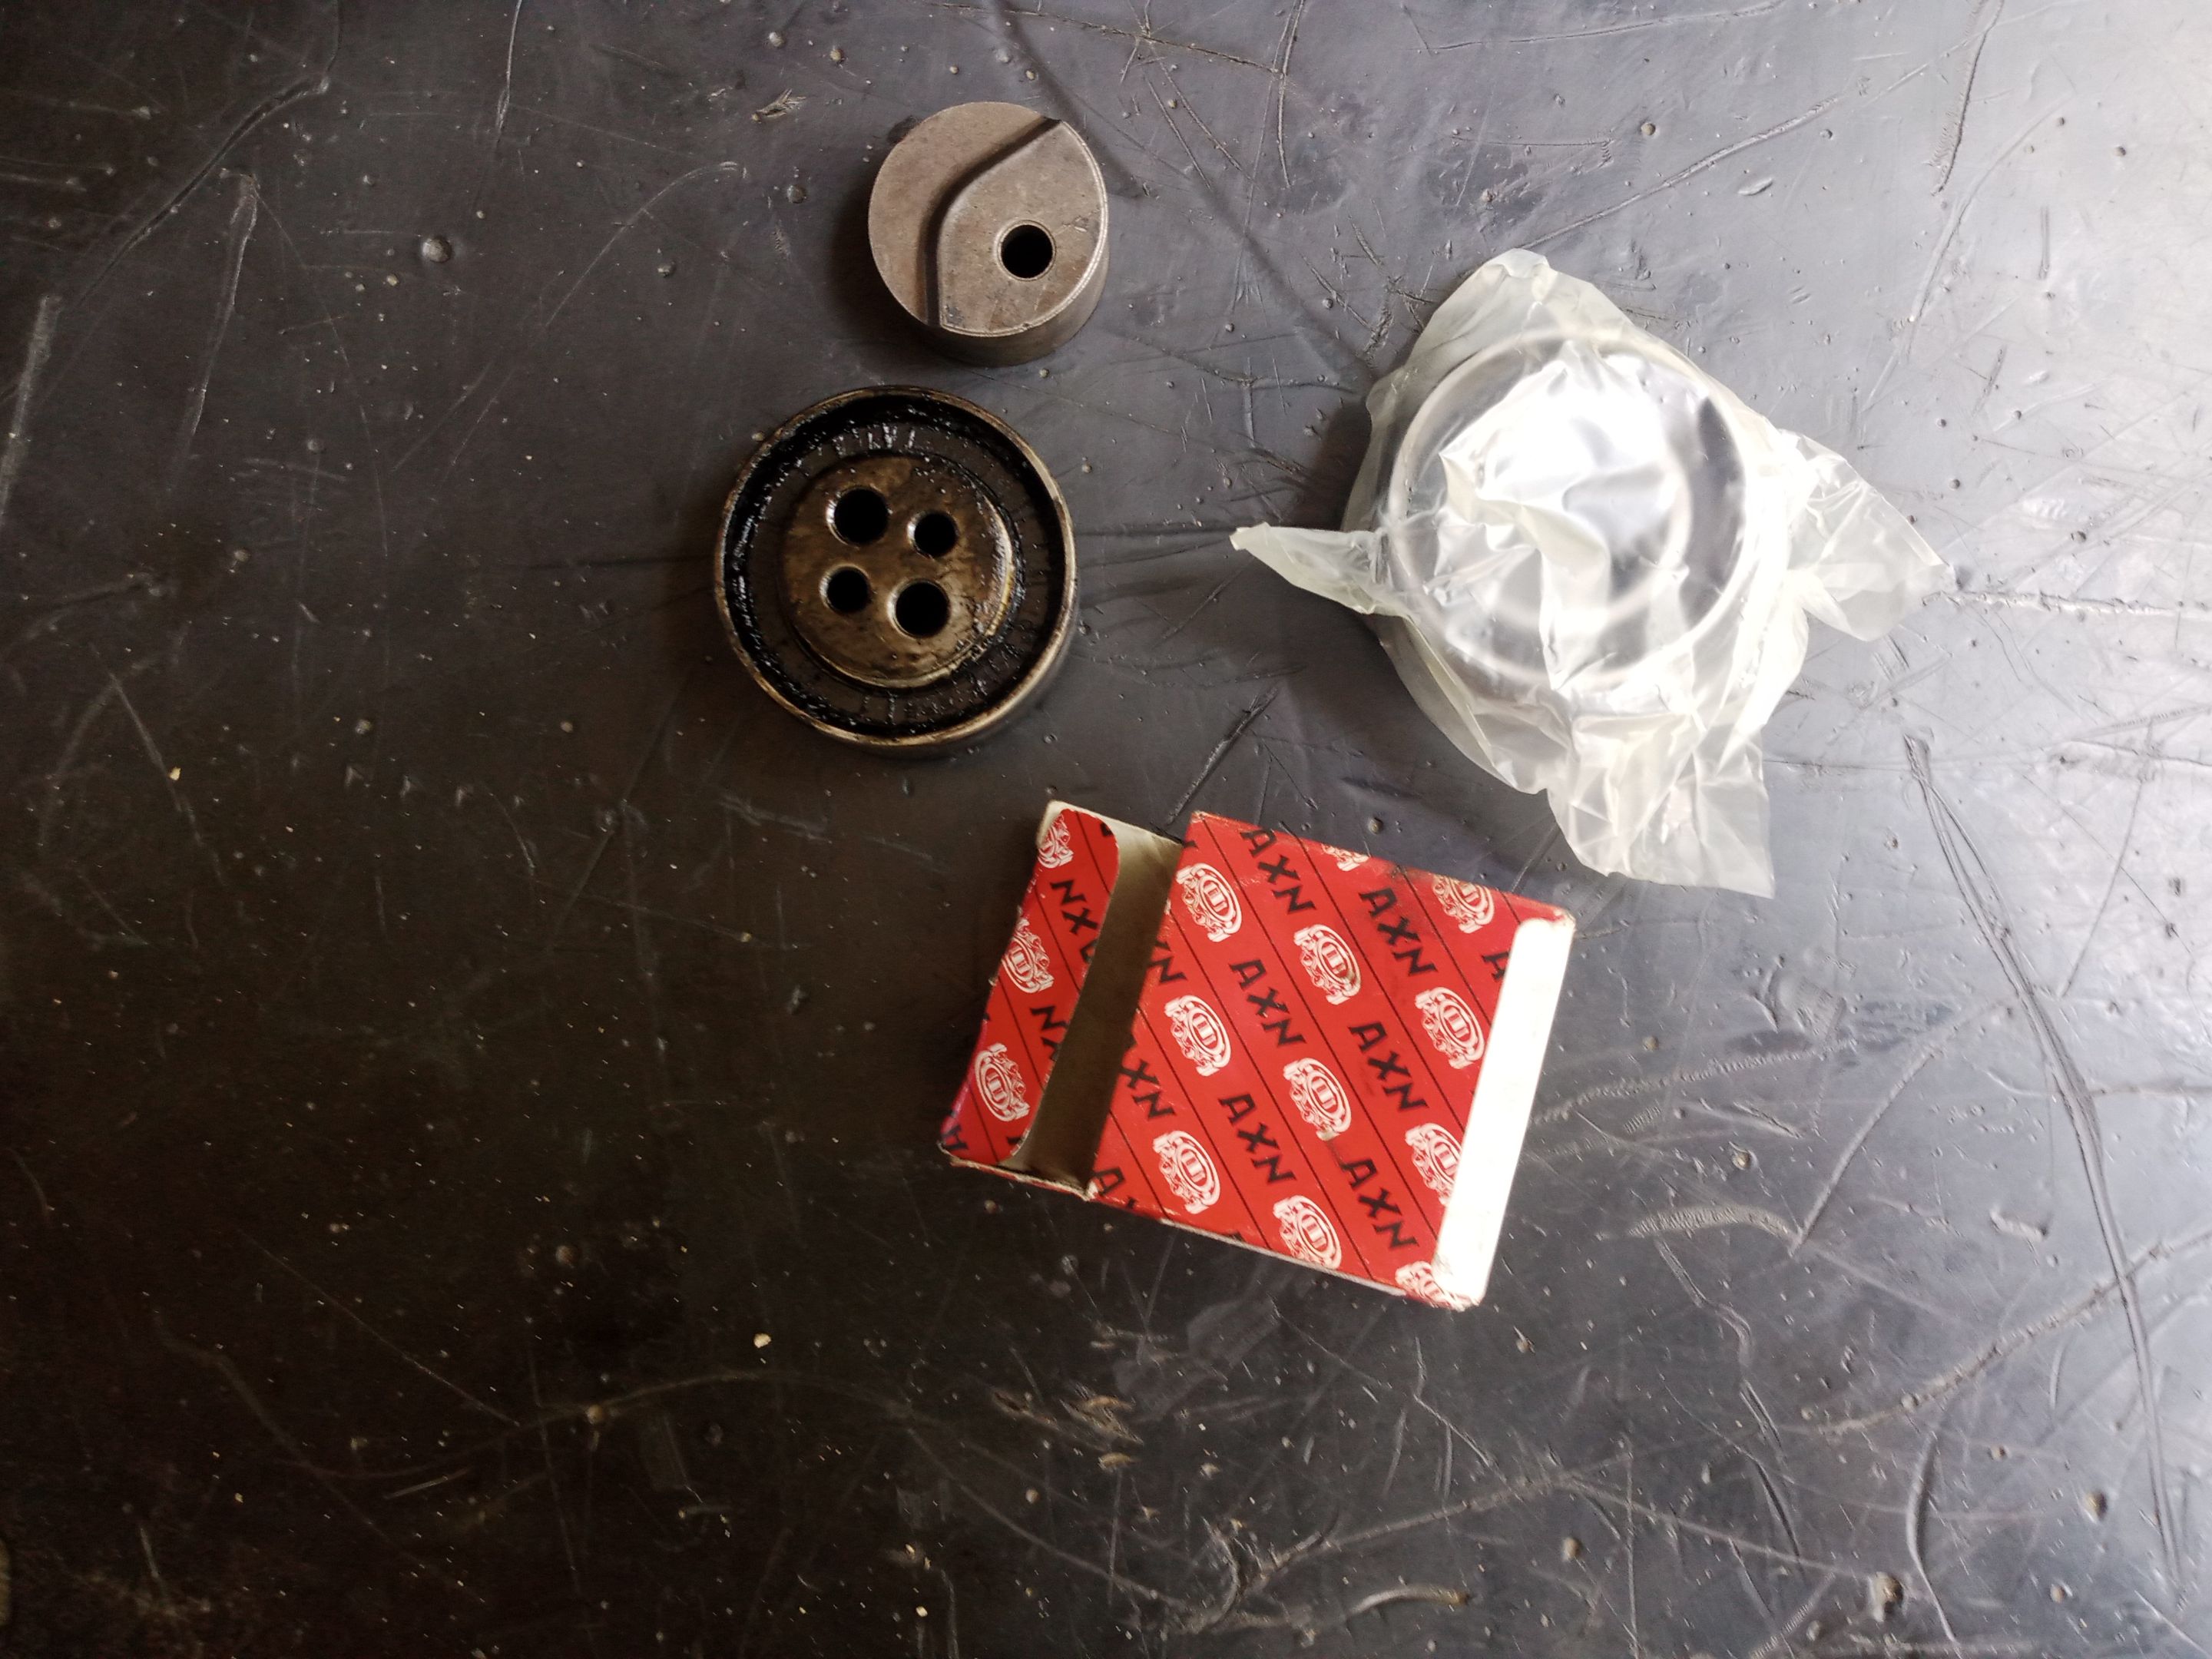
Before disassembling I went in the same car to buy the spare parts which seemed to me quite accessible the distribution kit including the stoppers had a cost of $ 60 and the tripoids $ 23 each.
Now I got down to work, I removed the car in two bases I removed the tires to work more comfortable, I removed the timing belt once I left the engine in neutral.
Then I washed the area with gasoline with the help of a brush and the compressor to remove all the dirt.
After this I replace the old stoppers with the new ones and then install the new timing kit.
I got the timing kit from the original Dayco brand.
Then I check well the points to install the new belt and ready to tighten everything well and place your covers.
Now we move on to the tripoid part, a job that I really like to do a little because that grease is a pain in the hands and it's hard to wash it well.
I disassemble the tip of the tripoid disconnecting it from the front end with the caveat that I disassemble the tip without removing the complete bar from the transmission.

The installation is very simple just add grease to the new tripoid that usually brings it, then place the rubber and insert the tip into the bar, check that it reaches its place of work and that the retainer acts so that it does not come out then place the clamps, these were metallic so it is time to use the special tool for it and finally install everything on the front axle again.
And finally just turn on the car and check all the work done and do the tests to make sure everything is working properly.
I really liked to work this car because the general conditions are very good I dare to say that there are very few cars of this model that are in a state of preservation as this still has the original paint, so mechanically we will continue correcting the faults to return to be at 100%.
So far my publication today thank you for joining me in this repair and God bless you greatly the photos are my property taken with the Infinix Hot 10 i cell phone.
SPANISH
Saludos,
Queridos amigos espero todos estén muy bien y con el cuerpo y la mente despejada luego de estos días de carnaval.
En esta oportunidad me llegó un auto para realizar mantenimiento preventivo en el kit de distribución y reemplazo de tripoides.
El dueño pensaba que requería cambio de amortiguadores delanteros pero estos están en buen estado.
El auto es un Fiat Tempra año 1991 motor 1.6 cc, al llegar y abrir el capot veo que el motor está muy sucio entre residuos de aceite y tierra así que lo primero que hice fue lavar el motor con desengrasante con la ayuda de un compresor.
Una vez ya el motor está en mejor estado de higiene empiezo a detectar las fugas de aceite que lo tenían tan sucio ya que la falla principal era el ruido al cruzar de los tripoides y el descarte de los amortiguadores.
Al retirar el protector de la correa de distribución noto que las fugas principales estaban en las estoperas de levas y del cigüeñal por lo que de una vez hice el reemplazo de la misma sin evaluar condiciones ya que el aceite con la tierra le acortan la vida útil.
Antes de desarmar fui en el mismo auto a comprar los repuestos los que me parecieron bastante accesibles el kit de distribución incluyendo las estoperas tuvo un costo de 60$ y los tripoides 23$ cada uno.
Ahora sí manos a la obra supe do el auto en dos bases retiro los neumáticos para trabajar más cómodo, retiro la correa de distribución una vez deje el motor en su punto muerto.
Luego volvía lavar el área con gasolina con la ayuda de una brocha y el compresor para que esté desprendiera todo el sucio.
Luego de esto reemplazo las estoperas viejas por las nuevas para luego instalar el kit de distribución nuevo.
El kit de distribución lo conseguí de la marca Dayco original.
Luego verifico bien los puntos para instalar la correa nueva y listo a apretar todo bien y colocar tus tapas.
Ahora pasamos a la parte de los tripoides un trabajo que de verdad me gusta hacerlo poco ya que esa grasa grafitada es una molestia en las manos y para lavarla bien cuesta.
Desarmo la punta del tripoide desconectandola del tren delantero con la salvedad de que desmonte la punta sin retirar la barra completa desde la transmisión.
La instalación es bien sencilla solo hay que agregar grasa al tripoide nuevo que por lo general el la trae, luego se coloca la goma y se inserta la punta en la barra, chequeamos que llegue hasta su sitio de trabajo y que el retén actúe para que no se salga luego colocamos las abrazaderas,estás eran metálicas así que toca utilizar la herramienta especial para ello y por último instalamos todo en el tren delantero nuevamente.
Ya por último solo queda encender el auto y verificar todo el trabajo realizado además de hacer las pruebas para saber que todo funciona correctamente.
Me gusto mucho trabajar este auto ya que las condiciones generales están muy buenas me atrevo a decir que son muy pocos los autos de este modelo que están en un estado de conservación como este aún posee la pintura original, así que mecánicamente seguiremos corrigiendo las fallas para que vuelva a estar al 100%.
Hasta aquí mi publicación de hoy gracias por acompañarme en esta reparación y que Dios les bendiga grandemente las fotos son de mi propiedad tomadas con el celular Infinix Hot 10 i.