
Materiales que vas a necesitar:
- Caja de zapatos
- Hojas blancas o papel para envolver
- Marcadores, pintura o lápices de colores
- Tijeras
- Pega o cinta adhesiva
- Imágenes impresas de las diferentes habitaciones(opcional)
- Etiquetas en ingles para cada habitación (opcional)
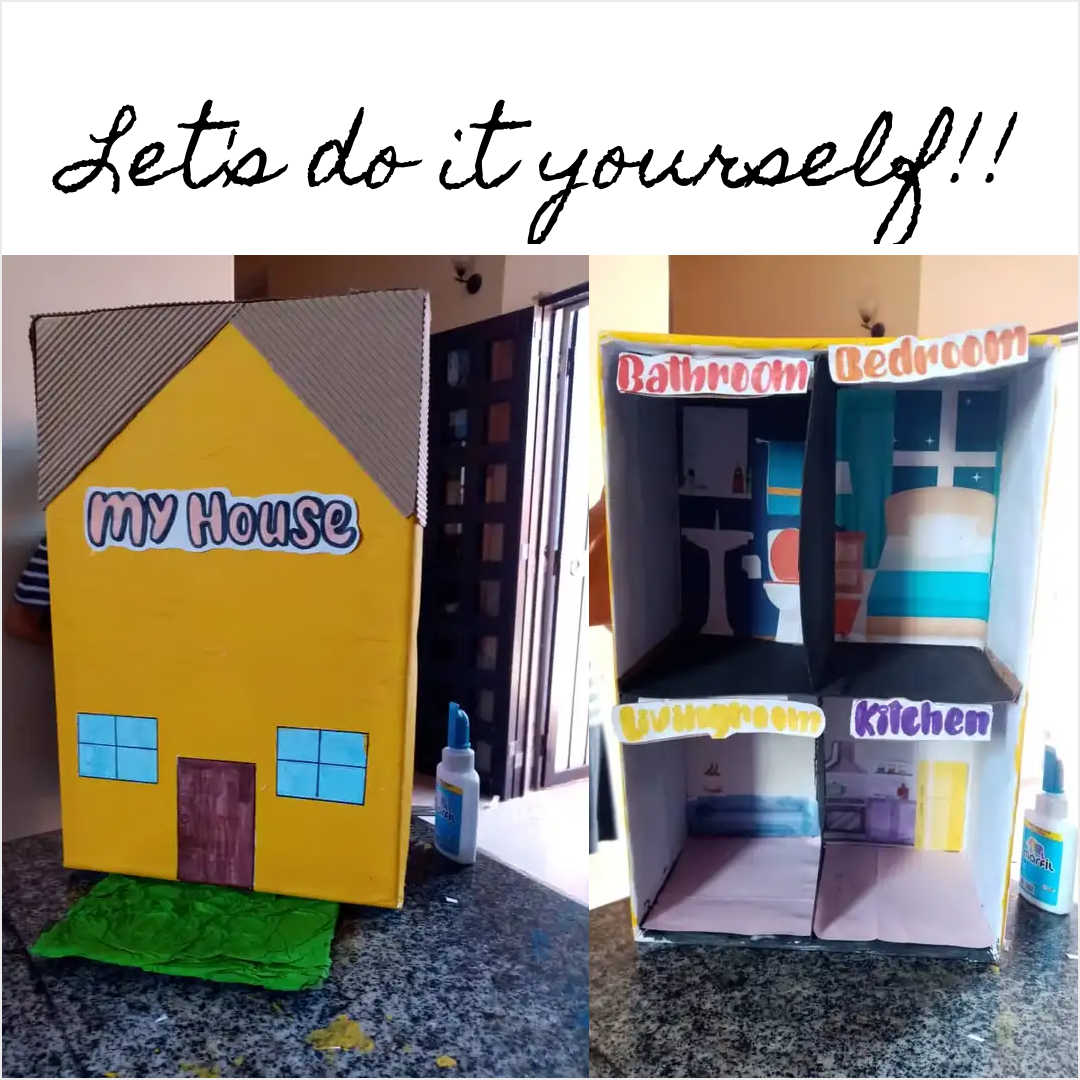
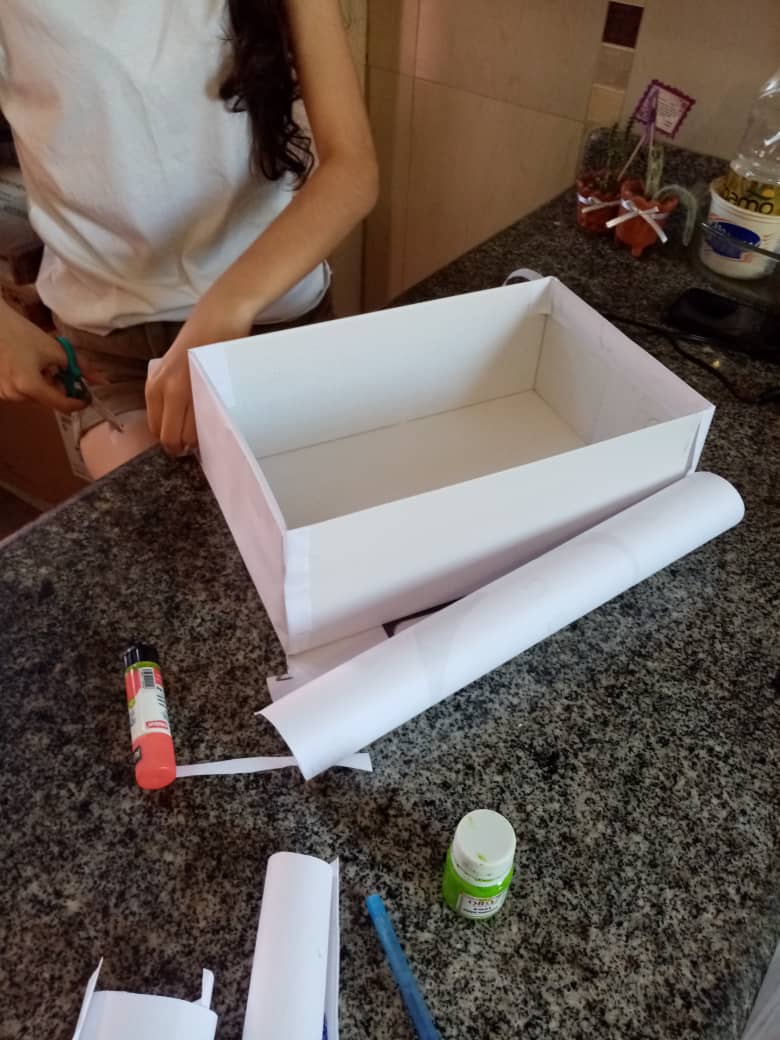
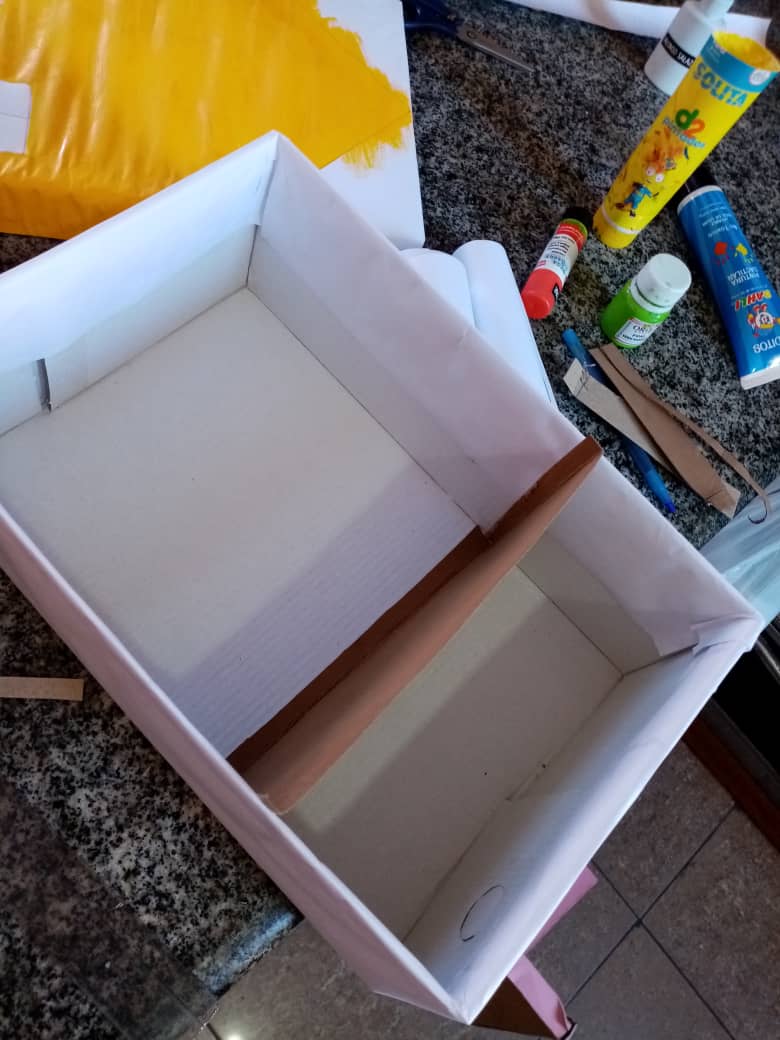
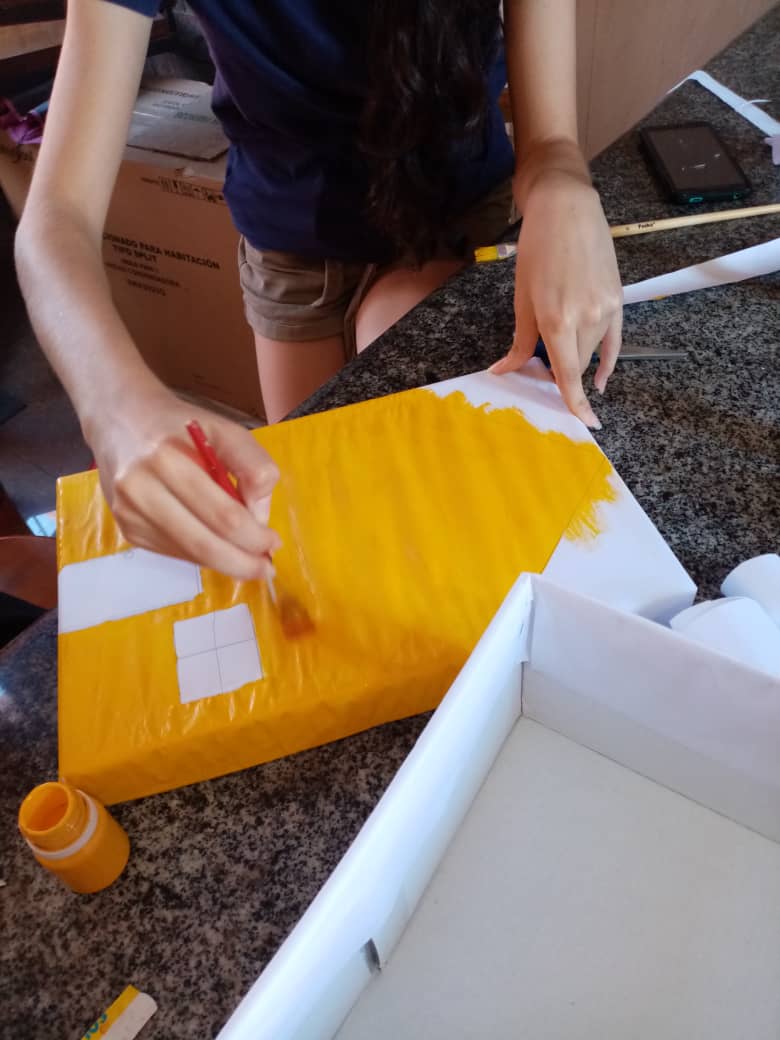
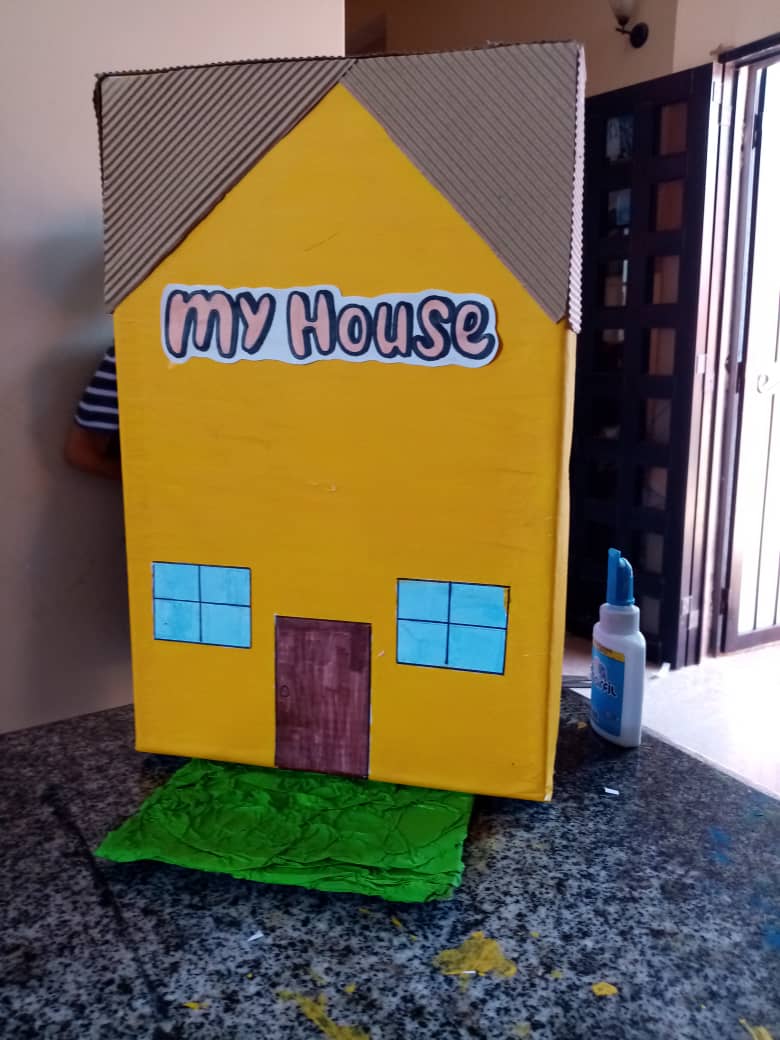
Para mi suerte uno de los niños trajo una caja de zapatos lo suficientemente grande para llevar a cabo esta idea y hacerla realidad. Se forró la caja con papel banco para así tener un lienzo limpio y poder dibujar o pintar como quisiéramos. Posteriormente a la caja como tal le hice unas divisiones, las cuales serían las distintas habitaciones que tiene la casa. A la tapa de la caja le dibujé una fachada para representar el frente de la casa.
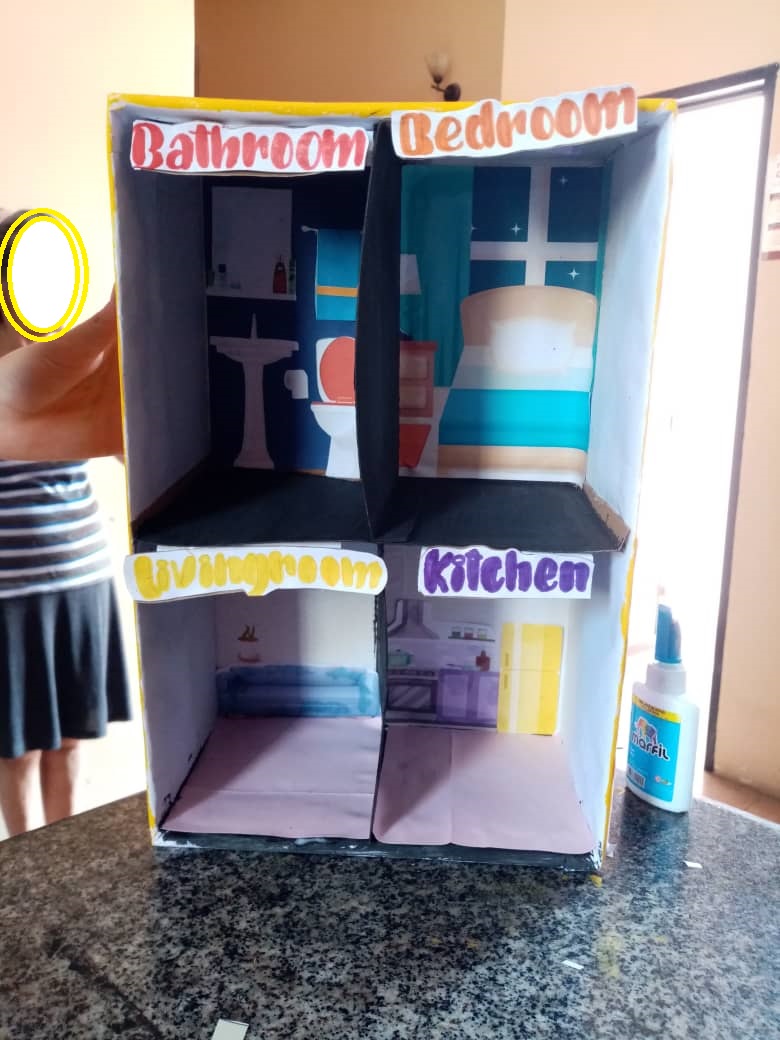
Como no teníamos mucho tiempo para hacer los muebles, decidimos imprimir imágenes de las distintas habitaciones y pegarlas en el fondo de cada una, si no hacíamos eso iba a tener que adoptar a esos niños, porque íbamos a estar haciendo eso todo el día jajajaja.
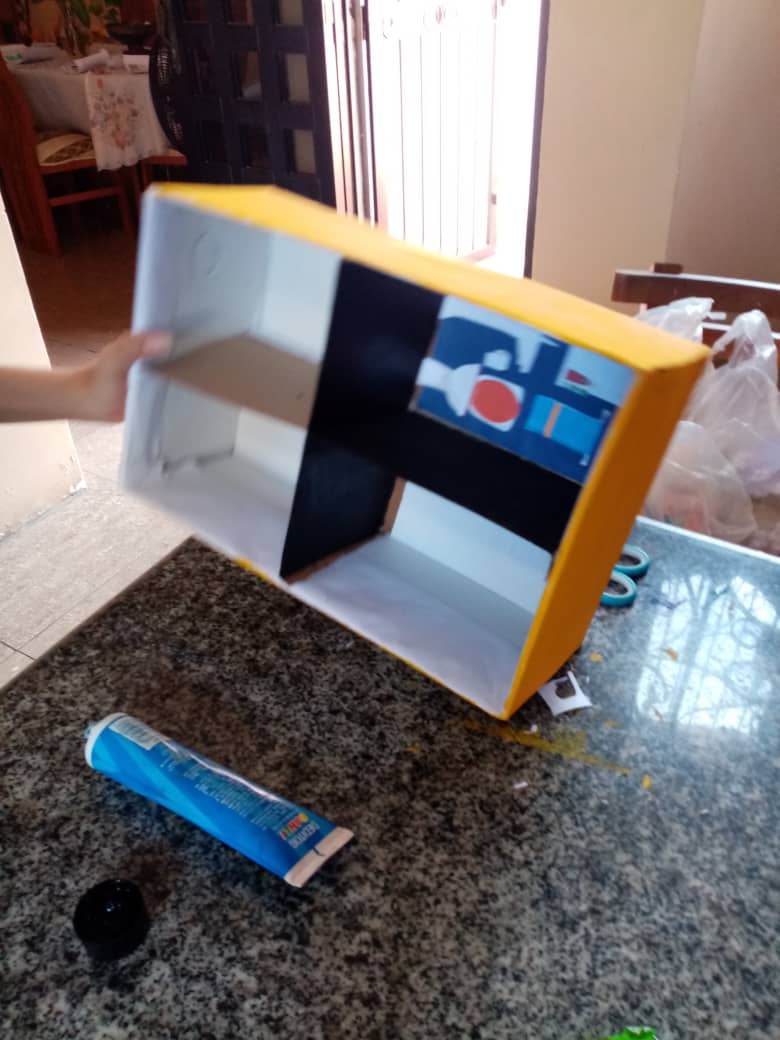
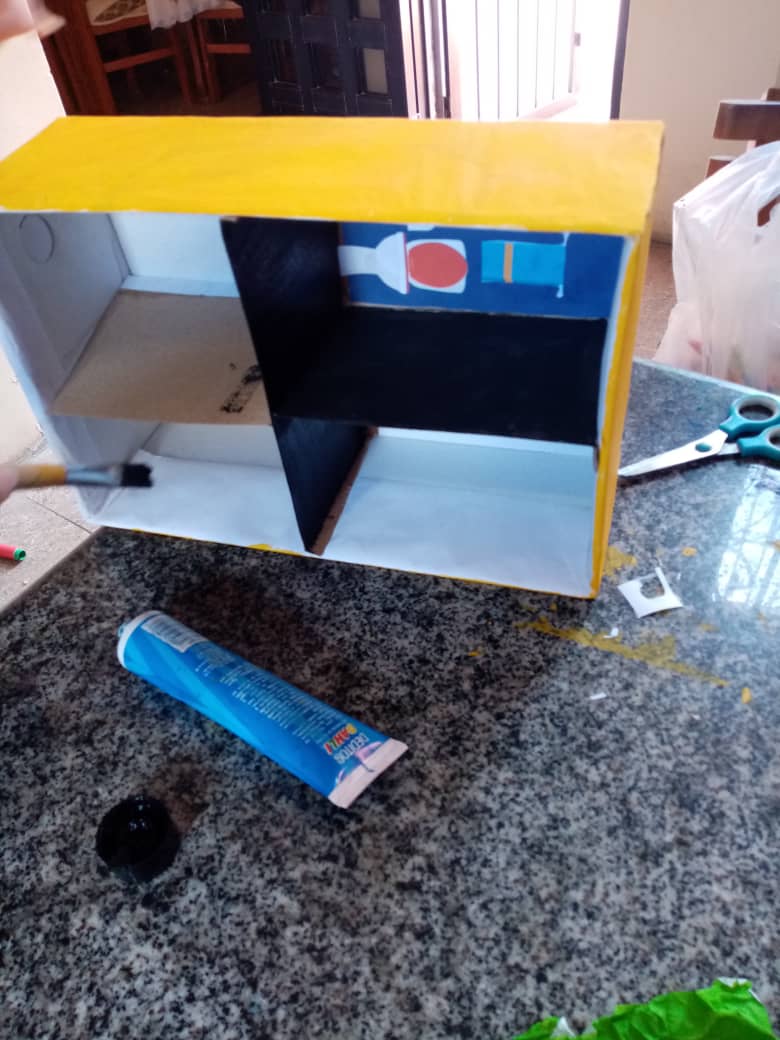
Al final los artistas decidieron pintar las paredes interiores de color negro. No es algo que yo haría, pero cuando me di cuenta ya era muy tarde, ya tenían dos cuartos pintados de color negro 🤣.
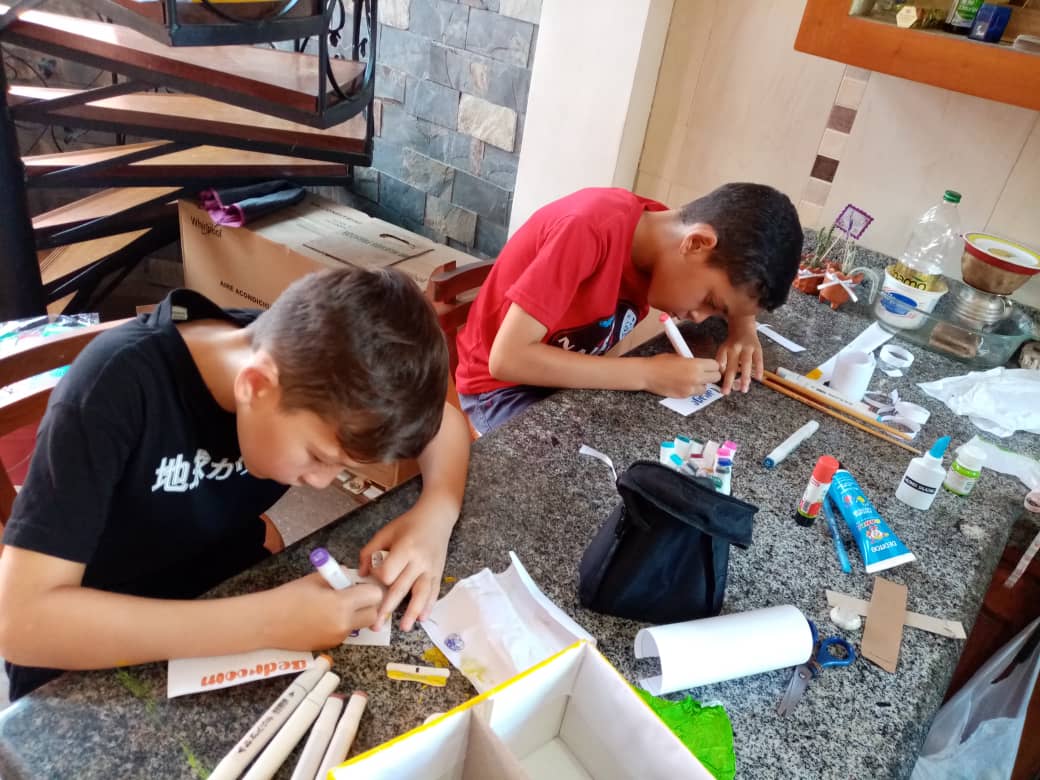
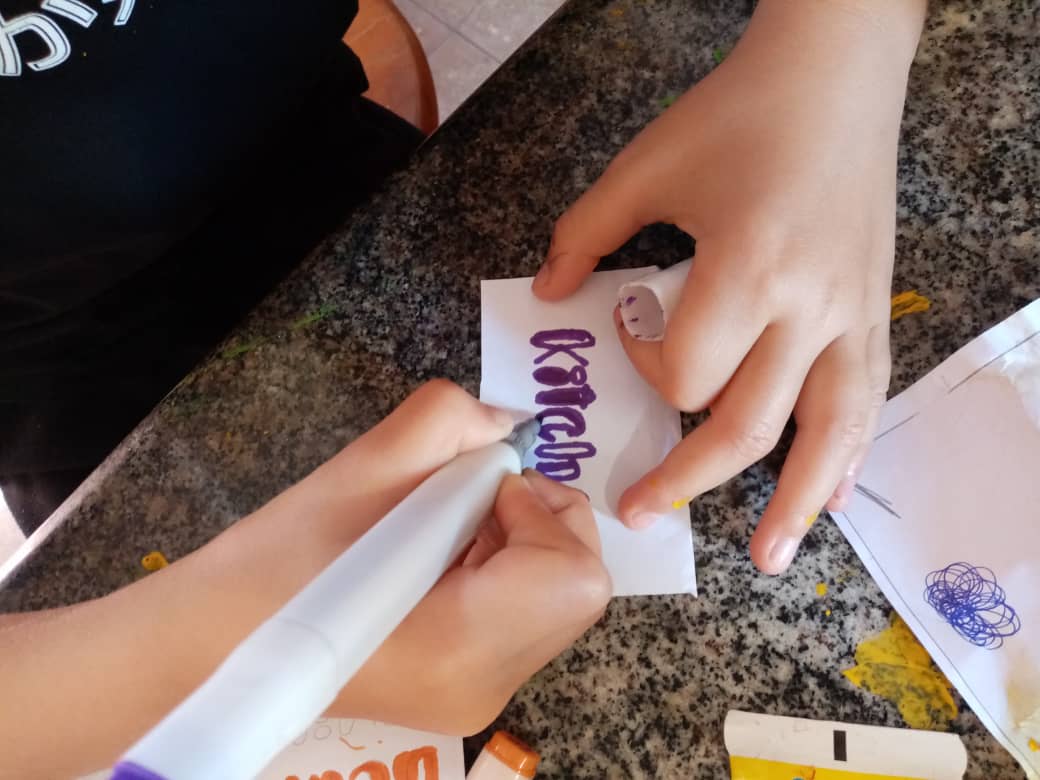
Para finalizar escribimos los nombres de cada habitación en inglés y lo pegamos donde correspondía.
Espero que esta idea te motive a hacerlo tu mismo.
Gracias por leer <3
Texto e imágenes: @valentina23


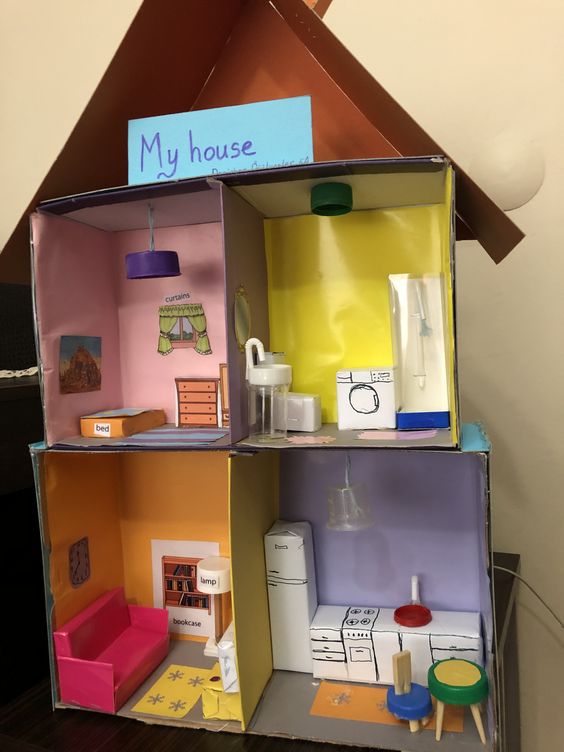
Hello, all my friends from DIYHub! How are you doing today? We don't take a break around here, and even though it's Easter break, I've been tasked with working with these two kids who need to submit a model for their English class next week. They have to identify the different rooms in their house for this project. To create this model, I was inspired by an idea I found on Pinterest.
Materials you'll need:
- Shoebox
- White paper or wrapping paper
- Markers, paints, or colored pencils
- Scissors
- Glue or tape
- Printed images of different rooms (optional)
- English labels for each room (optional)
Luckily, one of the kids brought a shoebox that was big enough to bring this idea to life. We covered the box with white paper to have a clean canvas where we could draw or paint as we pleased. Then, I made divisions inside the box to represent the different rooms in the house. On the lid of the box, I drew a facade to represent the front of the house.
Since we didn't have much time to make furniture, we decided to print images of the different rooms and glue them to the background of each one. Otherwise, we would have been adopting those kids because we would have been doing that all day, hahaha.
In the end, the artists decided to paint the interior walls black. It's not something I would have done, but by the time I realized, it was too late. They already had two rooms painted black! 🤣
To finish, we wrote the names of each room in English and stuck them where they belonged.
I hope this idea motivates you to do it yourself.
Thanks for reading <3
Text and images: @valentina23
English translation: @valentina23