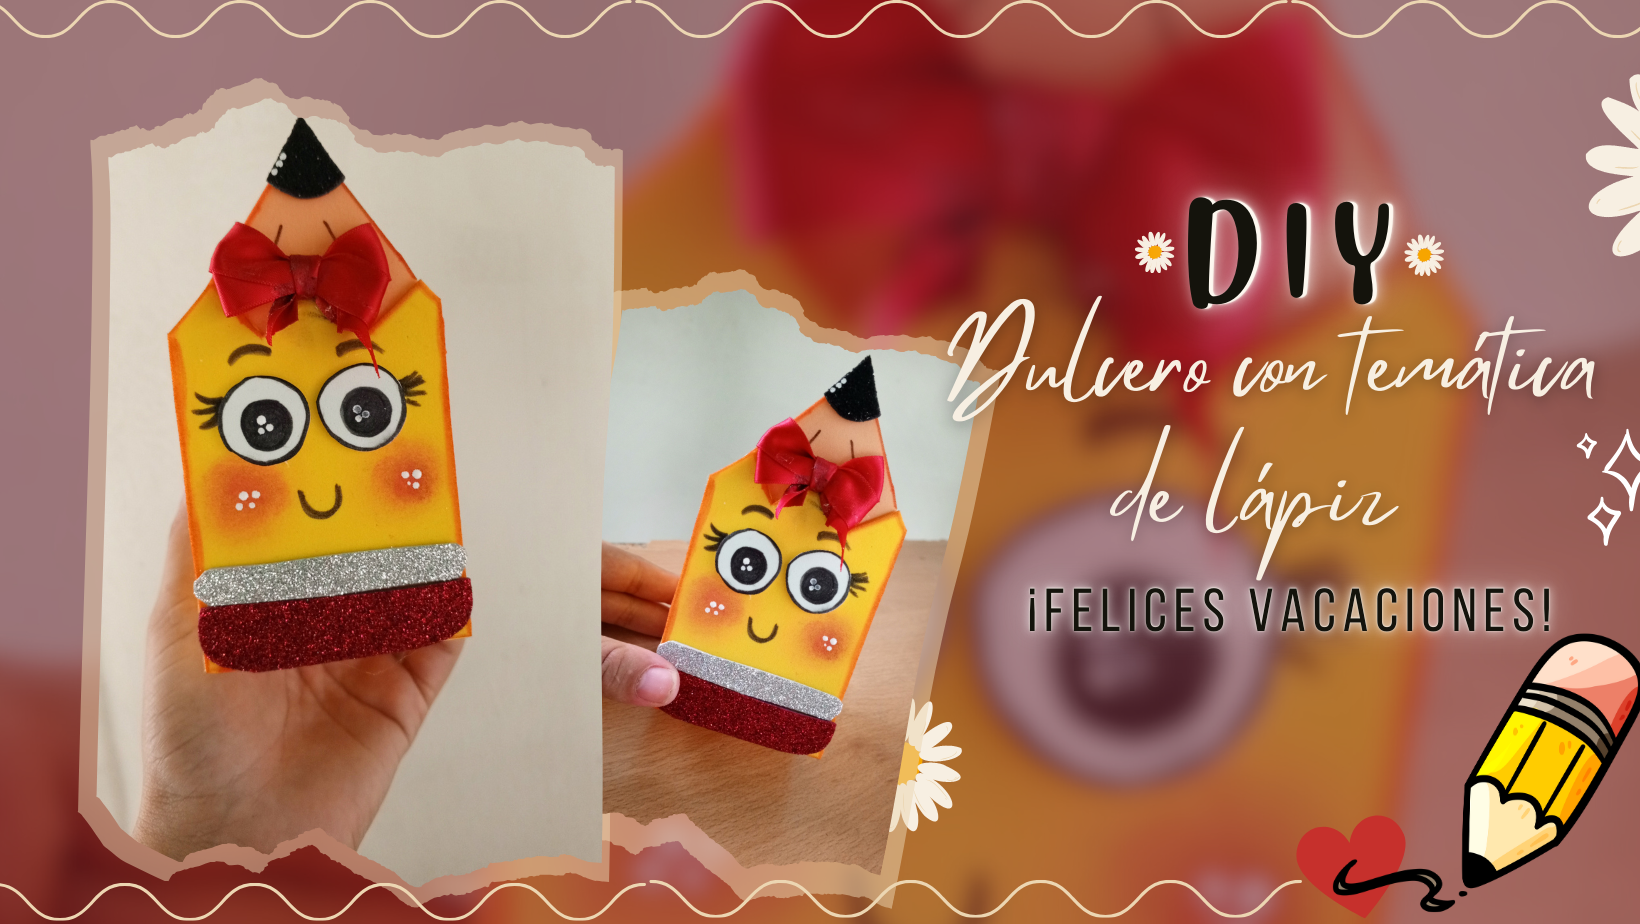
En muchos estados venezolanos estas son las fechas de cierre de ciclo o de año escolar, dónde vienen graduaciones y promociones y en esta oportunidad les comparto un lindo dulcero con temática de lápiz, ideal para dar como cotillón en las fiestas de despedida de año o como lo mencioné en las promociones de primaria, también puede servir para dar un presente sencillo a esas docentes que acompañaron a nuestros hijos durante este año escolar, sin más por aquí te muestro como realizar este detalle, fácil y bonito✏️🩷
Hello creative friends🎨✨ I hope you are very well and that your day is magnificent, here we are very well thank God.
In many Venezuelan states these are the dates of closing of cycle or school year, where graduations and promotions come and this time I share with you a nice candy box with pencil theme, ideal to give as cotillion at the farewell parties or as I mentioned in the promotions of primary school, can also serve to give a simple present to those teachers who accompanied our children during this school year, without further ado here I show you how to make this detail, easy and bonito✏️🩷

Materiales:
- Cartulina de color amarillo
- Foami liso de color amarillo, color piel
- Foami escarchado rojo, plateado y negro
- Cinta roja
- Pintura al frio color blanca
- Marcador negro
- Silicón
Materials:
- Cardboard of yellow color
- Smooth Foami of yellow color, color skin
- Red, silver and black frosted Foami
- Red ribbon
- Cold paint white color
- Black marker
- Silicone
Paso a Paso | Step by Step✏️✨
Antes de iniciar me gustaria mencionar que no tenia idea alguna de como resultaría, fui trabajando como quien dice SOBRE LA MARCHA
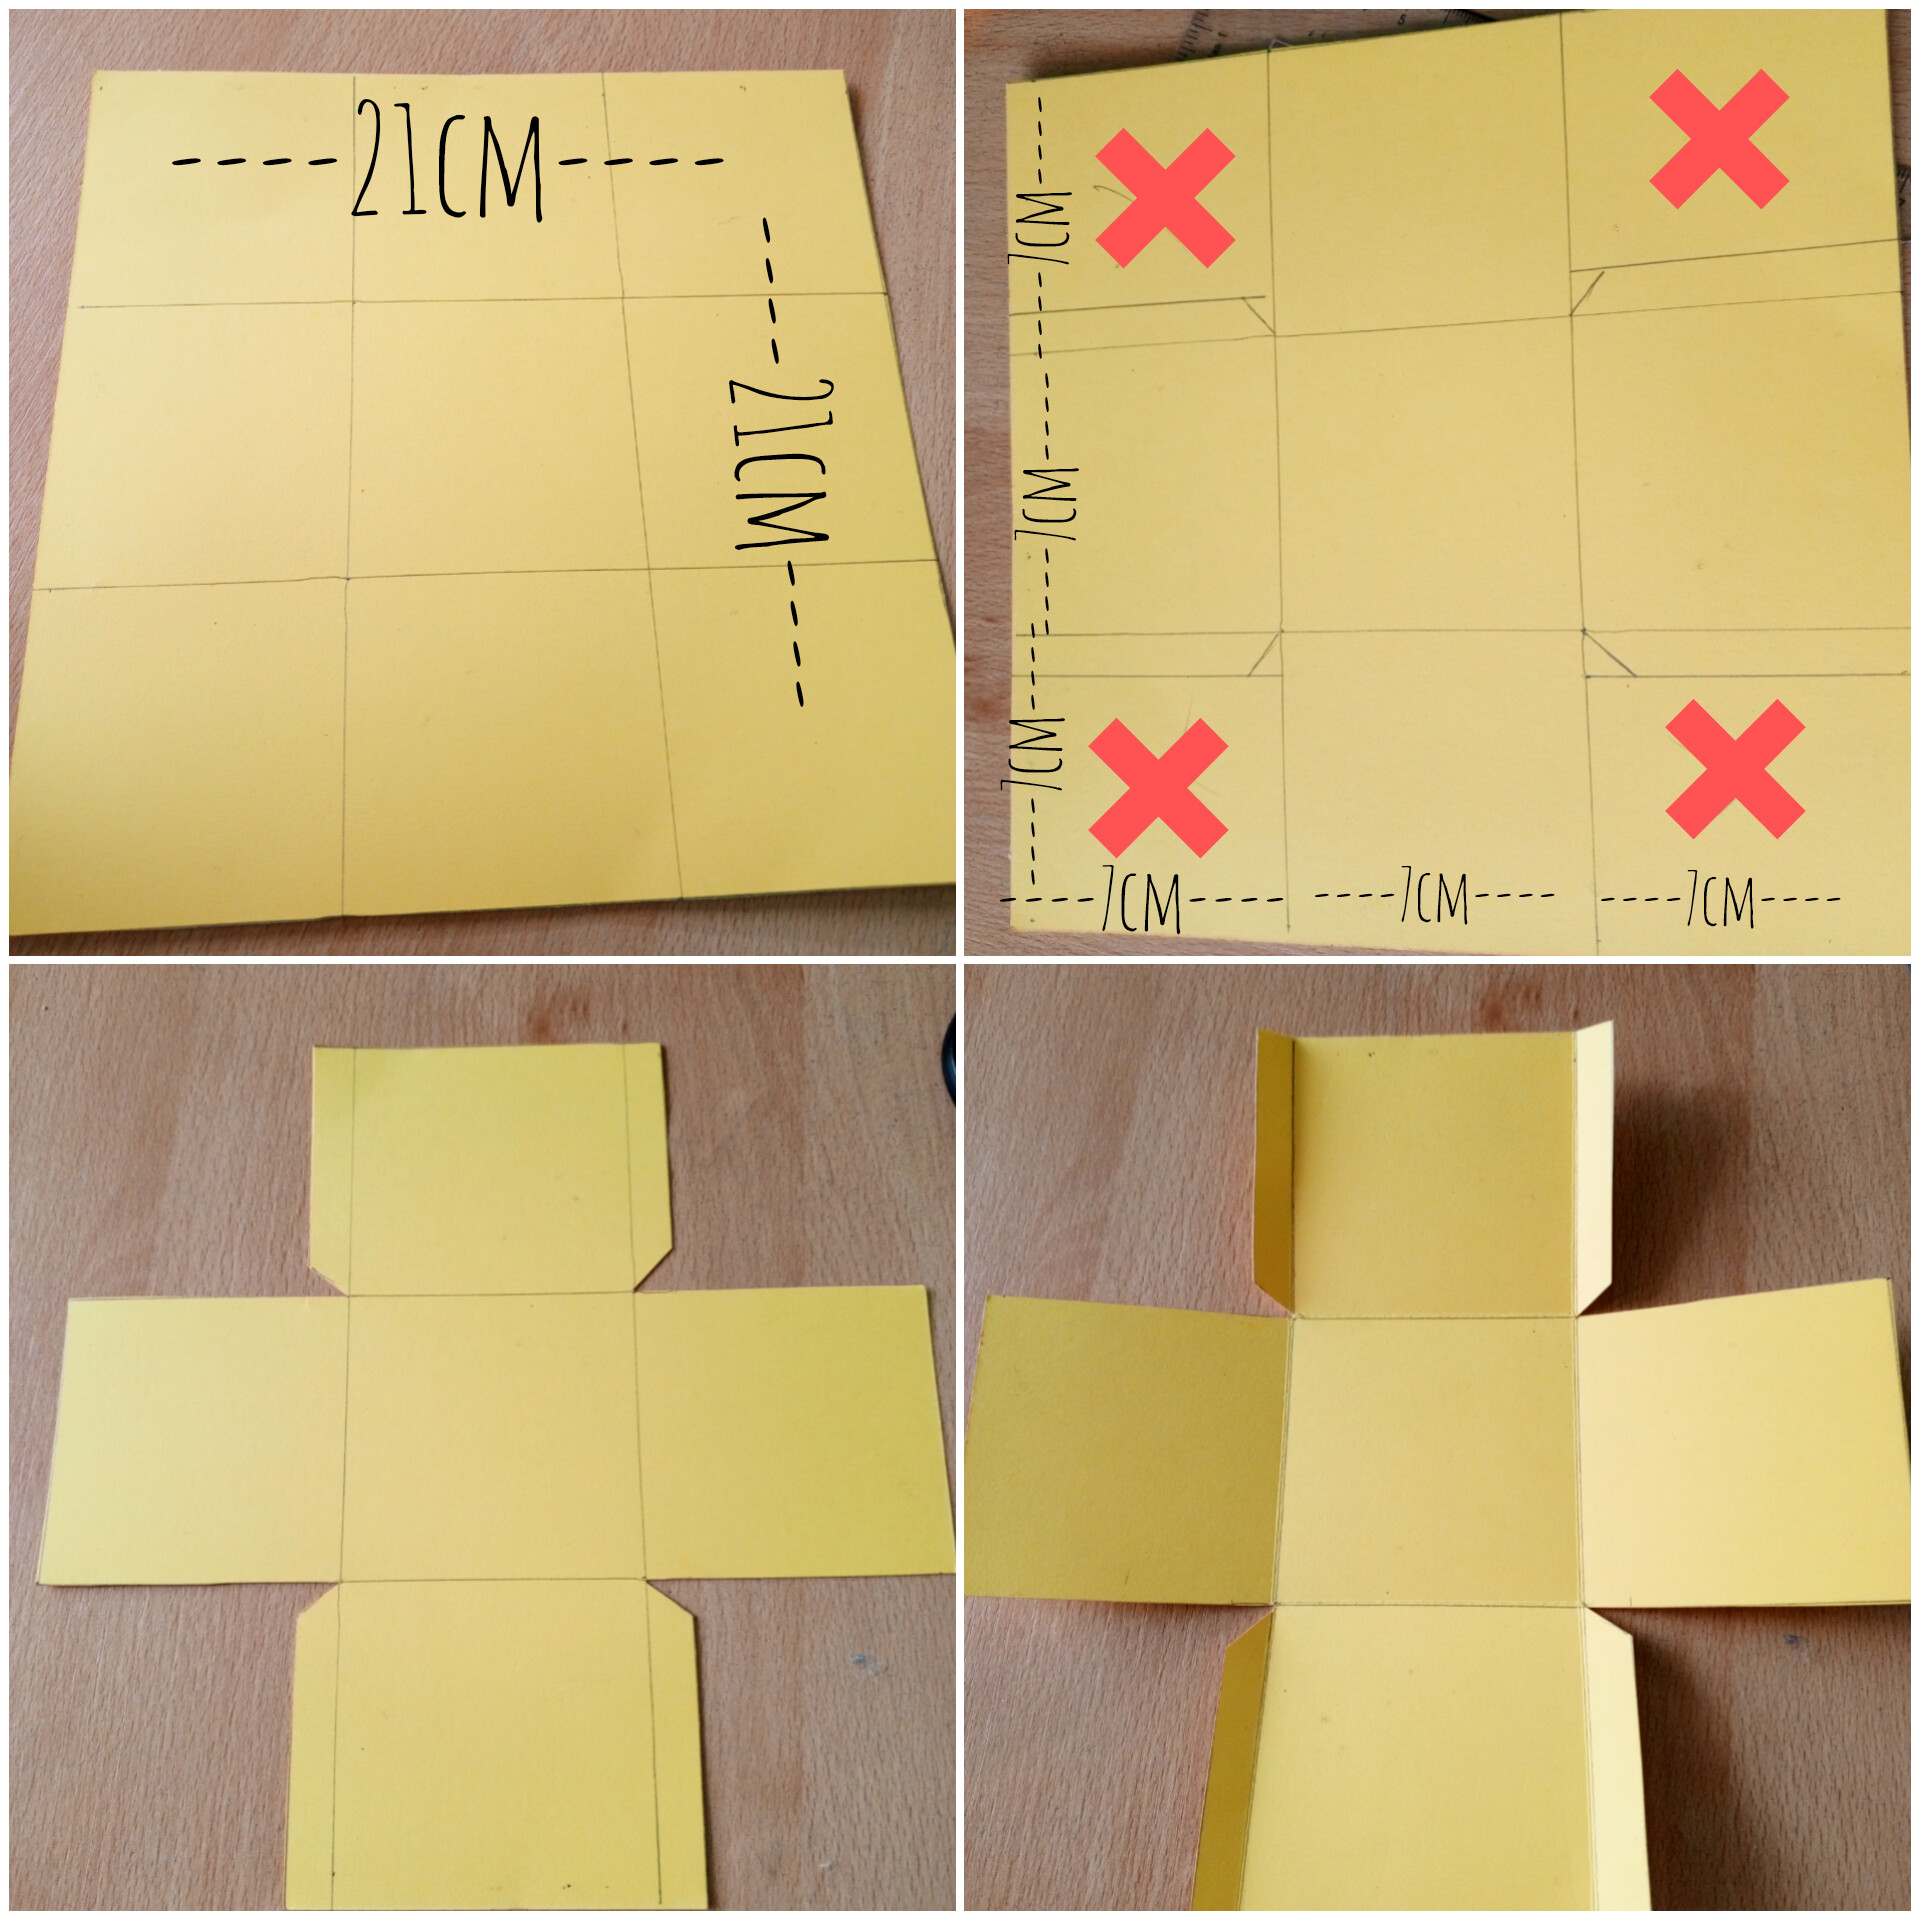
✨ En la cartulina amarilla medi un cuadrado de 21cm×21cm (puedes hacerlo mas grande si gustas), luego lo dividi en tres franjas de 7cm cada una y repeti el proceso de forma contraria, obteniendo 9 cuadros de 7cm×7cm, luego procedi a cortar todos los de las esquinas, dejando una pestaña de 1cm, para con ayuda de una regla marcar muy bien todos los dobleces.
Before I start I would like to mention that I had no idea how it would turn out, I was working as it were ON THE SPOT.
✨ In the yellow cardboard I measured a square of 21cm×21cm (you can make it bigger if you like), then I divided it into three strips of 7cm each and repeated the process in the opposite way, obtaining 9 squares of 7cm×7cm, then I proceeded to cut all the corners, leaving a tab of 1cm, to mark very well all the folds with the help of a ruler.
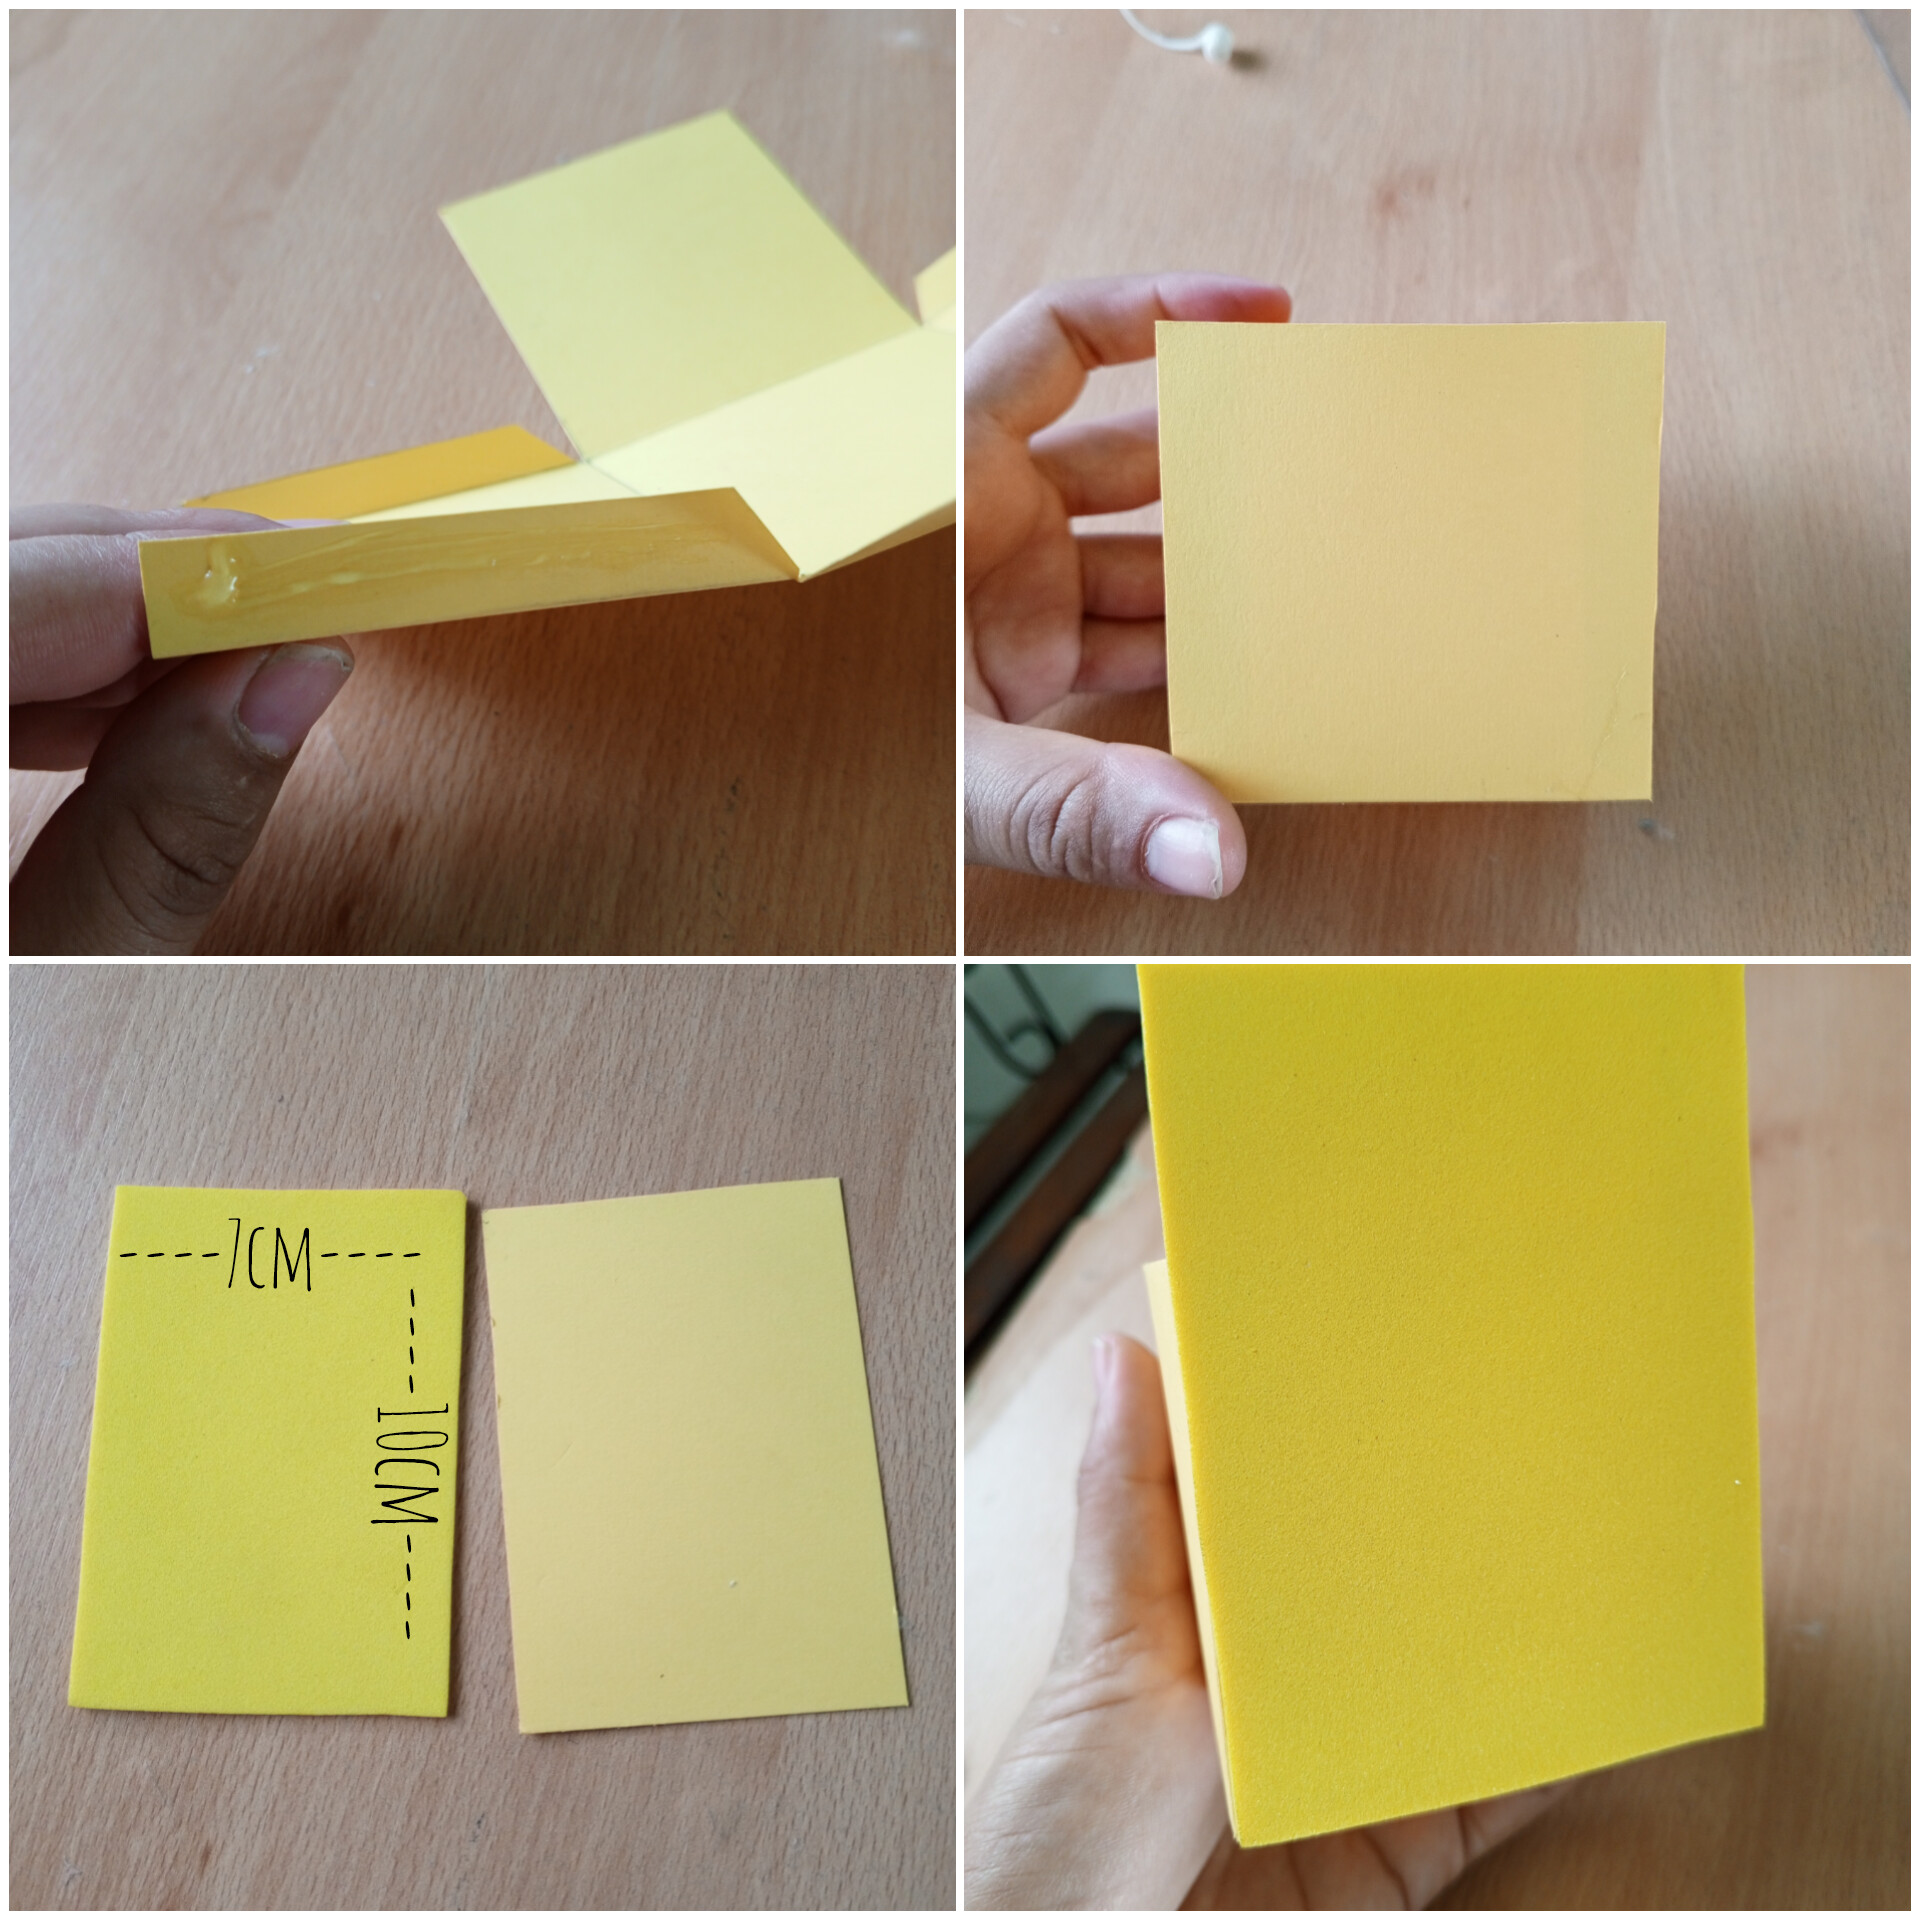
✨ Procedí al armado de la cajita, para luego nedir dos rectángulos de 7cm×10cm con la diferencia que uno es de cartulina y el otro en foami y lo pegue en lo que seria la parte frontal del dulcero.
✨ I proceeded to assemble the box, and then I made two rectangles of 7cm×10cm with the difference that one is made of cardboard and the other in foami and glued it in what would be the front part of the candy box.
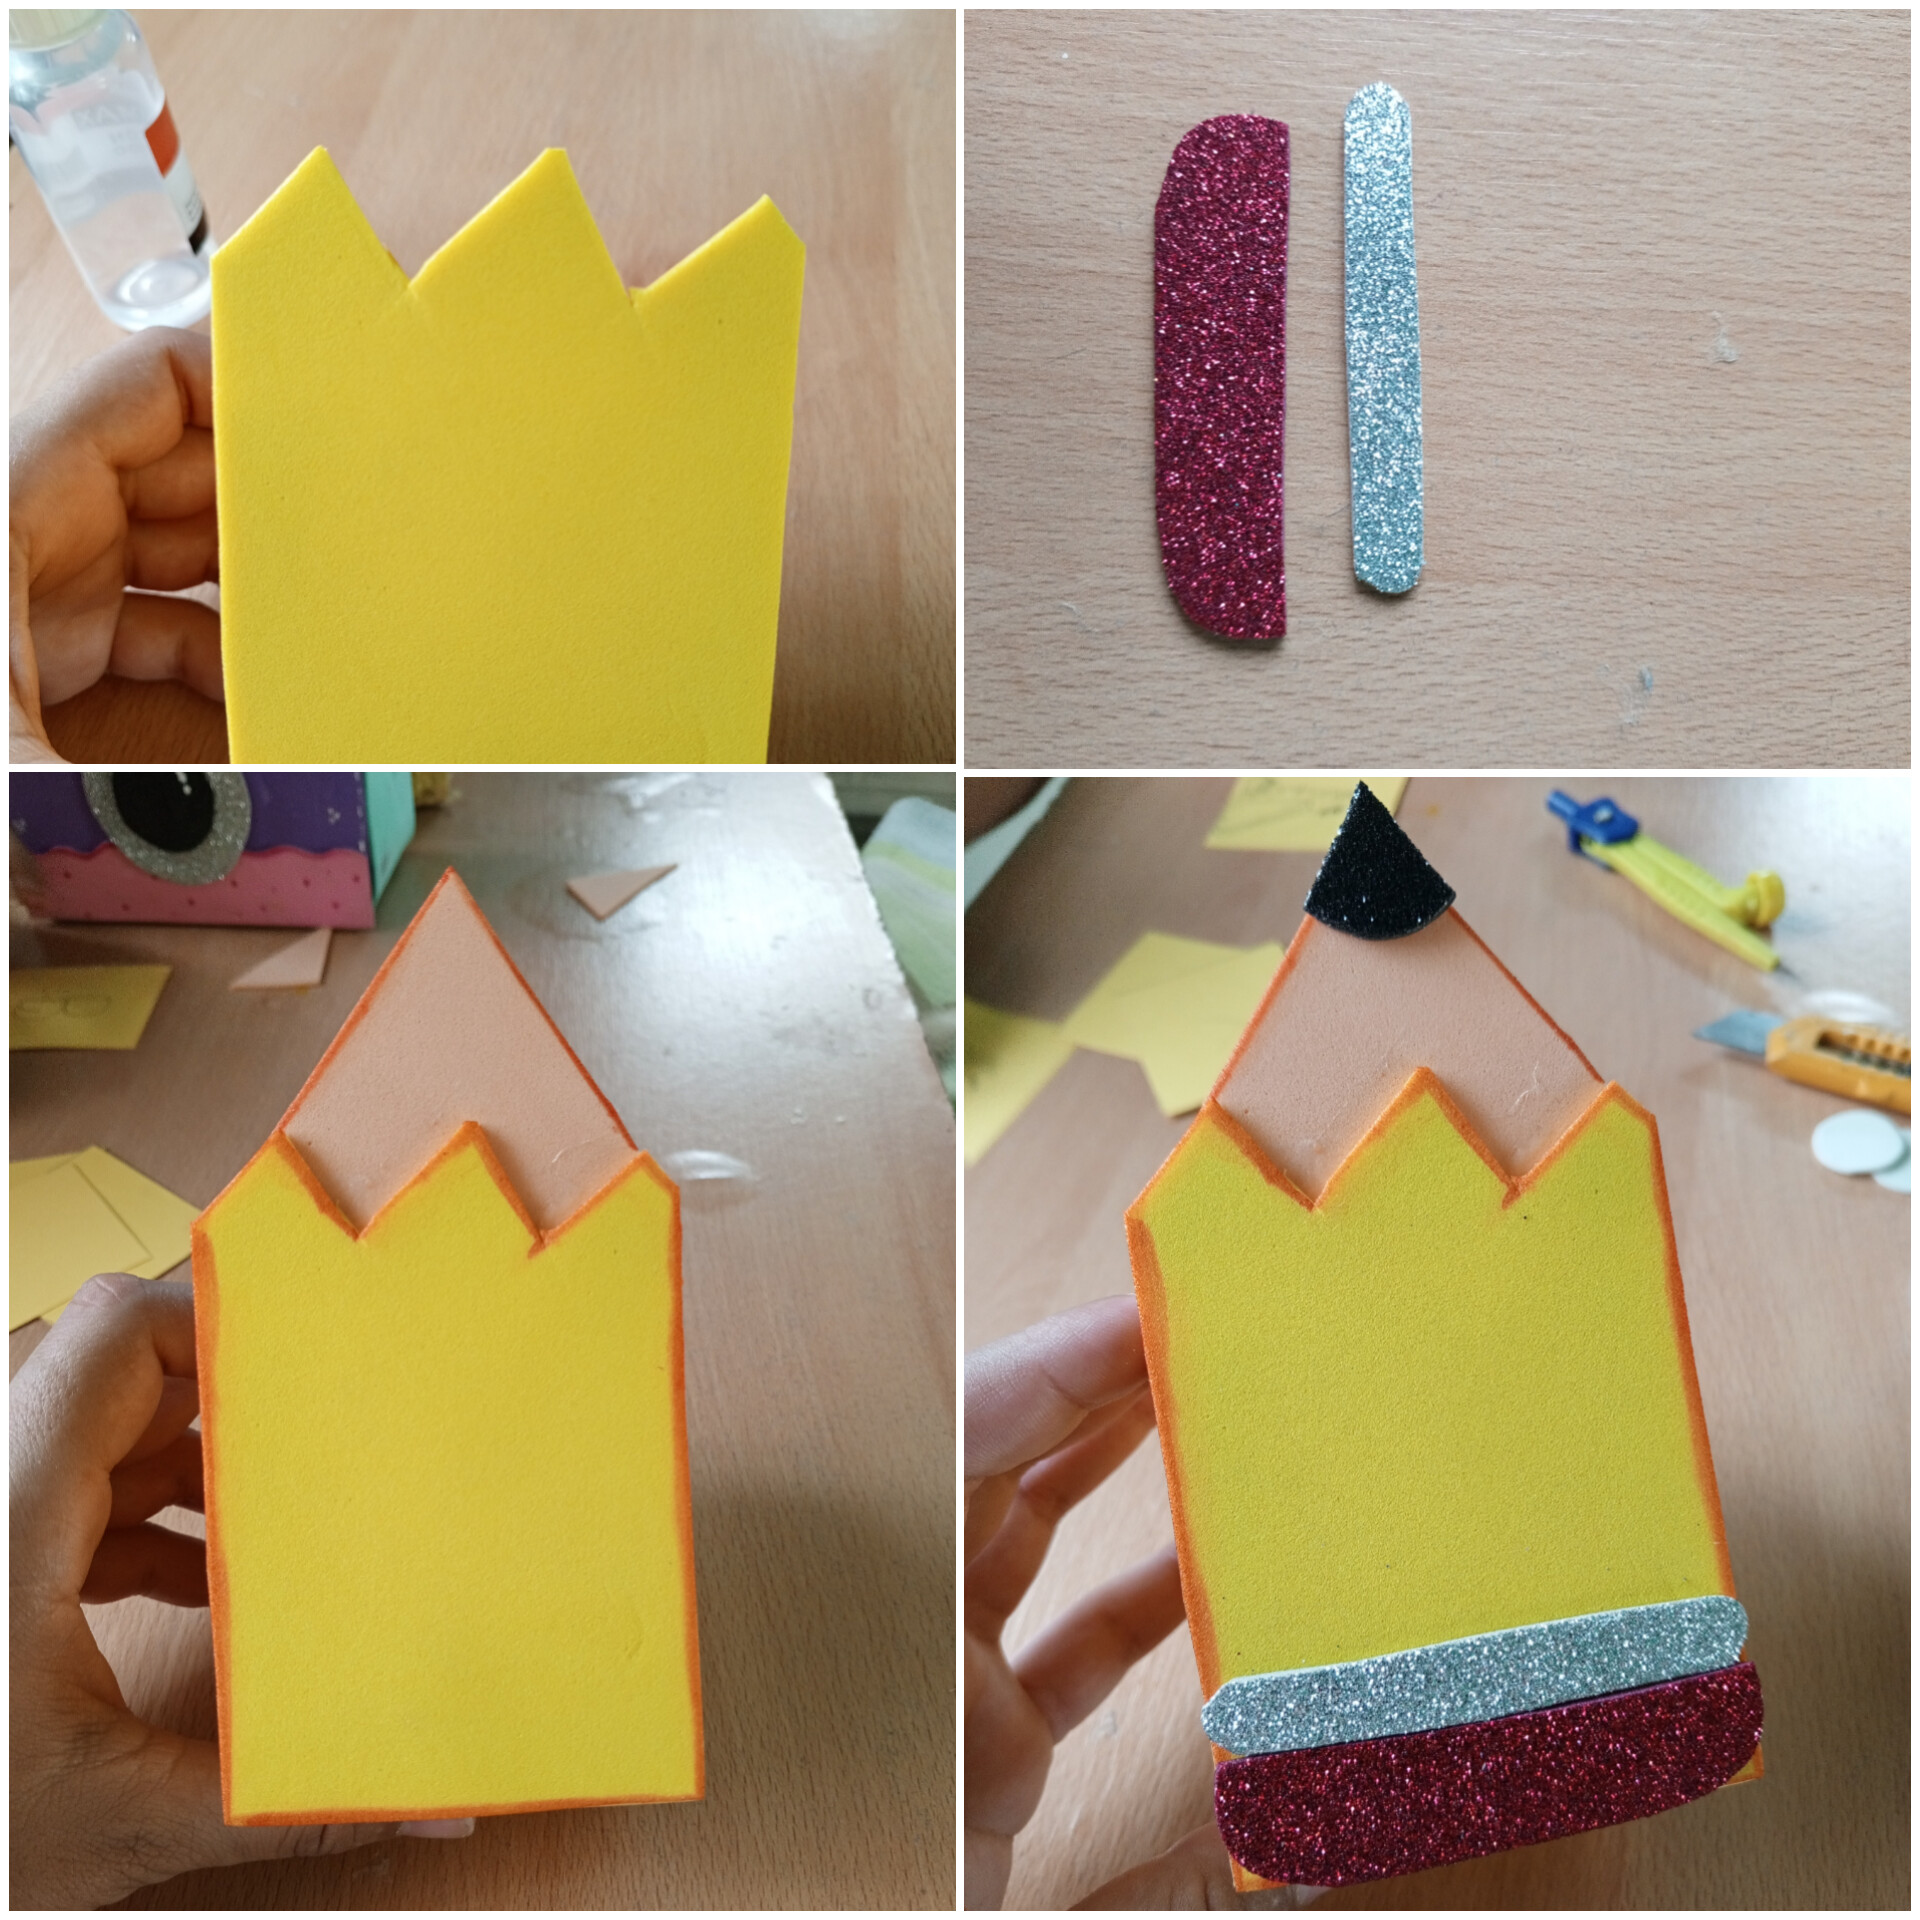
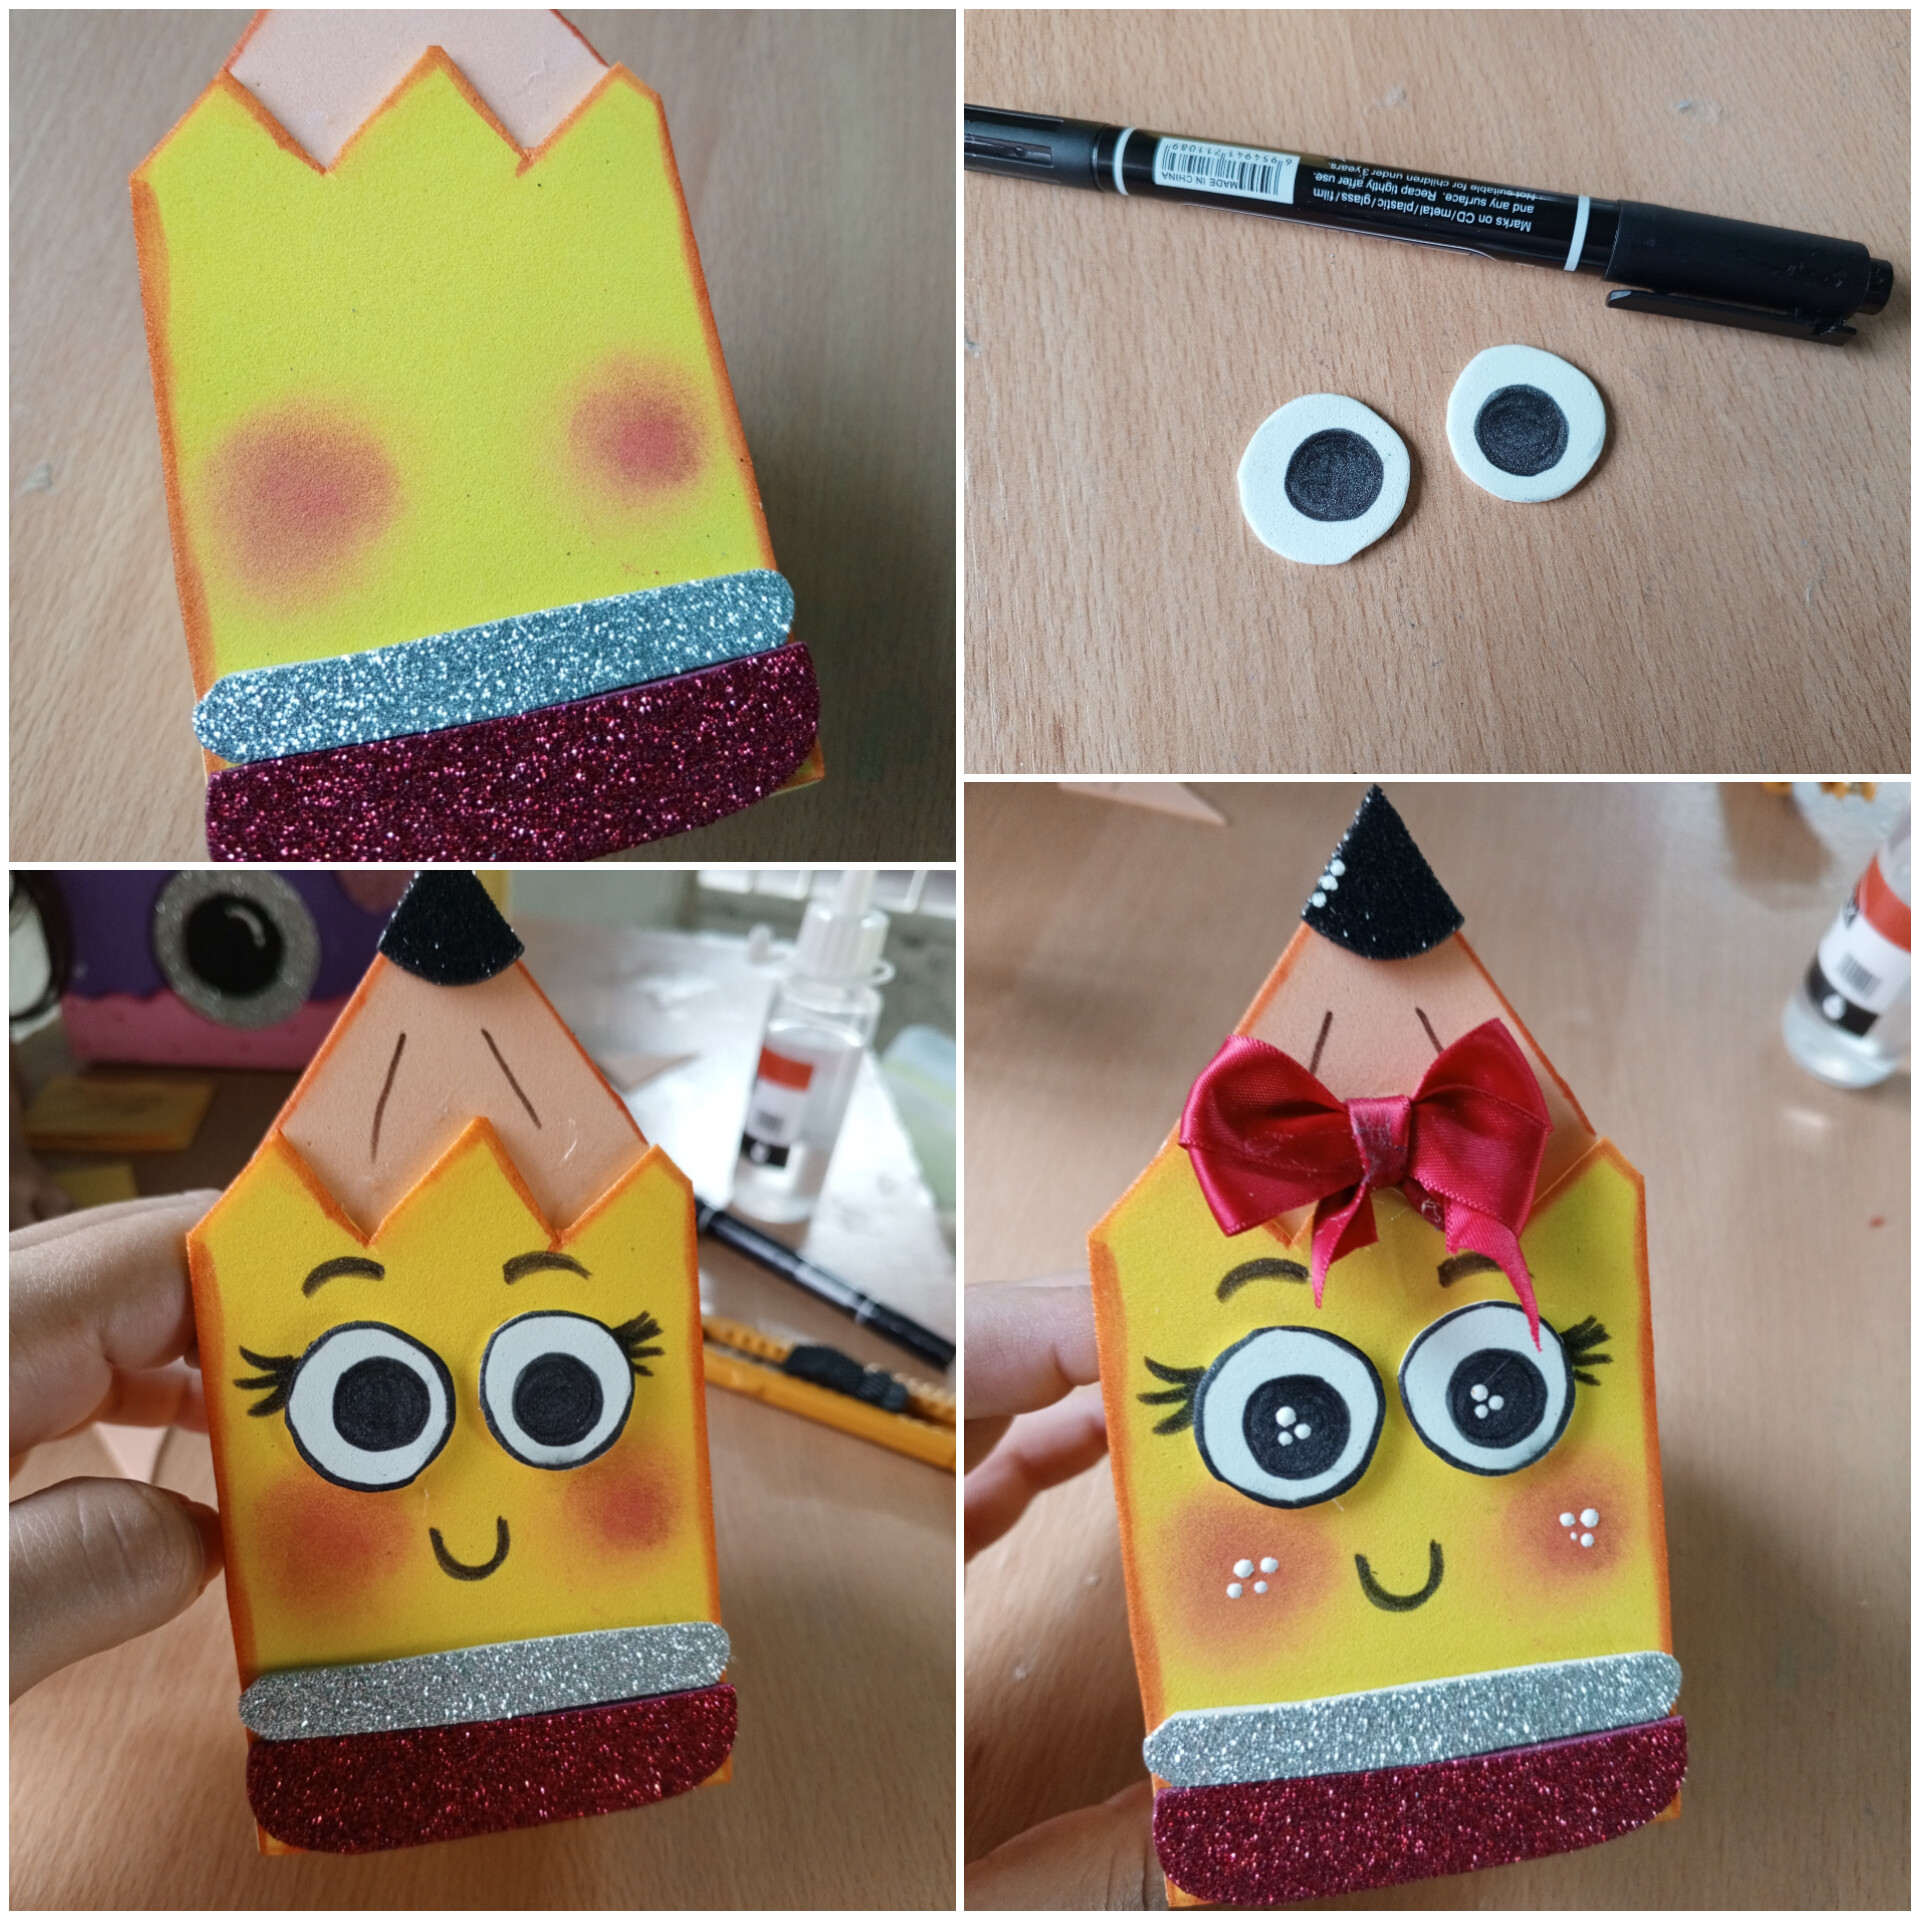
✨ Corte en forma de zigzag la parte superior del rectángulo que sobresalia y detrás de este pegué un triangulo de color piel, y sobre este uno mas pequeño en foami negro escarchado simulando el grafito del lápiz. Pará el detalle del borrador y la parte de metal que trae, utilicé foami rojo escarchado y plateado y pegué en la parte interior.
✨ I cut in a zigzag shape the upper part of the rectangle that stood out and behind it I glued a skin-colored triangle, and on top of it a smaller one in frosted black foami simulating the graphite of the pencil. For the detail of the eraser and the metal part, I used frosted red and silver foami and glued it on the inside.
✨ Con rubor hice las mejillas un poco mas bajo de la mitad del lápiz, adicional recorté dos circulos en foami blanco y con marcador negro dibuje dos circulos mas pequeños para que sean los ojos de este coqueto lápiz, además hice también con marcador negro detalles como cejas, pestañas y boca.
✨ Con la cinta roja realice un lazo y lo pegué en la parte superior y con pintura al frio blanca di detalles de luz. Culminando asi este lindo dulcero!
✨ With blusher I made the cheeks a little lower than the middle of the pencil, I also cut out two circles in white foami and with black marker I drew two smaller circles to be the eyes of this cute pencil, I also made with black marker details such as eyebrows, eyelashes and mouth.
✨ With the red ribbon I made a bow and glued it on the top and with white cold paint I gave details of light. This is how I finished this cute candy box!
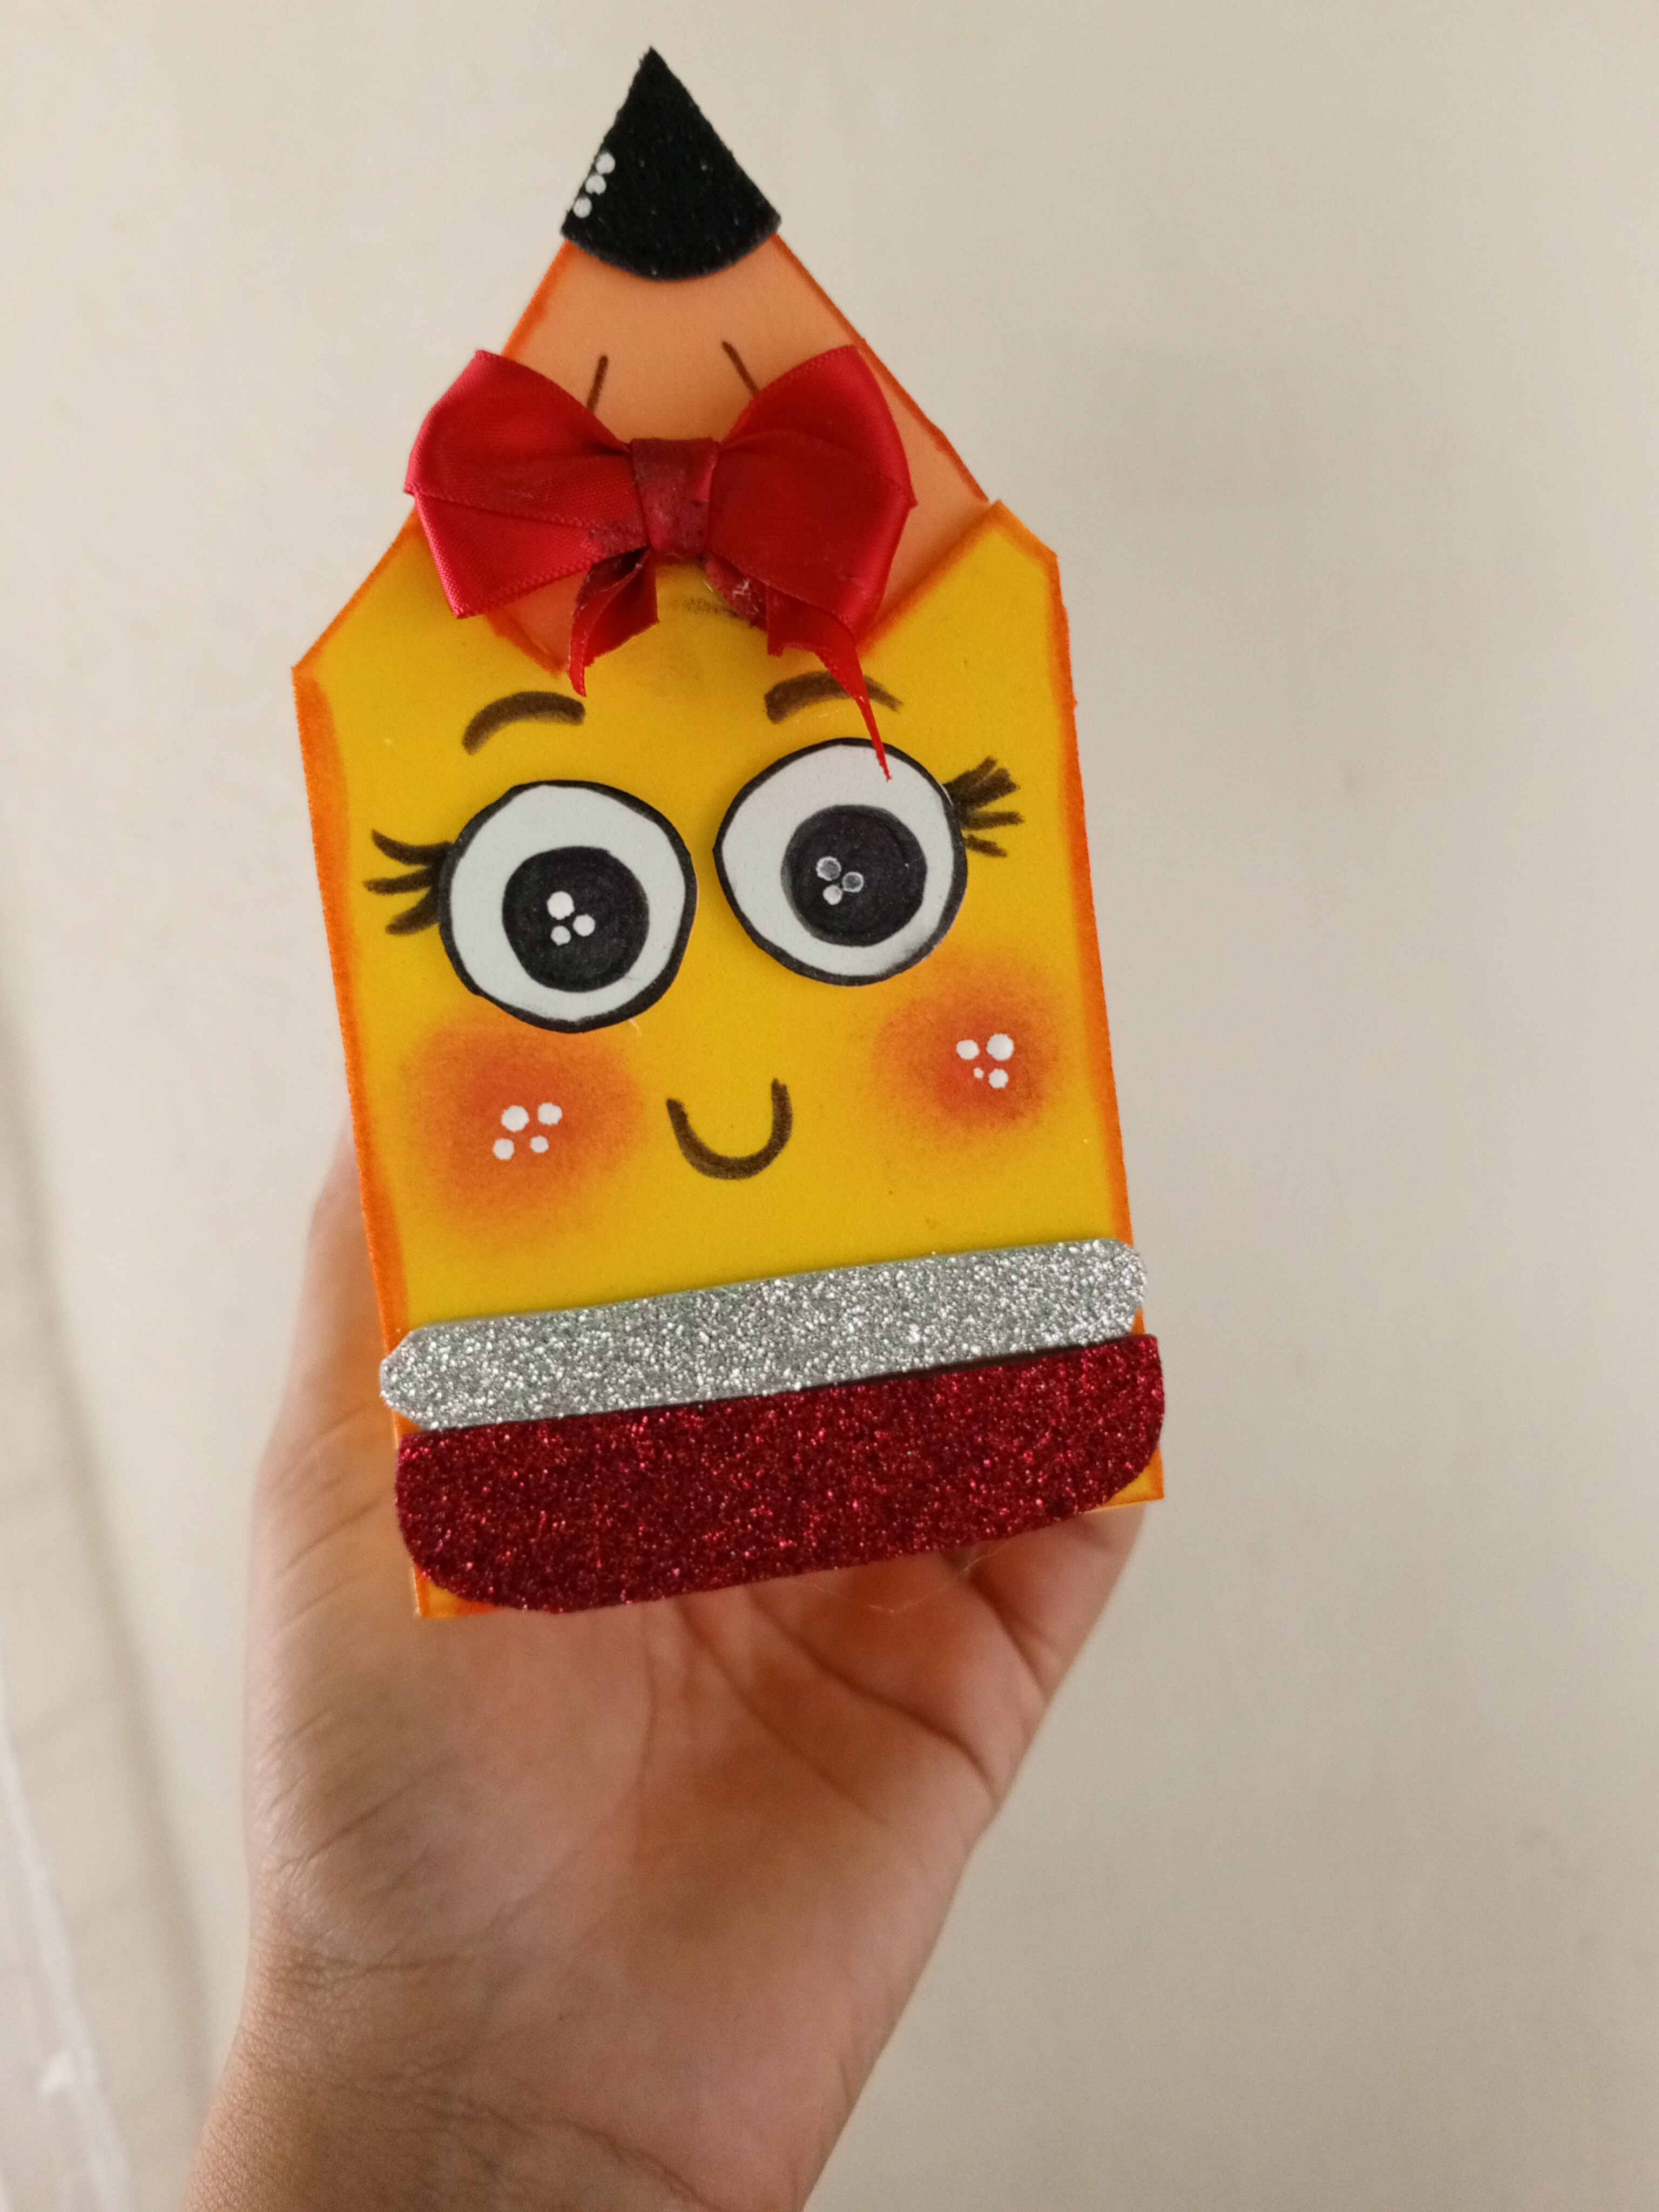
Resultado | Result✨
Como lo mencioné al principio, realmente comencé trabajando sobre la marcha ya que no tenia una idea clara de como resultaría pero me sorprendió el resultado y quede encantada, y ademas siento que es una forma muy fácil y linda de dar un lindo detalle ya sea a los niños o a las docentes en este cierre escolar 2023-2024🩷✏️
As I mentioned at the beginning, I really started working on the fly as I had no clear idea of how it would turn out but I was surprised by the result and I was delighted, and also I feel it is a very easy and nice way to give a nice detail either to the children or to the teachers in this school closing 2023-2024🩷🩷✏️
📷Ediciones | Editing in Canva and Picstar
✨Traducciones | Translations in Deepl