Buenas noches mis queridos creadores y amigos que me visitan.
Bienvenidos todos.
Así que prepárate y acompáñame para que aprendas!
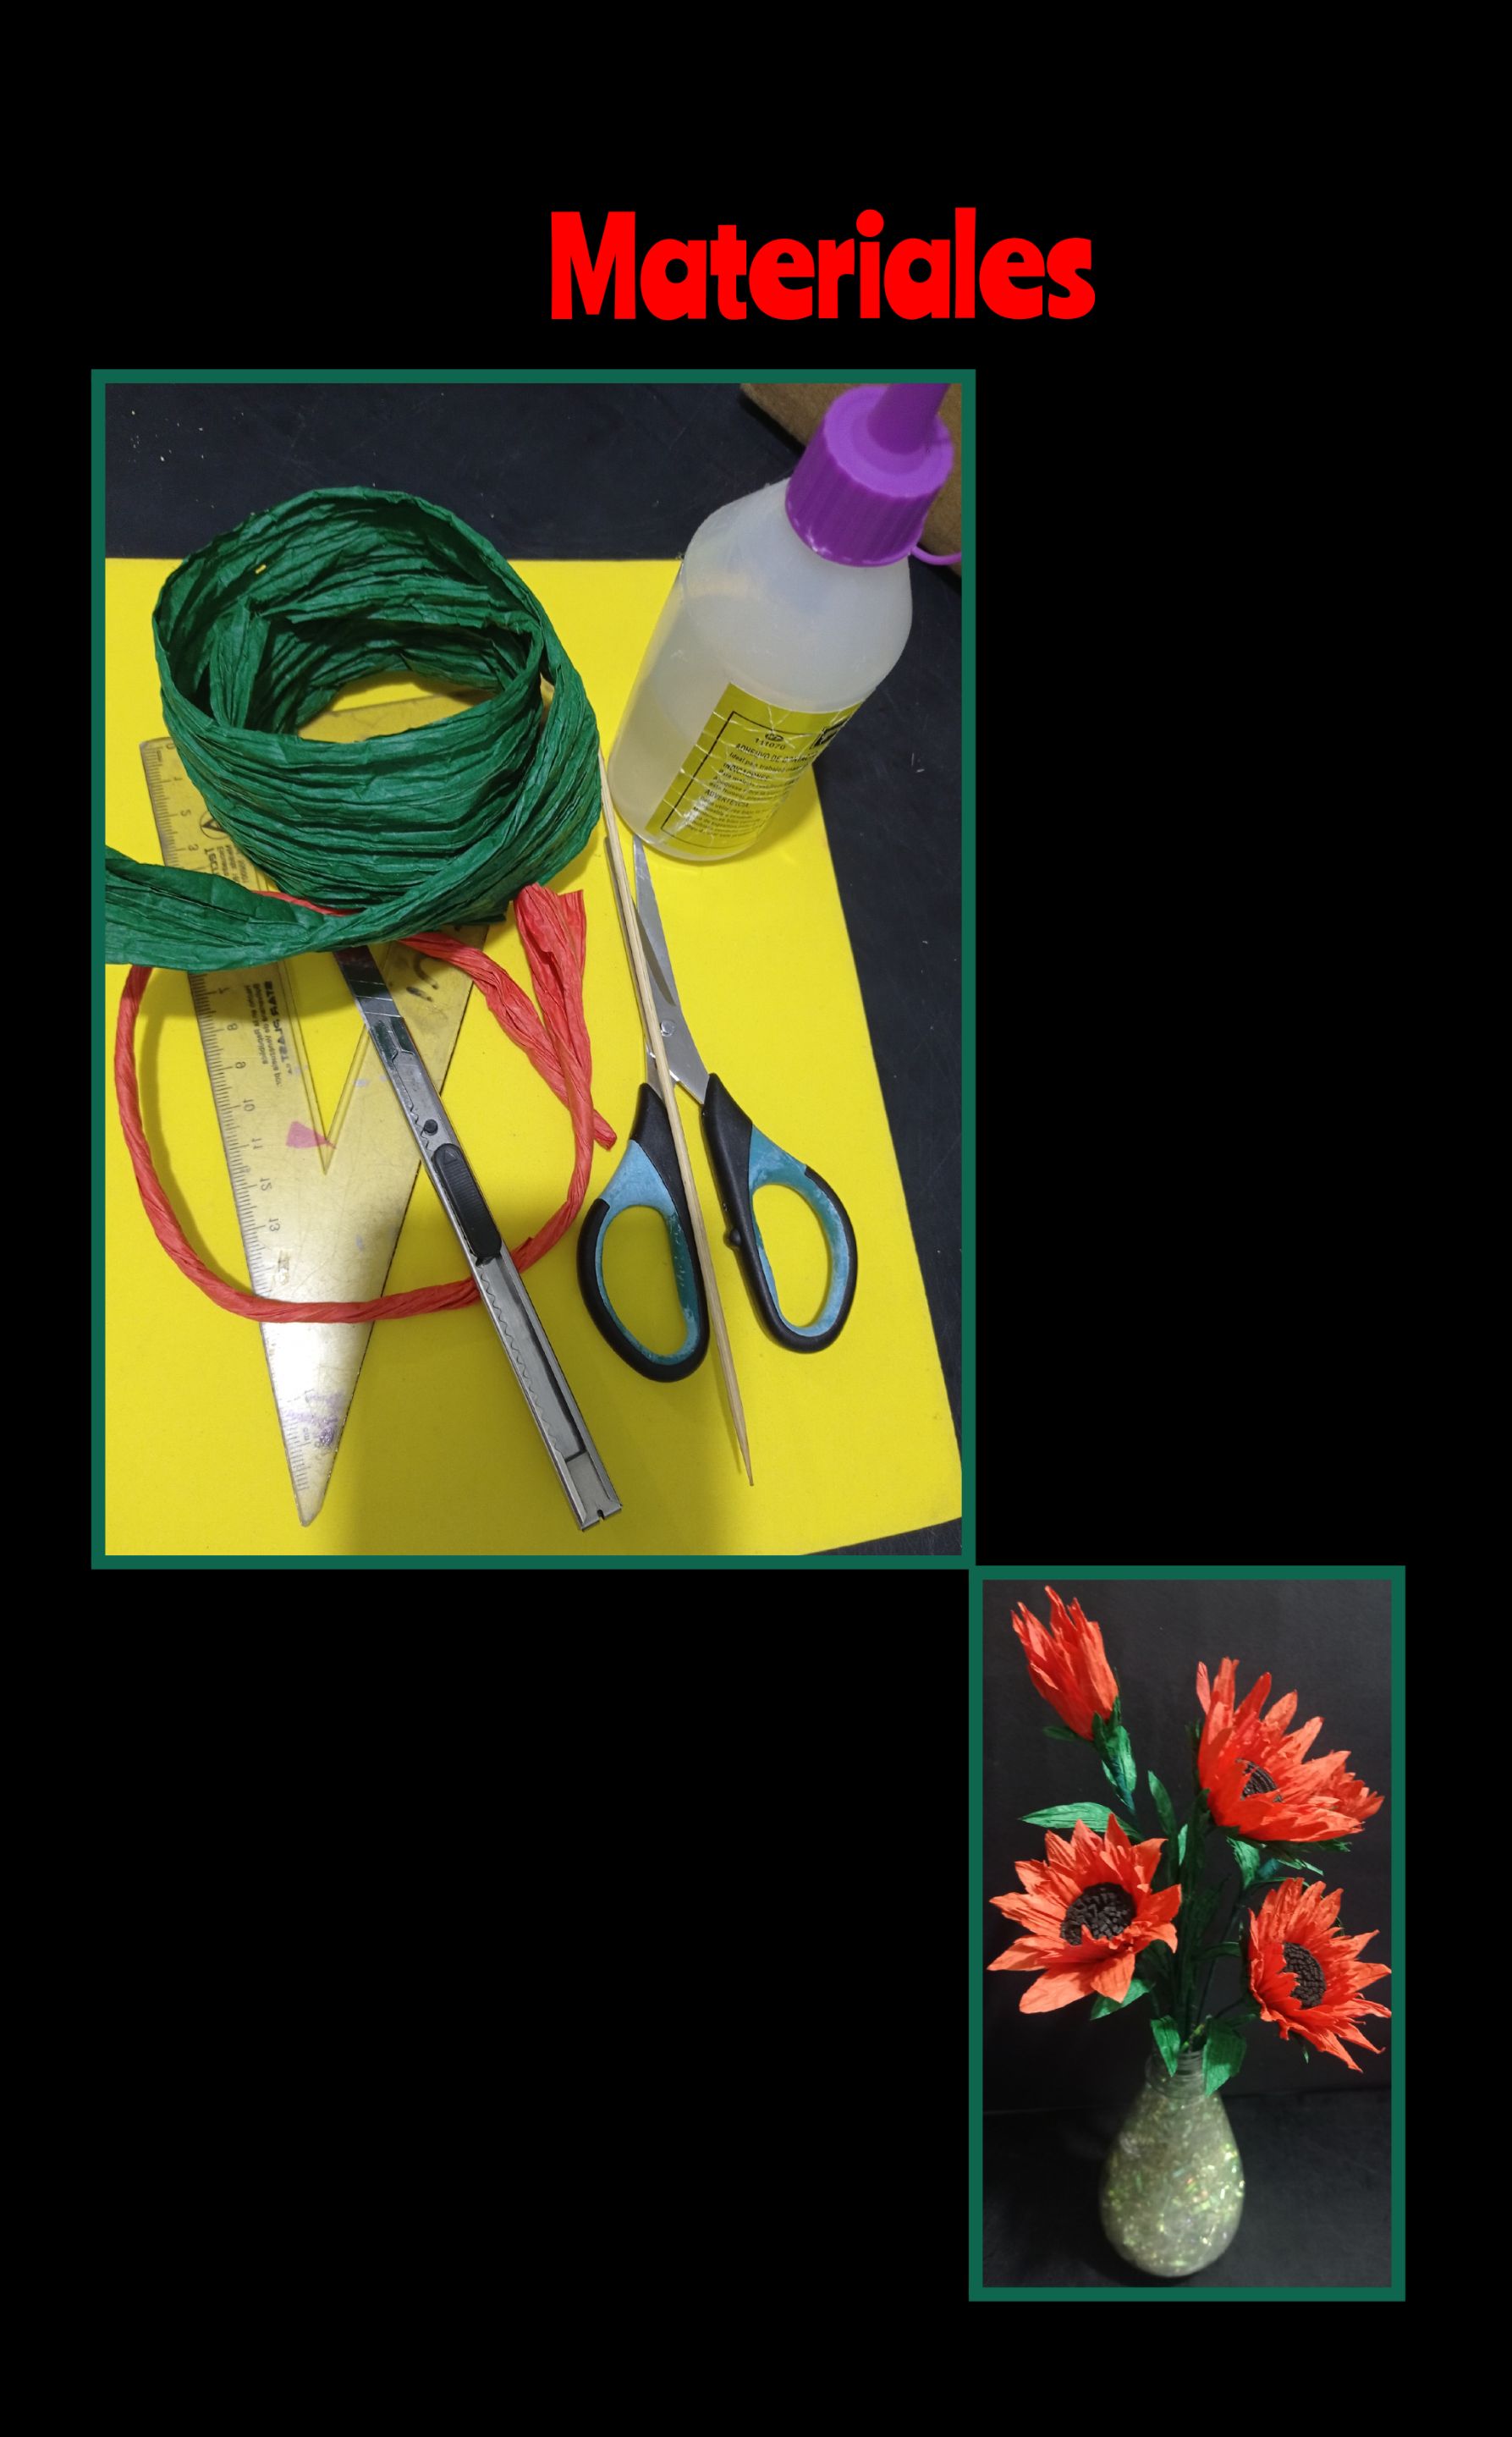
Para este proyecto vas a necesitar:
Materiales:
Cinta de papel roja y verde.
Foami negro.
Tijera
Silicón
Alambre o palitos de madera
Regla
Envase plástico (reciclaje)
Piedras de vidrio.
Virutas de papel celofán.
Paso 1:
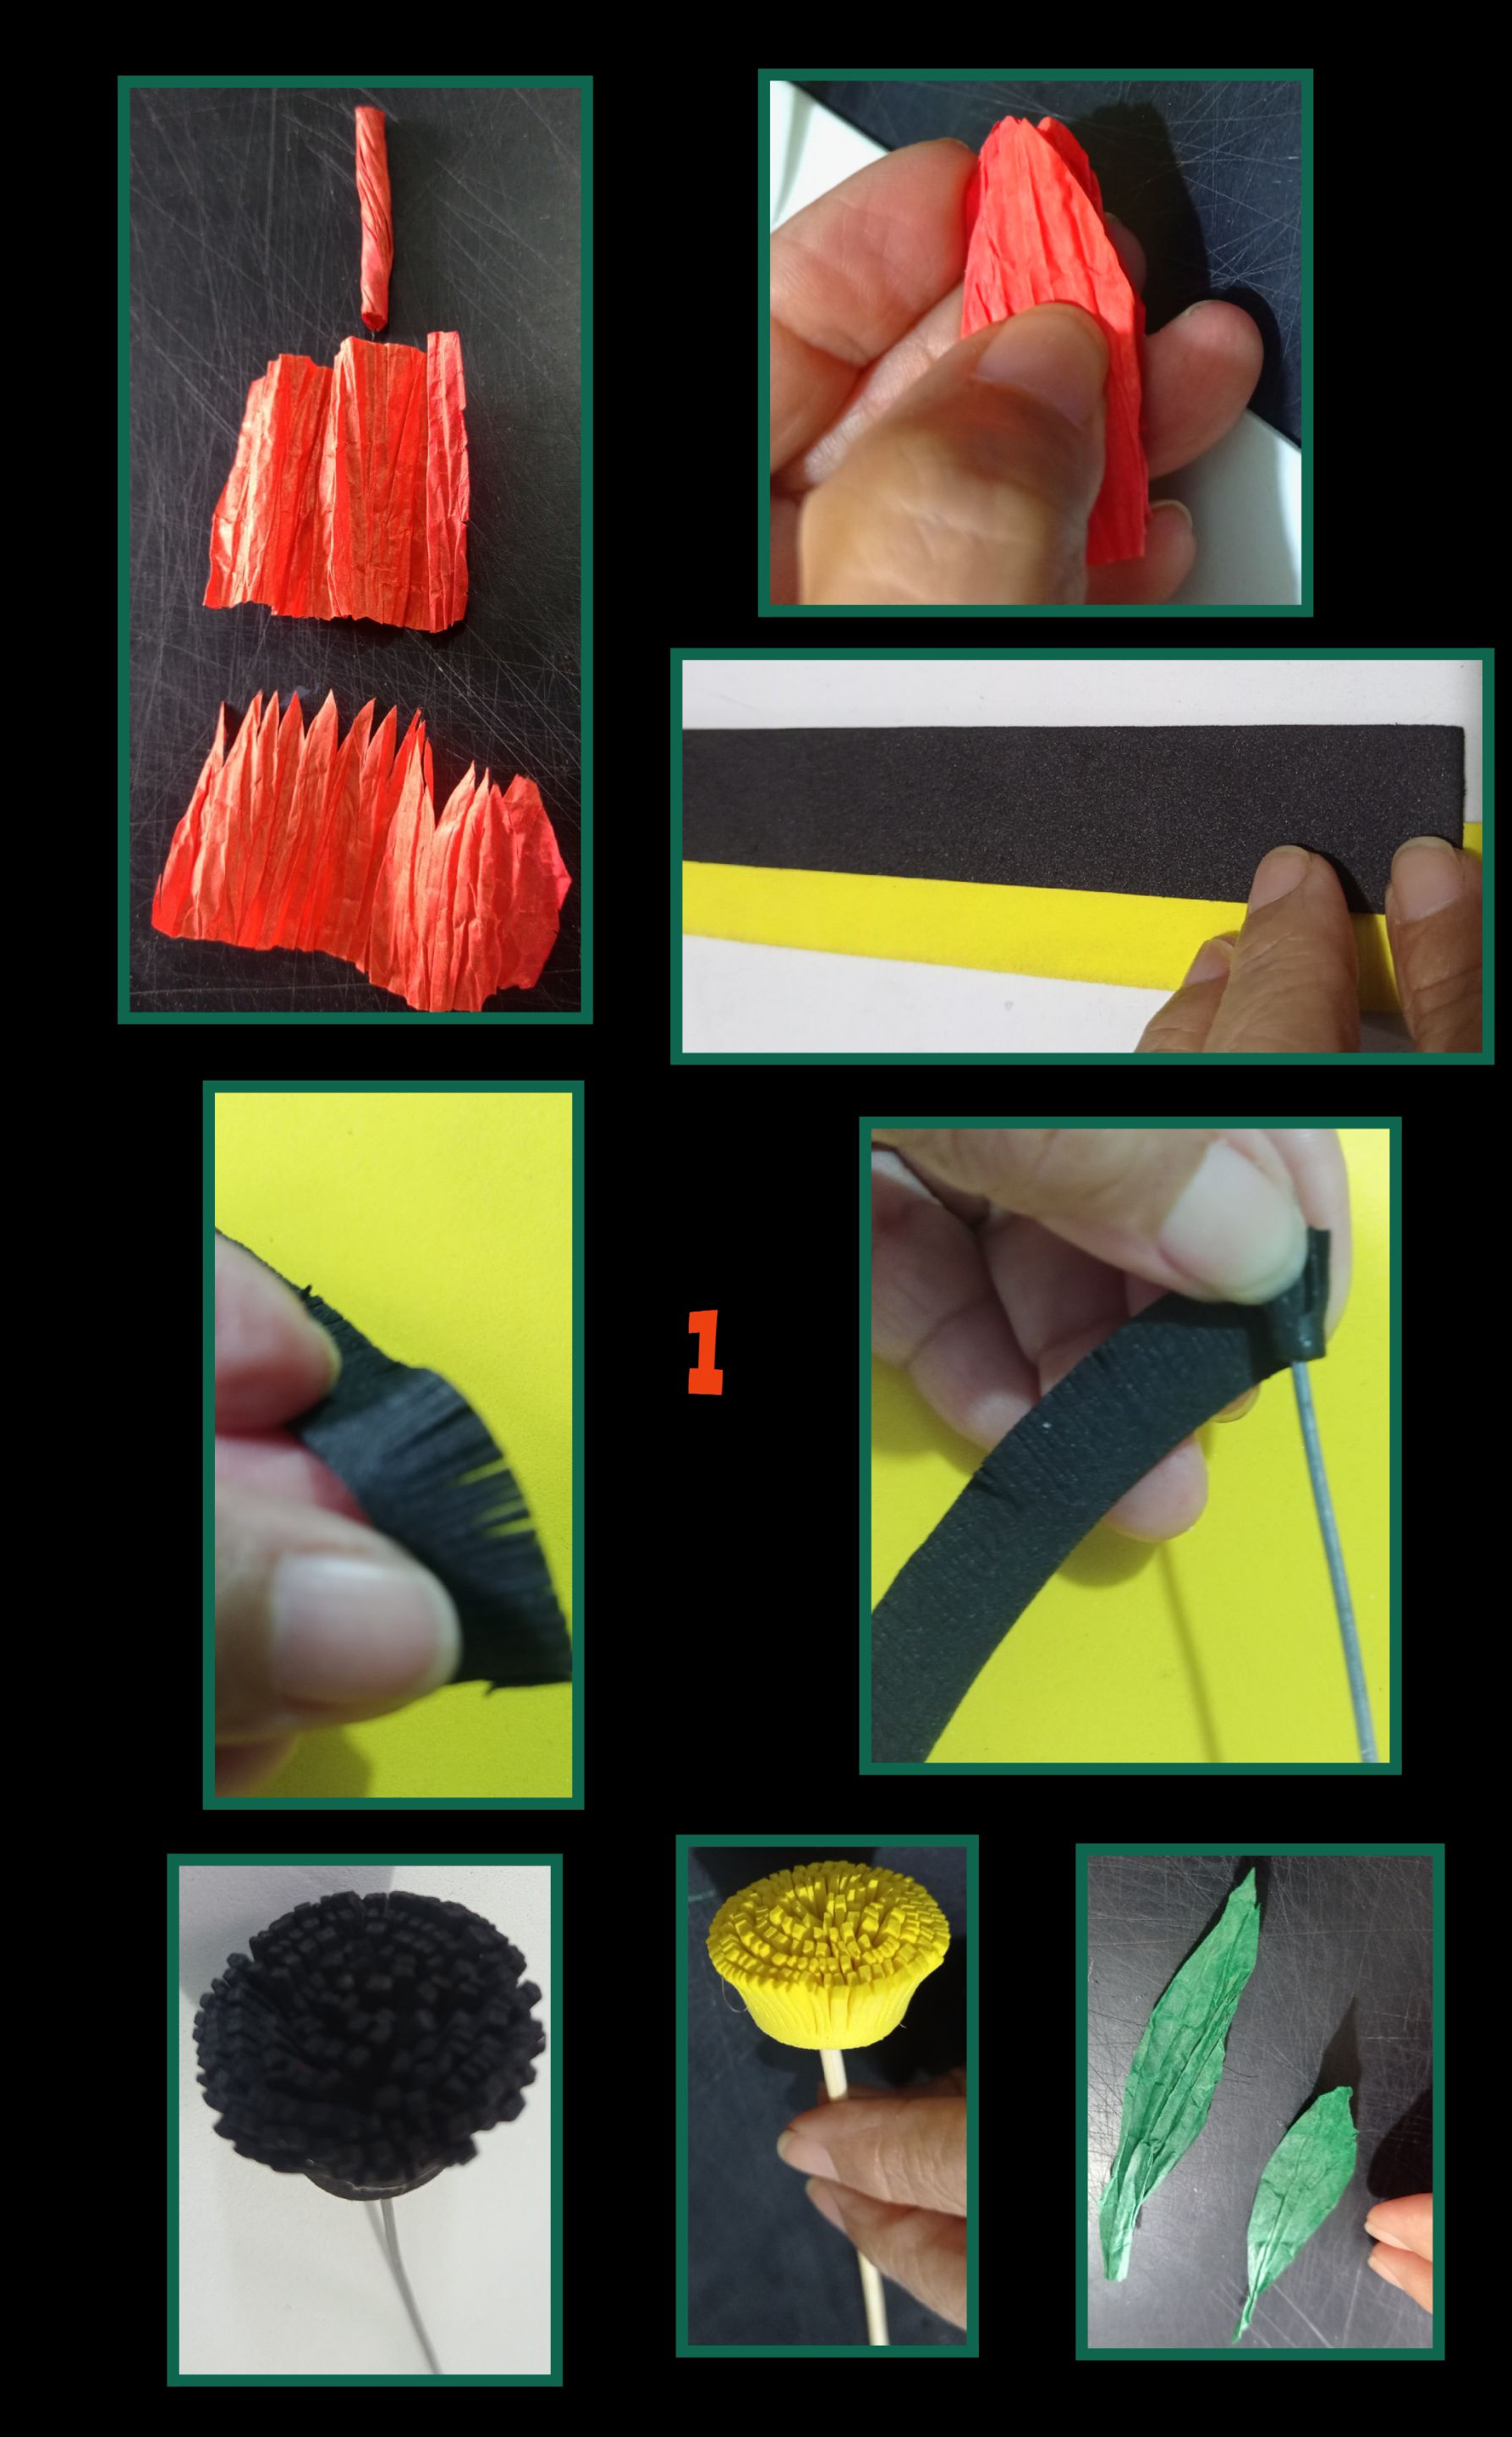
- Recorta trocitos de cinta de 4 y 5cms de largo, luego desenrolla, dobla y recorta sacando picos en una de los bordes, (también puedes recortar de forma redondeada.
- Ahora recorta tiras de foami negro y haz finos cortes en forma de tiritas, (realicé una en amarillo para que apreciaras más el resultado)
Luego aplica silicón al alambre y comienza a enrollar la tira de foami girando para ir formando los pistilos, recuerda ir aplicando silicón en la parte de abajo para que se peguen cada una de las vueltas y armar el centro de la flor. - Recorta las hojas de la forma que quieras, estas las realicé recortando los extremos punteagudos.
Paso 2:
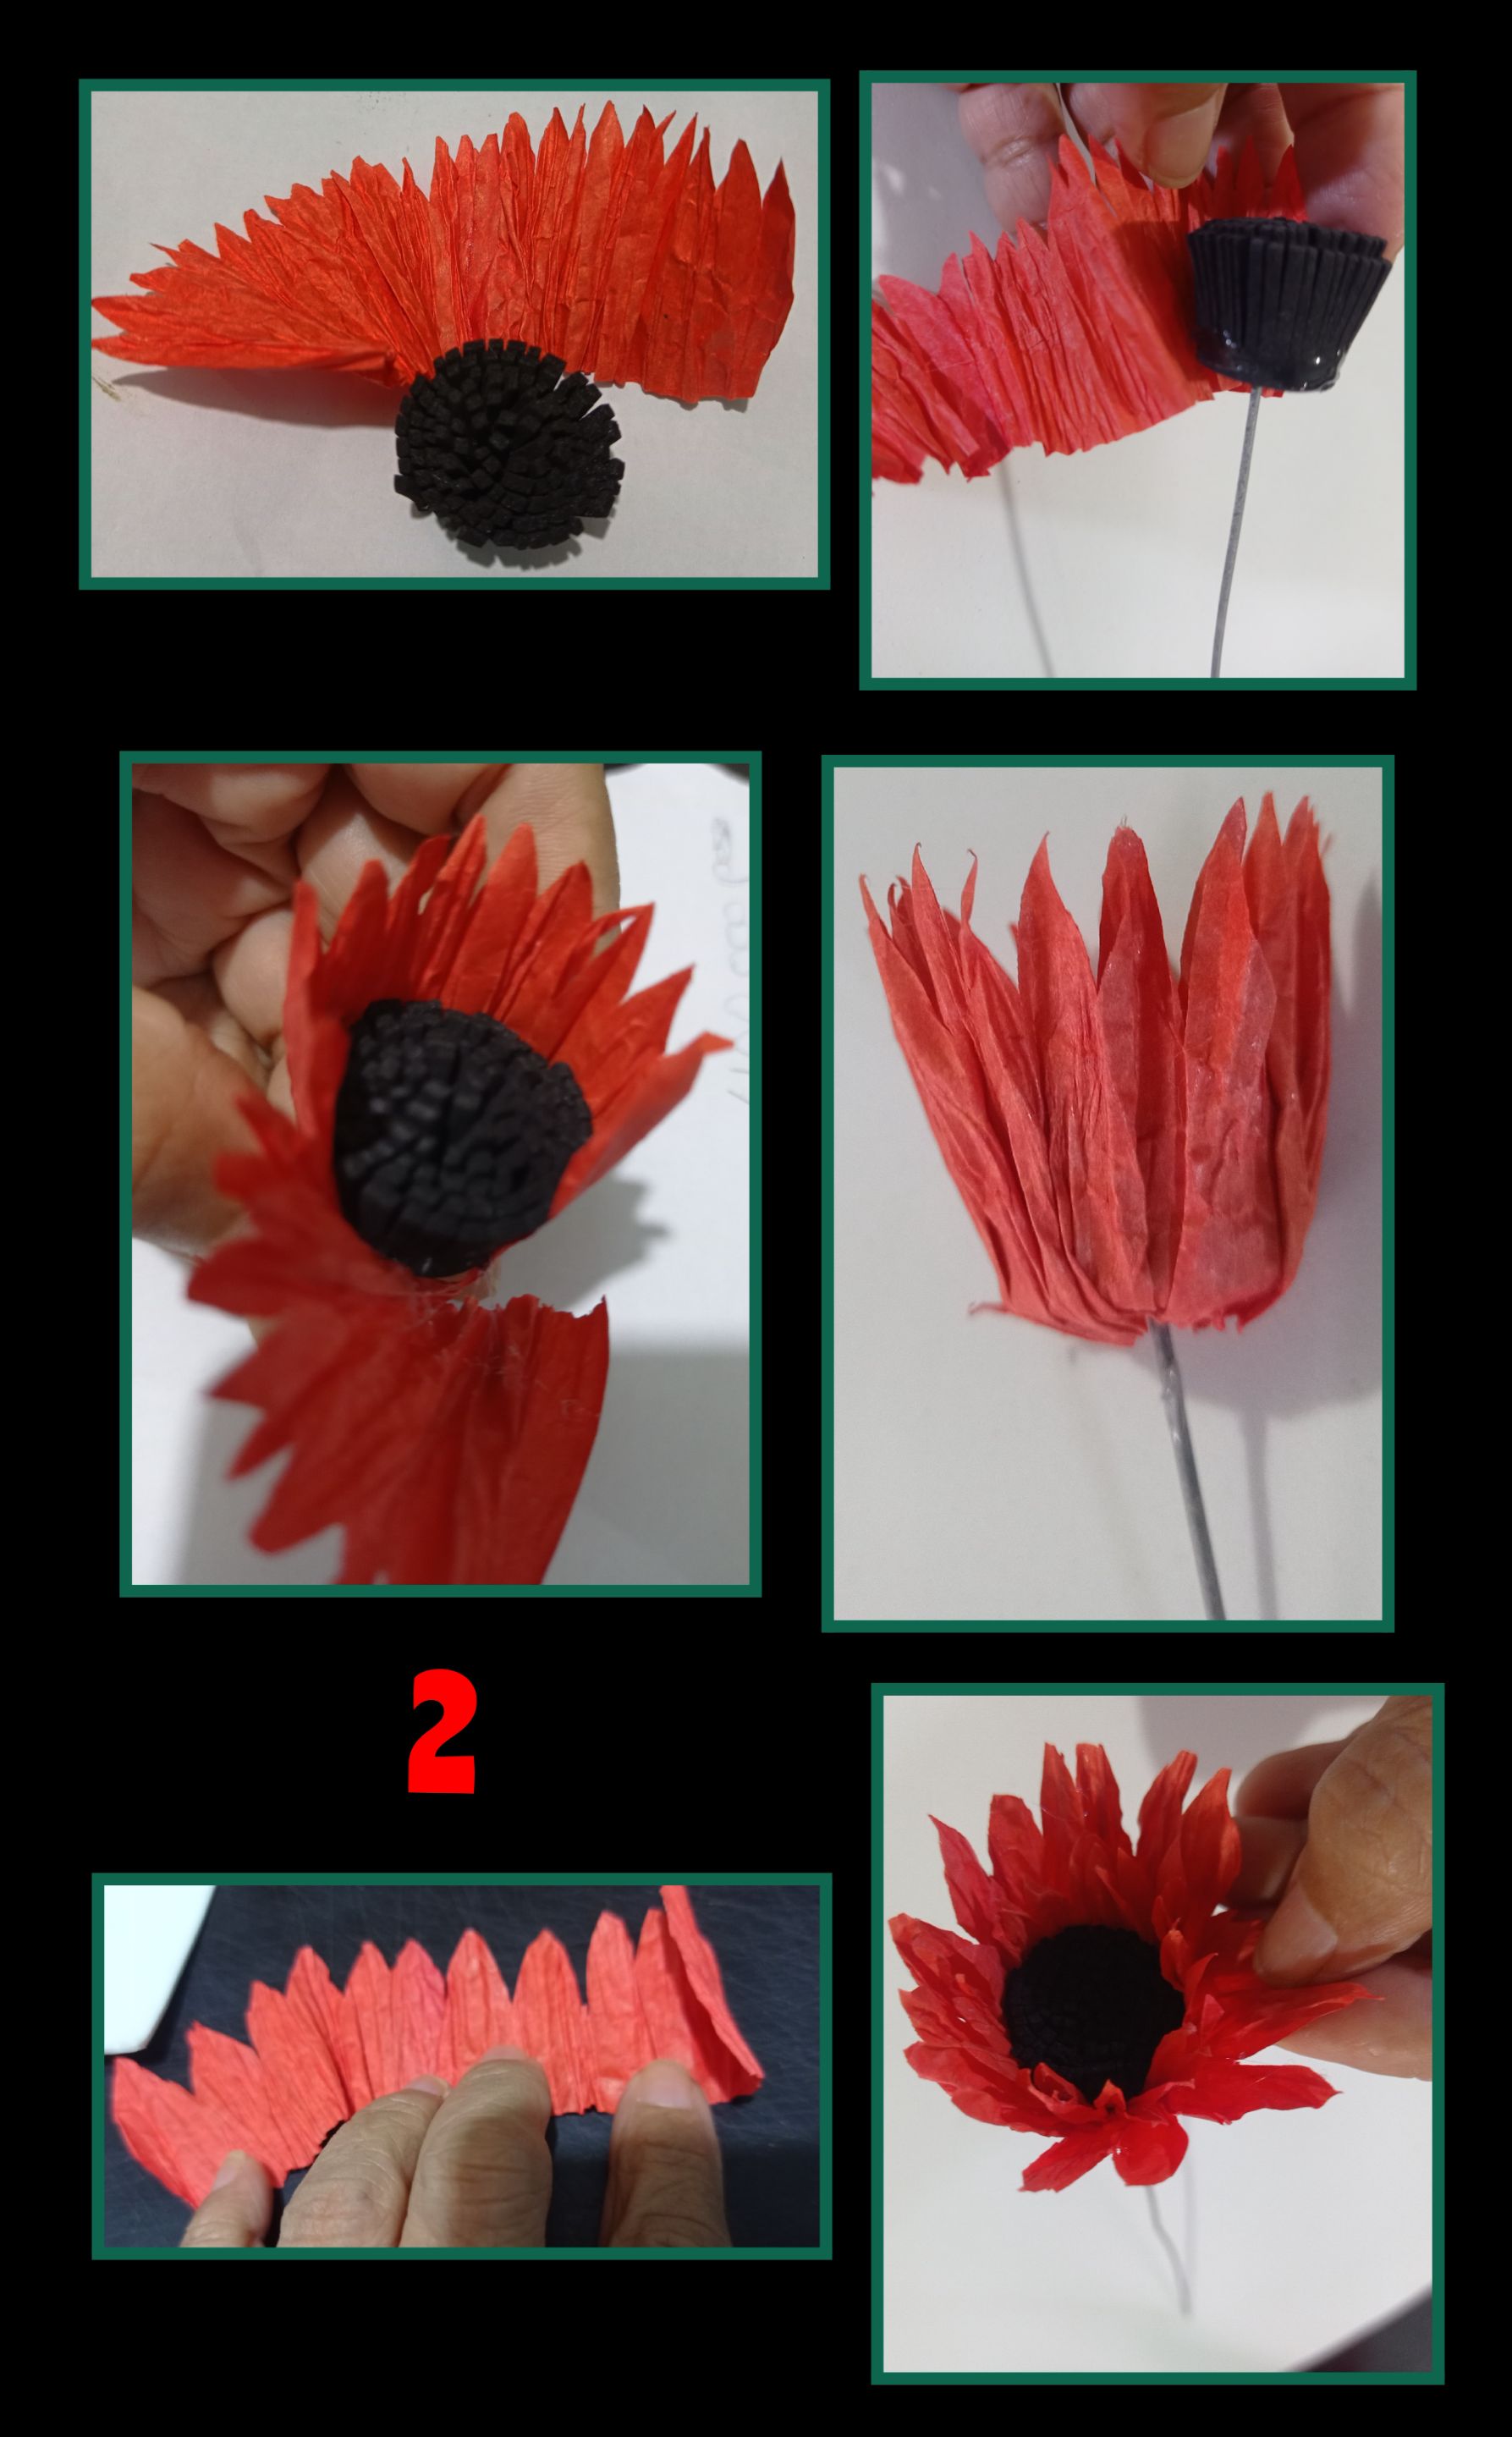
- Ahora recorta las tiras de papel en picos, aplica silicón a los centros y comienza a pegar alrededor como muestro en la foto y cerrar, recorta el exceso, luego recorta otra tira pero con los pétalos un poco más grande y pega la otra capa de papel, puedes colocar las capas que quieras pero debes aumentar de 0.5 a 1cm de largo entre capa y capa.
Paso 3:
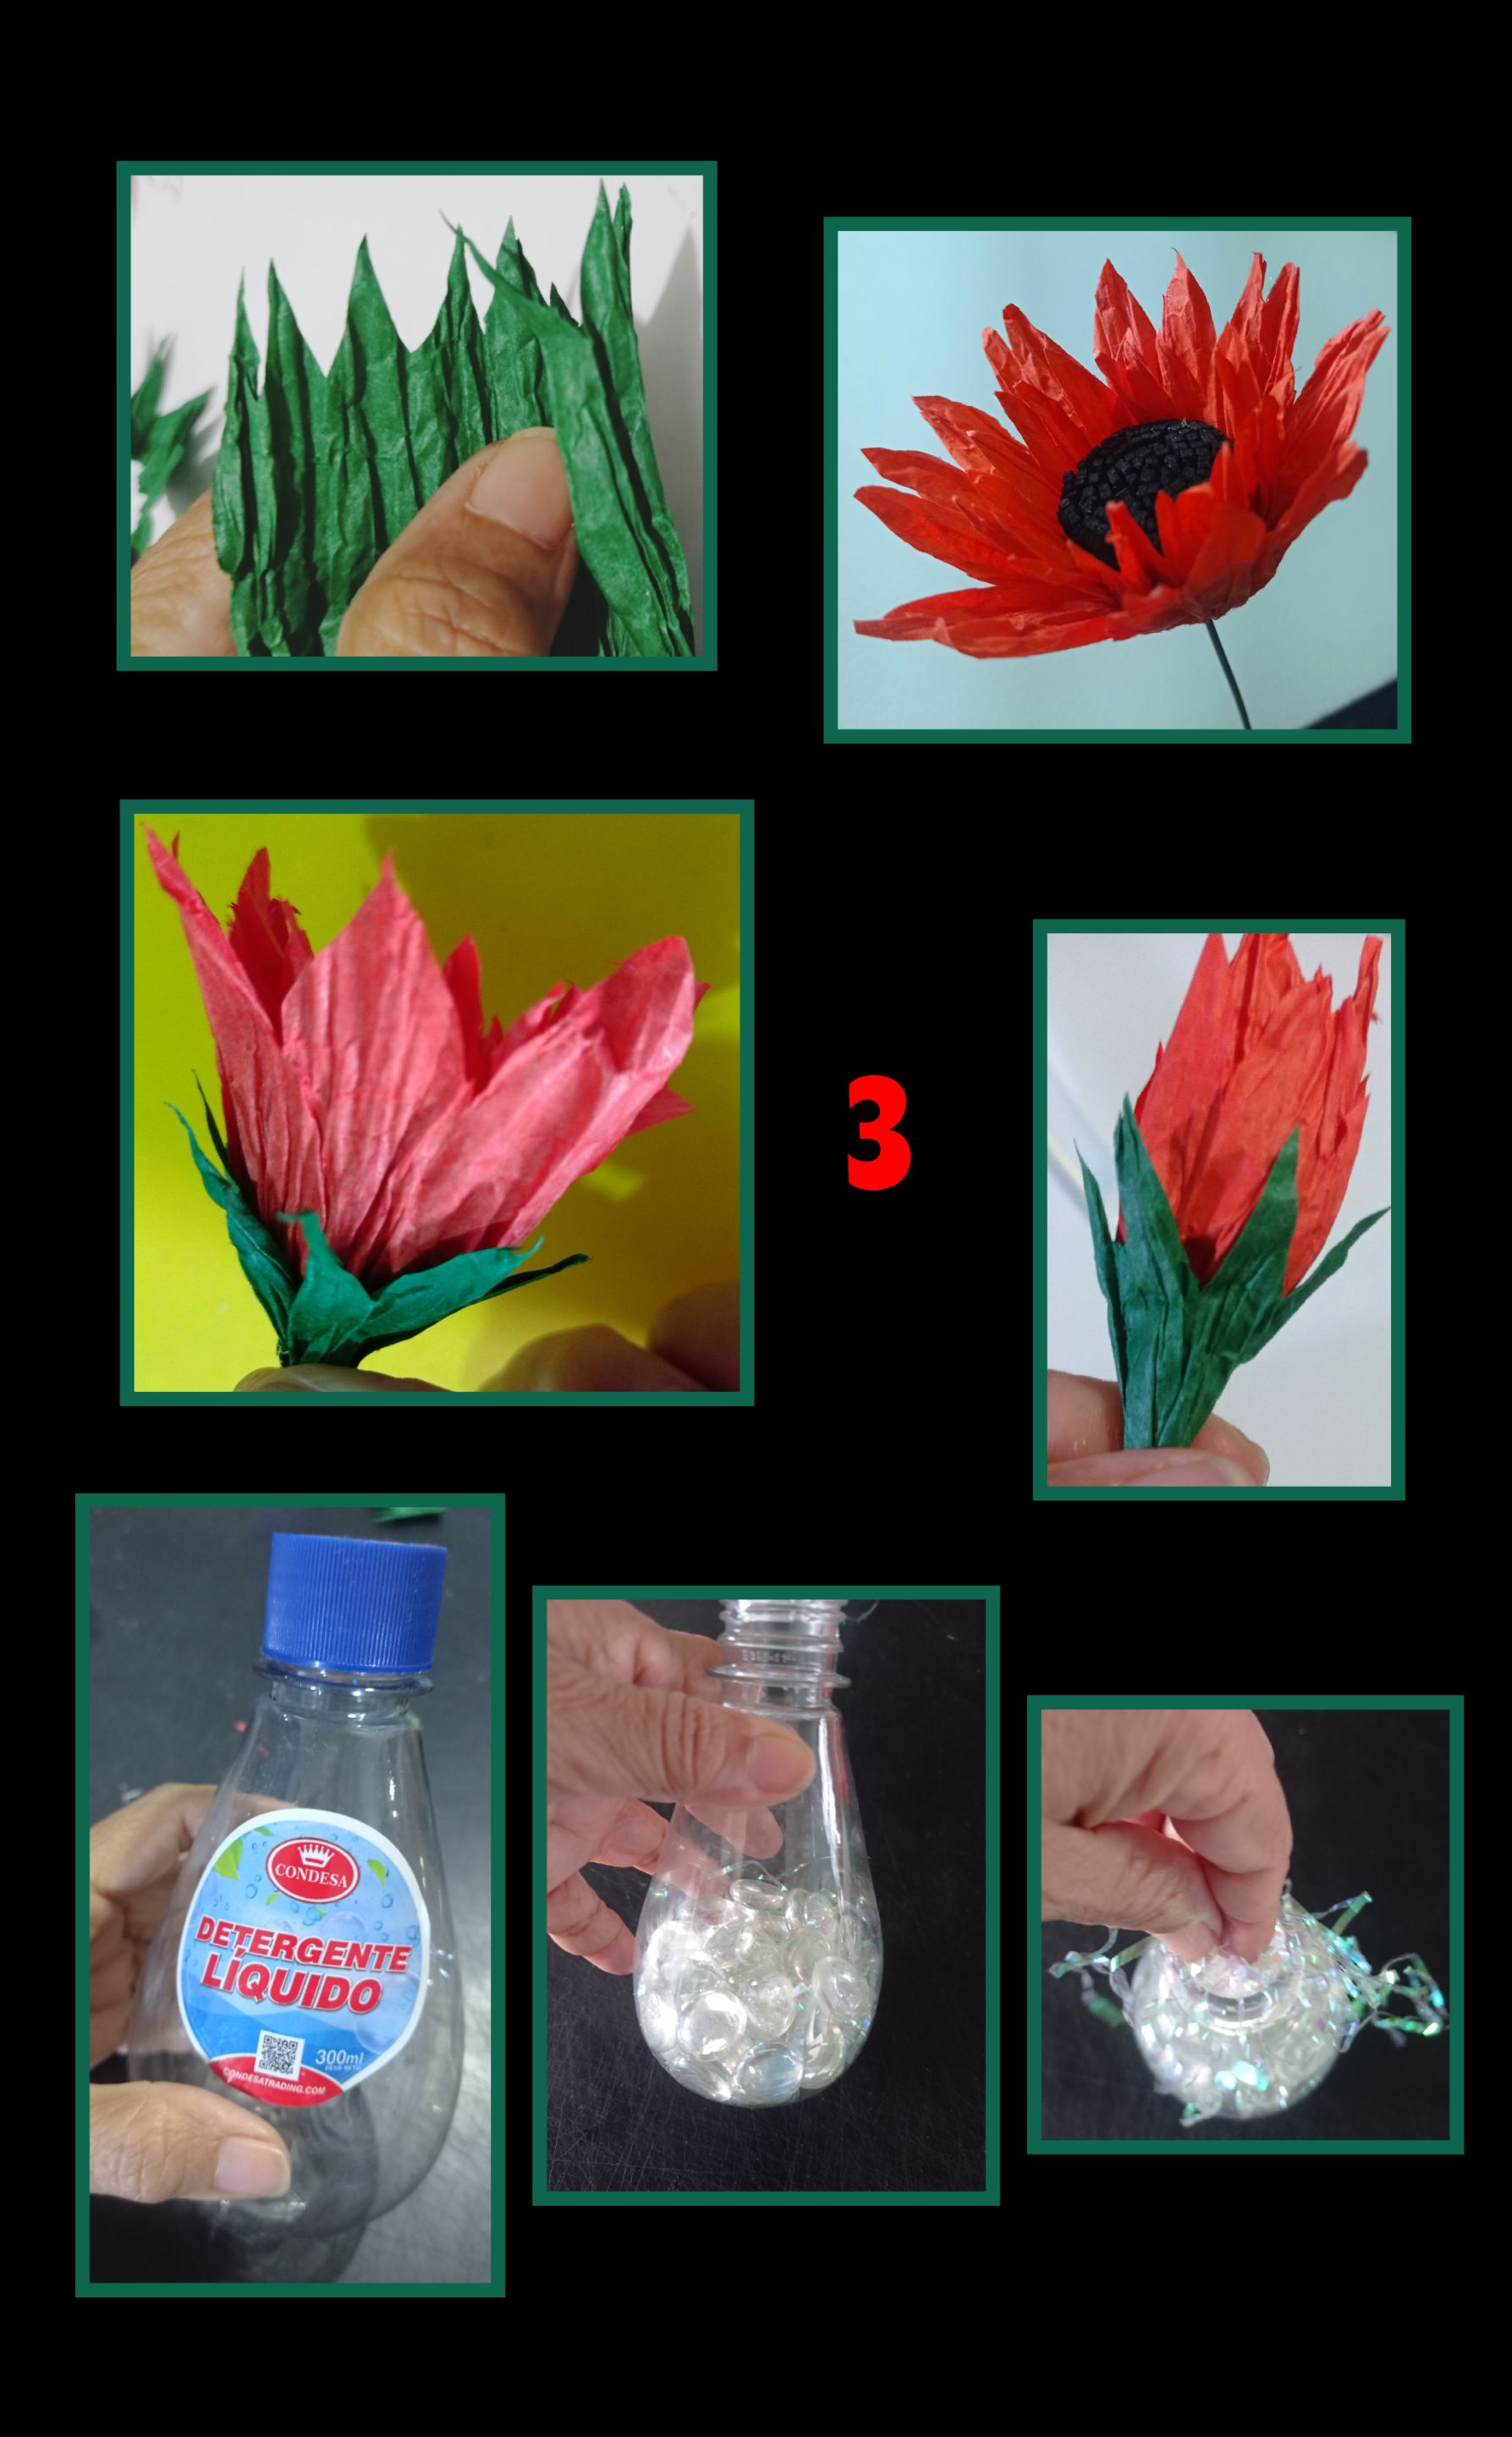
- Ahora recorta los sépalos y pega en la parte inferior de los pétalos. También puedes hacer capullos con el centro y una capa de pétalos y deja secar.
- Forra los alambres con tiras de papel crepé o teipe floral verde.
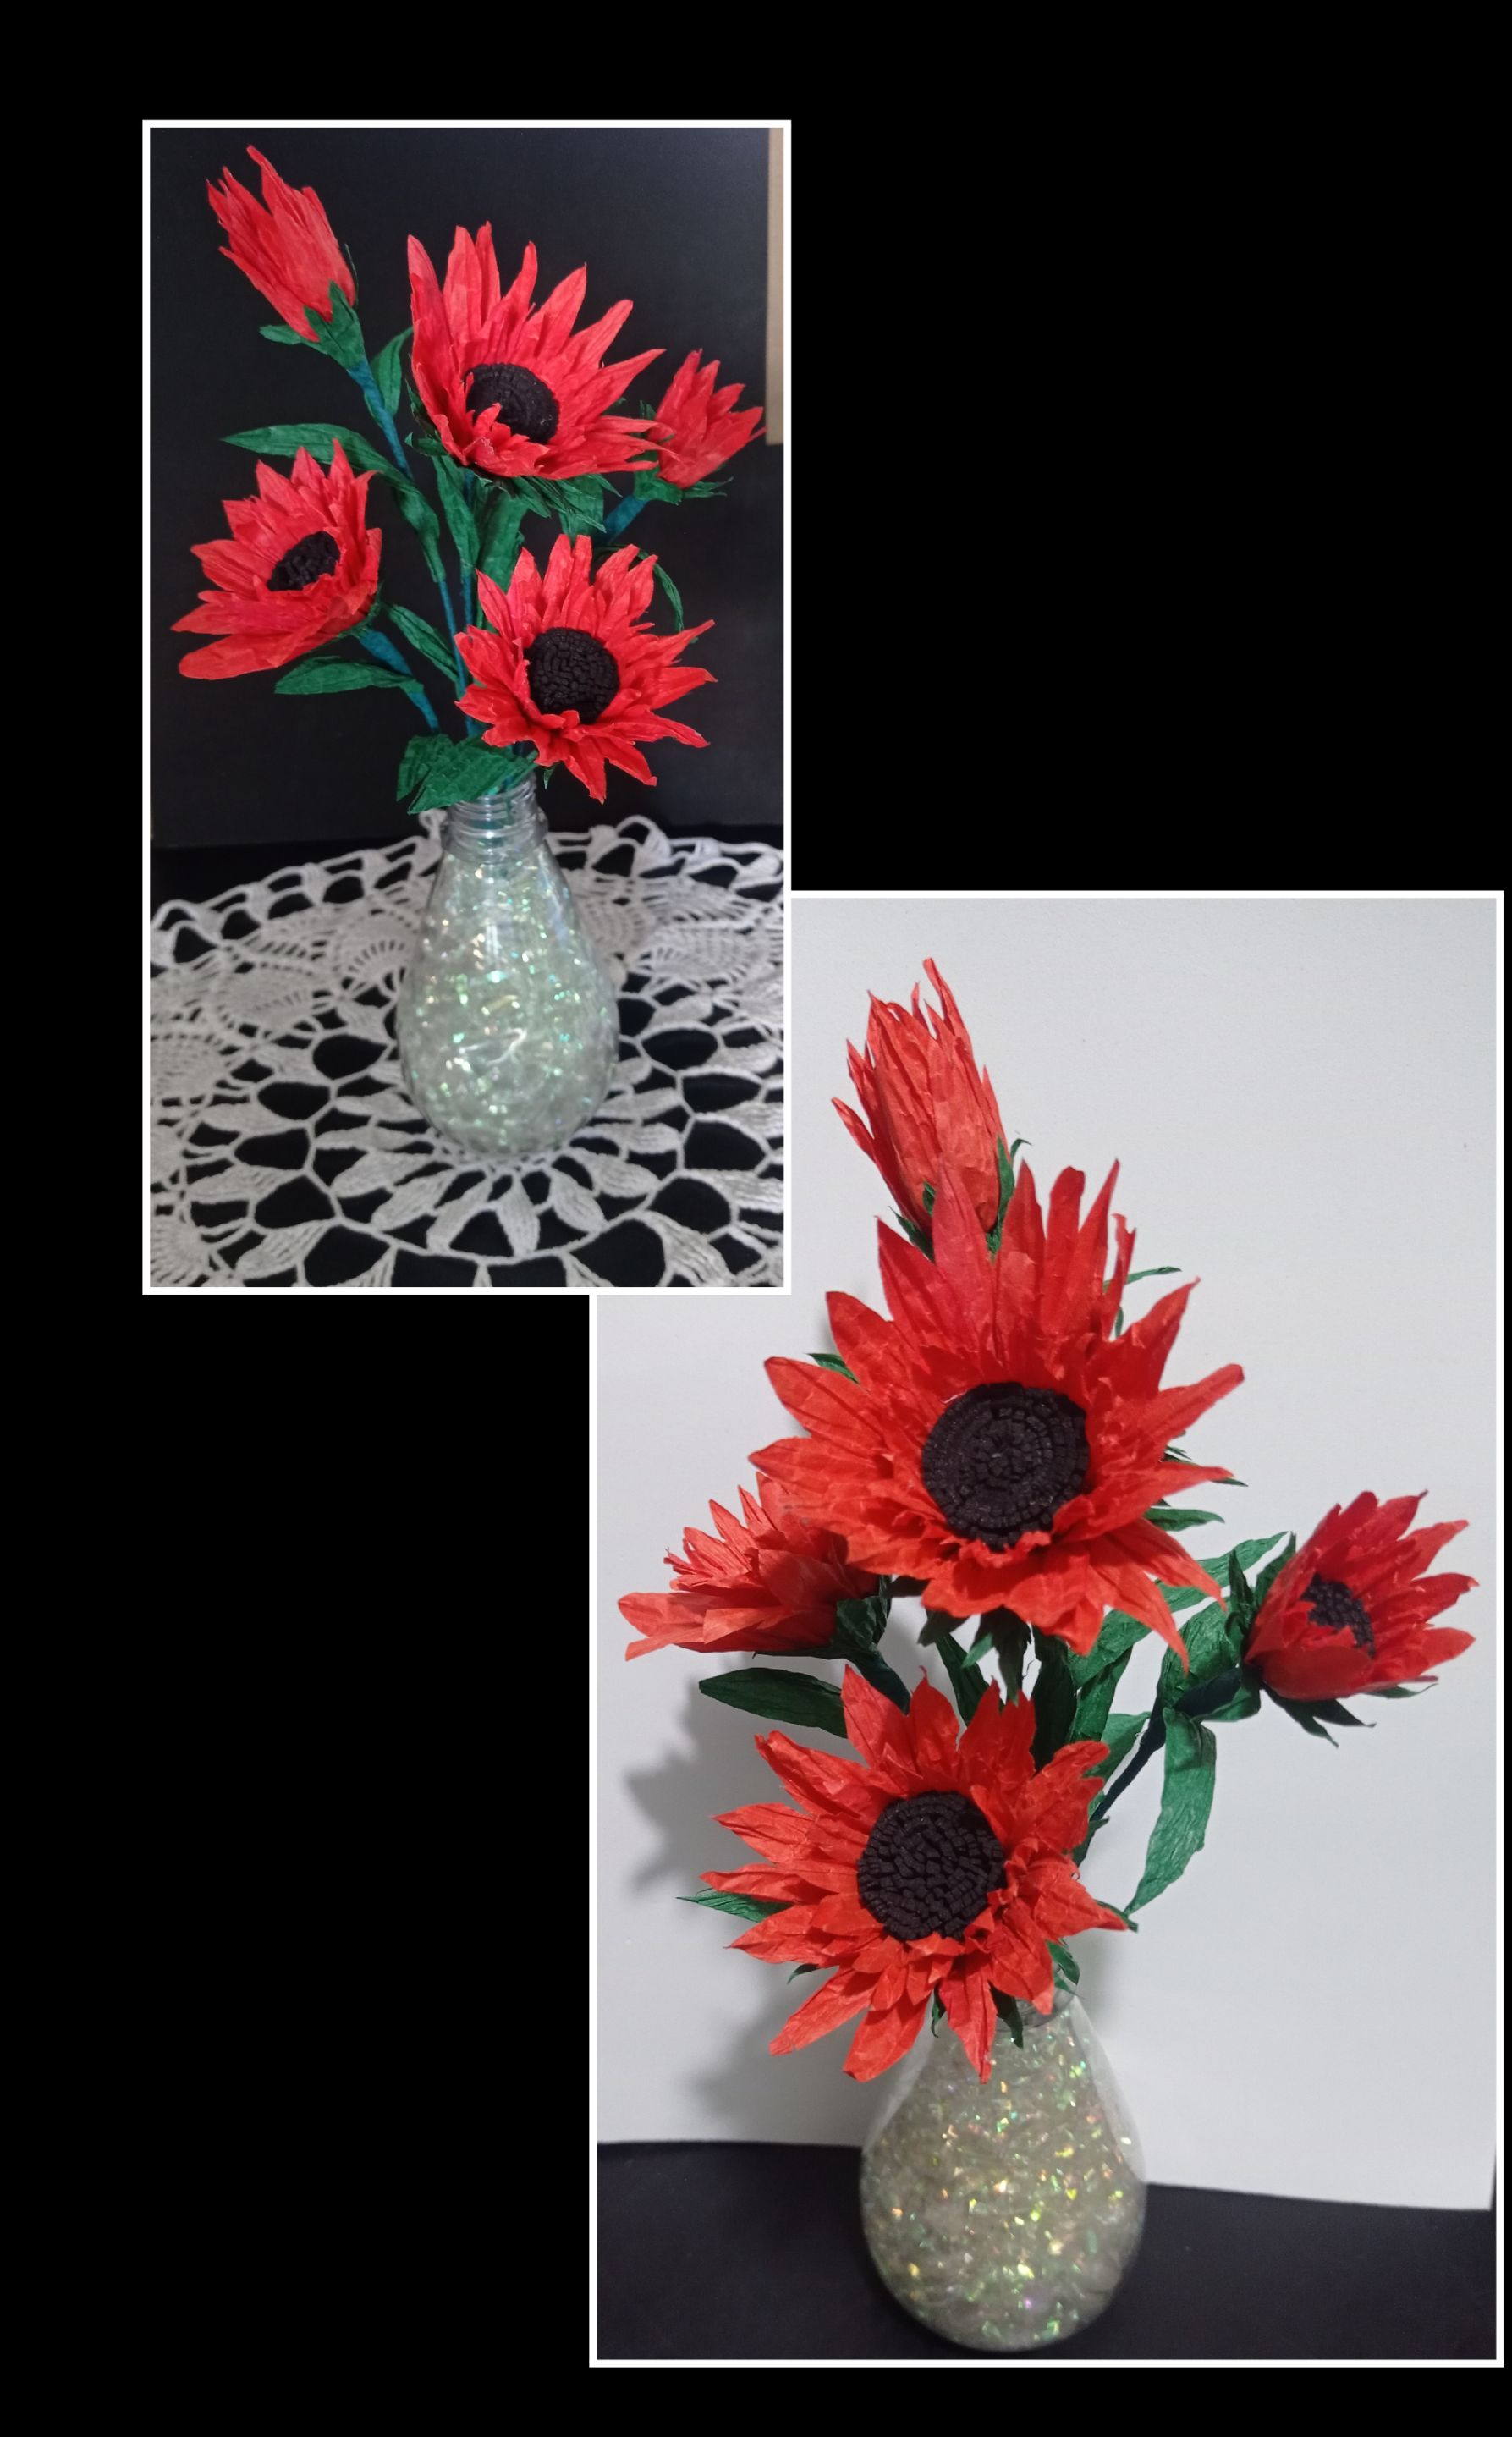
- Solo queda buscar un florero o improvisar uno jajajaja..
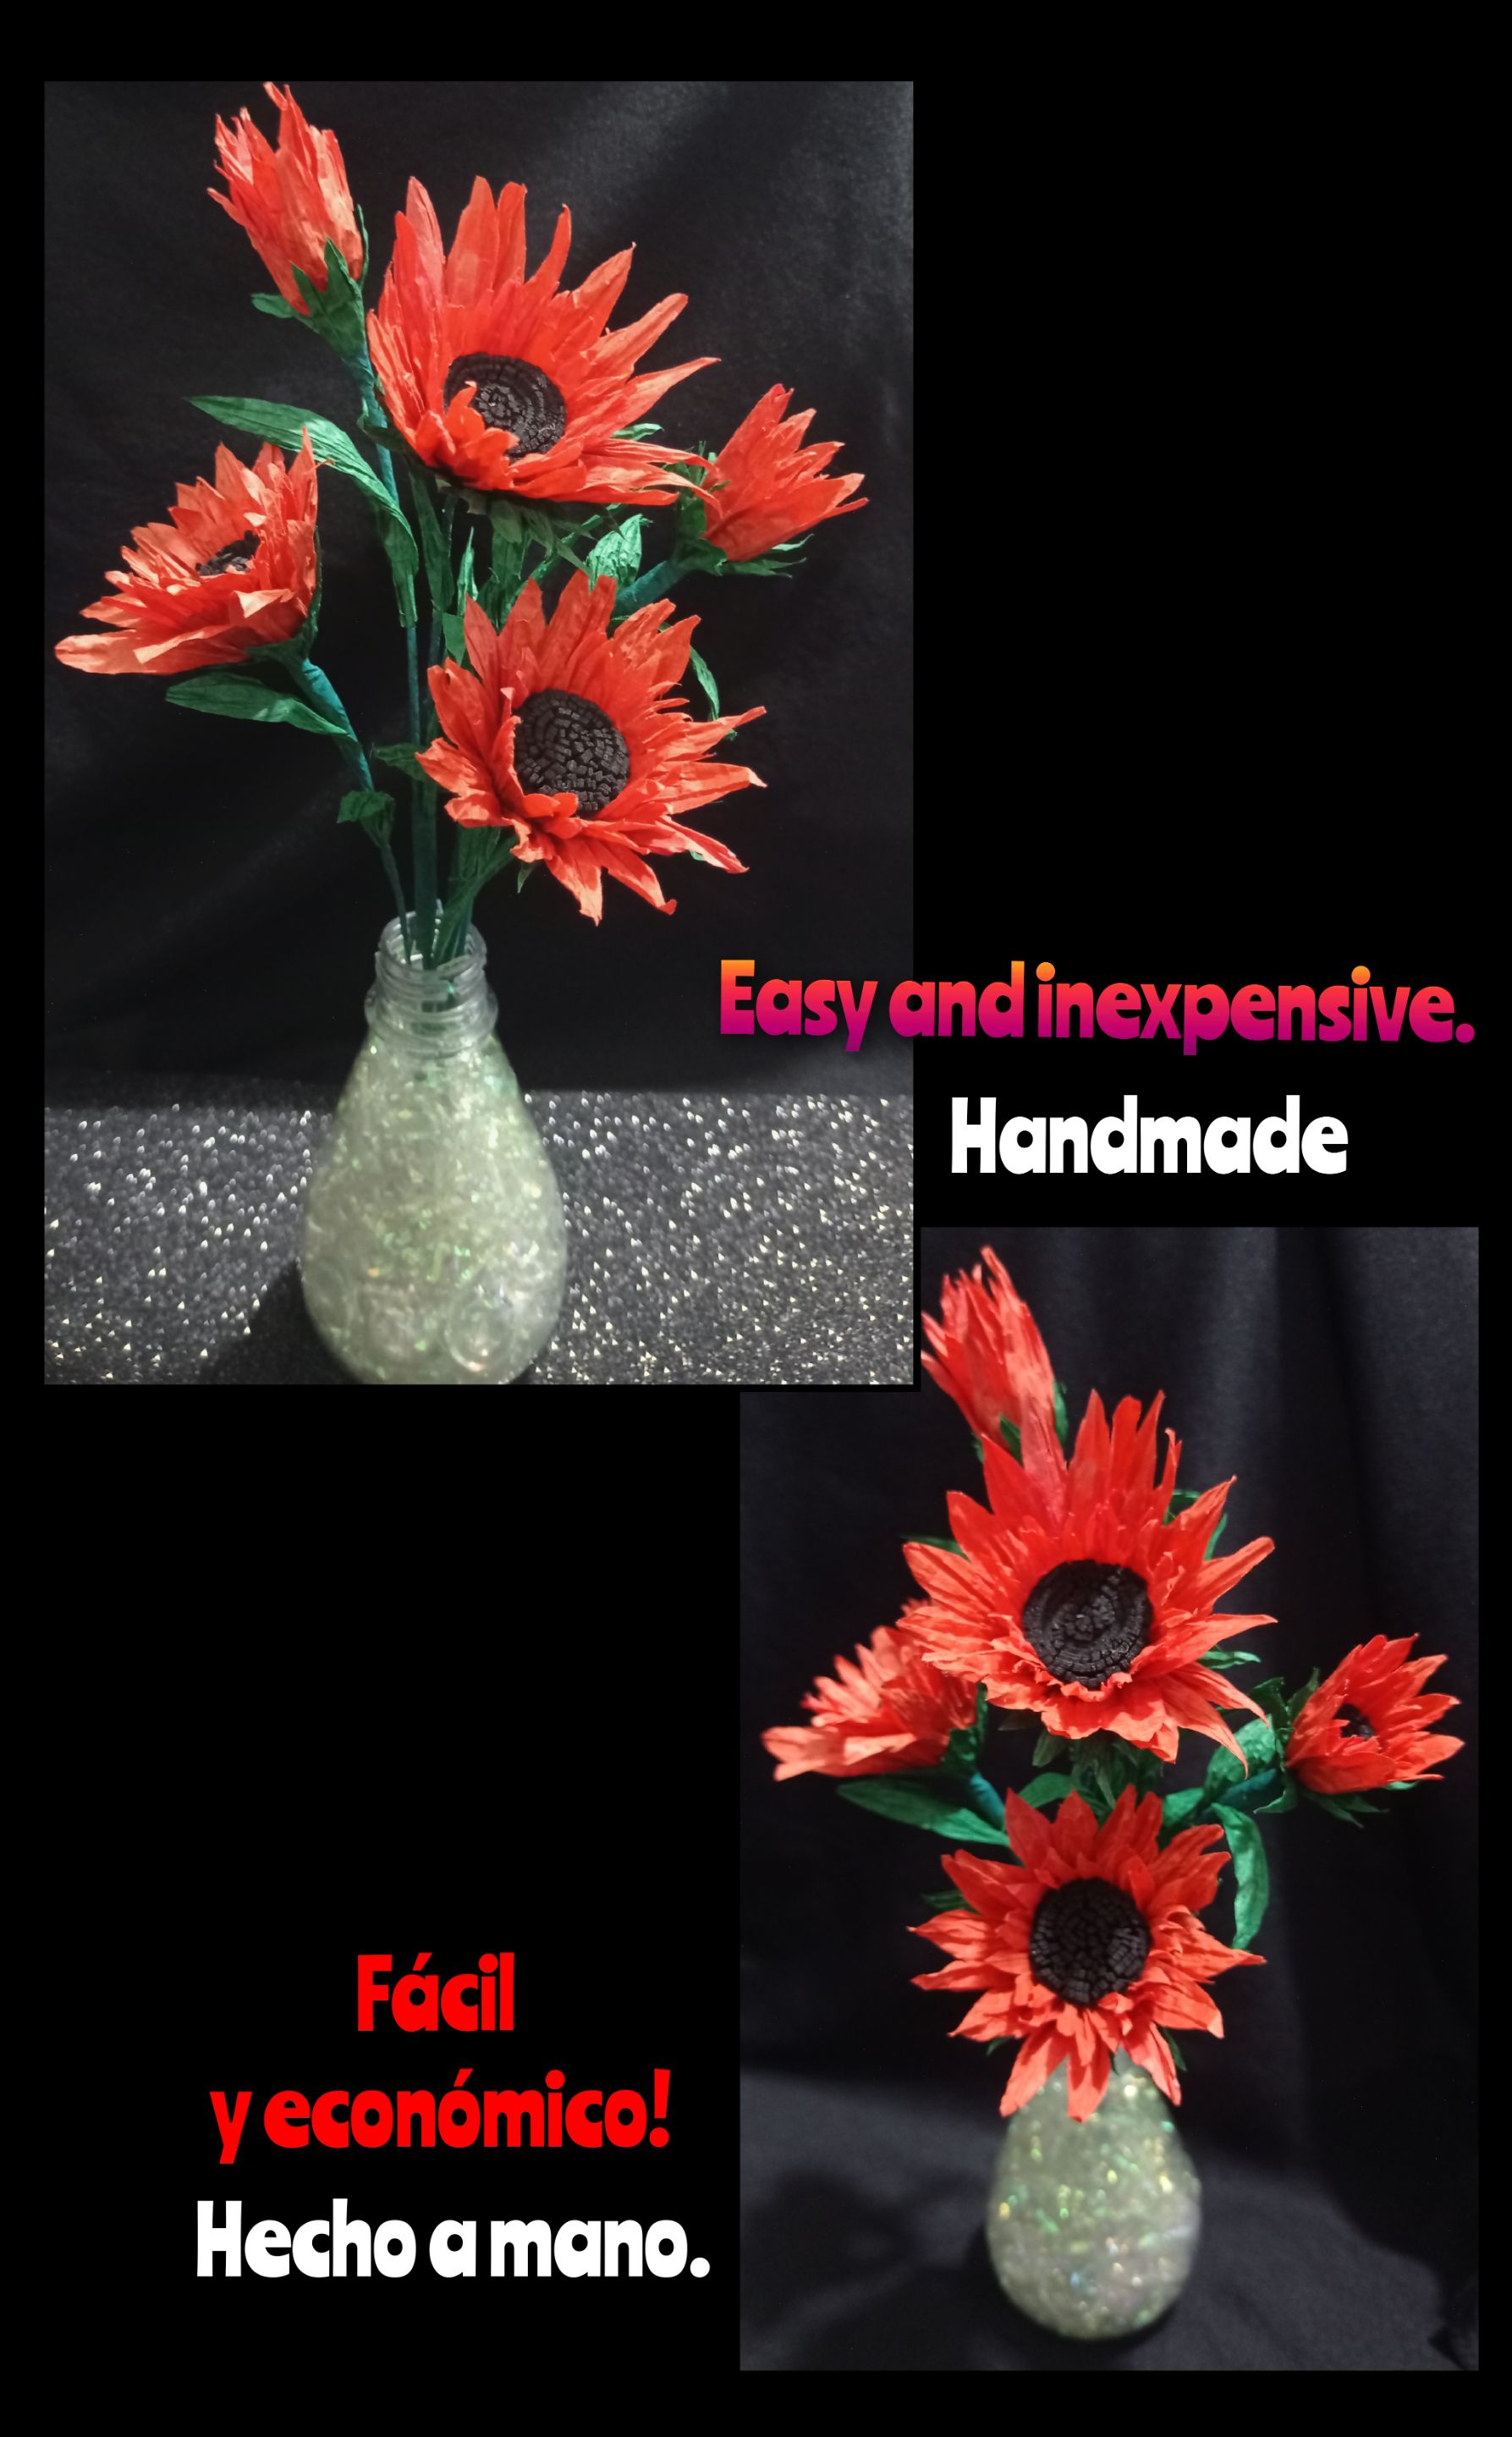
Como en mi caso, no tengo, usé un envase de plástico y lo rellené con piedritas de vidrio o con lo que quieras y tengas a la mano para darle un poco de peso y completa con virutas de papel celofán que le dan un toque especial e inserta las flores a tu gusto y listo!
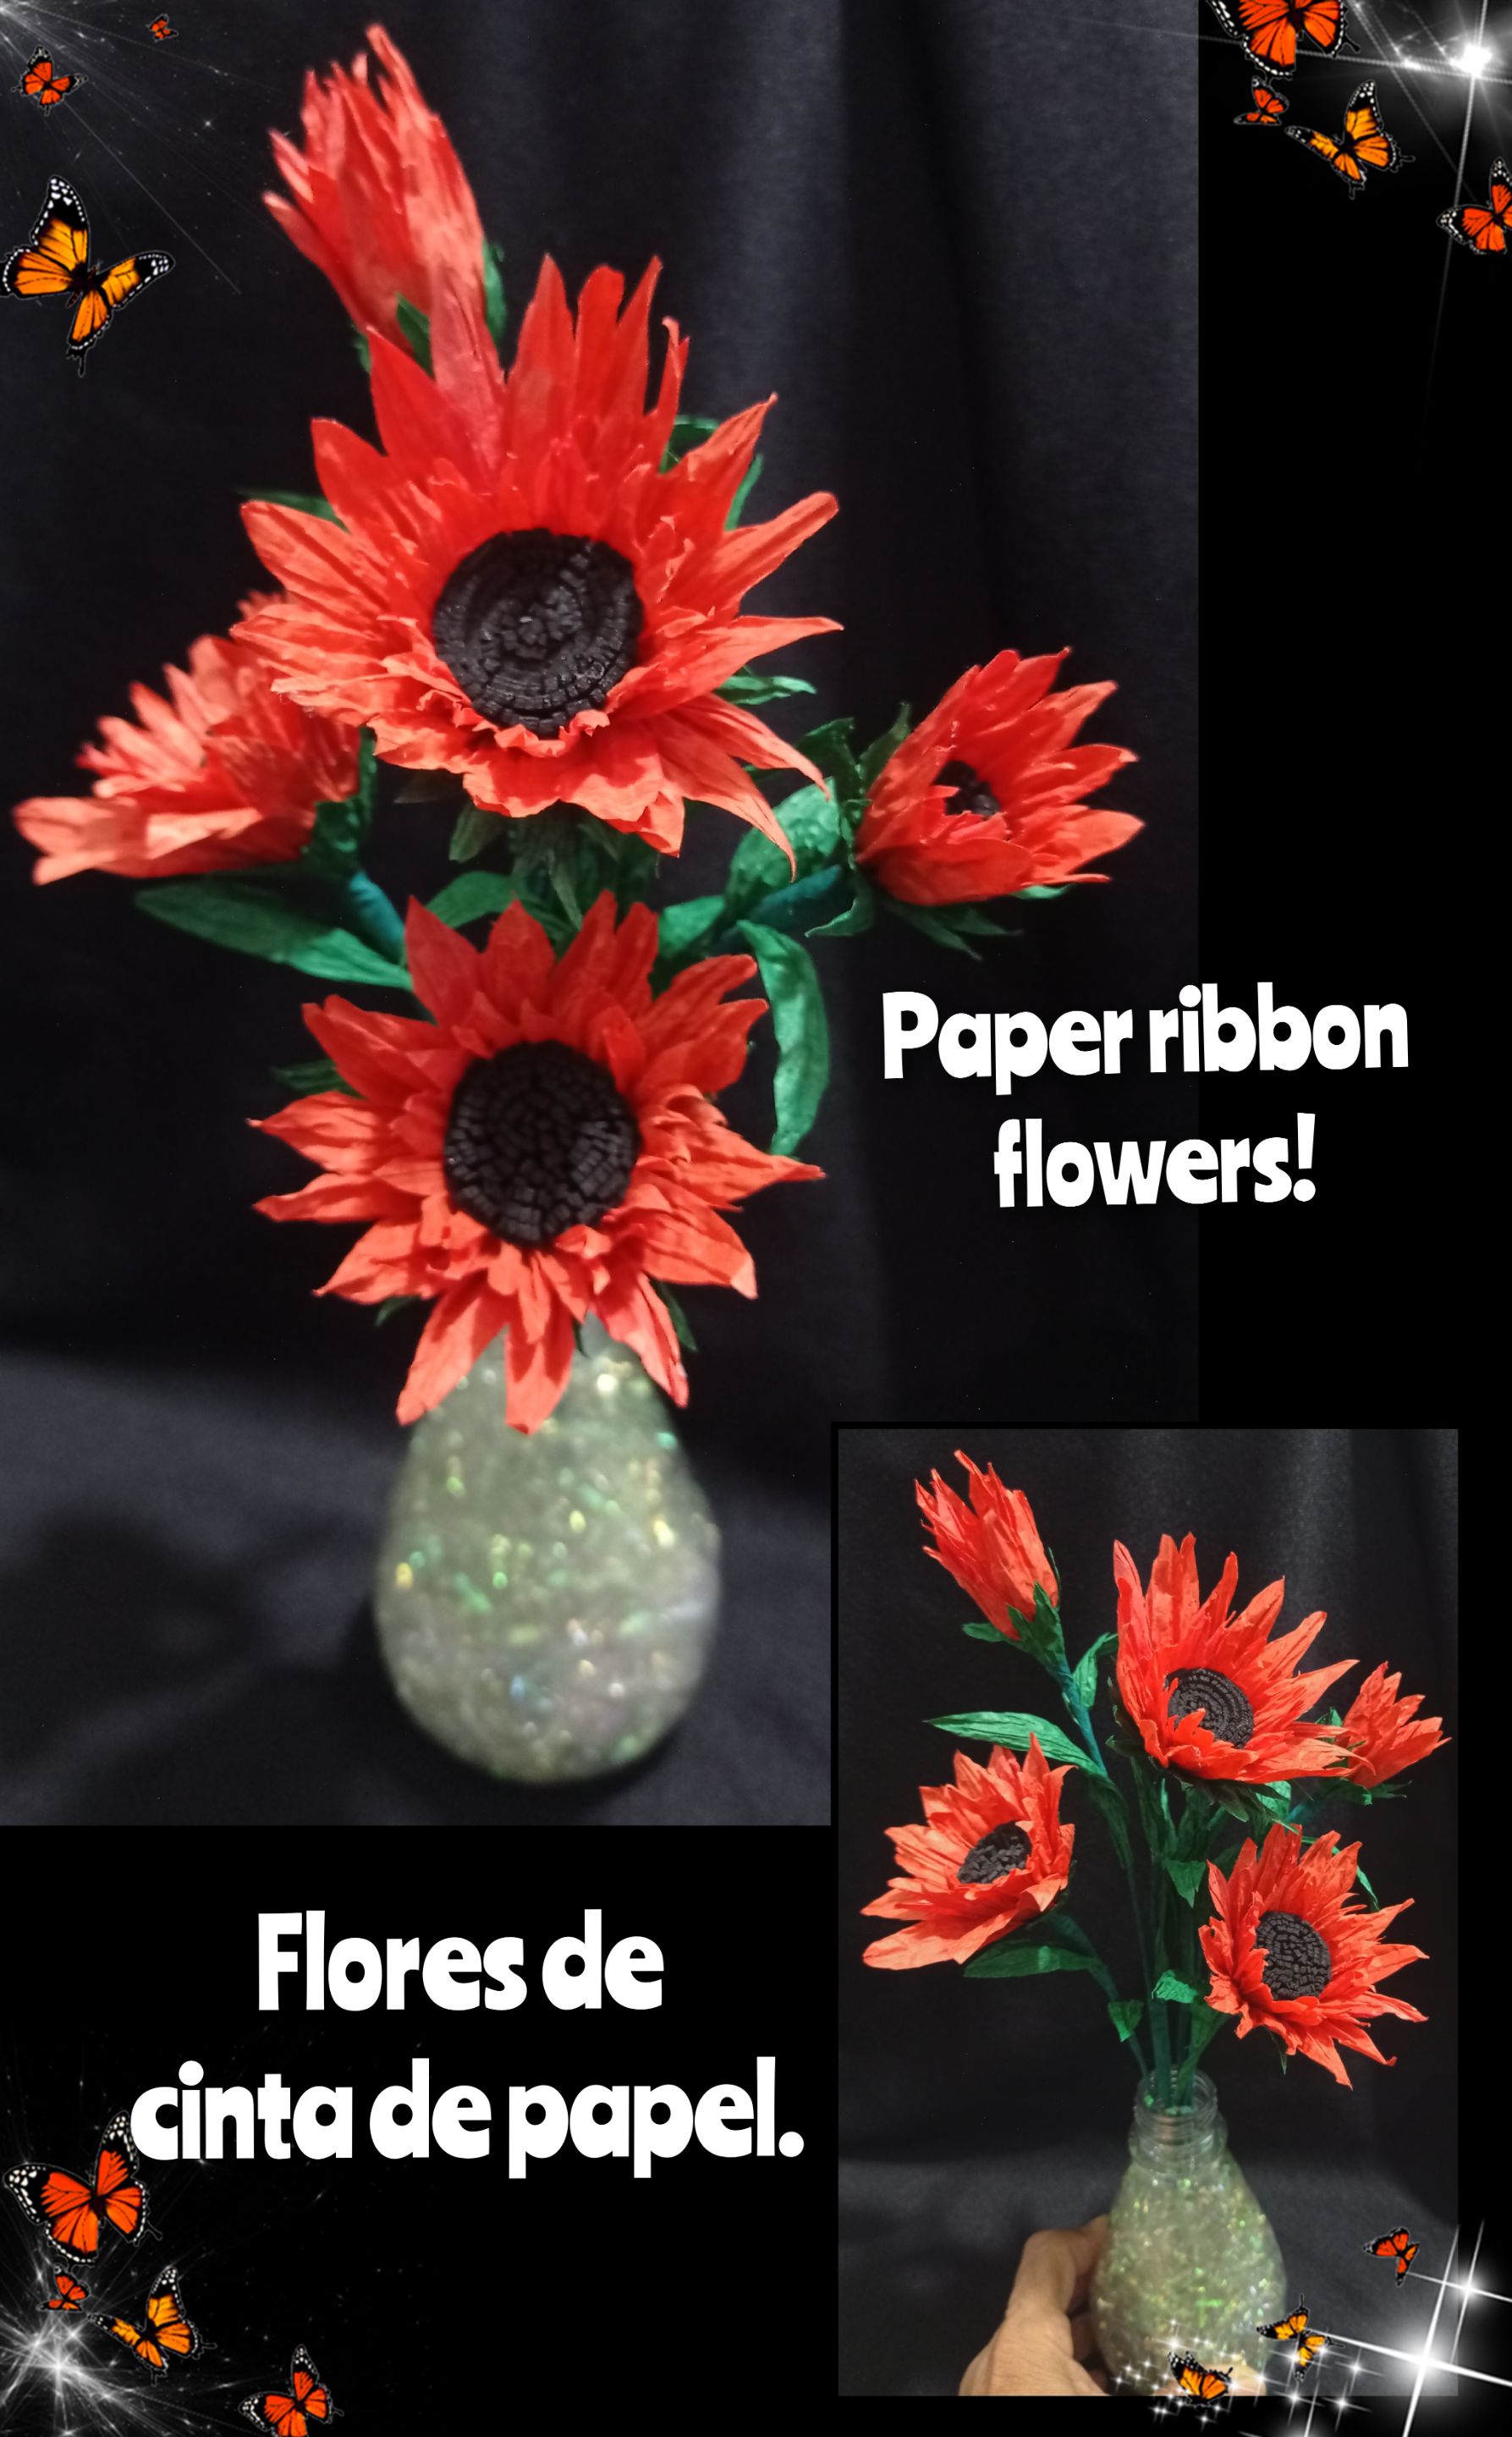
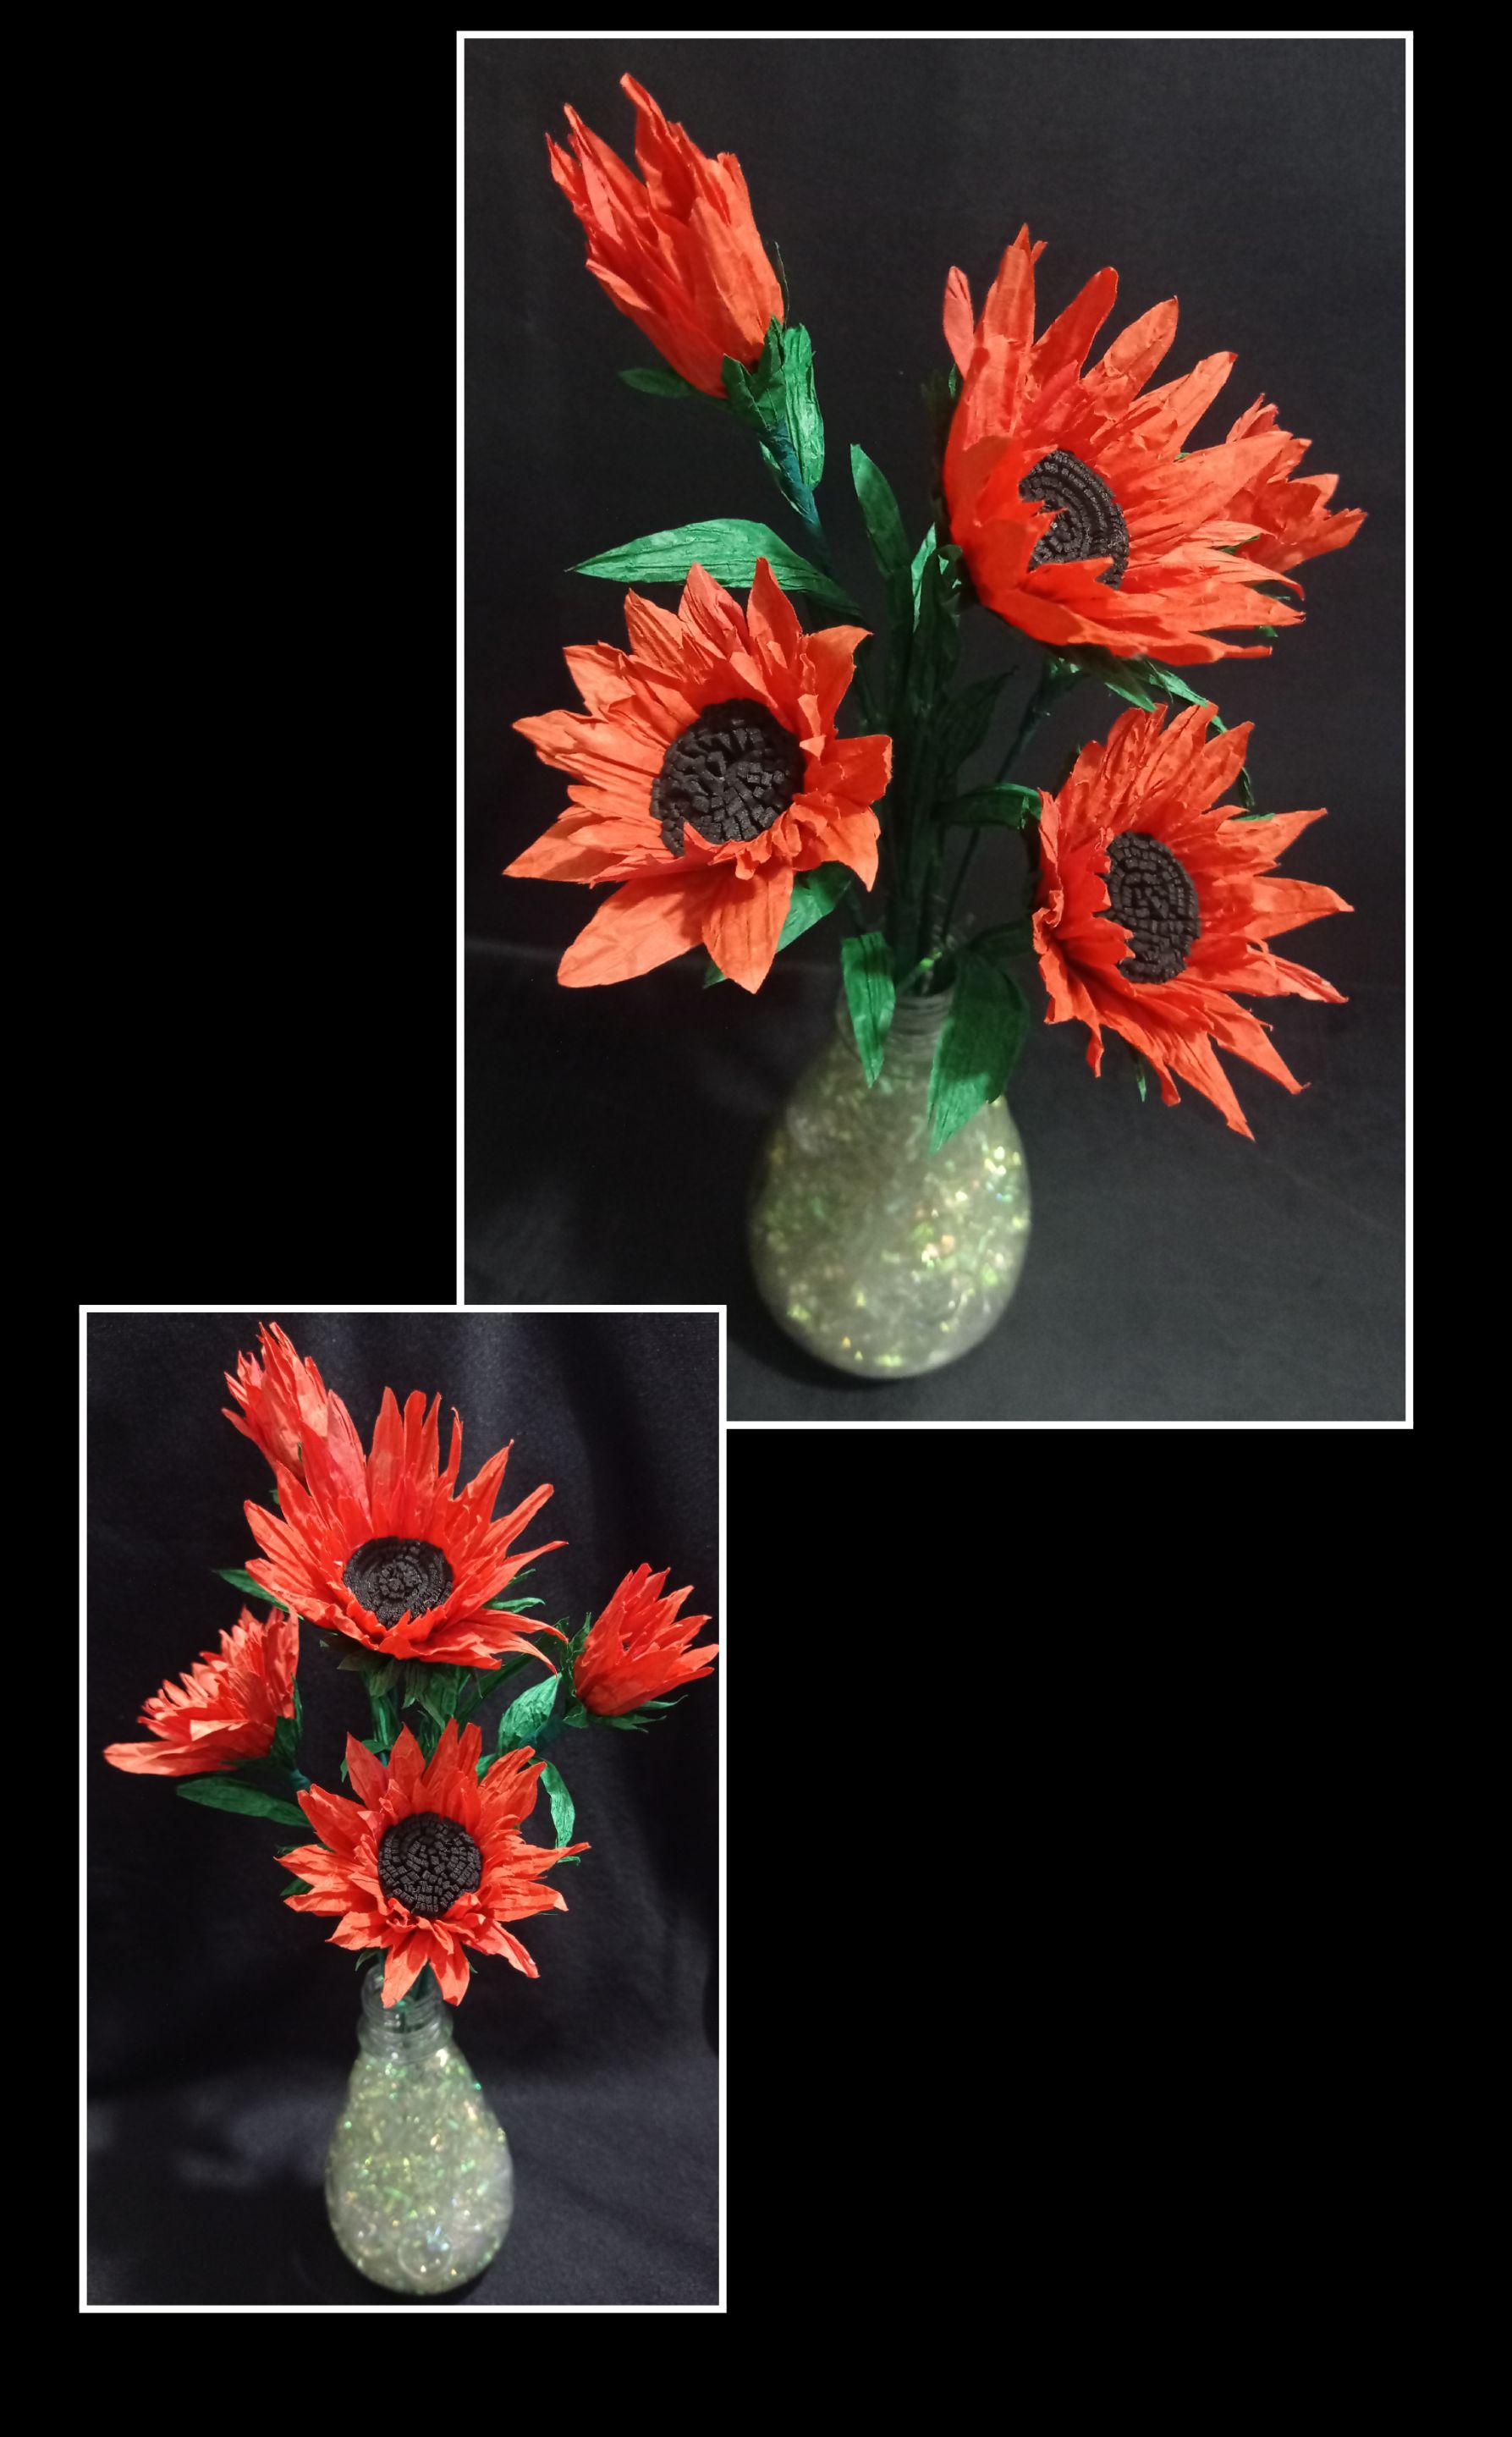
Ahora te muestro fotos de como quedó este fácil y sencillo adorno hecho a mano con flores de papel.
Usé etiquetas HTML, las fotos las capturé con mi teléfono Redmi Note 9 y las fotos editadas con GridArt.
Y llegó la hora de despedirme no sin antes invitarte a que te animes y hagas estas sencillas y bonitas flores.
Espero sea útil y de tu agrado.
Saludos.
So get ready and join me to learn how!
For this project you are going to need:
Materials:
Red and green paper tape.
Black Foami.
Scissors
Silicone
Wire or wooden sticks
Ruler
Plastic container recycling
Glass stones.
Cellophane paper shavings.
Step 1:
- Cut out small pieces of ribbon 4 and 5cms long, then unroll, fold and cut out the edges of the ribbon, (you can also cut rounded edges).
- Now cut out strips of black foami and make fine cuts in the shape of strips, (I made one in yellow so you could appreciate the result).
Then apply silicone to the wire and start to roll up the foami strip turning to form the pistils, remember to apply silicone to the bottom so that each of the turns stick together and form the centre of the flower. - Cut out the leaves in the shape you want, I made these by cutting off the pointed ends.
Step 2:
- Now cut the strips of paper into peaks, apply silicone to the centres and start gluing around as shown in the photo and close, trim the excess, then cut another strip but with the petals a little bigger and glue the other layer of paper, you can place the layers you want but you must increase 0.5 to 1cm in length between each layer.
Step 3:
- Now cut out the sepals and glue them to the bottom of the petals. You can also make buds with the centre and a layer of petals and leave to dry.
- Line the wires with strips of crepe paper or green floral tissue.
- All that remains is to find a vase or improvise one hahahaha....
As in my case, I don't have one, I used a plastic container and filled it with glass pebbles or whatever you want and have at hand to give it a little weight and complete with cellophane paper shavings that give it a special touch and insert the flowers to your liking and that's it!
Now I show you photos of how this easy and simple handmade paper flower ornament turned out.
I used HTML tags, the photos were captured with my Redmi Note 9 phone and the photos were edited with GridArt.
And now it's time to say goodbye, but not before inviting you to take the plunge and make these simple and beautiful flowers.
I hope it will be useful and to your liking.
Greetings.