(ENG)
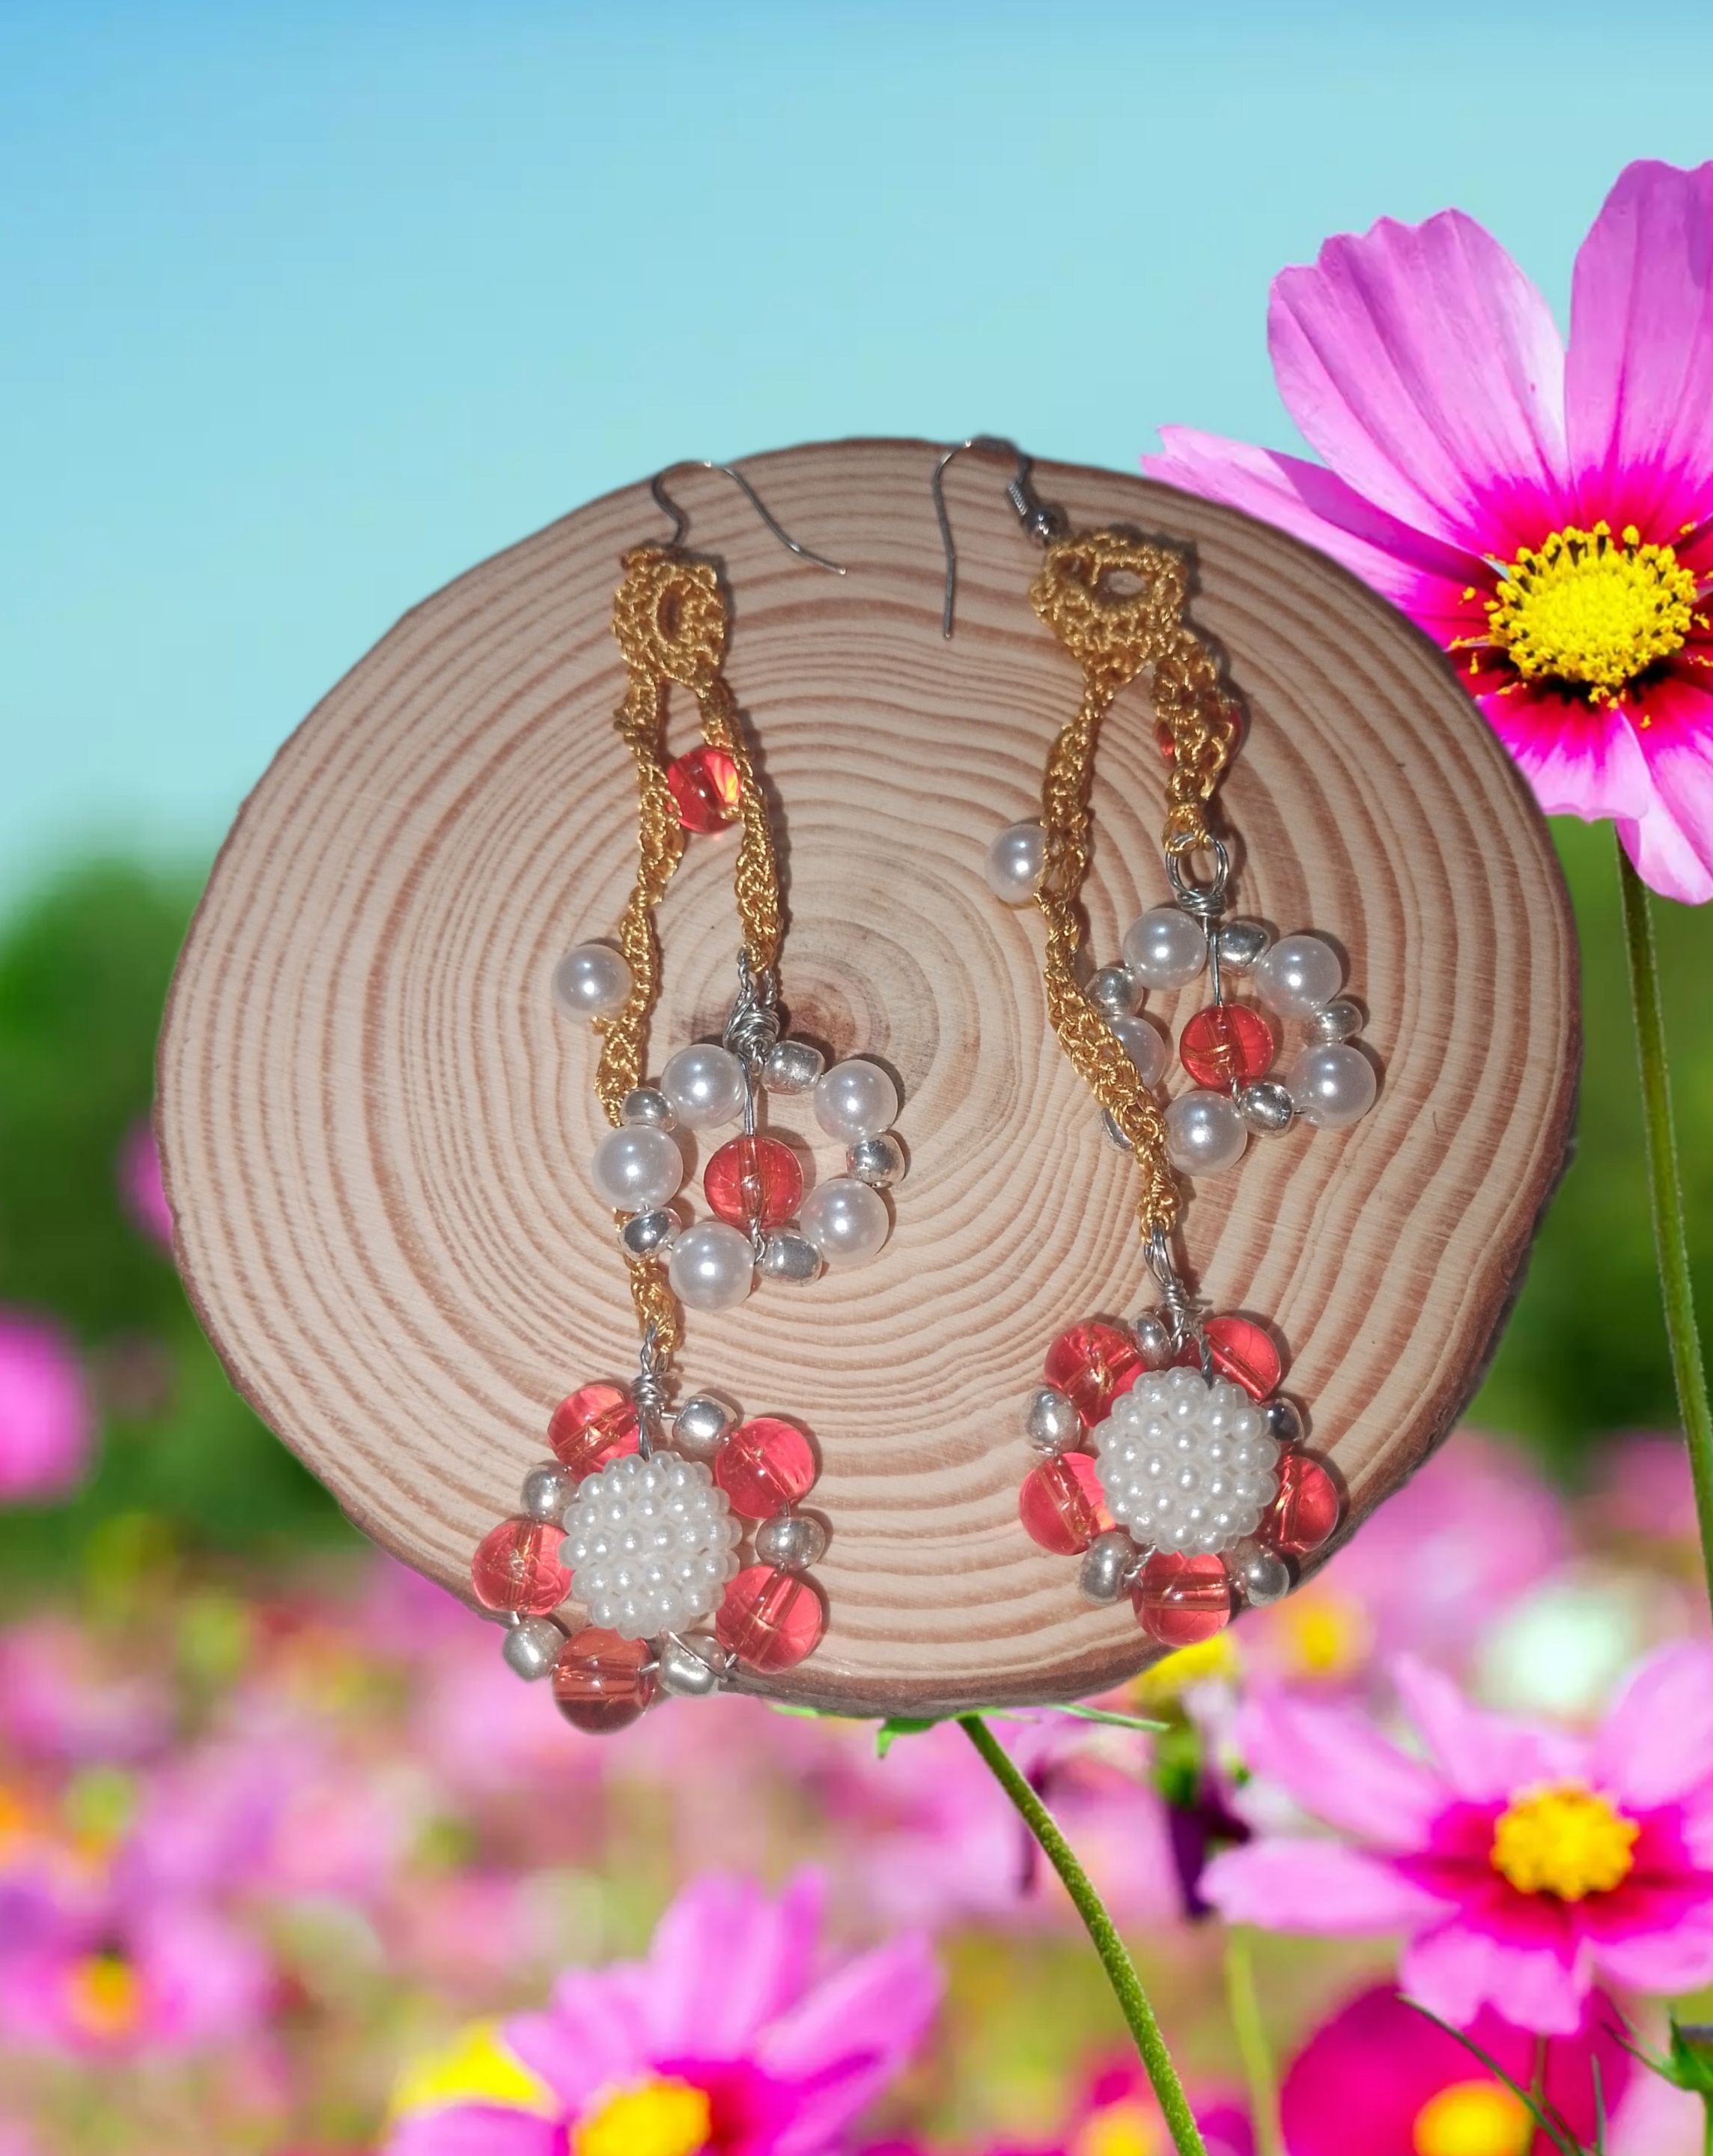
Hello everyone, I am pleased to be once again with you in this great community of creators, @jewelry, today I come to show you a very simple, step by step, how to make a beautiful and practical accessory to show off. very pretty, ideal to be worn at any time and occasion, inspired by that great touch of elegance and distinction that pearls, crystals and beads give us, and also applying the crochet and wire technique. So without further ado, I welcome you to my blog, follow me and you will see what I did especially for you.
Materials:
. Pearly white beads.
. White n6 pearls.
. Orange glass stones.
. Silver beads.
. Wire n0.5 .
Golden thread for knitting
. Knitting needle.
. Earring hook.
. Bracelet pin.
. Jewelry tweezers
. Scissors
Steps:
1.) After cutting four pieces of wire, I begin by inserting and centering five glass beads separated by a silver bead, I moved the pieces leaving them centered and causing the wire to remain in equal parts. I continue, placing a new bead on one side, and insert the wire from the next side, in the shape of an X. And forming a flower. On the remaining wire, I insert a pearl bead and center it in the middle, going around with the wire at the next end, leaving it securely fixed. With the tweezers, round tip and I make a small ring, with the remaining wire I make several turns under the rite.
2.) I take the next wire, and repeat the previous step, unlike the ones that will be with pearls, separated by beads. Placing the glass stones in the center. In this way, I repeat and make a couple of the ones I did previously and a pair of these, since I will use two for each earrings.
3.) I insert the thread into the hook and tie it very well with two knots, I raise ten chain stitches, where I involve the remaining thread of the knots, I return to the starting point, and I make a small circle, then inside the circle, I will knit, 15 half stitches, and I will return to the middle of the circle, with slipped stitches. I shuffle, 5 points chains, and I take a glass crystal.
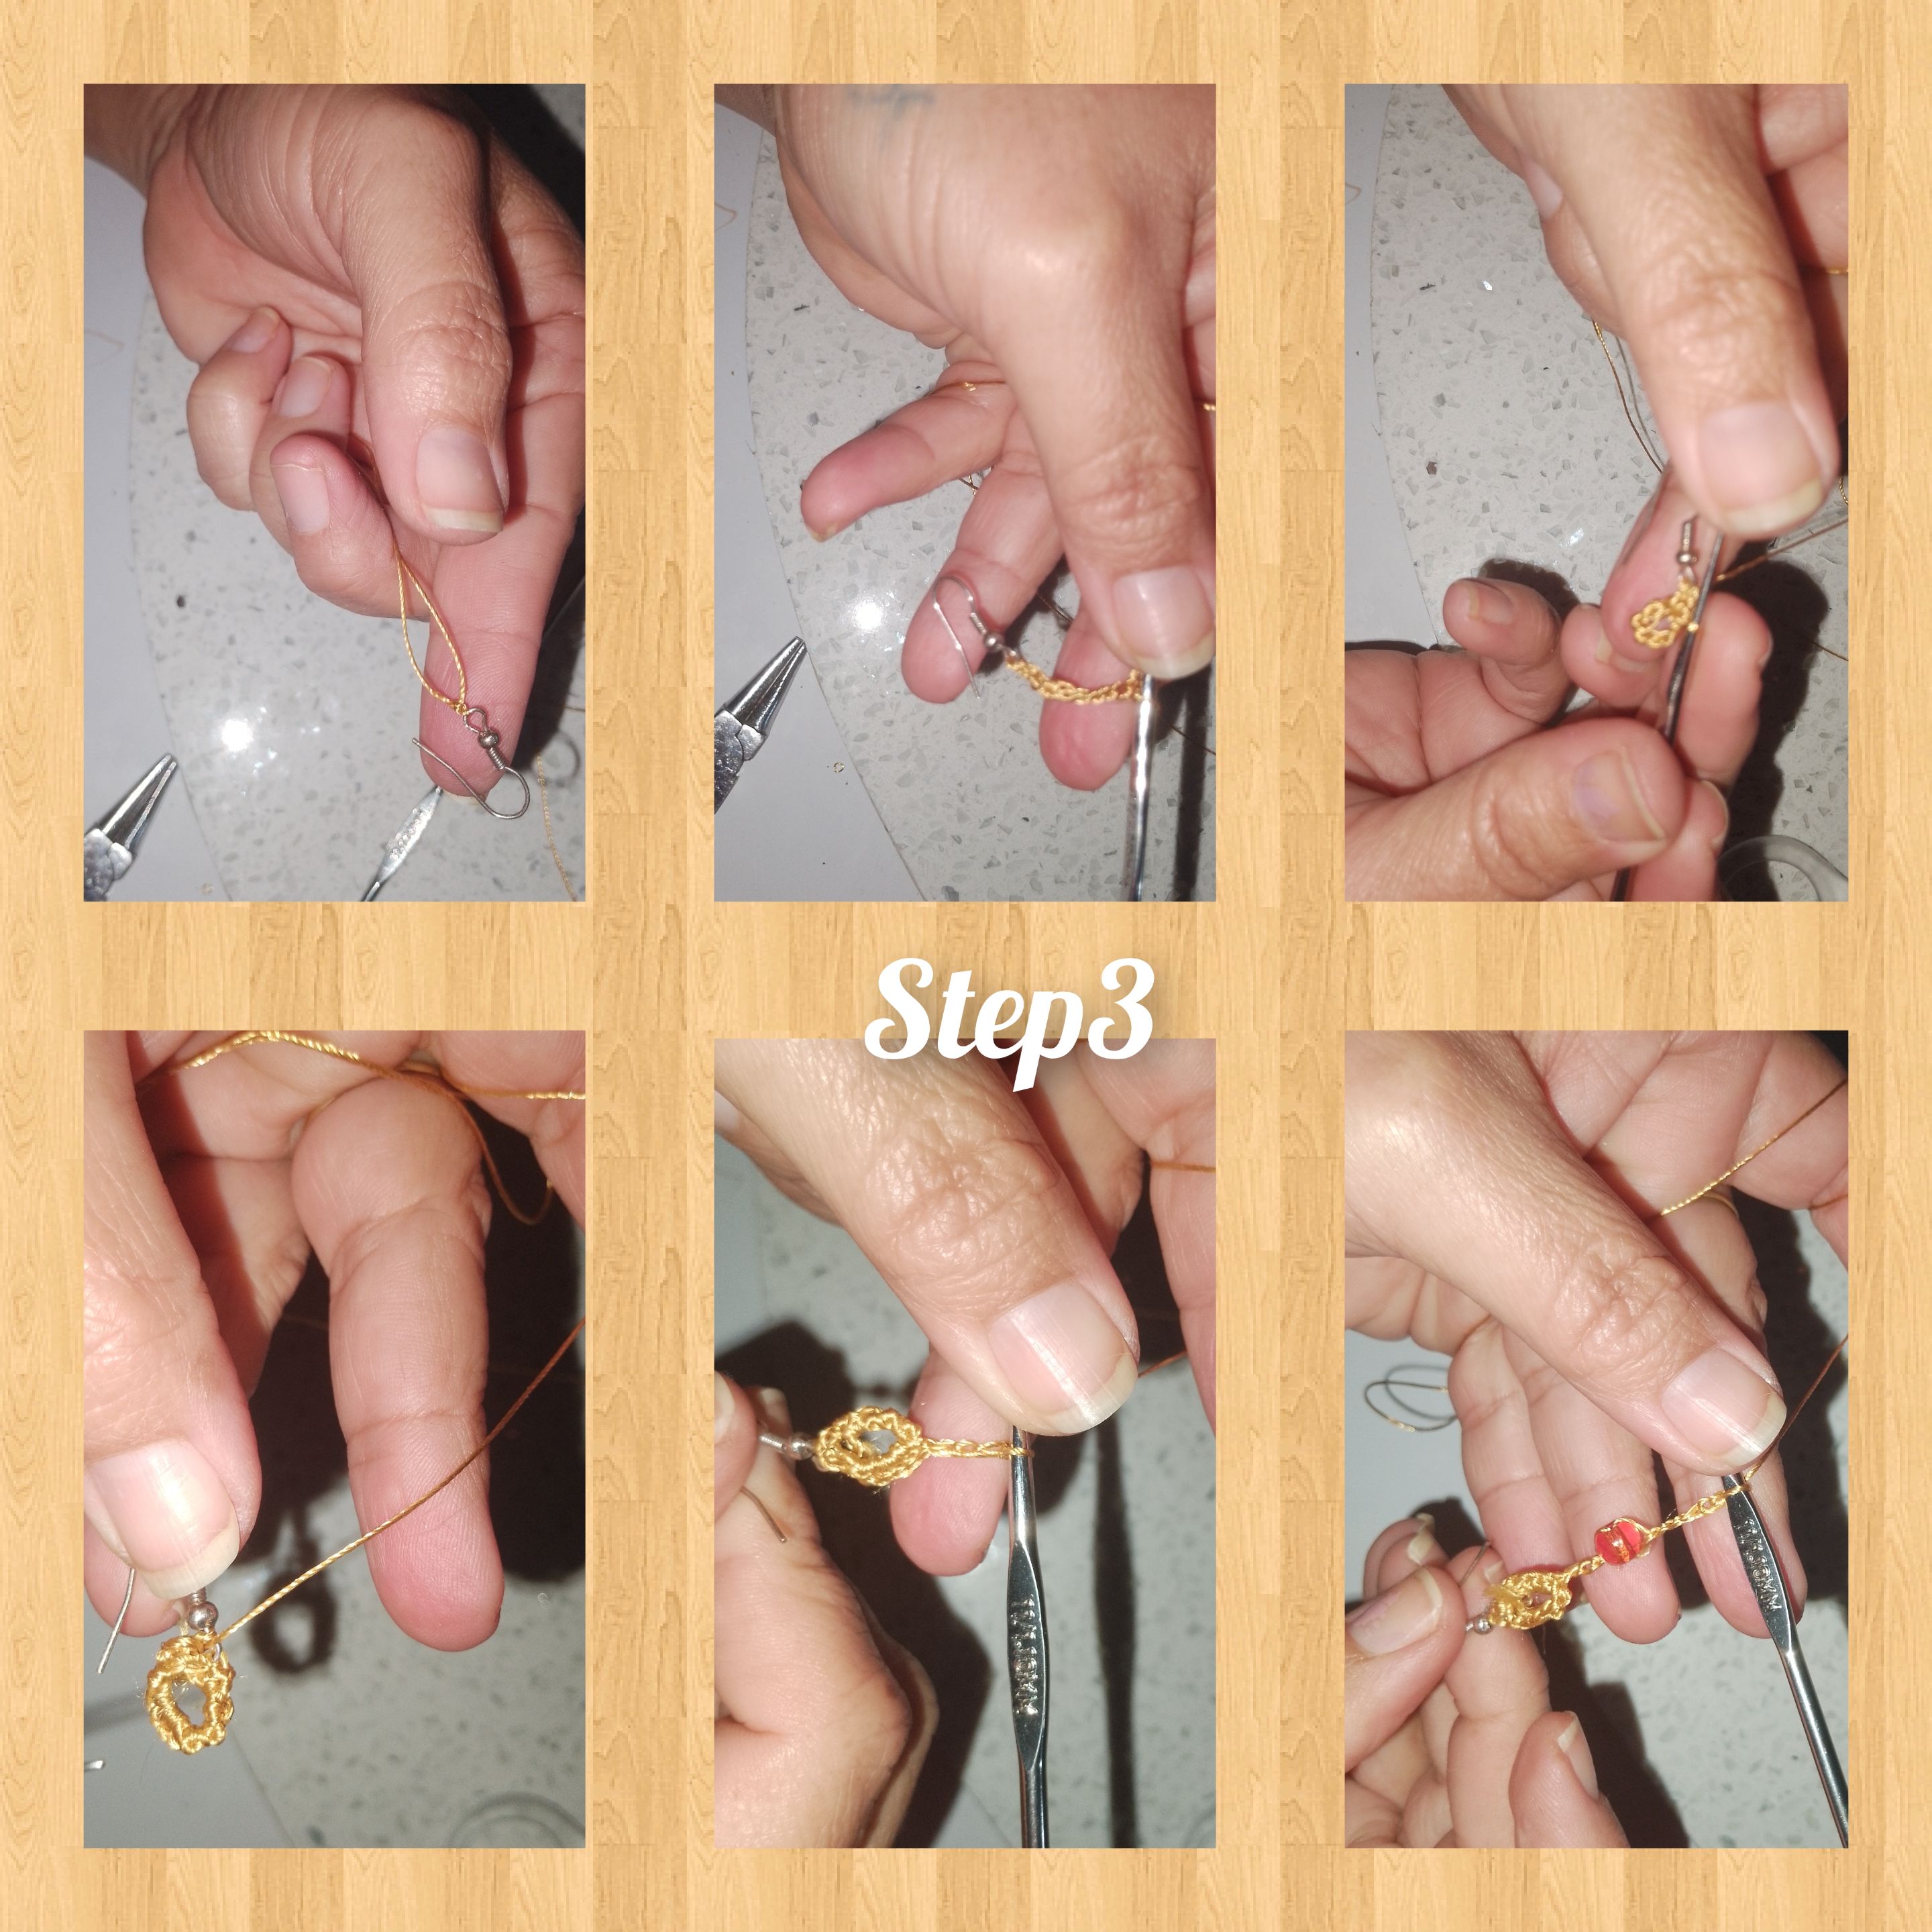
4.) I continue, knitting, 5 chain stitches and I place a first flower appliqué, done in 1/2 steps, I give two running stitches inside the appliqué hoop, and I return, knitting half stitches, over the chain stitches, until I reach the beginning of the weaving, located in the circle, initial, I knit two slipped stitches, on the left side, and I pick up 10 chain stitches, I place a white pearl, I knit 10 chain stitches, I take a new application involving it , with two running stitches, and I return, with half stitches, to the top of the earring, I cut the thread. Thus, the first earring is ready. ah In this way, I repeat and obtain, the first piece of this set ofaccessories.
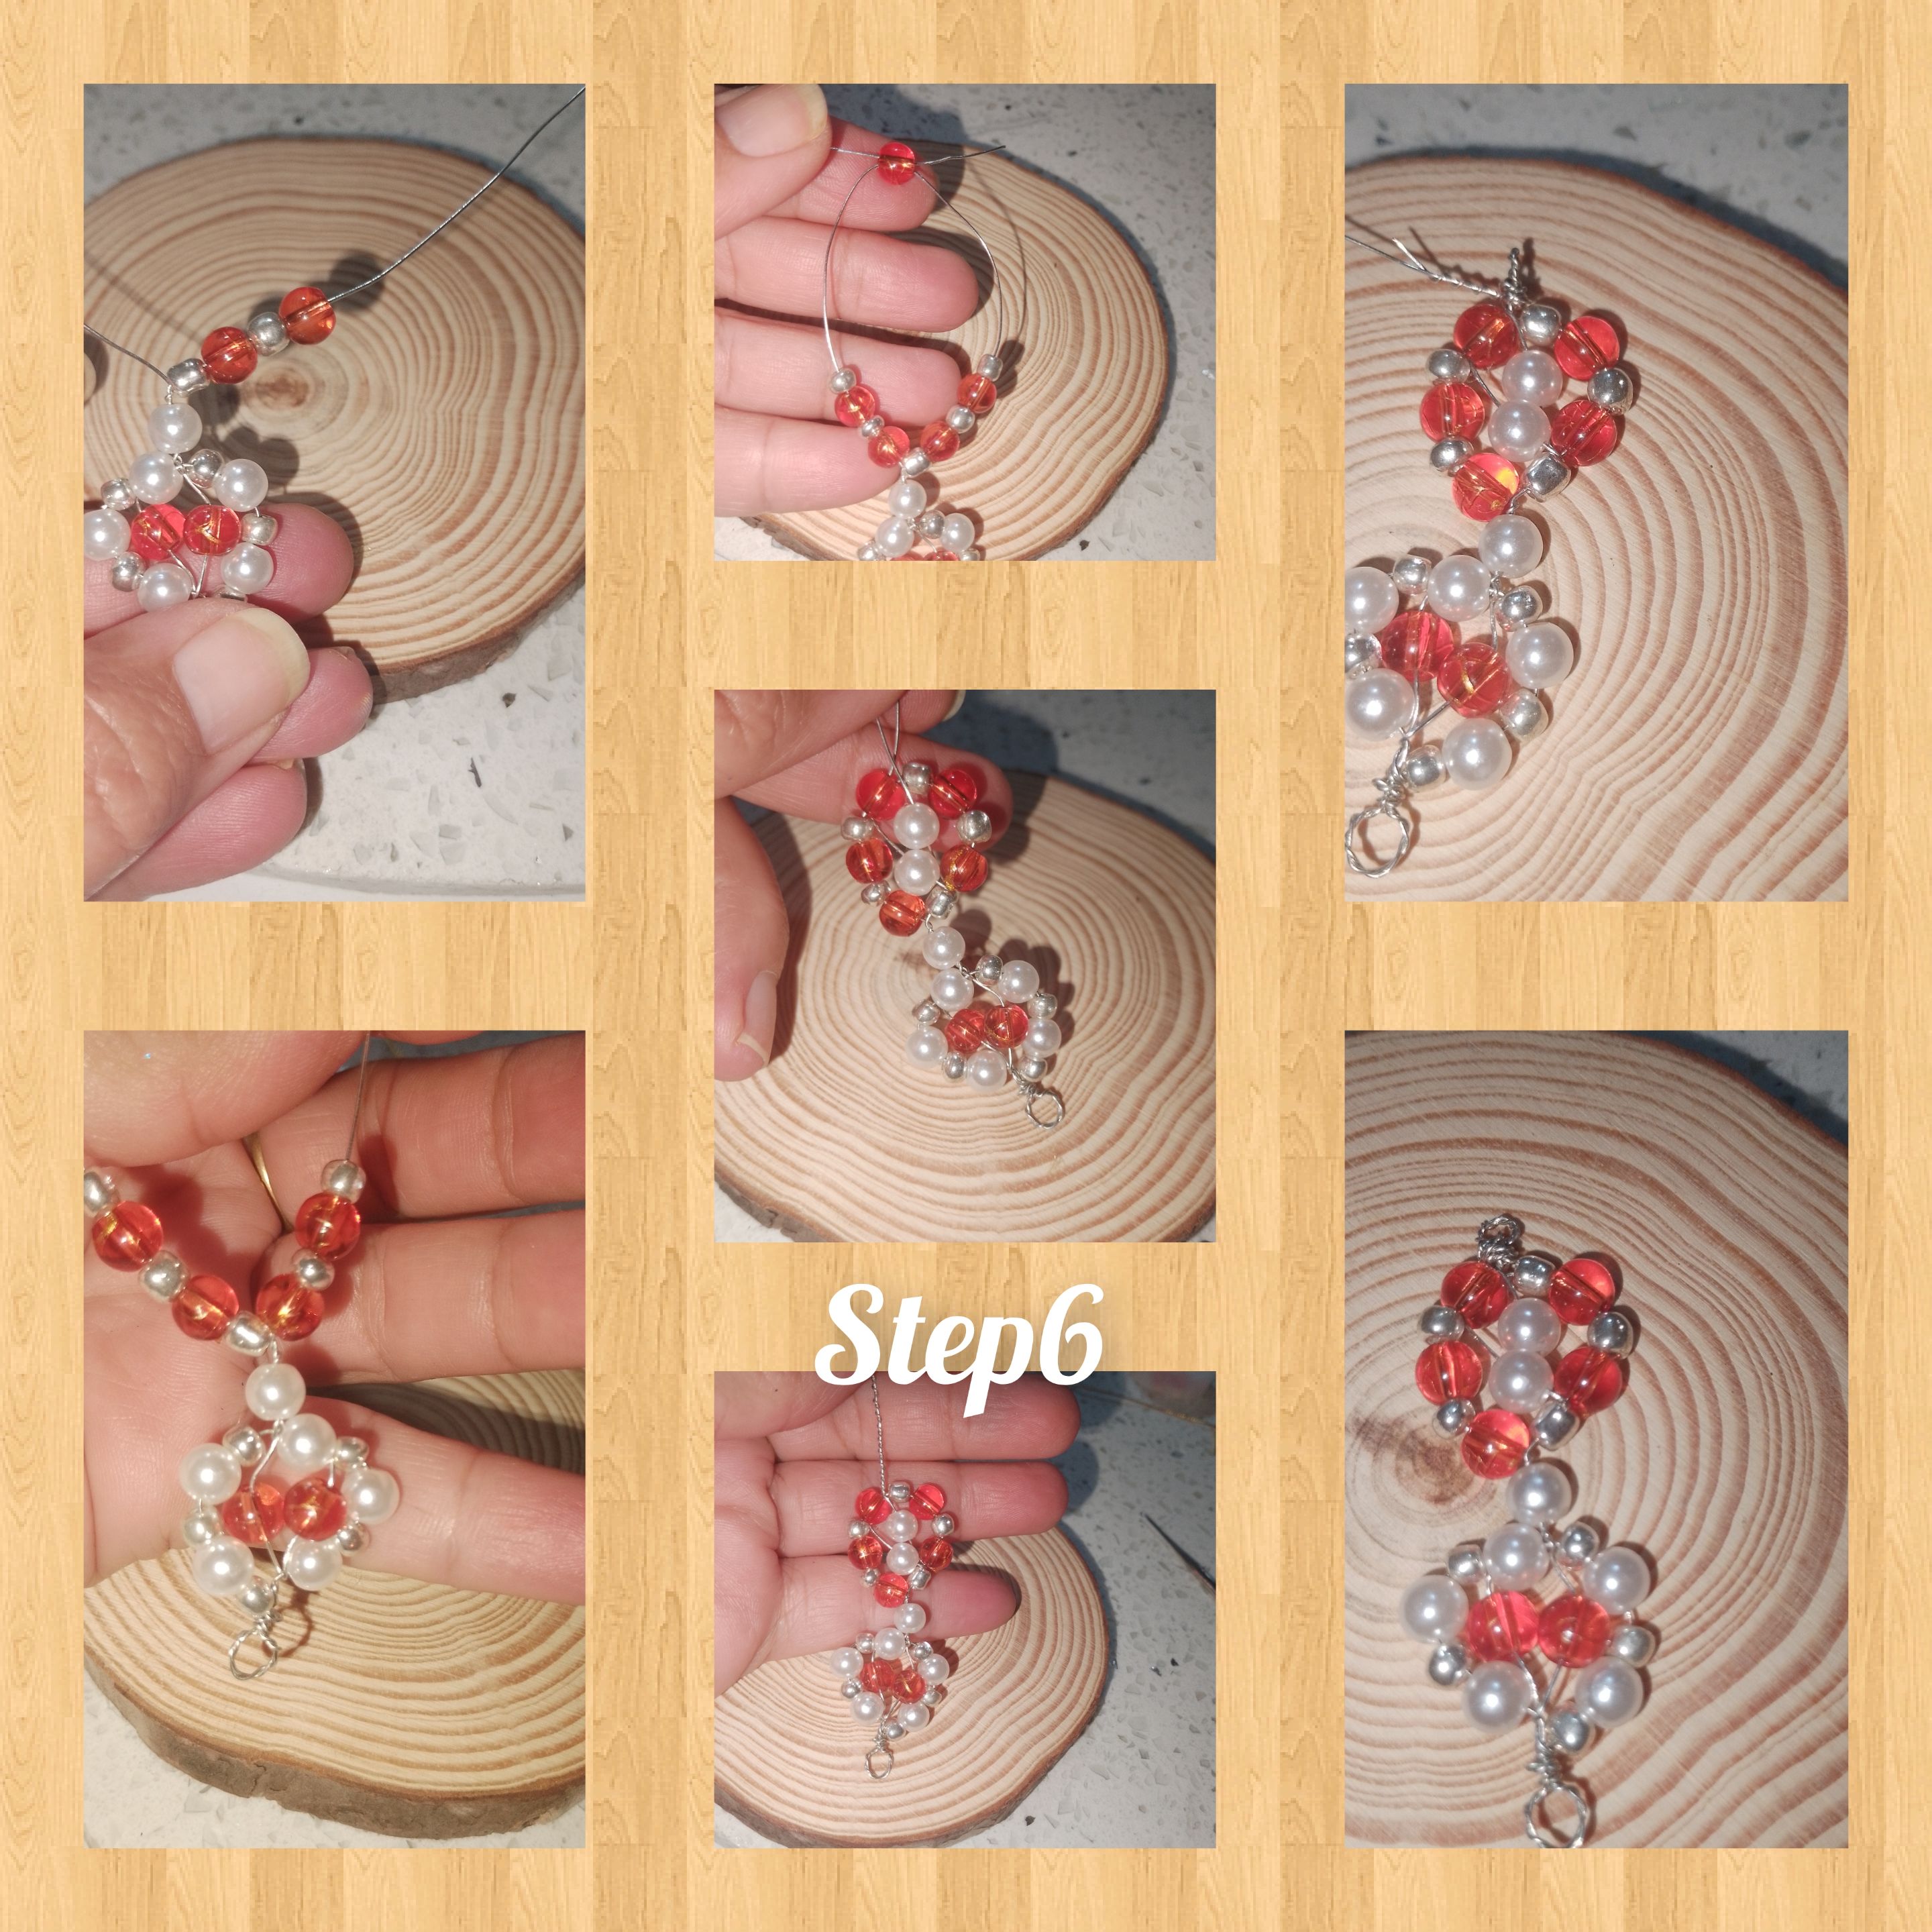
5.) short a wire, fold it in equal parts, twist it around each other, and with the help of the tweezers I make a little ring, with the bent piece of wire, now I insert two white pearls on each side, separated by one bead, I place a new pearl and crosswise I pass the next wire. On one of the ends of the wire, I place an orange glass stone, and I go to the next end, leaving it centered, I make a turn with the wire, I place another stone, and I go to the starting place, I make a turn to fix, I make four turns between the wires to join them, again and place a pearl to continue.
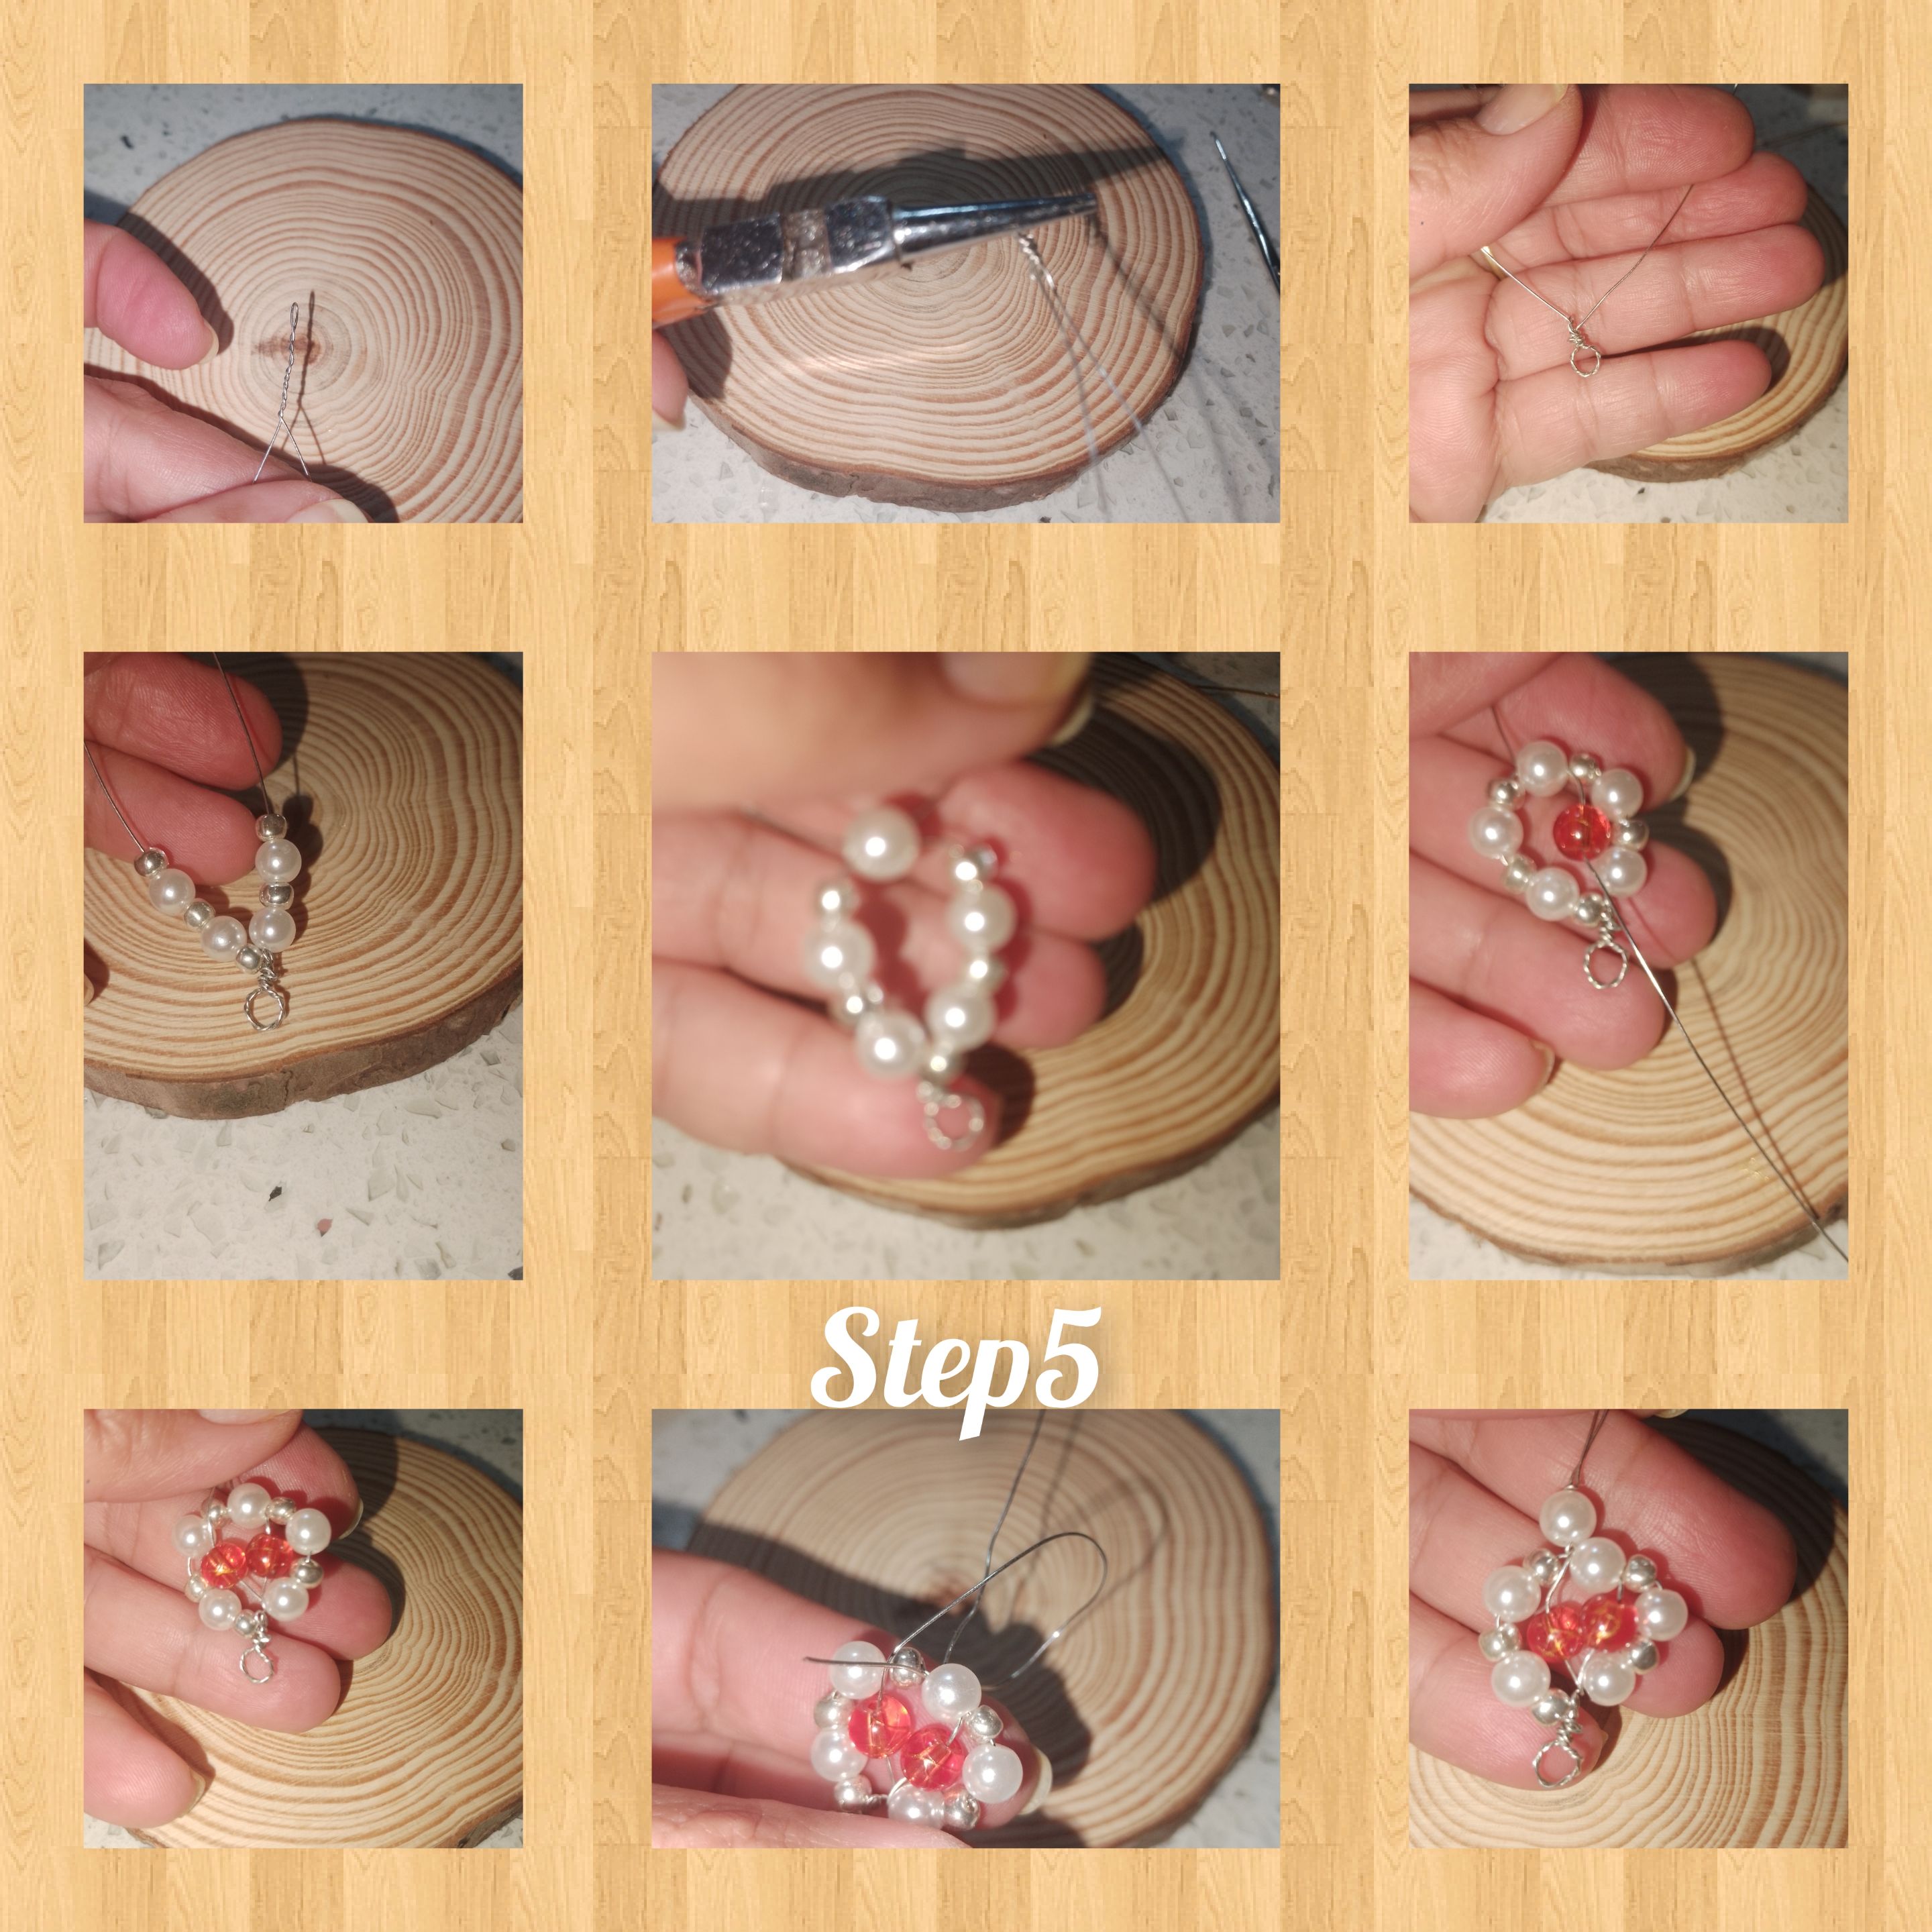
6.) I repeat the previous step, but this time, I will use the glass stones and in the center, I will place white pearls. Once this is done, I turn the wire around each other and make a new earring.
7.) I tie the thread very well, to knit on one of the sides of the flowers, I knit ten chain stitches, I return to the first stitch, I make a circle of chains and inside it I knit 15, half stitches, then From this, I return to the weaving, and I go down with a delicate stitch to the center of the circles, I take a pearl and I knit it, I repeat, until I place a total of three pearls and weave five circles, completing this first side of the bracelet , I knit several running stitches to secure the pin.
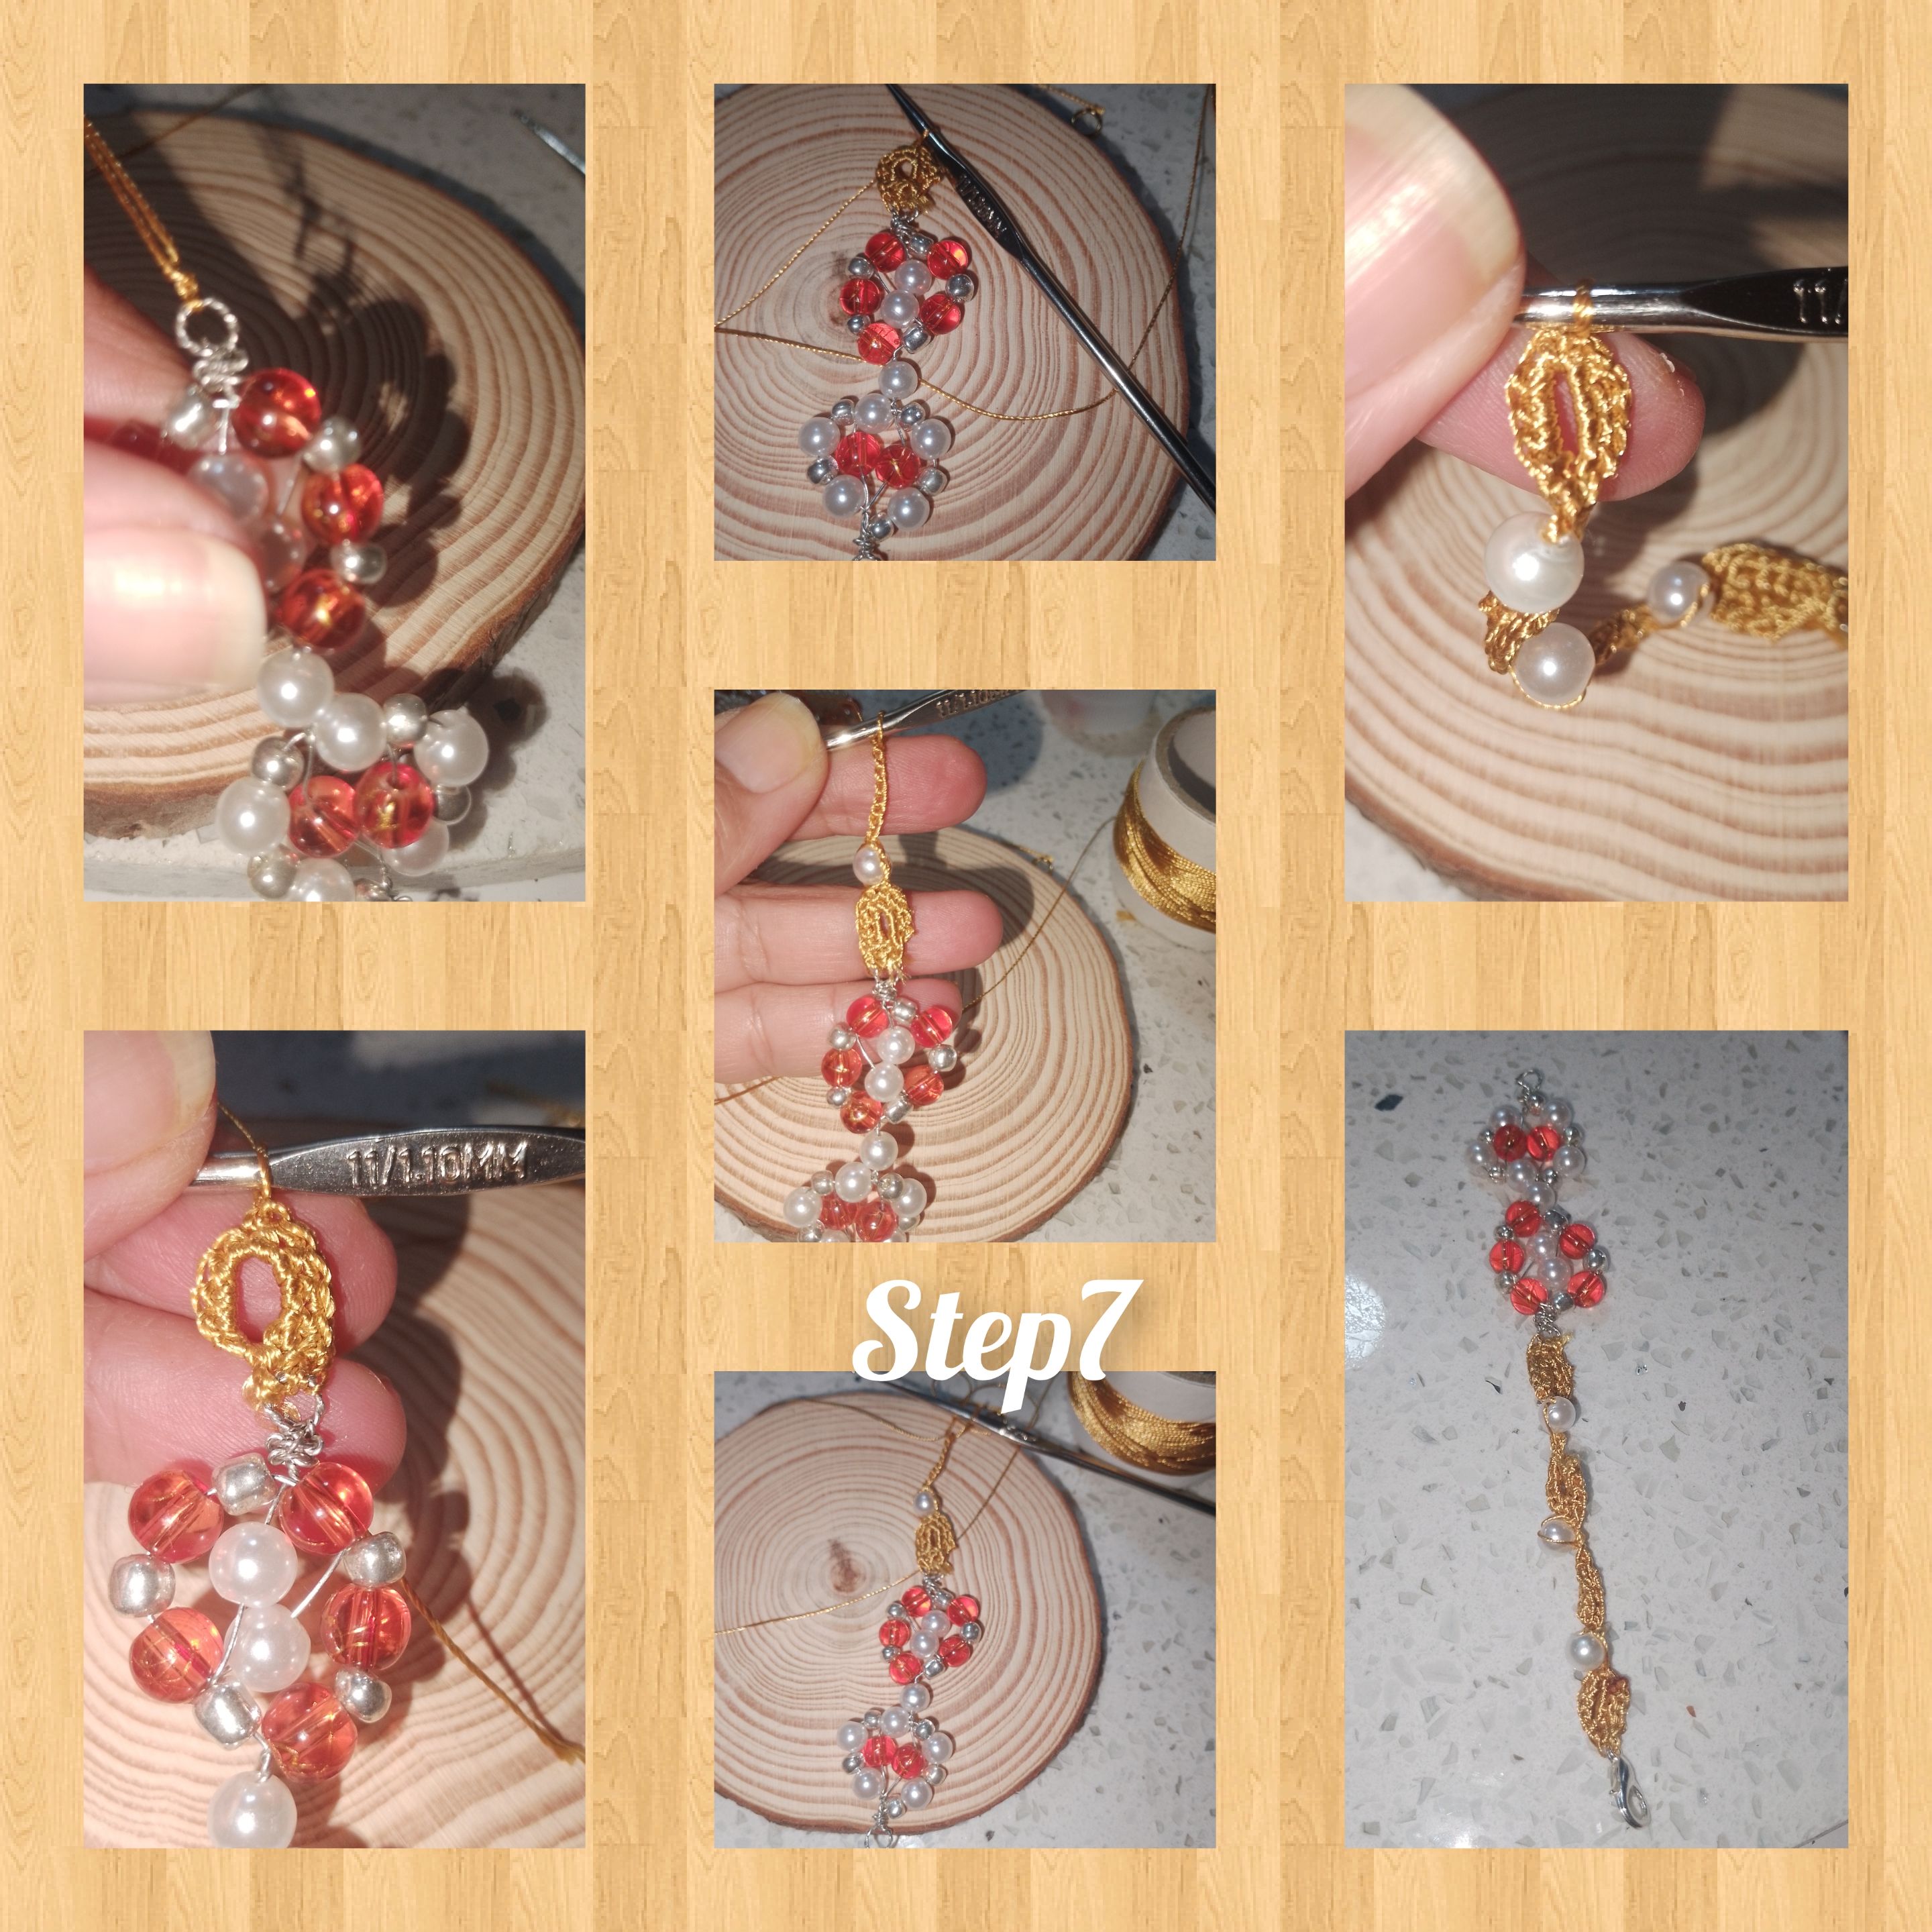
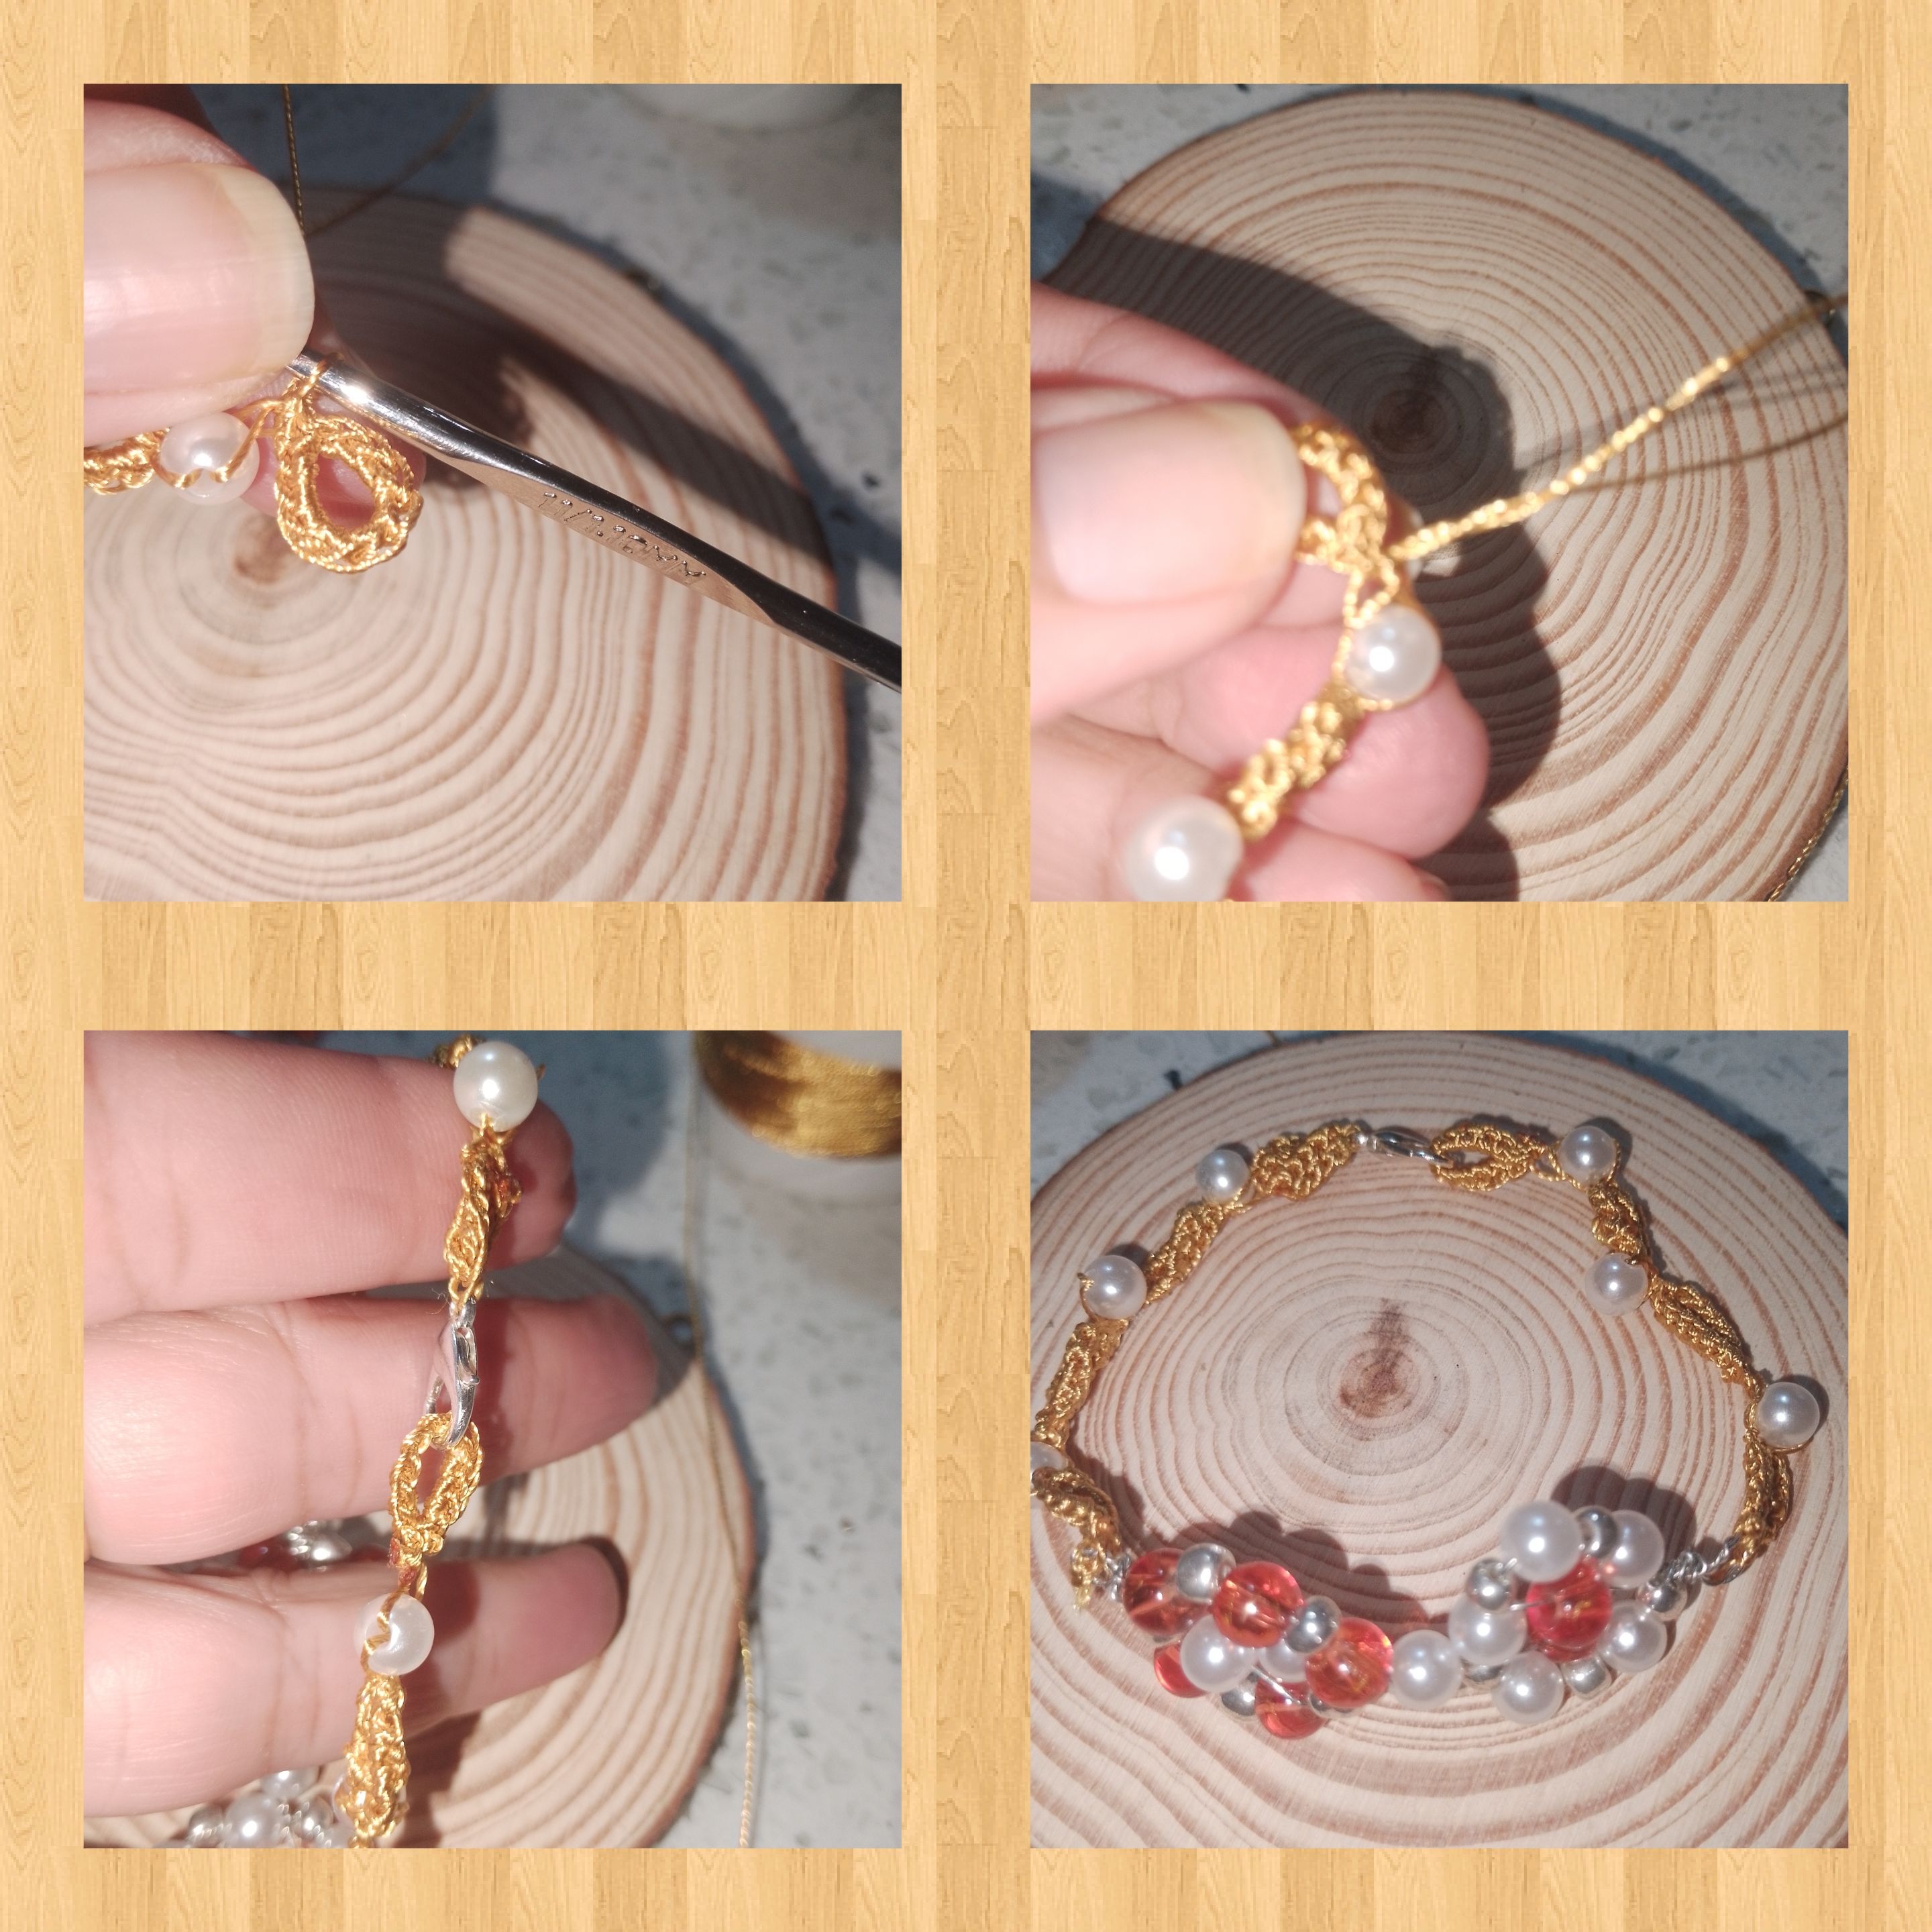
8.) I am ready to finish, and to do so I must do the same as the process in the previous step, except that to conclude, I knit a small circle of six head stitches, filling with ten half stitches, this being where I will ensure the bracelet on the wrist of the hand, with the pin.
. All photos are my property.
. Use language translator.
. Use incollage
Grateful that you came to the end with Migo, I am always pleased to show my latest idea and be able to show you how to make it. It will be until very soon.
(ESP)
Hola a todos, me complace estar una vez más, con ustedes en esta gran comunidad, de creadores, @jewelry, hoy vengo a mostrarles un muy sencillo, paso a paso, de como realizar, un hermoso y práctico ser de Accesorios, para lucir muy linda, ideales para ser usados en cualquier momento y Ocasión, inspirados en ese gran toque de elegancia y distinción que nos da las perlas, cristales y chaquiras, y aplicando además la técnica de crochet y alambrismo. Así que sin más les doy la bienvenida mí blog, sigueme y verás, lo que hice especialmente para ustedes.
Materiales:
. Cuentas blancas perladas.
. Perlas n6 de color blanca.
. Piedras de vidrio, color anaranjadas.
. Chaquiras plateadas.
. Alambre n0.5
. Hilo dorado par tejer
. Aguja par tejer.
. Anzuelo para aretes.
. Pasador para pulsera.
. Pinzas de bisutería
. Tijeras
Pasos:
1.) luego de cortar, cuatro pedazos de alambre, comienzo introduciendo y centrando, cinco cuentas de vidrio separadas por una chaquira plateada, corri las piezas dejandolas centradas y provocando el alambre de quedé en partes iguales. Continuo, colocando en uno de los lados, una nueva chaquira, e introduzco el alambre de el siguiente lado, en forma de equis. Y formando una flor. En el alambre restante, introduzco una cuenta perlada y centro en el medio, dando vueltas con el alambre en el siguiente extremo, dejando a está bien, fijada. Con la pinza, punta redonda y hago un pequeño arito, con el alambre restante doy varias vueltas debajo de el rito.
2.) Tomo el siguiente alambre, y repito el paso anterior, a diferencia de que serán con perlas, separadas por chaquiras. Colocando en el centro,las piedras de vidrio. De esta forma, repito y hago un para de las hecho anterior mente y un par de estas, ya que usaré, para cada aretes, dos.
3.) introduzco en el anzuelo, el hilo y ato muy bien con dos nudos, levanto diez puntos cadenas, dónde voy involucrando a el hilo restante de los nudos, me devuelvo a el punto inicial, y hago un pequeño circulo, luego dentro de el círculo, tejere, 15medios puntos, y me devolveré a la mitad de el círculo, con puntos deslizados. Tejo, 5puntos cadenas, y Tomo un cristal de vidrio.
4.) continuo, tejiendo, 5 puntos cadenas y coloco un primer aplicación de flor, hecha en pasos 1/2, doy dos puntos corridos dentro de el arito de la aplicación, y me devuelvo, tejiendo medios puntos, sobre los puntos cadenas, hasta llegar a el inicio de el tejido, ubicada en el círculo, inicial, tejo dos puntos deslizados,en el lado izquierdo, y levanto, 10, puntos cadenas, coloco un perla de color blanca, tejo 10puntos cadenas, tomo una nueva aplicación involucrandola ,con dos puntos corridos, y me devuelvo, con medios puntos, hasta la parte superior de el arete, corto el hilo. Quedando así listo el primer arete.
 ah
De esta forma, repito y obtengo, la primer pieza de este set de ccesorios.
5.) corto, un alambre, doblo en parte iguales, doy vueltas entre sí, y con ayuda de la pinza hago un arito, con el pedacito de alambre doblado, ahora introduzco en cda lado, dos perlas de color blanca, separadas por una chaquira, coloco una nueva perla y de manera Cruzada paso el siguiente alambre. En una de las puntas de el alambre, coloco una piedra de vidrio anaranjada, y voy a el siguiente extremos, dejándola centrada, doy una vuelta con el alambre, coloco otra piedra, y me voy a el lugar de partida, doy una vuelta para fijar, doy cuatro vueltas entre los alambre parca unirlos, nuevamente y coloco una perla para continuar.
6.) Repito el paso anterior, pero en esta oportunidad, usaré las piedras de vidrios y en el centro, colocaré perlas blancas, hecho esto, doy vueltas entre sí a el lambre y hago un nuevo arito.
7.) Ato muy bien el hilo, para tejer en uno de los lados de las flores, tejo, diez puntos cadenas, me devuelvo a el primer punto, hago un a circulo de cadenas y dentro de el tejo 15, medios puntos, luego de ello, soy vuelta a el tejido, y bajo con punto delicado hasta el centro de el círculos, tomo una perla y la involucró, repito, hasta colocar un total de tres perlas y tejer cinco círculos, la culminar este primer lado de la pulsera, tejo varios puntos corridos para asegurar el pasador.
8.) me dispongo a terminar, y para ello debo hacer tal cual el proceso de el paso anterior, solo que para concluir, tejo un pequeño circulo de seis puntos cabezas, rellenando con diez medios puntos, siendo este, dónde valla a asegurar la pulsera en la muñeca de la mano, con el pasador.
. Todas las fotos son de mí propiedad.
. Use traductor lenguaje.
. Use incollage
Agradecida hayas llegado con Migo hasta el final, siempre me complace, mostrar mí más reciente idea y poder mostrarles, como realizarla. Será hasta muy pronto.