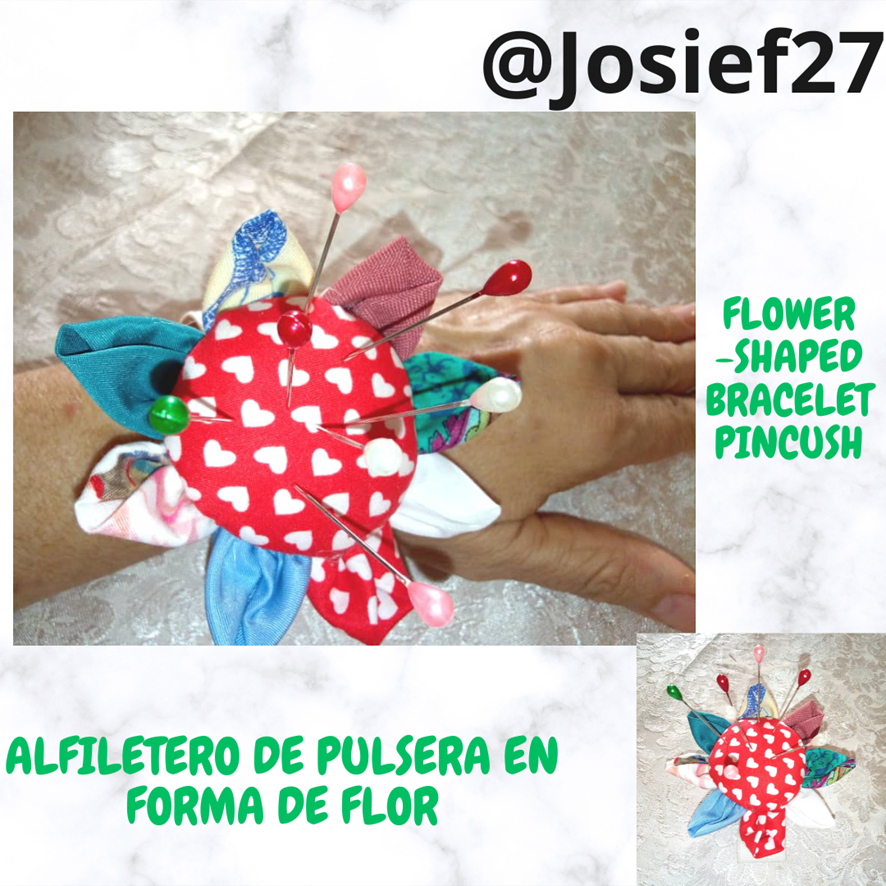

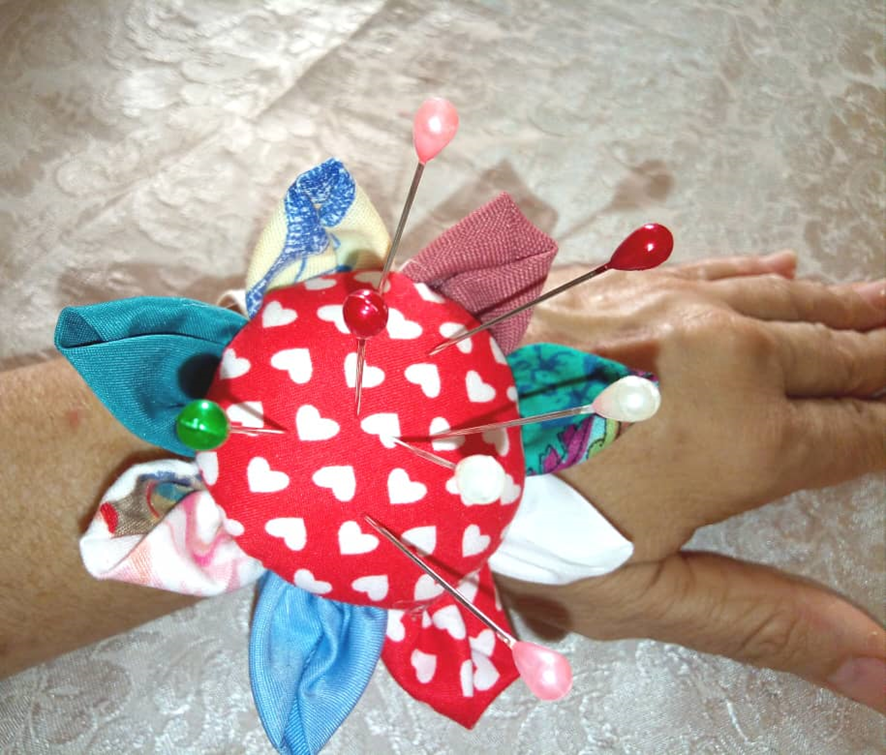
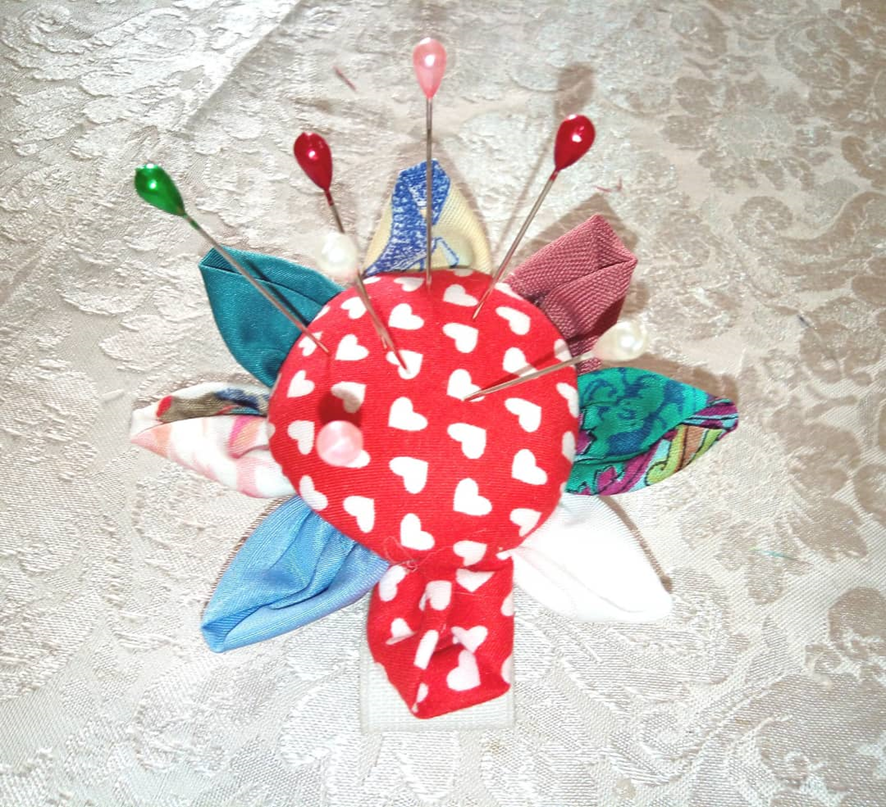
Hola apreciada comunidad creativa espero estén bien, hoy les quiero compartir este útil y practico alfiletero de pulsera en forma de flor hecho con pequeños retazos de tela que siempre tenemos en casa que nos van sobrando.
Es de gran utilidad a la hora de realizar cualquier trabajo manual o de costura donde utilicemos alfileres o agujas de coser para tenerlos a la mano de manera cómoda.
Hello dear creative community I hope you are well, today I want to share this useful and practical flower-shaped bracelet pincushion made with small scraps of fabric that we always have at home that we have left over.
It is very useful when doing any manual work or sewing where we use pins or sewing needles to have them at hand in a comfortable way.
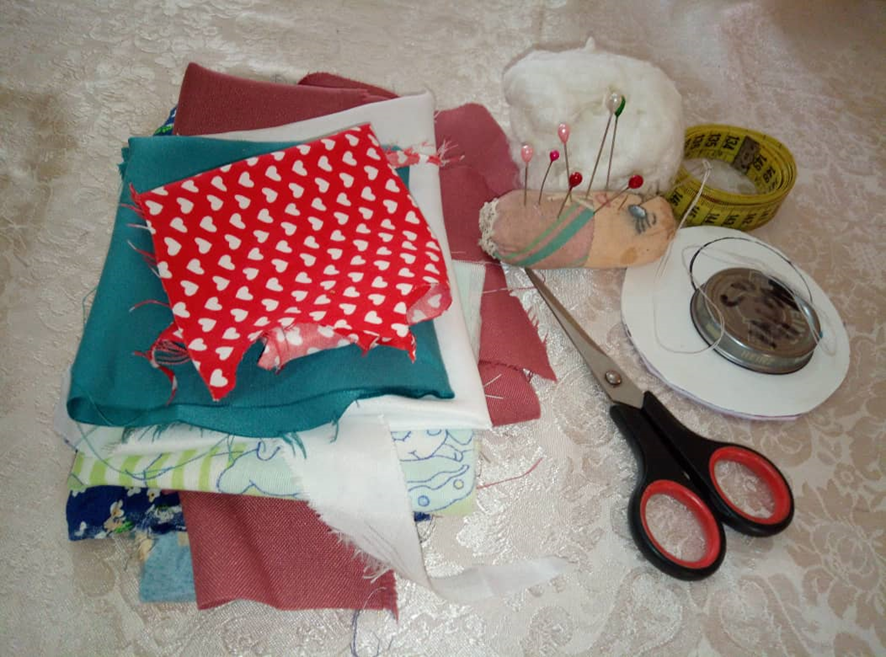
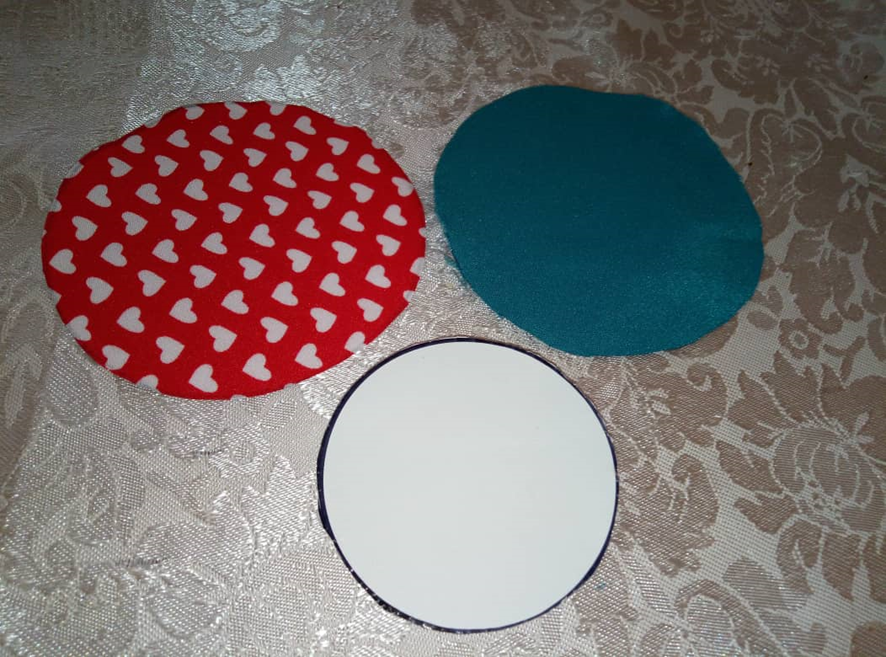
MATERIALES
Pequeños retazos de tela
Tapa de 4.5 cmts de diámetro
Redondo de cartón de 4.5 cmts
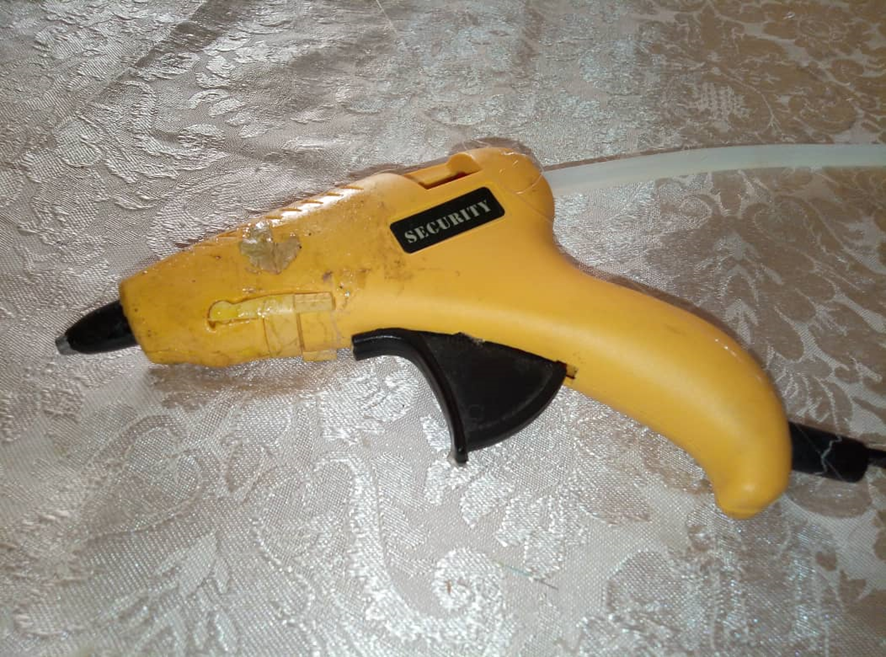
Pistola de silicón
Barra de silicón
Tijeras
Relleno para cojín
Cinta métrica
>MATERIALS
Small fabric scraps
4.5 cm diameter lid.
Cardboard round of 4.5 cmts.
Silicone gun
Silicone rod
Scissors
Padding for cushion
Measuring tape
PASO A PASO
>STEP BY STEP
-Cortamos dos círculos de 10 cmts de circunferencia
-Recortamos un círculo de cartón del tamaño de la tapa.
-Cut two circles of 10 cm in circumference.
-Cut out a cardboard circle the size of the cover.
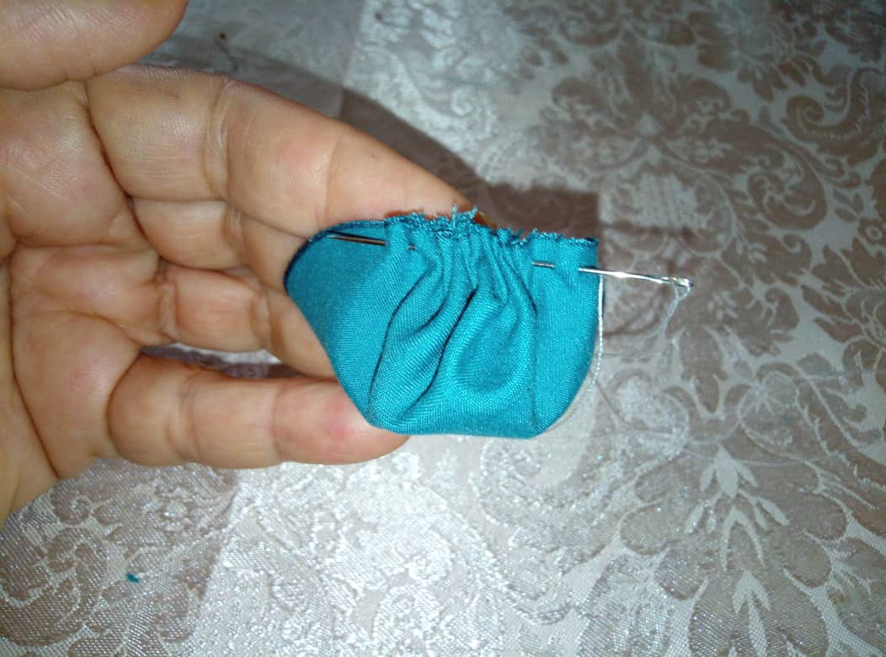
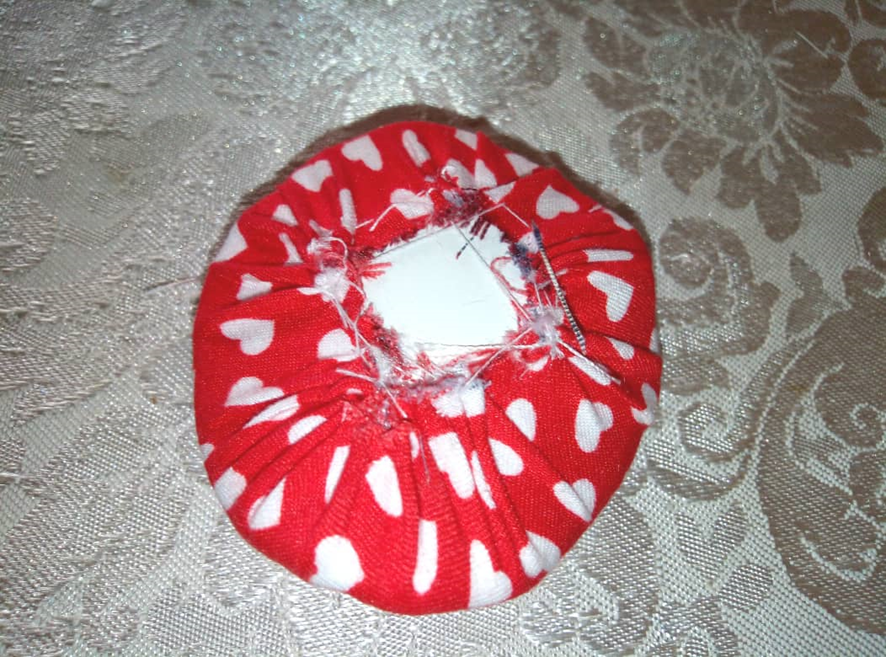
-Enhebramos una aguja con hilo, Pasamos un pespunte de puntadas cortas a medio cmts desde el borde de la tela por el círculo que forrara la tapa, la corte de color verde para simular el cali de la flor.
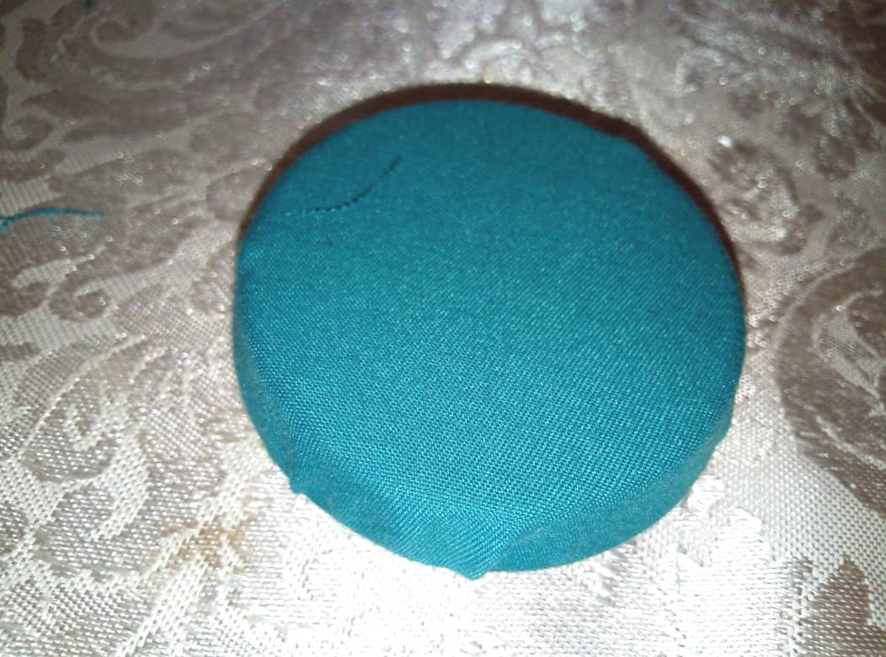
-Arruchamos con cuidado y metemos la tapita dentro del saquito, Ajustamos y aseguramos bien la costura.
-Thread a needle with thread, pass a short stitch backstitch half a cm from the edge of the fabric through the circle that will line the cover, cut it in green to simulate the cali of the flower.
-We carefully gather and put the cover inside the bag, adjust and secure the stitching well.

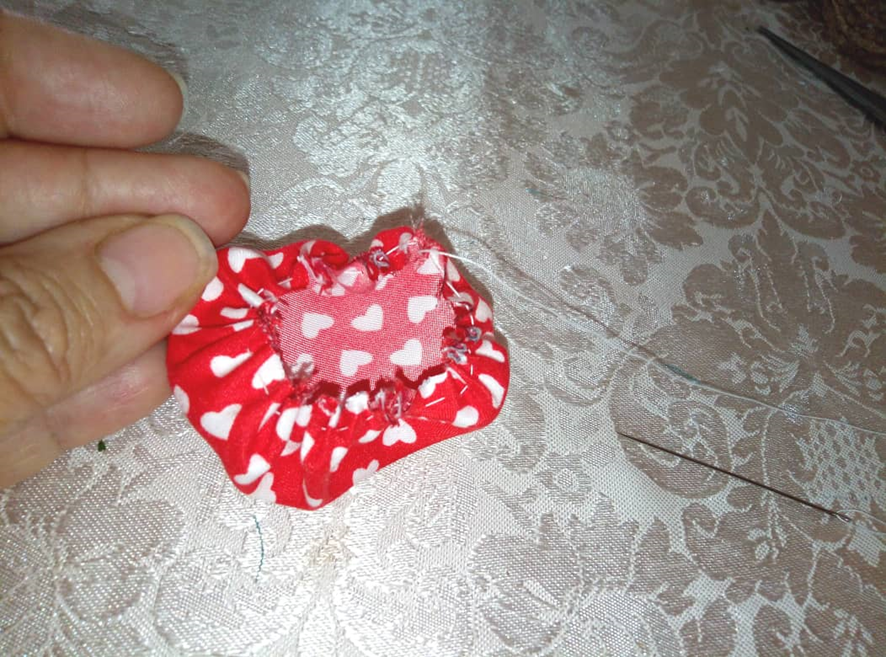
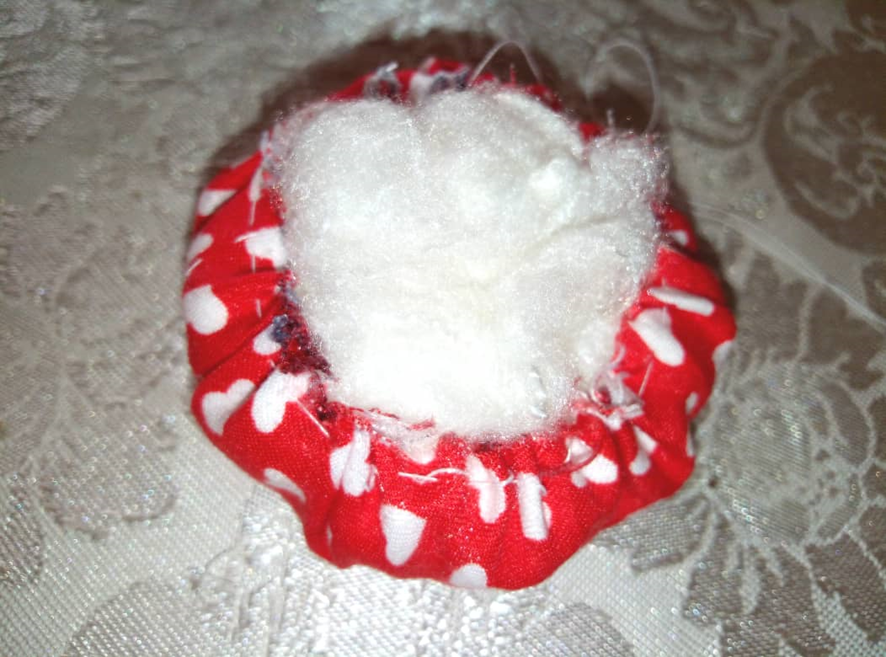
-Hacemos el mismo procedimiento con el círculo que será el centro de la flor, pasamos el pespunte, arruchamos, rellenamos con relleno, introducimos el círculo de cartón, jalamos el hilo con cuidado hasta ajustar y asegurar.
-We do the same procedure with the circle that will be the center of the flower, we stitch the stitch, we gather, we fill with stuffing, we introduce the cardboard circle, we pull the thread carefully until it is tight and secure.
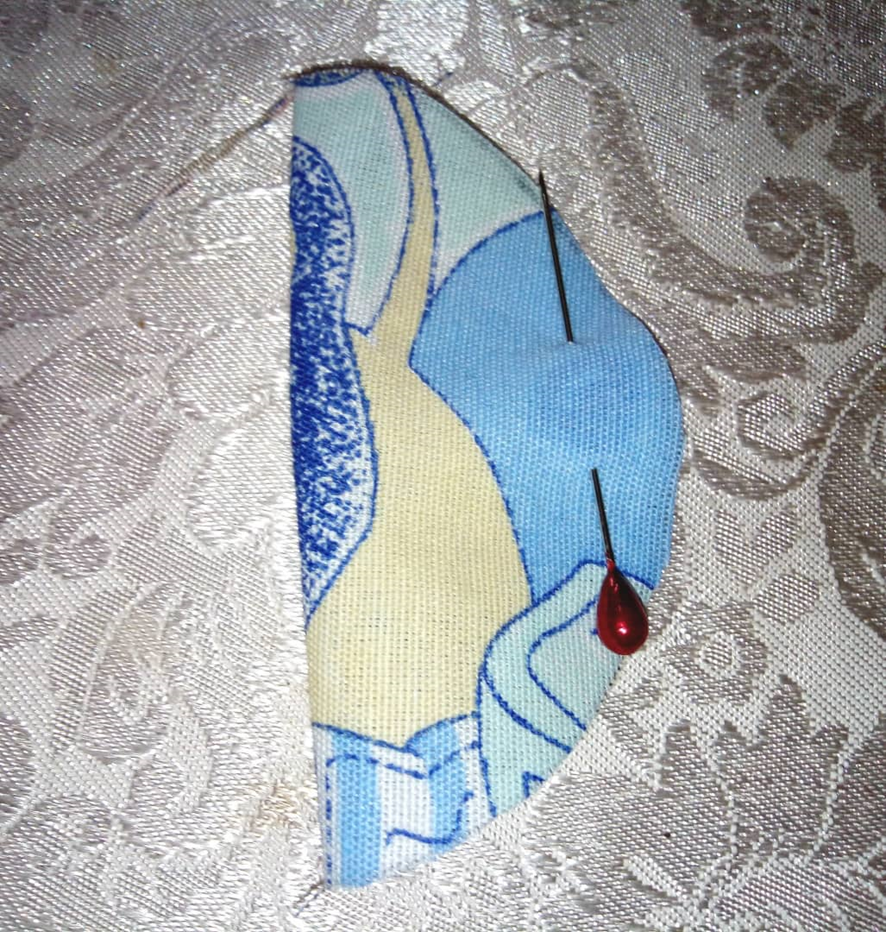
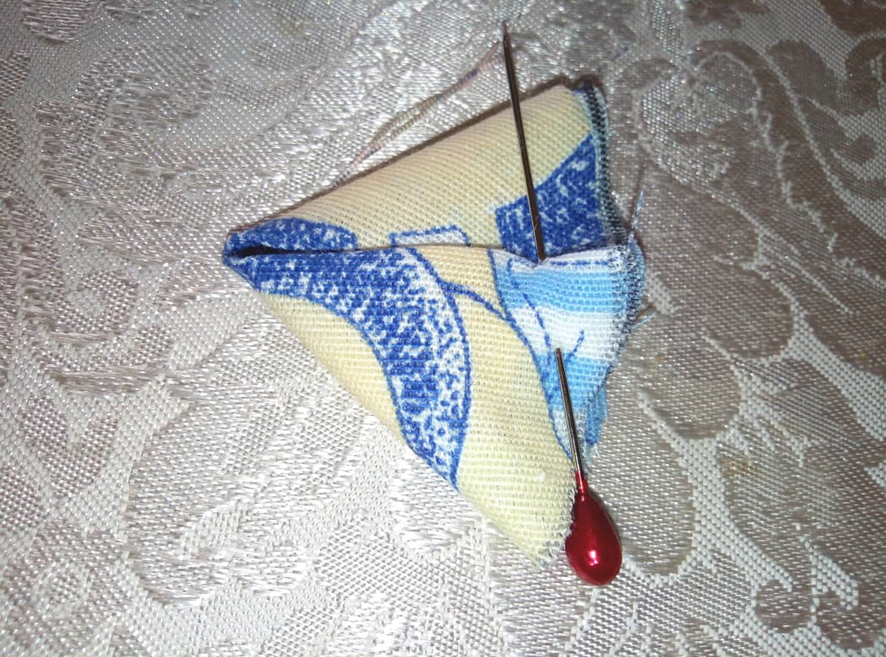
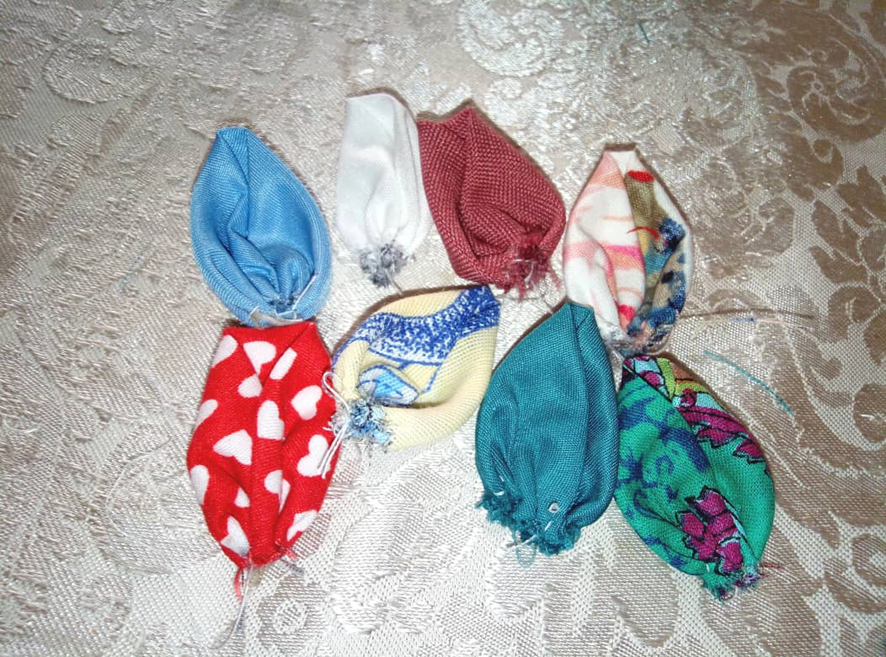
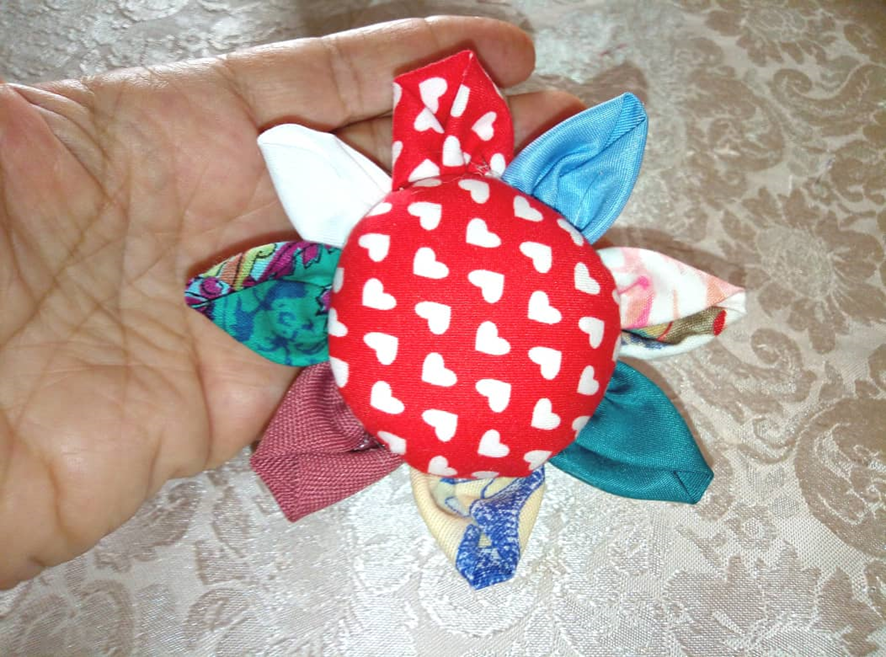
-Cortamos 8 círculos más pequeños de 8 cms que serán los pétalos de la flor. Doble cada círculo a la mitad, luego doble cada extremo hacia el centro de la media luna, cerramos los triángulos por la parte más ancha con un pespunte, arruchamos y aseguramos la costura.
-Cut 8 smaller circles of 8 cm that will be the petals of the flower. Fold each circle in half, then fold each end towards the center of the crescent, close the triangles at the widest part with a backstitch, gather and secure the seam.
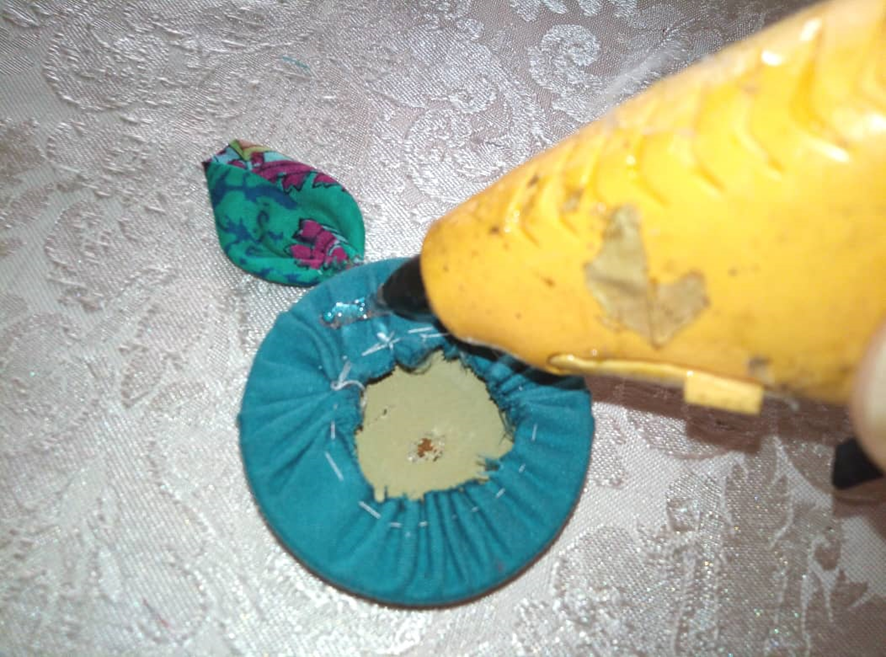
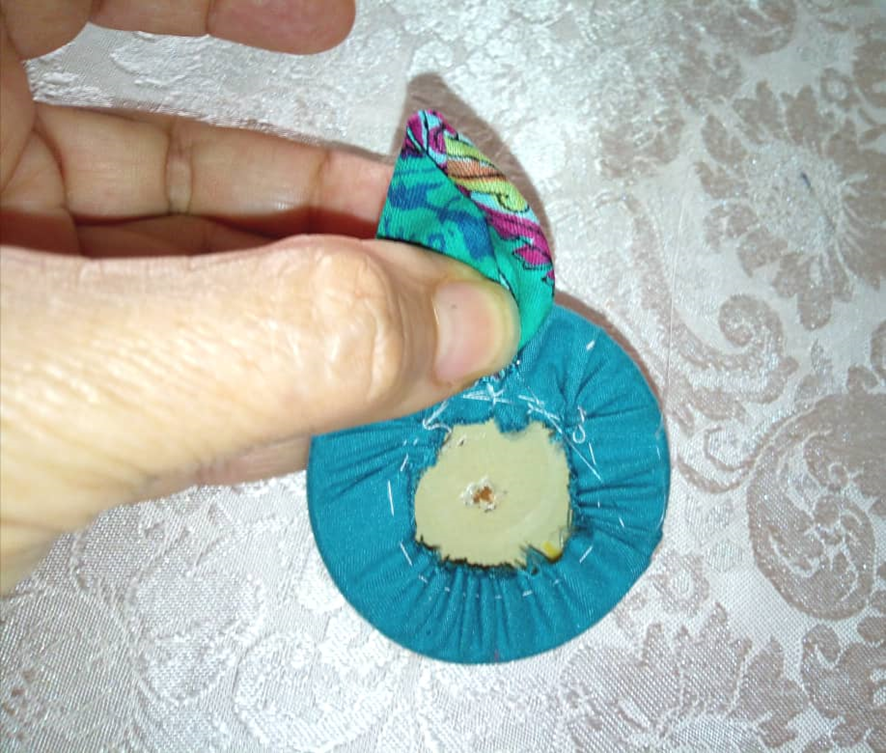
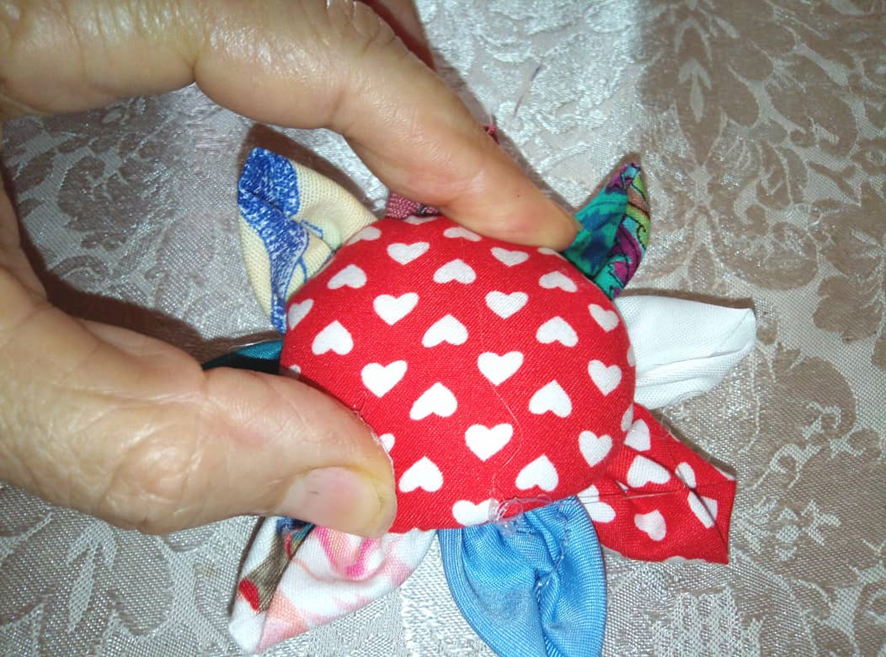
-Tomamos la base de la flor por la parte de abajo y pegamos cada pétalo con silicón caliente.
-We take the base of the flower from the bottom and glue each petal with hot silicone.
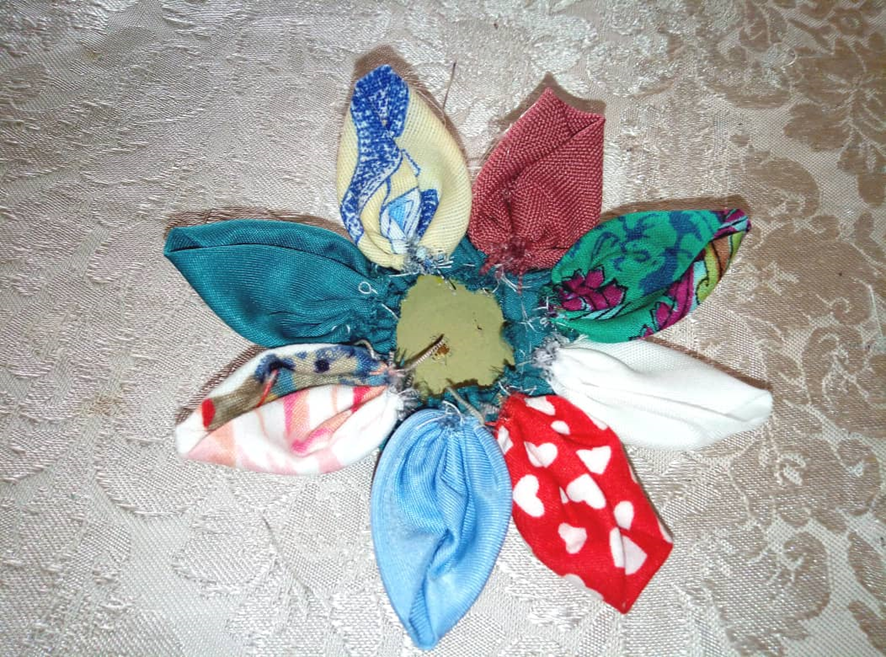
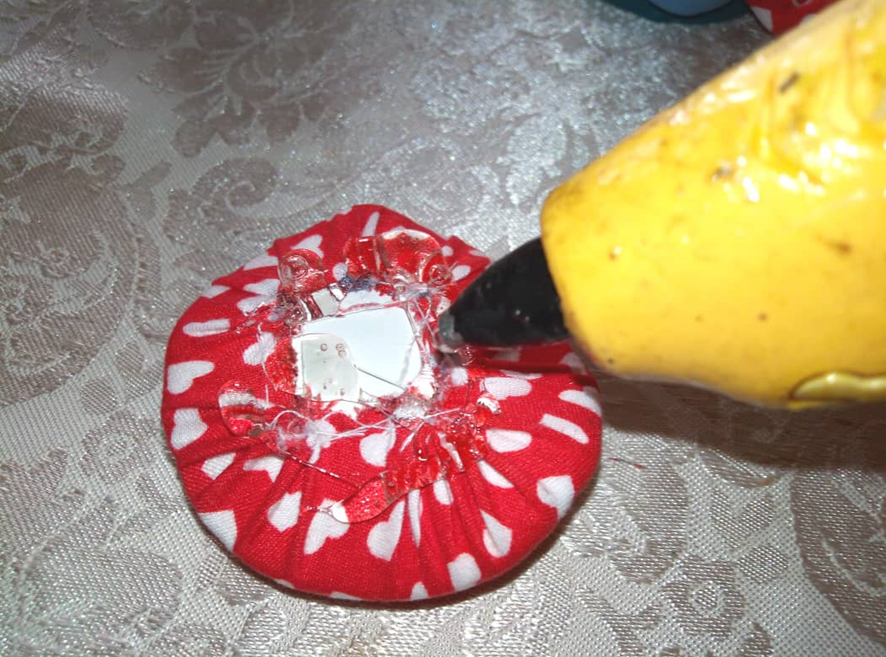
-Le puse silicón caliente al centro de la flor donde van los alfileres y agujas, pegue en el centro donde están los pétalos.
-I put hot silicone in the center of the flower where the pins and needles go, glue in the center where the petals are.
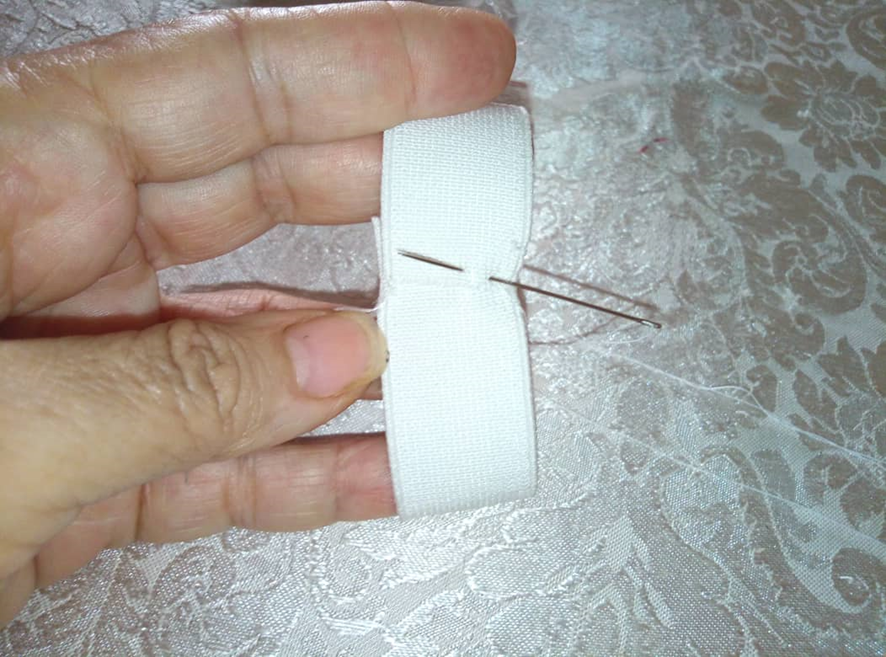
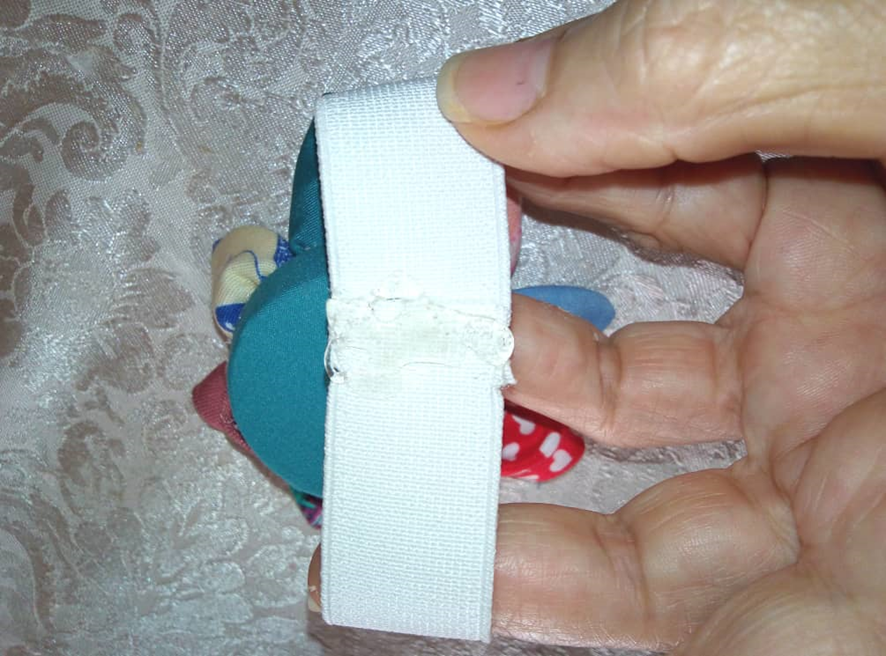
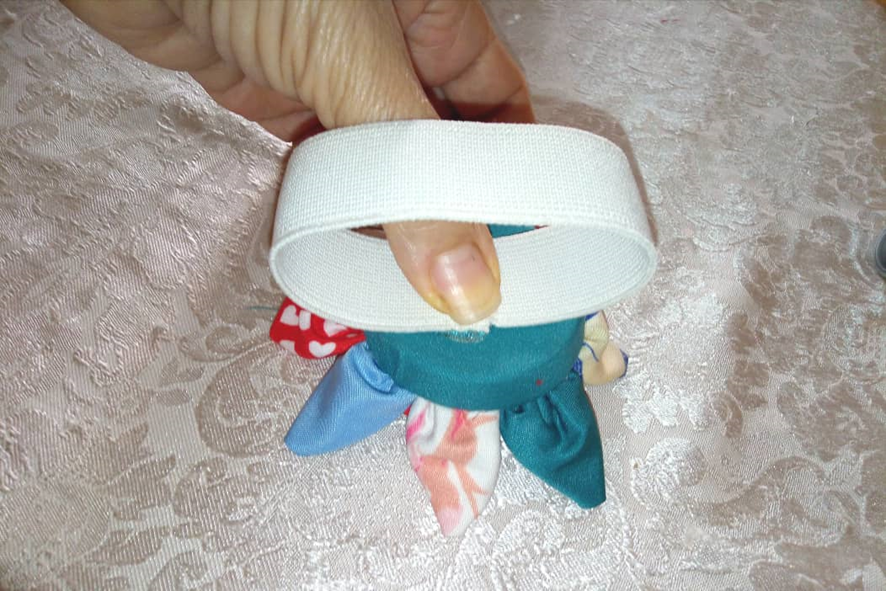
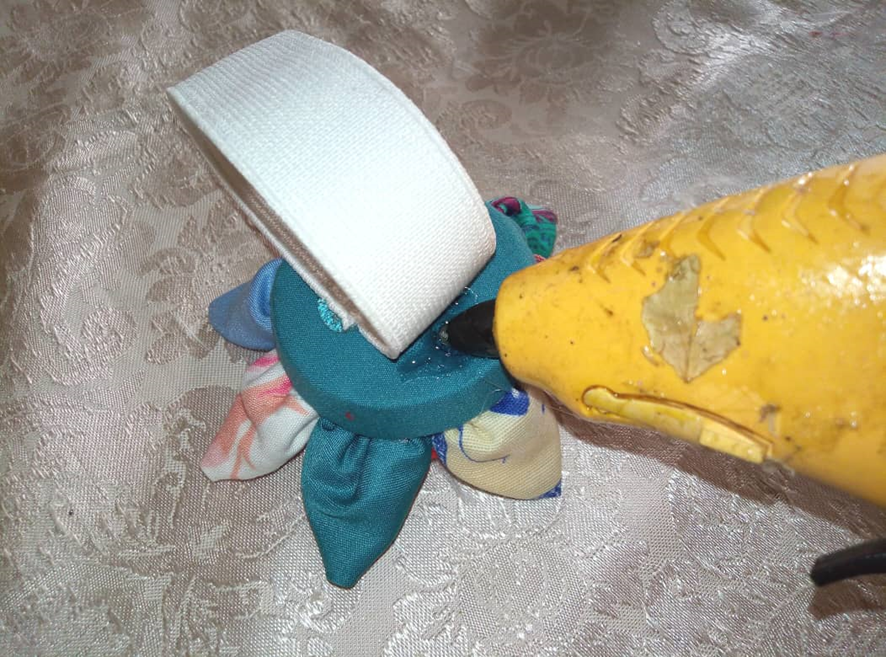
-Medí la elástica en mi muñeca, cerré con unas puntadas con aguja e hilo, pegue con silicón a la base de la flor asegurando bien por los bordes para que quede bien pegado.
-Measure the elastic on my wrist, close with a few stitches with needle and thread, glue with silicone to the base of the flower, securing the edges well so that it is well glued.
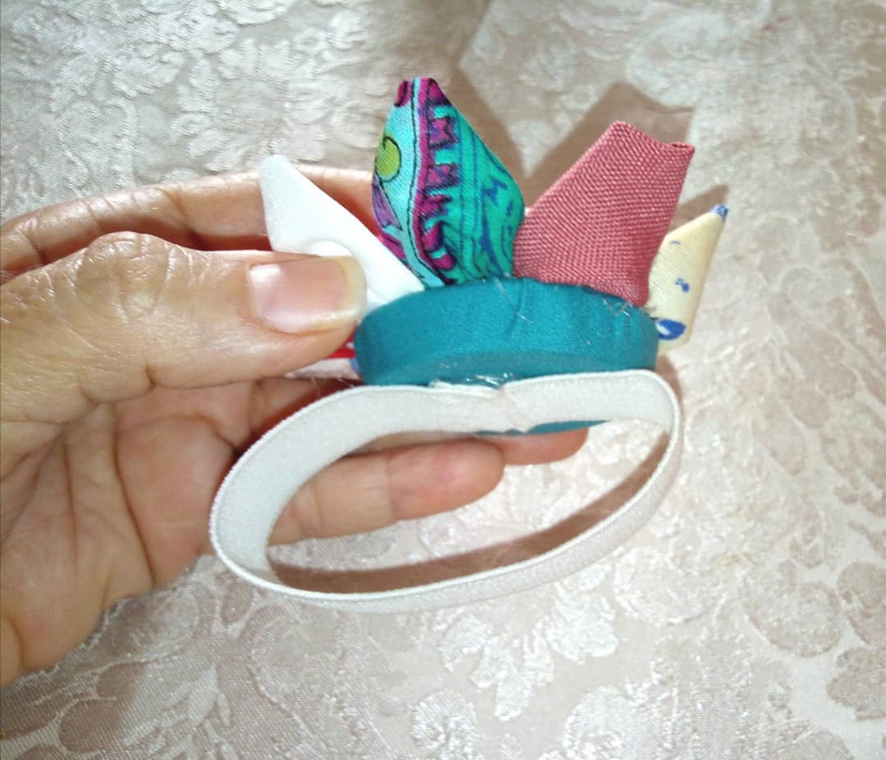
Ya está listo este hermoso trabajo manual, espero se animen a hacerlo, seguimos haciendo cosas hermosas con materiales de provecho.
Now this beautiful handwork is ready, I hope you are encouraged to do it, we continue making beautiful things with useful materials.
Gracias por acompañarme, leer, comentar y votar, hasta una próxima publicación.
Las fotos son de mi autoría tomadas con mi tlf. Honor 7S, editada en Canva, traducido con Deepl.
Thank you for joining me, reading, commenting and voting, until the next publication.
The photos are of my authorship taken with my Honor 7S phone, edited in Canva, translated with Deepl.