English
Preparing a delicious pineapple to present to guests
Hello dear friends of the Foodies Bee Hive community! This time I bring you something that I learned to do in my new job and it is simply to cut pineapple very nicely.
Although this may seem complex in the pictures (it depends on who sees it, because at first I found it a bit complicated to do), in truth it ends up being a simple task, because once you learn the technique, well, that's it.
You just have to be careful with the knife, and make the cuts very slowly, especially when we go around the edge of the pineapple.
In addition, having a sharp knife will be key to cut the pineapple more quickly and neatly.
Español
Preparando una deliciosa piña para presentar a los huéspedes
Hola queridos amigos de la comunidad de Foodies Bee Hive! En esta ocasión les acerco algo que aprendí a hacer en mi nuevo trabajo y es sencillamente cortar bien bonito el ananá.
Aunque esto puede parecer complejo en las imágenes (depende de quién lo vea, pues a mí al principio me pareció algo complicado de hacer), en verdad termina siendo una tarea simple, ya que una vez aprendida la técnica, pues listo.
Solo hay que tener cuidado con el cuchillo, y hacer los cortes muy lentamente, en especial cuando vamos bordeando la piña.
Además, contar con un cuchillo bien afilado, será clave para cortar el ananá de manera más rápida y prolija.
Steps and more tips
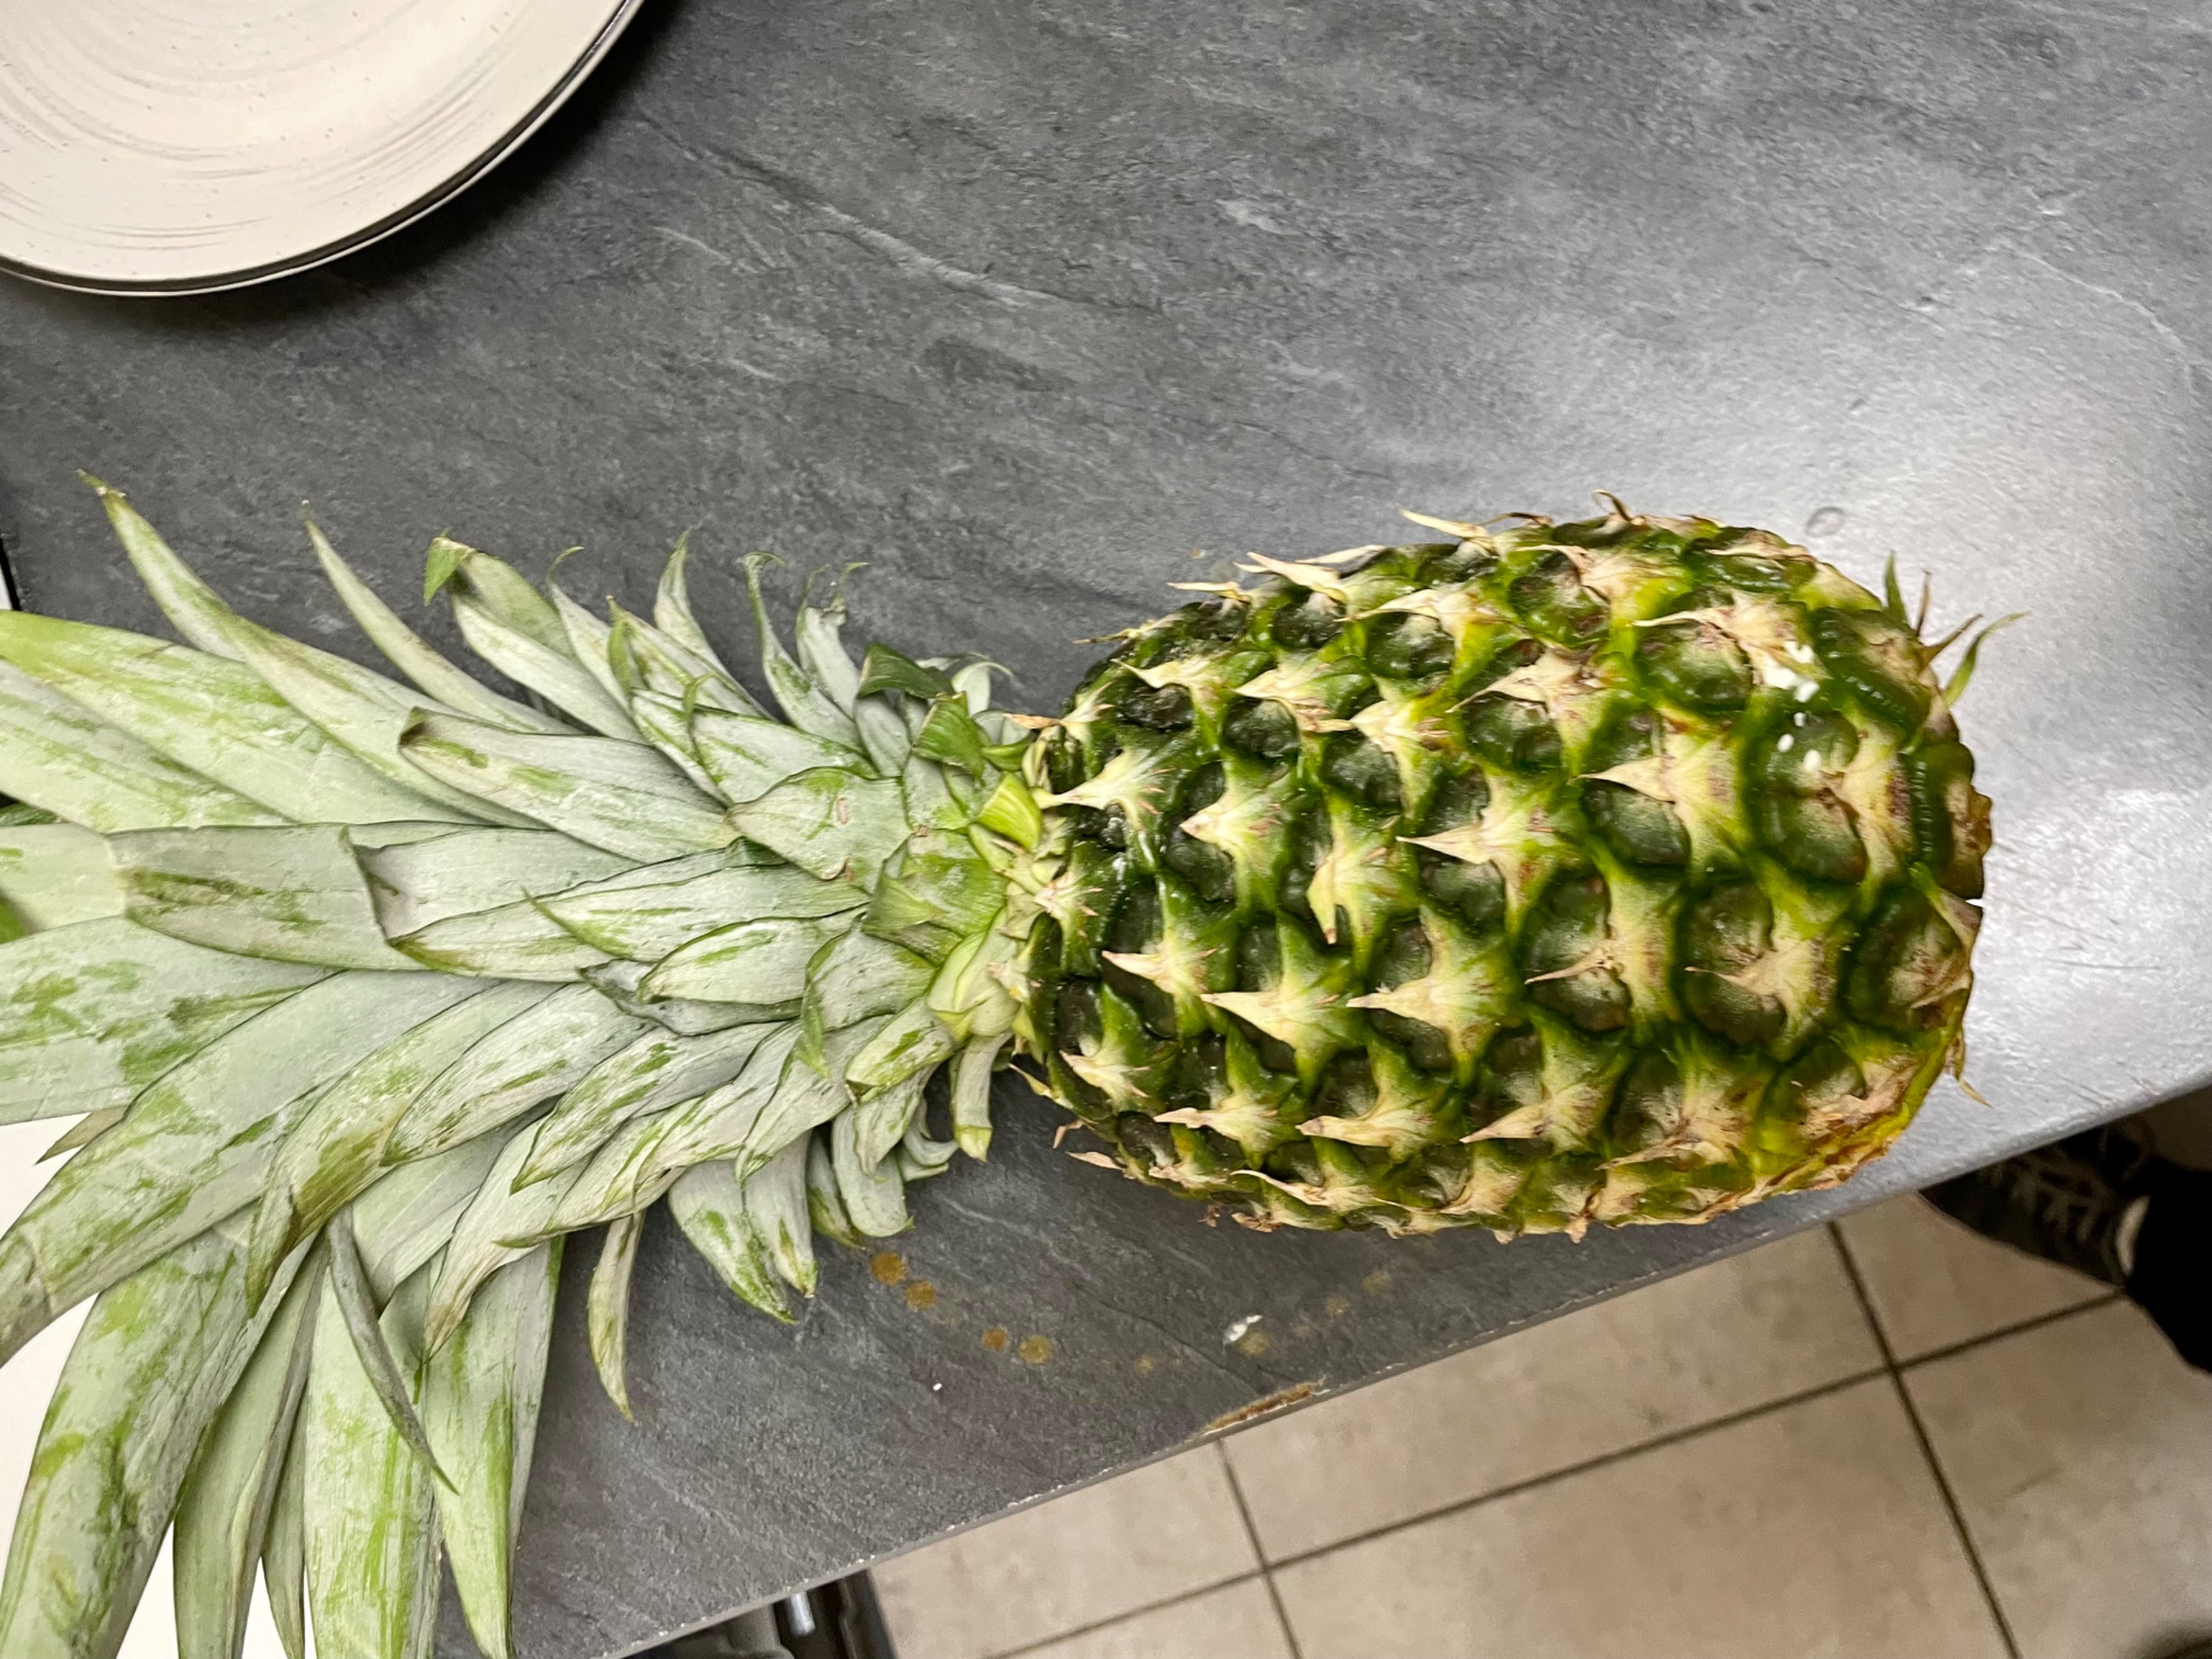
It is important that the pineapple is ripe, as this makes it easier to cut, gives a really nice visual image and the flavor is delicious. We know the pineapple is ripe when the color of the body is light to dark brown and the leaves that come up remain green. On the contrary, if the whole pineapple has a greenish tone, it means that it has lacked ripeness. In addition, we can try to press the pineapple and see if it has some flexibility, it does not have to be too soft or too hard.
As you can see, my pineapple was not very ripe.
Pasos y más consejos
Es importante que la piña esté madura, pues esto facilita los cortes, brinda una imagen visual realmente bonita y el sabor es delicioso. Sabemos que la piña está madura cuando el color del cuerpo es marrón entre claro y oscuro y las hojas que salen hacia arriba se mantienen verdes. Por el contrario, si todo el ananá tiene un tono verdoso, significa que le ha faltado madurar. Además, podemos intentar presionar el ananá y ver si tiene cierta flexibilidad, no tiene que estar demasiado blando ni demasiado duro.
Como pueden ver, mi ananá no estaba muy maduro, je.


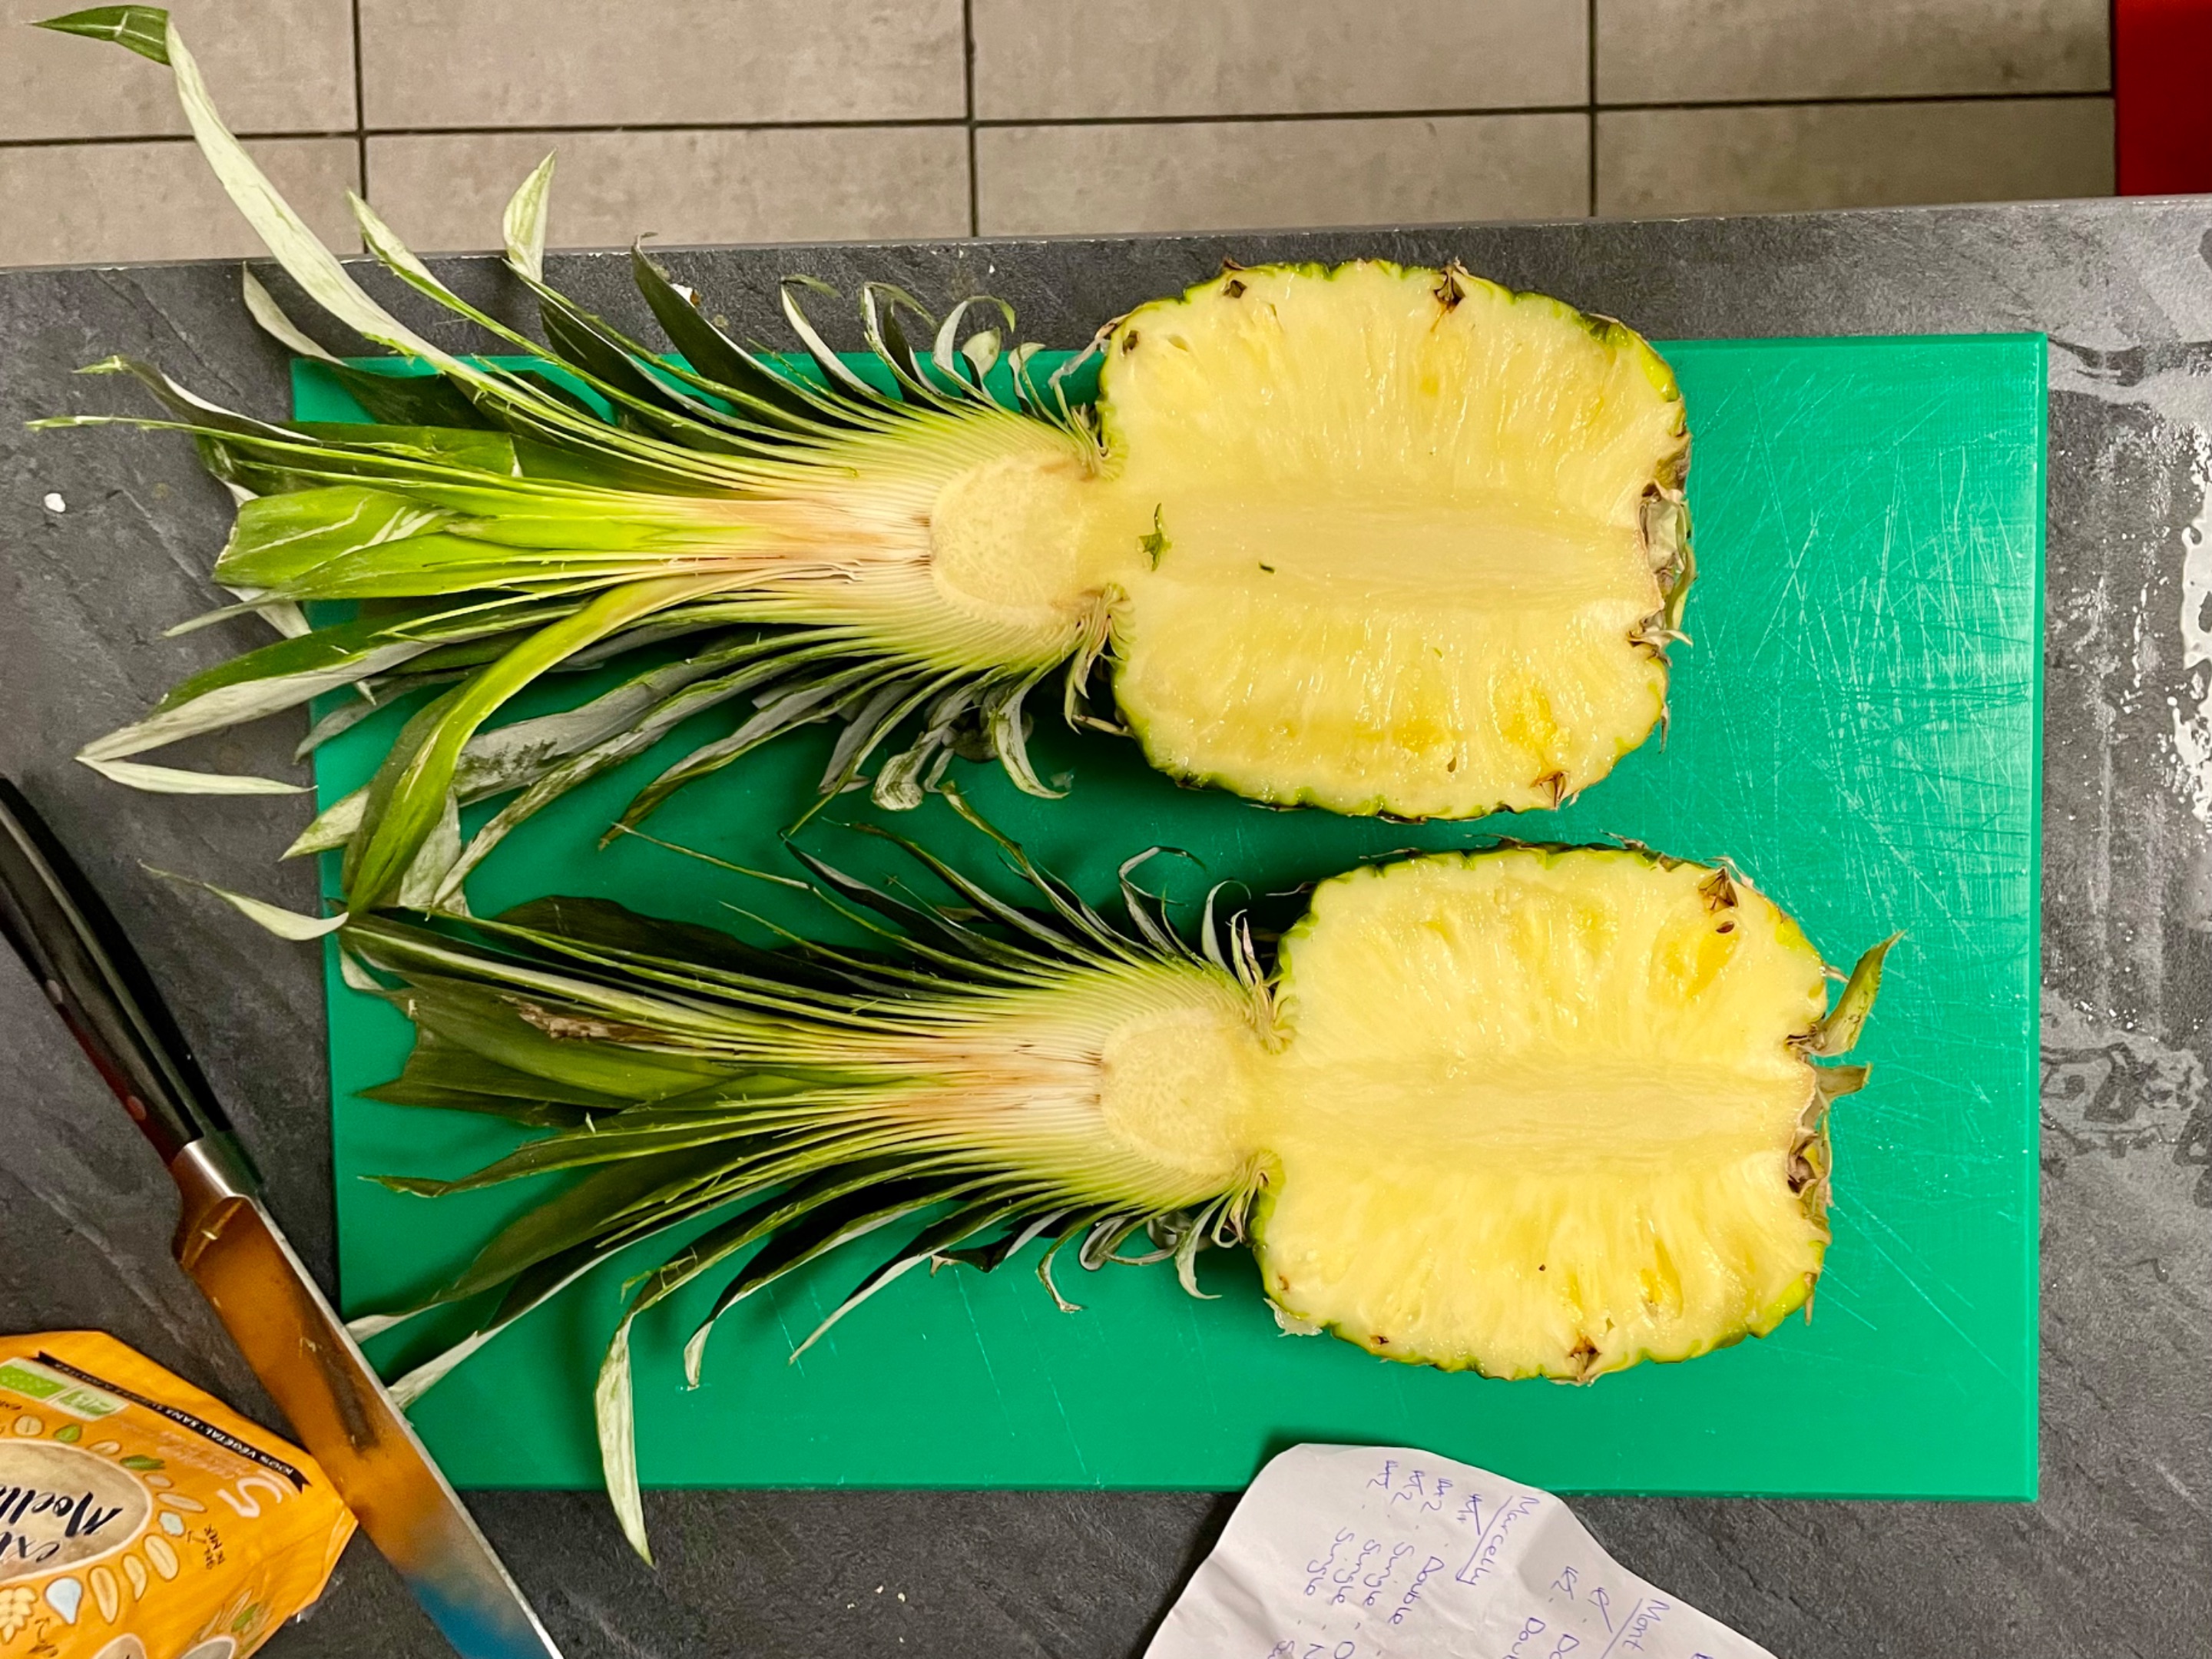
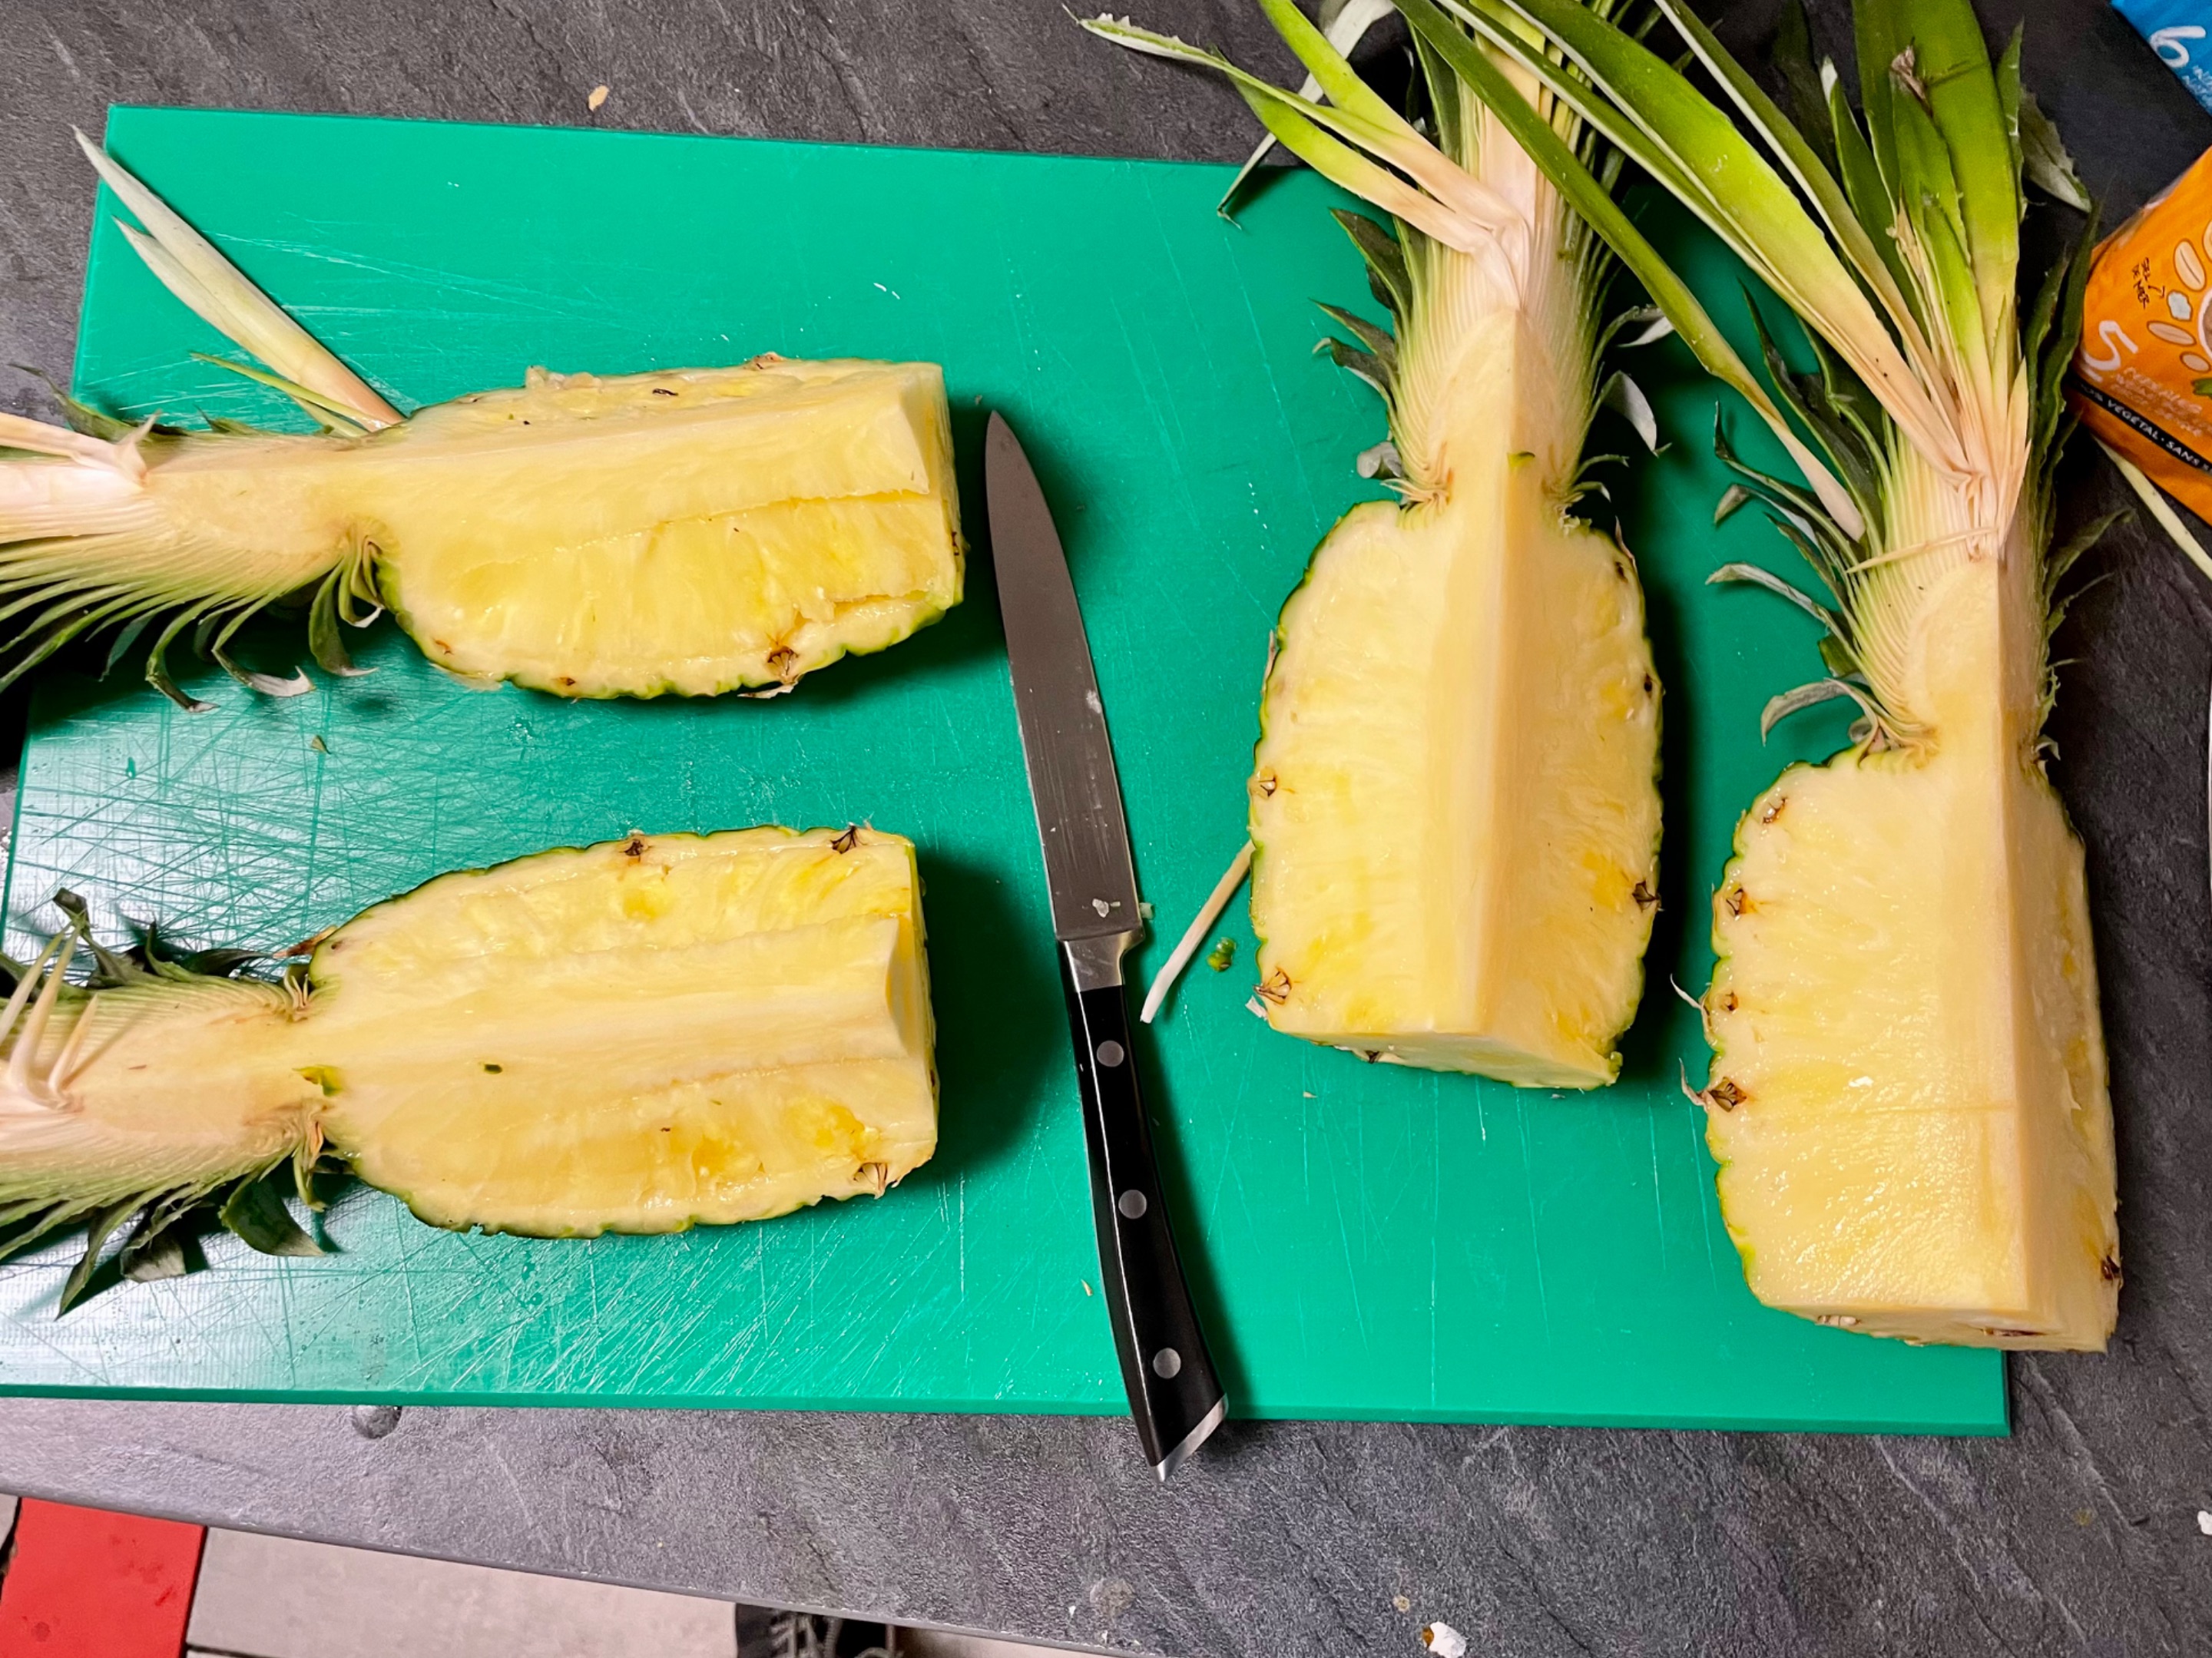
1 - Cut the pineapple into 2 pieces.
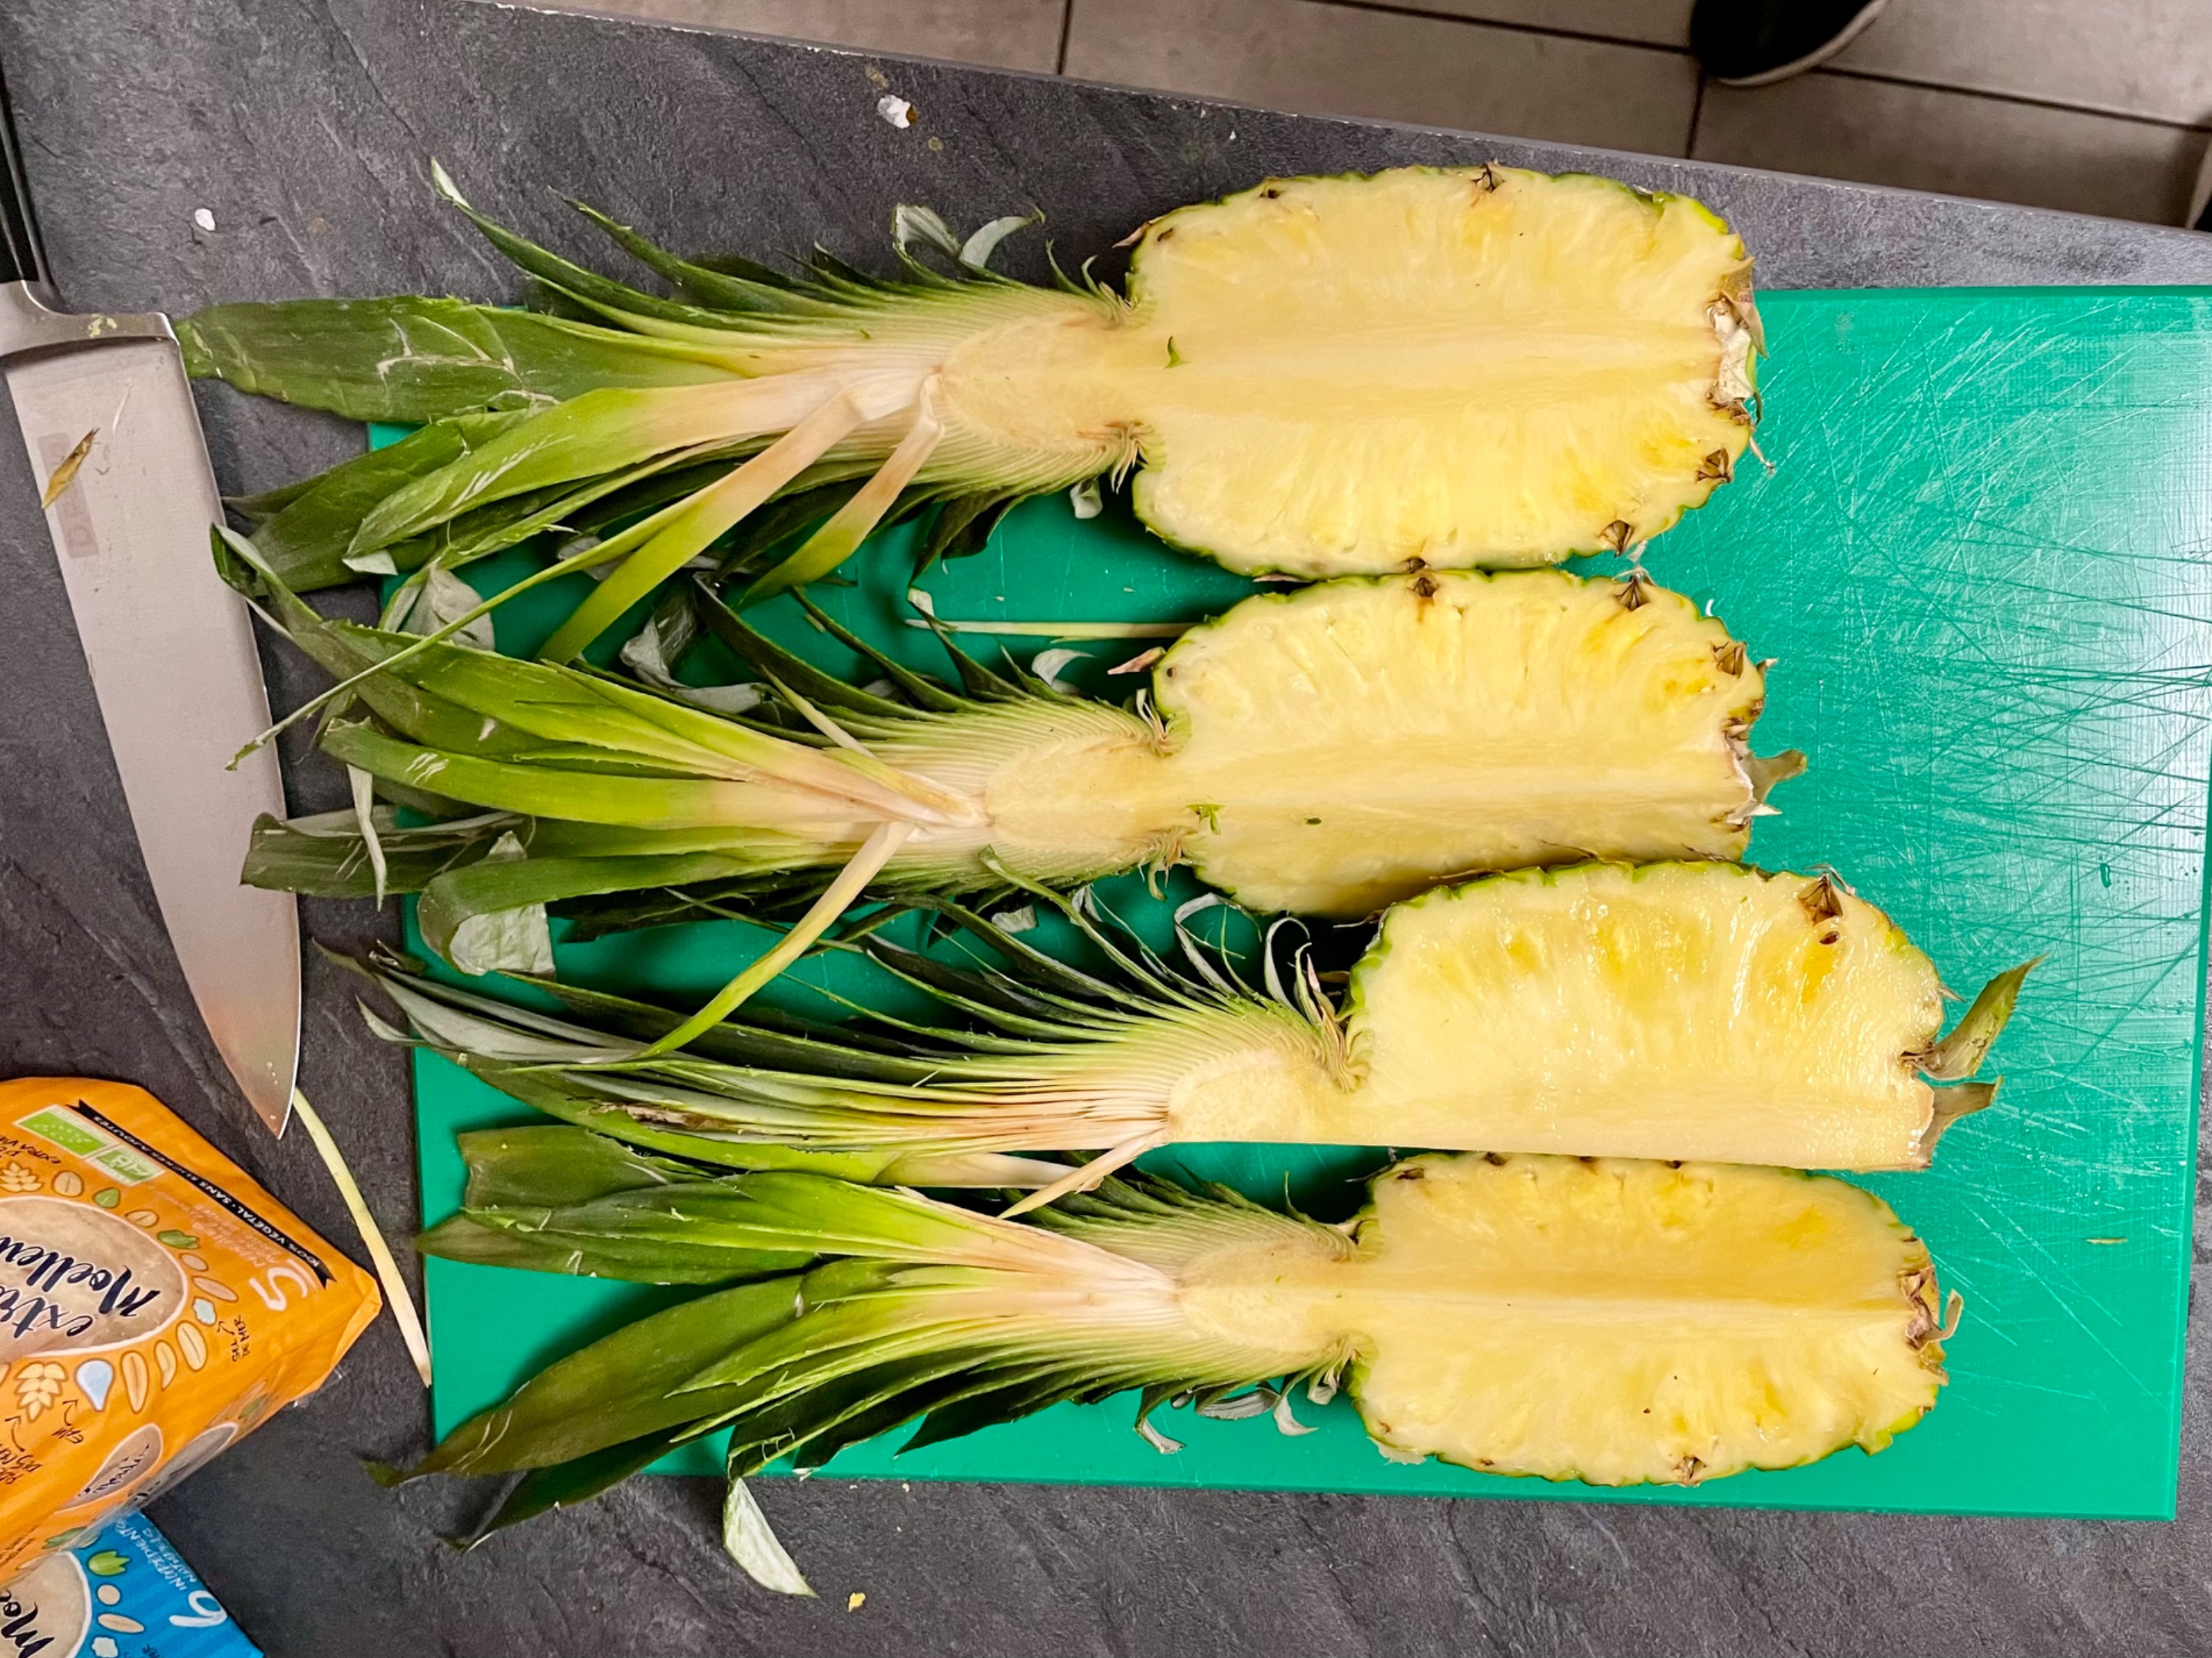
2 - You can cut the pineapple into 2 more parts (4 quarters will remain) or you can remove the bottom part of the pineapple and then go for the quarters.
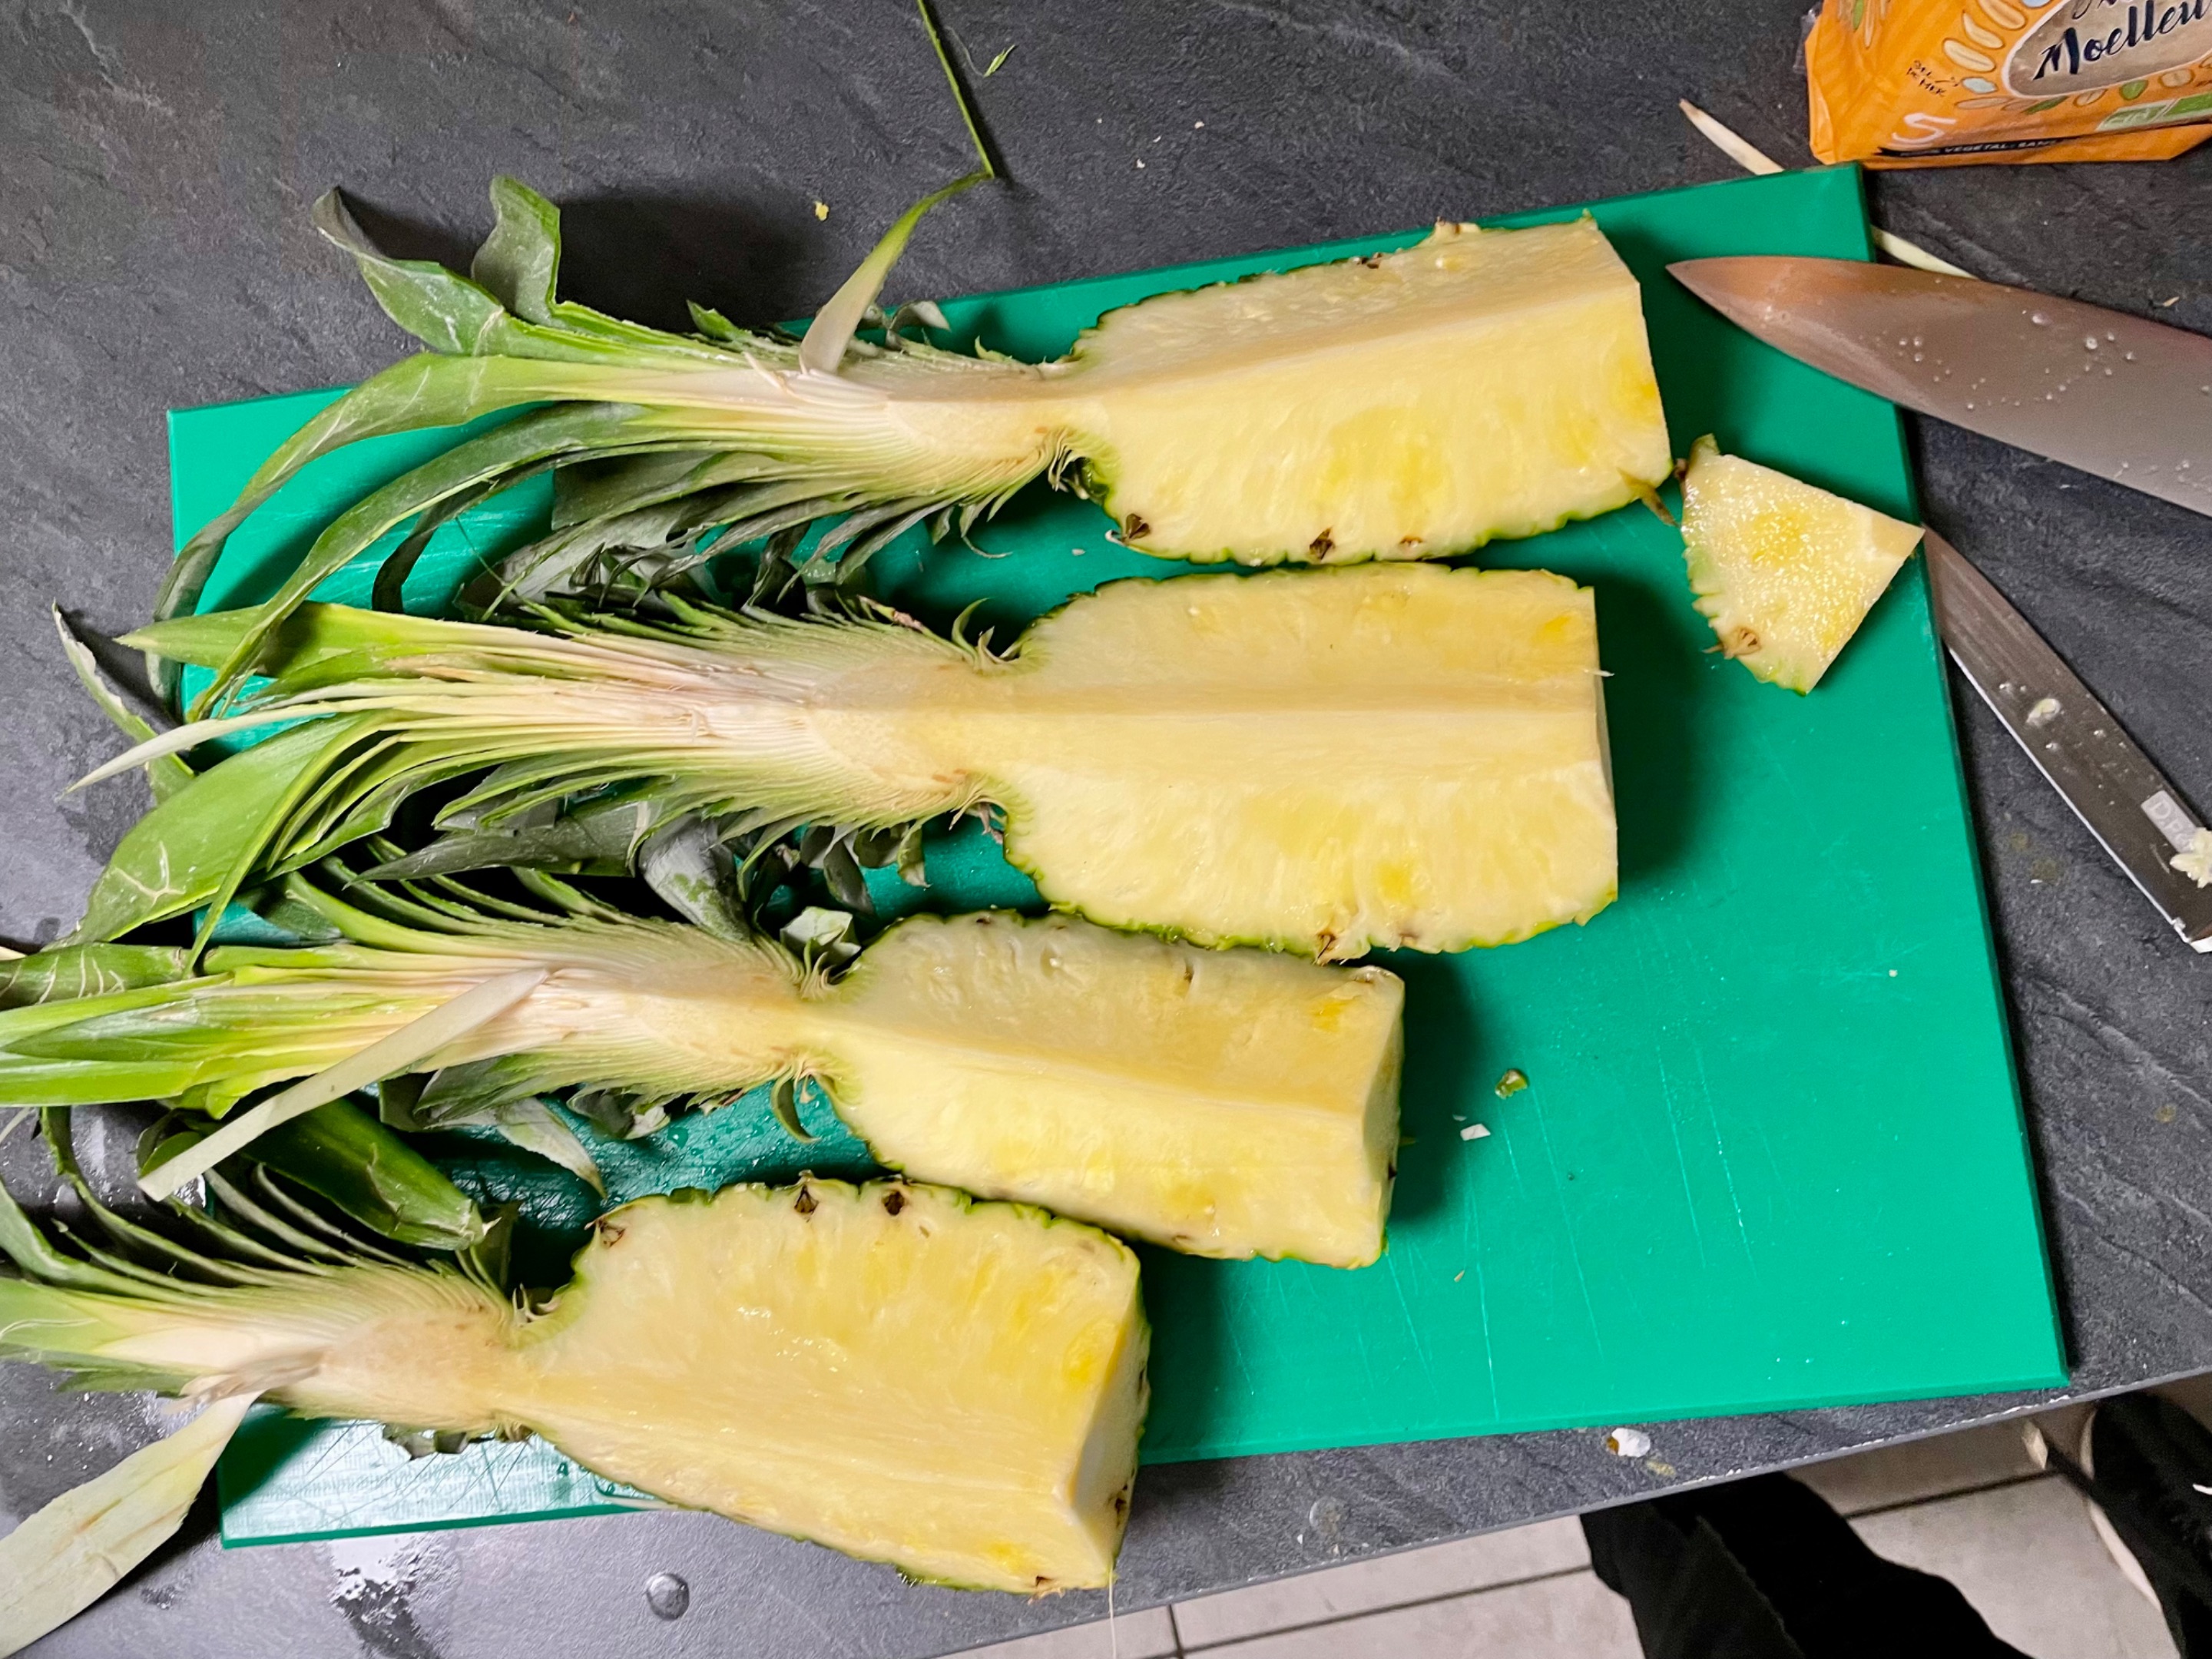
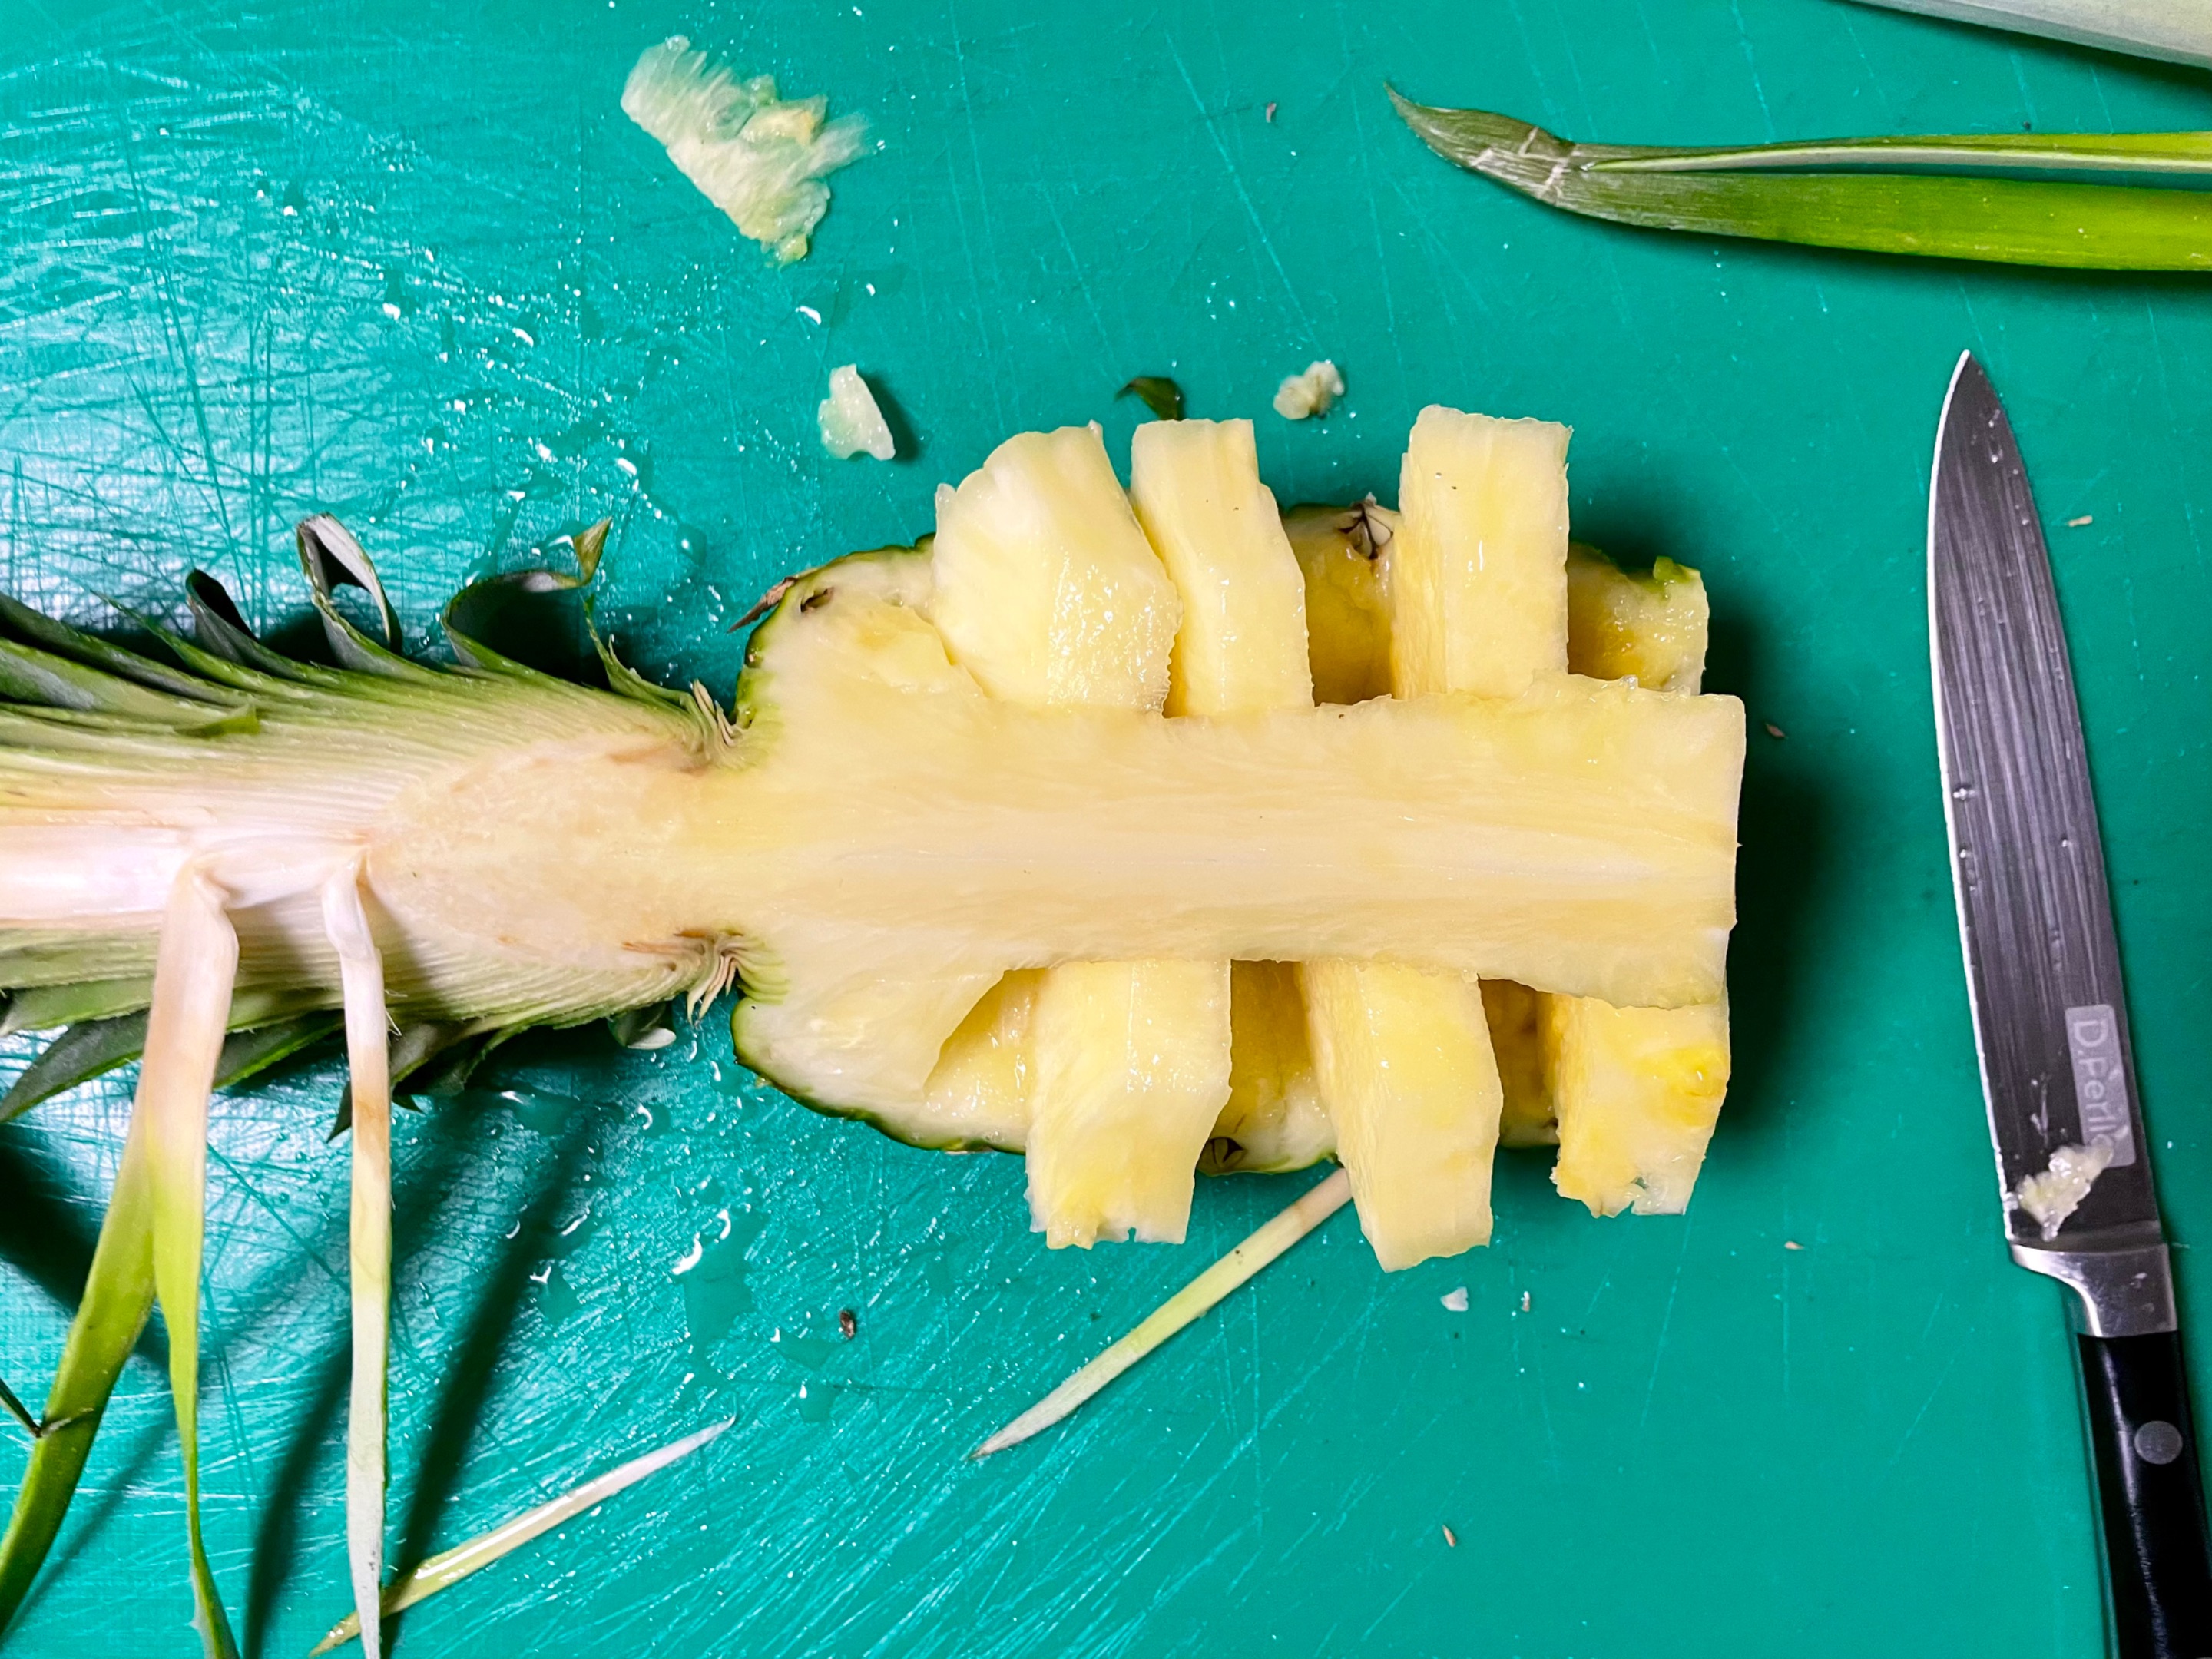
3 - Gently cut the center of the pineapple from the bottom up, without detaching it from the leaves.
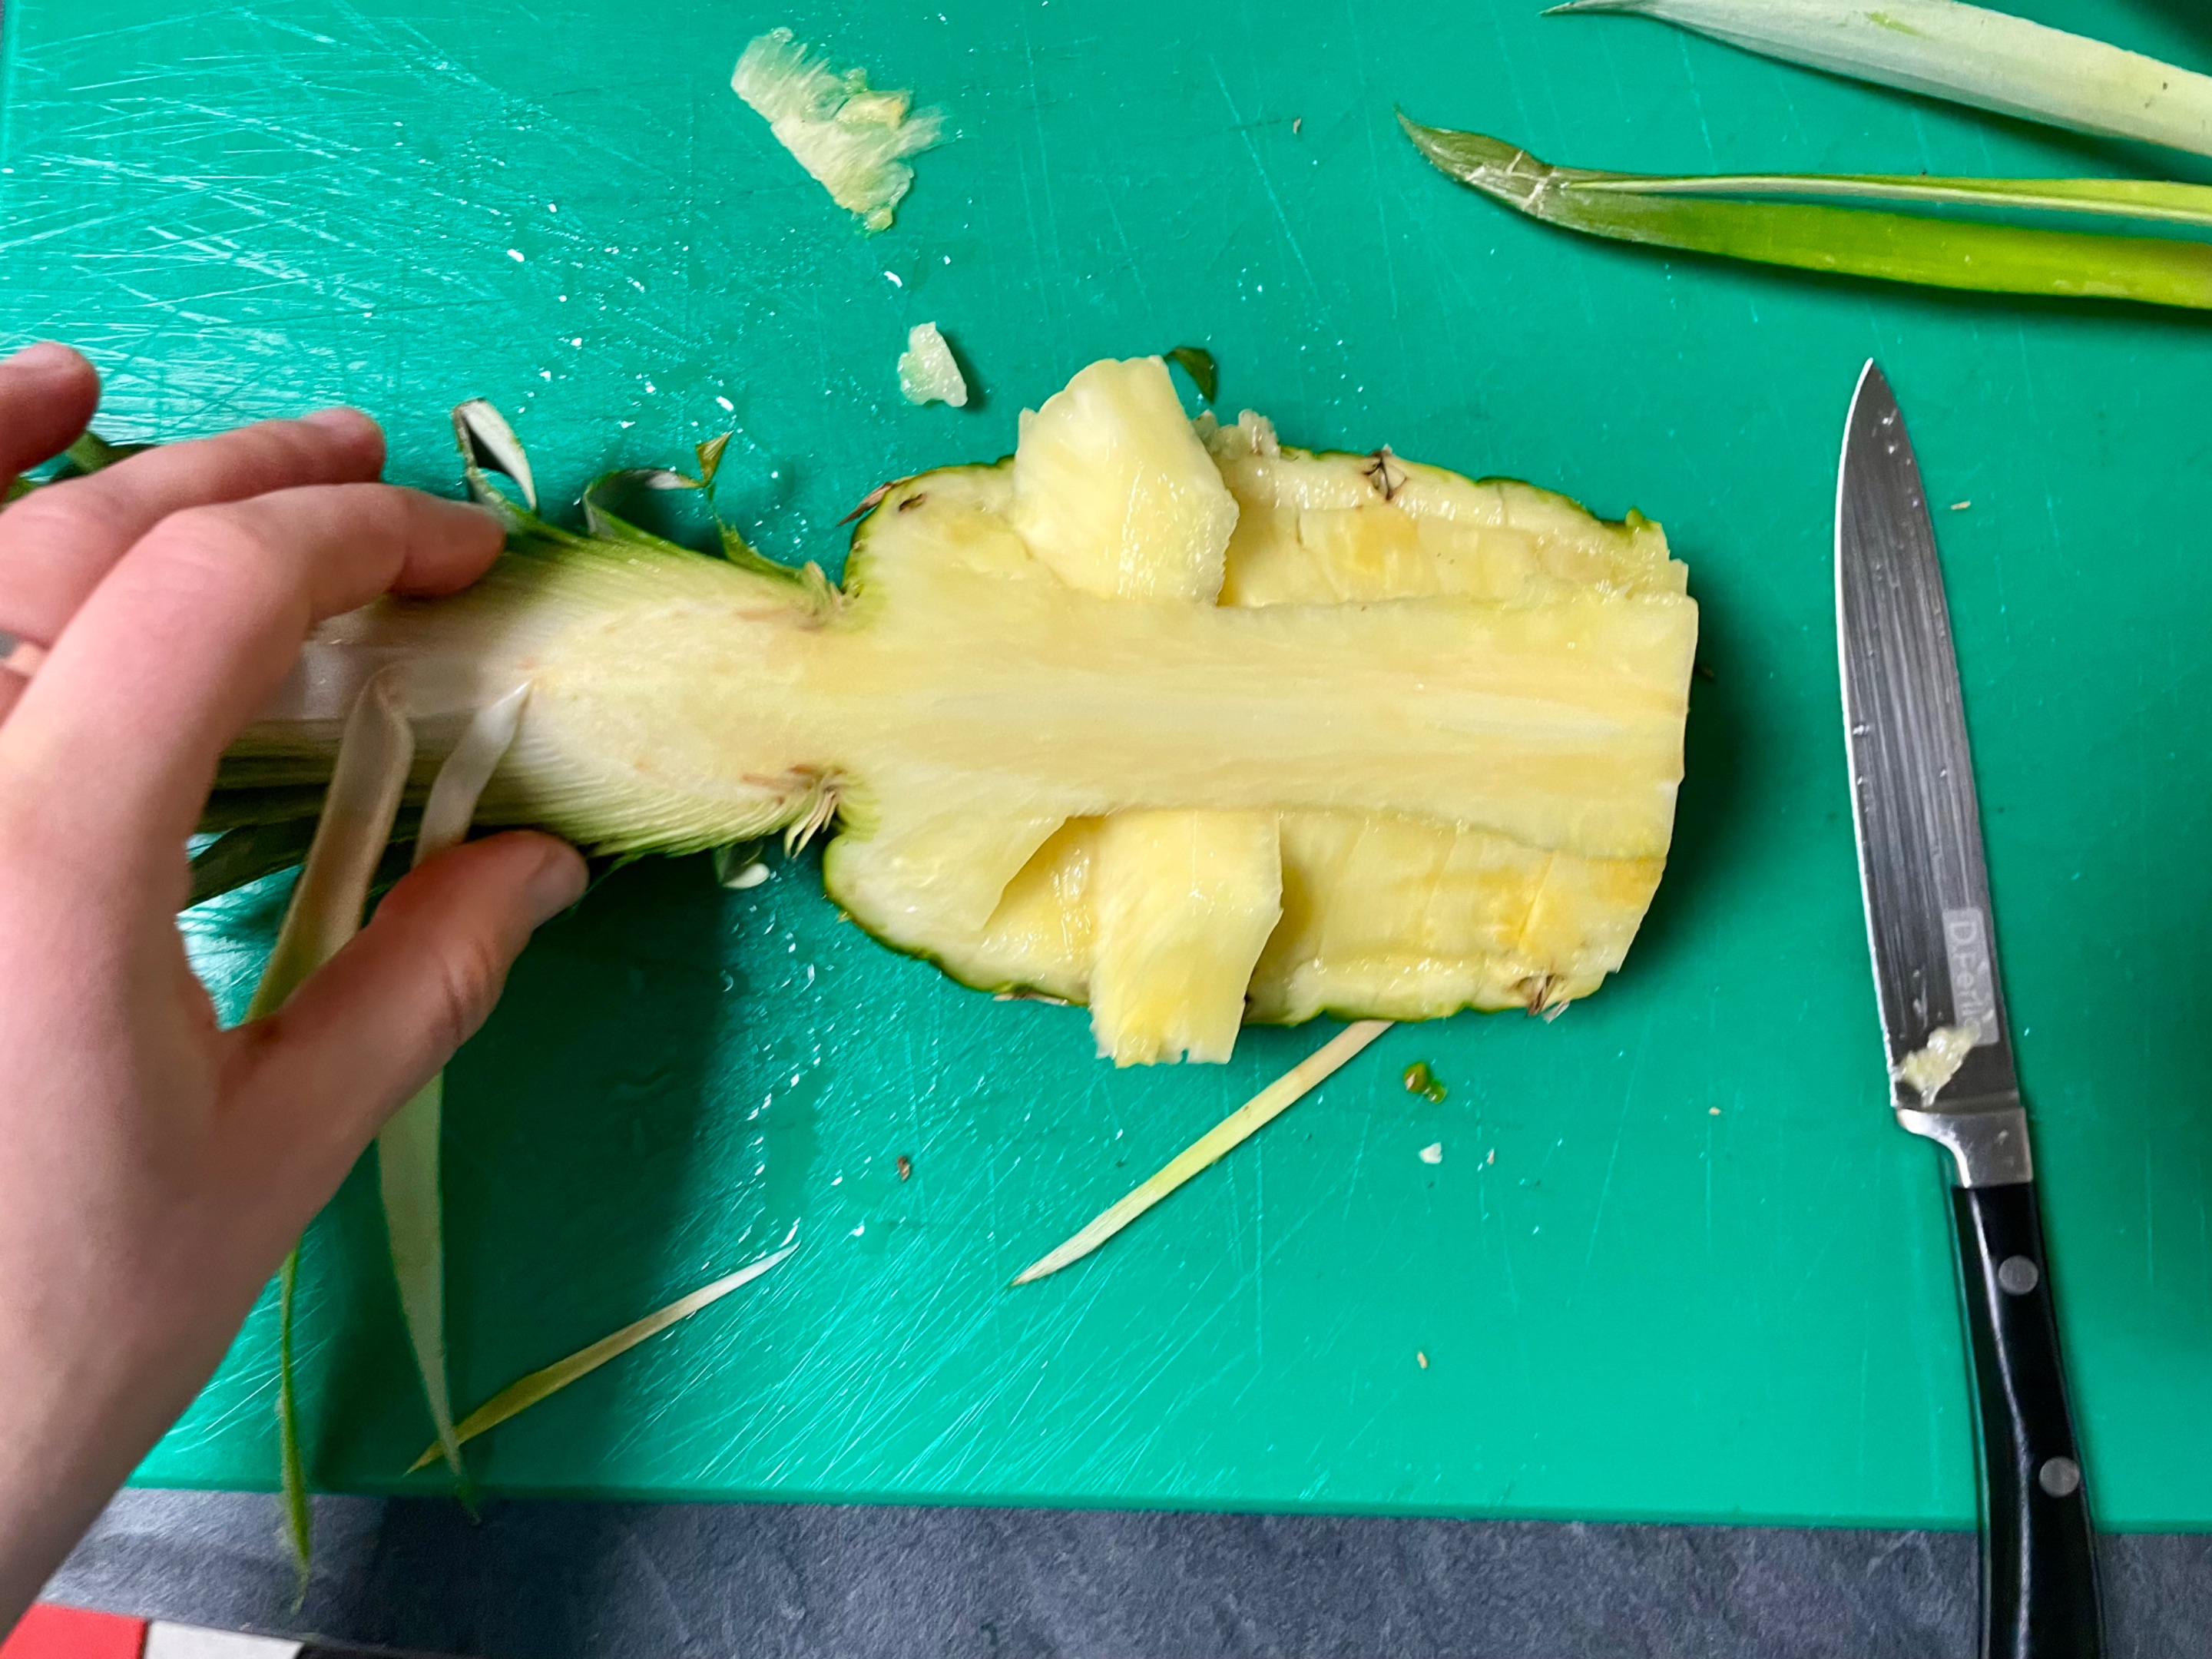
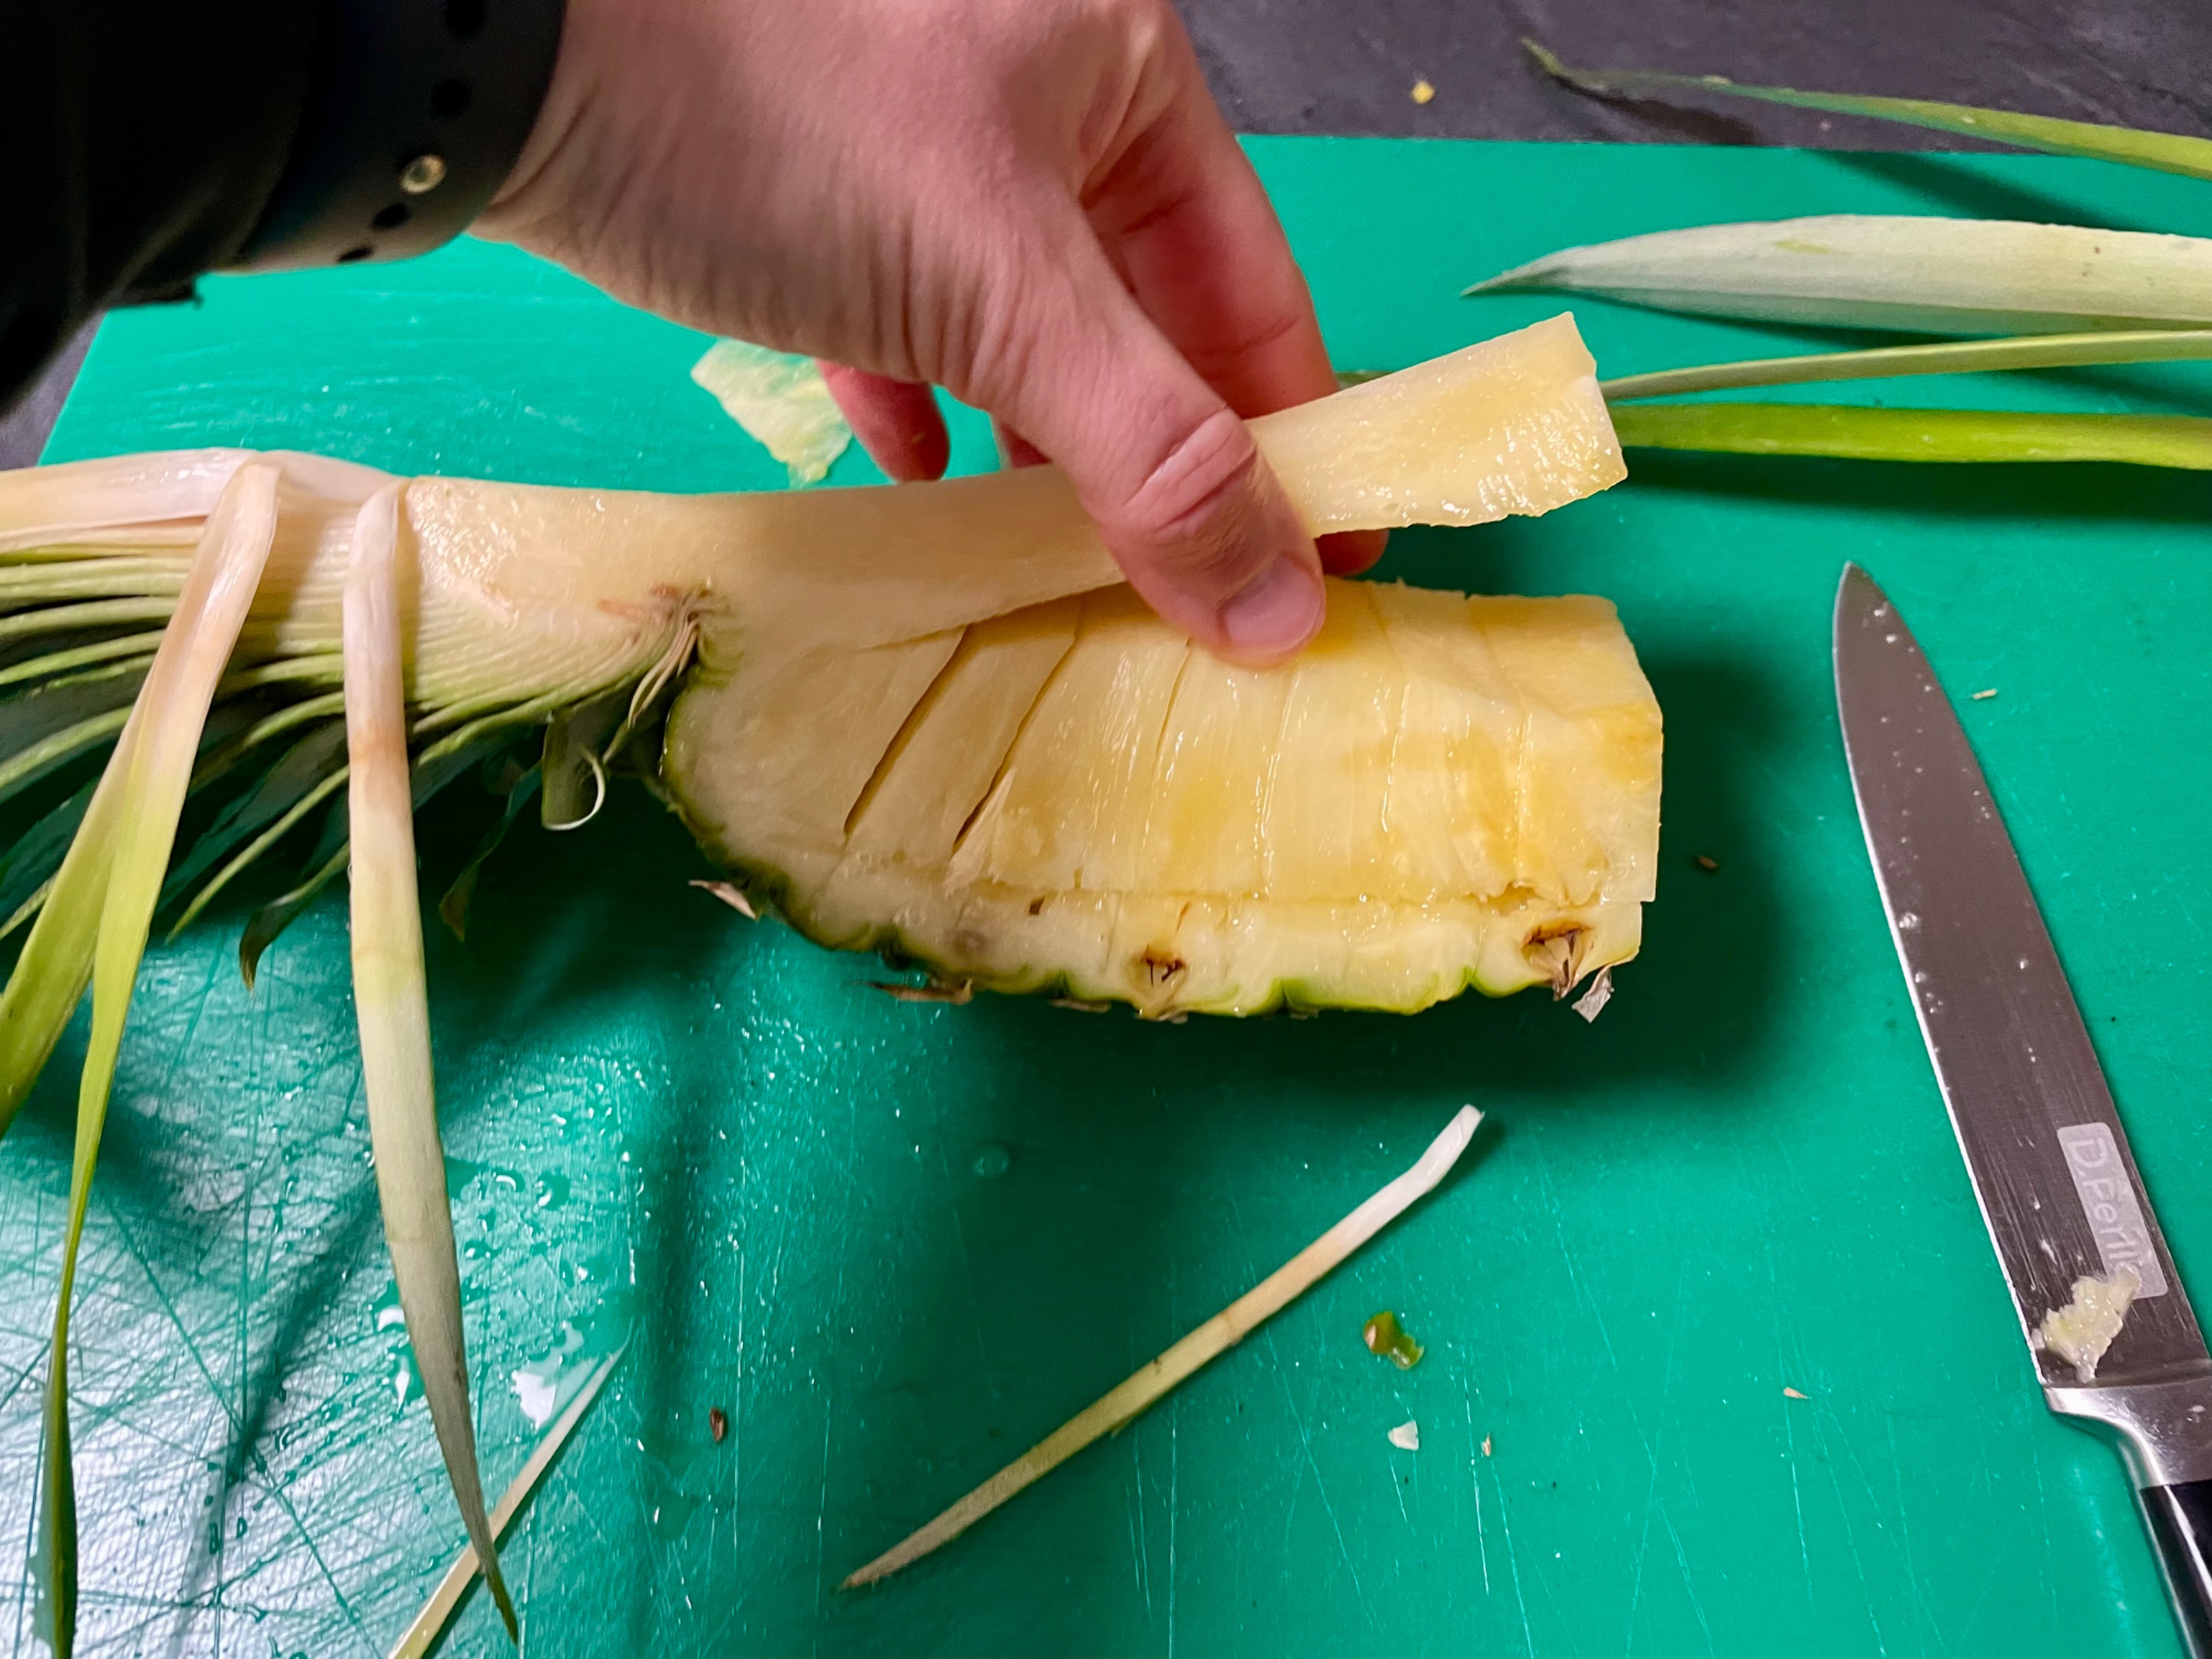
4 - Make a concave cut following the peel of the pineapple. Here the cut should be simple. You will see that the cut is drawn only on the softest part, which is the part that can be eaten.
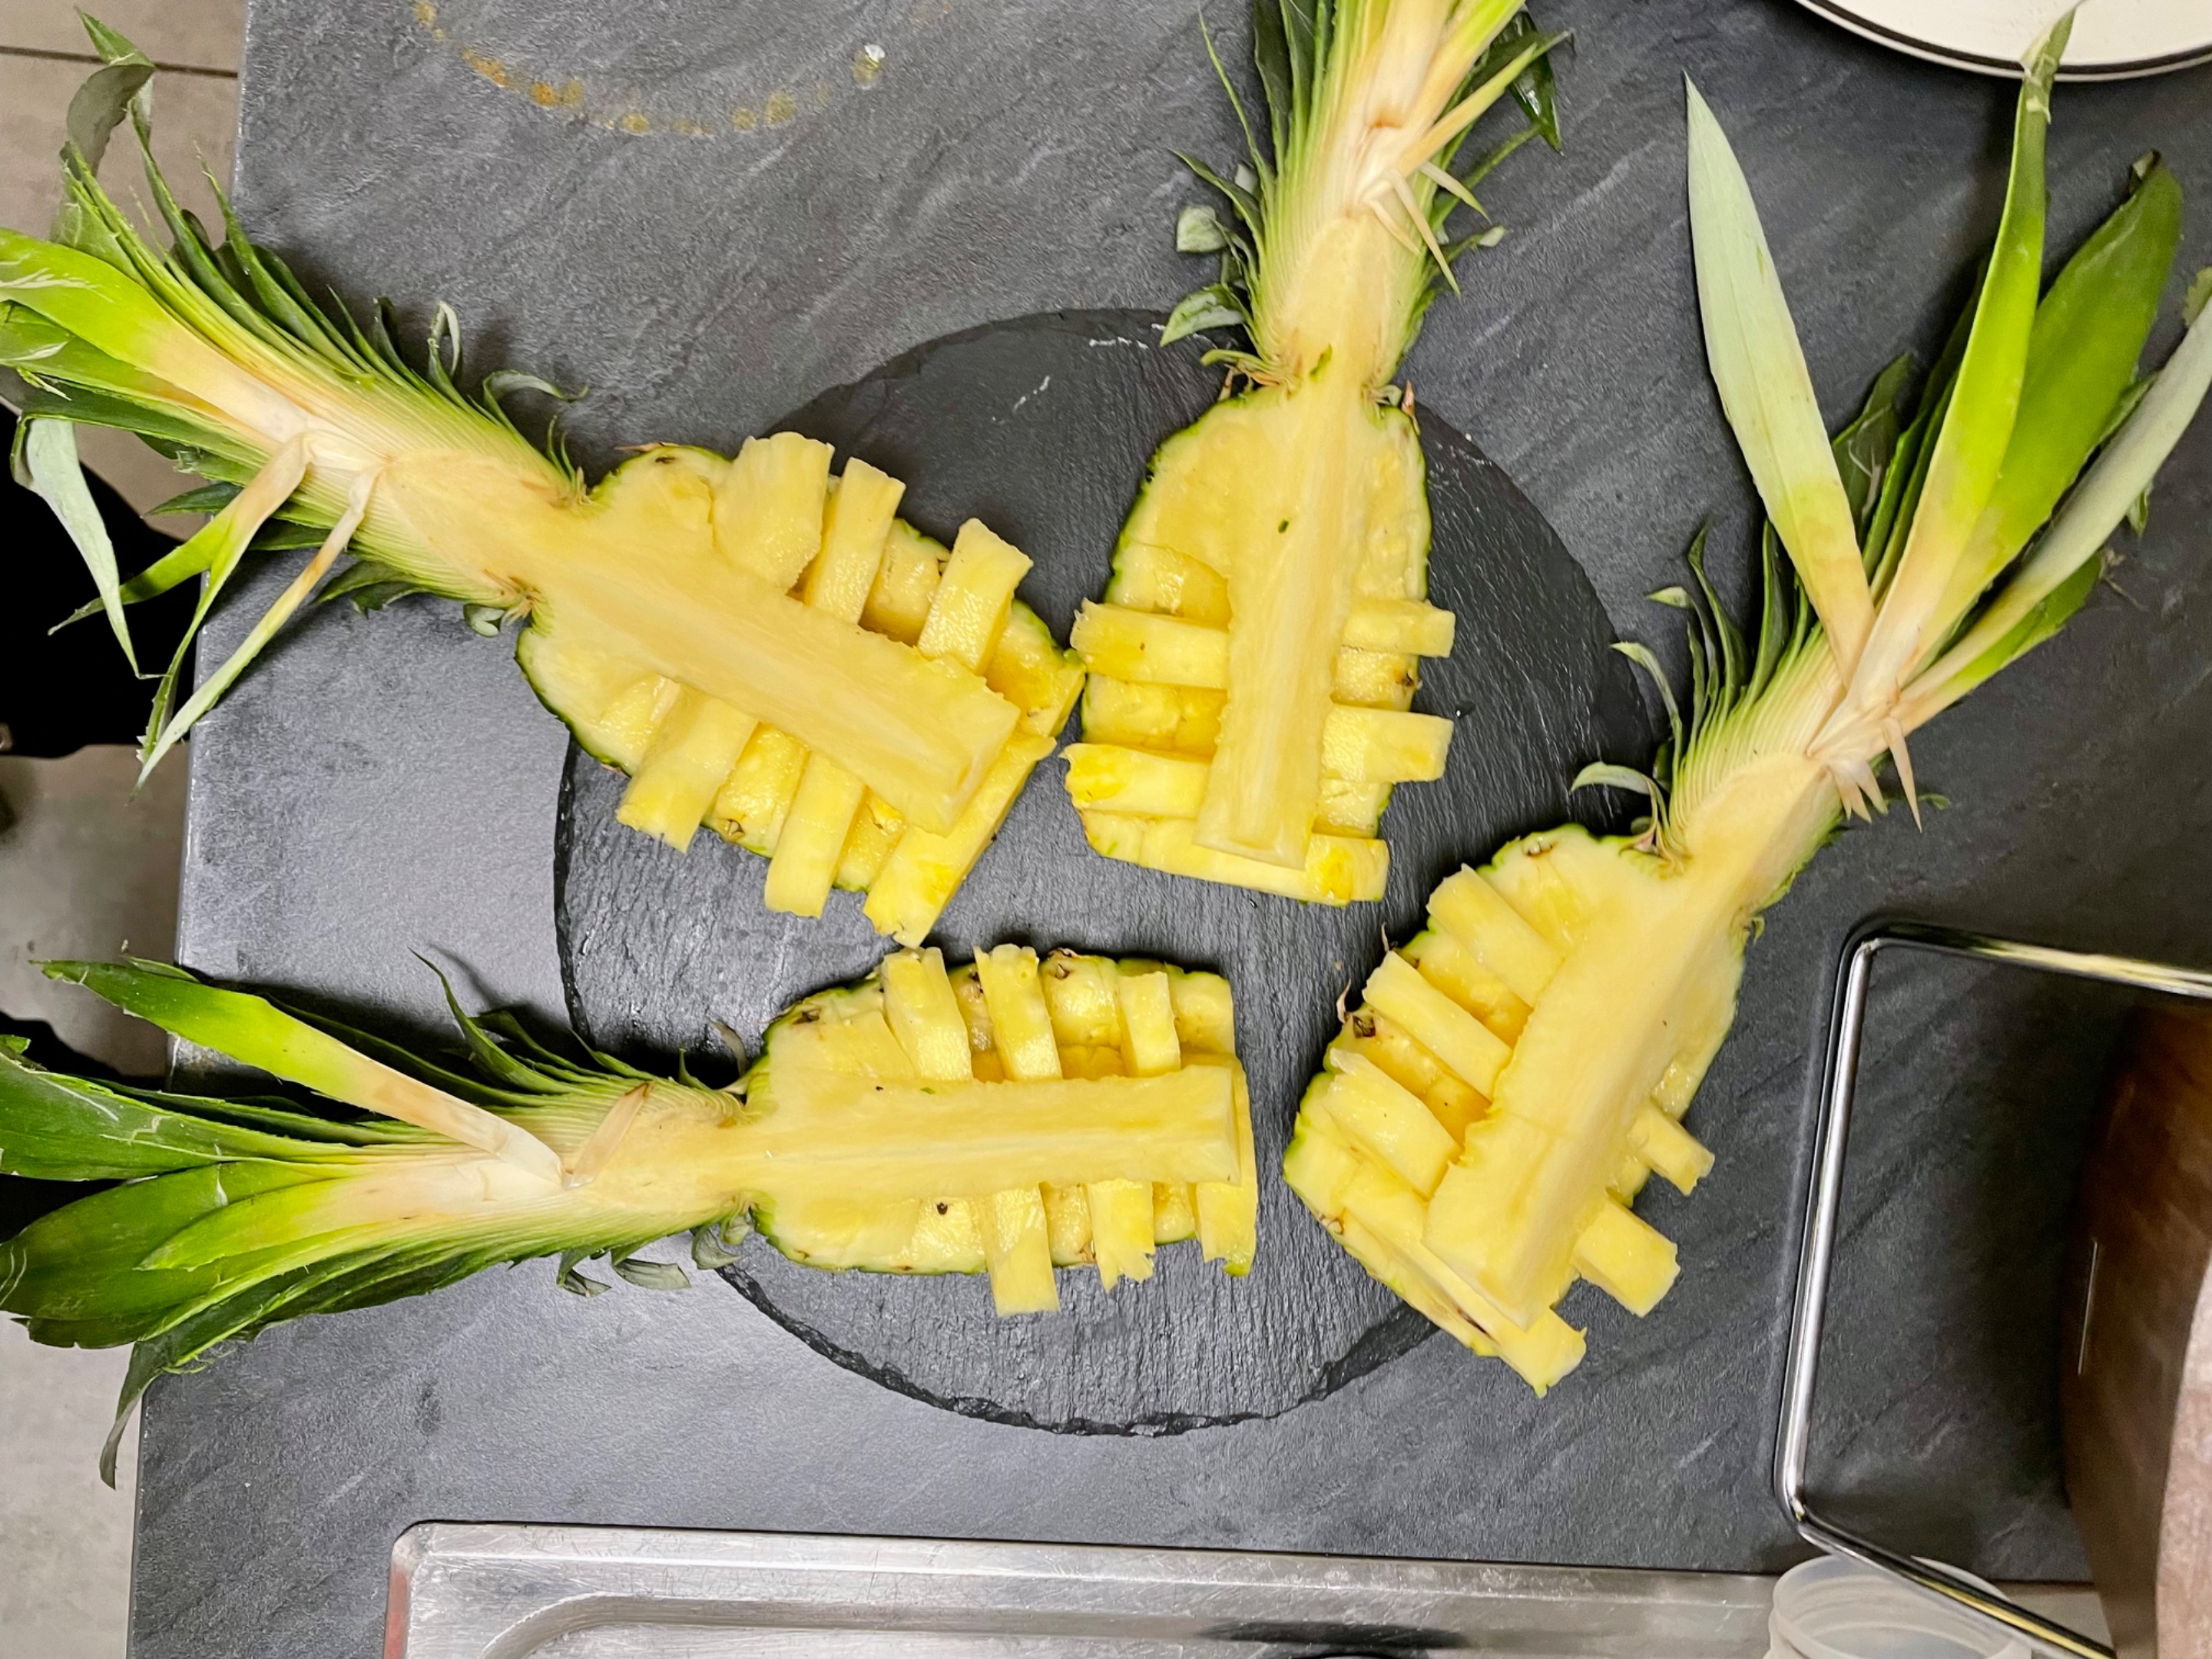
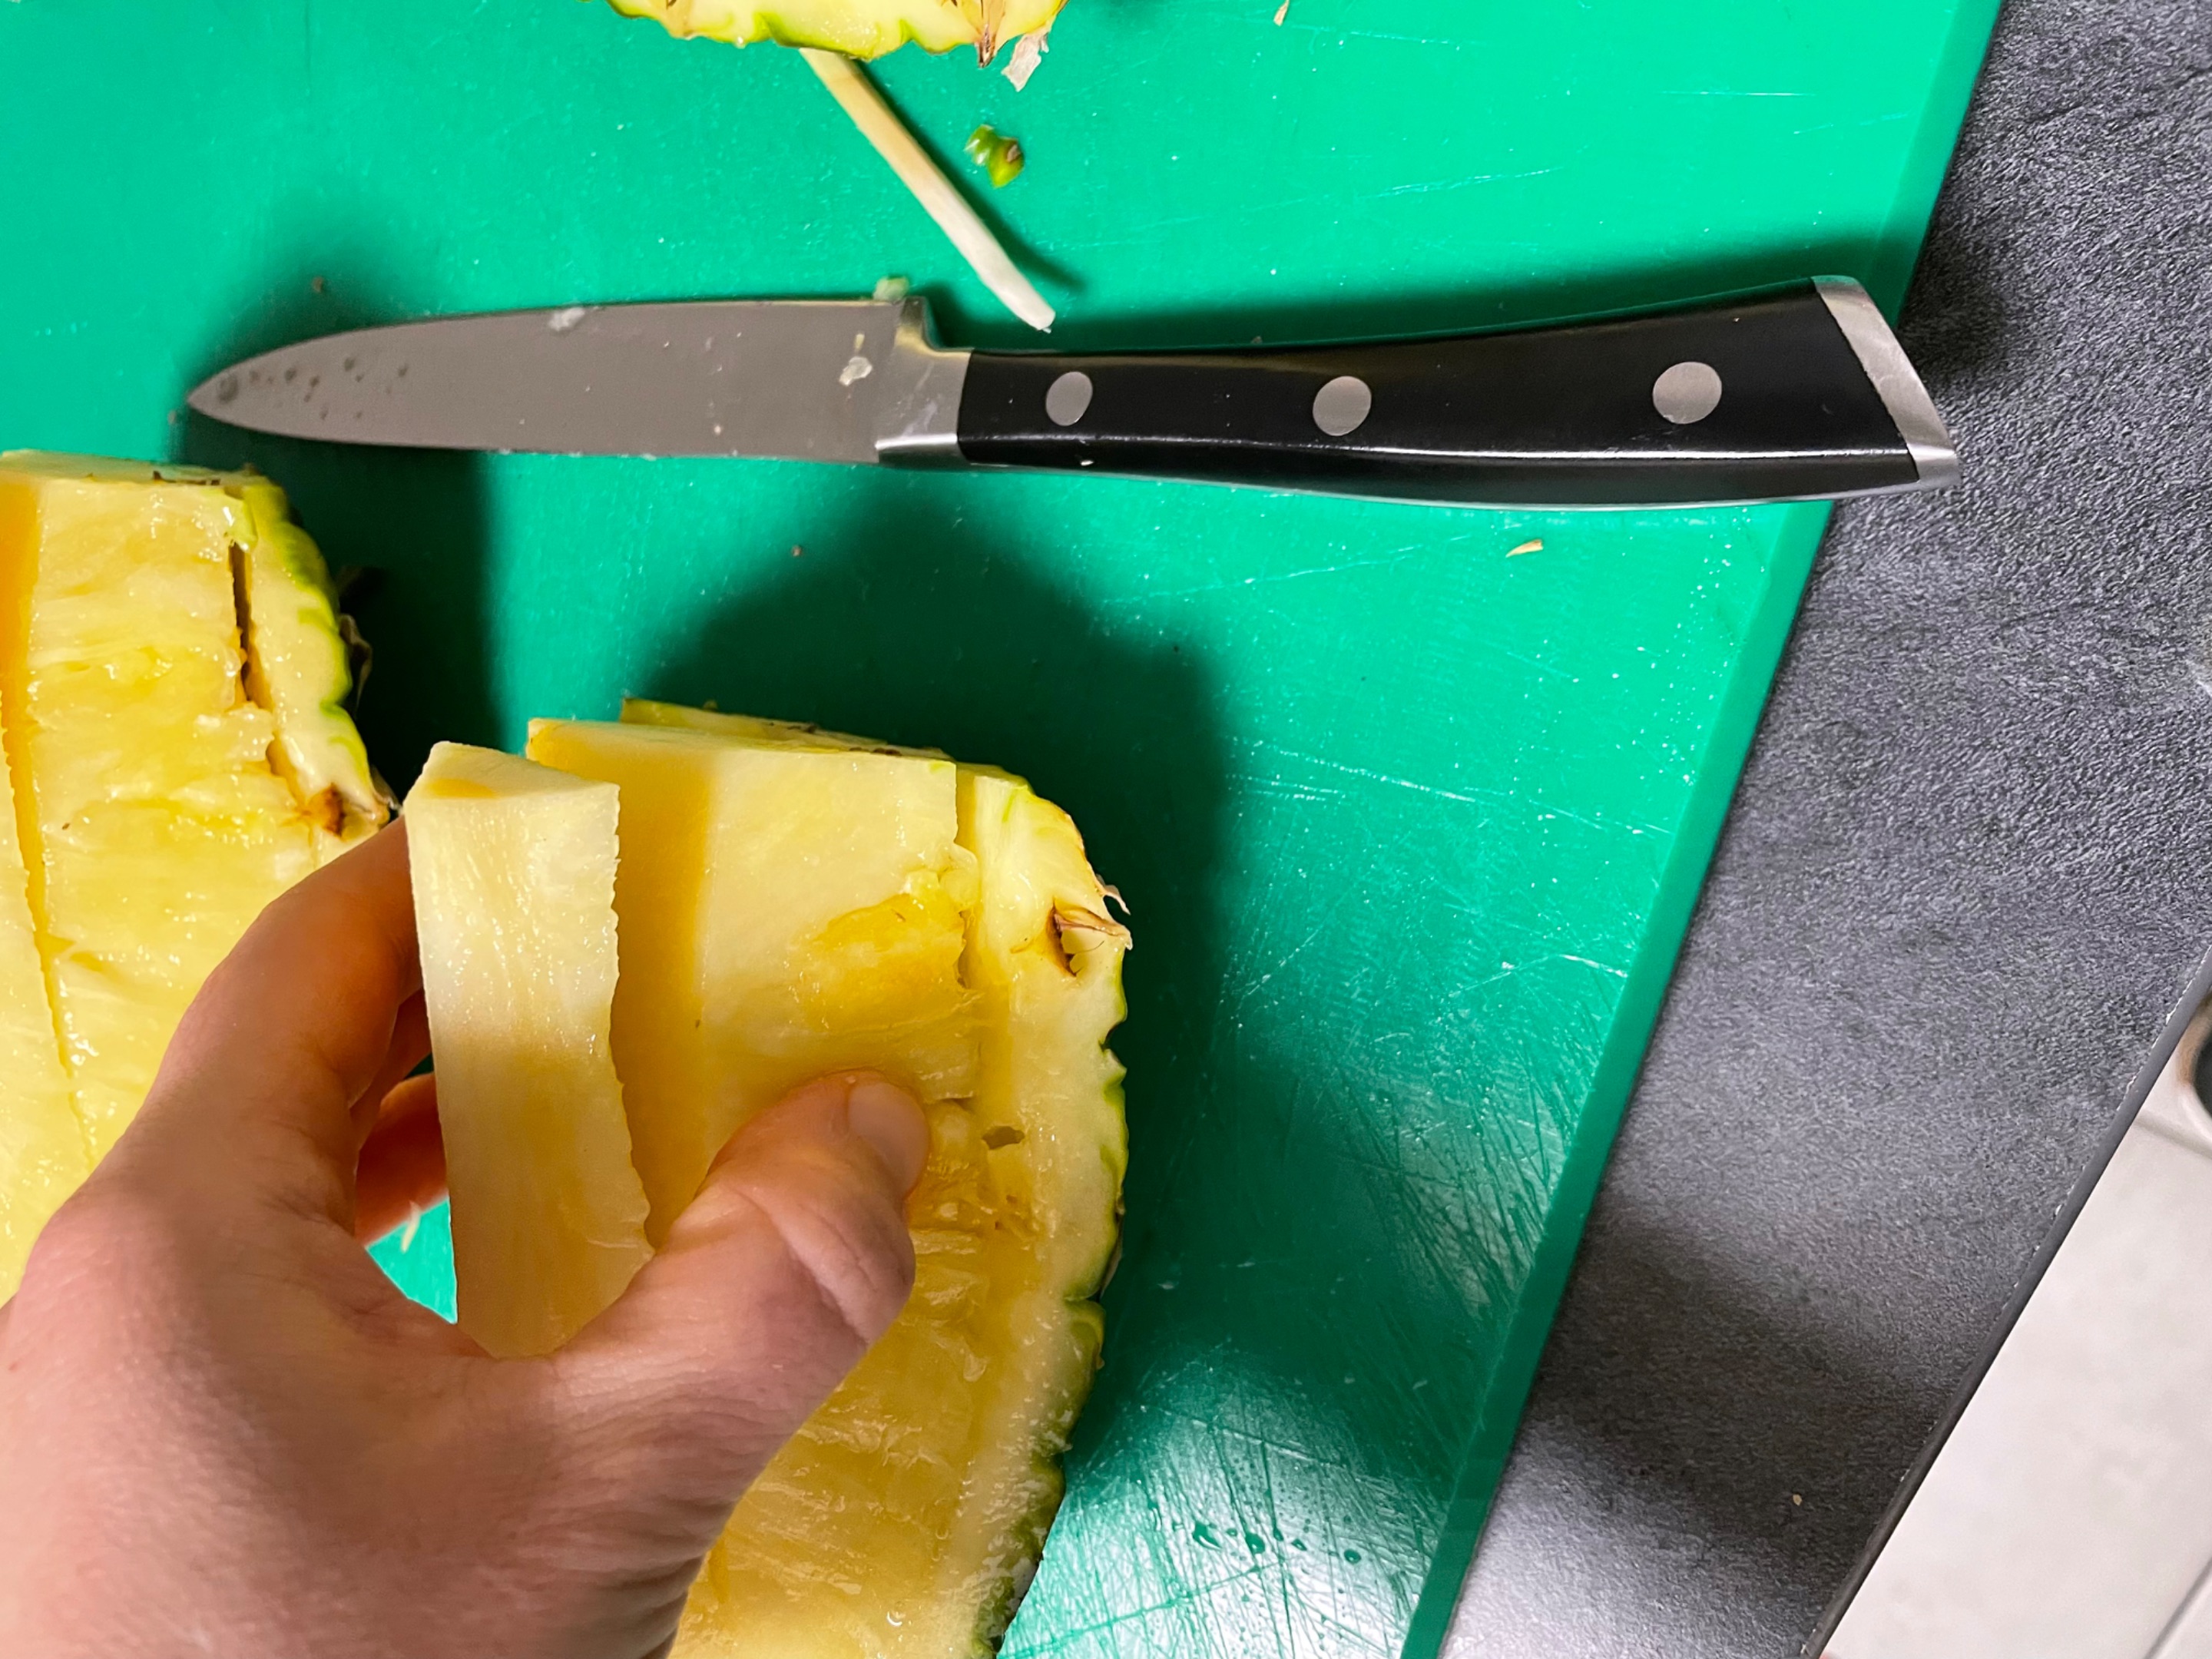
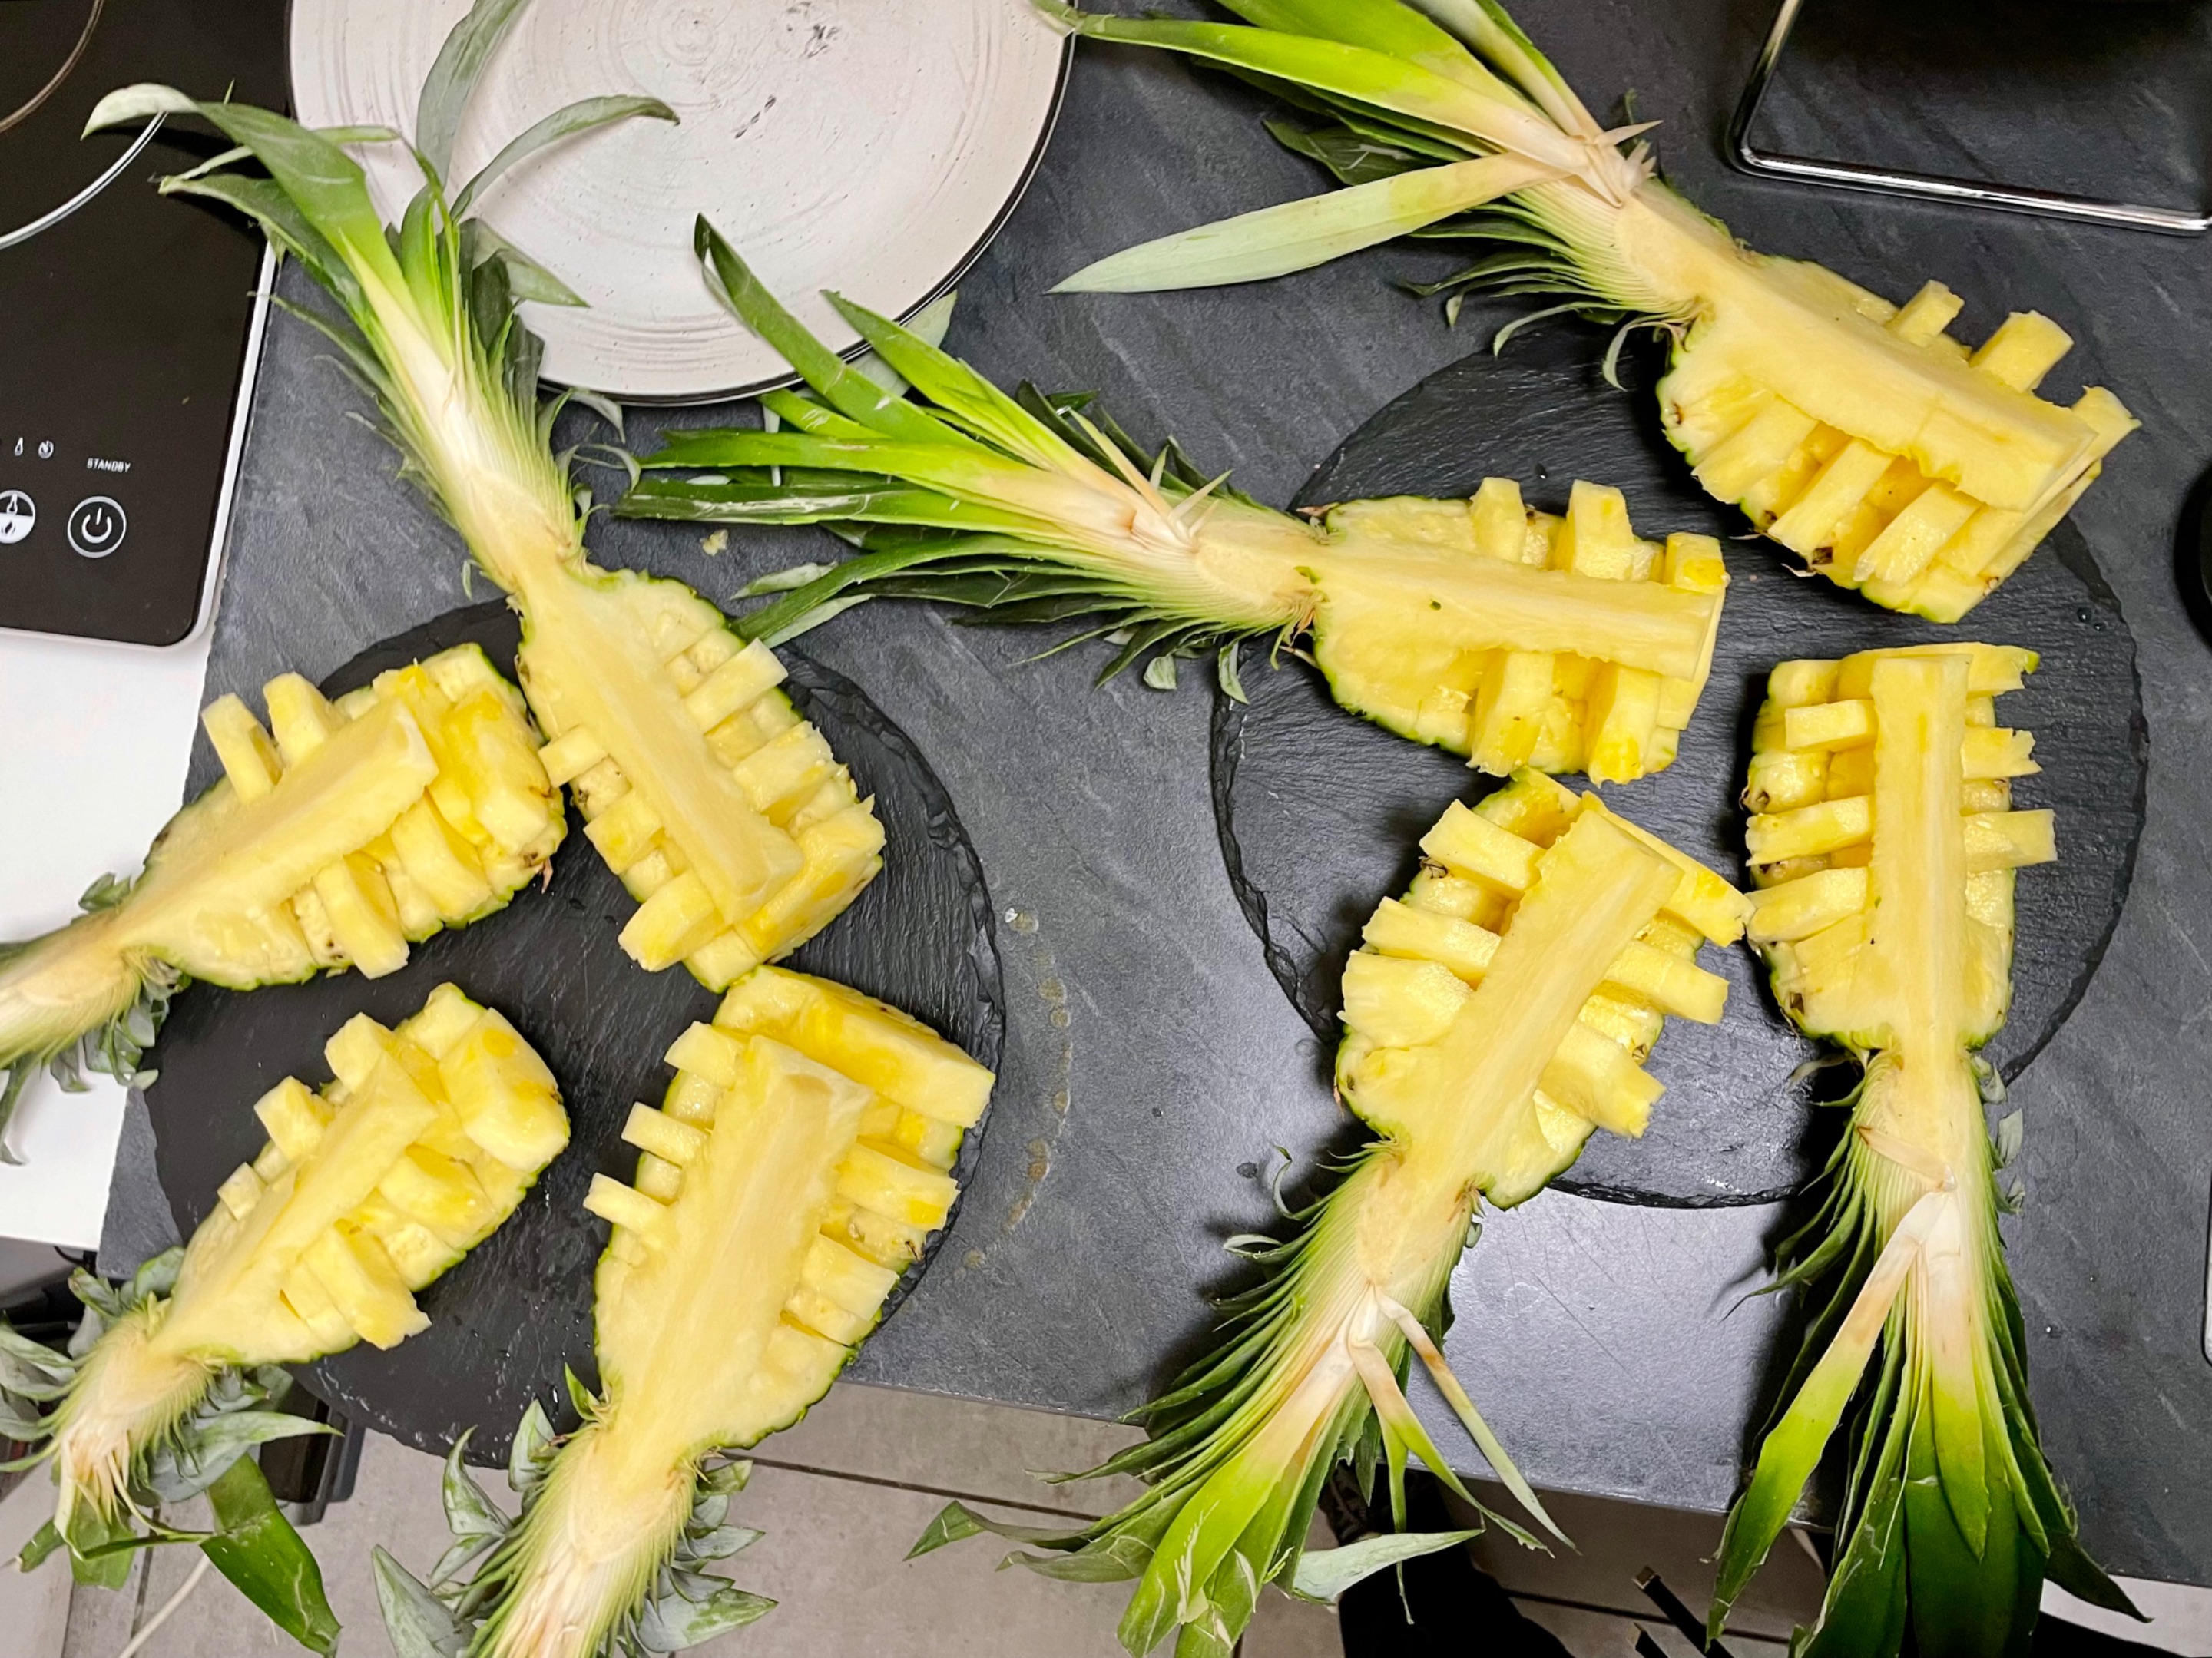
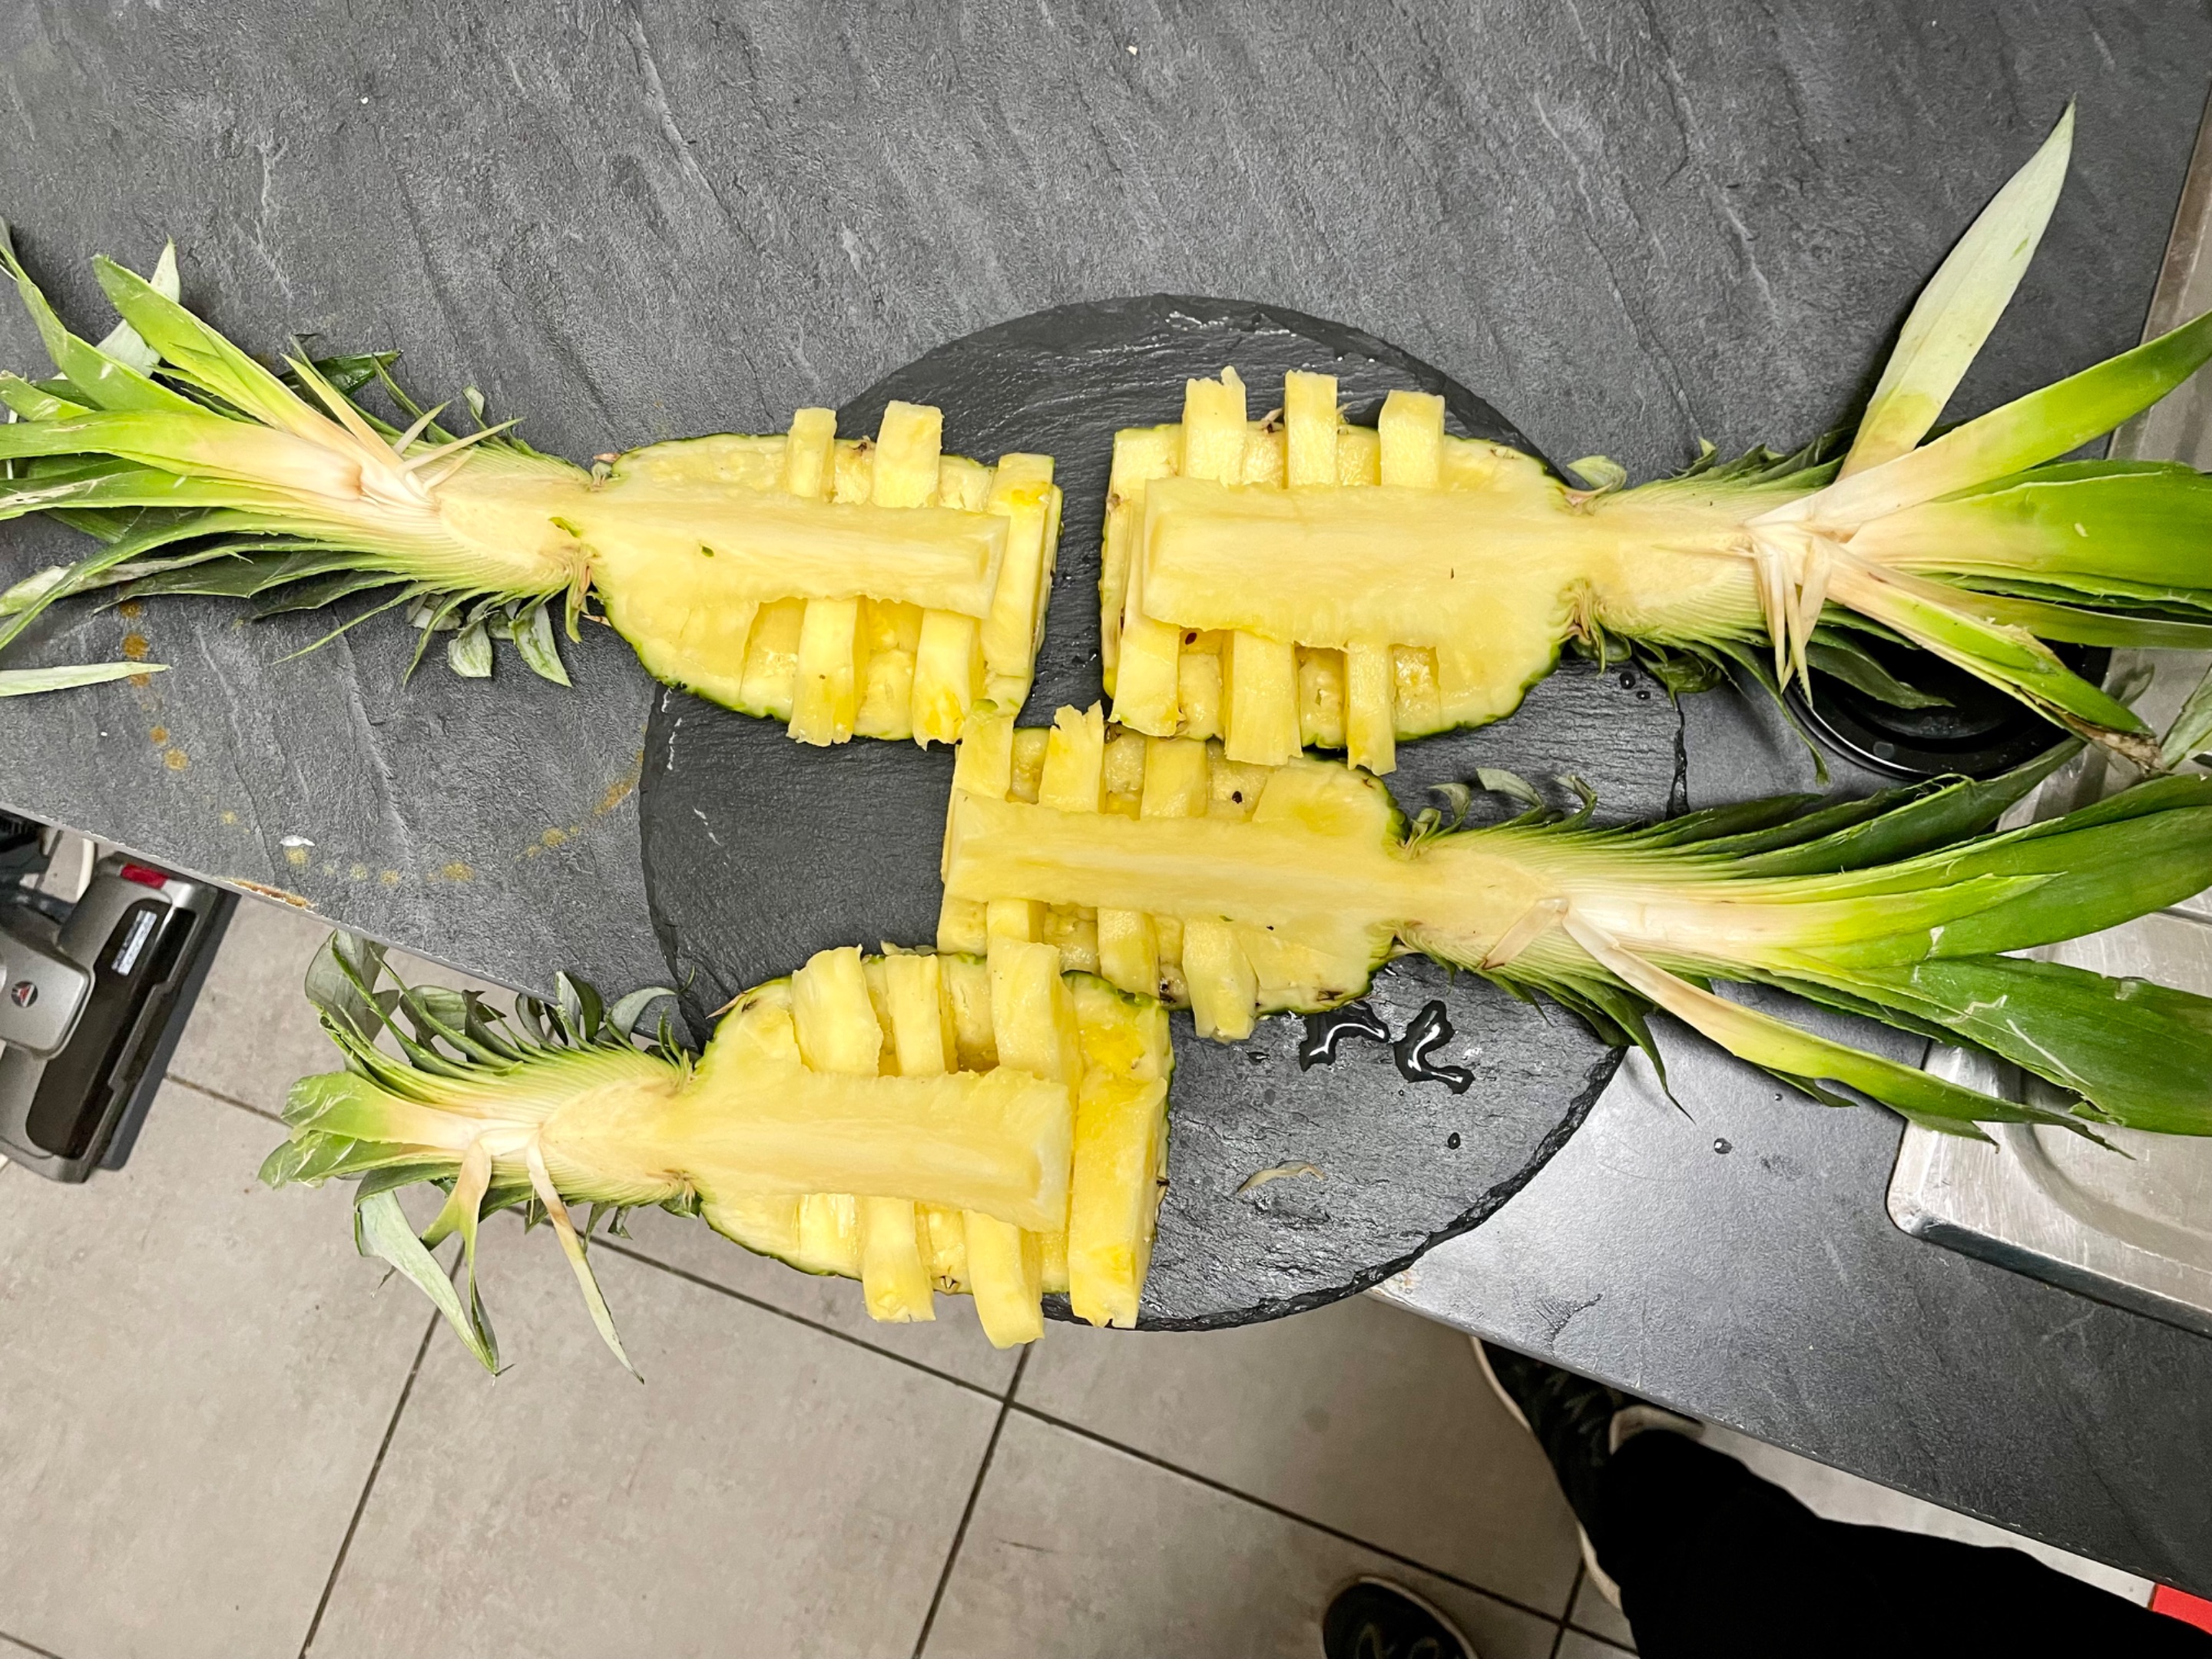
5 - Cut thick ribbons under the center of the pineapple.
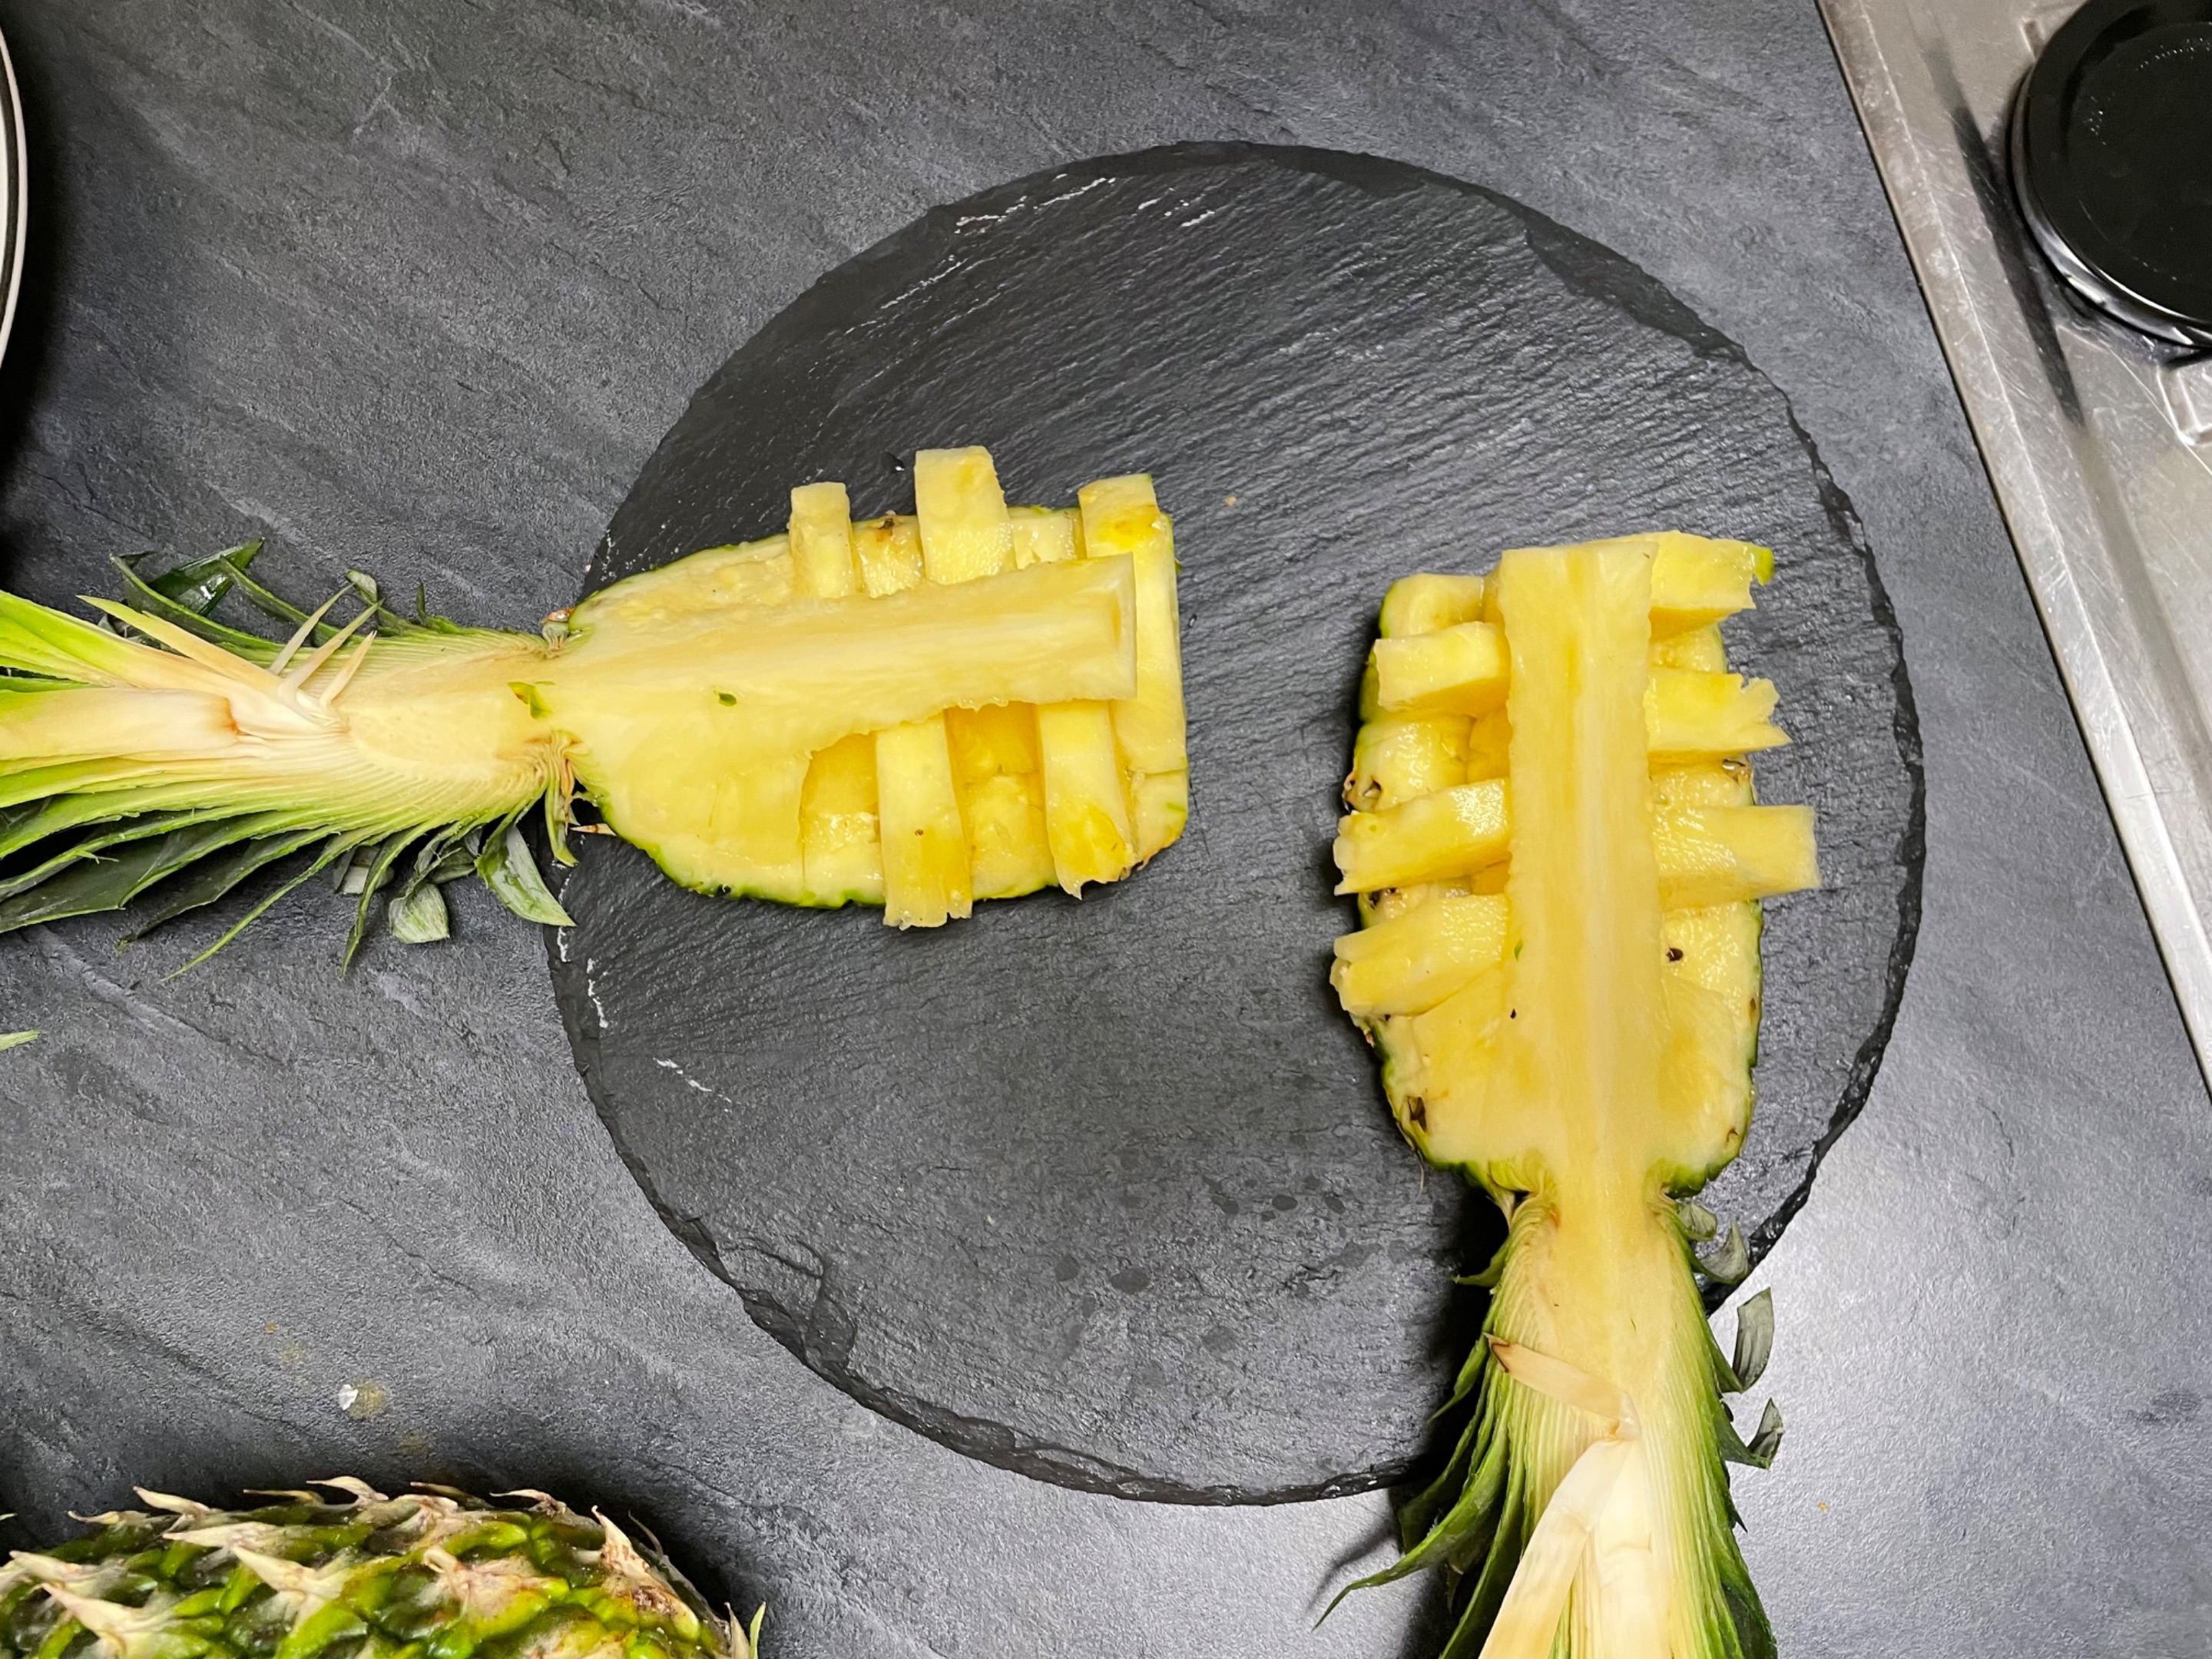
6 - Move these rectangles to the sides, intercalating them.
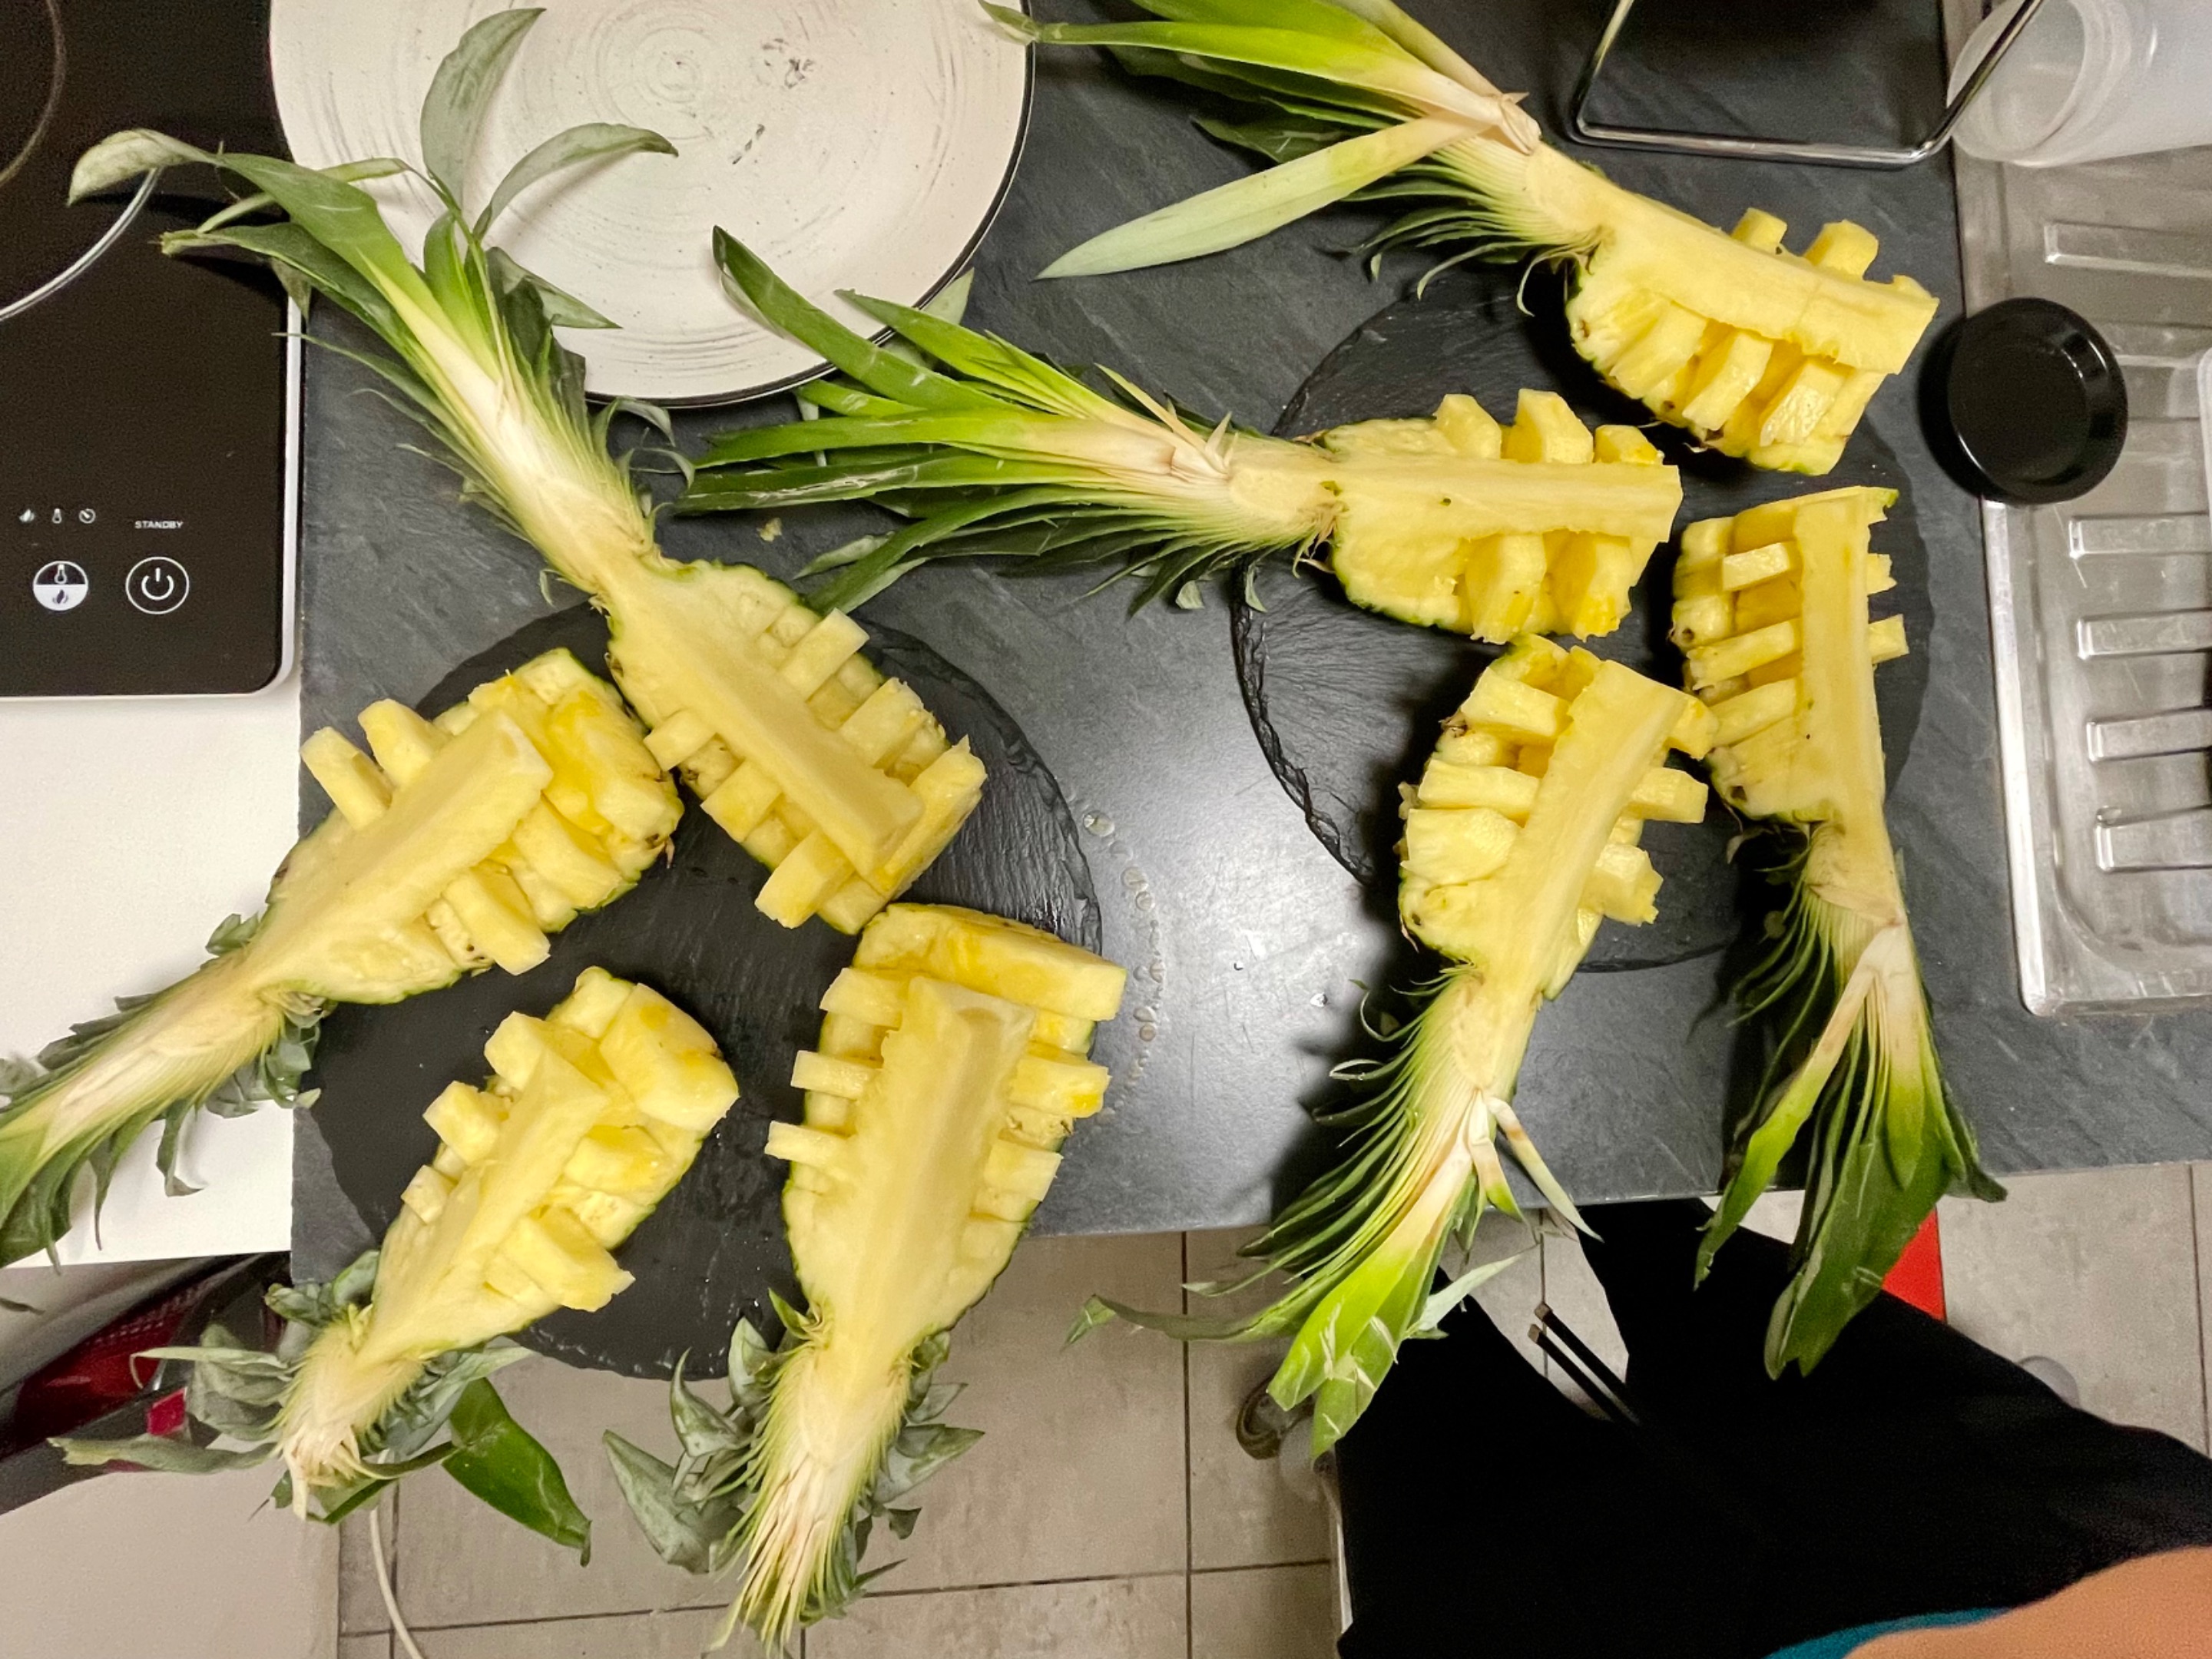
7 - Present the different quarters of the pineapple on a plate or tray.
In this case we did not make it, but for me, a fresh fruit ice cream, such as mango, would go very well with this presentation.
1 - Se corta la piña en 2 partes.
2 - Puedes cortar la piña en 2 partes más (quedarán 4 cuartos) o puedes remover la parte inferior de la piña y luego ir a por los cuartos.
3 - Corta suavemente el centro de la piña desde la parte inferior hacia arriba, sin despegarla de las hojas.
4 - Haz un corte cóncavo siguiendo la cáscara del anan. Ahí el corte debe ser simple. Verás que se dibuja sólo el corte por la parte más blanda, que es la que se puede comer.
5 - Corta cintas gruesas por debajo del centro del ananá.
6 - mueve estos rectángulos hacia los costados, intercalándolos.
7 - Presenta en un plato o bandeja los diferentes cuartos del ananá
En este caso no lo realizamos, pero para mí, un helado fresco de fruta, como mango, iría muy bien con esta presentación.
I think this presentation is beautiful for when we don't have time and want to impress our guests anyway. Not only does it look great, but it also allows the person to have an absolutely edible piece of pineapple, in an easy and tidy way, without having to worry about the pineapple juice or anything similar.
Esta presentación me parece preciosa para cuando no tenemos tiempo y de todas maneras queremos impresionar a nuestros invitados. No solamente se ve muy bien, sino que además permite que la persona tome un pedacito de ananá absolutamente comestible, de manera fácil y también ordenada, sin tener que preocuparse por si el jugo del ananá ni nada similar.
Device: iPhone 12 Pro
Translation: DeepL
Dispositivo: iPhone 12 Pro
Traducción: DeepL