Hola hola gente bonita de hive, hoy les traigo un tutorial súper fácil, para todas las chicas que les encanta estar en tendencia. Estás bandas se han popularizado muchísimo desde el año pasado, y hoy les mostraré como hacerlas. No está demás decir que estoy super feliz de poder compartir en esta comunidad nuevamente.
Hello hello beautiful people of hive, today I bring you a super easy tutorial, for all the girls who love to be in trend. These bands have become very popular since last year, and today I will show you how to make them. It goes without saying that I am super happy to be able to share in this community again.

Spanish
English
Banda para el cabello en 4 pasos
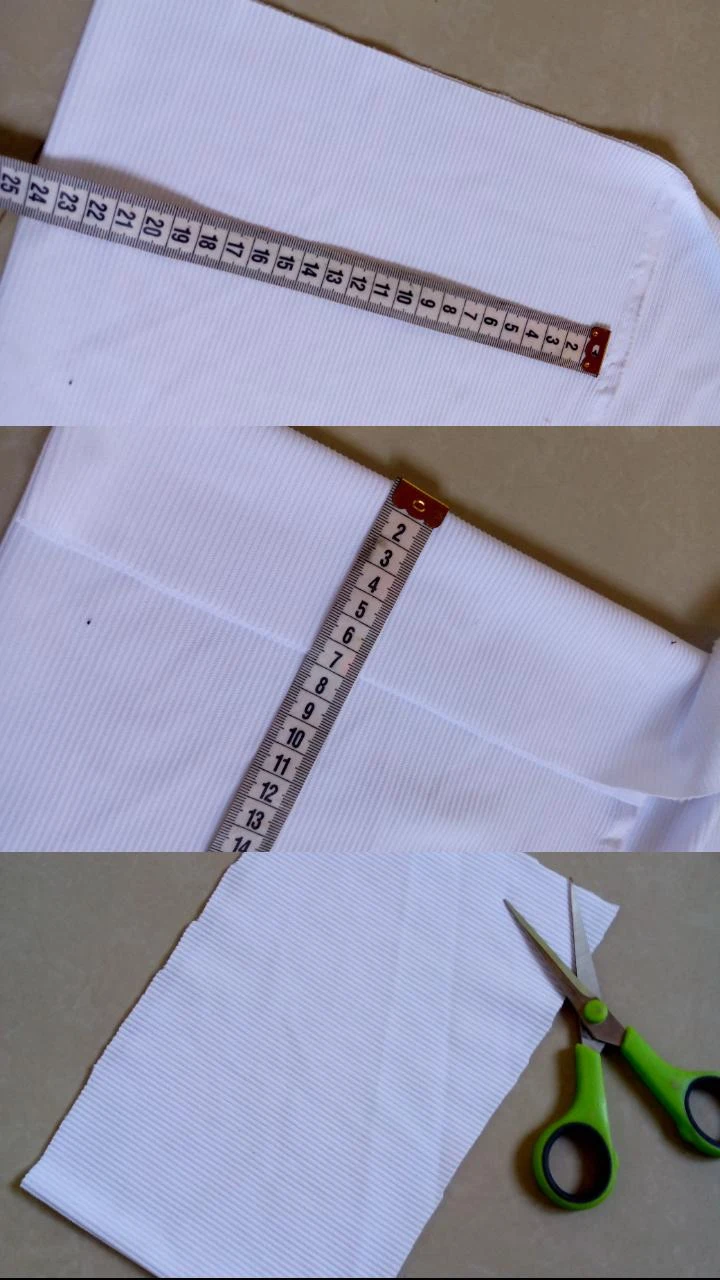
PASO 1:
Vamos a extender la tela y cortar un rectángulo de 24cm x14cm.
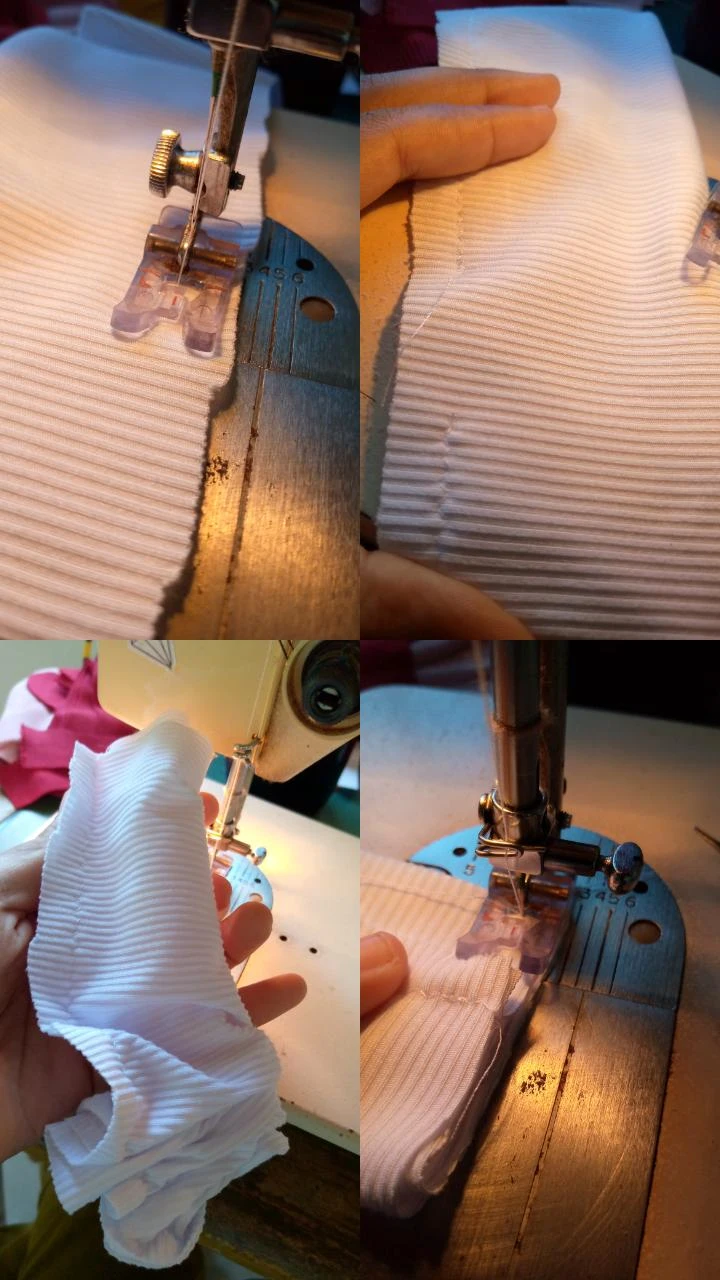
Paso 2:
Cosemos doblando en dos la tela por el lado más largo, con una puntada de zigzag, dejando una abertura en el centro.
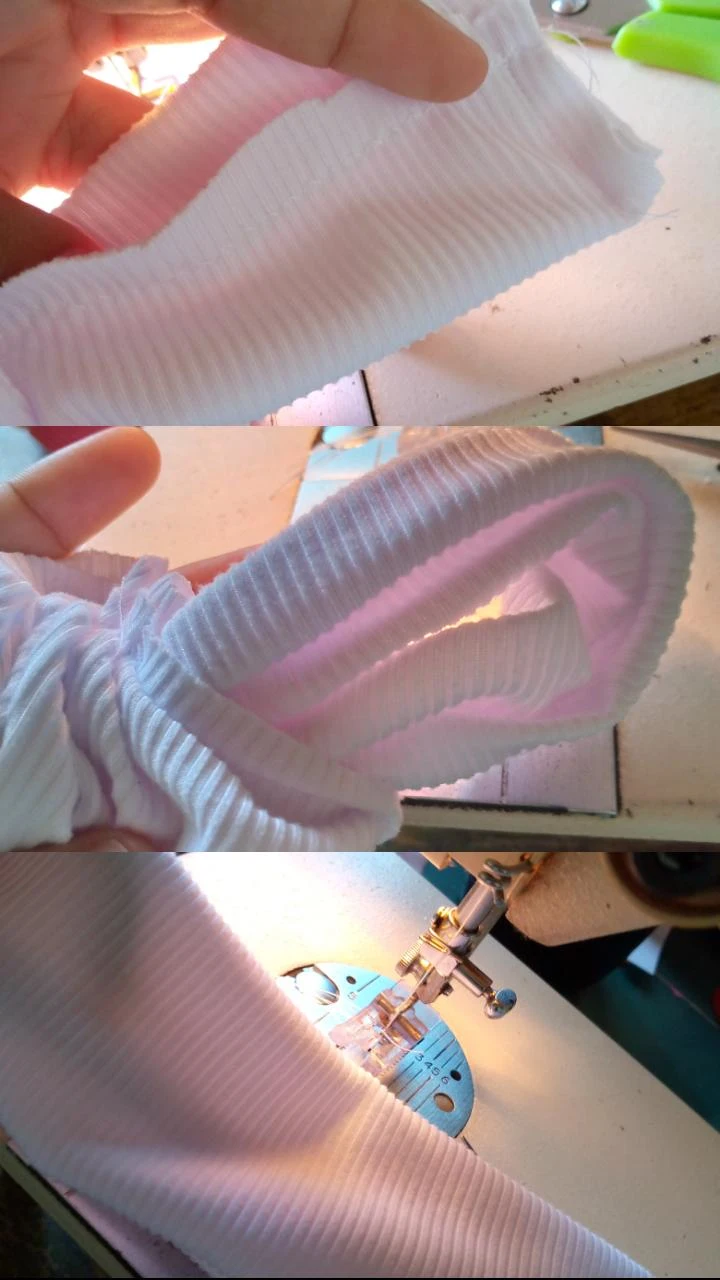
Paso 3:
Vamos a meter una de las puntas hacia adentro hasta llegar al otro lado de esta forma, y vamos a coser con mucho cuidado para que las costuras queden juntas.
Paso 4:
Volteamos por el orificio que dejamos anteriormente y listo, tenemos nuestra banda lista para usar.
Puedes usarlas de muchas formas y hacerlas en muchos colores, están cool para ir a entrenar, pero también para una tarde con amigas, Se adaptan a cualquier outfit, y también están disponibles en mi tienda, se las dejo por AQUI

Hair band in 4 steps
STEP 1:
We are going to spread the fabric and cut a 24cm x12cm rectangle.
Step 2:
We sew by folding the fabric in two on the longest side, with a zigzag stitch, leaving an opening in the center.
Step 3:
We are going to put one of the ends in until we reach the other side like this, and we are going to sew very carefully so that the seams are together.
Step 4:
We turn through the hole we left previously and that's it, we have our band ready to use.
You can use them in many ways and make them in many colors, they are cool for going to training, but also for an afternoon with friends. They adapt to any outfit, and they are also available in my store, I leave them HERE
¡GRACIAS POR LEERME! Cómo siempre les envío la mejor vibra y nos vemos en un próximo post❣️
THANKS FOR READING ME! As always, I send you the best vibes and see you in the next post❣️