
Saludos, hivers, creadores es momento de hacer magia y esa es la razón de mi presencia en la comunidad para presentar mi entrada al concurso que propones @diyhub con el tema de MAGIA, por lo que me traslade por completo a esas escenas películas y comiquitas donde salen brujas haciendo pociones mágicas en un gran caldero negro tomando en cuenta que el caldero en uno de los elementos más usados para la magia.
Greetings, hivers, creators, it's time to do magic and that is the reason for my presence in the community to present my entry to the contest that you propose @diyhub with the theme of MAGIC, so I moved completely to those scenes in movies and comics where witches are making magic potions in a big black cauldron taking into account that the cauldron is one of the most used elements for magic.
Mi proyecto, como mencioné anteriormente, trata de un caldero mágico elaborado en crochet empleando la técnica de amigurumi, incorporando diferentes materiales para concretar mi idea de lo que realmente imaginé que sería la magia en ese caldero.
My project, as I mentioned before, is about a magic cauldron made in crochet using the amigurumi technique, incorporating different materials to realize my idea of what I really imagined that magic would be in that cauldron.
Materiales
Hilo de crochet en color negro
Hilo de coser en color blanco
Hilo decorativo en color dorado
Alambre de floristería
Pinza y piqueta
Aguja para tejer crochet
Aguja lanera
Tijera
Relleno
Materials
Black crochet thread
White sewing thread
Decorative thread in gold color
Florist wire
Tweezers and picks
Crochet knitting needle
Wool needle
Scissors
Stuffing
Proceso/Process
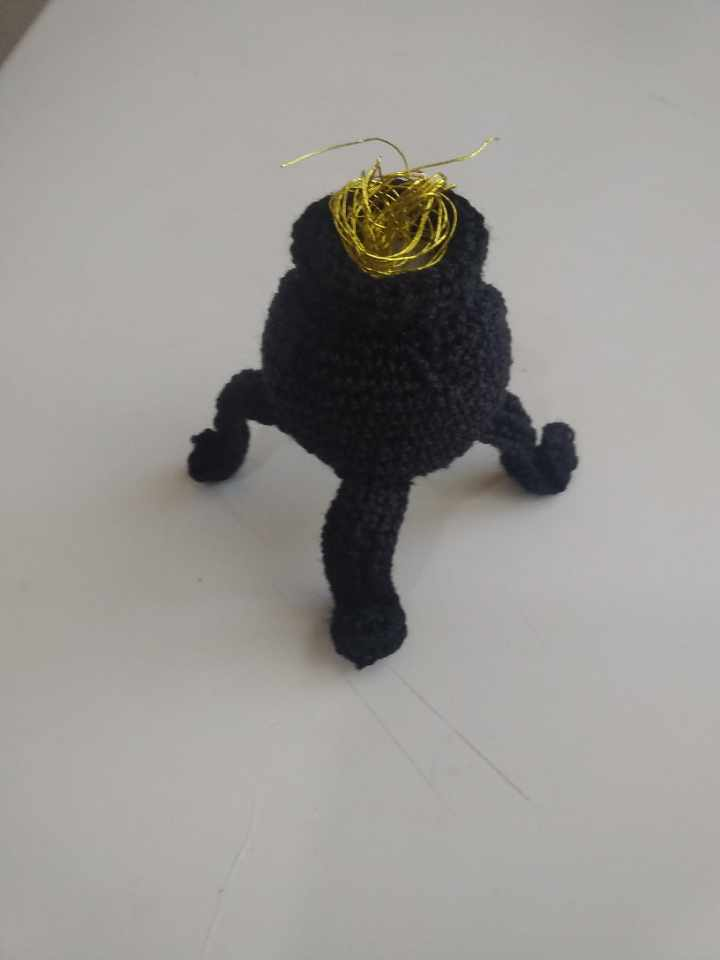
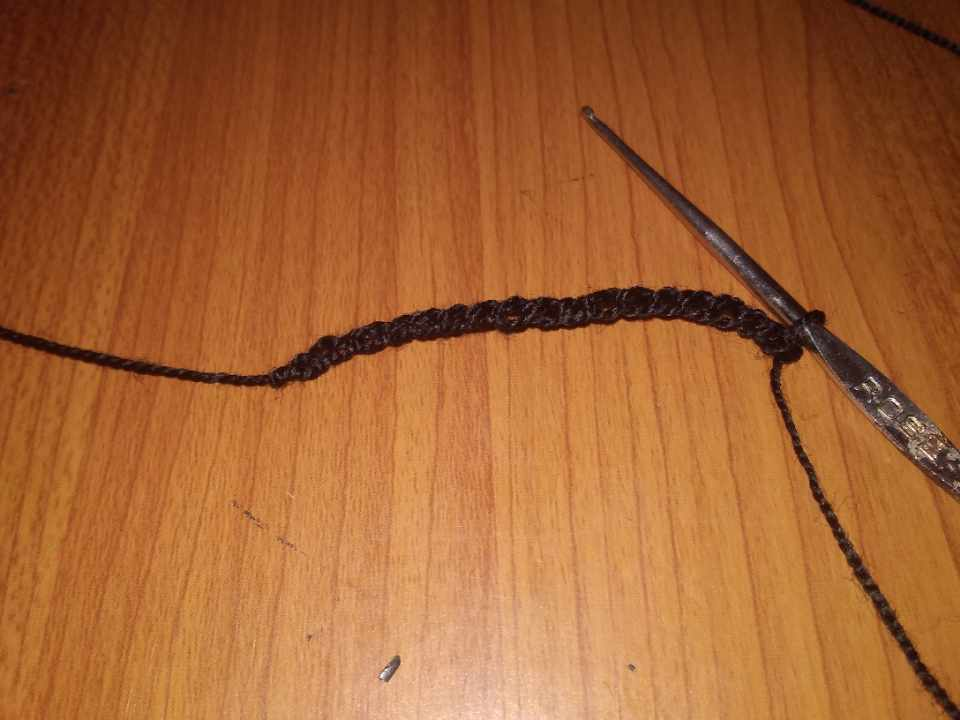
Para realizar la base de este caldero, trabajamos con hilo negro e iniciamos con un anillo mágico de seis puntos bajos, luego en la próxima vuelta hacemos solo aumentos para obtener doce puntos, seguidamente un punto bajo más aumento logrando 18 puntos, luego 2 puntos bajos más un aumento obteniendo 24 puntos y por último una vuelta más de tres puntos bajos más aumento con un total de 30 puntos bajos. Como pueden observar, la pieza posee el hilo blanco de costura debido a que lo usé como marcador en cada vuelta.
To make the base of this cauldron, we work with black yarn and start with a magic ring of six single crochet stitches, then in the next round we make only increases to obtain twelve stitches, then a single crochet plus increase to obtain 18 stitches, then 2 single crochets plus an increase to obtain 24 stitches and finally one more round of three single crochets plus increase for a total of 30 single crochets. As you can see, the piece has the white sewing thread because I used it as a marker in each round.
Repetimos todo el proceso para realizar una pieza más que dejaremos reservada para el final. A una de las piezas le dejamos hilo de más y la otra continuará en el rollo de hilo.
We repeat the whole process to make one more piece that we will leave reserved for the end. One of the pieces will have some extra yarn and the other will continue on the yarn spool.
A partir de aquí vamos a comenzar a elaborar el cuerpo del caldero, por lo que comenzamos realizando una vuelta simple de 30 puntos bajos, en la siguiente vuelta 6 puntos más aumentos con un total de 34 puntos, seguidamente realizamos 6 vueltas de 34 puntos, proseguimos y a partir de aquí las disminuciones con 6 puntos y disminución obteniendo 30 puntos, en las próximas vueltas 5-4-3 puntos y disminución consiguiendo así 25-20-15 puntos respectivamente.
From here we will begin to elaborate the body of the cauldron, so we start by making a simple row of 30 single crochet stitches, in the next row 6 stitches plus increases with a total of 34 stitches, then we make 6 rows of 34 stitches, we continue and from here the decreases with 6 stitches and decrease obtaining 30 stitches, in the next rows 5-4-3 stitches and decrease obtaining 25-20-15 stitches respectively.
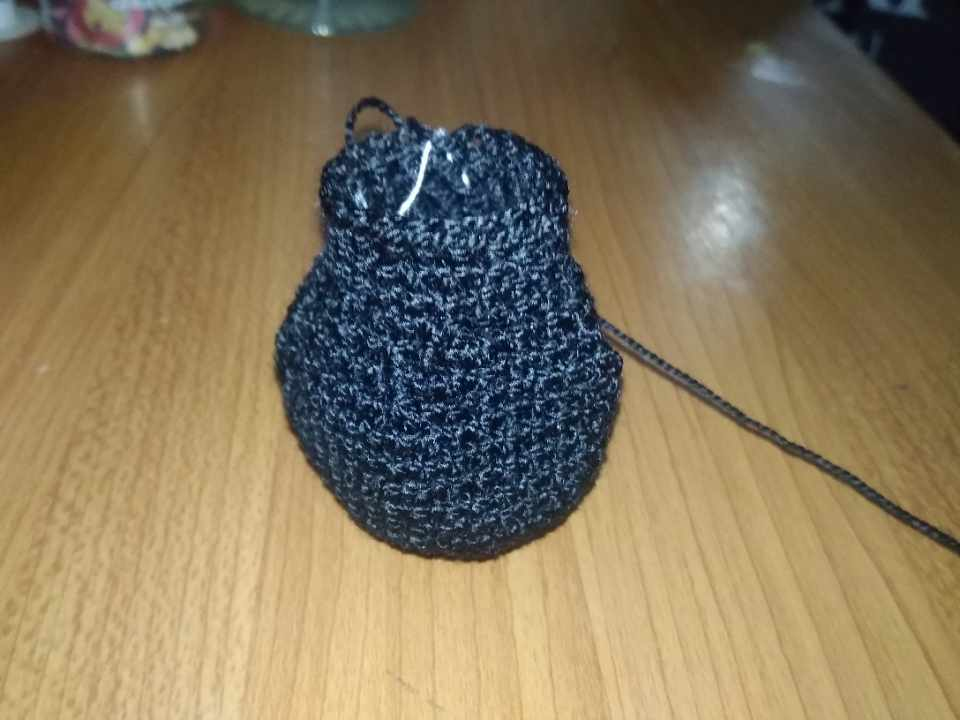
Las siguientes tres vueltas serán de 15 puntos cada una.
The next three laps will be of 15 stitches each.
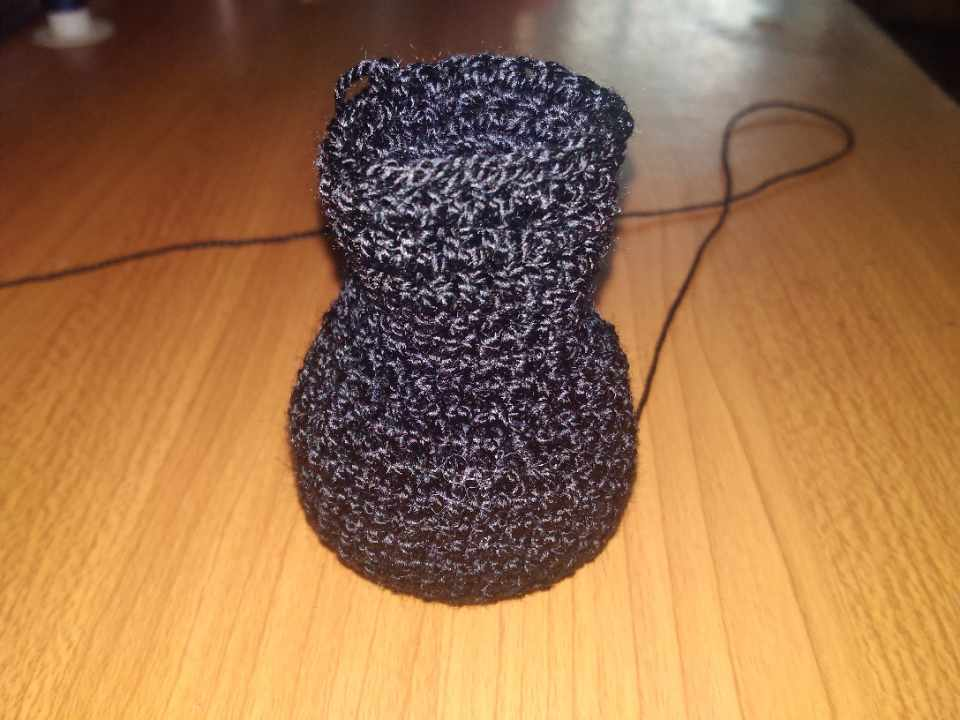
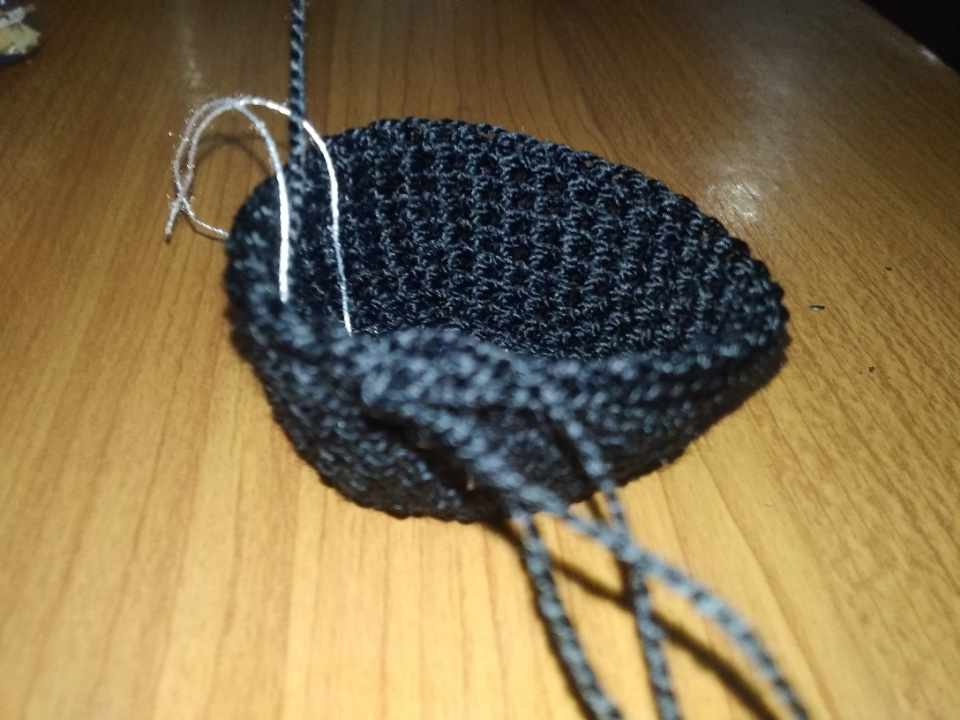
Para elaborar el borde del caldero, elaboramos 3 vueltas de 15 puntos medios altos, rematamos y dejamos hilo largo.
To make the edge of the cauldron, we knit 3 rows of 15 medium-high stitches, finish off and leave long yarn.
La parte que recién hicimos de puntos medios altos, la doblamos hacia fuera. El hilo largo que dejamos lo llevamos a la aguja lanera para asegurar el borde. Luego de ello, podemos fácilmente agregar en el fondo un poco de relleno.
The part that we just made of medium high stitches, we fold it outwards. The long thread that we left we bring it to the wool needle to secure the edge. After that, we can easily add some stuffing to the bottom.
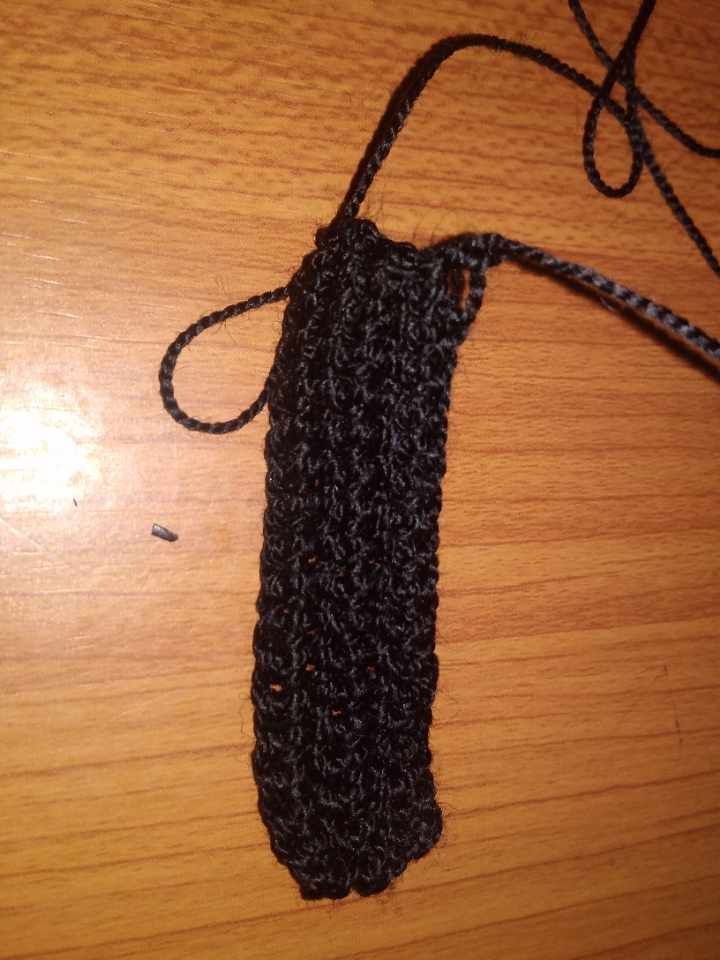
Para las patas del caldero, lo primero es levantar 16 cadenetas y en ellas hacemos puntos bajos, con un total de 5 vueltas.
For the legs of the cauldron, the first thing to do is to pick up 16 chain stitches and knit a total of 5 rows.
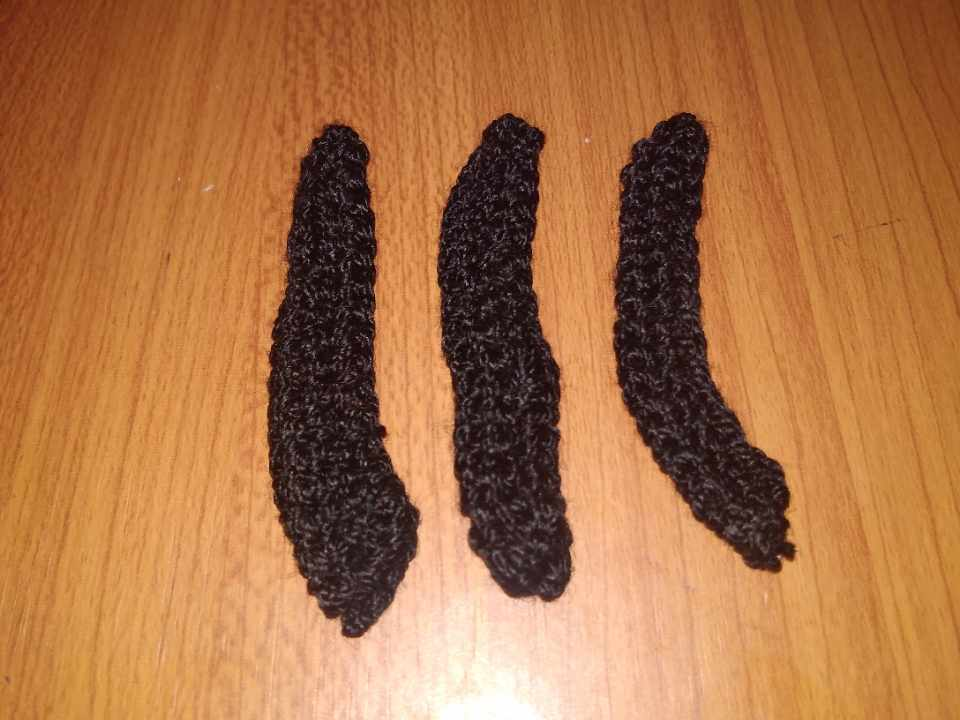
Doblamos a la mitad y con punto deslizado unimos cada pieza, cerrando solo en una de las puntas.
Fold in half and slip stitch each piece together, closing only at one end.
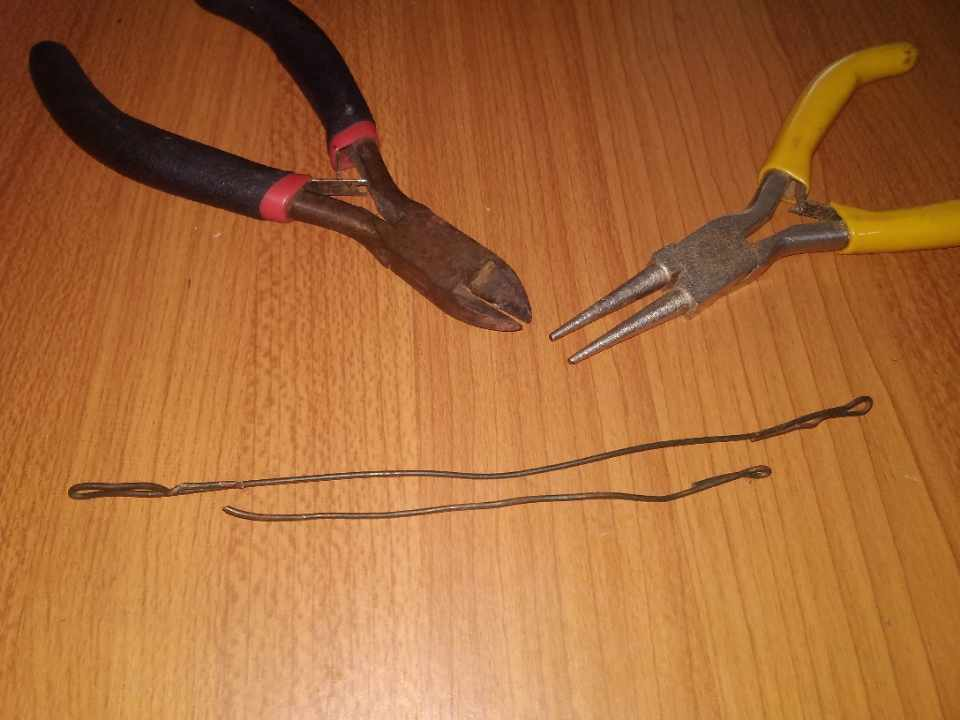
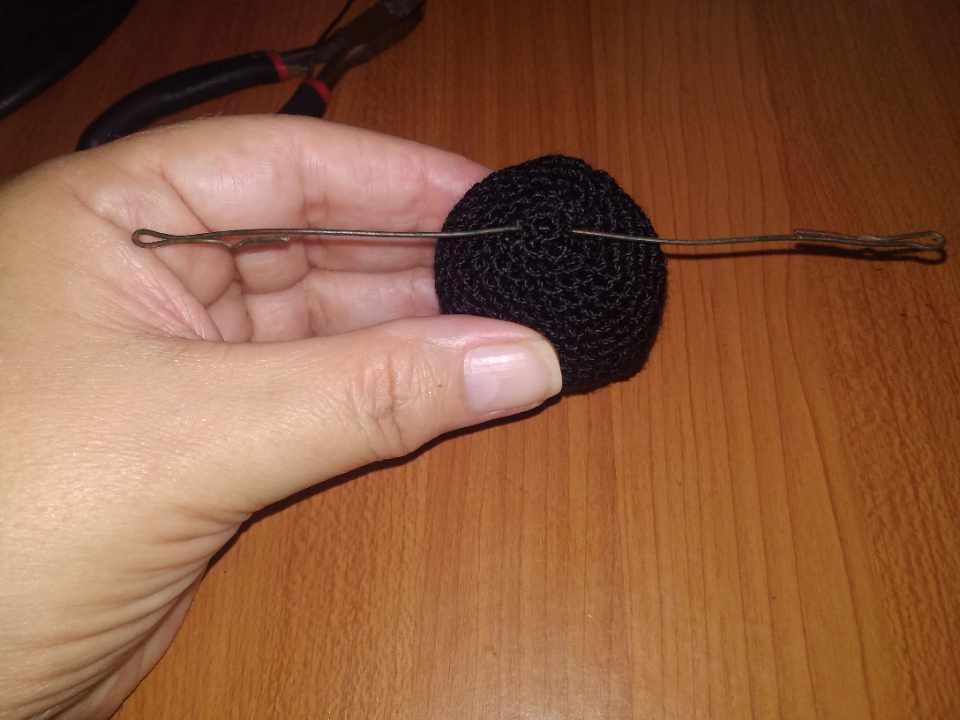
Cortamos 20 centímetros del alambre de floristería usando la piqueta y de lo que quede cortamos 19 centímetros. En las puntas y con ayuda de la pinza doblamos las puntas del alambre tal como lo muestra la imagen.
We cut 20 centimeters of the florist wire using the pickaxe and from what is left we cut 19 centimeters. At the ends and with the help of the pliers we bend the ends of the wire as shown in the image.
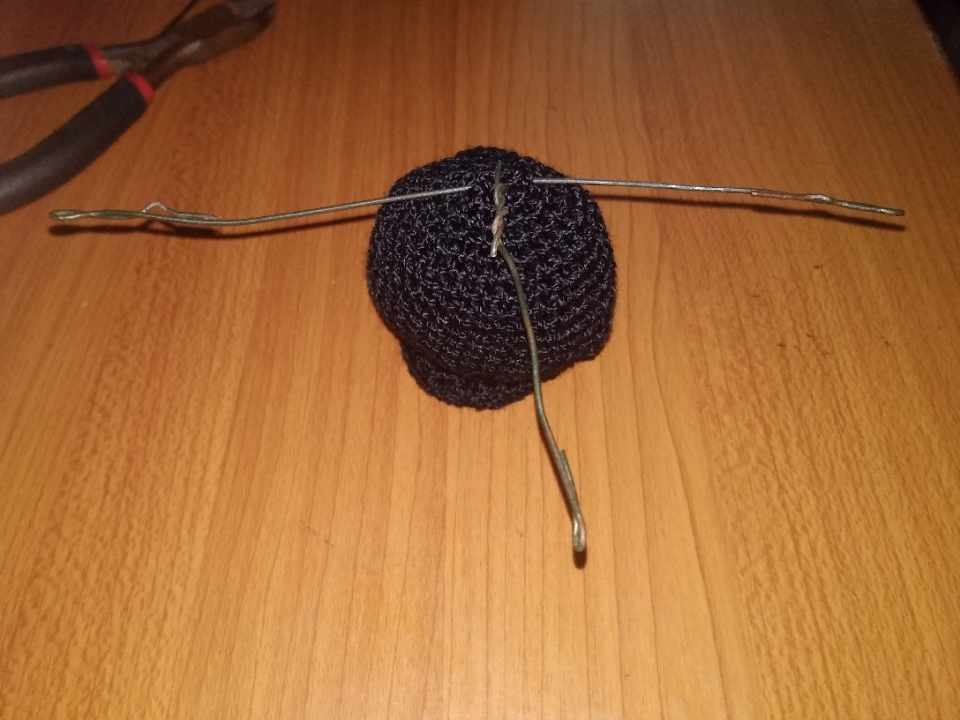
Tomamos el alambre largo y lo introducimos en la parte de la base, justo donde iniciamos con el anillo mágico, Allí aseguramos que quede la mitad del alambre y tomando el otro alambre, lo unimos al más largo, entorchando con ayuda de la pinza para asegurar.
We take the long wire and we introduce it in the part of the base, just where we started with the magic ring, there we make sure that half of the wire is left and taking the other wire, we join it to the longer one, twisting it with the help of the clamp to secure it.
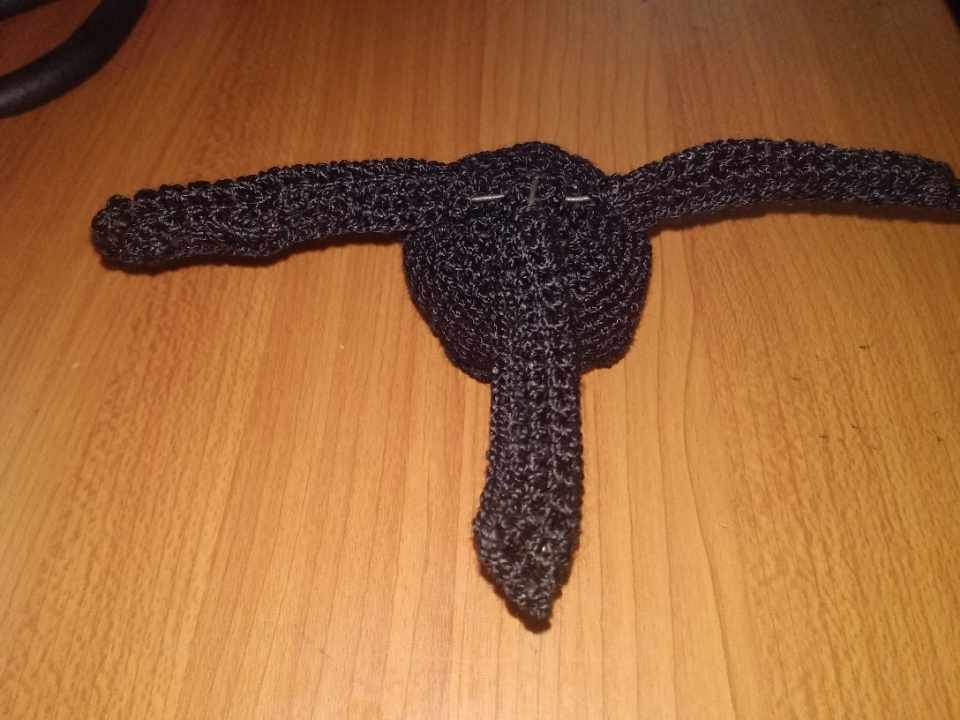
Lo siguiente es vestir los alambres con el tejido que hicimos para las patas.
Next is to dress the wires with the fabric we made for the legs.
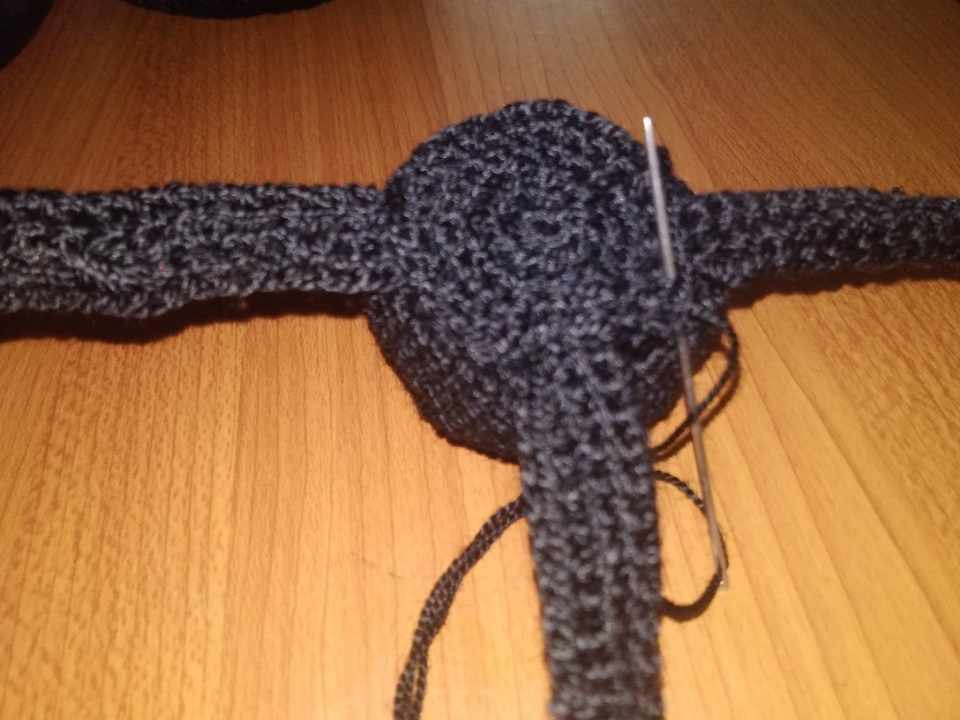
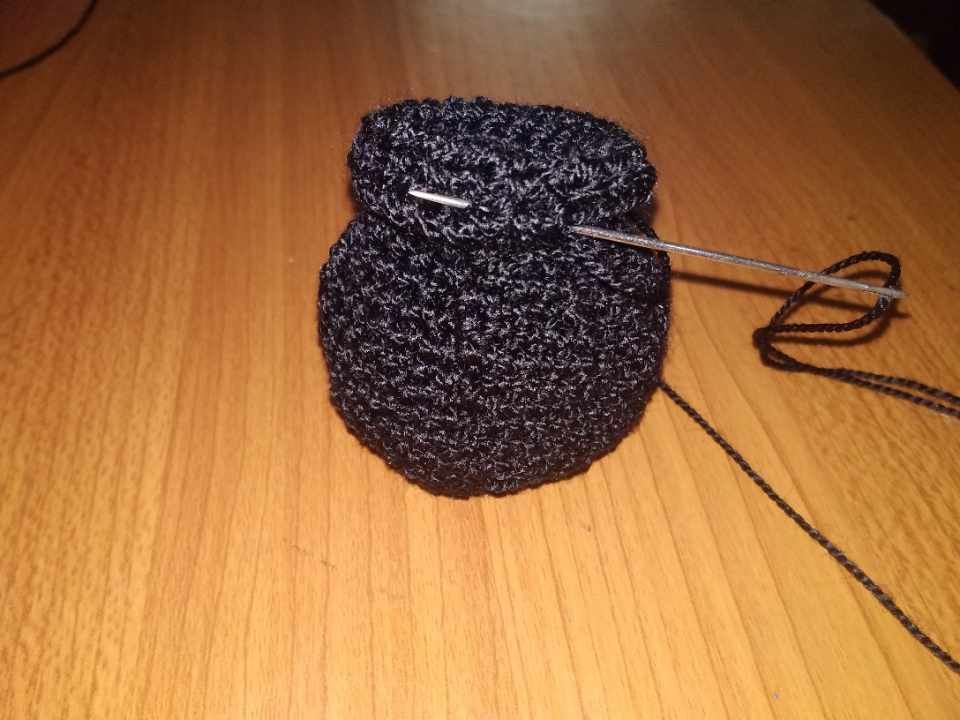
En esta parte vamos a pegar la otra base que teníamos en reserva, así que esto lo hacemos con la aguja lanera.
In this part we are going to glue the other base that we had in reserve, so we do this with the wool needle.
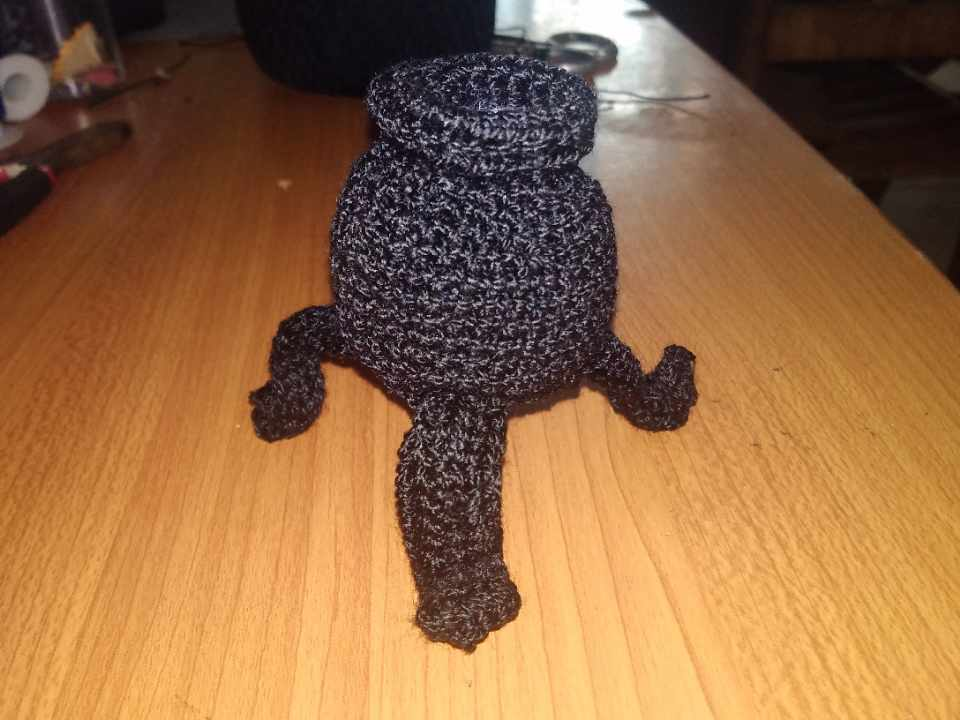
Acá le damos forma a las patas, esto lo podemos hacer con ayuda de la pinza.
Here we shape the legs, this can be done with the help of the tweezers.
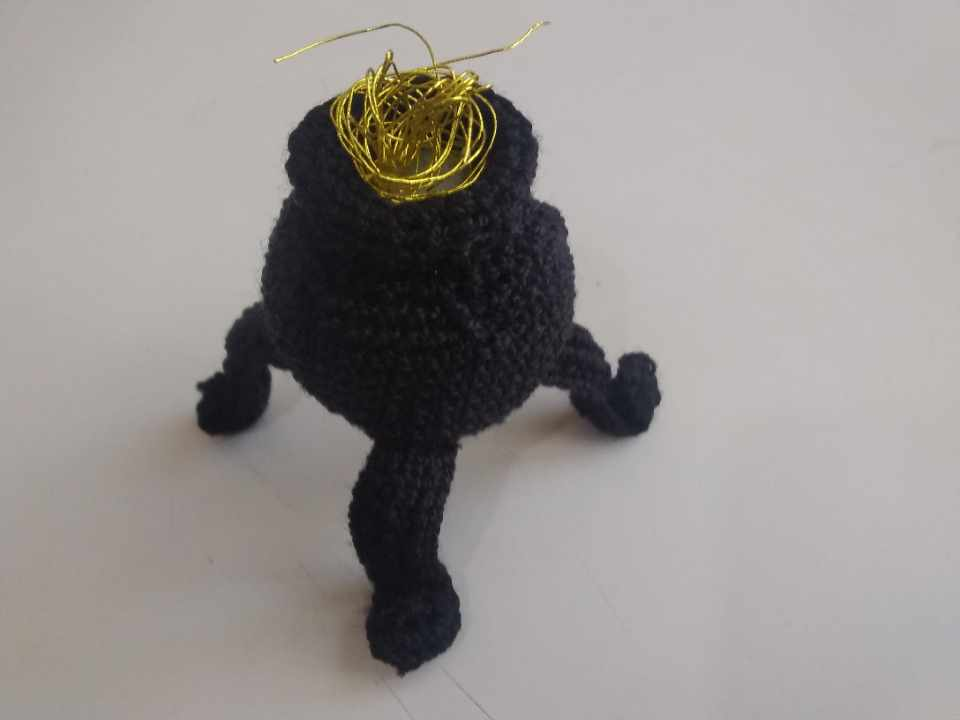
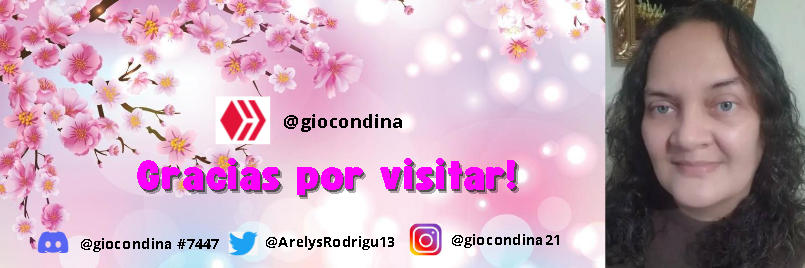
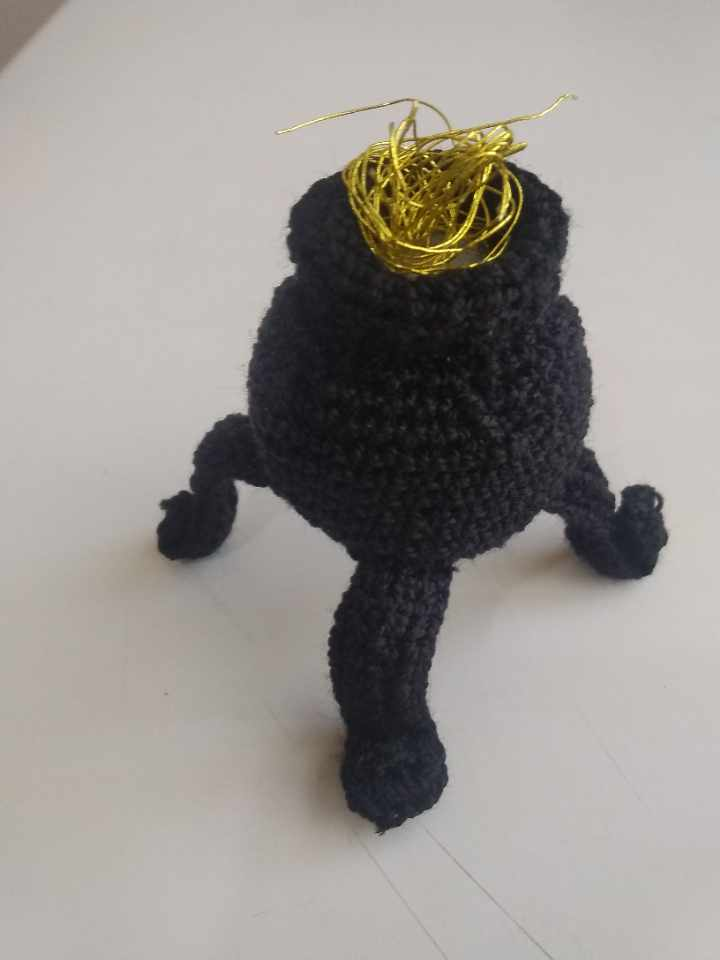
Lo último será tomar el hilo dorado para colocarlo encima del relleno y así simular el hechizo mágico que se cocina en este caldero.
The last thing to do is to take the golden thread and place it on top of the filling to simulate the magic spell that is cooked in this cauldron.