Hola amigos, espero que estén muy bien. Por aquí vengo una vez más para compartirles un nuevo proyecto. Me encantó hacerlo porque me distraje, ocupé mi tiempo haciendo lo que me gusta y aproveché algunos pocos de hilos que tenía en la cesta, además reciclé, me fue súper útil y práctico este material. ¿Quieren saber de qué se trata? No dejen de ver y leer el siguiente post. Realizado con mucho cariño y entusiasmo para compartir con todos ustedes.
Hello friends, I hope you are very well. Here I come once again to share with you a new project. I loved doing it because it distracted me, I occupied my time doing what I like and I took advantage of a few threads that I had in the basket, besides I recycled, I found this material very useful and practical. Do you want to know what it is about? Be sure to see and read the following post. Made with love and enthusiasm to share with all of you.
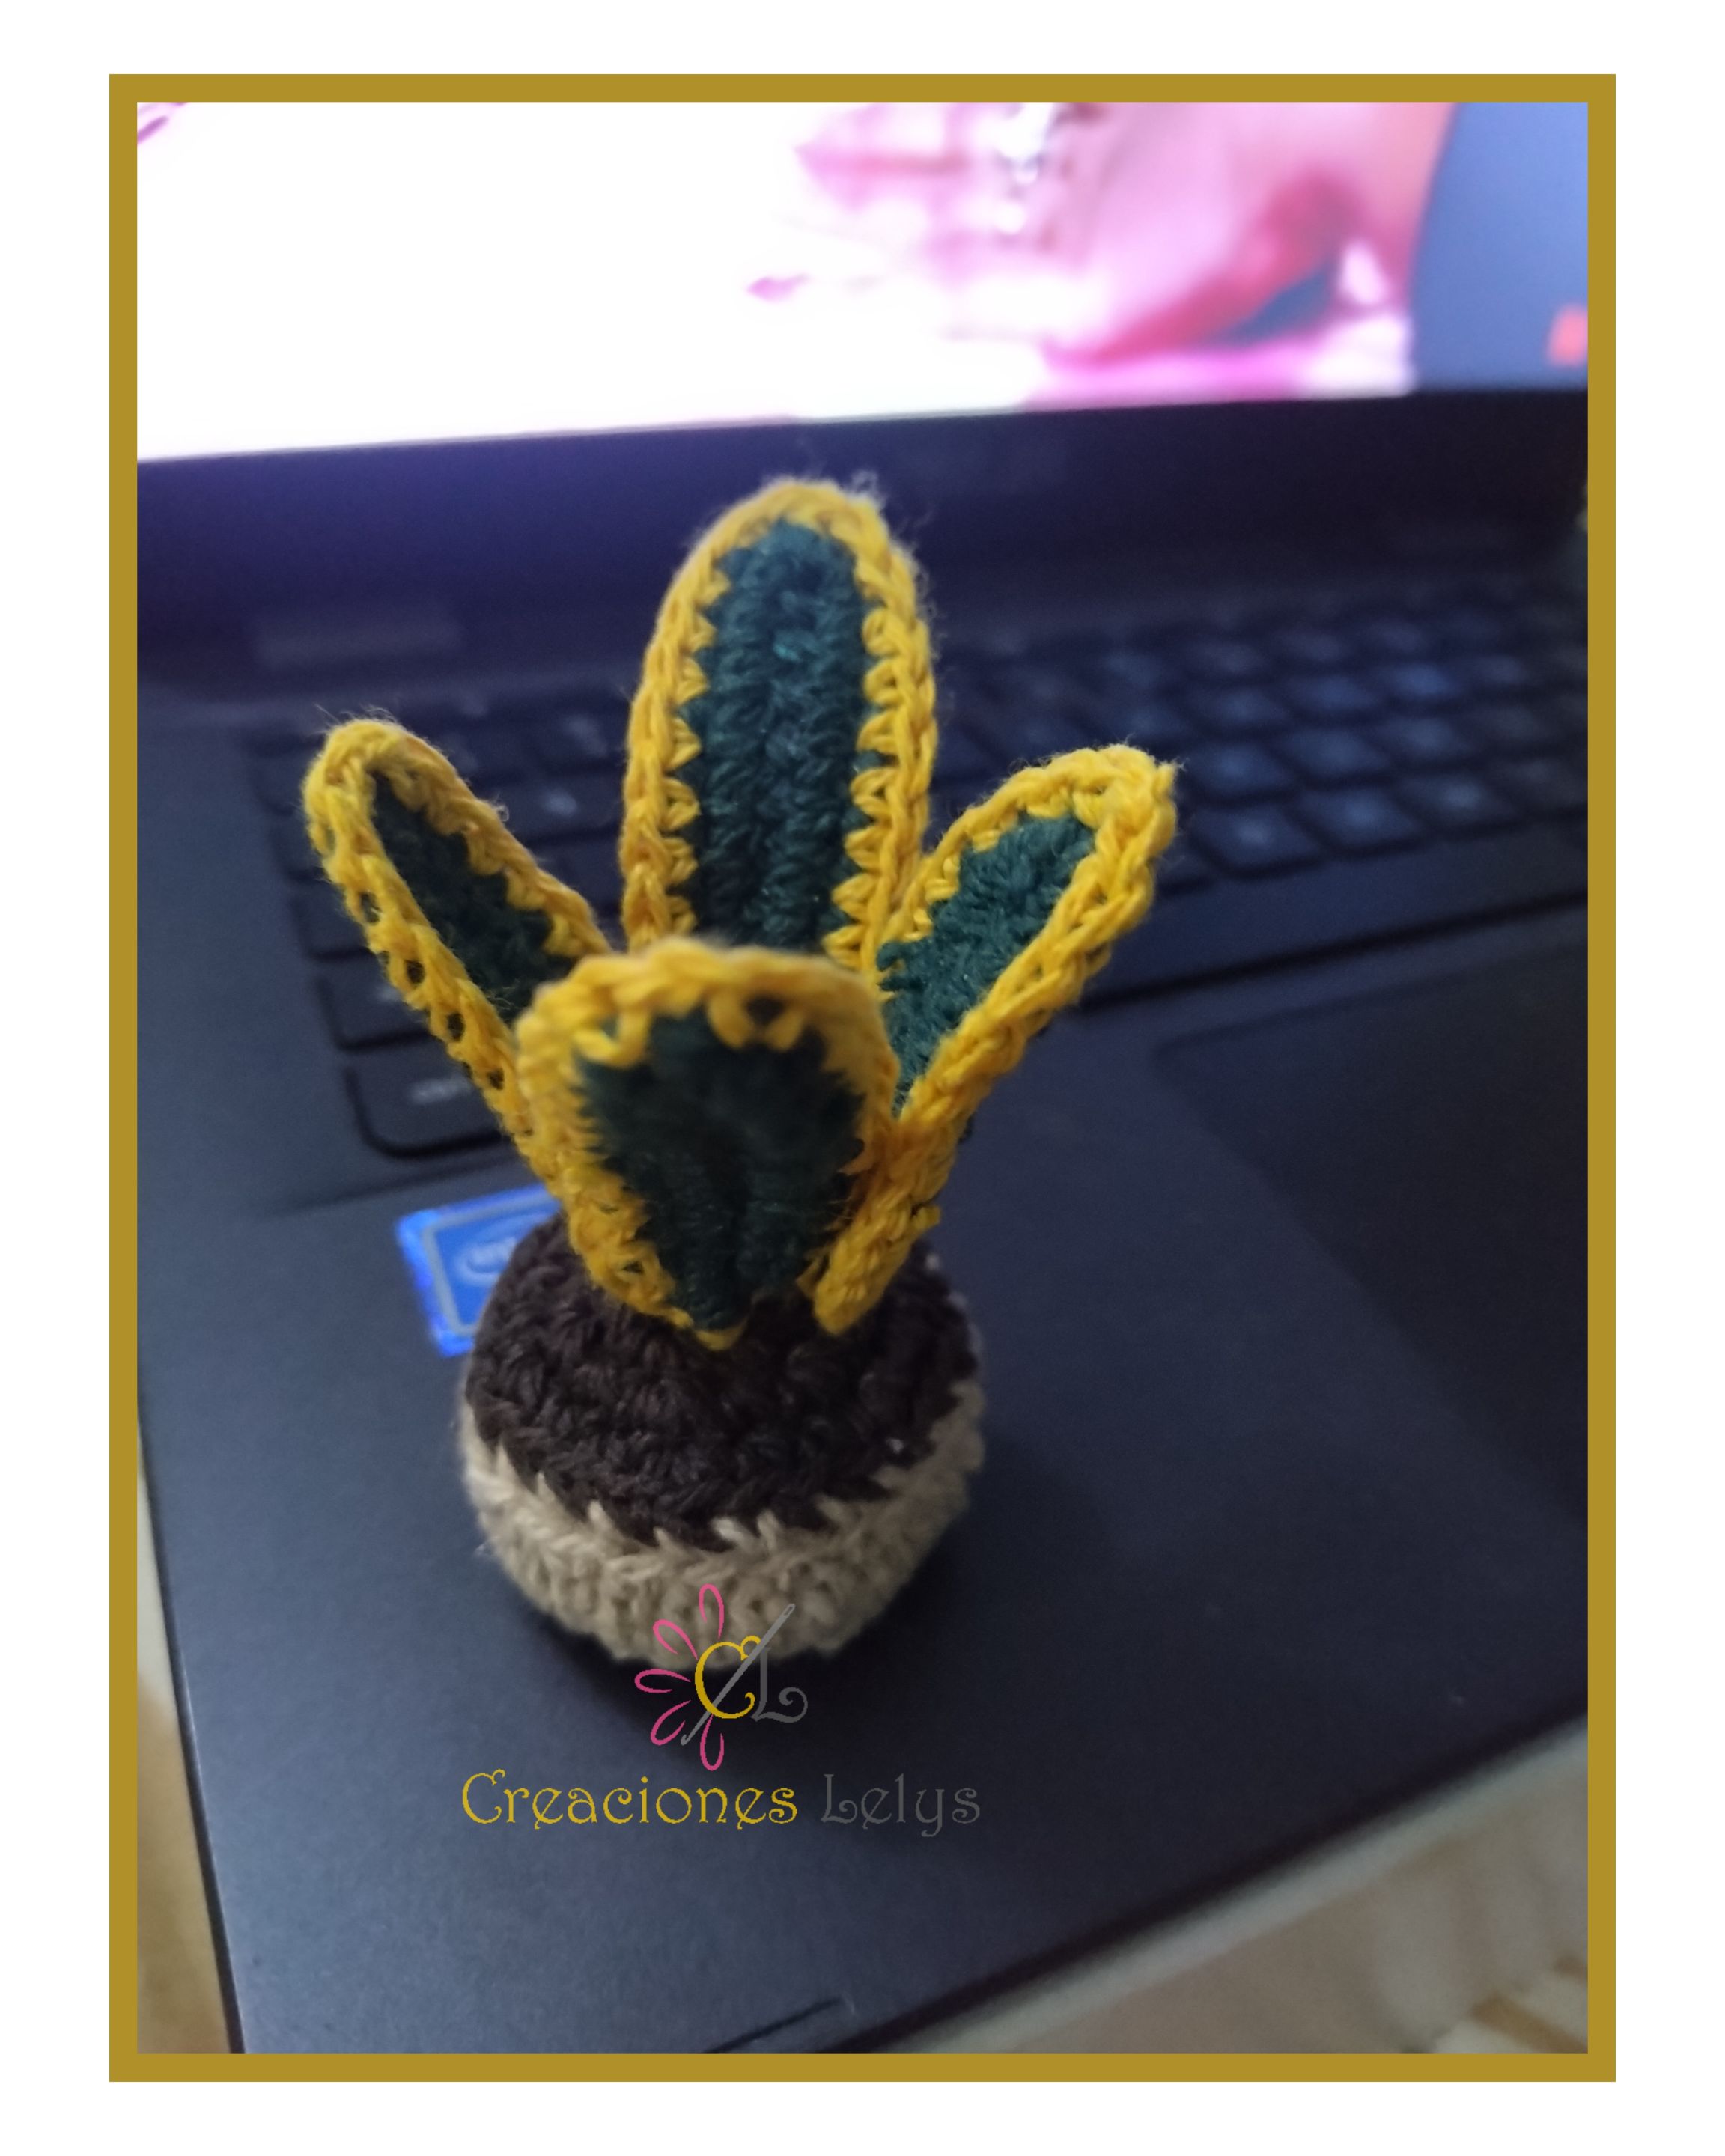
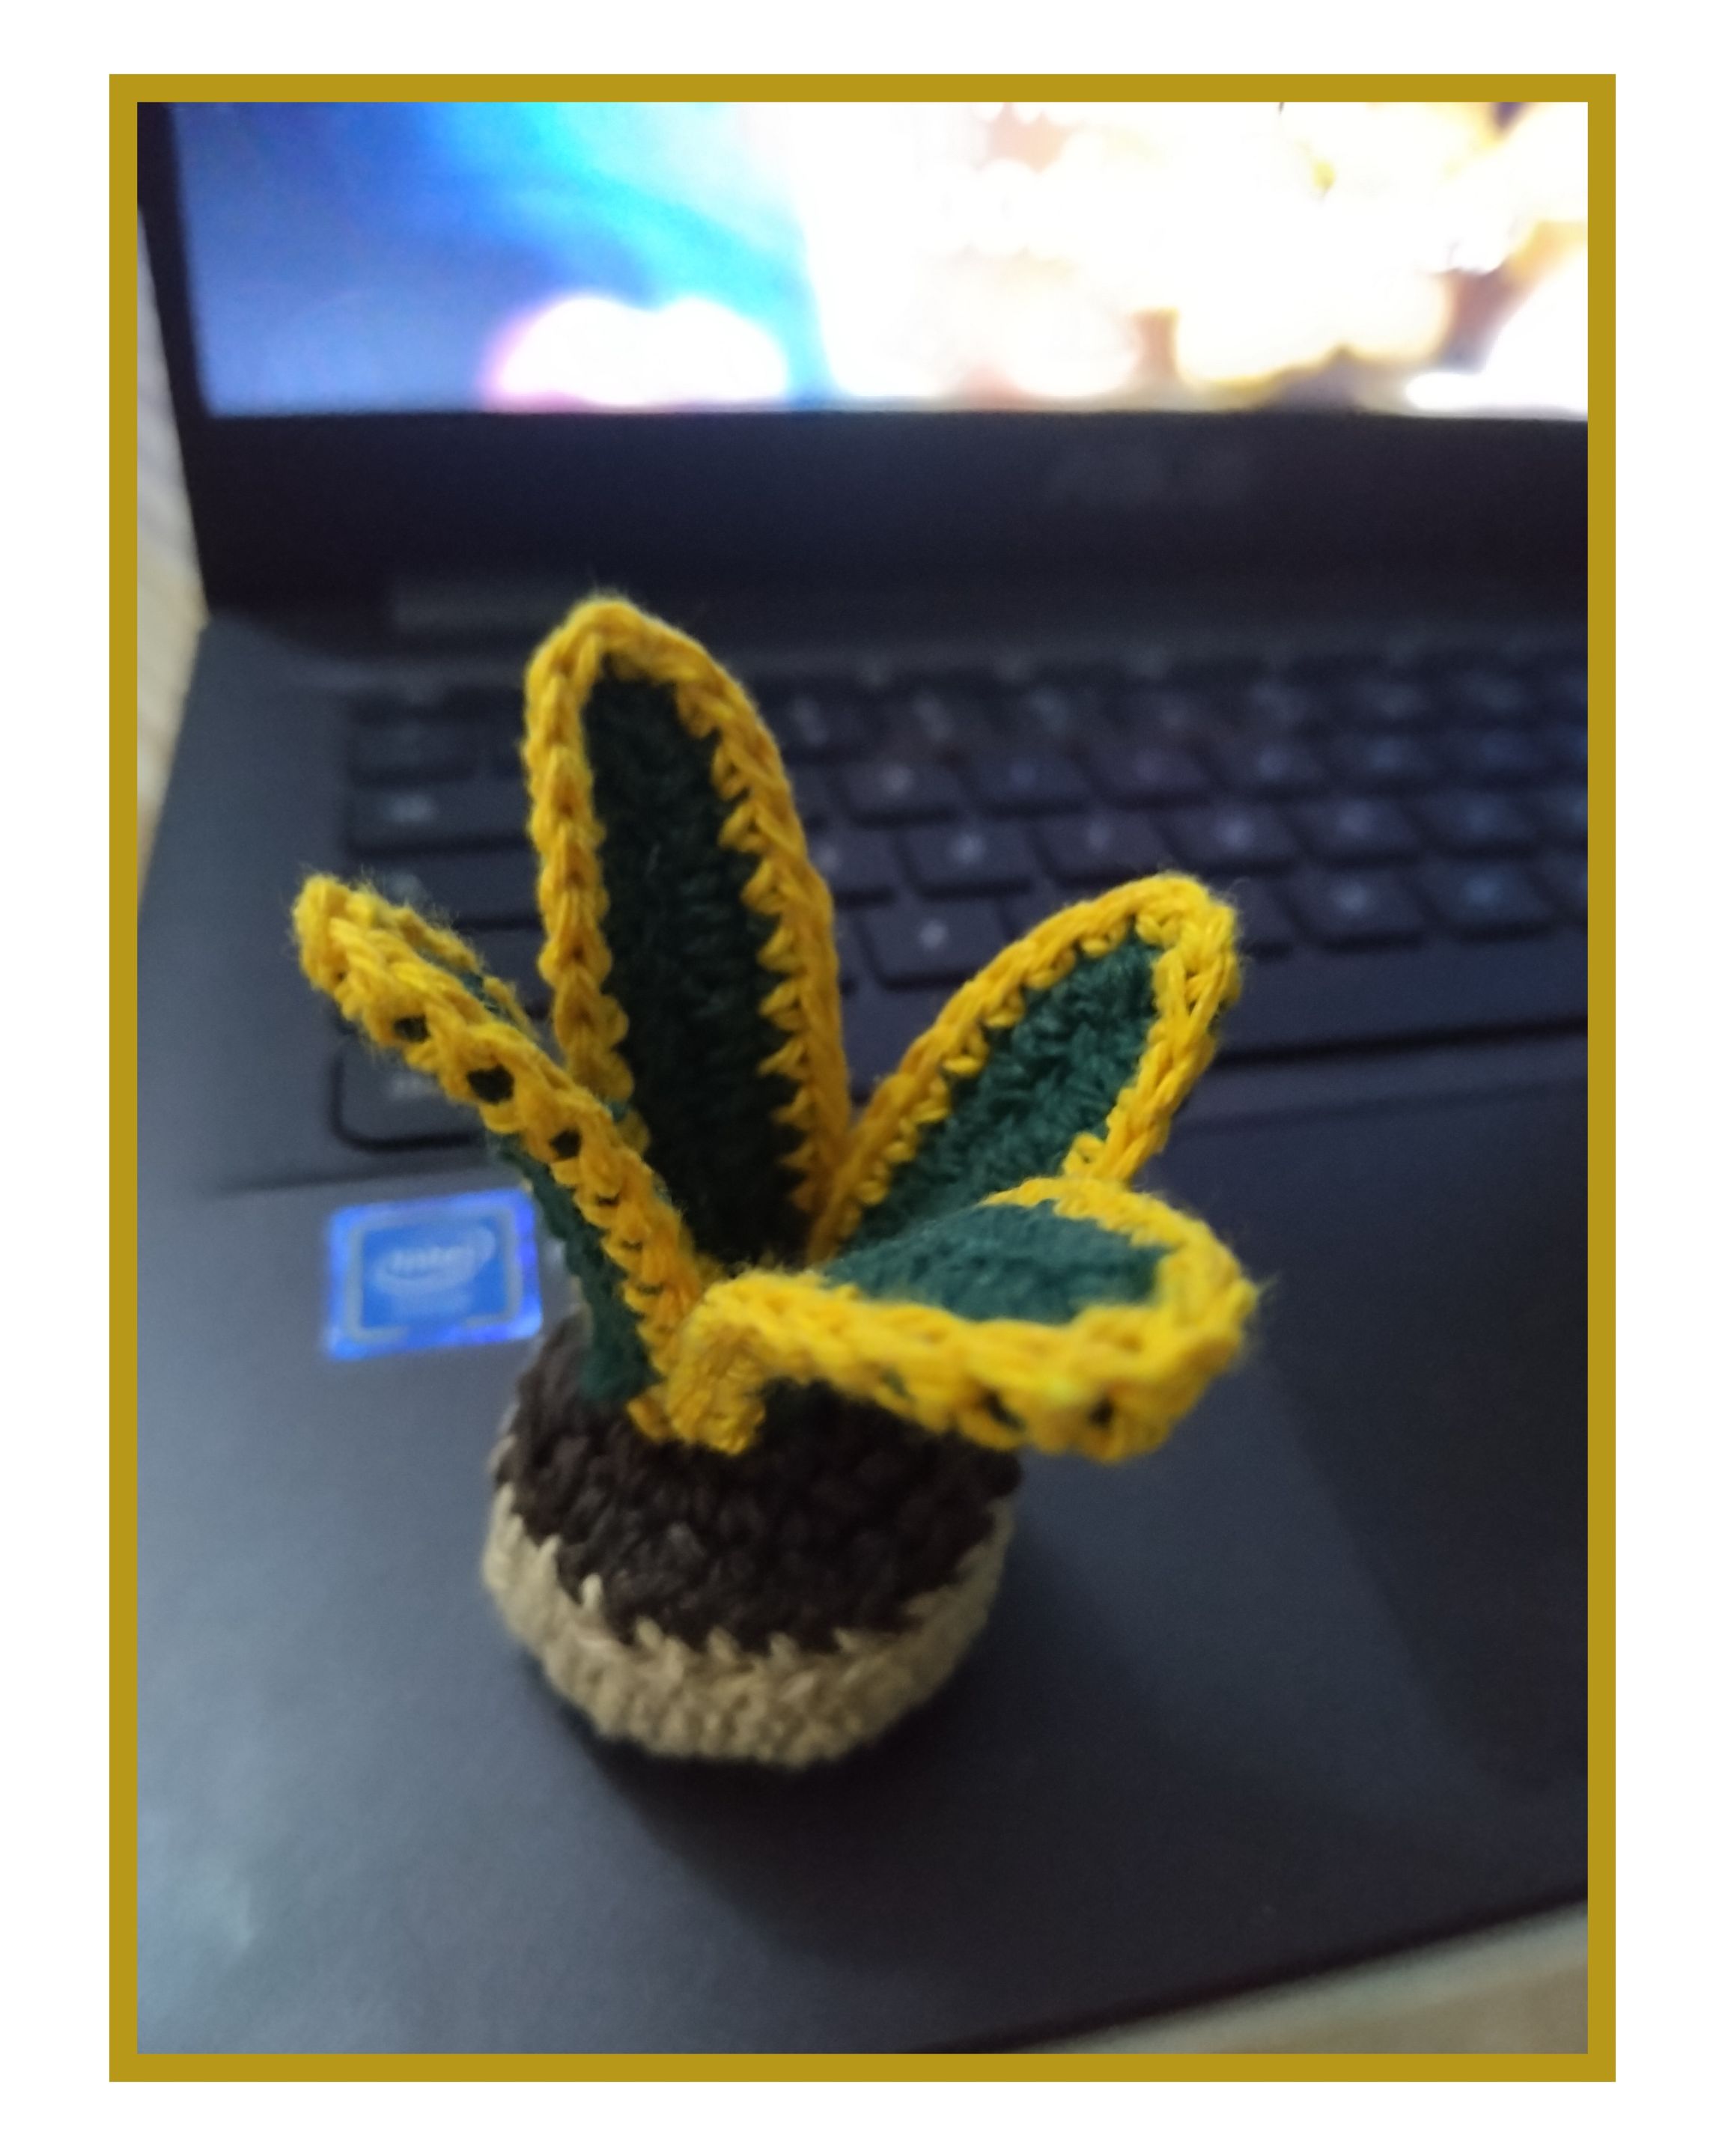
Lengua de suegra tejida a crochet. Versión mini.
Crocheted mother-in-law's tongue. Mini version.
Les cuento que no estoy tejiendo proyectos pequeños porque mi mano y brazo aún me duelen, pero estos tejidos me enamoran 😍 los veo tan cuchis y delicados. Hace un buen tiempo tejí algunas macetas pequeñas para mi mamá, ahora que se acerca la fecha de su cumpleaños quiero llevarle unas nuevas plantas para que las coloque de adorno en su casa. Ella es amante de las plantas y además le gusta mucho tener su sala y el corredor decorados. Espero que este diseño de mini lengua de suegra le guste mucho.
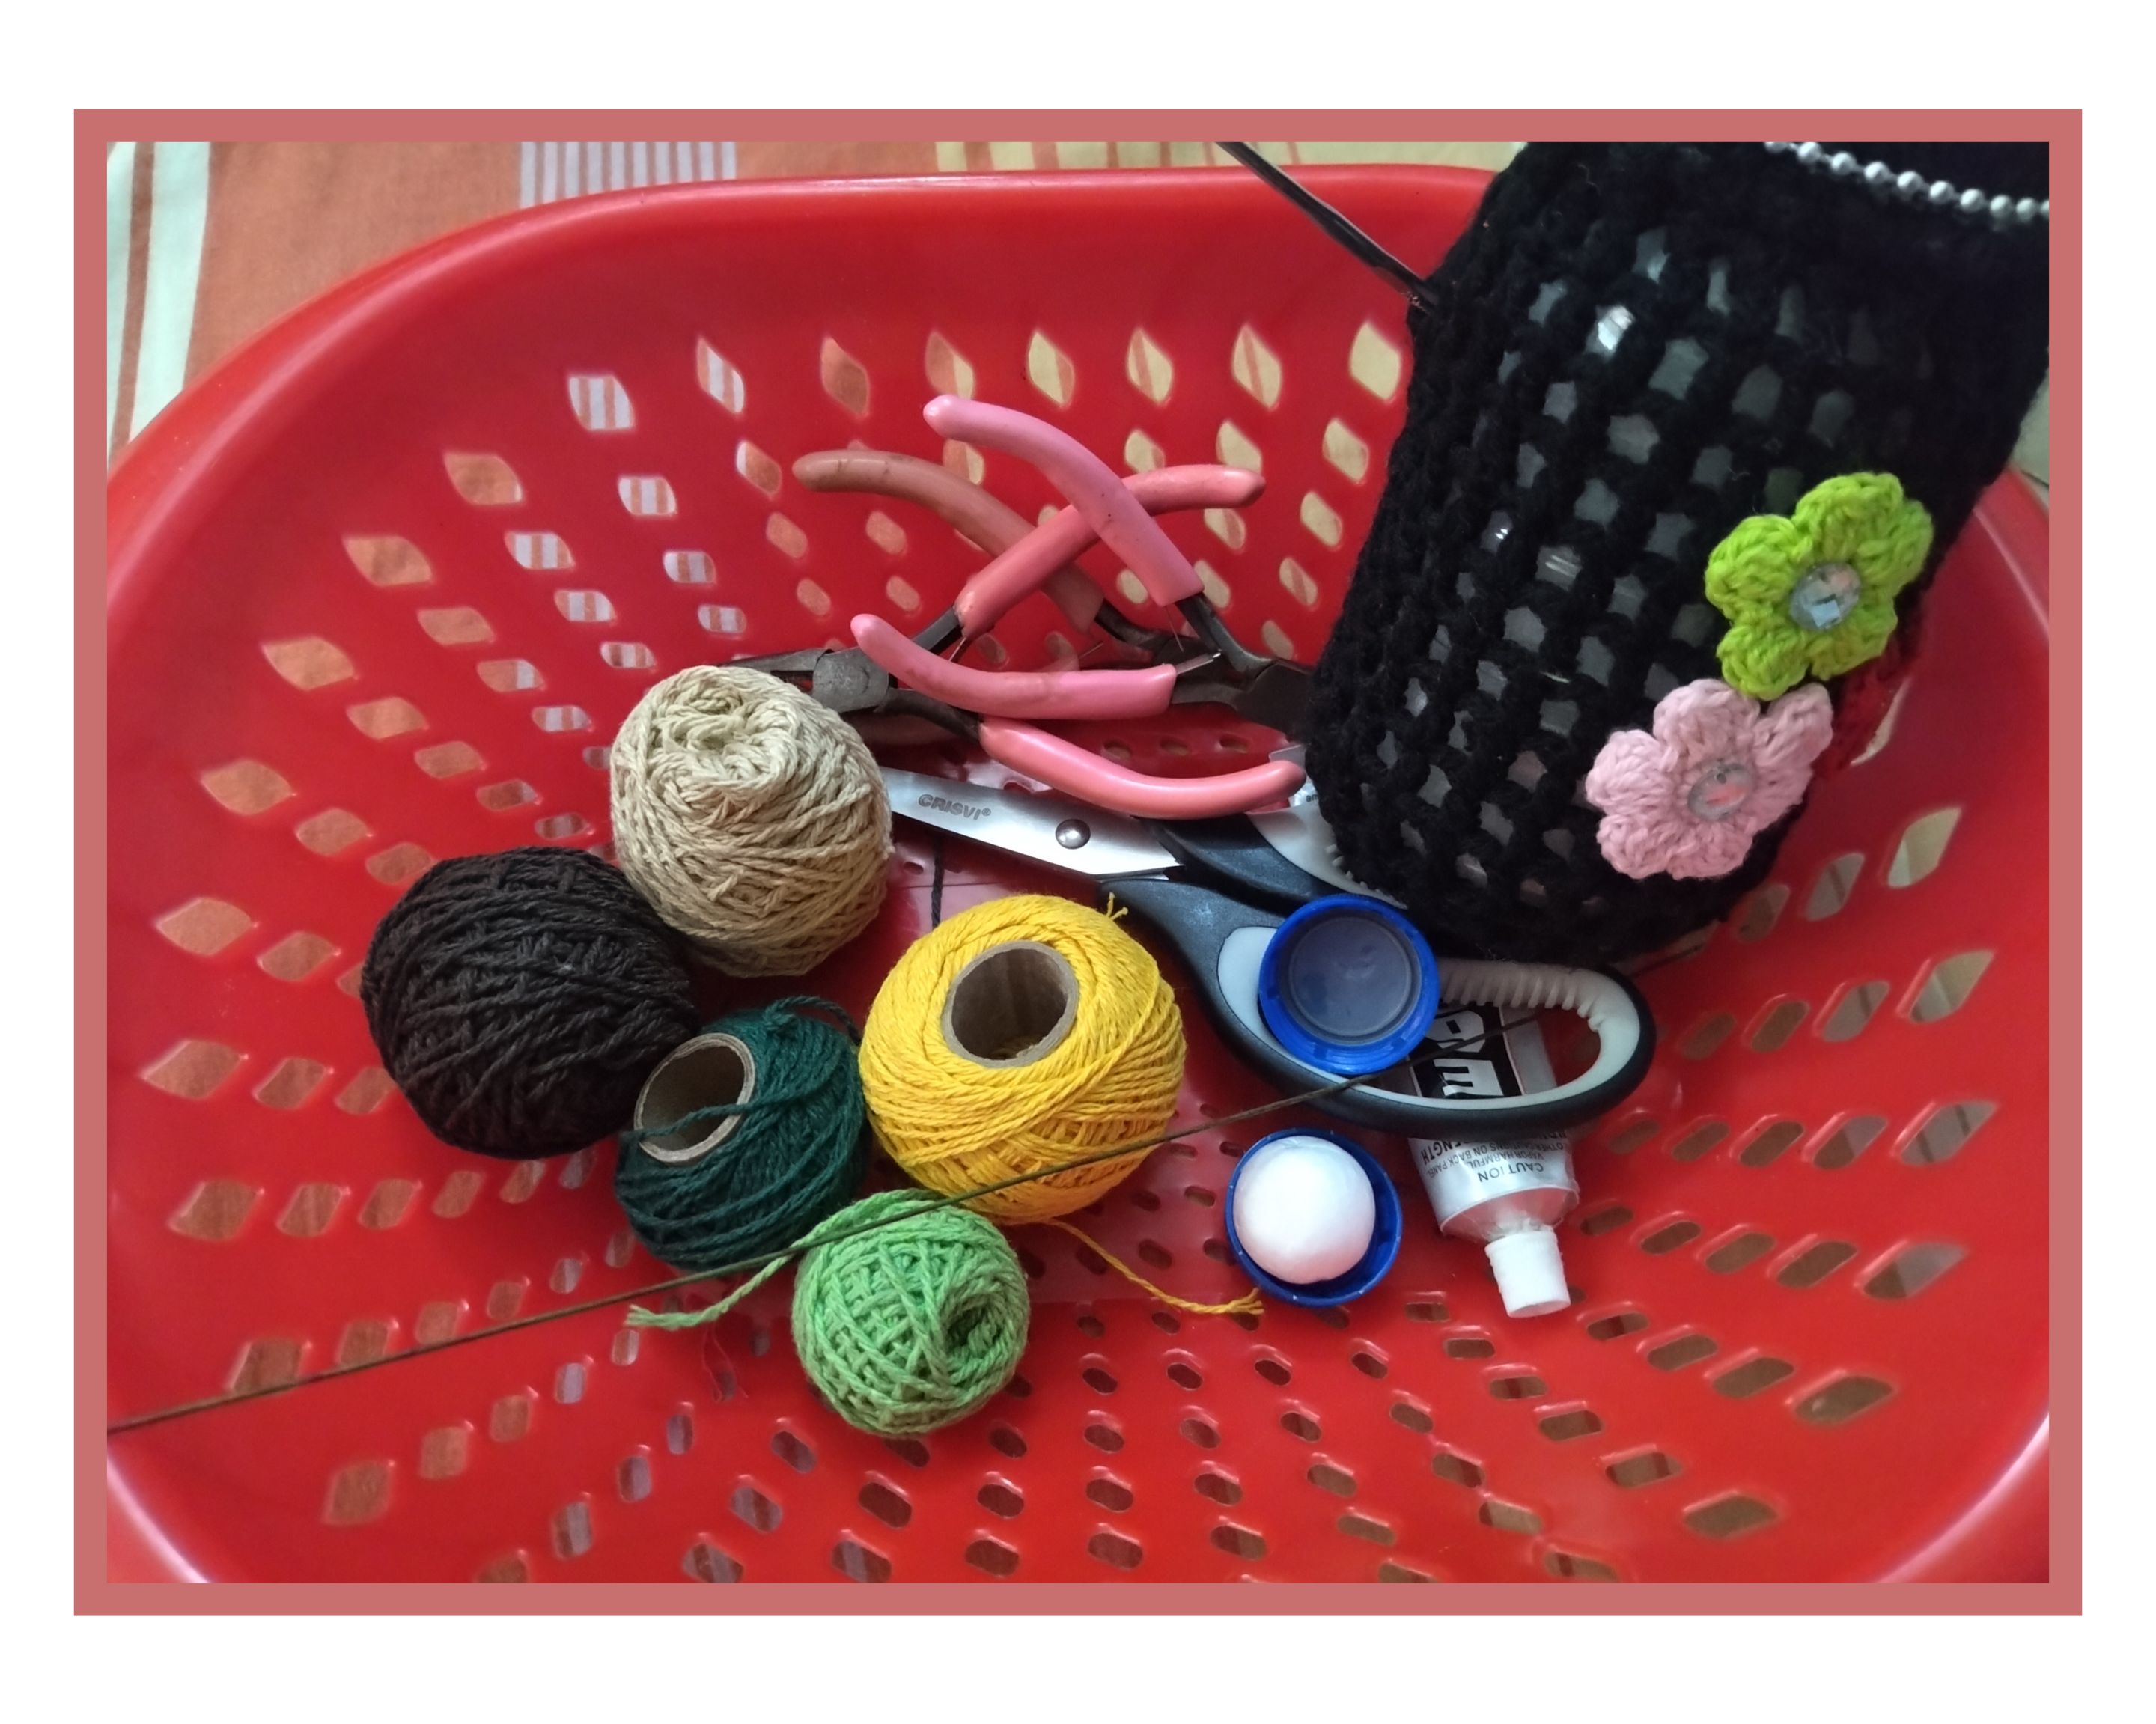
Para realizar mi nuevo proyecto usé los siguientes MATERIALES.
- Hilos pabilos.
- Gancho de crochet de 2,25mm.
- Aguja lanera.
- Tijeras.
- Media esfera de anime pequeña.
- Alambre de floristería del más delgado.
- Pinzas de bisutería.
- Pegamento.
- Tapa plástica reciclada.
I'm not knitting small projects because my hand and arm still hurt, but I love these knits 😍 I see them so cute and delicate. A while ago I knitted some small pots for my mom, now that her birthday is coming up I want to bring her some new plants to decorate her house. She is a plant lover and also loves to have her living room and hallway decorated. I hope she likes this mini mother-in-law tongue design.
To make my new project I used the following MATERIALS.
- Pabilos yarns.
- Crochet hook of 2.25mm.
- Wool needle.
- Scissors.
- Small anime half sphere.
- Thinner florist's wire.
- Jewelry tweezers.
- Glue.
- Recycled plastic lid.
Para ELABORAR esta mini versión de Lengua de suegra tejida seguí los siguientes pasos:
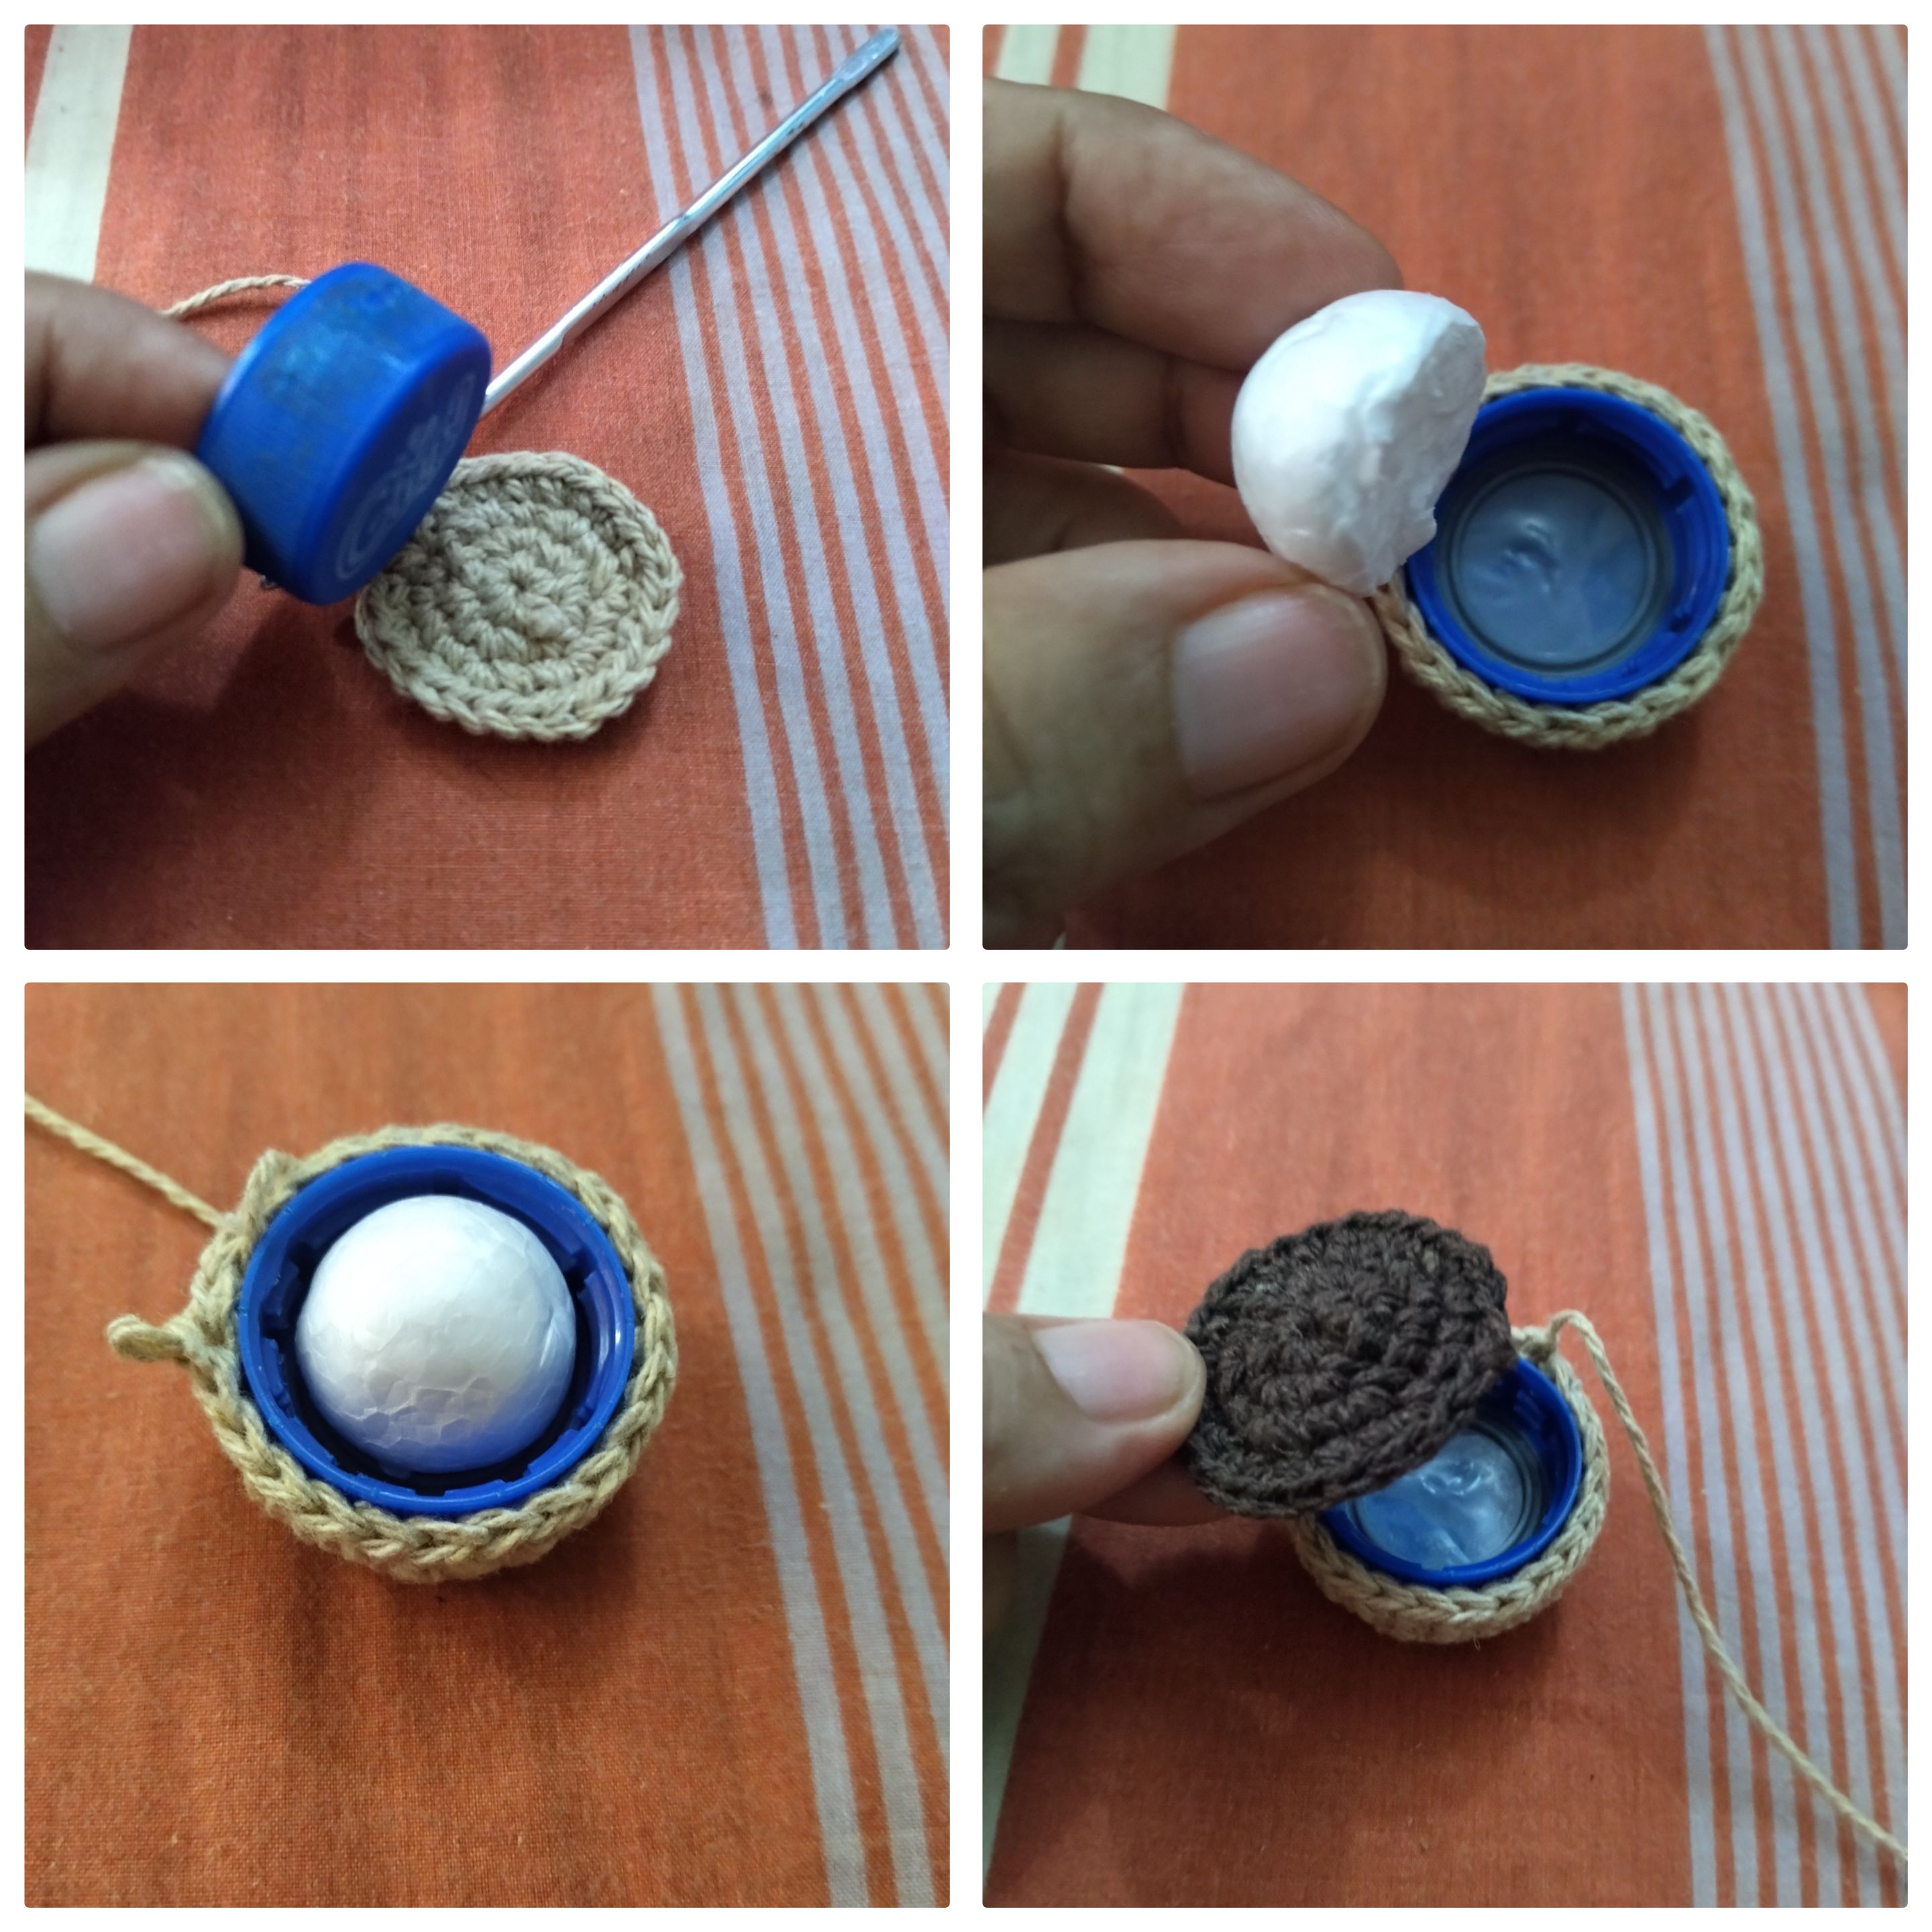
- Tejí con el hilo color beige la maceta. Inicié con 6pb en am. Luego tejí una vuelta de aumentos. Después una vuelta de 1pb-1aum. Otra de 2pb-1aum. La siguiente solo tomando la hebra de atrás tejí solo puntos bajos. Subí con dos vueltas más sin aumentos hasta cerrar con punto deslizado y cortar el hilo.
- Con el hilo color marrón tejí el mismo patrón, pero solo hasta la vuelta de 2pb-1aum. Cerré con pd y dejé la hebra larga para coser después a la maceta.
- Comprobé el tamaño colocando la tapa de Teo del tejido y la media esfera de anime.
To MAKE this mini version of the knitted Mother-in-law's Tongue I followed the following steps:
- I knitted with the beige yarn the flower pot. I started with 6pb in am. Then I knit one round of increases. Then a round of 1pb-1aum. Another round of 2pb-1aum. The next one I only knitted a single crochet, taking the strand from the back. I went up with two more rows without increases until I closed with slip stitch and cut the yarn.
- With the brown yarn I knit the same pattern, but only up to the round of 2pb-1aum. I closed with pd and left the long strand to sew later to the pot.
- I checked the size by placing the Teo cap of the fabric and the anime half sphere.
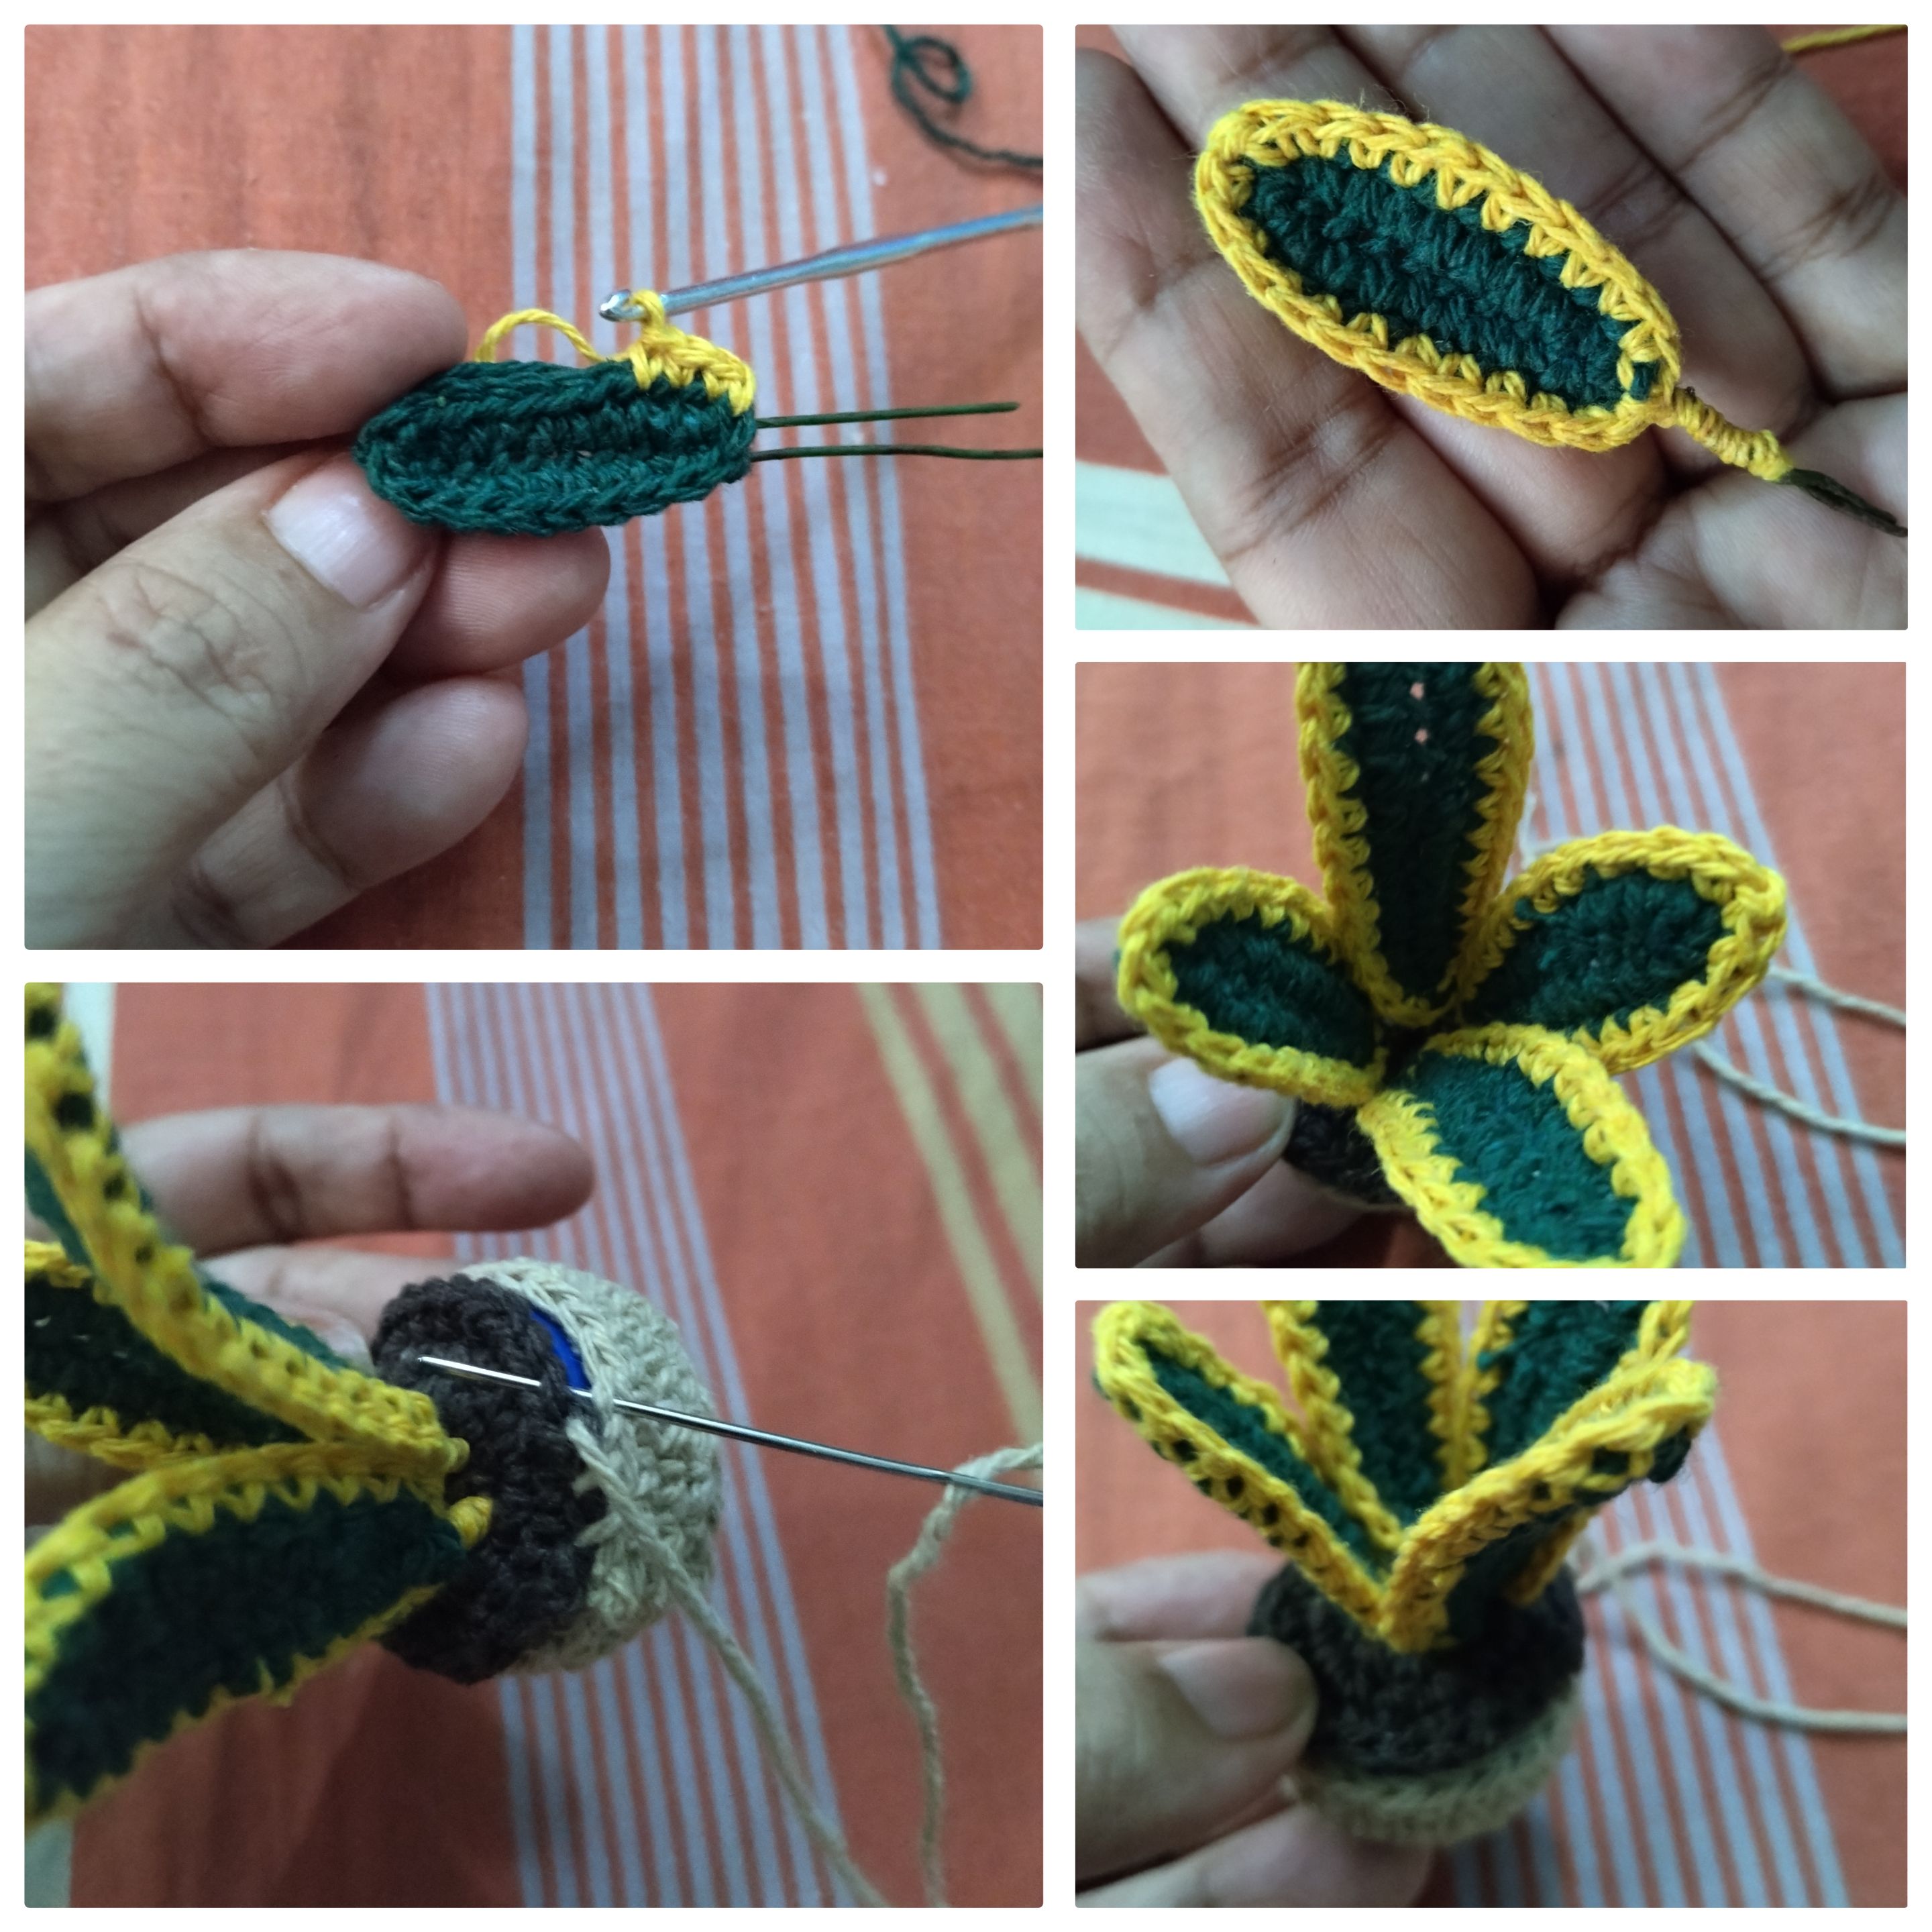
- Para tejer las hojas utilicé los hilos verde y amarillo. Empecé tejiendo en unas 12 cadenas en otras 15 cadenas. Unas hojas son más pequeñas que las otras. El tamaño puede variar o tejerlas todas iguales. Sobre esas cadenas tejidas coloqué el alambre de floristería y fui tejiendo una vuelta de puntos bajos en las cadenas y también por sobre el alambre. Antes de girar en la cadena tejí 1punto al aire y en ese mismo punto tejí otro punto bajo. Luego seguí tejiendo solo pb por el resto de la cadena. En el último punto de esta vuelta realicé el cambio de color a amarillo. En esa próxima vuelta repetí los mismos puntos de la vuelta anterior. Al cerrar la vuelta dejé el hilo un poquito largo para forrar el alambre.
- Una vez tejidas las hojas las coloqué en la parte marrón del tejido. Una vez allí las enganché en la media esfera de anime, acomodándolas para que todas quedaran en el centro.
- Finalmente uní con el hilo largo marrón que dejé en el tejido la maceta y la tierra. Si lo deseas o es necesario puedes colocar pegamento en la parte de adentro de la maceta antes de meter la tapa plástica y también en la media esfera. Como puedes ver es una versión mini y se ve súper linda.
- To weave the leaves I used the green and yellow yarns. I started weaving in about 12 strands in another 15 strands. Some leaves are smaller than others. The size can vary or weave them all the same. Over those woven chains I placed the florist wire and went knitting a round of low stitches in the chains and also over the wire. Before turning in the chain I knitted 1 stitch in the air and in that same stitch I knitted another single crochet. Then I continued knitting single crochet for the rest of the chain. In the last stitch of this row I made the color change to yellow. In the next row I repeated the same stitches of the previous row. When closing the loop I left the yarn a little bit long to cover the wire.
- Once the leaves were knitted I placed them in the brown part of the fabric. Once there, I hooked them onto the anime half sphere, arranging them so that they were all in the center.
- Finally I attached the pot and the soil with the long brown thread that I left on the fabric. If you wish or if necessary you can put glue on the inside of the pot before putting the plastic lid and also on the half sphere. As you can see it is a mini version and looks super cute.
Ahora ya sabes de qué manera reutilizar las tapas plásticas. Fácil, práctico y muy rápido de realizar. Es un bello adorno. Ahora que vaya a casa de mi mamá se la llevaré para que decore su hogar.
Now you know how to reuse plastic lids. Easy, practical and very quick to make. It is a beautiful ornament. Now when I go to my mom's house I will take it to her to decorate her home.
Muchísimas gracias por su apoyo. Todas las fotos son de mi propiedad. Edité con Polish. Usé el traductor de Deepl. Bendiciones.
Thank you very much for your support. All photos are my property. I edited with Polish. I used Deepl translator. Blessings.