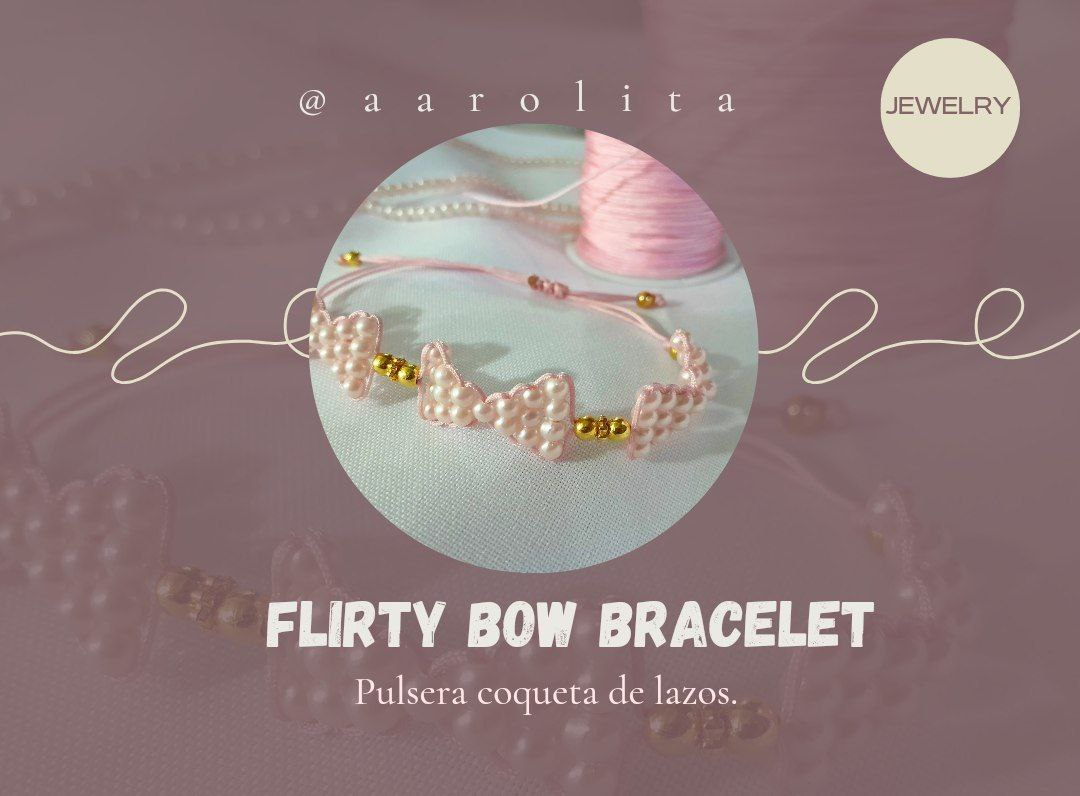
Hello my loves, I hope you had a great day. Today I stopped by to show you a model of a very pretty bracelet that I made. It's been a while since bows became fashionable and people still use them, so I wanted to make this pretty bracelet to show off when I go out.
Hola mis amores, espero que hayan tenido un grandioso día. El día de hoy pasó por acá para mostrarle un modelo de una pulsera muy bonita que hice, ya hace un tiempo que los lazos se pusieron de moda y la gente los sigue usando por lo que quise hacer esta pulsera bien coqueta para lucirla cuando salga.
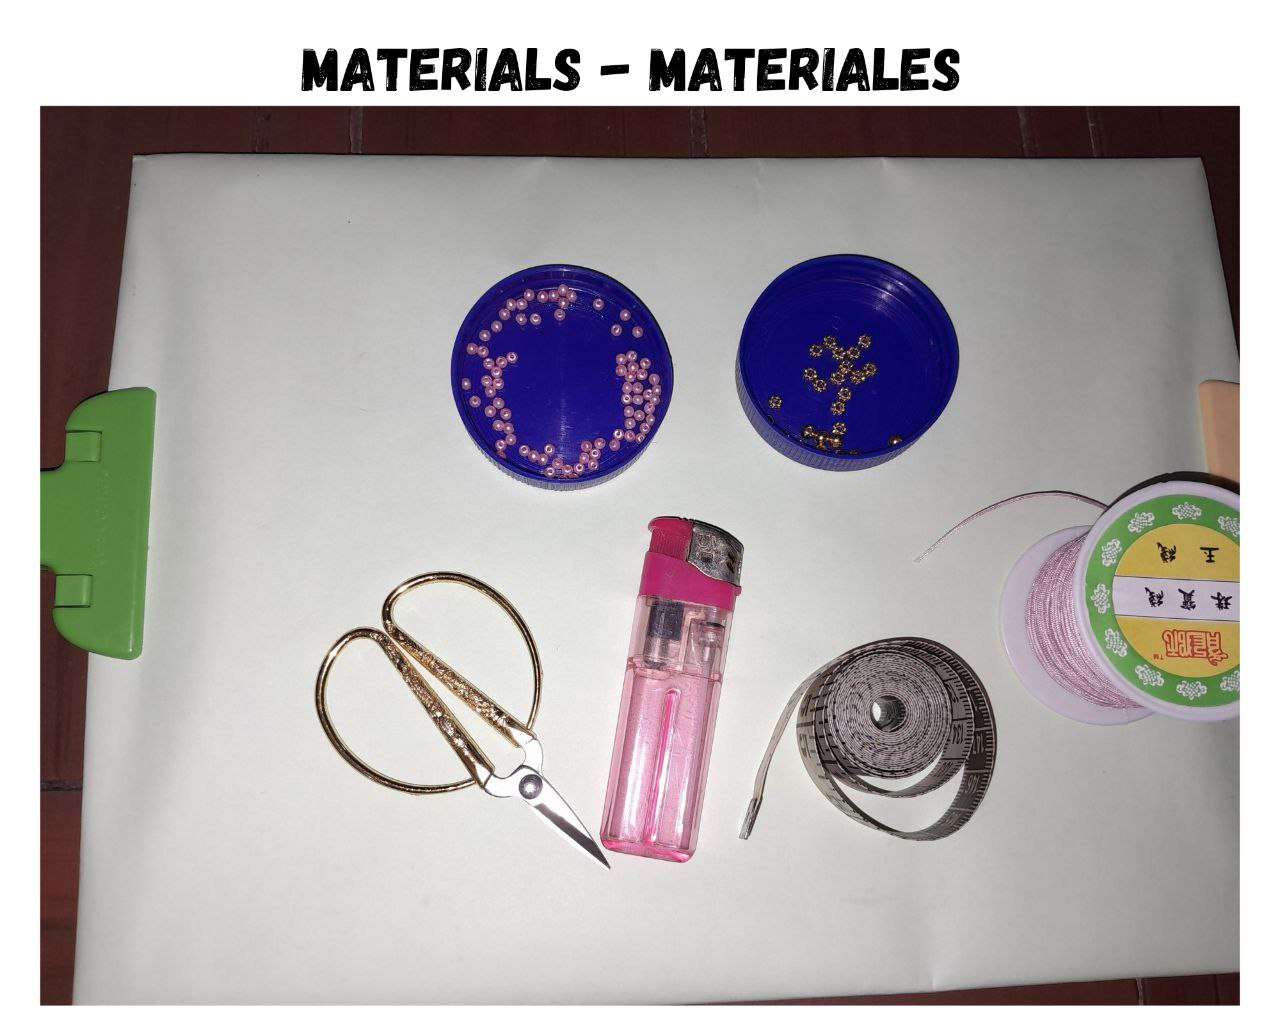
Materials:
- 1.40cm Pink Chinese thread.
- Pink pearls.
- Golden pellets.
- Flat dividers.
- Lighter.
- Scissors.
- Meter.
Materiales:
- 1,40cm Hilo chino rosado.
- Perlas rosadas.
- Balines dorados.
- Separadores planos.
- Encendedor.
- Tijera.
- Metro.
Procedure:
Procedimiento:
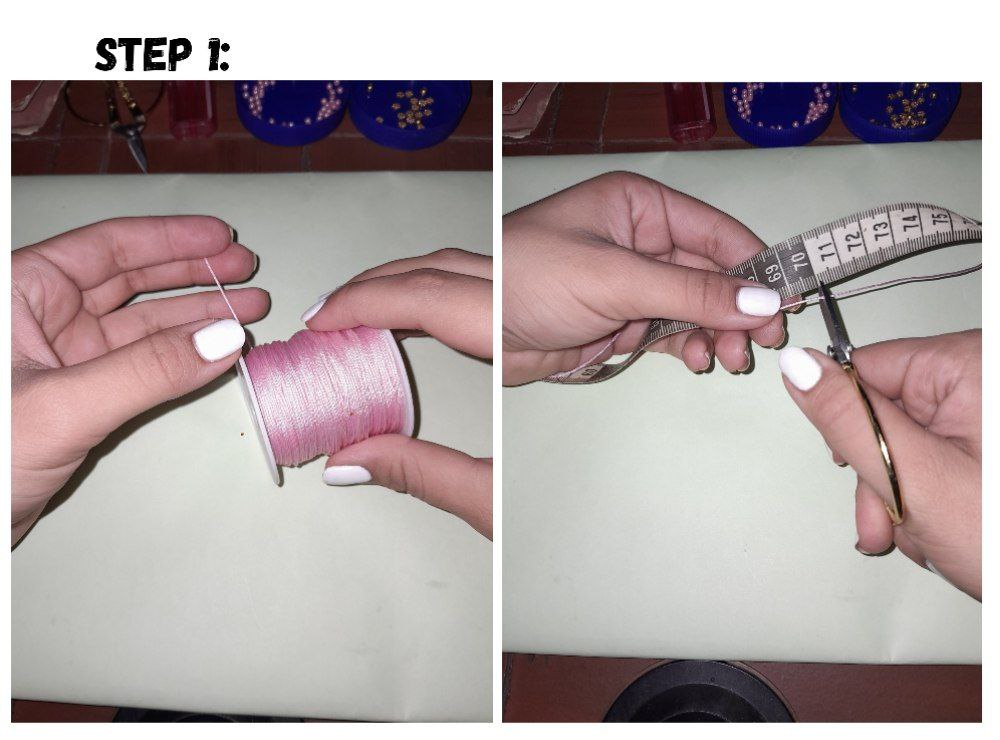
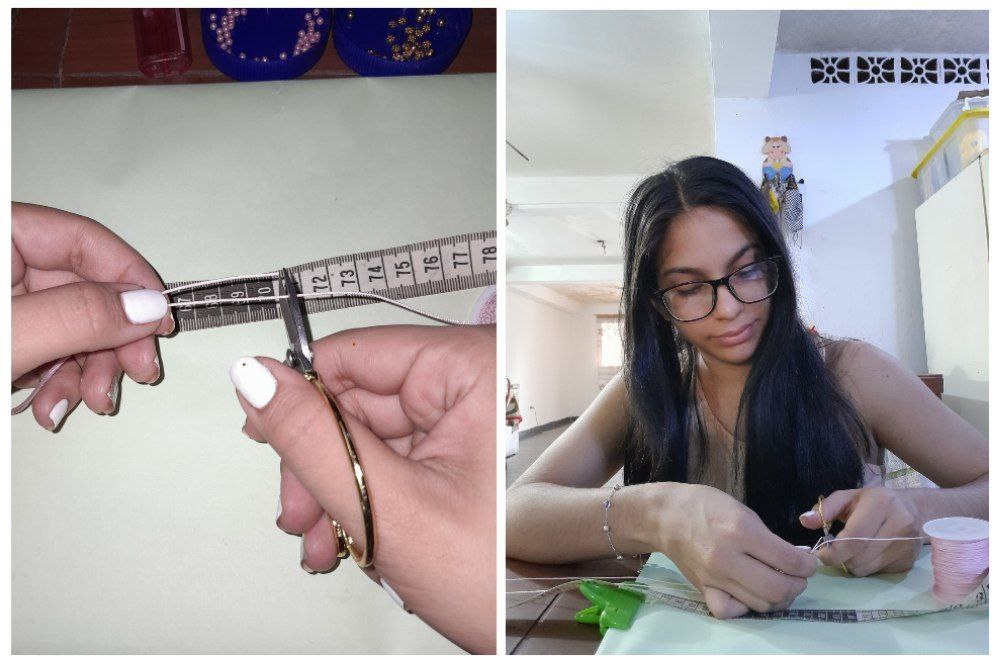
1.- To start with this bracelet we are going to cut two 70cm threads.
1.- Para iniciar con esta pulsera vamos a cortar dos hilos de 70cm.
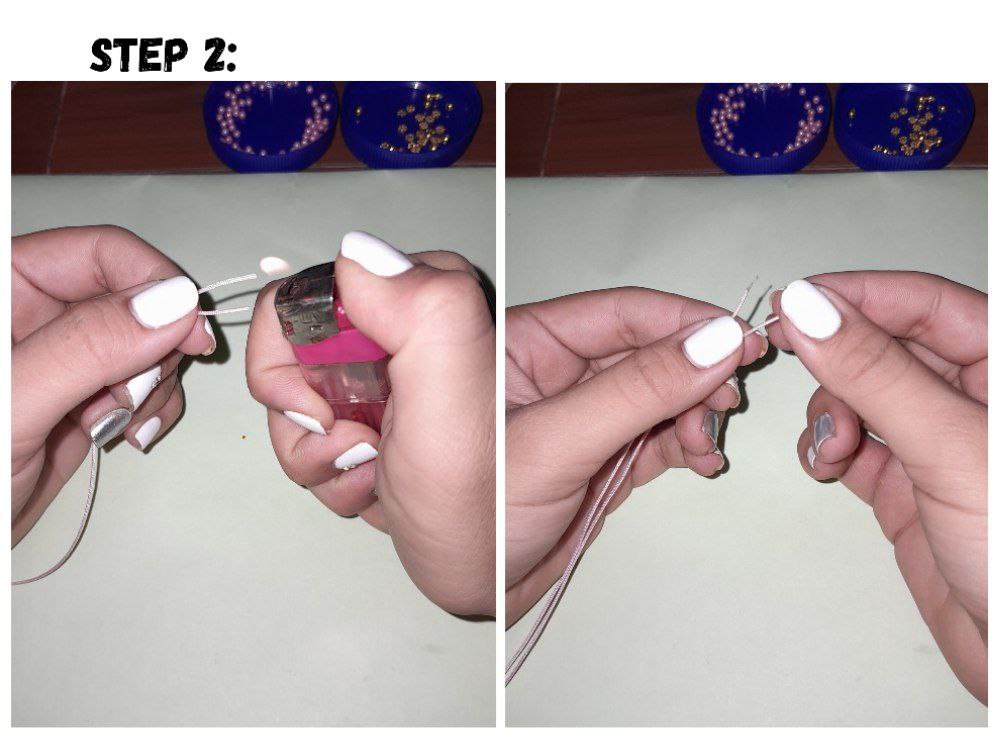
2.- We are going to take our two strands of thread and we are going to refine the ends, with the lighter we are going to melt a little and we are going to do it little by little with the tip of our fingers, we repeat the procedure on the other end. This is to make it easier to insert the pellets.
2.- Vamos a tomar nuestras dos hebras de hilo y vamos a afinar los extremos, con el encendedor vamos a fundir un poco y vamos a harlar poco a poco con la yema de los dedos, repetimos el procedimiento en el otro extremo. Esto para que sea más fácil introducir los Balines.
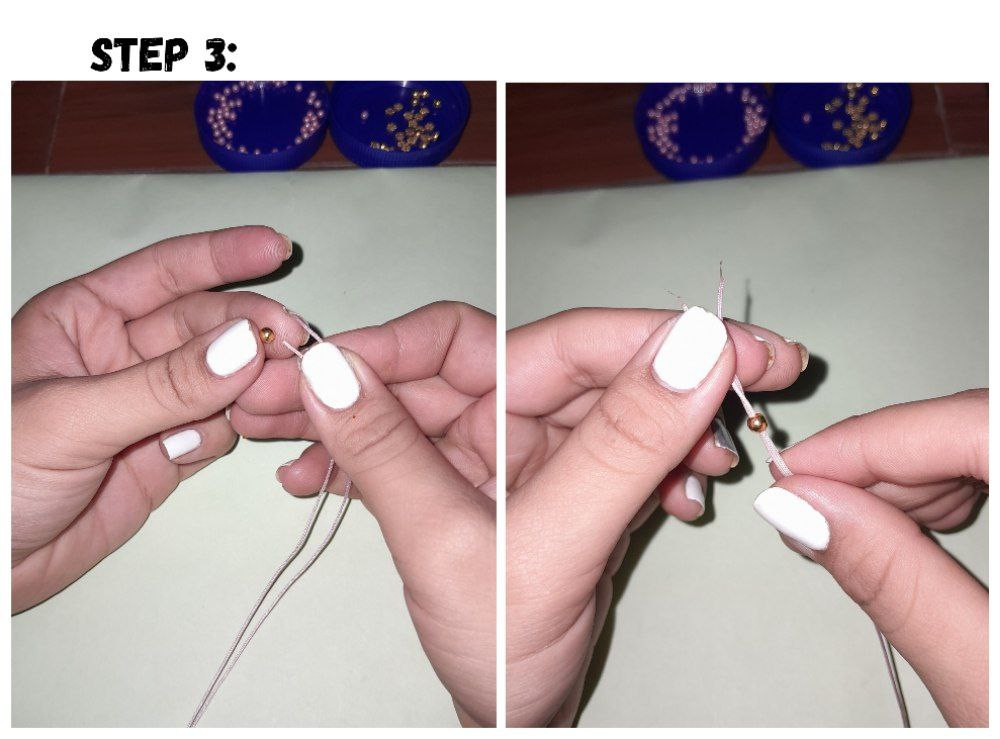
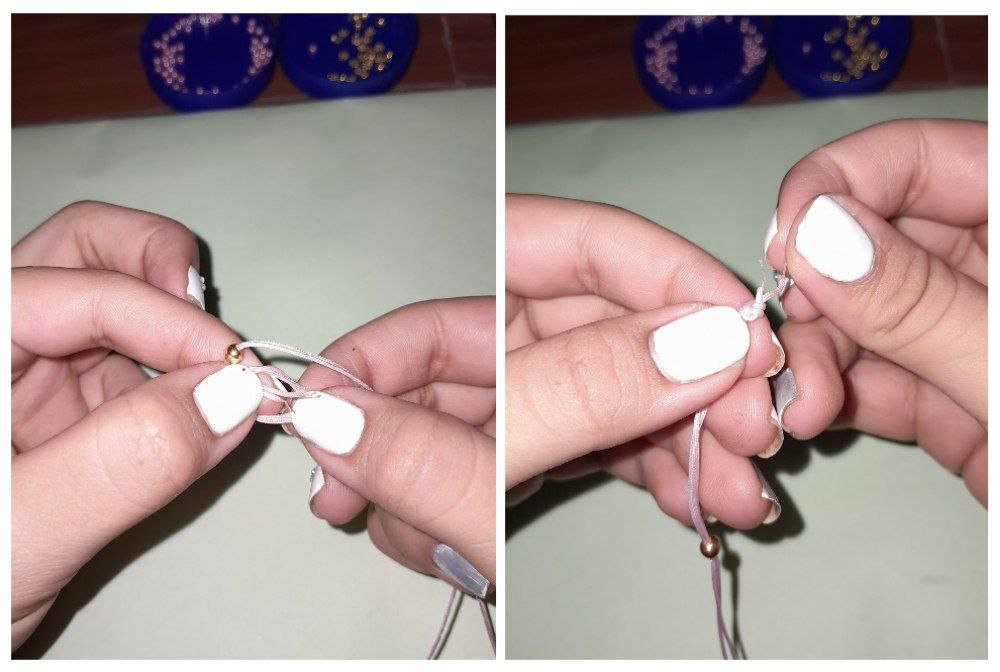
3.- We take the ball and we are going to pass both ends together and we are going to make a simple knot as close to the ends of our thread and we tighten very well.
3.- Tomamos el balín y vamos a pasar ambos extremos juntos y vamos a realizar un nudo simple lo más pegado a las puntas de nuestro hilo y apretamos muy bien.
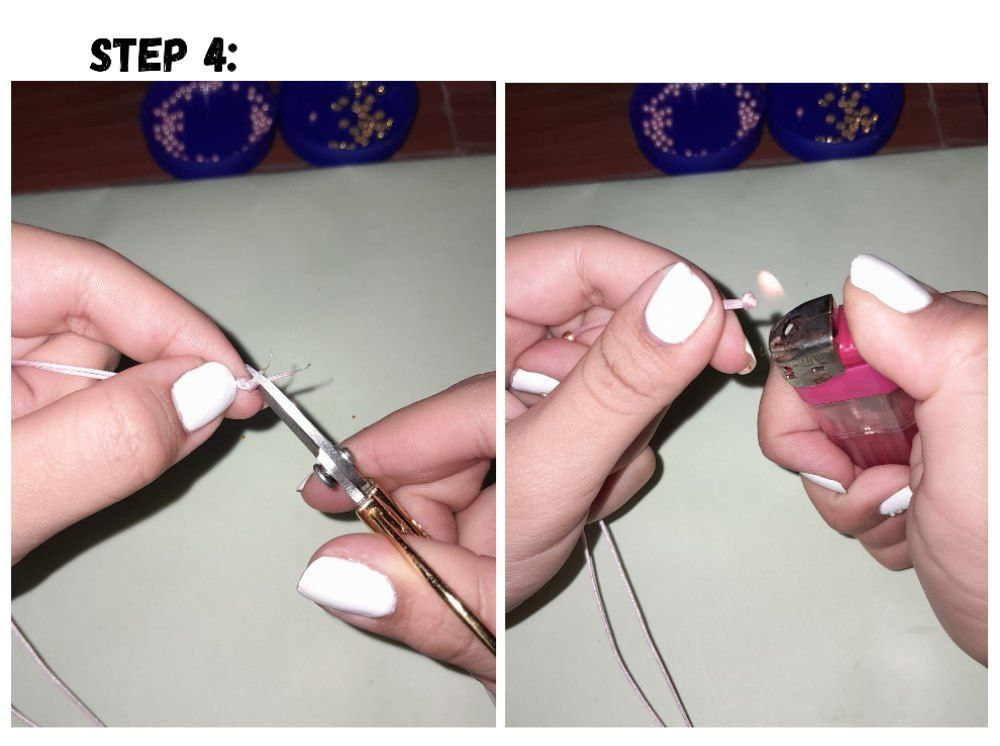
4.- We cut the excess thread from the knot and begin to seal it with the help of our lighter.
4.- Cortamos el excedente de hilo del nudo y pasamos a sellar con ayuda de nuestro encendedor.
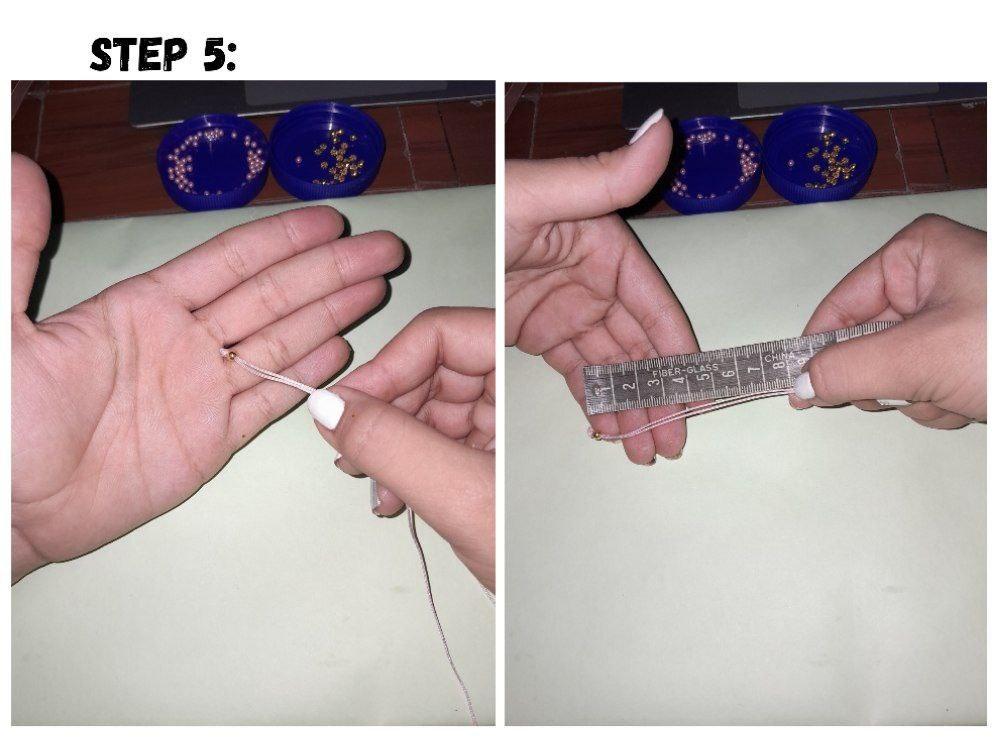
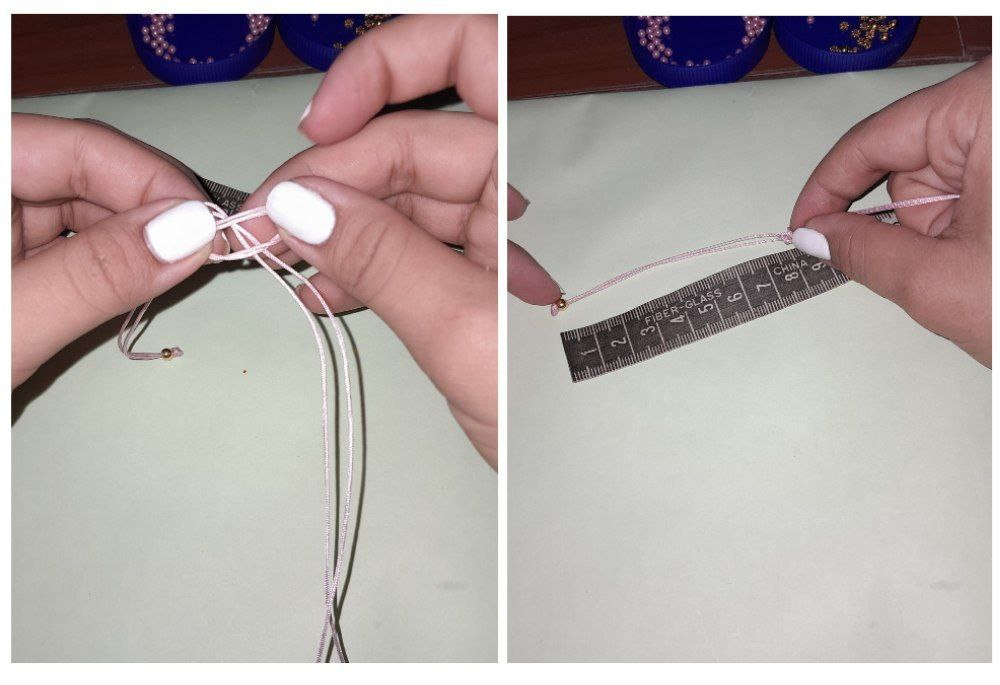
5.- From the knot we are going to measure 8cm to make another simple knot. We tighten our knot and confirm that the measurement is the desired one.
5.- A partir del nudo vamos a pasar a medir 8cm para realizar otro nudo simple apretamos nuestro nudo y confirmamos que la medida sea la deseada.
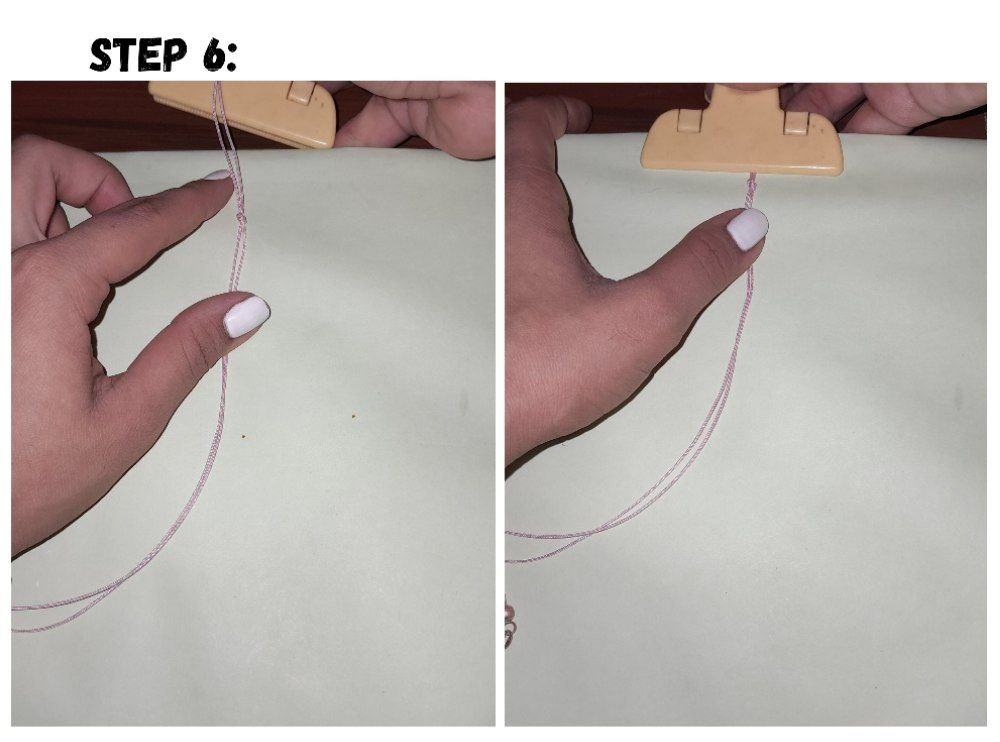
6.- We place our thread on the work table and with the help of our hook we are going to fix it. Remember that if you don't have a work table you can fix it to the table with adhesive tape.
6.- Colocamos nuestro hilo en la tabla de trabajo y con ayuda de nuestro gancho vamos a fijar. Recuerda que si no tienes tabla de trabajo puedes fijarlo a la mesa con una cinta adhesiva.
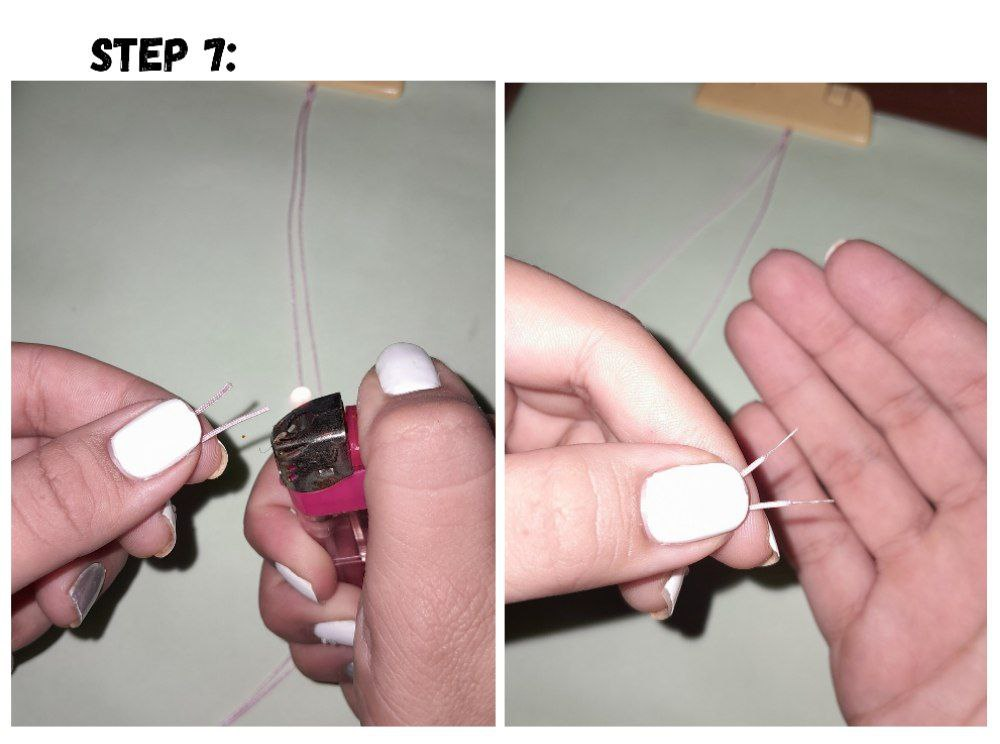
7.- Let's take our thread ends and tune them again.
7.- Vamos a tomar nuestros extremos de hilo y afinamos nuevamente.
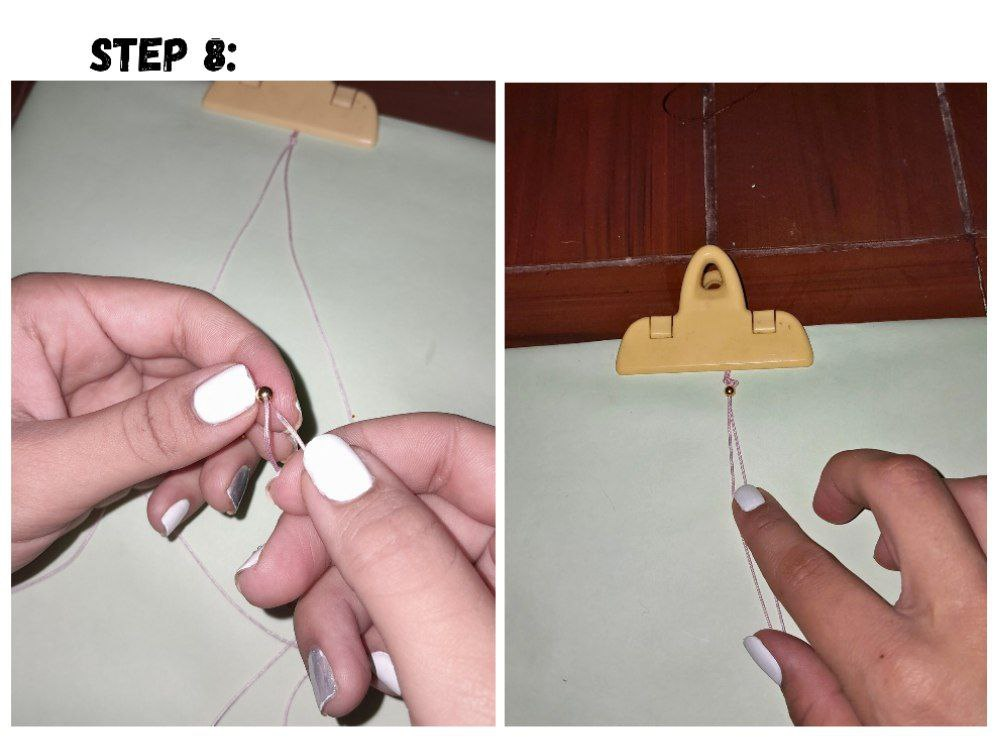
8.- We are going to place our two strands of thread inside a number 4 ball and pass it through to the end where the knot is.
8.- Vamos a colocar nuestras dos hebras de hilo por dentro de un balín número 4 y lo pasamos hasta el final en donde esta el nudo.
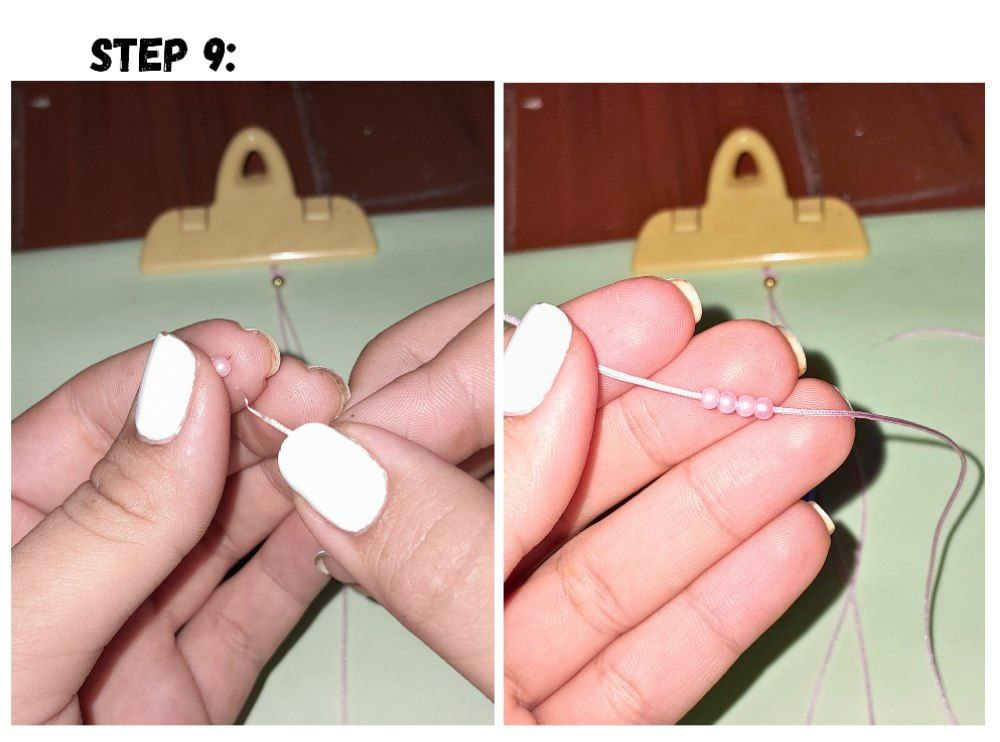
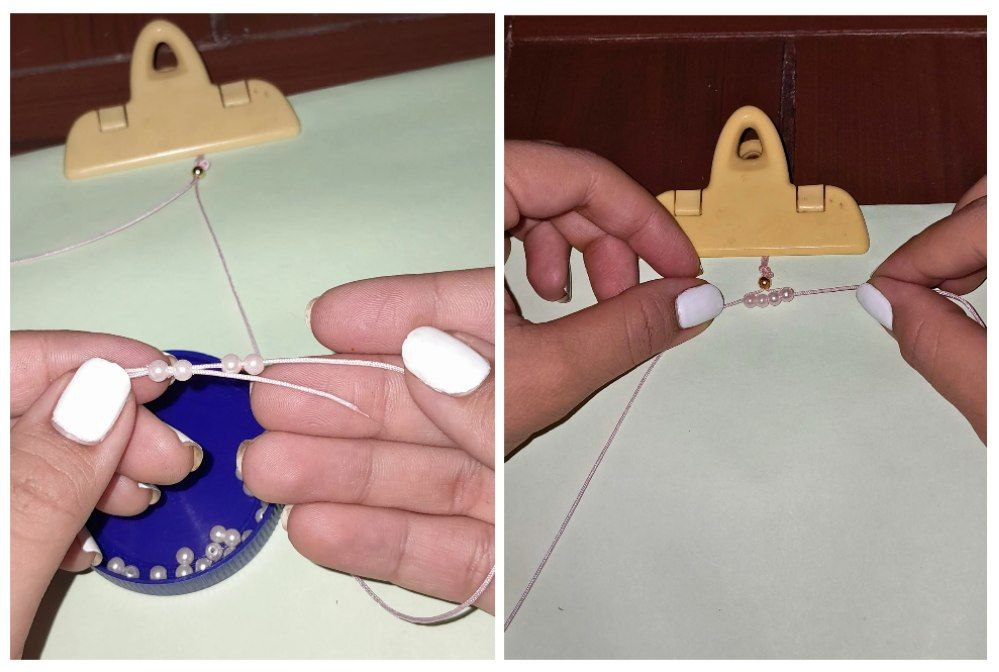
9.- Now we take one of the strands, in this case I took the right one and we are going to place four pearls on one of the ends, we hold our pearls and pass the thread on the left inside my pearl in the opposite direction. And so on, I'm going to pass the thread inside all the pearls that I just placed, I take my two ends of the thread and I carry it to the end, trying to make it as centered as possible.
9.- Ahora tomamos una de las hebras, en este caso yo tome la derecha y vamos a pasar a colocar cuatro perlas por uno de los extremos, sujetamos nuestras perlas y pasamos el hilo de la izquierda por dentro de mi perla en dirección contraria. Y así sucesivamente voy a ir pasando el hilo por dentro de todas las perlas que acabo de colocar, tomo mis dos extremos de hilo y llevo hasta el final tratando de que me quede lo más centrado posible.
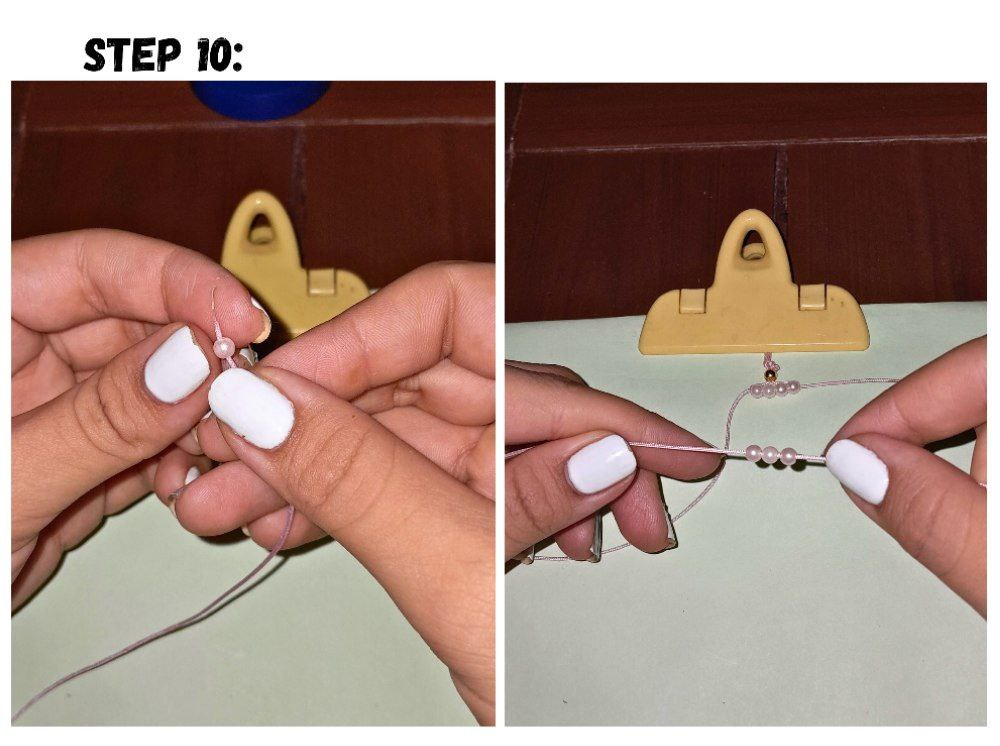
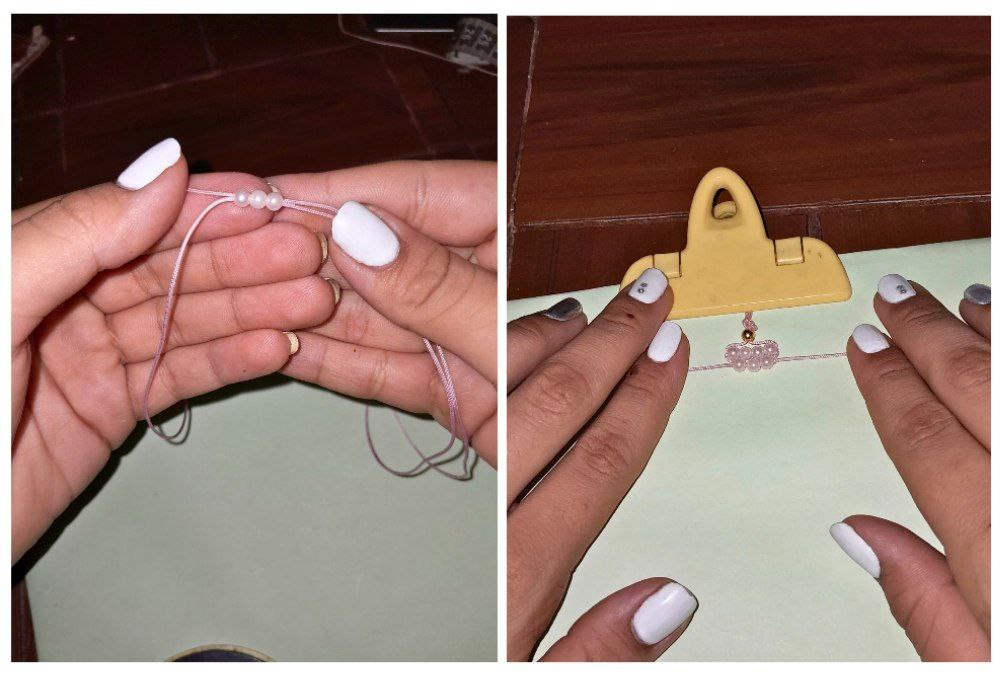
10.- I take a strand again, this time I took the one on the left side and now I will place only three pearls, holding our pearls in the same way and taking our strand on the right side and passing it inside our pearls in the opposite direction where we inserted the other thread. We will take the ends of the threads and place these beads with the previous ones, trying to make it as centered as possible.
10.- Vuelvo a tomar una hebra, esta vez tomé la del lado izquierdo y ahora colocaré solamente tres perlas, sujeto nuestras perlas del mismo modo y tomar nuestra hebra del lado derecho y la paso por dentro de nuestras perlas en dirección contraria por donde metimos el otro hilo. Tomaremos los extremos de los hilos y pasamos a llevar estas perlas con las anteriores tratando de que quede lo más centrado posible.
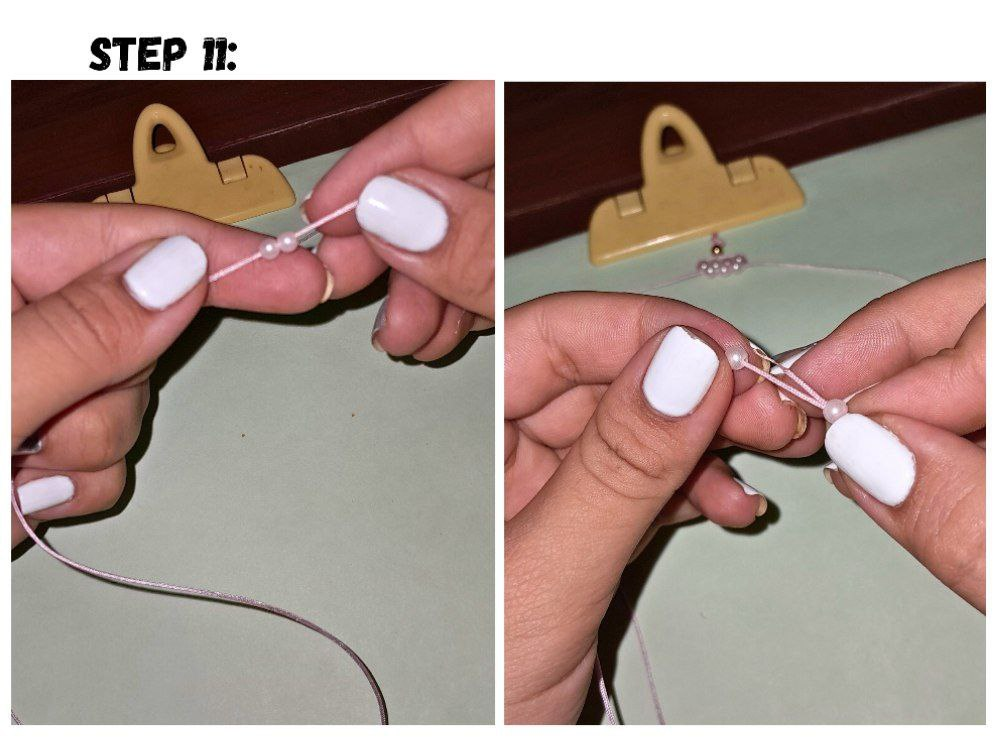
11.- We take the strand from the left side and we are now going to place two pearls, we are going to hold them and we will take the strand from the right side and we will pass them inside our pearls in the opposite direction. We take our threads and pull to join the pearls and form our fabric. It doesn't matter which end you insert the pearls through, the important thing is to insert the other thread from the opposite side.
11.- Tomamos la hebra del lado izquierdo y vamos a pasar ahora a colocar dos perlas las vamos a sujetar y tomaremos la hebra del lado derecho y las pasaremos por dentro de nuestras perlas en dirección contraria tomamos nuestros hilos y jalamos para unir las perlas y formar nuestro tejido. No importa por cual extremo introduzcan las perlas, lo importante es introducir el otro hilo por el lado contrario.
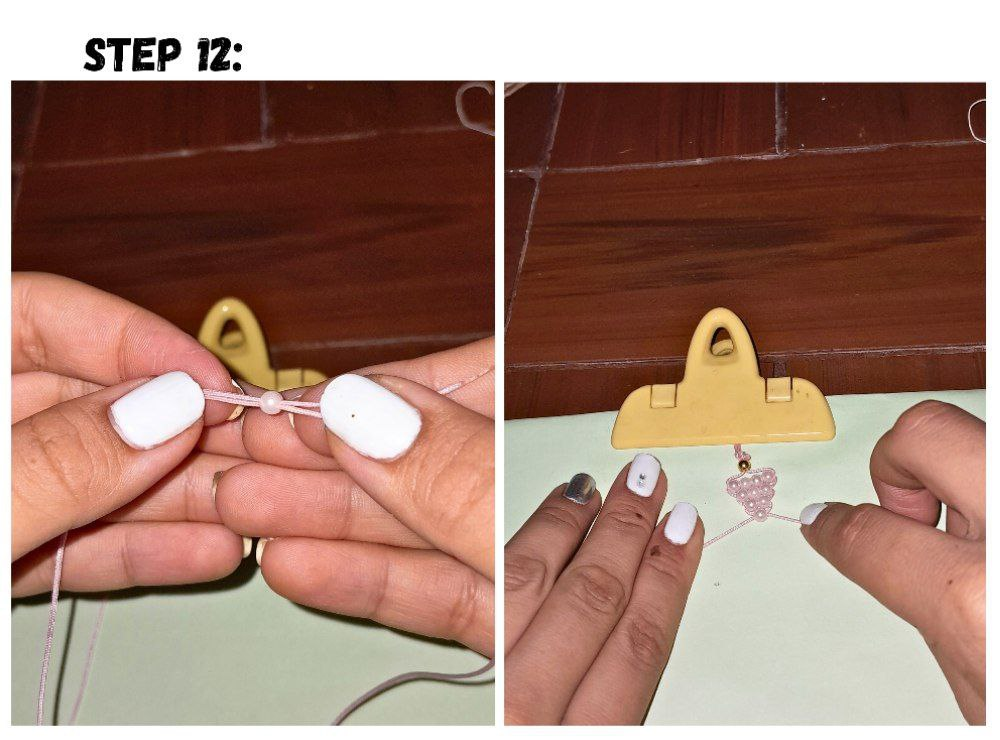
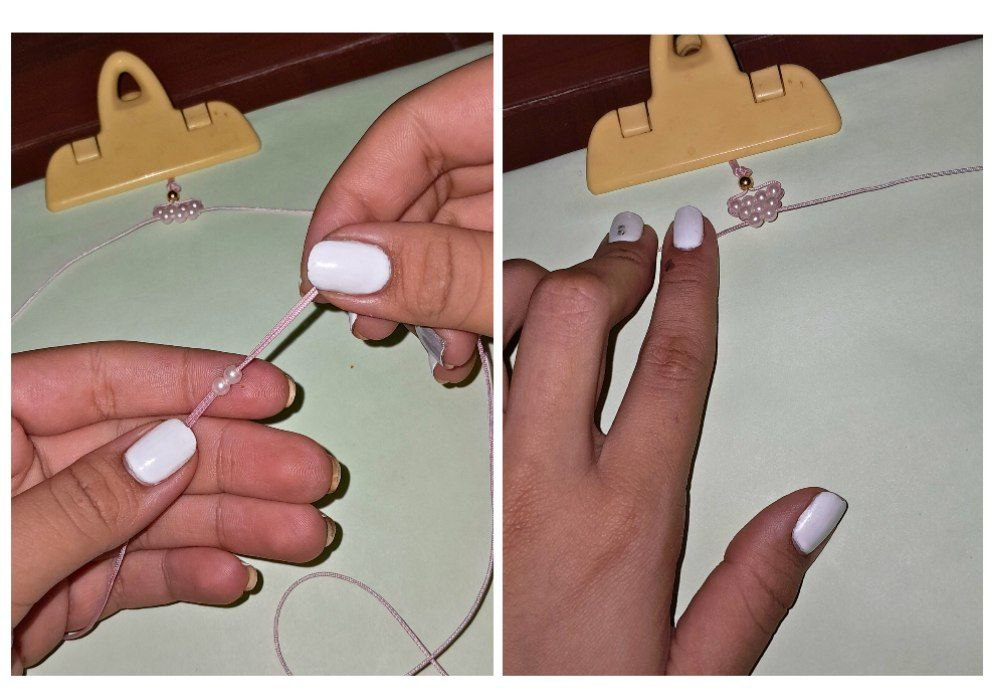
12.- We take the strand from the left side again and place a pearl and repeat the same procedure of holding it and passing the strand from the right side inside our Pearl in the opposite direction, pulling and placing it as centered as possible.
12.- Tomamos de nuevo la hebra del lado izquierdo y pasamos a colocar una perla y a repetir el mismo procedimiento de sujetarla y pasar la hebra del lado derecho por dentro de nuestra Perla en dirección contraria jalamos y la ubicamos lo más centrada posible.
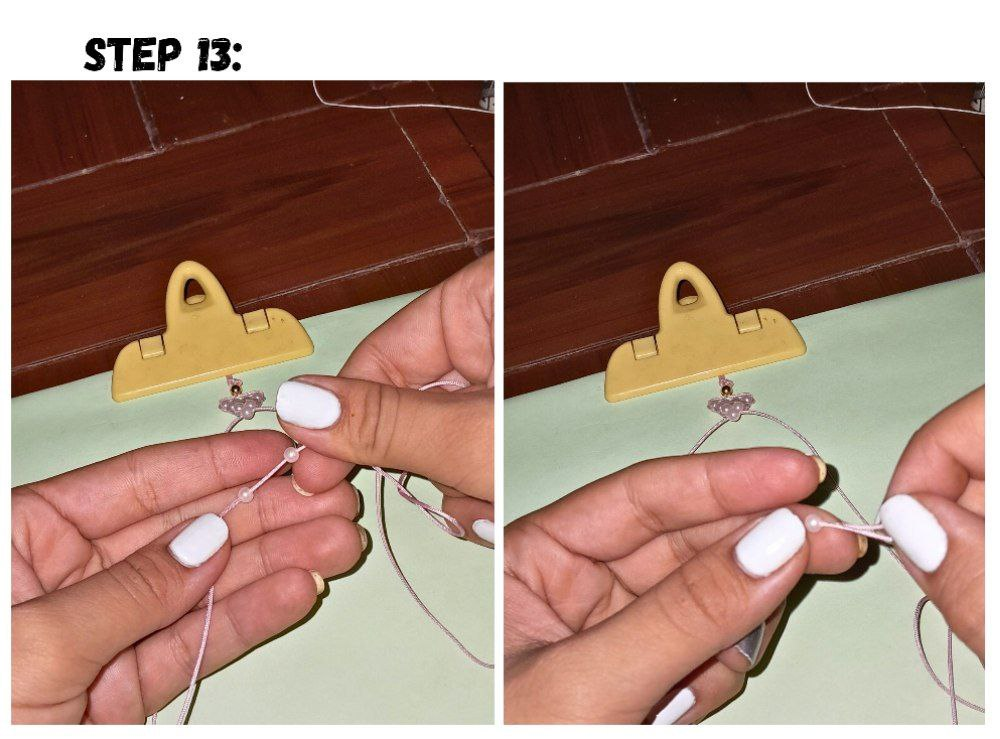
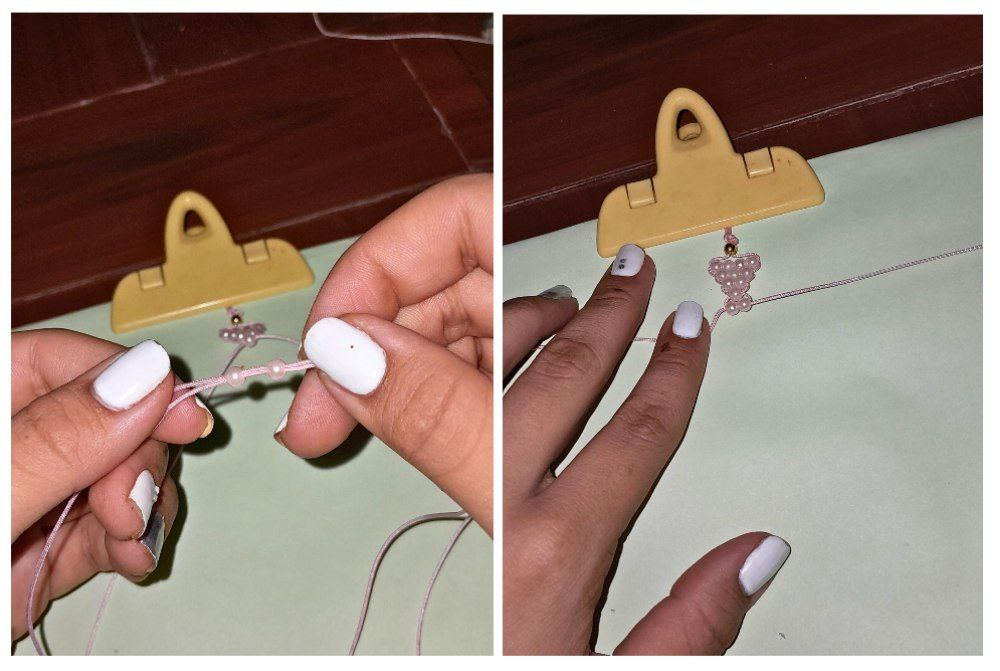
13.- Half of our bow is ready, now we are going to take the strand on the left side and we are going to pass two pearls, we are going to hold, we pass the thread on the right side inside our Pearls in the opposite direction, we take our two ends and pull keeping everything aligned and as centered as possible.
13.- Ya está tenemos lista la mitad de nuestro lazo ahora vamos a tomar la hebra del lado izquierdo y vamos a pasar dos perlas vamos a sujetar pasamos el hilo del lado derecho por dentro de nuestras Perlas en dirección contraria tomamos nuestros dos extremos y halamos llevando todo alineado y lo más centrado posible.
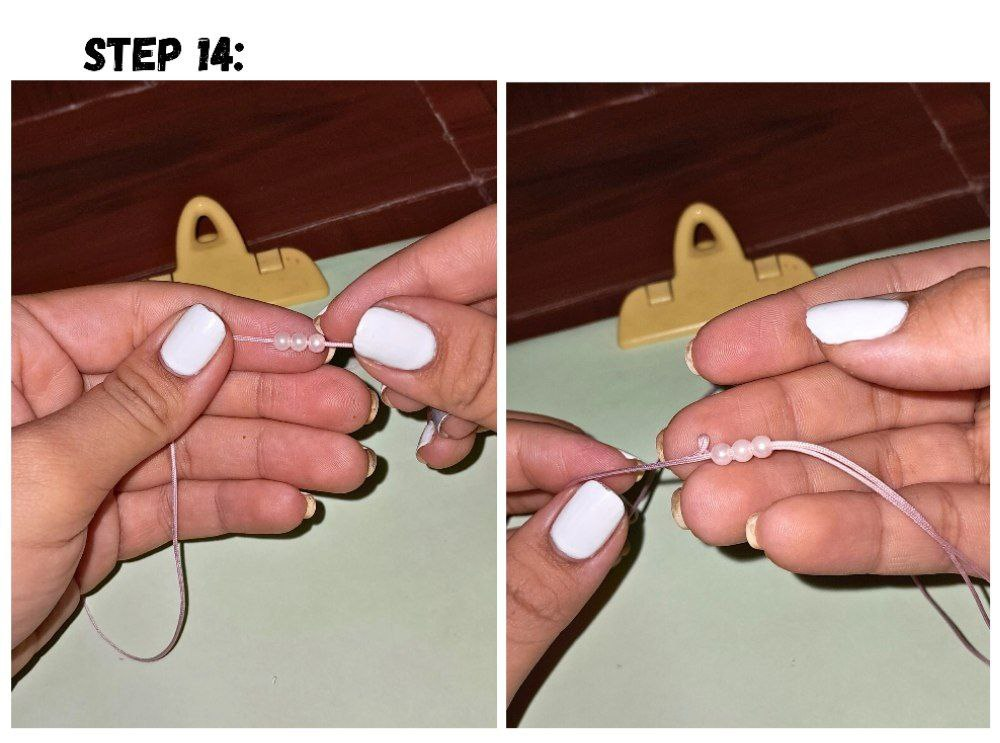
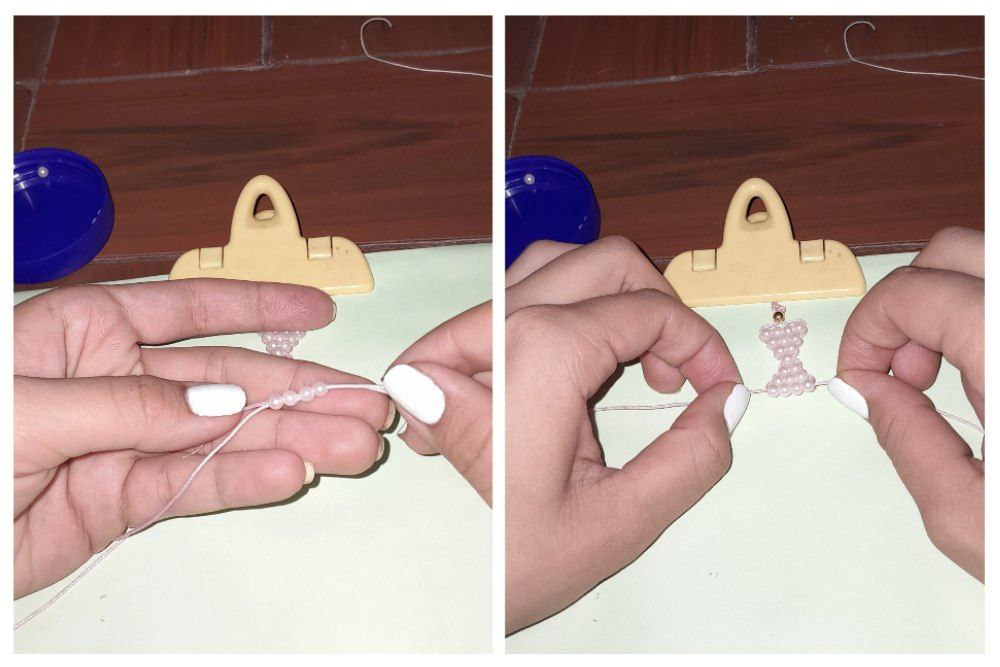
14.- We take our thread from the left side again and now we are going to place three beads. We take our thread from the right side and we are going to pass it inside our beads in the opposite direction. We take to continue forming our fabric. We organize all our fabric and take again the strand on the left side and place four Pearls inside our Chinese thread and pass the strand on the right side inside our Pearls in the opposite direction, tightening our fabric without overdoing it to avoid deforming our bow.
14.- Tomamos de nuevo nuestro hilo del lado izquierdo y ahora vamos a colocar tres perlas tomamos nuestro hilo del lado derecho y lo vamos a pasar por dentro de nuestras perlas en dirección contraria tomamos para continuar formando nuestro tejido organizamos todo nuestro tejido y tomamos de nuevo la hebra del lado izquierdo y colocamos cuatro Perlas por dentro de nuestro hilo chino y a pasar la hebra del lado derecho por dentro de nuestras Perlas en dirección contraria vamos apretando nuestro tejido sin excedernos para evitar deformar nuestro lazo.
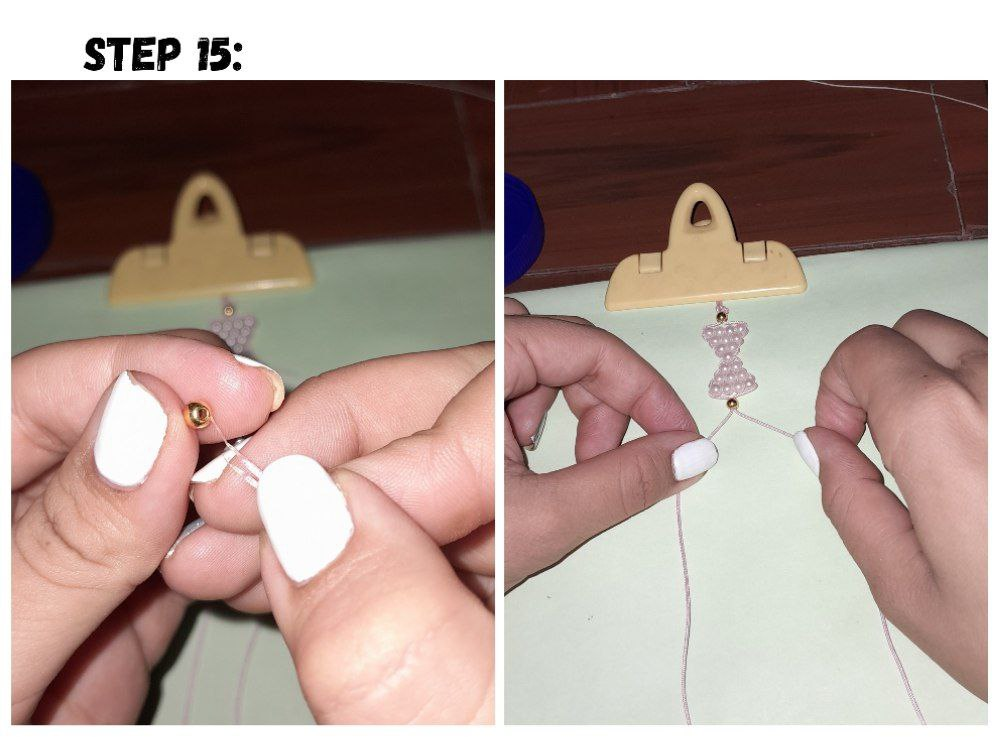
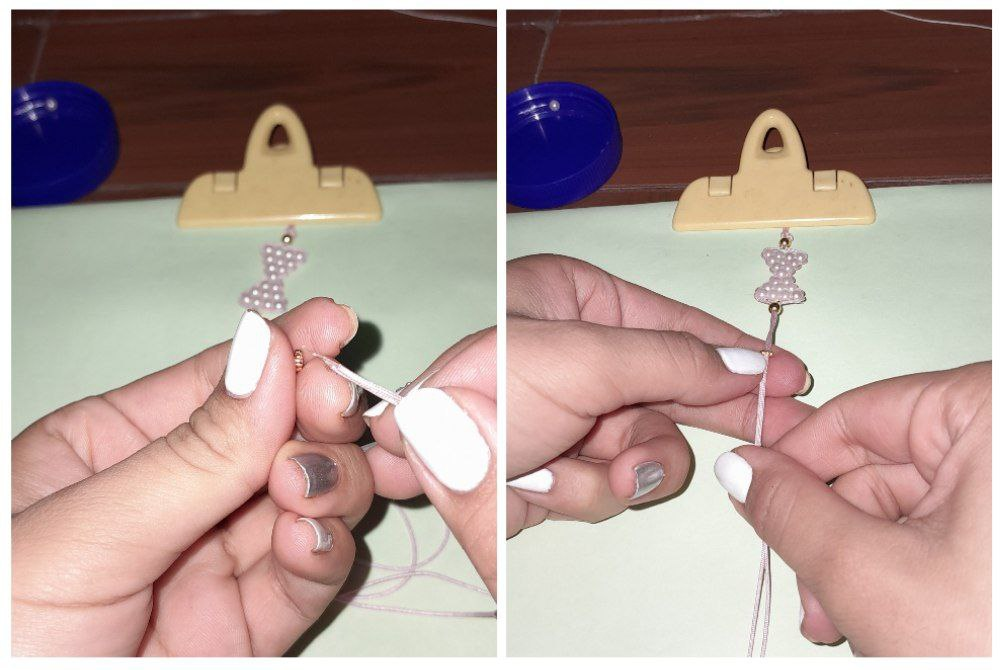
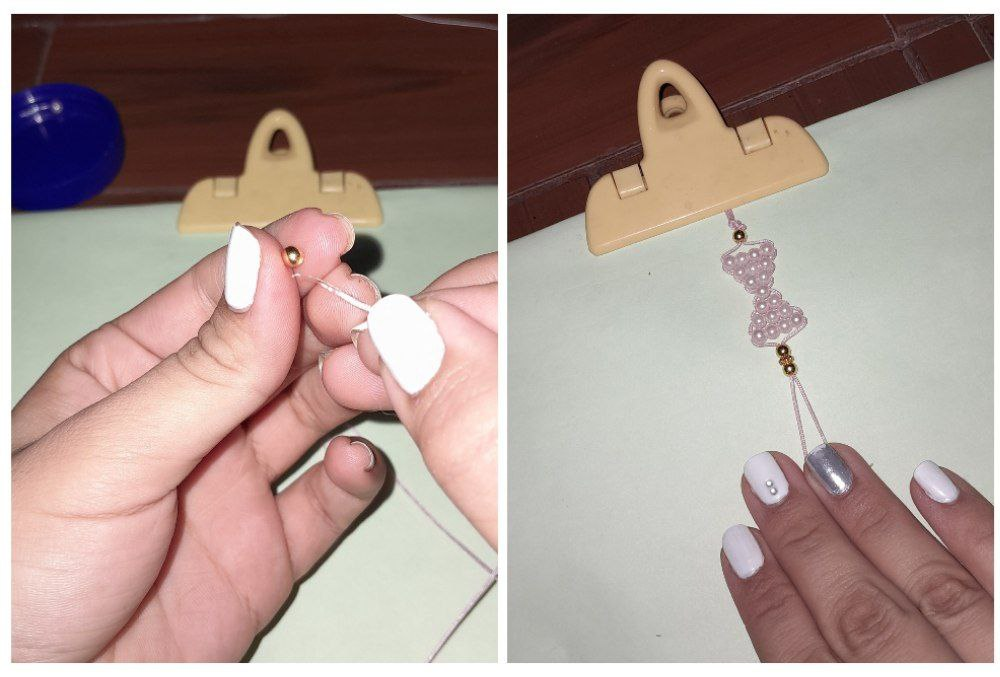
15.- Now we are going to take both strands of thread and we are going to pass them inside a ball, we take our ball to where our loop is and we are going to place our flat separator and followed by another ball.
15.- Ahora vamos a tomar ambas hebras de hilo y las vamos a pasar por dentro de un balín, llevamos nuestro balín hasta donde se encuentra nuestro lazo y vamos a colocar nuestro separador plano y seguido otro balín.
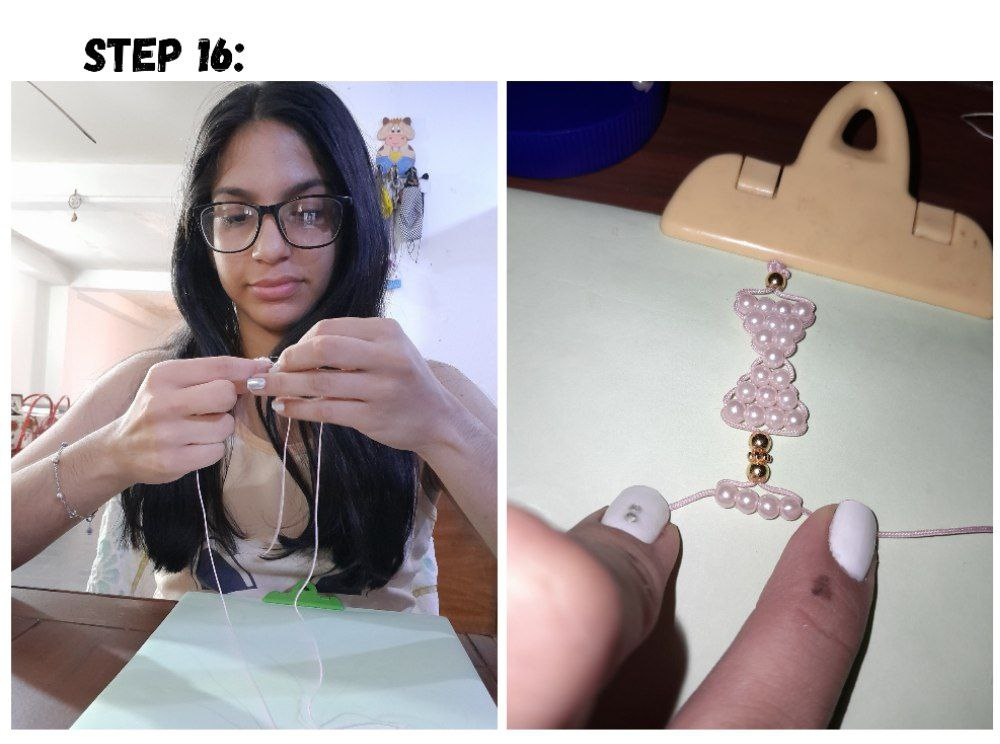
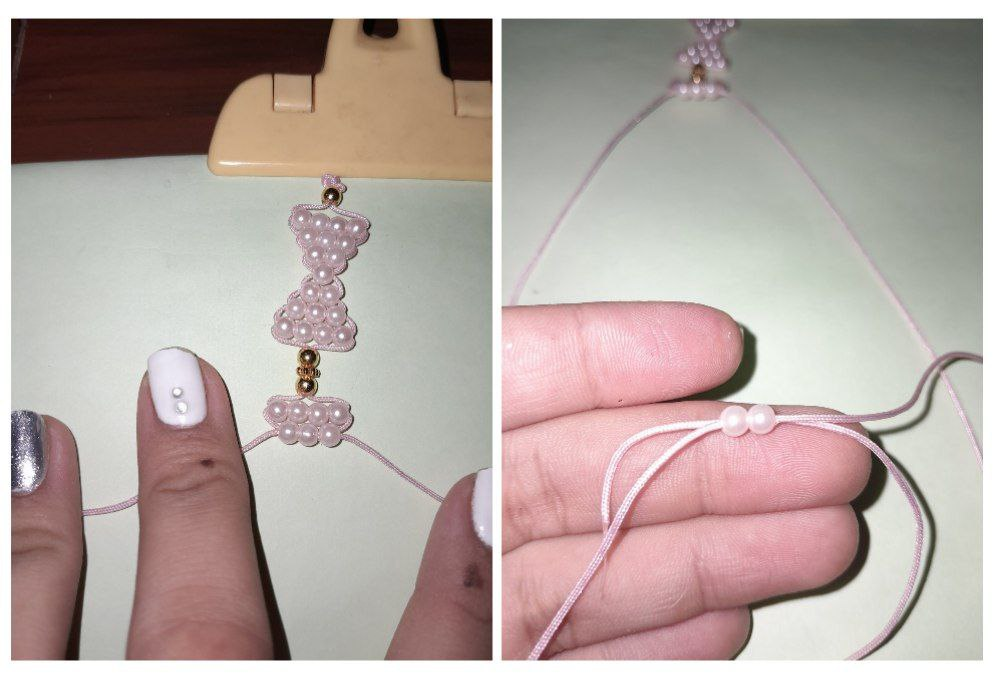
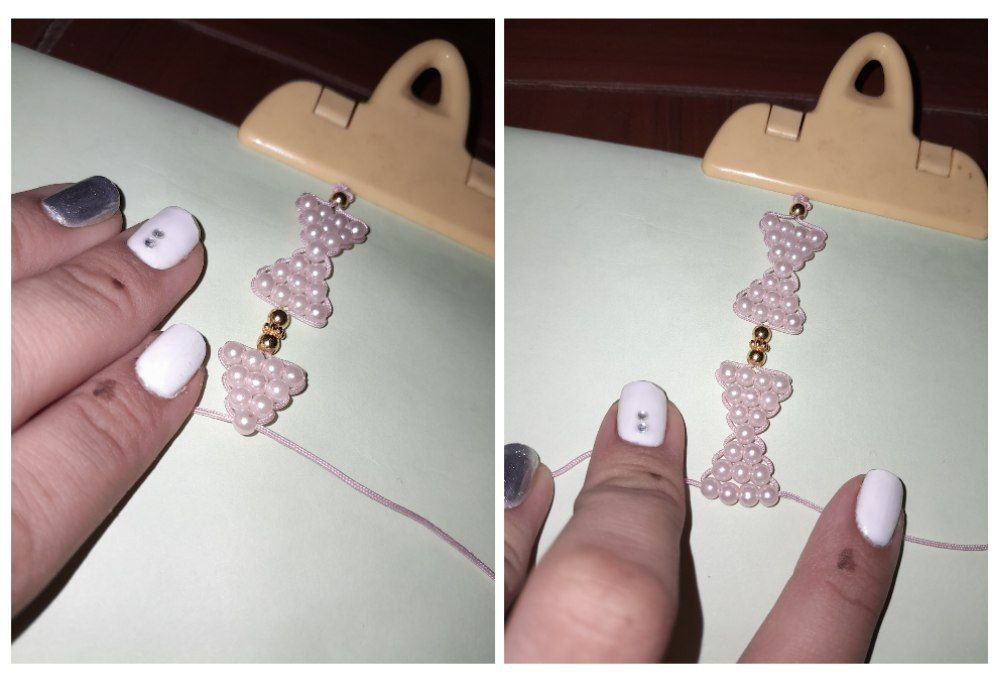
16.- We are going to repeat the same procedure to assemble the next loop, passing four Beads through one end and passing the other end through the opposite side, we repeat with three beads, followed by two, and one last to do exactly the same on the opposite direction, and have our second loop made.
16.- Vamos a repetir el mismo procedimiento para armar el siguiente lazo, pasando cuatro Balines por un extremo y pasando el otro extremo por el lado contrario, repetimos con tres perlas, seguido de dos, y una última para hacer exactamente lo mismo en el sentido opuesto, y tener nuestro segundo lazo hecho.
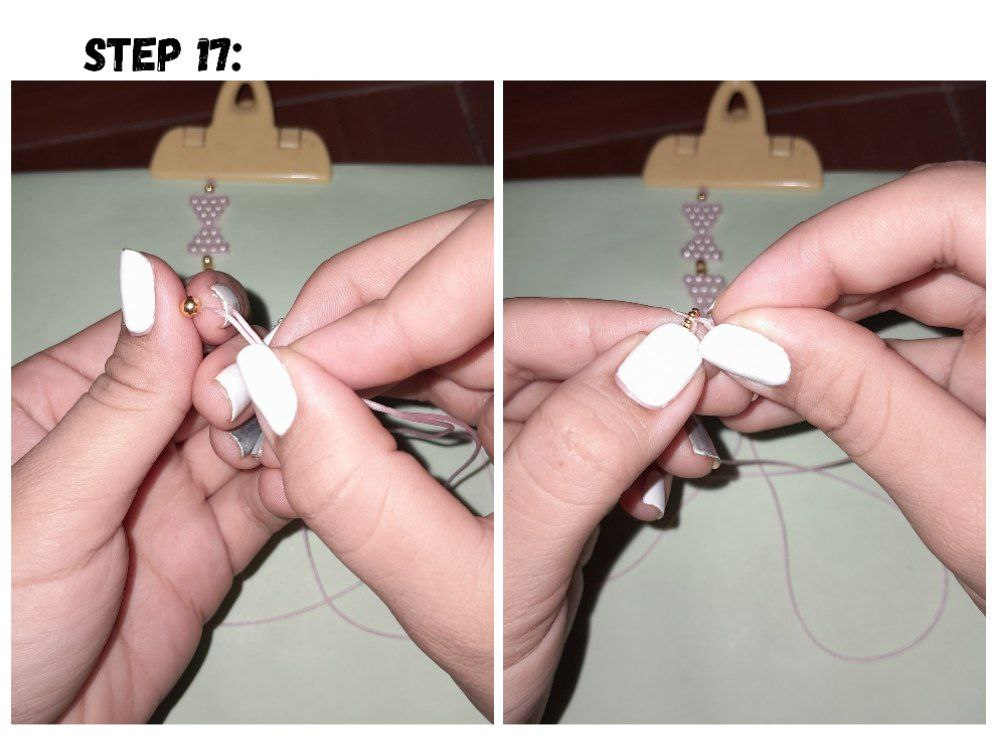
17.- We pass again a ball, a flat separator and another ball
17.- Pasamos nuevamente un balin, un separador plano y otro balín
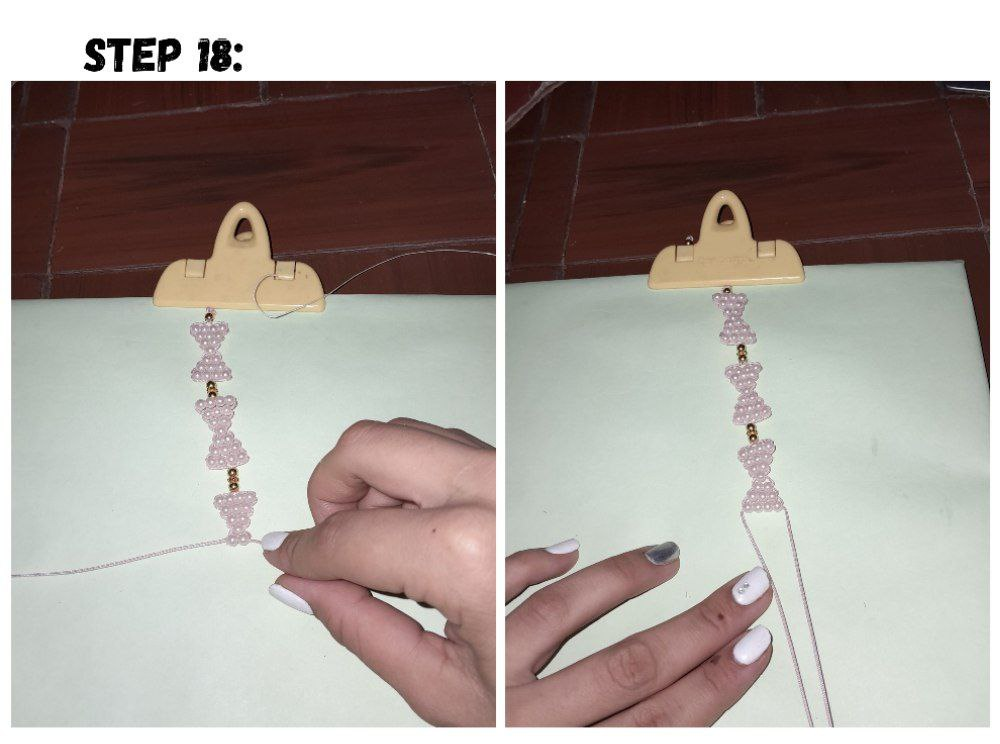
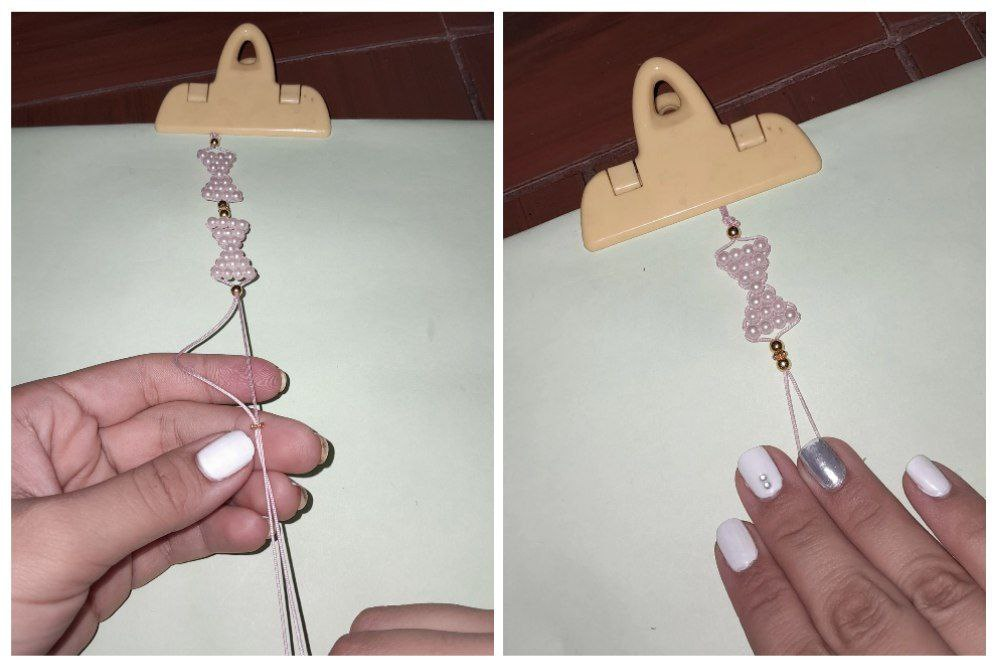
18.- We make the third and last loop and finish by passing a pellet.
18.- Hacemos el tercer y último lazo y finalizamos pasando un balín.
19.- We tie a knot at the end.
19.- Hacemos un nudo al final.

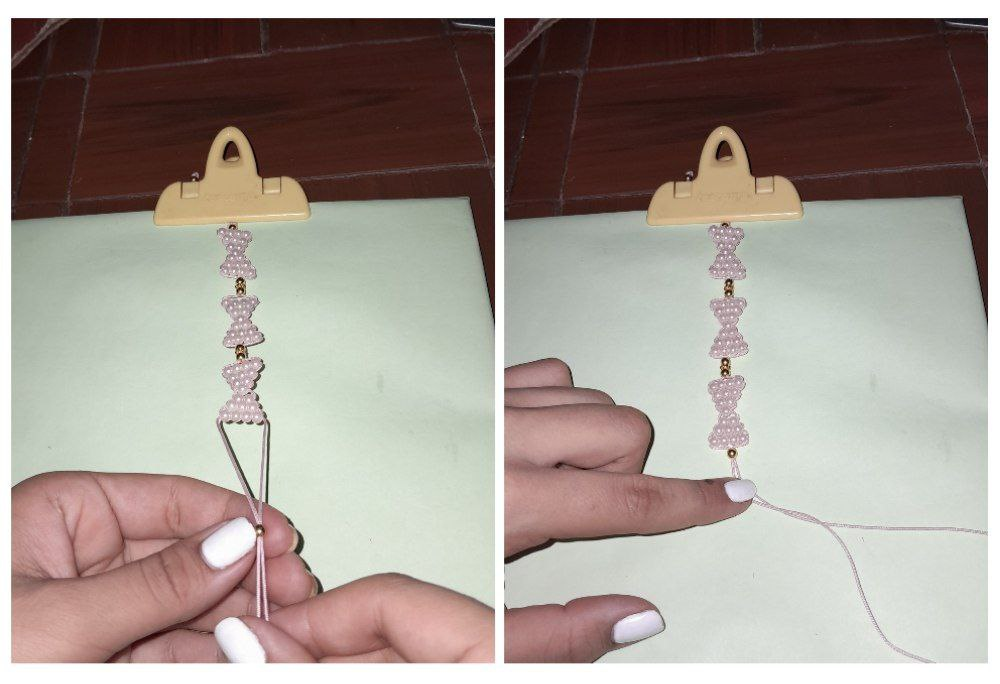
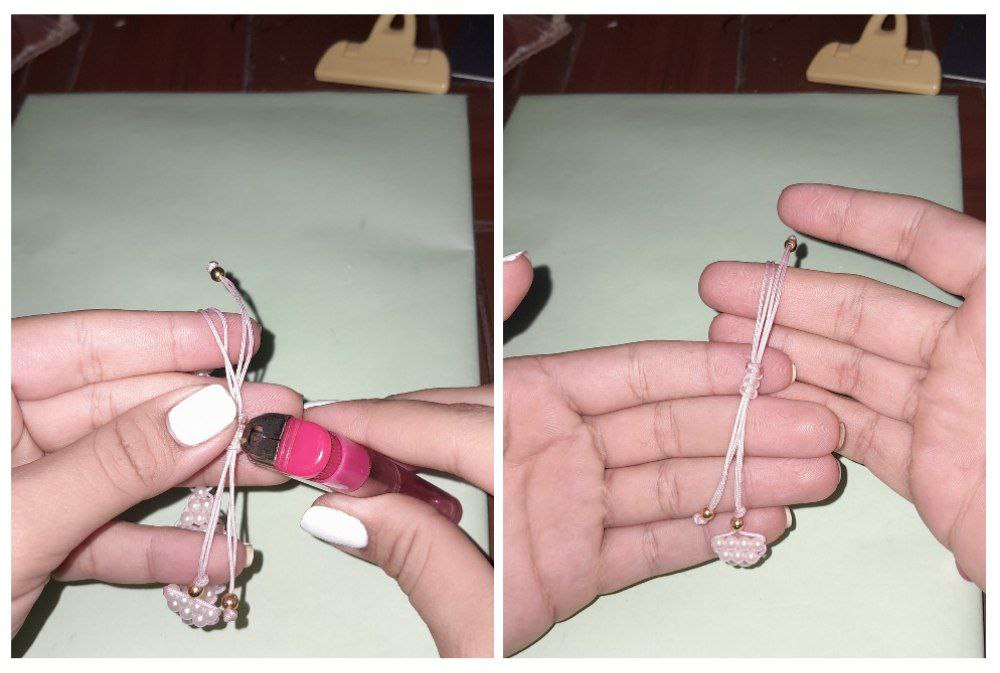
20.- We pass another ball and I am going to measure again a space of 8cm to tie a knot. I will cut the excess threads and burn the knot.
20.- Pasamos otro balin y voy a medir nuevamente un espacio de 8cm para hacer un nudo. Cortaré los hilos excedentes y voy quemar el nudo.
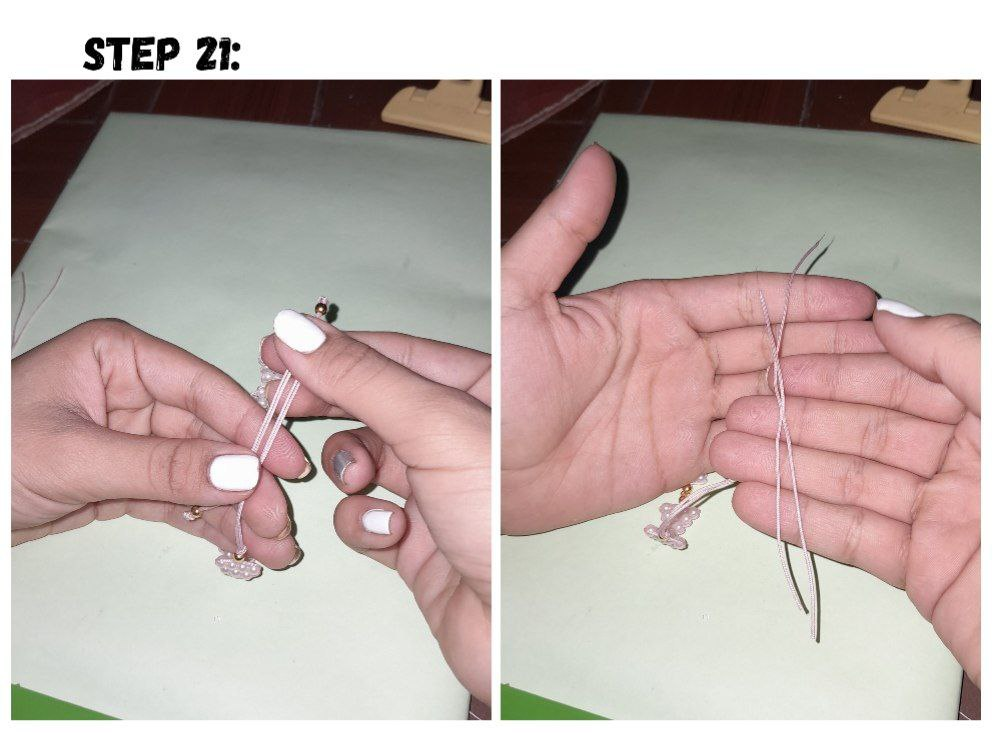
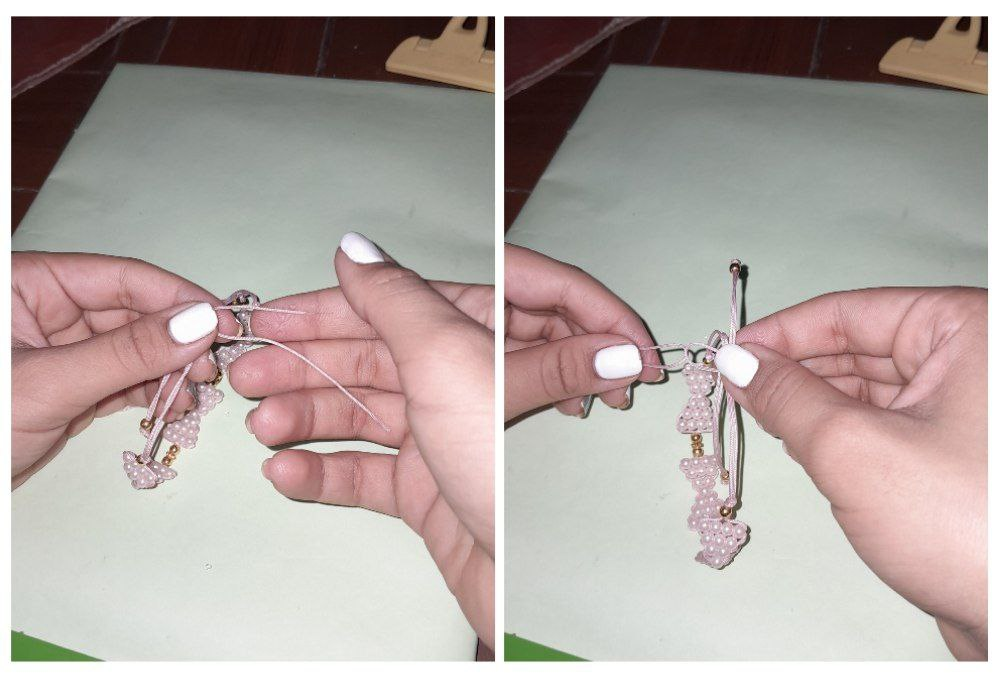
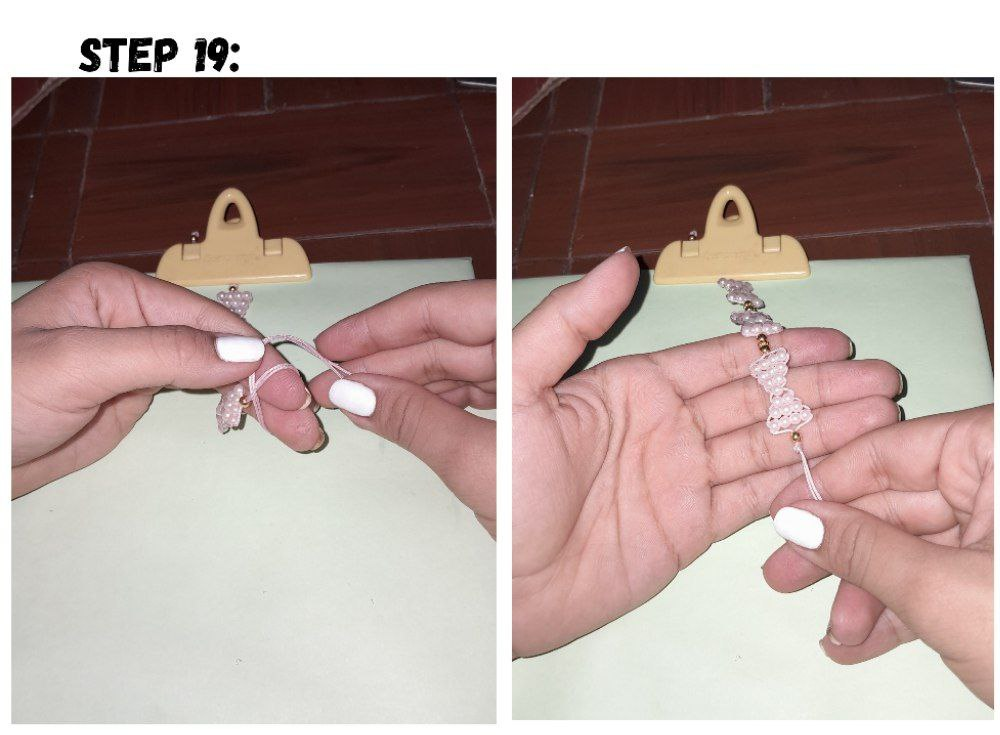
21.- To close the bracelet I will make a sliding knot with a flat knot. I will take the threads that I cut from the rest of the bracelet and I will work with them, each one measures about 10cm or so. I will make a double forming a "C" leaving the shorter end on top. I am going to place one on top of the threads of the bracelet and I am going to introduce another one below the "C" the thread on the left side, introducing the ends of the right side through the center of the ear that we just passed under the little ear that was left on the left side. I tighten and I already have the first flat knot.
21.- Para cerrar la pulsera haré un nudo corredizo con nudo plano, Tomaré los hilos que corte del resto de la pulsera y voy a trabajar con ellos, cada uno mide unos 10cm más o menos. Haré un dobles formando una "C" dejando el extremo más corto por encima. Voy a colocar uno pon encima de los hilos de la pulsera y voy a introducirlo otro por debajo de la "C" el hilo por el lado izquierdo introduciendo los extremos del lado derecho por el centro de la orejita que acabamos de pasar por debajo de la orejita que quedó del lado izquierdo. Aprieto y ya tengo el primer nudo plano.
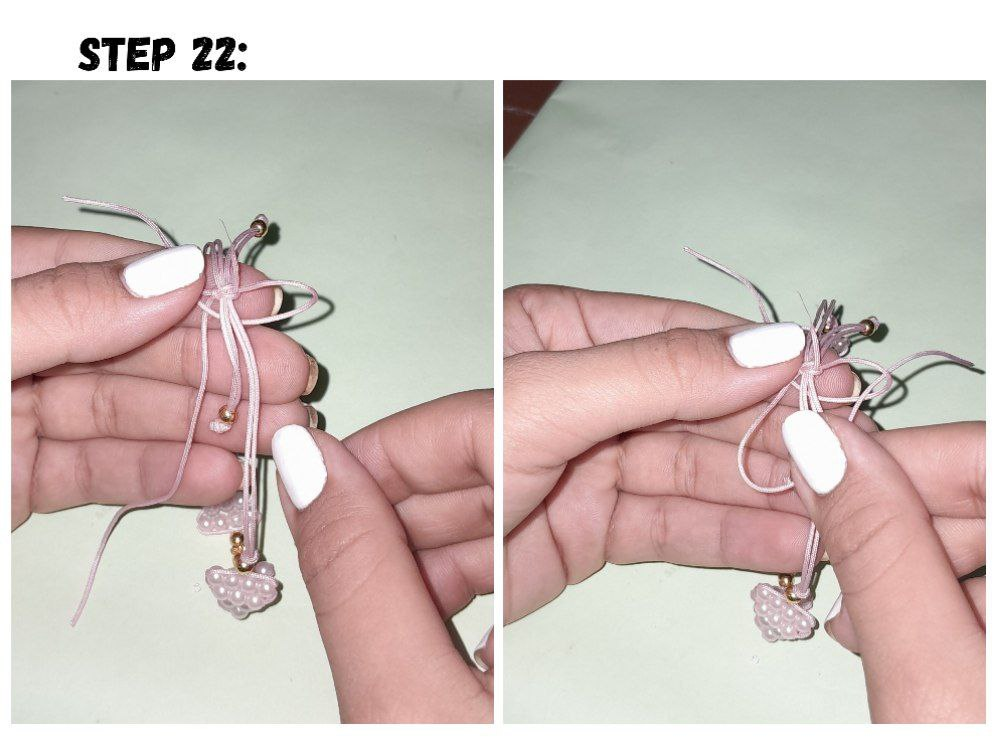
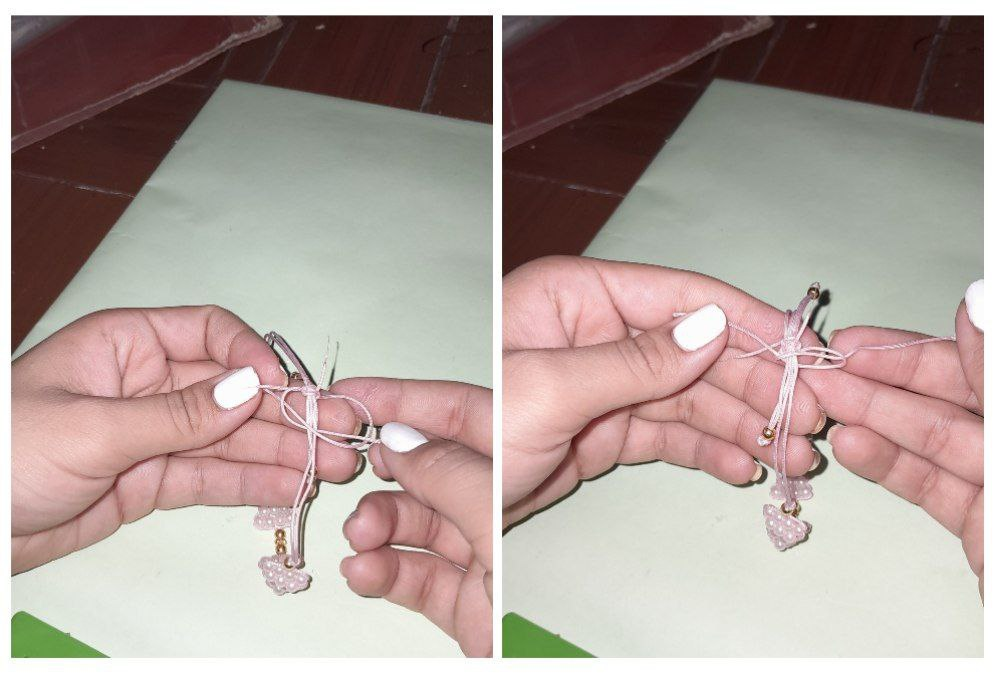
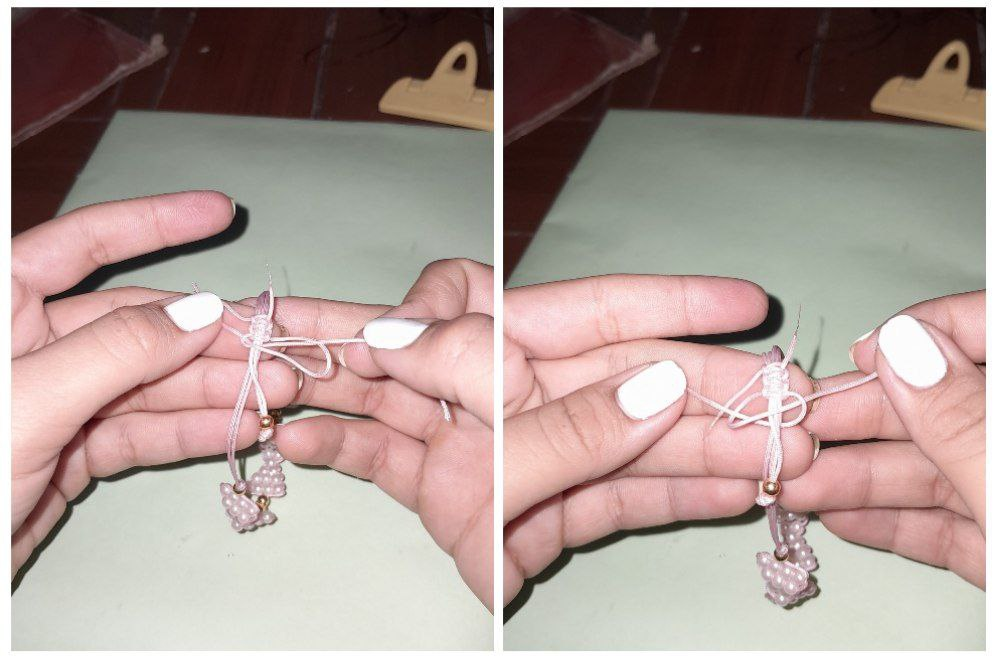
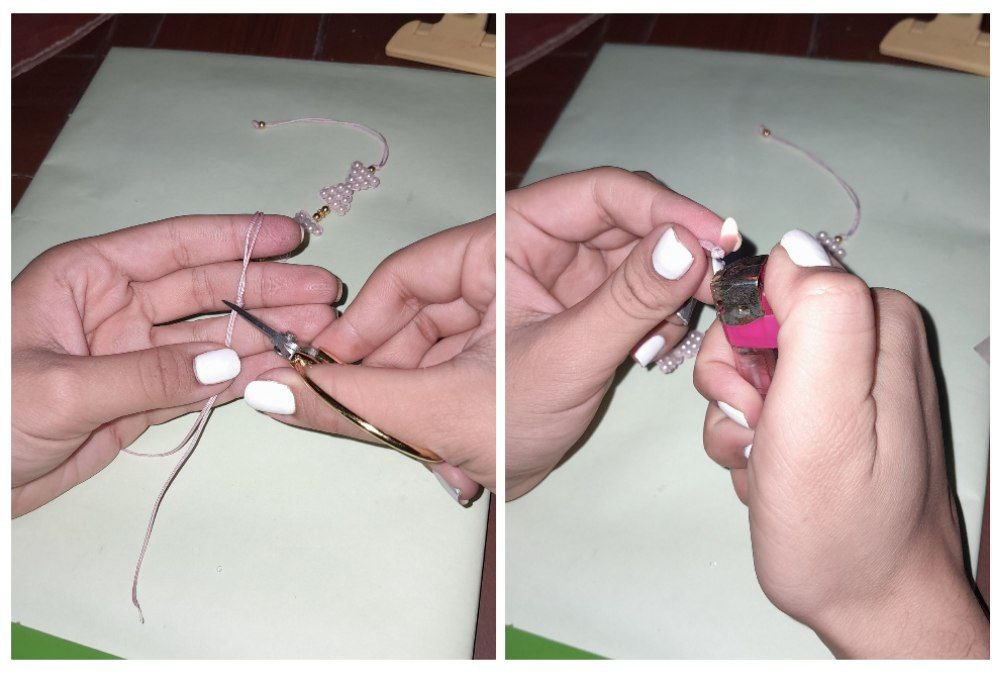
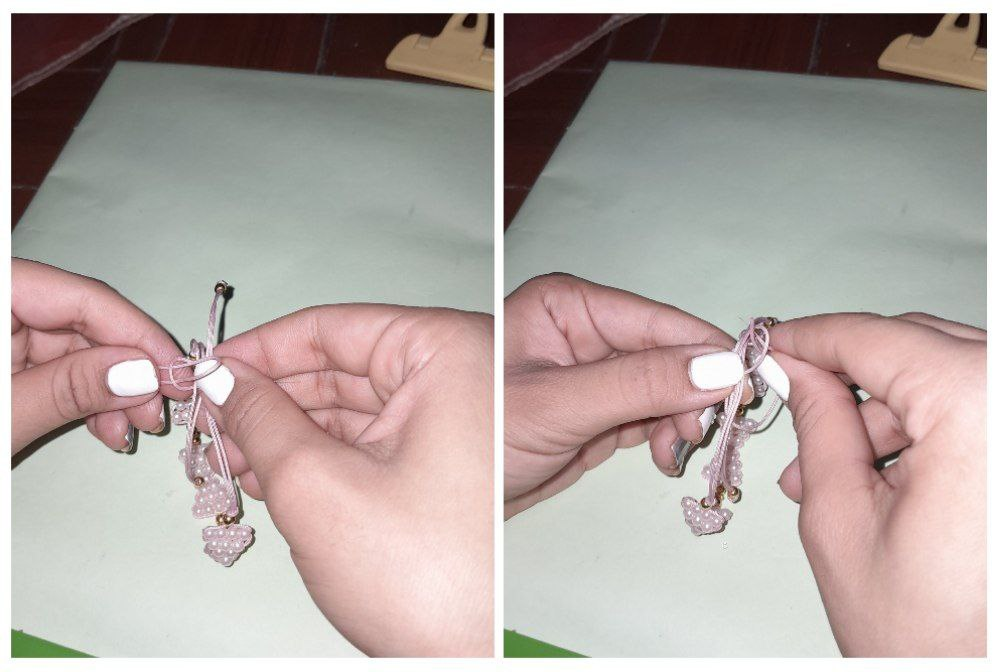
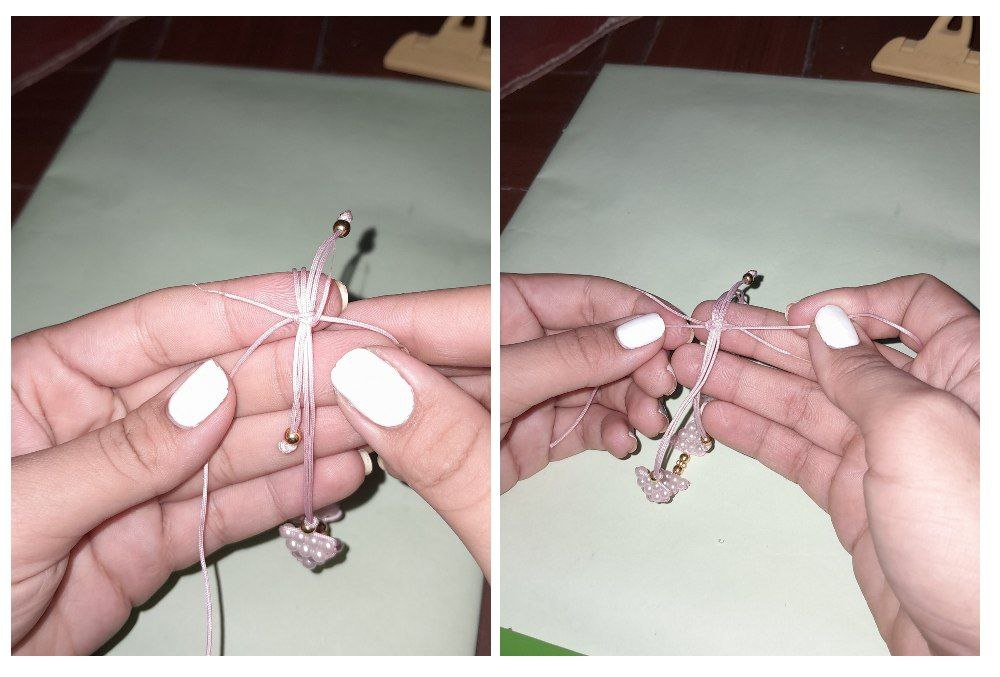
22.- Then we continue weaving our normal flat knot until the desired length.
22.- Luego seguimos tejiendo nuestro nudo plano normal hasta el largo deseado.
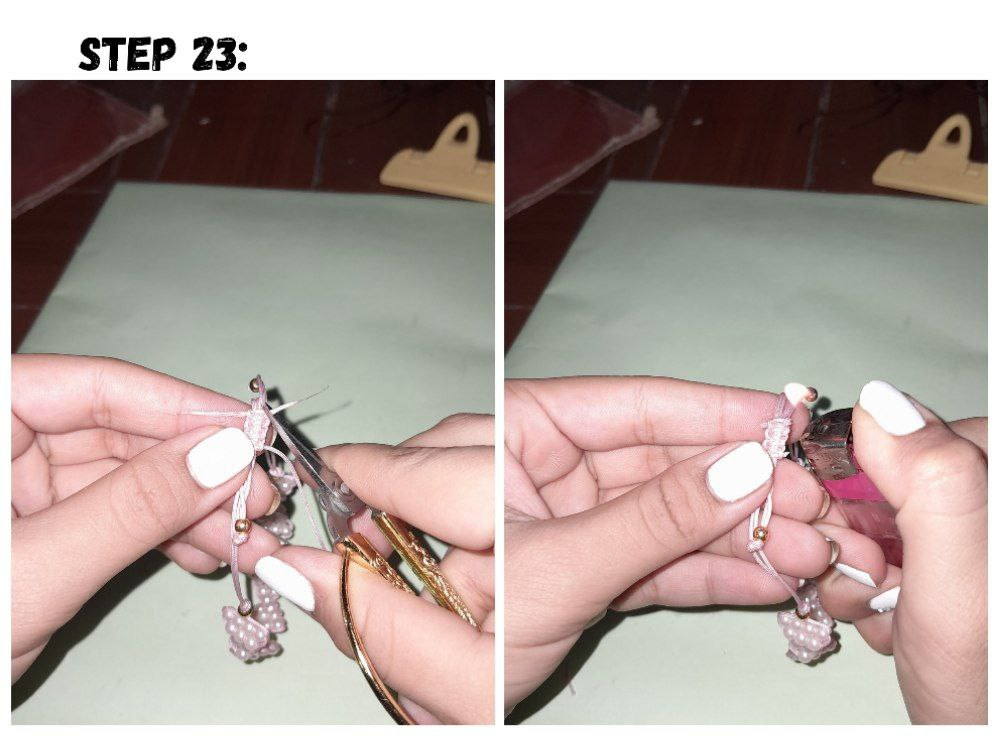
23.- He cut the excess threads and burned them.
23.- Corto los hilos excedentes y los quemó.
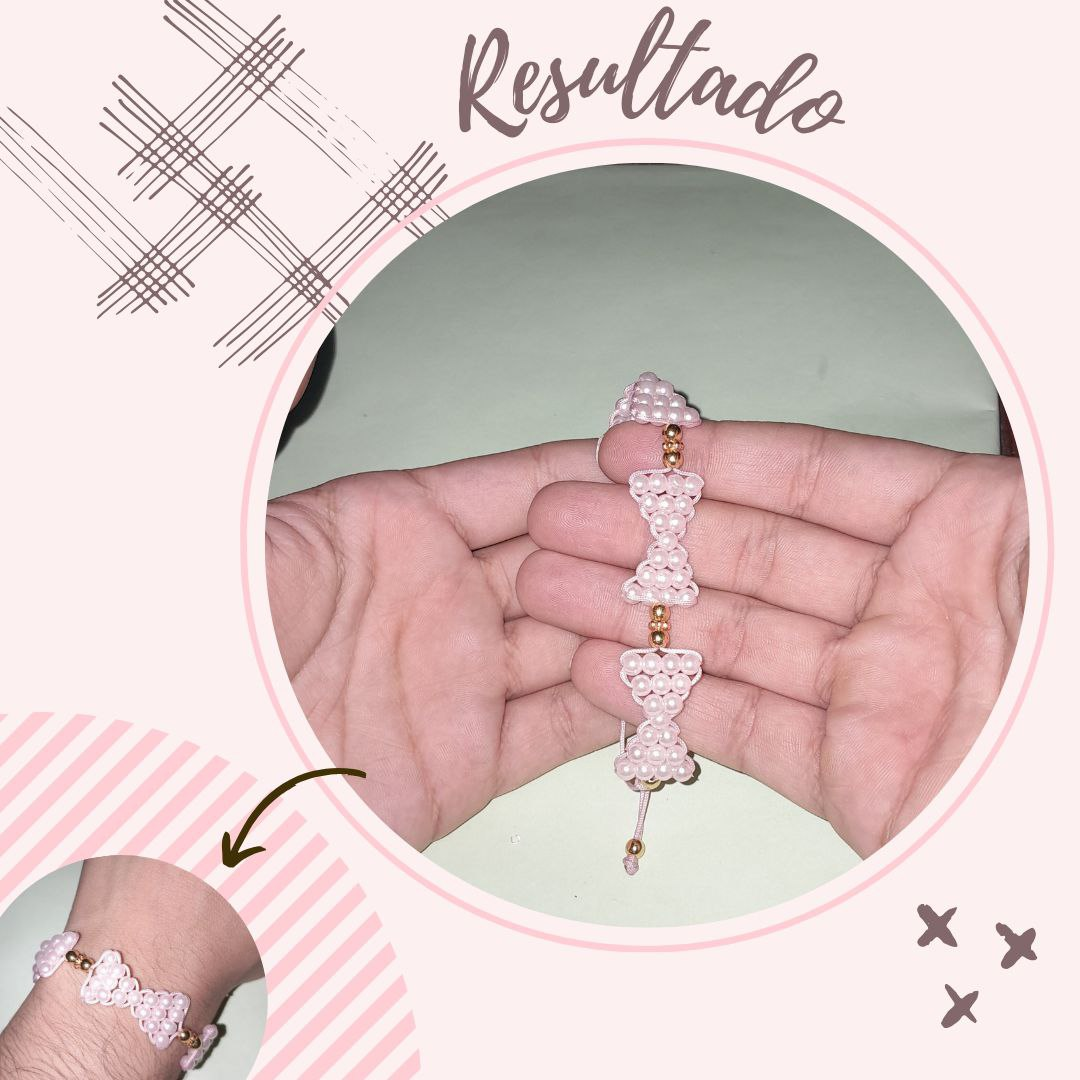
And so our beautiful bracelet was ready to show off.
Y así quedó nuestra hermosa pulsera lista para lucirla.
