¡Bienvenidos a mi blog!
Hola,feliz noche del Martes a todos los miembros de esta linda comunidad de #Diyhub, tan rápido ha pasado el tiempo. Ya casi Marzo por la mitad, Dios nos ayude .
Hoy traigo como siempre un lindo proyecto tejido. Espero que lo disfruten y que sea de su agrado. Ya que todas las cosas que hago , las realizo con mucho amor ❤️ .
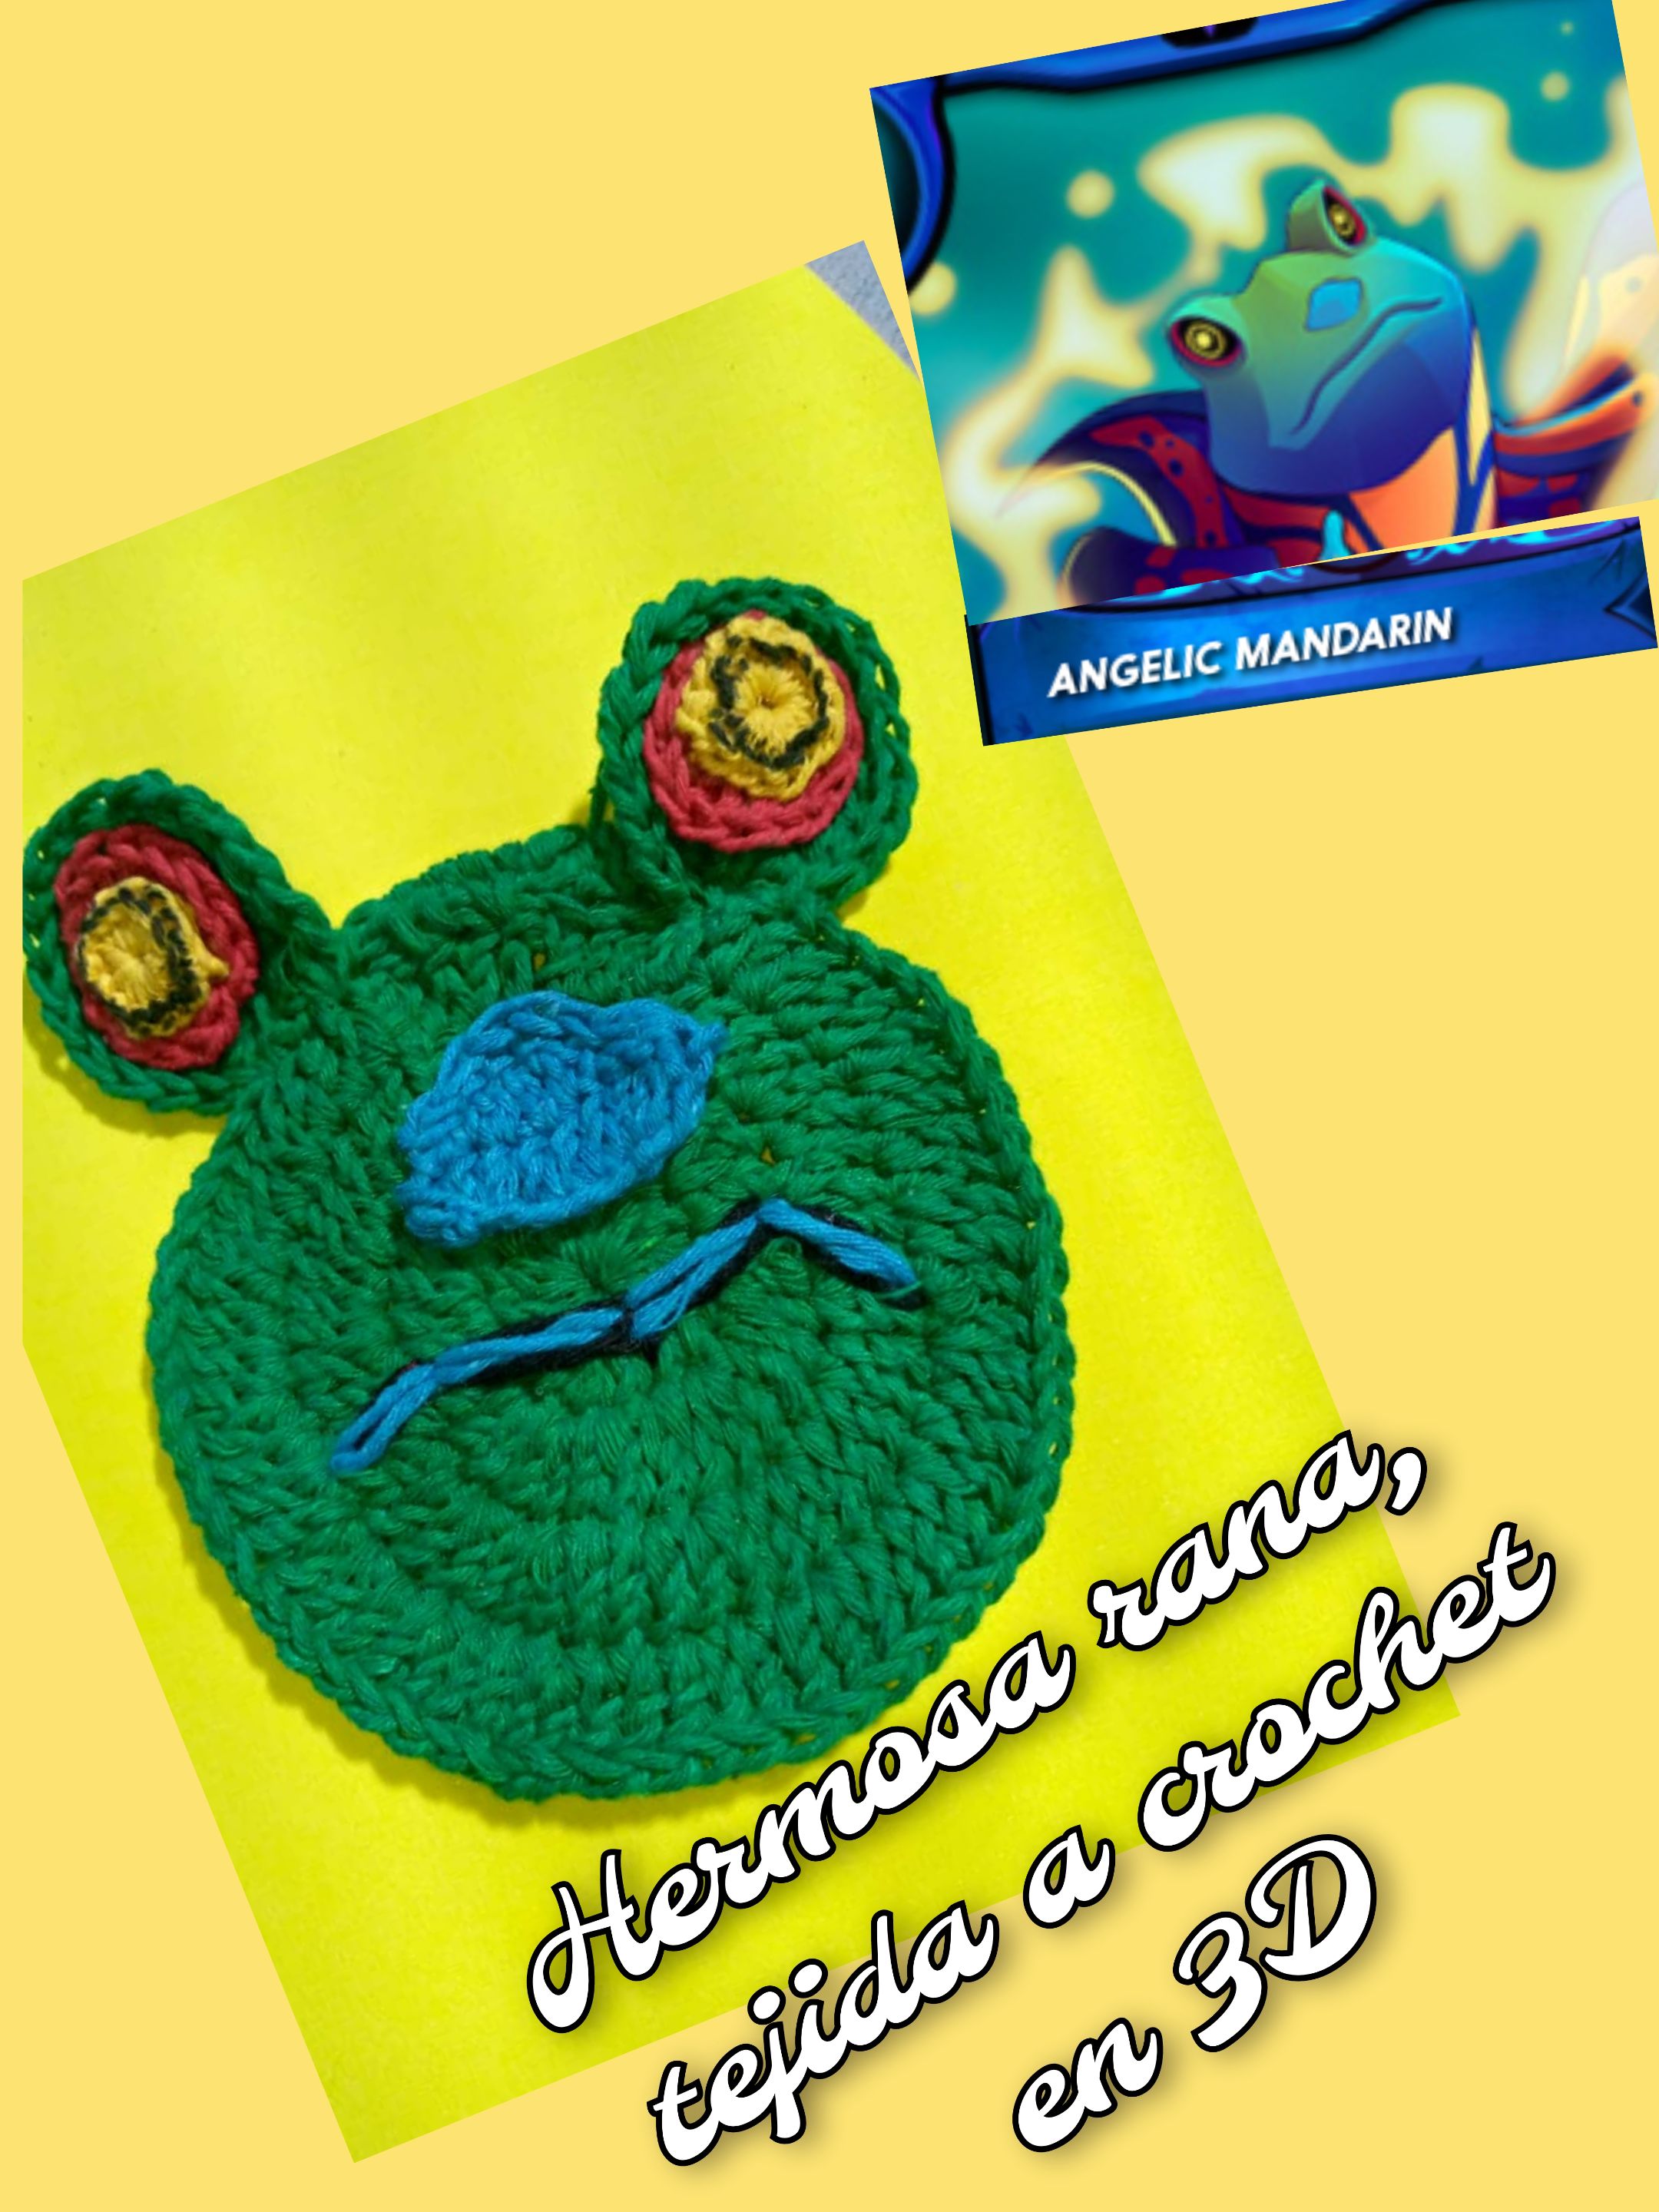
Quiero mostrar como hacer una cara de rana 🐸 en 3D ,inspirada en Angélic Mandarín en el concurso de artr 336 de @Splinterlands.
Este proyecto , es un motivo que sirve para colocar en franelas de niños,para decorar cuartos o fiestas, para colocarlas en toallas o paños. En fin puede servir para muchas cosas.
Welcome to my blog!
Hello,happy Tuesday evening to all the members of this nice #Diyhub community, so fast time has passed. March is almost half over, God help us .
Today I bring as always a nice knitted project. I hope you enjoy it and that it is to your liking. Since all the things I do , I do them with love ❤️ .
I want to show how to make a frog face 🐸 in 3D , inspired by Angelic Mandarin in the @Splinterlands artr 336 contest .
This project is a motif that can be placed on children's flannels, to decorate rooms or parties, to place them on towels or cloths. In short, it can be used for many things.
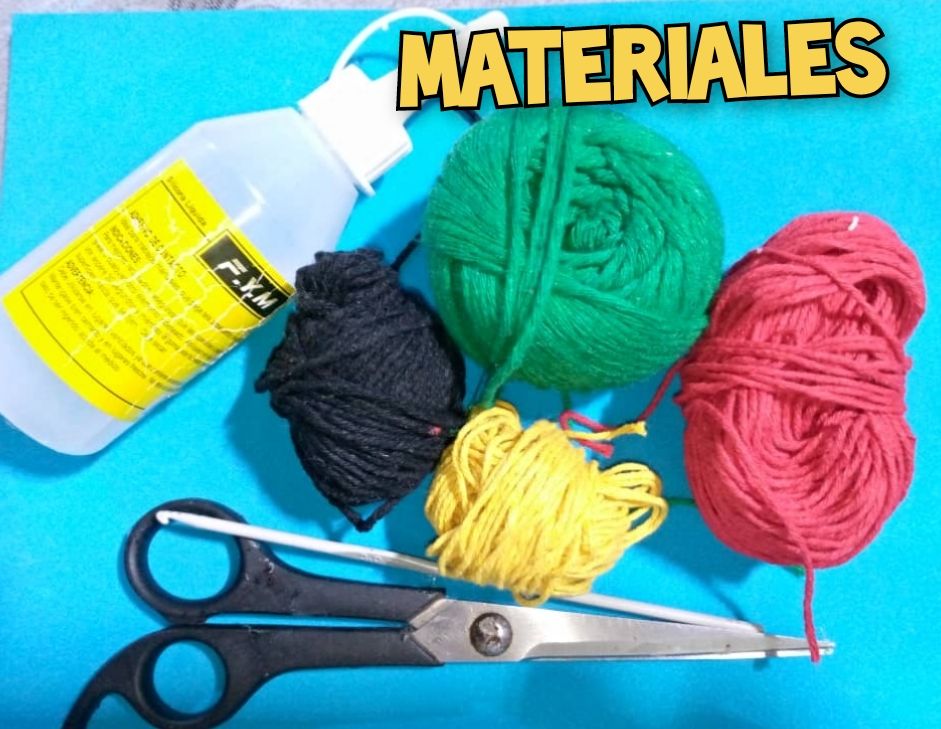
Materiales que se necesitan para la realización de la cabeza de rana🐸:
- Hilo de tejer ,colores: verde, amarillo, rojo, negro y azul.
- Aguja de tejer , número 3.
- Aguja lanera.
- Silicona líquida.
- Tijera.
Materials needed for the realization of the frog head🐸:
- Knitting yarn ,colors: green, yellow, red, black and blue.
- Knitting needle , number 3.
- Wool needle.
- Liquid silicone.
- Scissors.
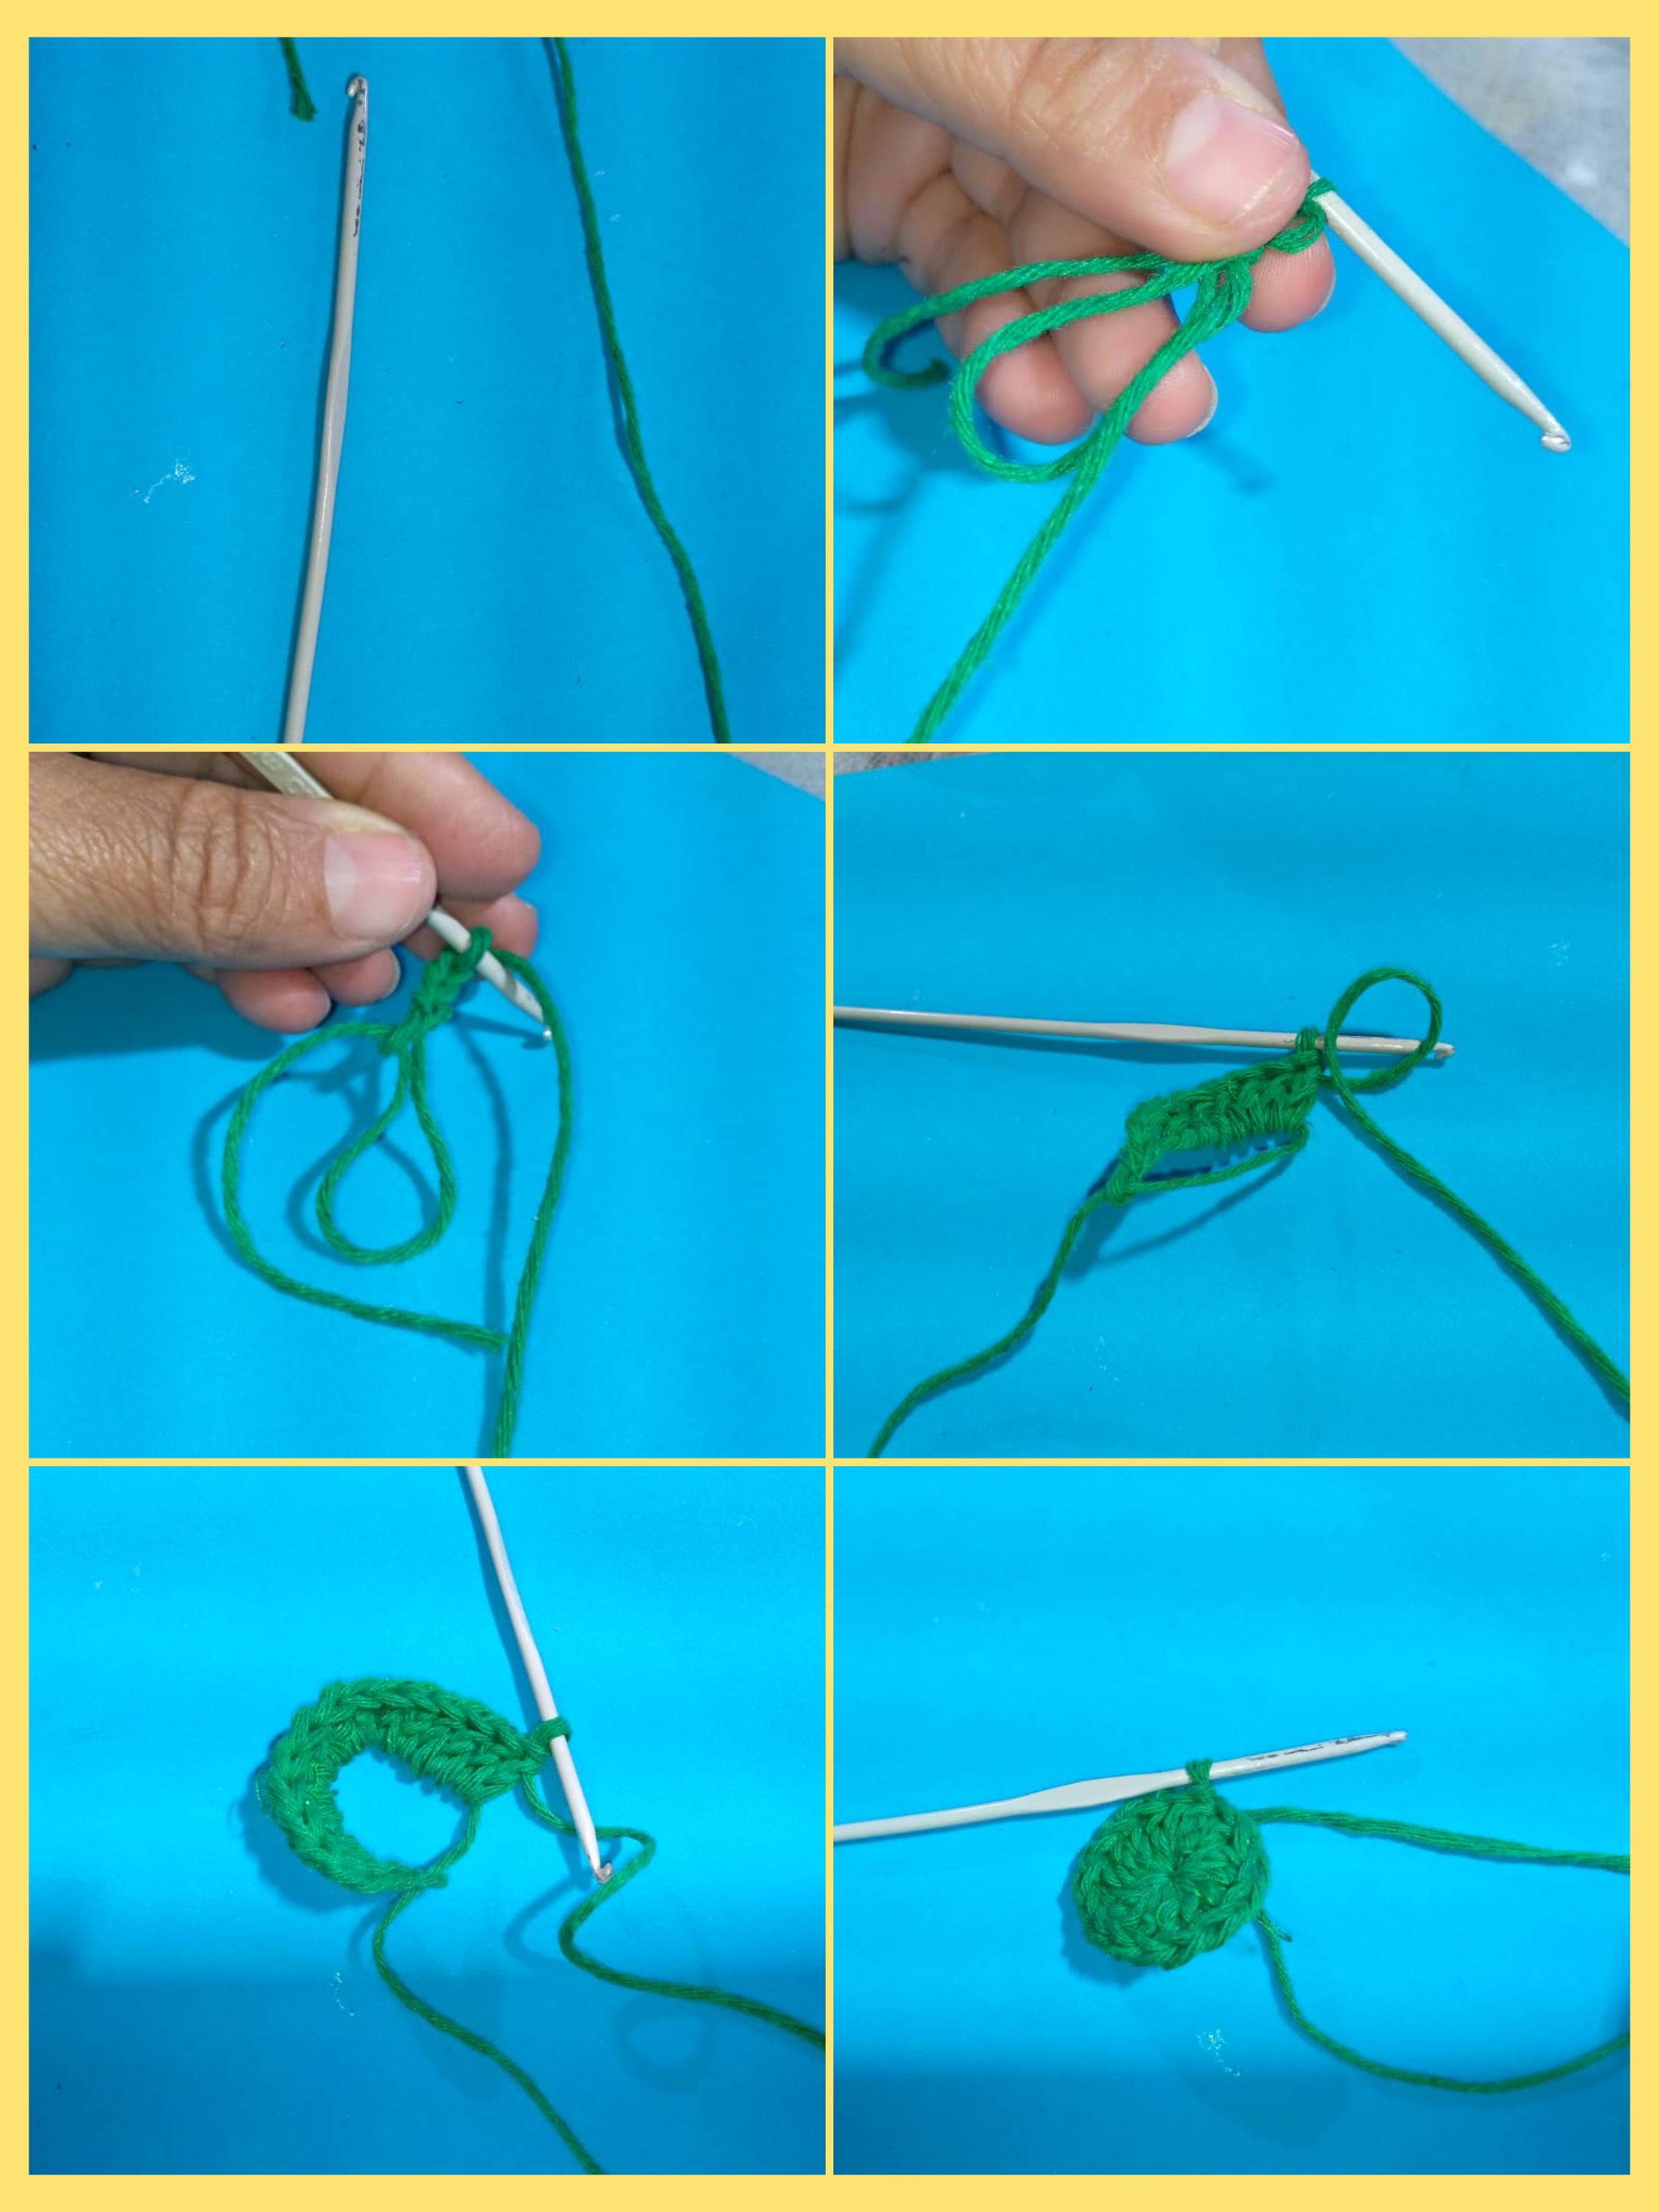
Paso a paso para la realización del motivo:
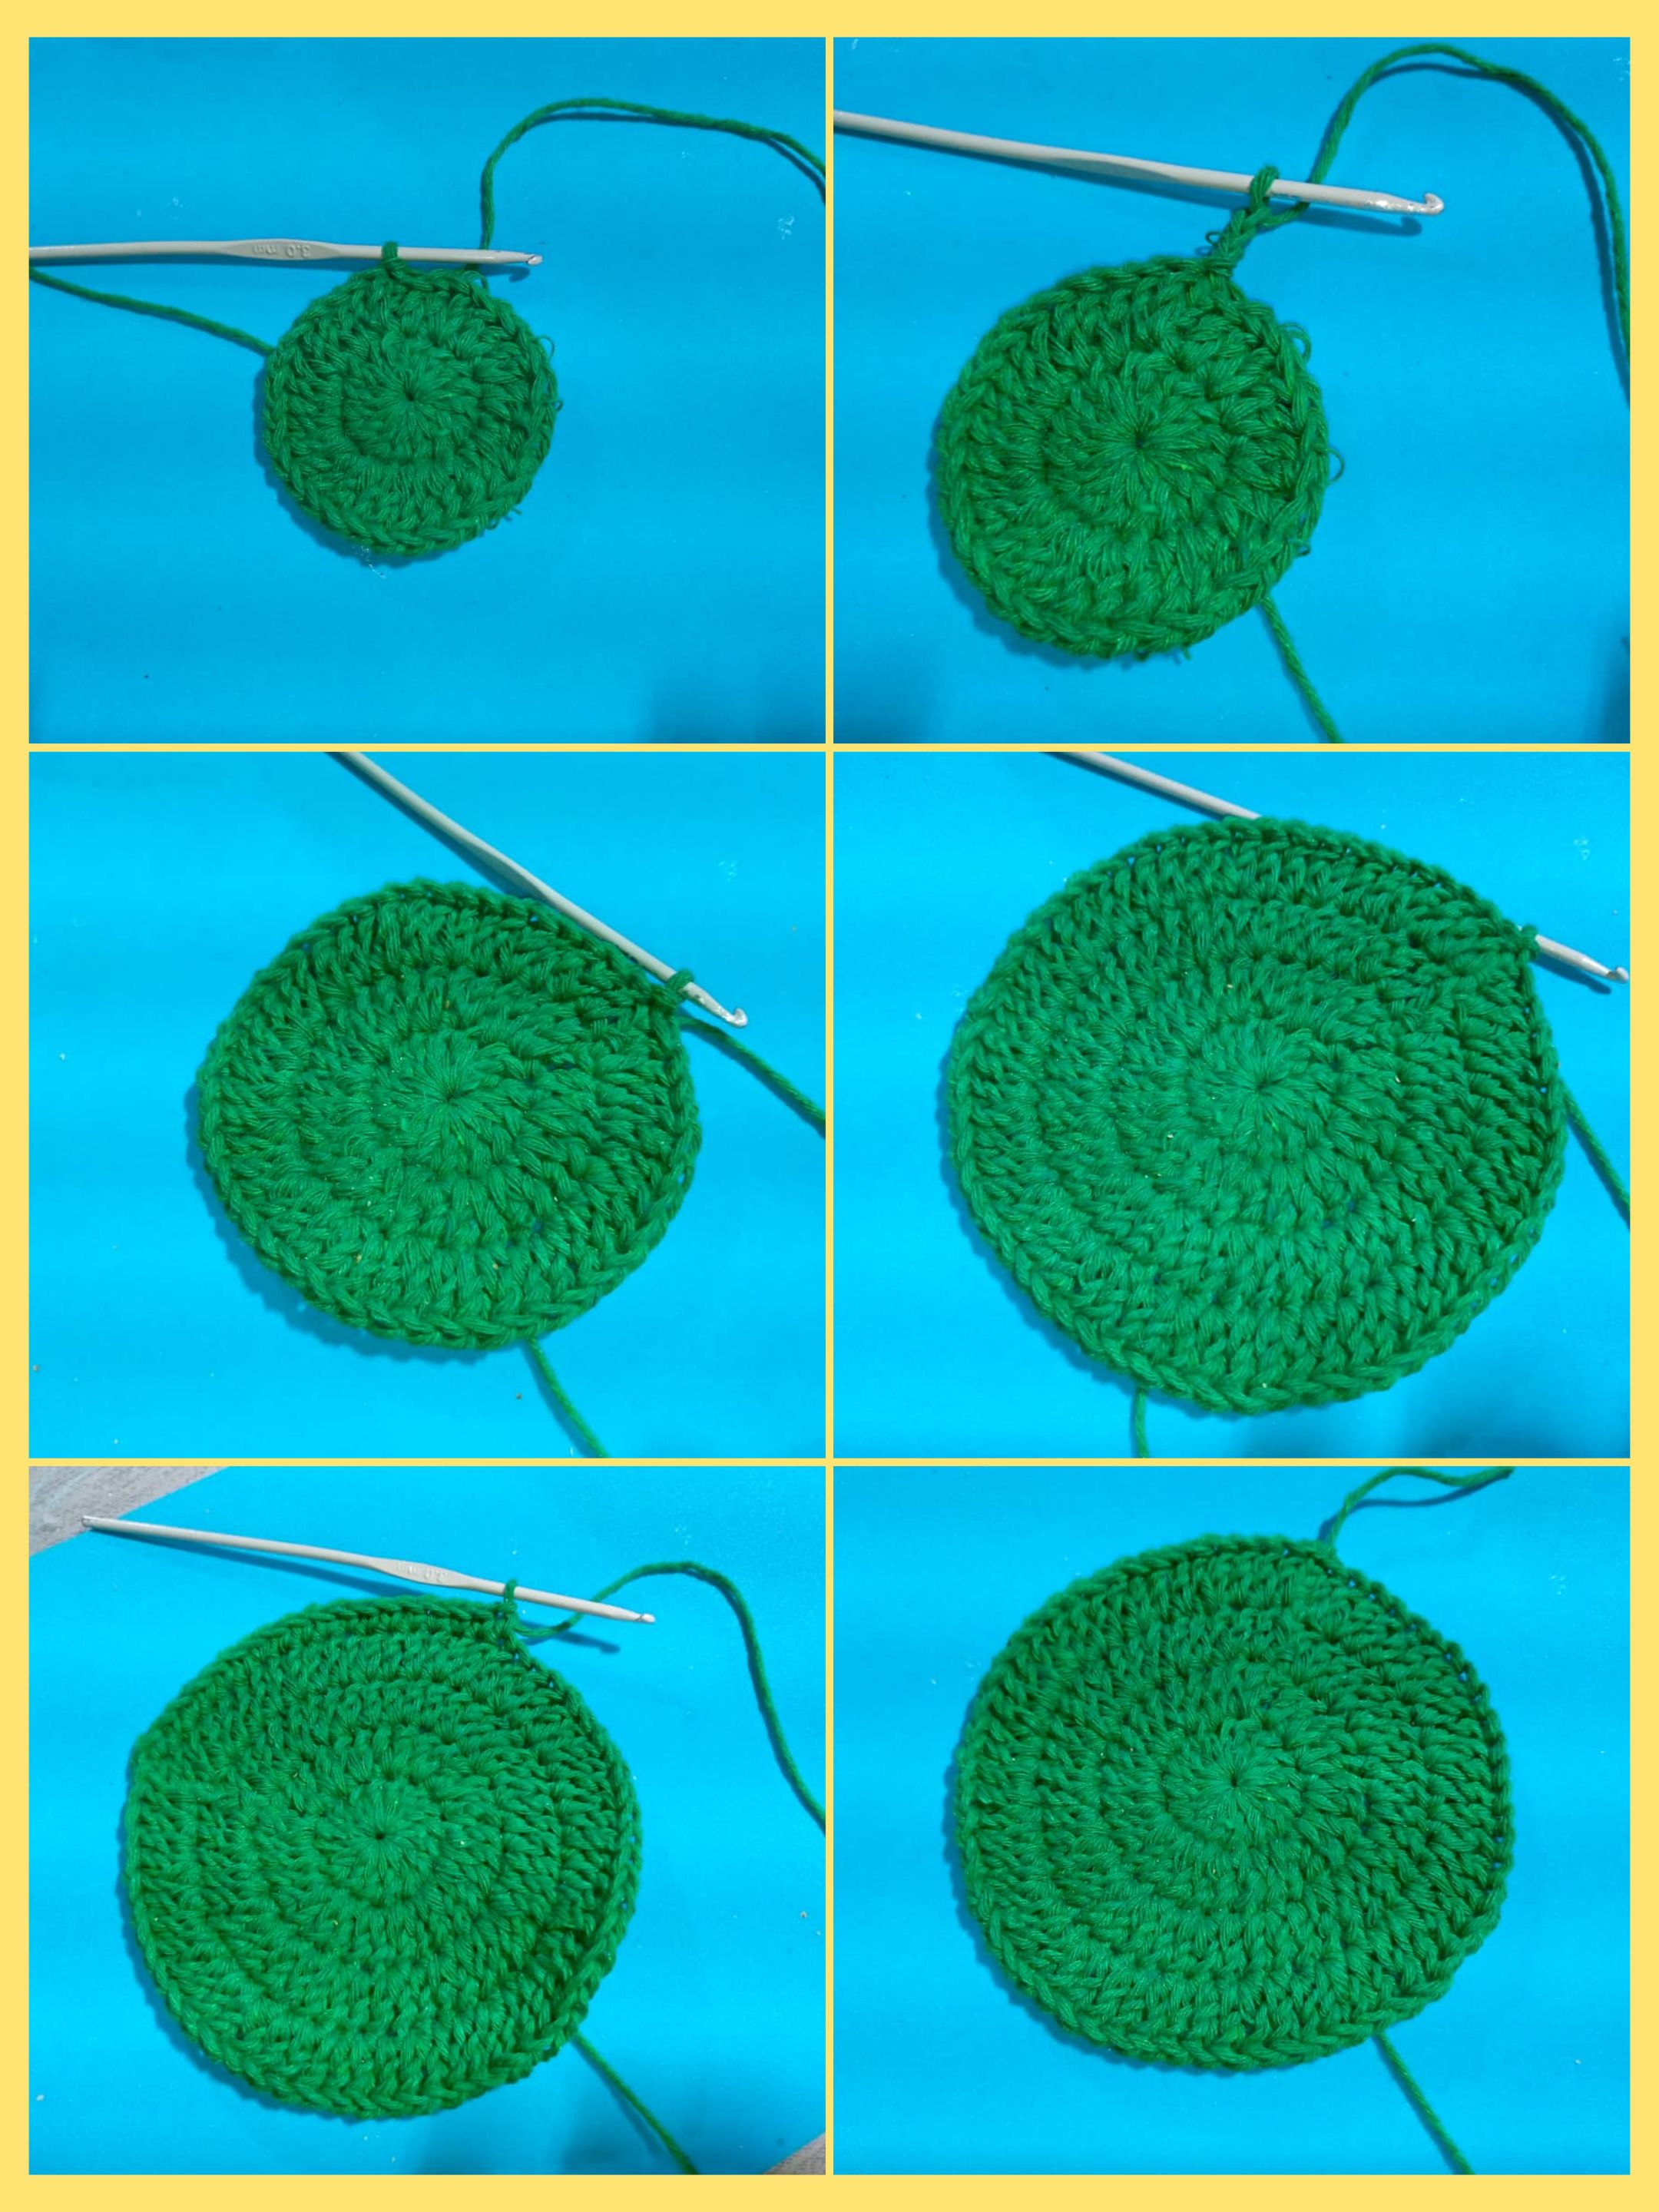
- Lo primero que haremos ,es tomar la aguja y el hilo verde, hacer un anillo mágico , luego levantar tres cadenas y dentro de ese anillo meter 16 puntos altos. Cerrar la vuelta con punto deslizado.
- Para la segunda vuelta, levantar tres cadenas, hacer un aumento en cada punto. En total debe haber 32 puntos altos. Cerrar siempre con punto deslizado.
- Tercera vuelta: levantar tres cadenas, luego hacer un aumento en el siguiente punto hacer un punto alto y siguiente hacer un aumento.
- Para la cuarta vuelta: levantar tres puntos. Ese sería la número uno, hacer otro punto alto en el siguiente punto, está vuelta sería dos puntos altos y un aumento.
- Con esto se terminaría el redondo de la cara de la rana 🐸.
Step by step for the realization of the motif:
- The first thing we will do ,is to take the needle and green yarn, make a magic ring , then pick up three chains and inside that ring put 16 high stitches. Close the row with slip stitch.
- For the second row, pick up three chains, make an increase in each stitch. In total there should be 32 double crochet stitches. Always close with slip stitch.
- Third row: pick up three chains, then make an increase in the next stitch, make a double crochet and then make an increase in the next stitch.
- For the fourth row: pick up three stitches. That would be number one, make another double crochet in the next stitch, this round would be two double crochets and an increase.
- This would finish the frog face round 🐸.
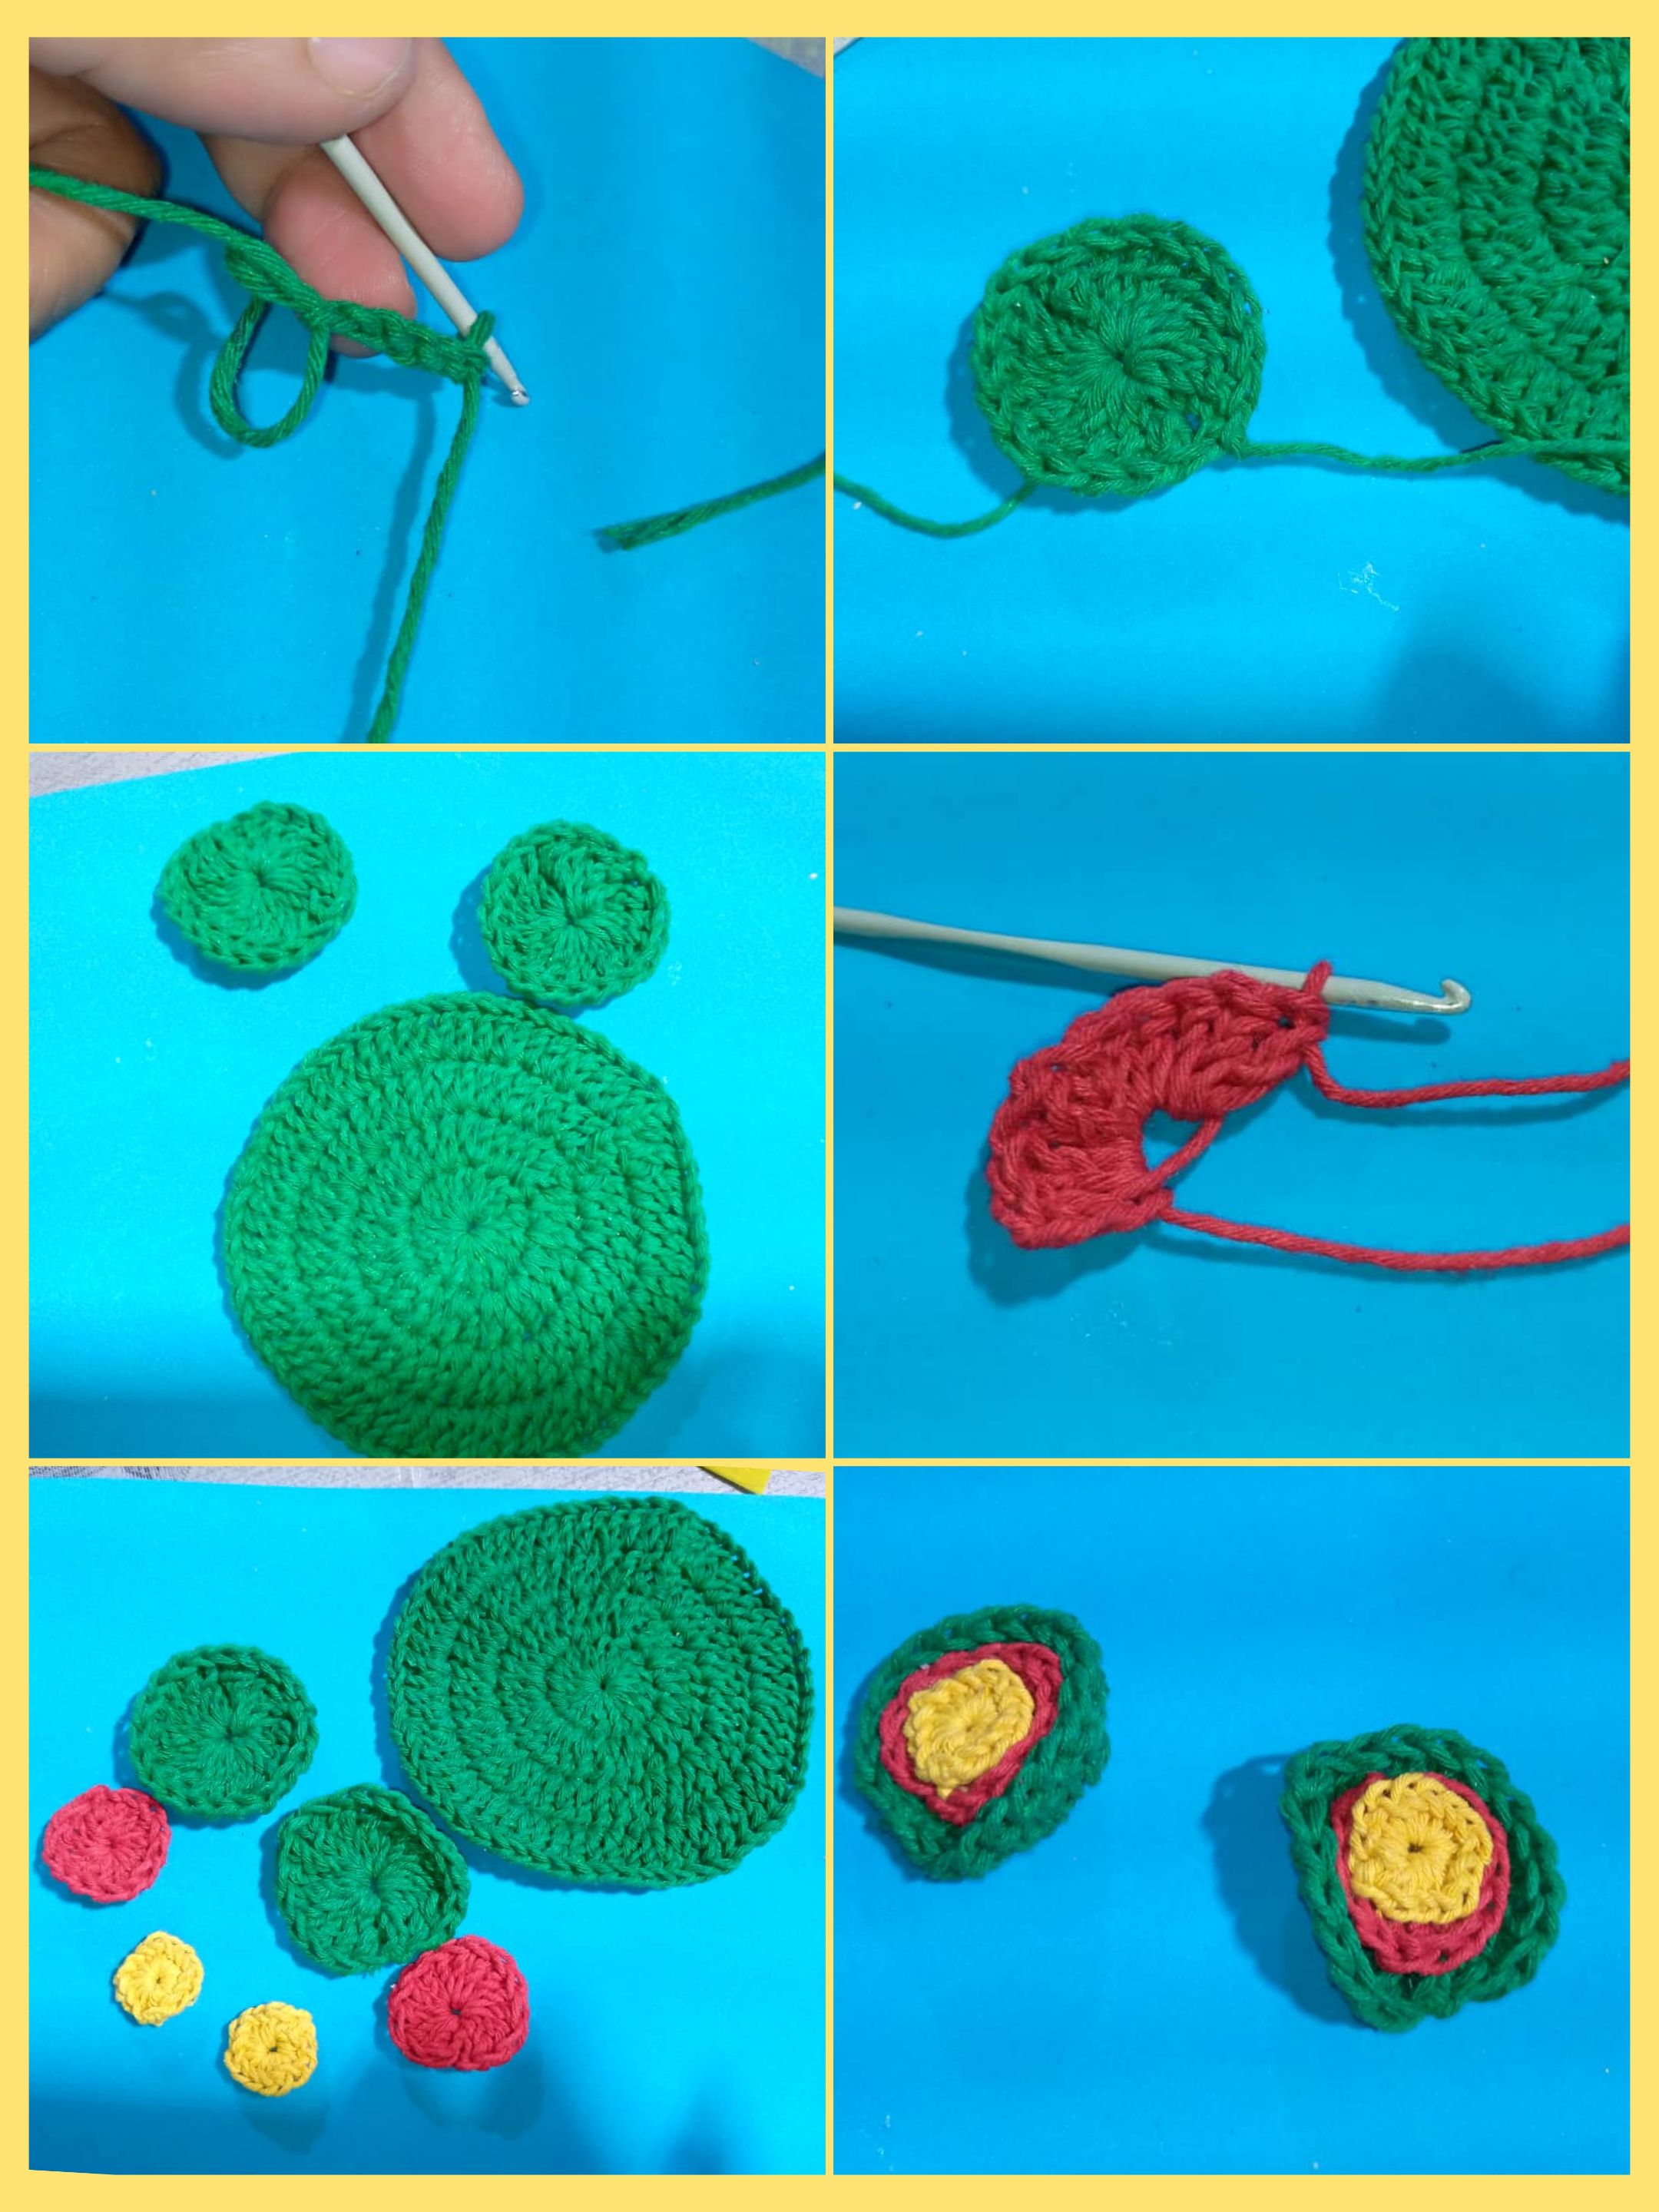
- Ahora para hacer las orejas, se hace lo siguiente, un anillo mágico, dentro del anillo se debe hacer 16 puntos altos dobles, de estos se hacen dos.
- Para completar las orejas, se debe hacer ,un anillo mágico y meter dentro del anillo 10 puntos altos.Se deben hacer dos.
- Luego con el color amarillo continuar ,haciendo un anillo mágico, meter dentro del anillo 5 puntos bajos. Se deben hacer dos. Y listo las orejas.
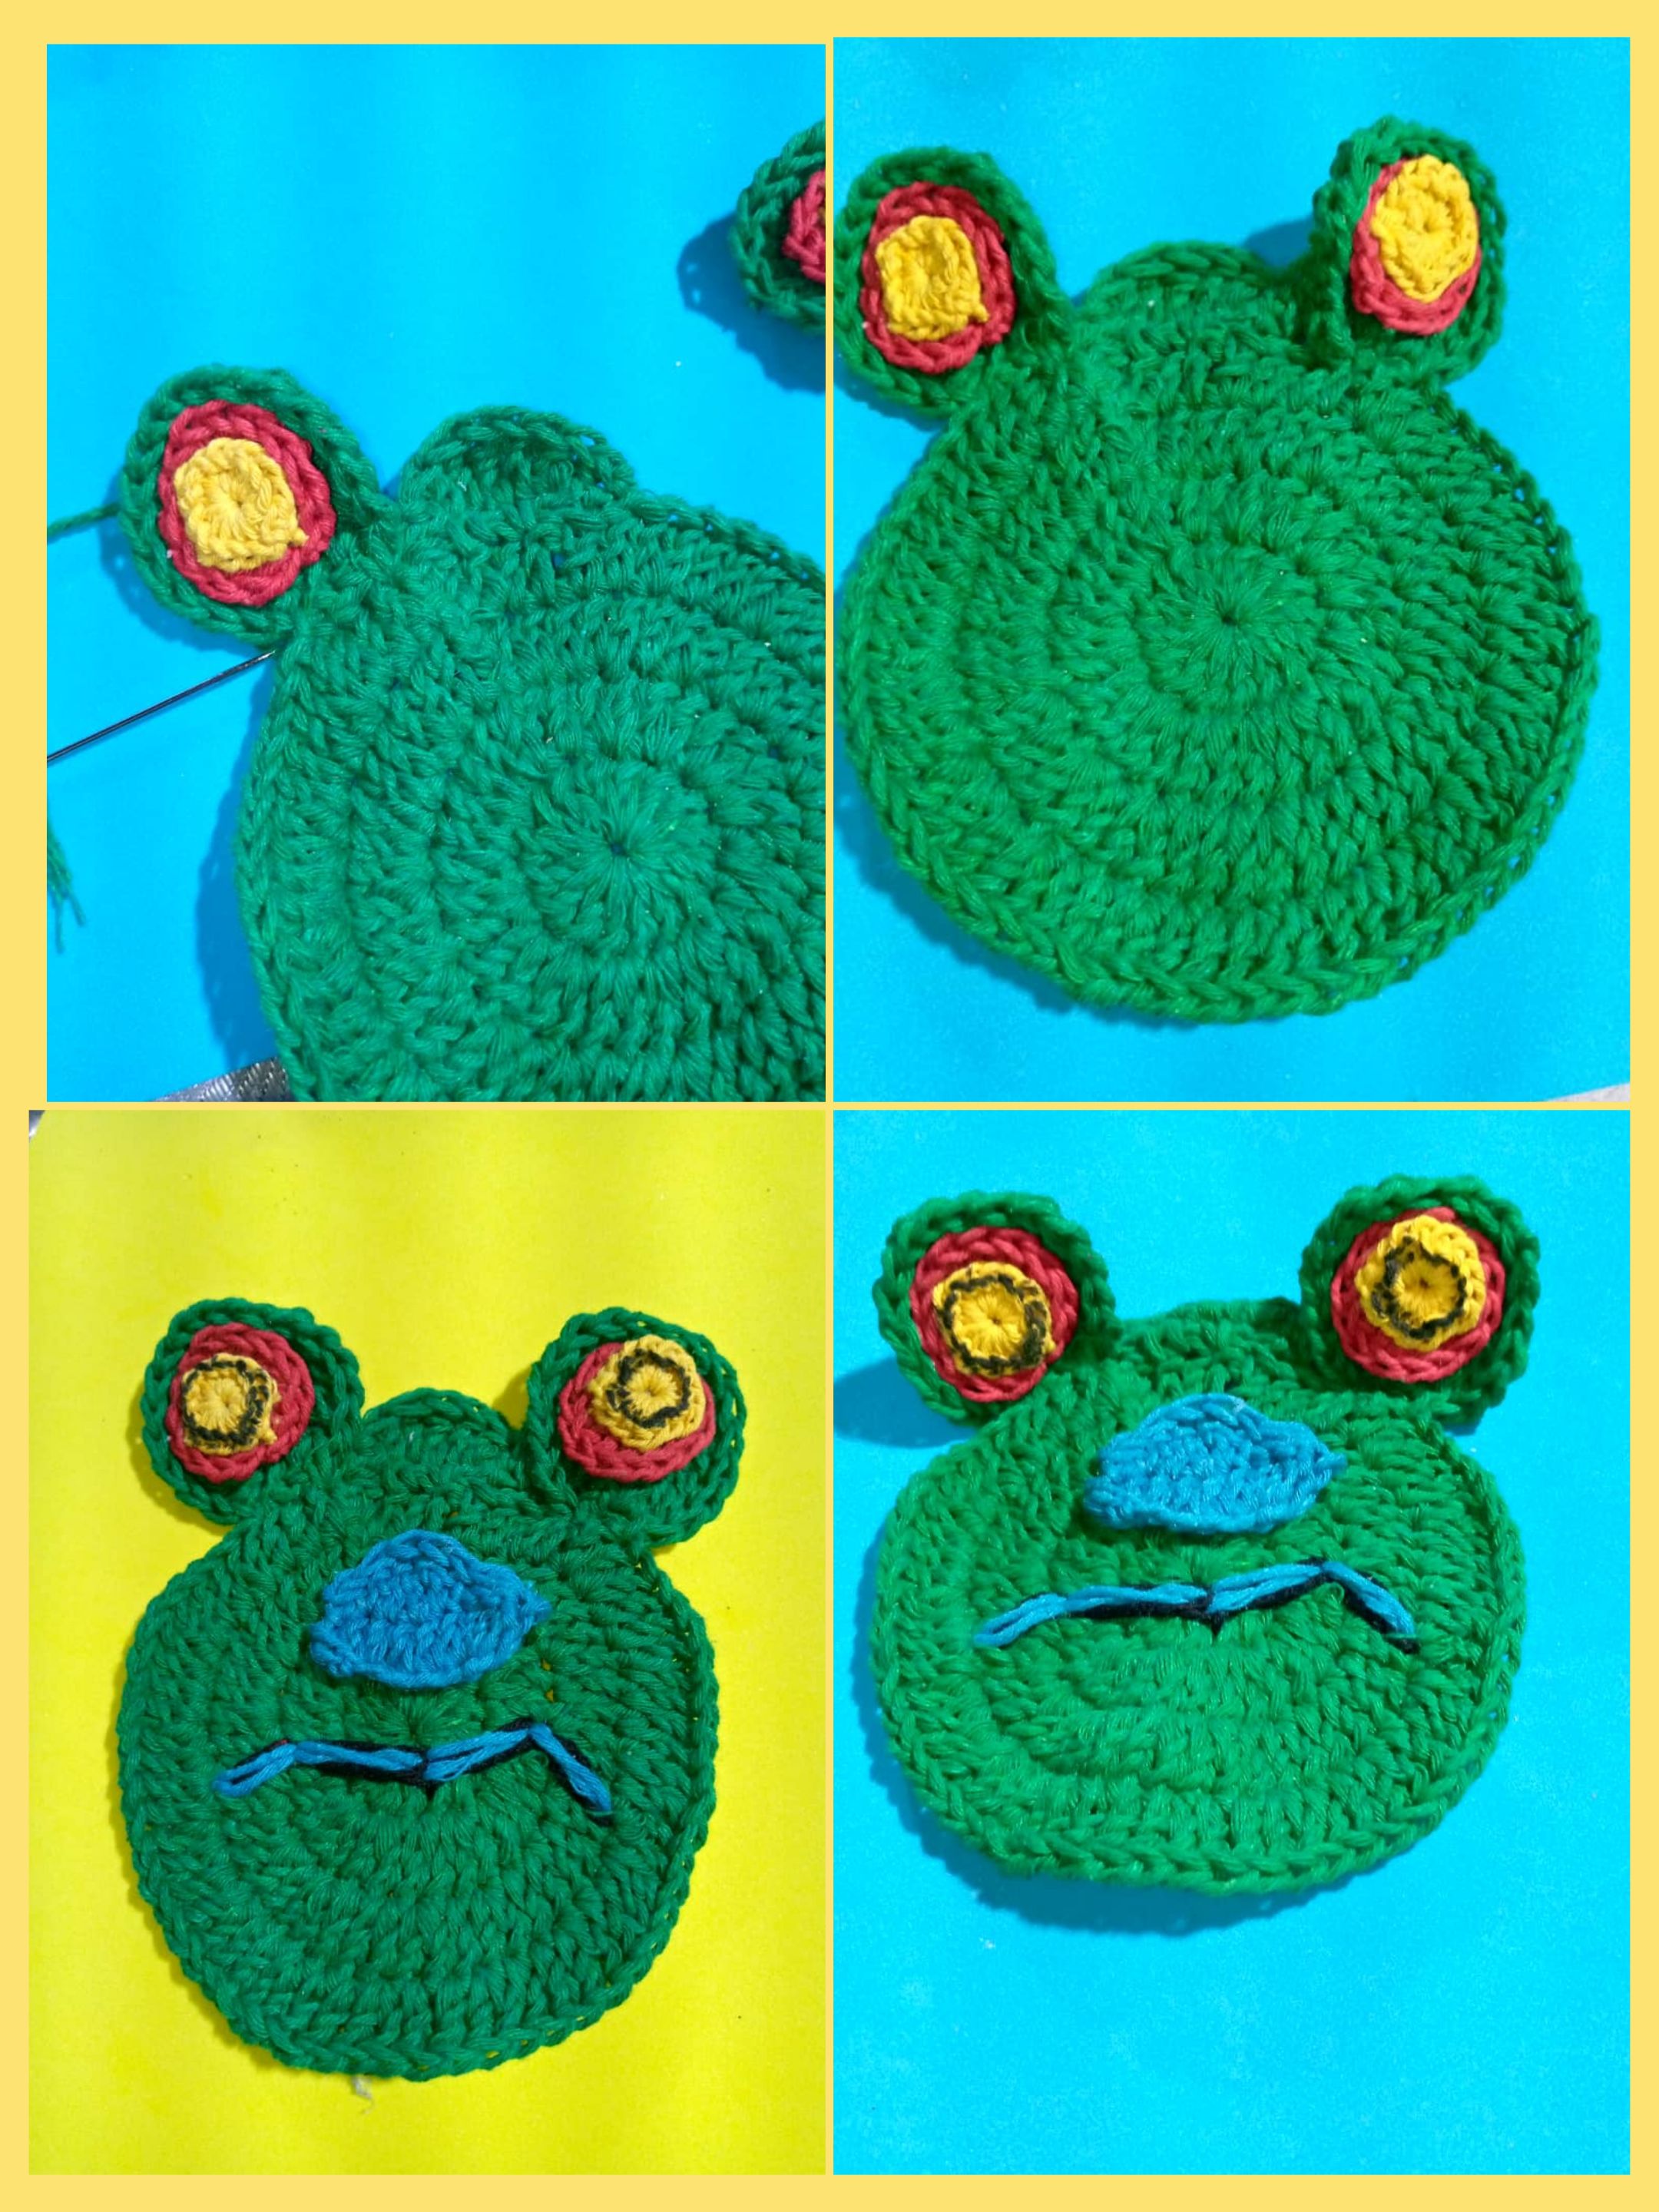
- Para hacer la nariz, tejer ocho cadenas ,en la primera hacer un deslizado, un punto bajo, uno alto, otro punto alto y otro alto, uno bajo y por último el deslizado.
- Teniendo todas las partes listas,procedemos a pegar algunos y otras a coser con la aguja lanera.
- Now to make the ears, do the following, a magic ring, inside the ring you must make 16 double crochet stitches, of these you make two.
- To complete the ears, make a magic ring and put 10 double crochet stitches inside the ring, make two of them.
- Then with the yellow color continue, making a magic ring, put inside the ring 5 low stitches. You must make two. And the ears are ready.
- To make the nose, knit eight chains, in the first one make a slip, a single crochet, a double crochet, a double crochet, a single crochet, a double crochet, a single crochet and finally the slip.
- Having all the parts ready, we proceed to glue some and others to sew with the wool needle.
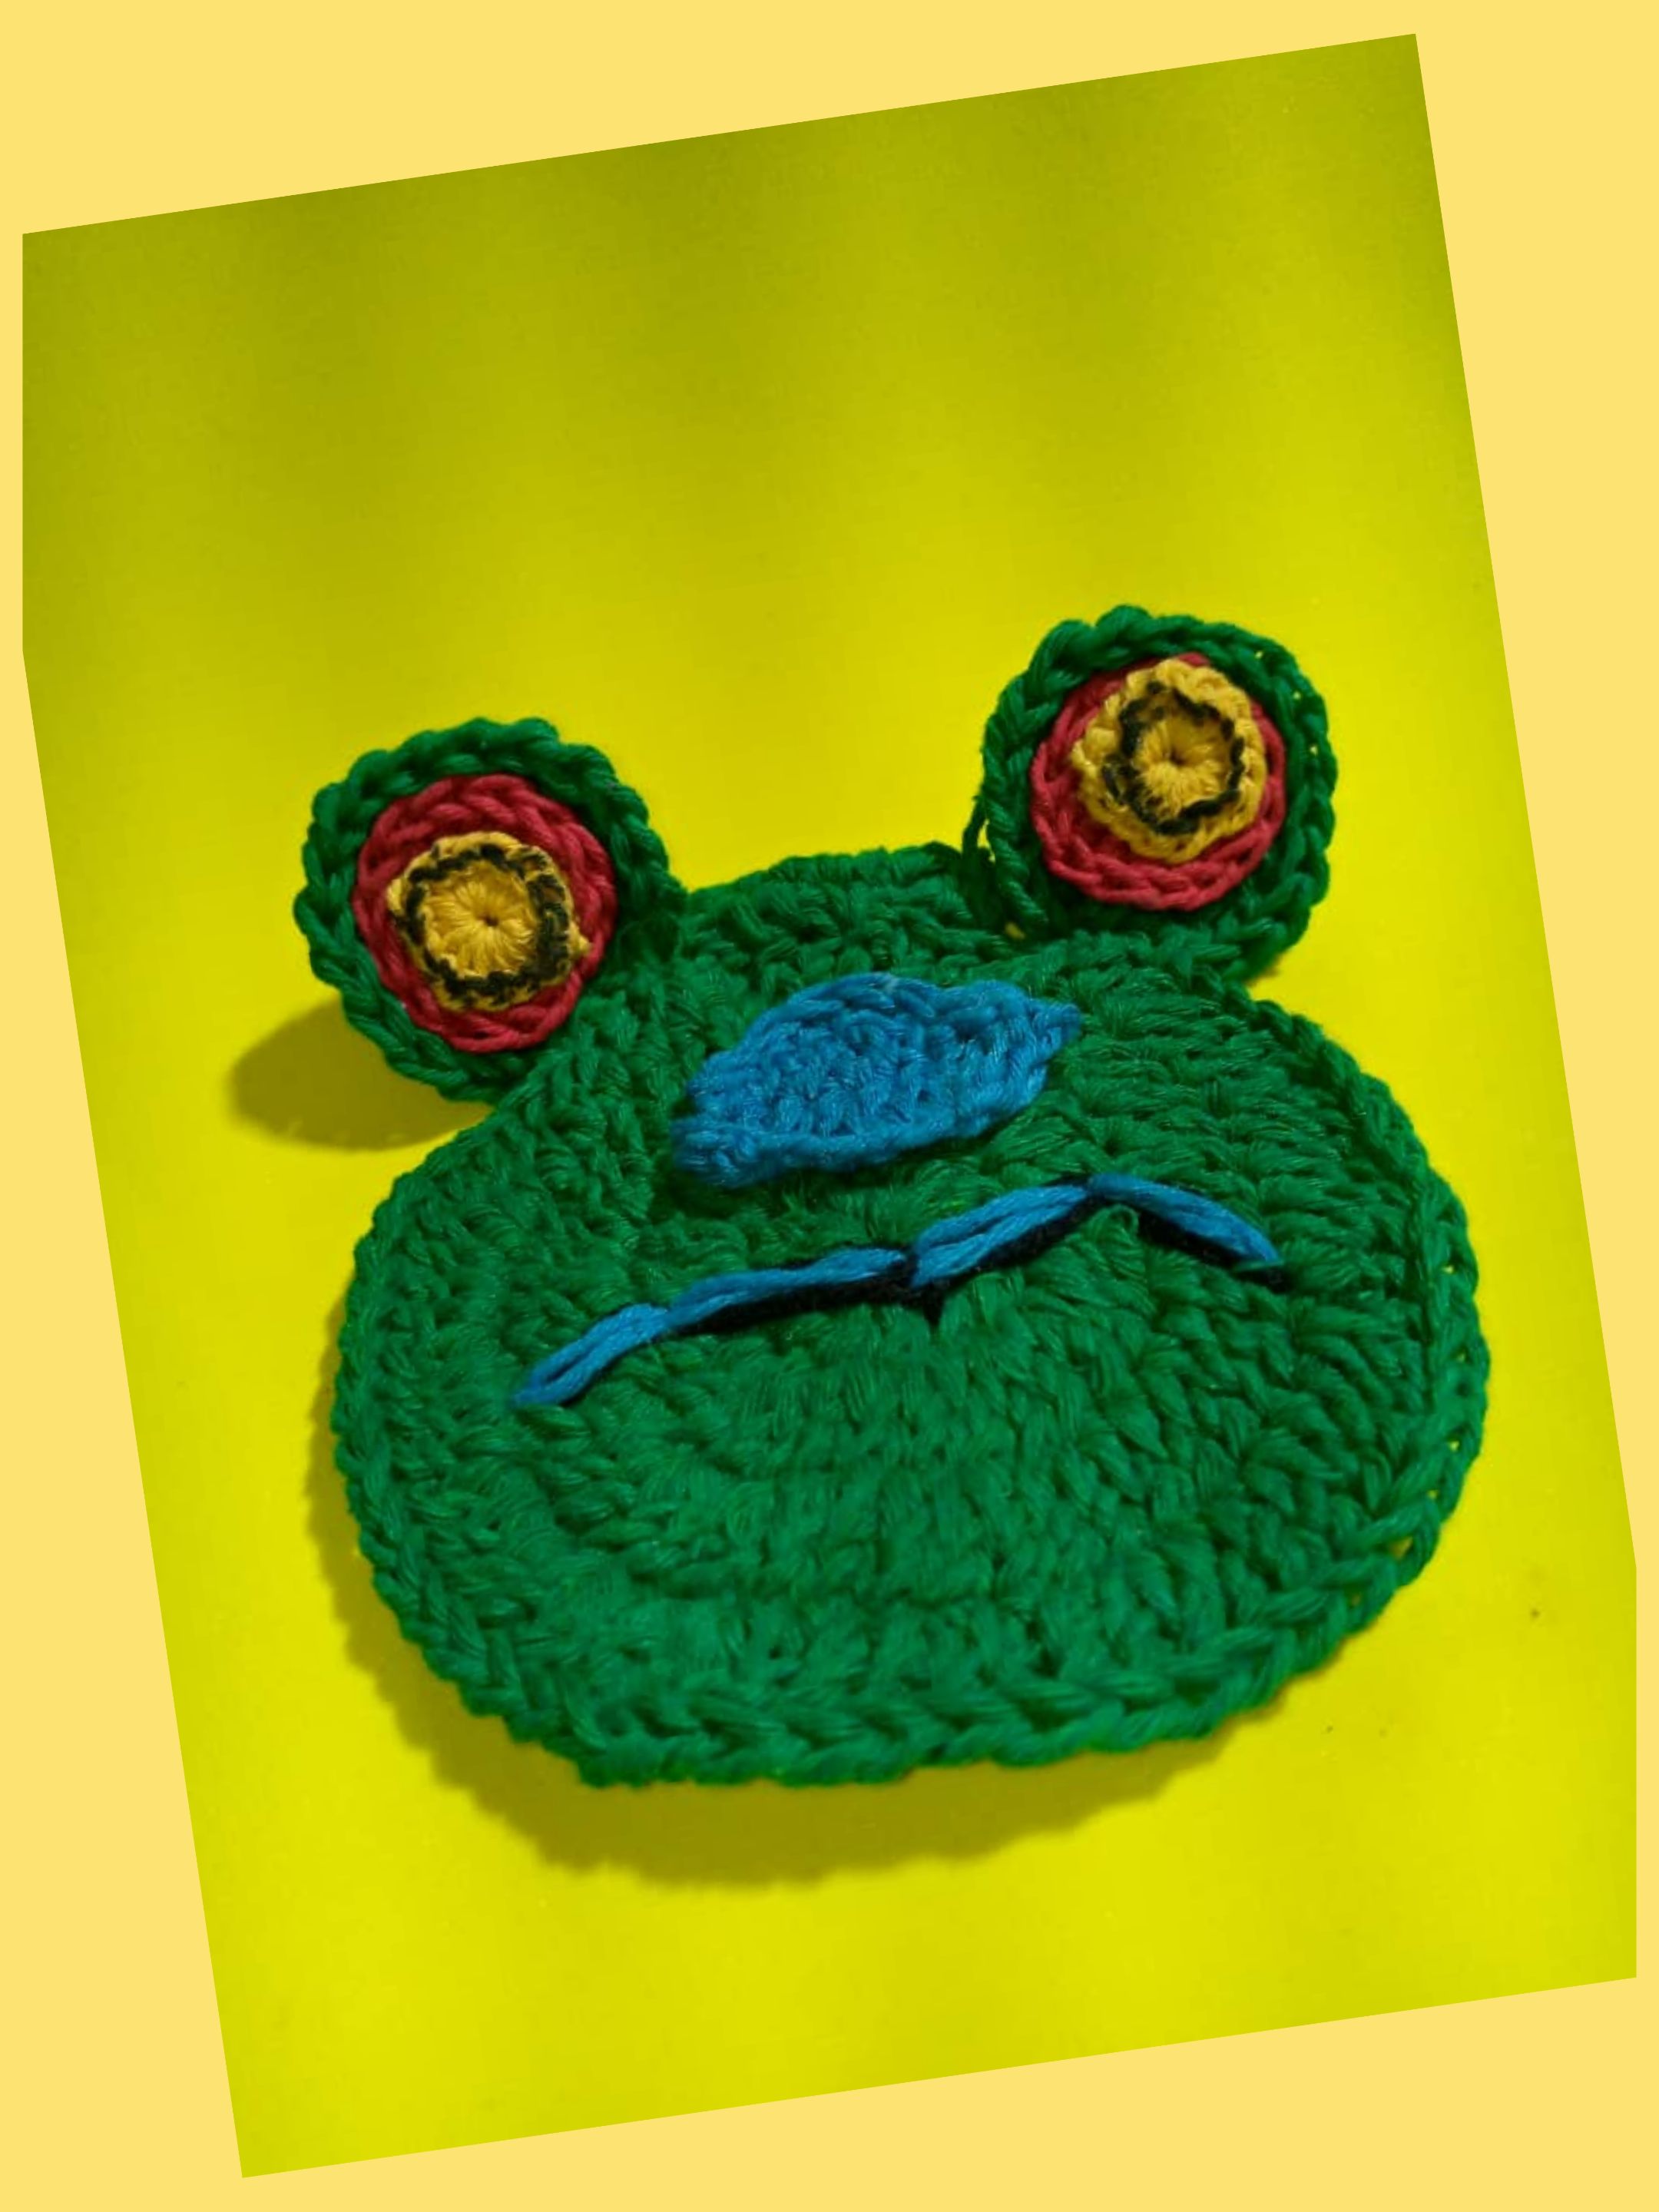
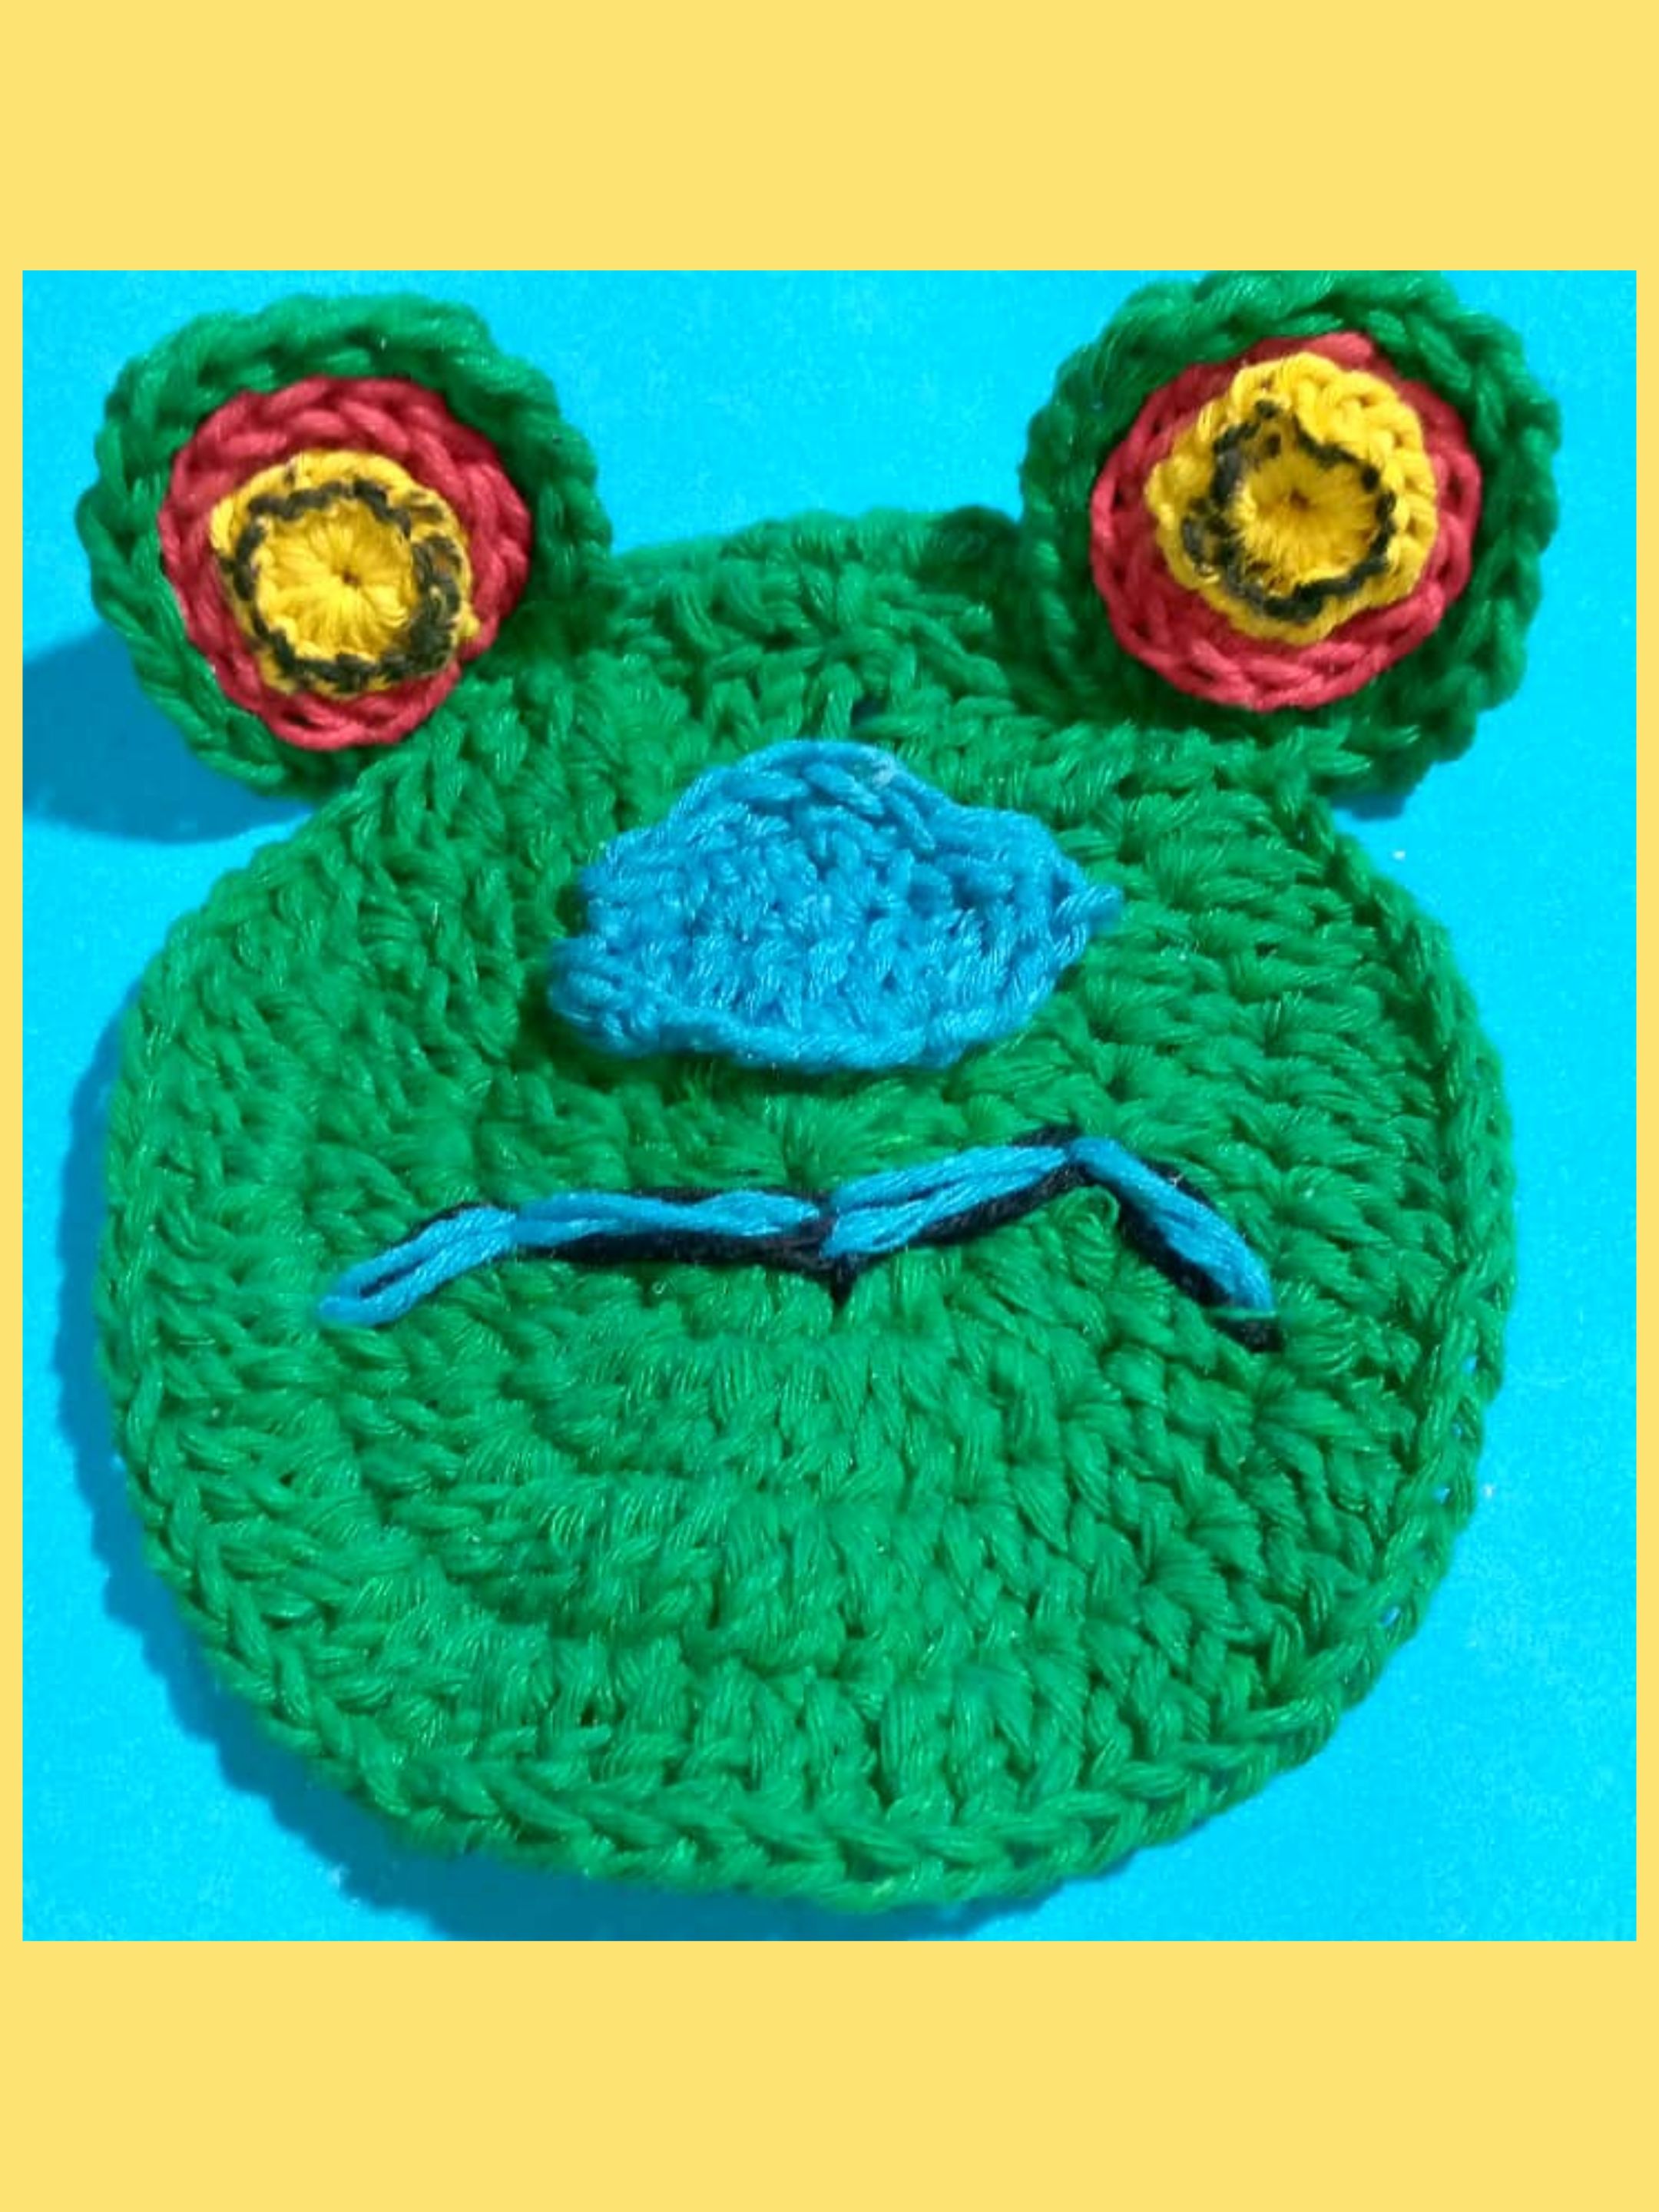
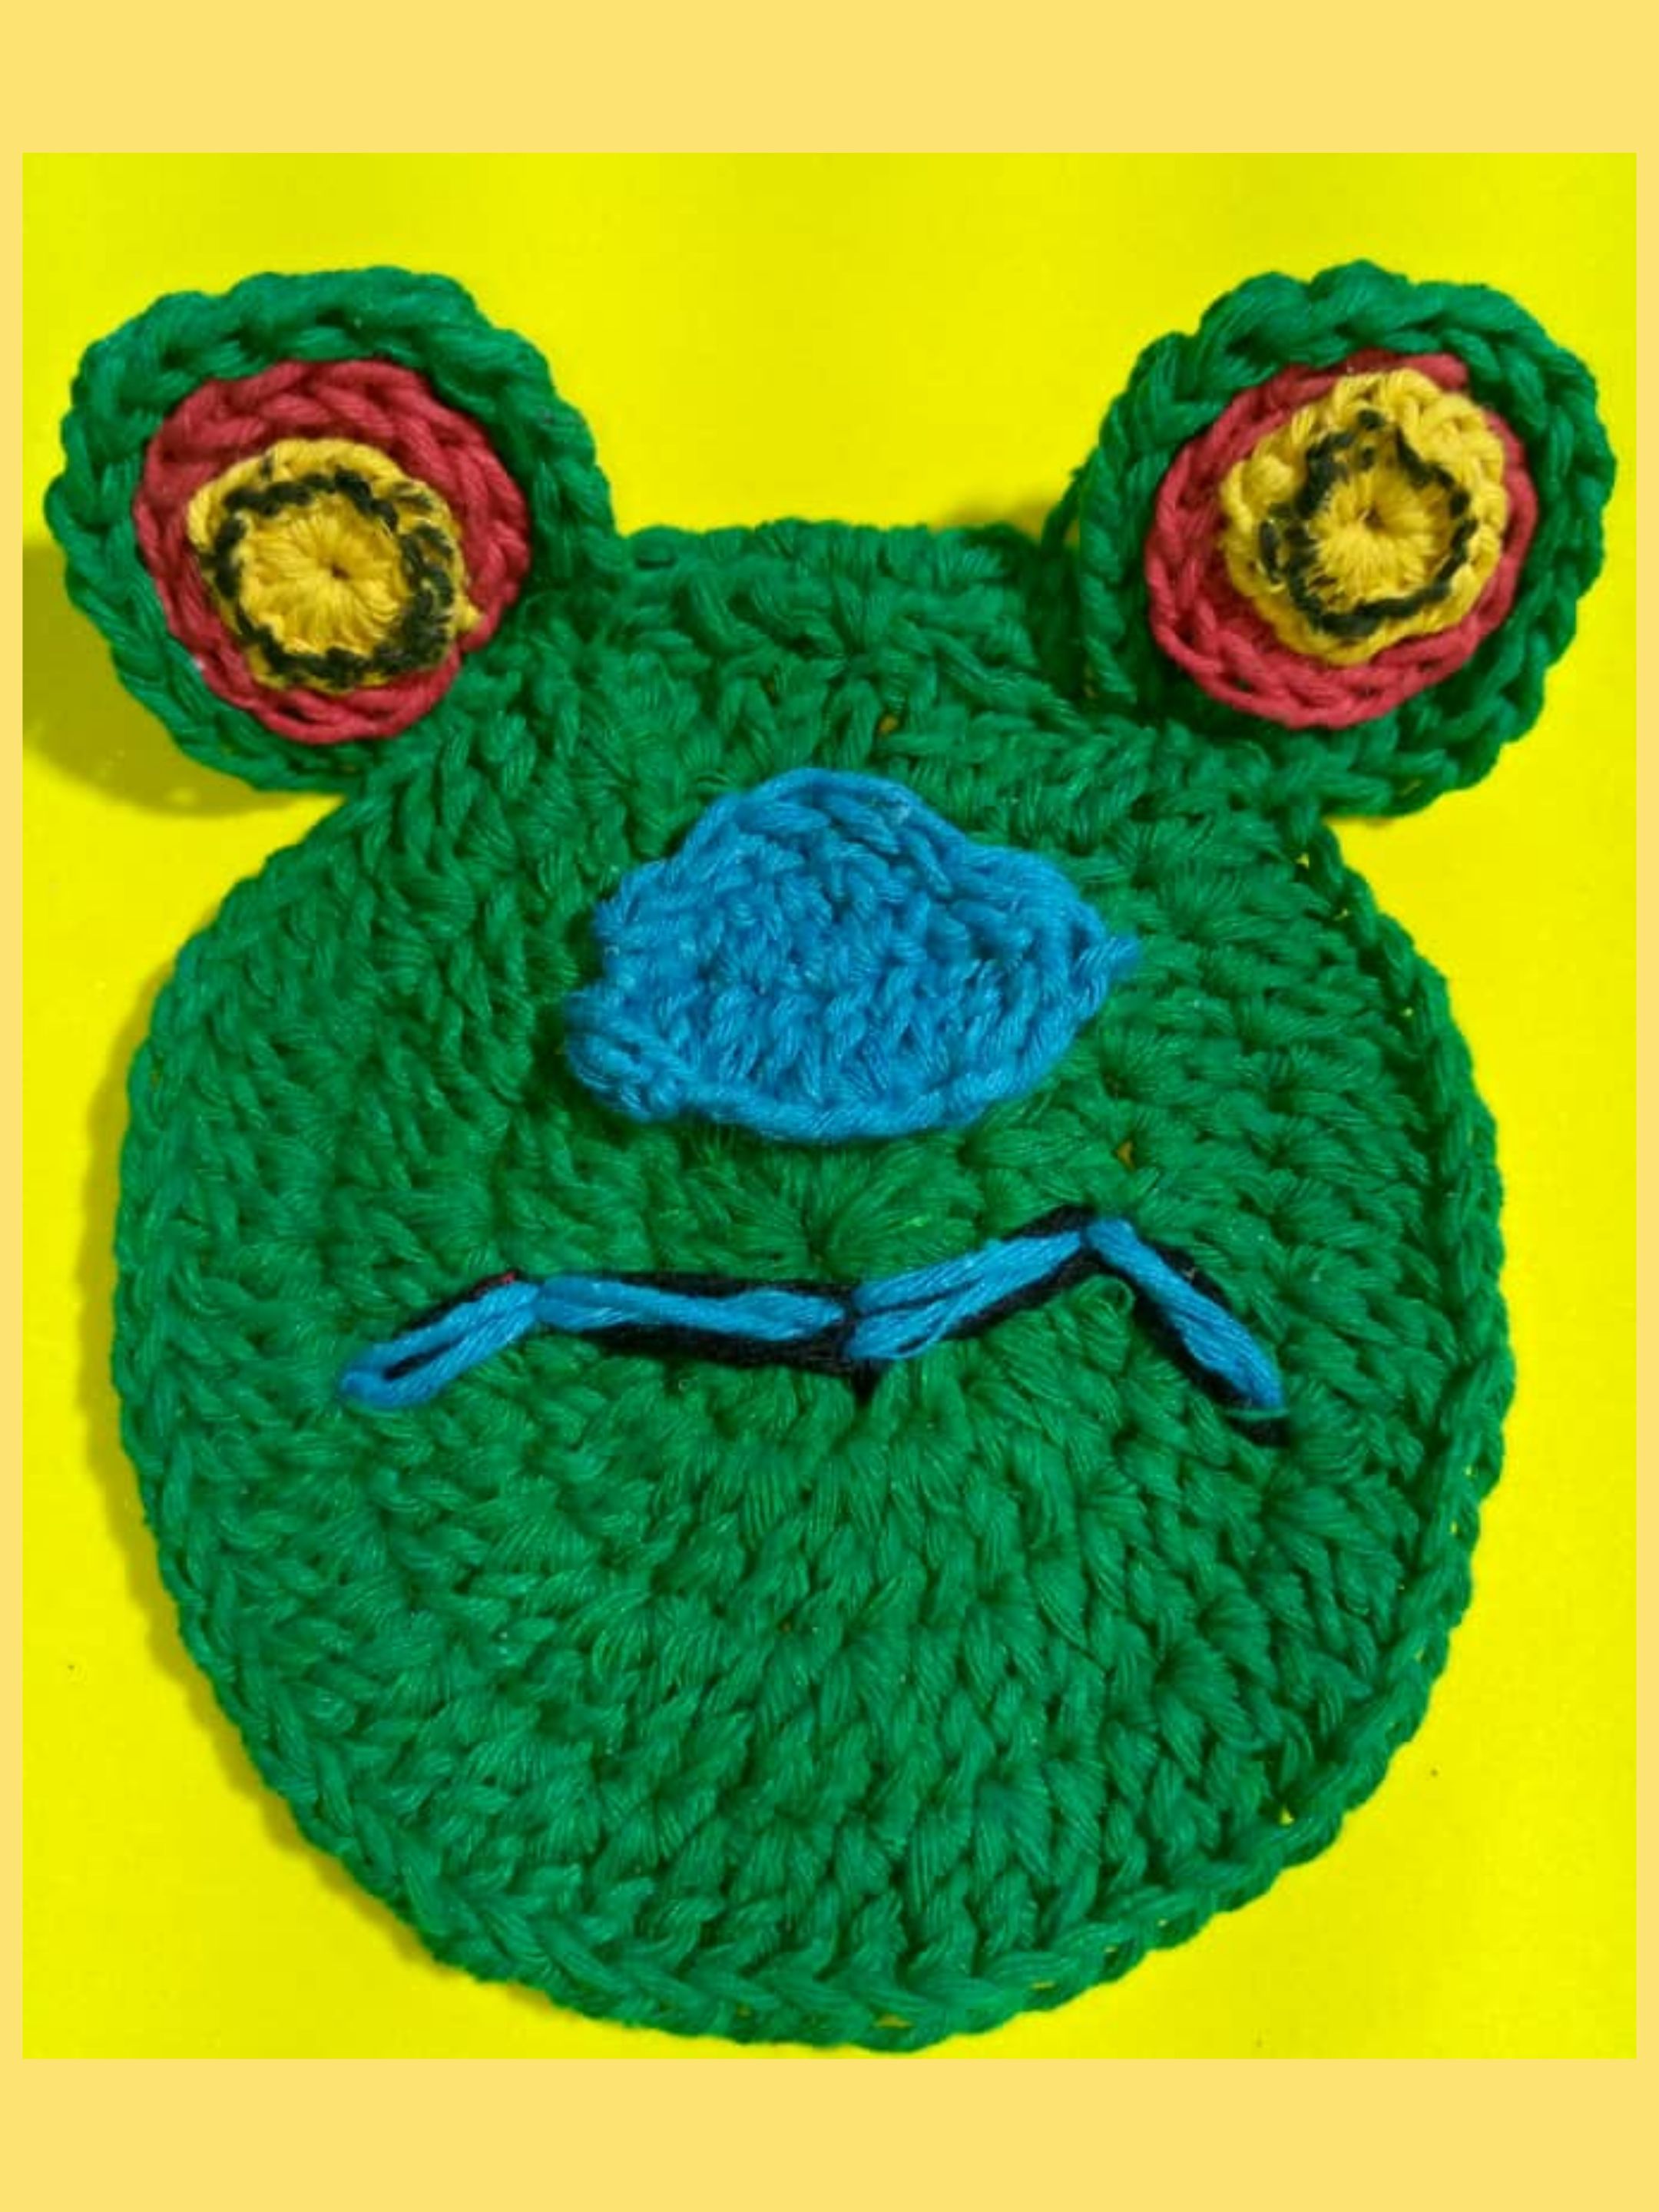
Aquí el resultado final de la hermosa cara de la rana en 3D, tejida a crochet.
Here is the final result of the beautiful 3D crocheted frog face.
Gracias por leer y comentar mi post las fotos son mías , tomada por teléfono Infinix ,editado por incollage y traducida por Deepl.
Thanks for reading and commenting on my post the photos are mine , taken by Infinix phone ,edited by incollage and translated by Deepl.