Hola amigos de hive Diy hace varios días he querido publicar en esta comunidad he interactuado he investigado sobre las reglas y lo que se puede publicar, si embargo a la hora de realizar cualquier tipo de arte soy bastante complicado ya que me cuesta aprender todo lo que se trata de manualidades pero hoy eso cambió, estoy viendo algunos vídeos de YouTube y me consigo con un tutorial de origami para niños y logré hacerme un pájaro de origami y desde este post les mostraré un tutorial de cómo hacerlo para que le enseñen a sus hijos. Estos fueron los materiales que usé:
Hello friends for hive Diy several days I have wanted to publish in this community I have interacted I have researched about the rules and what can be published, however when it comes to making any kind of art I am quite complicated because it costs me to learn everything that is about crafts but today that changed, I'm watching some YouTube videos and I get me with an origami tutorial for children and I managed to make me an origami bird and from this post I will show you a tutorial on how to do it so you can teach your children. These were the materials I used:
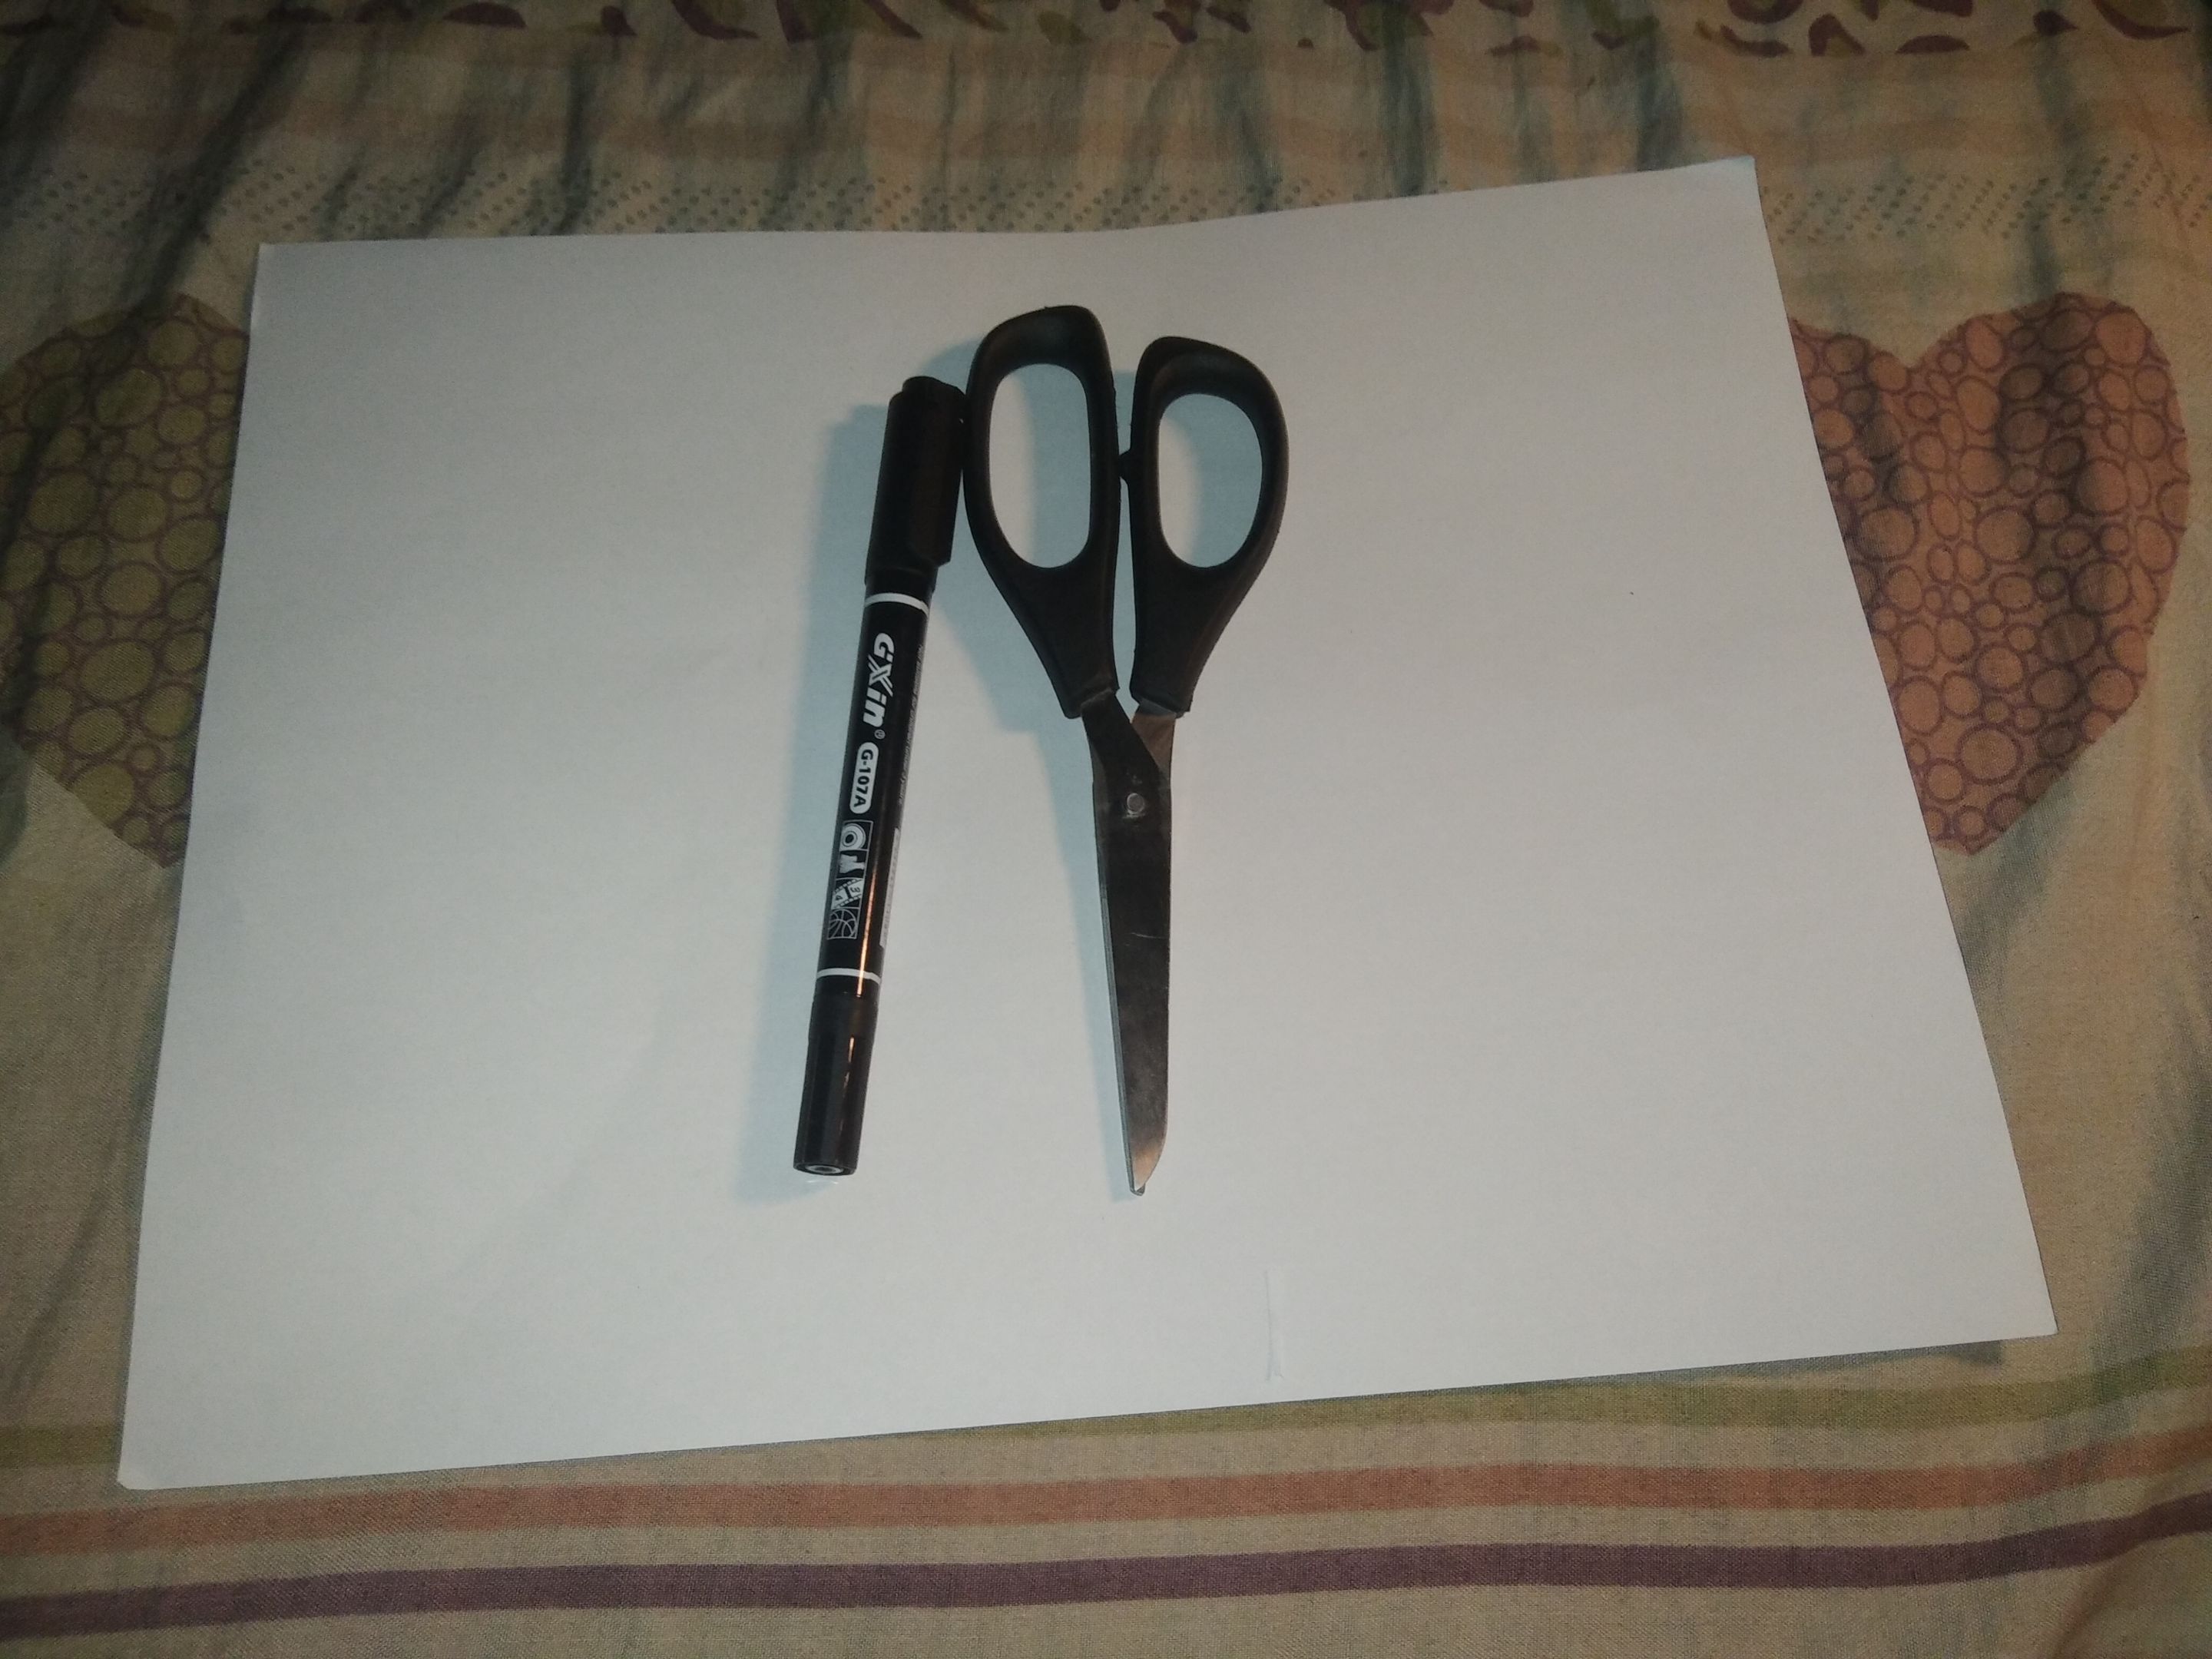
Estas 3 cosas son los únicos materiales que vamos a usar por eso les digo que este pájaro de origami es algo bastante fácil para que nuestro hijos lo hagan eso sí con supervisión ya que usar la tijeras sin un adulto al lado no lo recomendaría. Ahora paso a paso les hiere explicando como hacer para armar su pájaro lo trataré de hacer de la manera más sencilla. De igual manera en la parte de abajo les dejaré el enlace al video donde también están los pasos a seguir recuerden esta idea fue tomada desde un usuario en la página de YouTube.
These 3 things are the only materials that we are going to use that's why I tell you that this origami bird is something easy enough for our children to do, but with supervision because I would not recommend using scissors without an adult by your side. Now step by step I will explain you how to make your bird and I will try to do it the easy way. In the same way in the part below I will leave you the link to the video where you will also find the steps to follow remember this idea was taken from a user on the YouTube page.
 |  |
|---|
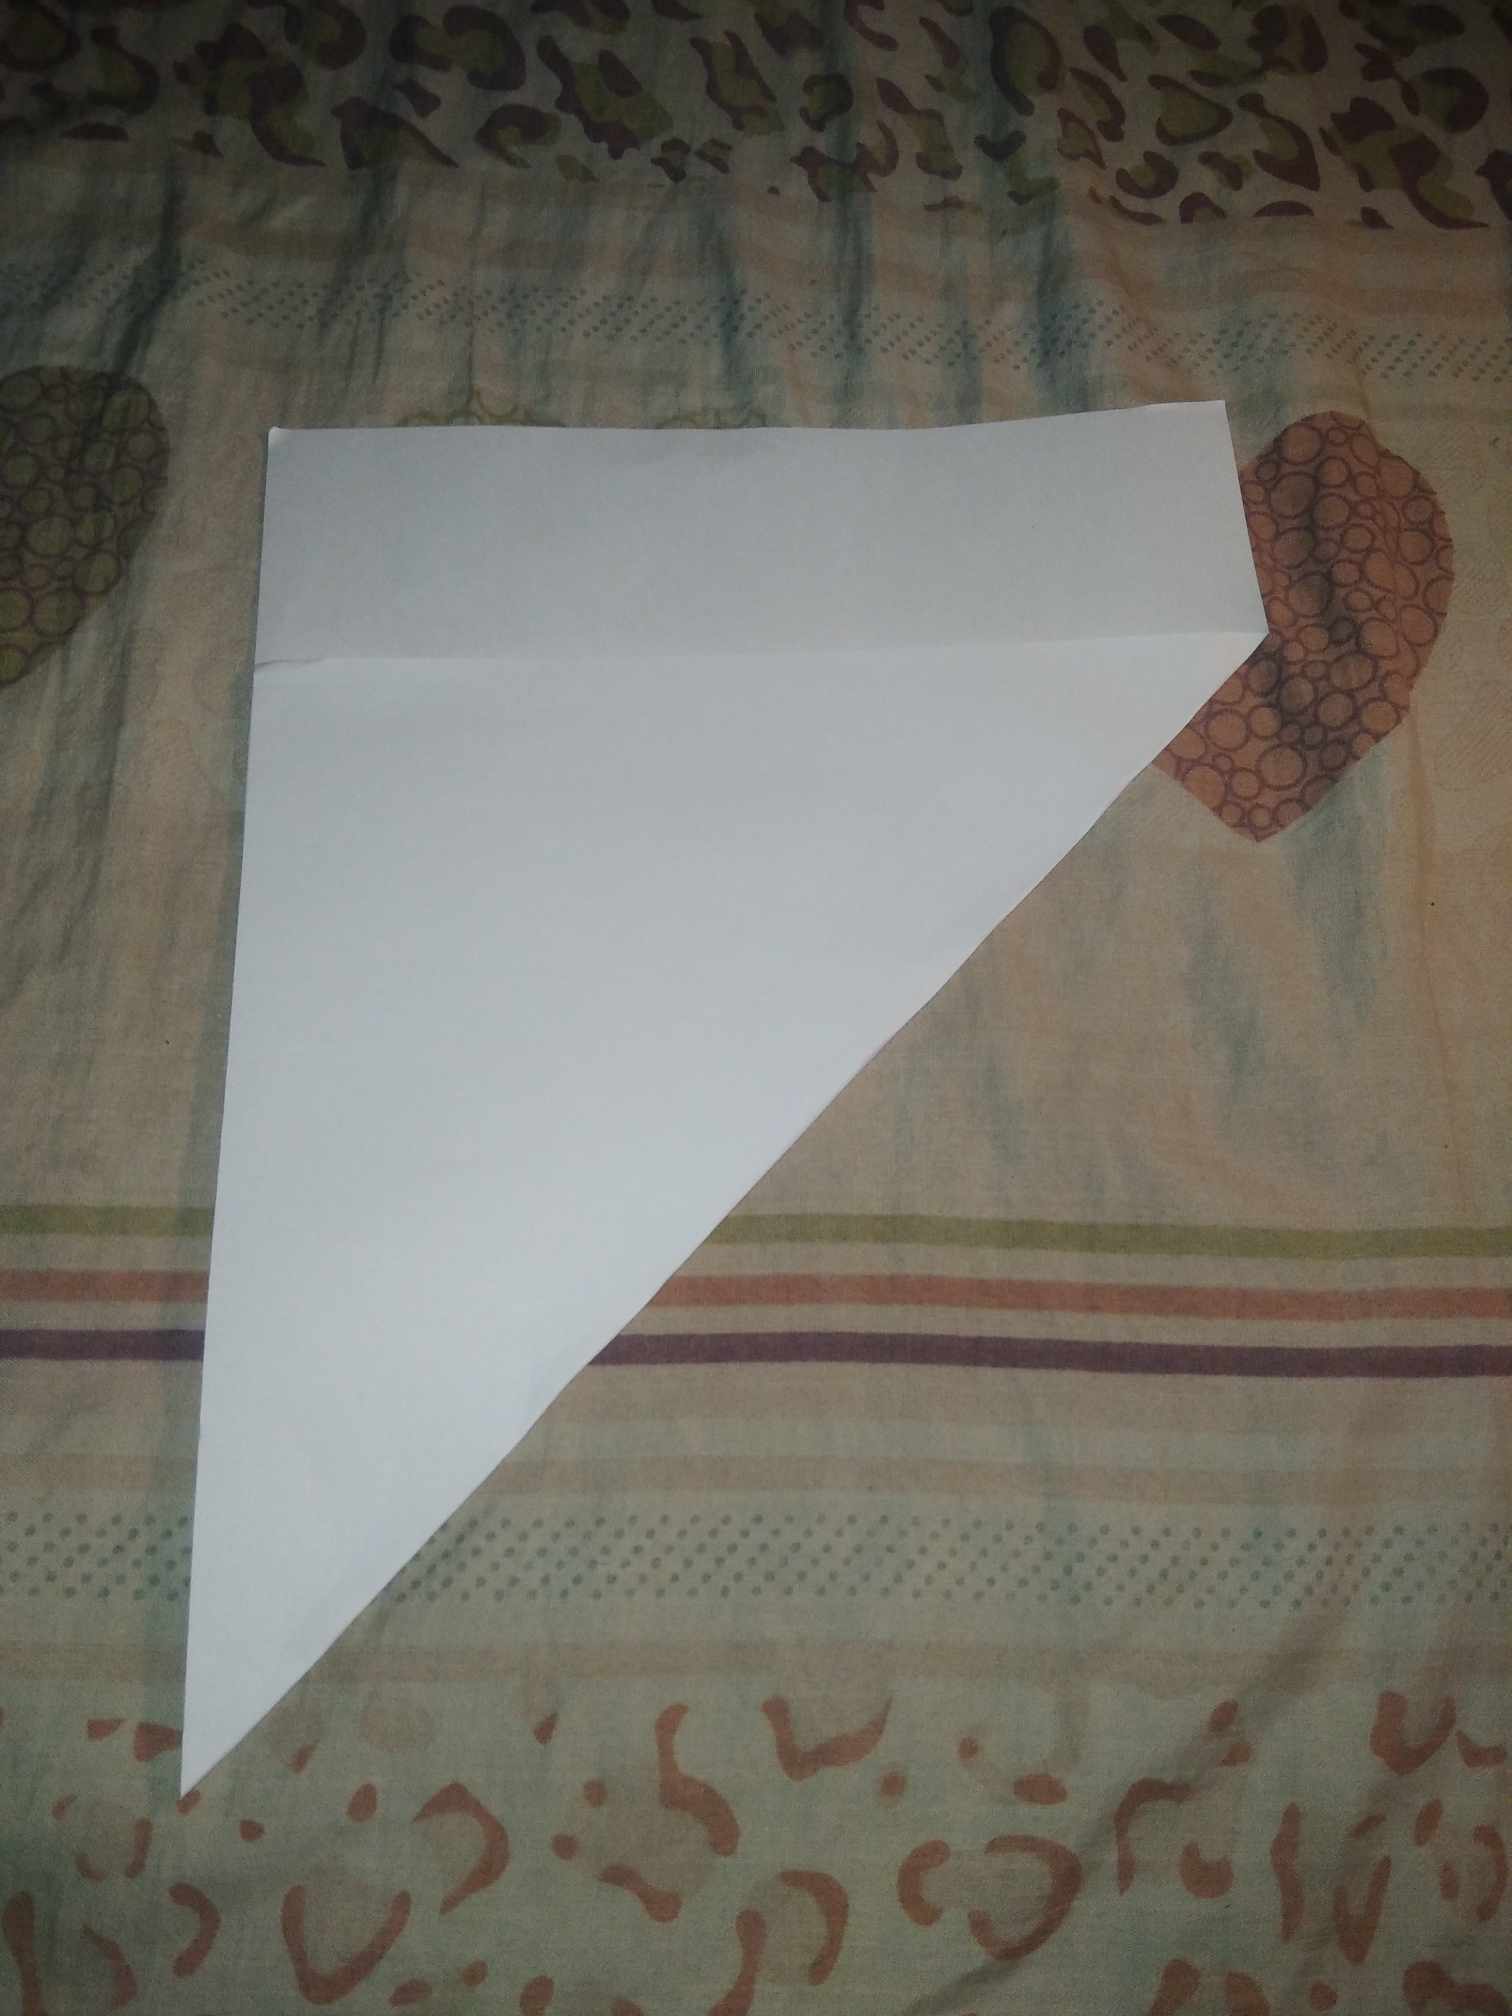
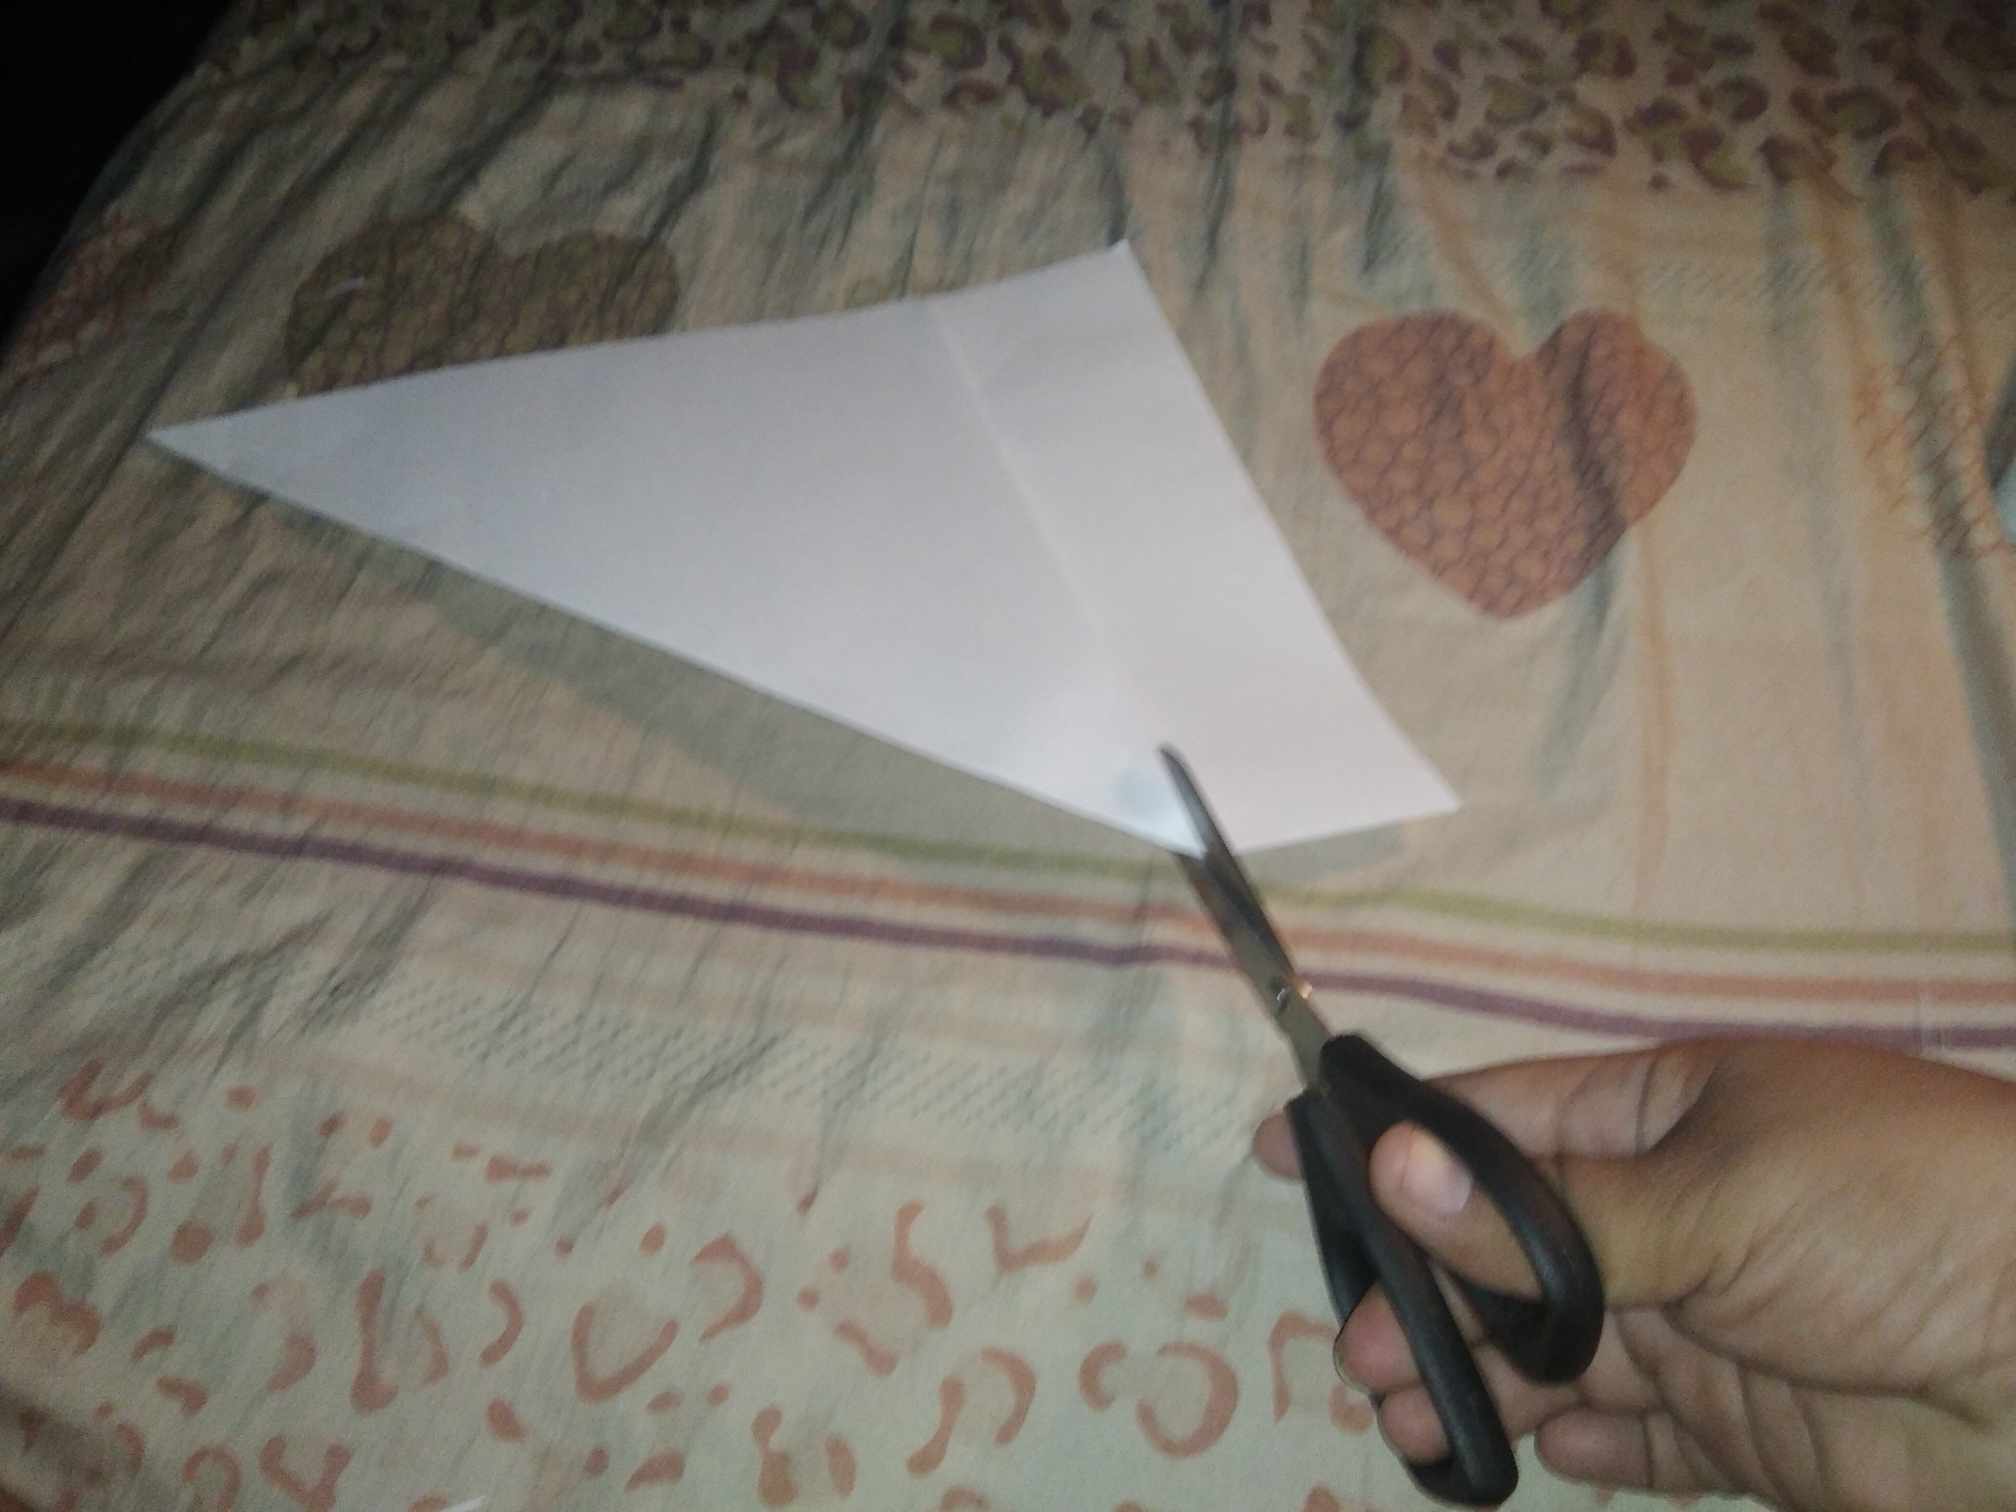
1. En el primer paso van a escoger una punta de la hoja y llevarlo hacía la otra punta, se darán cuenta que sobrará una por de la hoja luego de juntar las puntas para esta parte es que necesitamos las tijeras ya que esa parte sobrante debemos hacer un corte para que nuestra hoja quede de forma correcta.
1. In the first step you are going to choose one end of the leaf and take it to the other end, you will notice that there will be a part of the leaf left over after joining the ends together, for this part is that we need the scissors because that part left over we must make a cut so that our leaf is correctly shaped.
 |  |
|---|
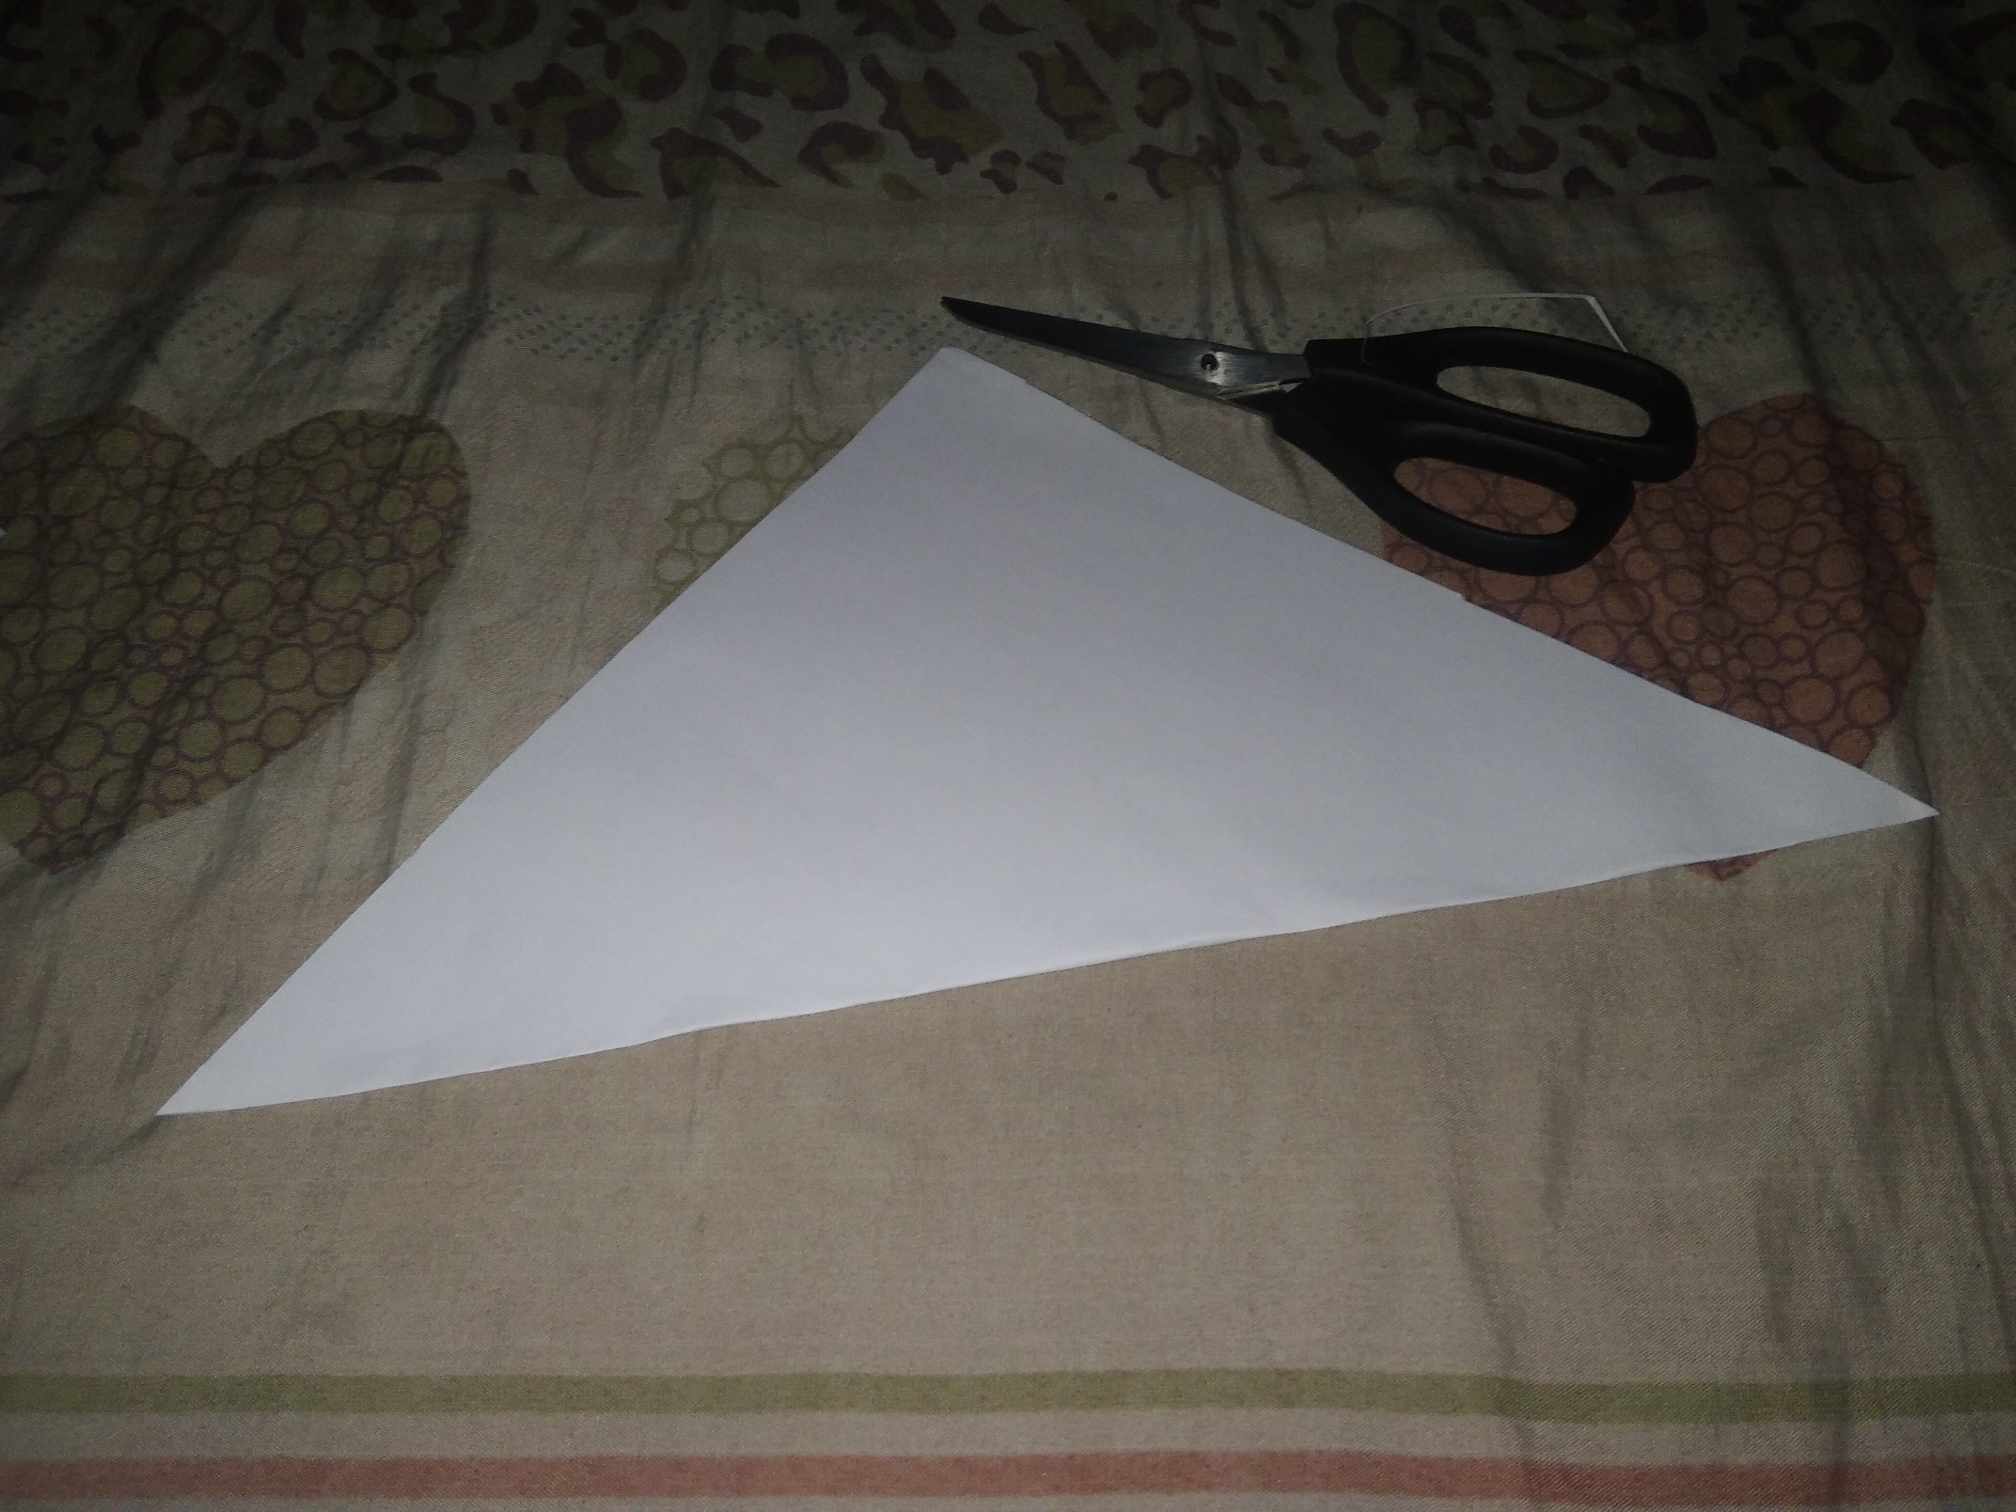
2. En el segundo paso se puede ver cómo cortó la parte sobrante y como debe quedar. Está es la forma en la que debe estar la hoja para pasar al siguiente paso.
In the second step you can see how he cut the excess part and how it should be. This is the way the leaf should be to move on to the next step.
 |  |
|---|
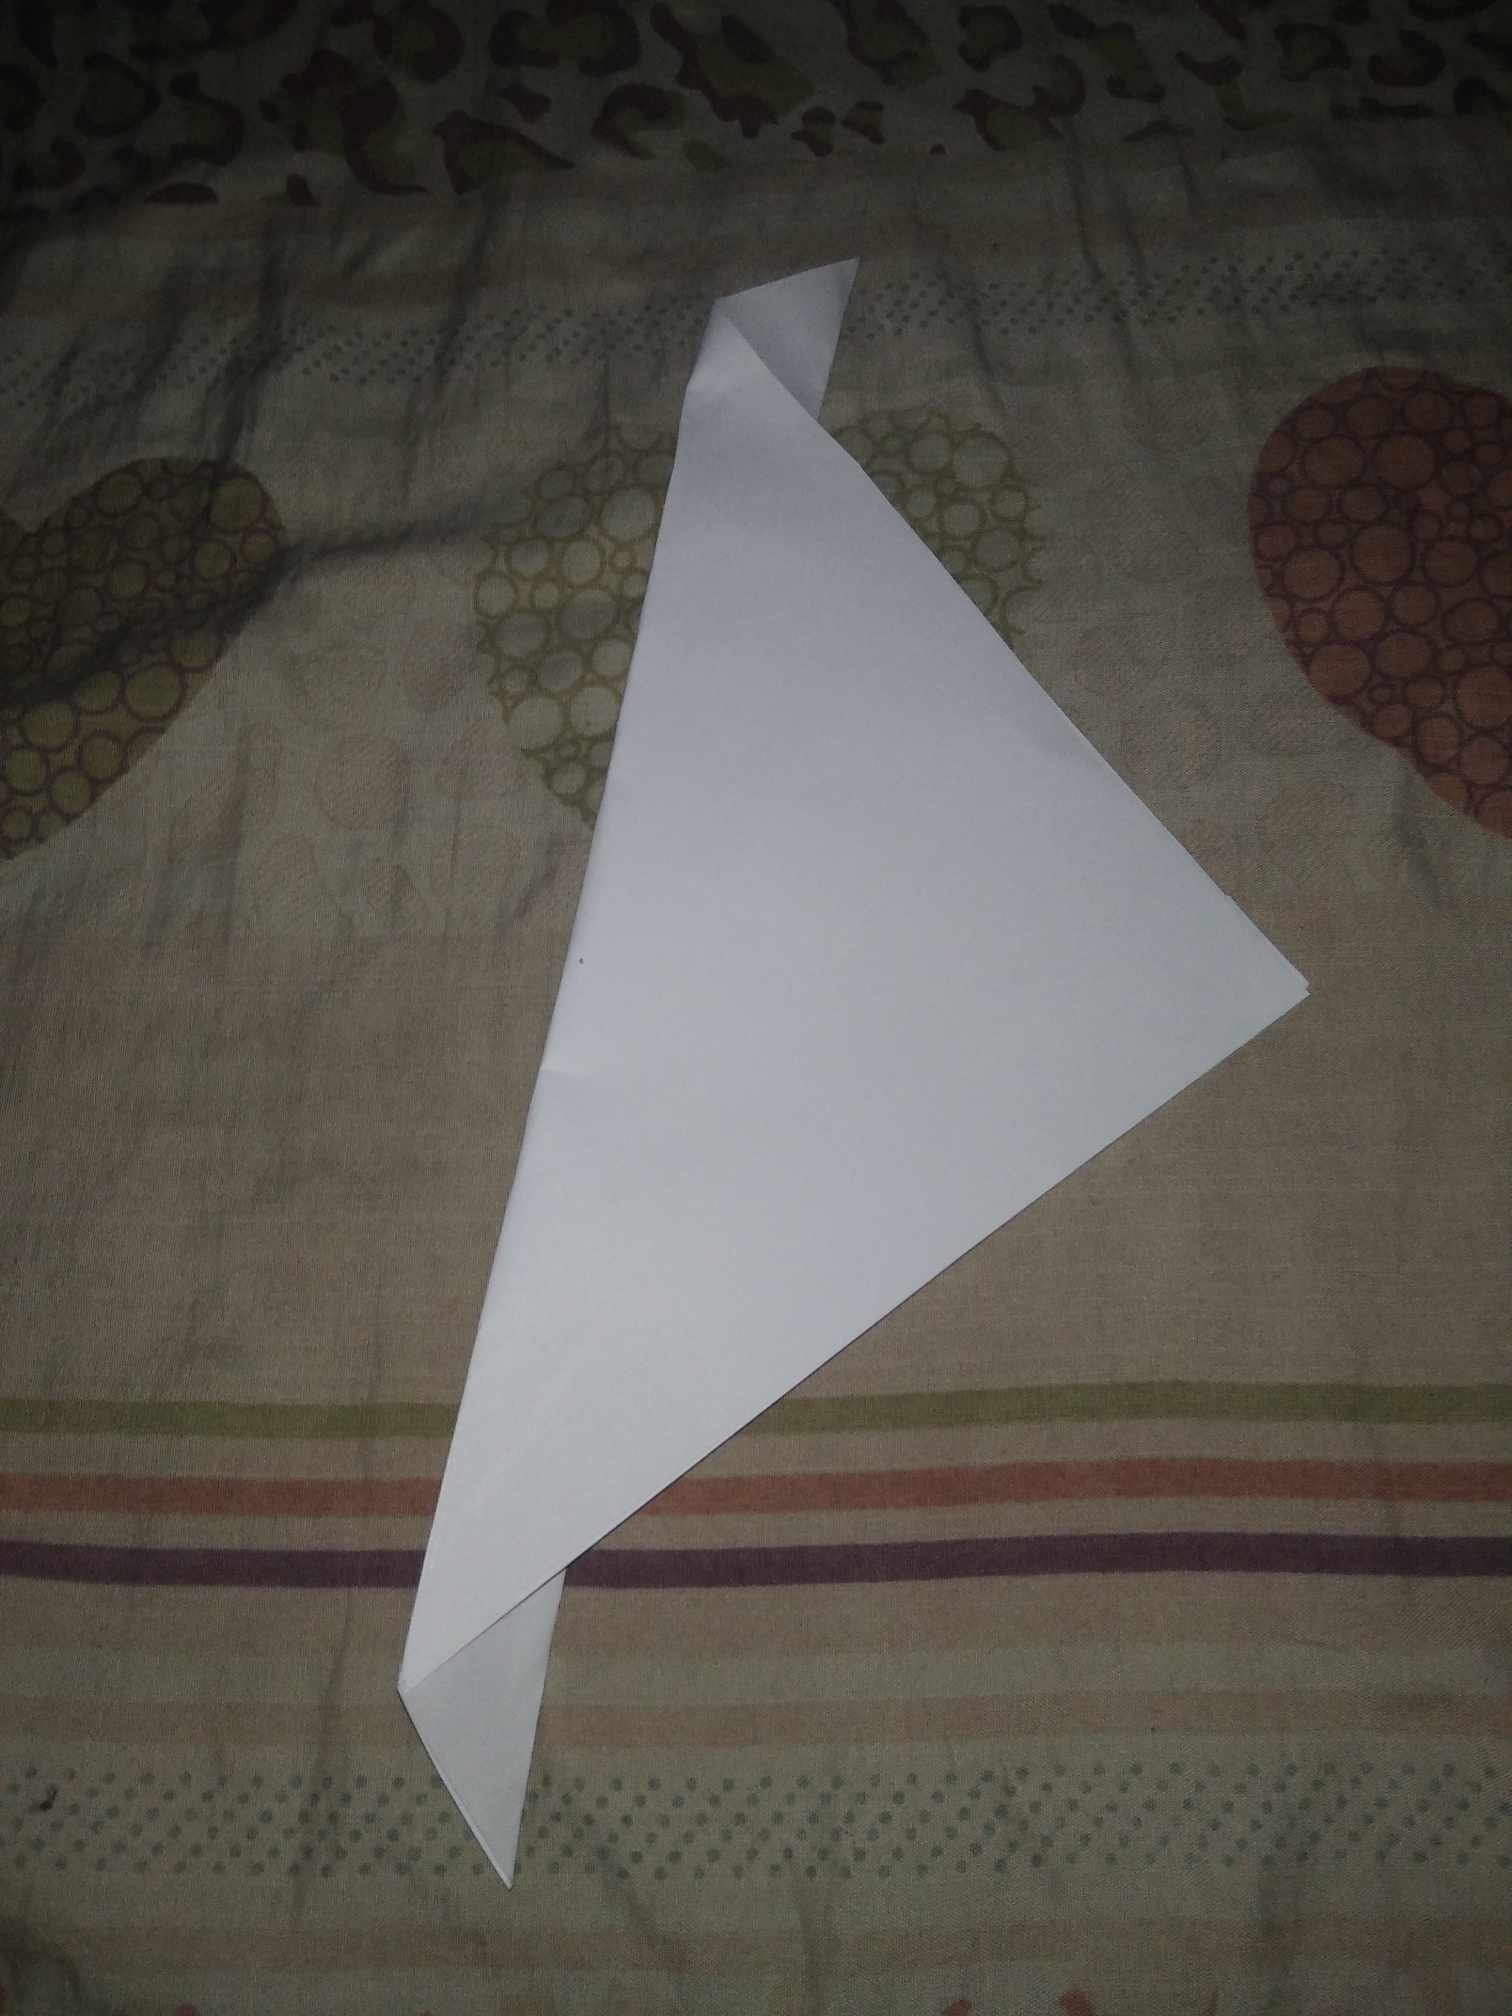
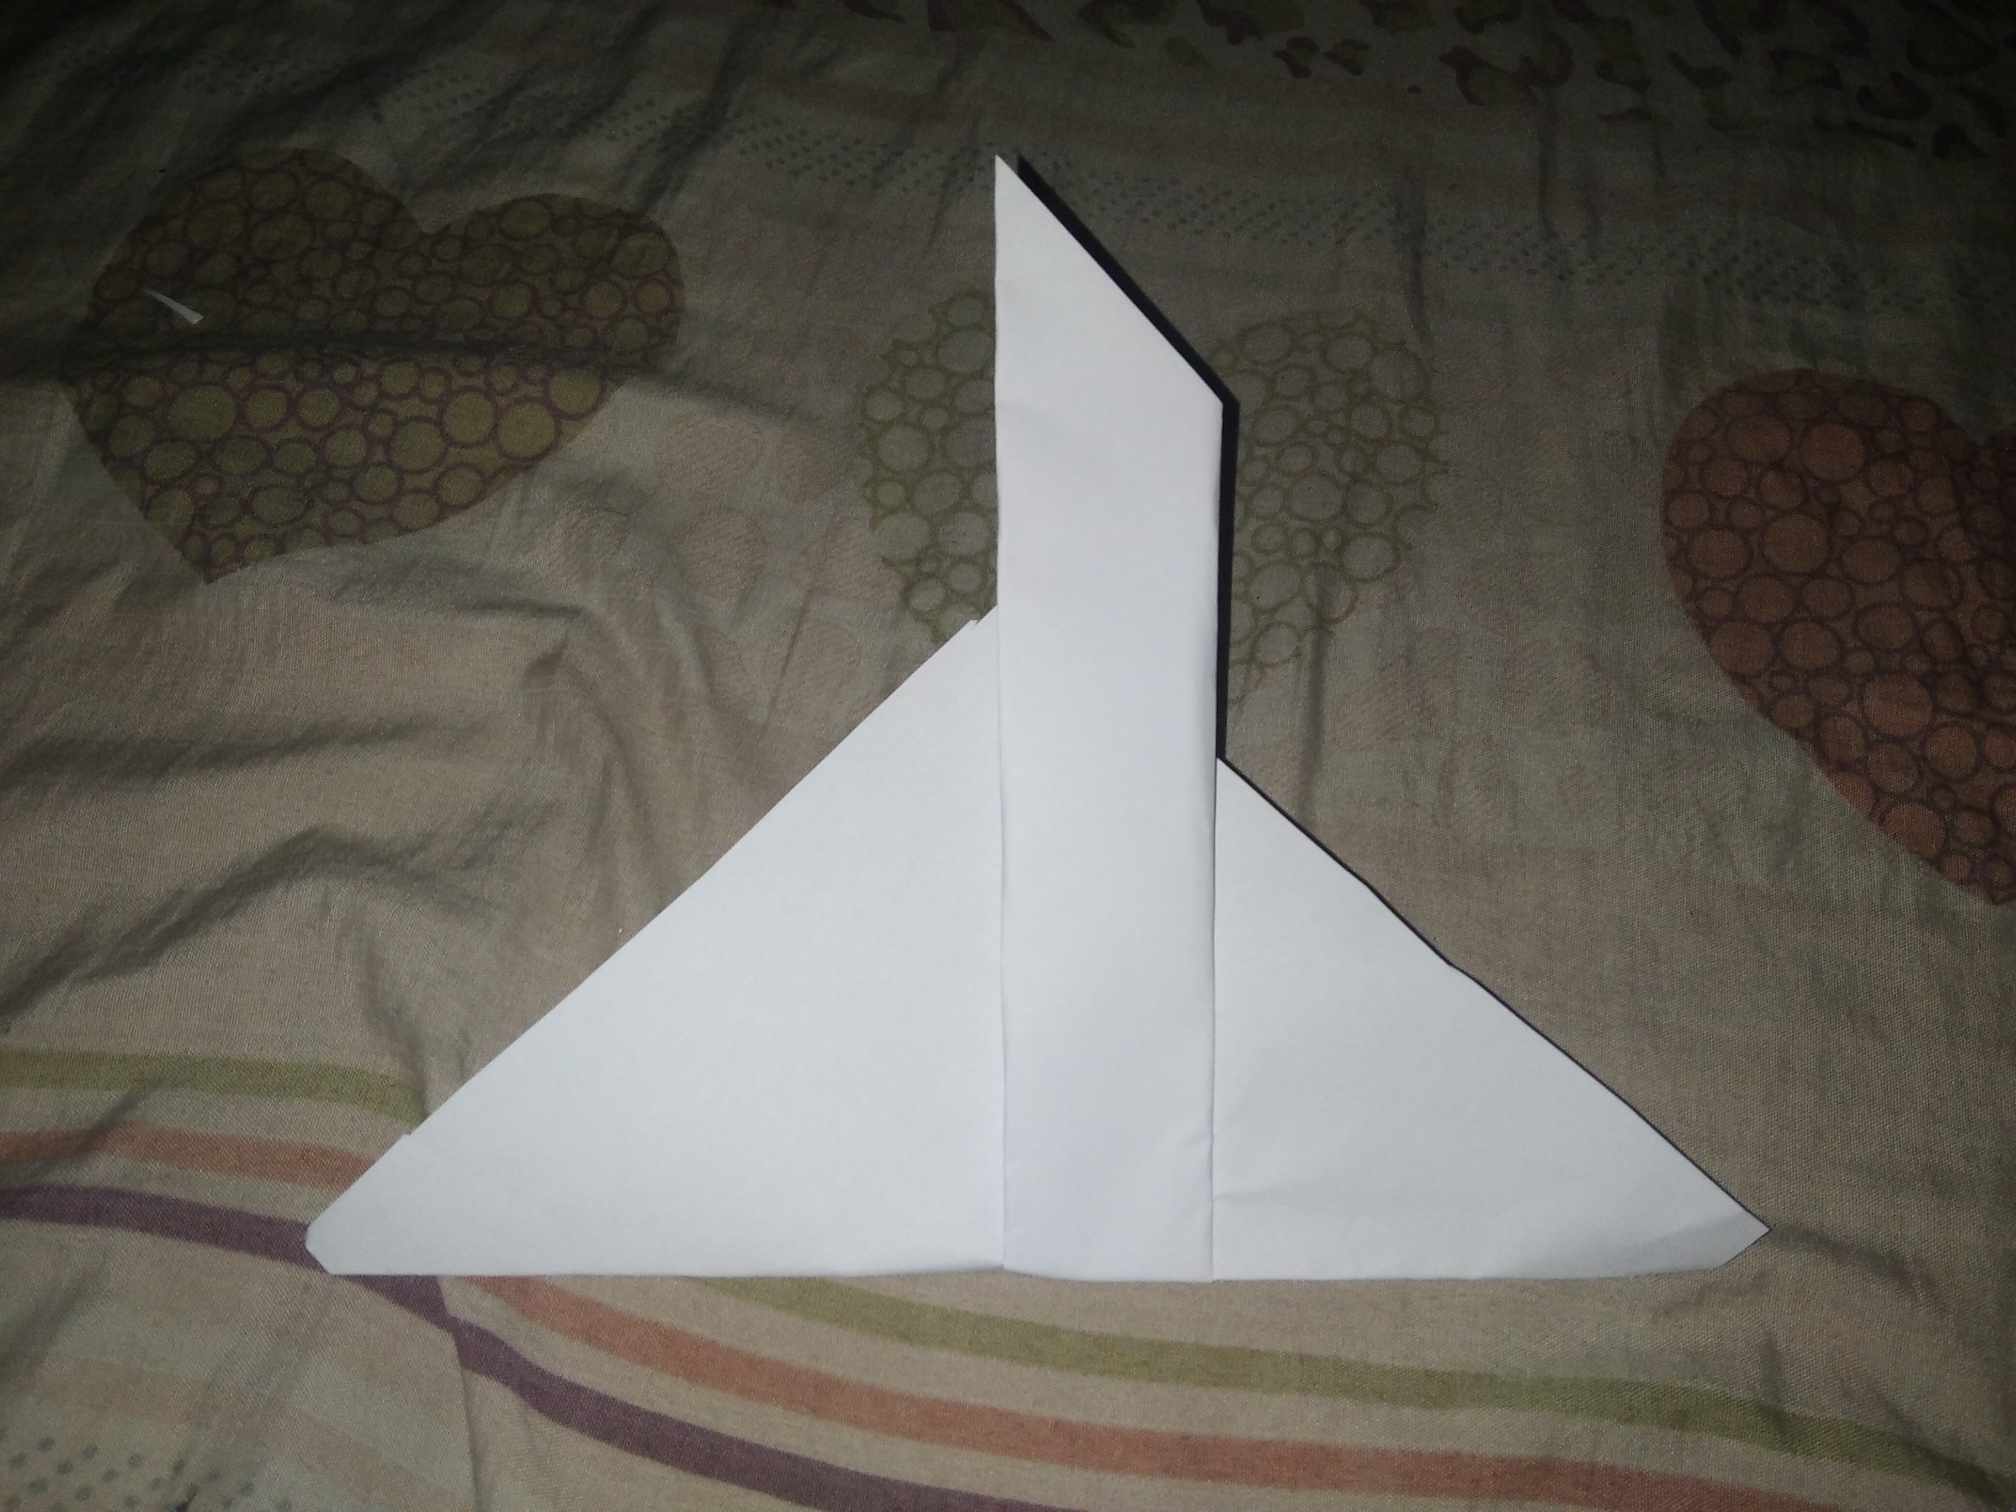
3. Después que juntamos las puntas y cortamos el sobrante, agarramos las puntas y doblamos hacia la parte arriba dejando la parte de abajo con un dobles así como lo muestra la fotografía, les recomiendo el que doble tengo máximo un dedo de ancho más adelante entenderán el porque.
3. After we put the ends together and cut the excess, we take the ends and bend them towards the top leaving the bottom with a double as shown in the picture, I recommend you to bend it with a maximum width of one finger, later you will understand why.
 |  |
|---|
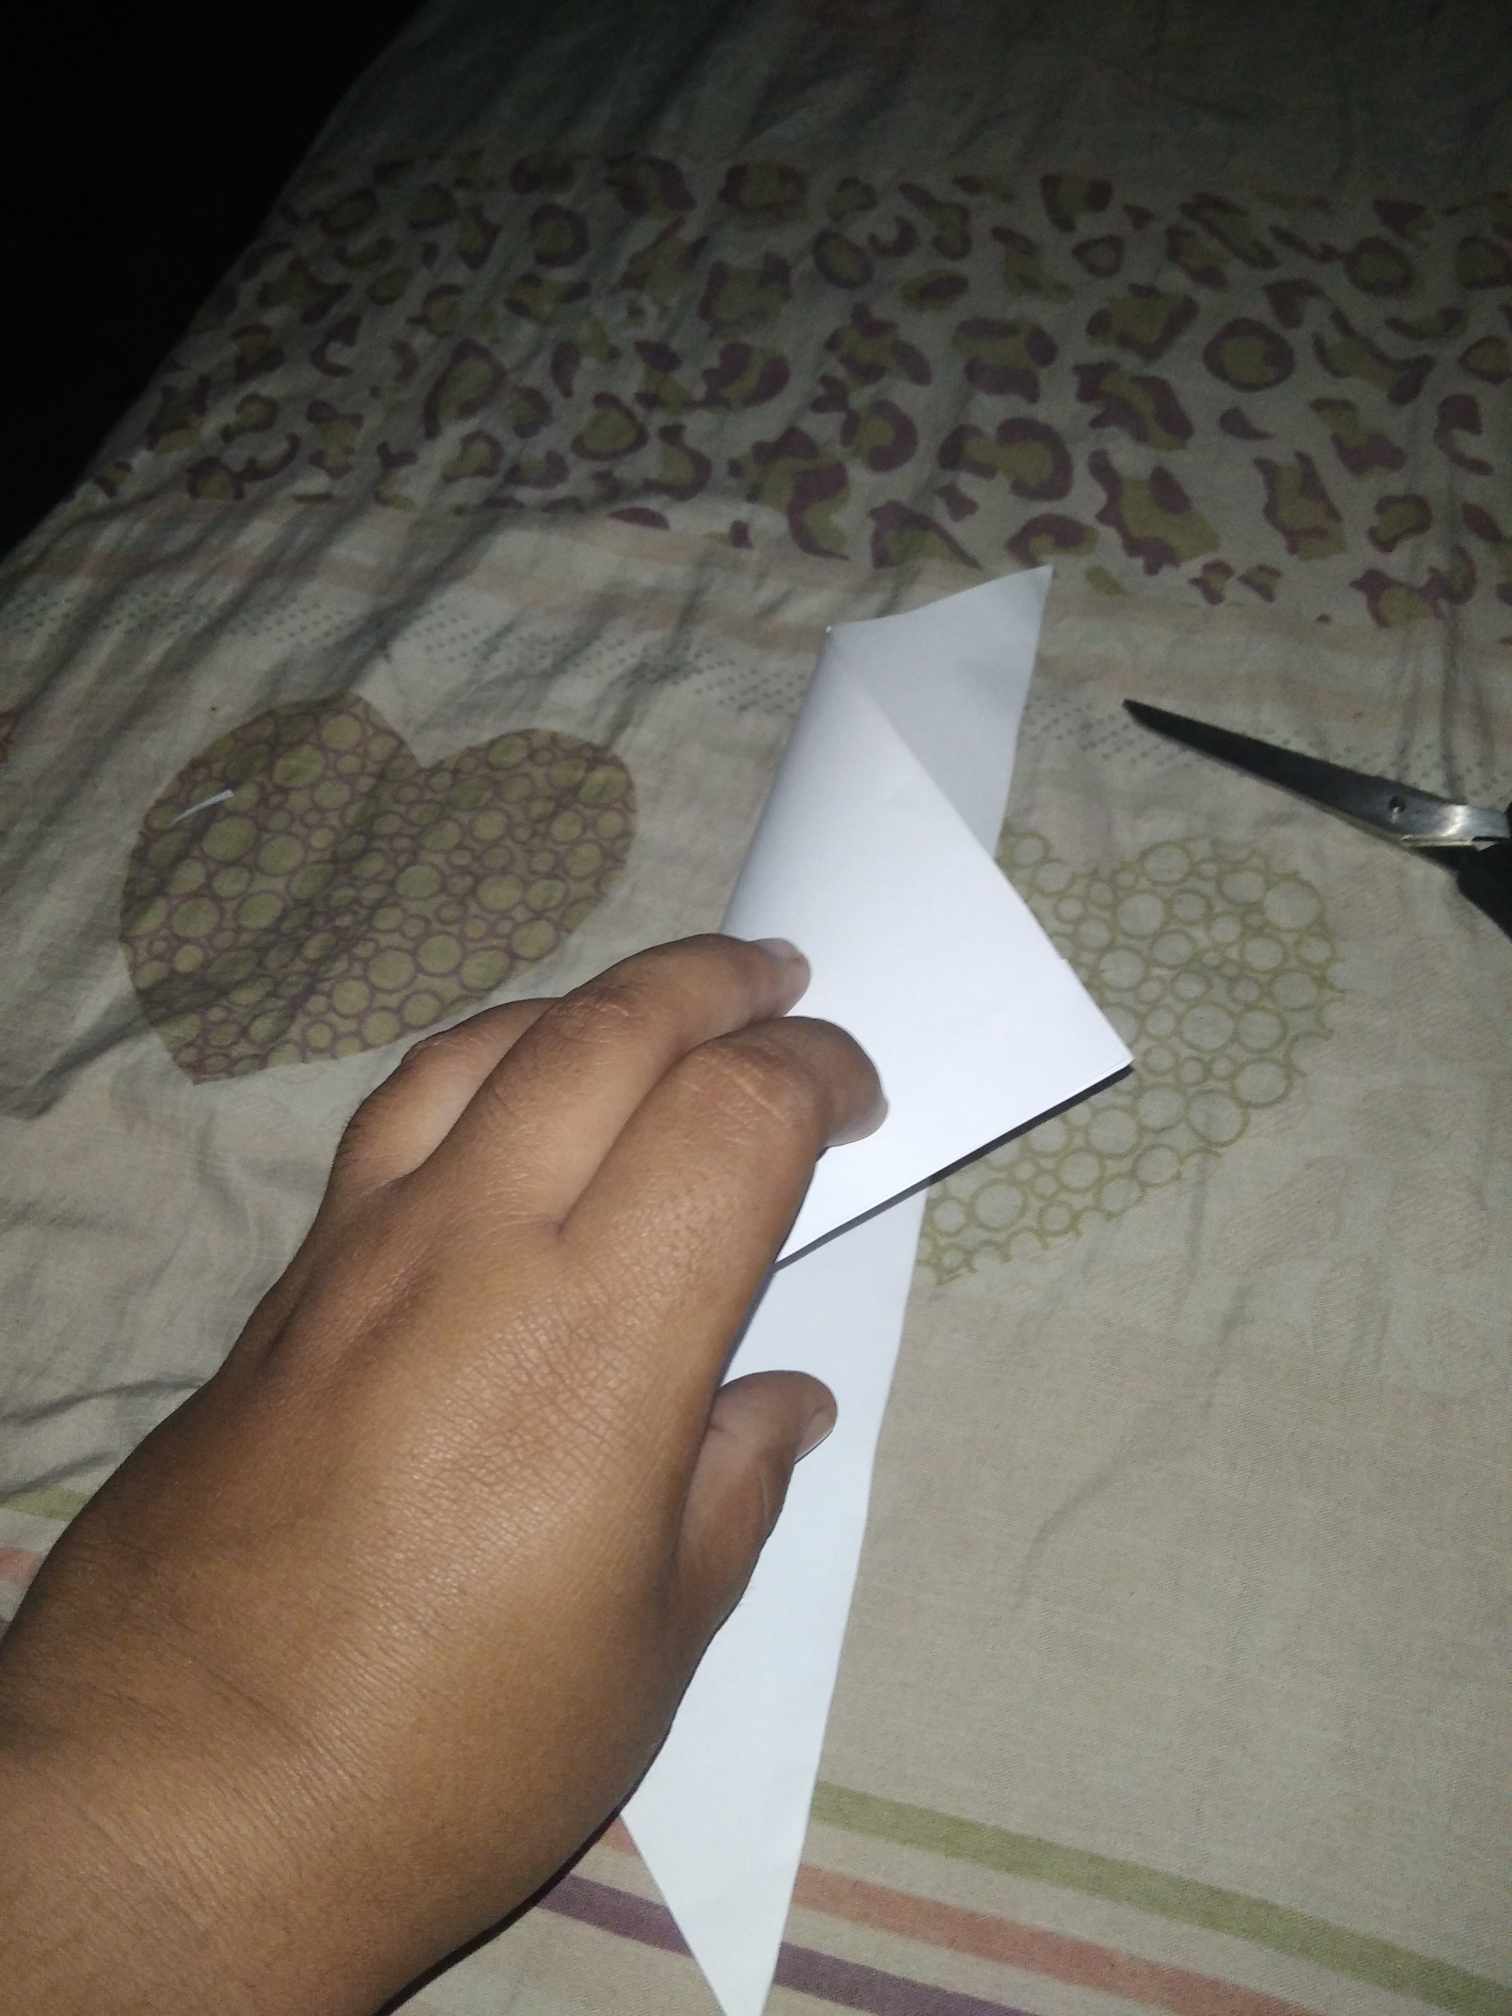
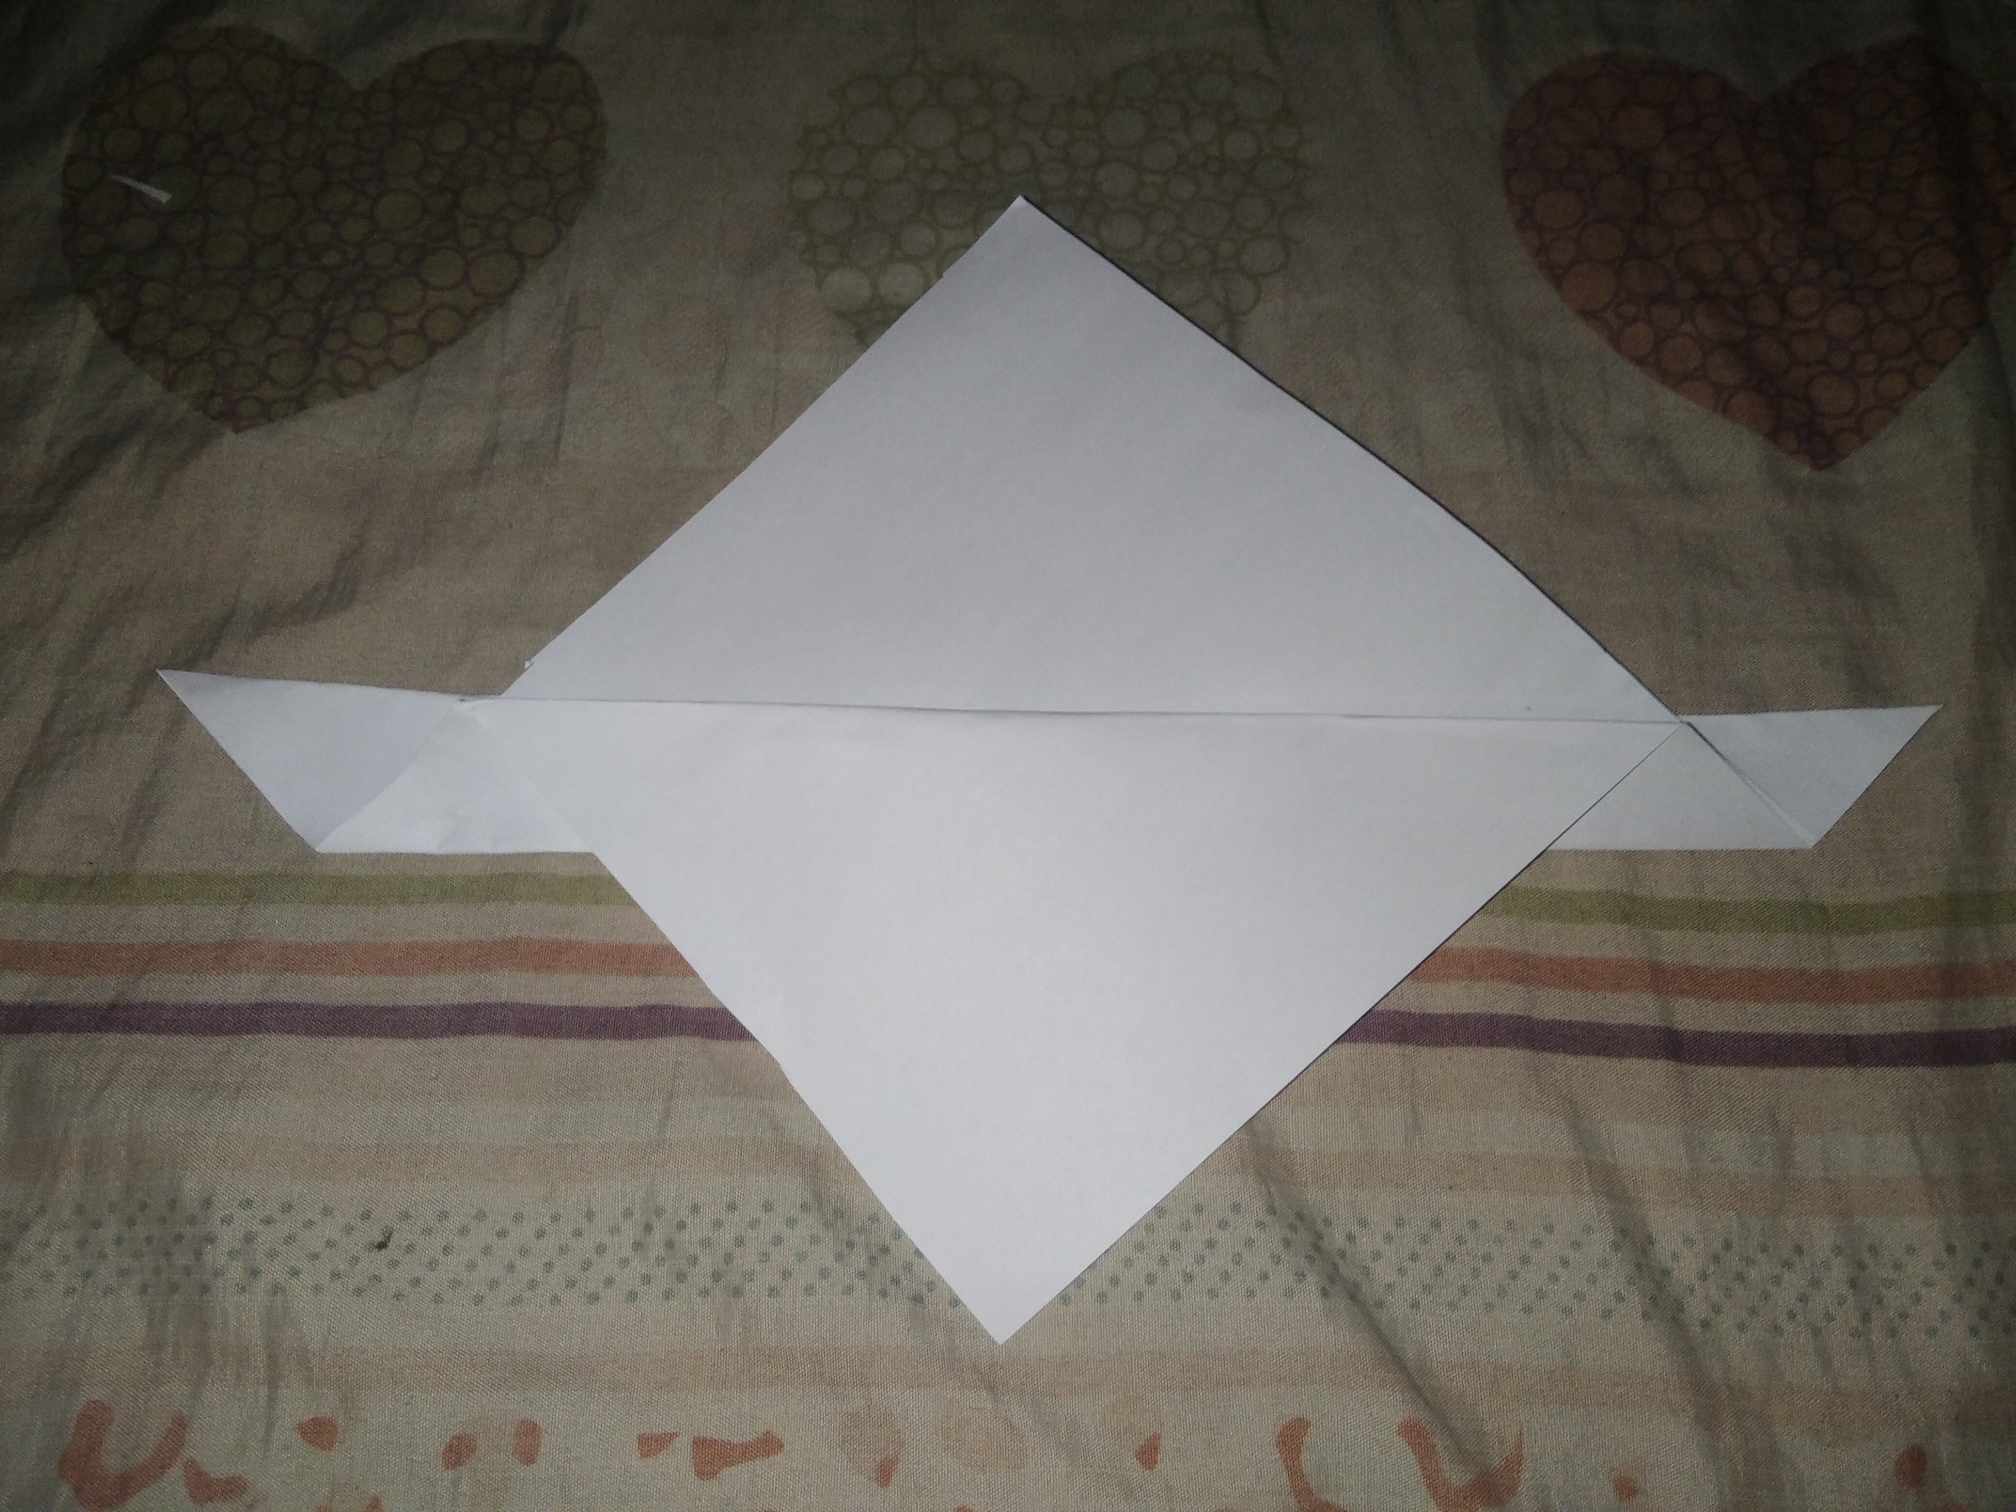
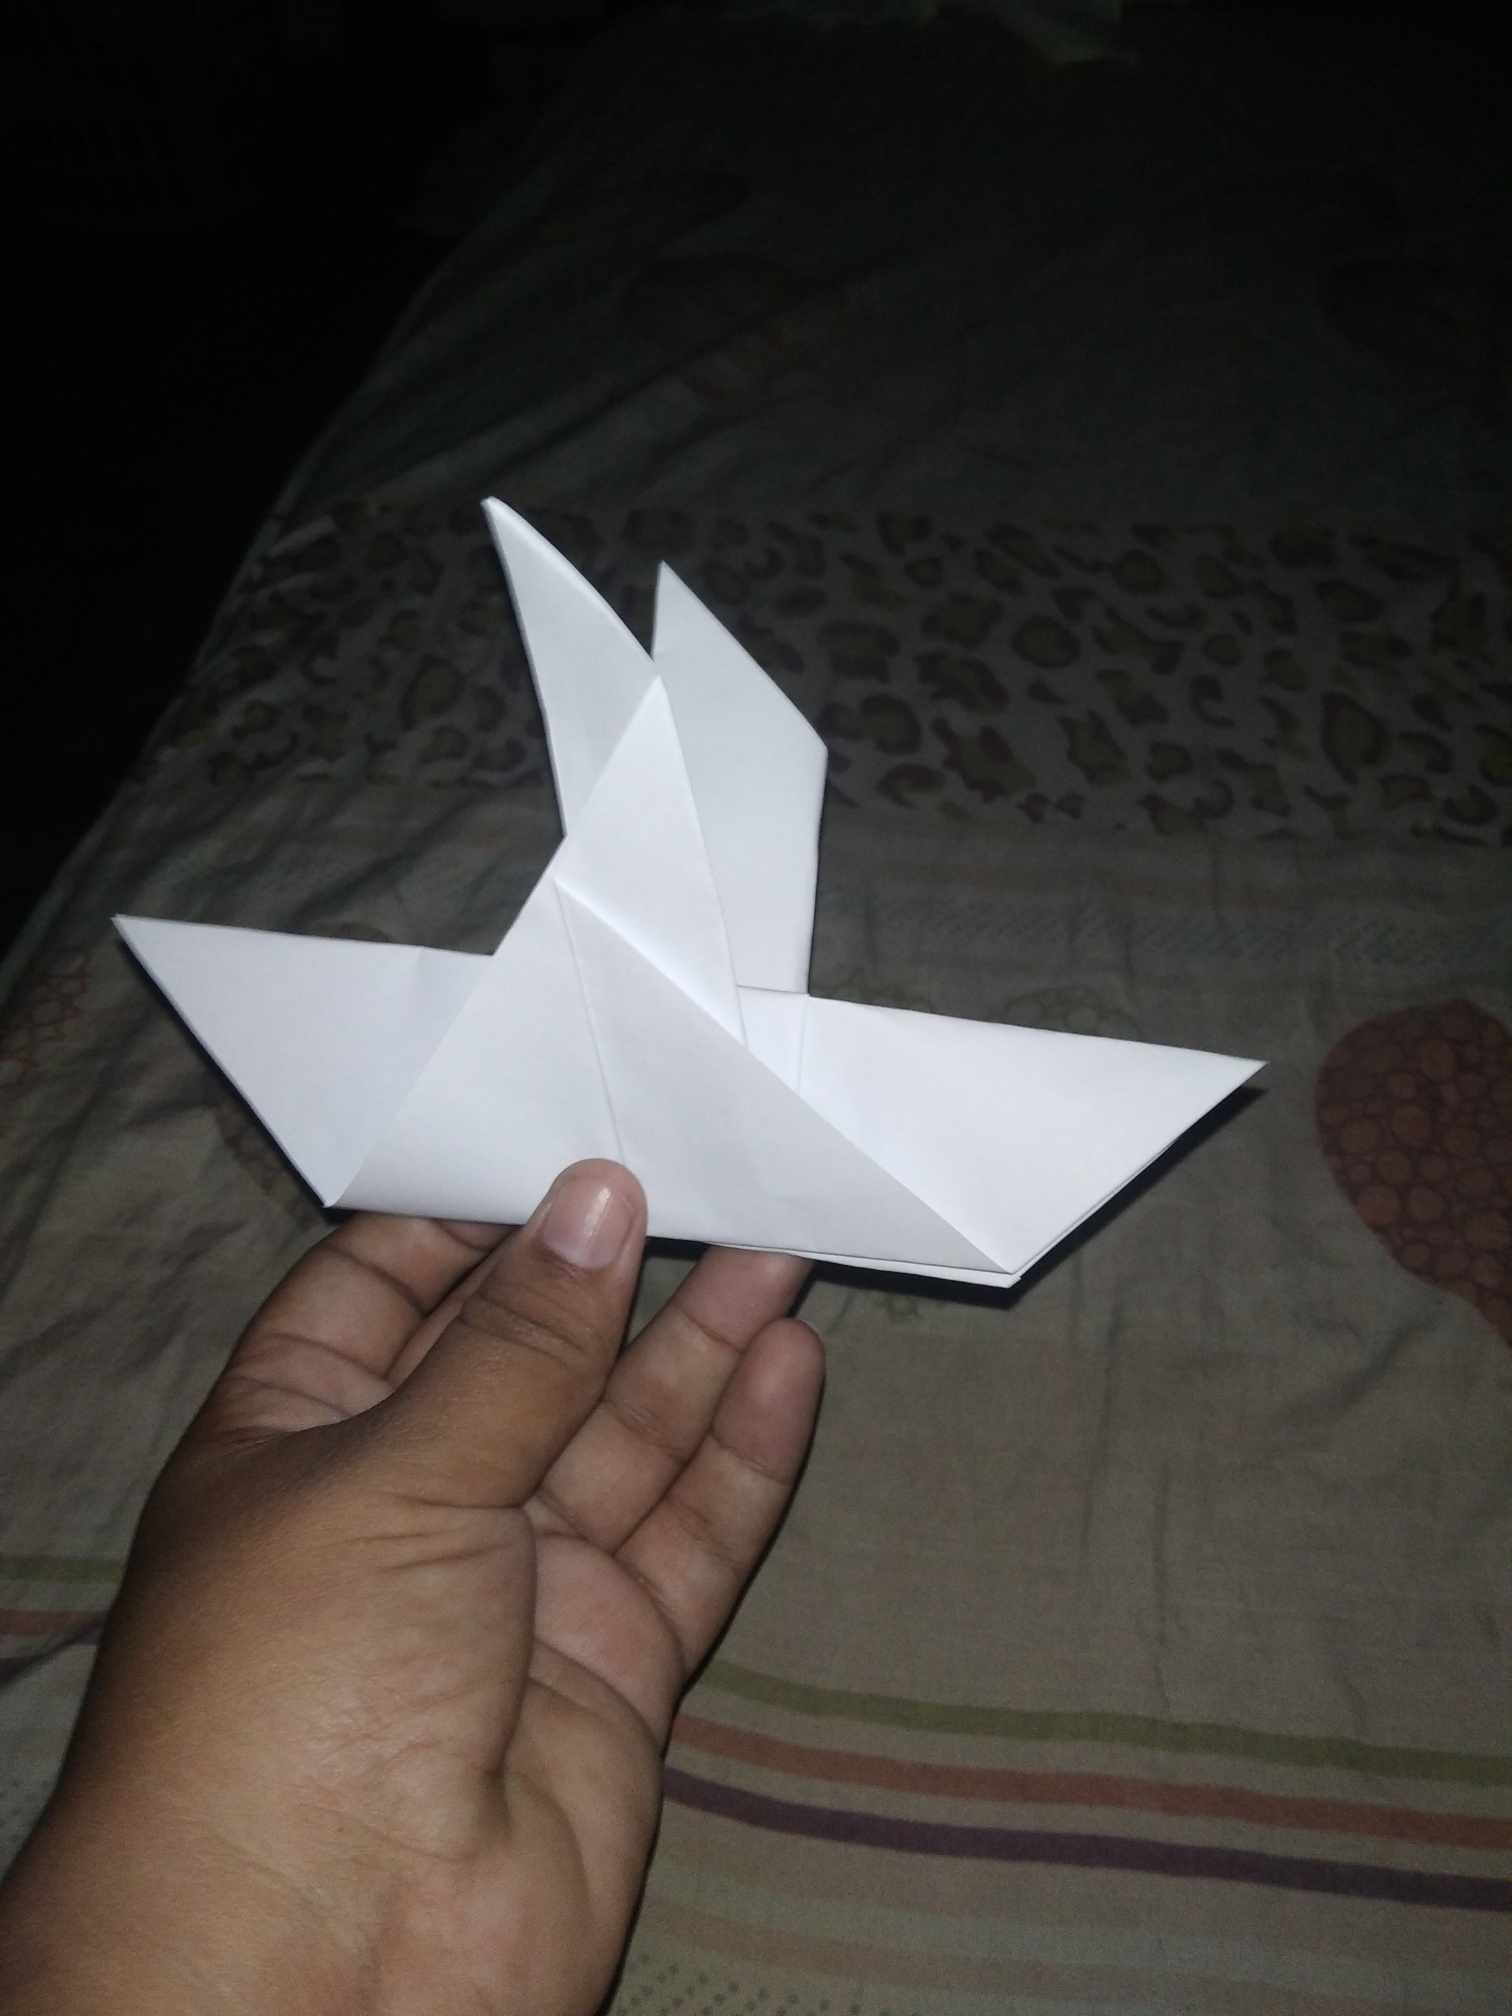
4. Realizamos otro dobles pero está vez con una sola de las puntas de manera que ellas queden divididas y una de ellas sobresaliente hacía la parte donde esta el dobles que dejamos en el paso anterior, las puntas quedarán en polos opuestos.
4. We make another double but this time with only one of the ends so that they are divided and one of them protruding towards the part where the double that we left in the previous step is, the ends will be at opposite poles.
 |  |
|---|
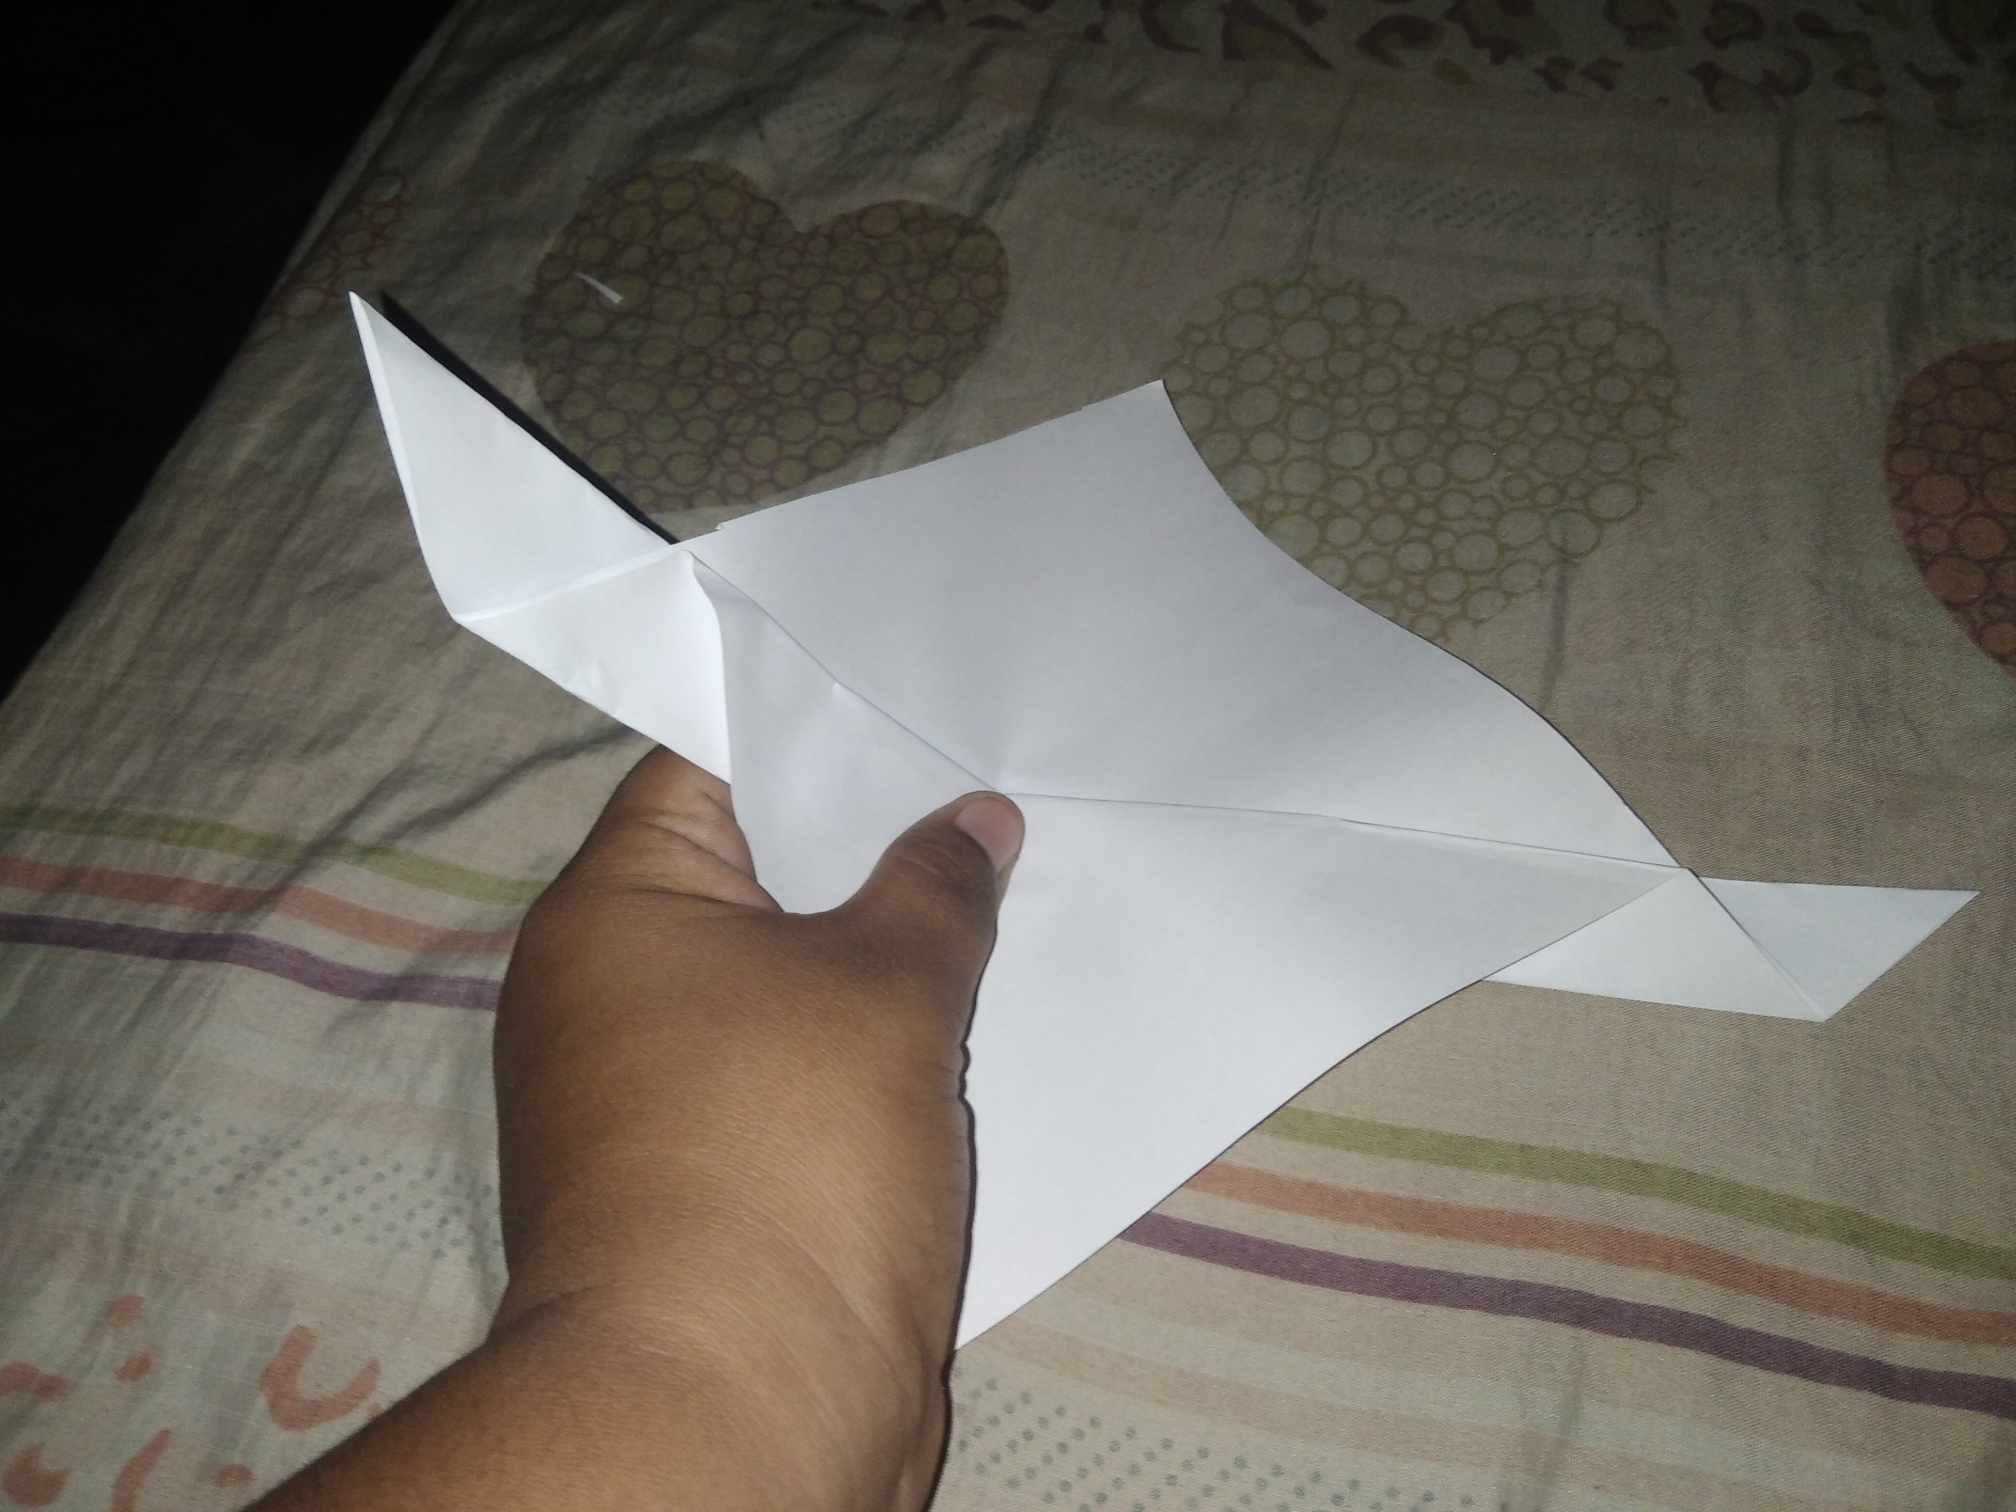
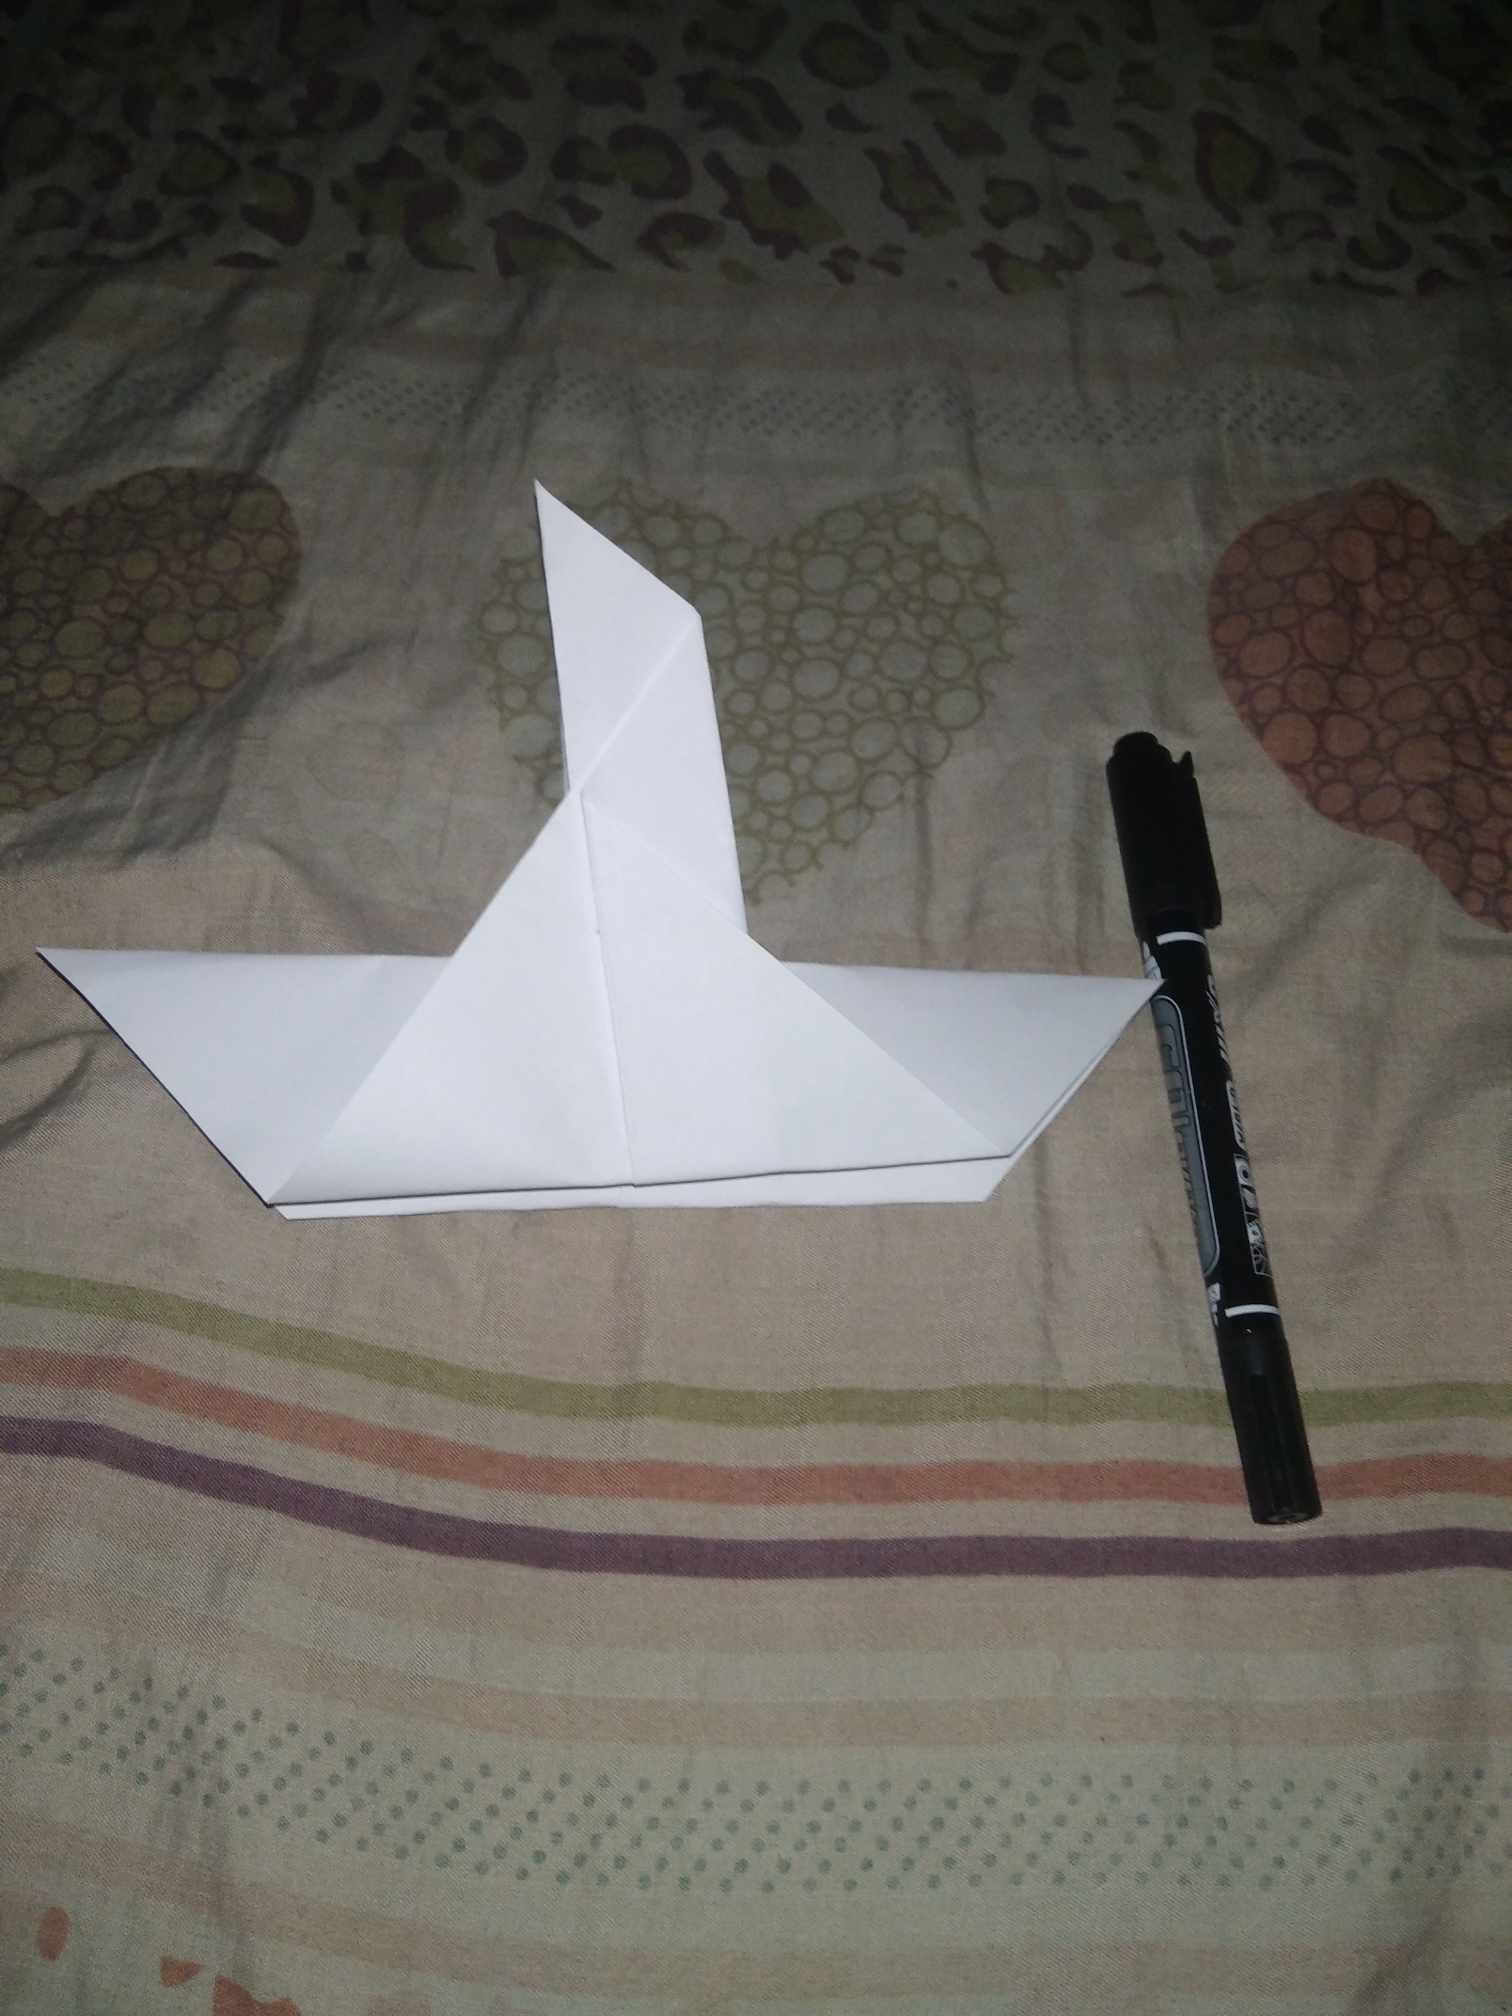
5. Este paso es un poco complicado de explicar así que presten atención a la fotografía y al video, trataré de explicarlo de forma fácil. Ahora juntan las dos puntas del borde que tiene en la parte de abajo.
5. This step is a bit complicated to explain so pay attention to the picture and the video, I will try to explain it in an easy way. Now join the two ends of the edge at the bottom.
 |  |
|---|
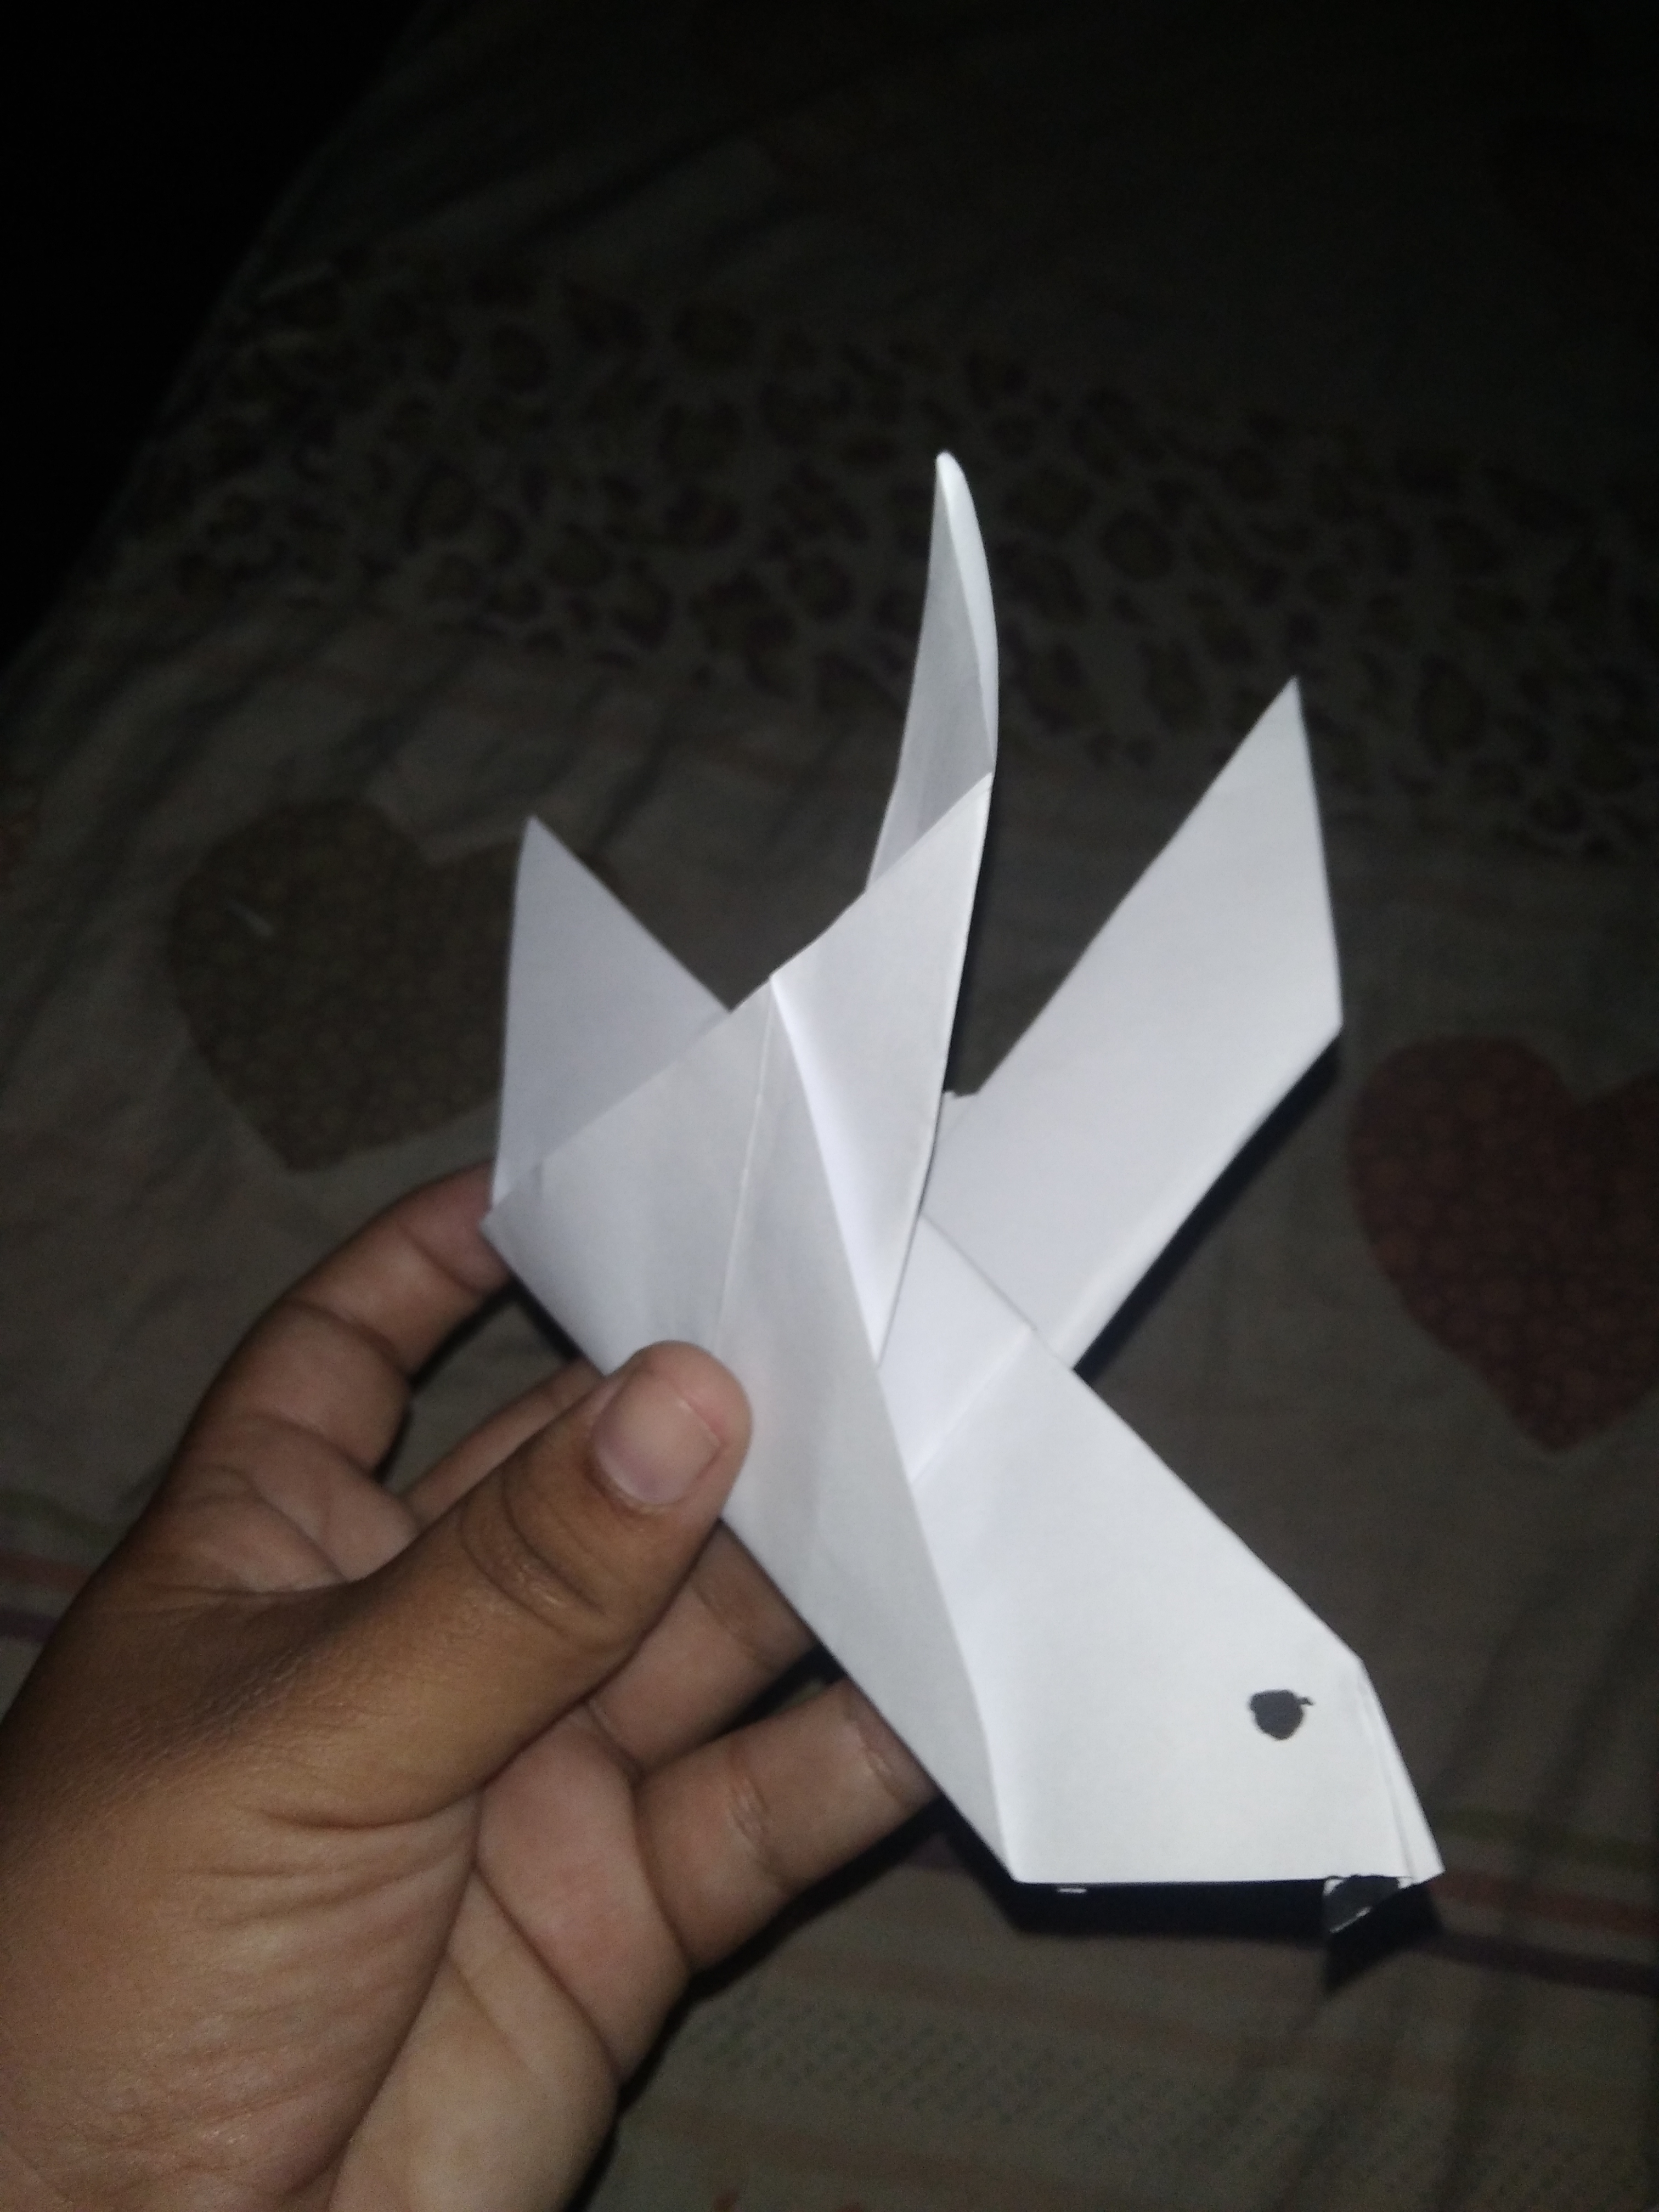
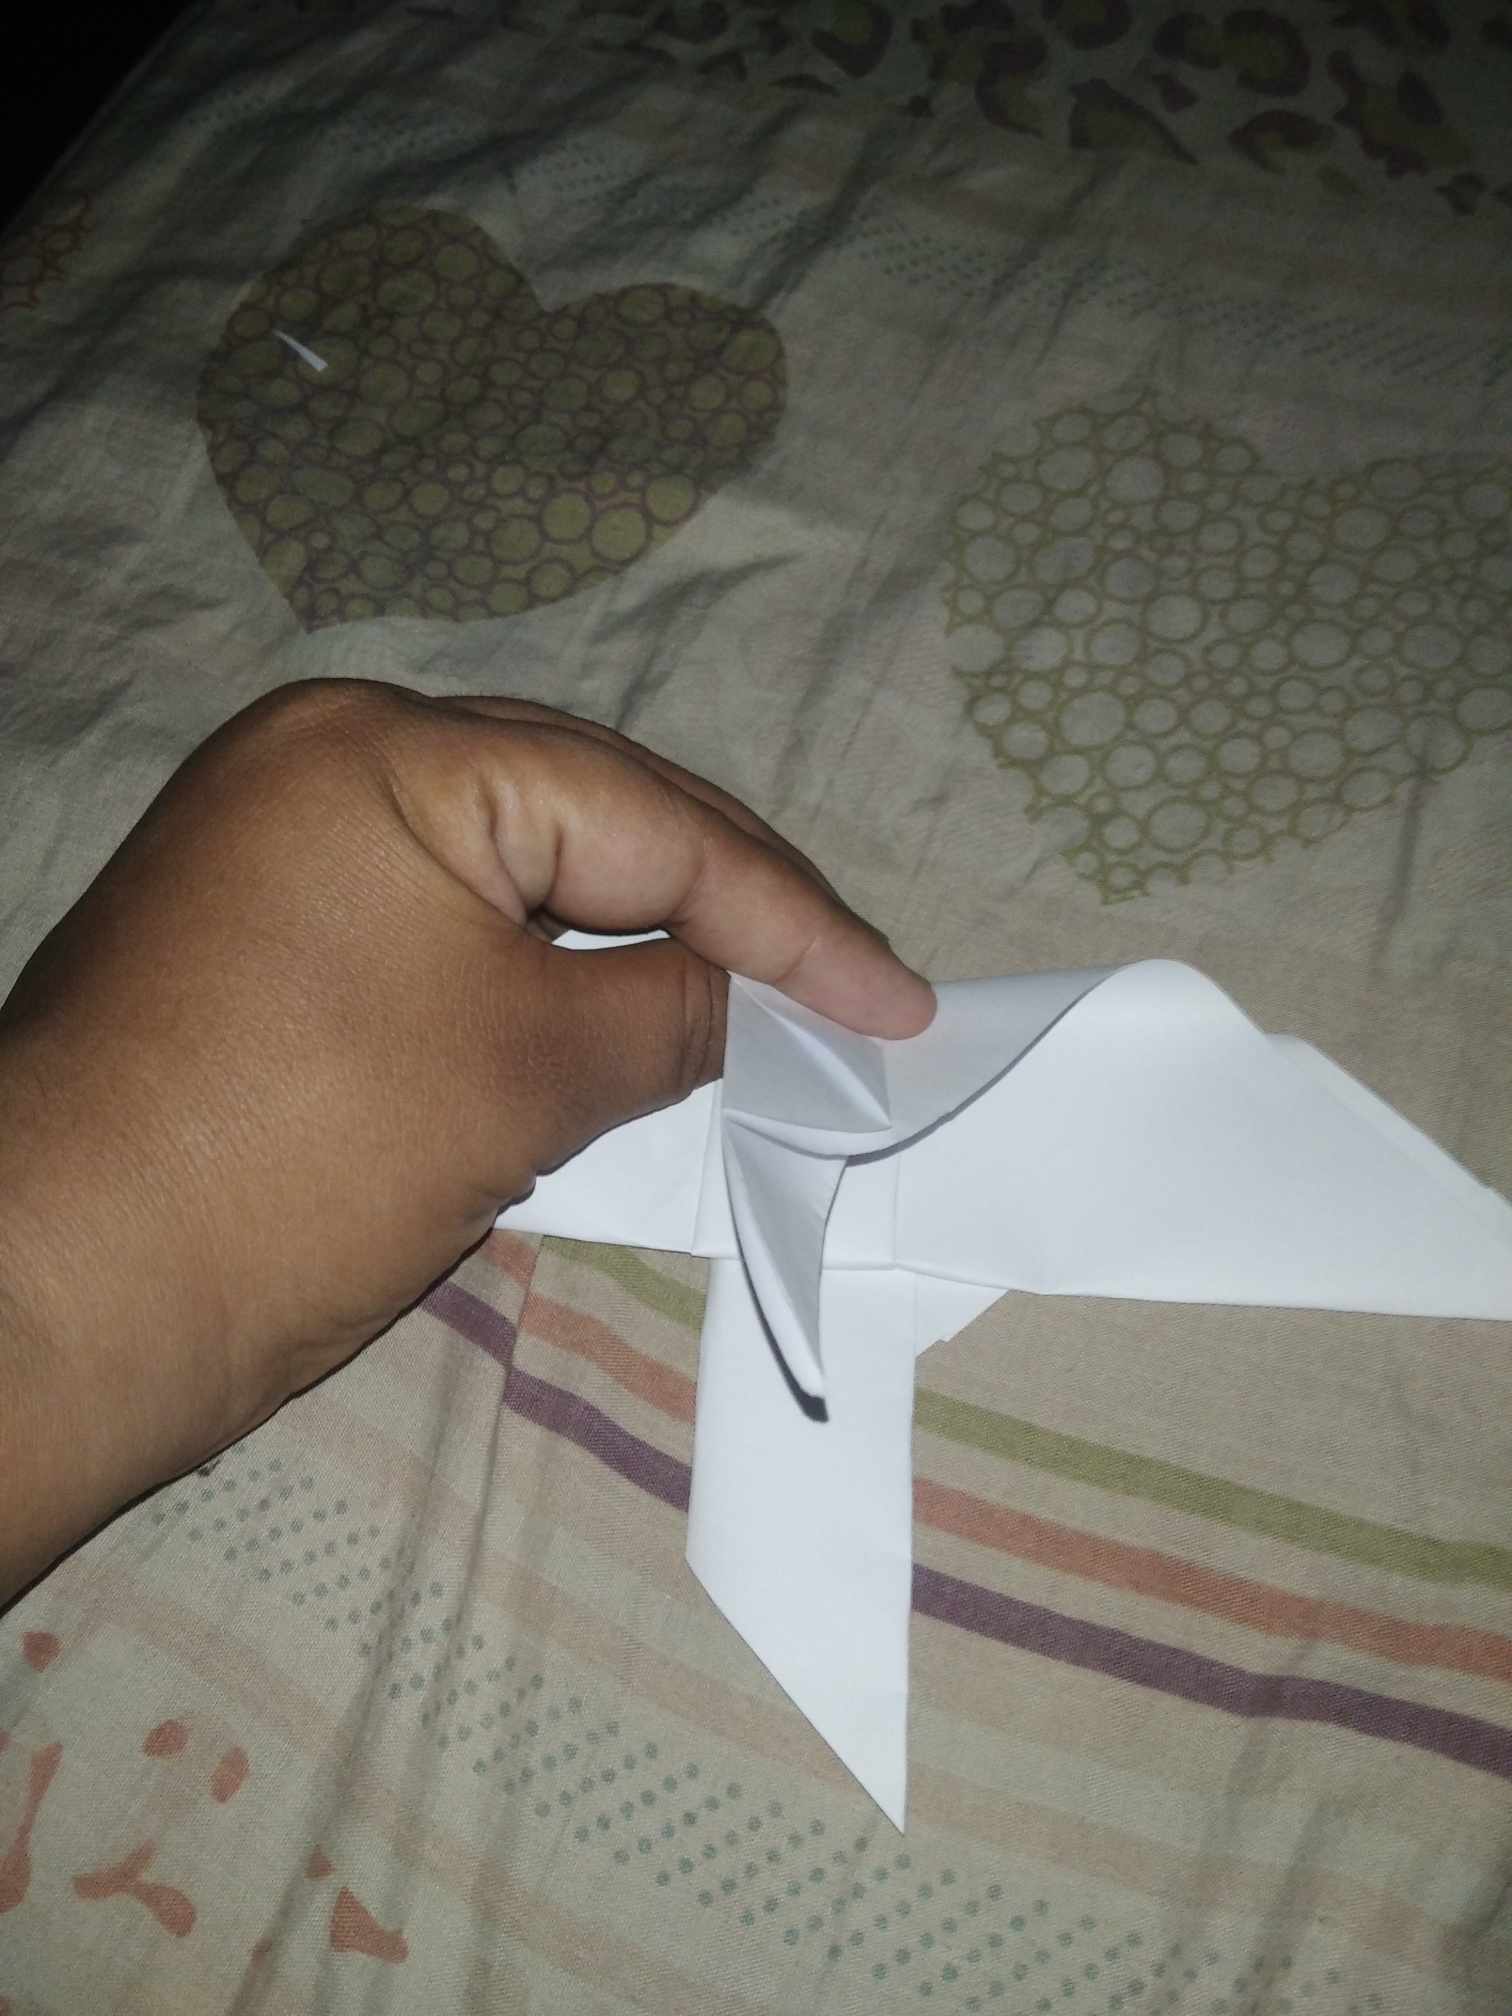
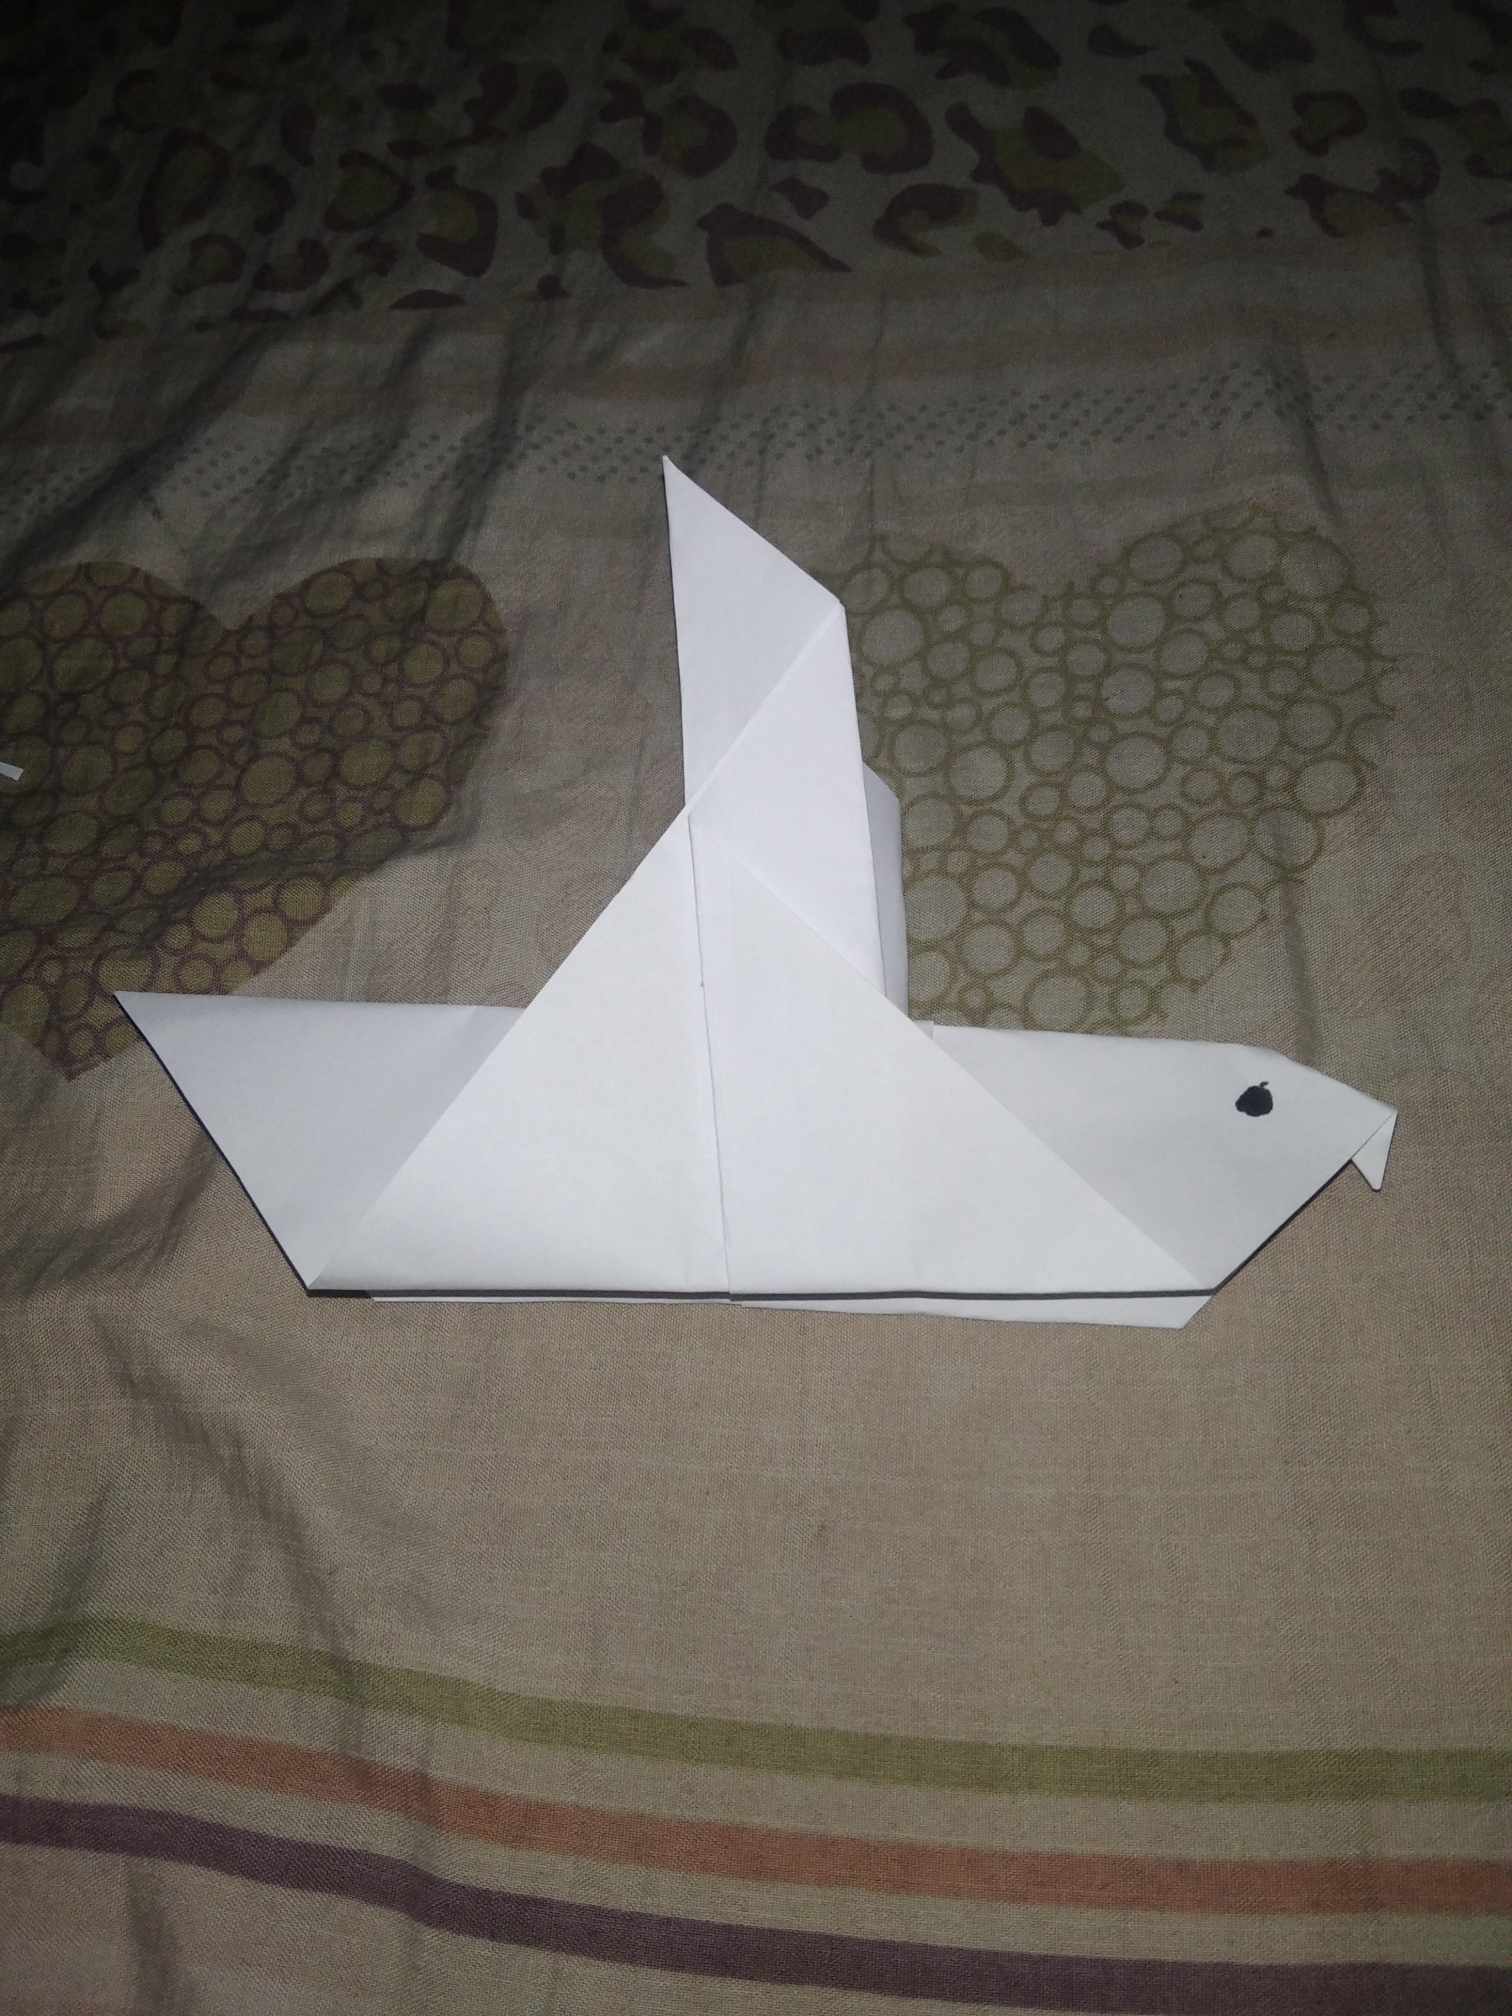
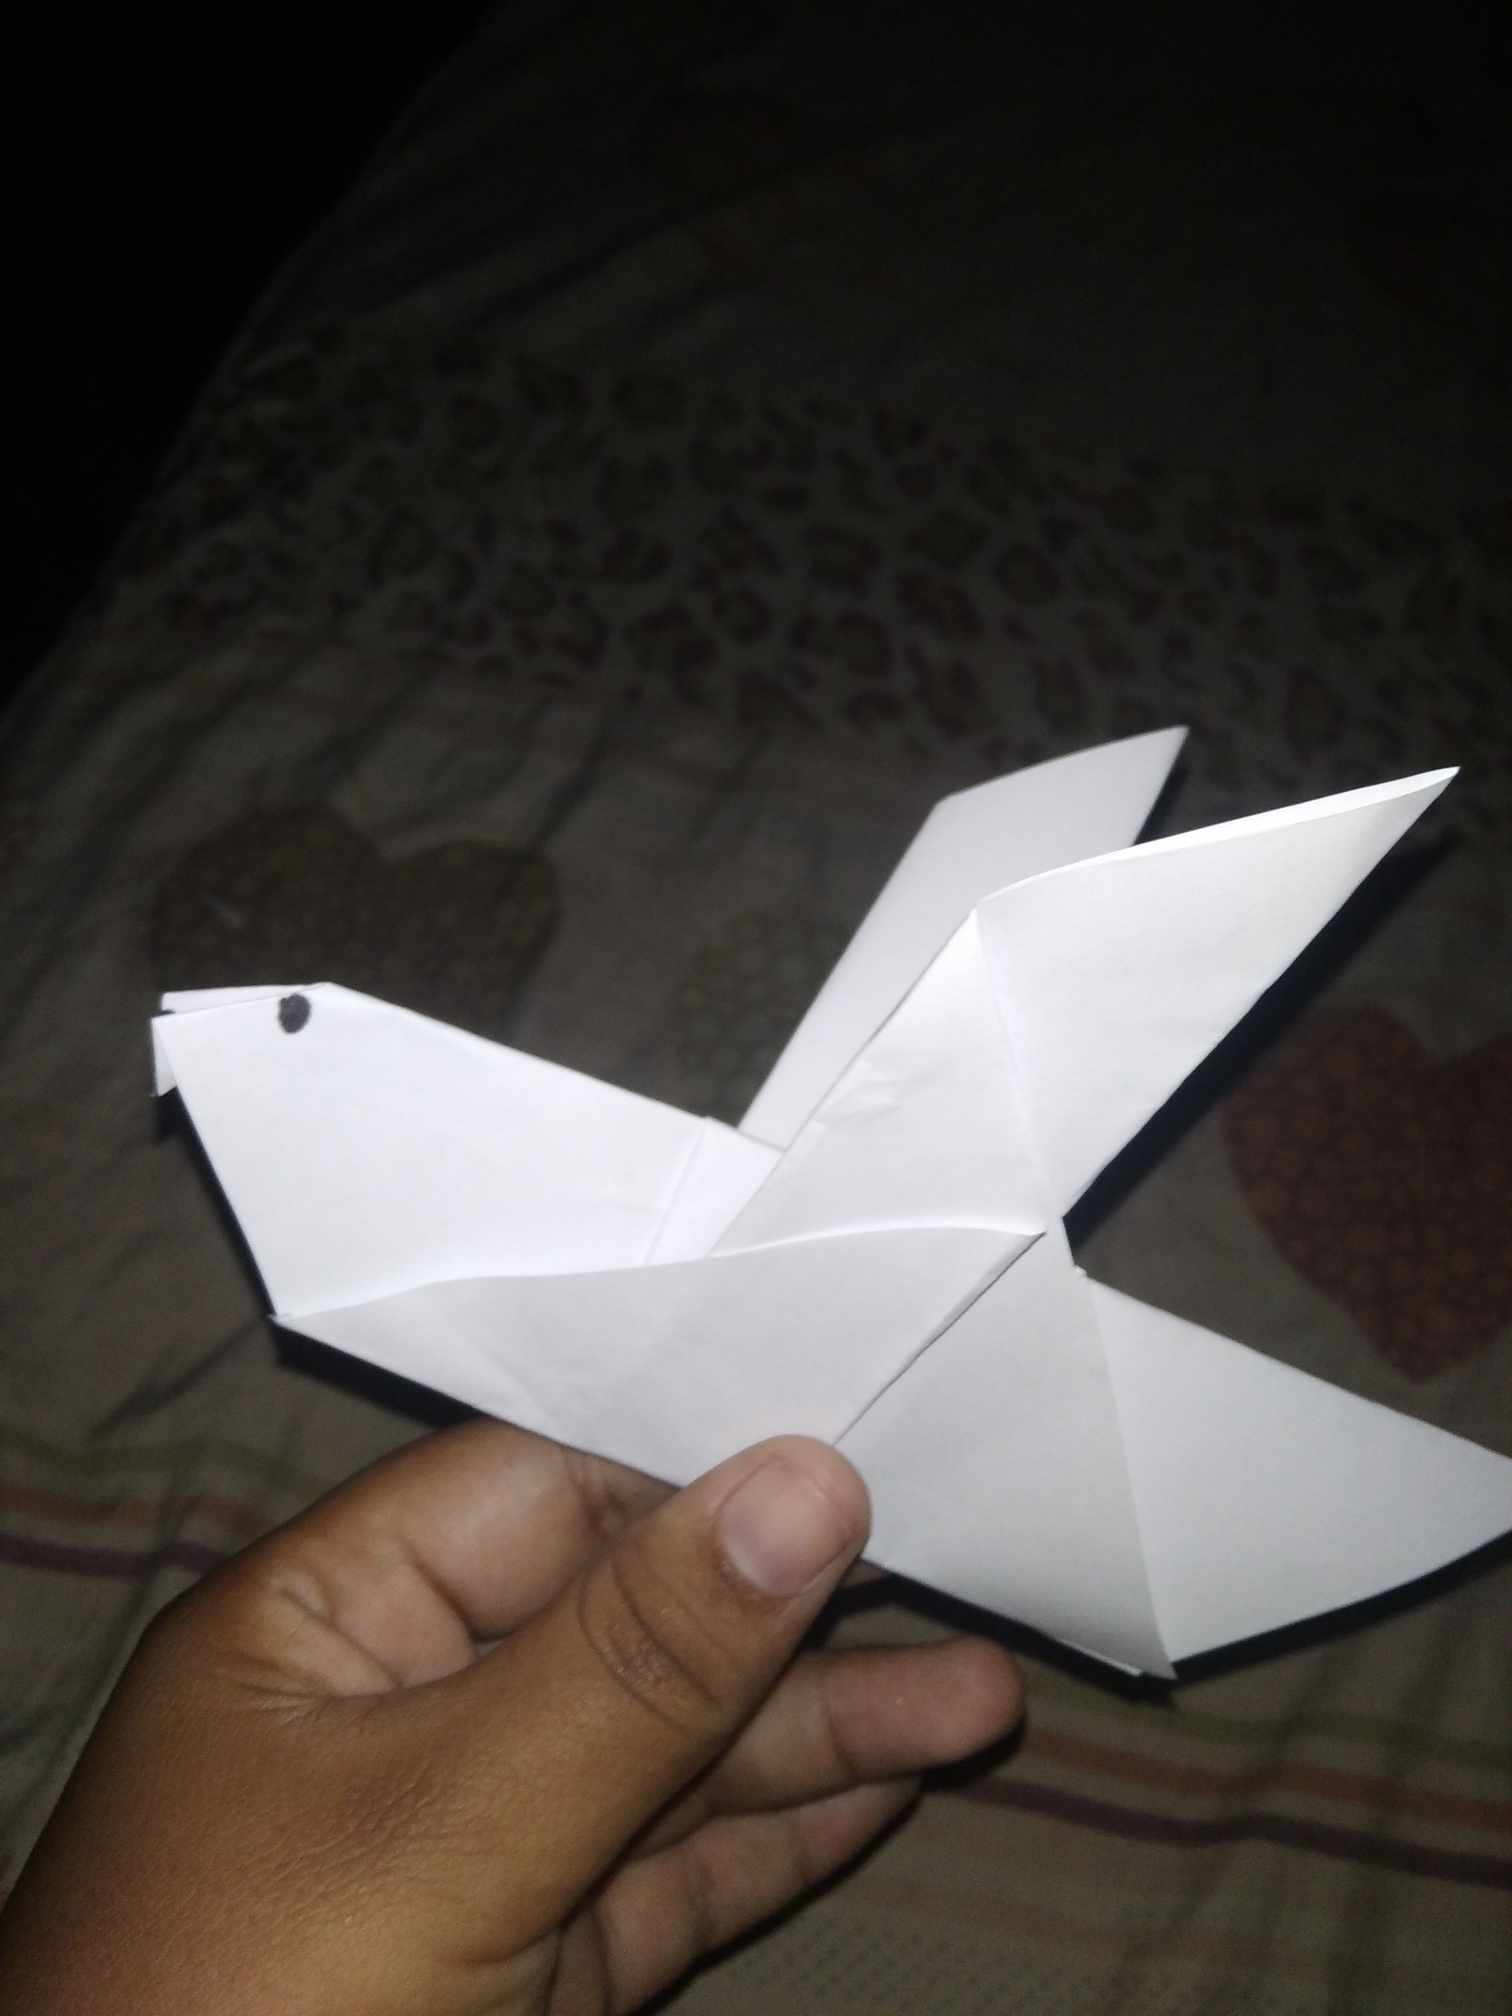
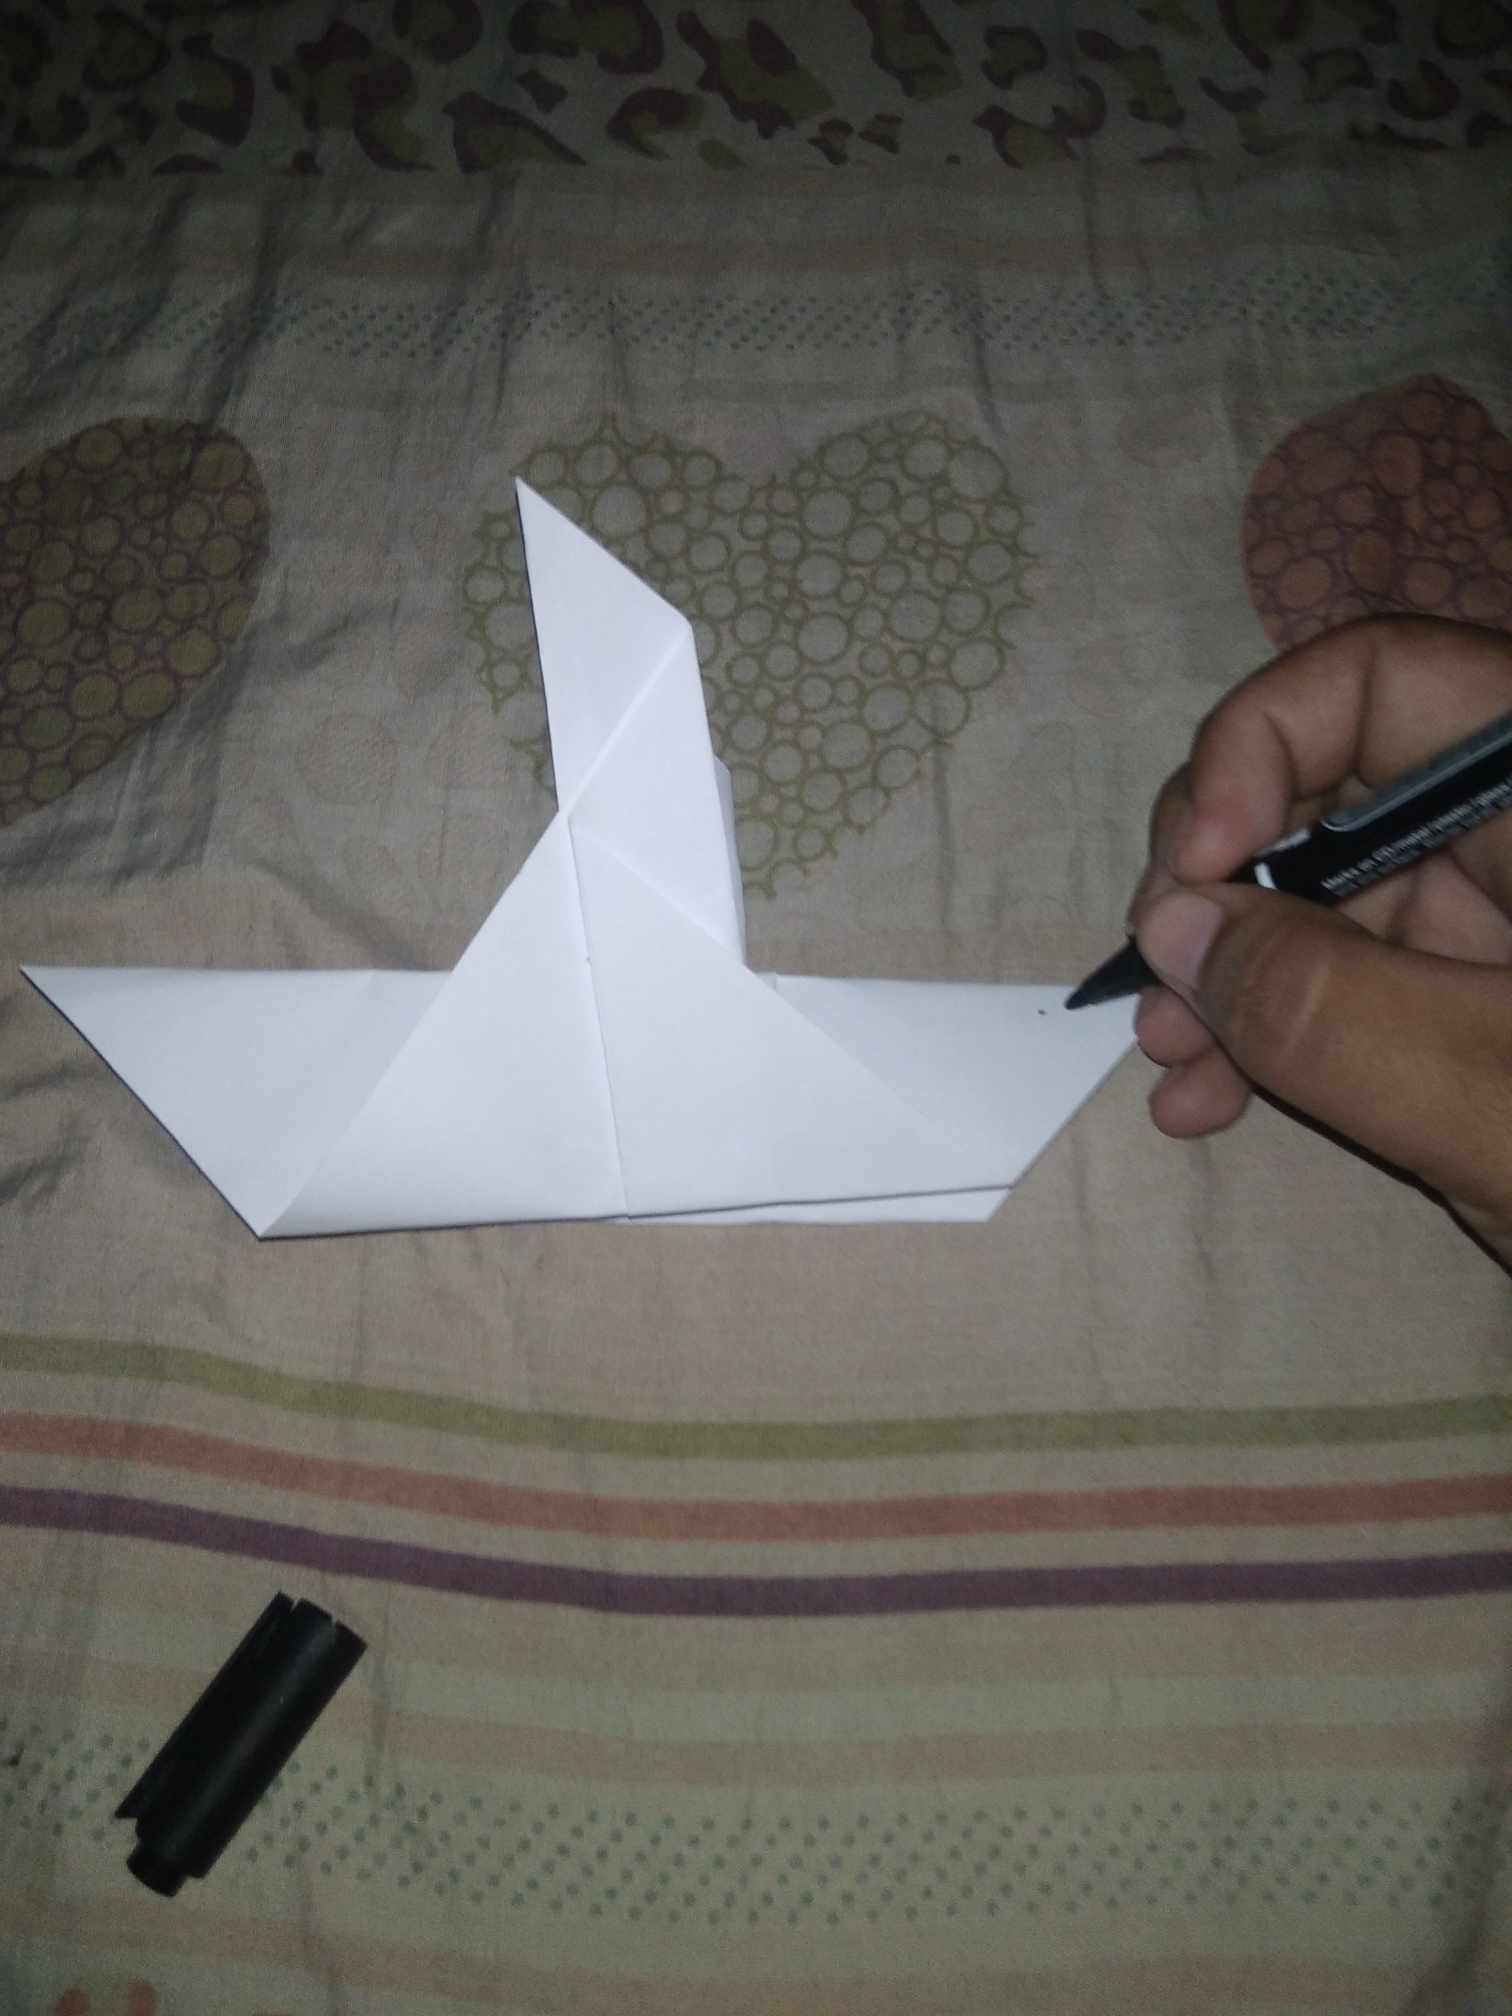
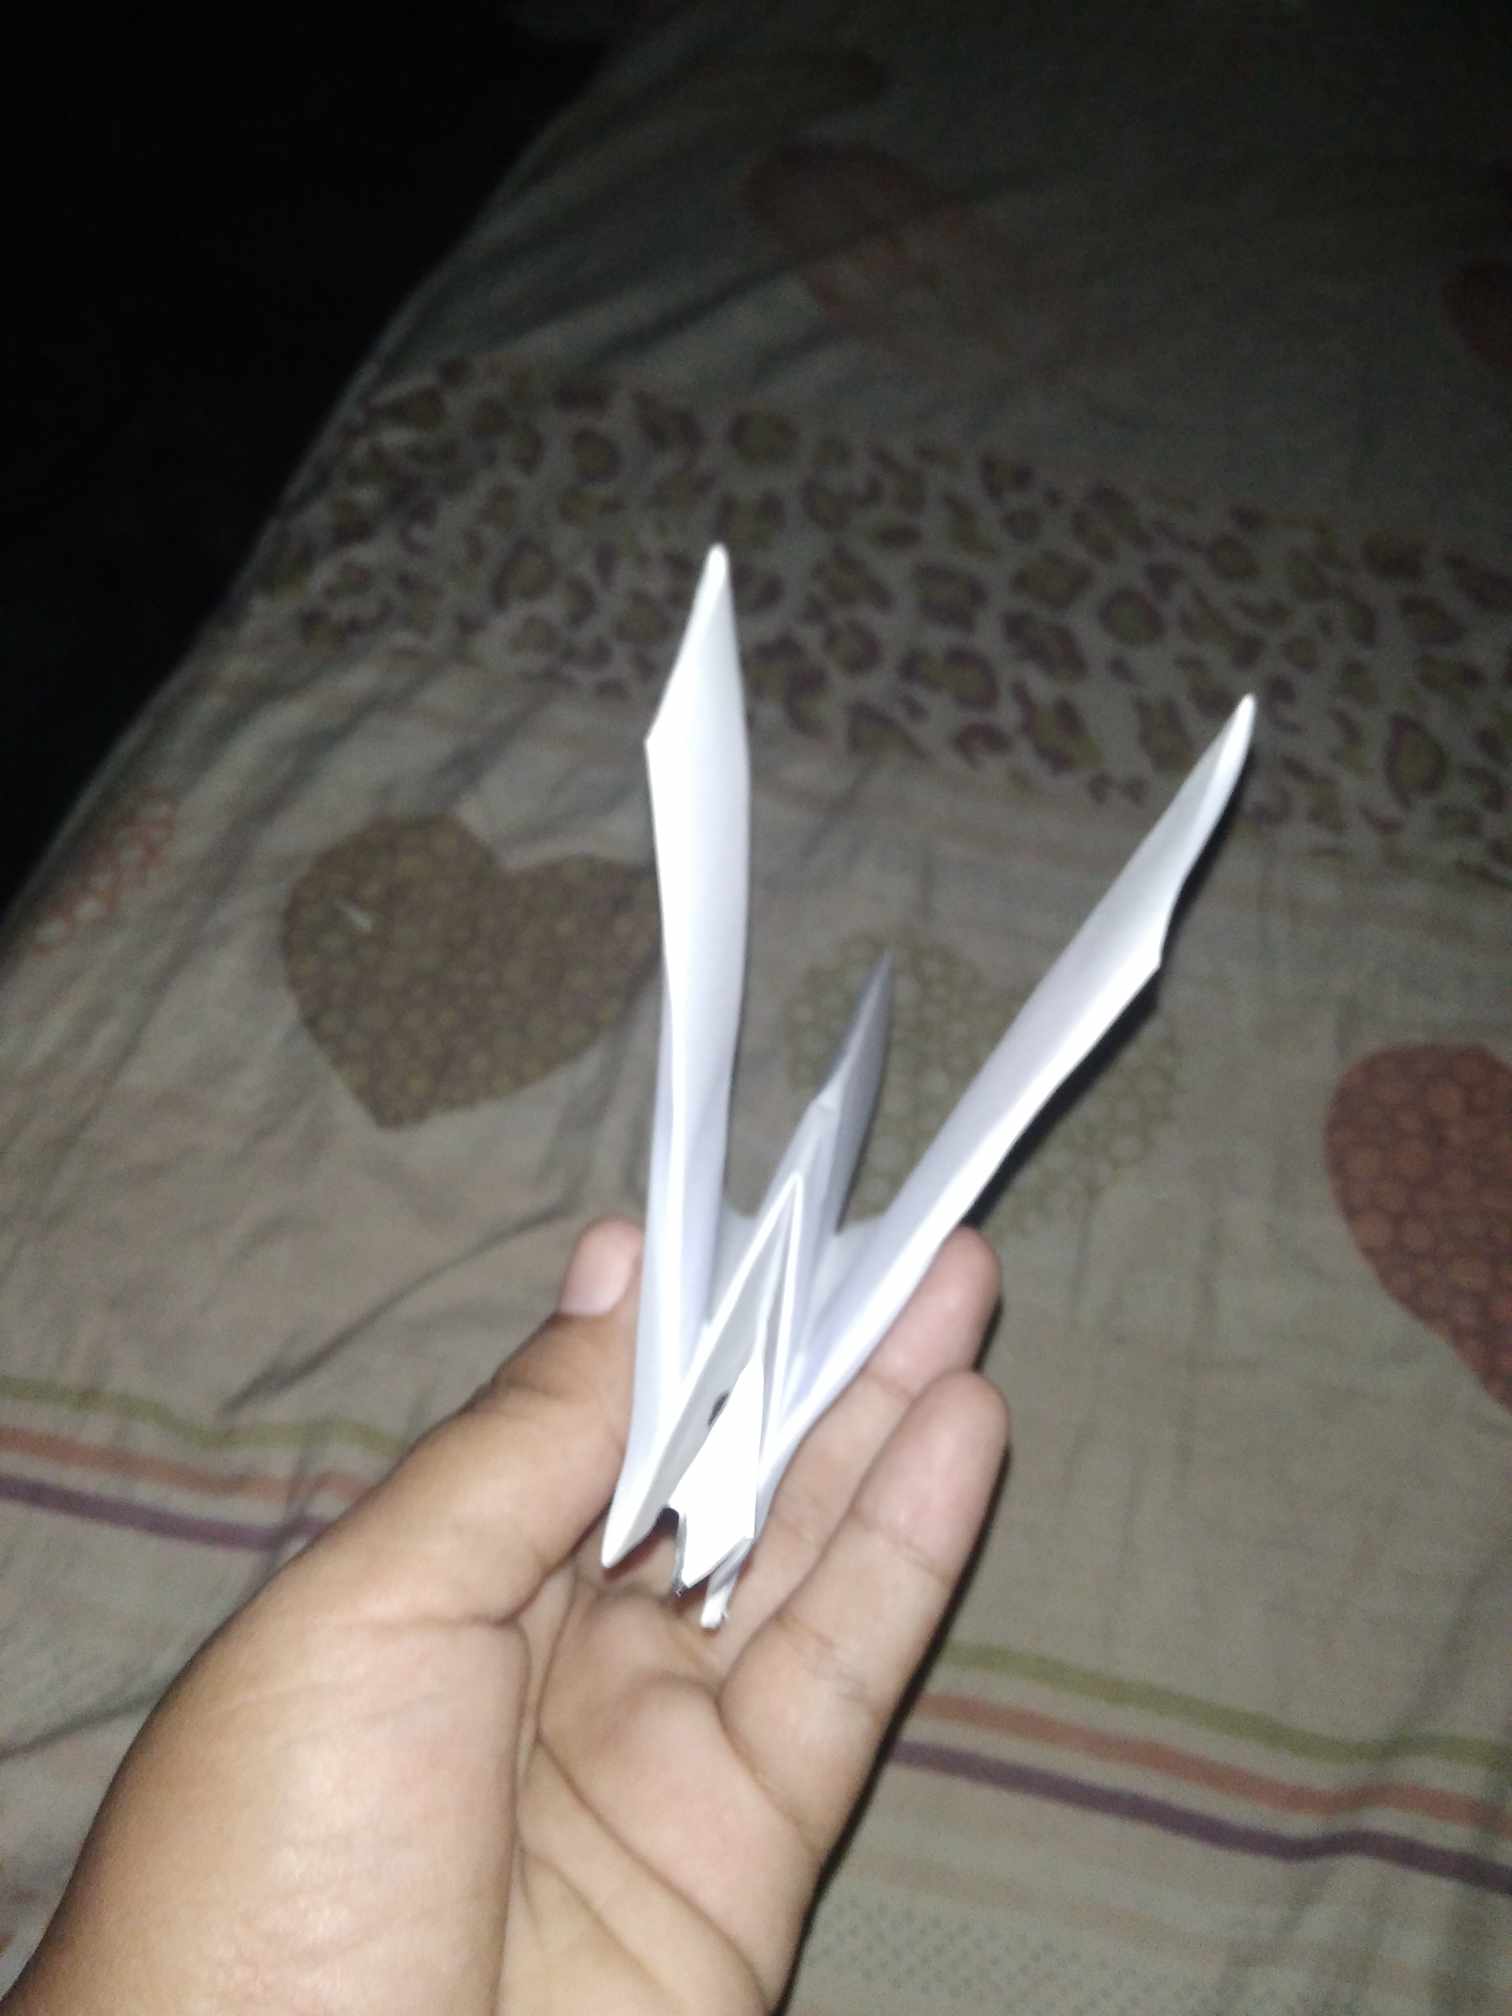
6. Este es el último paso y el más divertido con el marcador escogemos el lado que quedó más corto y le dibujamos los ojos y en la punta le hacemos un pequeño dobles que también debemos pintar para que sea el pico y todos esos pasos te llevarán a qué quede así:
6. This is the last step and the most fun with the marker we choose the side that was shorter and we draw the eyes and at the tip we make a small double that we must also paint to be the beak and all these steps will lead you to what looks like this:
Vivo
I
˜”°•. ˜”°•
@maykit55 •°”˜ .•°”˜
|
.gif)