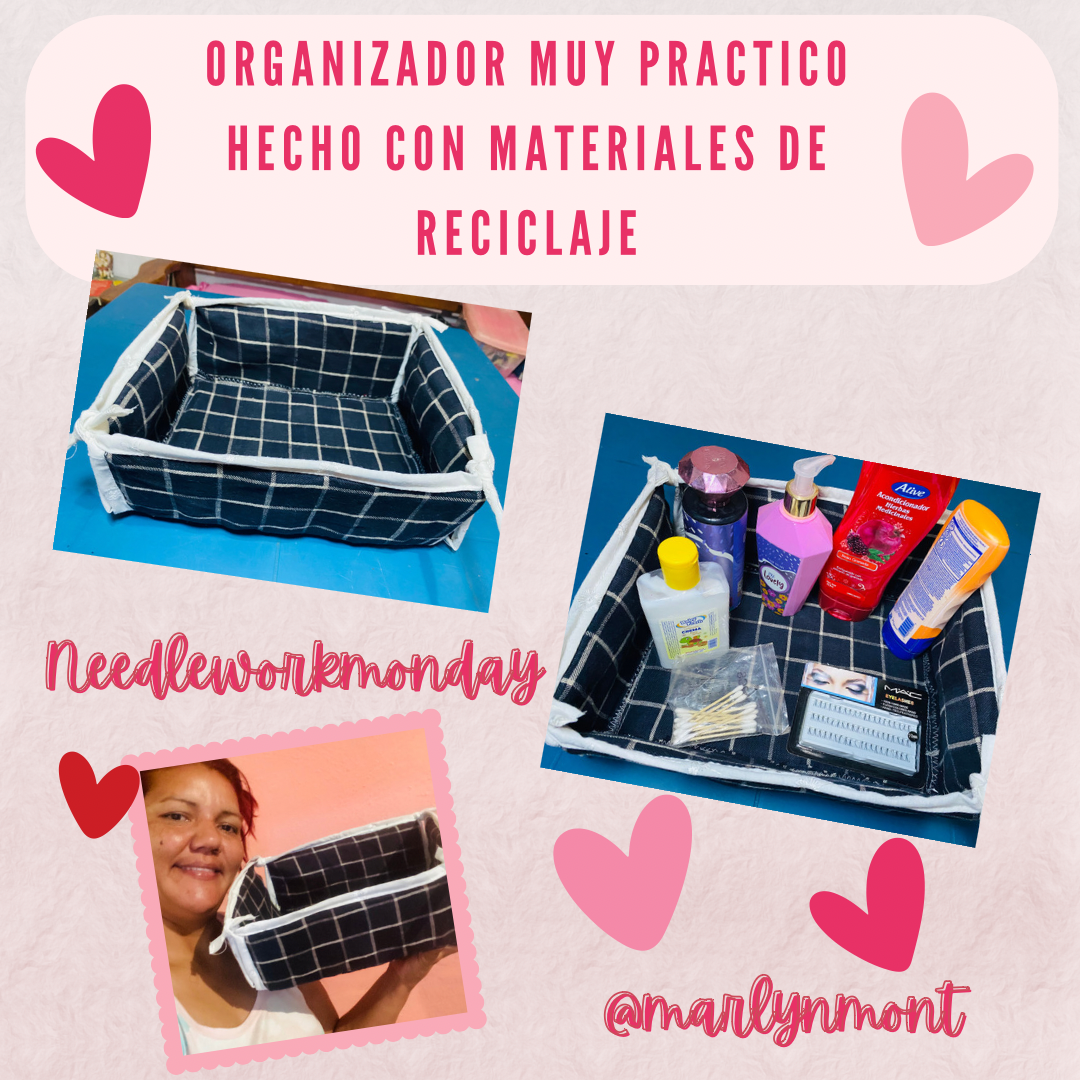
Hola amigos de Needleworkmonday, espero que hoy tengan un excelente día 🥰❤️🪡🧵
Muchas veces se dificulta muchísimo organizar nuestros artículos personales, escolares, entre otros, es por esto que hoy les traigo una excelente idea para hacer un lindo organizador el cual realicé con materiales de reciclaje, ven y te muestro cómo lo hice:
Hello Needleworkmonday friends, I hope you have a great day today 🥰❤️🪡🧵
Many times it is very difficult to organize our personal items, school items, among others, that is why today I bring you an excellent idea to make a nice organizer which I made with recycling materials, come and I will show you how I did it:
〰️〰️〰️〰️🪡🧵〰️〰️〰️〰️
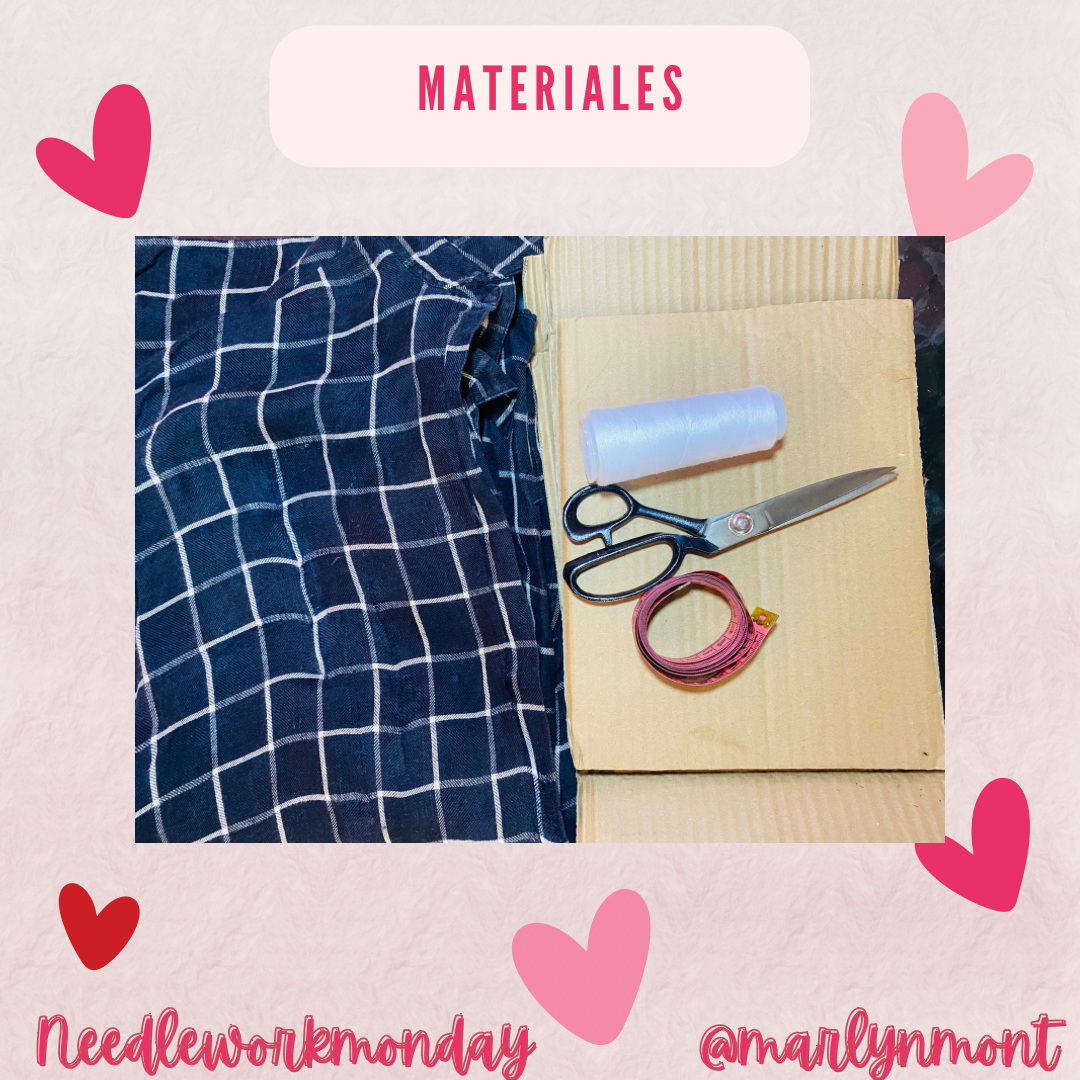
MATERIALES
MATERIALS
A quien mas le ocurre que por mas que intentas organizar tus cosas, al rato esta todo desordenado otra vez, hace un tiempo hice unos organizadores de tela y me ayudaban mucho en el orden, pero estos ya están deteriorados por el uso y el tiempo, entonces quise idearme unos nuevos, pero quise hacerlo de una manera que podamos guardarlos en caso de no usarlos.
Busque entre mis telas y recordé que mi papá hace tiempo me había regalado una camisa que ya no usaba, esta la guardé por supuesto para hacer mis manualidades y me pareció perfecta para esta, aquí te dejo la lista de materiales que utilicé
- carton
- tela , Yo utilizaré una camisa vieja
- si tienes sesgo a la mano puedes utilizarlo, en mi caso para las orillas utilizaré tiras de tela blanca
- tijeras
- Hilo y aguja o si tienes, tu máquina de coser
Who else happens that no matter how much you try to organize your things, after a while everything is messy again, a long time ago I made some fabric organizers and they helped me a lot with order, but these are already deteriorated due to use and time, So I wanted to come up with new ones but I wanted to do it in a way that we could save them in case we don't use them.
I looked through my fabrics and remembered that my dad had given me a shirt a long time ago that he no longer wore. I of course kept this one to make my crafts and it seemed perfect for this one. Here is the list of materials I used.
- cardboard
- fabric, I will use an old shirt
- If you have a bias on hand you can use it, in my case for the edges I will use strips of white fabric
- scissors
- Thread and needle or if you have it, your sewing machine
〰️〰️〰️〰️🪡🧵〰️〰️〰️〰️
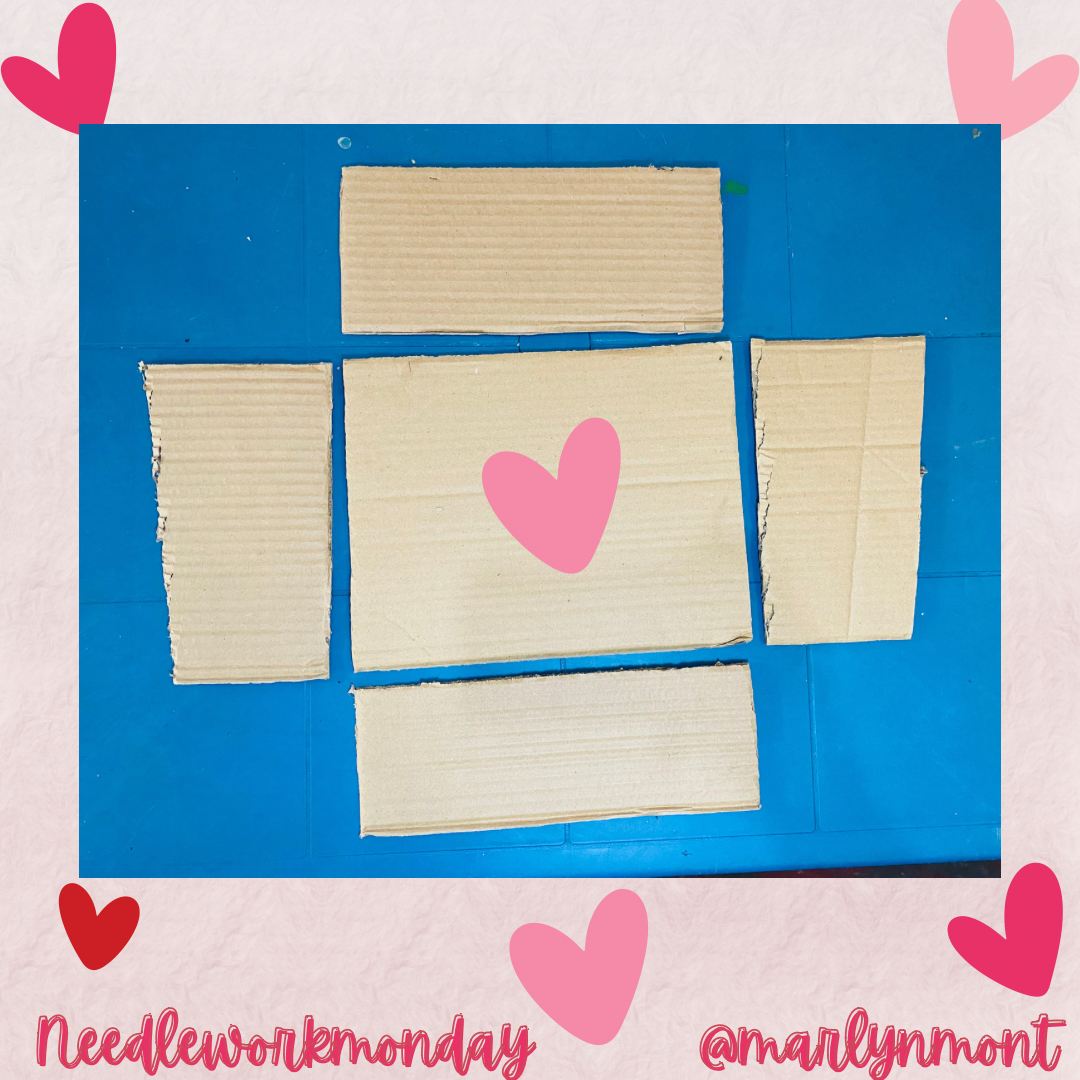
PASO A PASO
STEP BY STEP
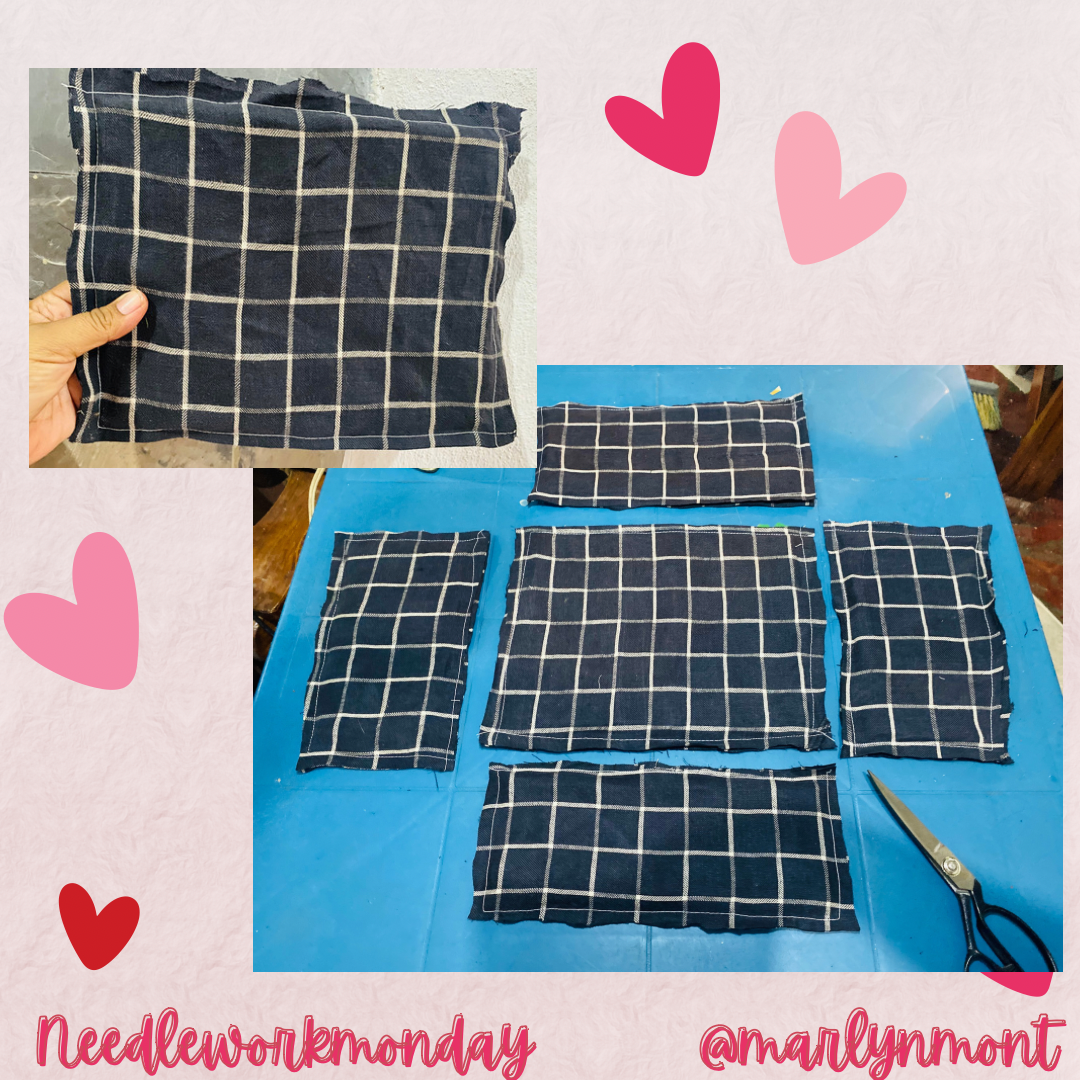
Como primer paso vamos a calcular el tamaño de nuestro organizador, éstos los puedes hacer del tamaño que tú desees, yo lo haré de 27 cm de largo por 21 cm de ancho, esto es para la base, la parte delantera la vamos a cortar de 27 cm de larga por 10 cm de alta, la parte trasera será de 27 cm de larga por 12 cm de alta.
Para los laterales vamos a cortar el cartón de 21 cm de largos y la altura será en una esquina de 12 cm y en la otra de 10 cm luego trazamos una línea, esta va a quedar en caída.
As a first step we are going to calculate the size of our organizer, you can make these the size you want, I will make it 27 cm long by 21 cm wide, this is for the base, we are going to cut the front part 27 cm long by 10 cm high, the back will be 27 cm long by 12 cm high.
For the sides we are going to cut the cardboard 21 cm long and the height will be 12 cm in one corner and 10 cm in the other. Then we draw a line, this will fall.
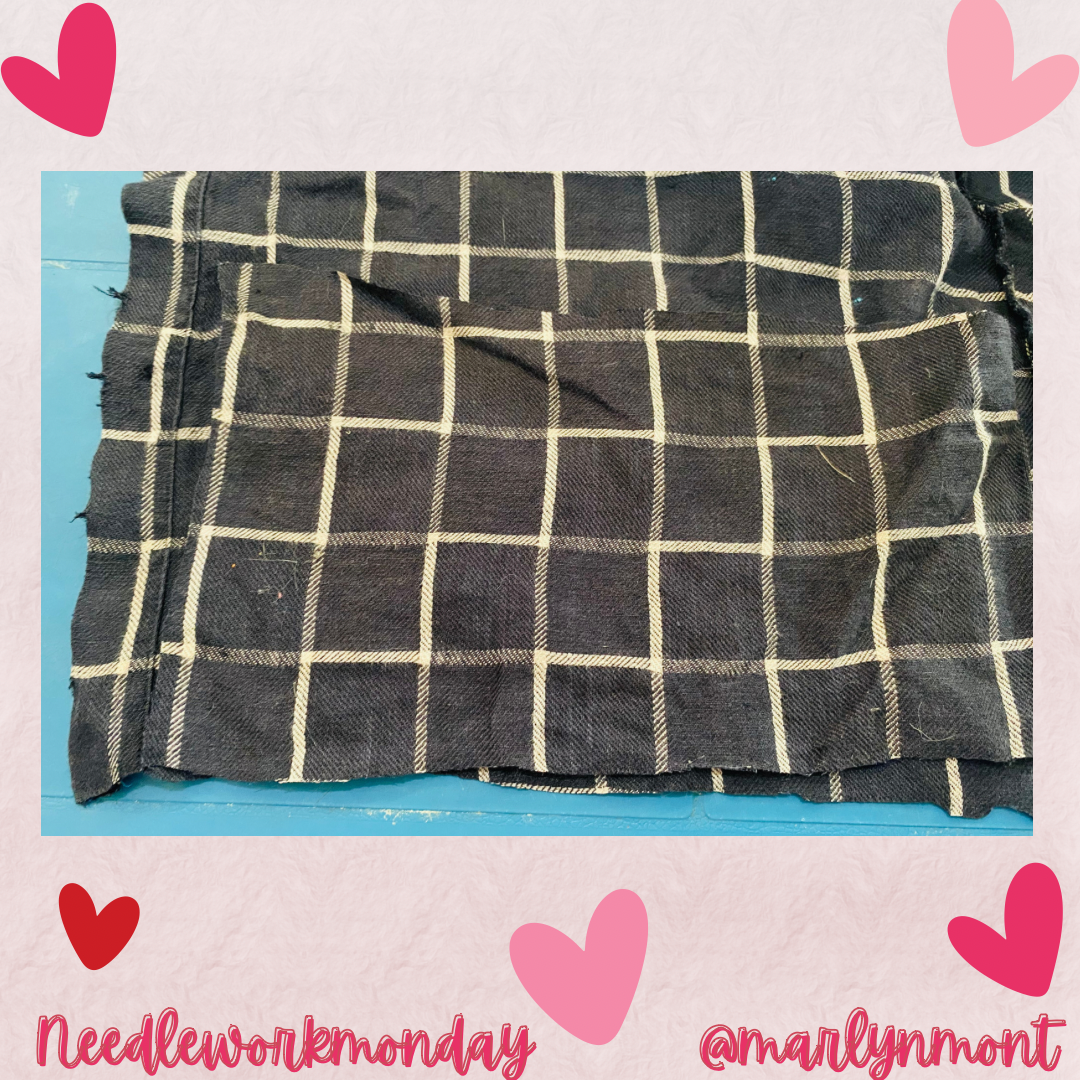
Vamos a cortar 2 piezas de tela por cada pieza de cartón dejando 1cm extra por cada lado, esto es para las costuras, voy a planchar todas las telas para poder alisar en las partes donde ya ha tenido costura o en donde está arrugada.
We are going to cut 2 pieces of fabric for each piece of cardboard, leaving 1cm extra on each side, this is for the seams, I am going to iron all the fabrics to be able to smooth out the parts where it has already been sewn or where it is wrinkled
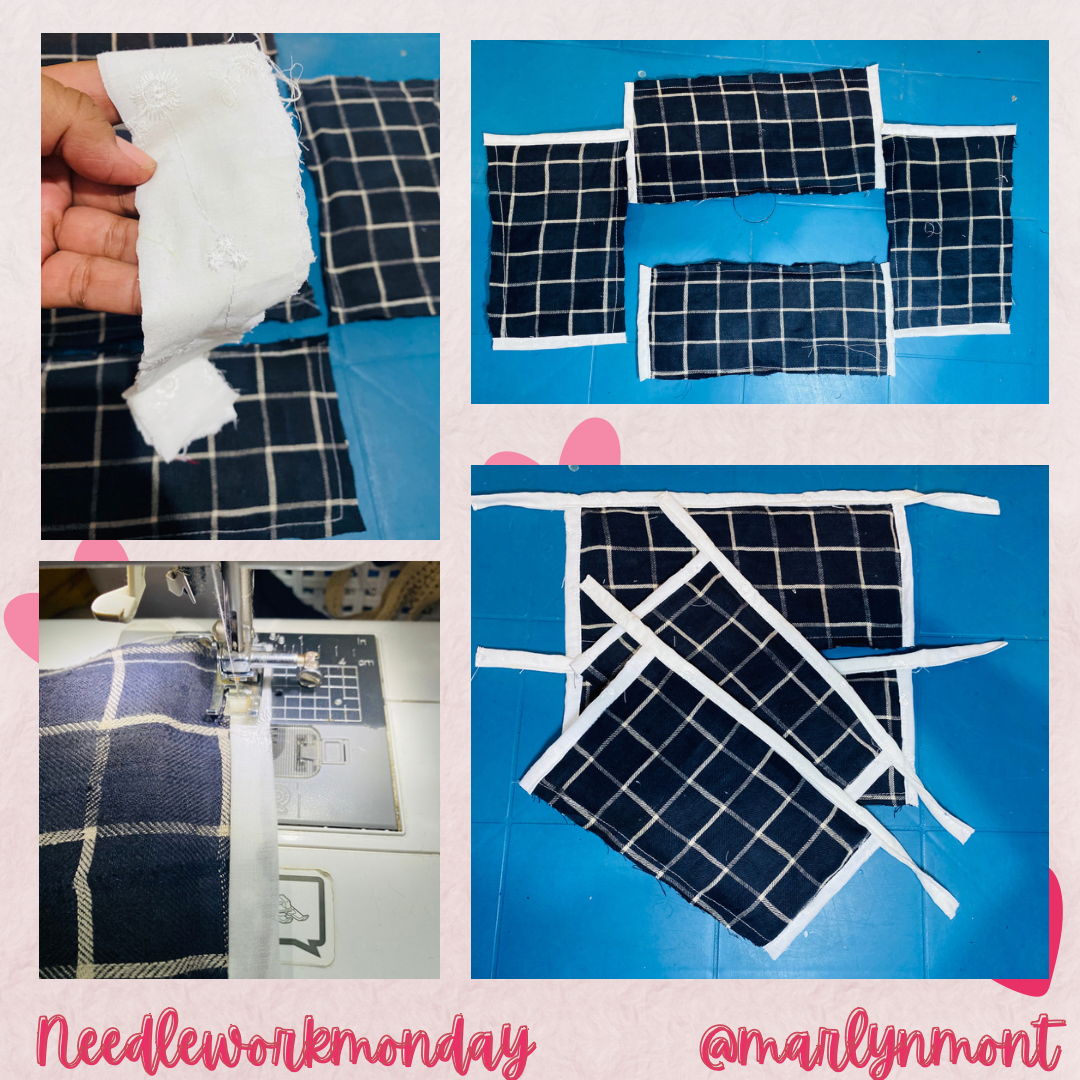
Para comenzar con las costuras vamos a fijar o encerrar los cartones adentro de las piezas de tela, le pasaremos costura por todo el alrededor tratando de acercarnos lo más posible al cartón pero no es necesario que lo dejemos apretado.
Éstos organizadores si los cuidamos bien es muy raro que se ensucien, es por esto que decidí colocarle cartón en la parte interna, pero si quieres que sea lavable le puedes colocar algún tipo de entretela que no se dañe con el agua puede ser guata o el tipo de entretela que se le coloca a los cuellos de las camisas.
To begin with the seams we are going to fix or enclose the cardboard inside the pieces of fabric, we will sew all around it trying to get as close as possible to the cardboard but it is not necessary that we leave it tight.
If we take good care of these organizers, they rarely get dirty, which is why I decided to put cardboard on the inside, but if you want it to be washable you can put some type of interlining that will not be damaged by water, it can be wadding or cotton. type of interlining that is placed on the collars of shirts.
Para el siguiente paso vamos a cortar tiras de tela de 5 cm de ancha, esta es para utilizarlas como sesgo, yo conseguí entre mis retazos de tela una tela blanca muy linda que le combina Perfecta a la tela que estoy usando.
A cada pieza le vamos a colocar sesgo en las orillas de los lados, luego le vamos a colocar el sesgo en la orilla superior dejando un sobresaliente de 10 cm en cada extremo, esto lo vamos a hacer con las cuatro piezas de nuestro organizador
For the next step we are going to cut strips of fabric 5 cm wide, this is to use as a bias, I found among my scraps of fabric a very nice white fabric that matches perfectly with the fabric I am using.
We are going to place a bias on the side edges of each piece, then we are going to place the bias on the top edge, leaving a 10 cm protrusion at each end. We are going to do this with the four pieces of our organizer.
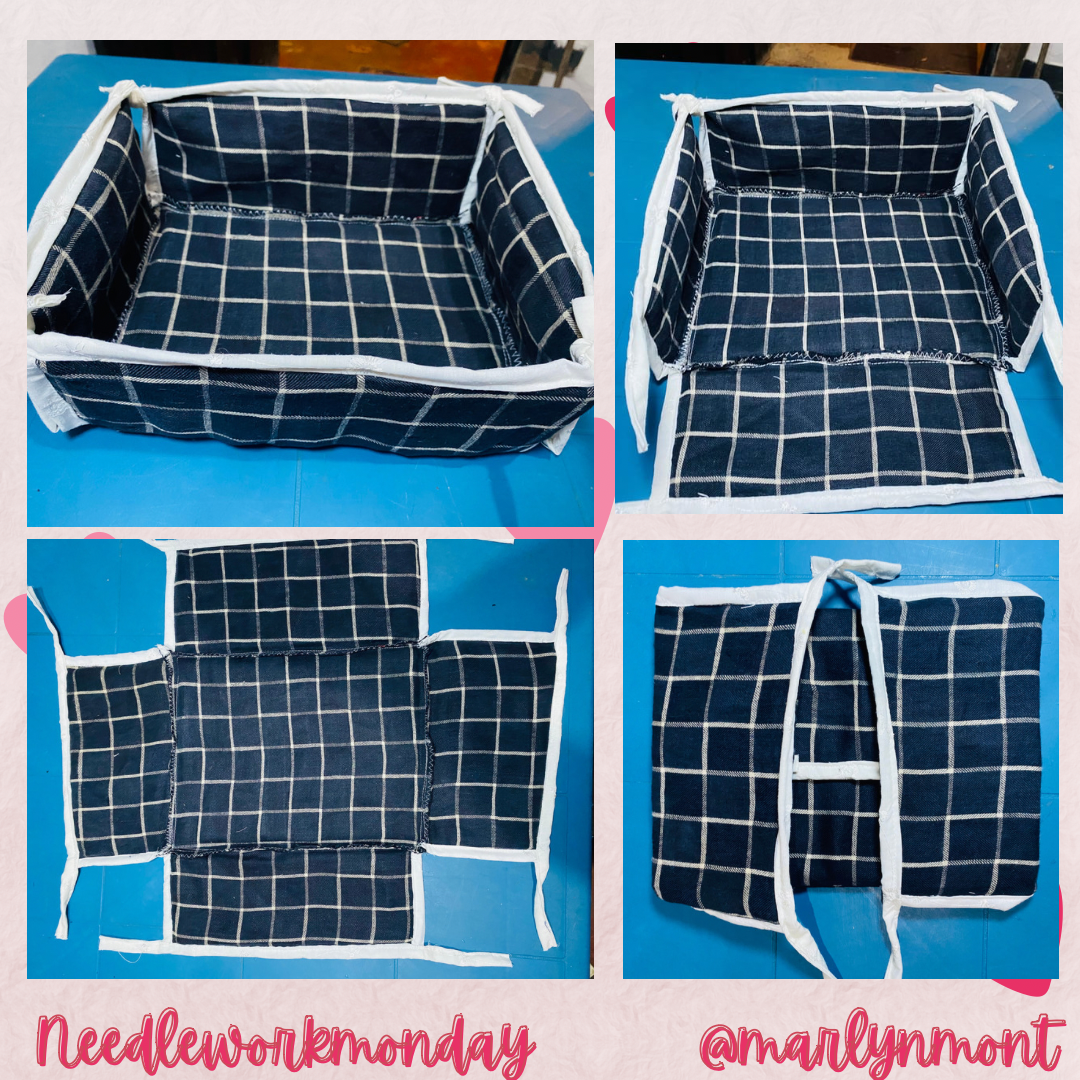
Ahora uniremos todas las piezas a la base de nuestro organizador, lo puedes hacer de dos maneras, las puedes unir con costura hacia afuera y colocárles sesgo por toda la orilla y la otra manera será dejar las costuras por el lado interno del organizador para que no se vean.
Now we will join all the pieces to the base of our organizer, you can do it in two ways, one by joining them and placing a bias along the entire edge and the other way will be to leave the seams on the inside of the organizer so that they cannot be seen.

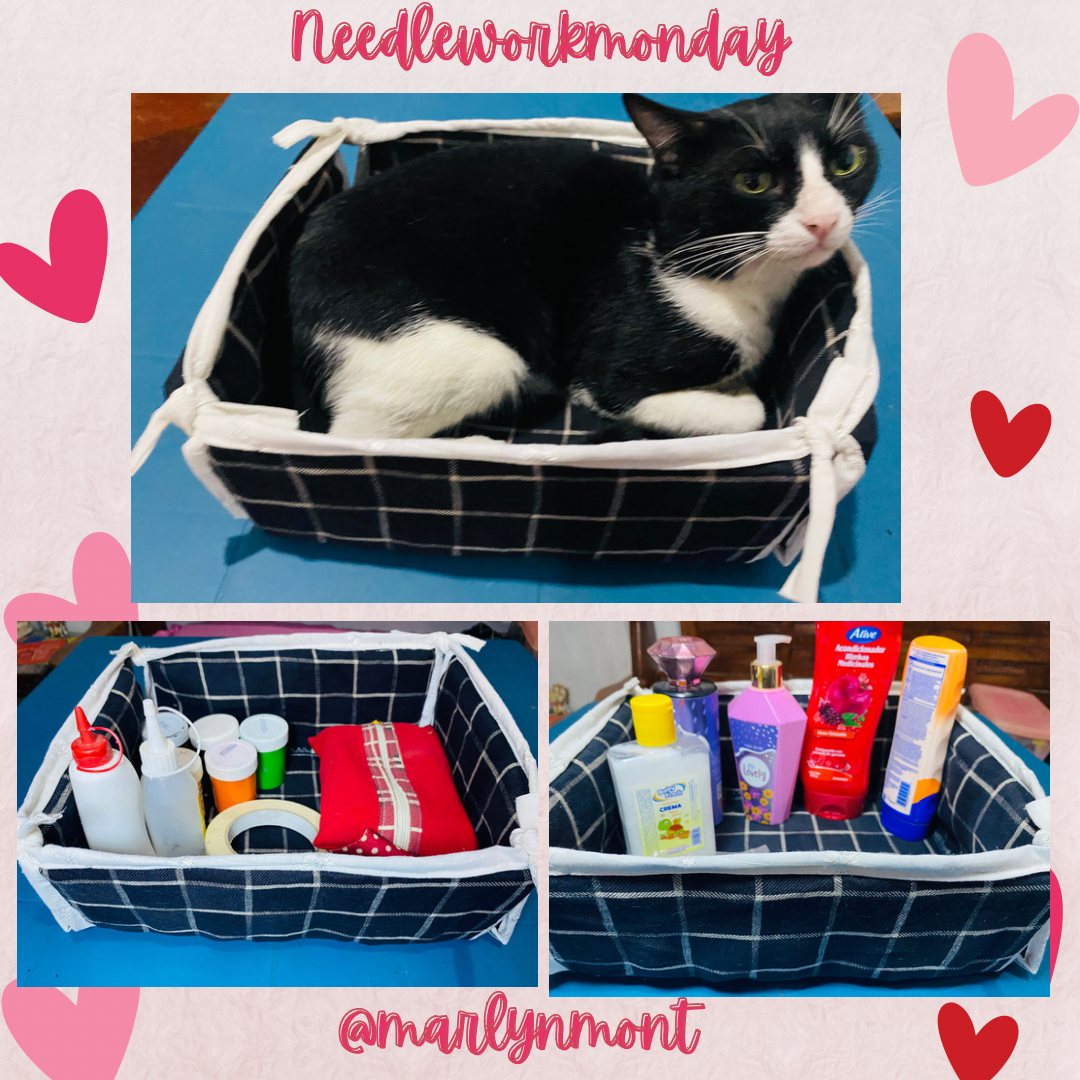
Luego de unir todas las piezas ya tendremos listo nuestro organizador, éste le podemos dar diferentes usos, en él podemos organizar nuestros artículos personales, artículos escolares, incluso podemos organizar nuestra ropa íntima, mi gatito creyó que era una cama para él y se acostó dentro de ella, ja ja
Lo que más me encantó de este organizador es la forma en la que lo podemos guardar, desatamos los nudos y doblamos las partes y lo podemos guardar en cualquier lugar pequeño.
After joining all the pieces we will have our organizer ready, we can give it different uses, in it we can organize our personal items, school items, we can even organize our intimate clothes, my kitten thought it was a bed for him and he lay down inside of her, ha ha
What I loved most about this organizer is the way we can store it, we untie the knots and fold the parts and we can store it in any small place.
Ya no tenemos excusa para tener desorden en nuestros clóset, con esta idea podemos hacer todos los organizadores que queramos y tener acomodadas todas nuestras cosas, y lo mejor los podemos hacer personalizados y adaptados a nuestros espacios, si llegaste hasta aquí te agradezco mucho por haber visitado mi Publicación, hasta otra oportunidad 🤗❤️
We no longer have an excuse to have clutter in our closets, with this idea we can make all the organizers we want and have all our things arranged, and best of all we can make them personalized and adapted to our spaces, if you came this far I thank you very much for having visited my Publication, until another opportunity 🤗❤️
〰️〰️〰️〰️🪡🧵〰️〰️〰️〰️
las fotos aquí compartidas son de mi propiedad tomadas con mi teléfono iPhone 11 y editadas en canva
The photos shared here are my property taken with my iPhone 11 phone and edited in canva