| Esp | Eng |
|---|---|
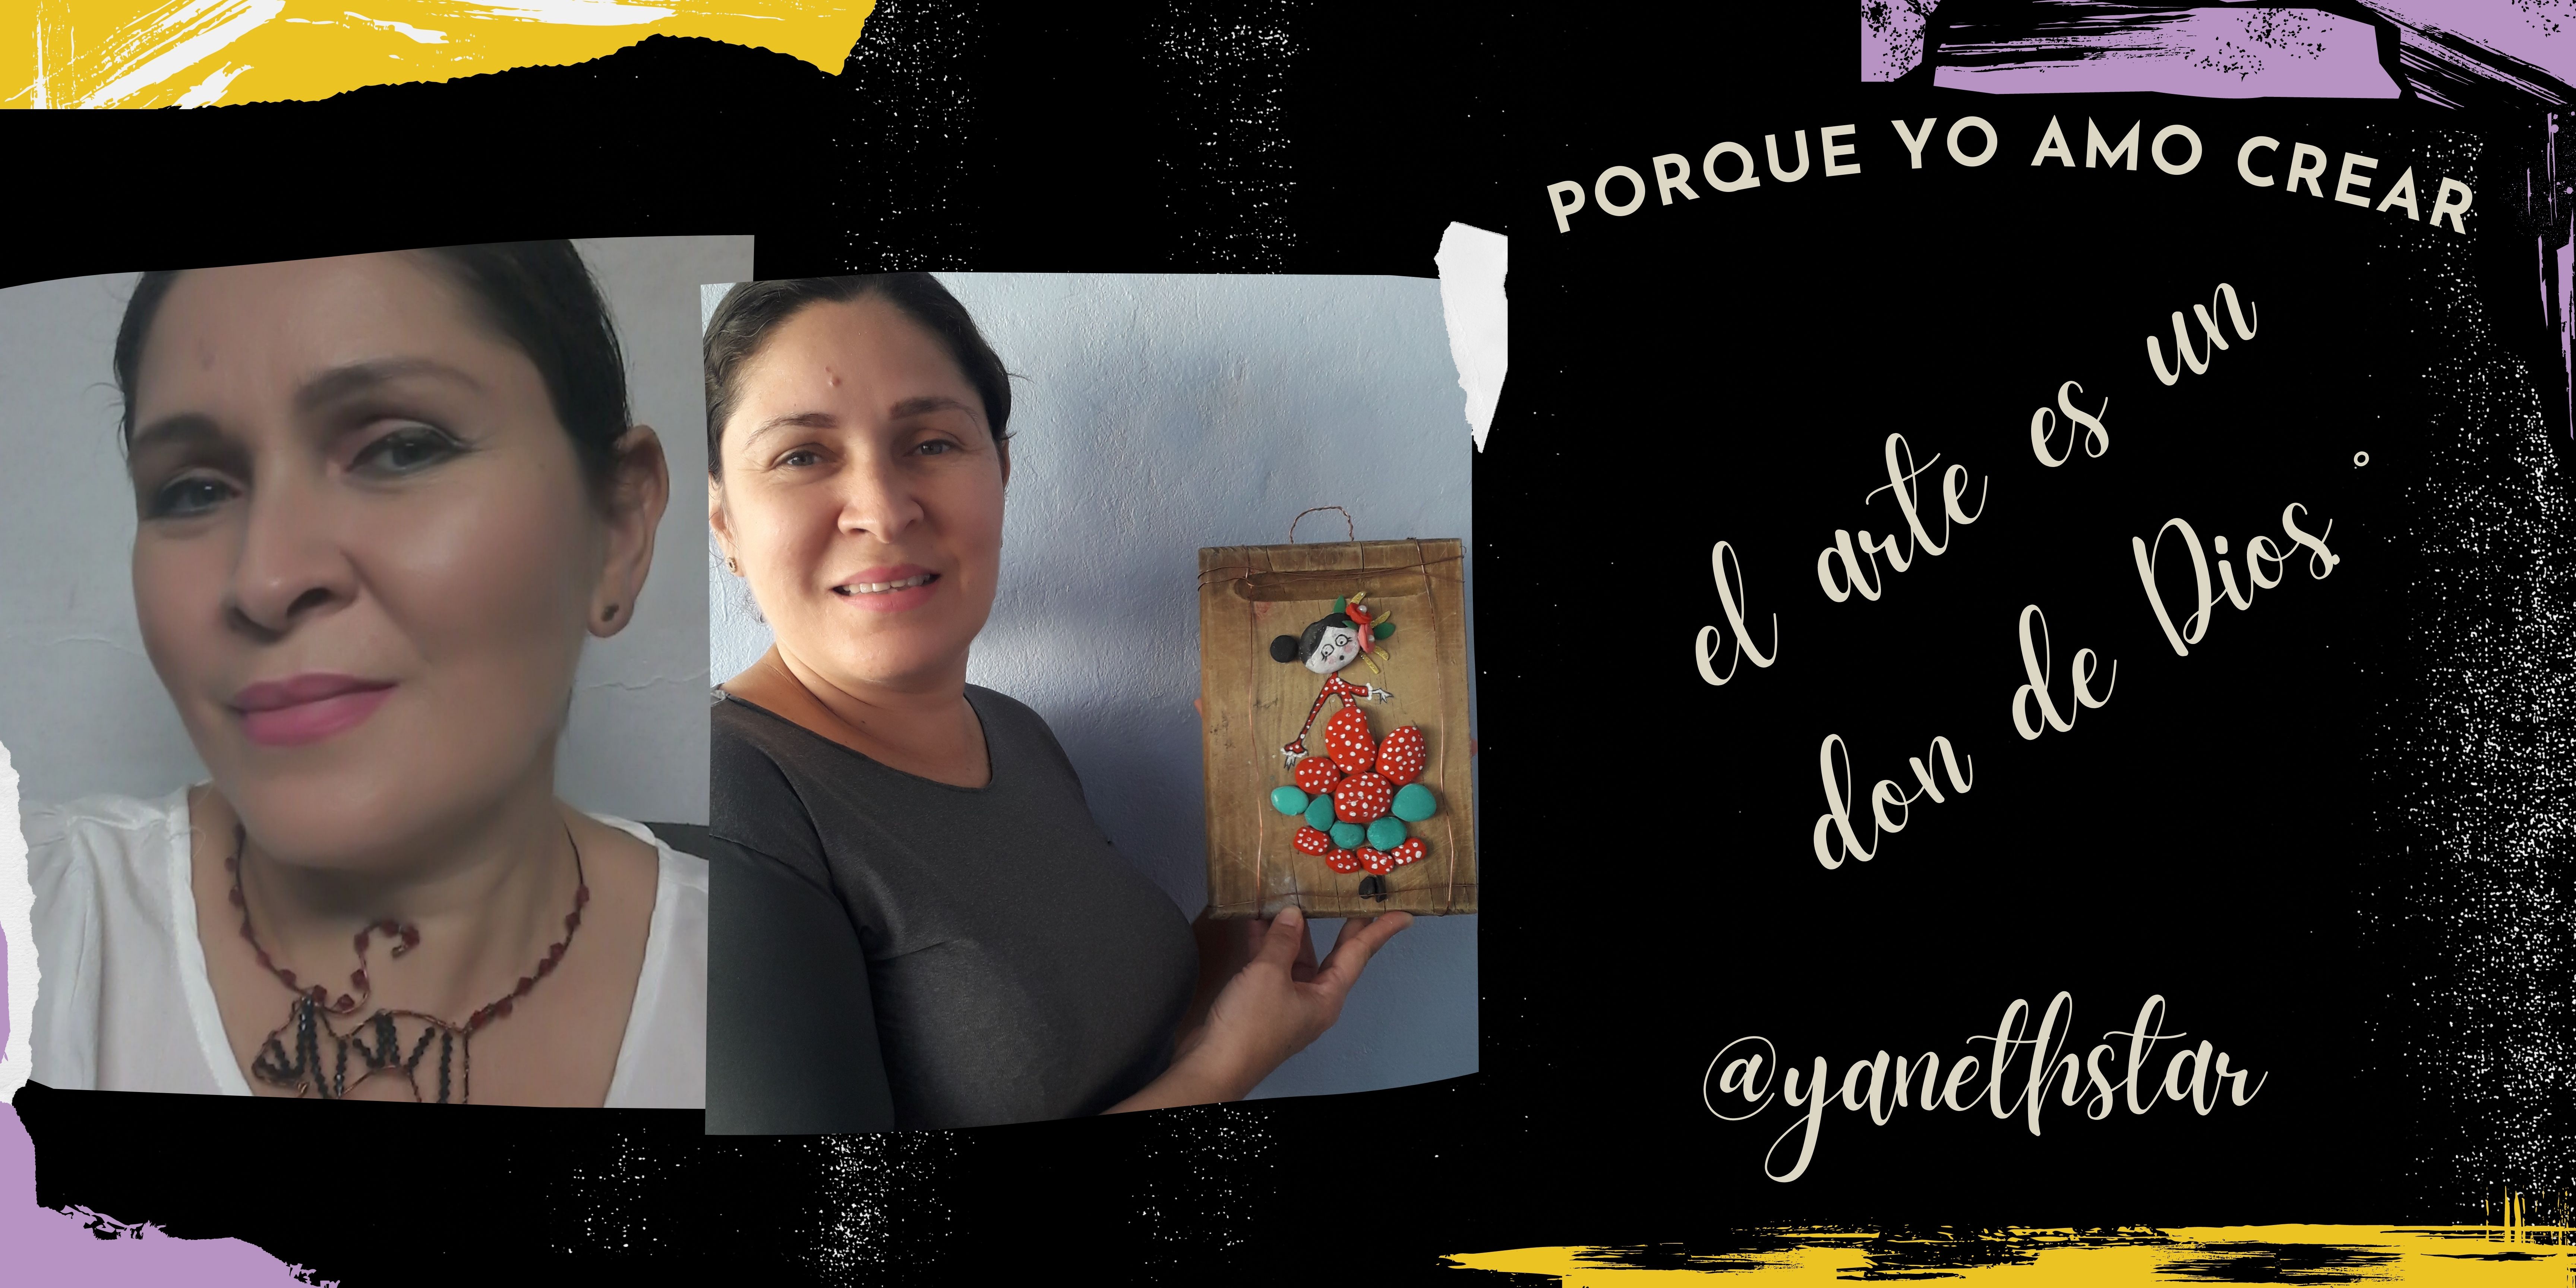
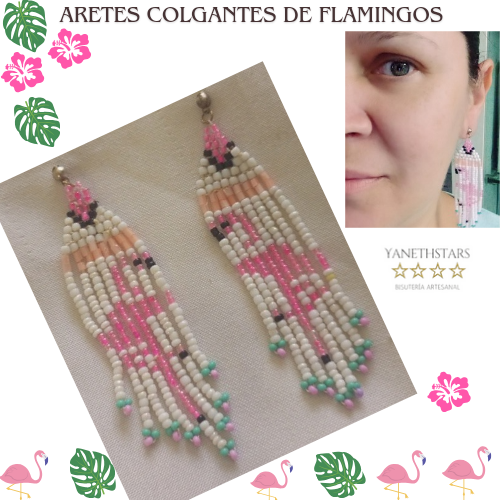
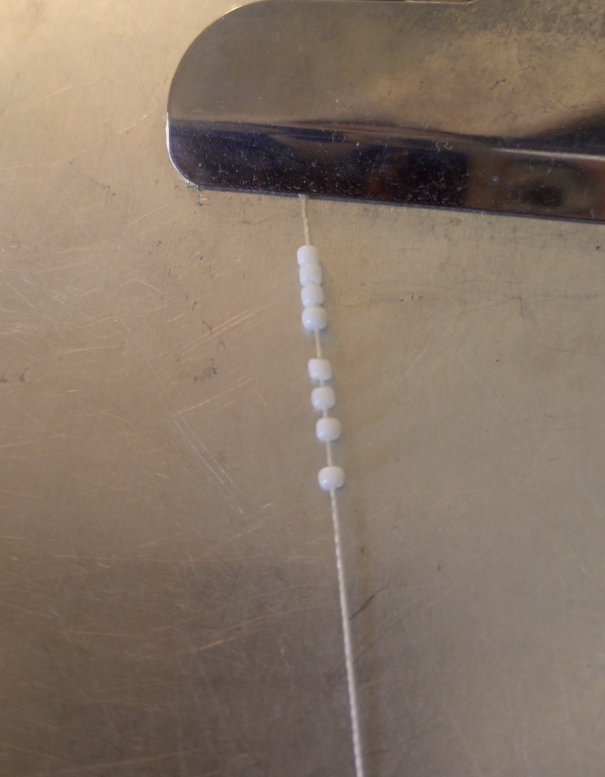
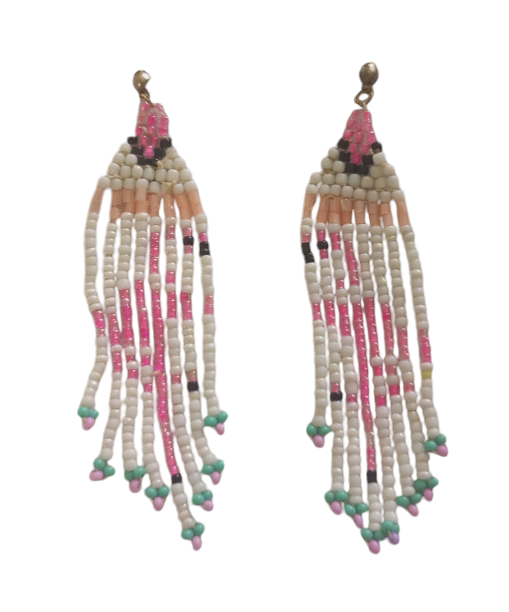
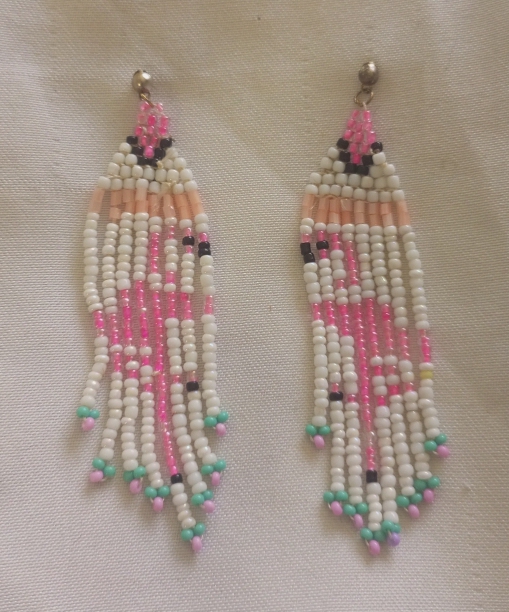
| Hola amigos creativos de nuestra linda comunidad @Jewelry,el día de hoy traigo estos. HERMOSOS Y TROPICALES ARETES DE CASCADAS DE FLAMINGOS, hechos en mostacillas. Los flamingos es uno de mis animalitos favoritos, ya que su color rosa es muy tierno, además que su figura es muy elegante y majestuosa. A continuación la lista de materiales y el procedimiento. | Hello creative friends of our beautiful community @Jewelry, today I bring these. **Beautiful and tropical flamingo waterfall earrings, made in beads. The flamingos is one of my favorite animals, because its pink color is very tender, plus its figure is very elegant and majestic. Here is the list of materials and the procedure. |

| Materiales: | Materials: |
|---|---|
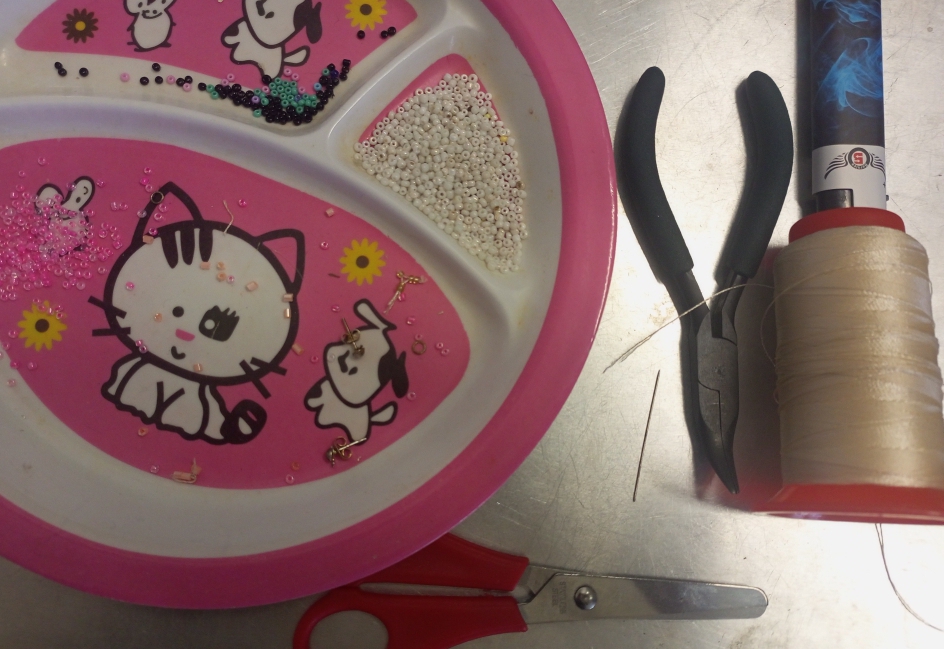
| Mostacillas: blancas, rosadas, negras, verdes y moradas, hilo de mostacilla color beige, canutillos rosados, aguja mostacillera, 2 aretes, 2 aros, tijeras, yesquero, pinzas de bisutería. | Beige beads: white, pink, black, black, green and purple, beige beads, pink beads, beading needle, 2 earrings, 2 earrings, scissors, tinder, jewelry tweezers, beige beads, beige beads, pink beads, beading needle, 2 earrings, 2 earrings, scissors, tinder, jewelry tweezers. |
| Instrucciones: | Instructions: |
|---|

| Paso 1 | Step 1 |
|---|---|
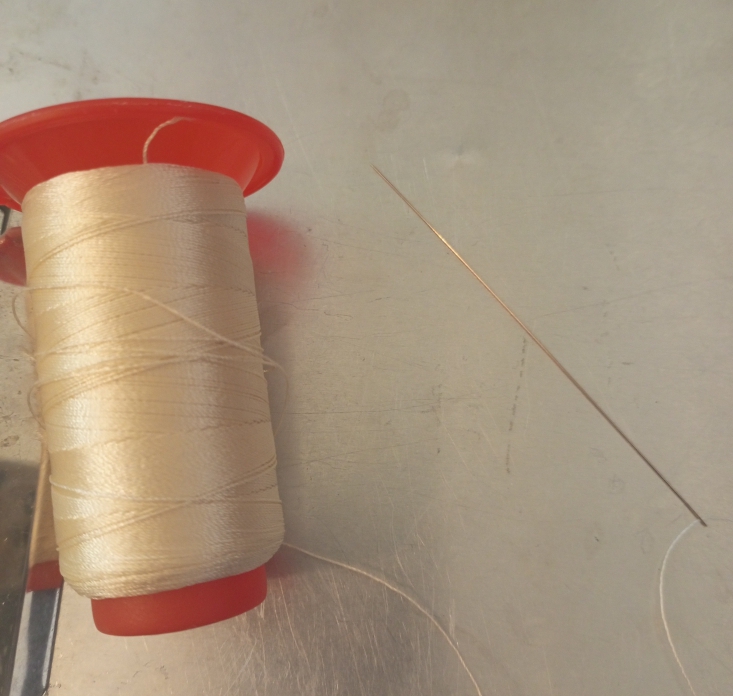
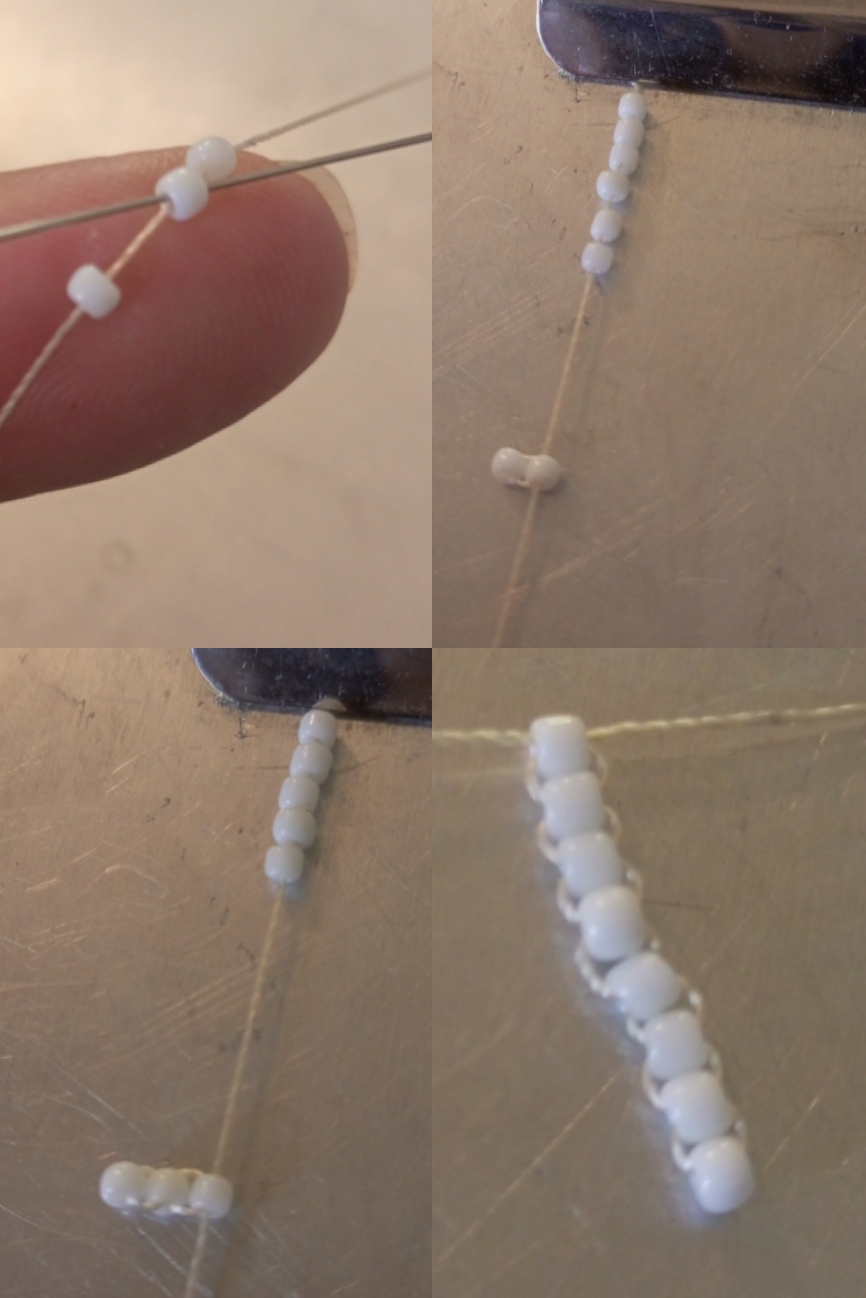
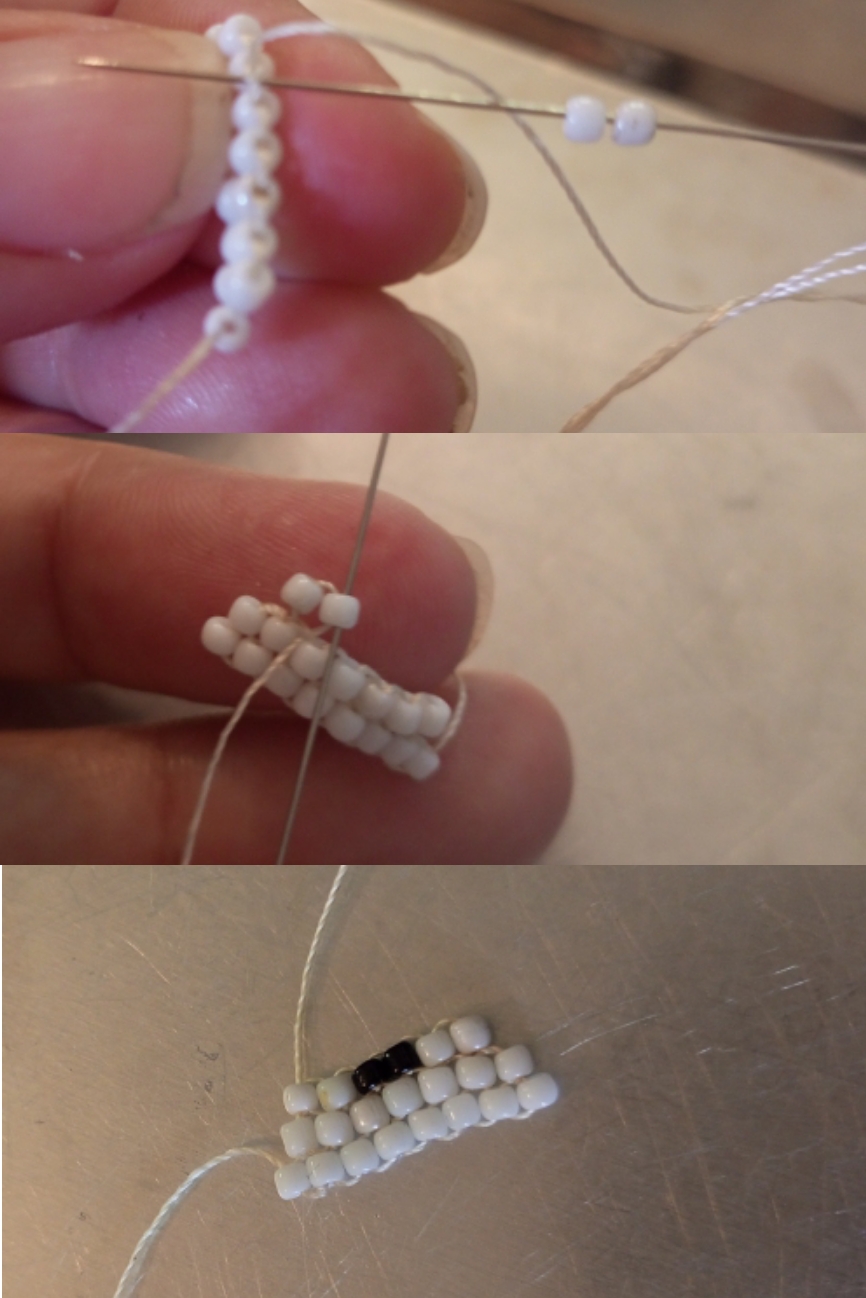
| Dispuse 1 metro de hilo para mostacillas beige y enhebre en la aguja para mostacilla. | I laid out 1 meter of beige beading thread and threaded it on the beading needle. |
| Paso 2 | Step 2 |
|---|---|
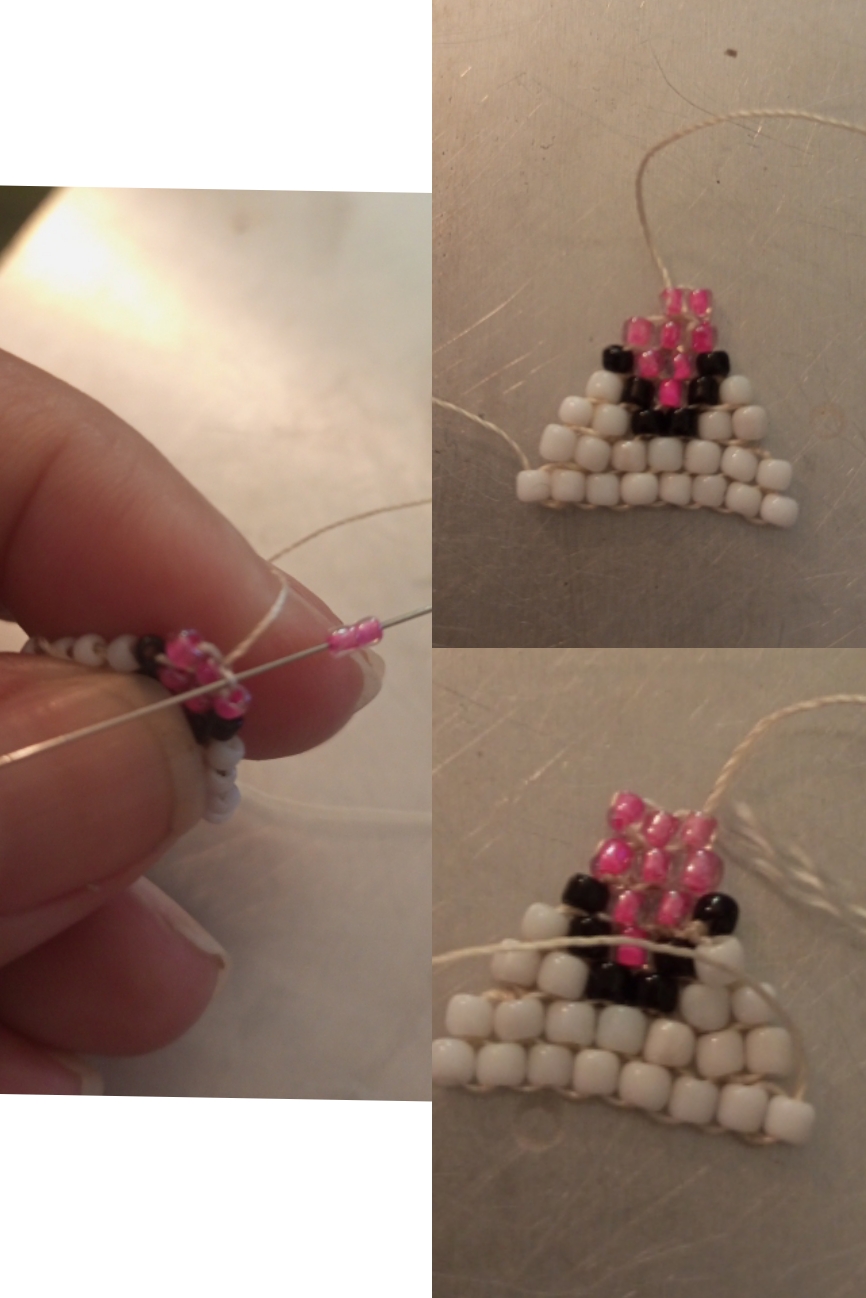
| Introduje 8 mostacillas en la aguja color blanco que las utilizaré para construir la fila o columna principal, lleve las mostacillas a la mitad del hilo y la presione con el gancho de una carpeta para poder construir con tranquilidad y no se salgan las mostacillas. | I introduced 8 beads in the white needle that I will use to build the main row or column, take the beads to the middle of the thread and press it with the hook of a folder to be able to build with tranquility and not to leave the beads. |
| Paso 3 | Step 3 |
|---|---|
| Para comenzar a construir la columna principal Introduje la aguja en la segunda mostacilla hacia abajo, como observamos en la imagen tenemos las dos primeras mostacillas de la primera columna, y seguimos construyendo introduciendo la aguja de a una mostacilla, hasta construir una columna de 8 mostacilla. | To start building the main column I introduced the needle in the second bead downwards, as we can see in the image we have the first two beads of the first column, and we continue building introducing the needle one bead at a time, until building a column of 8 beads. |
| Paso 4 | Step 4 |
|---|---|
| Para la siguiente fila haremos una reducción para eso llevamos la aguja hacia la mostacilla de abajo, volteamos la fila y seguimos construyendo. Siempre iniciamos cada fila con dos mostacillas y luego seguimos de a una mostacilla. | For the next row we will make a reduction for that we bring the needle to the bottom bead, turn the row over and continue building. We always start each row with two beads and then continue with one bead at a time. |
| Paso 5 | Step 5 |
|---|---|
| La segunda fila es de 7 mostaclllas. | The second row is a 7-mustard row. |
| Paso 6 | Step 6 |
|---|---|
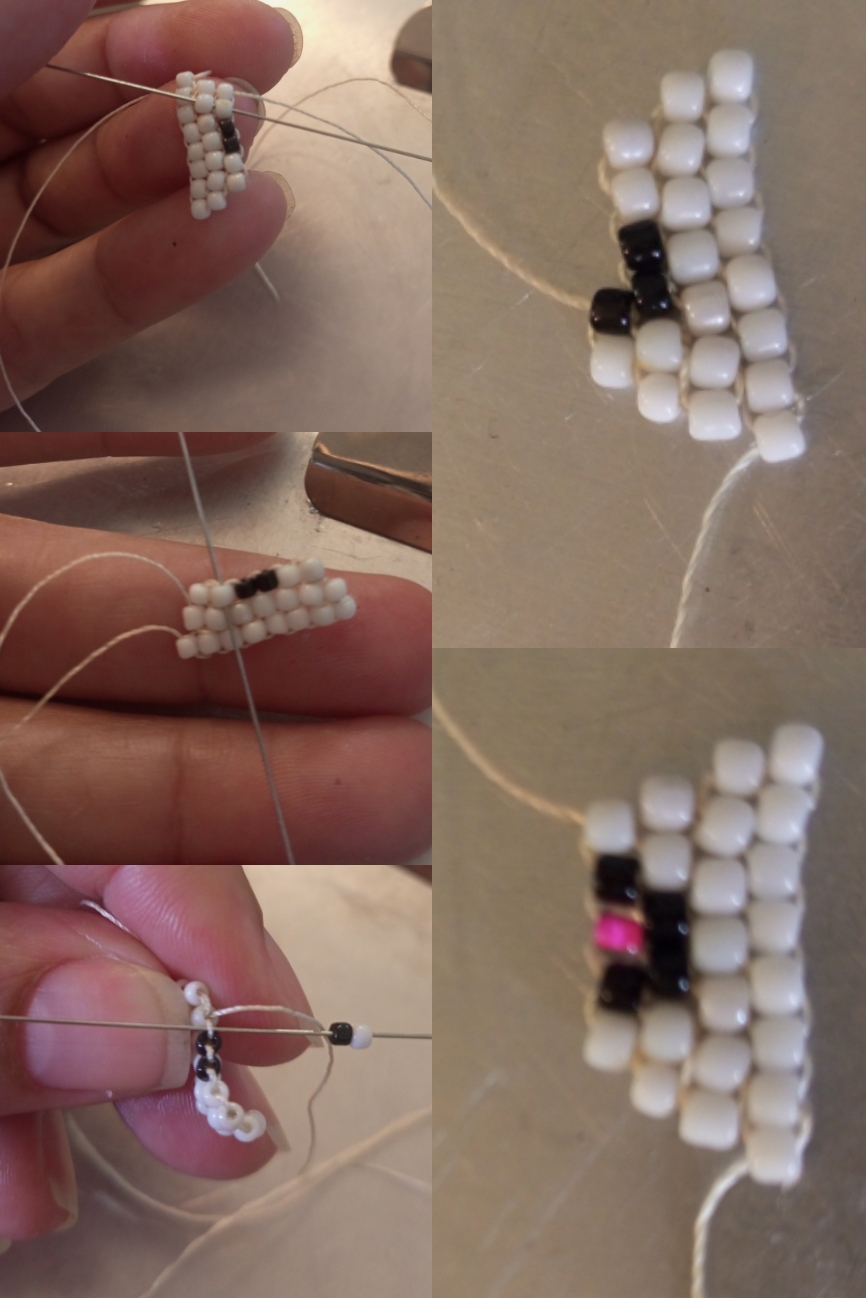
| La tercera columna igual comenzamos con dos mostacillas e introducimos la aguja en el primer puente de hilo para luego sacar la aguja en la segunda mostacilla., hasta terminar de construir la tercera fila. | The third column is the same, we start with two beads and insert the needle in the first thread bridge and then pull out the needle in the second bead, until we finish building the third row. |

| Paso 7 | Step 7 |
|---|---|
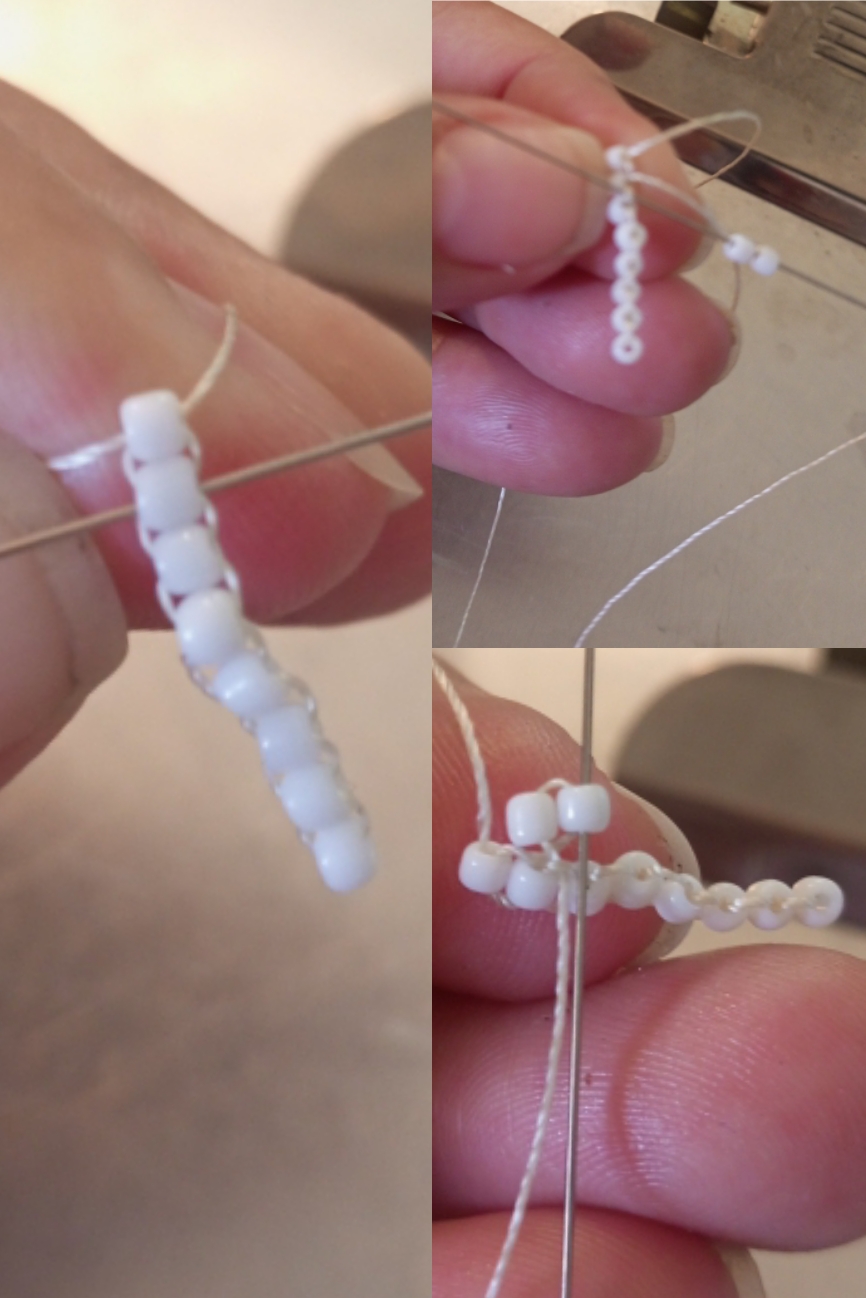
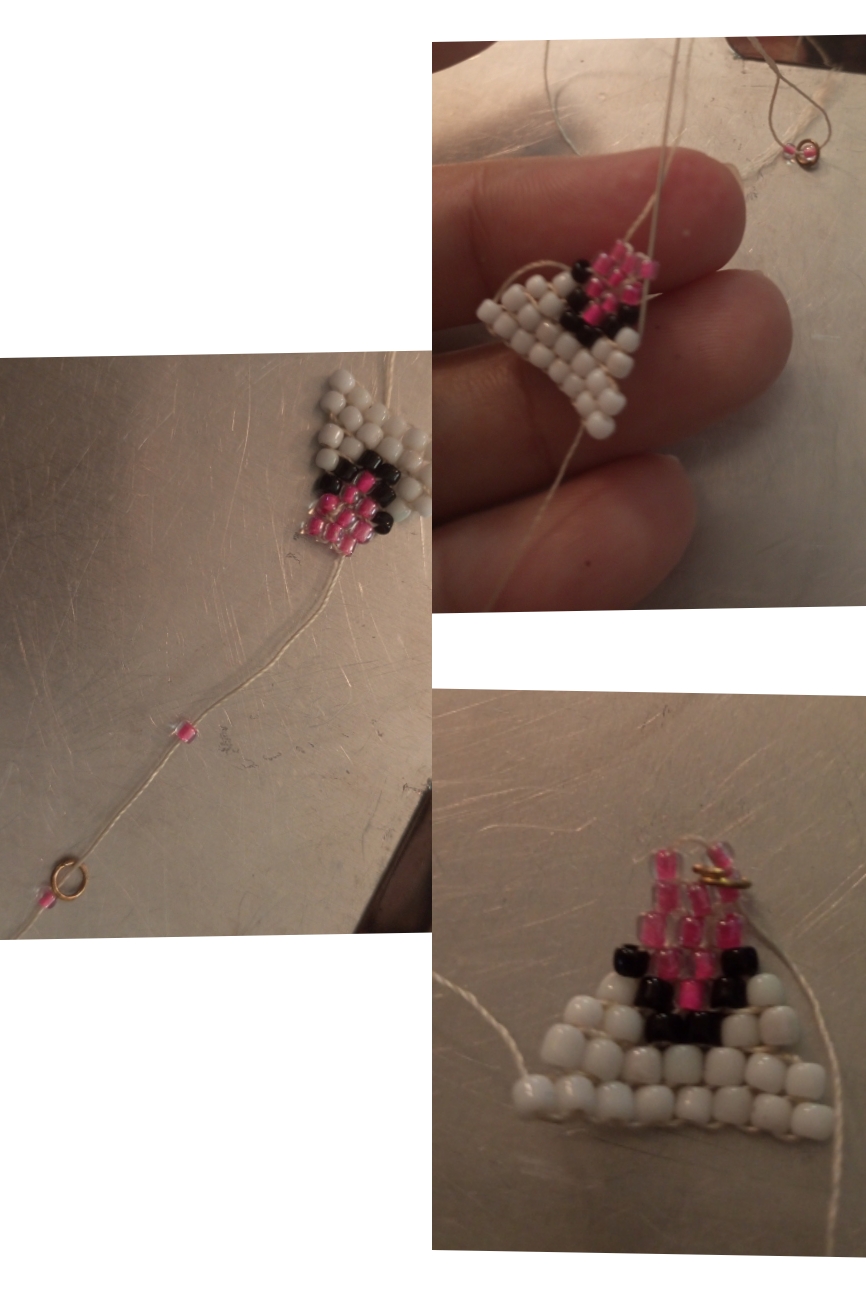
| La cuarta columna se inicia igual con una reducción según el orden de colores que observamos en la imagen. | The fourth column starts the same way with a reduction according to the order of colors shown in the image. |
| Paso 8 | Step 8 |
|---|---|
| La quinta columna es igual con reduccion por lo que debemos llevar el hilo hacia las mostacillas de abajo, para luego subir y posicionar en la segunda mostacillade de la cuarta columna ya que queremos que esta columna inicié desde allí, está fila es de 4 mostacilla. | The fifth column is the same with reduction so we must take the thread to the lower beads, then go up and position it in the second bead of the fourth column since we want this column to start from there, this row is of 4 beads. |
| Paso 9 | Step 9 |
|---|---|
| La sexta columna también es con reducción y es de 3 mostacillas en color rosado. | The sixth column is also with reduction and is made of 3 pink beads. |
| Paso 10 | Step 10 | |
|---|---|---|
| La septima columna es de 3 mostacillas sin reducciones. | The seventh column is 3 beads without reductions. |
| Paso 11 | Step 11 |
|---|---|
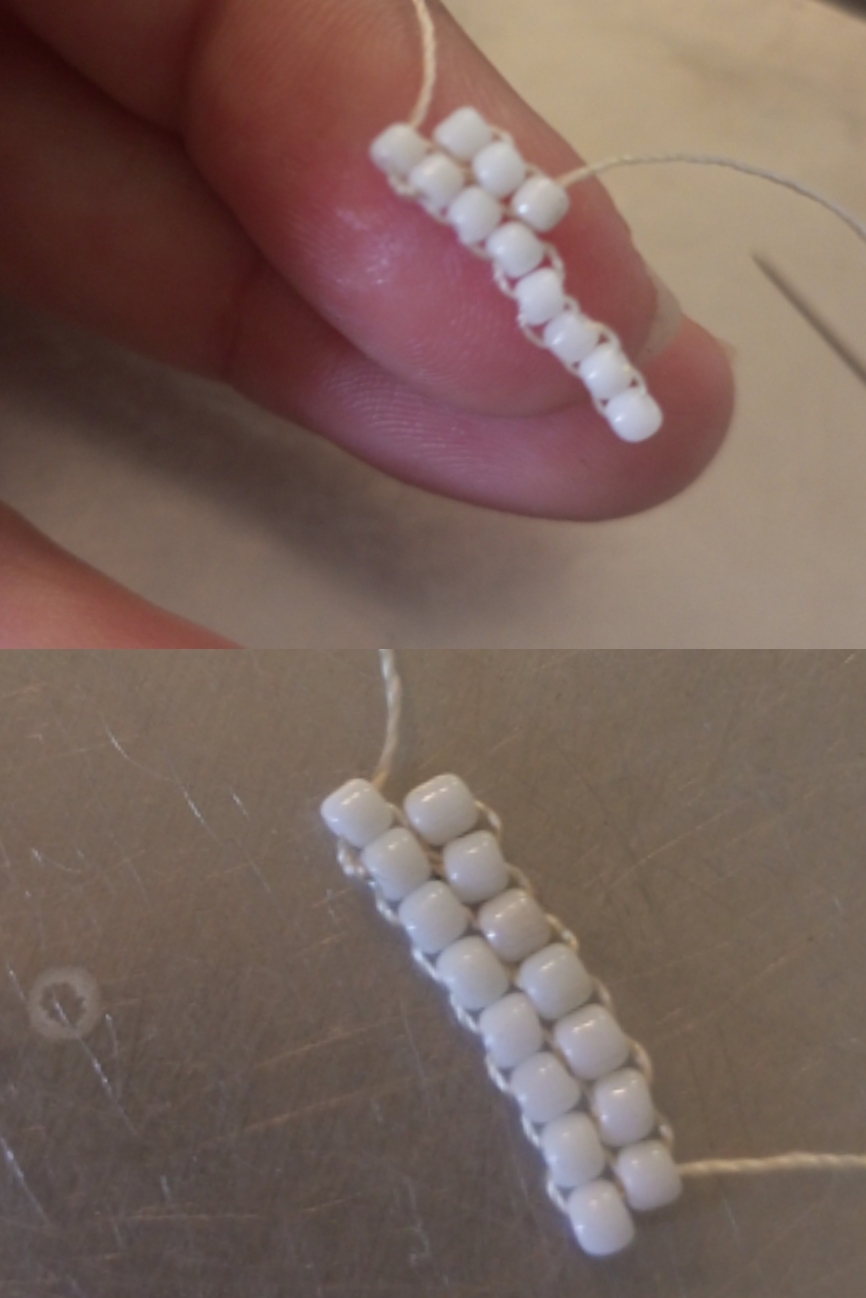
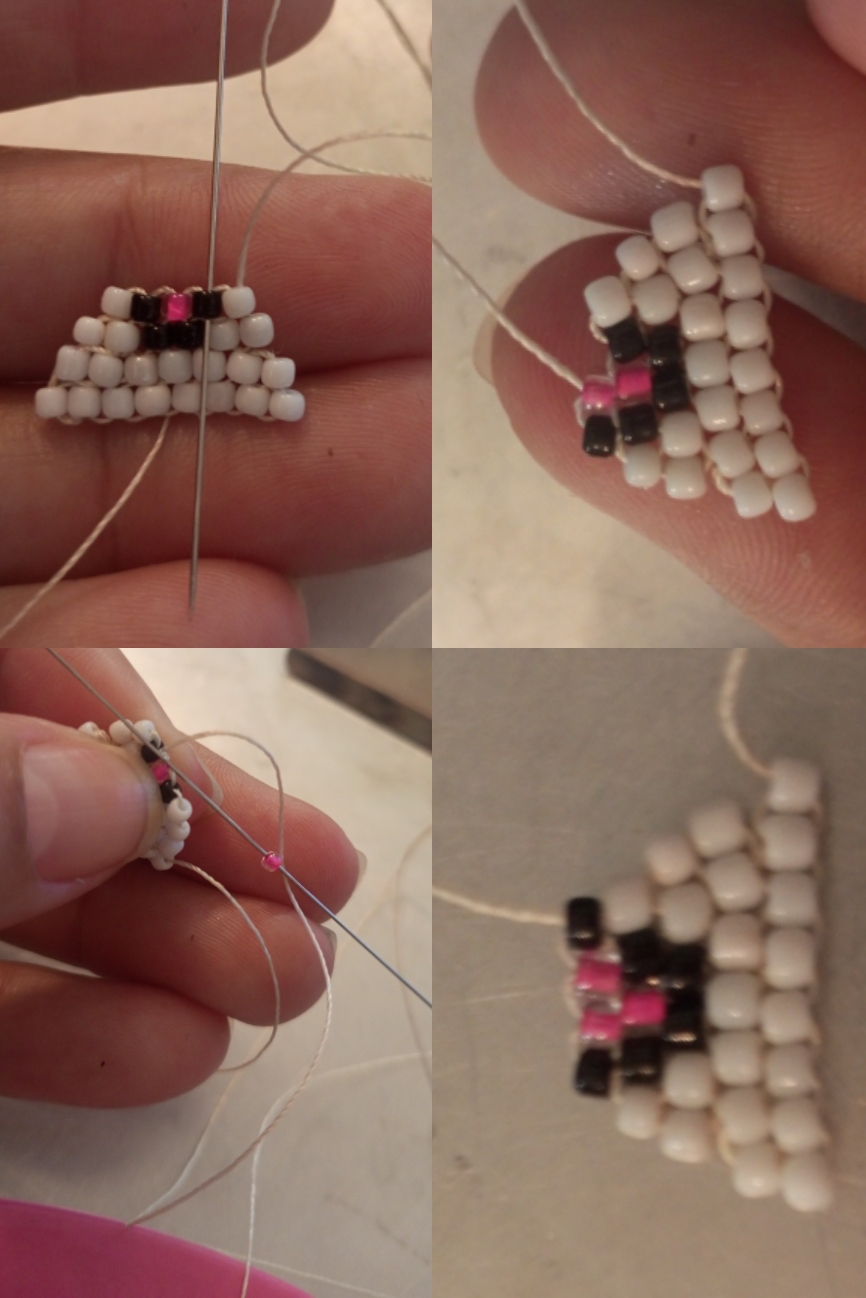
| En este paso introducimos 1 mostacilla rosada, la argolla y por último una mostacilla rosada e introducimos la aguja en la pirmera mostacilla de la septima columna. | In this step we introduce 1 pink bead, the ring and finally a pink bead and introduce the needle in the first bead of the seventh column. |
| Paso 12 | Step 12 |
|---|---|
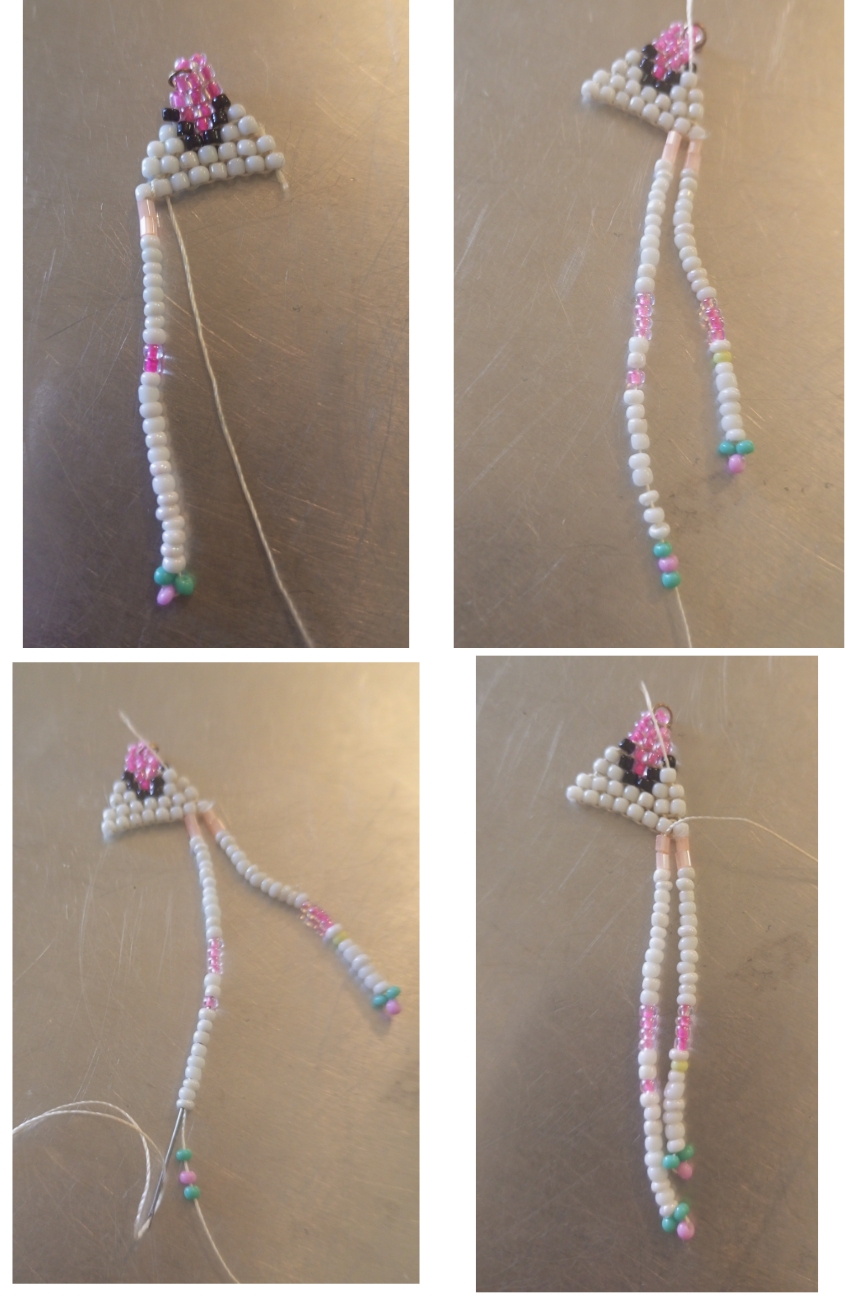
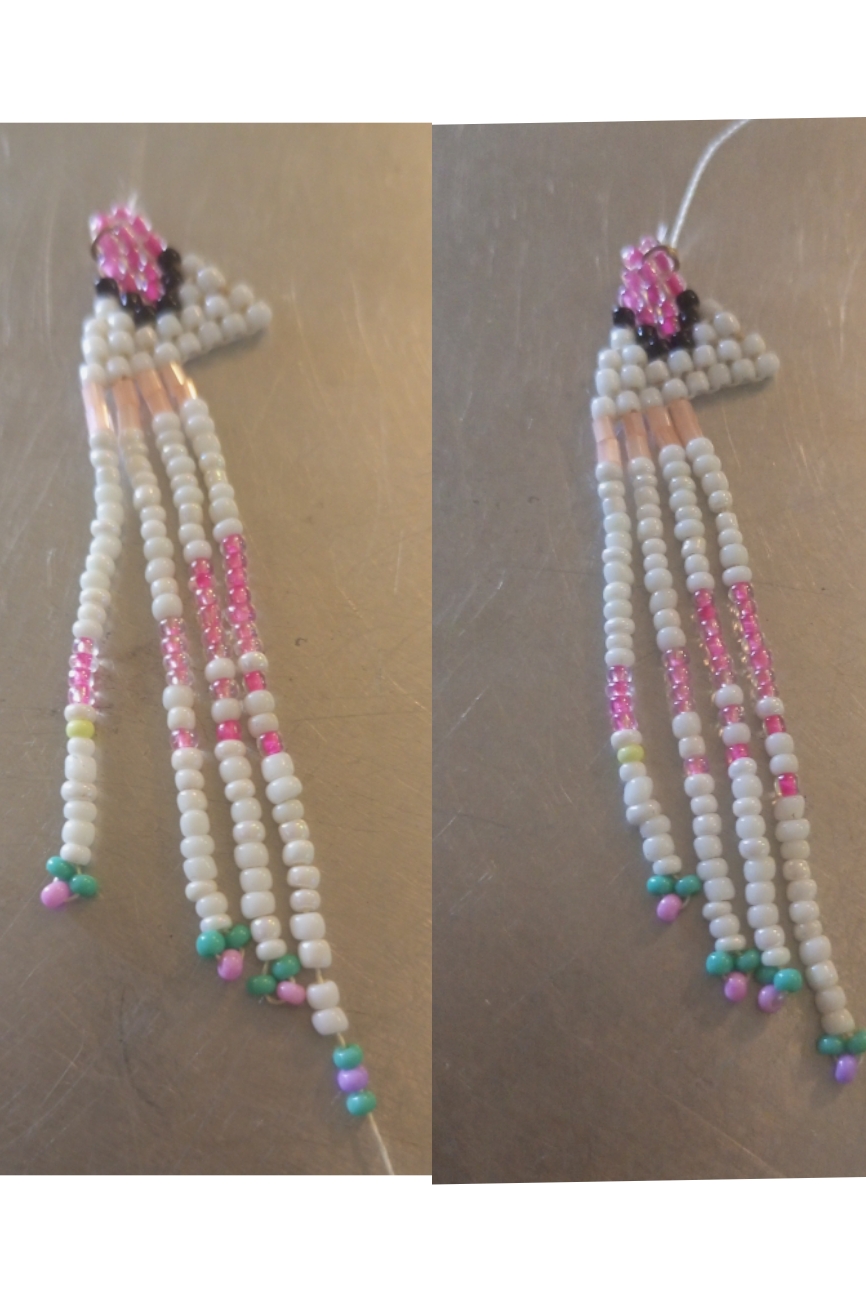
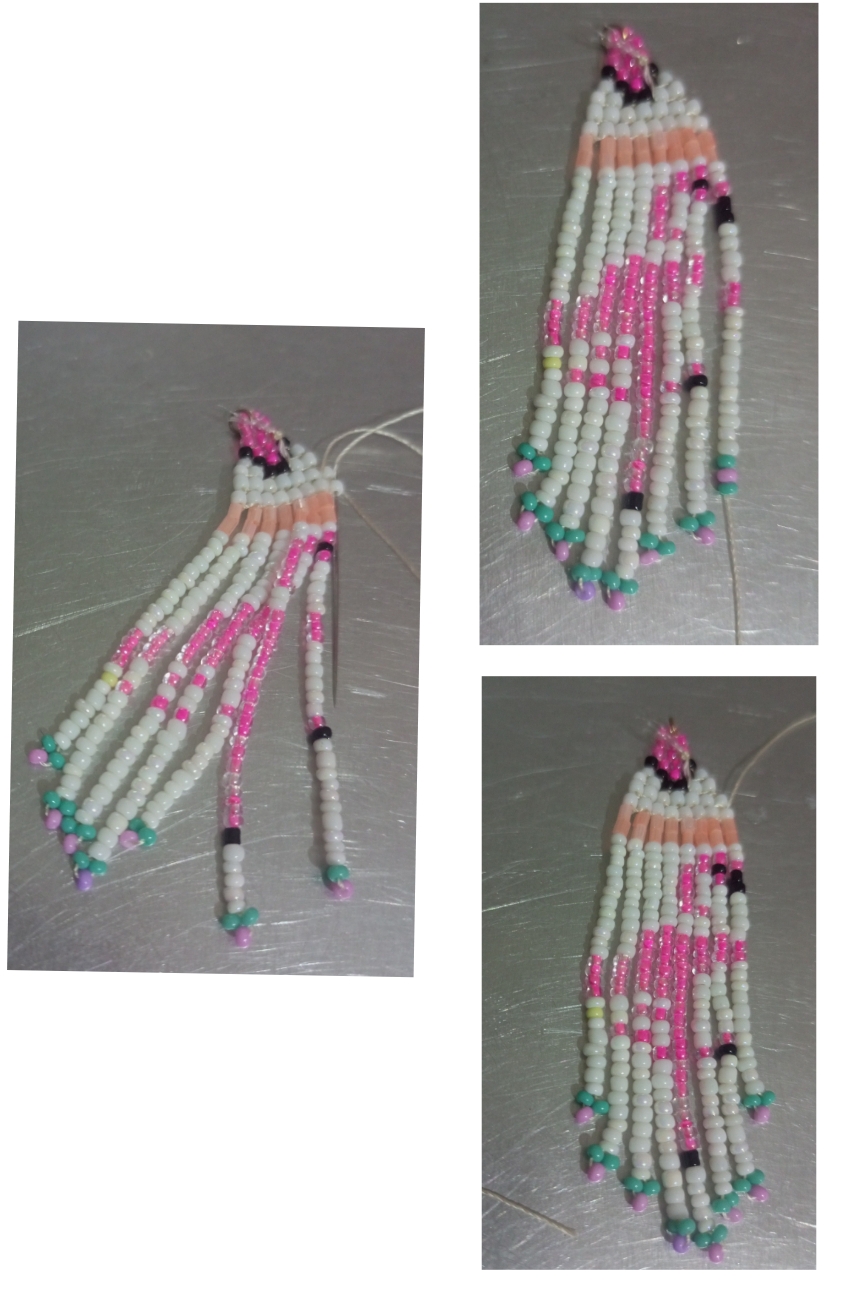
| Construiremos los flecos y en los flecos plasmaremos la silueta de los flamingos. Introduje las mostacillas según el orden de colores que demuestra la imagen. Introduje la aguja en el inicio de las mostacillas blancas para que quedé una punta de tres mostacillas y llevamos la aguja a la mostacilla de la columna principal. | We will build the bangs and in the bangs we will shape the silhouette of the flamingos. Iinserted the beads according to the order of colors shown in the picture. I introduced the needle in the beginning of the white beads so that there is a point of three beads and we take the needle to the bead of the main column. |

| Paso 13 | Step 13 |
|---|---|
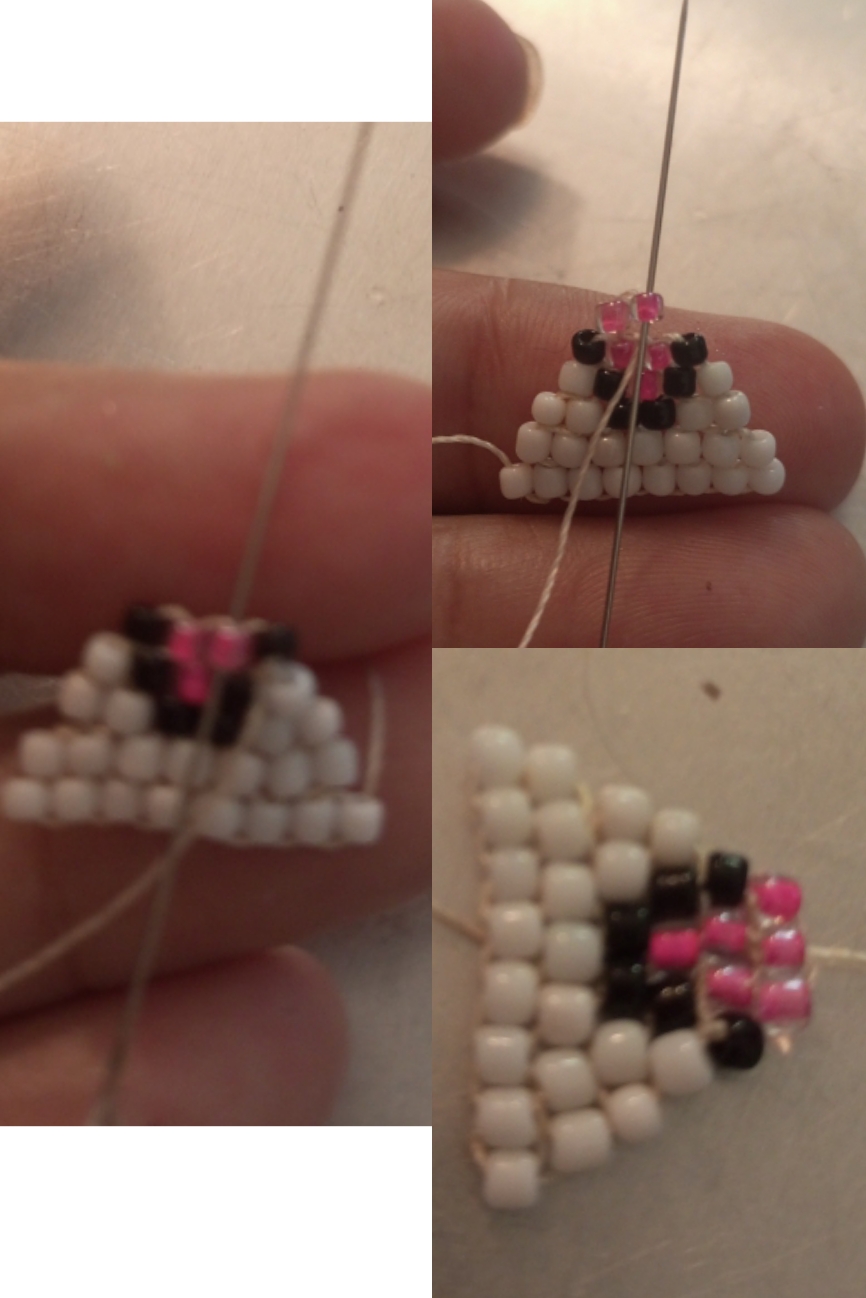
| En la imagen observamos el segundo fleco. | . |
| Paso 14 | Step 14 |
|---|---|
| Observamos el tercer fleco. | . |
| Paso 15 | Step 15 |
|---|---|
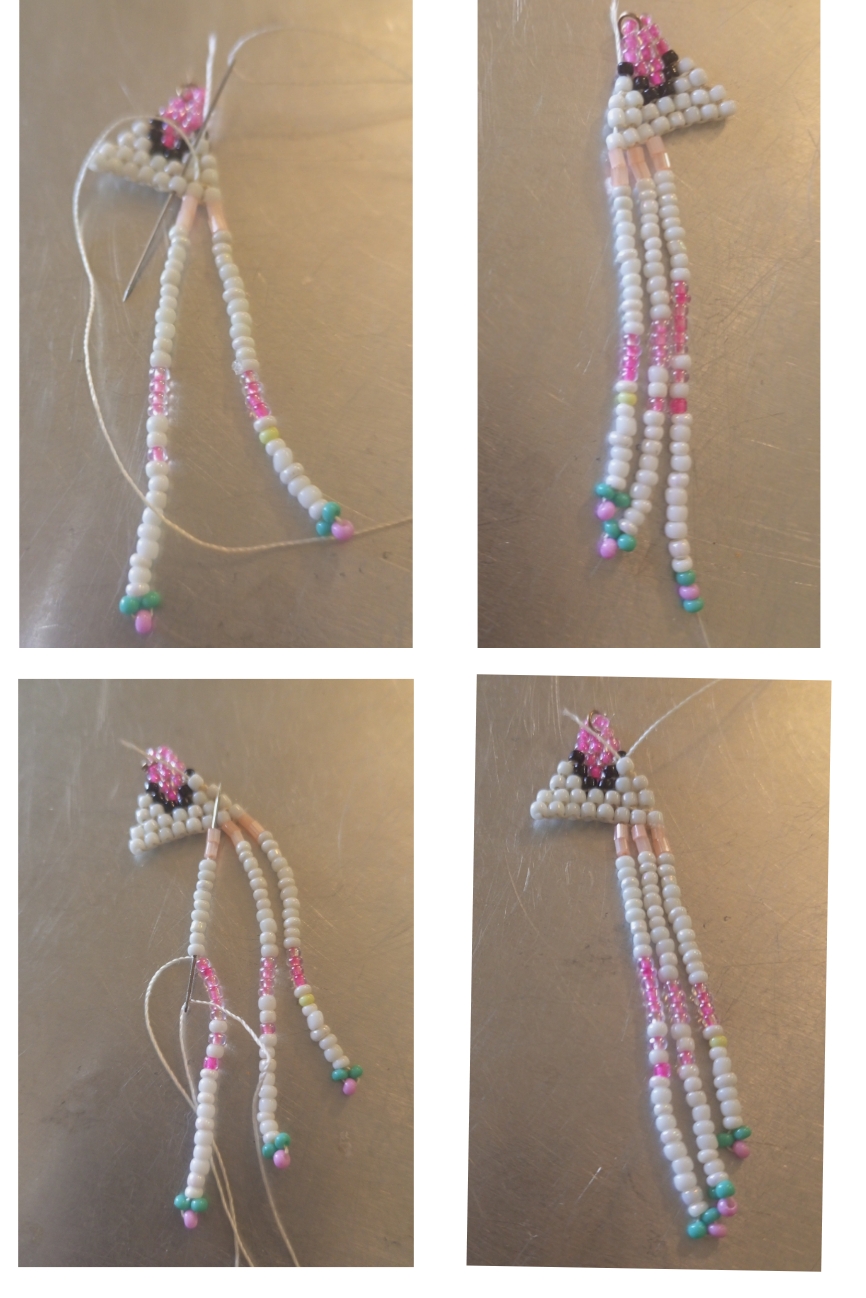
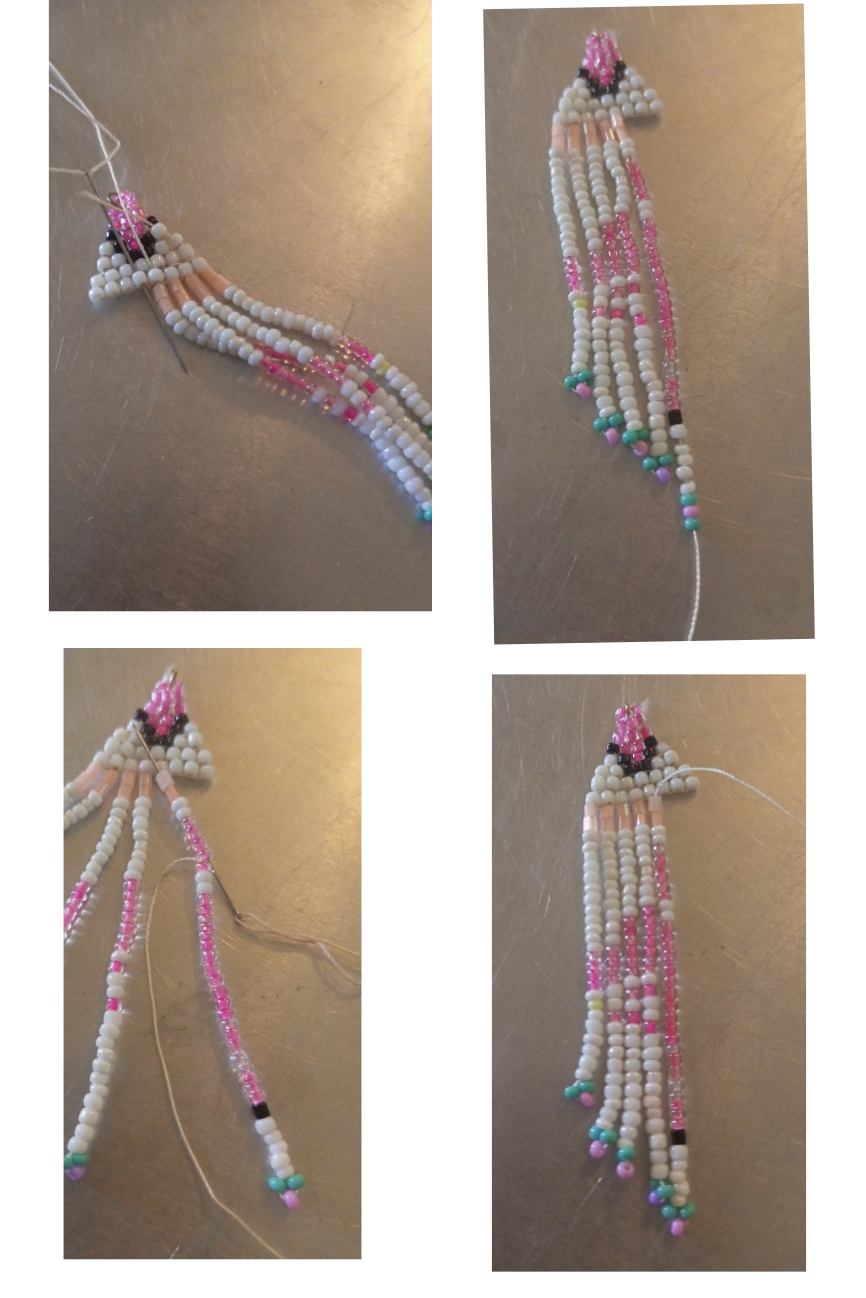
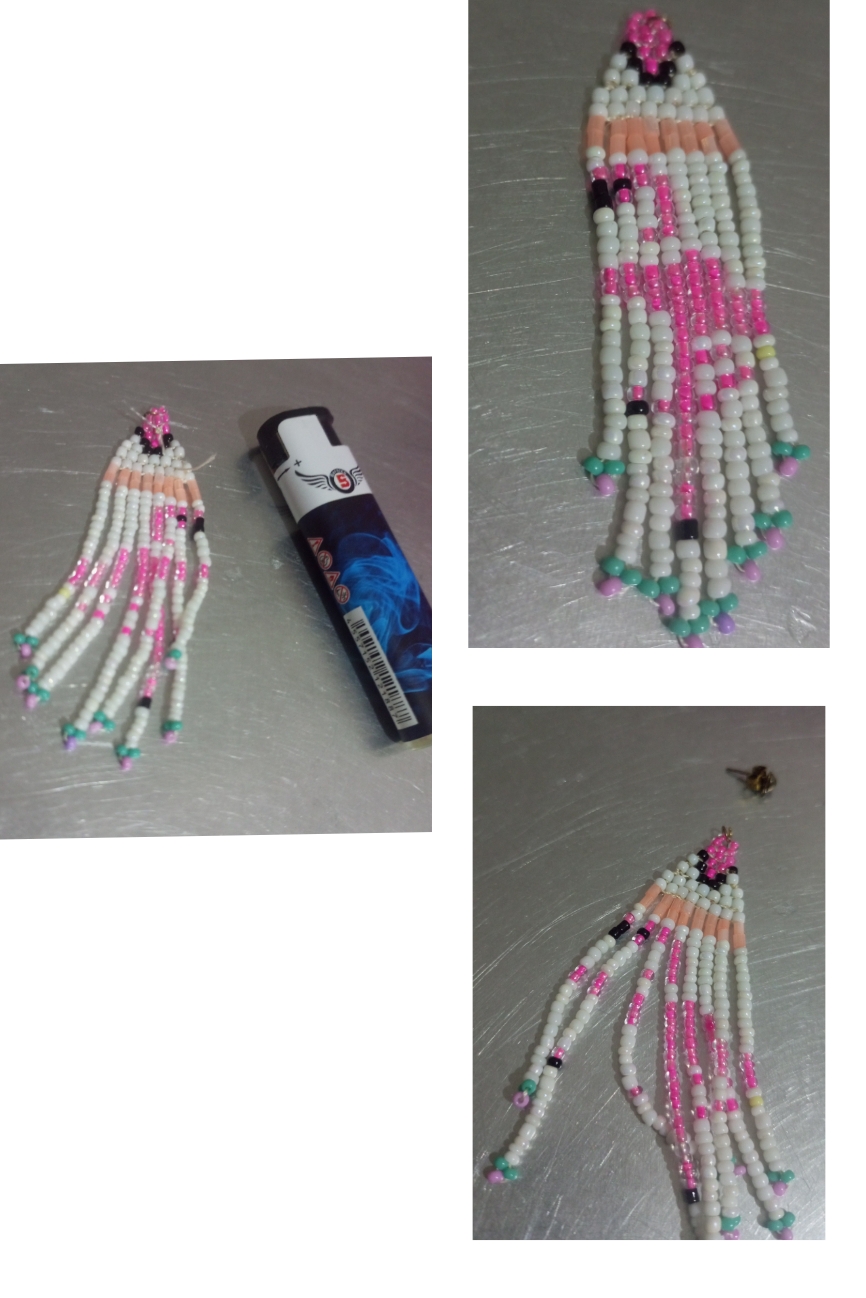
| En la imagen observamos el cuarto fleco. | In the image we can see the fourth fringe. |
| Paso 16 | Step 16 |
|---|---|
| En la imagen observamos el quinto fleco. | The image shows the fifth fringe. |
| Paso 17 | Step 17 |
|---|---|
| Sexto fleco. | Sixth fringe. |
| Paso 18 | Step 18 |
|---|---|
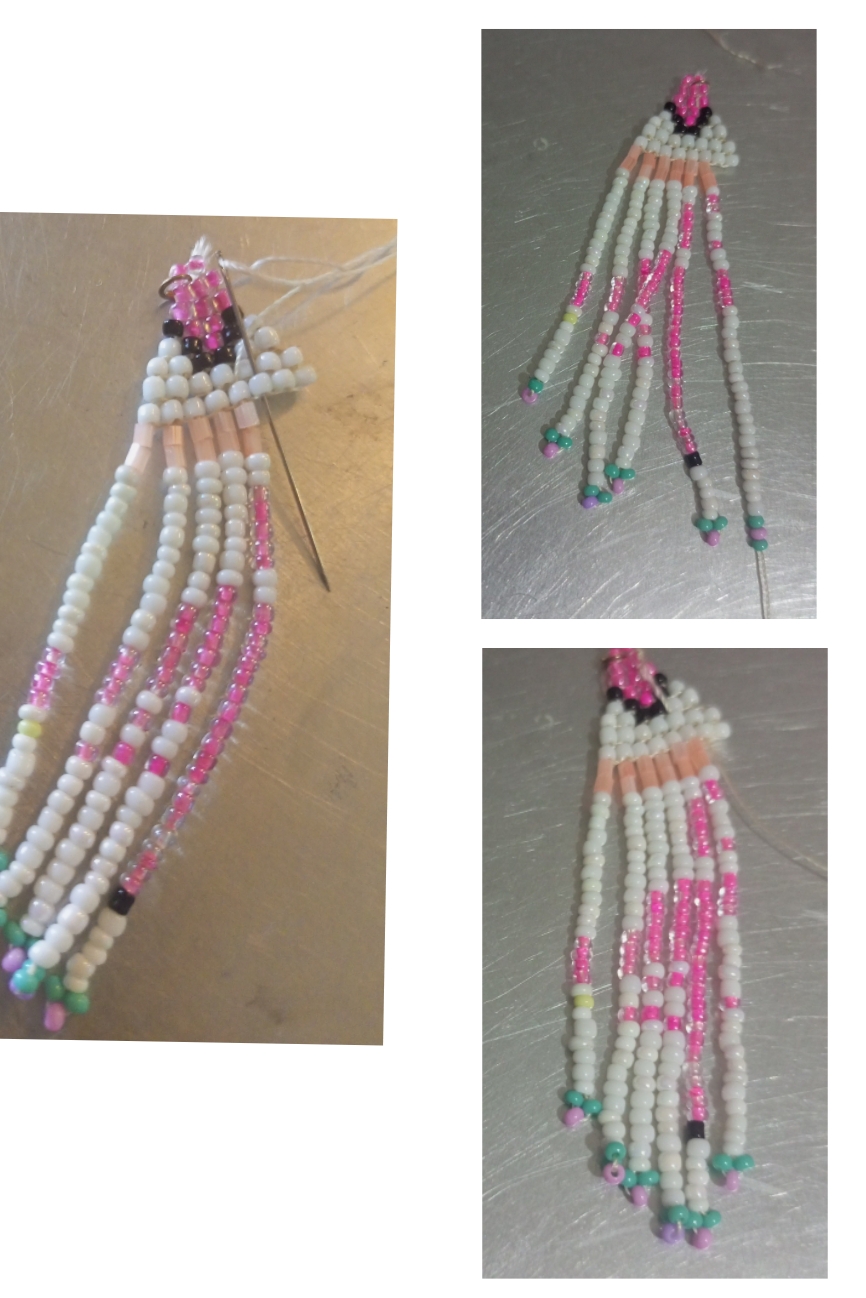
| Séptimo fleco. | Seventh fringe. |
| Paso 19 | Step 19 |
|---|---|
| Octavo fleco. | Eighth fringe. |
| Paso 20 | Step 20 |
|---|---|
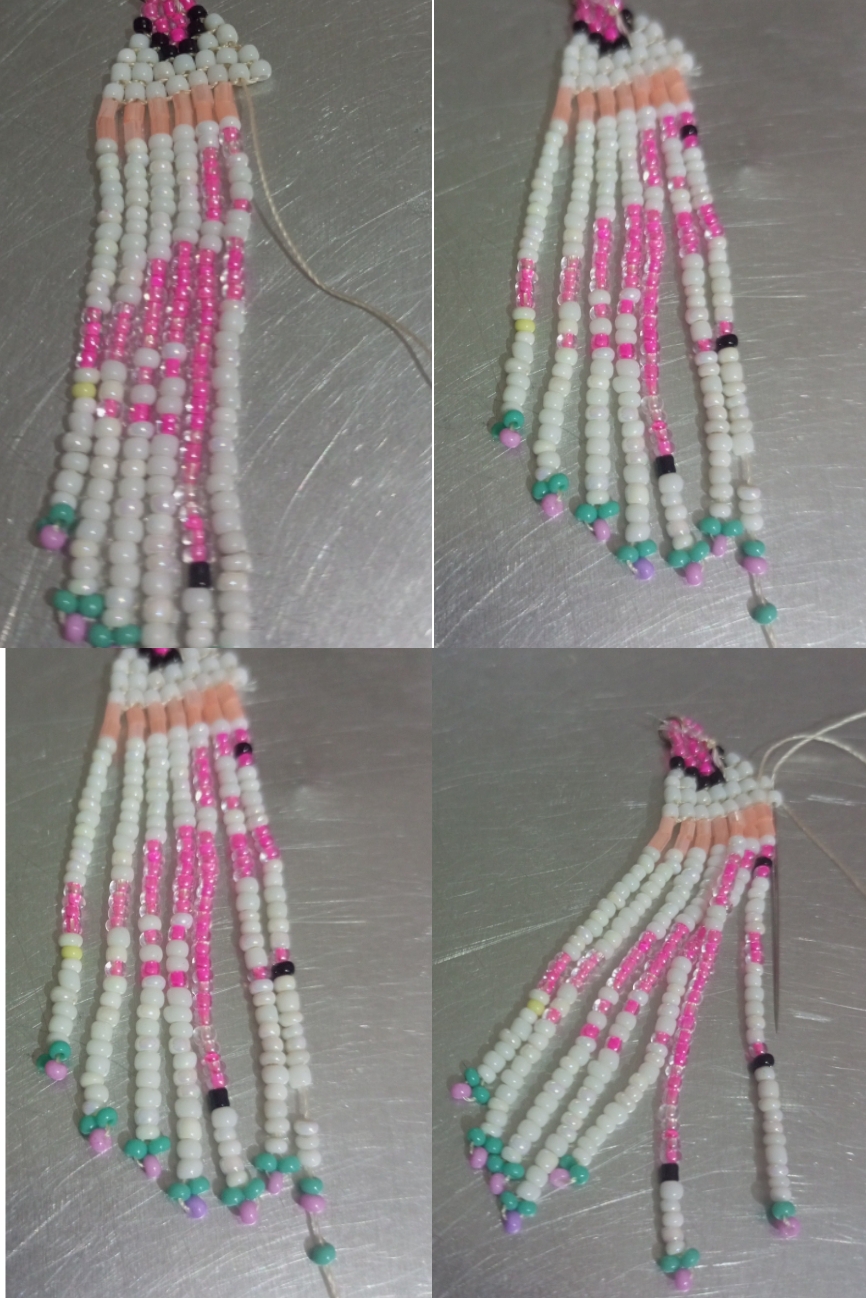
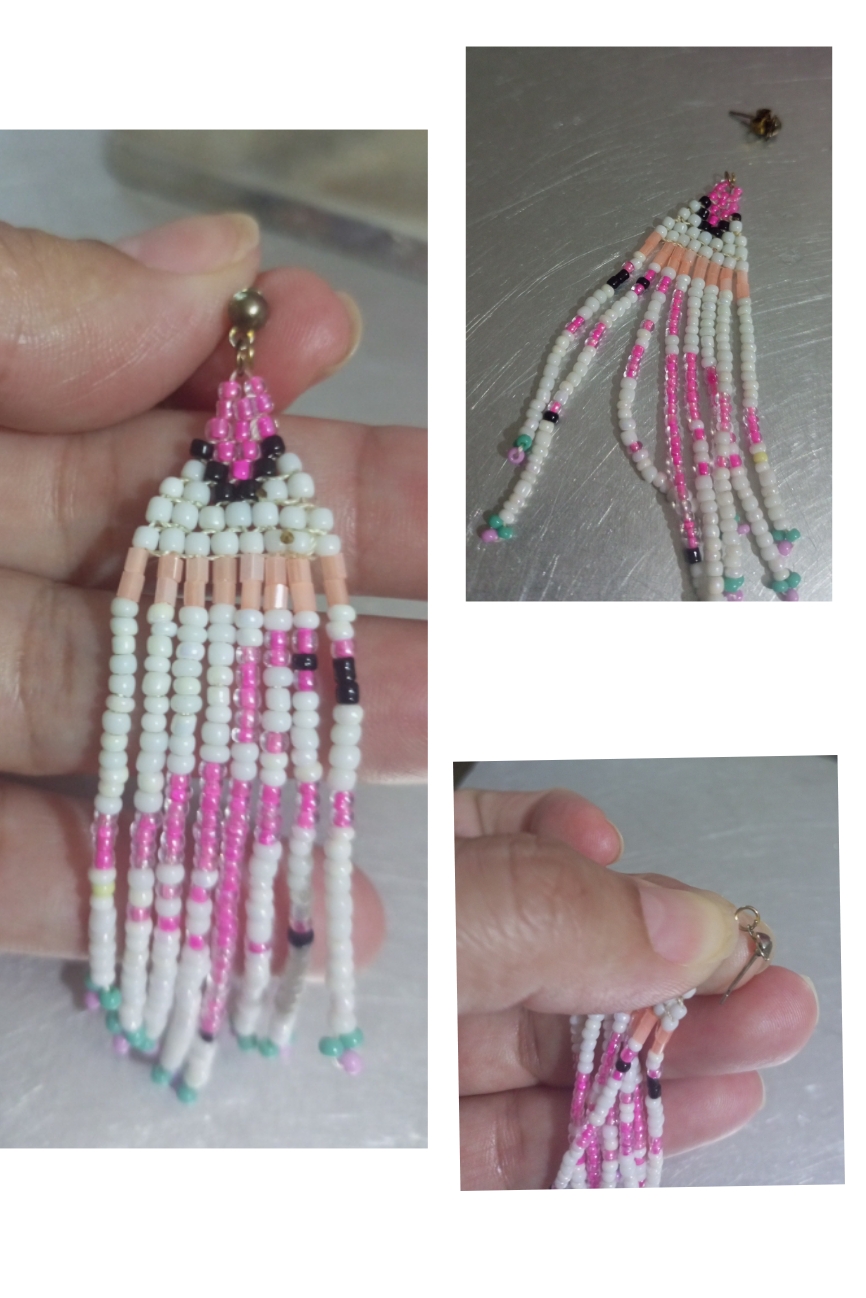
| Corté y quemé el hilo excedente. | I cut and burned the excess yarn. |
| Paso 21 | Step 21 |
|---|---|
| Abrí la argolla, me ayude con las pinzas e introduje el arete. | I opened the ring, helped myself with the tweezers and inserted the earring. |
| Paso 22 | Step 22 |
|---|---|
| Para el otro arete seguí el mismo procedimiento. | For the other earring I followed the same procedure. |
| Despedida | Farewell |
|---|---|
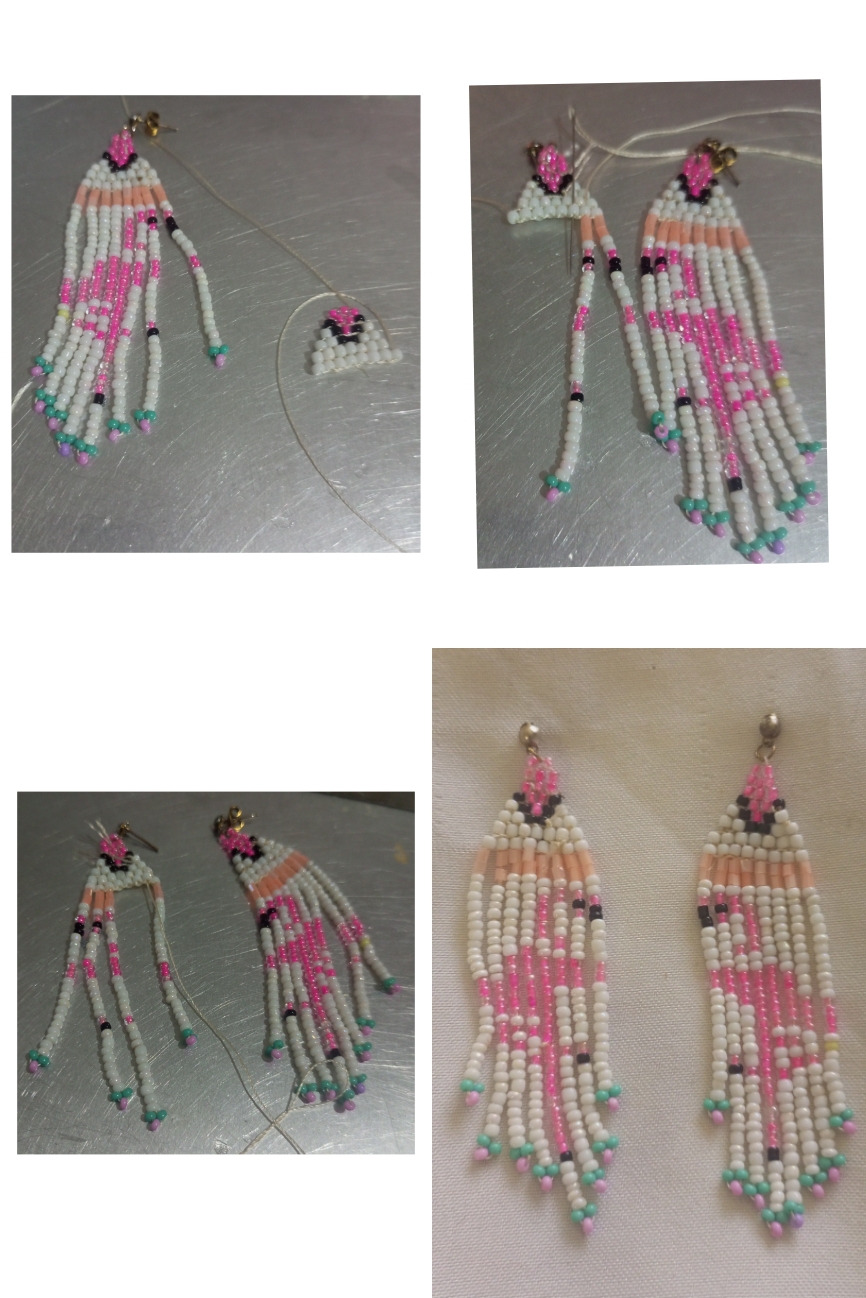
| Y esté es mi post del día de hoy HERMOSOS Y TROPICALES ARETES DE CASCADAS DE FLAMINGOS. Espero que hayan disfrutado mi post, un trabajo hecho con mucho amor, me despido y espero disfruten mi post. | And this is my post for today BEAUTIFUL AND TROPICAL FLAMINGO WATERFALL EARRINGS. I hope you enjoyed my post, a work made with love, I say goodbye and I hope you enjoy my post. |

| Créditos | Credits |
|---|---|
| Traductor: www.DeepL.com/Translator (free version).Las fotos fueron tomadas con mi Celular Tecno Sport 7T. Foto de portada editada con Canva y PhotoRoom. Banner:https://images.app.goo.gl/5N3pujMb9u2AePz87. | Translator: www.DeepL.com/Translator (free version). The photos were taken with my Tecno Sport 7T cell phone. Cover photo edited es Canva and PhotoRoom. Banner:https://images.app.goo.gl/5N3pujMb9u2AePz87. |