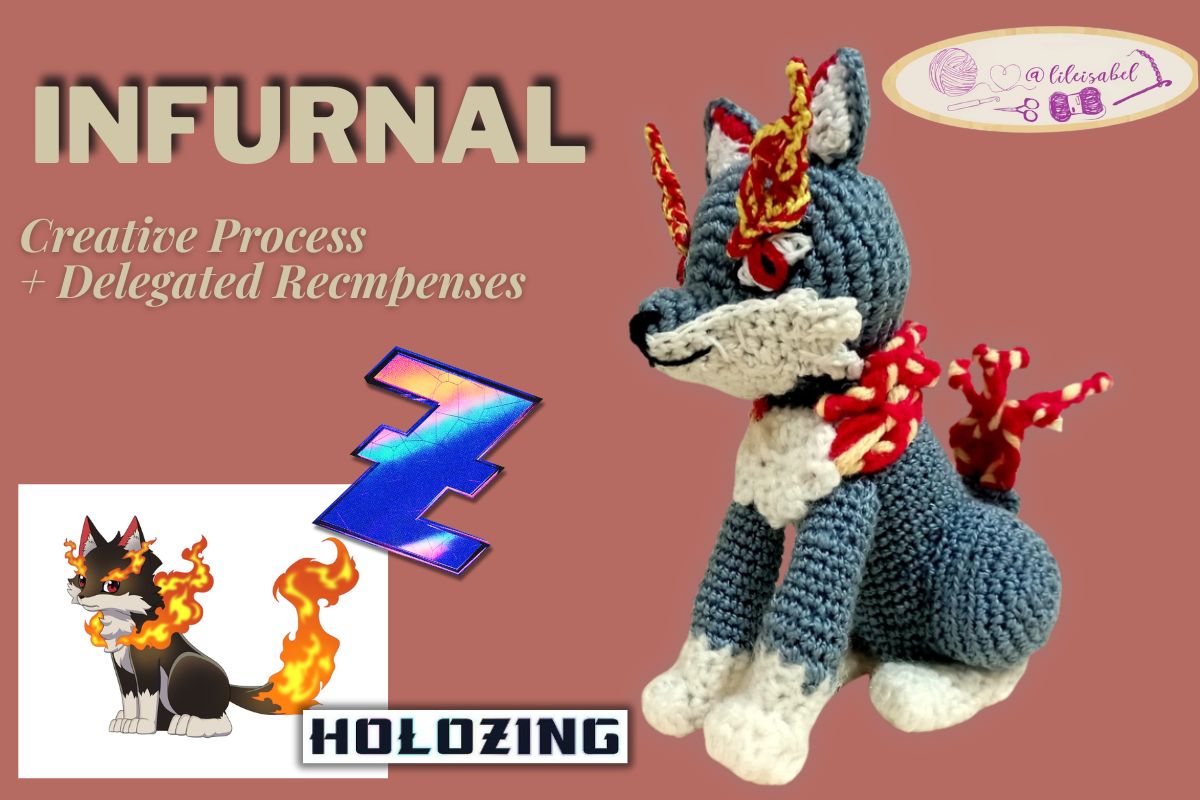
Hello everyone, my Holozing friends!
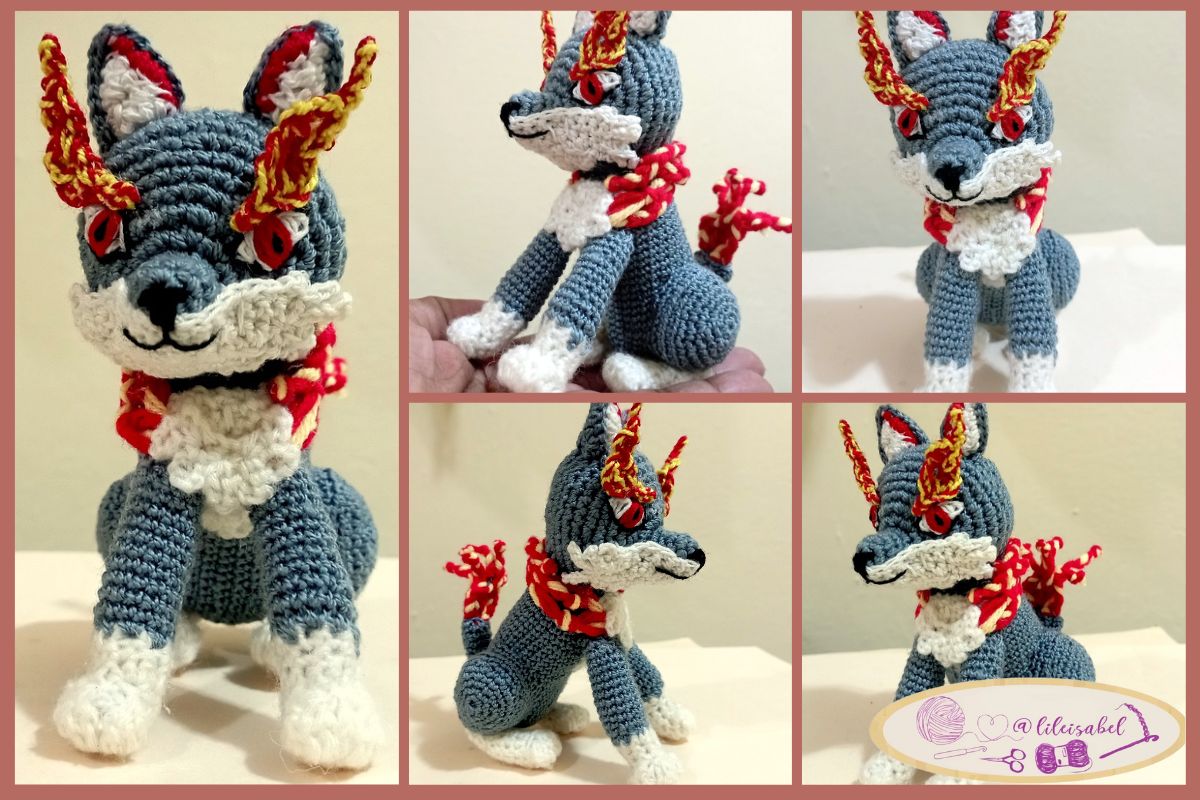
Today I want to share with you the status of my rewards, starting from the delegation made to this project and the creation of a new amigurumi. This time, I decided to evolve one of my favorite characters: Infurno, the fire wolf. I had already made an initial version of this character, but now I embark on its evolution.
¡Hola a todos, mis amigos de Holozing!
Hoy quiero compartir con ustedes el estado de mis recompensas, partiendo de la delegación realizada a este proyecto y la creación de un nuevo amigurumi. En esta ocasión, decidí evolucionar uno de mis personajes favoritos: Infurno, el lobo de fuego. Ya había realizado una versión inicial de este personaje, pero ahora me embarco en su evolución.

As in the previous version, I crocheted this amigurumi. I love this character because of the colorfulness that the fire brings to it. I always feel a challenge when trying to recreate the flames, and as I begin to knit the character, I am never clear on how I will manage to represent it. However, as I go along, the ideas start to flow and I can visualize the result.
Como en la versión anterior, tejí este amigurumi a ganchillo. Me encanta este personaje por el colorido que le aporta el fuego. Siempre siento un reto al intentar recrear las llamas, y cuando empiezo a tejer el personaje, nunca tengo claro cómo conseguiré representarlo. Sin embargo, a medida que avanzo, las ideas empiezan a fluir y puedo visualizar el resultado.
I always plan the whole process well before I start, since I don't follow a specific pattern and sometimes I have to undo what I have done several times. On this occasion, as in the previous one, the legs generate a lot of stress for me, because it is difficult for me to be completely satisfied with them. If I am not convinced, I redo them as many times as necessary.
Siempre planifico bien todo el proceso antes de empezar, ya que no sigo un patrón concreto y a veces tengo que deshacer lo hecho varias veces. En esta ocasión, como en la anterior, las piernas me generan mucho estrés, porque me resulta difícil estar completamente satisfecha con ellas. Si no me convencen, las rehago tantas veces como sea necesario.
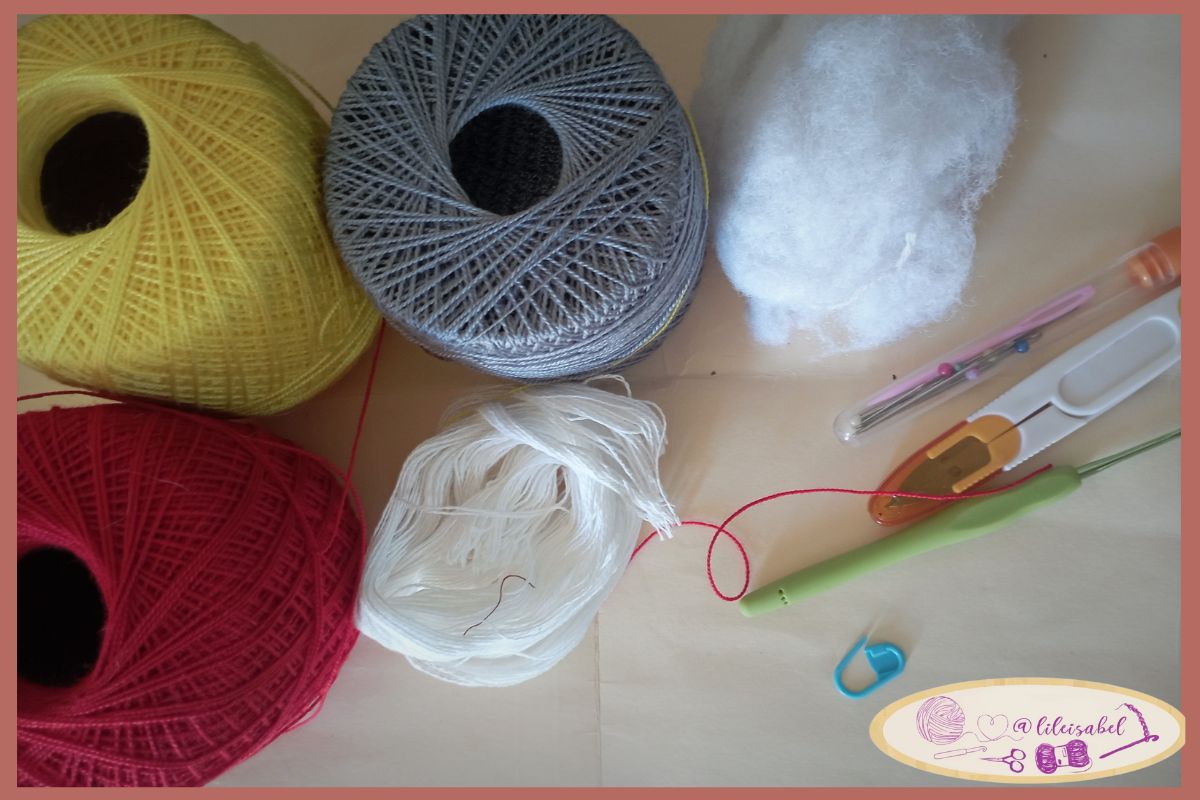
Well friends, without further ado, here are the materials and the creation process!
For this amigurumi I used yarns of different colors: gray, white, black, red and yellow. In addition, I needed a crochet needle, a wool needle, scissors and a marker. And, as always, a lot of imagination.
Bueno amigos, sin más preámbulos, ¡aquí están los materiales y el proceso de creación!
Para este amigurumi utilicé hilos de diferentes colores: gris, blanco, negro, rojo y amarillo. Además, necesité una aguja de ganchillo, una aguja lanera, tijeras y un rotulador. Y, como siempre, mucha imaginación.
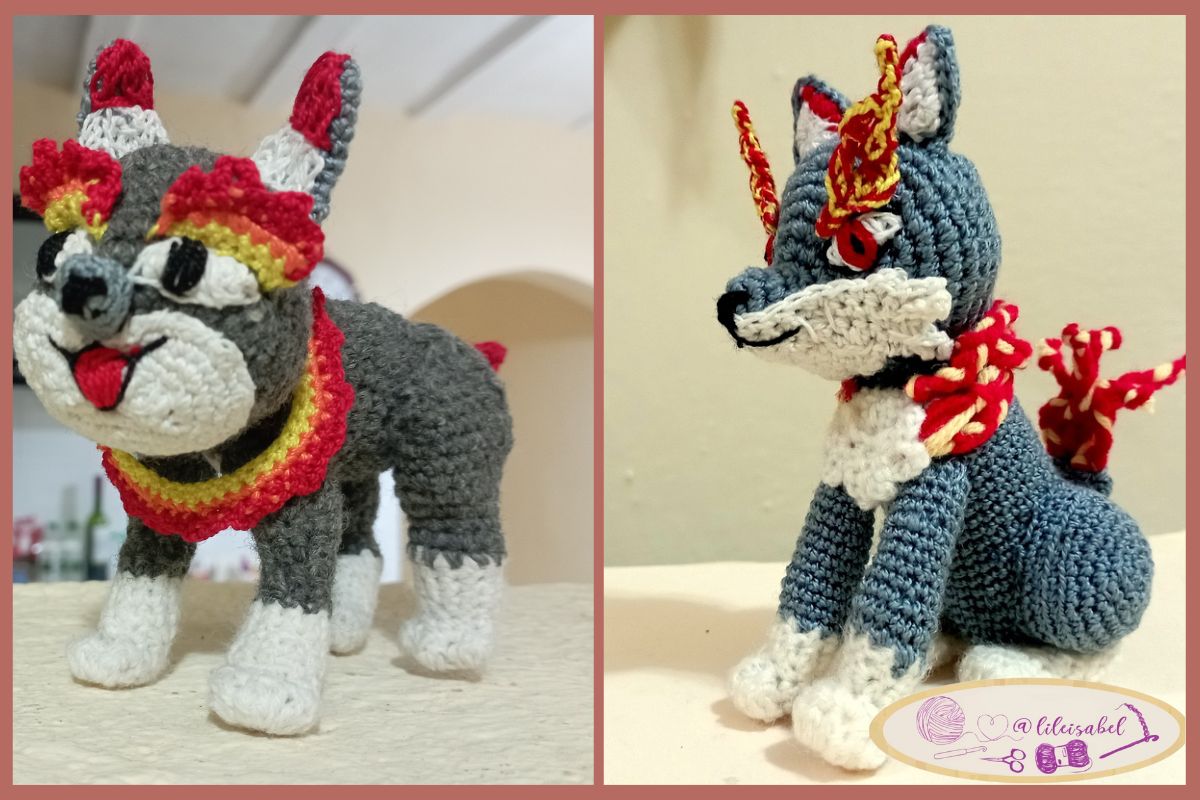
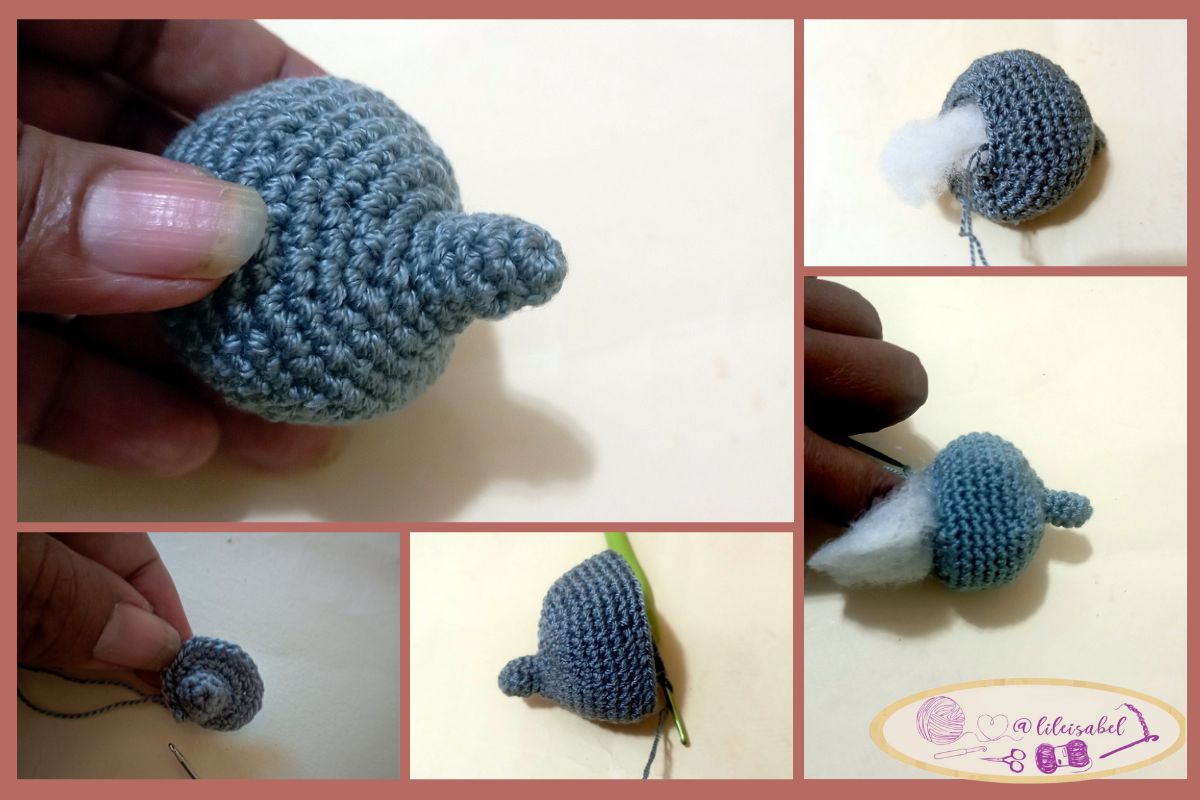
I started with the head, but this time I focused on making the muzzle more pronounced and different from the first wolf. Once I finished knitting, I stuffed and closed the head.
Empecé por la cabeza, pero esta vez me centré en hacer el hocico más pronunciado y diferente al del primer lobo. Una vez que terminé de tejer, rellené y cerré la cabeza.
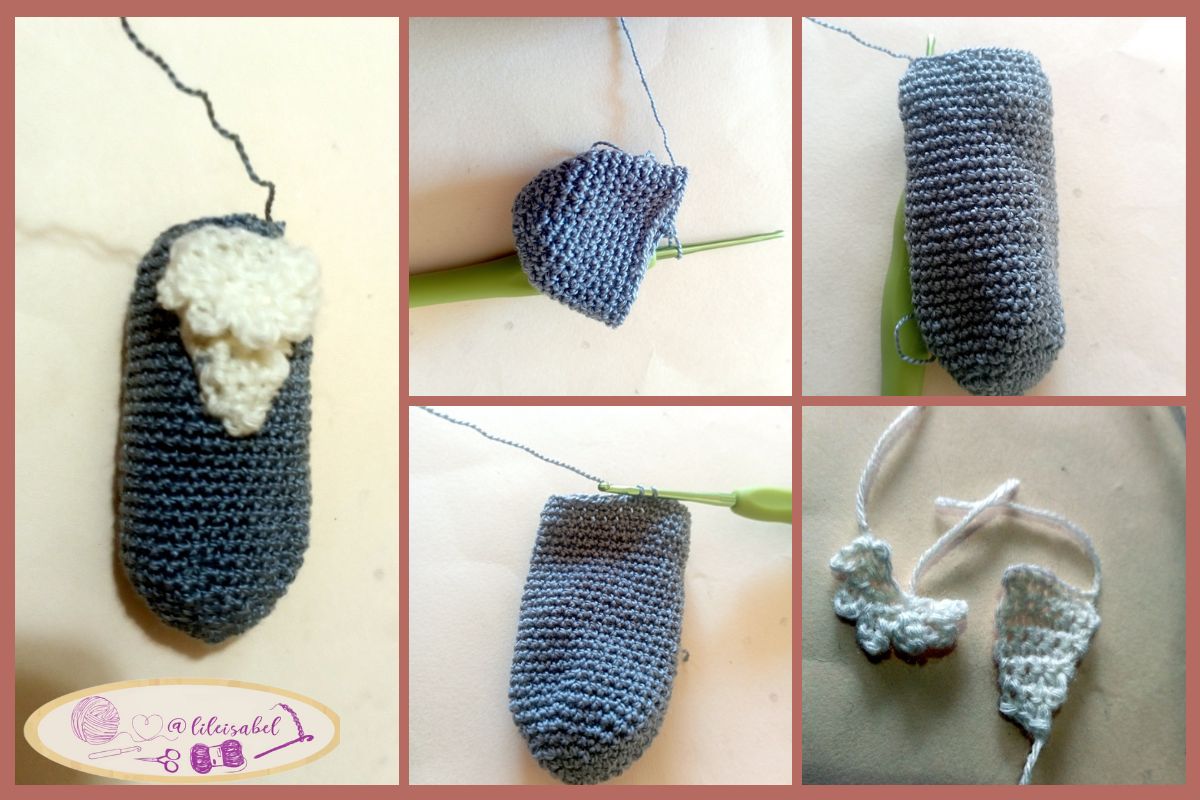
I then continued with the body in a cylindrical shape, using the color gray throughout the wolf. I really like the slightly shiny tone of this gray yarn I used. I also made a white triangle and trim to place on the chest, mimicking the abundant white fur in that area.
Luego continué con el cuerpo en forma cilíndrica, utilizando el color gris en todo el lobo. Me gusta mucho el tono ligeramente brillante de este hilo gris que utilicé. También hice un triángulo blanco y un ribete para colocar en el pecho, imitando el abundante pelaje blanco de esa zona.
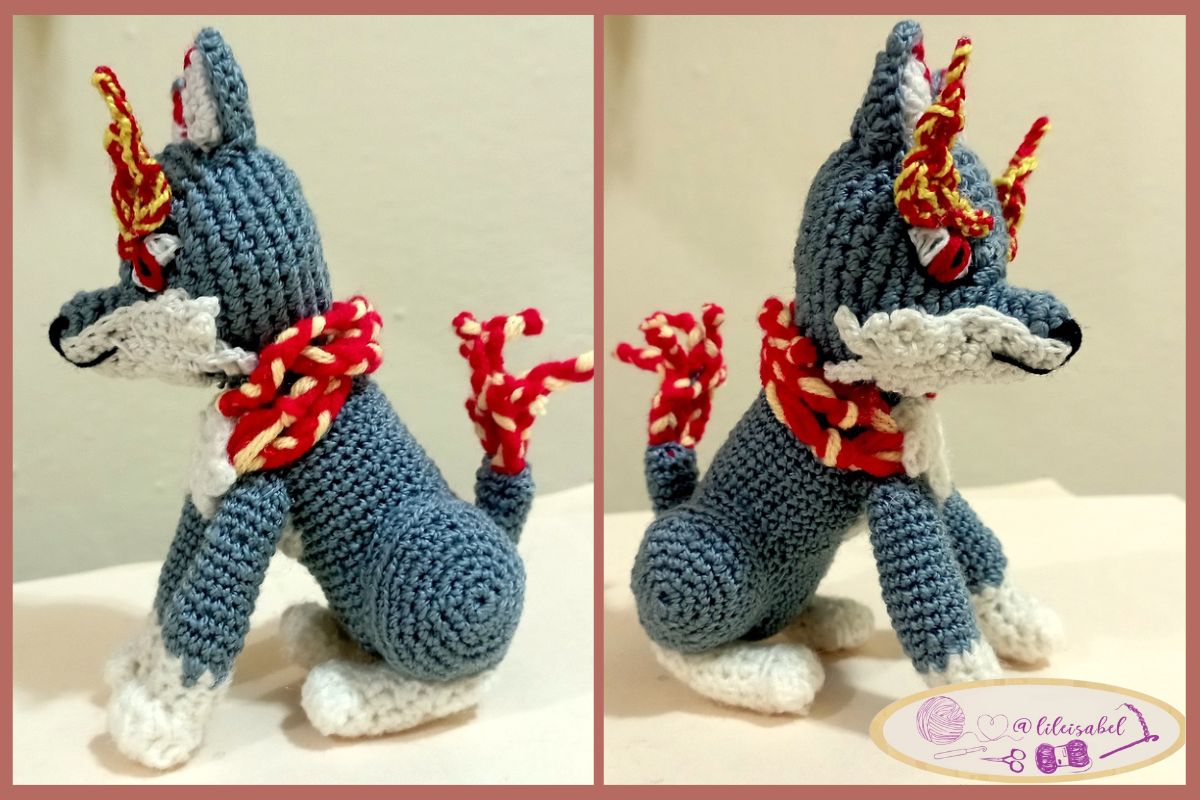
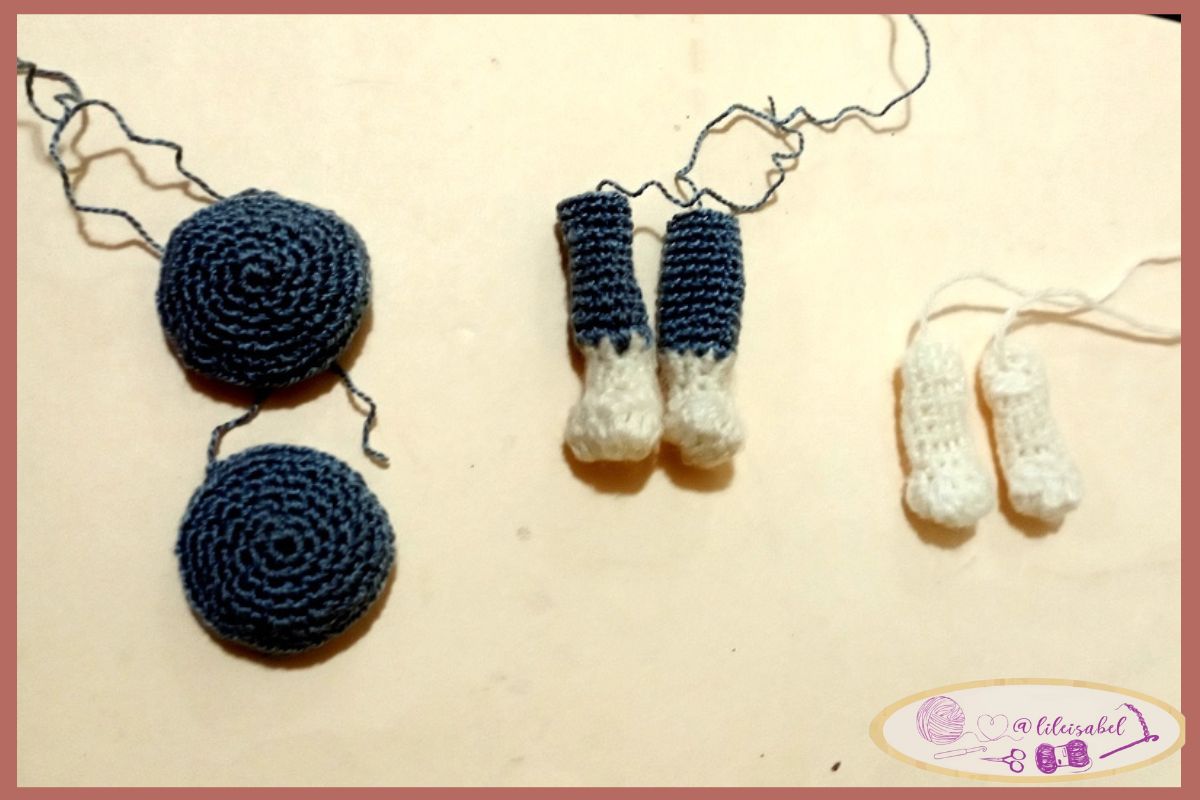
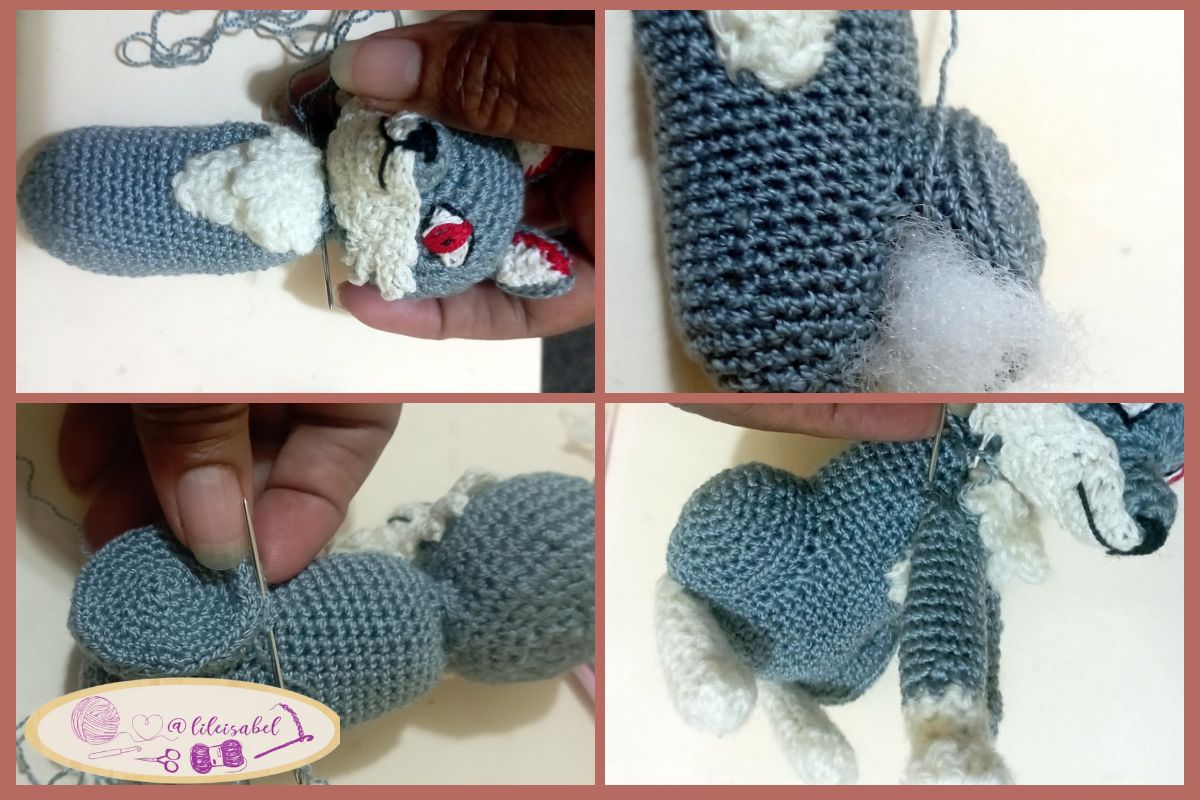
Next, I made the four little legs, as always with a lot of work and several repetitions (hehe!). In this version, the hind legs are tucked in, and that's how I wanted to represent them, as I really like that posture. I stuffed all the pieces with cotton, including the folded part of the hind legs, which I did at the time of placement.
A continuación, hice las cuatro patitas, como siempre con mucho trabajo y varias repeticiones (¡jeje!). En esta versión, las patas traseras están metidas hacia dentro, y así es como quería representarlas, ya que me gusta mucho esa postura. Rellené todas las piezas con algodón, incluida la parte doblada de las patas traseras, que hice en el momento de la colocación.
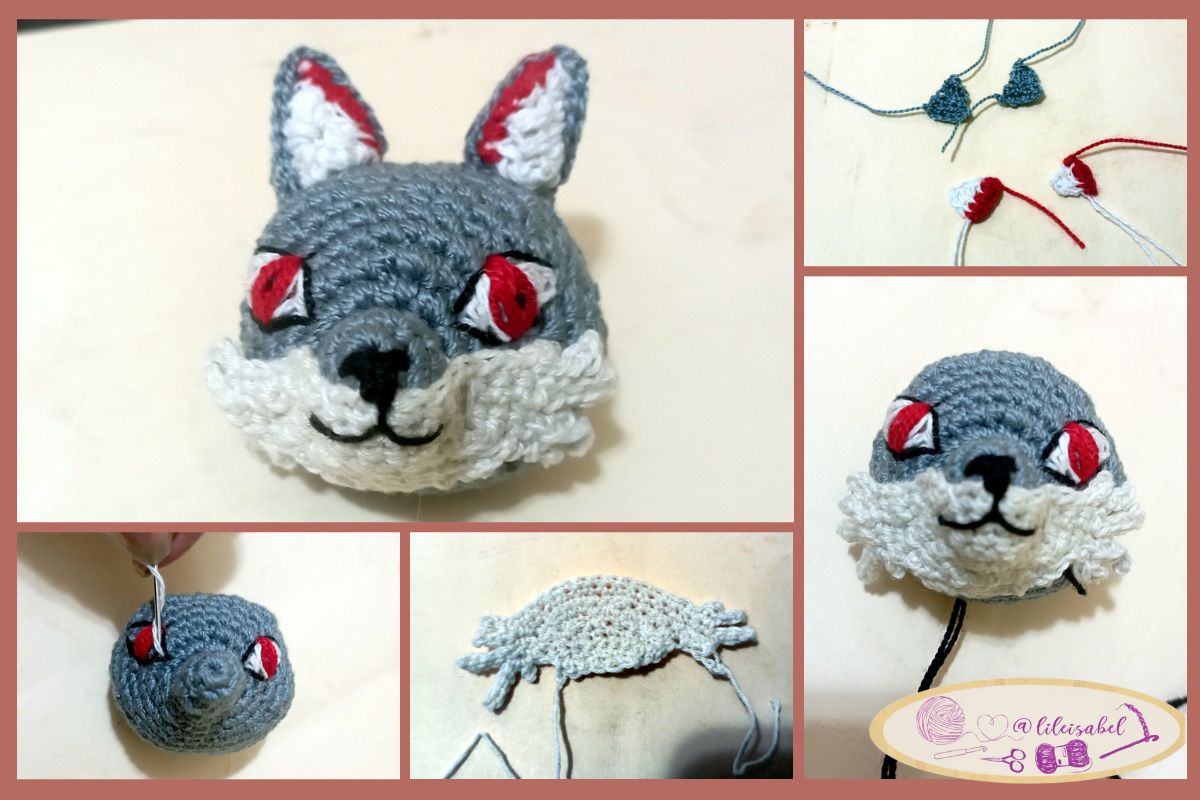
Next, I made the details of the face: whiskers, muzzle, mouth, eyes and ears. When I finished this part, I was sure I would like the result.
A continuación, hice los detalles de la cara: bigotes, hocico, boca, ojos y orejas. Cuando terminé esta parte, estaba segura de que me gustaría el resultado.
I attached the head to the body and then sewed the four legs, taking care to stuff the hind legs properly.
Uní la cabeza al cuerpo y luego cosí las cuatro patas, teniendo cuidado de rellenar bien las traseras.
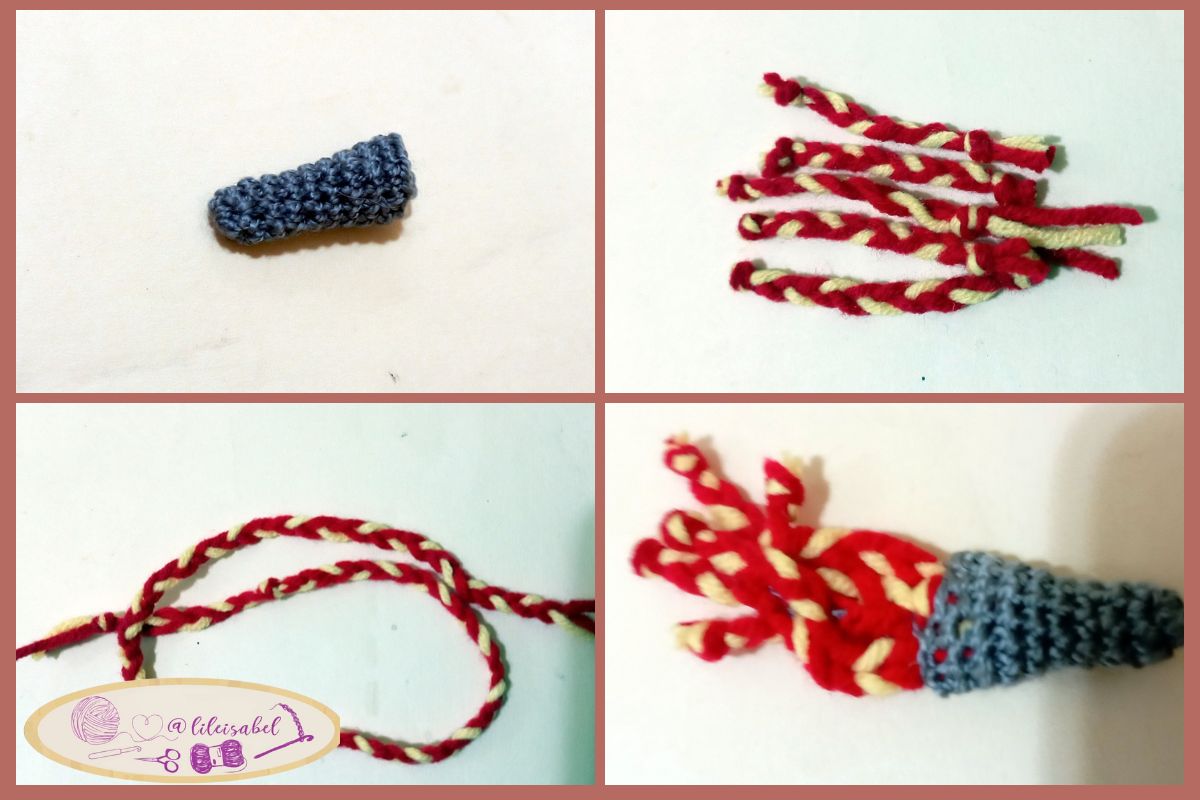
Finally, it was time to make the tail, leaving it open at the tip where the fire would come out. To create this effect, I took yellow and red worsted yarns, wove them with my hands in the shape of a braid and cut them into different lengths, tying knots at the ends. I placed them at the tip of the tail and sewed them on. Then, I sewed the tail to the body, obtaining the result you see now.
Por último, llegó el momento de hacer la cola, dejándola abierta en la punta por donde saldría el fuego. Para crear este efecto, cogí hilos de estambre amarillos y rojos, los tejí con las manos en forma de trenza y los corté en diferentes longitudes, haciendo nudos en los extremos. Los coloqué en la punta de la cola y los cosí. Después, cosí la cola al cuerpo, obteniendo el resultado que veis ahora.
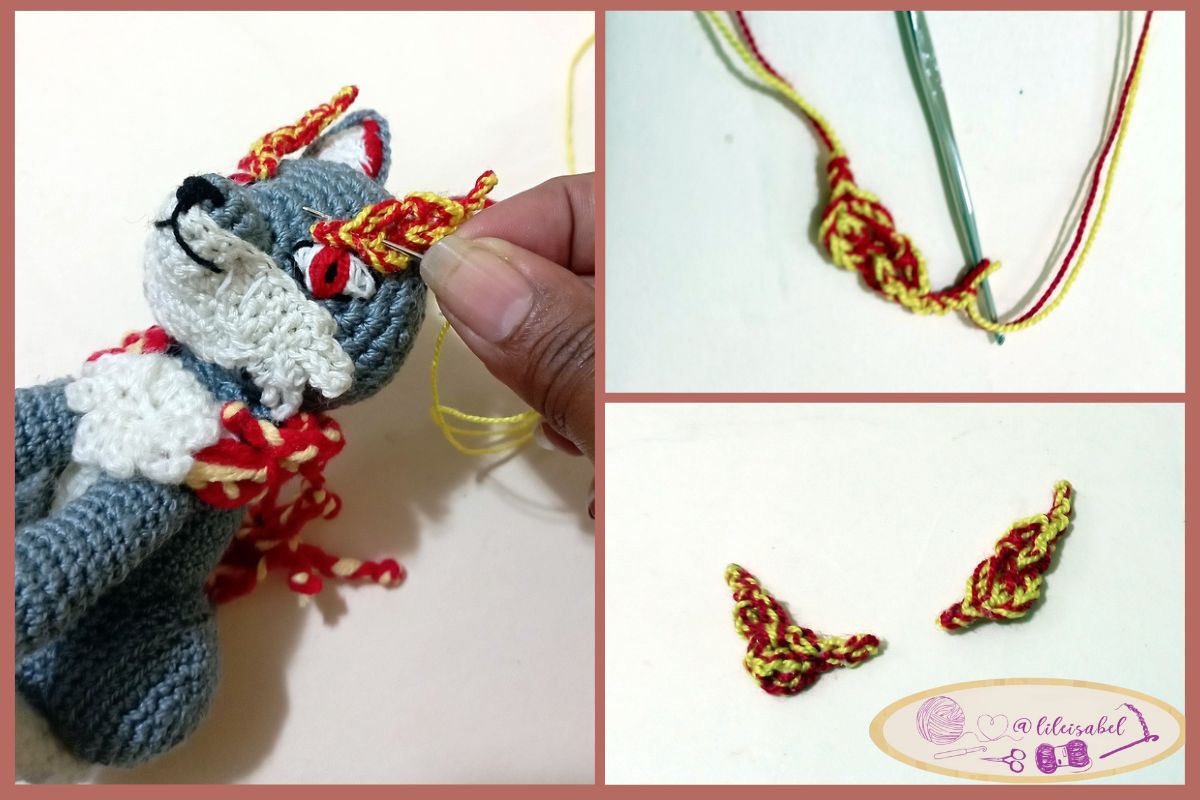
The neck flame, I did the same as with the tail, interlacing the yellow and red worsted yarns and giving a few stitches to fix it. Then, I took thinner red and yellow yarns, joined them together and knitted them with high stitches to make the flames long. Finally, I sewed them over the eyes, obtaining the final result you see.
El fuego del cuello, hice lo mismo que con la cola, entrelazando los hilos de estambre amarillo y rojo y dando unas puntadas para fijarlo. Después, cogí hilos rojos y amarillos más finos, los uní y los tejí con puntos altos para que las llamas fueran largas. Por último, las cosí sobre los ojos, obteniendo el resultado final que veis.
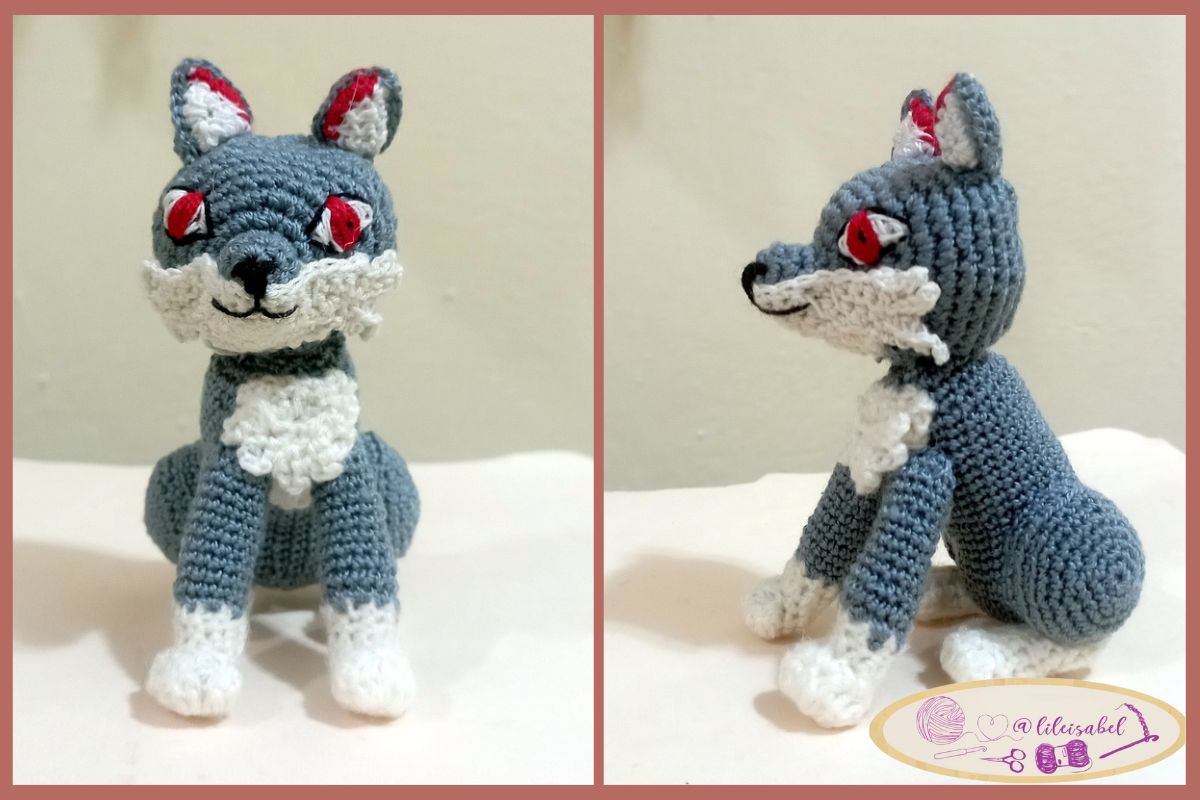
I was very happy with the final result, what do you think? I hope you like it, greetings to all and see you next time!
Quedé muy contenta con el resultado final, ¿qué les parece? Espero que les guste, un saludo a todos y ¡hasta la próxima!
Las fotos fueron tomadas con mi teléfono Xiaomi Note 11, unidas y recreadas en canva.
Usar Traductor DeepL
The photos were taken with my Xiaomi Note 11 phone, joined and recreated in canva.
Use Translator DeepL