ENGLISH
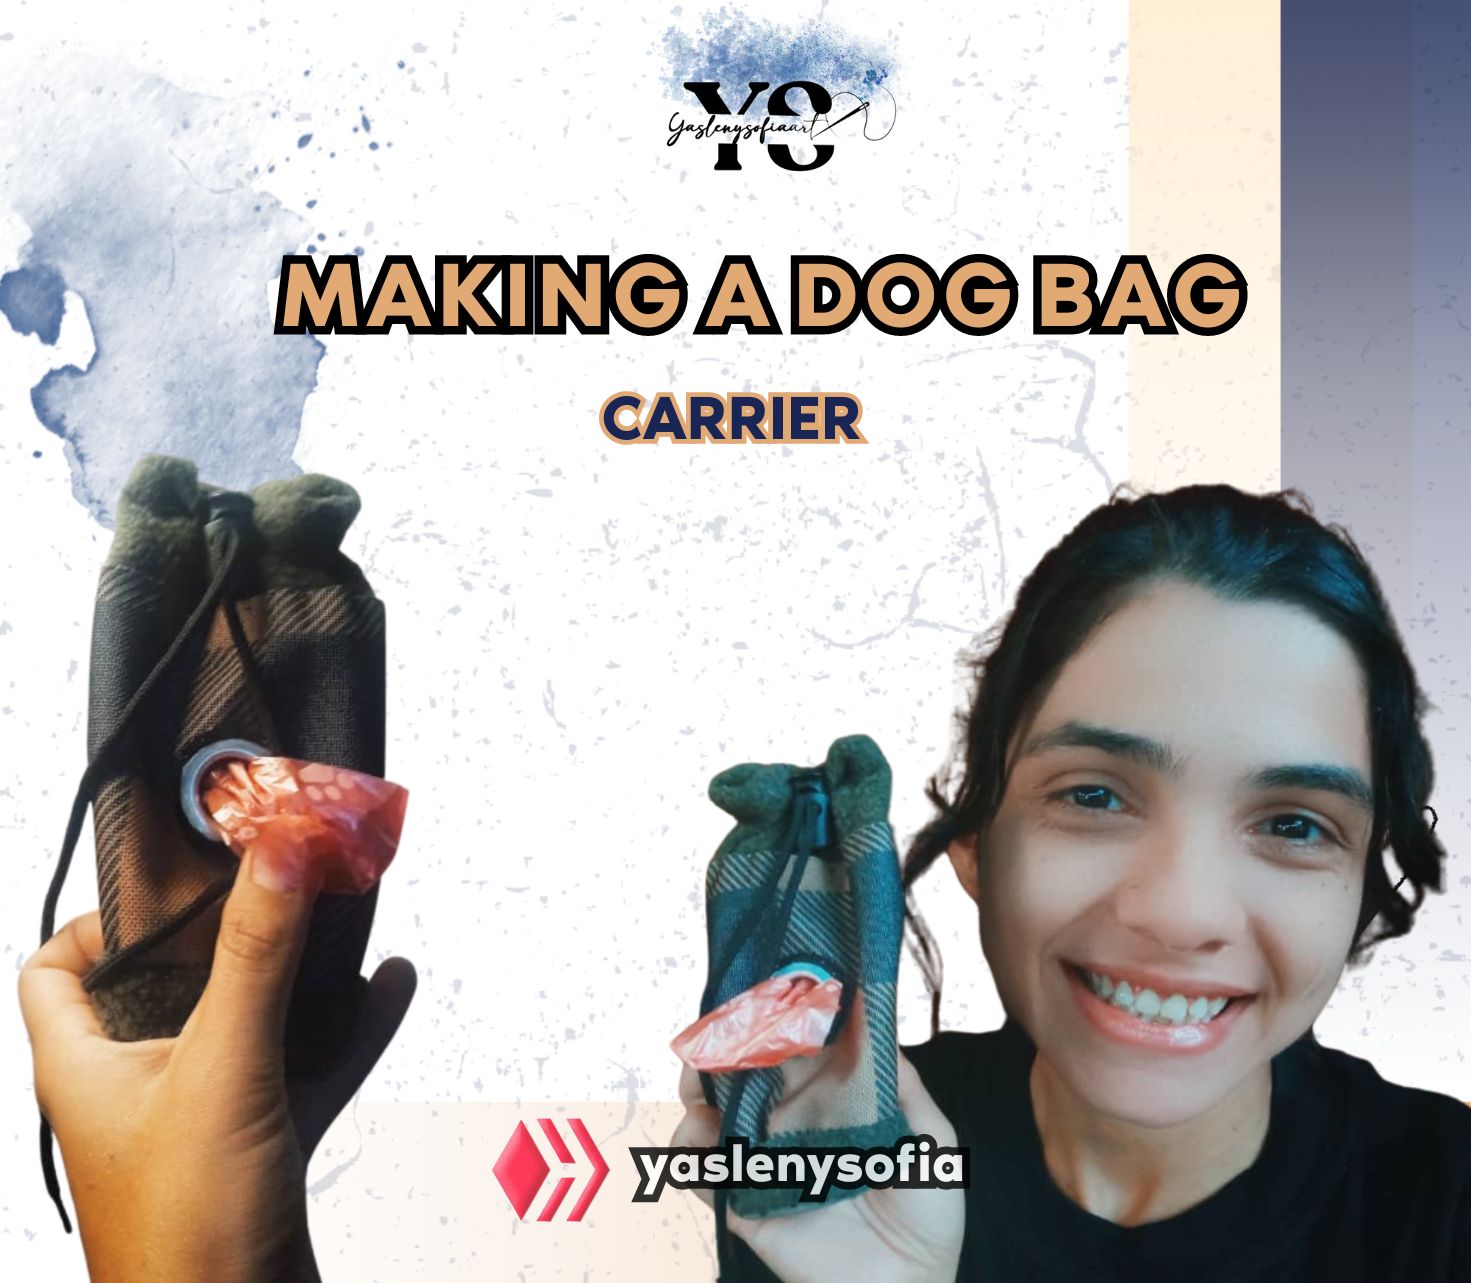
Greetings @needleworkmonday community, a few weeks ago one of my dogs lost the plastic bag holder that I had bought from my neighbor, it was elliptical in shape and, in addition to bringing 10 bags with certain motifs inside its packaging, the neighbor came with a package of 50 bags more, in different colors, but the boy threw it away, because it is supposed to be for them to carry it on their collar and one has access to the bag faster and well, in his shakes I threw it away, and I had the 50 new bags.
The one I bought 😢
So, I decided to make a fabric, since my neighbor told me to do it and not to hang my little dog, who was just starting to use it for the first time. Anyway, here I show you the whole process, which I did by hand, because as I didn't know how to put it together at first, I preferred to go little by little than with the sewing machine.

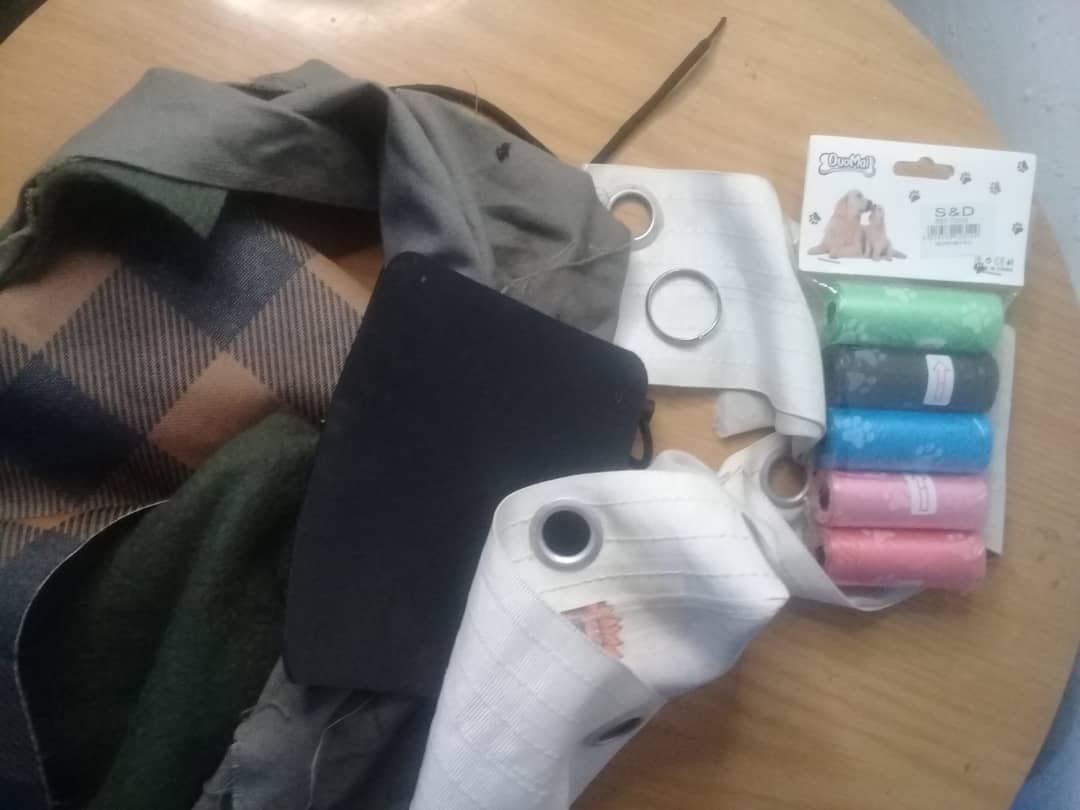
-A piece of Gabardine fabric (I don't really have knowledge of all types of clothing, but it looks more or less like that). Whatever color you want, in this case I used a green.
-50 cm of Polyester fabric. The color of your choice, in this case I used one with a square colored squares pattern on the front and white on the back.
-1 Hoop
-50 cm of cord, color of your choice.
- 1 drawstring clasp
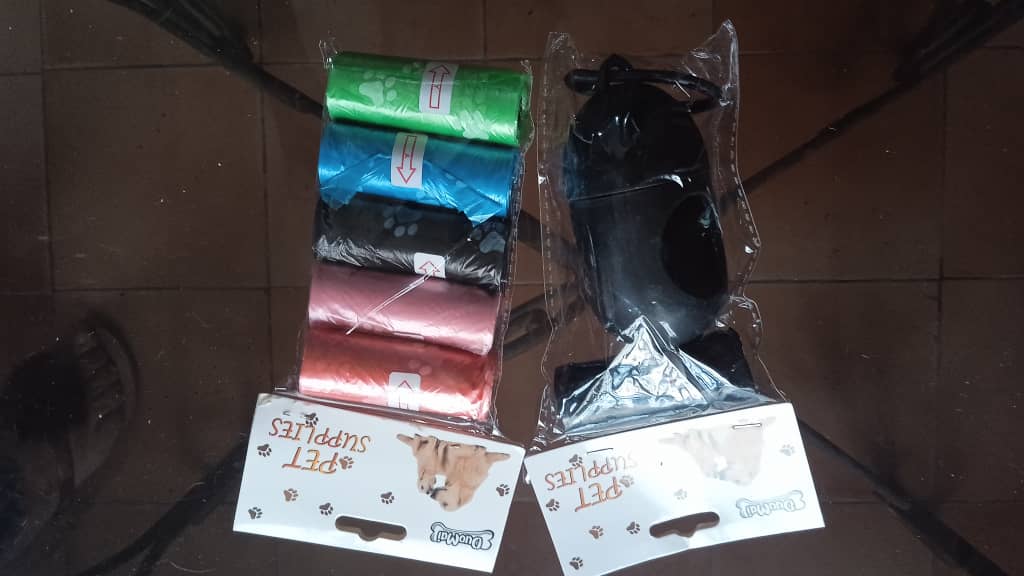
-1 package of plastic bags.
-1 piece of cardboard
-1 ring

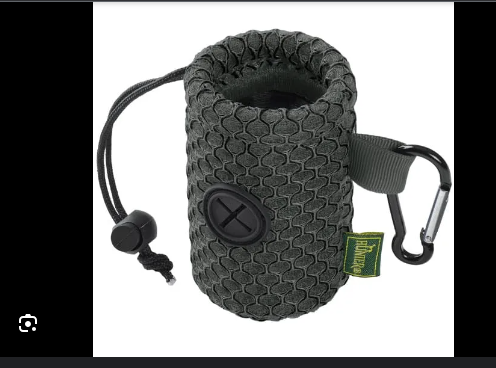
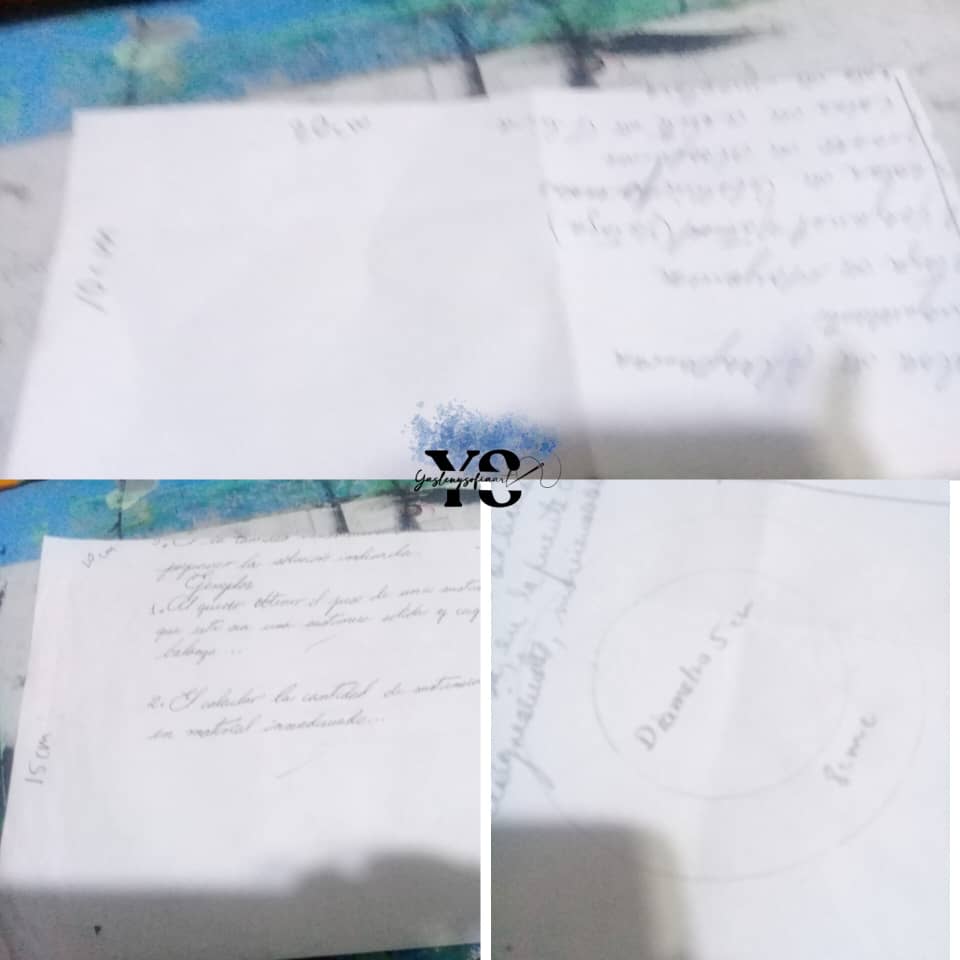
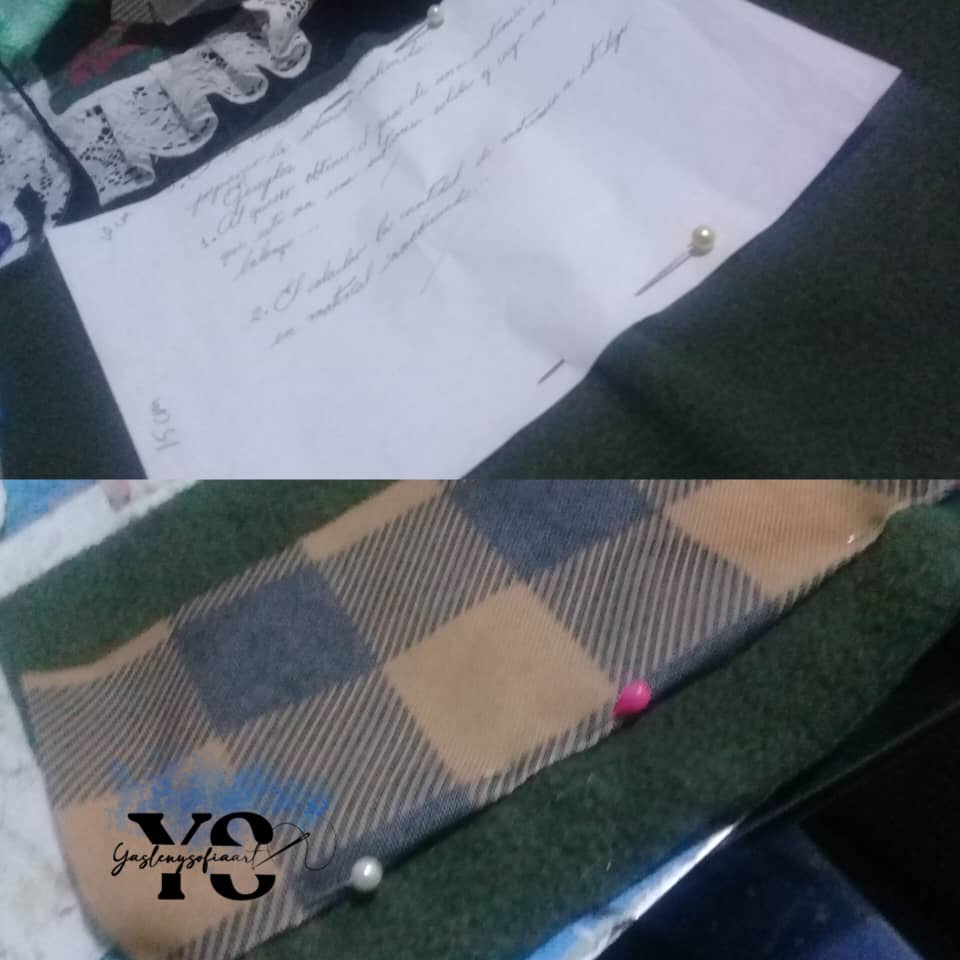
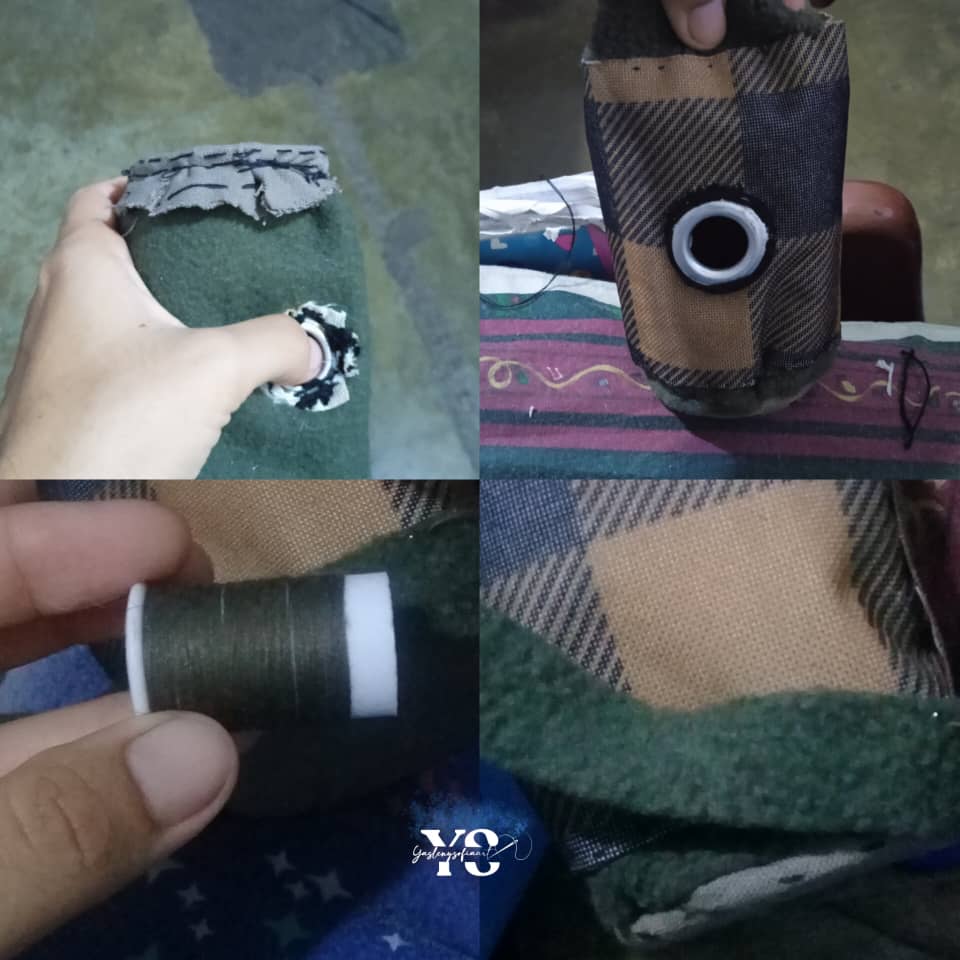
The first thing I did was to look for references on the internet, which there were many, but the following style that I will show you caught my attention. After that and to test if the shape fit, I made the patterns that consisted of two strips, one of 10 cm long by 20 cm wide and the other 15 cm long by 20 cm wide and a circle of 5 cm wide leaving about 2 cm more space around the circumference, because basically it is a cylinder, and you have to cover the bottom of it.
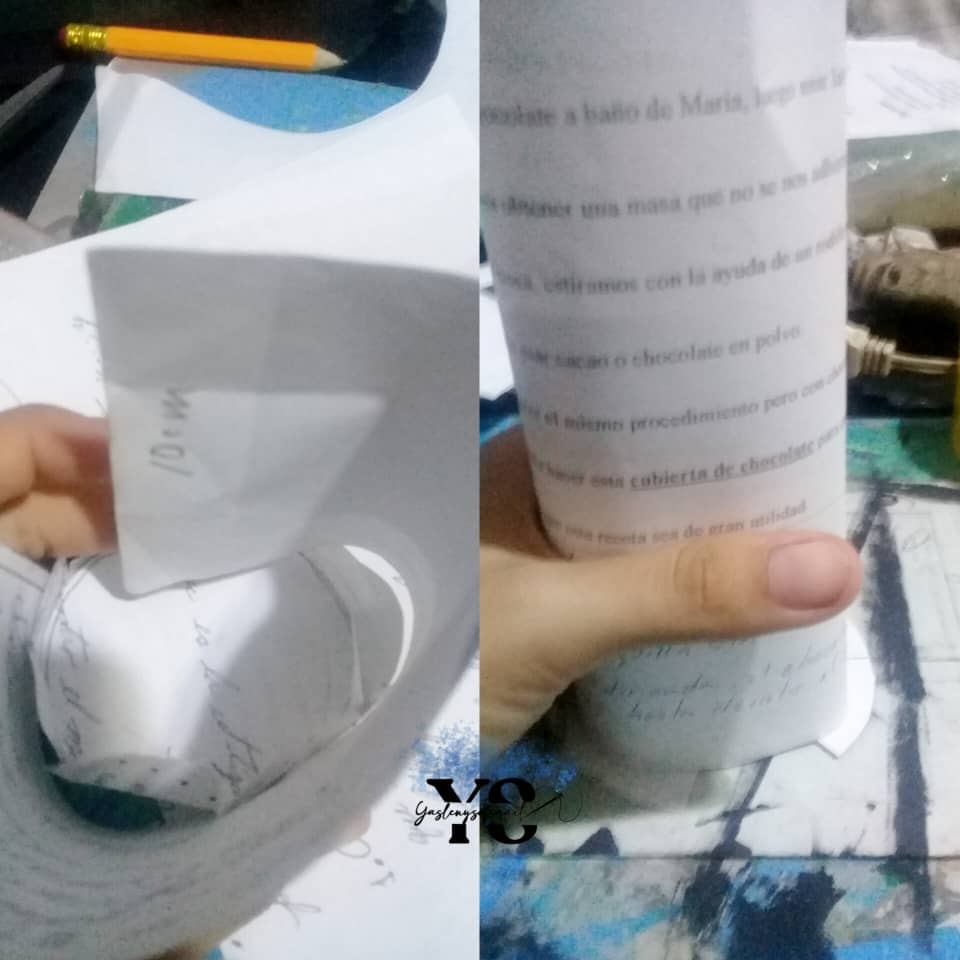
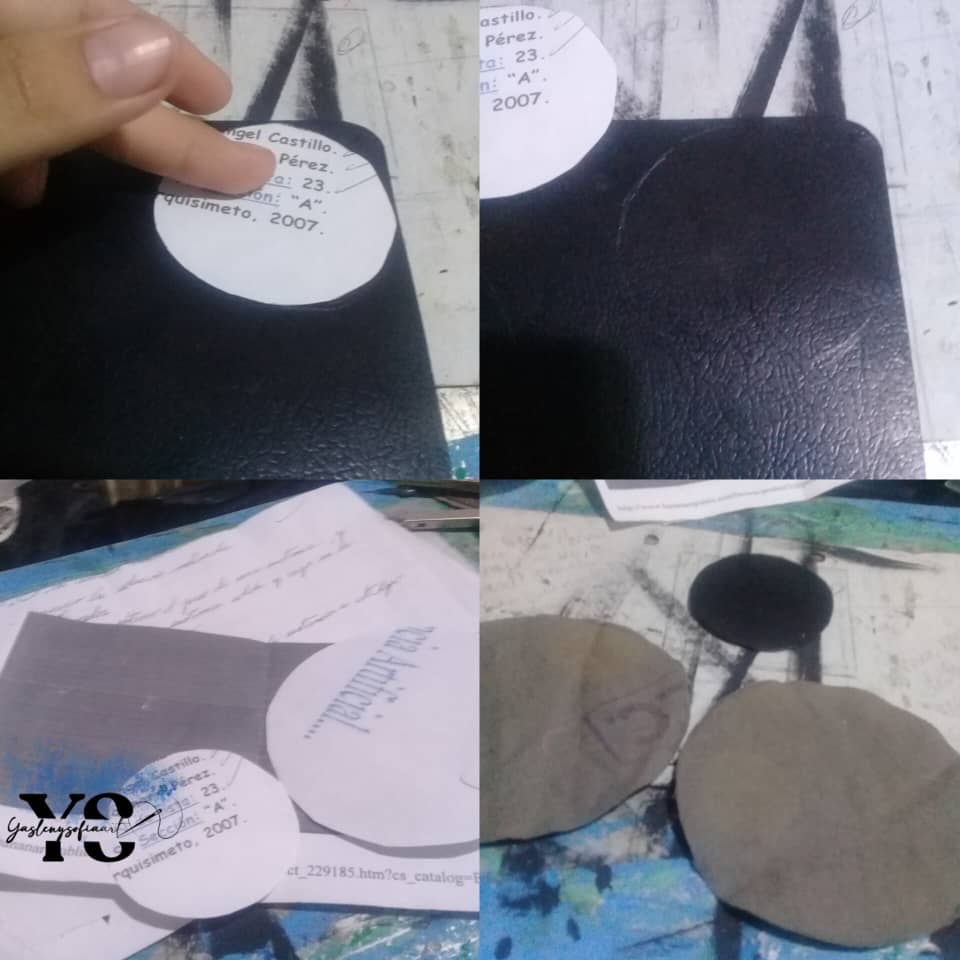
When I saw that everything fit well, I transferred the pattern of the circle to a cardboard that I had at hand, because the idea in general was to make this bag holder with what I had at home and not spend more than what I had done. Once the circle was cut in cardboard, with another circle 2 cm wider, I transferred it to the piece of Gabardina fabric, being two pieces at the end, as it is to line the cardboard and give the seam to what would be the other strips of fabric.
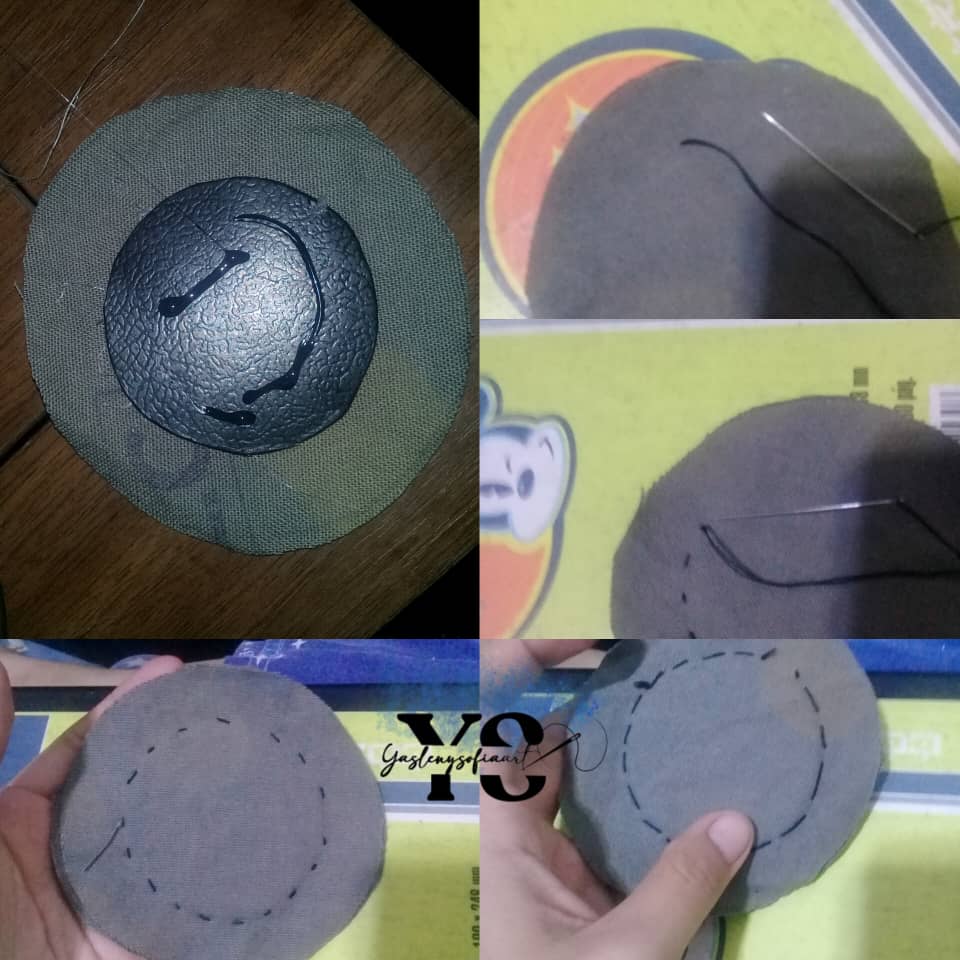
First I glued the cardboard to the fabrics and then I stitched it to reinforce it. With this ready, now I put the bag together, for that I transferred the two strips of 20 cm wide each in the respective fabrics, the 15 cm long for the olive green cotton and the 10 cm long for the polyester, sewing the latter to the cotton.
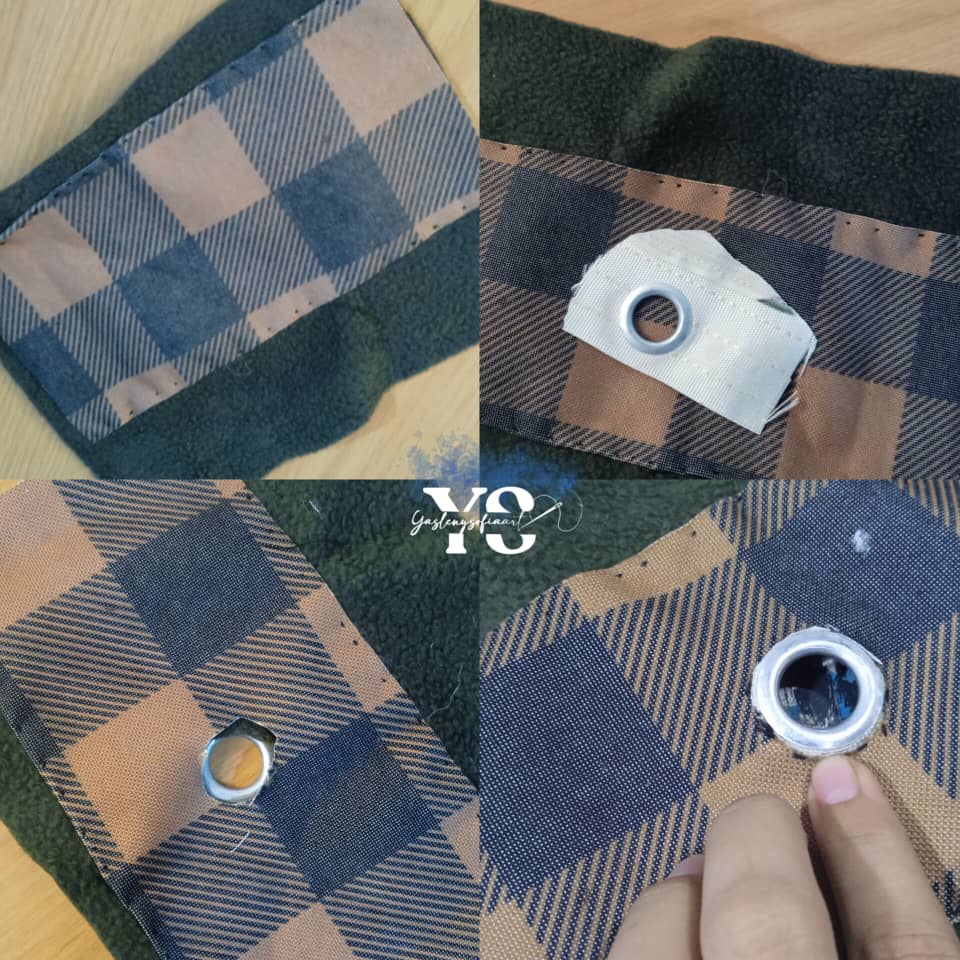
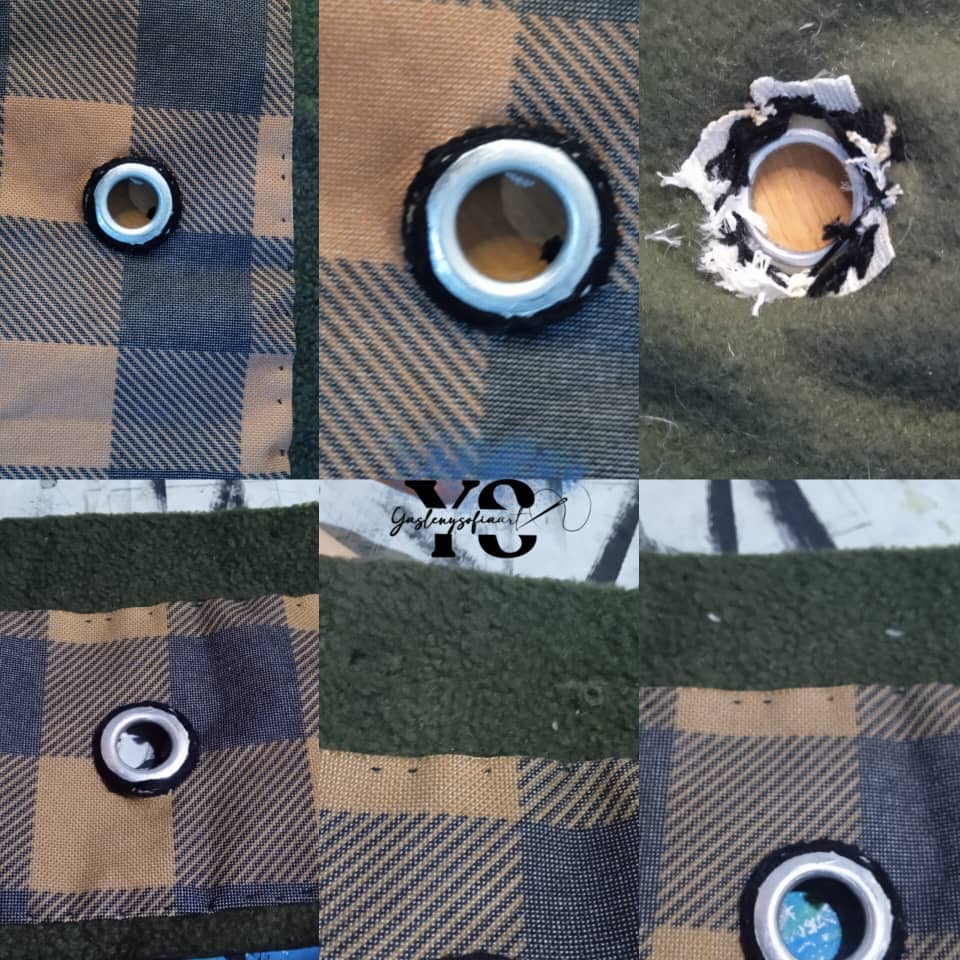
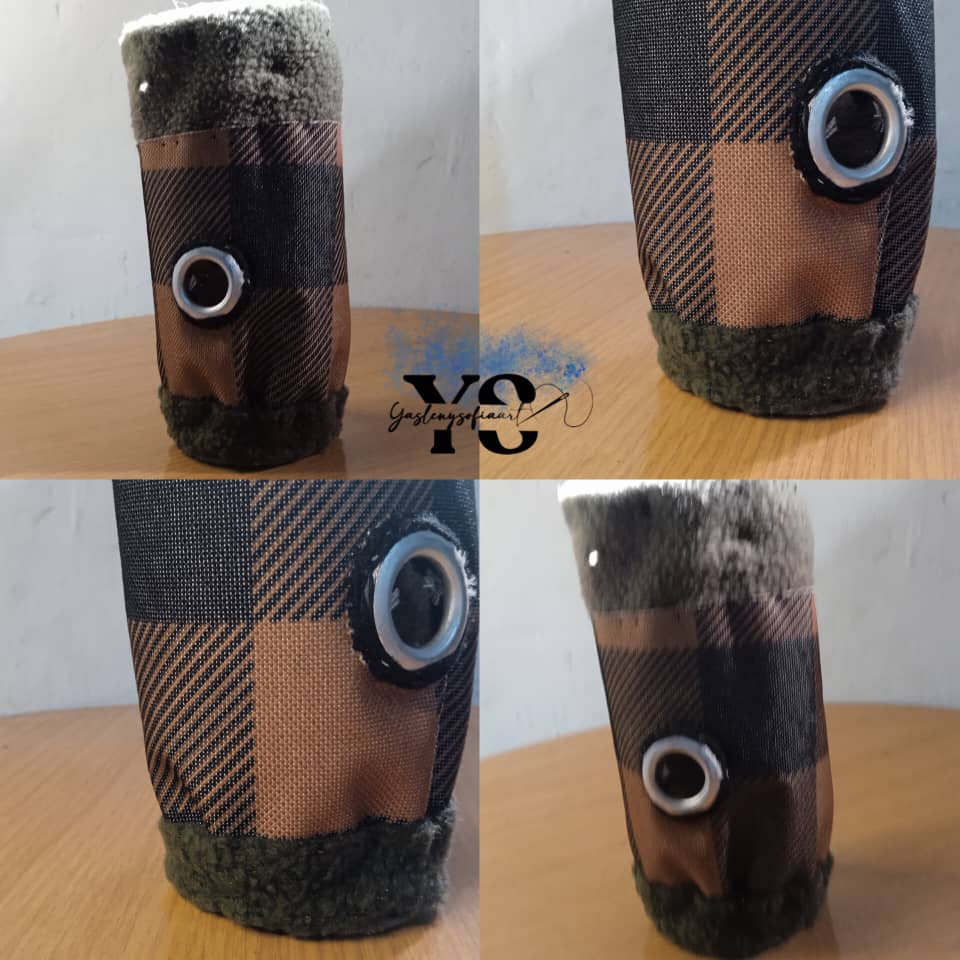
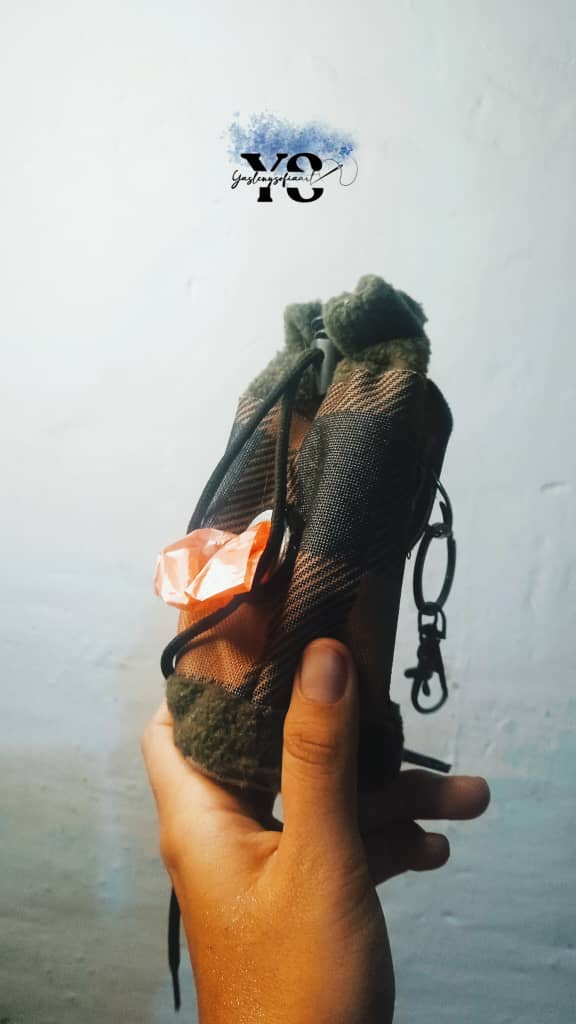
Now, before sewing the ends of the fabric, to make the cylinder, all open by hand a small hole in the center of this strap, where would go the ring that would leave the bag, as I do not have the machine that allows you to put this ring, I used one of a curtain that is damaged and sewed it as I could, leaving the fingers, but I did it. As the edges of this hoop look horrible, I embroidered the whole thing in black with black yarn, if this part works well, you can skip this procedure.
In the same way, I opened some small holes in the upper part of the cotton fabric, which is where the cord will pass through. Now, I sewed the ends of the strap together to form a cylinder.
Here unfortunately I had a horrible union, I lacked space in the polyester fabric, but I solved it by sticking a brown ribbon, as I said with the hoop, if it fits well, you can skip this step, it all depends on a good measurement, but as I was seeing how the shape was, I was wrong in many steps, even so, I learned a lot.
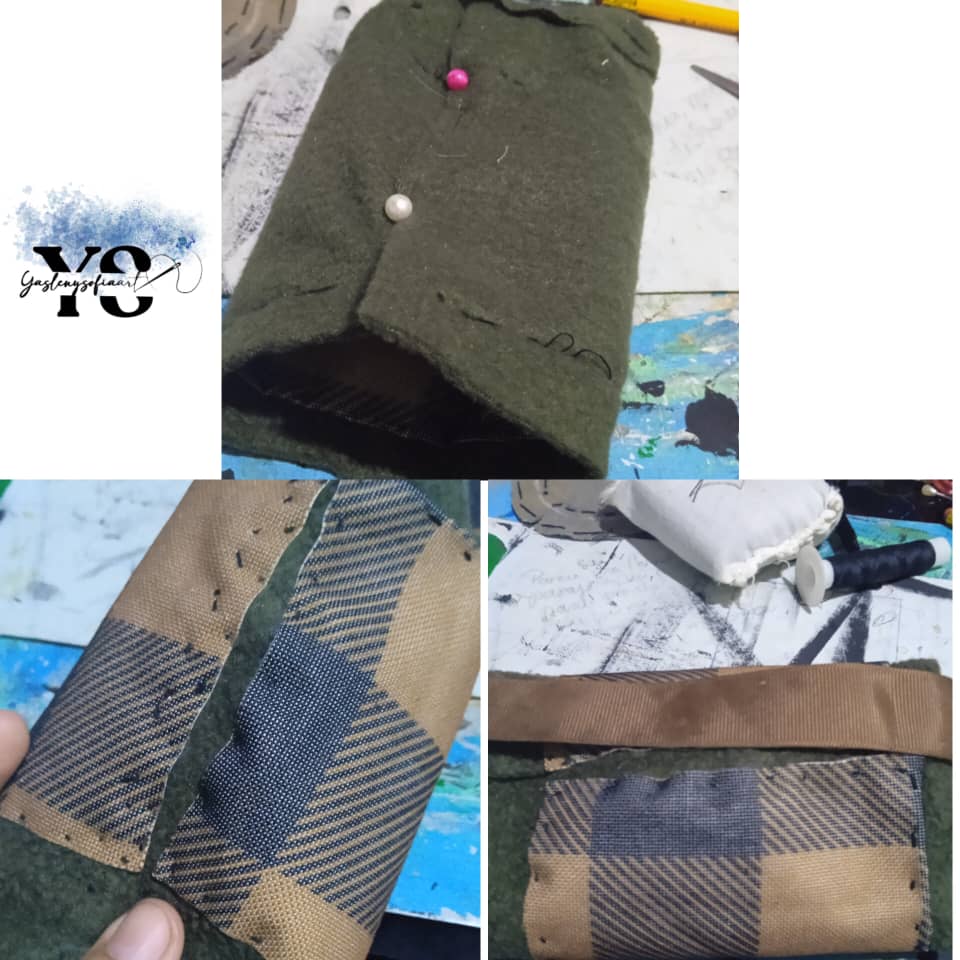
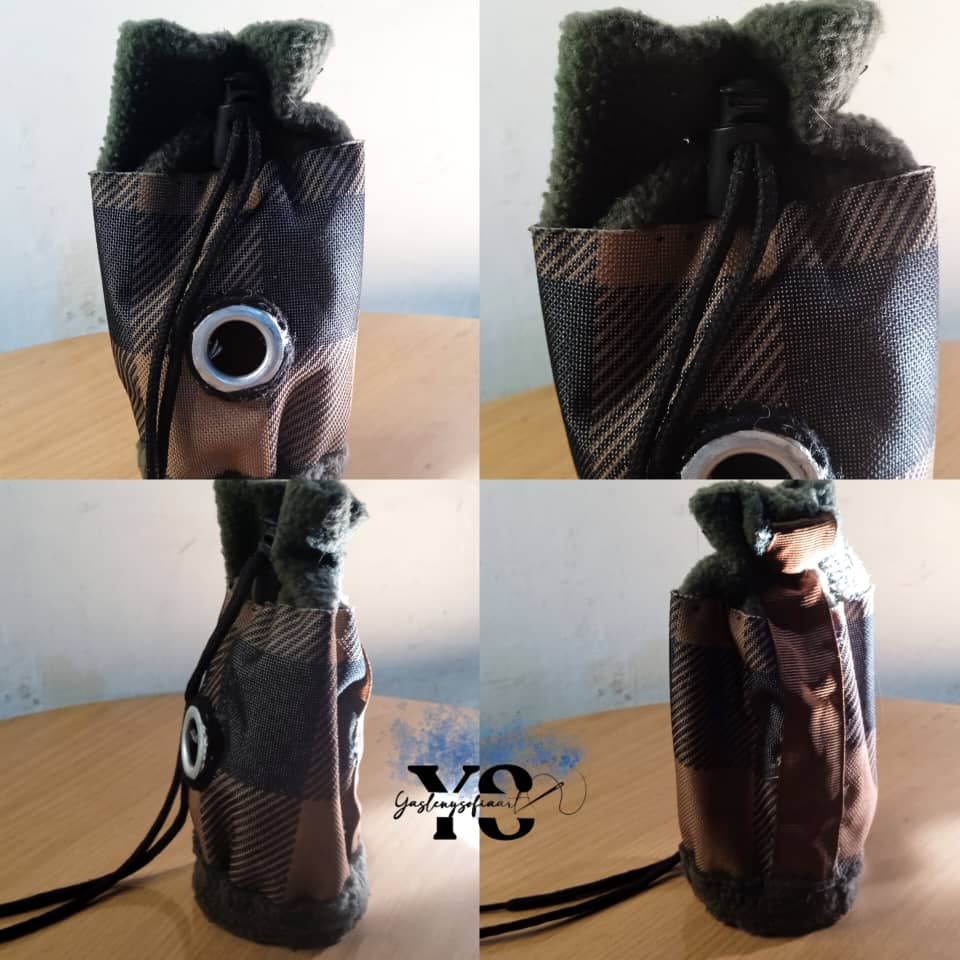
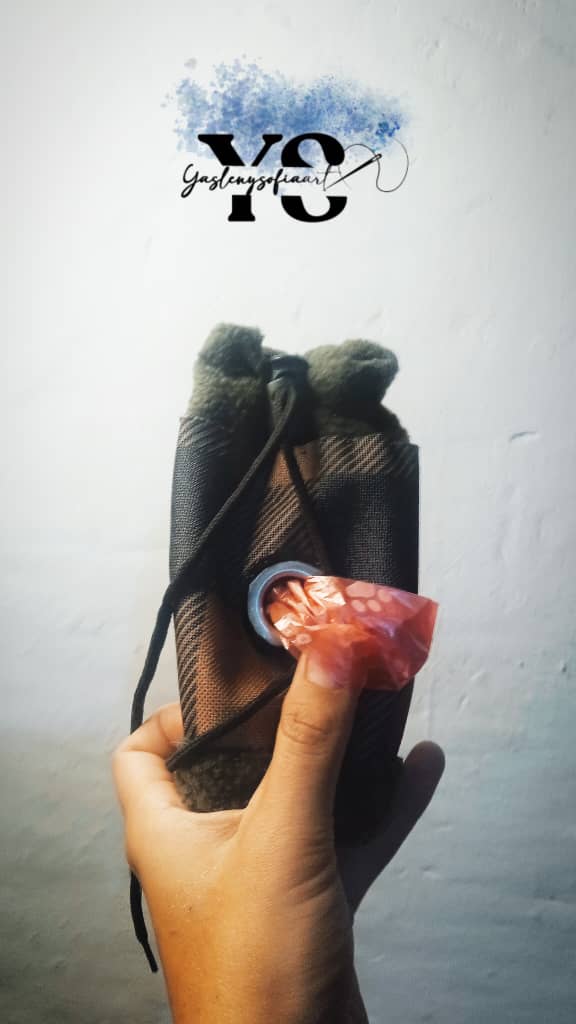
To continue, I sewed the circular piece to the back and then flipped the whole seam, here too I didn't draw, and added some of the cotton fabric to the bottom of the cylinder. I threaded the cord through the previously opened holes to attach the cord closure.
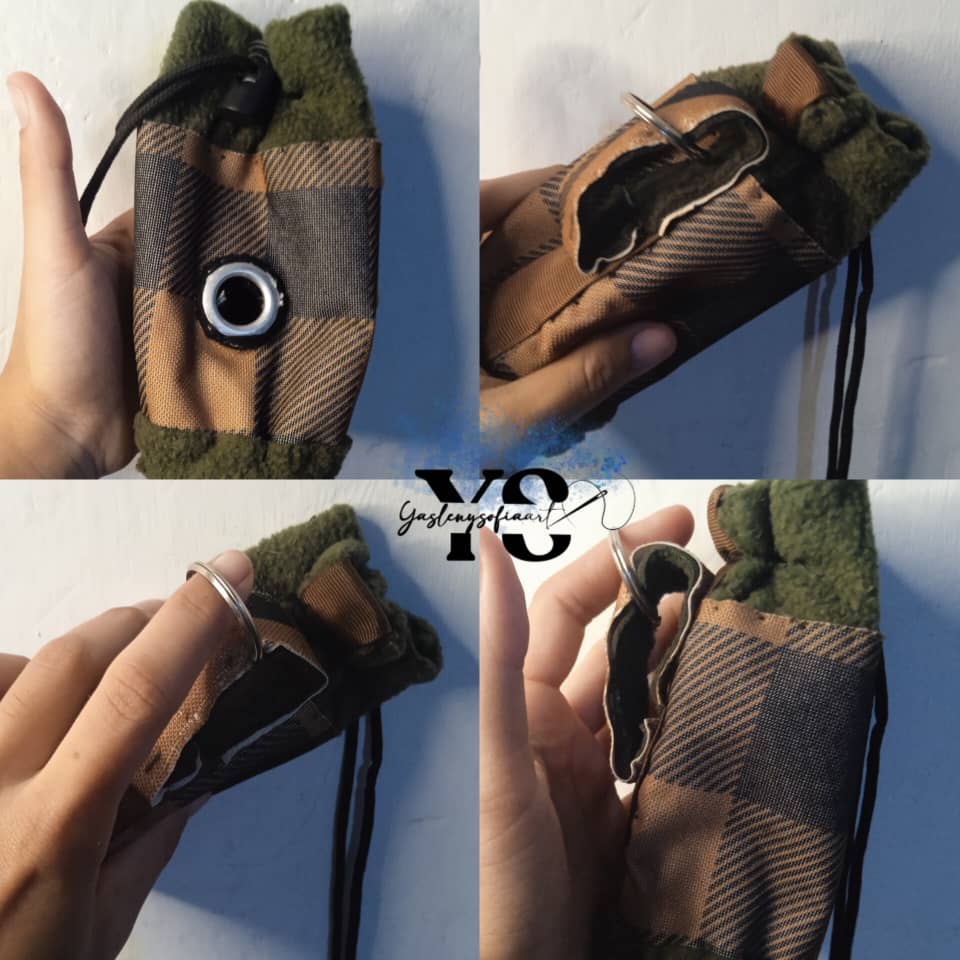
Already to make the part where this bag holder would hang, consisted of a small strip of 10 cm long and 1.5 cm wide that was sewn to this and before finishing the seam I introduced a ring, which is where you would put a hook and so put it on the belt or on the pants of oneself and so it is easier to get the bags for the needs of our furry when they go out for a walk.
This part where I put the small piece of cloth with the ring I didn't photograph it, but it is basically what I describe.
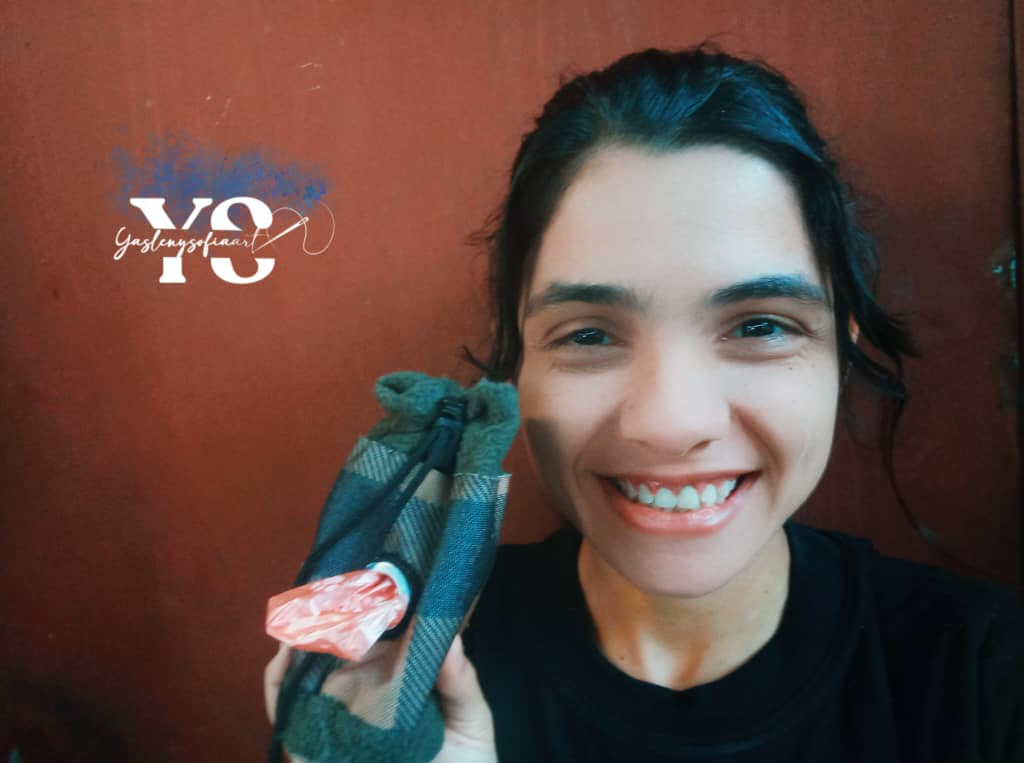
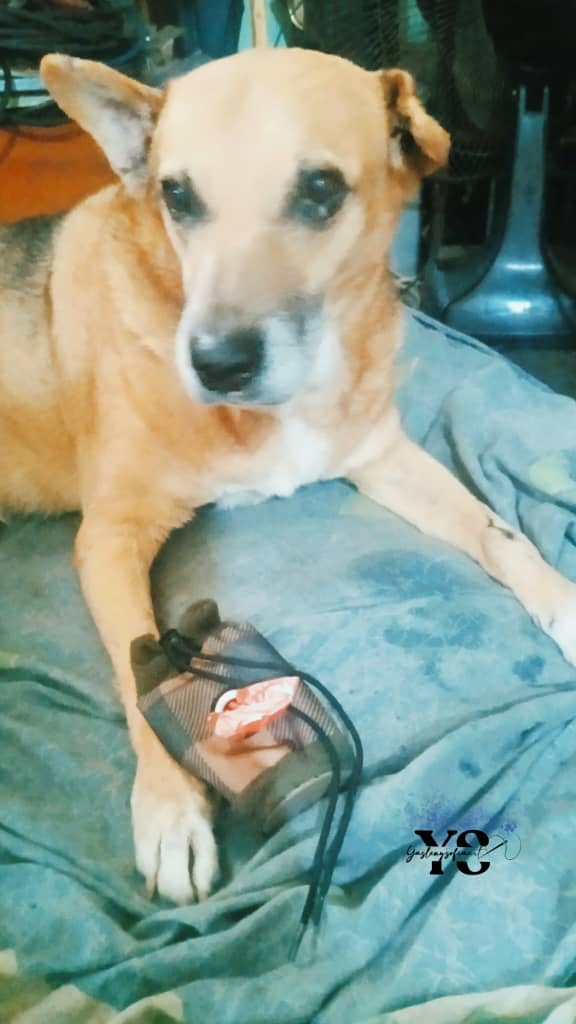
This is the final result and I attach some pictures with the culprit of throwing away the one I had bought.
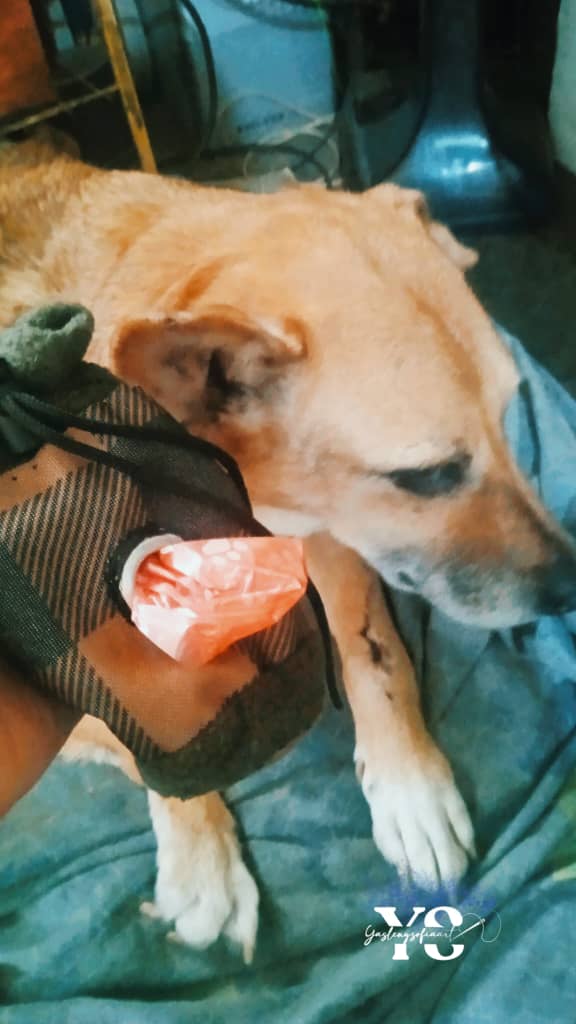
The one I was guilty of missing out on the one I had bought for him.

Thank you for reading my post. I hope you liked it. I will be attentive to answer your comments. You can visit my blog, follow my content and social networks.

FACEBOOK / INSTAGRAM / TWITTER
ESPAÑOL
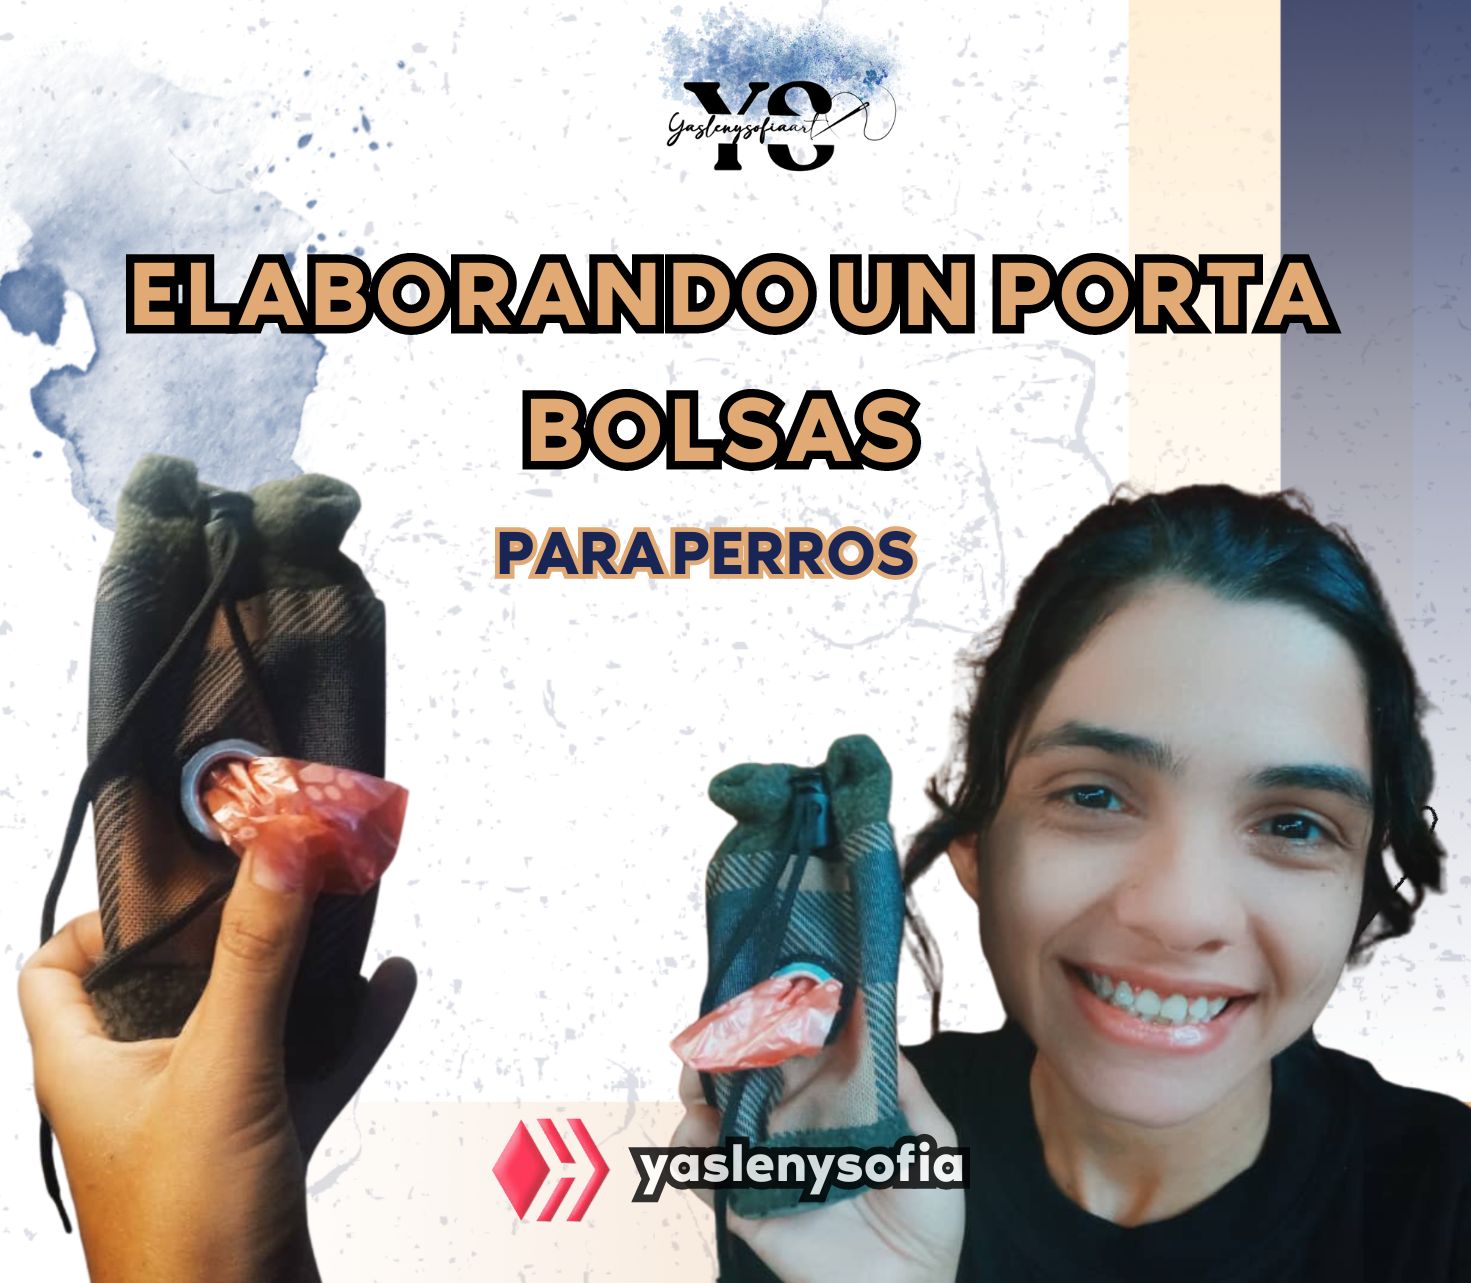
Saludos comunidad de @needleworkmonday, hace unas semanas atrás uno de mis perros me perdió el porta bolsas de plástico que le había comprado a mi vecina, era en forma elíptica y, además de traer 10 bolsas con ciertos motivos dentro de su empaque, la vecina lo venia con un paquete de 50 bolsas más, en distintos colores, pero el muchachito me la boto, porque se supone que es para que ellos la carguen en su collar y uno tenga acceso a la bolsa más rápido y bueno, en sus batidas me la boto, y me quedaron las 50 bolsas nuevas.
El que compré 😢
Así que, me propuse hacer una tela, ya que la vecina me dijo que me la ingeniara y así no ahorcar a mi perrito, apenas la estaba estrenando. En fin, aquí le muestro todo el proceso, el cual lo hice a mano, porque como no sabia como armarla en un inicio, preferí ir poco a poco que con la máquina de coser.
-Un retazo de tela Gabardina (realmente no tengo conocimiento de todos los tipos de ropa, pero más o menos se ve como esa). Del color que desees, en este caso usé un verde.
-50 cm de tela Poliéster. Del color que desees, en este caso usé unos con motivos de cuadritos de colores cuadrados en la parte de frente y al reverso es blanco.
-1 Aro
-50 cm de cordón, color de preferencia.
- 1 cierre de cordón
-1 paquete te bolsas plásticas.
-1 pedazo de cartón
-1 Argolla
Lo primero que hice fue buscar referencias en internet, el cual había muchas, pero me llamó la atención el siguiente estilo que les mostraré. Luego de eso y para probar si la forma cuadraba, hice los patrones que consistía dos tiras, una de 10 cm de largo por 20 cm de ancho y el otro 15 cm de largo por 20 cm de ancho y un círculo de 5 cm de ancho dejando como 2 cm de más de espacio alrededor de la circunferencia, porque básicamente se hace es un cilindro, y hay que tapar la parte inferior de este.
Al visualizar que todo encajara bien, traspase ese patrón del círculo a un cartón que tenía a la mano, pues la idea en general era hacer este porta bolsas con lo que tuviera en casa y no gastar más de lo que había hecho. Ya cortado ese círculo en cartón, con otro círculo de 2 cm más de ancho lo pase al retazo de la tela de Gabardina, siendo dos piezas al final, pues es para forrar ese cartón y darle la costura en si a lo que sería a las otras tiras de tela.
Primero pegué ese cartón a las telas y luego le pasé costura, para reforzar. Con esto listo, ahora si armar el bolsito, para eso traspase las dos tiras de 20 cm de ancho cada en las respectivas telas, la de 15 cm de largo para la de algodón verde olivo y la de 10 para el poliéster, cosiendo esta última a la de algodón.
Ahora bien, antes de coser los extremos de la tela, para hacer el cilindro, todo abrir a mano un pequeño orificio en el centro de este tirante, donde iría la argolla que saldría la bolsa, como no tengo la máquina que te permite poner este aro, usé uno de una cortina que se dañe y lo cosí como pude, dejando los dedos, pero lo hice. Como se vía horrible en las orillas de este aro, bordé todo de negro con ovillo negro, si les sale bien está parte, se pueden obviar este procedimiento.
Así mismo, abrí unos pequeños orificios en la parte superior de la tela de algodón, que es por donde va a pasar el cordón. Ahora sí, cosí los extremos del tirante, para formar un cilindro.
Aquí lamentablemente me quedó horrenda la unión, me faltó espacio en la tela de poliéster, pero lo solvente pegándole una cinta de color marrón, como dije con el aro, si les queda bien, pueden obviar este paso, todo depende de una buena medición, pero como estaba viendo como era la forma, me equivoqué en muchos pasos, aun así, aprendí bastante.
Para continuar, cosí la pieza circular al reverso y luego voltee toda la costura, aquí también no me cuadro, y le agregue un poco de la tela de algodón en esa parte inferior del cilindro. Pasé el cordón por los orificios anteriormente abiertos y así ponerle el cierre de cordón.
Ya para hacerle la parte donde se guindaría dicho porta bolsas, consistió en una pequeña tira de 10 cm de largo y 1,5 cm de ancho que fue cosido a este y antes de finalizar la costura le introduje una argolla, que es donde se pondría un ganchito y así ponerlo en la correa o en el pantalón de uno mismo y así es más fácil obtener las bolsas para las necesidades de nuestros peludos cuando salen de paseo.
Esta parte donde le ponía el pequeño retazo de tela con la argolla me faltó fotografiarlo, pero es básicamente lo que describo.
Este es el resultado final y adjunto algunas fotos con el culpable de botarme el que había comprado.
El culpable de perderme el que le había comprado.
Gracias por leer mi post. Espero que les haya gustado. Estaré atenta a responder sus comentarios. Pueden visitar mi blog, seguir mis contenidos y redes sociales
FACEBOOK / INSTAGRAM / TWITTER